
- 제목: 노스탤가이아의 마지막 영웅
- 출시일:
- 개발자:
- 발행자:
Information about The Last Hero of Nostalgaia is still incomplete. 이것을 사용하여 게임의 세부 정보를 입력할 수 있도록 도와주세요. 문의 양식.
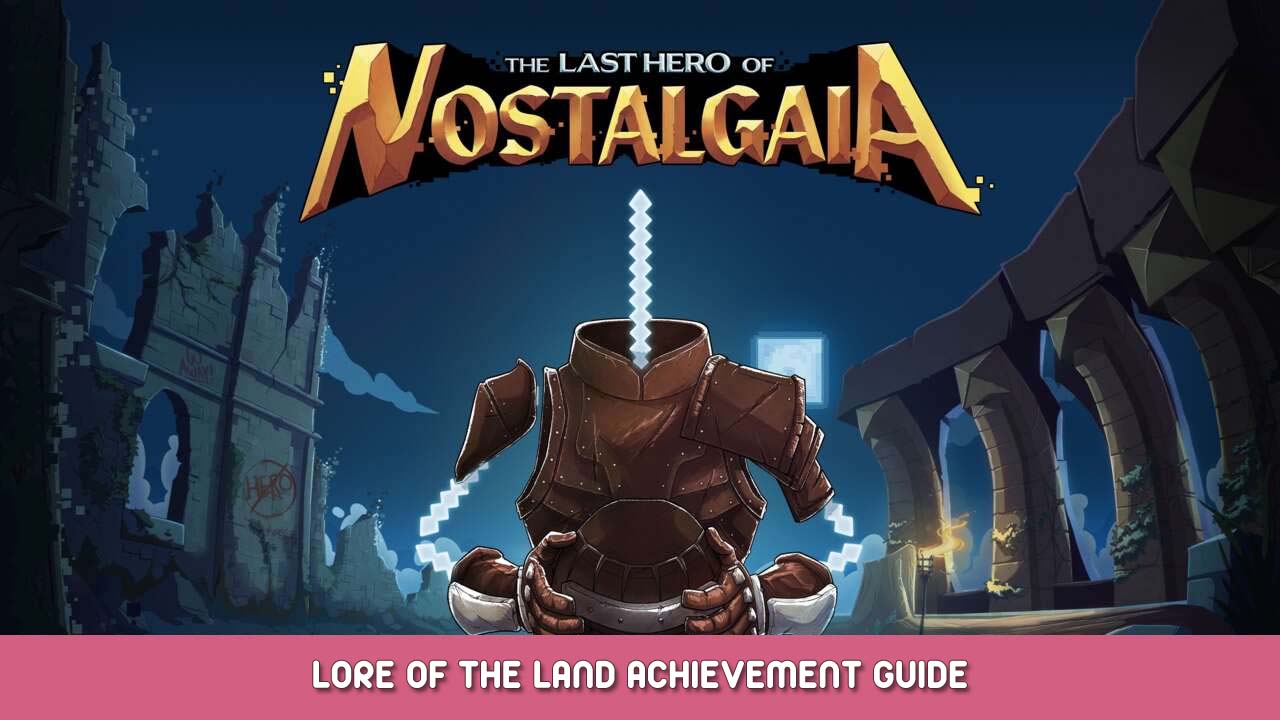
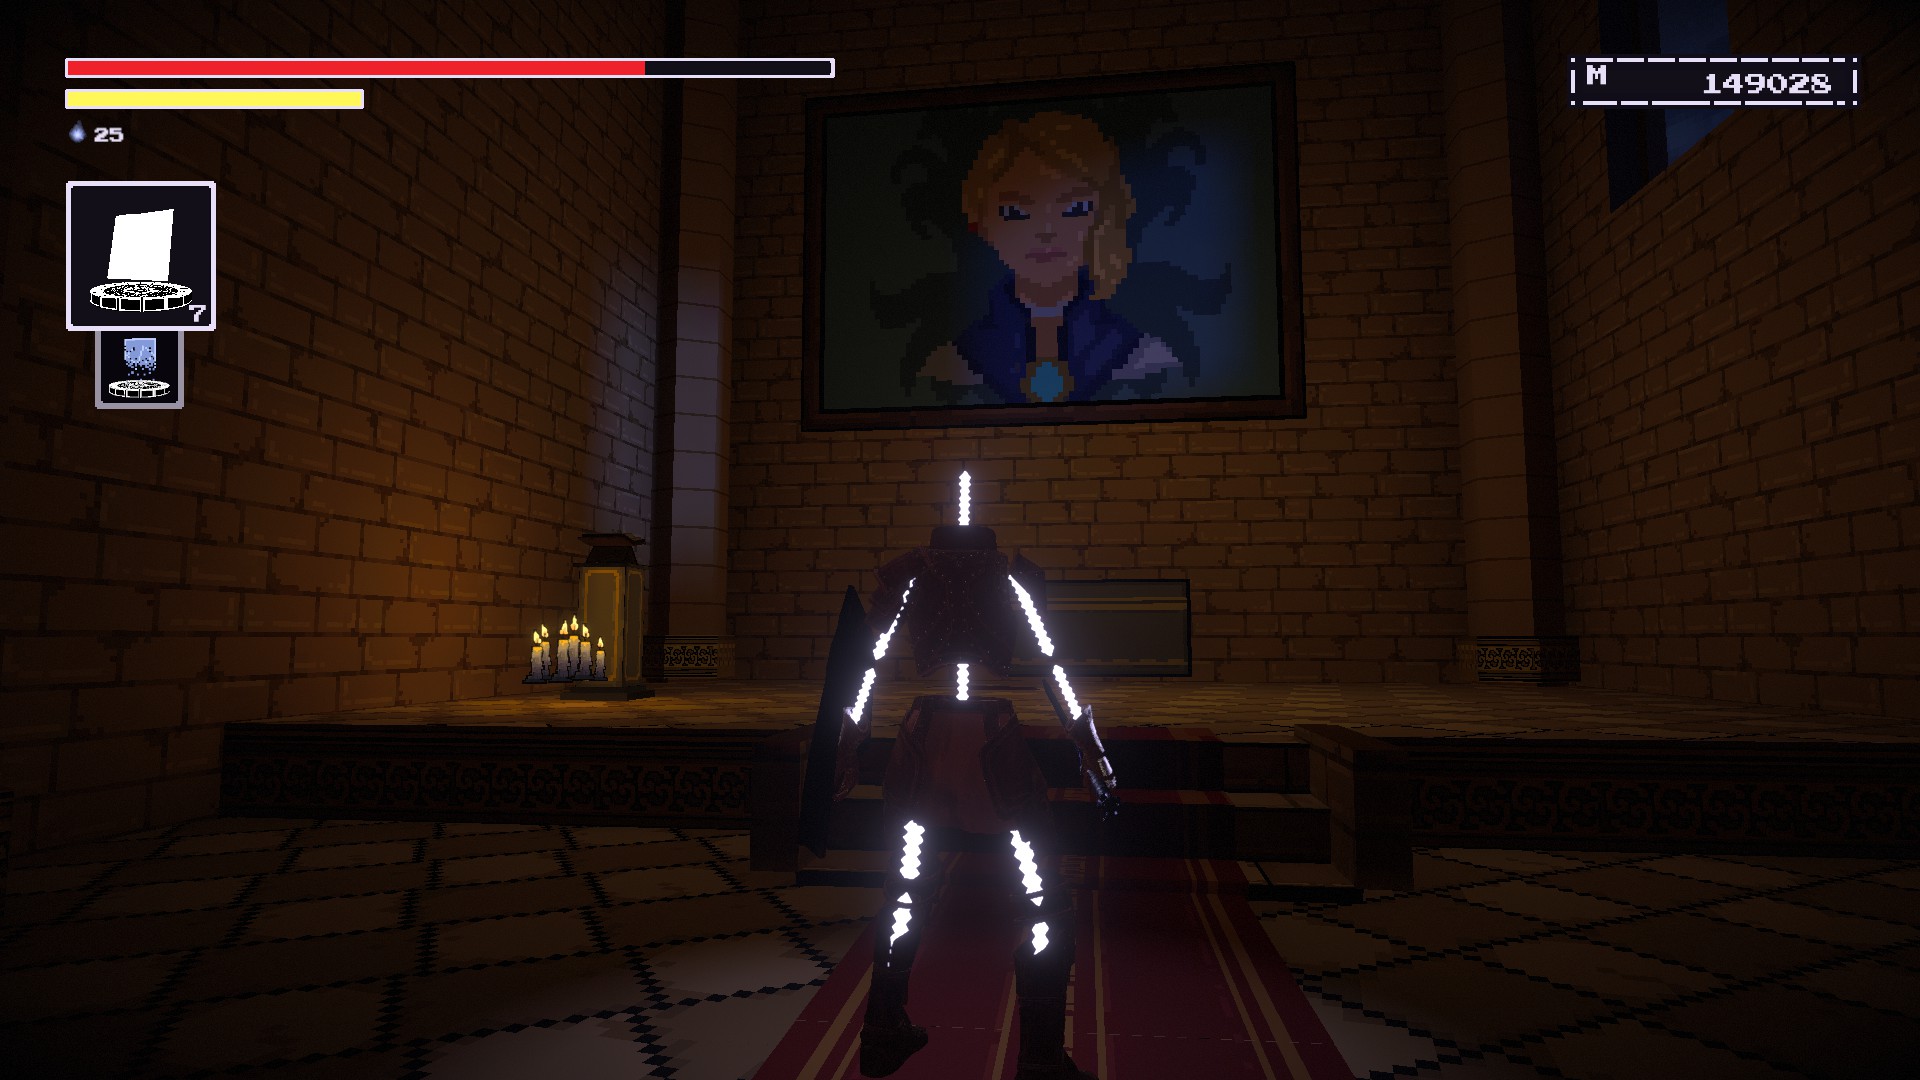
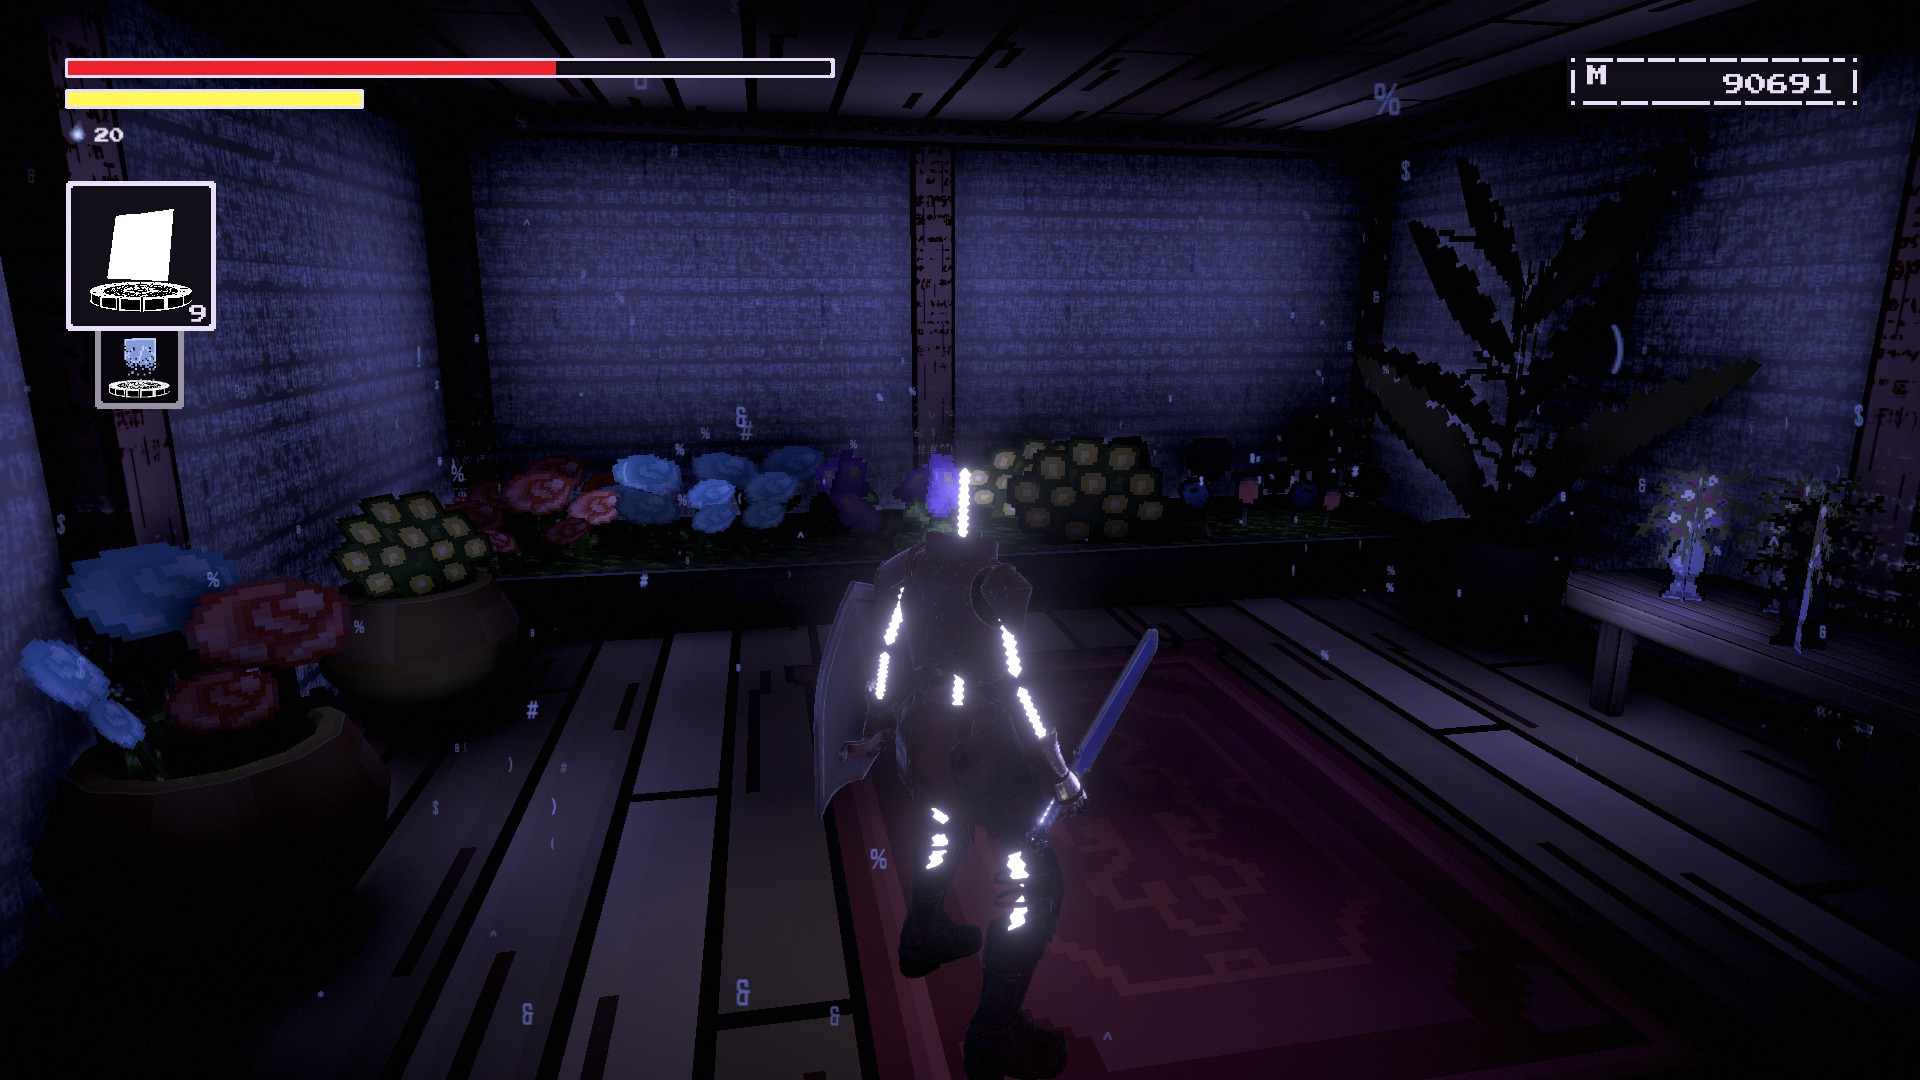
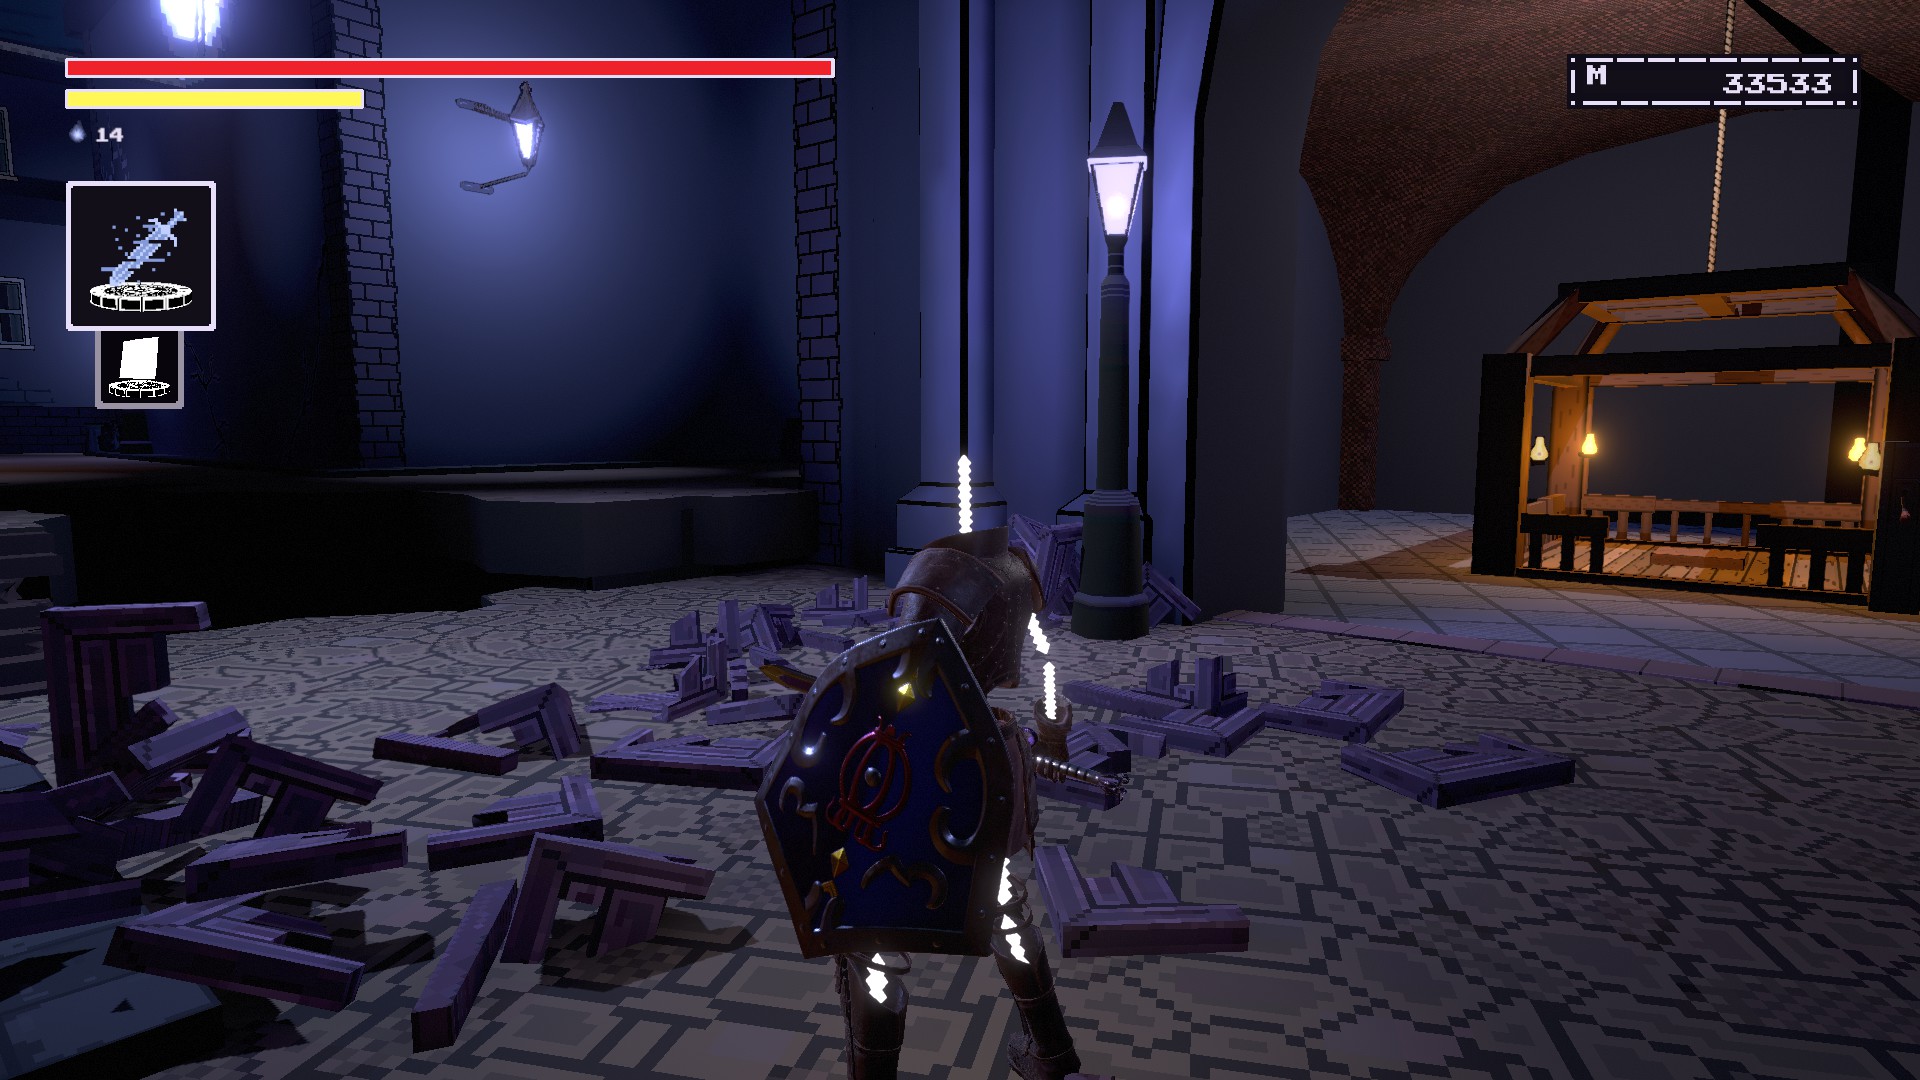
이 가이드는 The Last Hero of Nostalgaia의 모든 유물을 기억하는 방법을 보여줍니다.. 이렇게 하면 PVE 업적을 얻을 수 있습니다.. 유물을 얻는 동안 NPC 퀘스트도 수행하는 것이 좋습니다. I’ll include some relics that may not show up on the compendium.
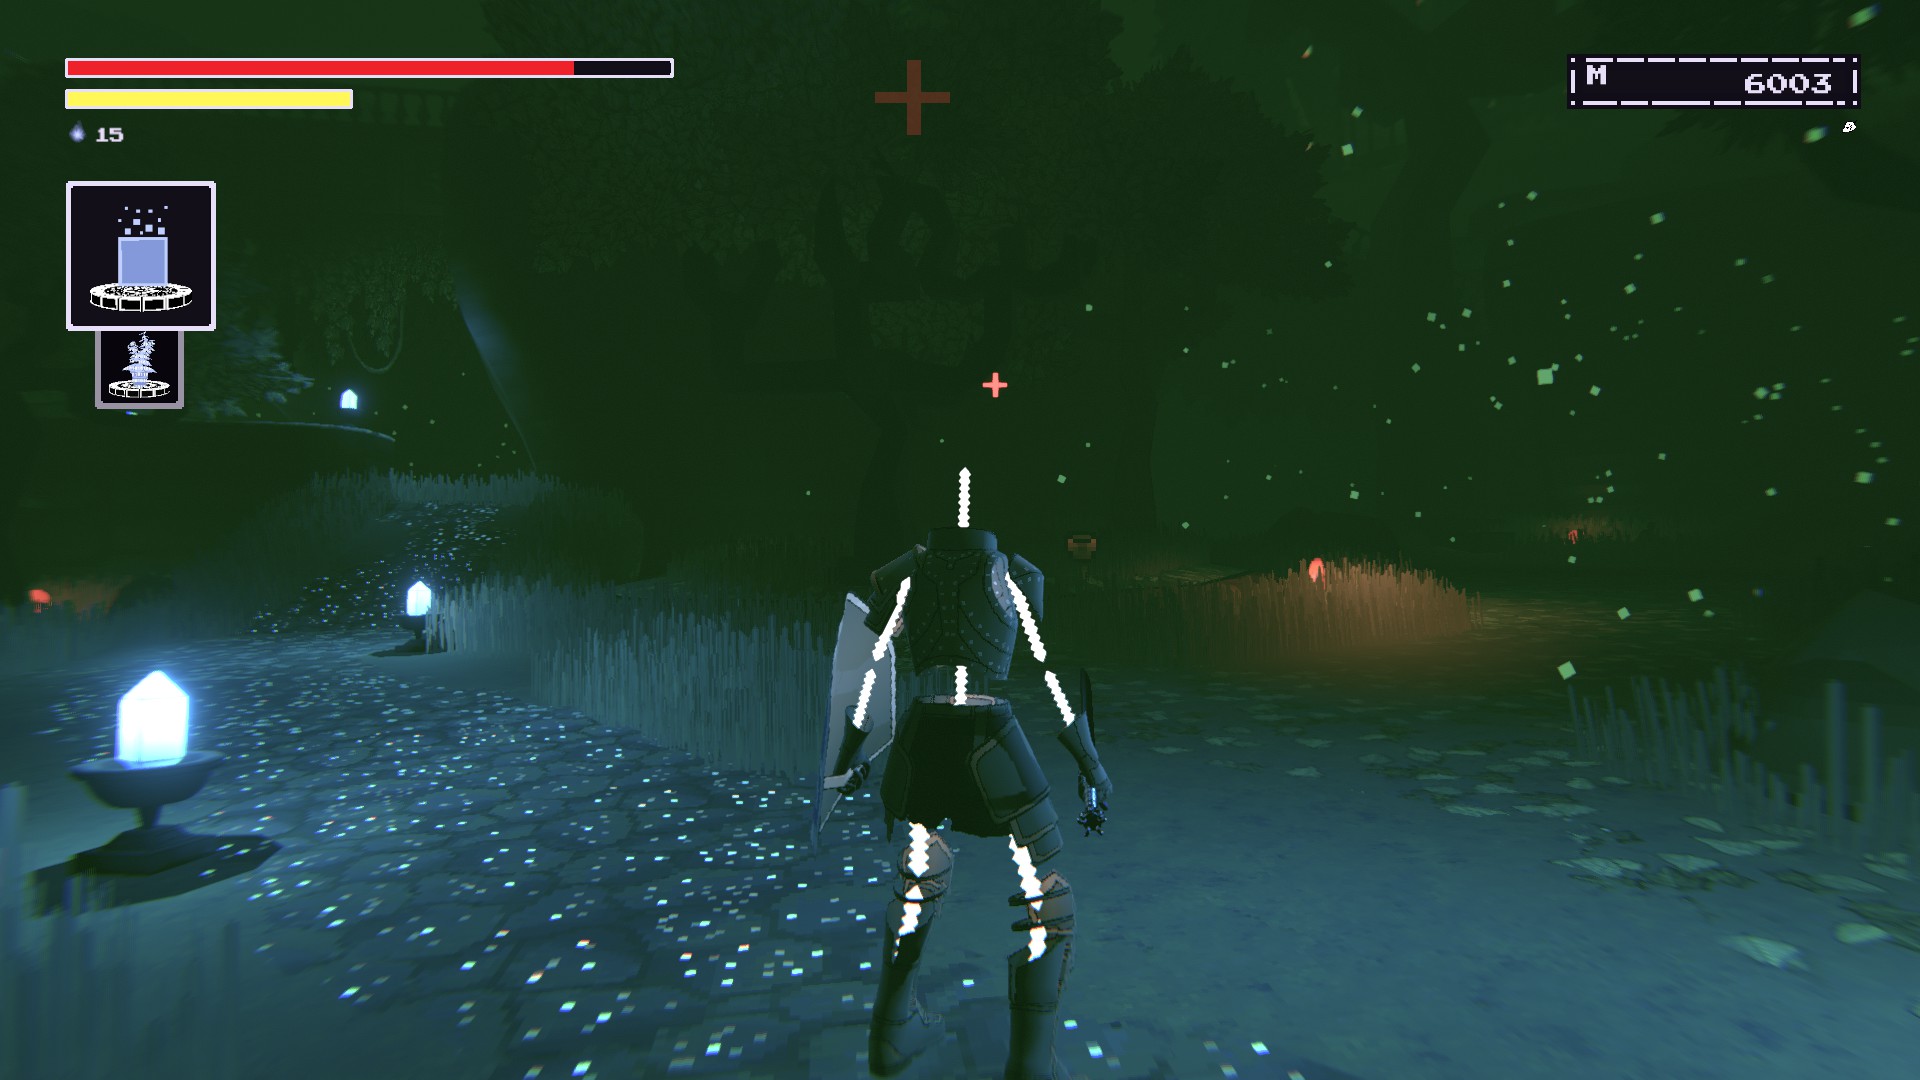
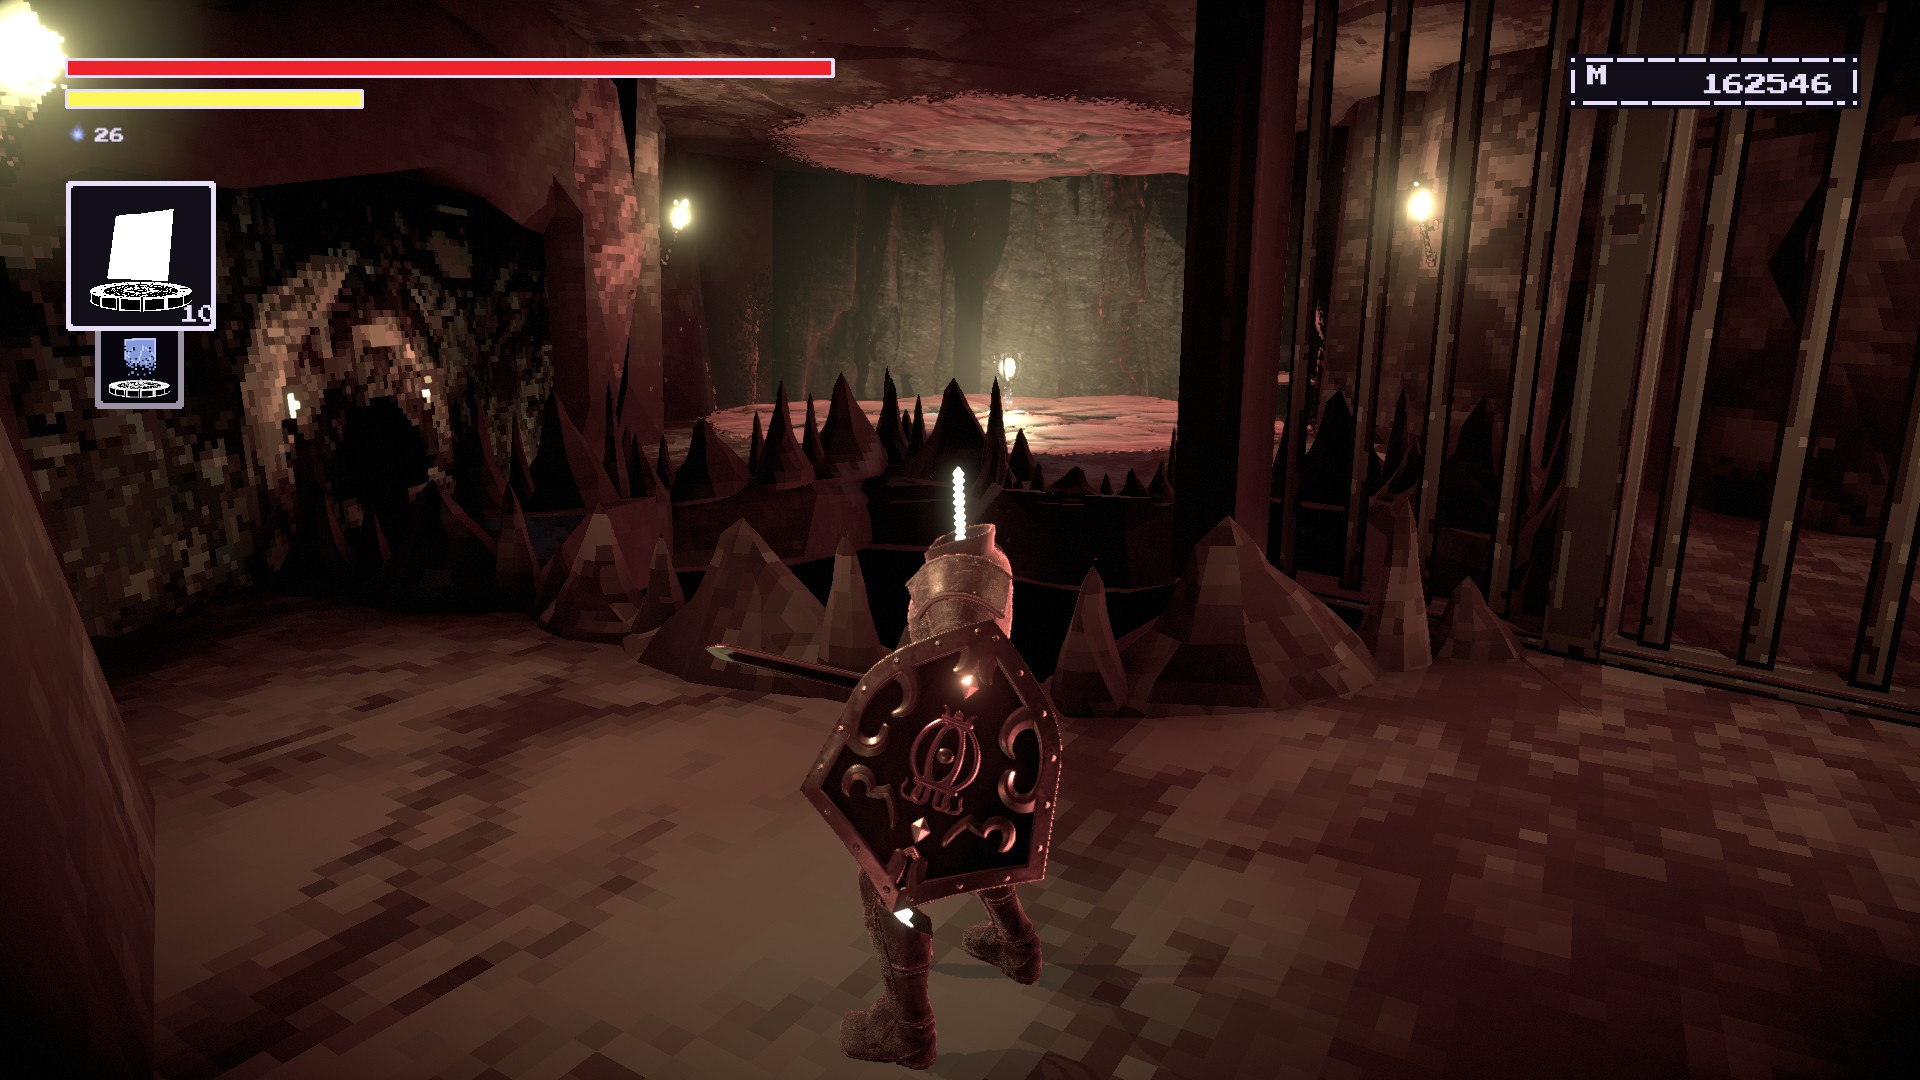
Things to Know
I will be listing off each relic as they appear in the compendium. 하지만, I’ll be putting the Mystery section near the end for convenience and fewer spoilers. Speaking of spoilers, THIS GUIDE WILL HAVE MAJOR SPOILERS!
Now if that didn’t scare you off then I’ll first try to show you where to get this item then I’ll reveal where you can restore them.
중요한! YOU WILL NEED TO DO NPC QUESTLINES! I WILL MARK SUCH ITEMS WITH, so make sure to read this before you get too far!
You need to unlock the Merchant and give him the Easymaker Keys to get the other relics. As long as you bought all of his stuff BEFORE you fight the Anti-Heroes/cut off the plot threads, you should be good.
To Unlock Merchant:
- He is located in the building across from the ruined blacksmith building. Both buildings are near the vandalized Gnom statue in Oreshaft Village.
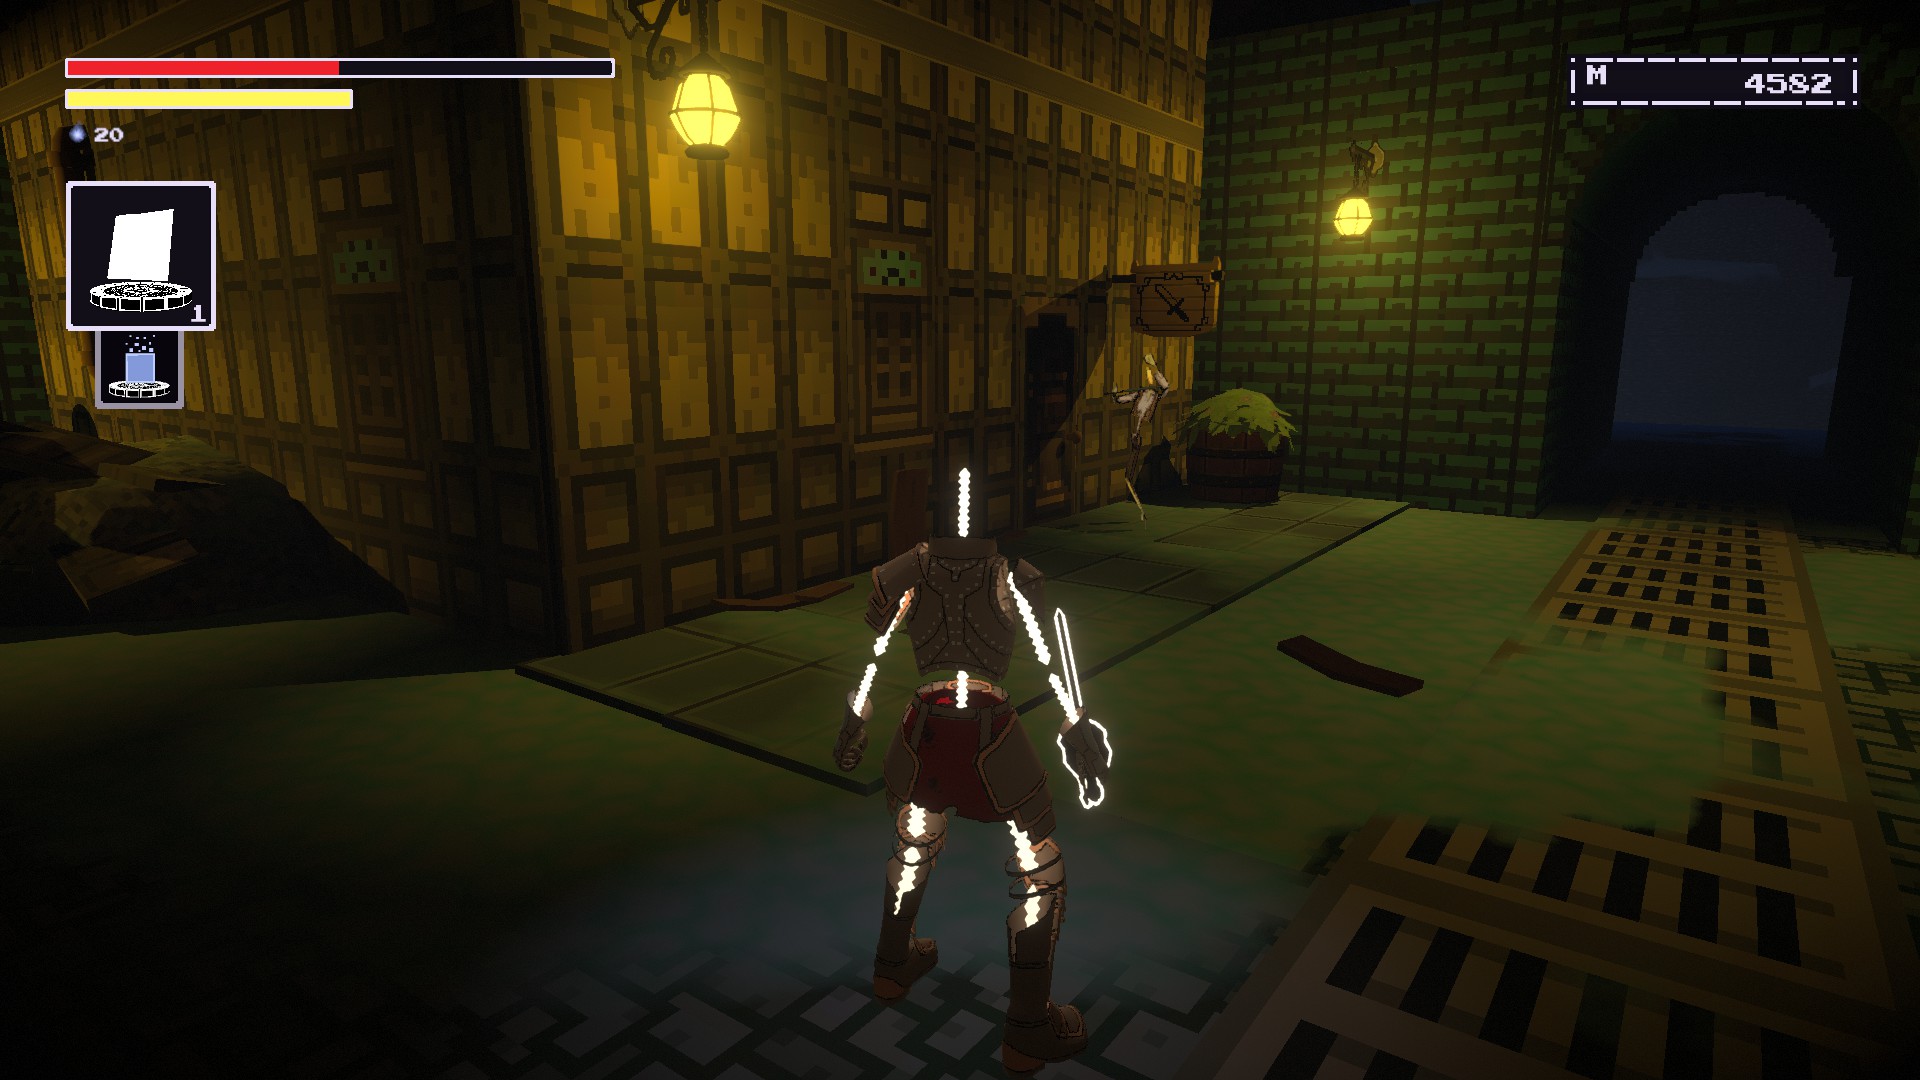
Be sure to kill the two NPCs attacking his door in order to talk to him. Before he’ll let you in, he needs Manacles to keep himself in check. These are located at the Oreshaft Shelter anvil.
Return to him and you’ll be able to access his wares.
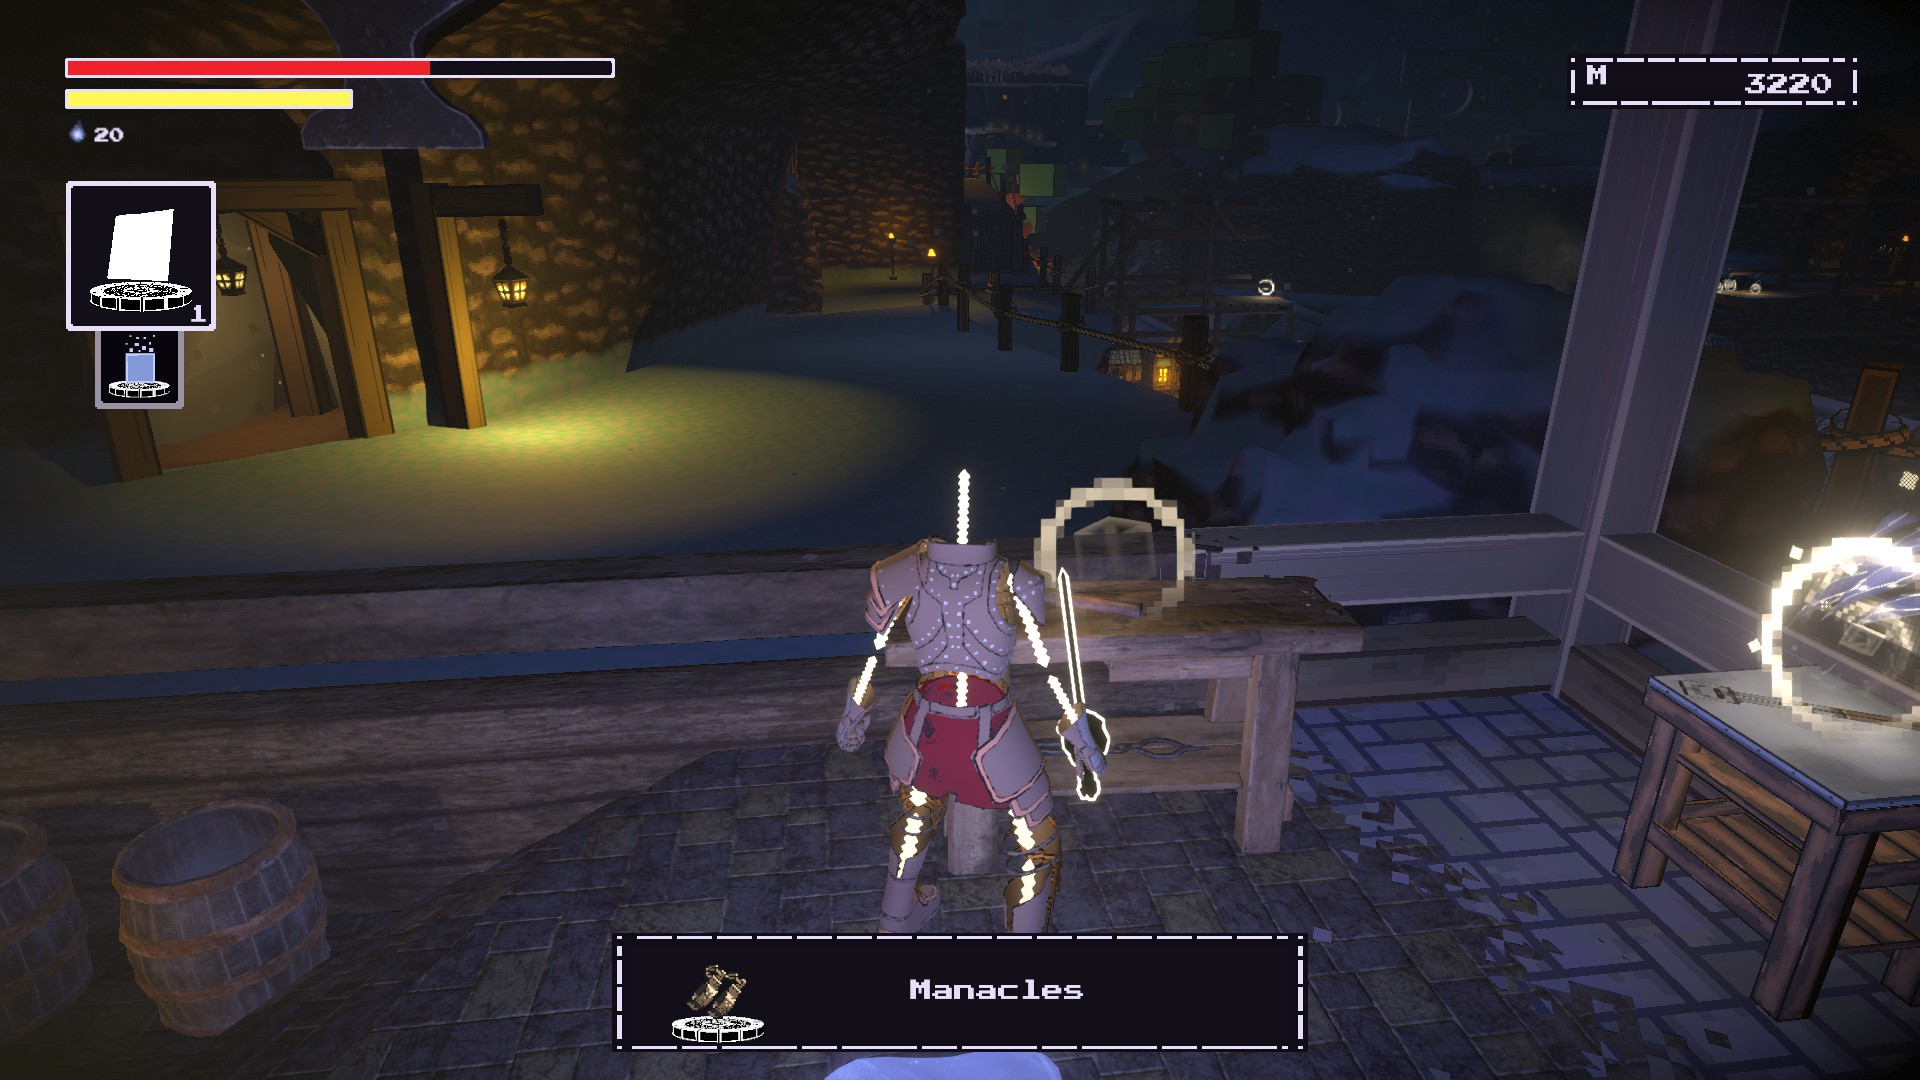
To Gain New Items in Shop
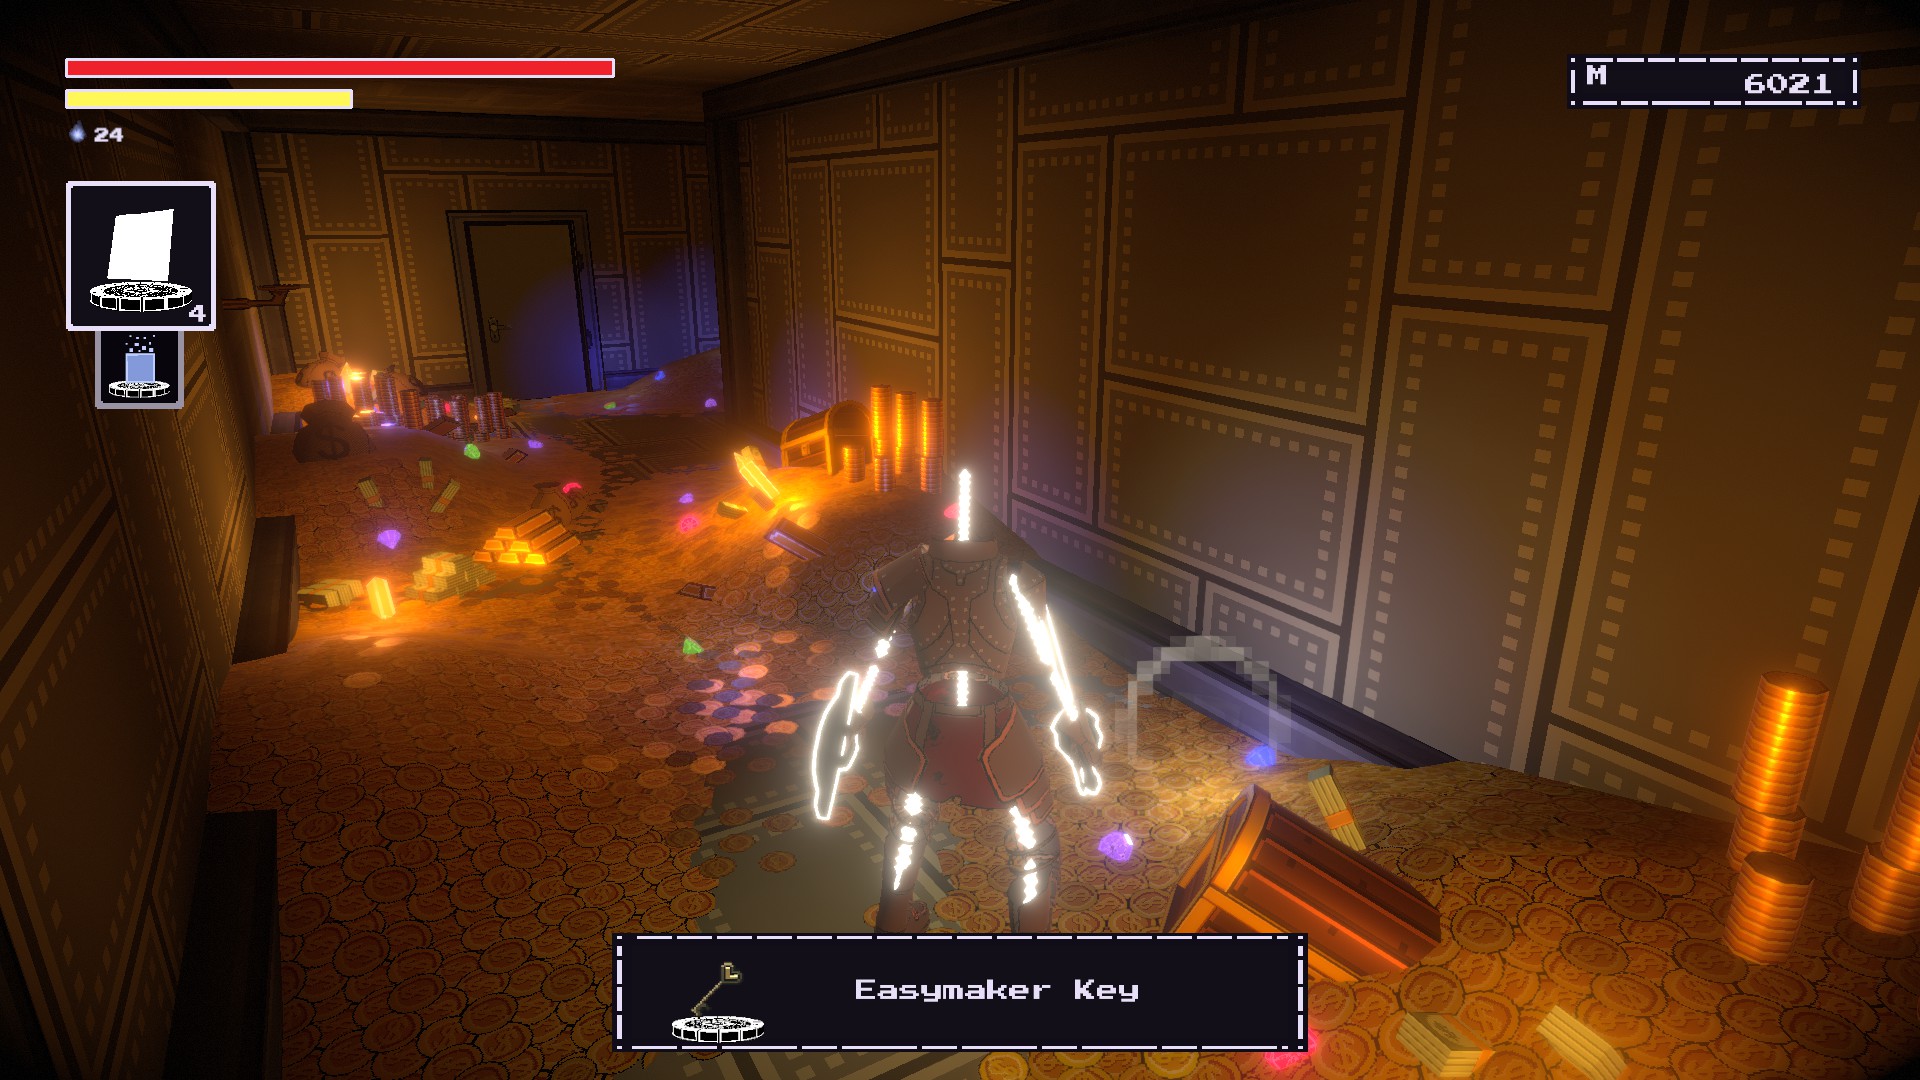
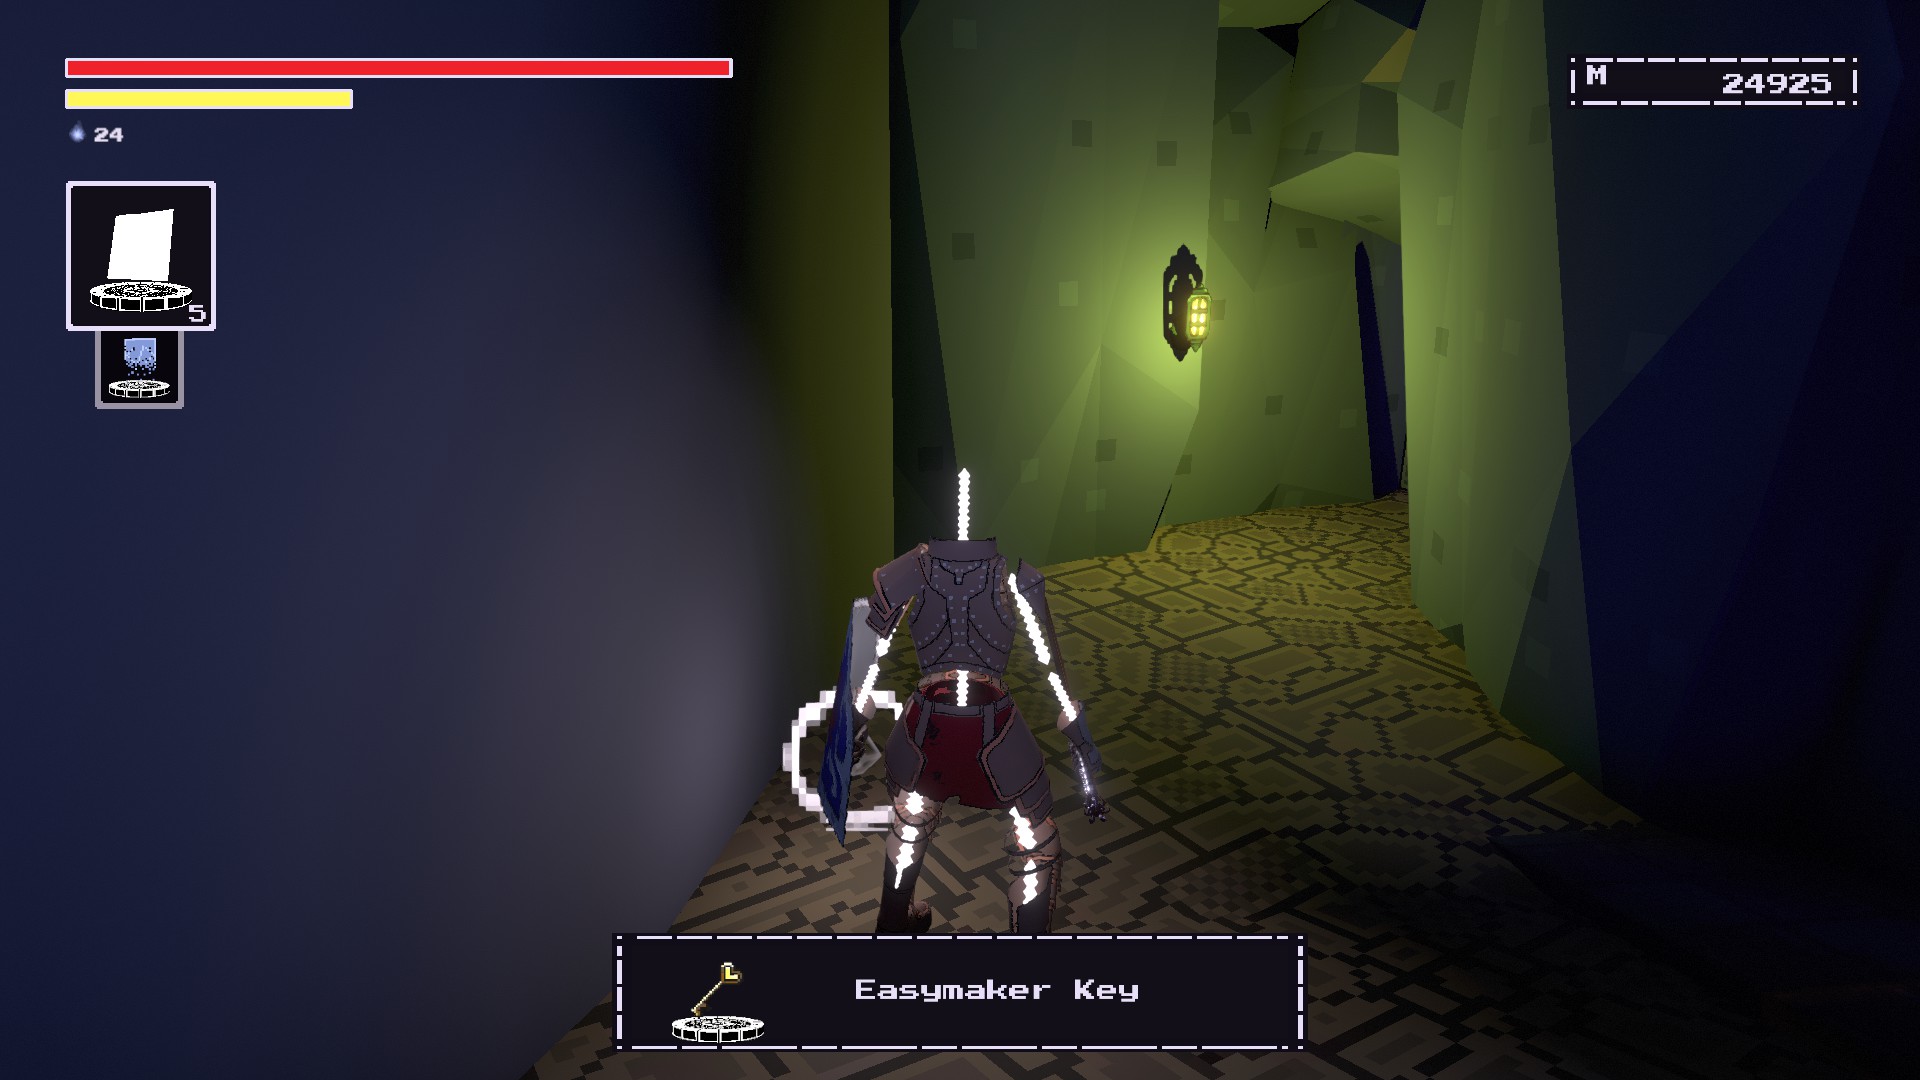
As you explore Nostalgaia, you might come across an Easymaker Key. You can give this to the Merchant to have more options in the store.
QUEST REWARD VAULT
WARLOCK’S WILDS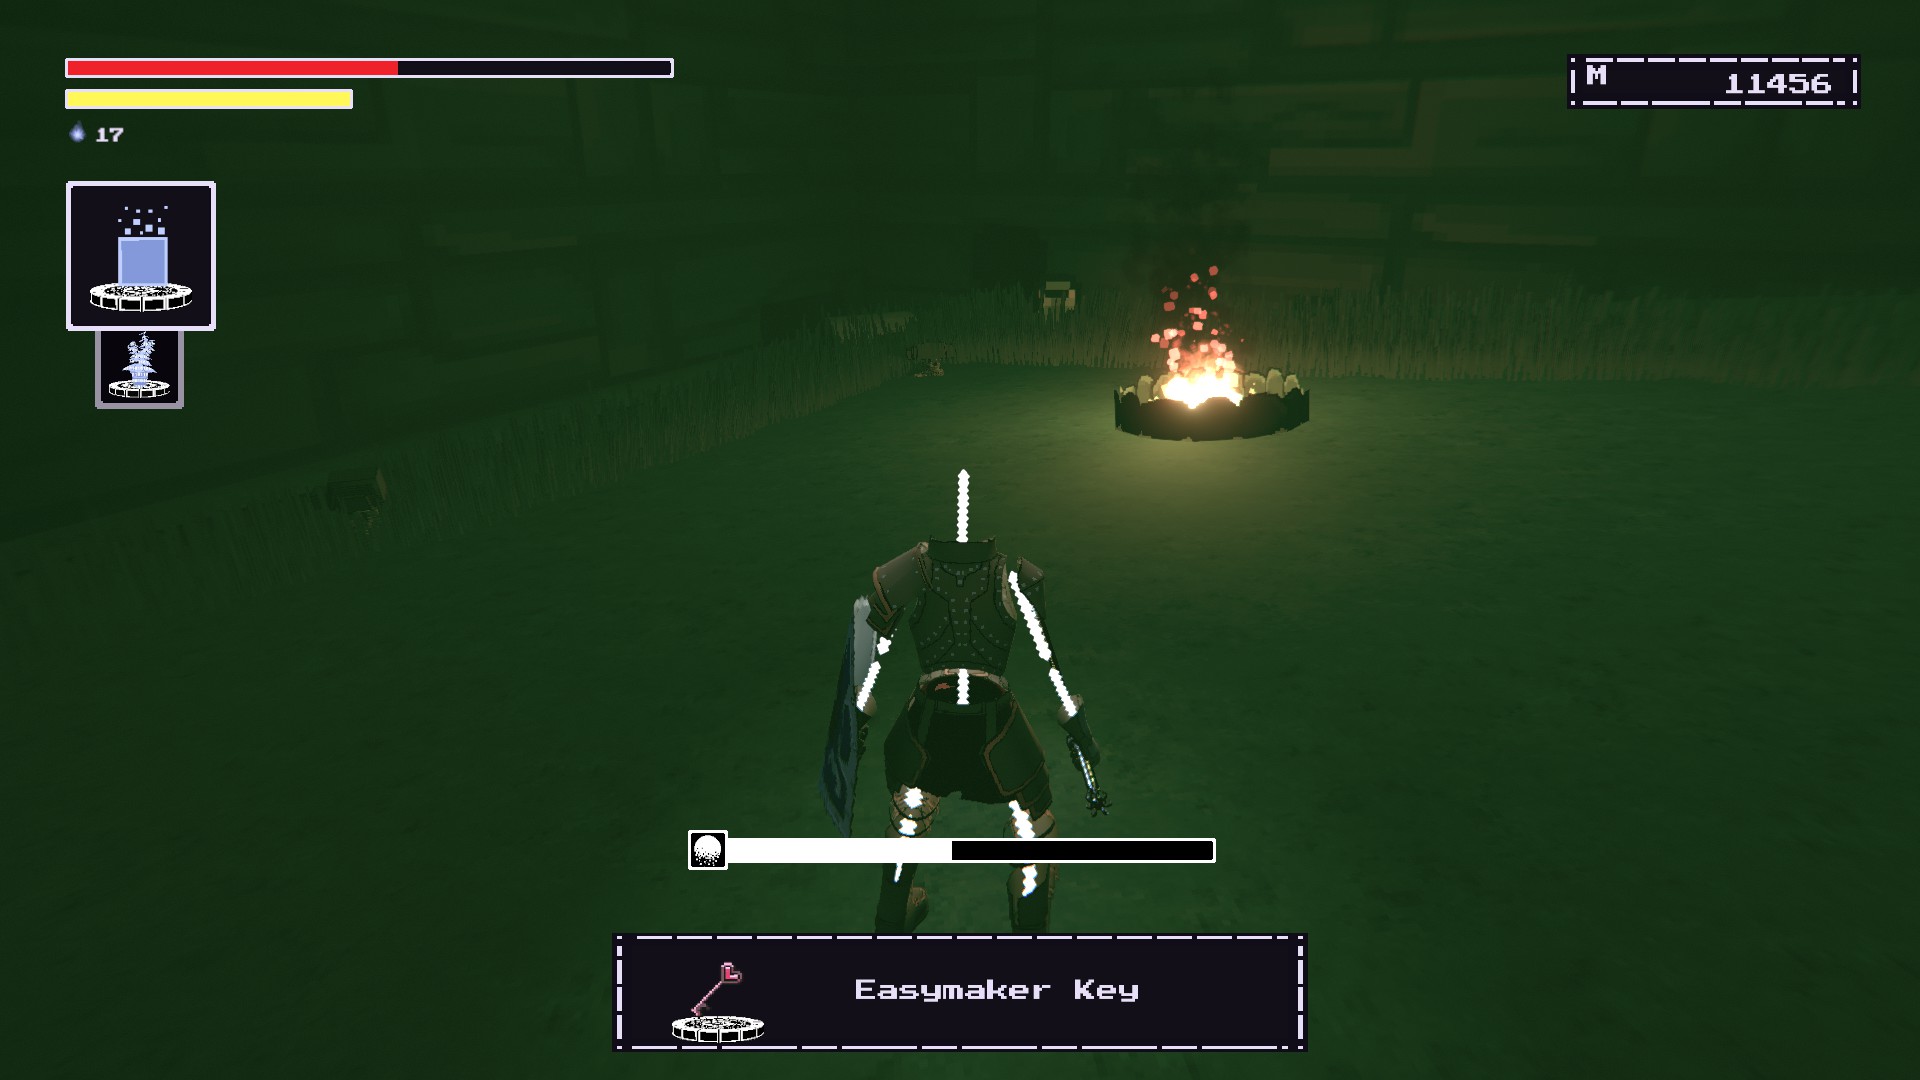
NPC CITY(Optional if you want more Fragments)
Welcome Uniform
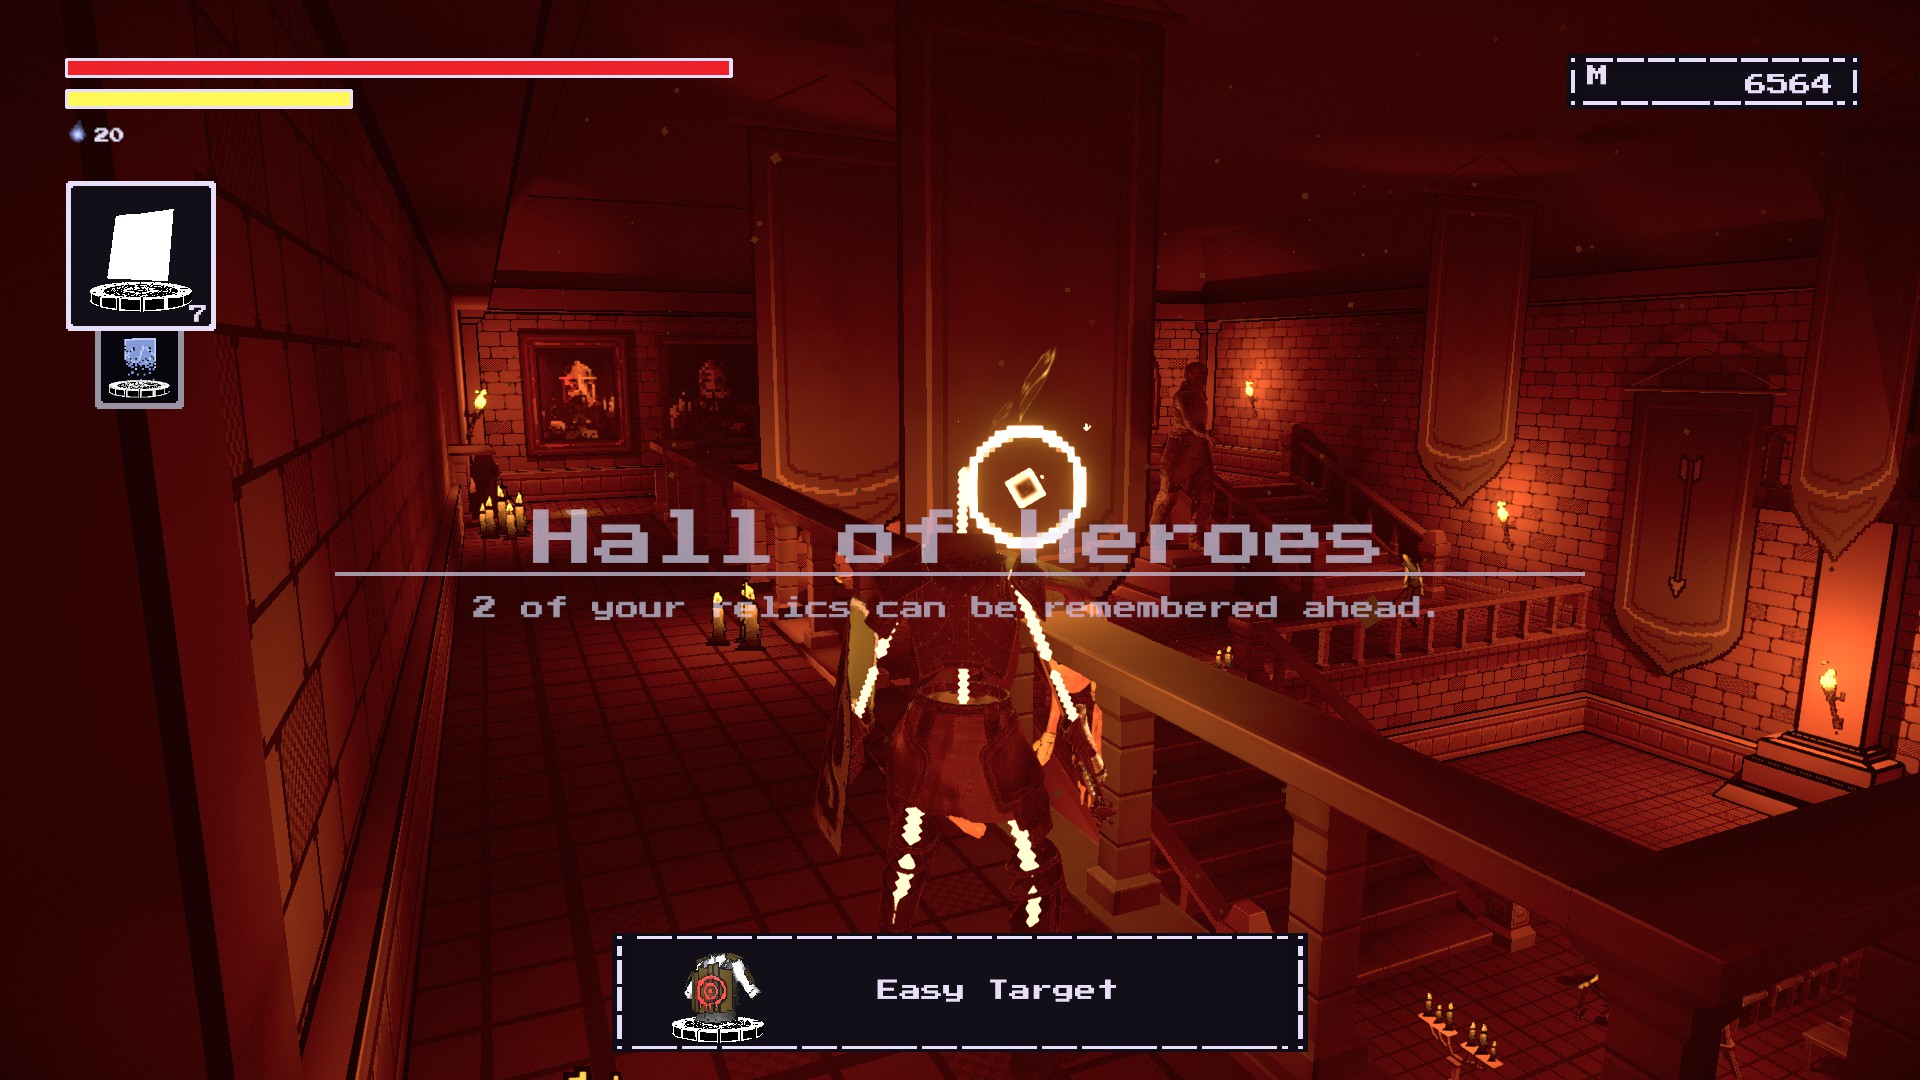
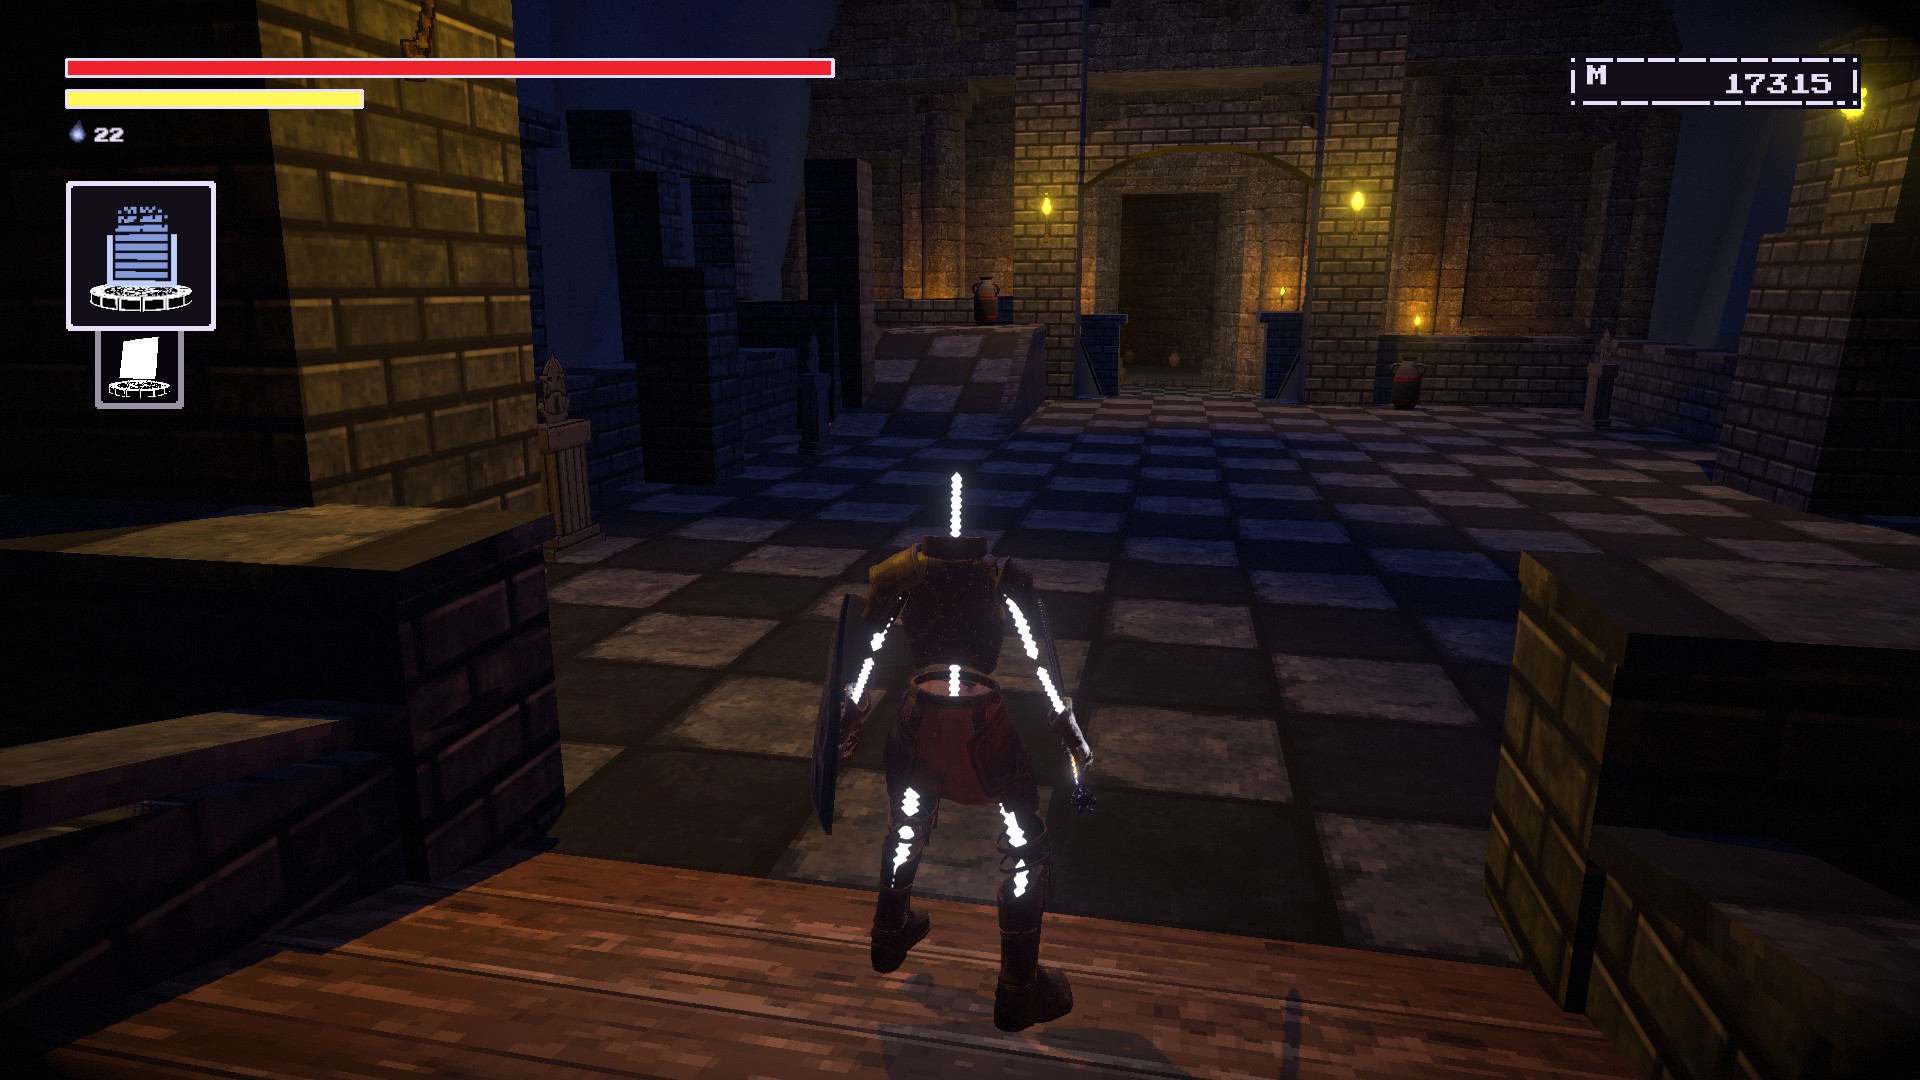
HALL OF HEROES #1
When you are required to
confront the Narrator, you’ll end up in the
Start of Sequence영역.
있다
degraded versions of the umbrella-wielding NPCsyou have fought. The Welcome Uniform is dropped by these enemies, so you’d
need to farm these guys.
Return to the beginning of the game where you first spawned.You should see
a NPC hanging in the air~와 함께
a banner saying you to “Go Back To Where You’re From!”Remember the torso here!
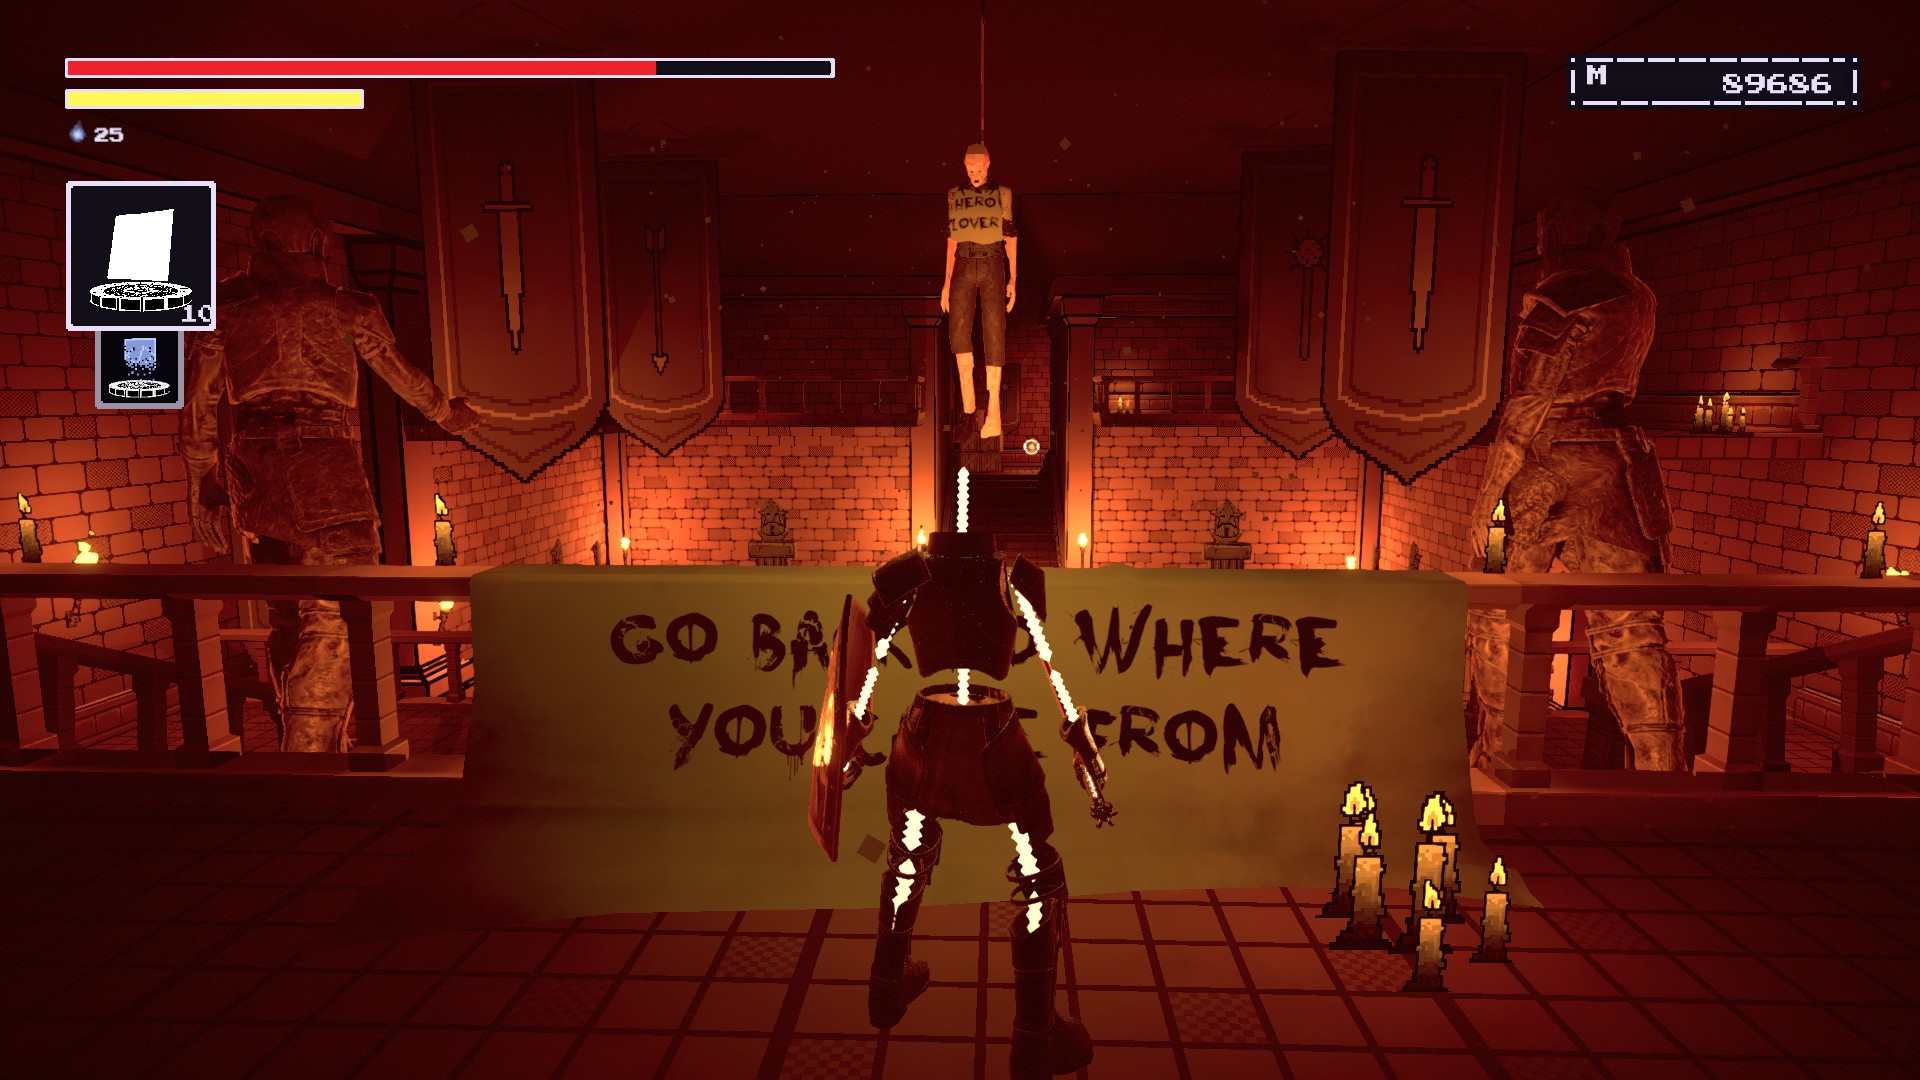
쉬운 목표
HALL OF HEROES #2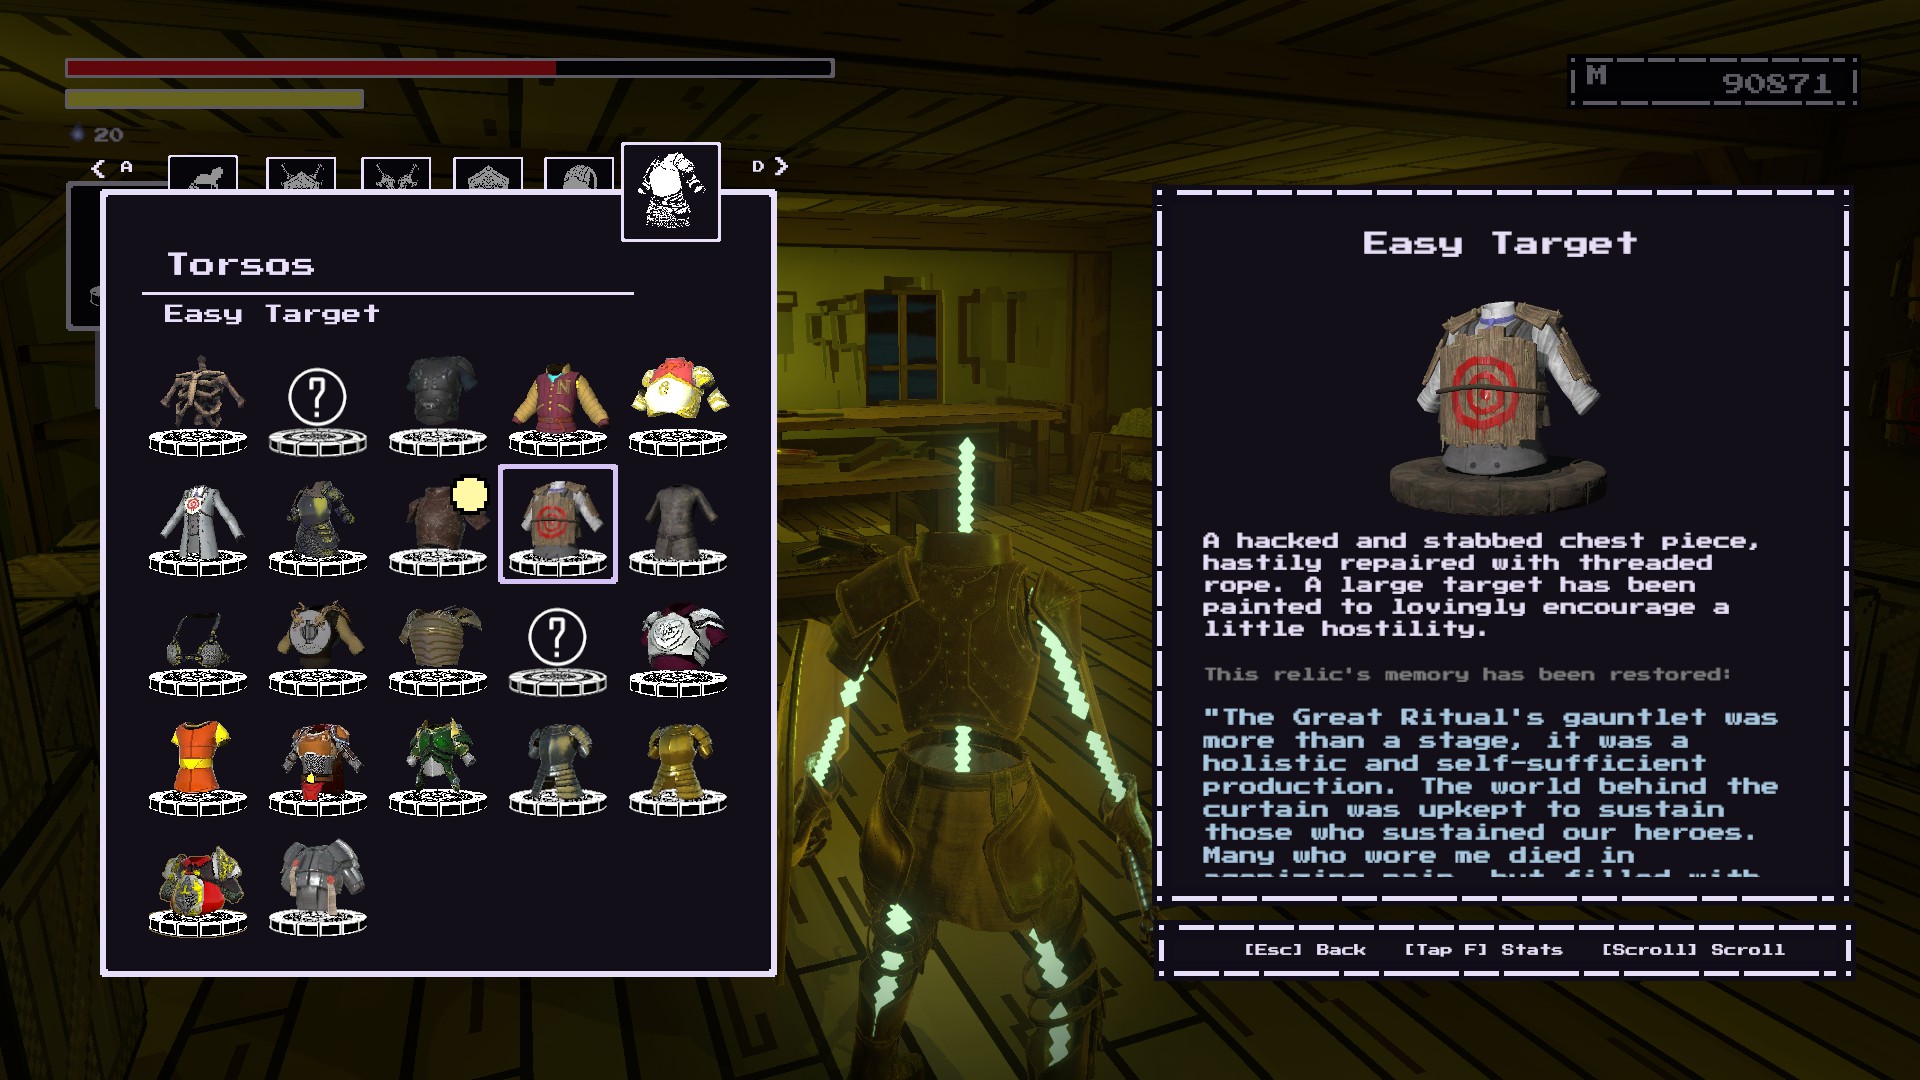
You can get this item very early in the game.
Get the NPC Staging Room Keyby the Hall of Heroes beacon through killing the NPCs.
Use the key to open this door near the area with the huge knight on watch.
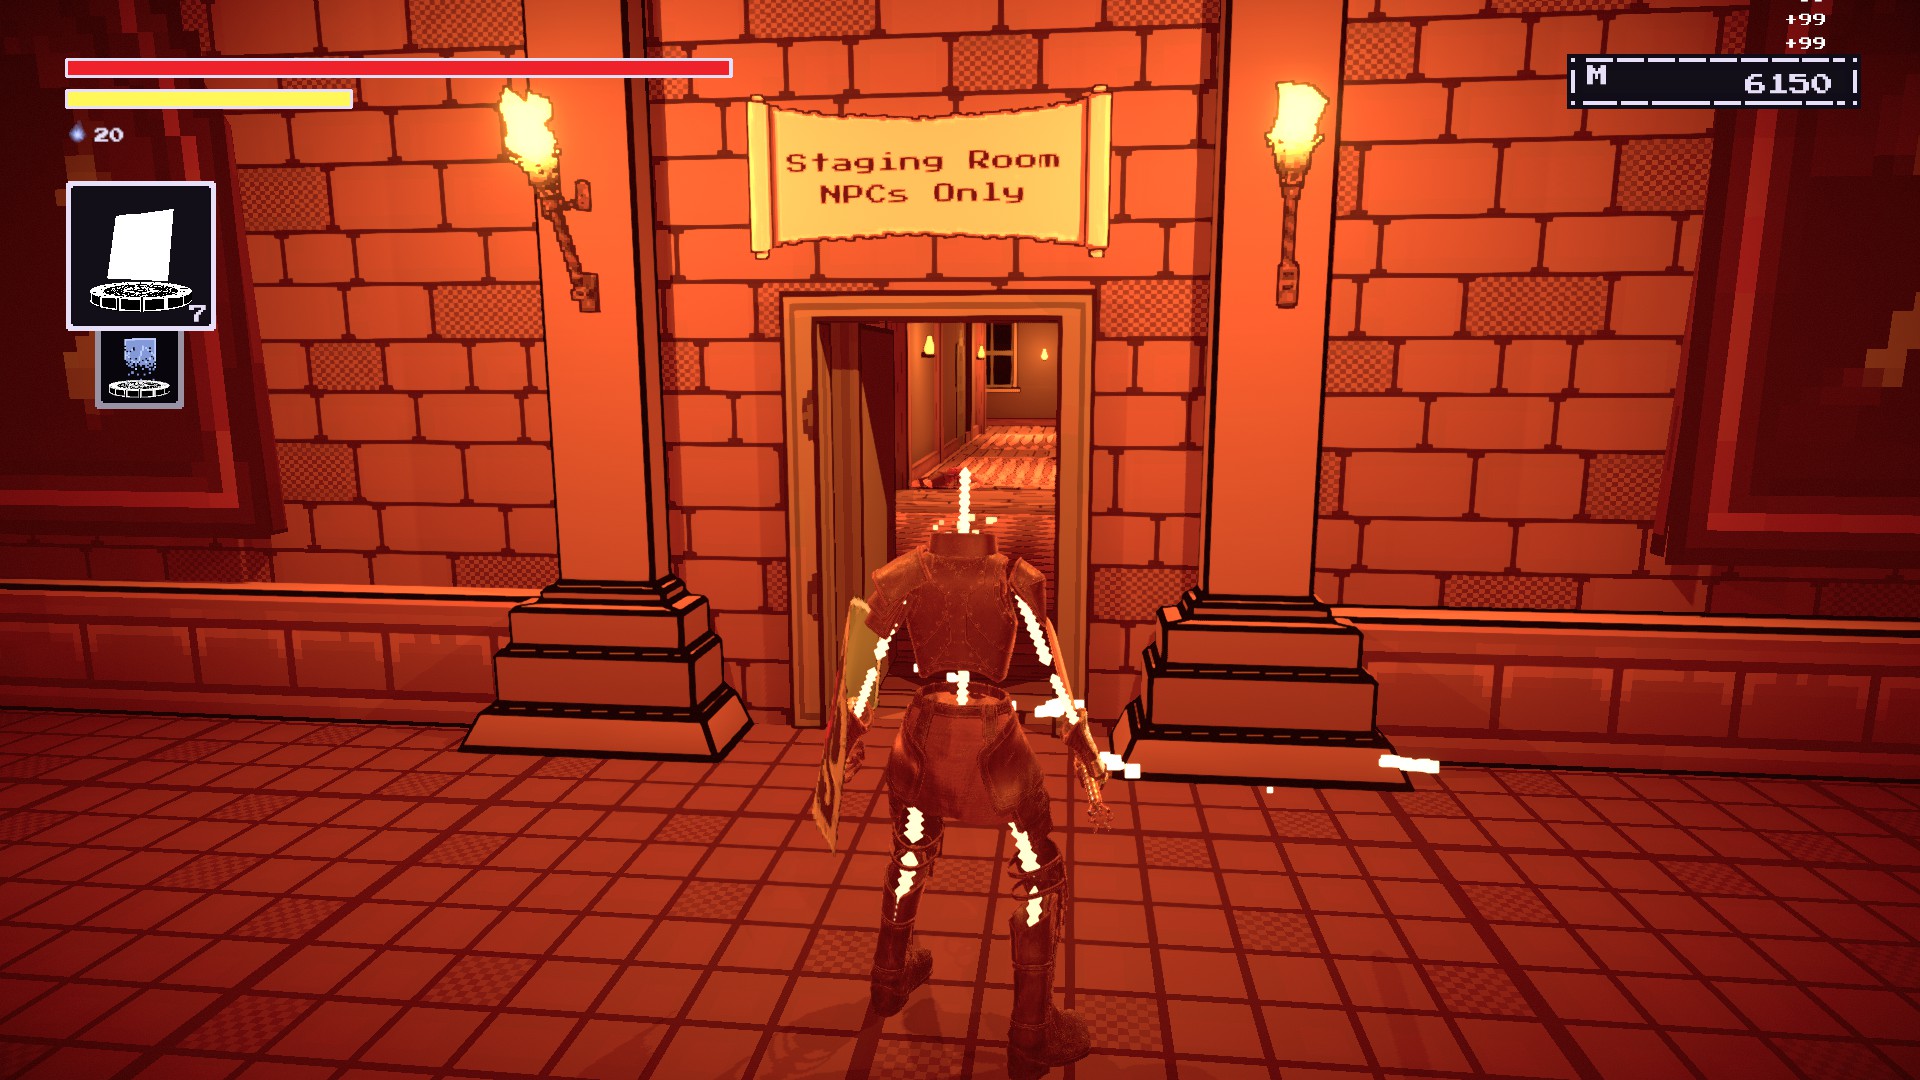
Go through the area until you’re at a city section with those two annoying SCP things.
You should see this door that can be opened.
Open it but be wary of a degraded knight. Once you dealt with him, go through the left hallway and you should be by the welcoming party section. The item is on a corpse.
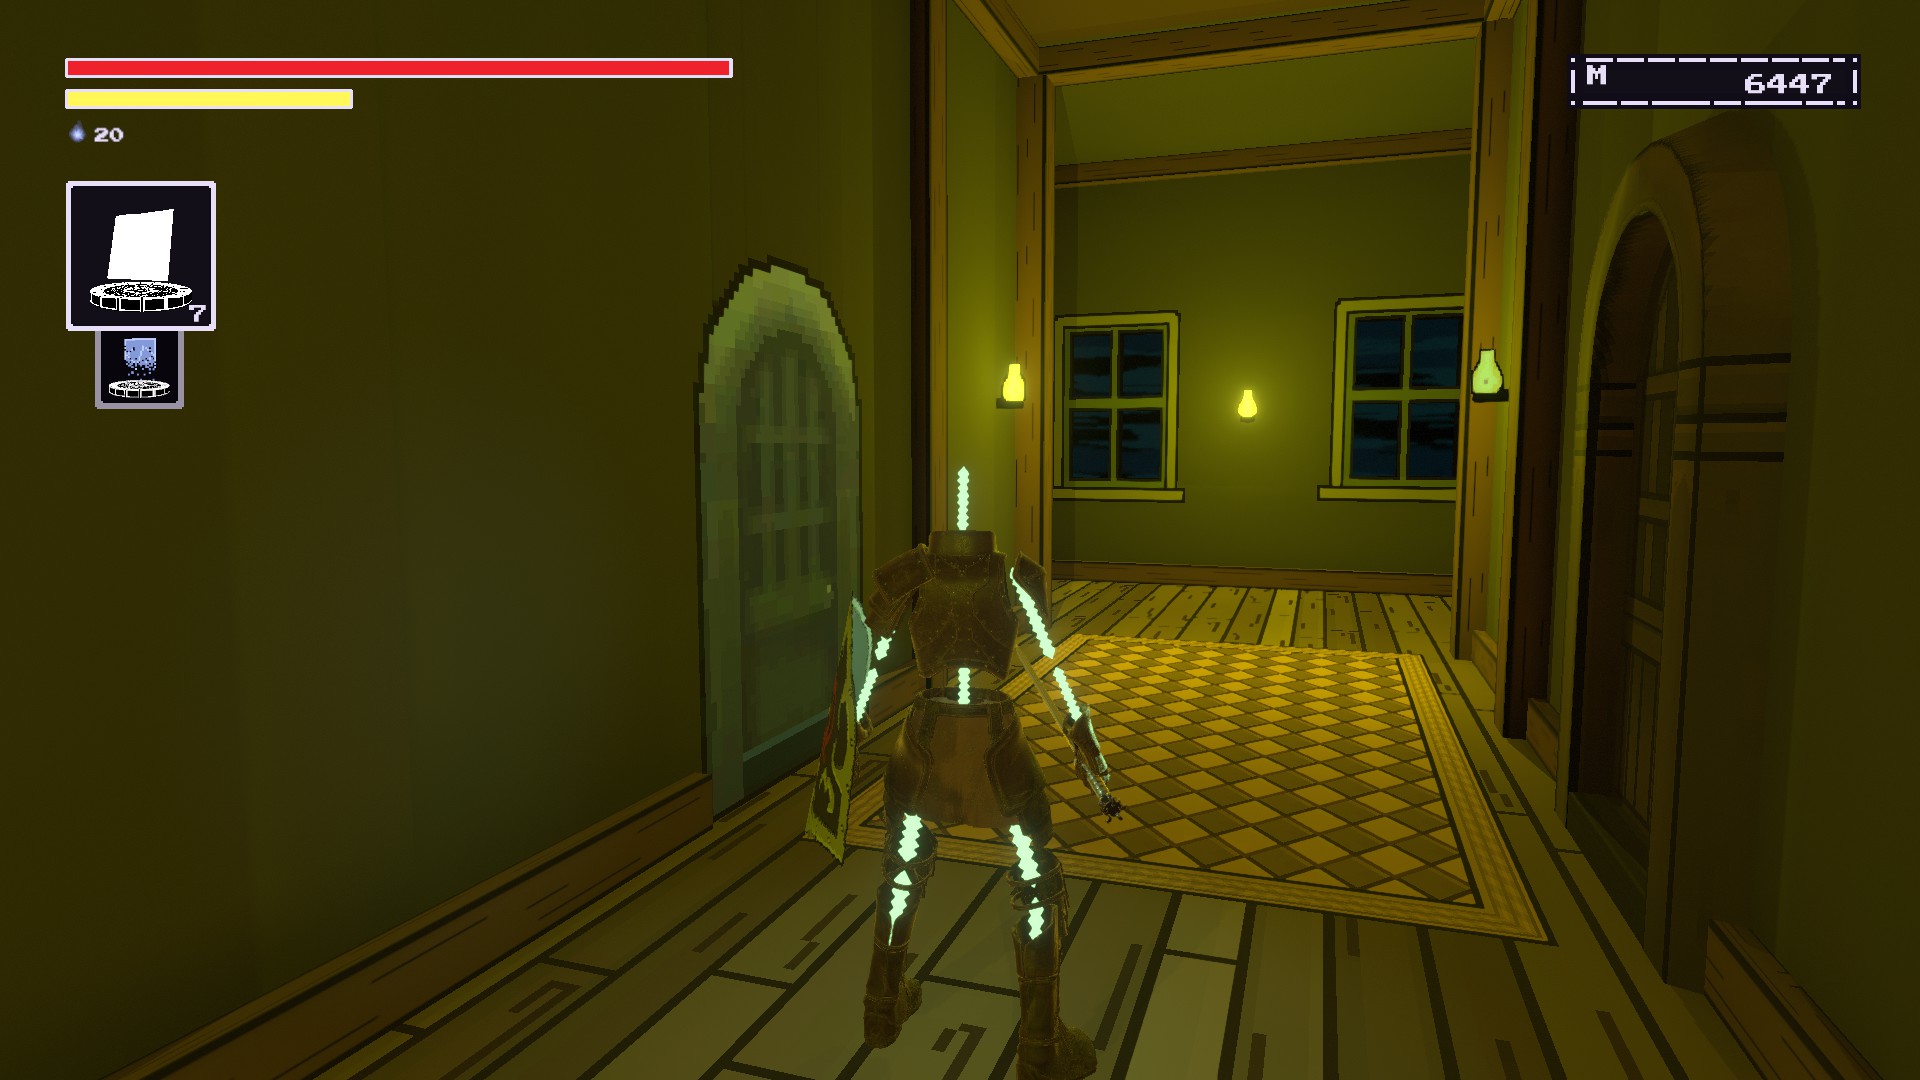
At the NPC Staging Room through which you originally went in order to get the Easy Target.
You’ll notice an unstable door to your left.
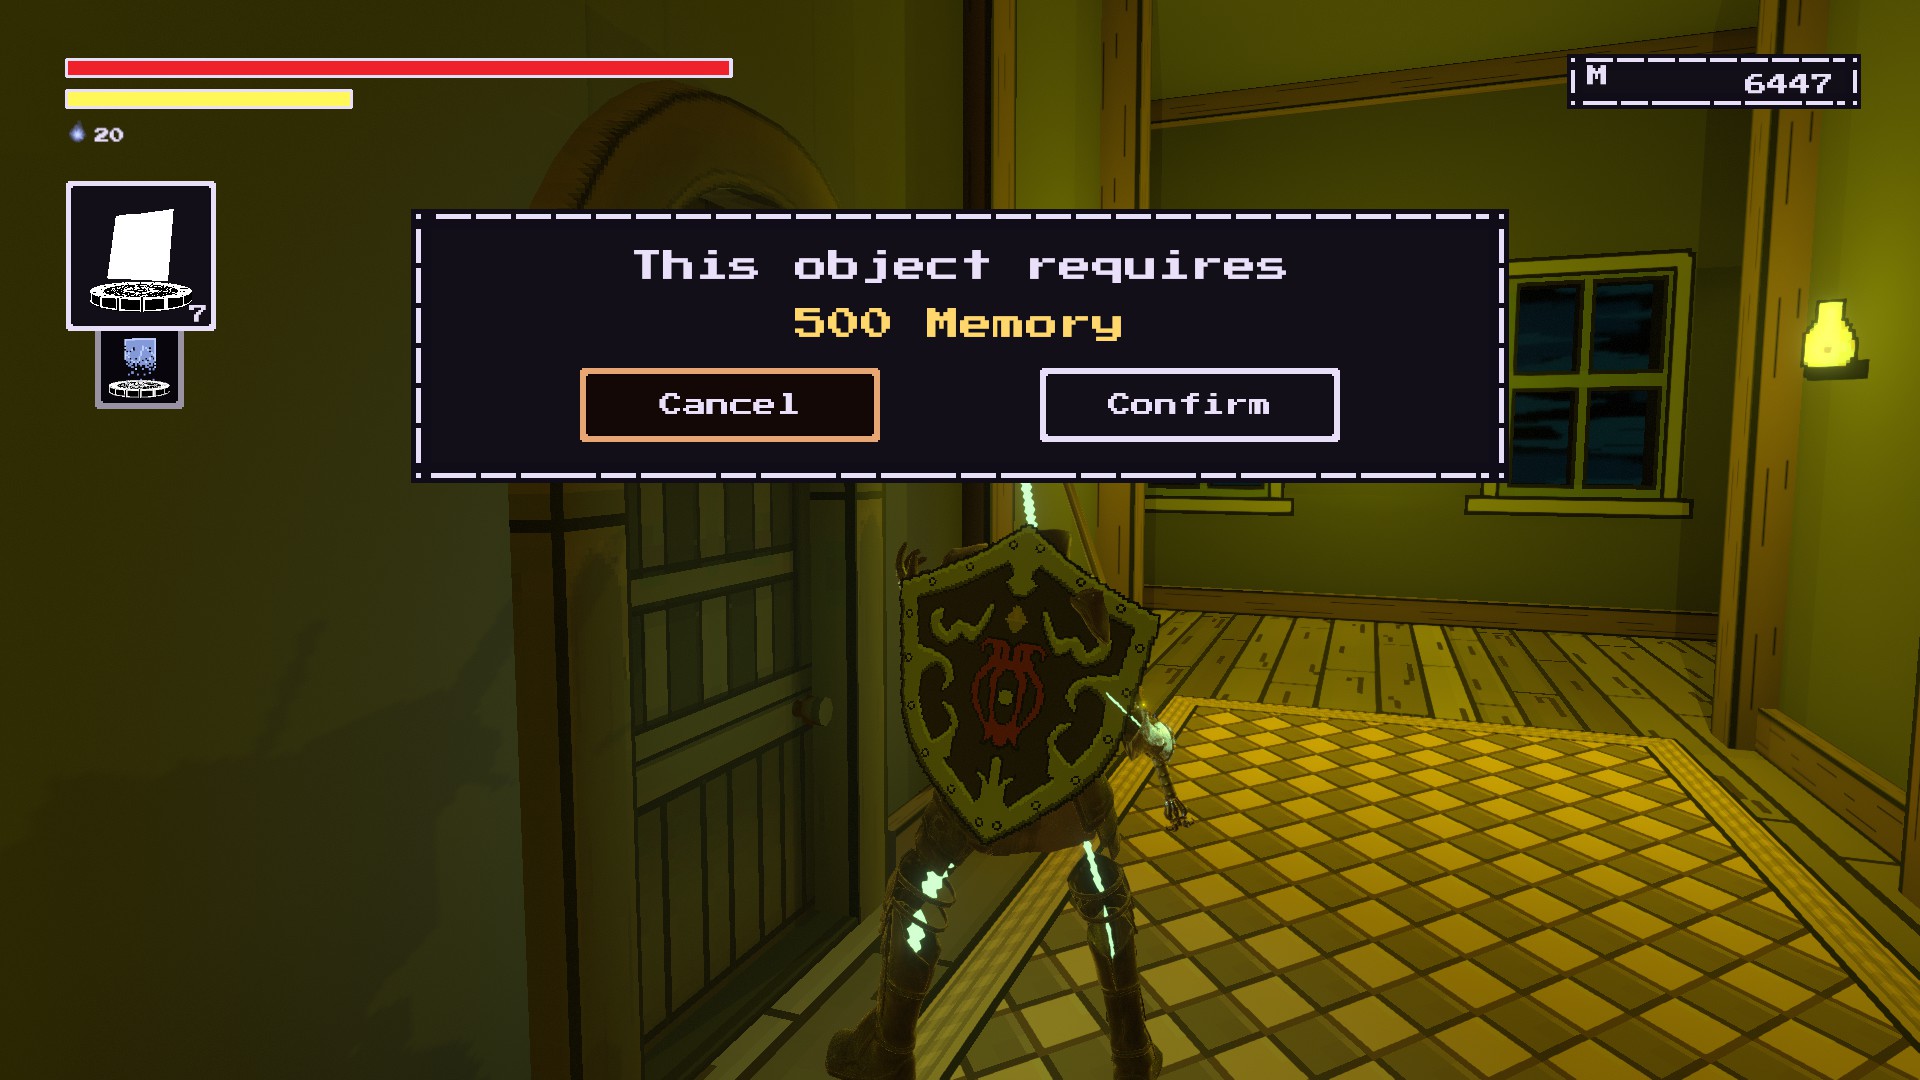
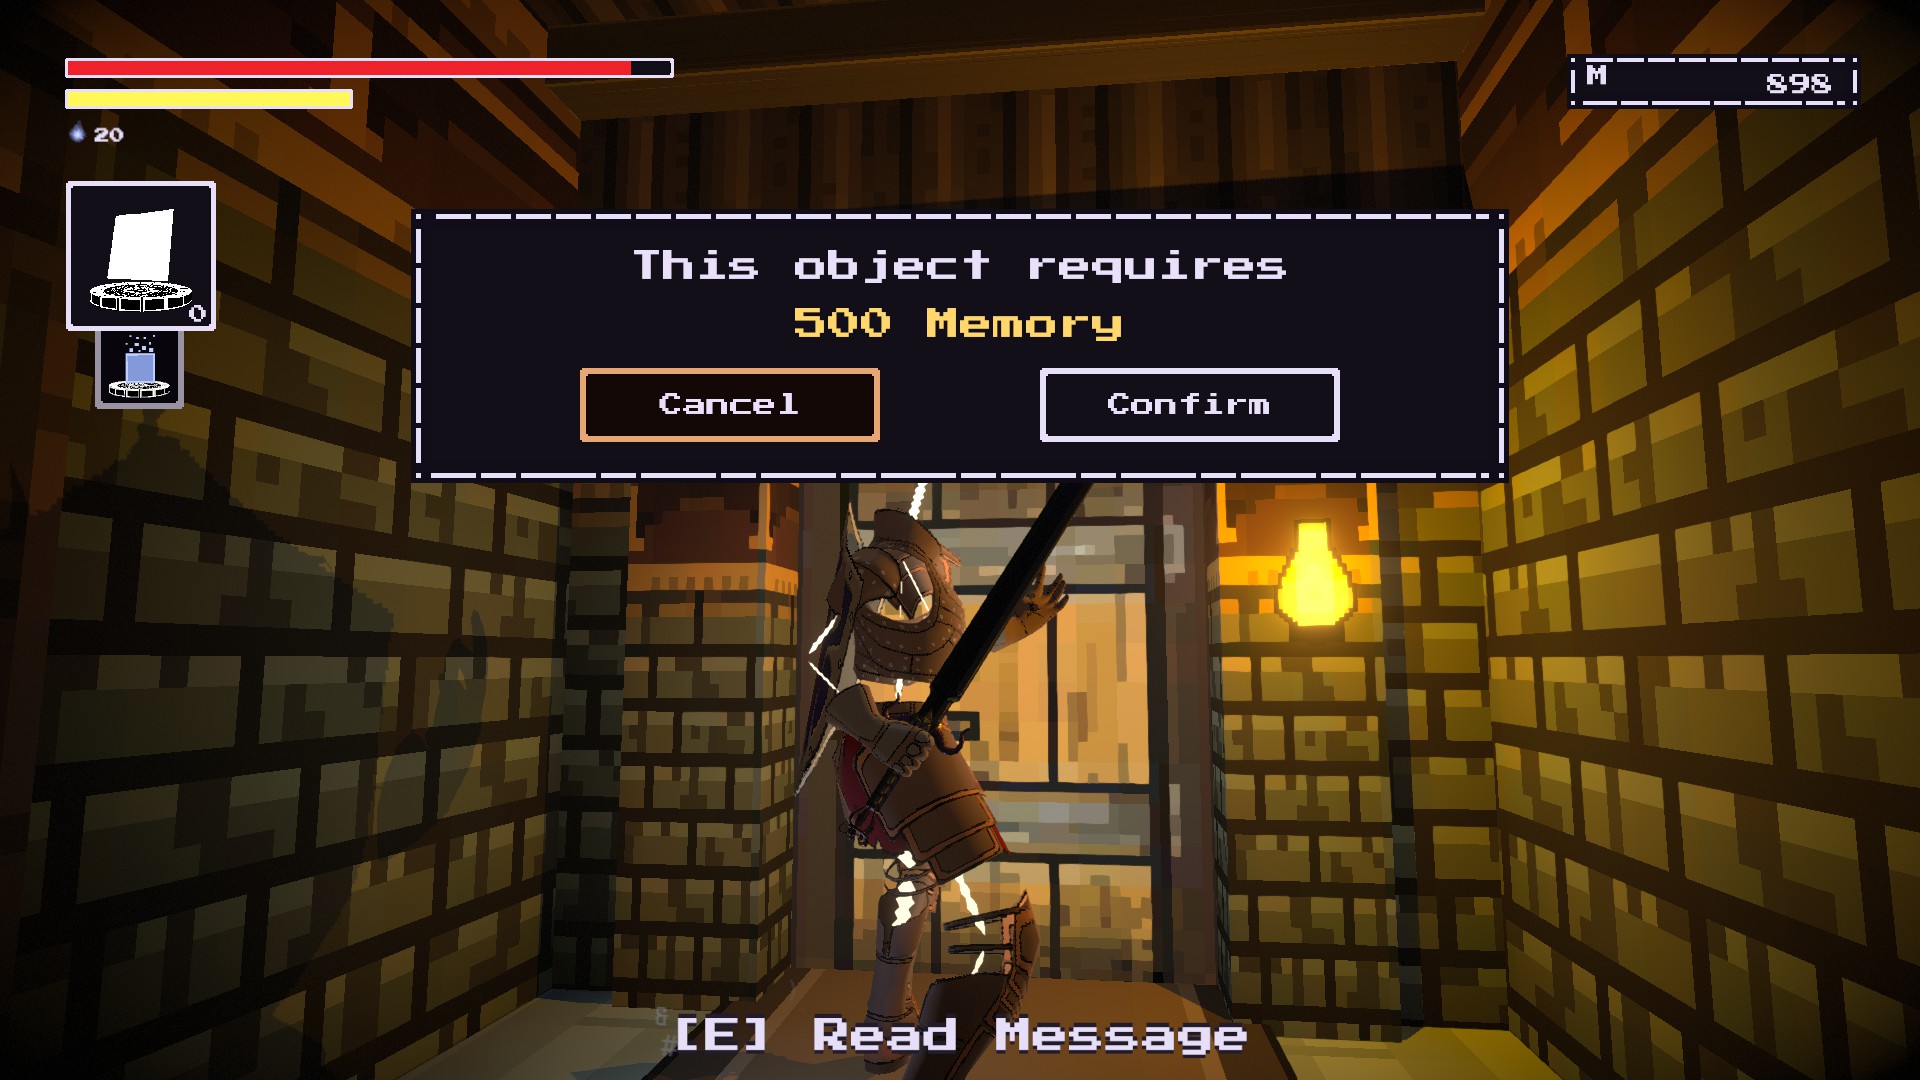
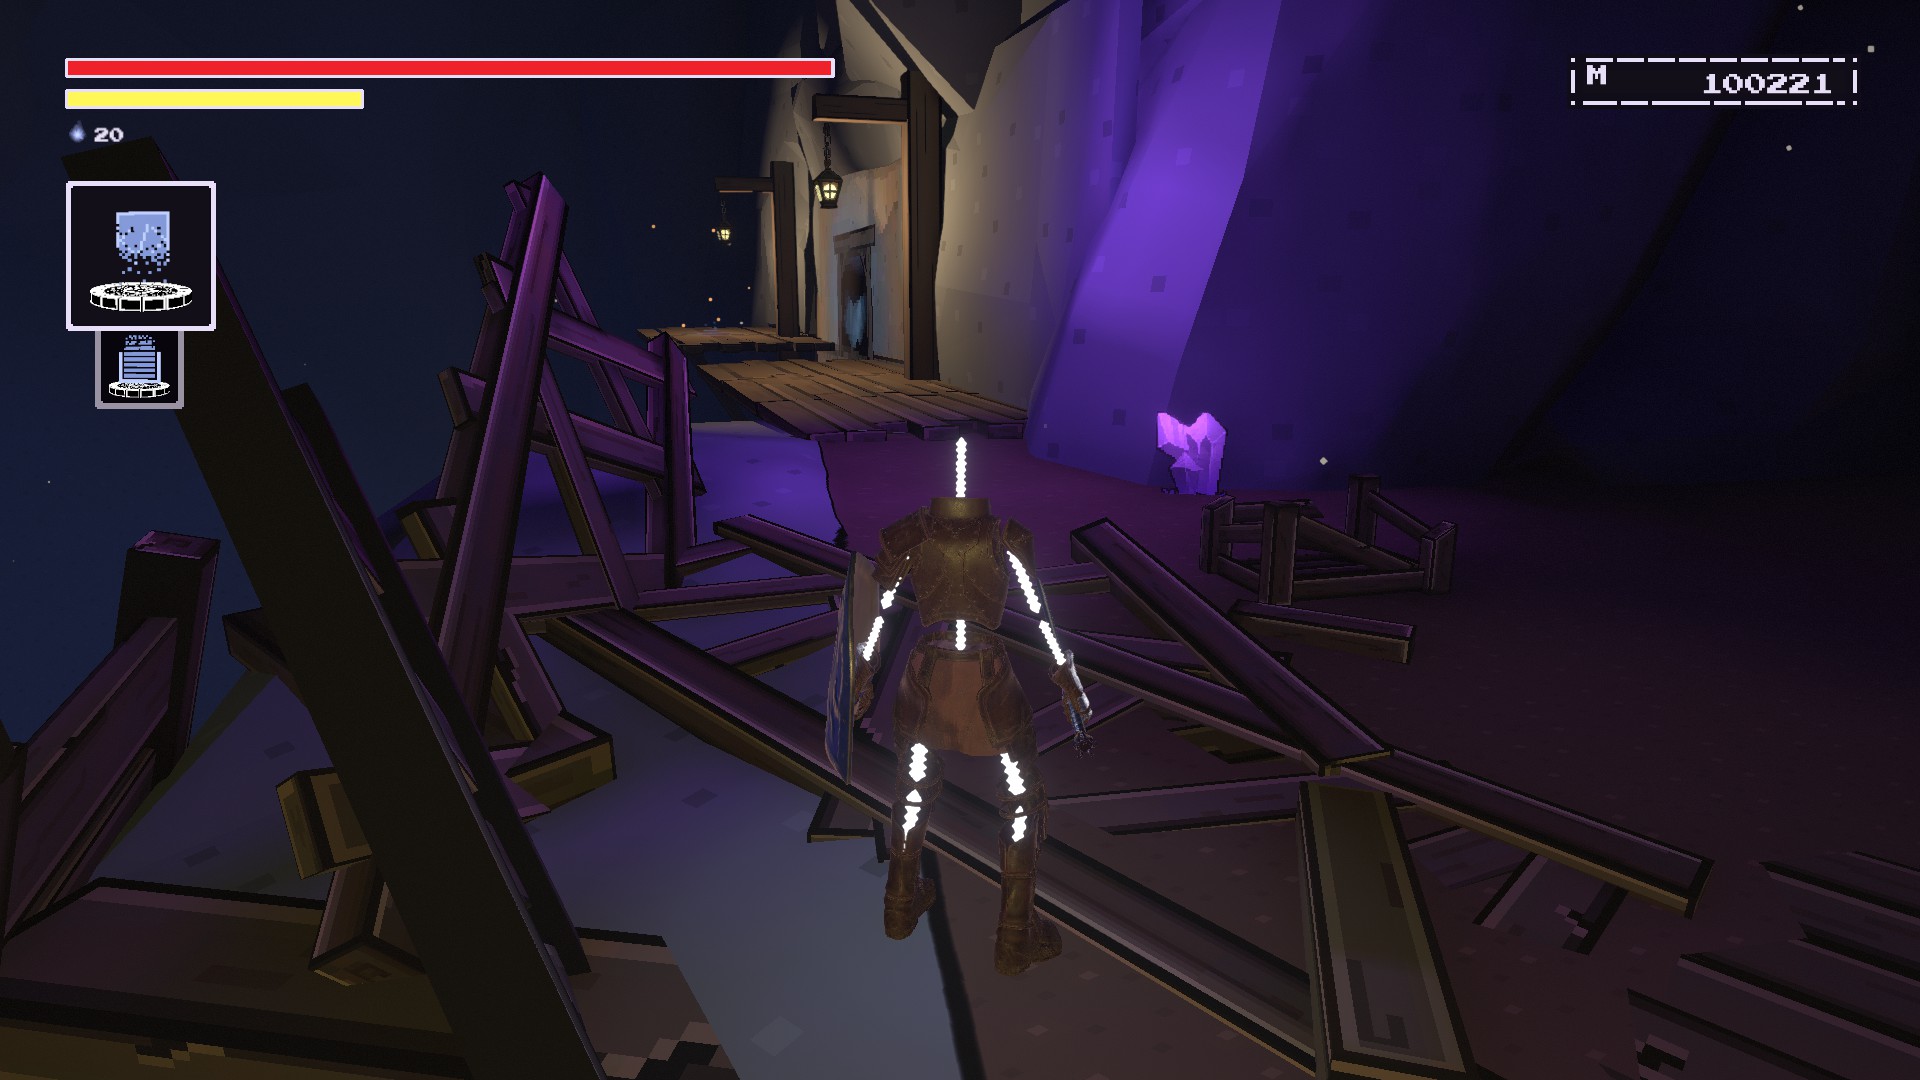
You need to have Uprez and at least 500 memory.Enter the room and you should be able to restore the Easy Target.
New Order’s Rule
HALL OF HEROES #3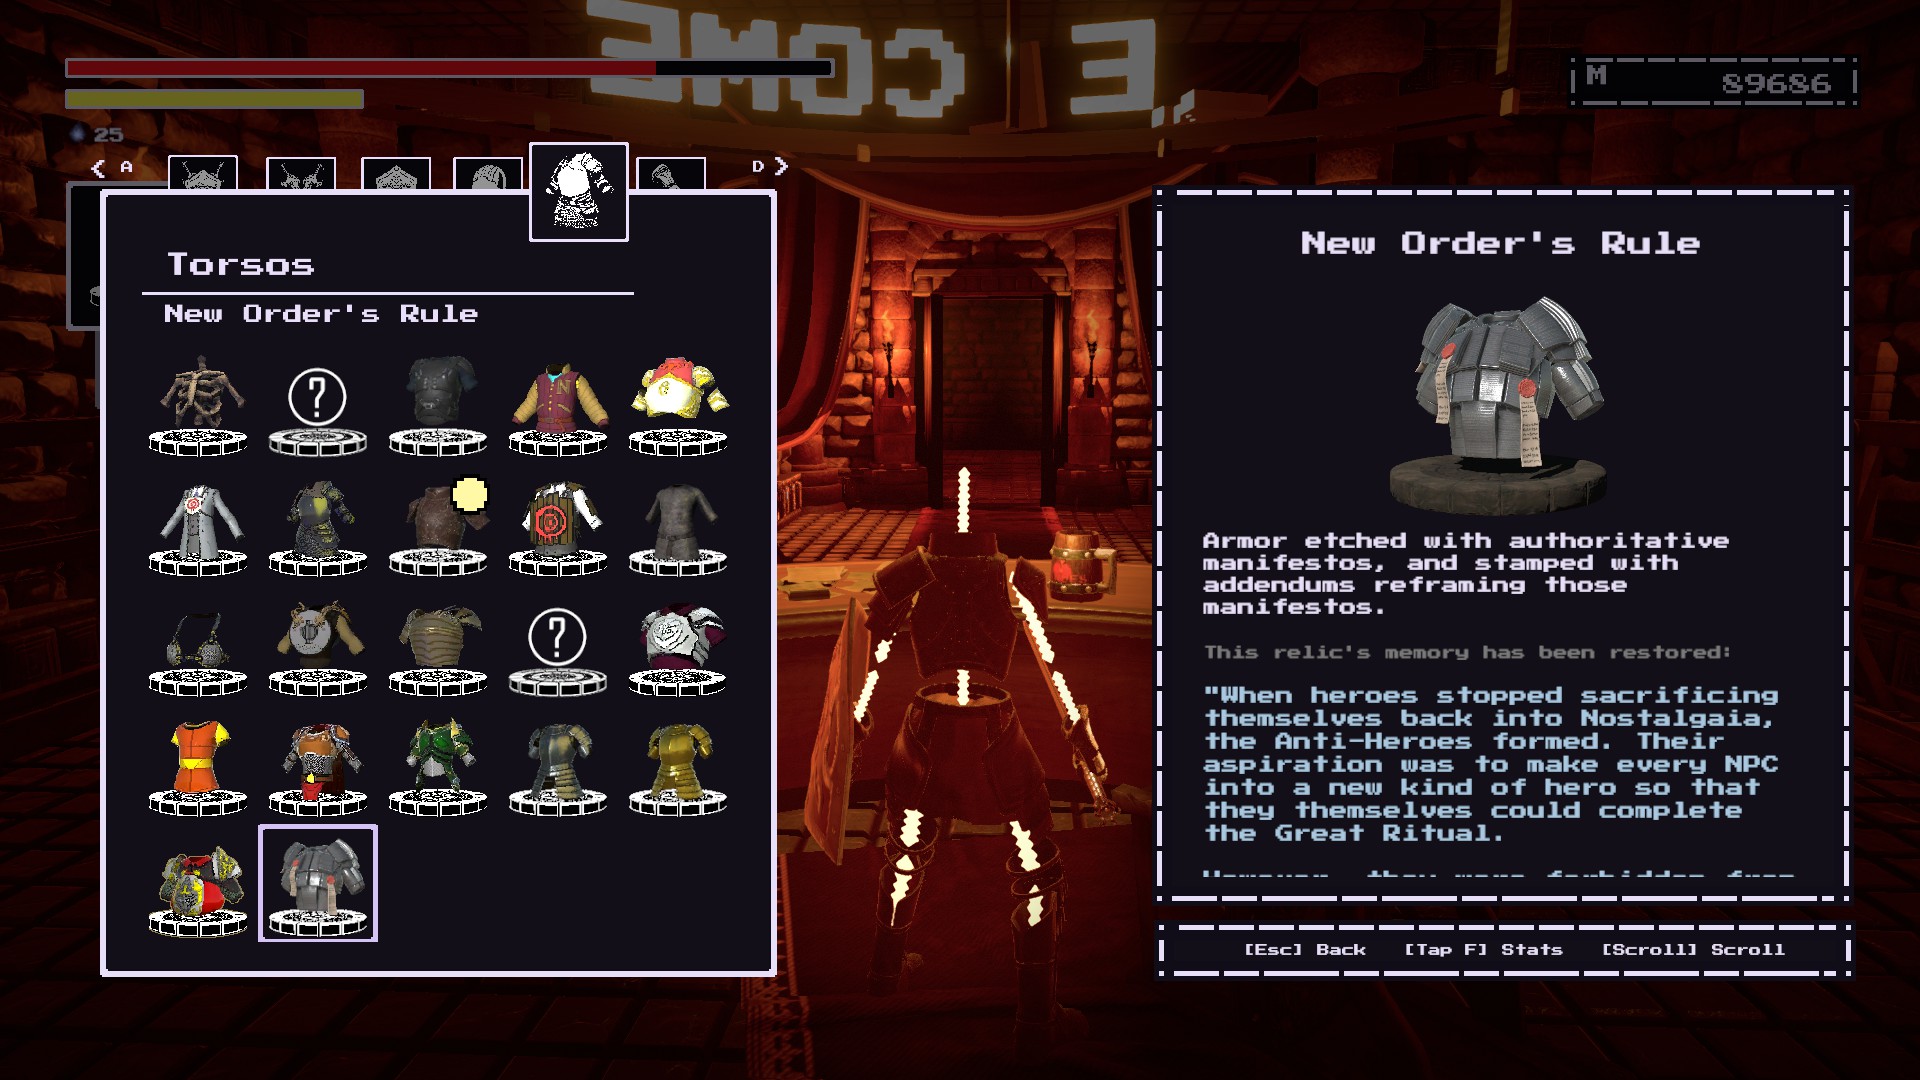
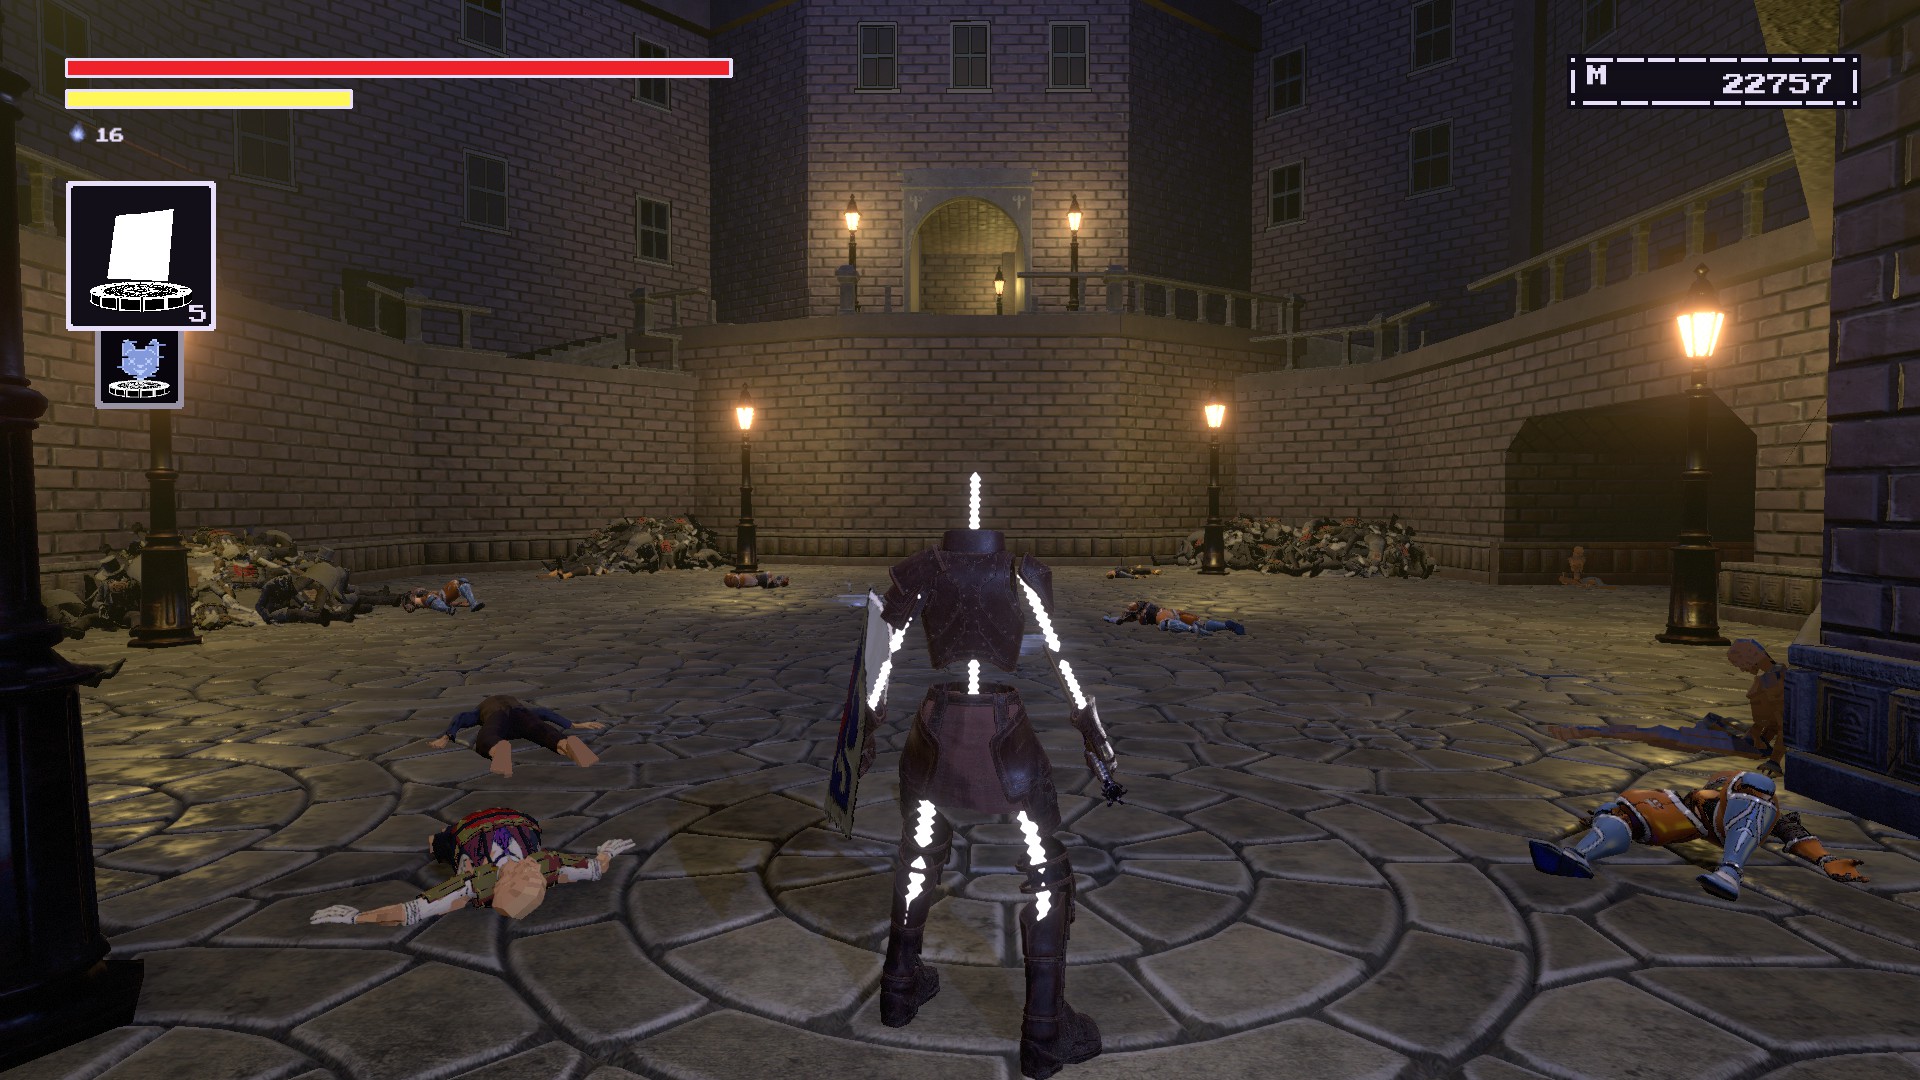
As you progress through the story, you’ll need to
cut the plot threads in the Narrator’s Study.In order to do that, you must bypass the Anti-Heroes who stand in your way at the
arena in NPC City.
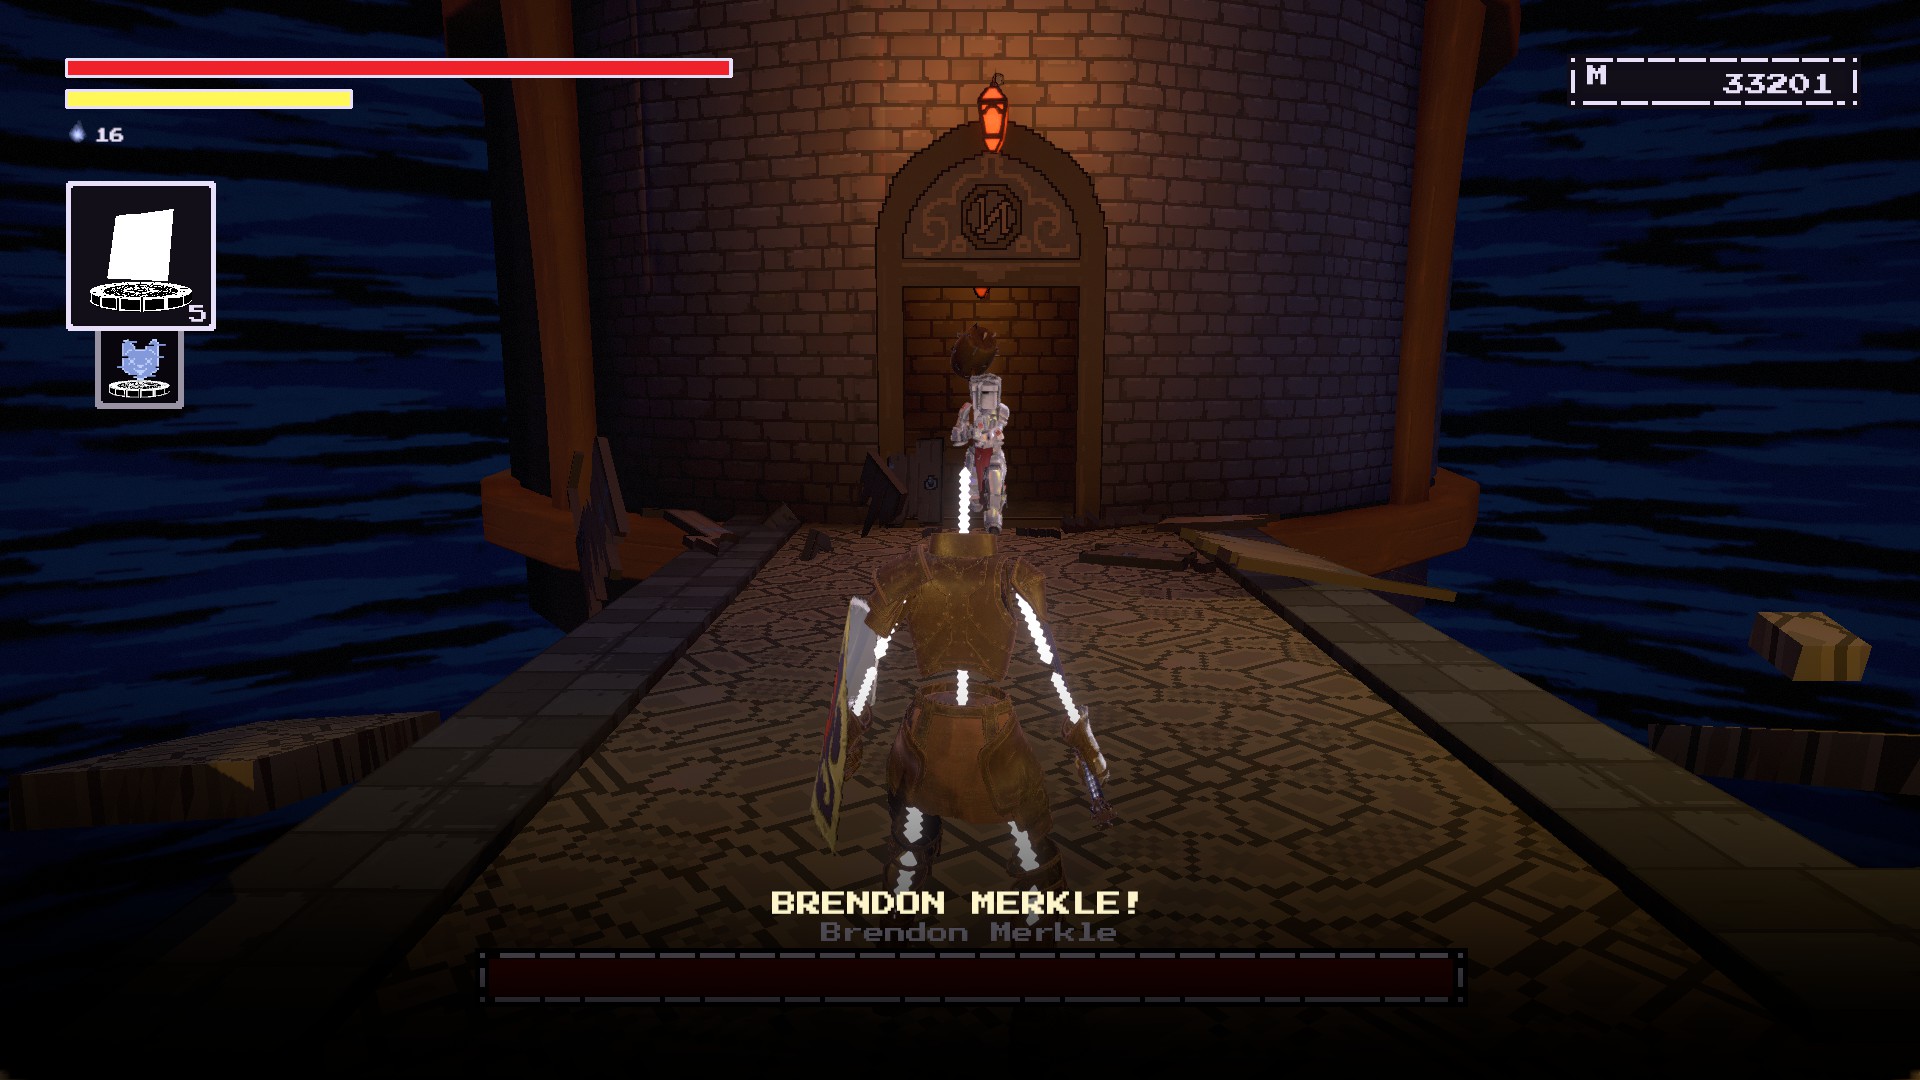
You’ll need to fight Brendon Merkle.
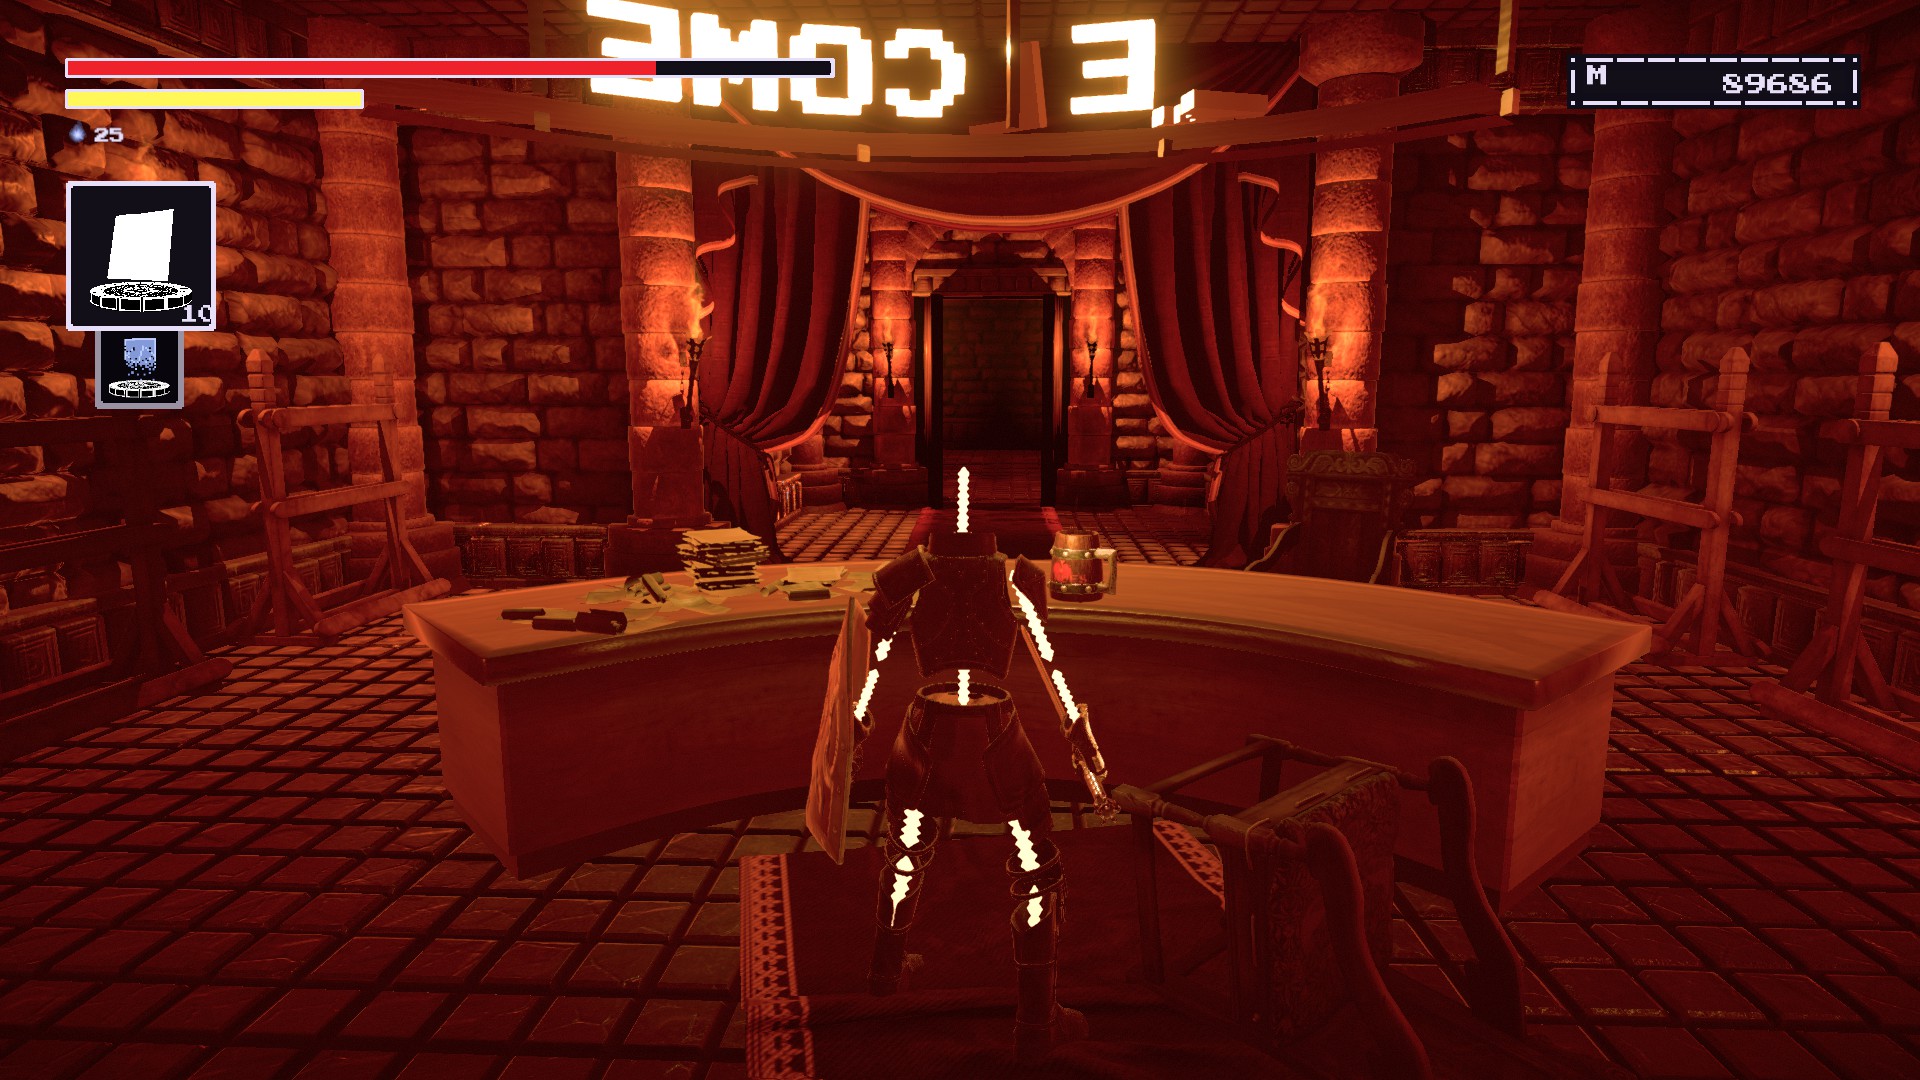
Go back to the beginning of the gamewhere you’ll find a
welcome desk.Remember the torso here.
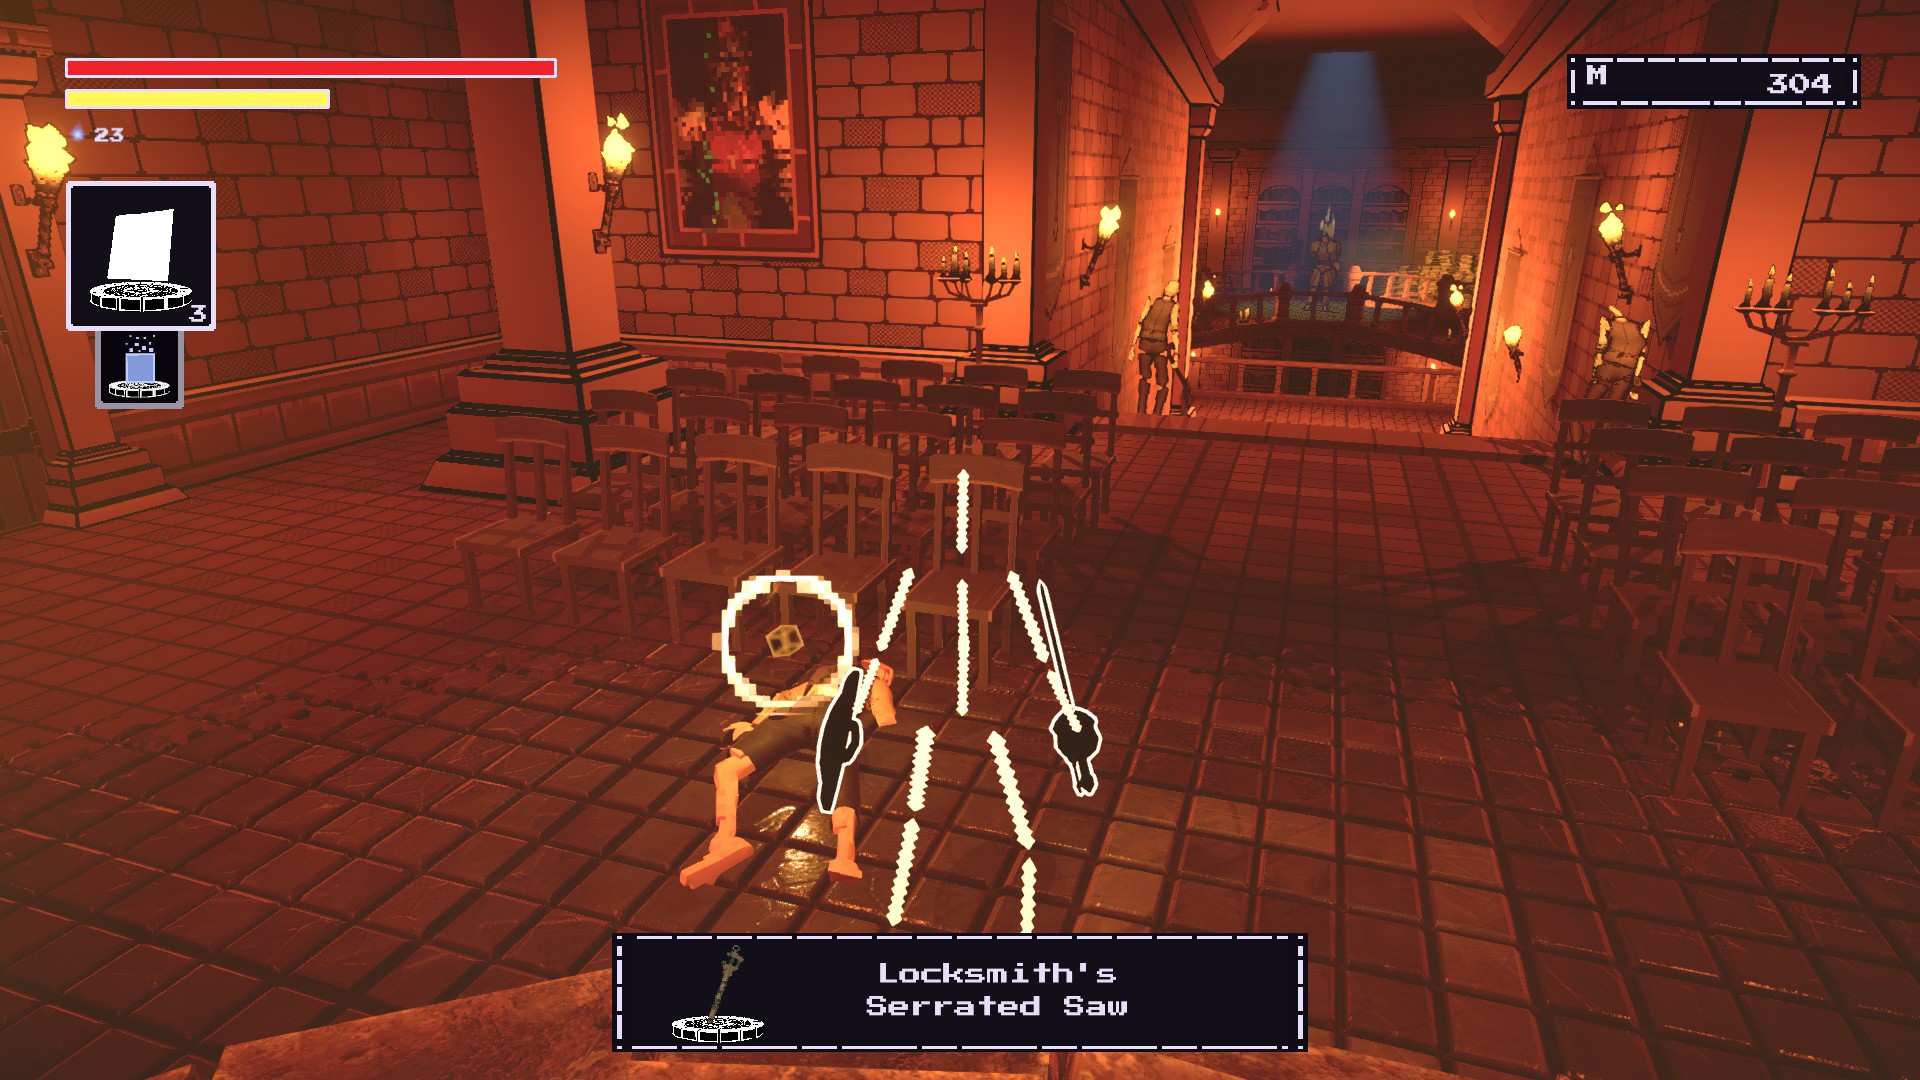
Locksmith’s Serrated Saw
HEARTFLOW ALTAR #1
It is found
on the corpsenear the
Hall of Heroes becaon.
I’m pretty sure this one is
mandatorysince it’s used for the tutorial.
You use it
near the Old Manonce you’ve lit up the Heartflow Altar beacon.
Shield of Inspiration***
HEARTFLOW ALTAR #2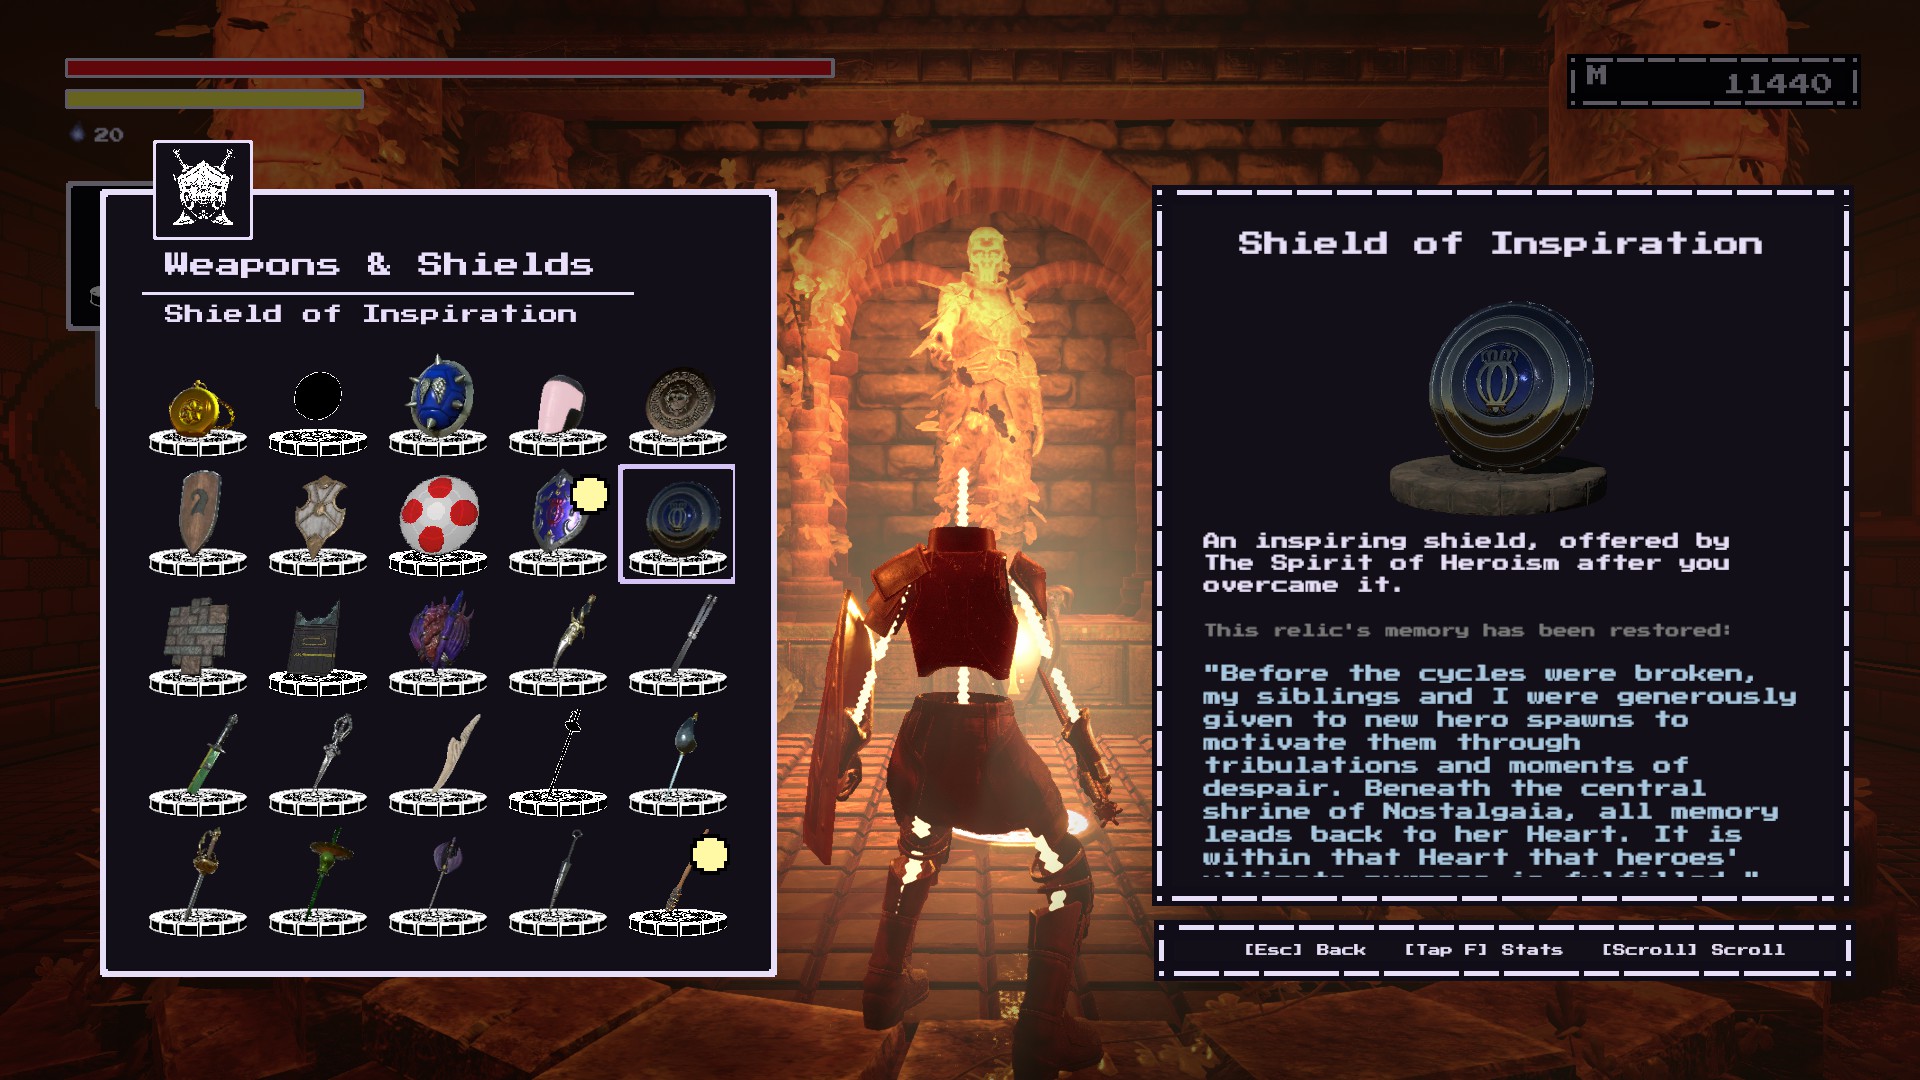
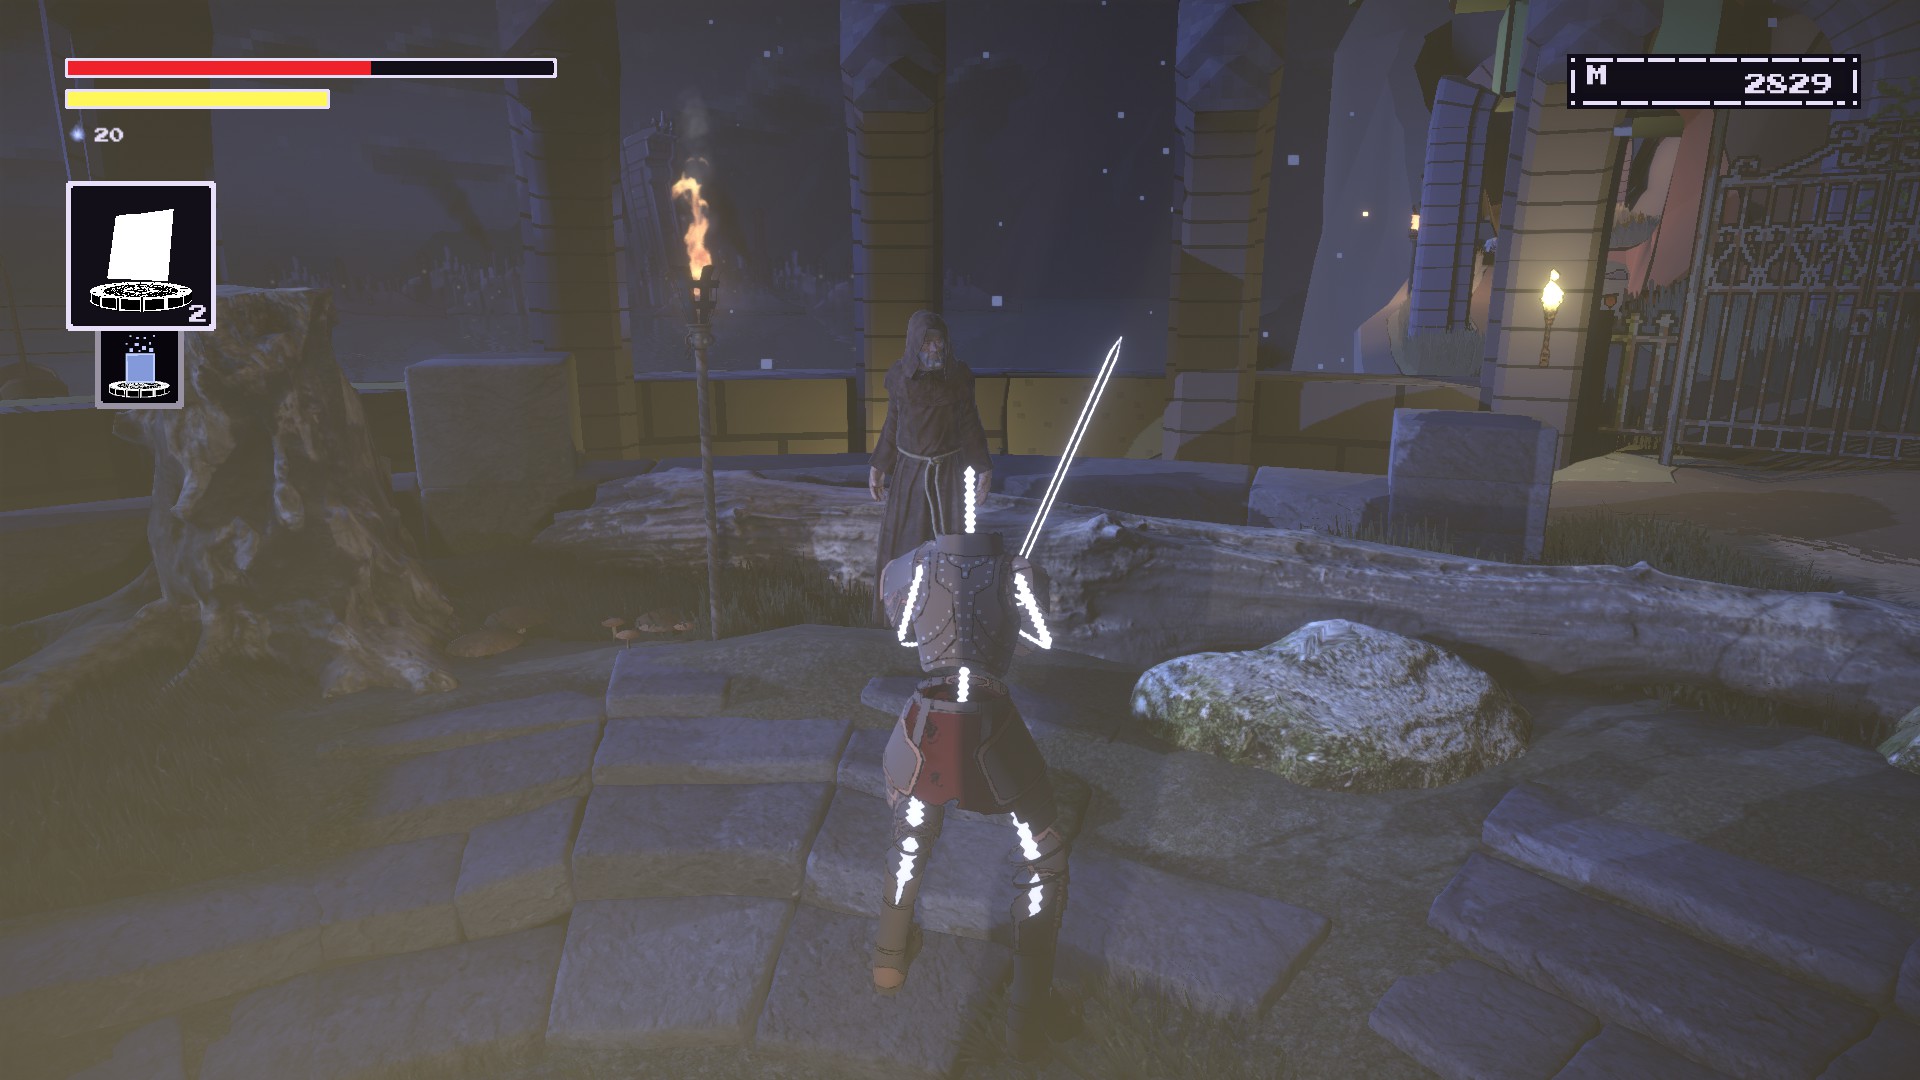
You’ll get this item after
beating the Spirit of Heroism.
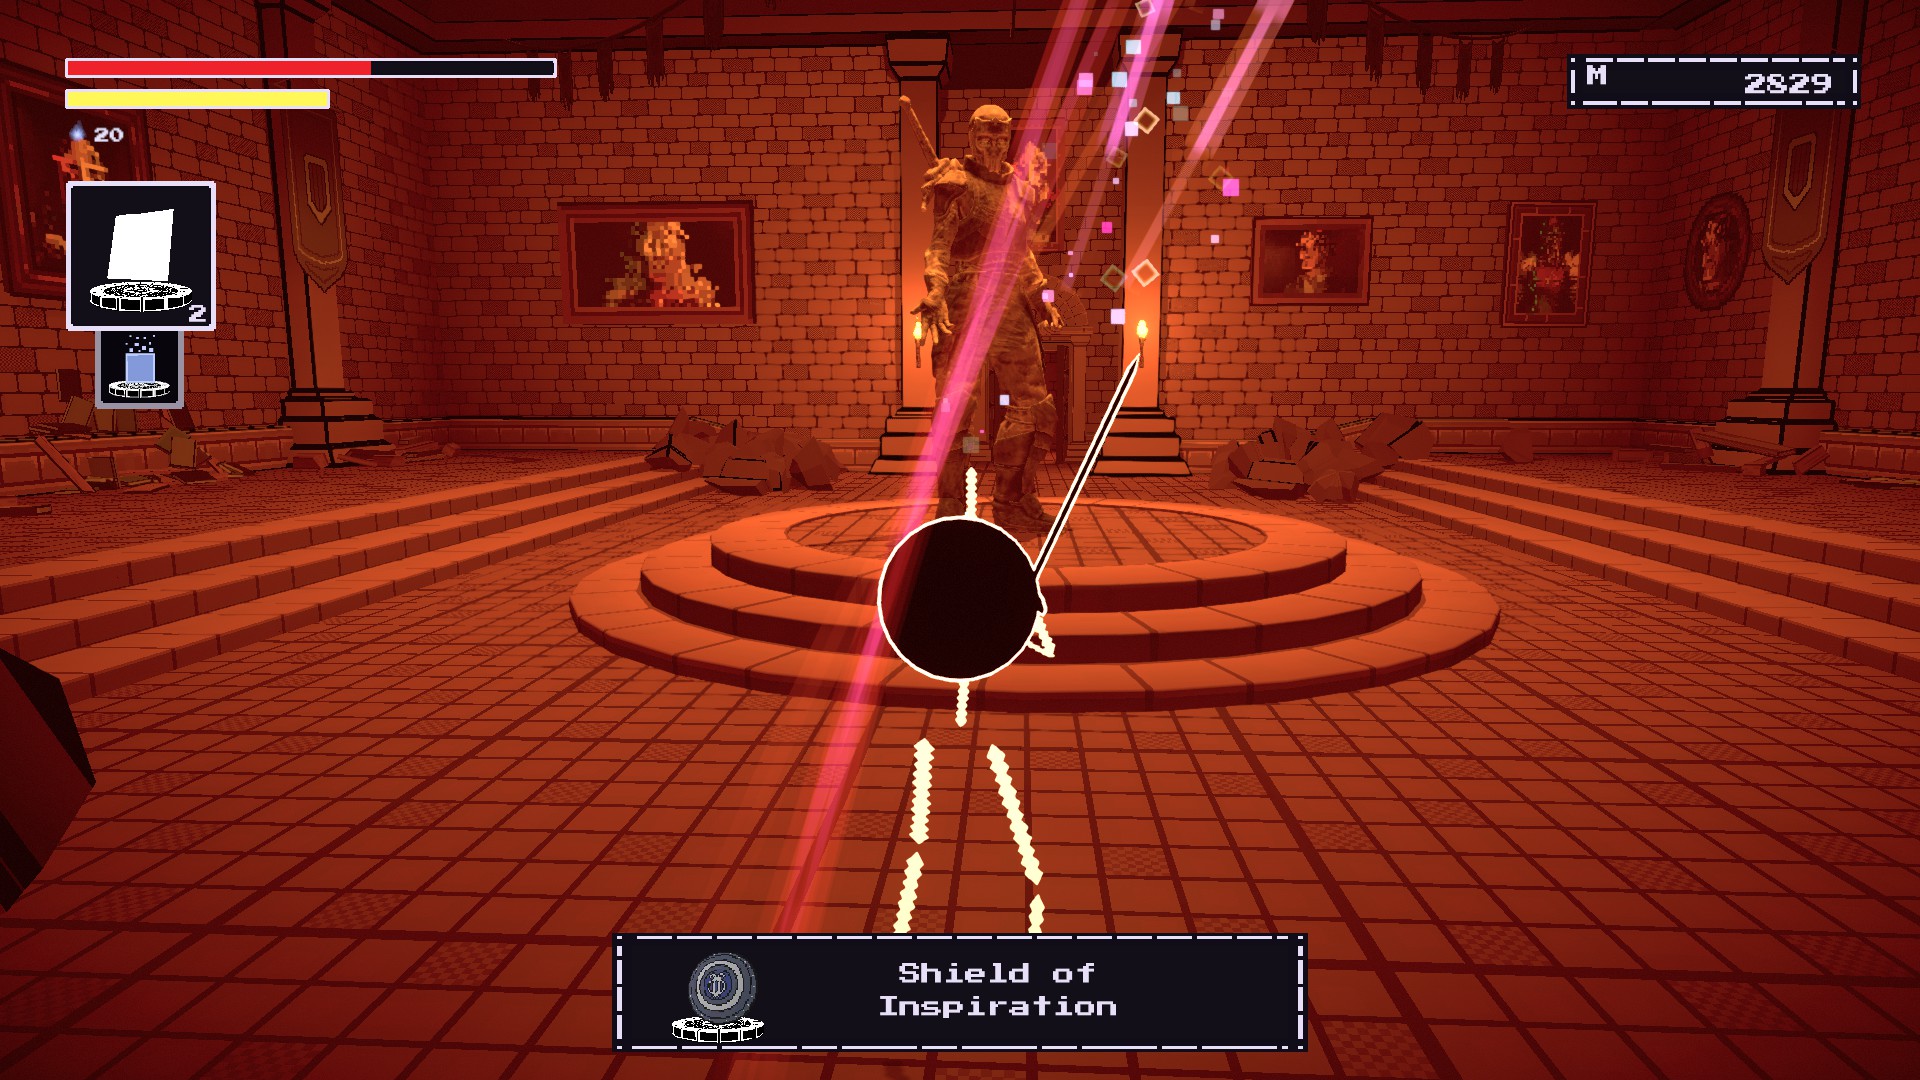
At the
Heartflow Altar, you go down the spiral stairs to the
Heart of Nostalgaia.
Remember the item near the pipe.
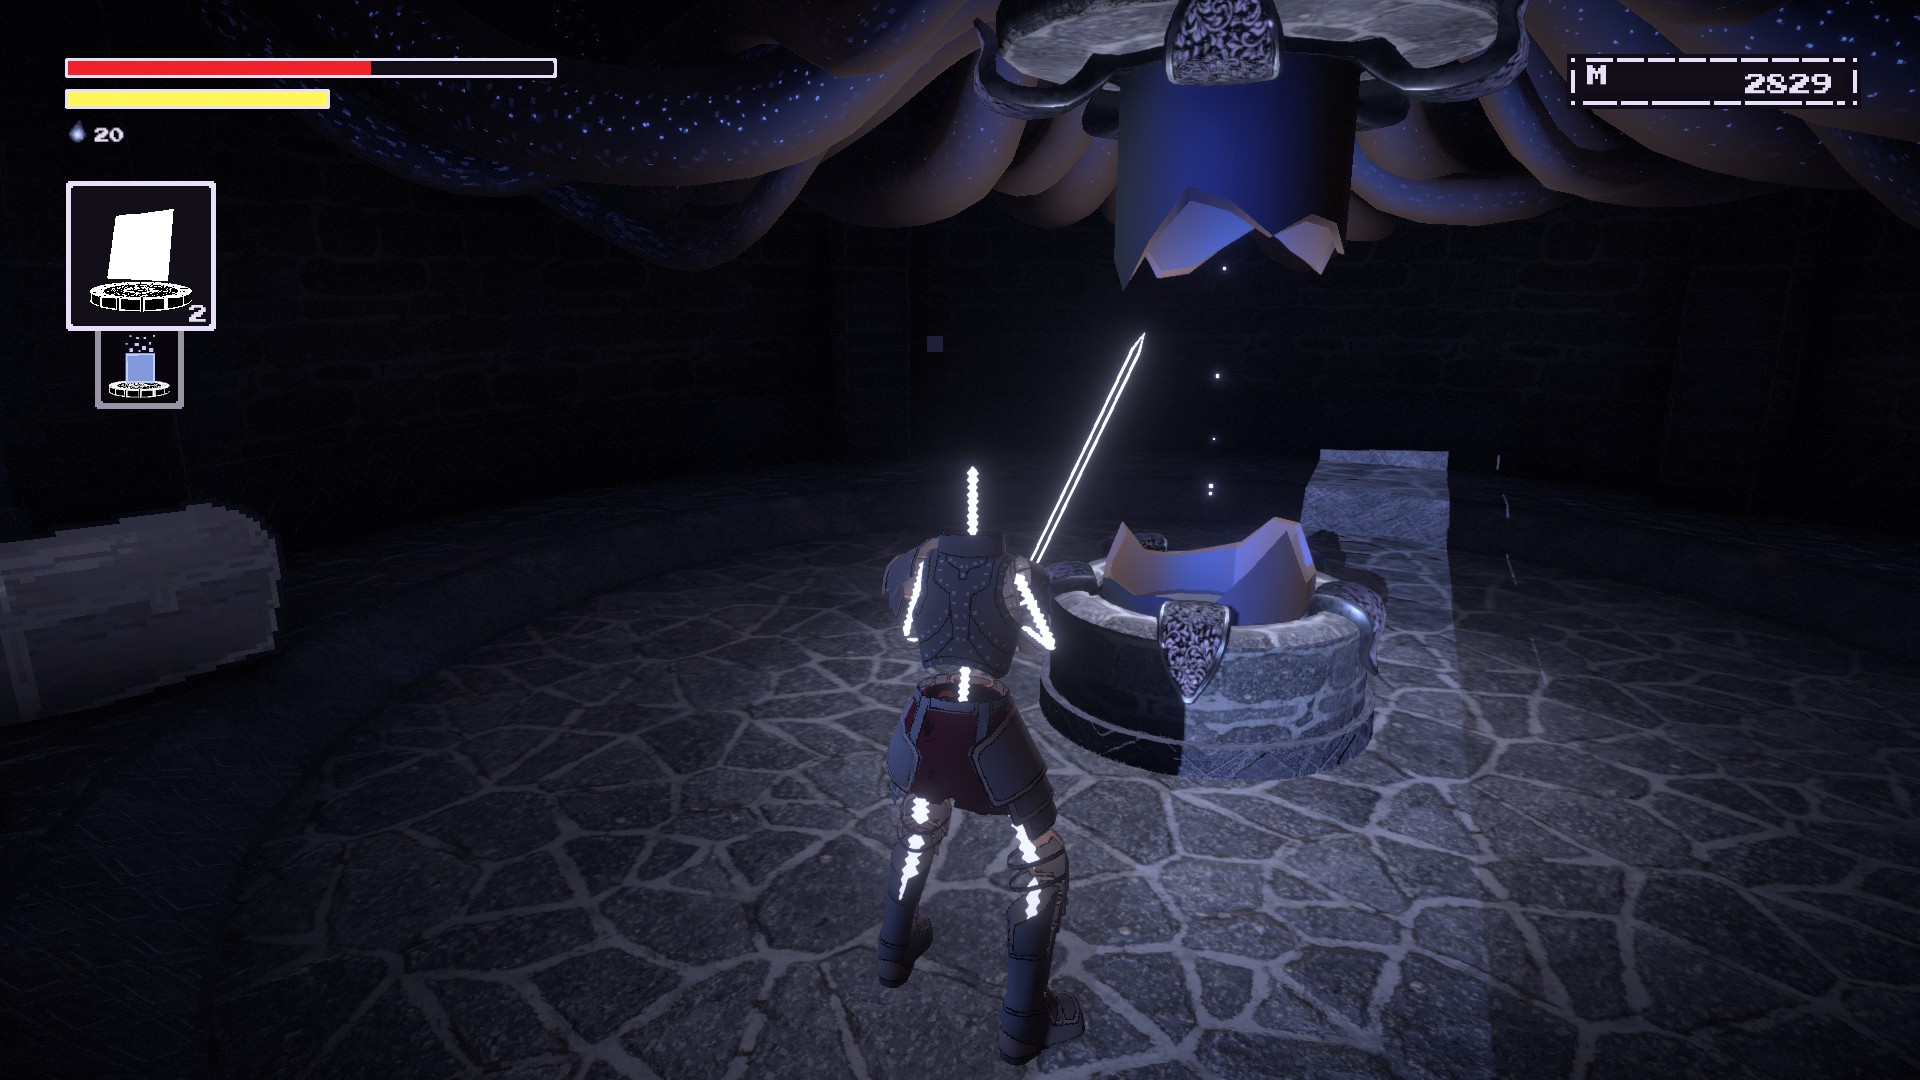
메모: You’ll need this item restored to advance Nameless Nhero’s questline by giving it to him at Festivity Row.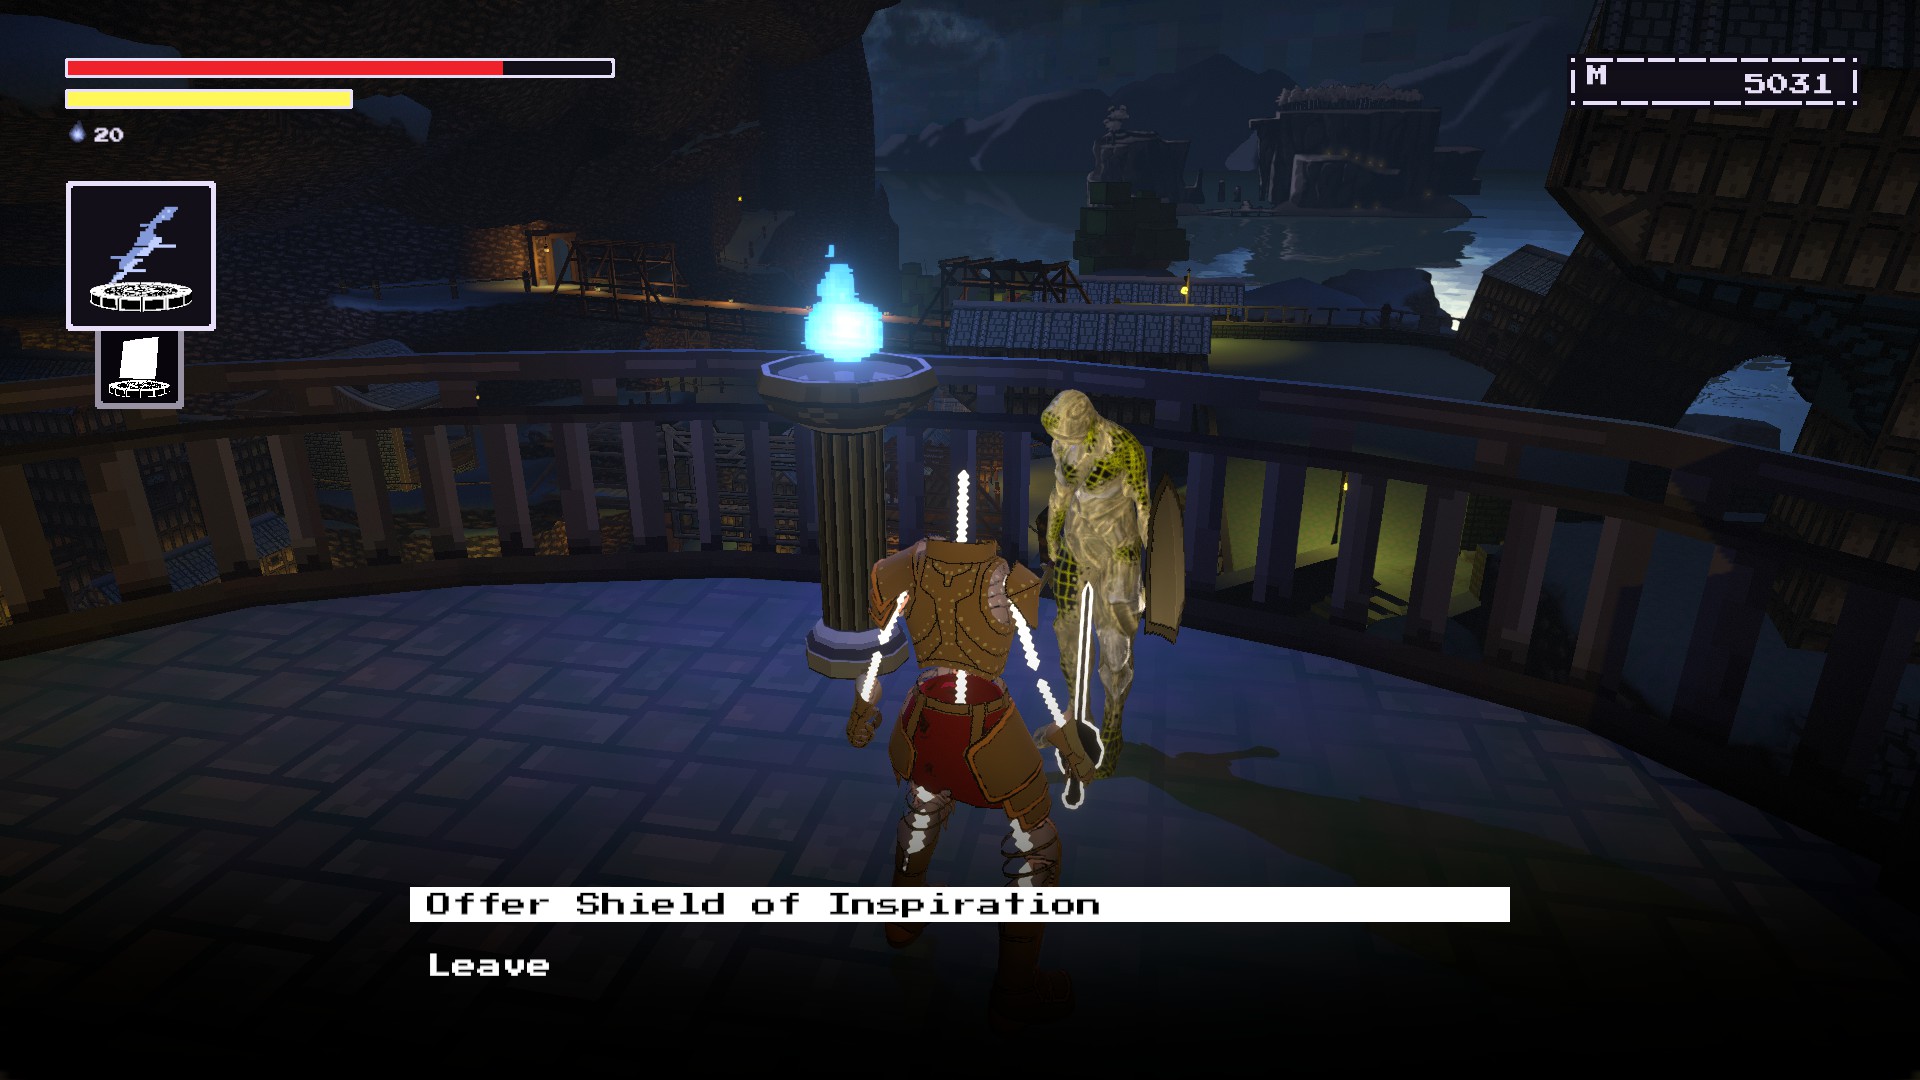
Noble Epeen
ORESHAFT VILLAGE #1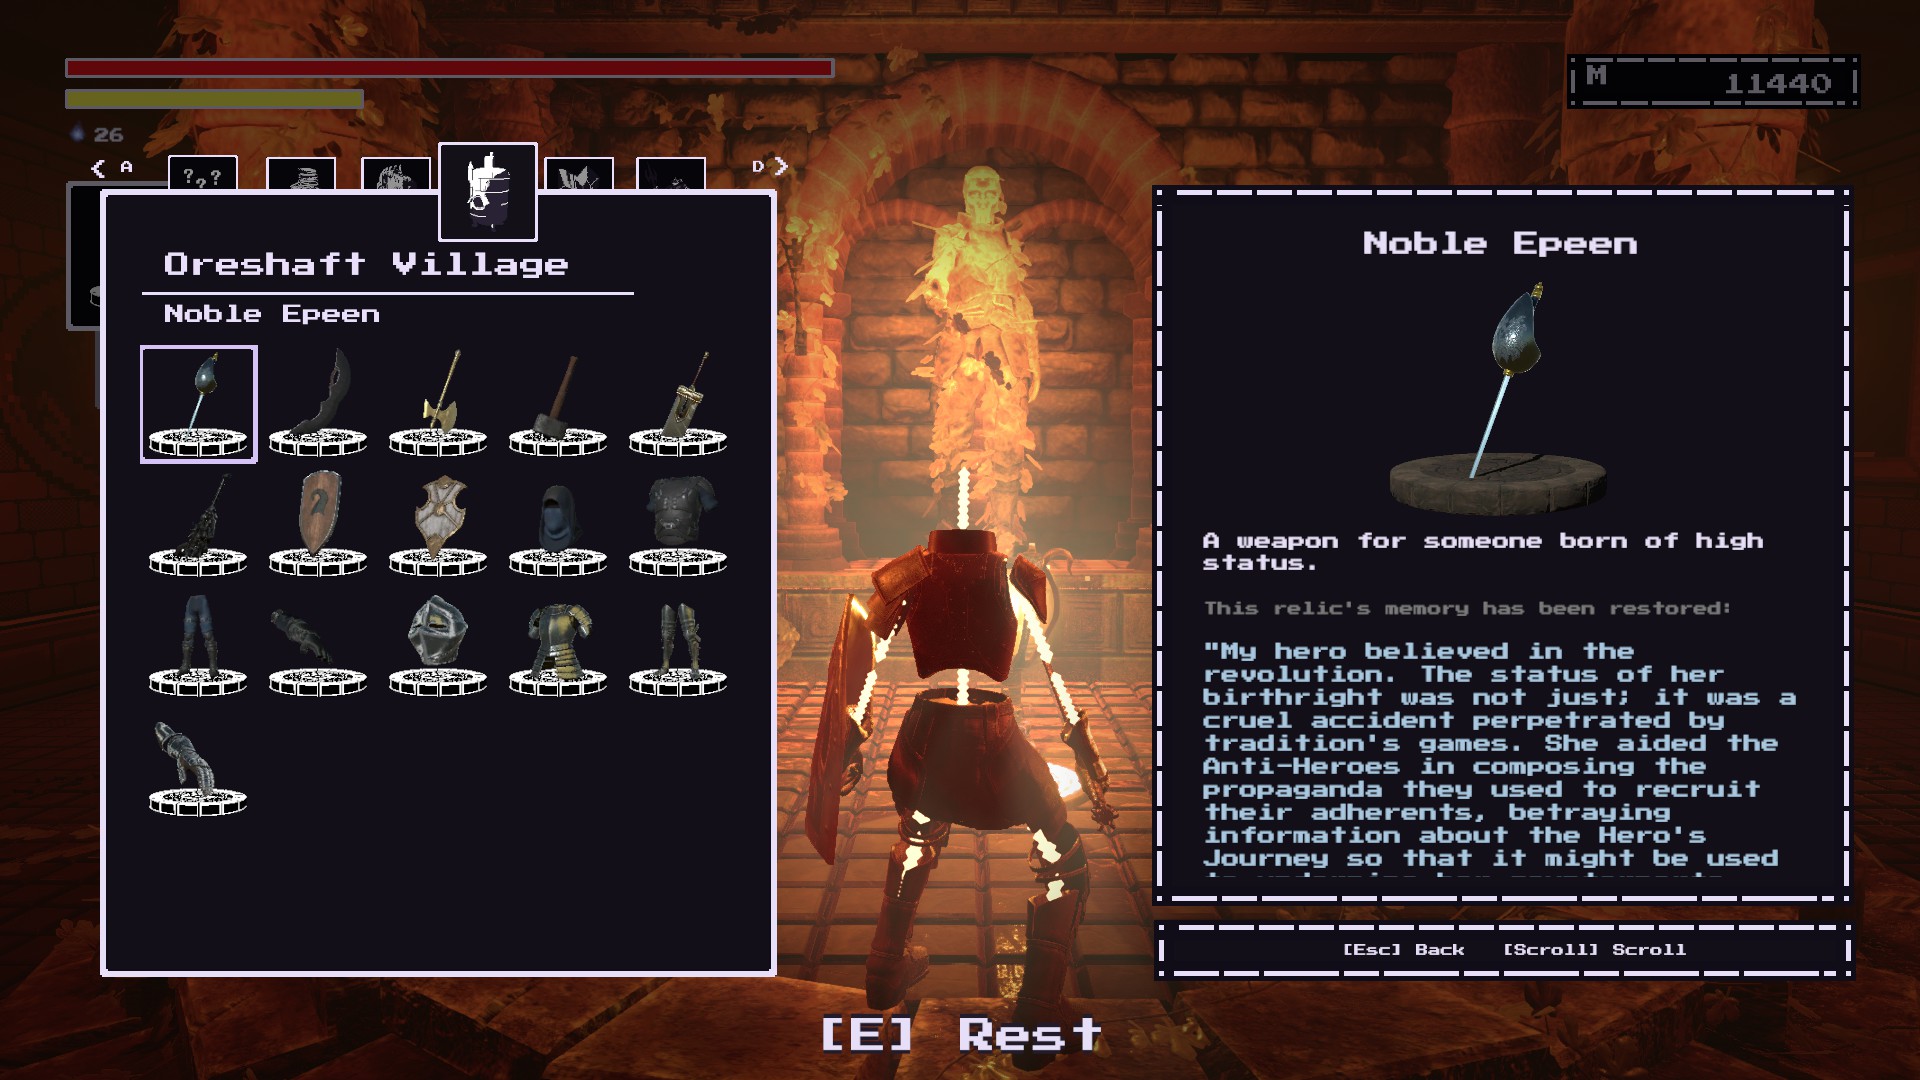
당신은 할 수 있습니다
buy it from the Merchant’s base stock.
No Easymaker Keys needed.
소송 비용 750 memory.(I know that it shows the Vibrating Sword but you get the drift of it.)
At the Oreshaft Village entrance, go to the left side and you should see a building like this.
문을 열어라and you’ll see a bunch of boxes. Break them down to
access the hidden ladder.
You should see an unstable door.
You need to have Uprez and at least 500 memory.Enter the room and you’ll be able to restore the Noble Espeen.
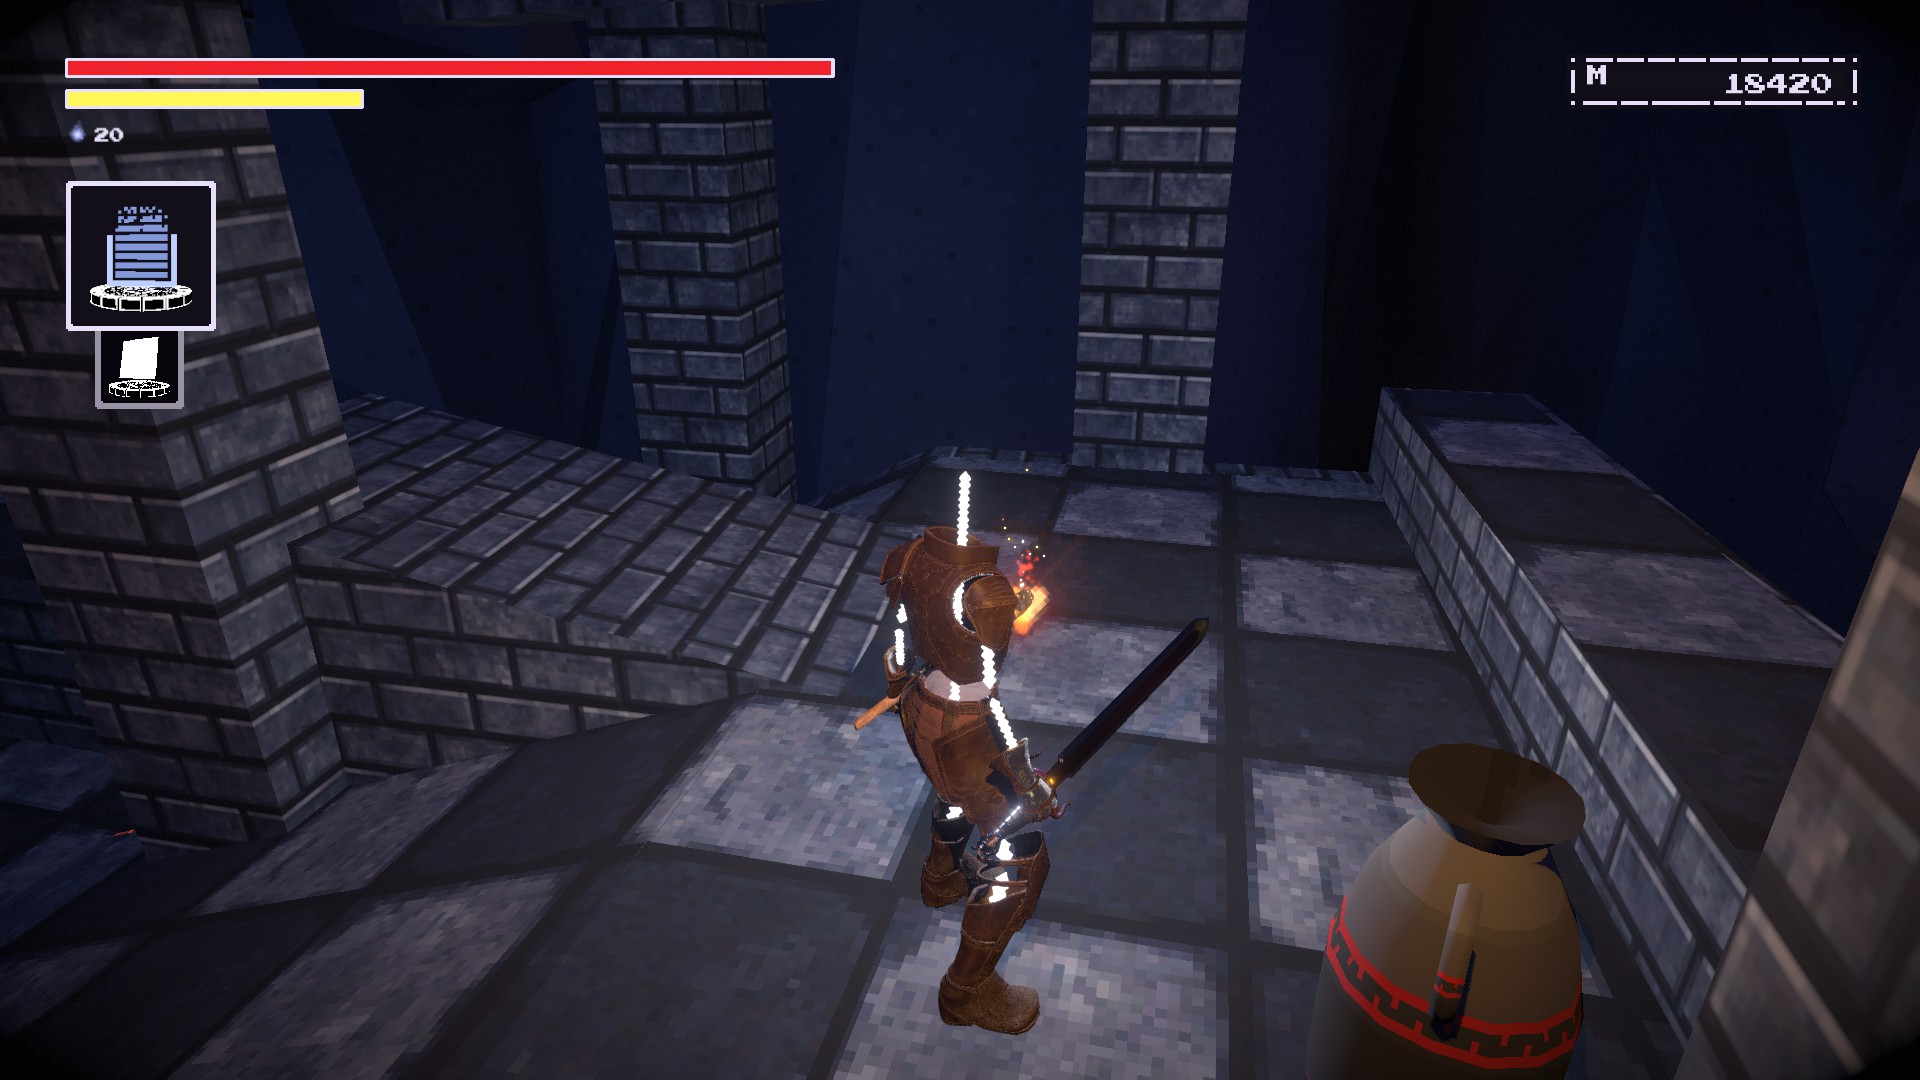
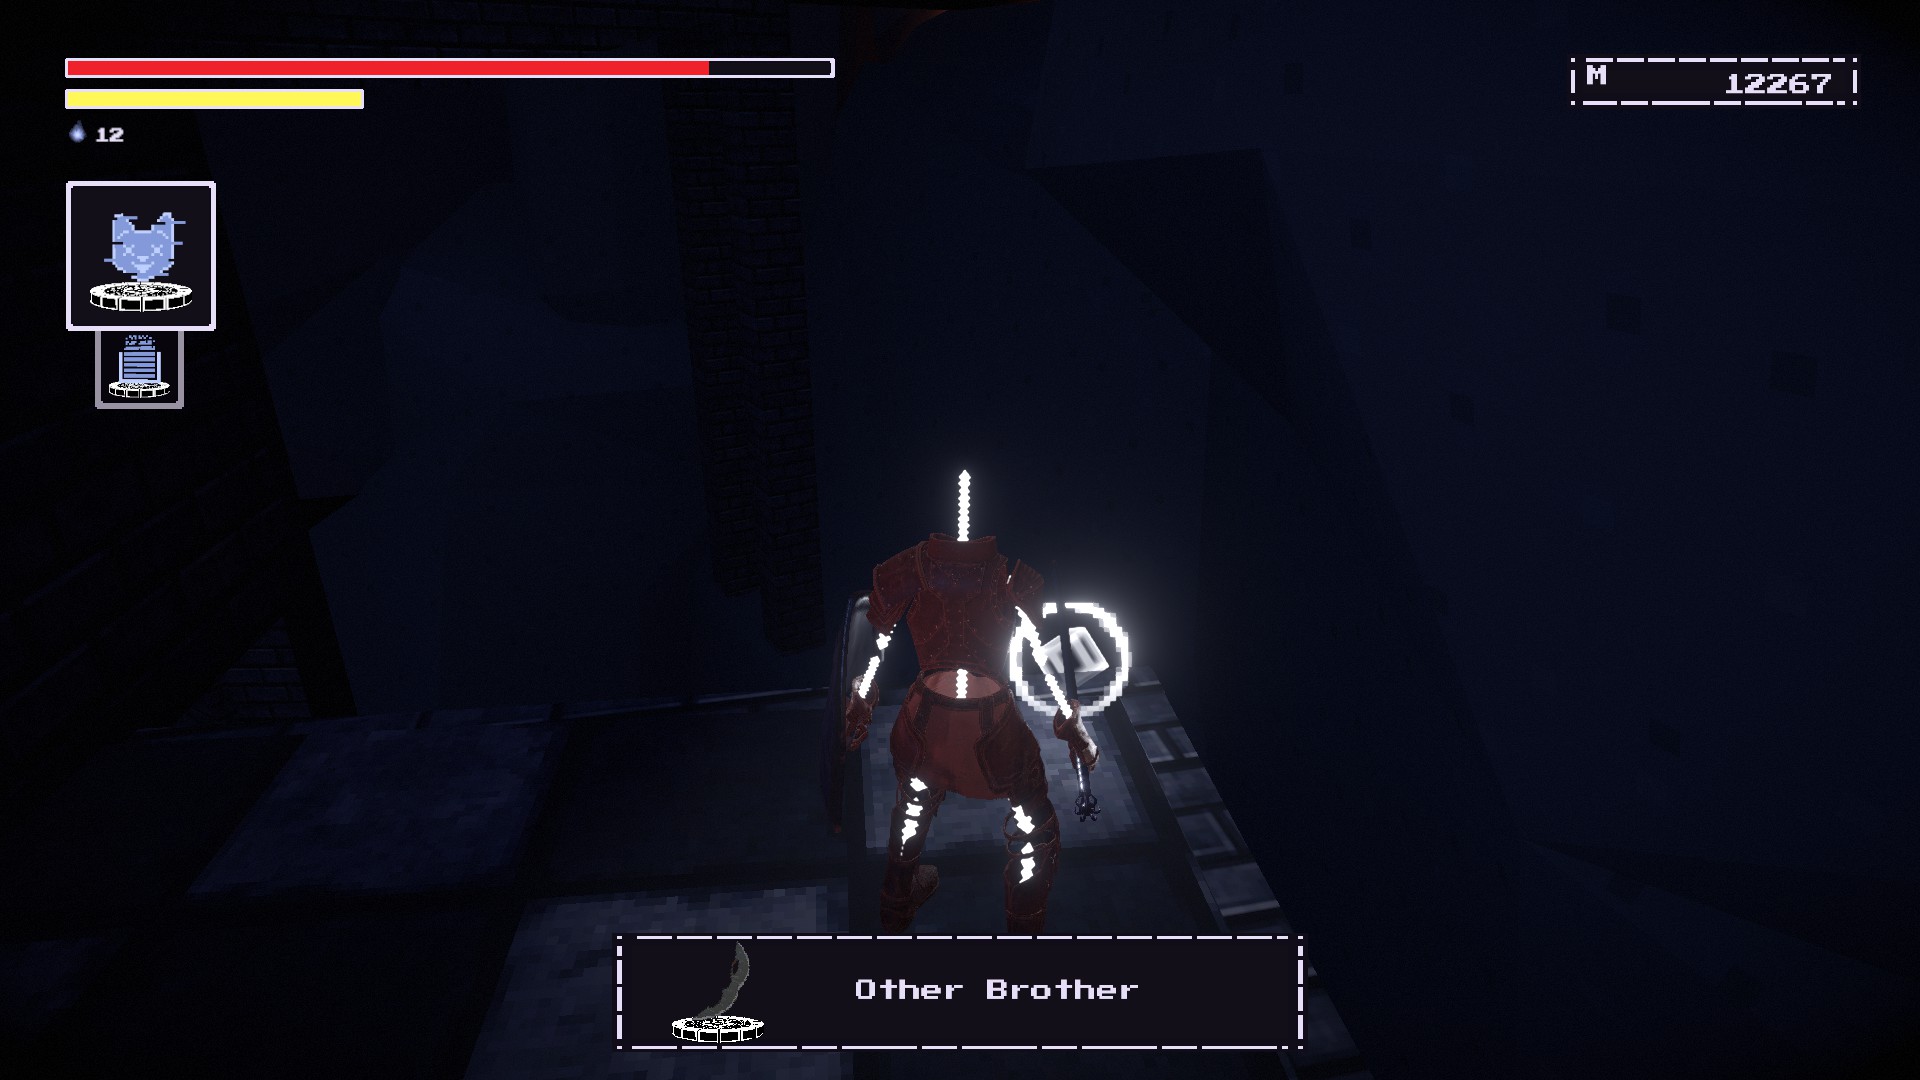
Other Brother
ORESHAFT VILLAGE #2
Venture towards the Lair of the Adversaryuntil you reach this area.
Go to the left그리고
you’ll see a path behind the wall.
The weapon is found at the end of this path.
Near the Marketplace Beaconat Oreshaft Village.
Go towards the bee fetish place then make a left turn.Remember the weapon
in front of this sealed sewer tunnel.
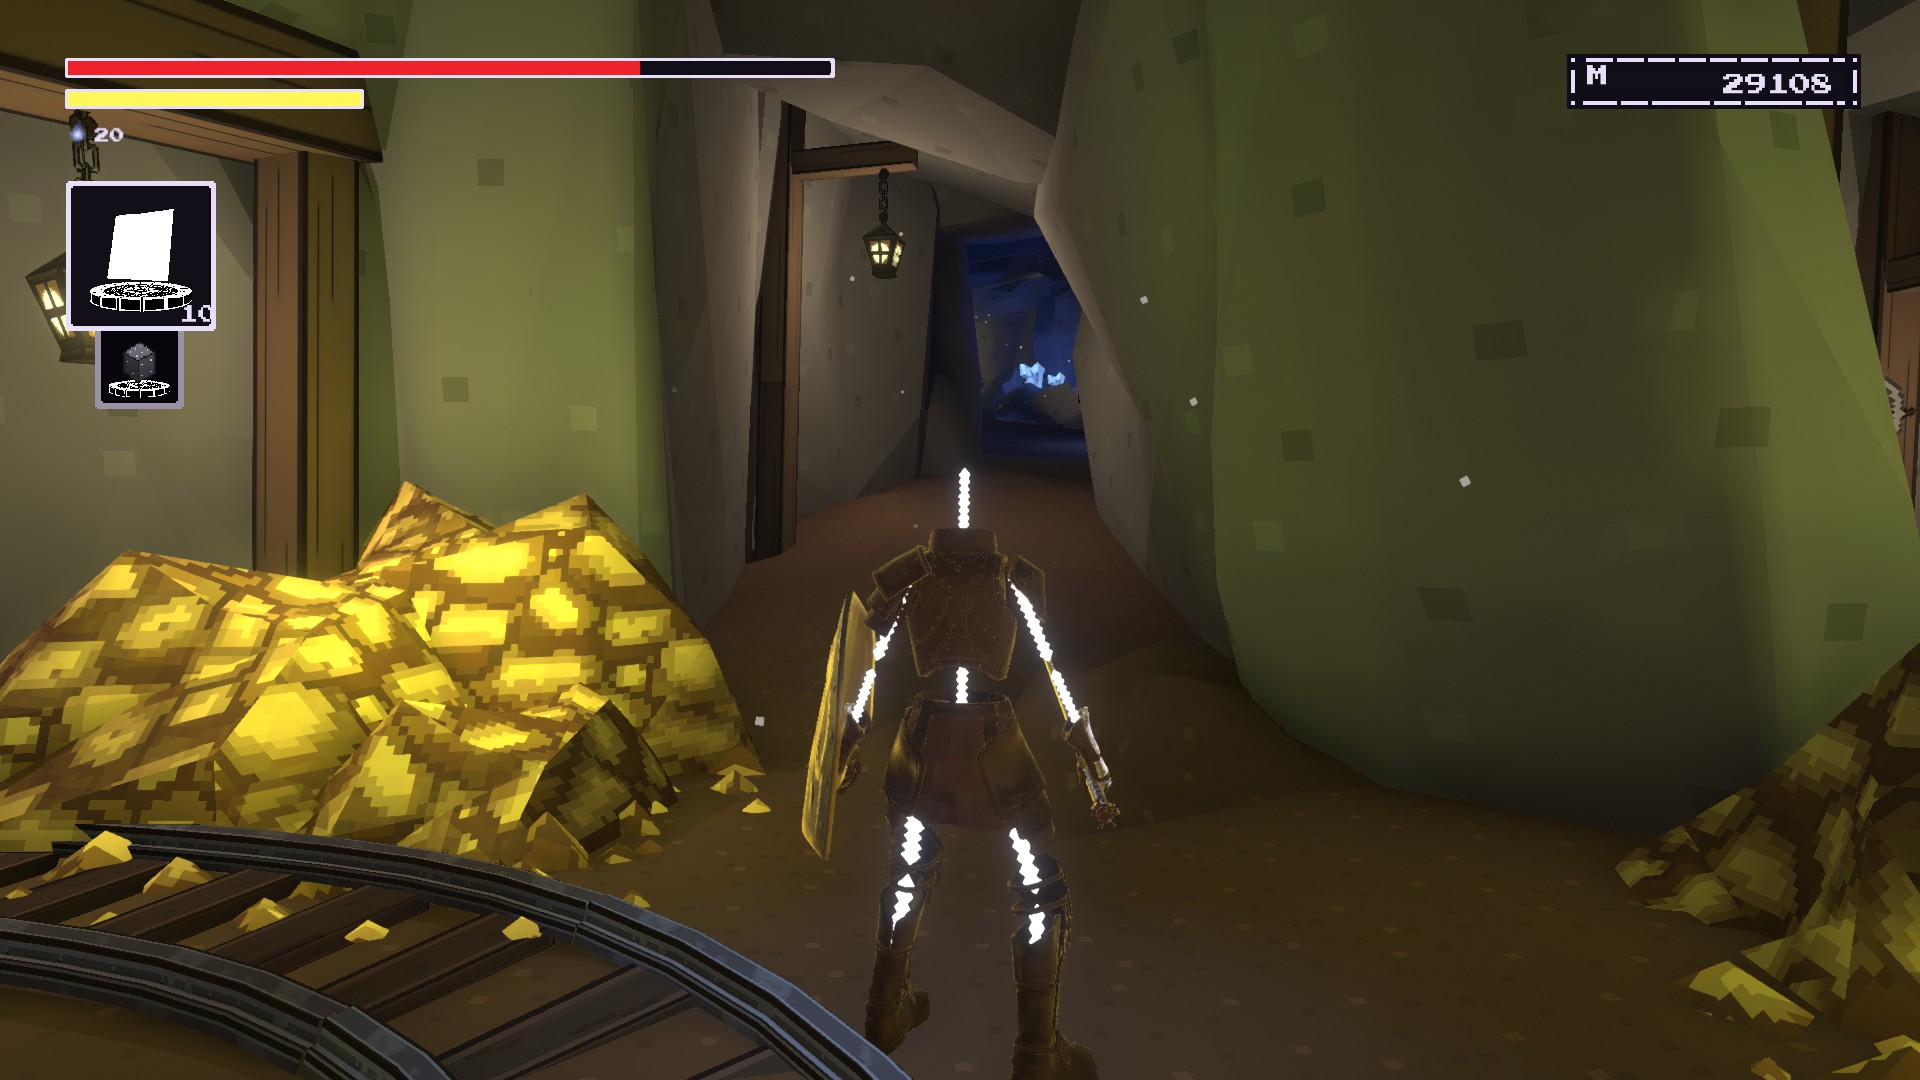
Gilded Axe
ORESHAFT VILLAGE #3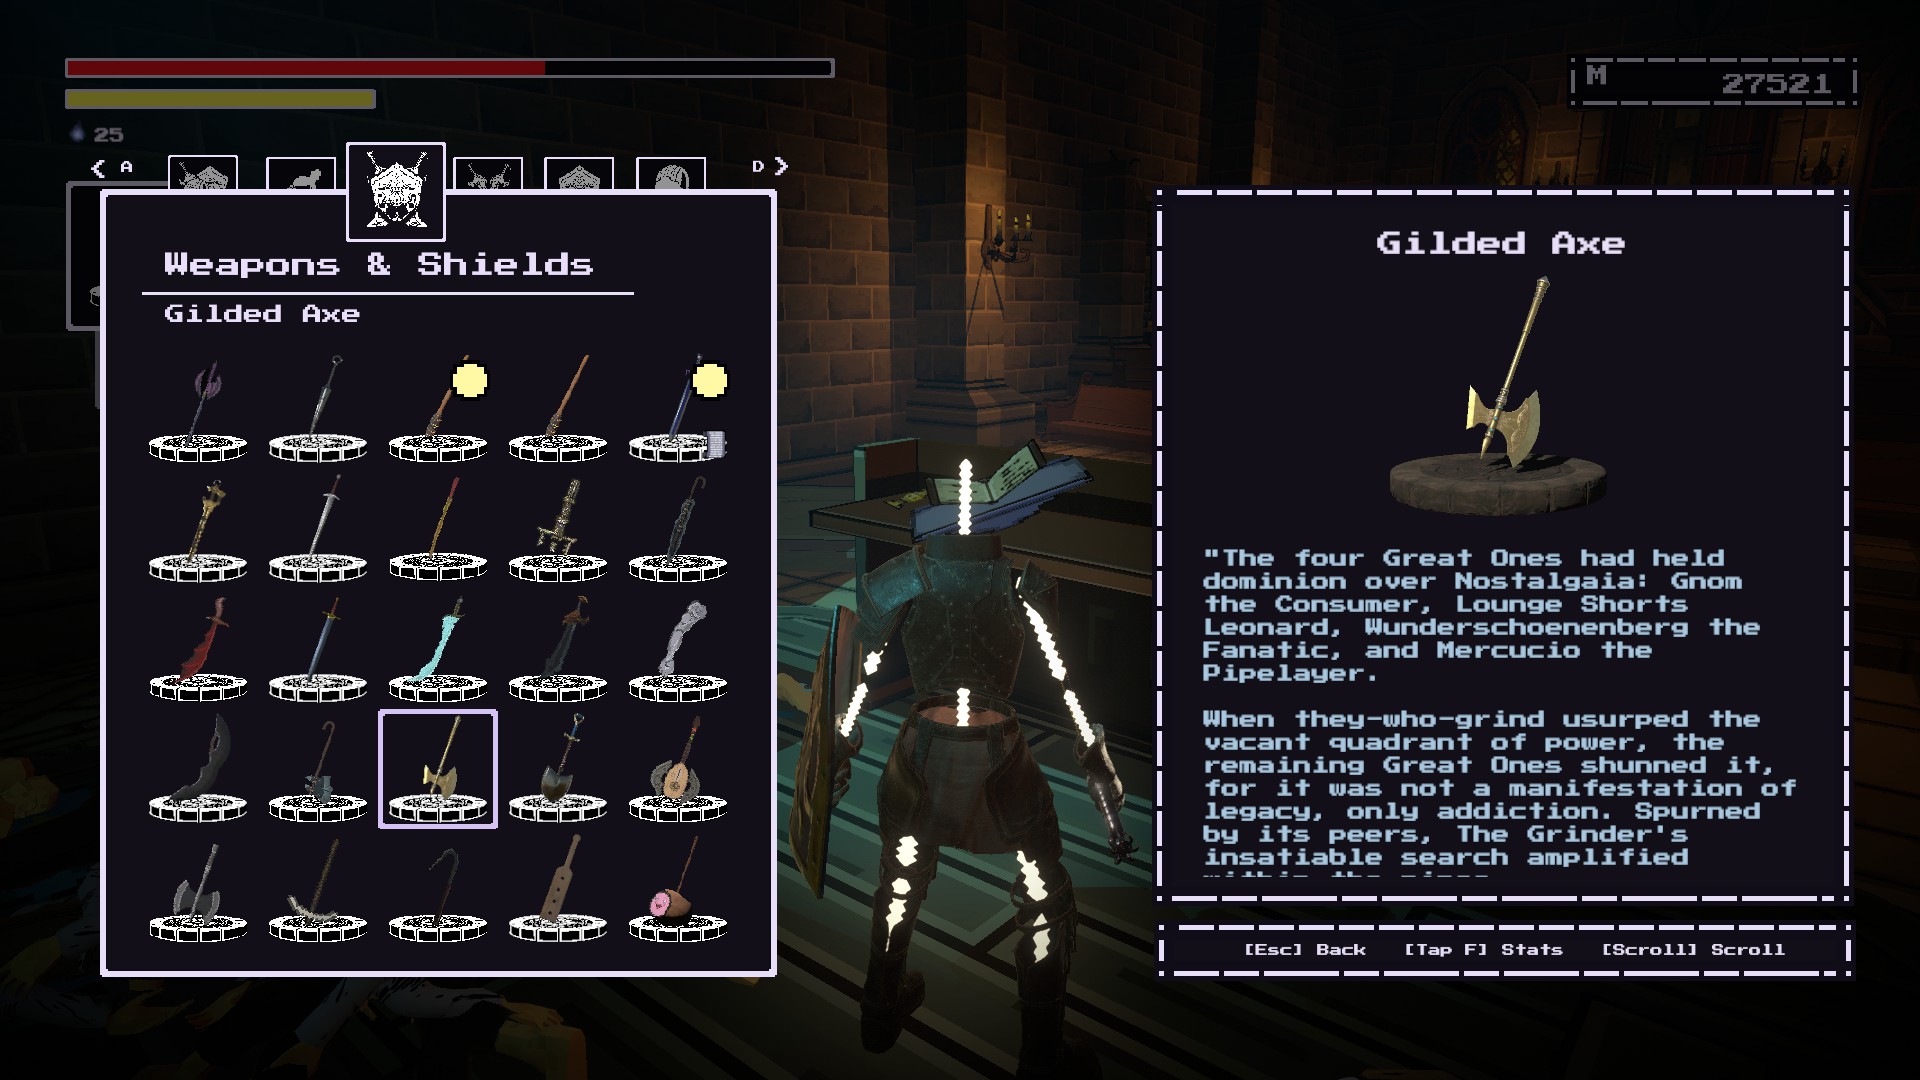
Found at the
left side shrine on the base floorof the Narrator’s Library at the
beginning of the game.
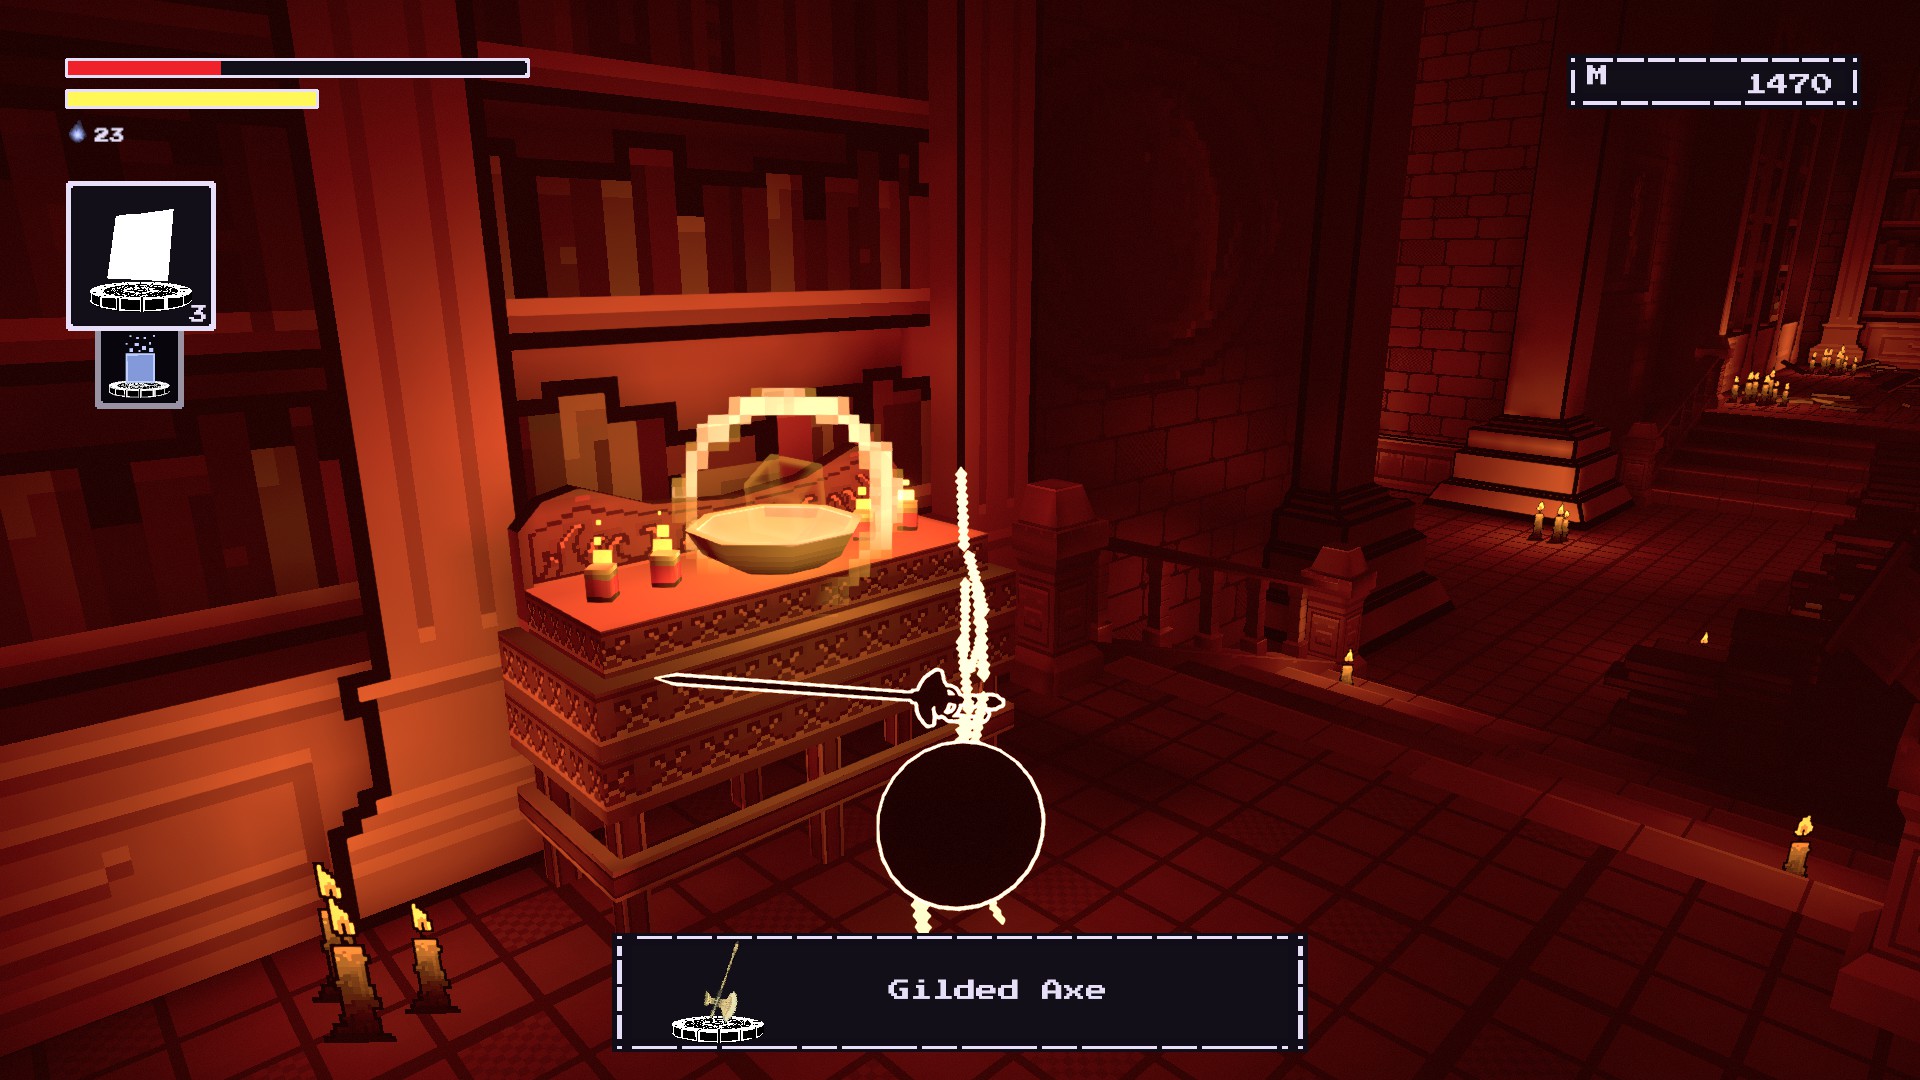
At the chapel area~에
Oreshaft Village.
You’ll need to go to
the podium where there are headless NPCsto restore the axe.

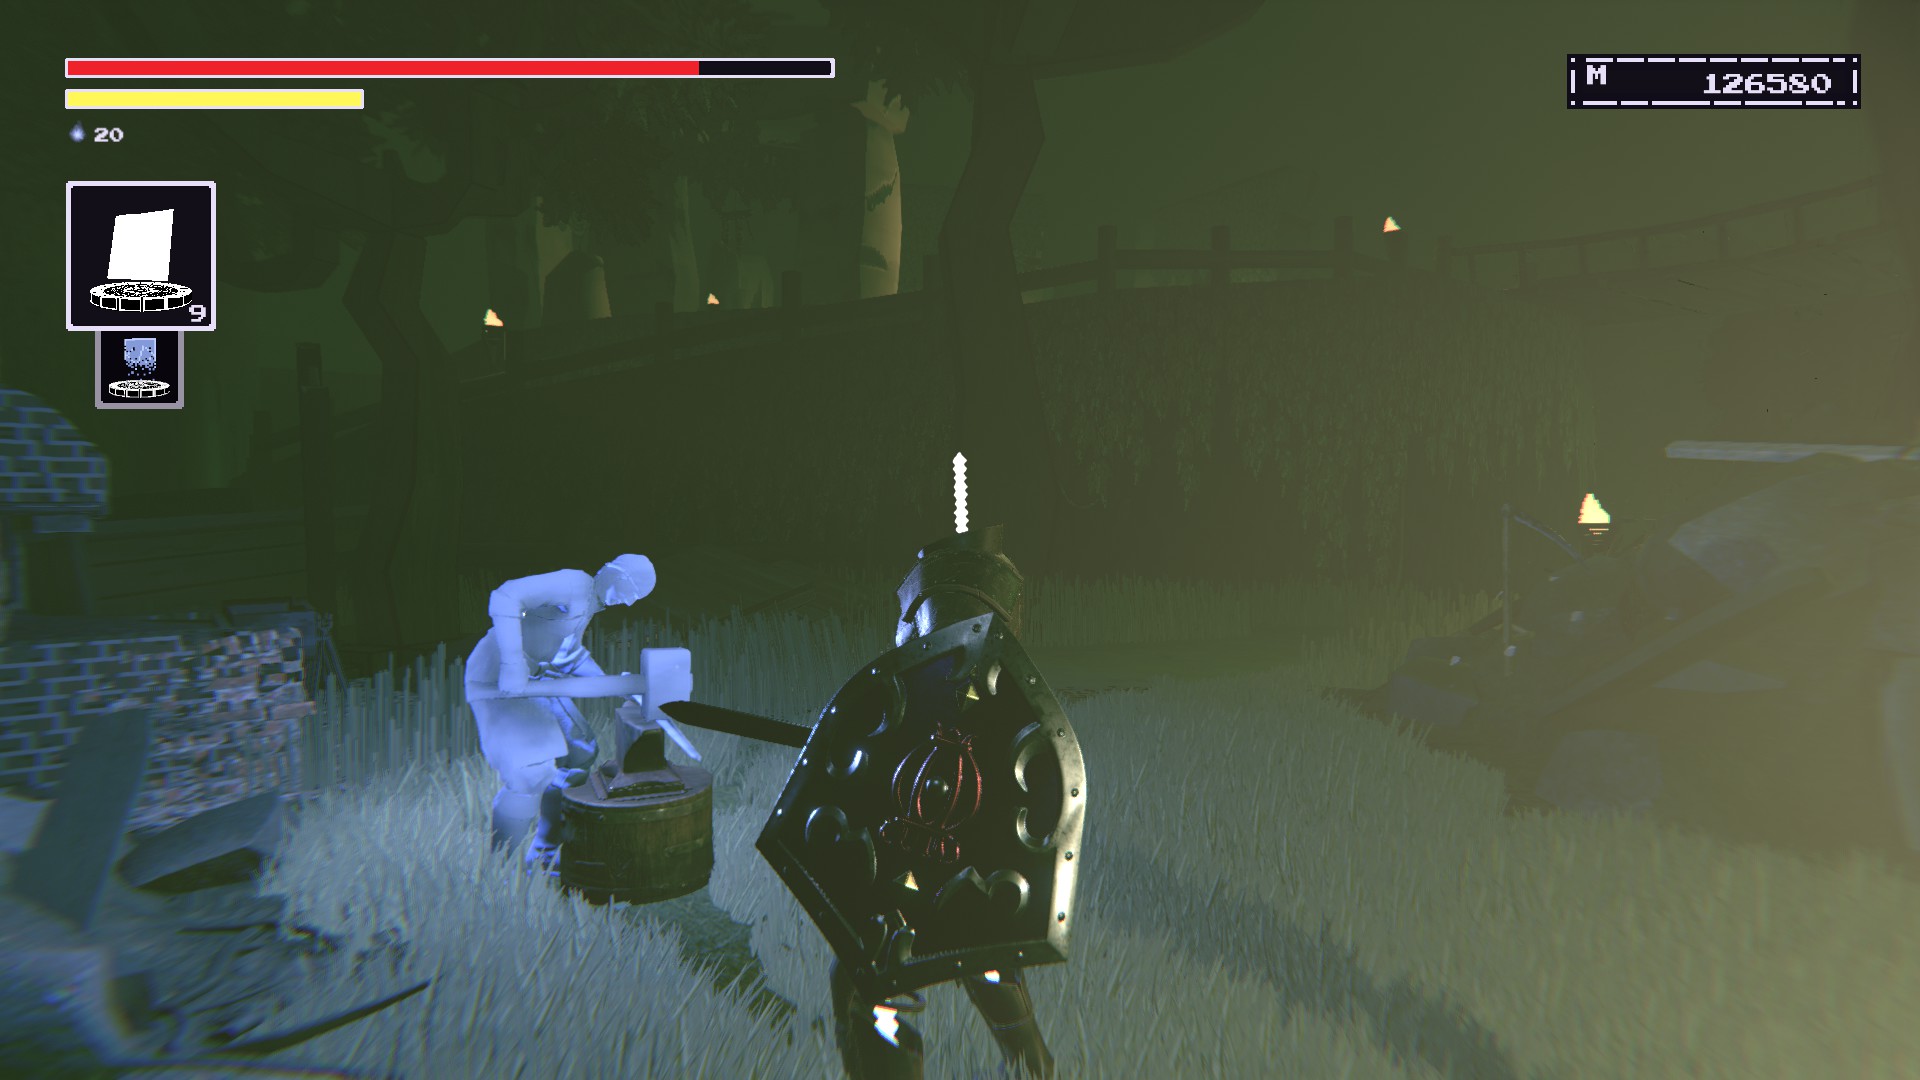
Smith’s Hammer
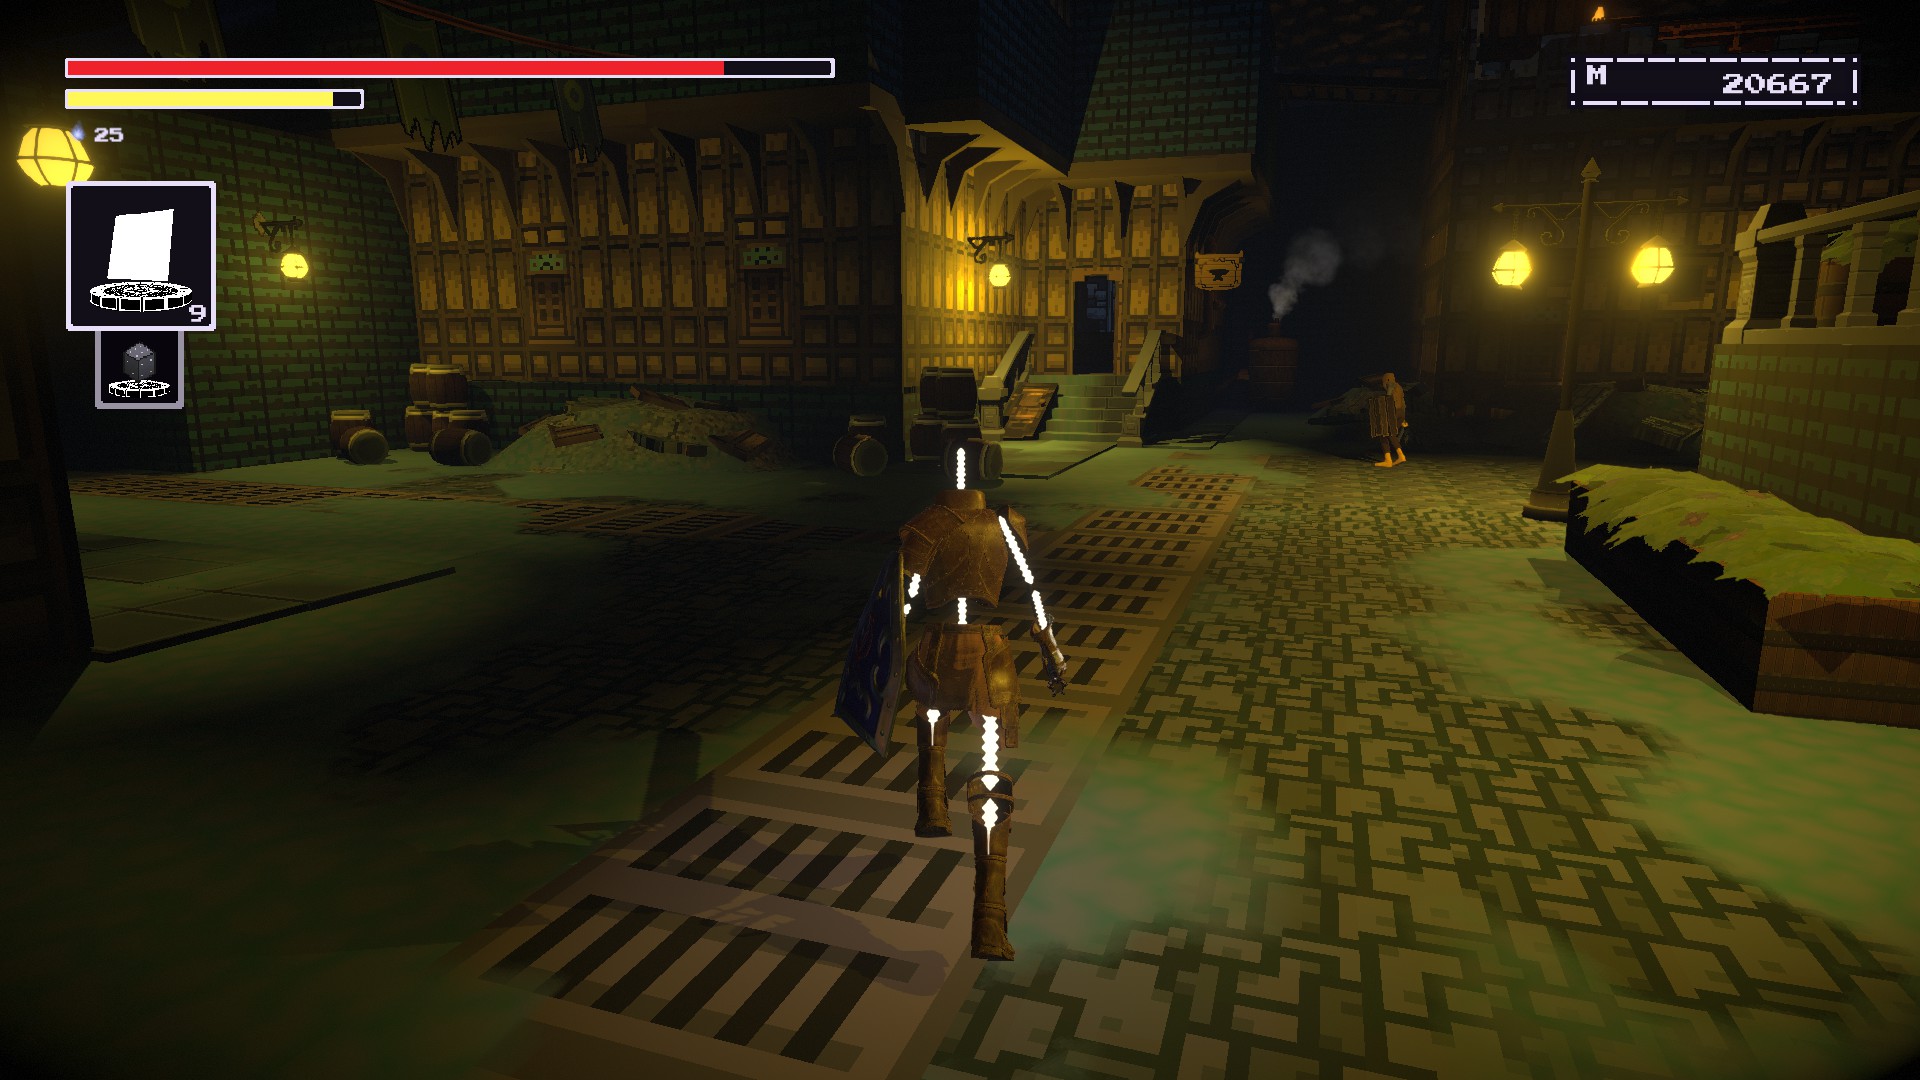
ORESHAFT VILLAGE #4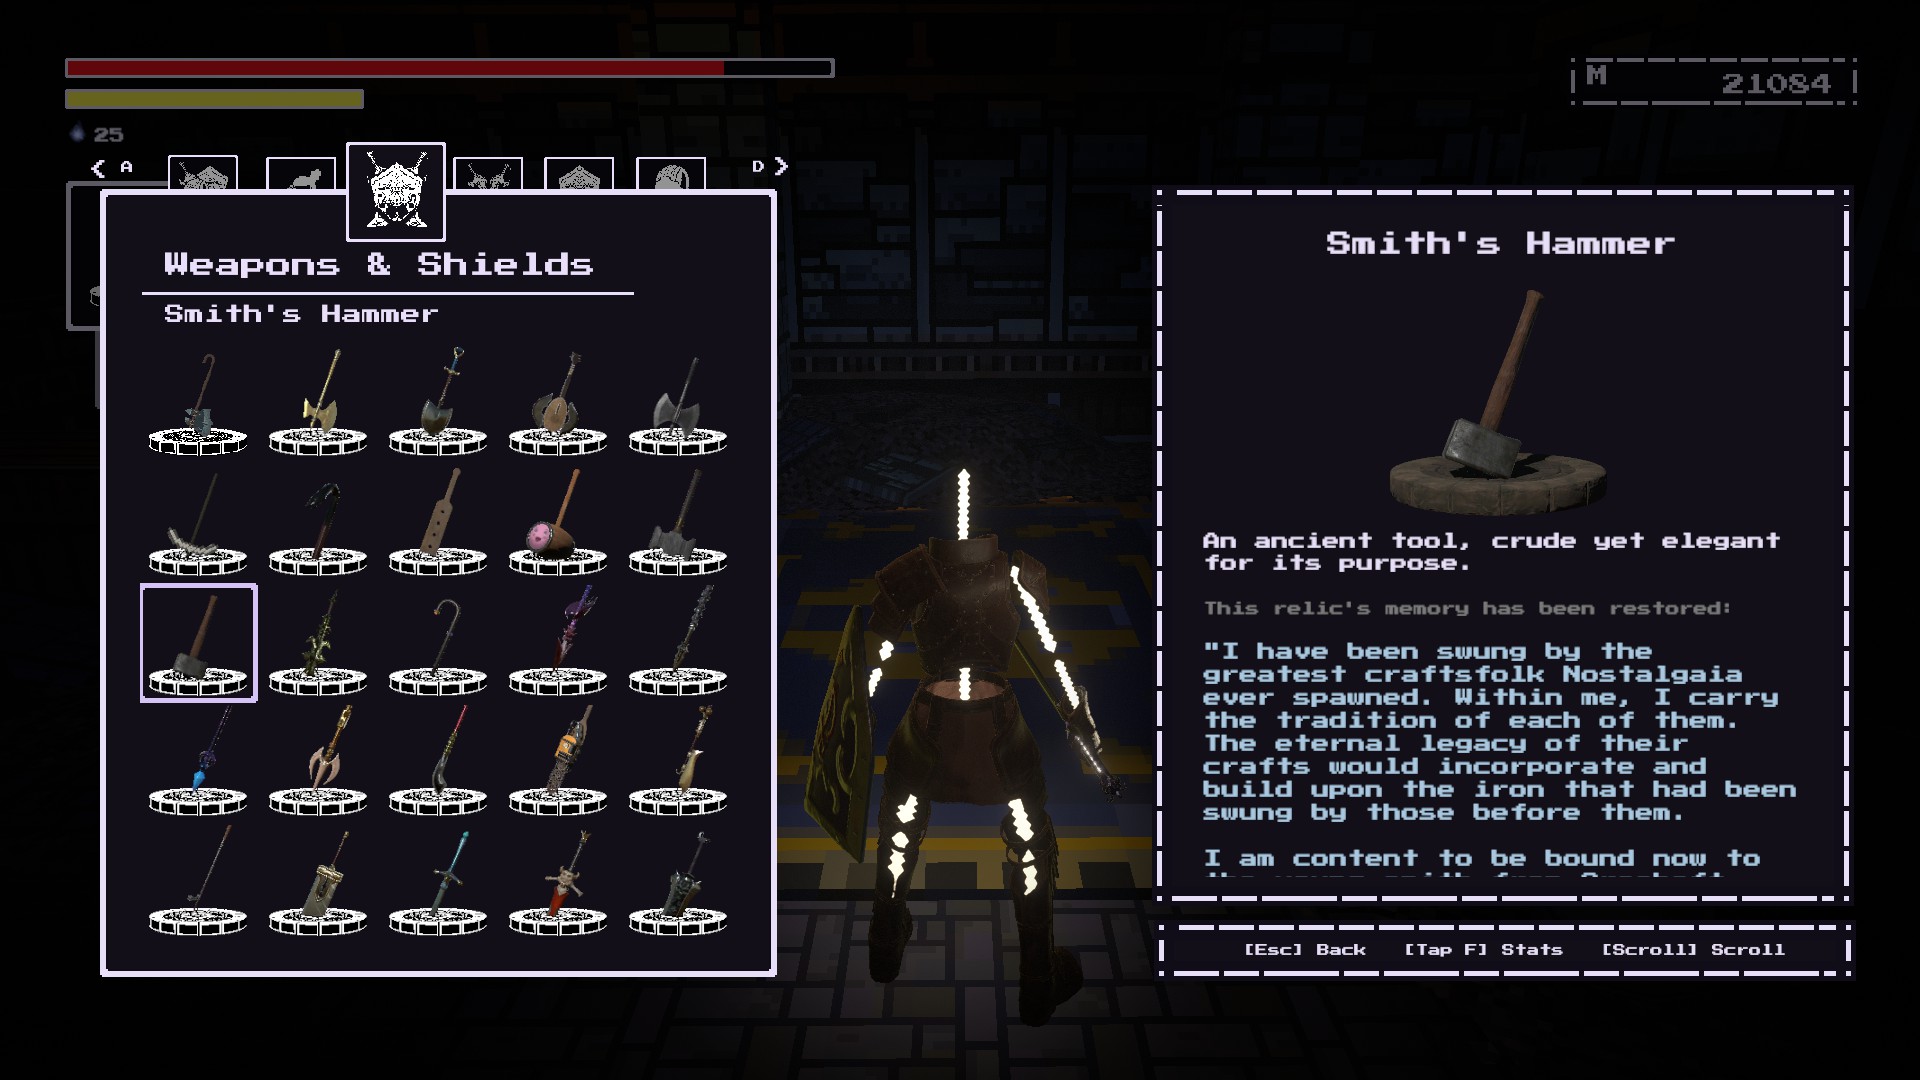
Inside the ruined Blacksmith shopnear the Gnom statue at Oreshaft Village.
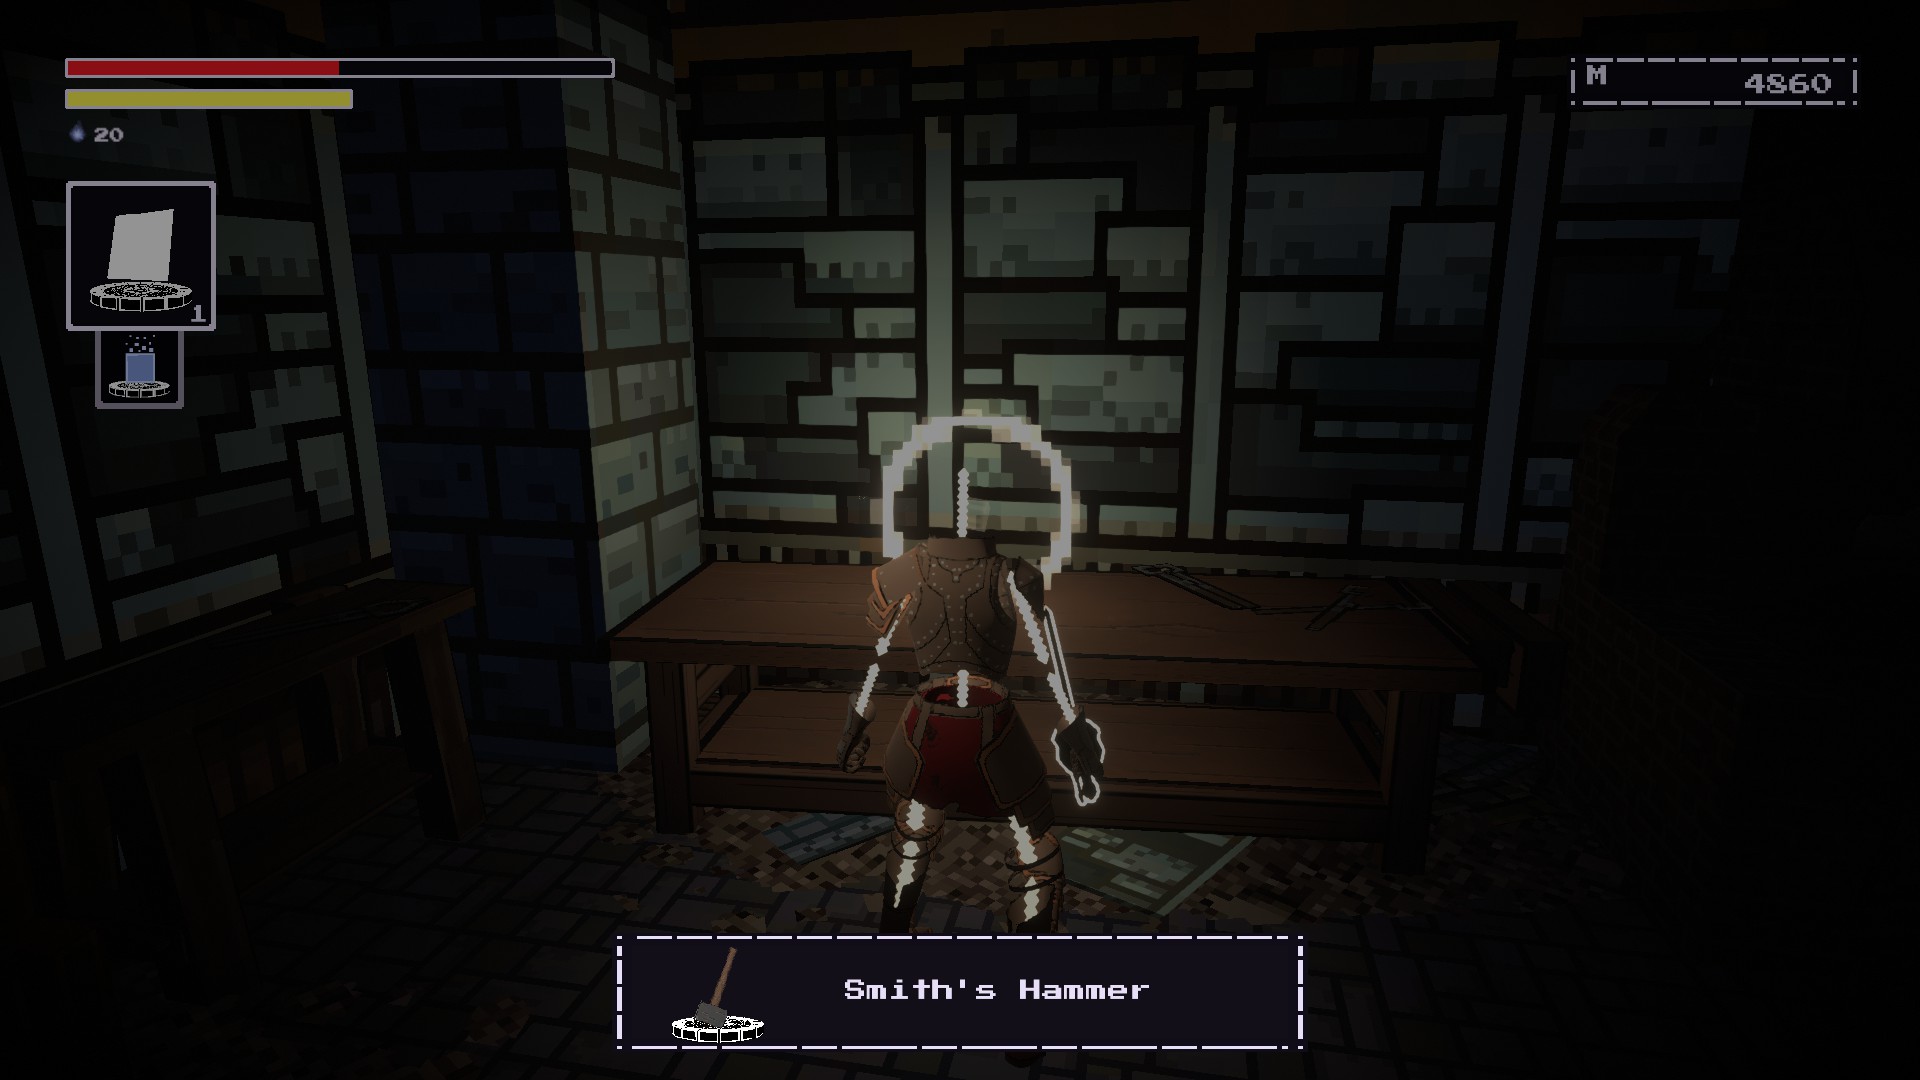
Remember the hammer
near the novice blacksmith.
Bucko Blade
ORESHAFT VILLAGE #5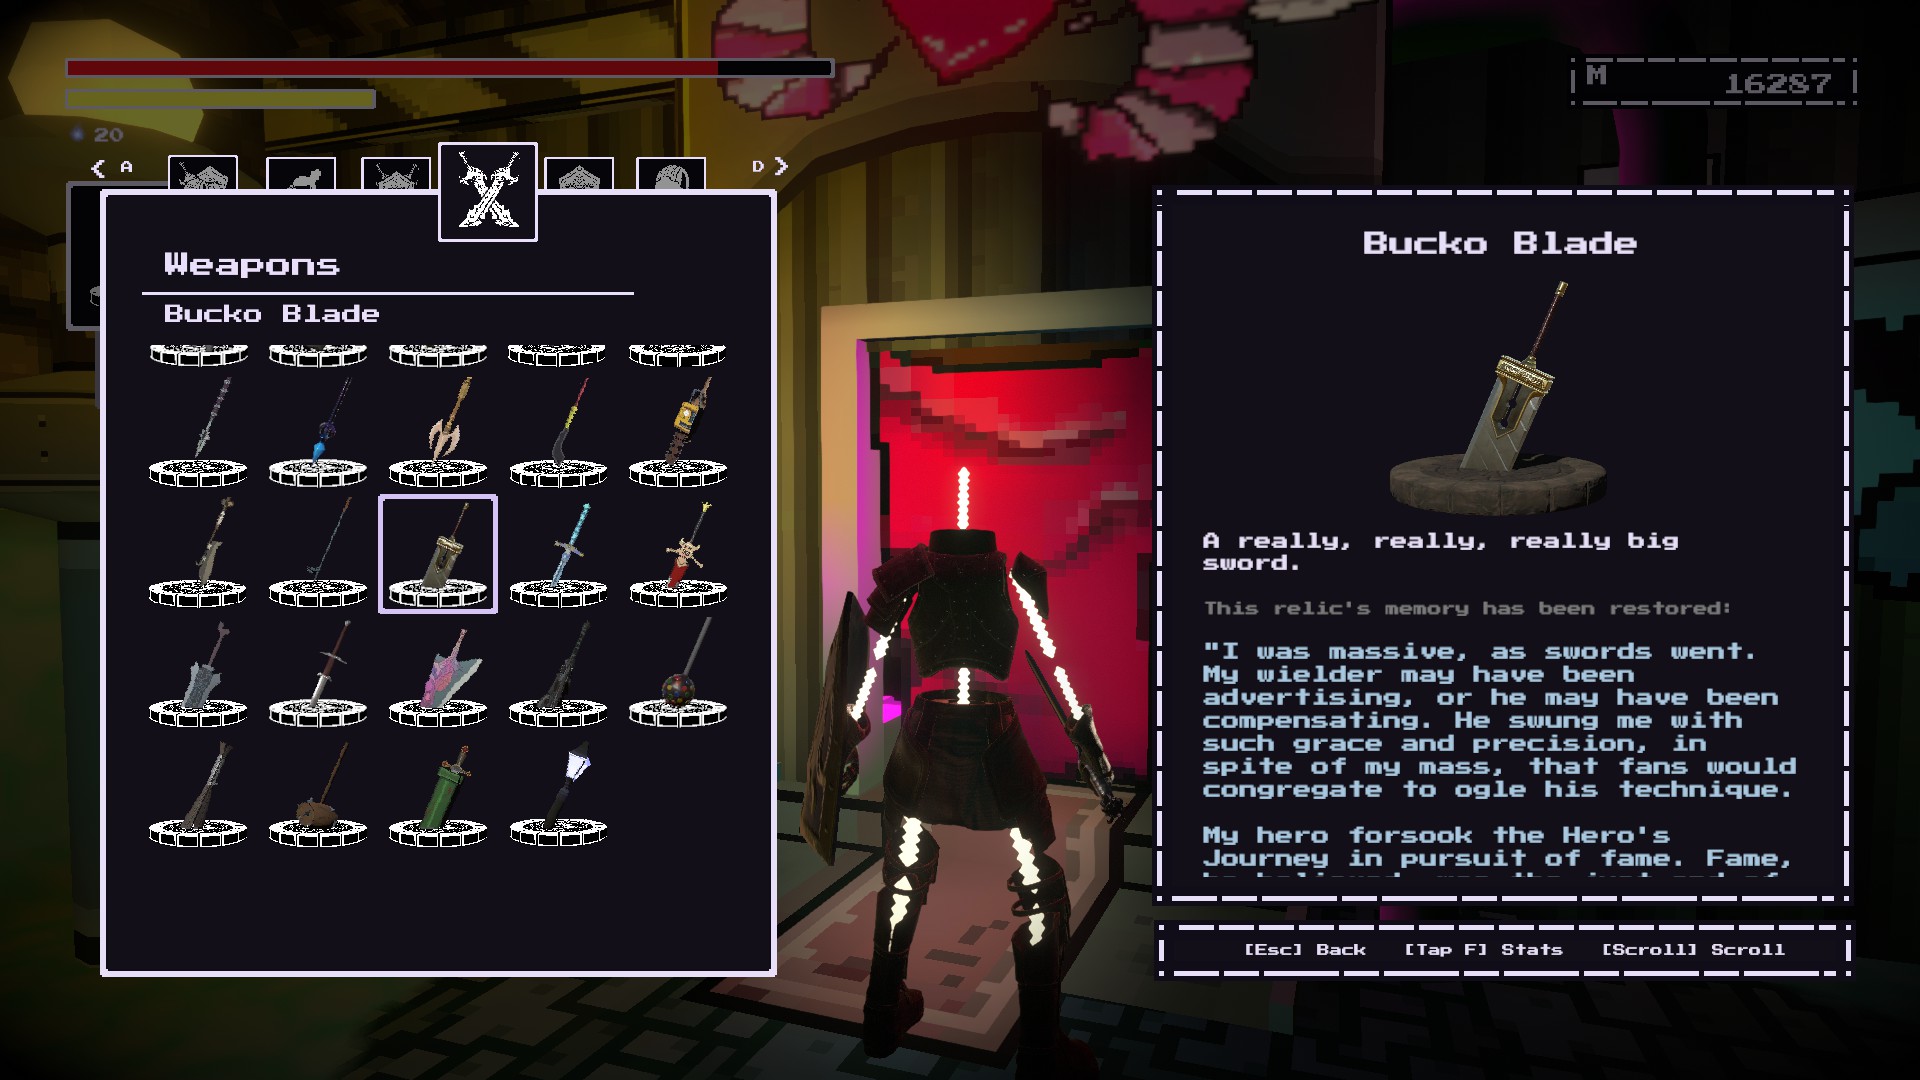
내에서
Quest Reward Vault, you’ll see a room with
two Guard knights…and a fridge.
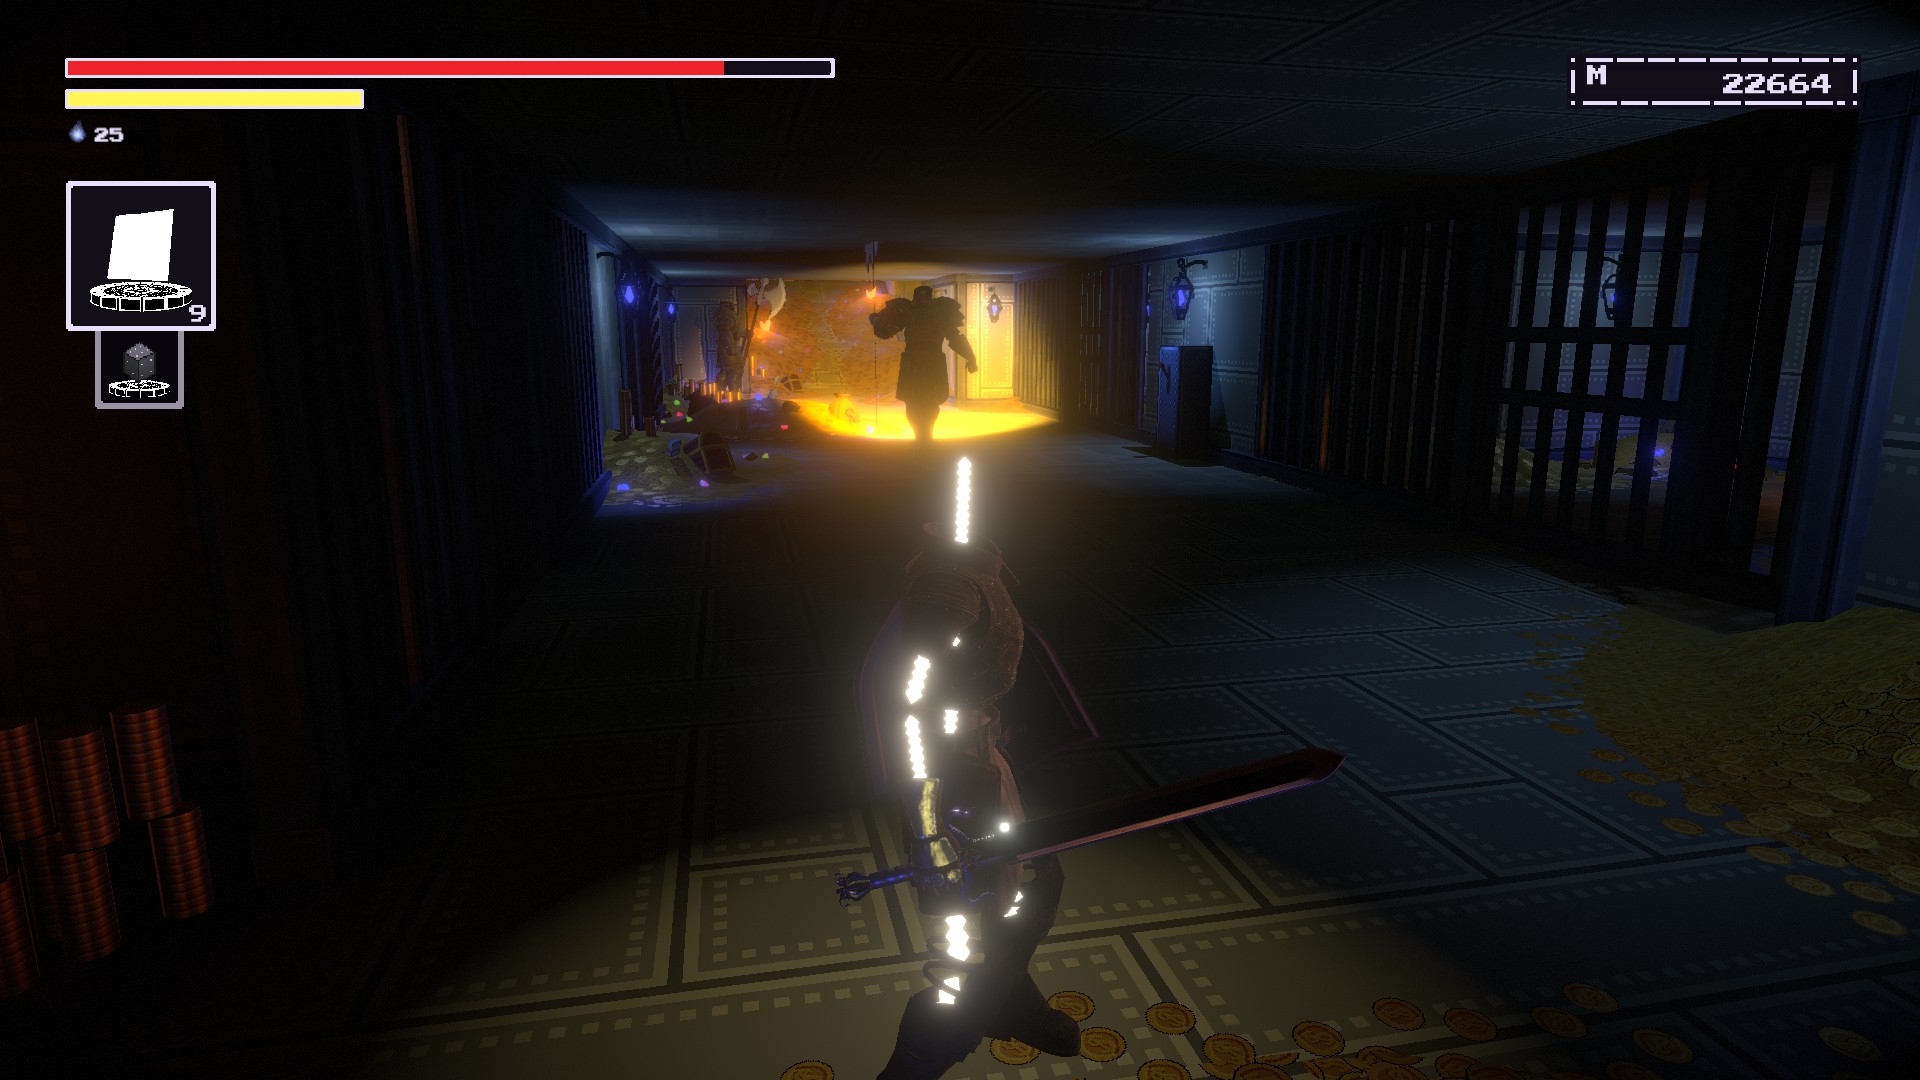
You’ll need to
레버를 당겨which releases NPCs but opens the doors for you.
Head for the
far leftcell and you should see the item inside.
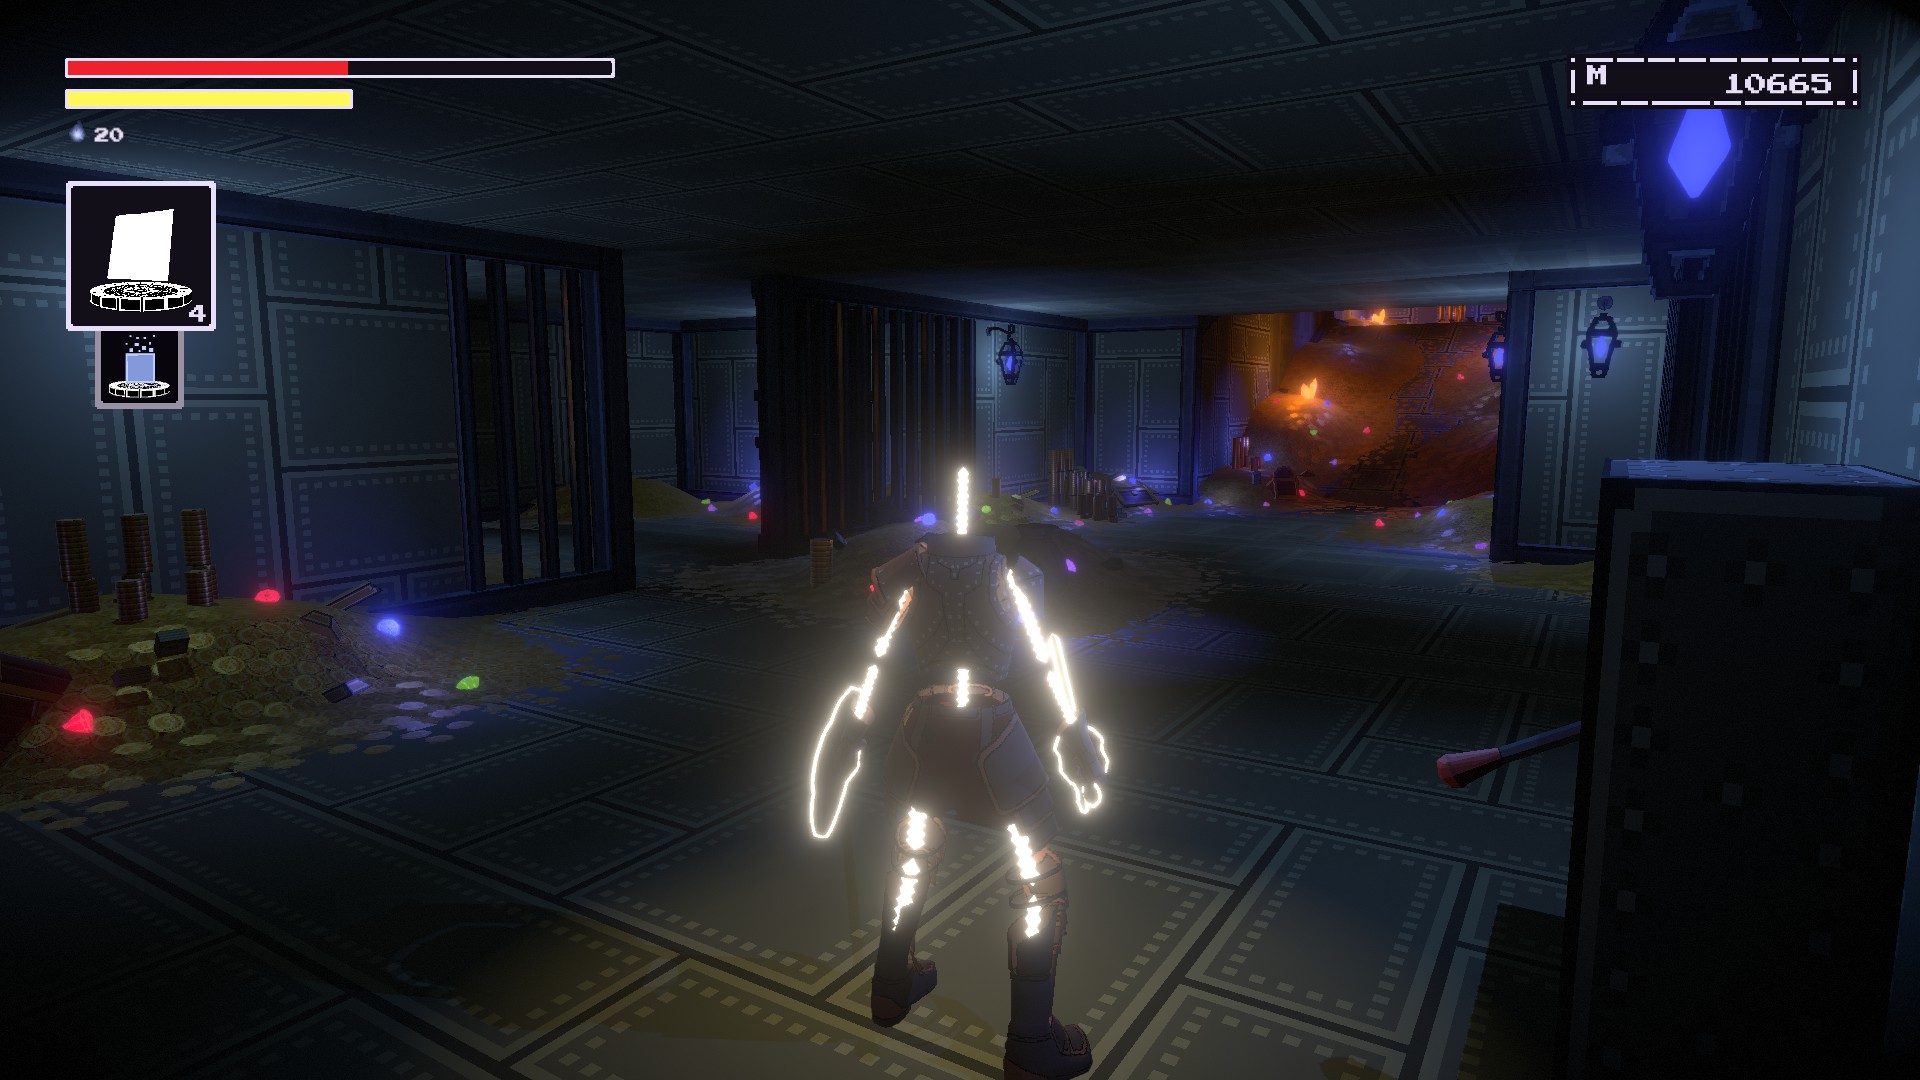
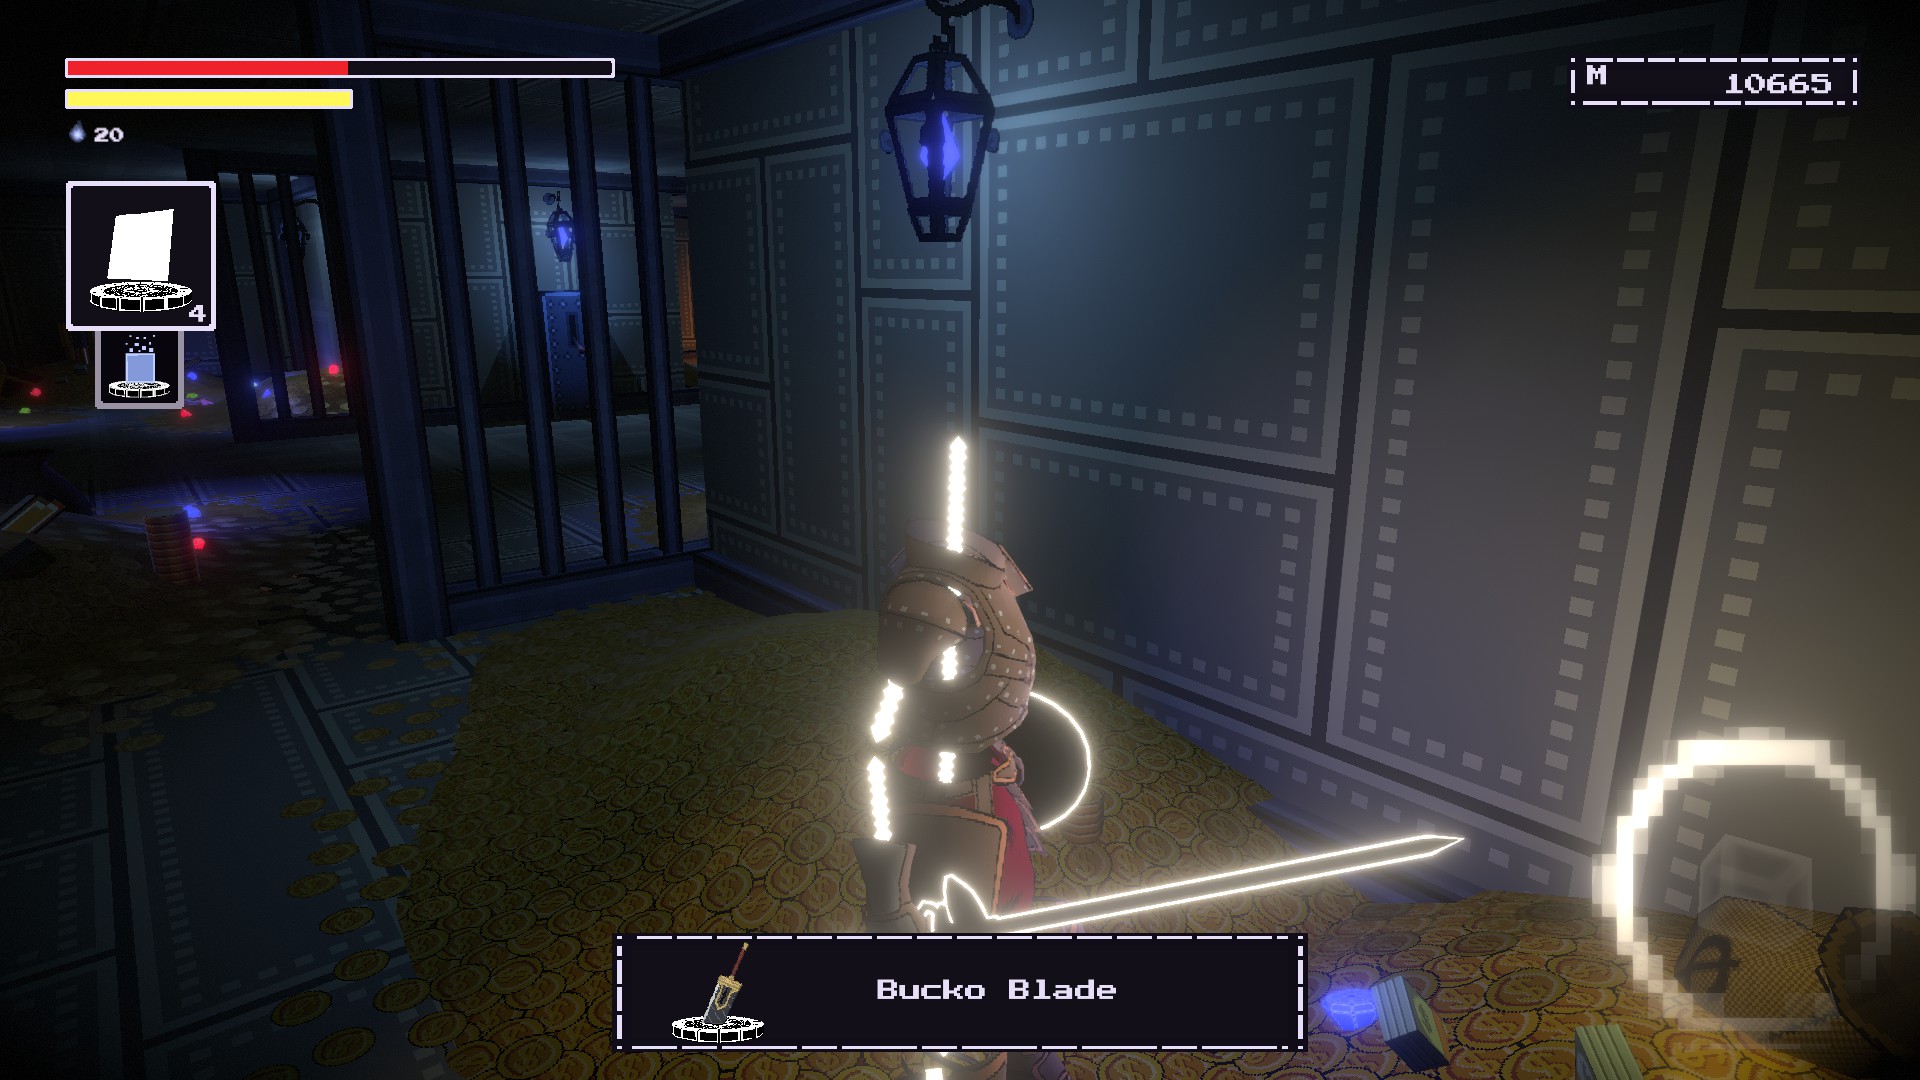
Bee Sting Fetish place가까운
Marketplace Beacon in Oreshaft Village.

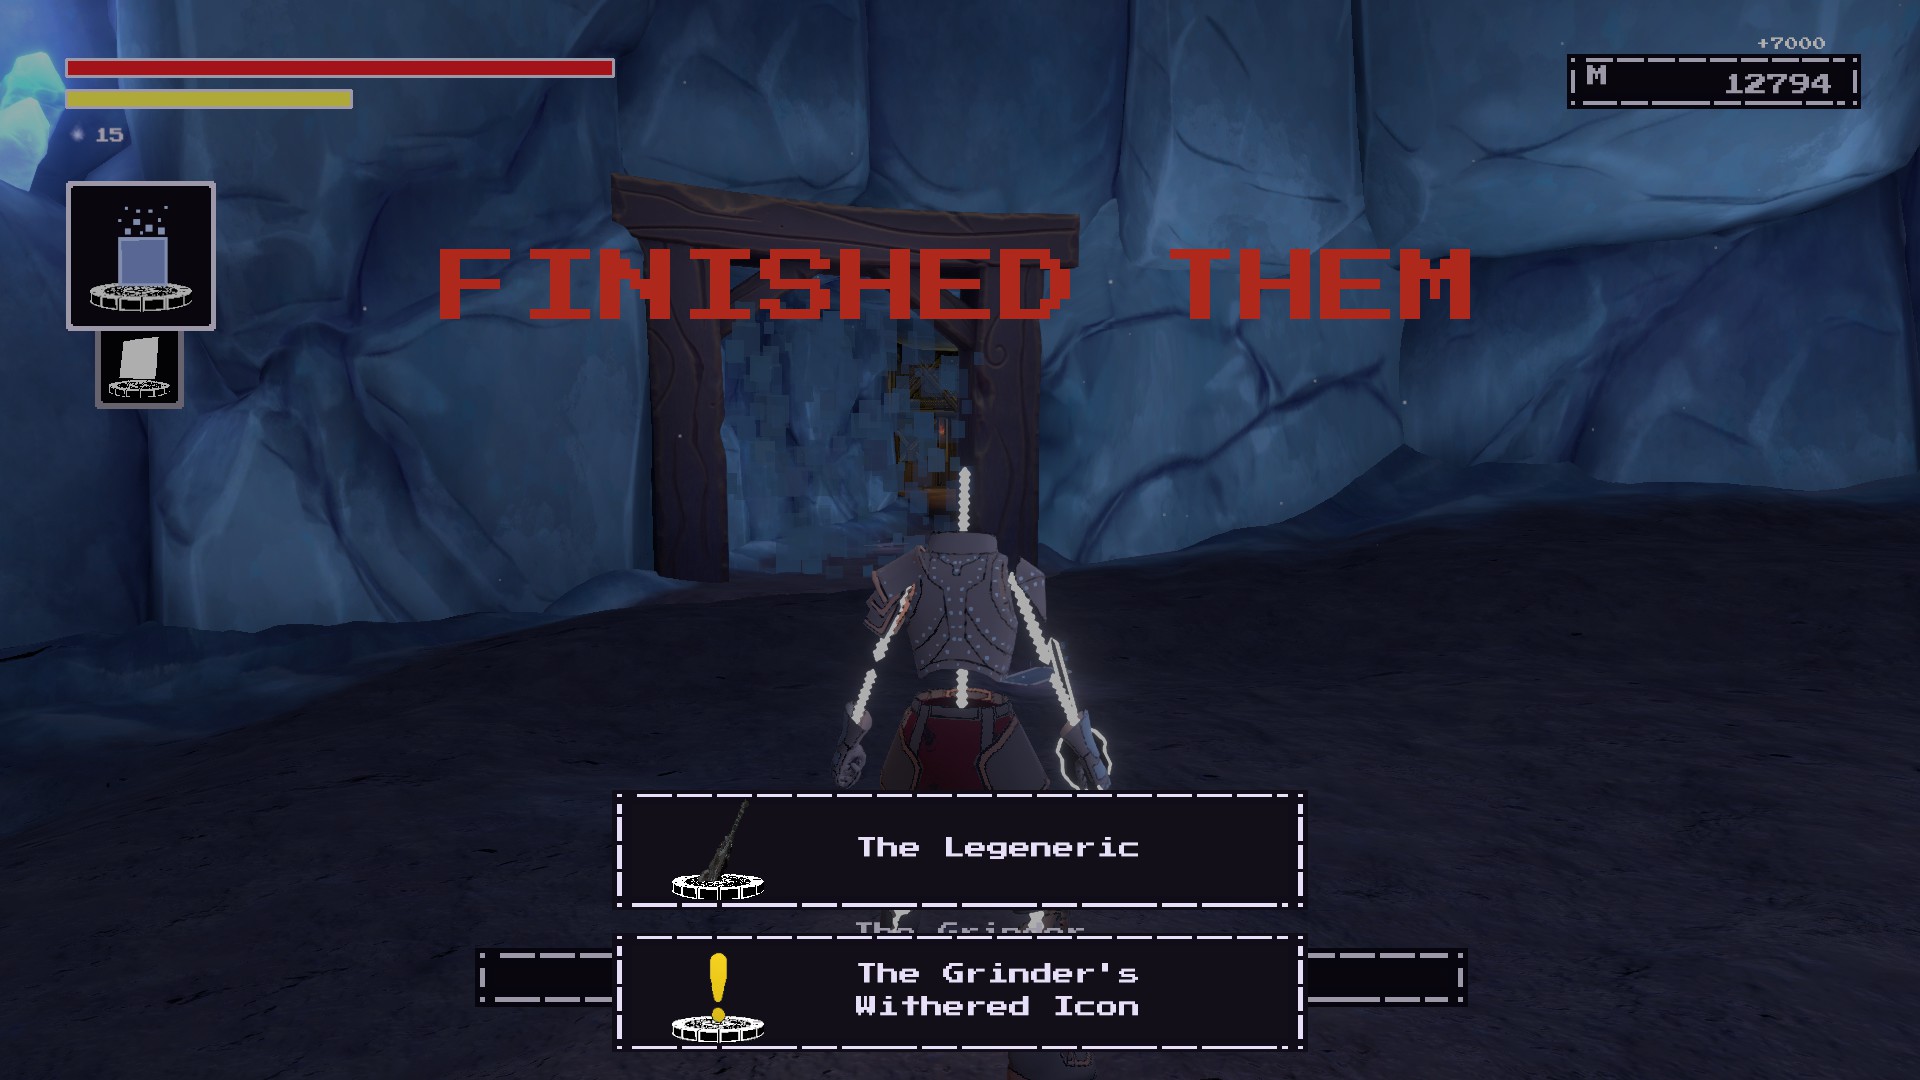
The Legeneric
ORESHAFT VILLAGE #6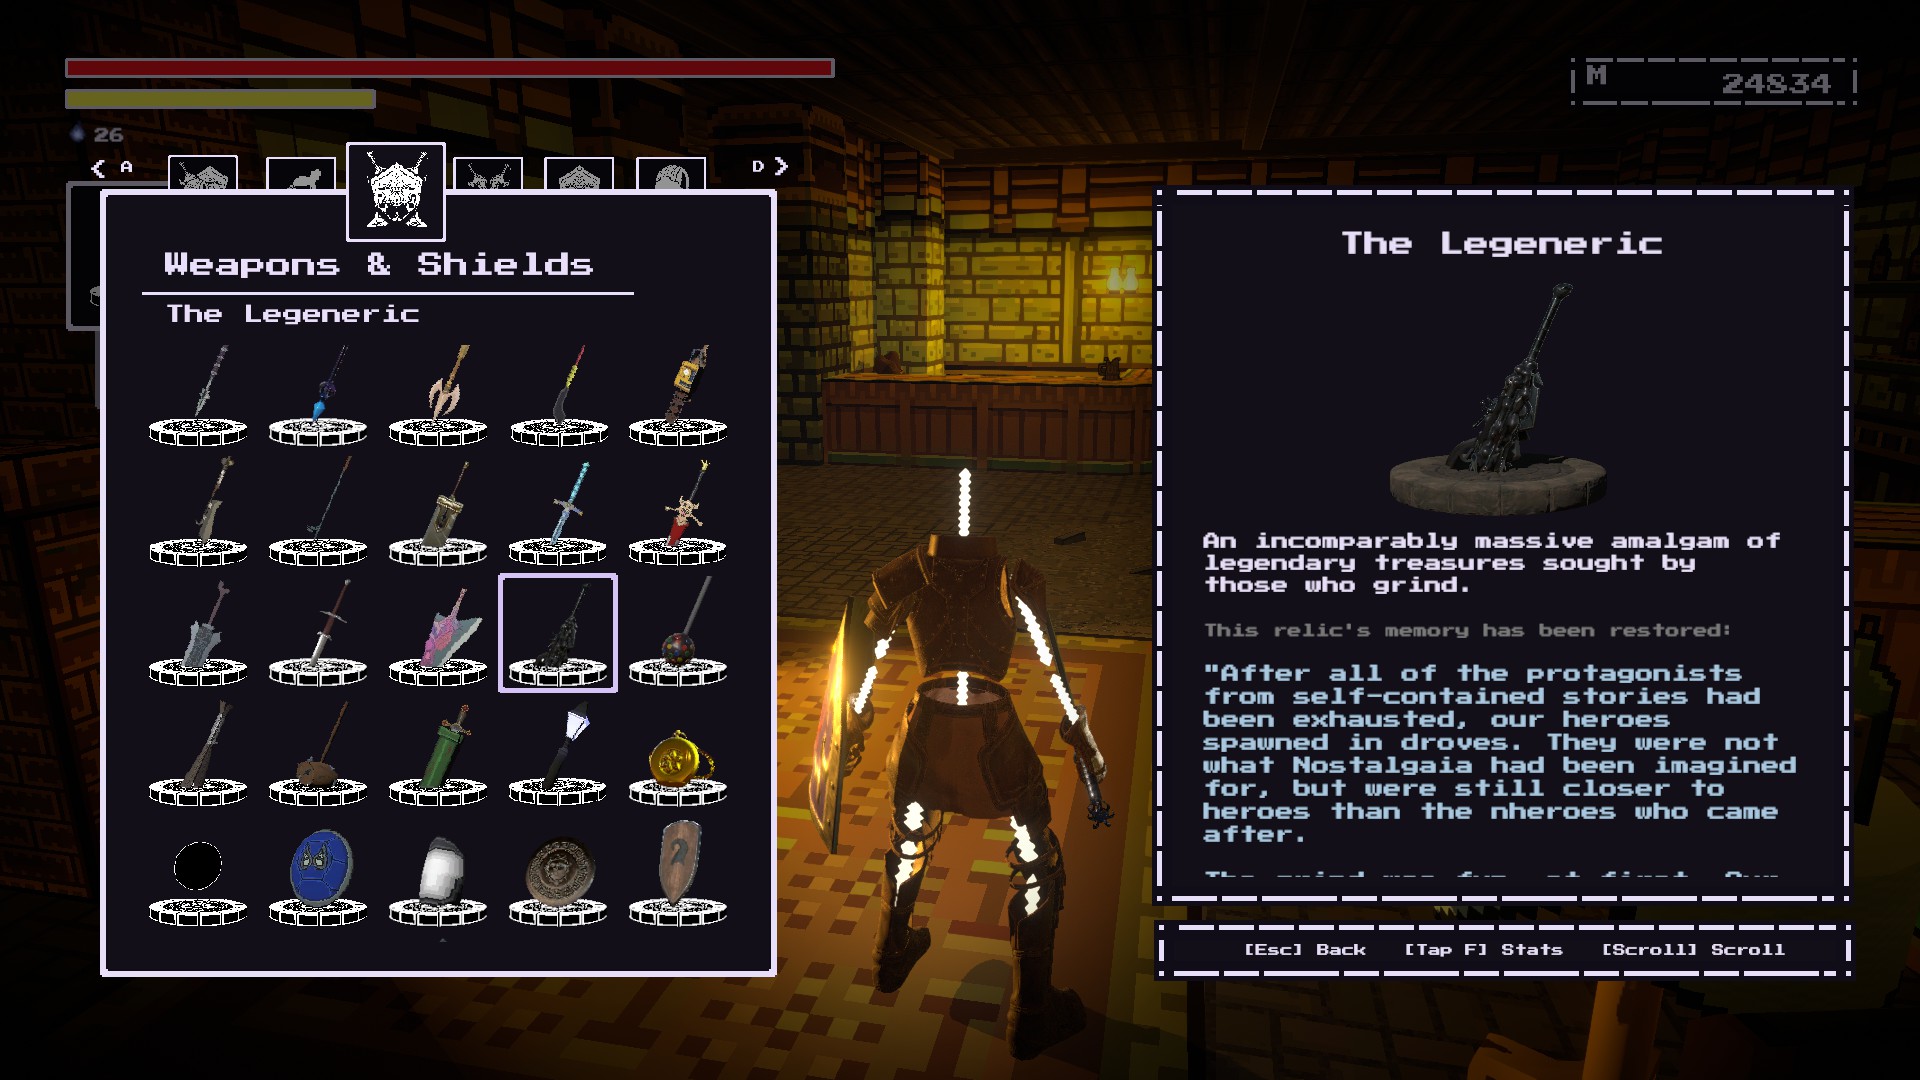
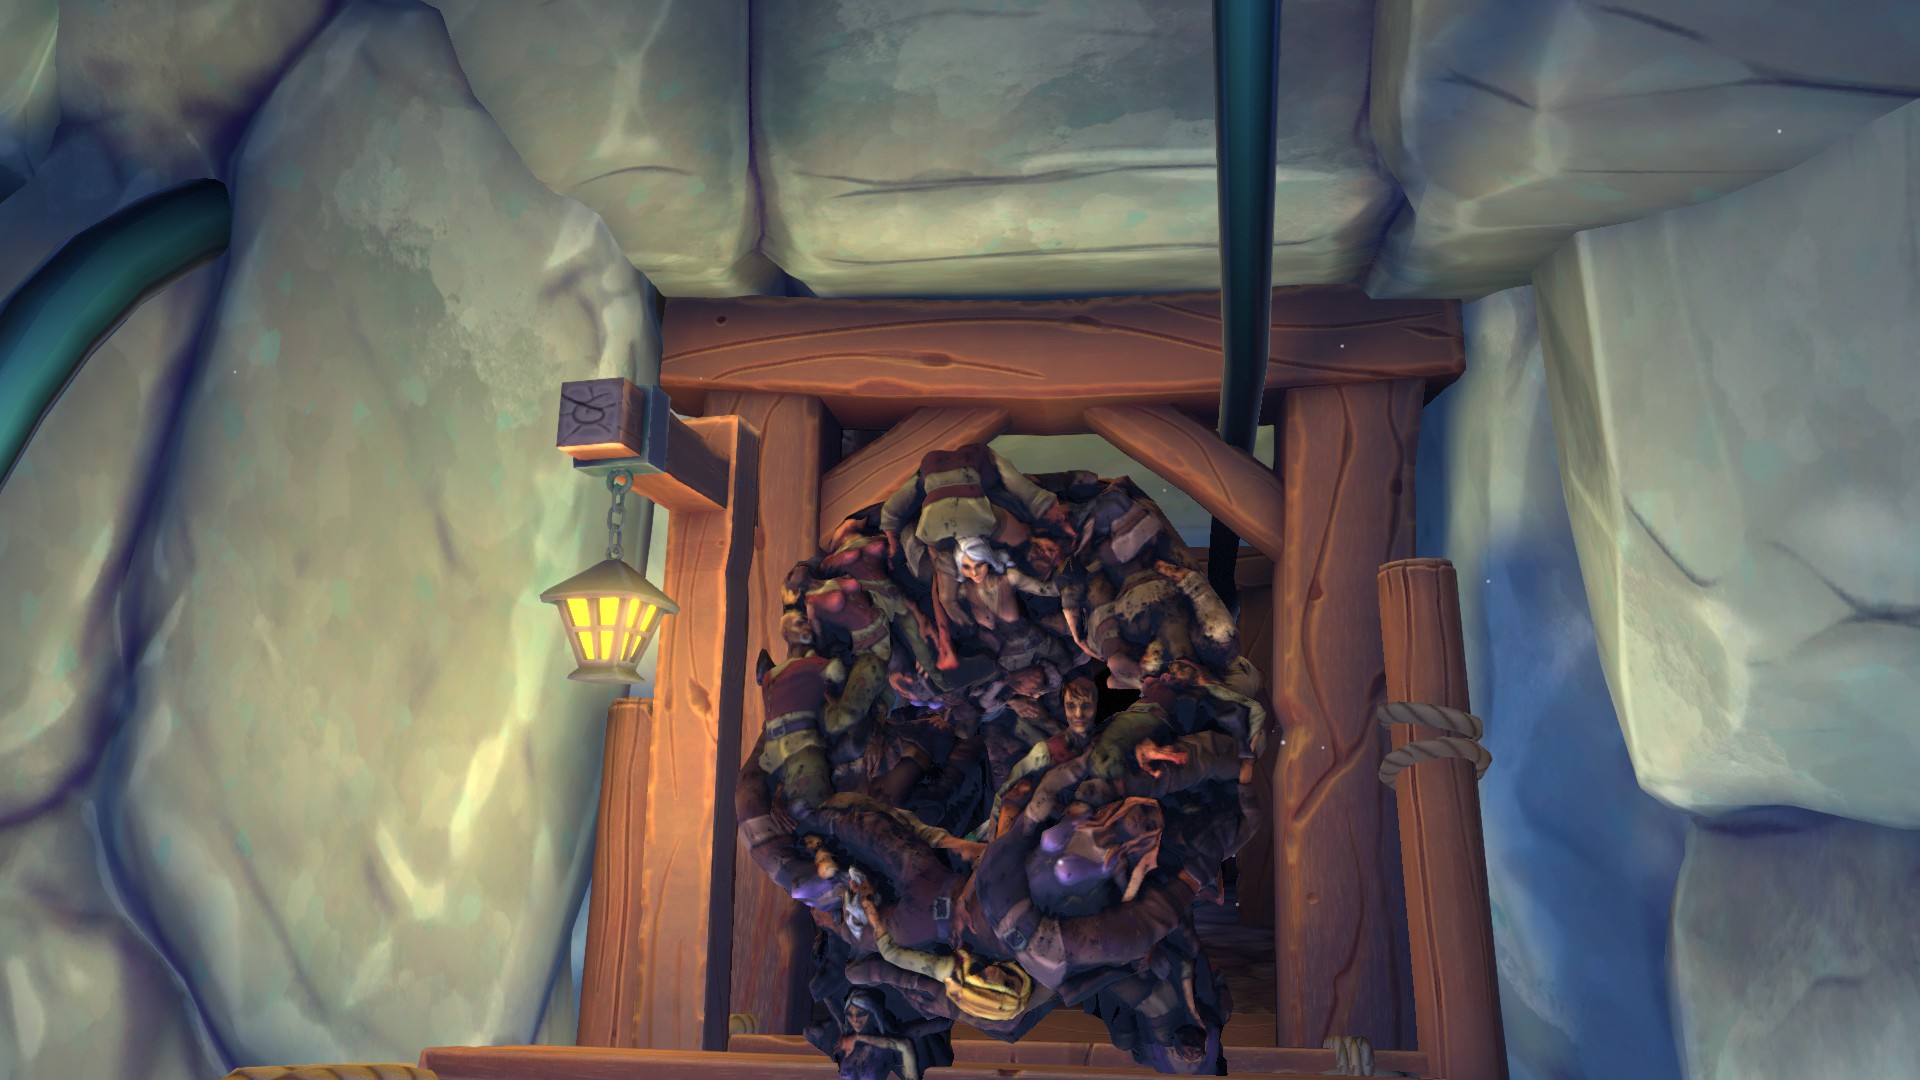
You get this weapon by
beating The Grinderin the Depths.
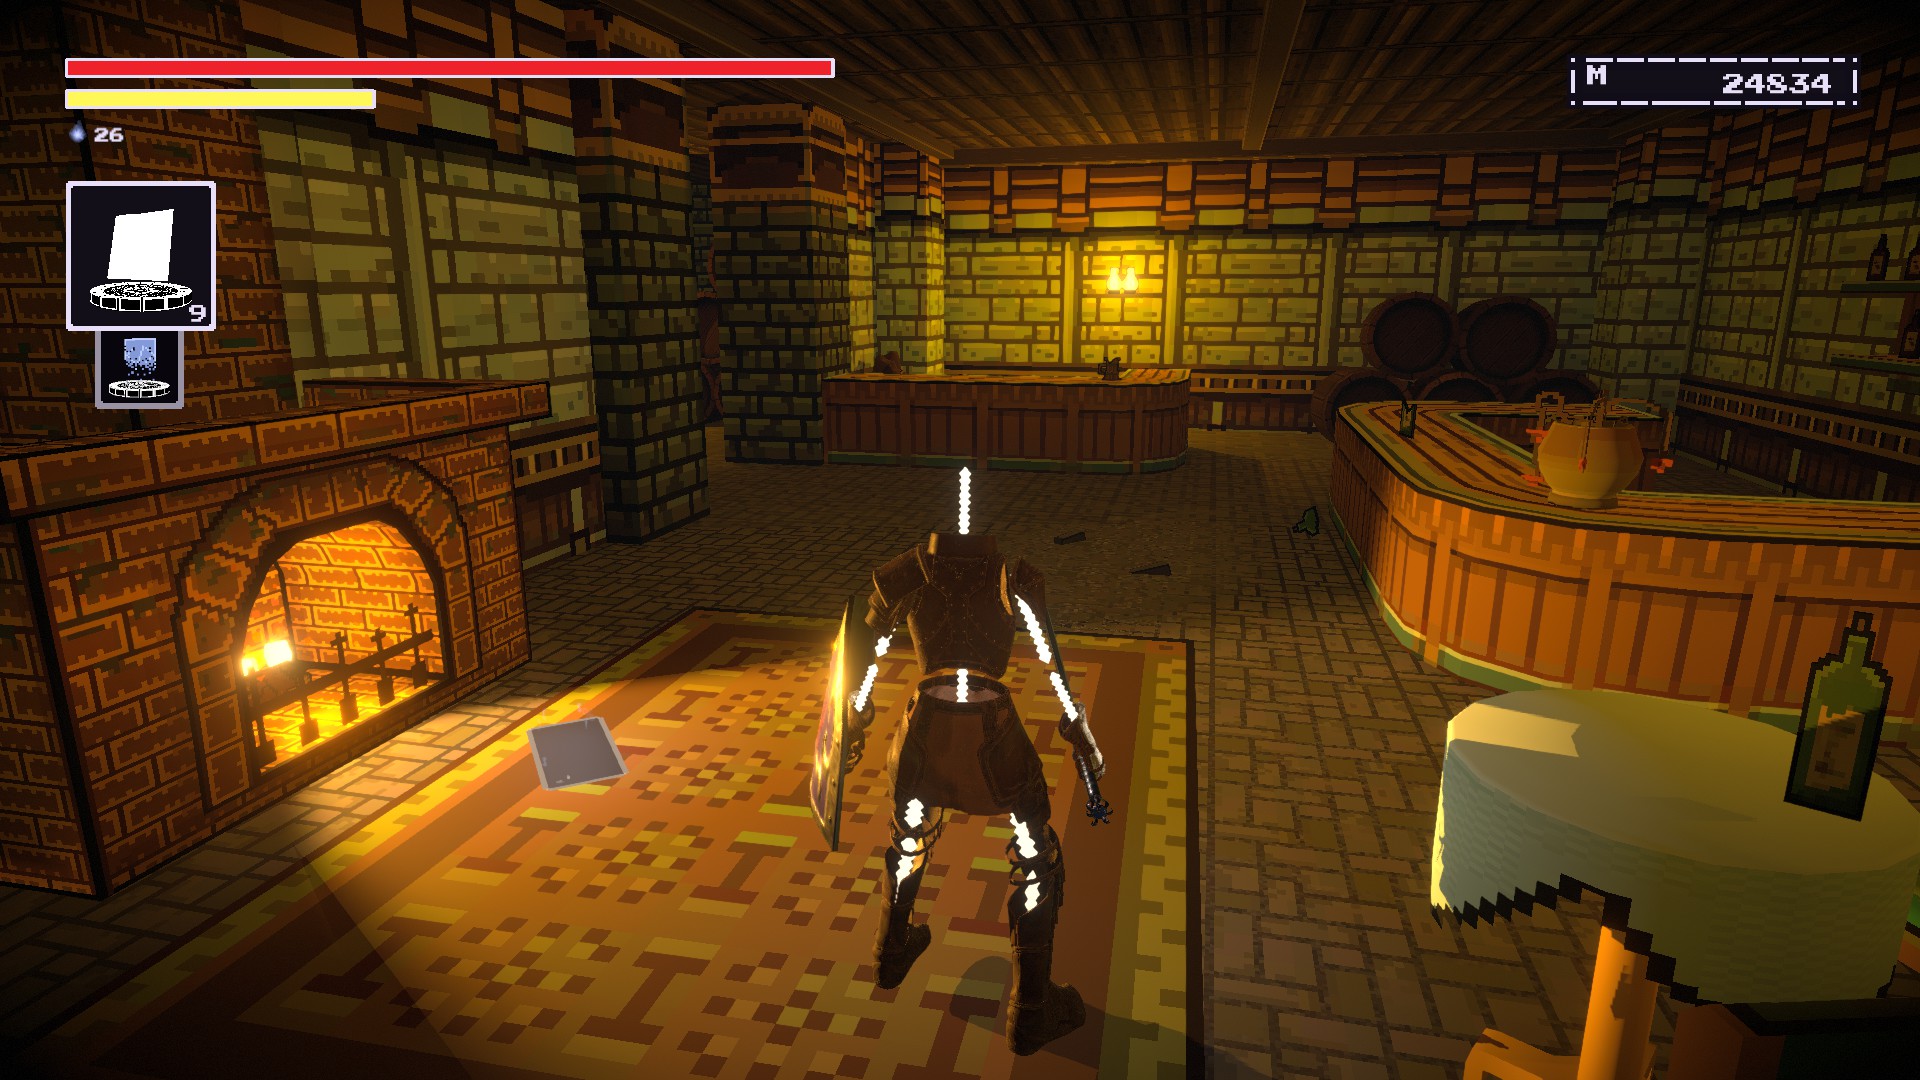
Return to the Tavernnear the Gnom statue in
Oreshaft Village.
Restore the weapon
near the bar area and fireplace.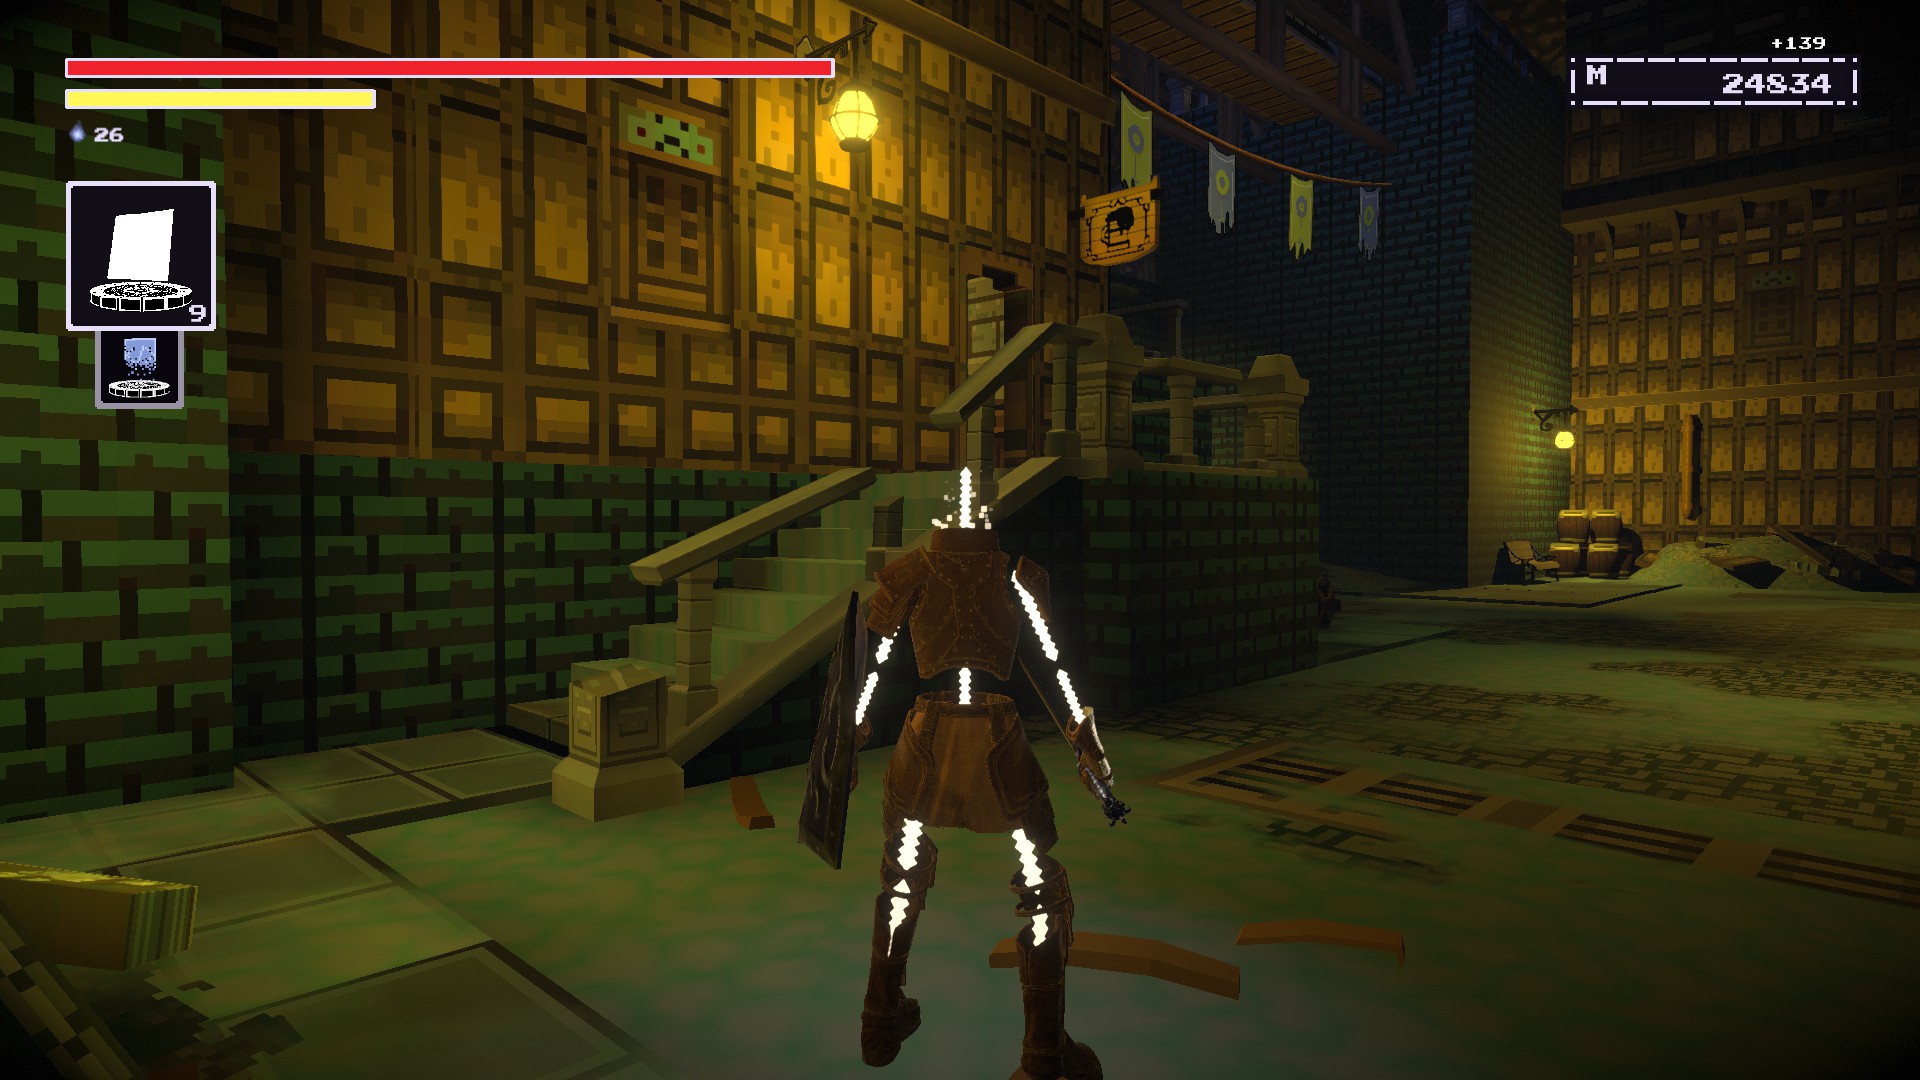
Covert Cultist Cover
ORESHAFT VILLAGE #7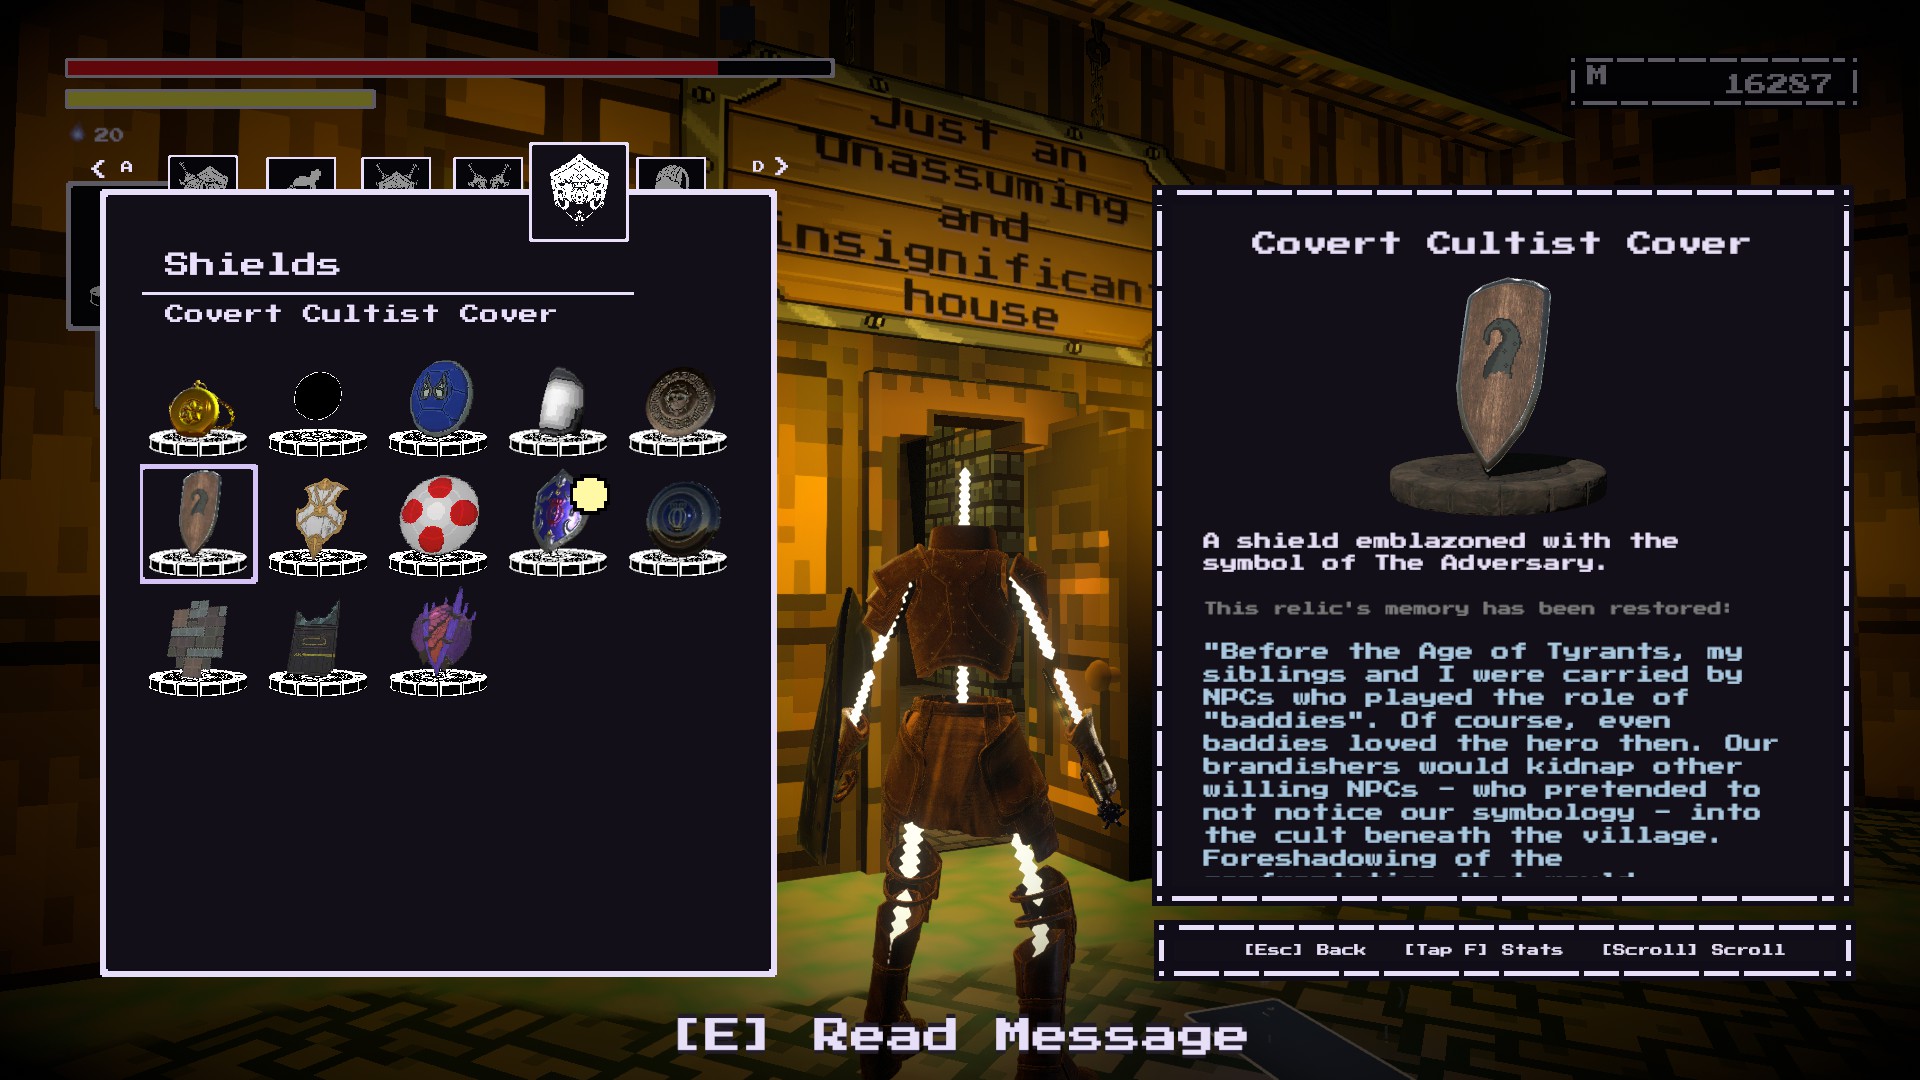
있다
snowy pathway near the Merchant and Blacksmith shops.
Go down until you reach the pile of dead NPCs.
The item is on one of the corpses.
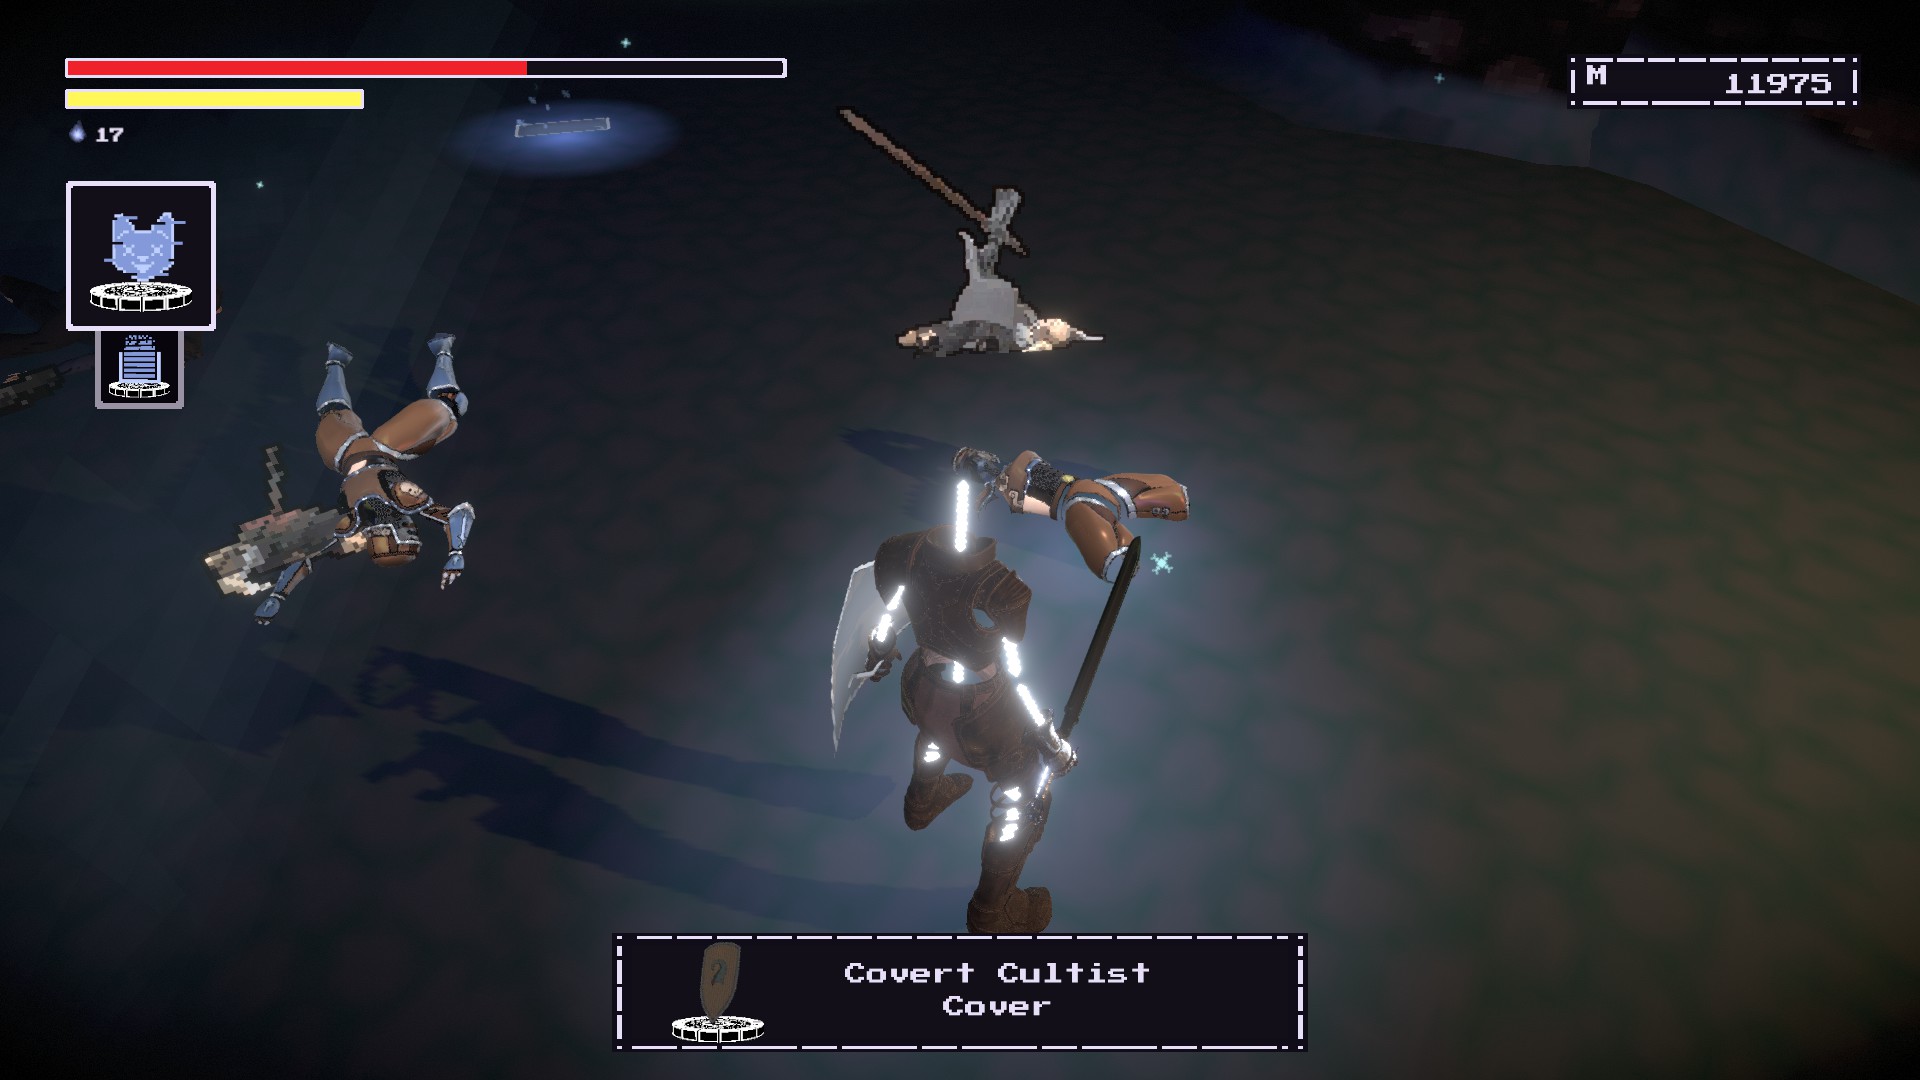
It is in front of the
Unassuming and Insignificant Housethat’s guarded by a knight in
Oreshaft Village.Remember the shield in front of the house.
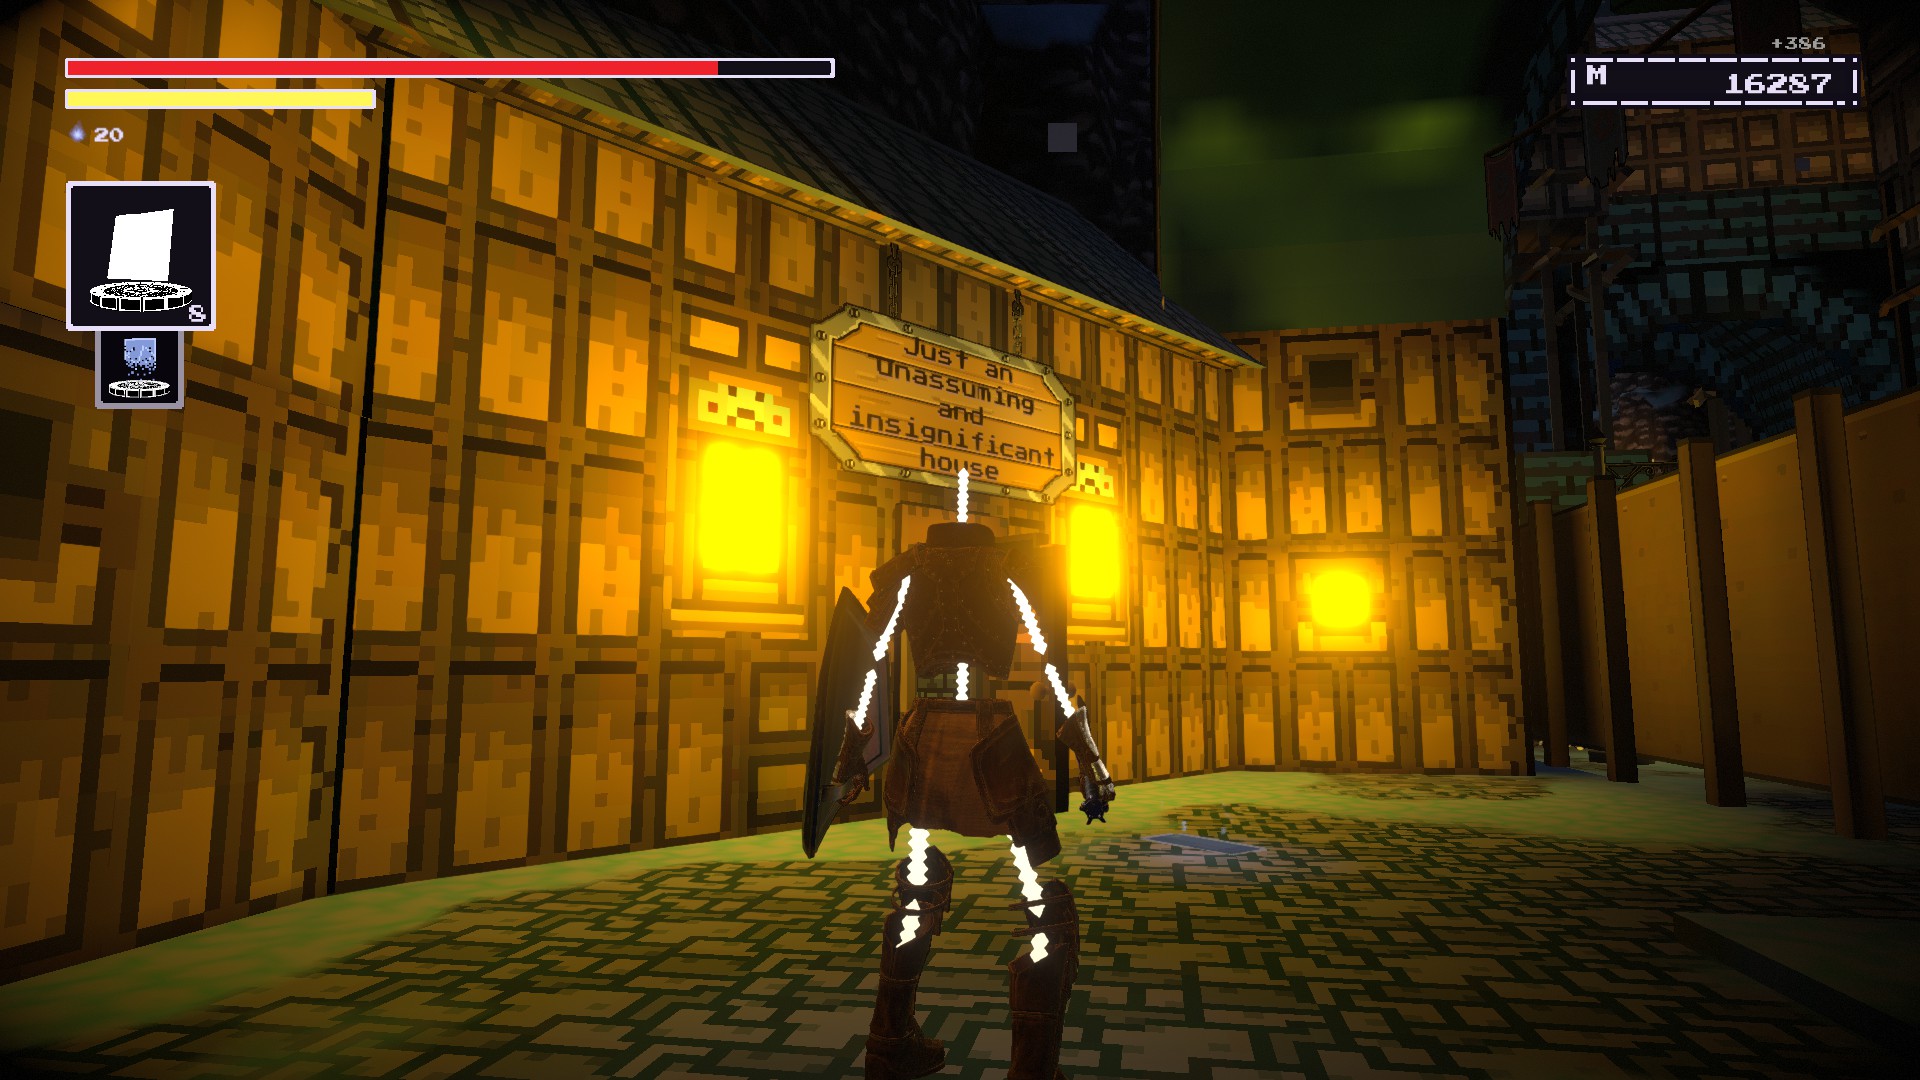
Shield Of Nostalran
ORESHAFT VILLAGE #8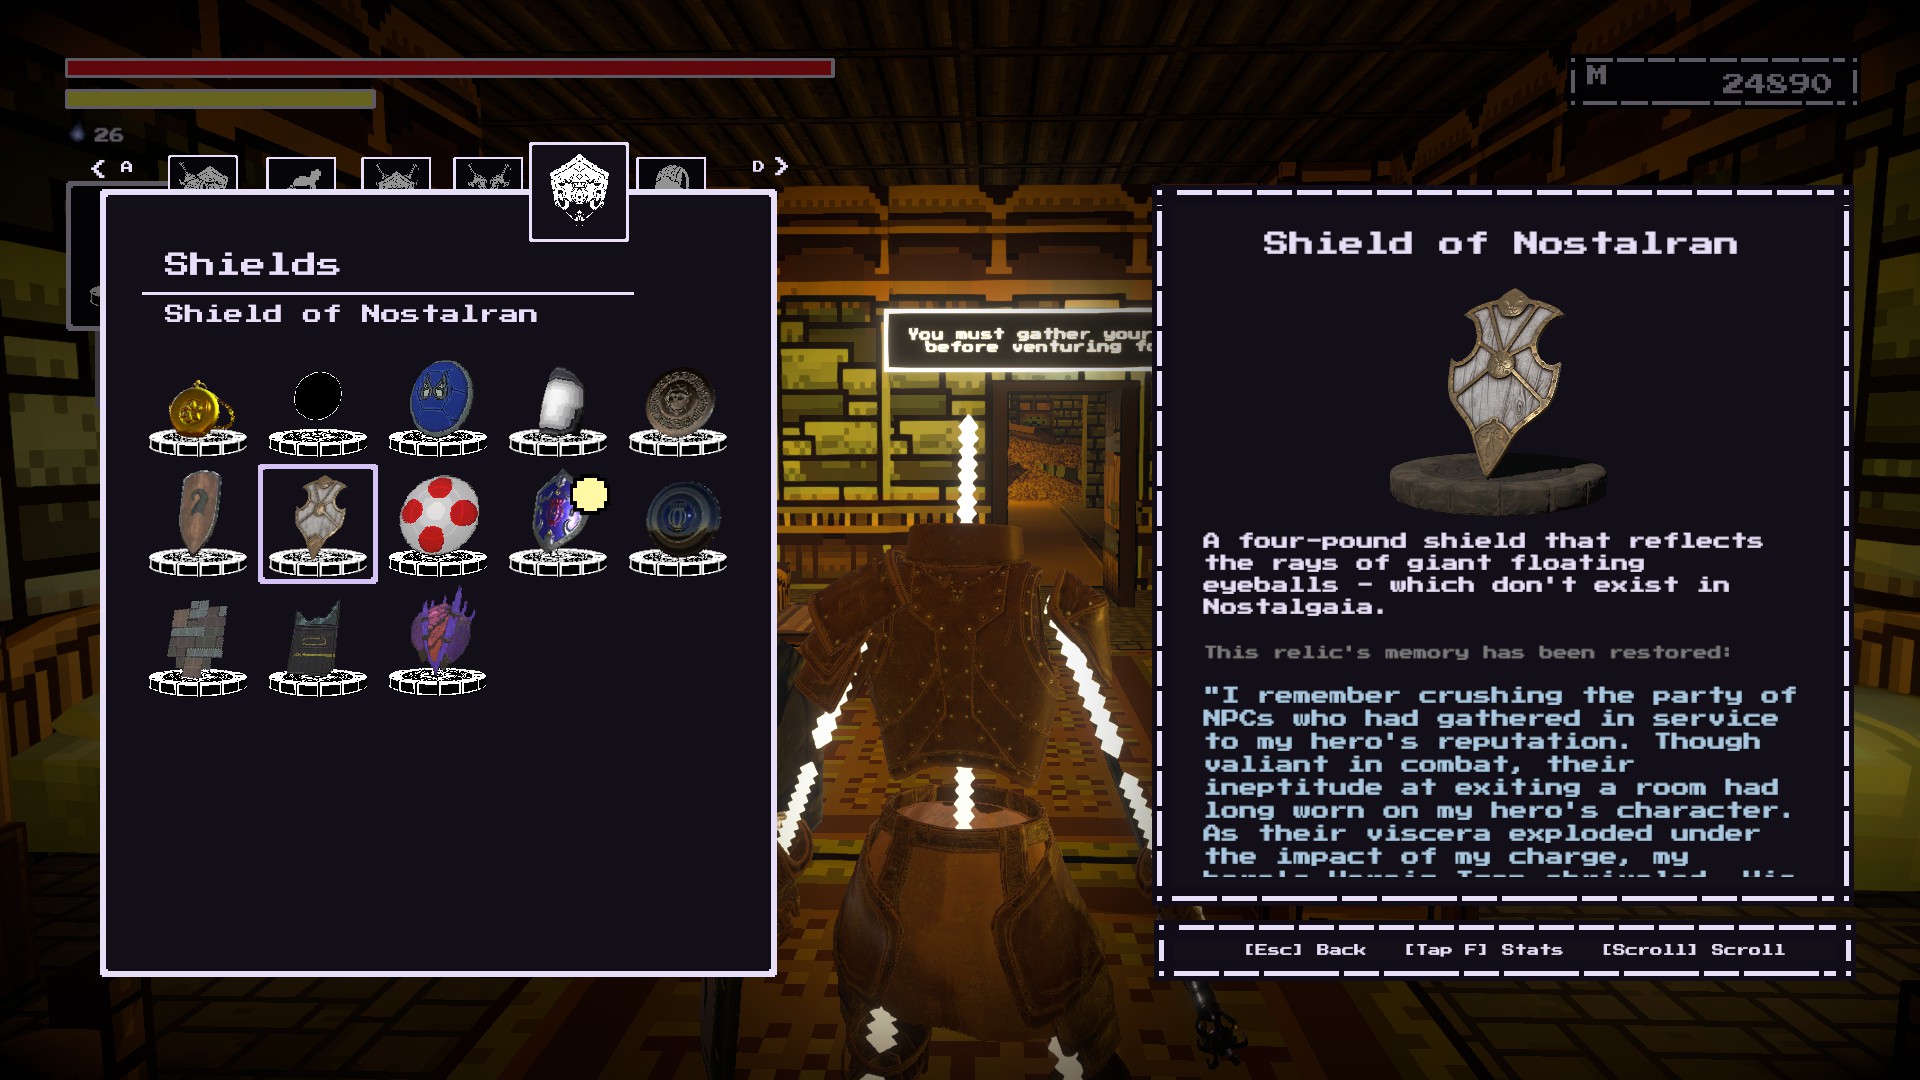
당신은 할 수 있습니다
buy it from the Merchant’s base stock.
No Easymaker Keys needed.
소송 비용 500 memory.
선술집으로 이동 that is near the Gnom statue in
Oreshaft Village.
Continue through the Tavern until you
2 층에 도달하십시오.There should be an unstable door on your left.
You’ll need to have Uprez and 500 memory.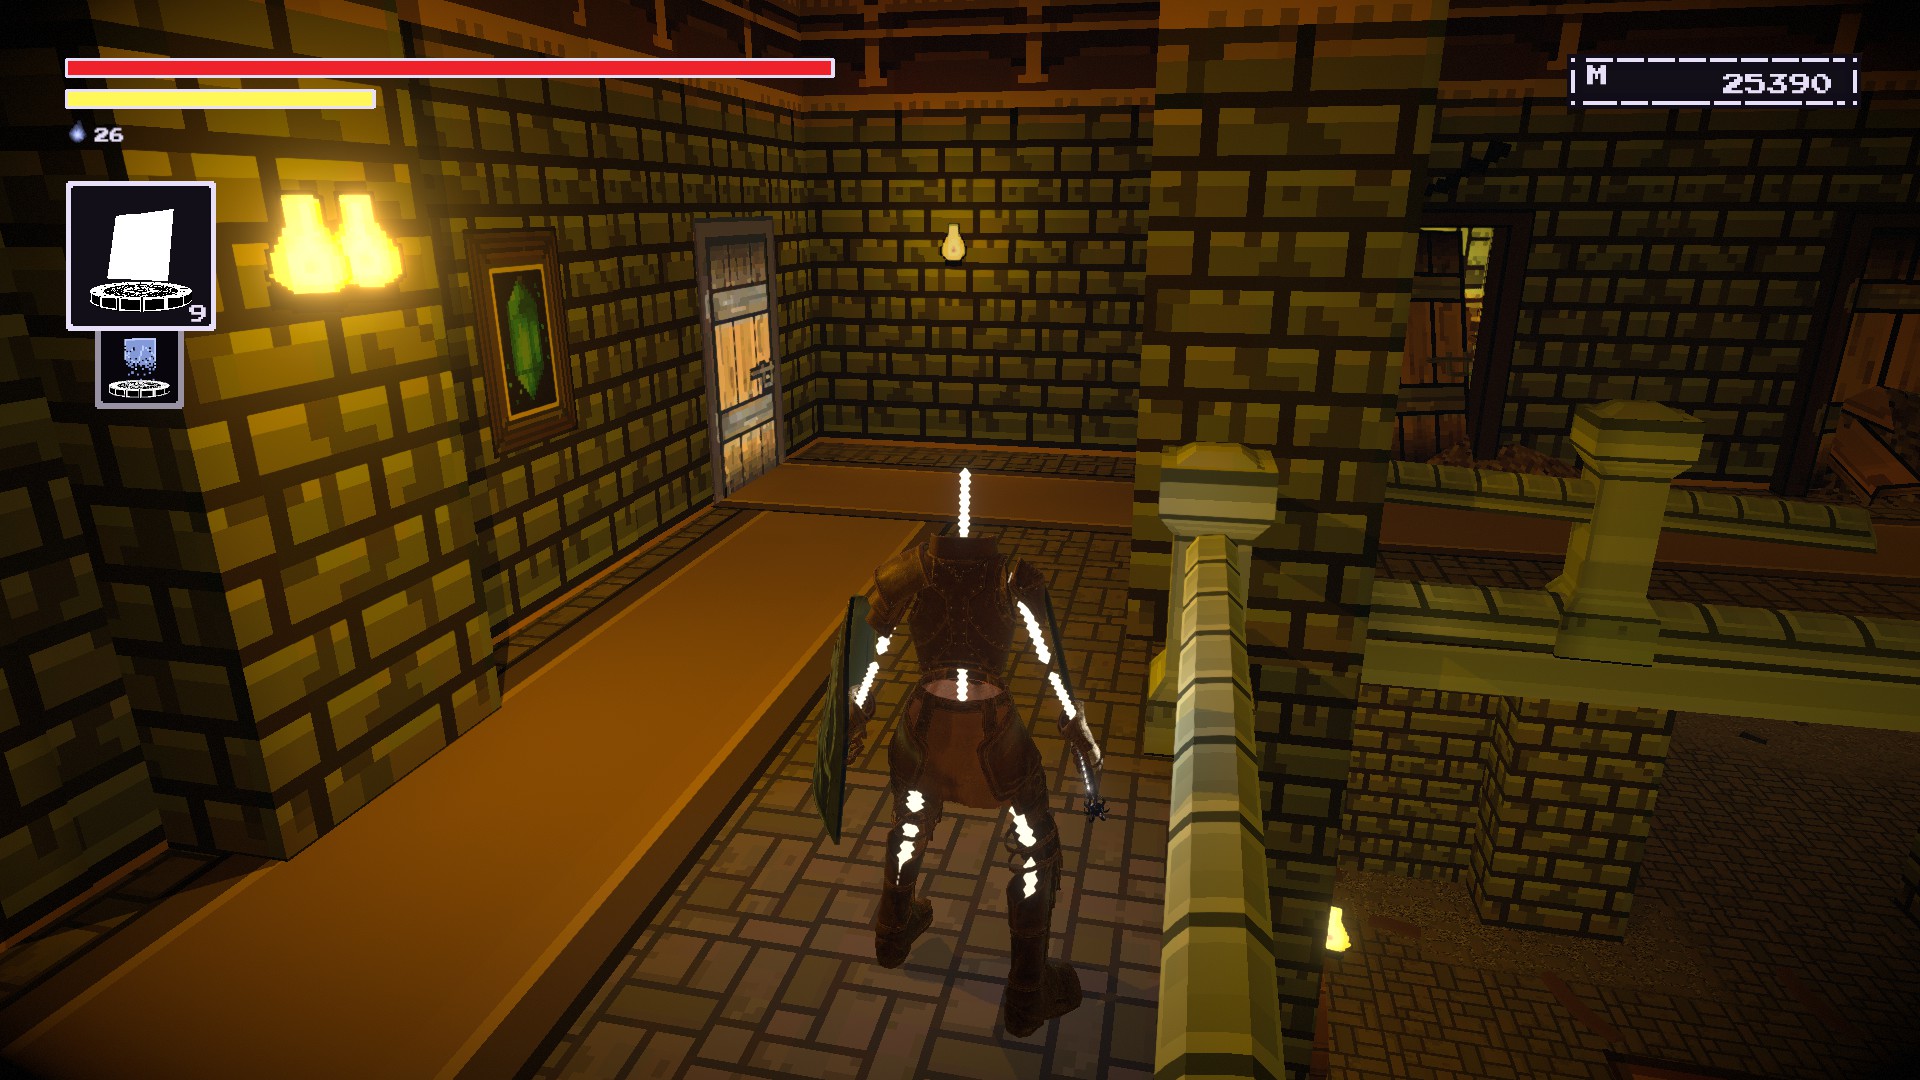
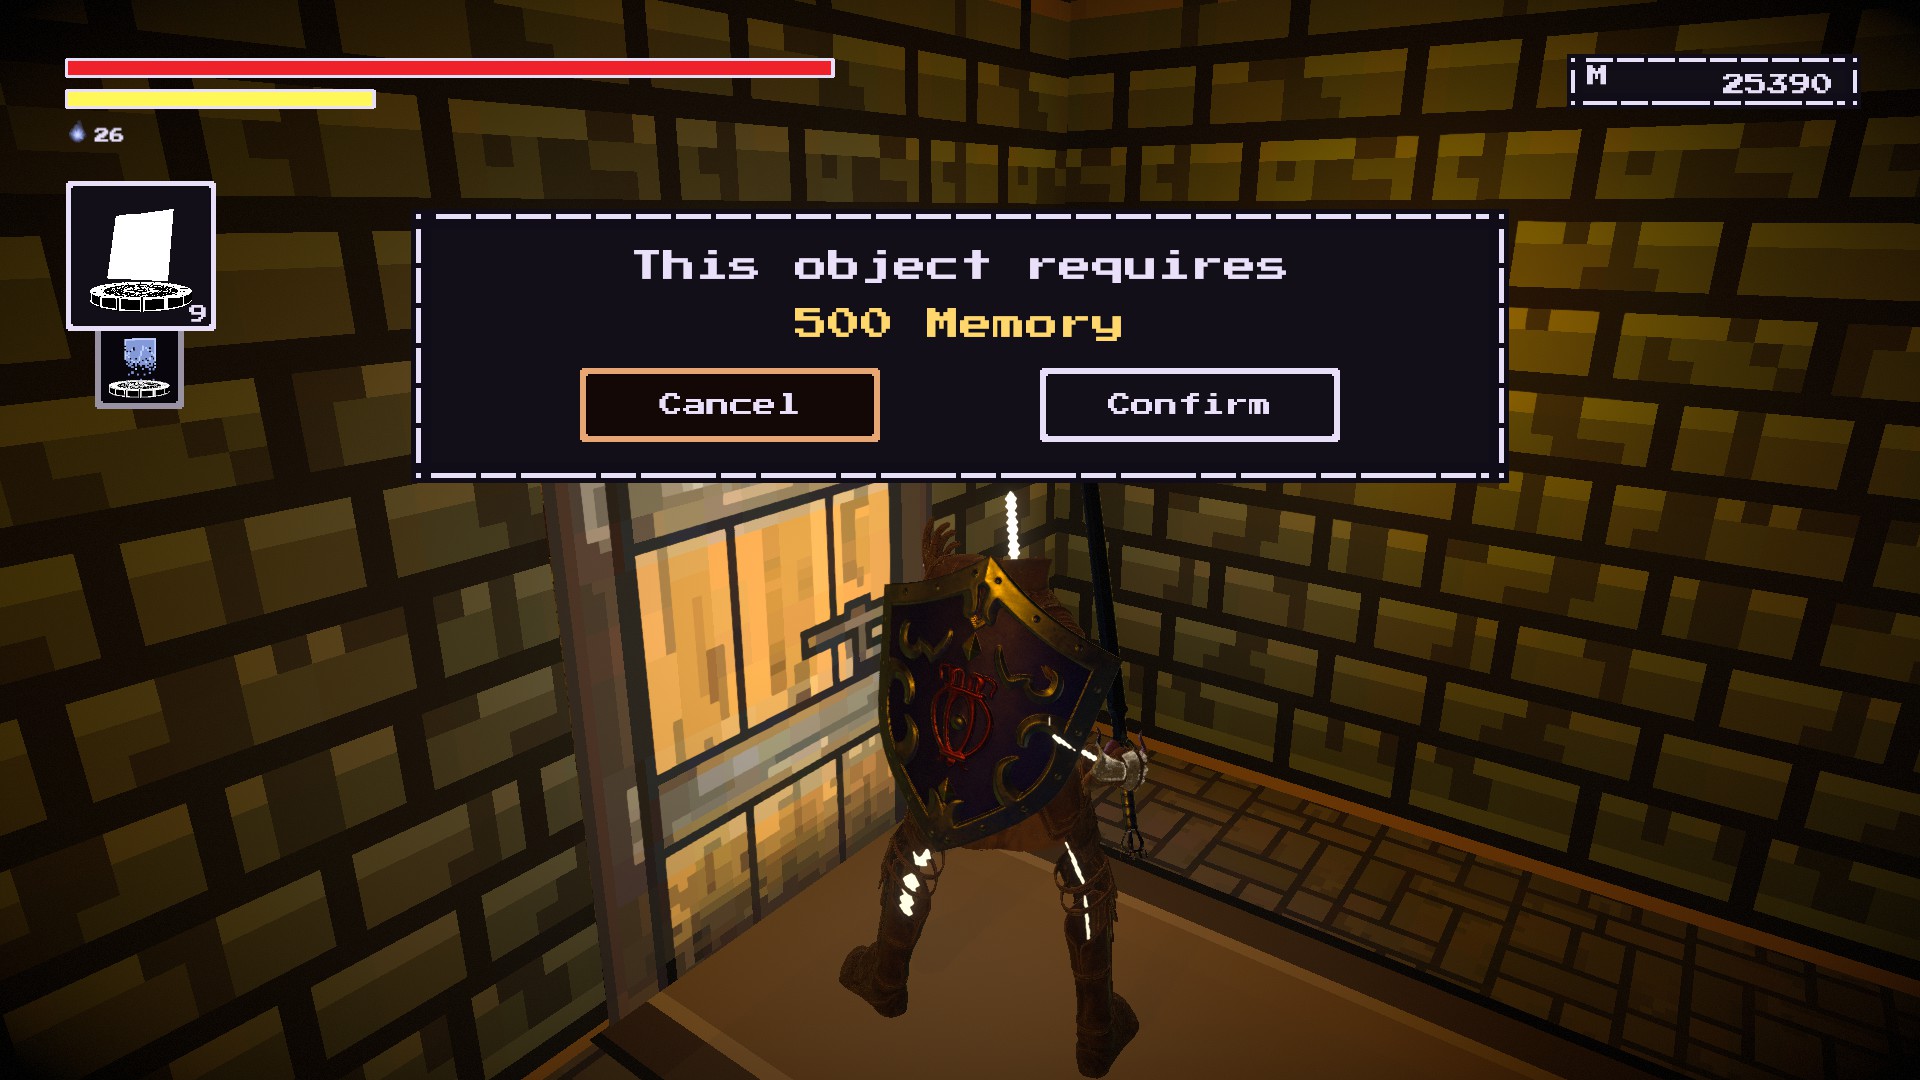
Enter the room and
you’ll see beds with several Memories of NPCs.
Remember the shield here.
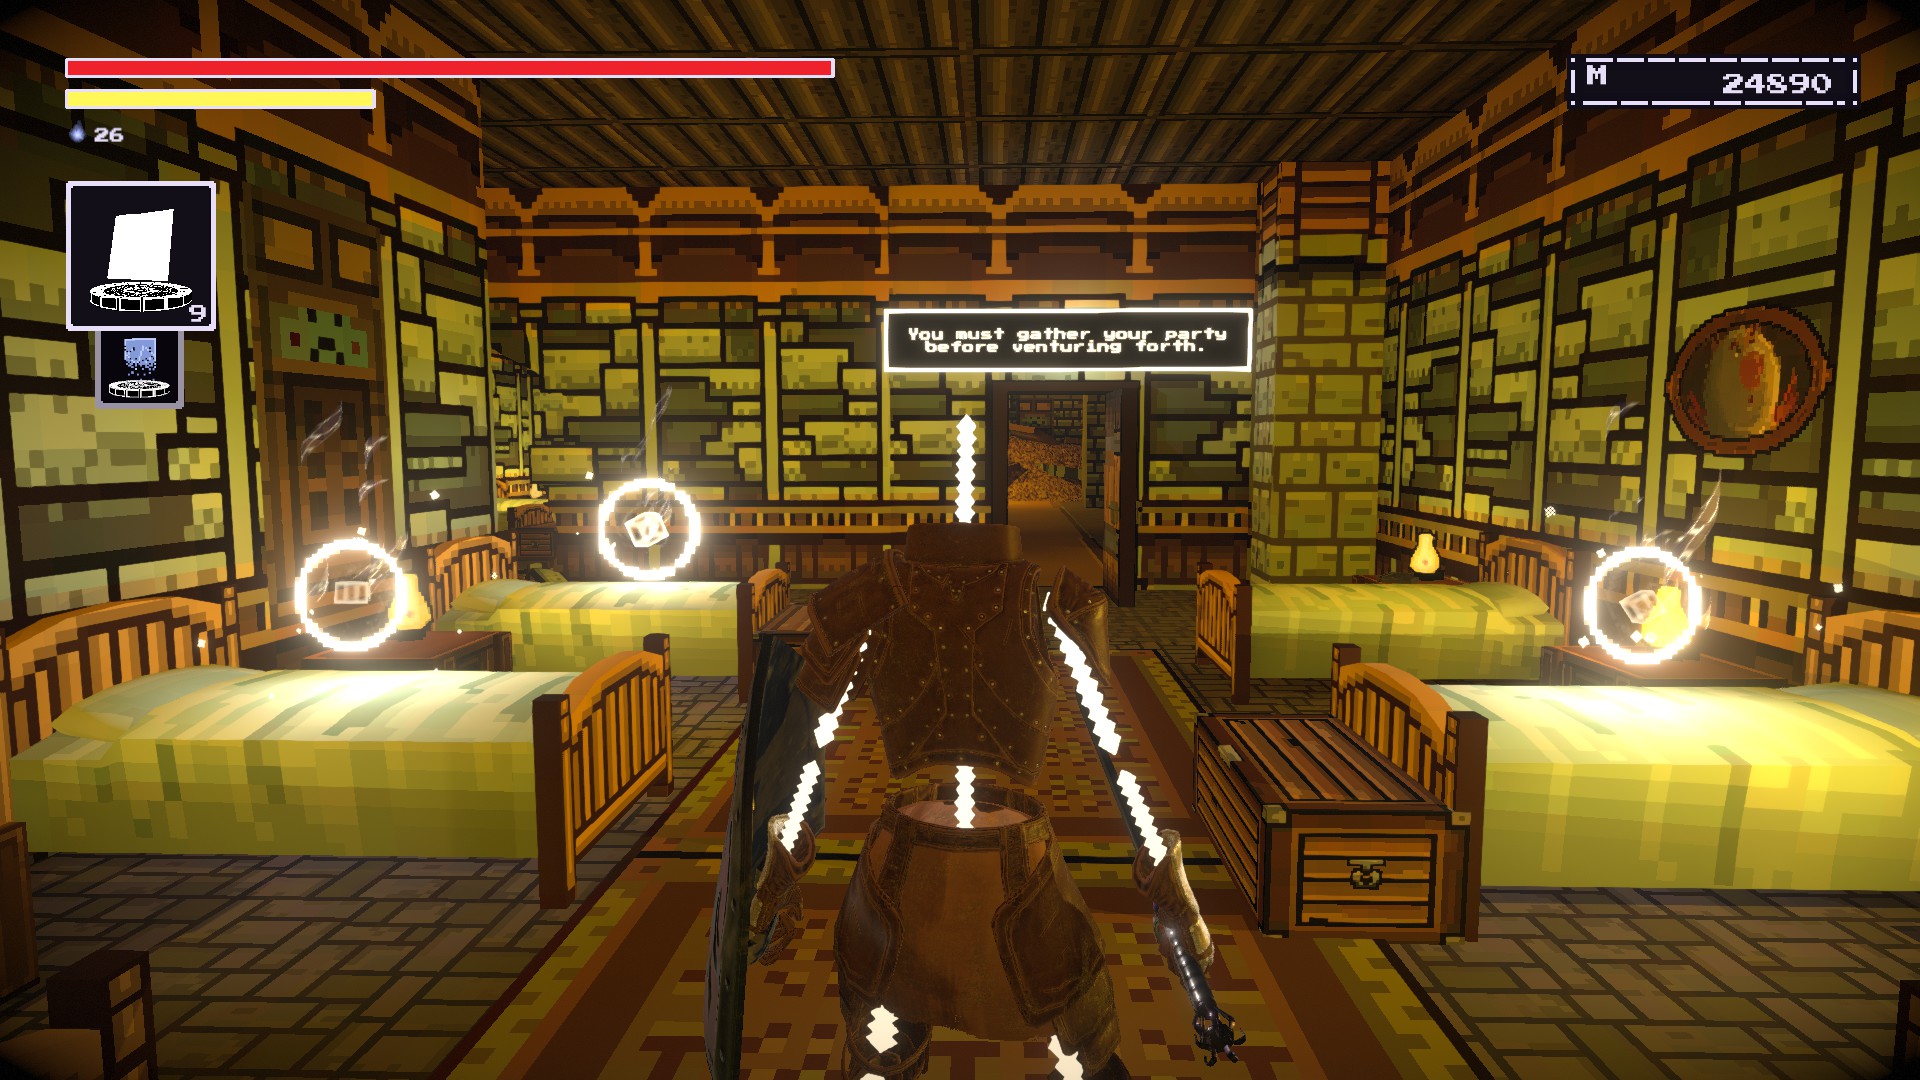
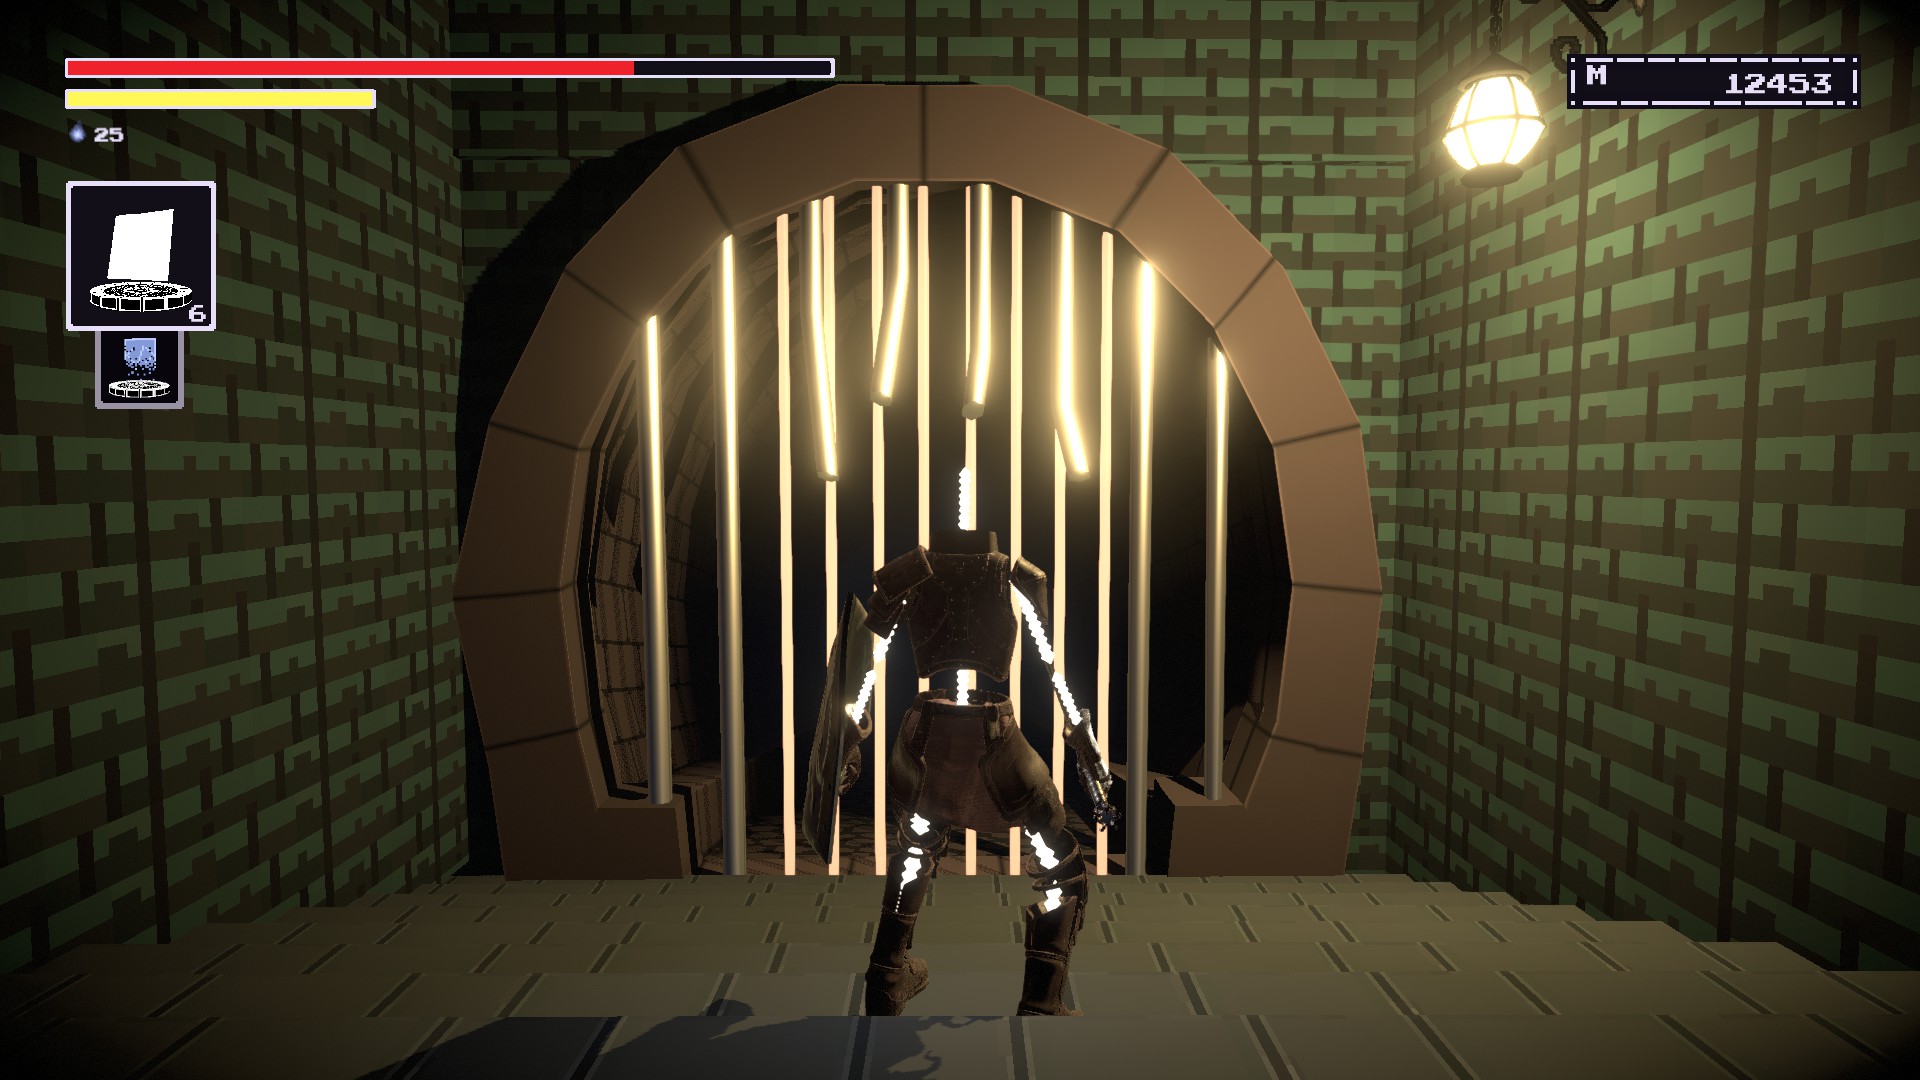
Stolen Wraps
ORESHAFT VILLAGE #9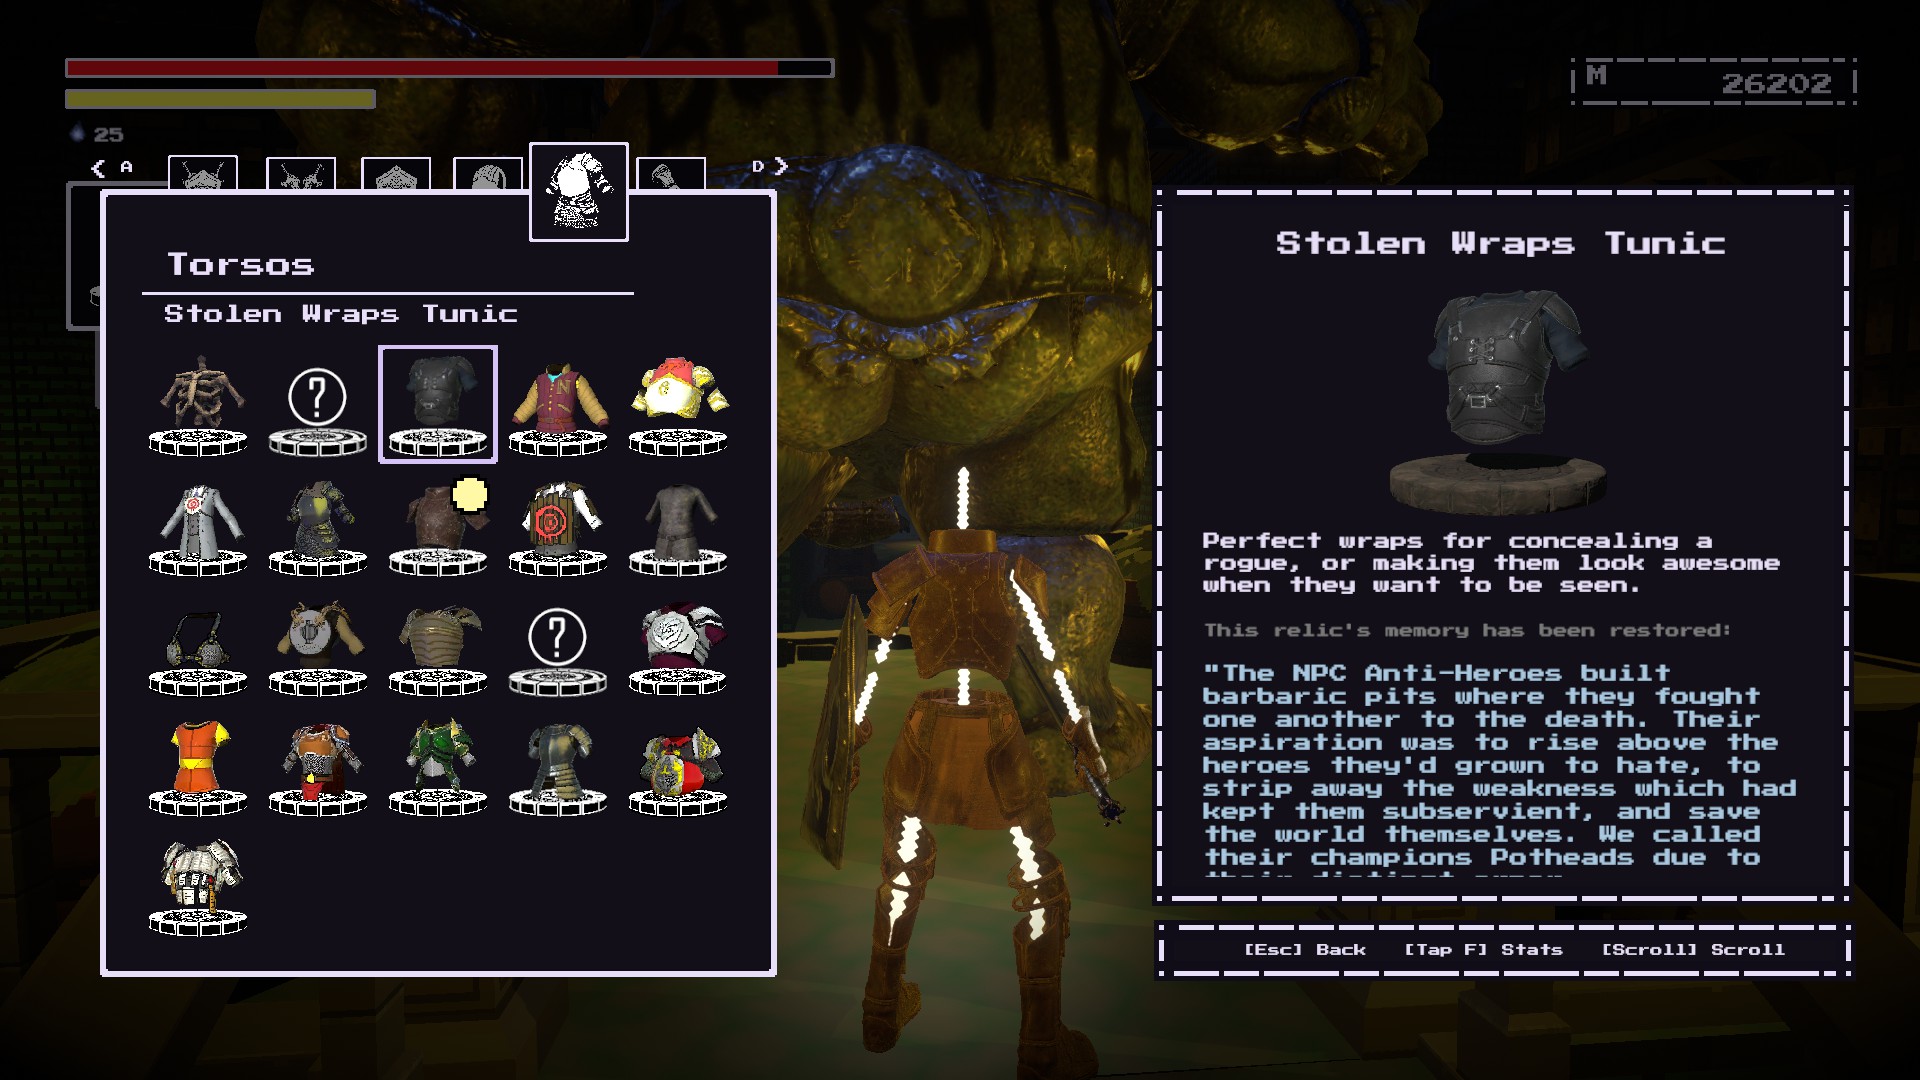
It is found
in front of the Unassuming and Insignificant House ~에
Oreshaft Village.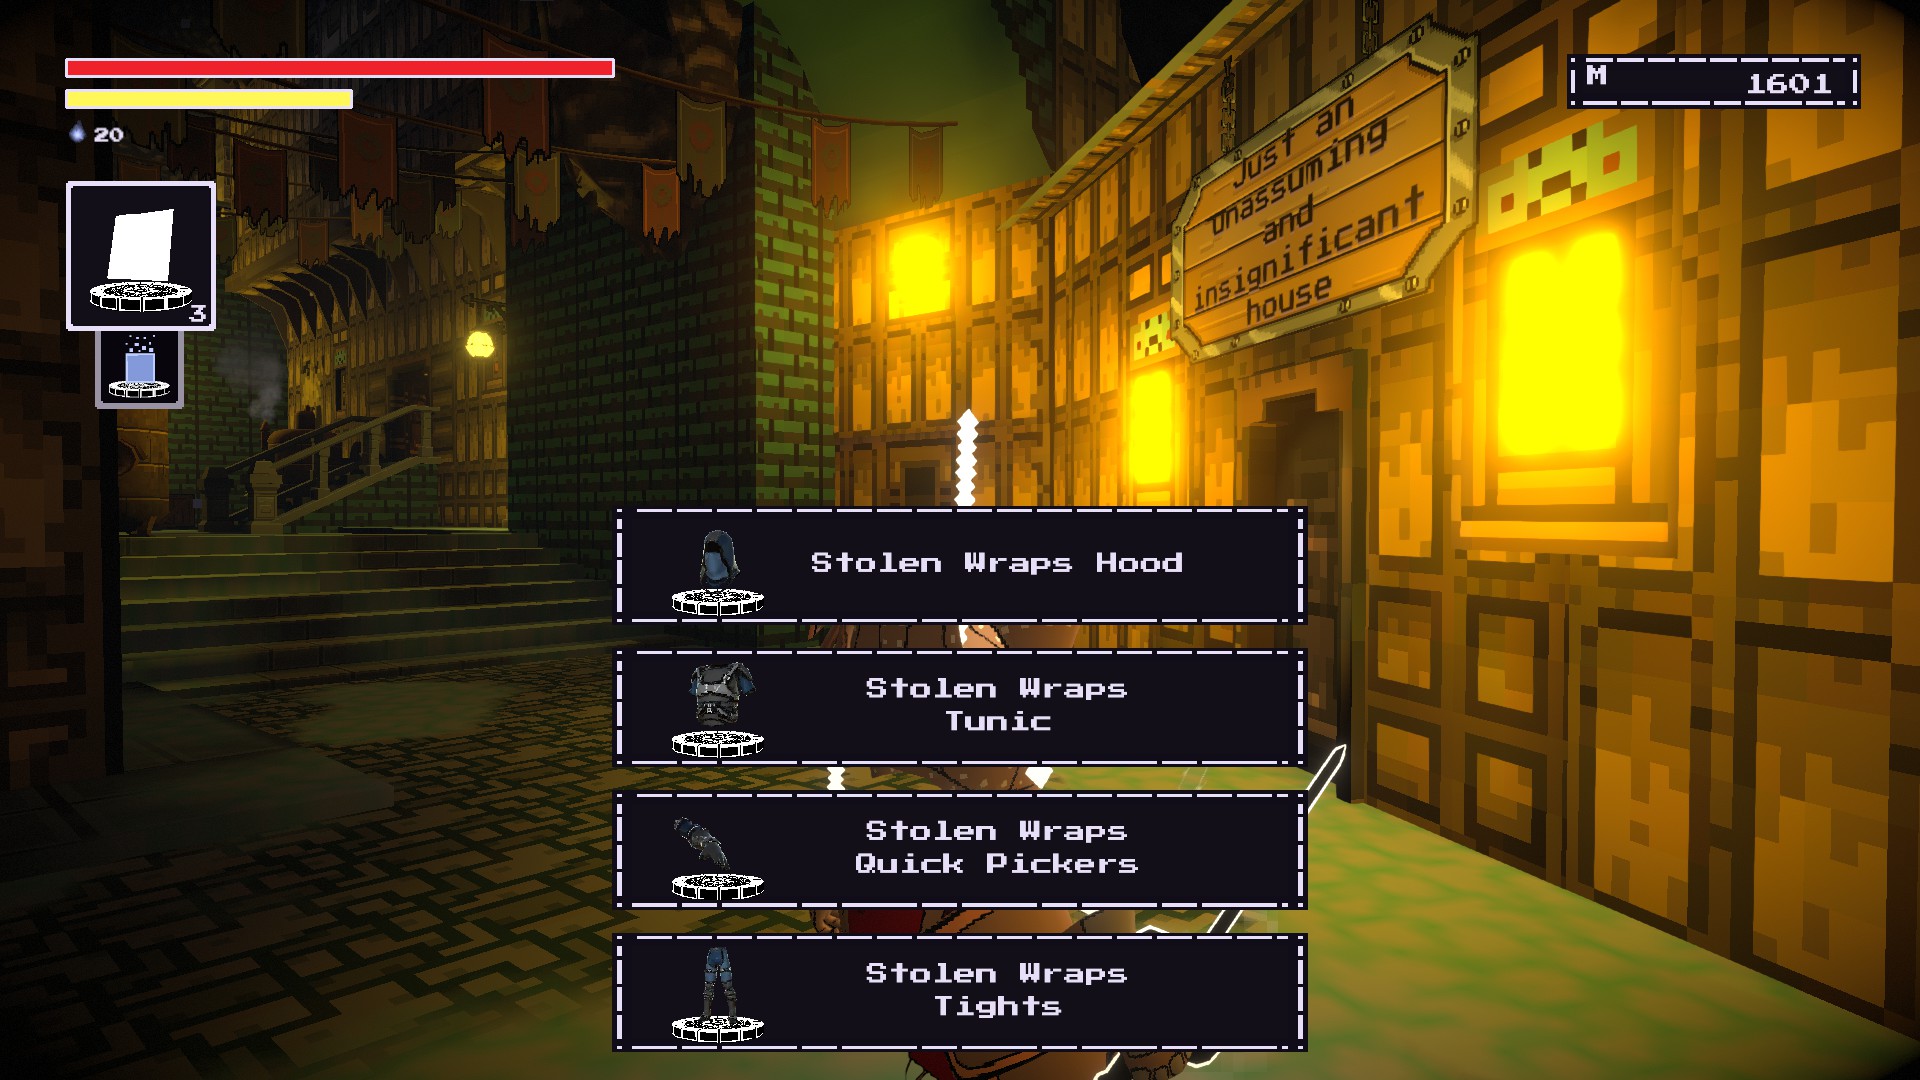
It is at the
Gnom Statue at Oreshaft Village.
Remember the torso under his glorious dump.

Haunted Dreams
ORESHAFT VILLAGE #10

당신은
need to farmfor this armor set at the
Keep of the Stolen Crown.The pieces are dropped from the
Haunted Armor enemies.(예, it includes the maid ones too.)
Go through the snowy pathwaybetween the Merchant and Blacksmith shops at
Oreshaft Village.Continue until you are
at the Unbreakable Maw’s entrance.
Remember the armor here!
Iron Jimmy
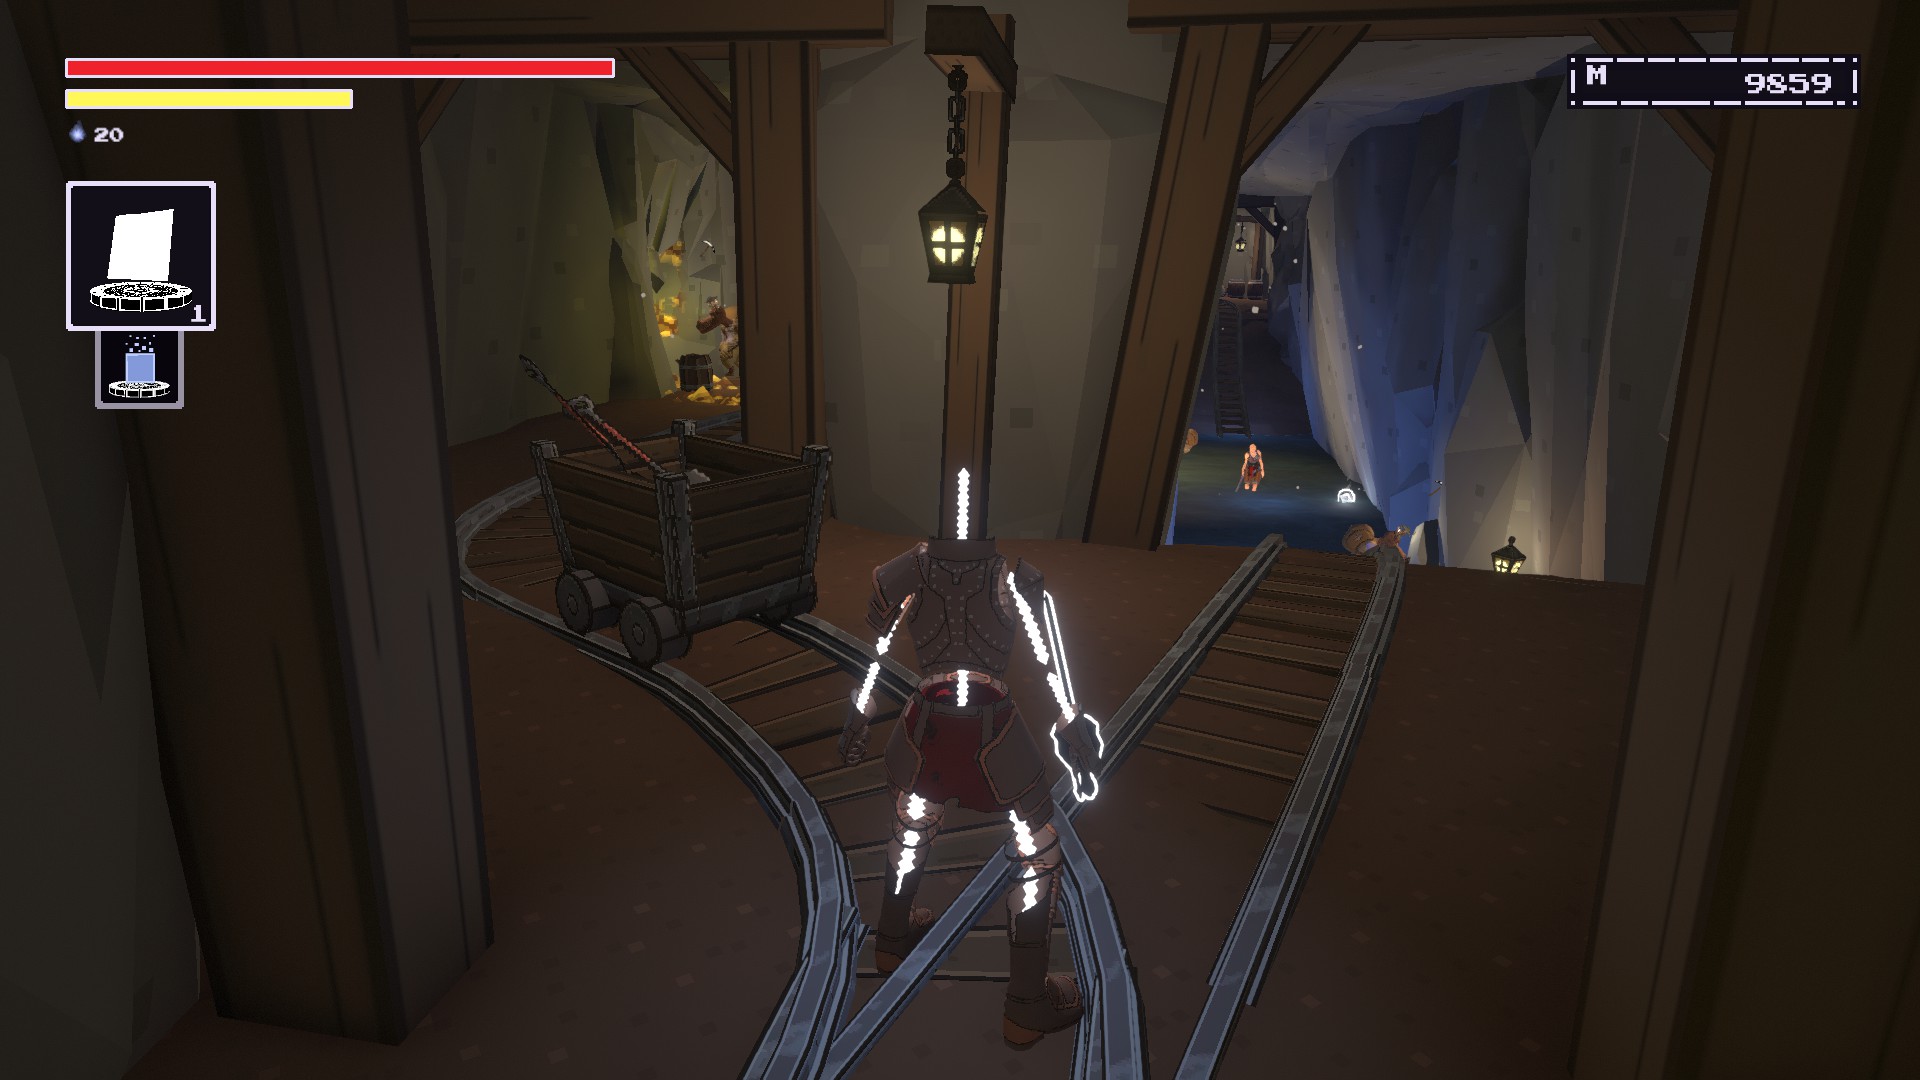
THE DEPTHS #1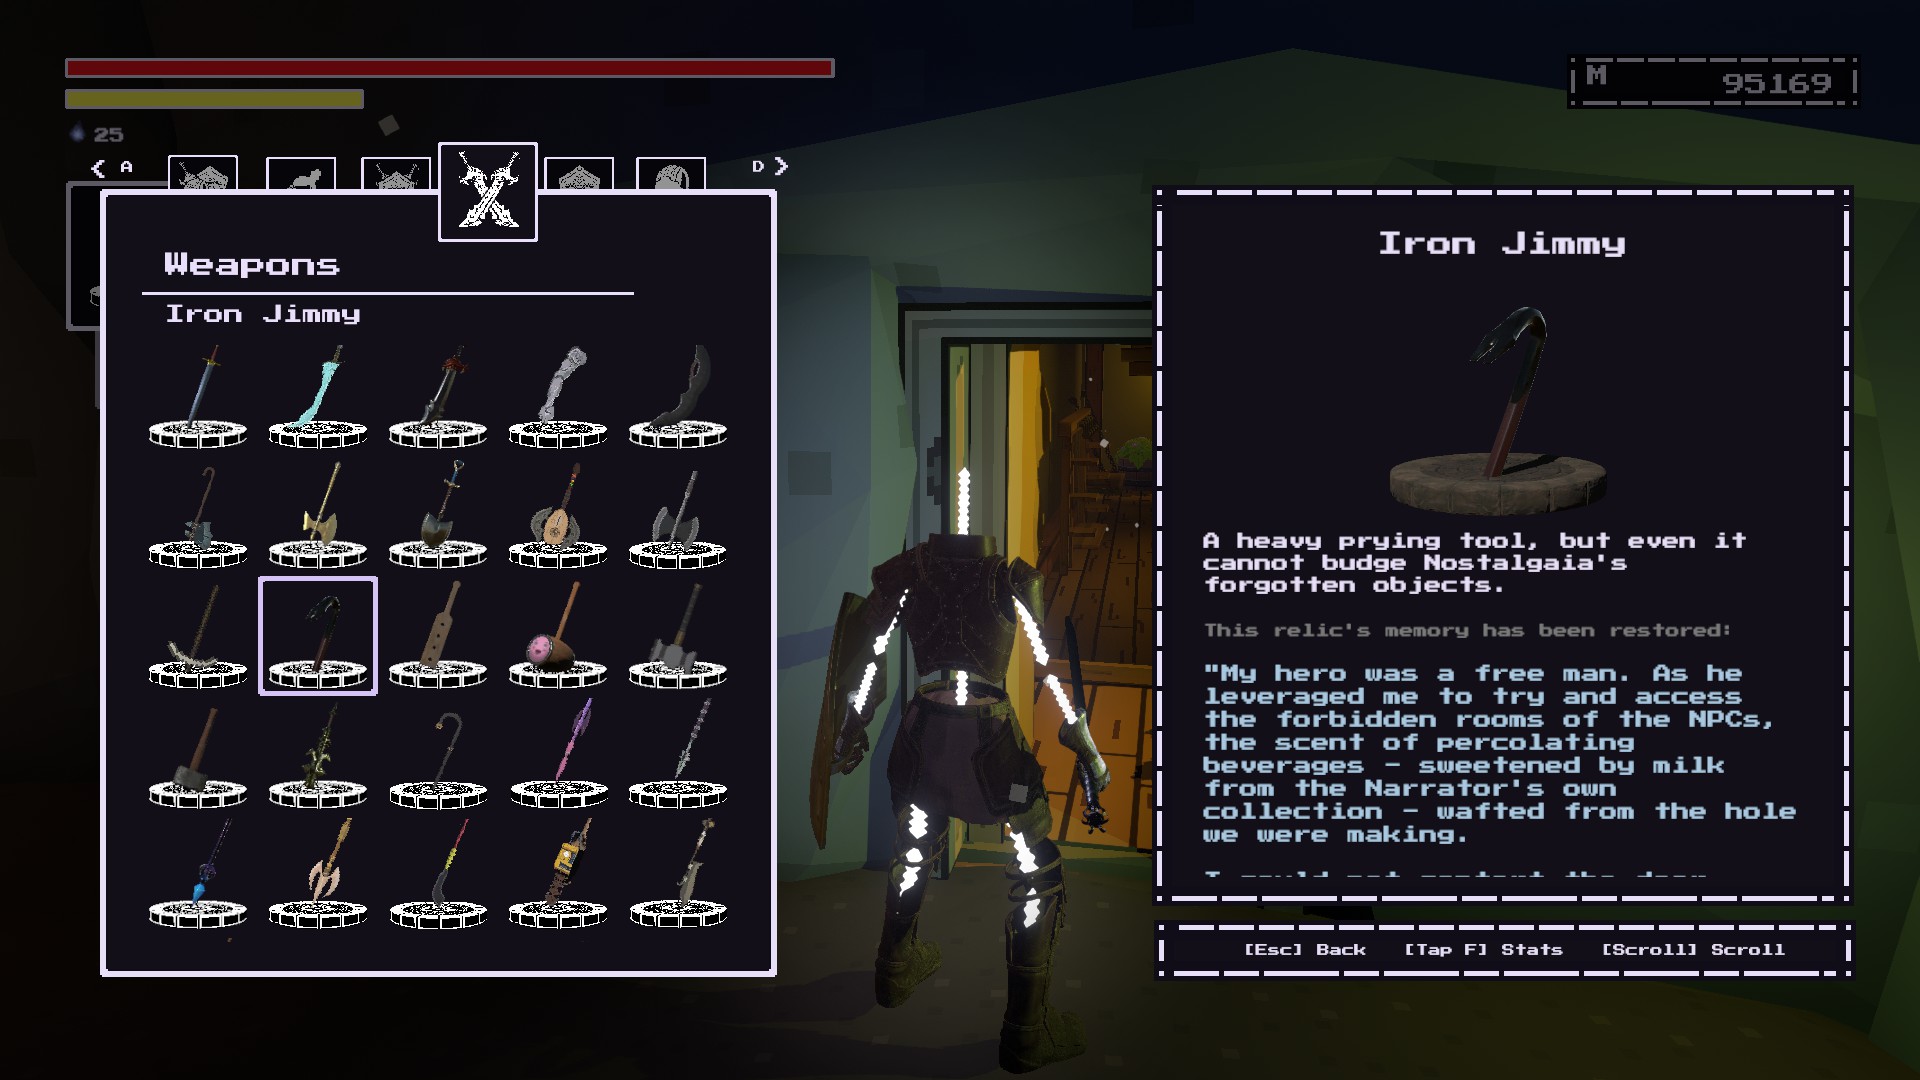
Once you enter
The Depths, you should be in
a watery room with two Miners and an Overseer on top. The item is
방 오른쪽에.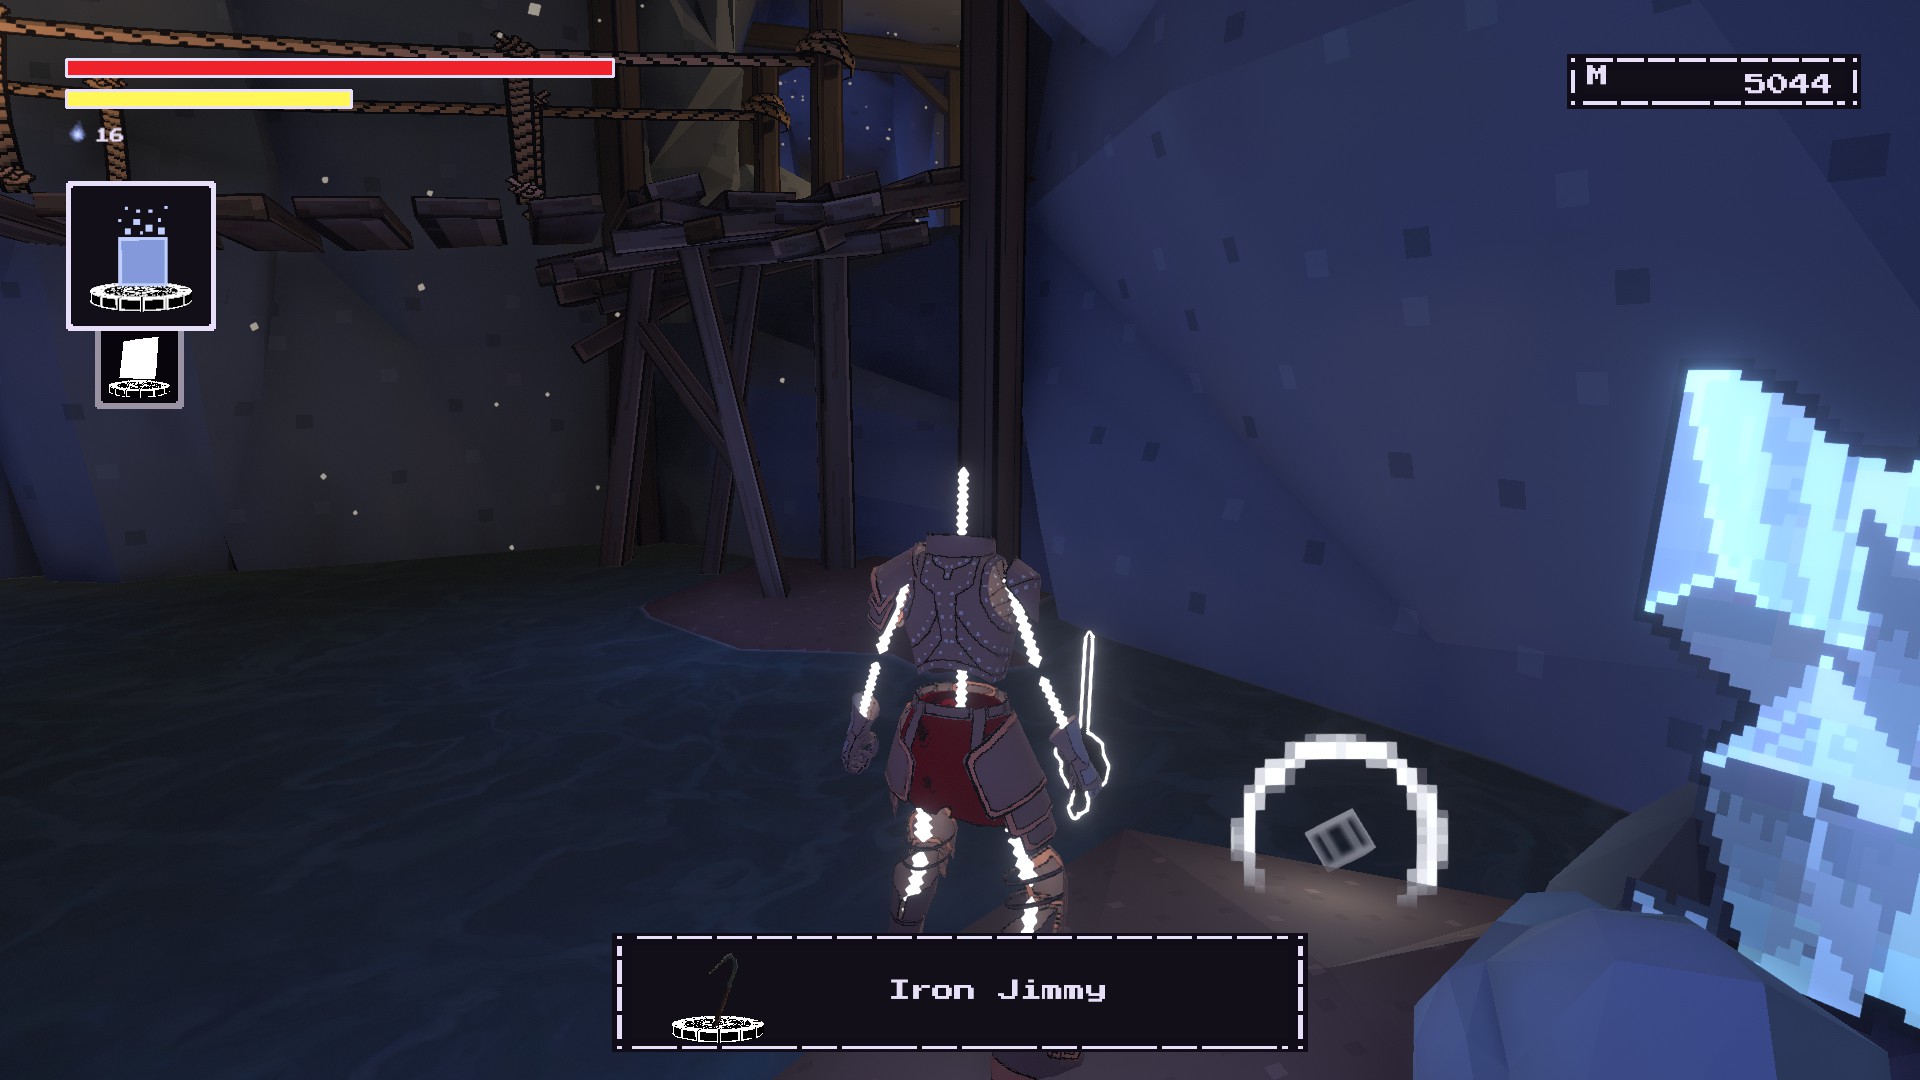
From where the Overseer was,
go to the rightwhere you see a single NPC mining his own business.
Continue down the tunnel until you see
a door that’s been damaged.
Remember the weapon right near this door.
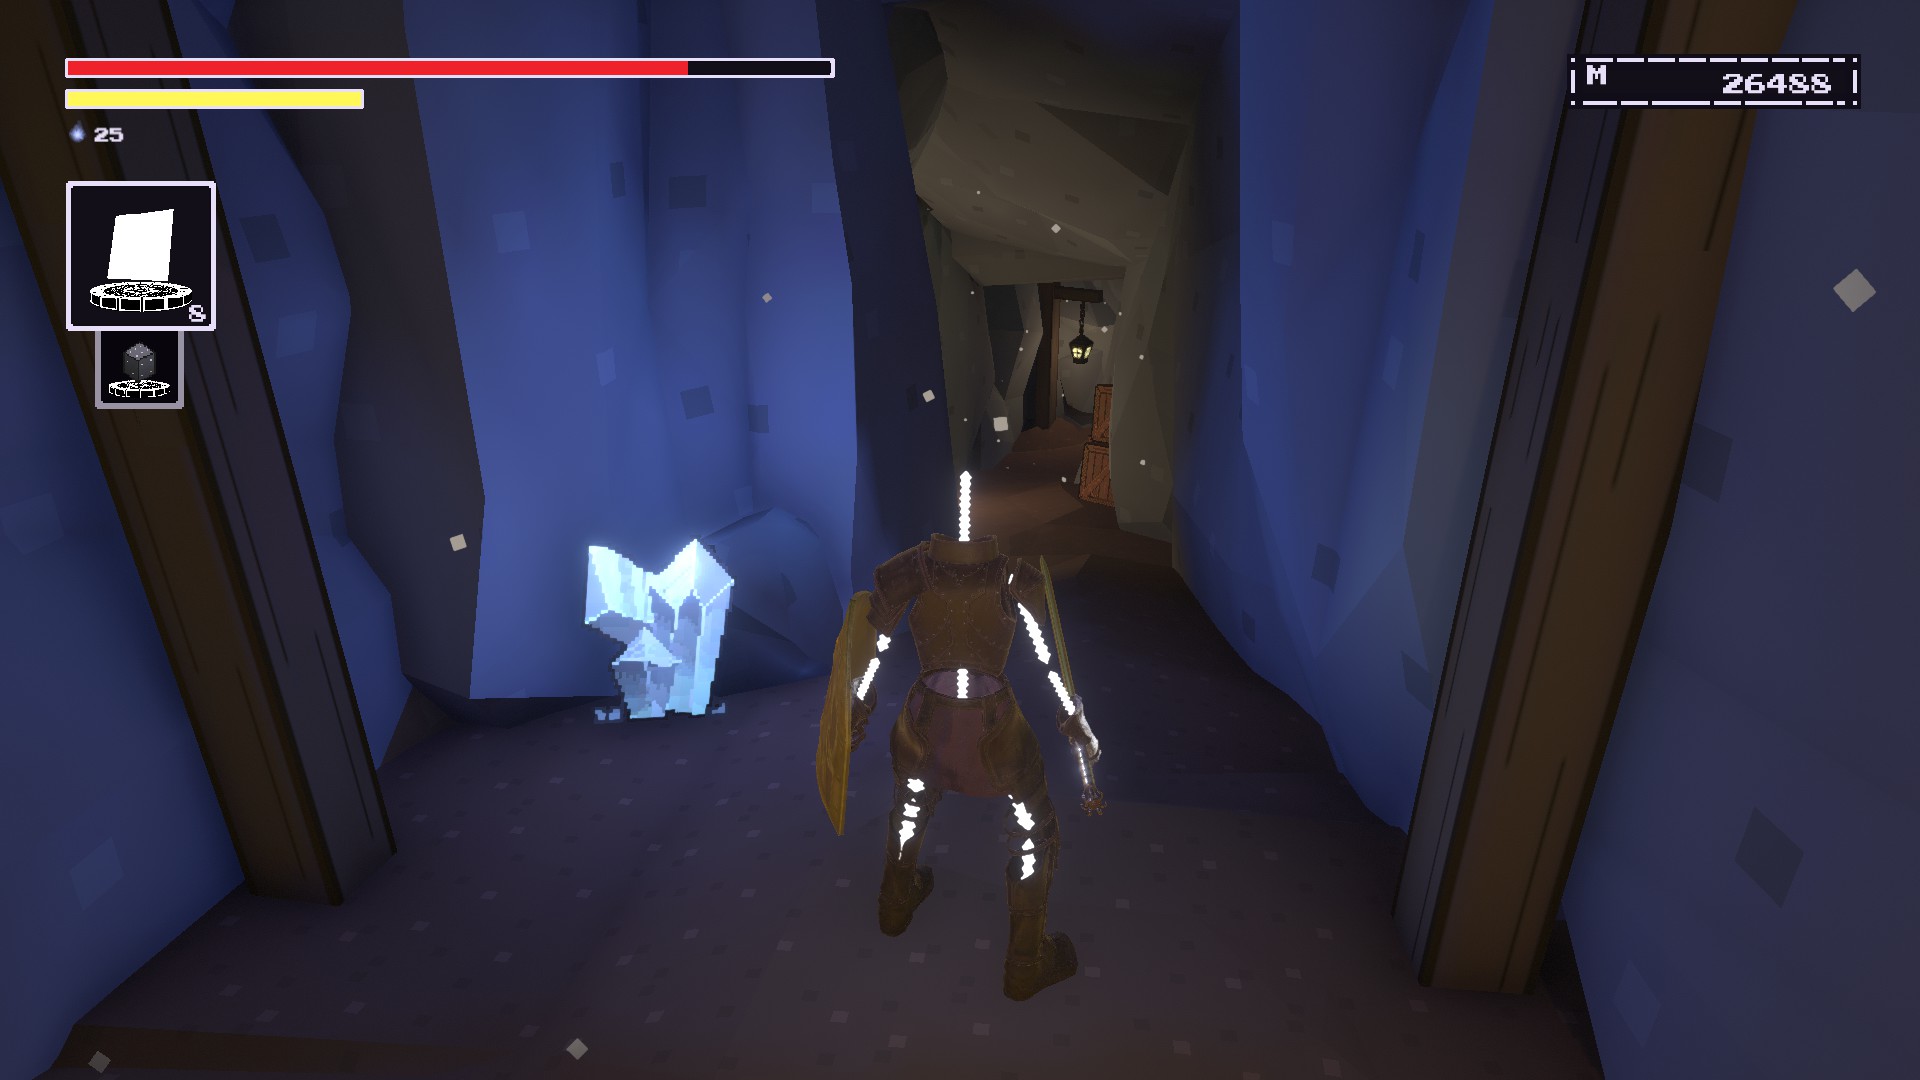
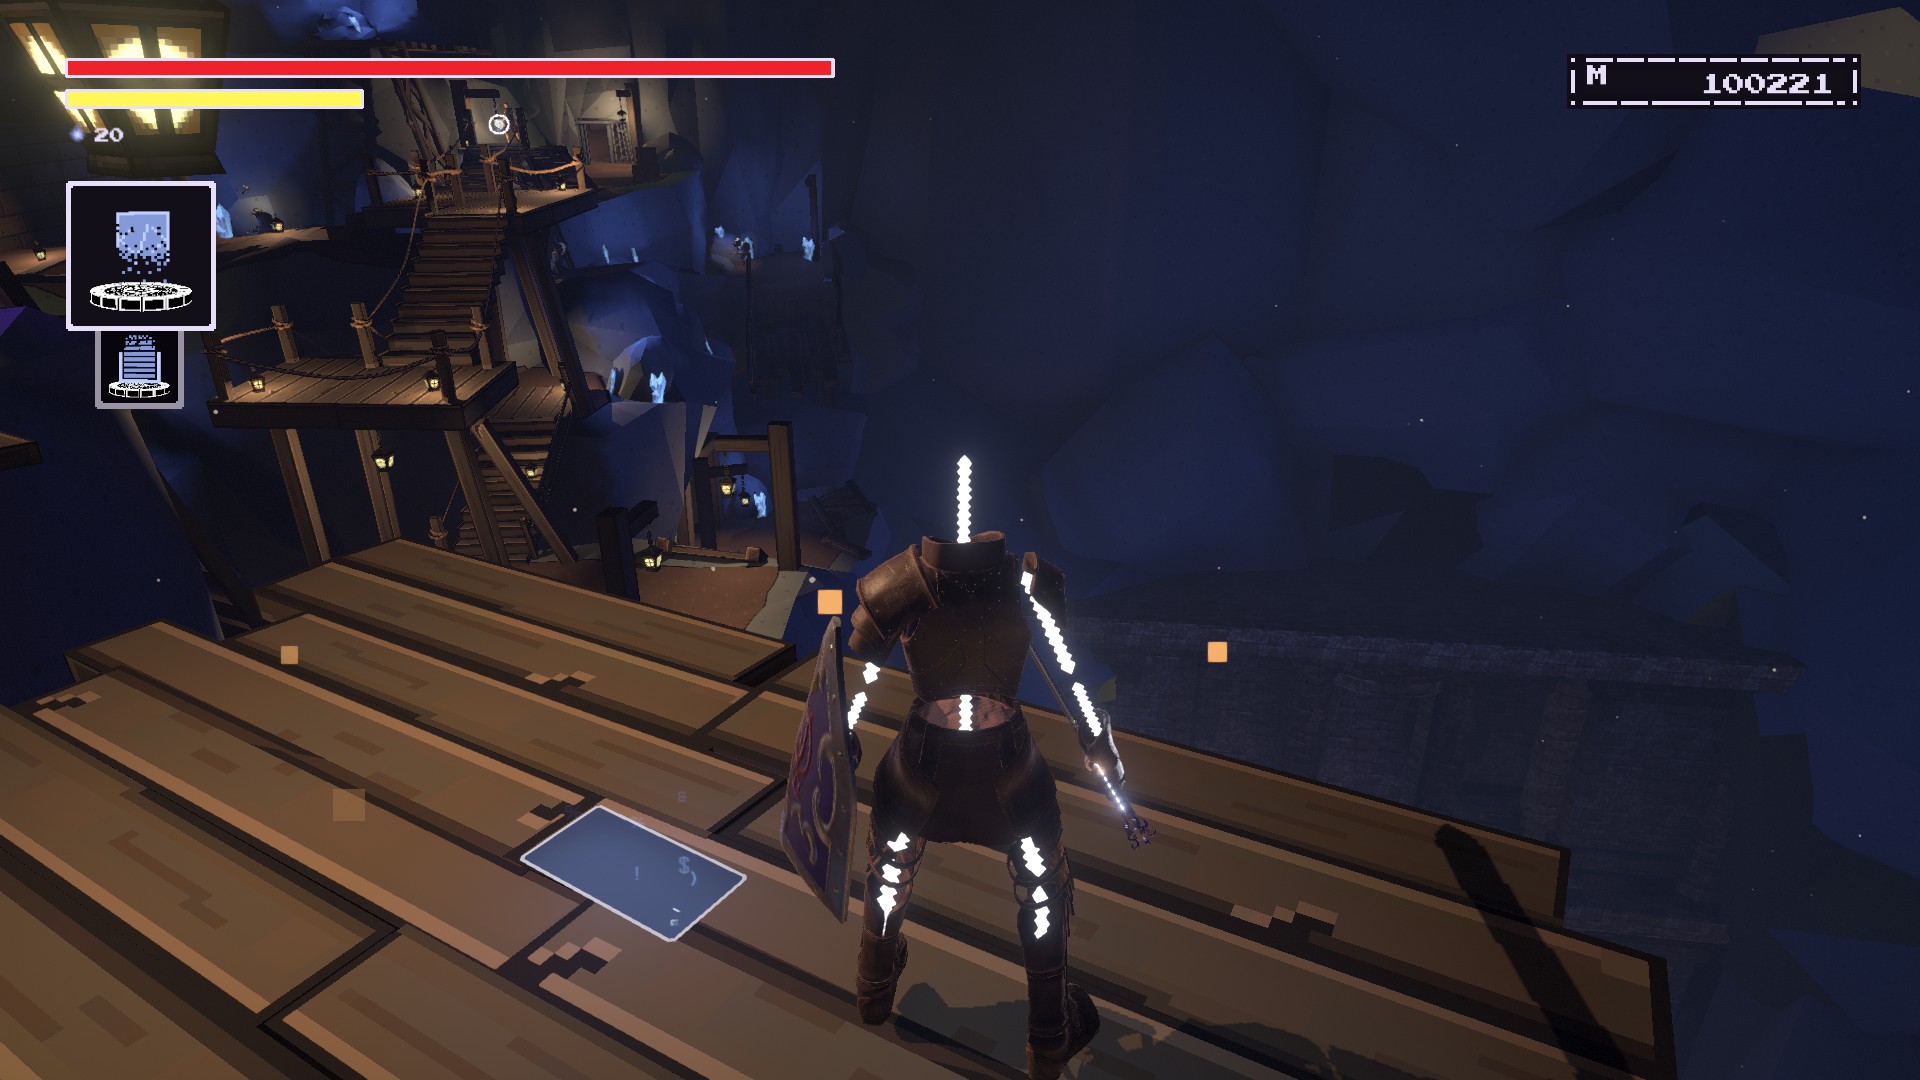
Projector Shield
THE DEPTHS #2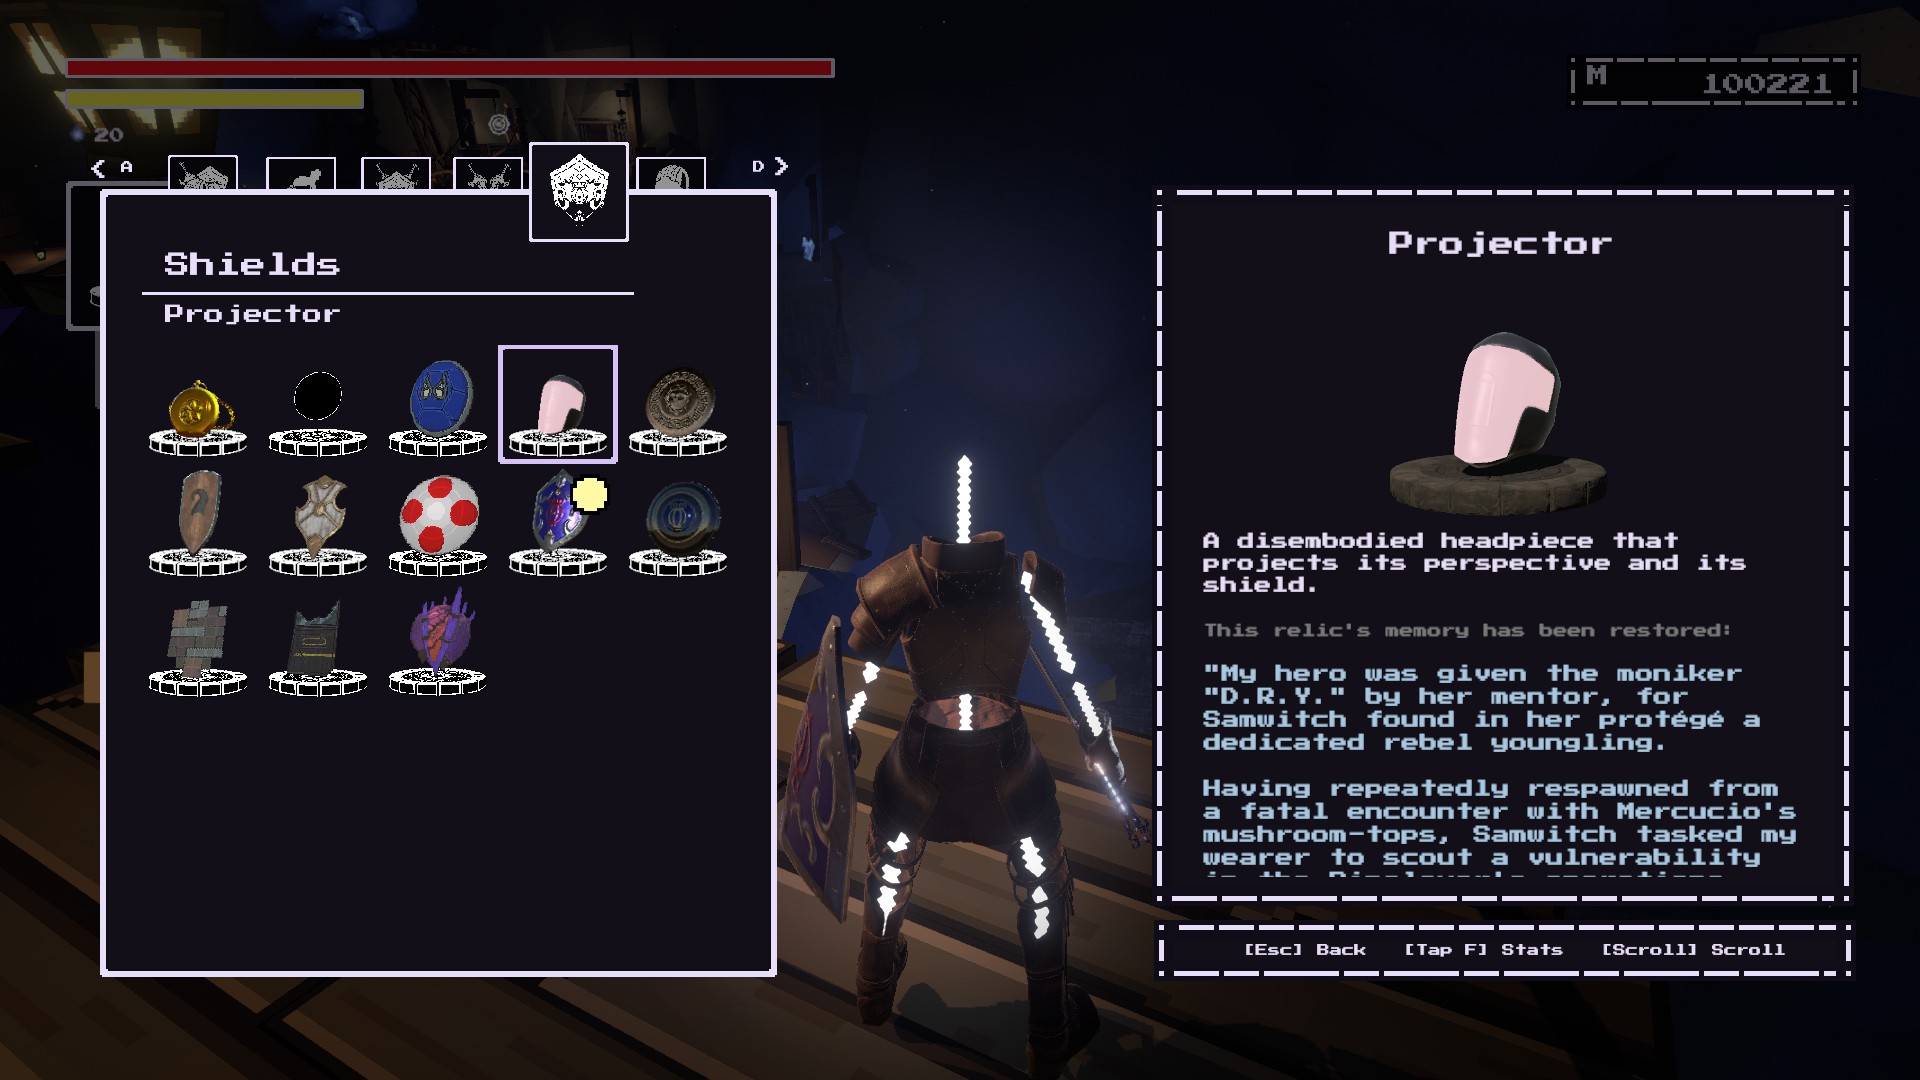
~에
Start of Sequence, there is
a room with three ladders.
Left ladder is where you go for your train-ing.
Right ladder leads to a single enemy and an item.
Middle ladder that glows and leads to two degraded spiders.

Go climb up the middle ladder and fight them.
One drops the Cipher,
the other will drop the Projector Shield.
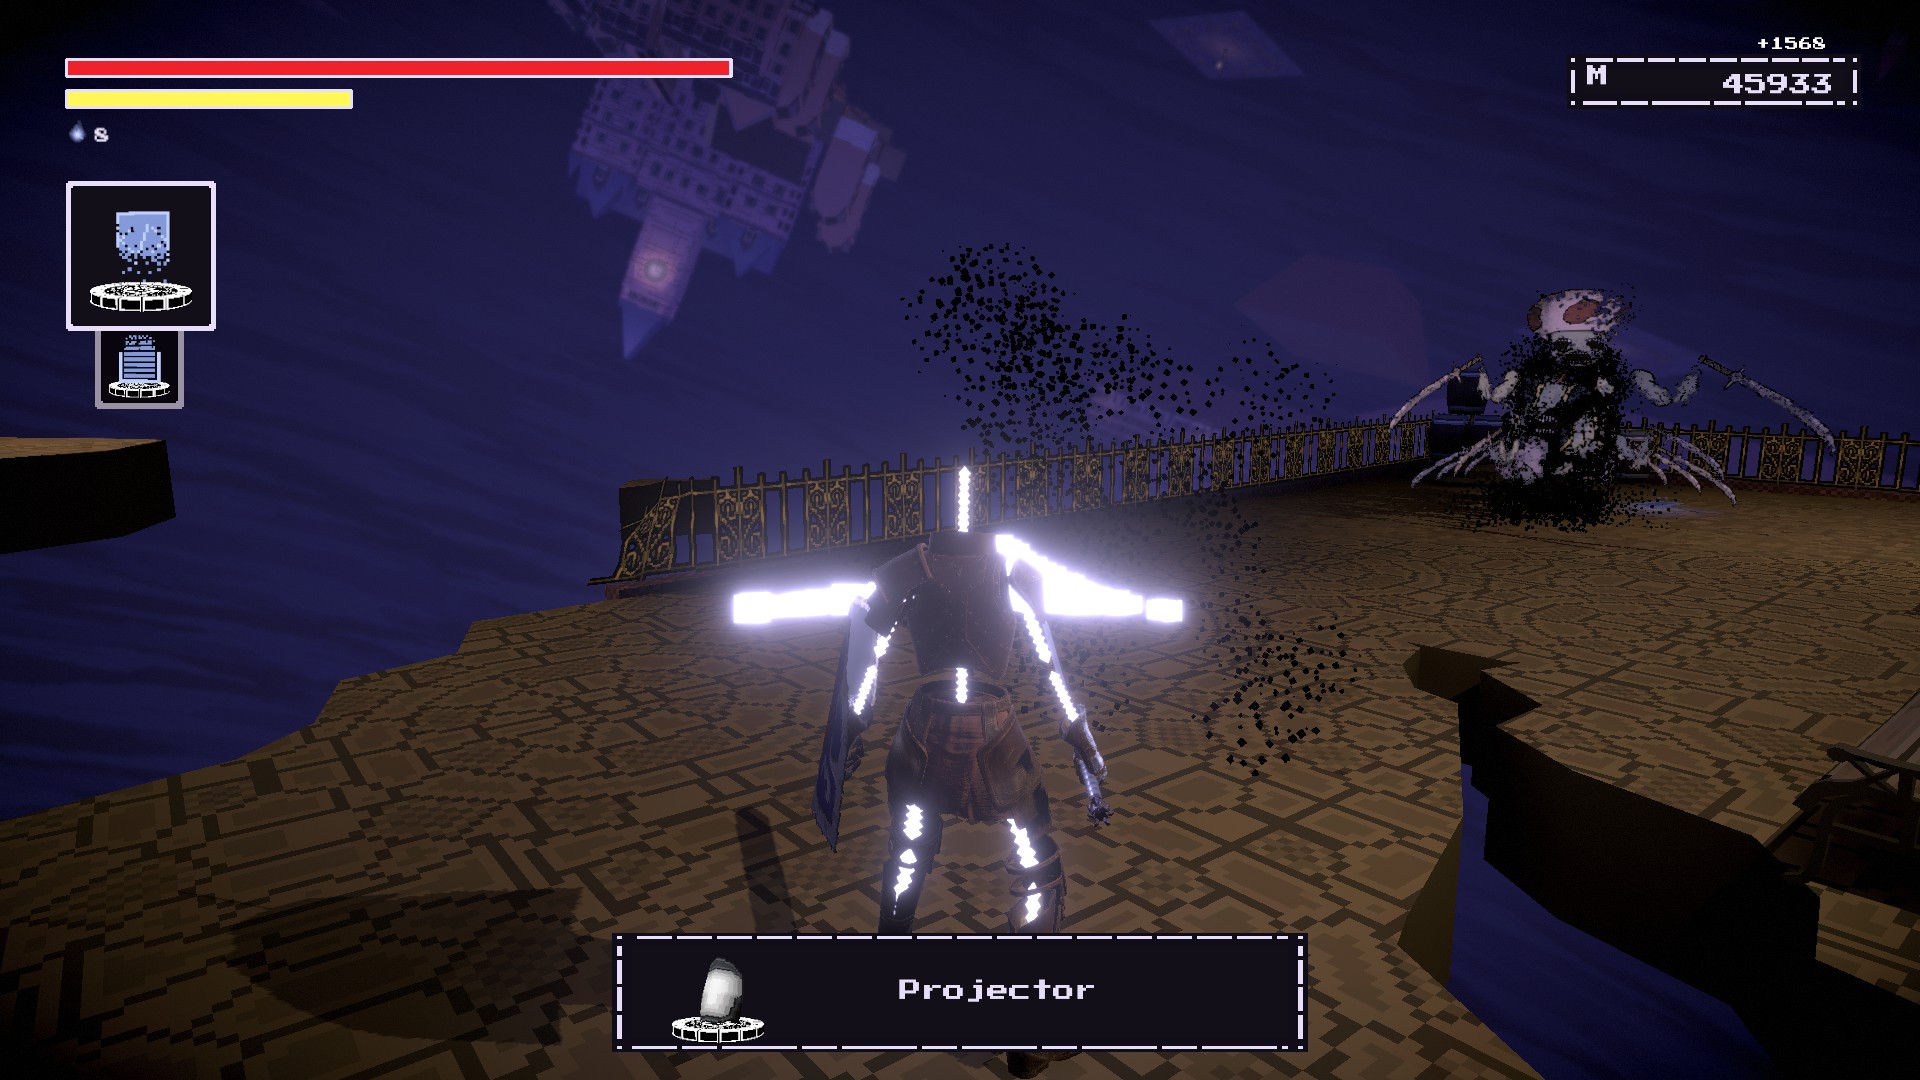
돌아온다
The Depths, specifically where
the elevator after defeating the The Grinder is unlocked. You need to have Flat Traversalto reach this spot.
Remember the shield at this place brimming with fireflies.
Forgottenspace Armor
THE DEPTHS #3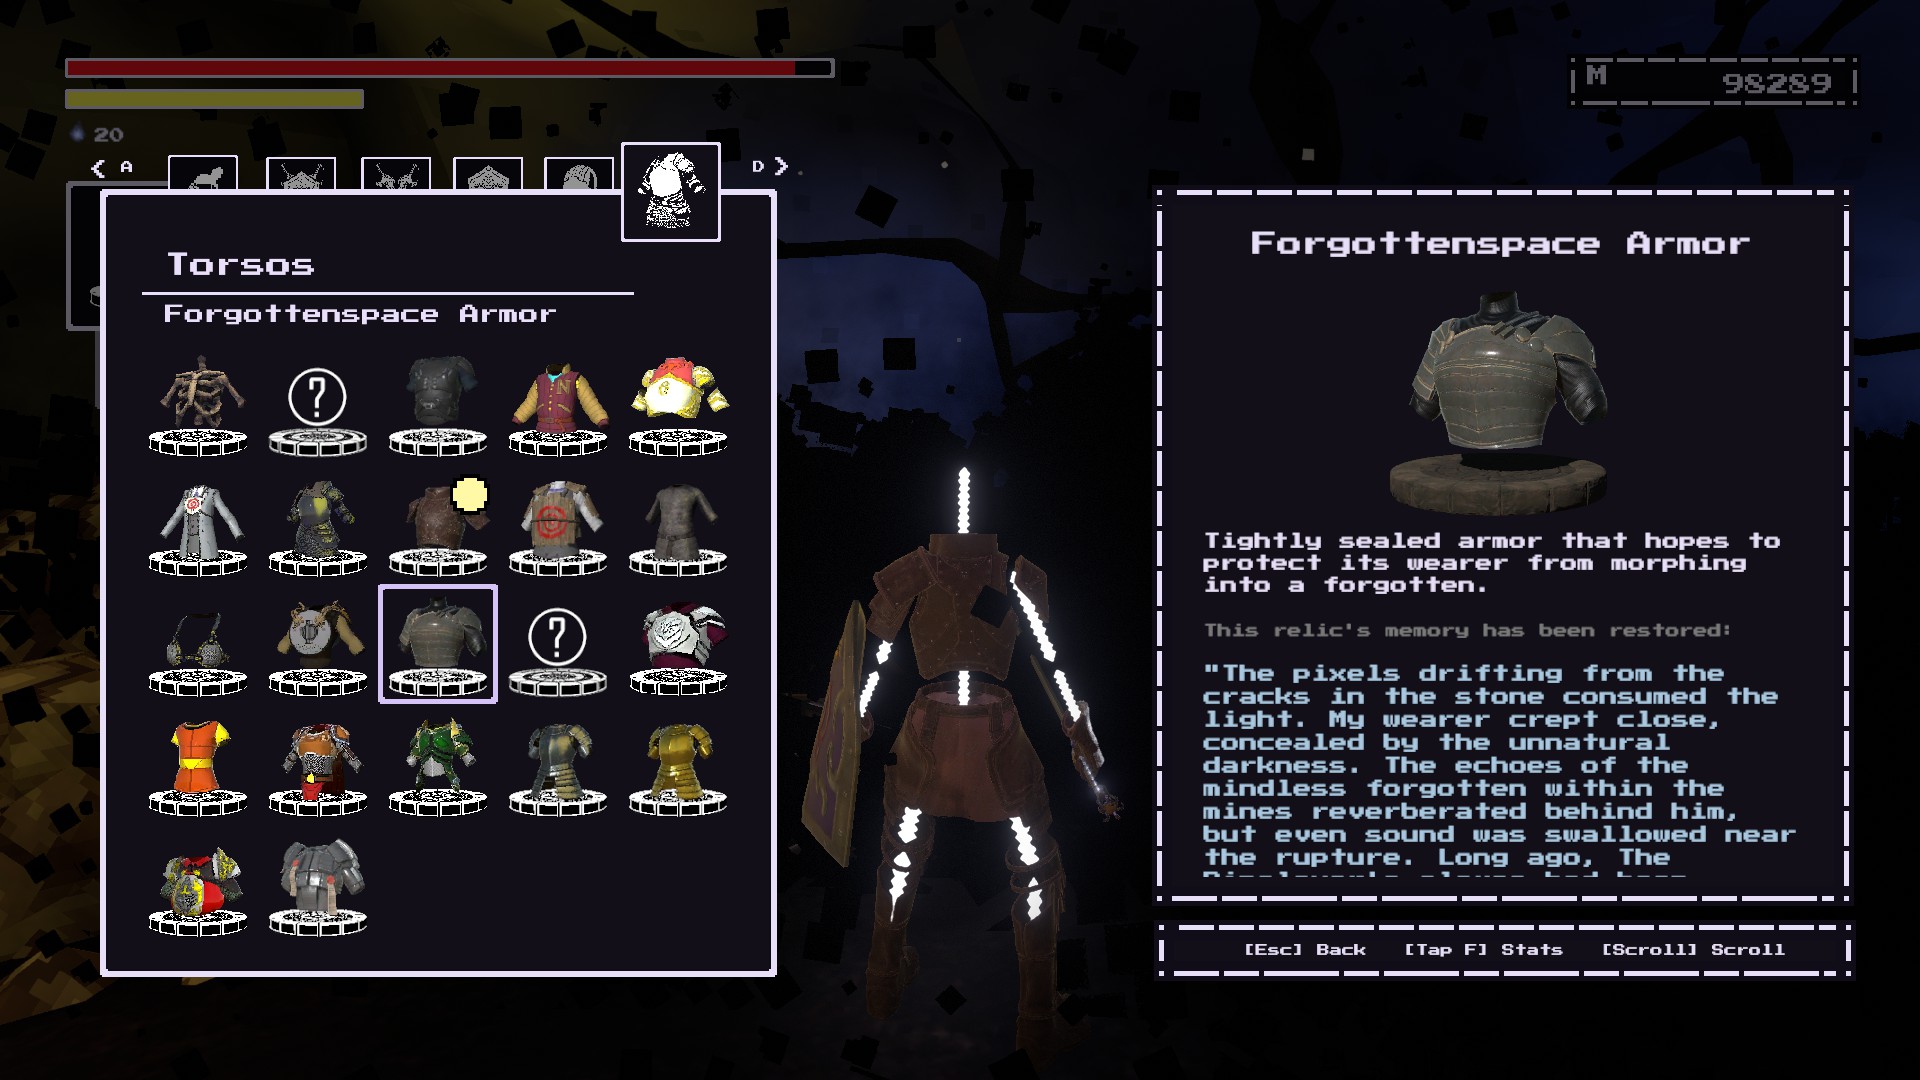
~에
Warlock’s Wilds, you need to enter the
Village areawith all the Wild Ones.
Climb the ladder and traverse through the upper platforms.
The armor set should be near the end.
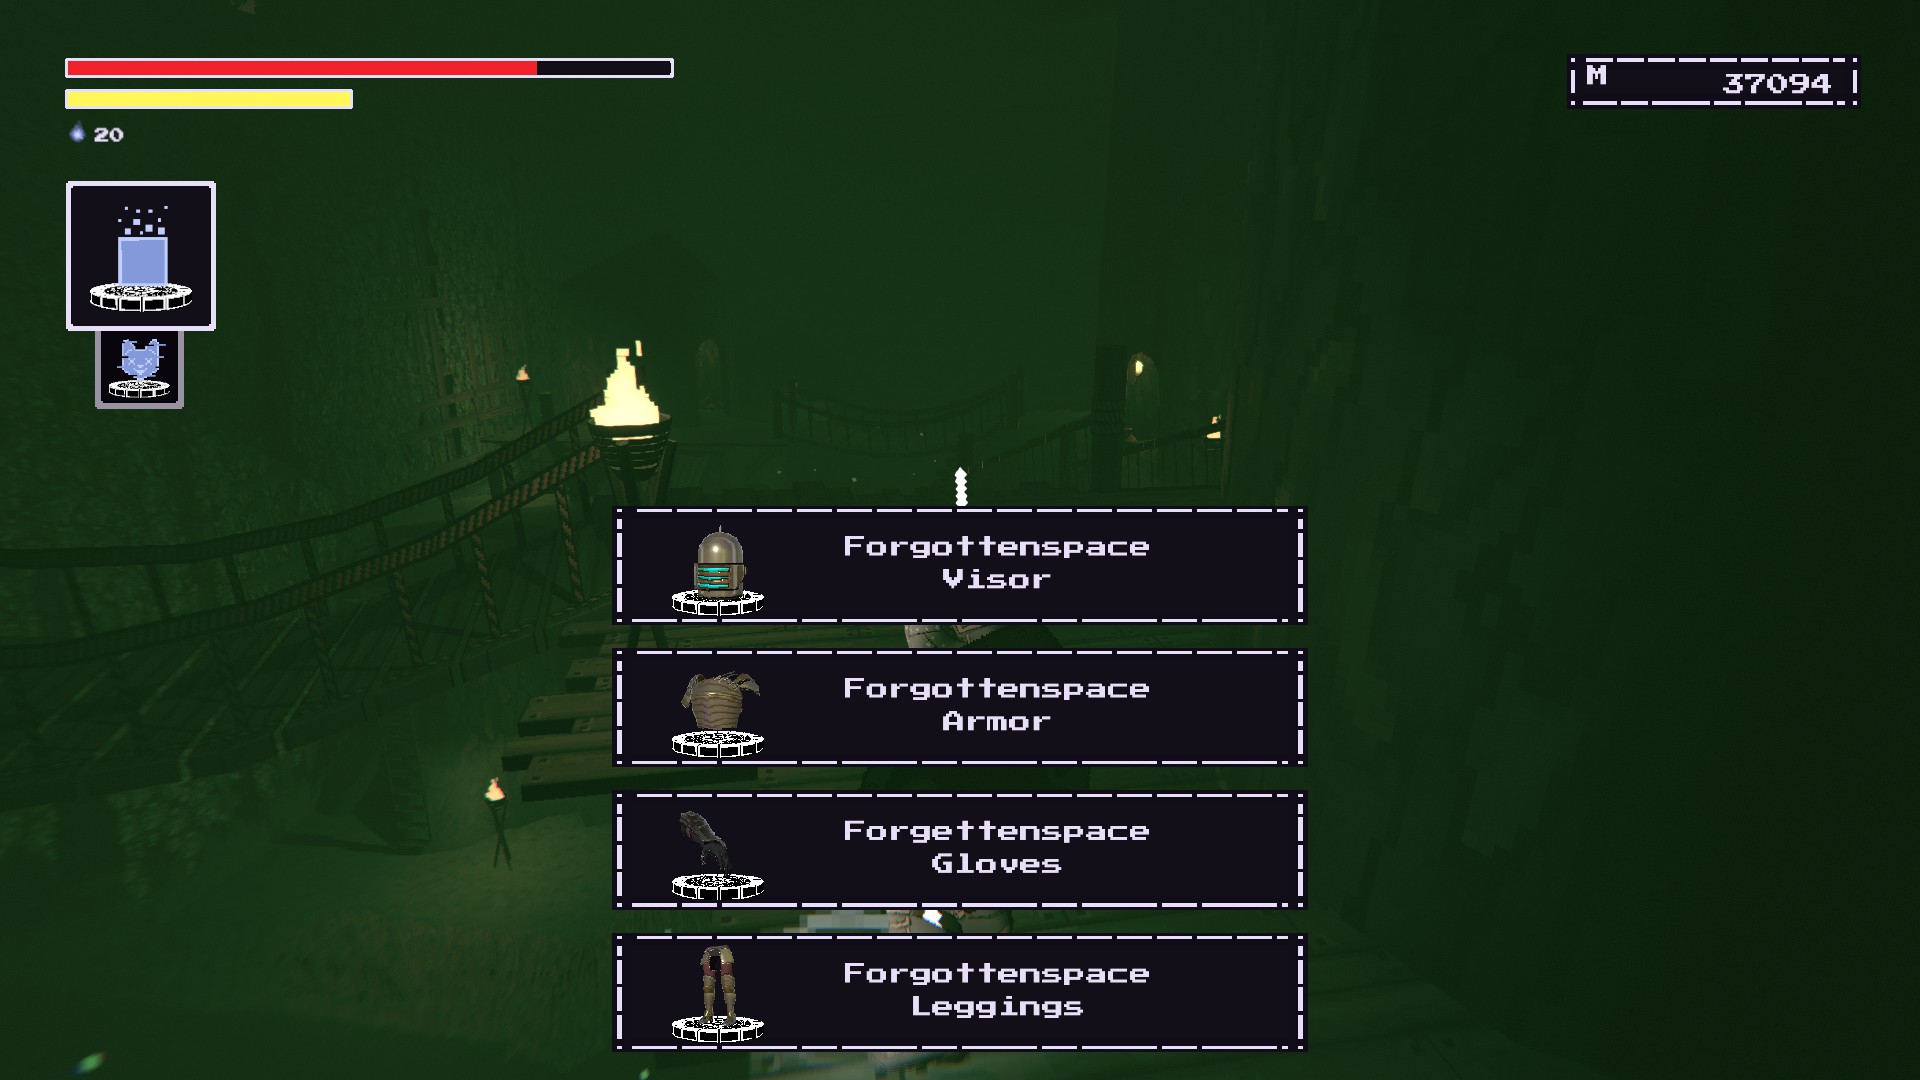
Return back to
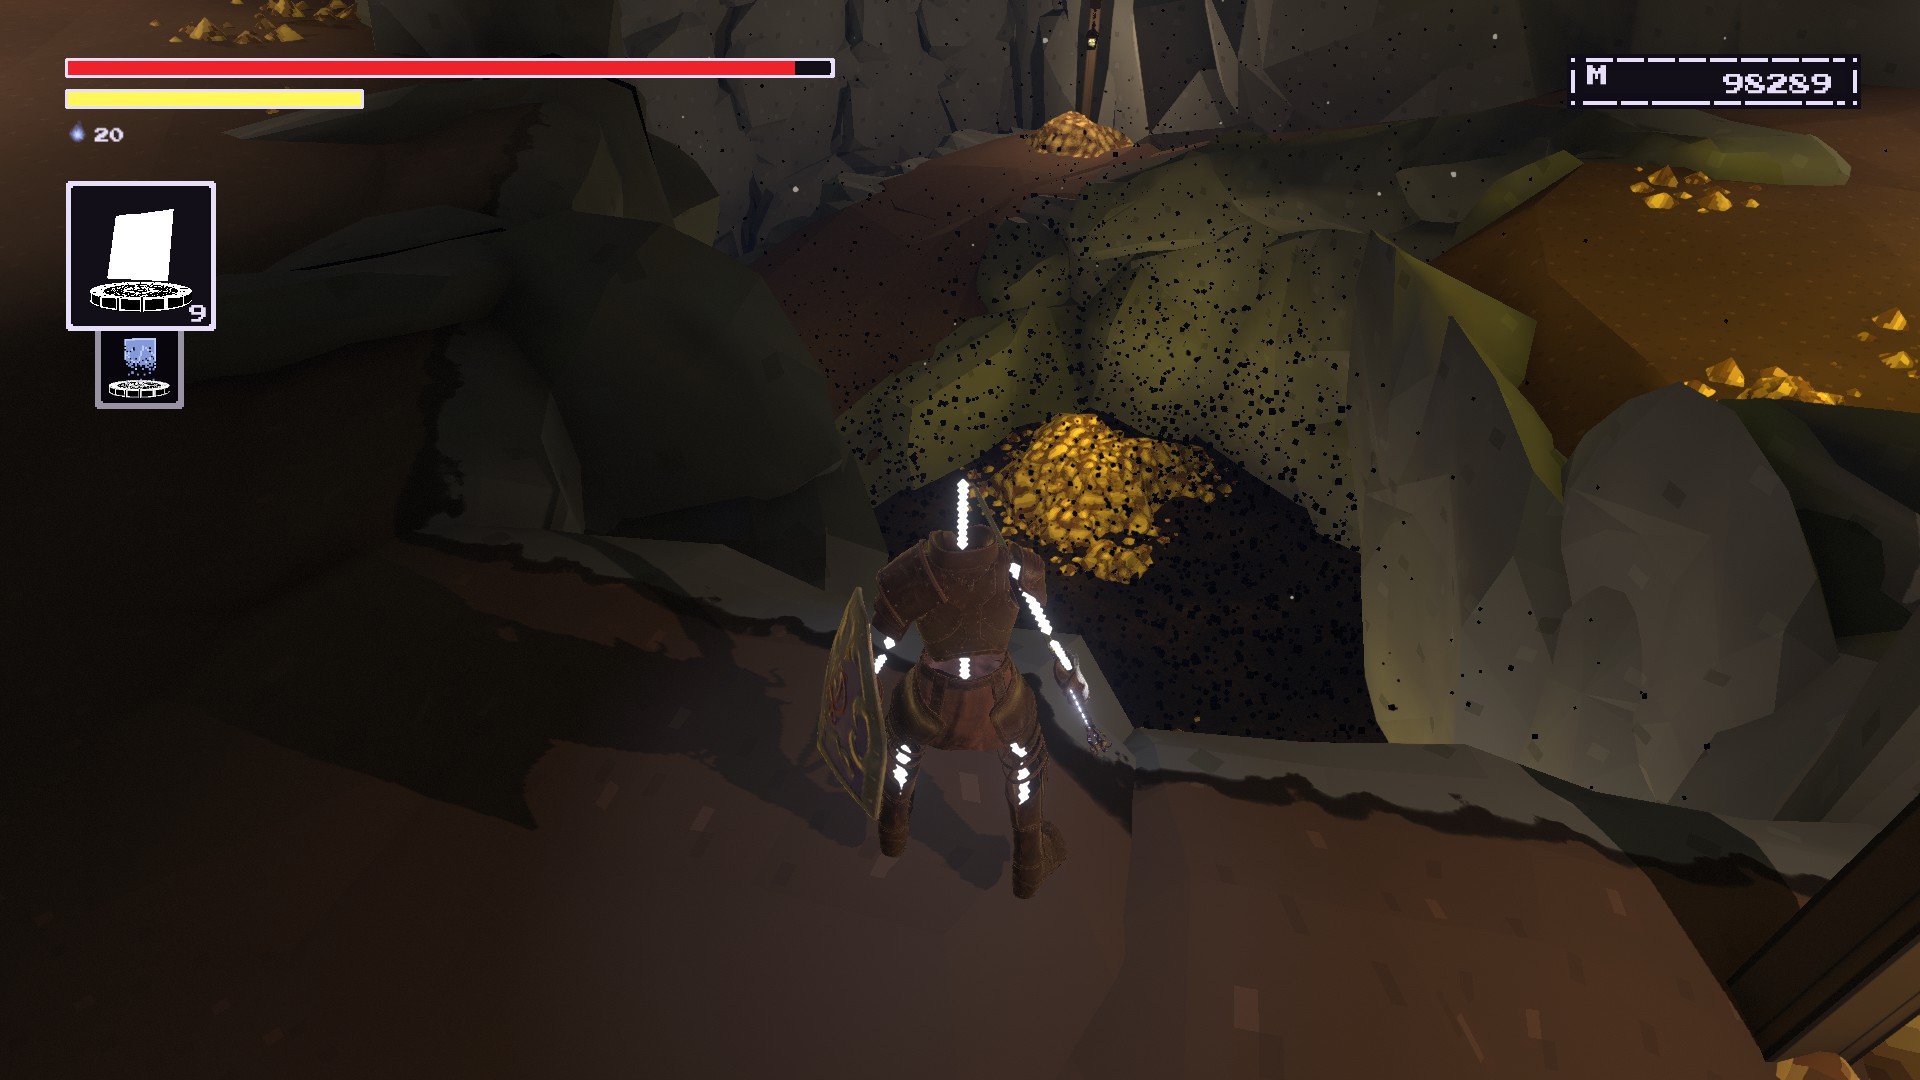
The Depths, go through the area until you’re around here.
You’d want to go through the
left path.
(Path should be left of the slope you’ll go up for the Primal Armor set).

This is what you should be seeing:
a gold mine with void spewing everywhere.
Go down and remember the armor
right at where the void is spewing from.
Lute Hero’s Loot
Festivity Row #1
에서
Keep of the Stolen Crown, you’ll need to be in
the room with the movable staircases.
The weapon will be
near the edge of the platformthat has
a Haunt Armor Knight with a Shield.
~에
Festivity Row, make sure to
go through the Spire and use the elevator to go up.
Continue forward until you are
at the section with knive-throwing nobles and a banana tree.
You’ll want to
head towards the Golden Guardthat’s protecting the upstage.
Enter the door and
you should be in the rafters.
Go to where that 4T weight isand you should be able to restore the lute.
Gnom’s Dancing Pole
FESTIVITY ROW #2
You get it after
beating Gnom the Consumer.
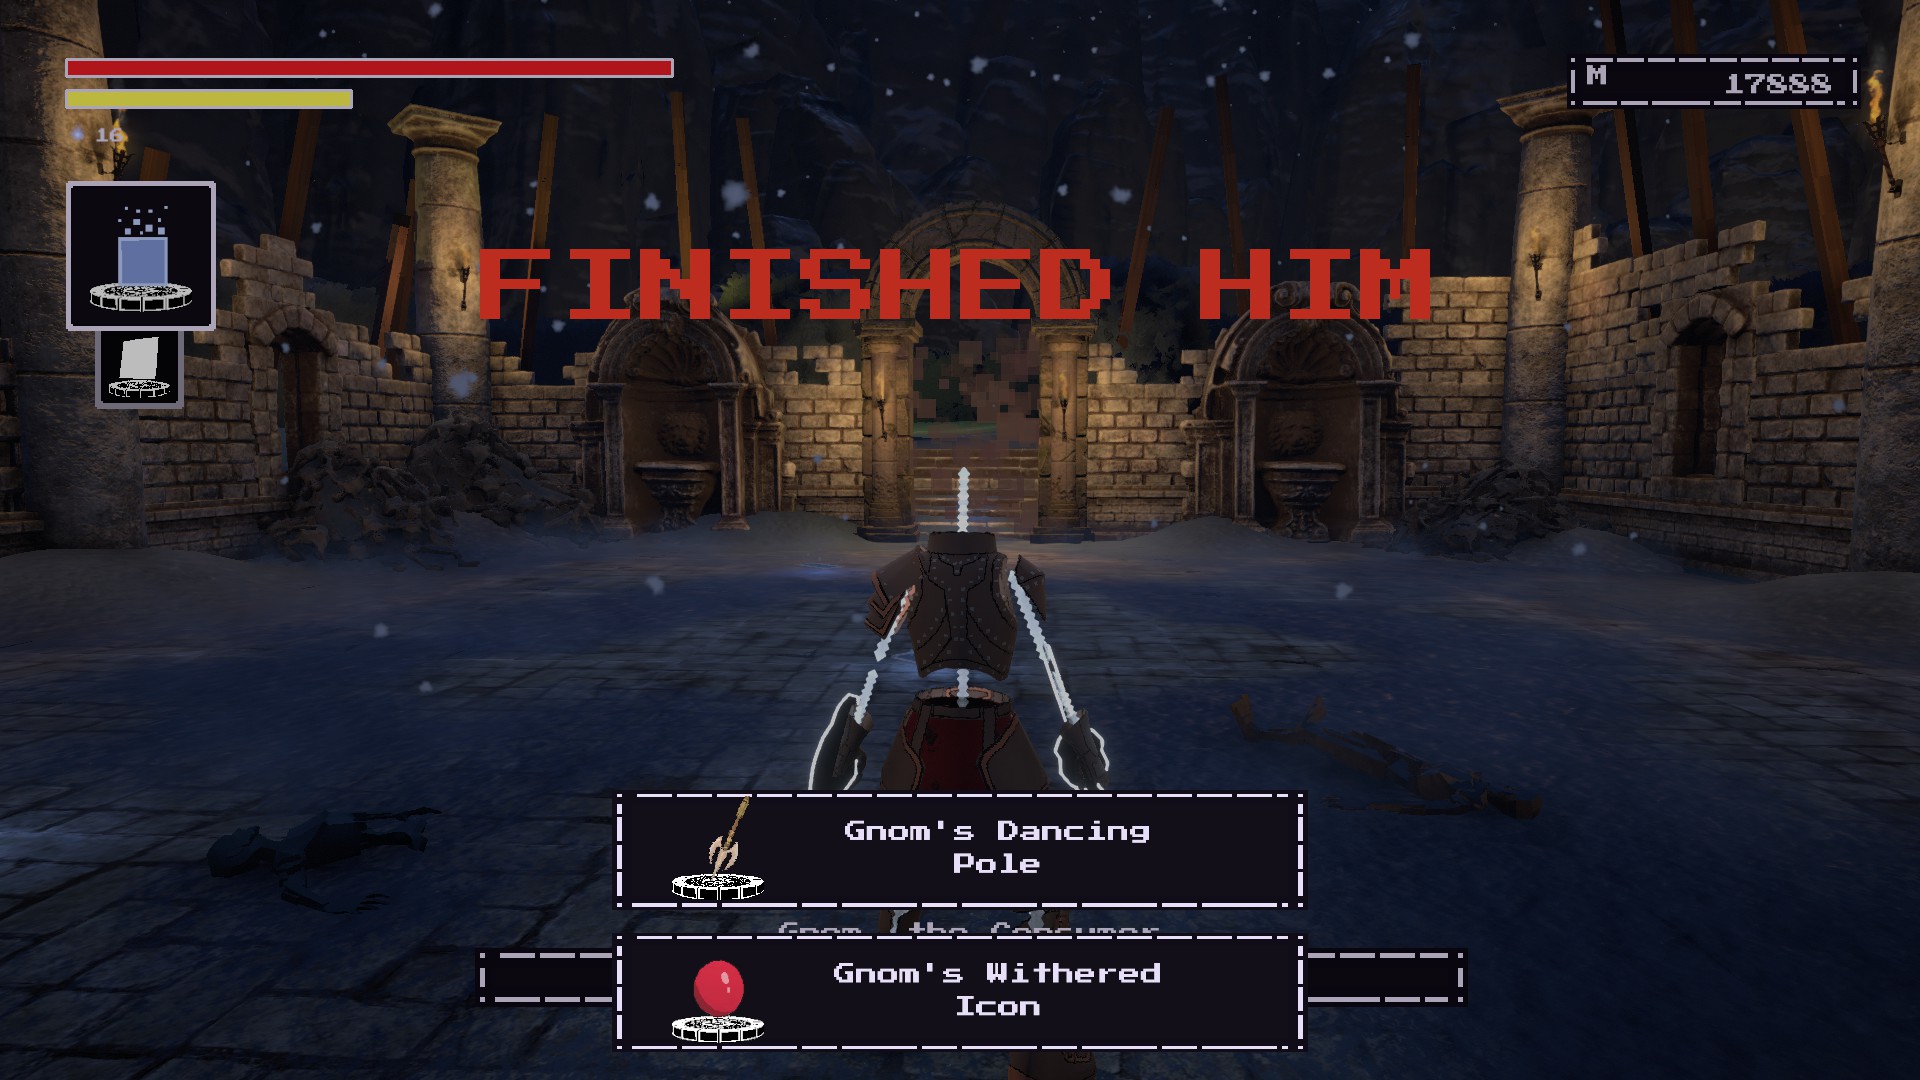
Return back to the
Theater in Fesitivity Row.
The stage with the spotlightis where you can restore the pole.

Disgraced Defence
FESTIVITY ROW #3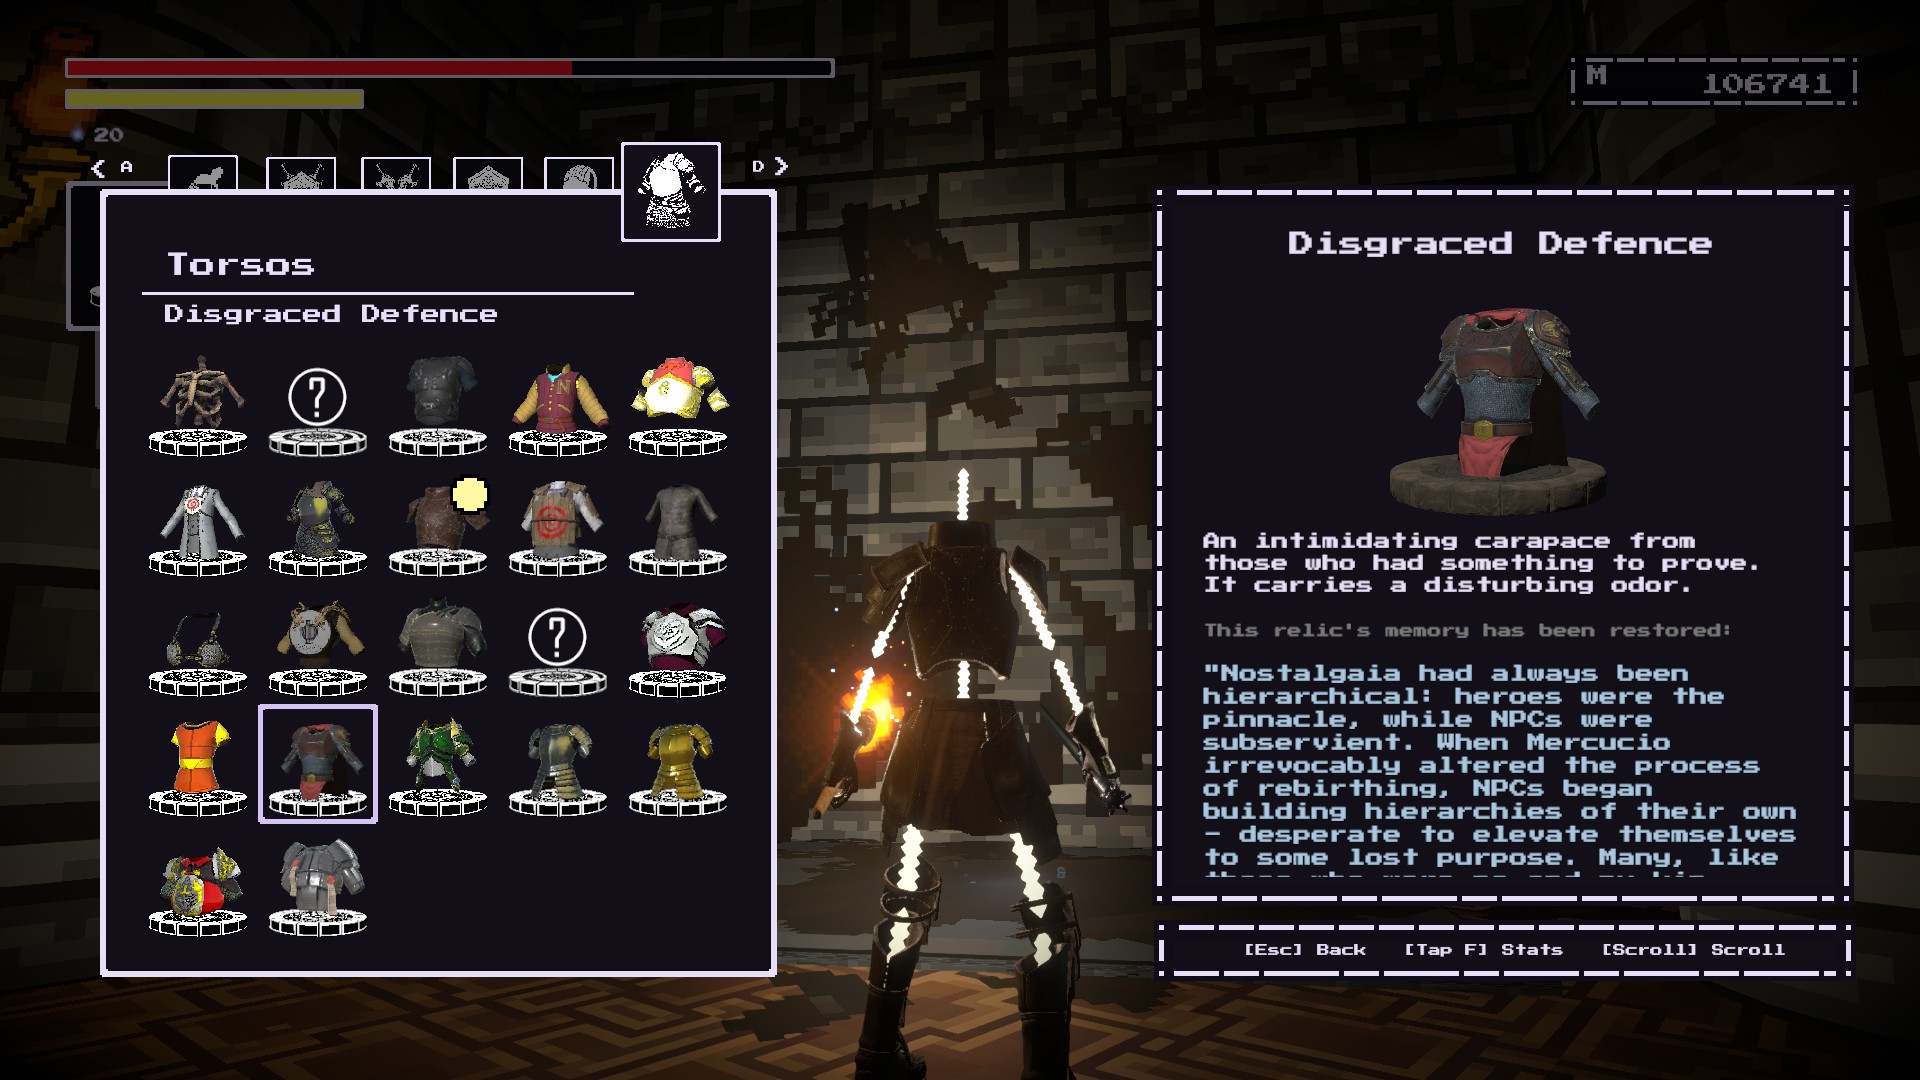
Farm the Disgraced Soldiers at the Quest Reward Vault or Oreshaft Village
Return back to the
Fesitivity Rowbeacon.
Go to the Spire area and proceed downward all the way to the base.You should notice this
shower with a lot of brown on it, remember the armor here.
Golden Guard
FESTIVITY ROW #4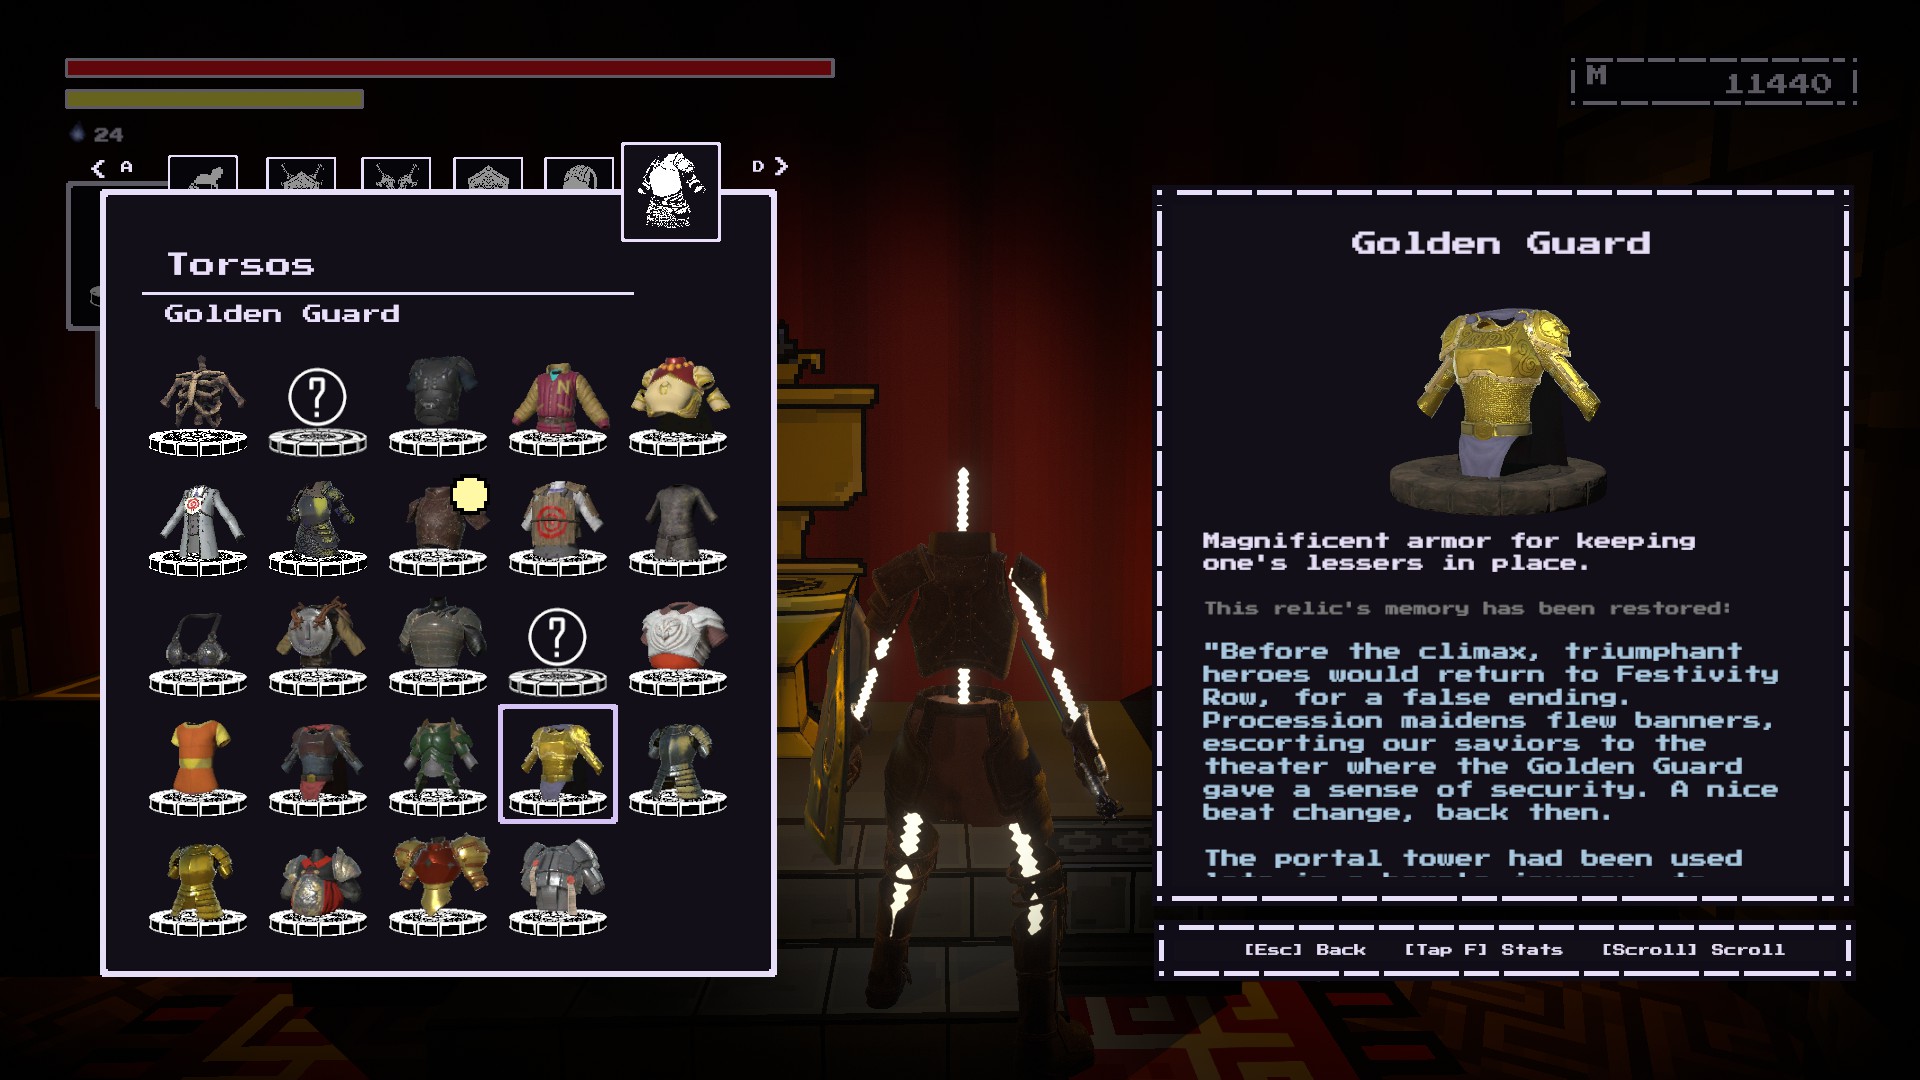
Farm the Golden Guards at Festivity Row.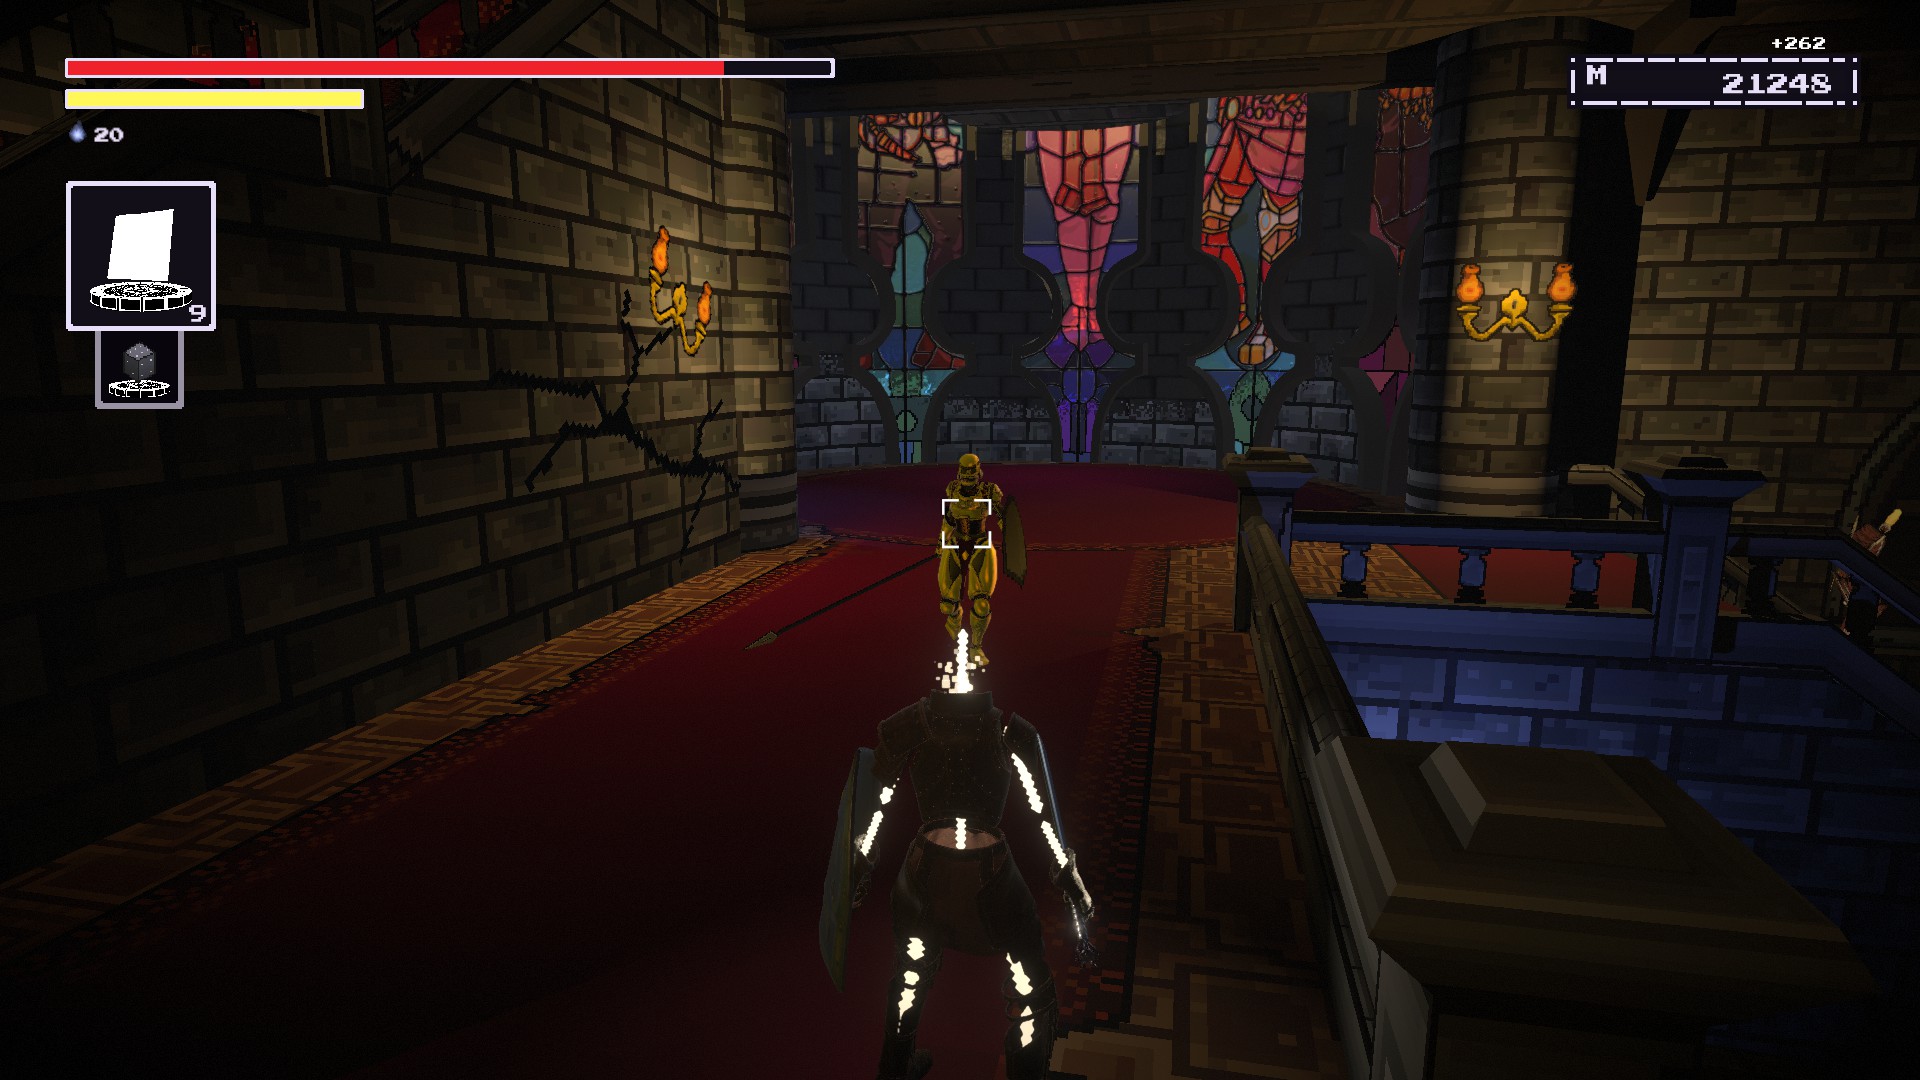
Similar to restoring the Disgraced Defence, you’ll want to go back to
Festivity Row.
Go through the Spireuntil you’re at the bottom floor.
Take the elevator to the top leveland feast your eyes on the
golden throne.
Remember the armor here.

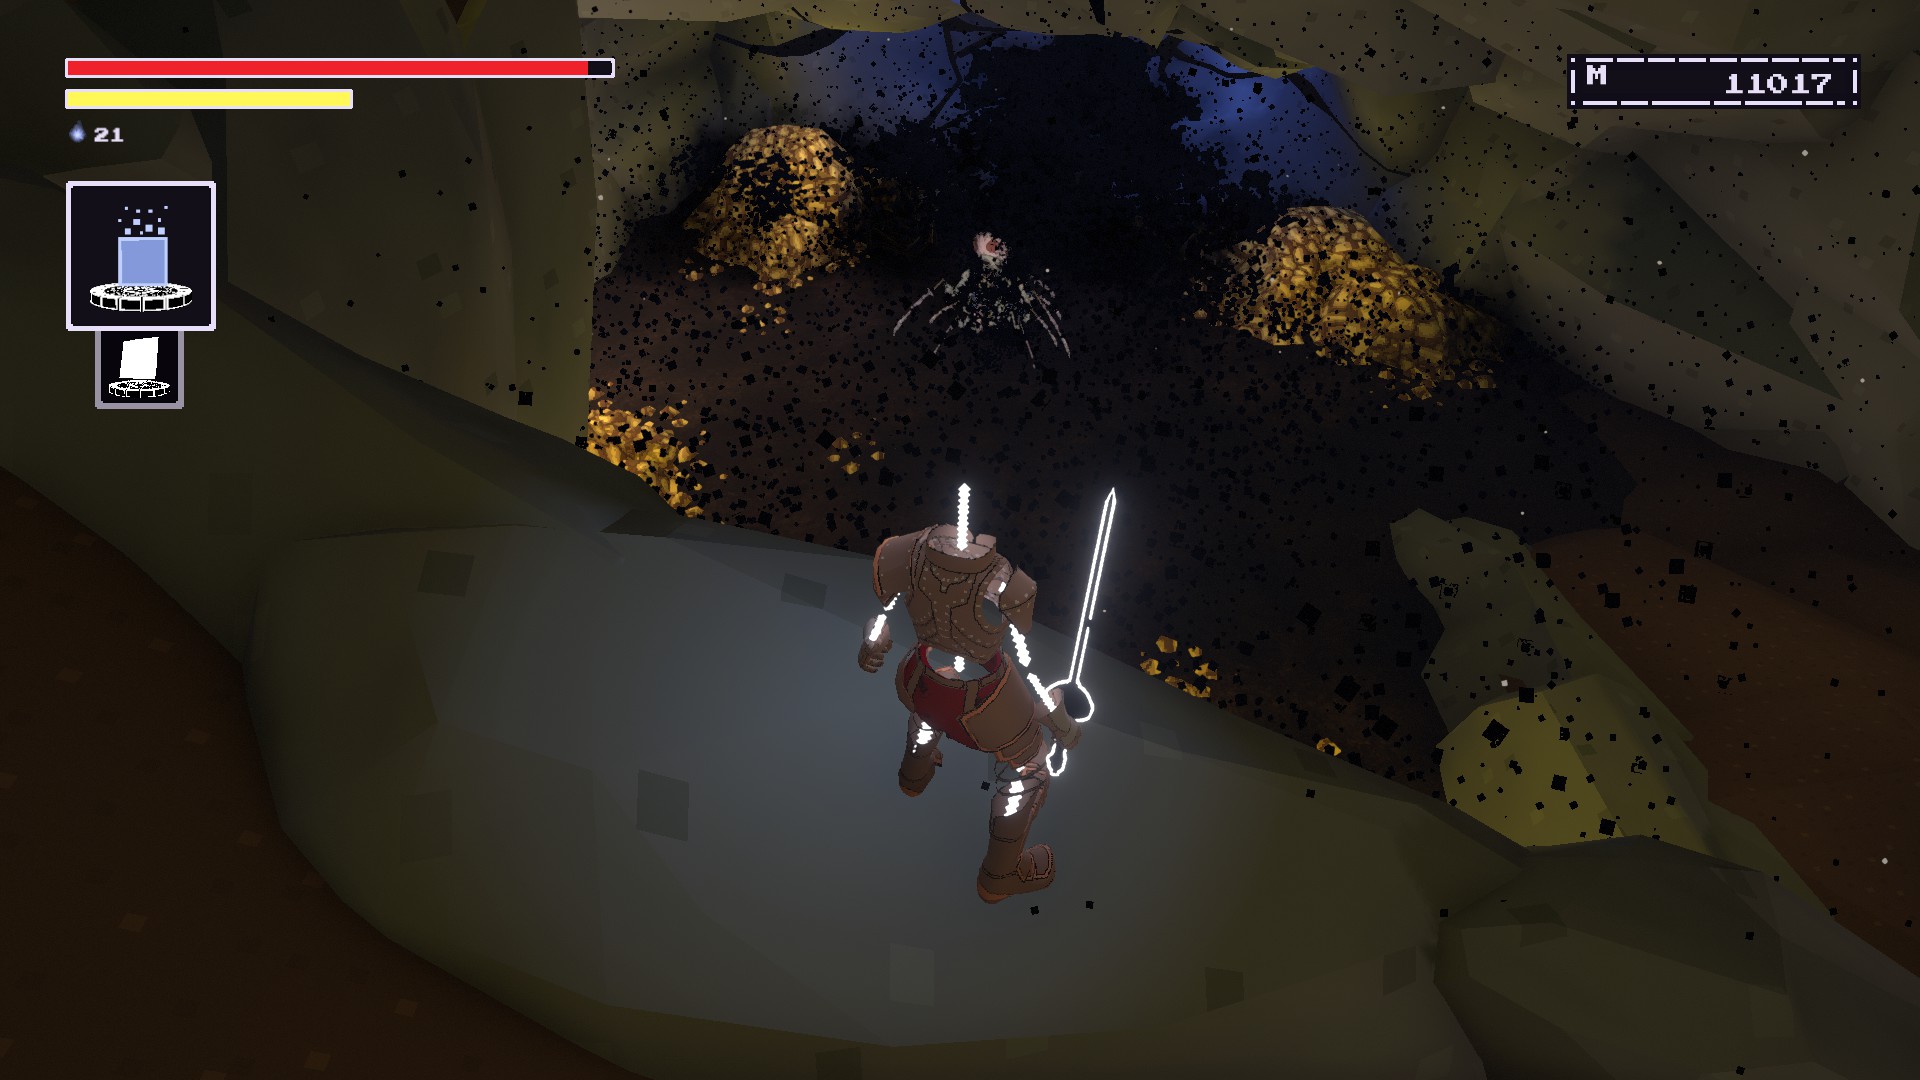
Arachnid’s Stinger
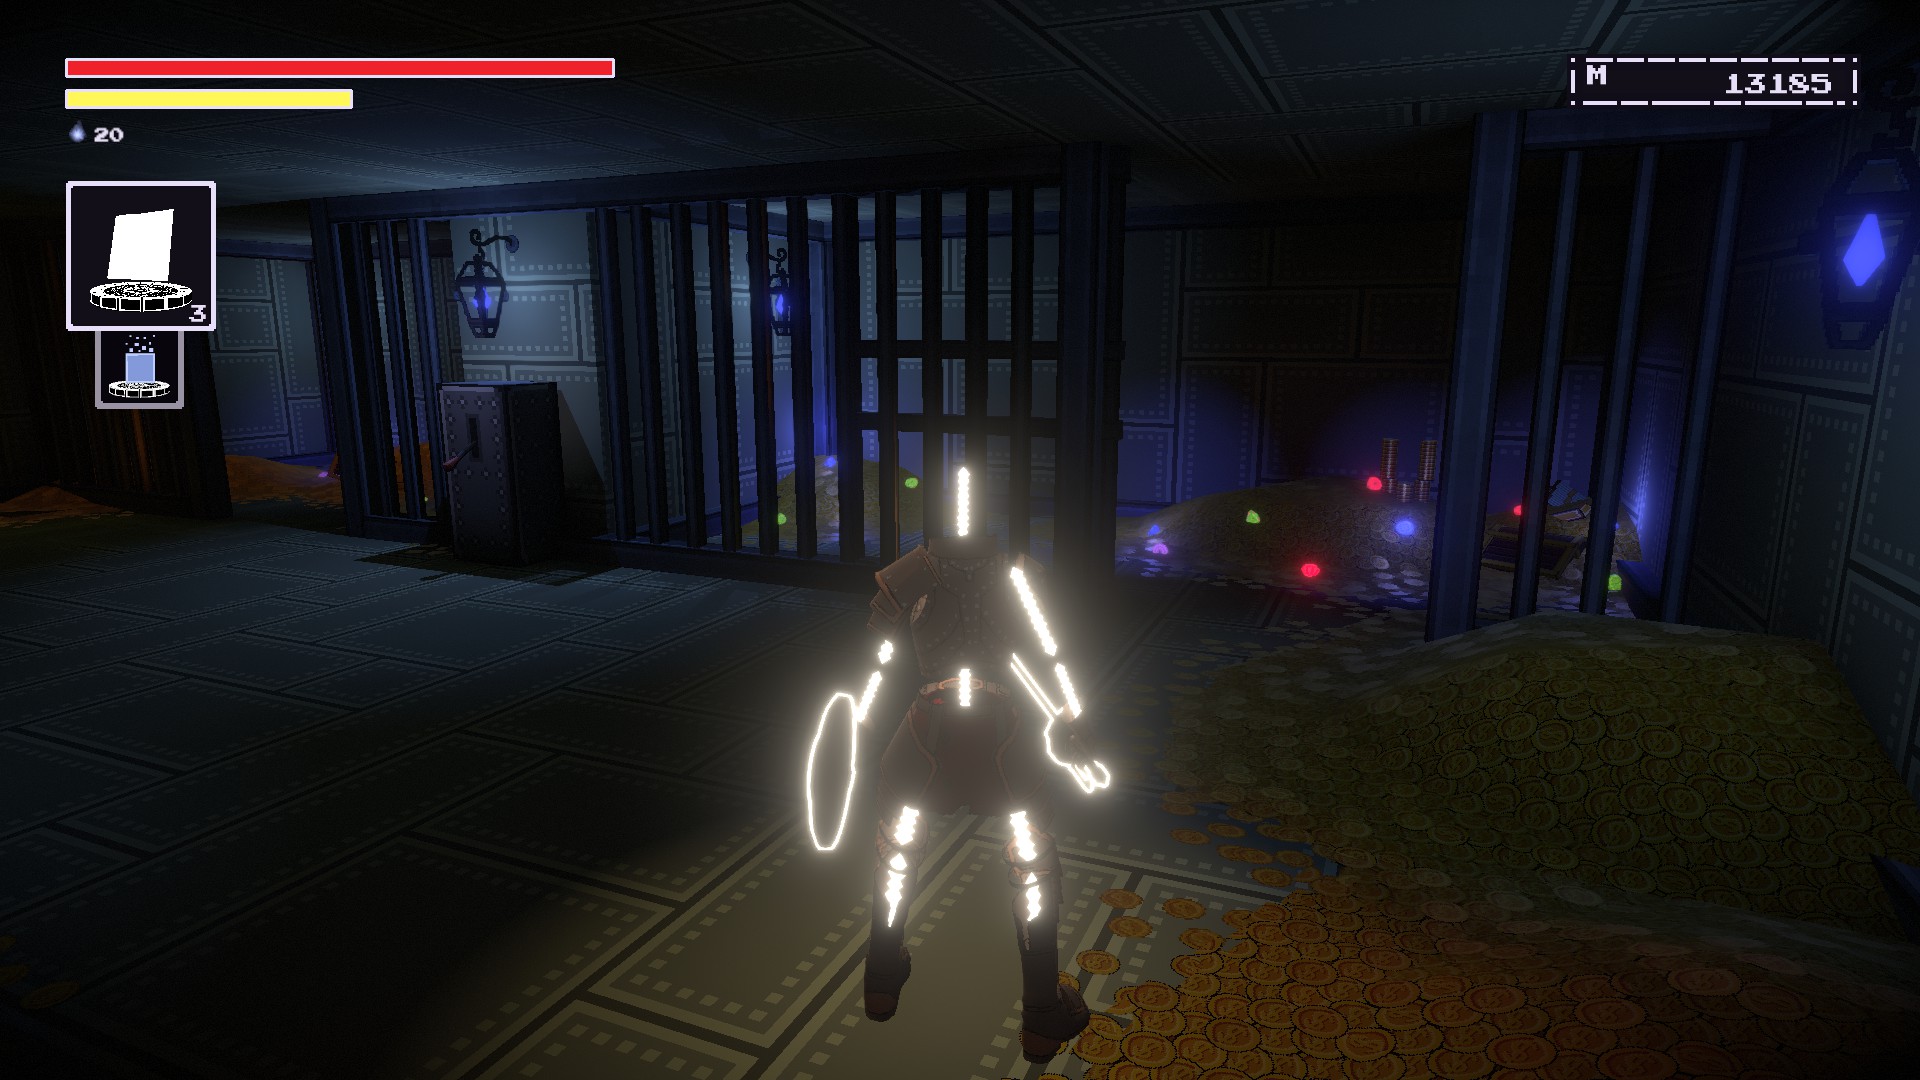
QUEST REWARD VAULT #1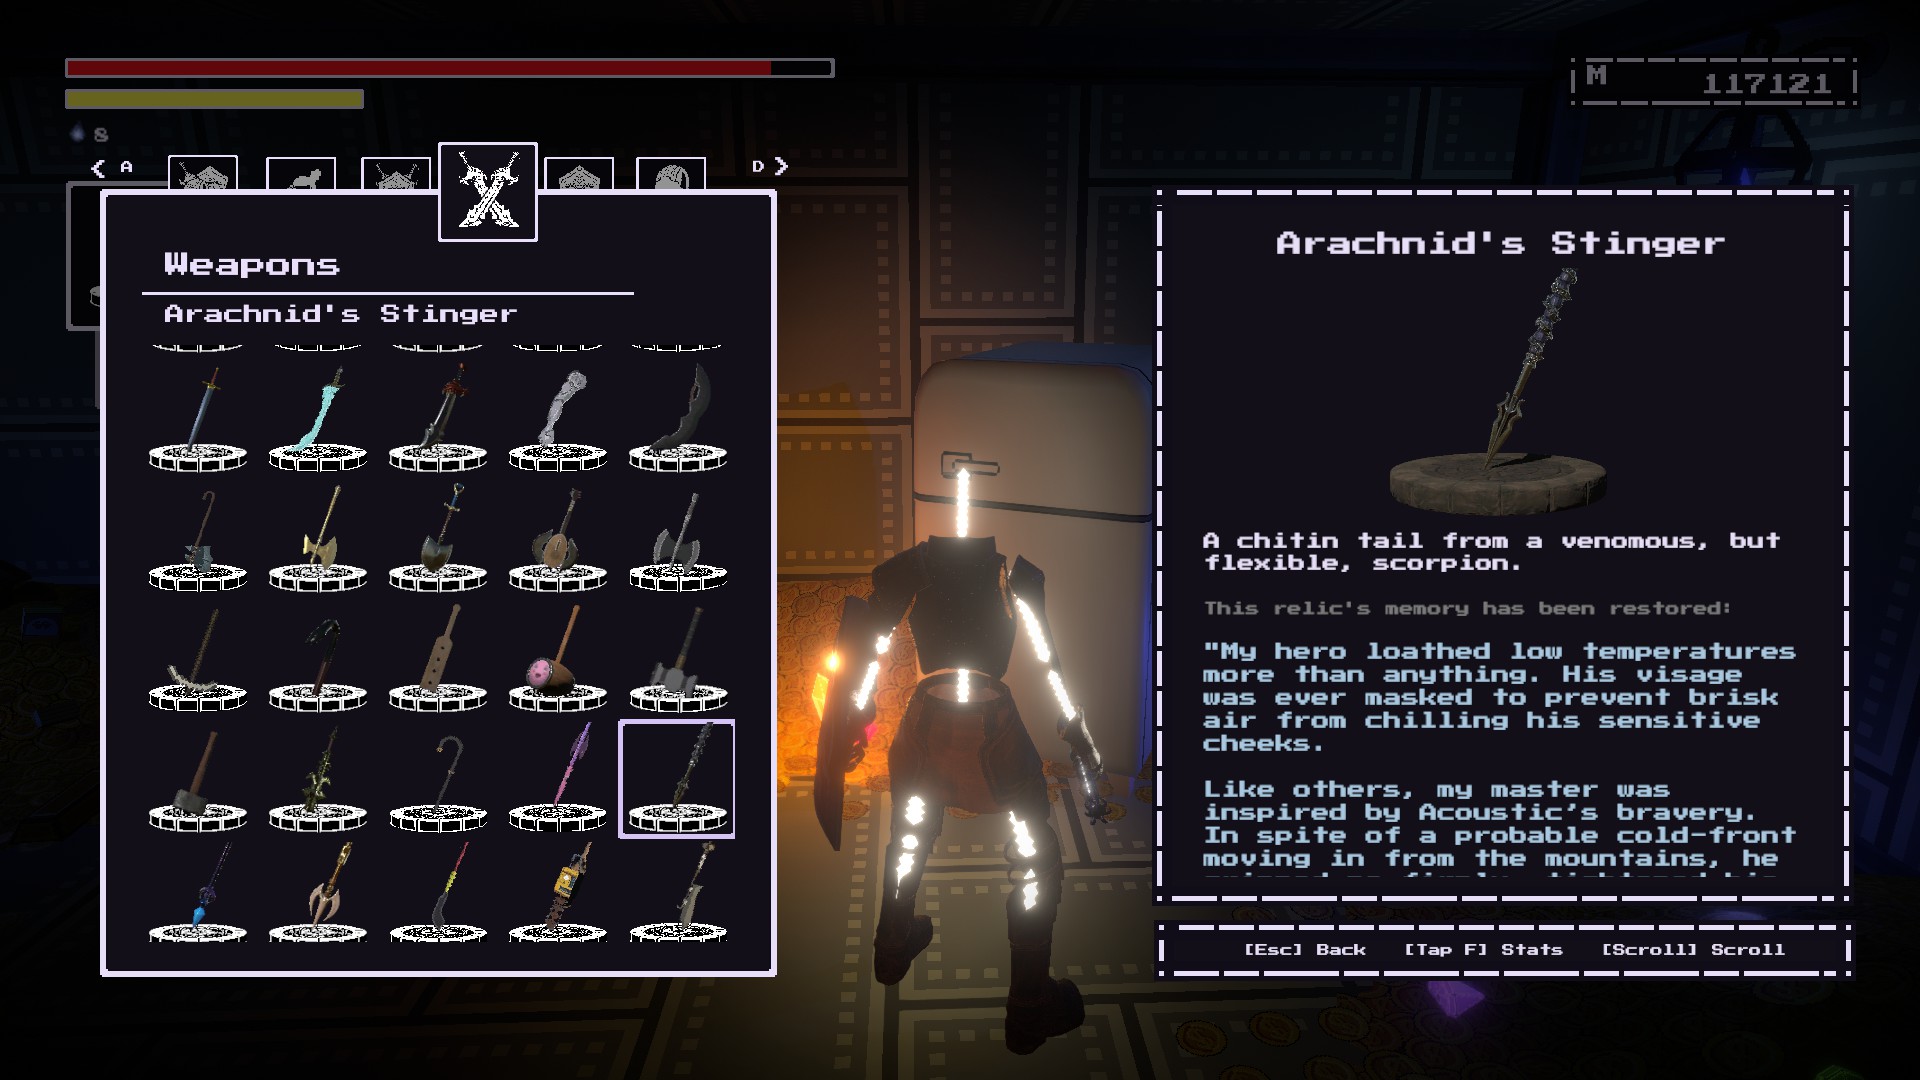
통과하다
The Depths , 그만큼
area is the same one in which you can restore the Forgottenspace Armorso check that section for directions.
There will be a
Degraded Spider enemy that you’ll need to killfor the weapon to drop.

Go through the
Quest Reward Vaultuntil you reach
a prison room with two Guard Knights.This should be the same room in which you can get the Bucko Blade.
Pull the lever and head towards the cell with the fridge.Remember it here.
Master Chef’s Iron Apron
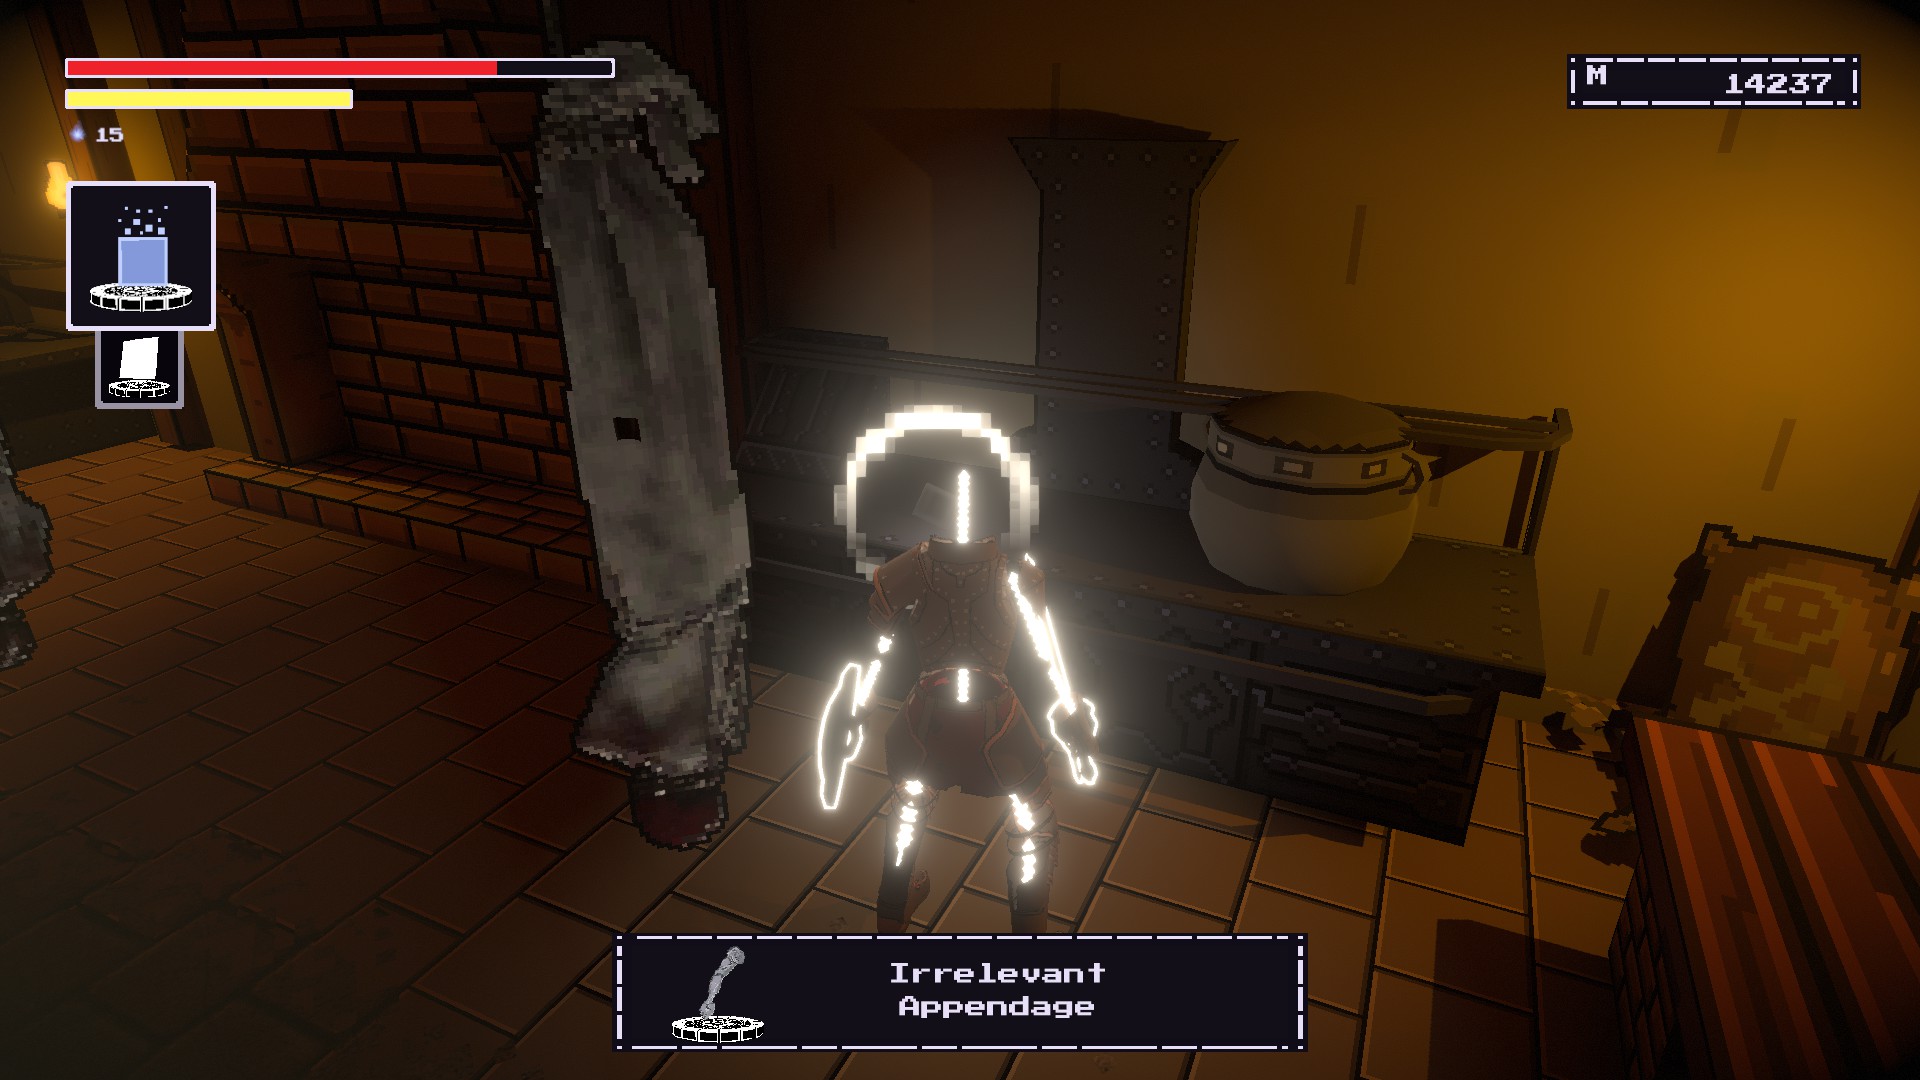
QUEST REWARD VAULT #2
~에
Oreshaft Village, there should be a house with a basement.
There will be a Disgraced Soldier and two pixelated NPCs here.
The item should be
near a pillar.
You’ll need to proceed through the
Quest Reward Vaultuntil you reach the
Kitchen beacon.
Go towards the
stove at the rightthat has the Irrelevant Appendage item.
Remember the armor here.
Shellter
PATH OF THE GOOD MONARCH
Start at
The Depthsbeacon.
Continue until you reach a
room full of goldlike this and
go for path on the right.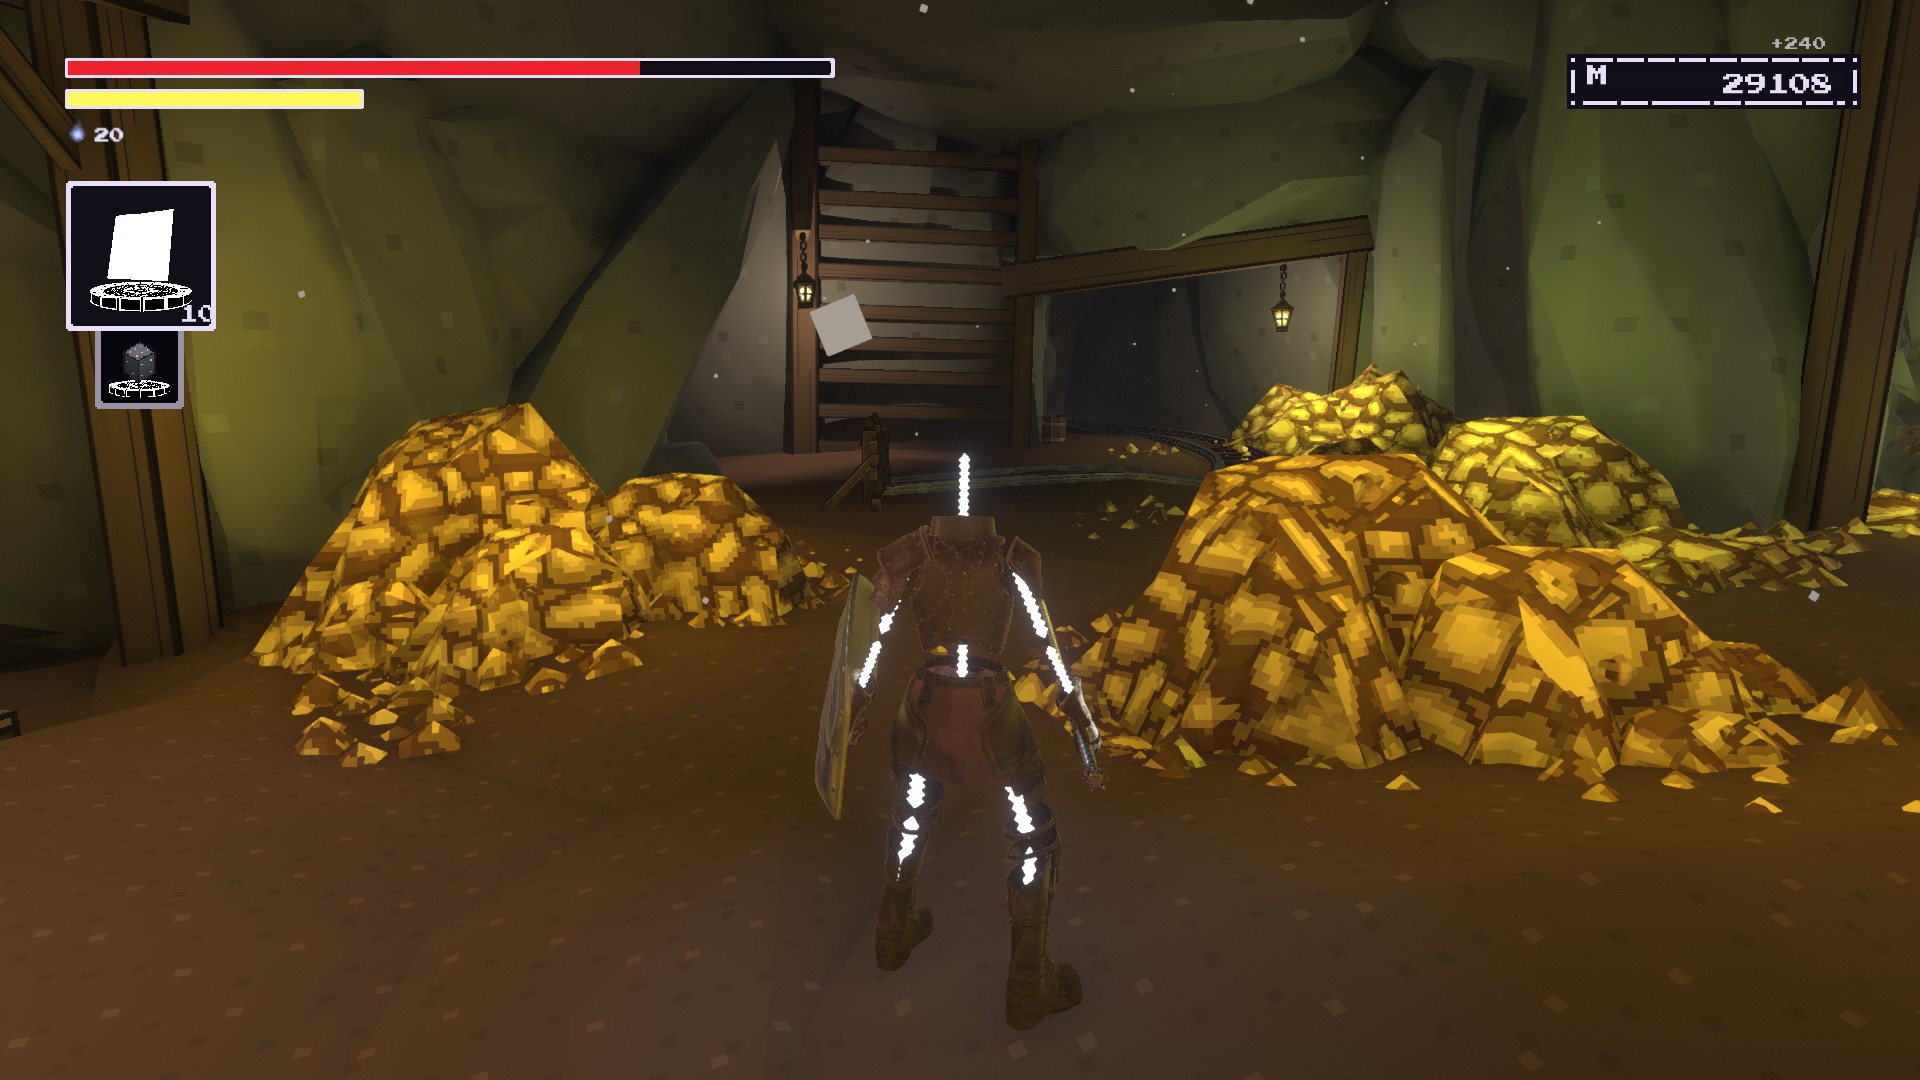
Progress forward until you reach a room full of donkeys and NPCs.
있을 것입니다
a pile of boxes. Smash them and grab the Shellter.
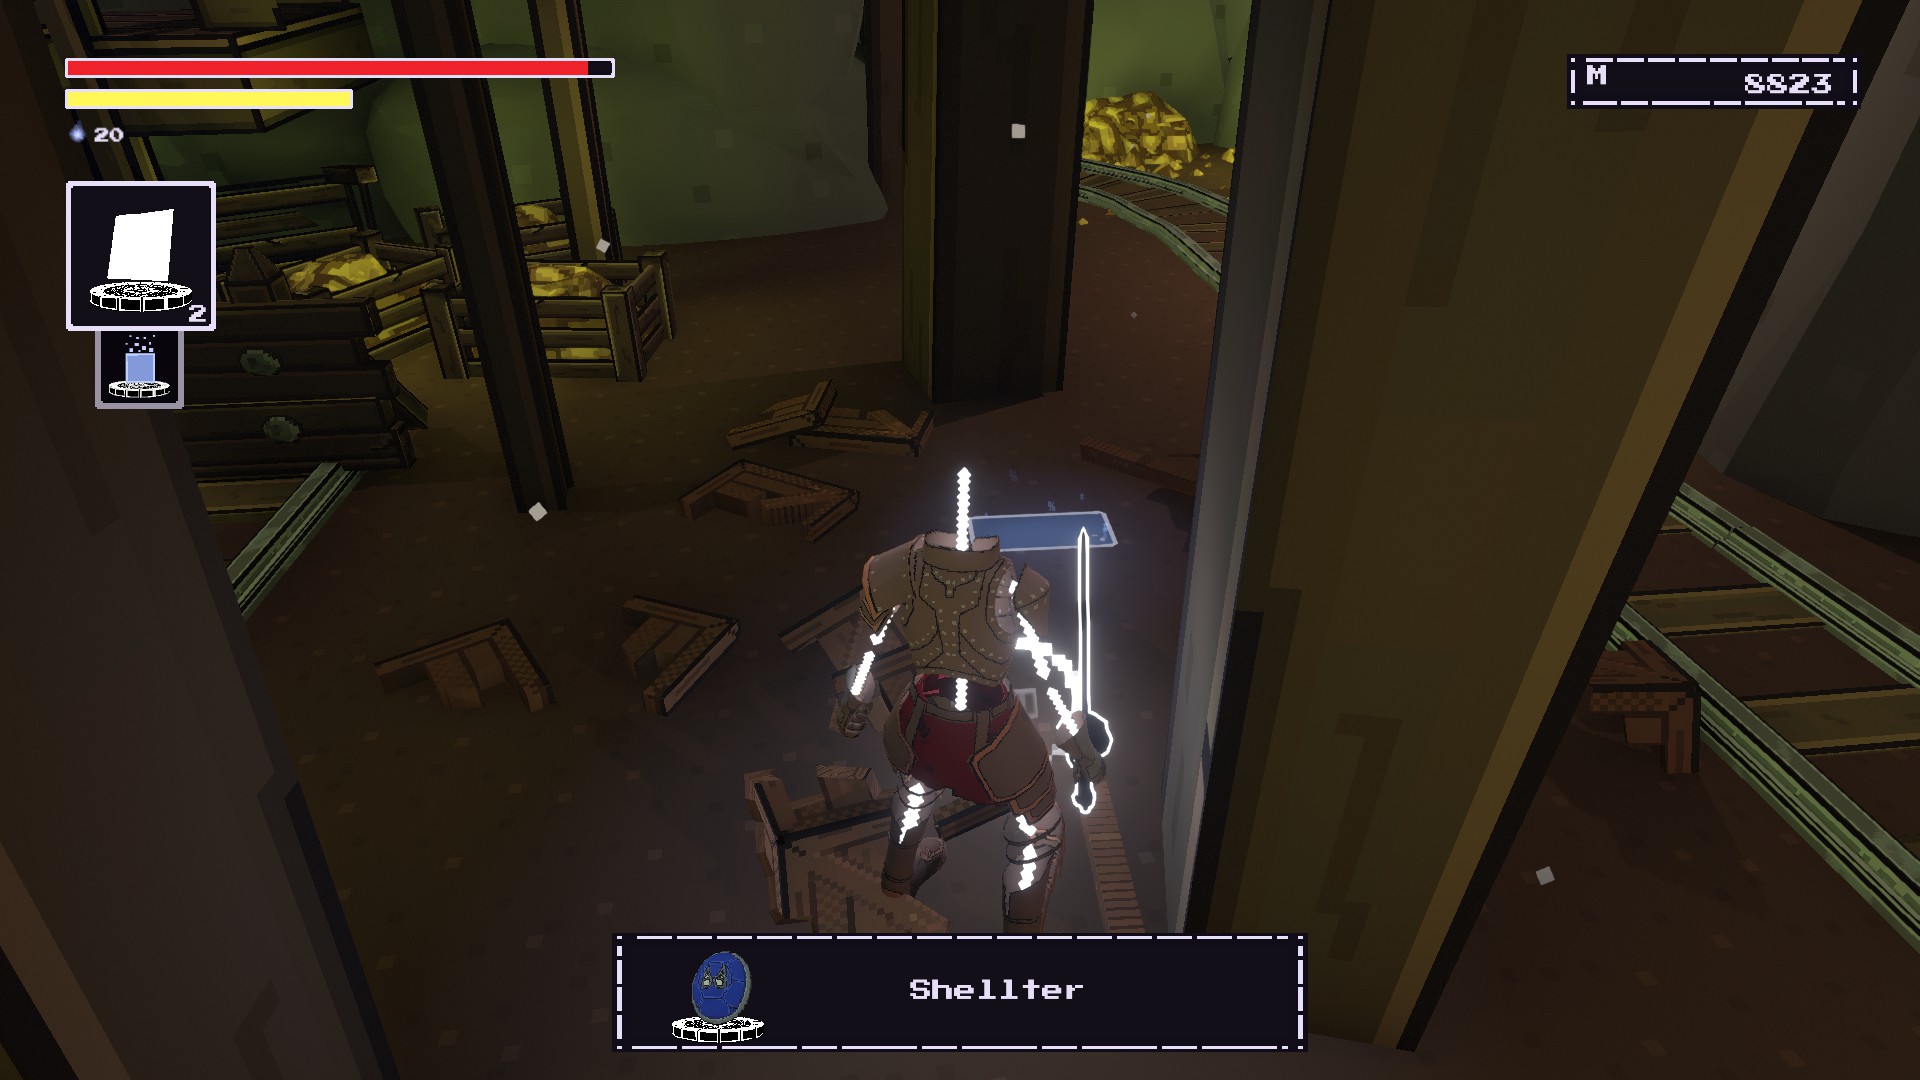
후에
beating Gnom the Consumer, advance forward until the Narrator creates
a rainbow bridge of hope. This is where you need to restore the shield.
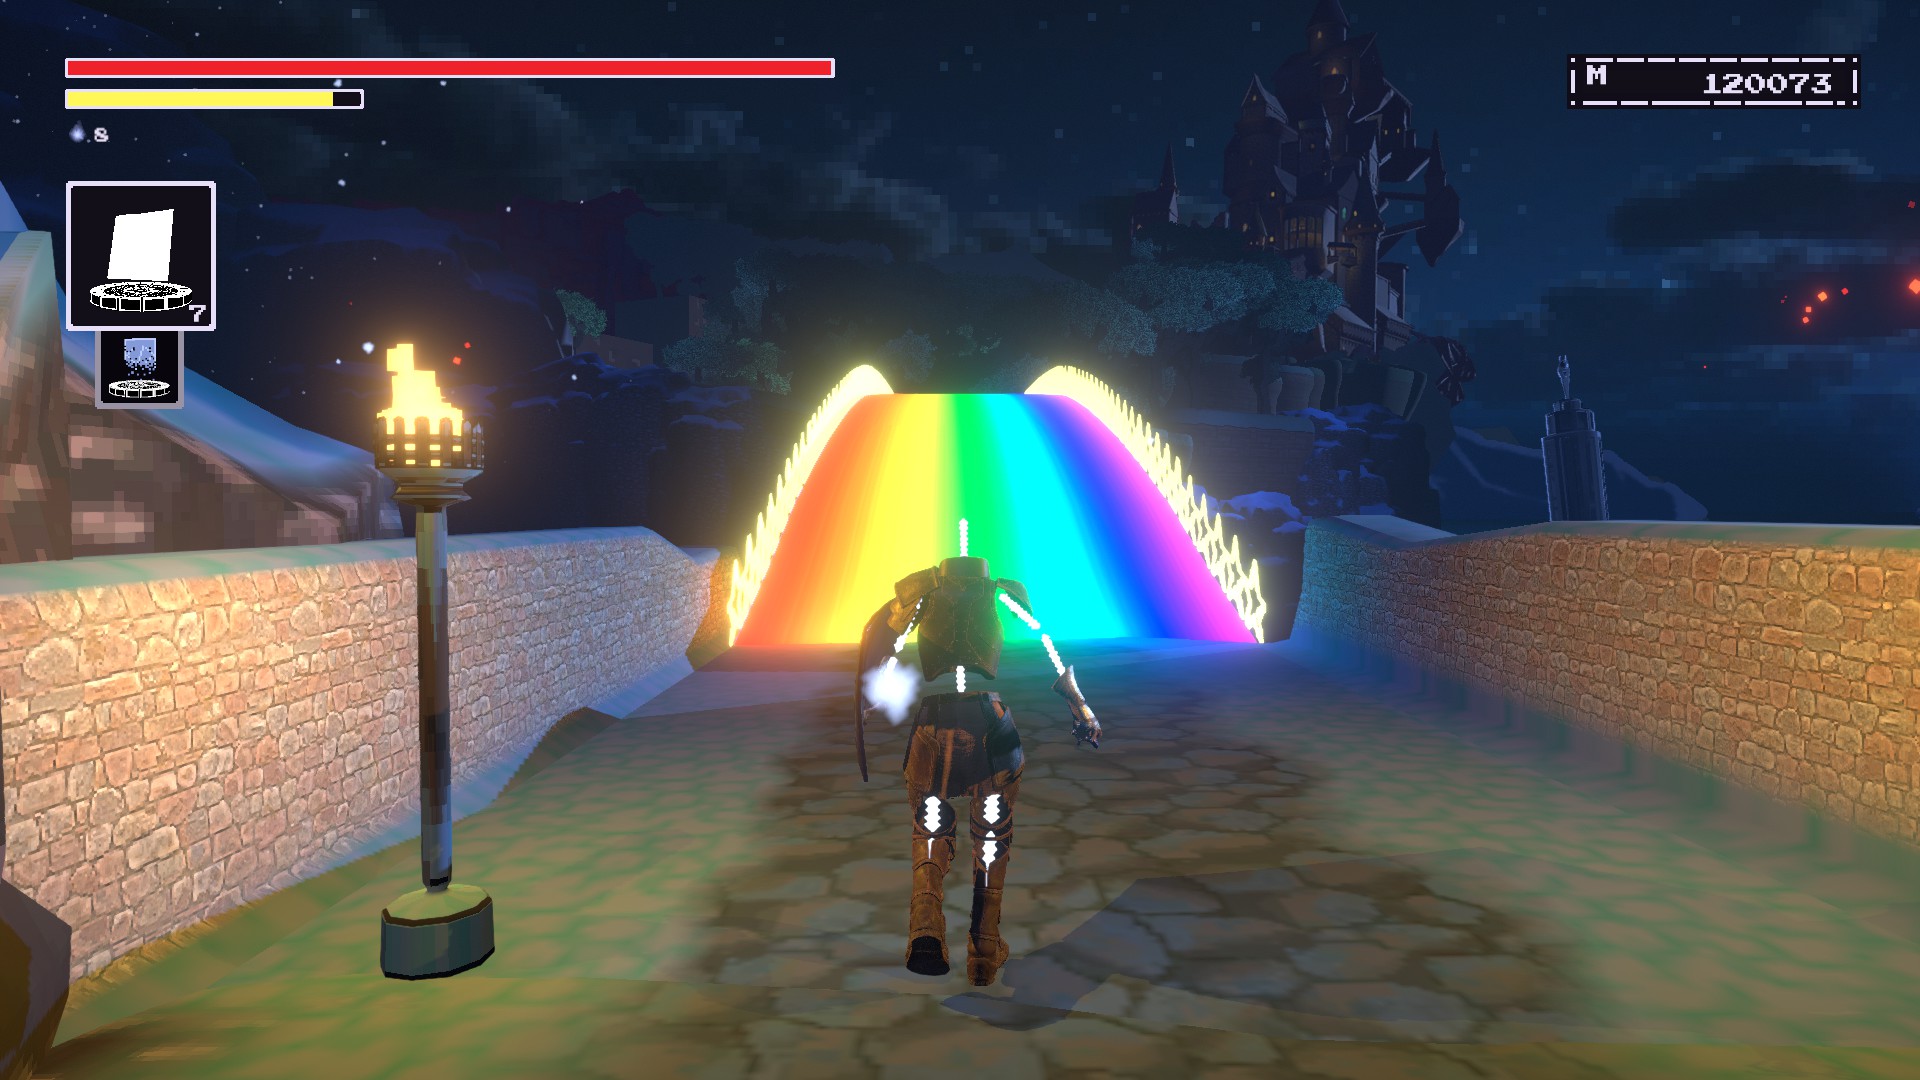
Chrysalis Tooth
WARLOCK’S WILDS #1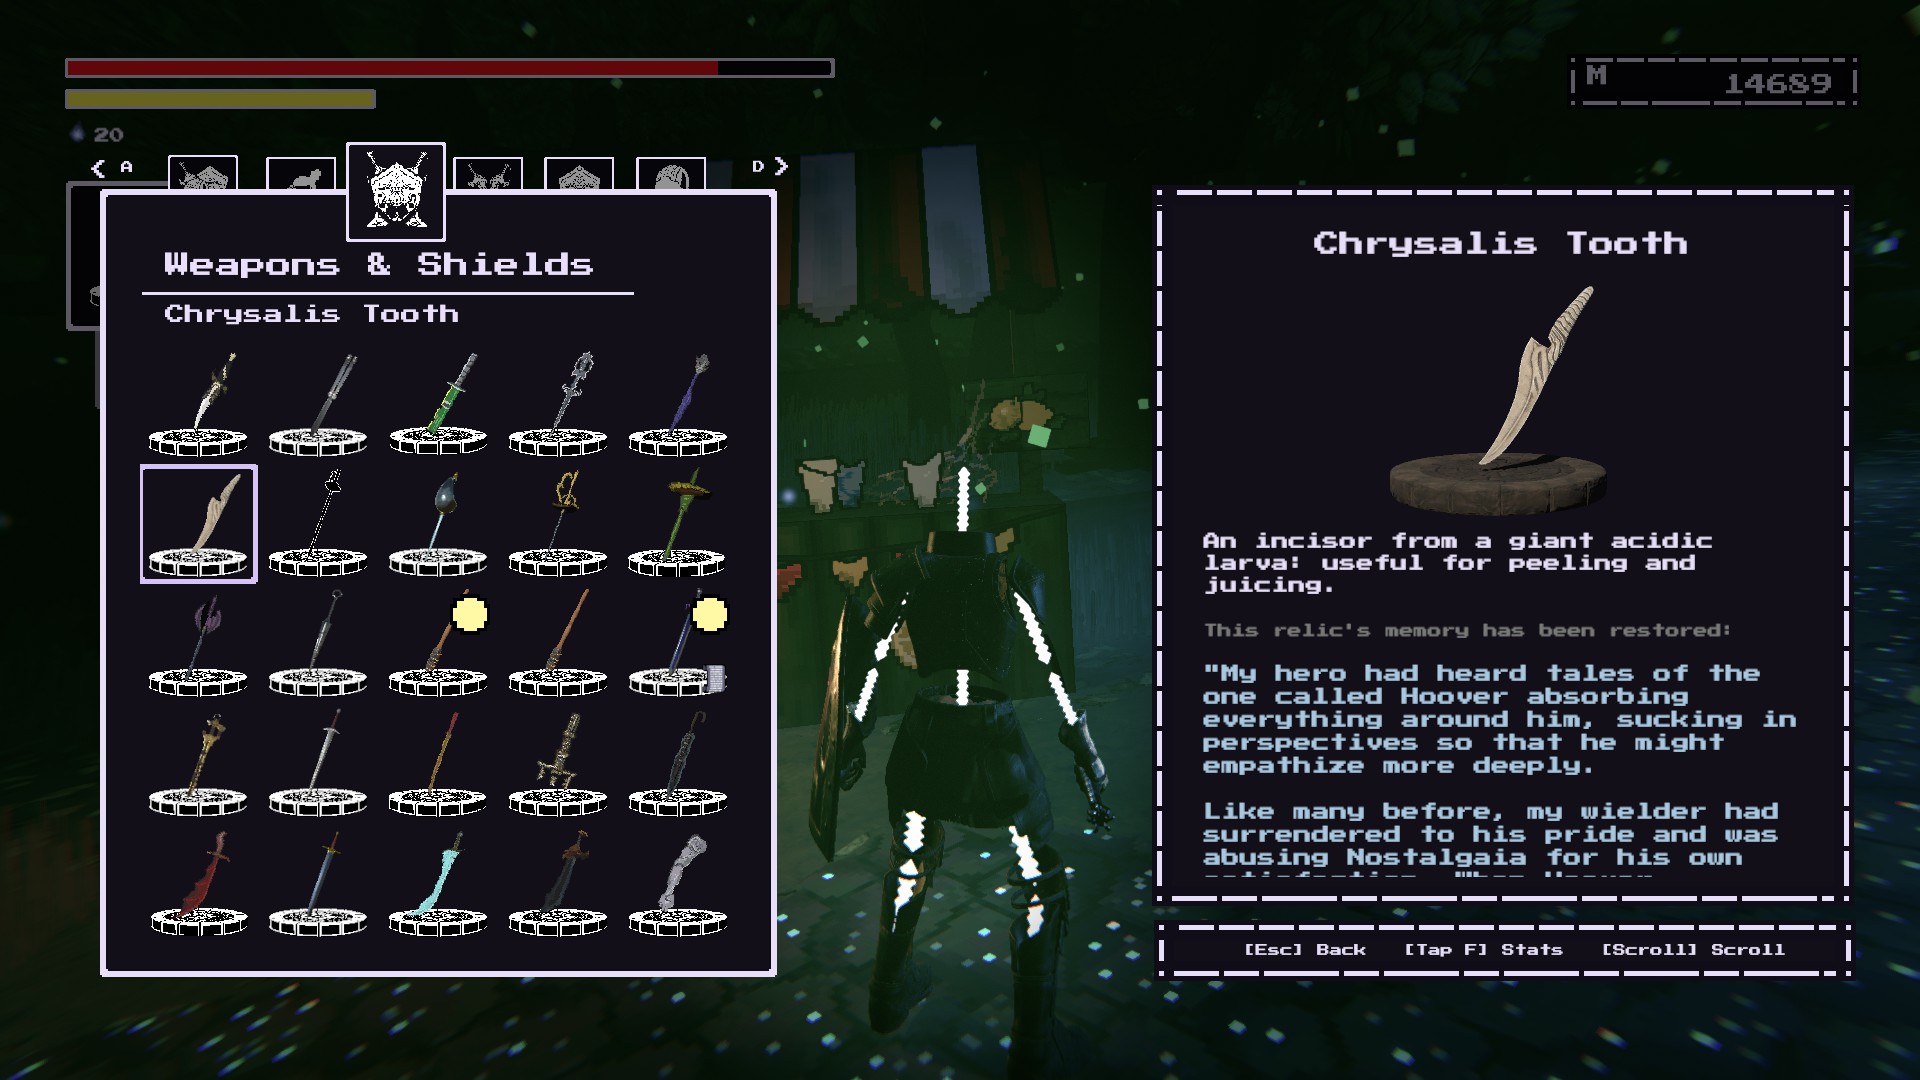
Similar to how the Lute Hero’s Loot is restored, we must first
go to Festivity Row.
Traverse through the level until
we reach the Banana Tree.
Instead of going left to the rafters, we’ll
go to the right down the spiral stairs where there is a Vampire Abomination perched.
The item will be
on the shrubs near the upper entrance to the Theater.

Progress through the
Warlock’s Wilds영역.
You should have activated the Crystal Rod #2 in the tower near the campfire of skeletons.Once the path is lit, you should see
a lemonade stand on the left side of the path.
Be wary of the patrolling Skeleton Knight and remember the weapon here.

Sword of Service
WARLOCK’S WILDS #2(Ignore the Sourcerous and +5, I wanted to make it strong)
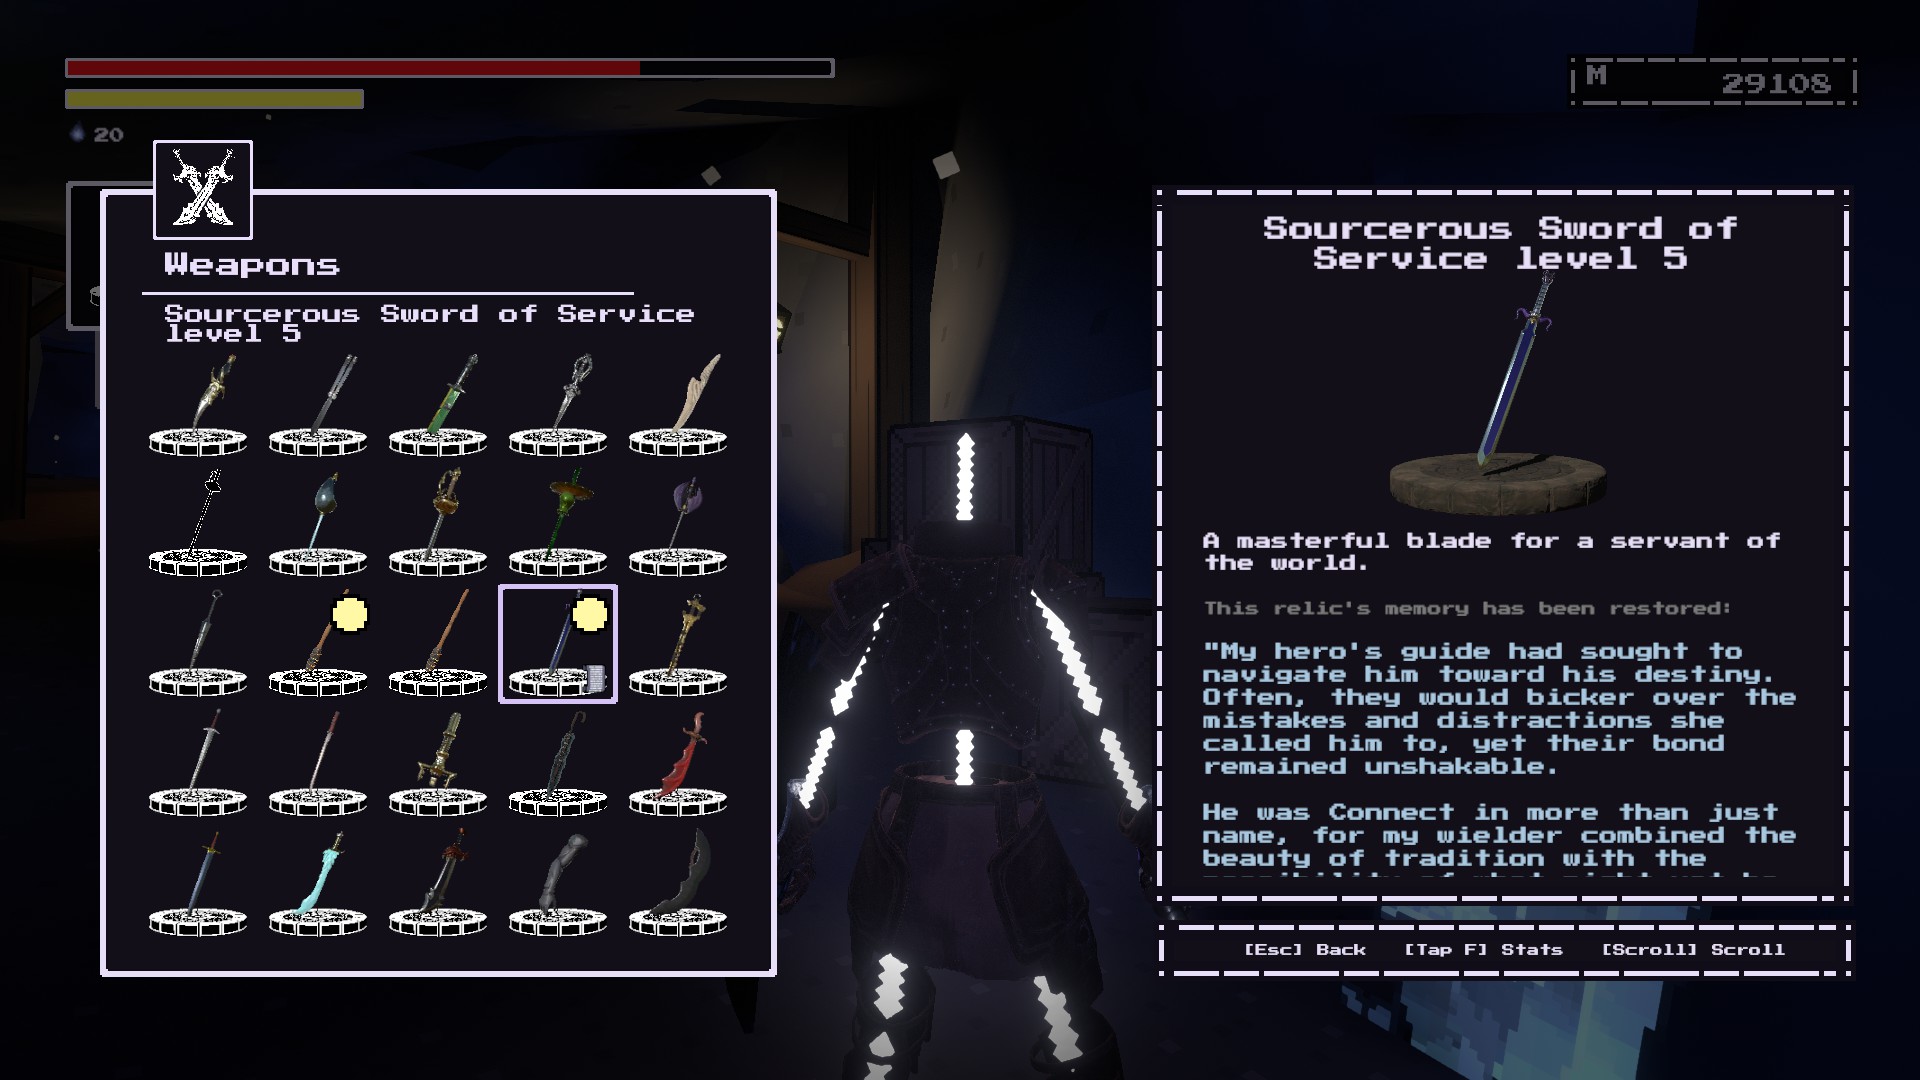
Upon entering the
Warlock’s Wilds, the sword should be near the
right side of the first Crystal Rod.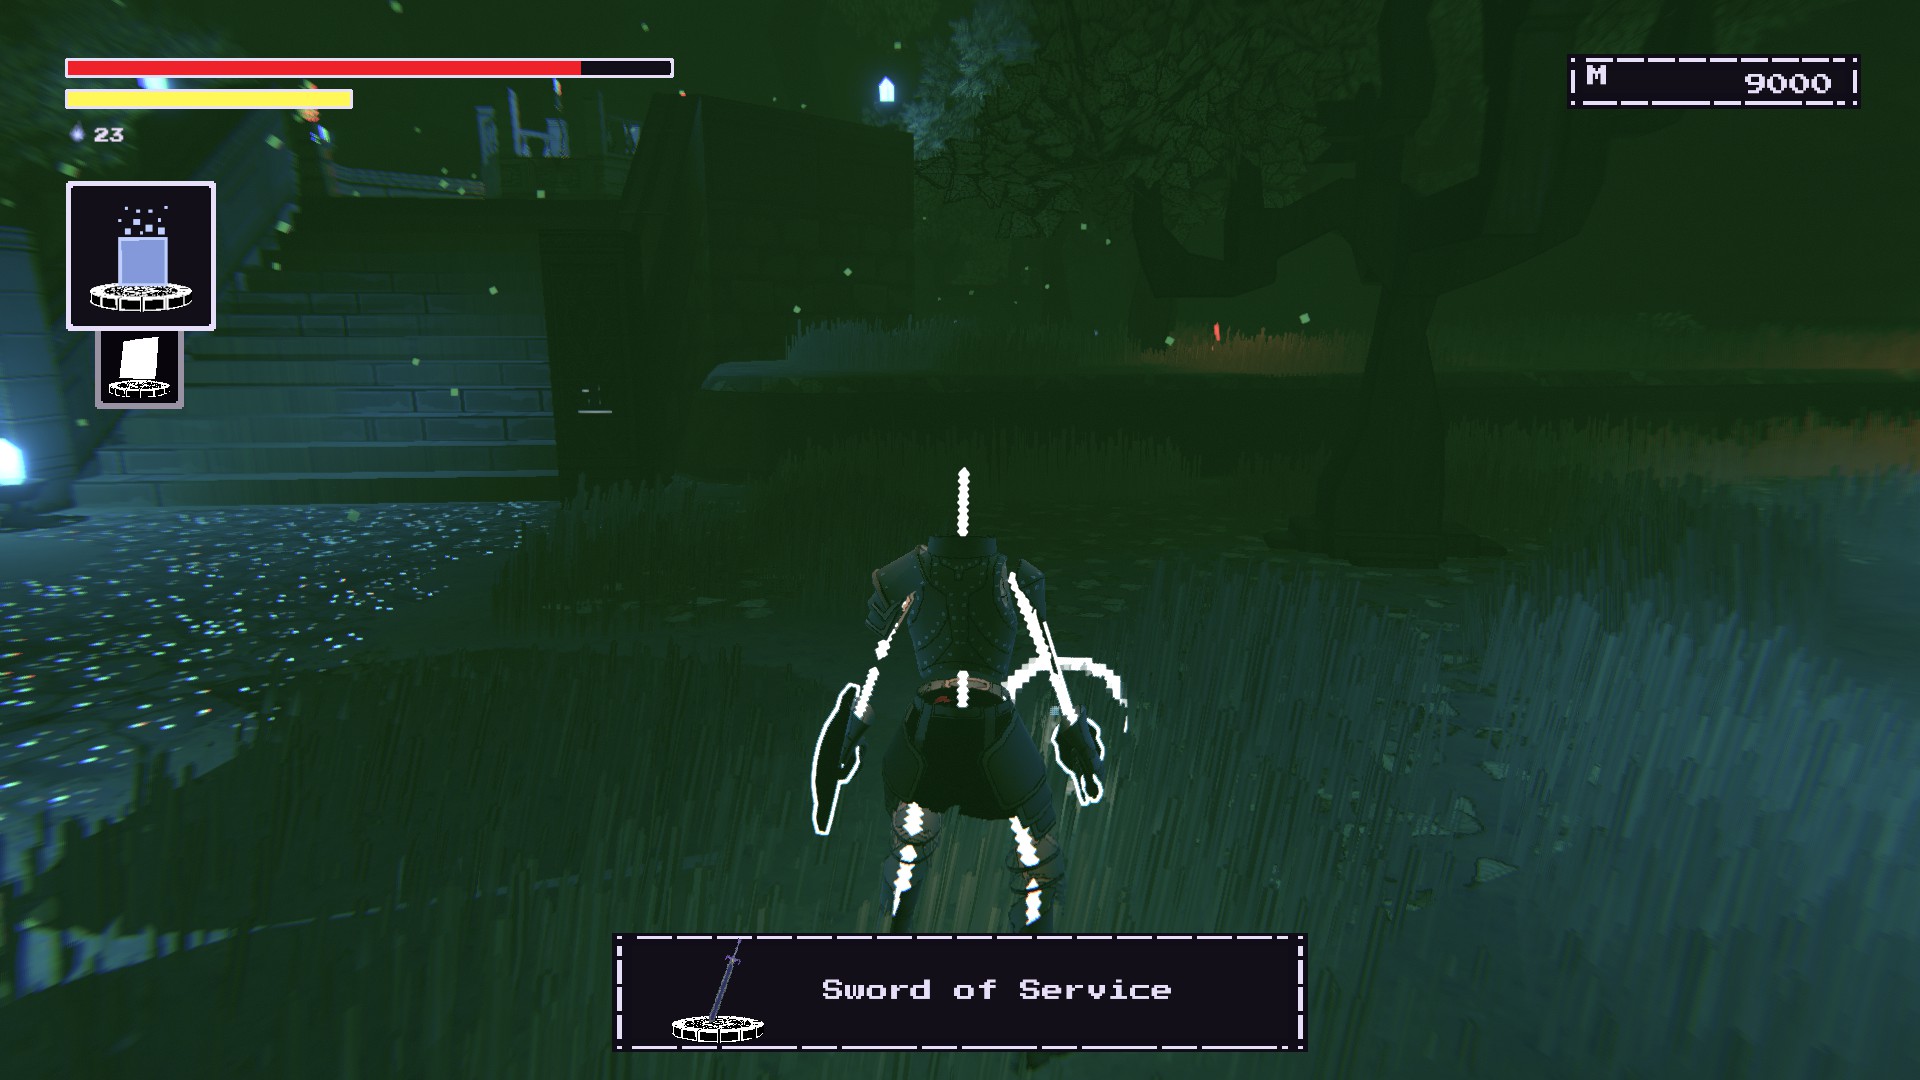
첫 번째, you should’ve activated the 2nd Crystal Rod and light up the path.Along the
right side of the path, you should see
a log with two torches.
Enter the log and
go for the path that leads upwards.
You’ll be in some
stone-henge area with a fairy lady in the middle.
Remember the sword here, but watch out for her attacks.
My Crafter
WARLOCK’S WILDS #3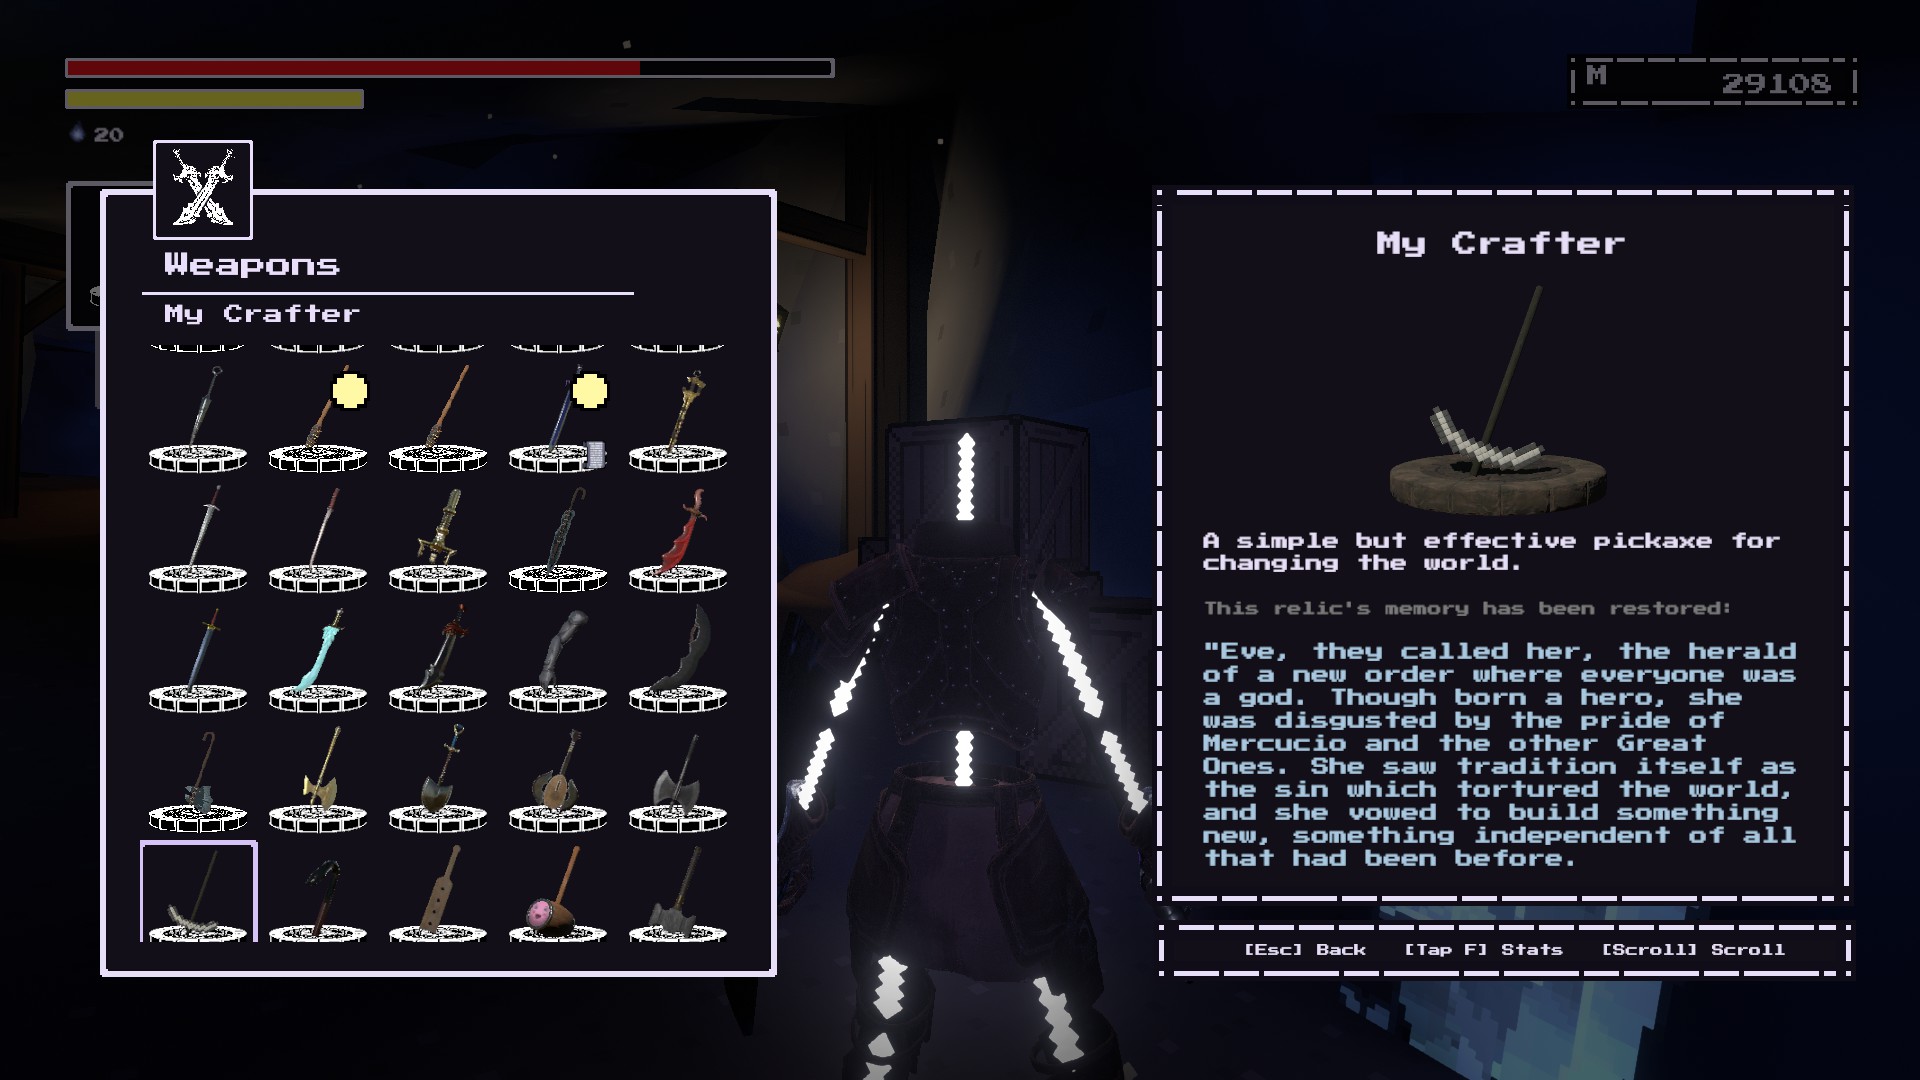
~에
The Depths, starting from where The Grinder elevator is, head towards
the room with the two purple pickaxe NPCS and a Giant Knight.
The item will be by one of the two pickaxe NPCS
near the glowing crystals.
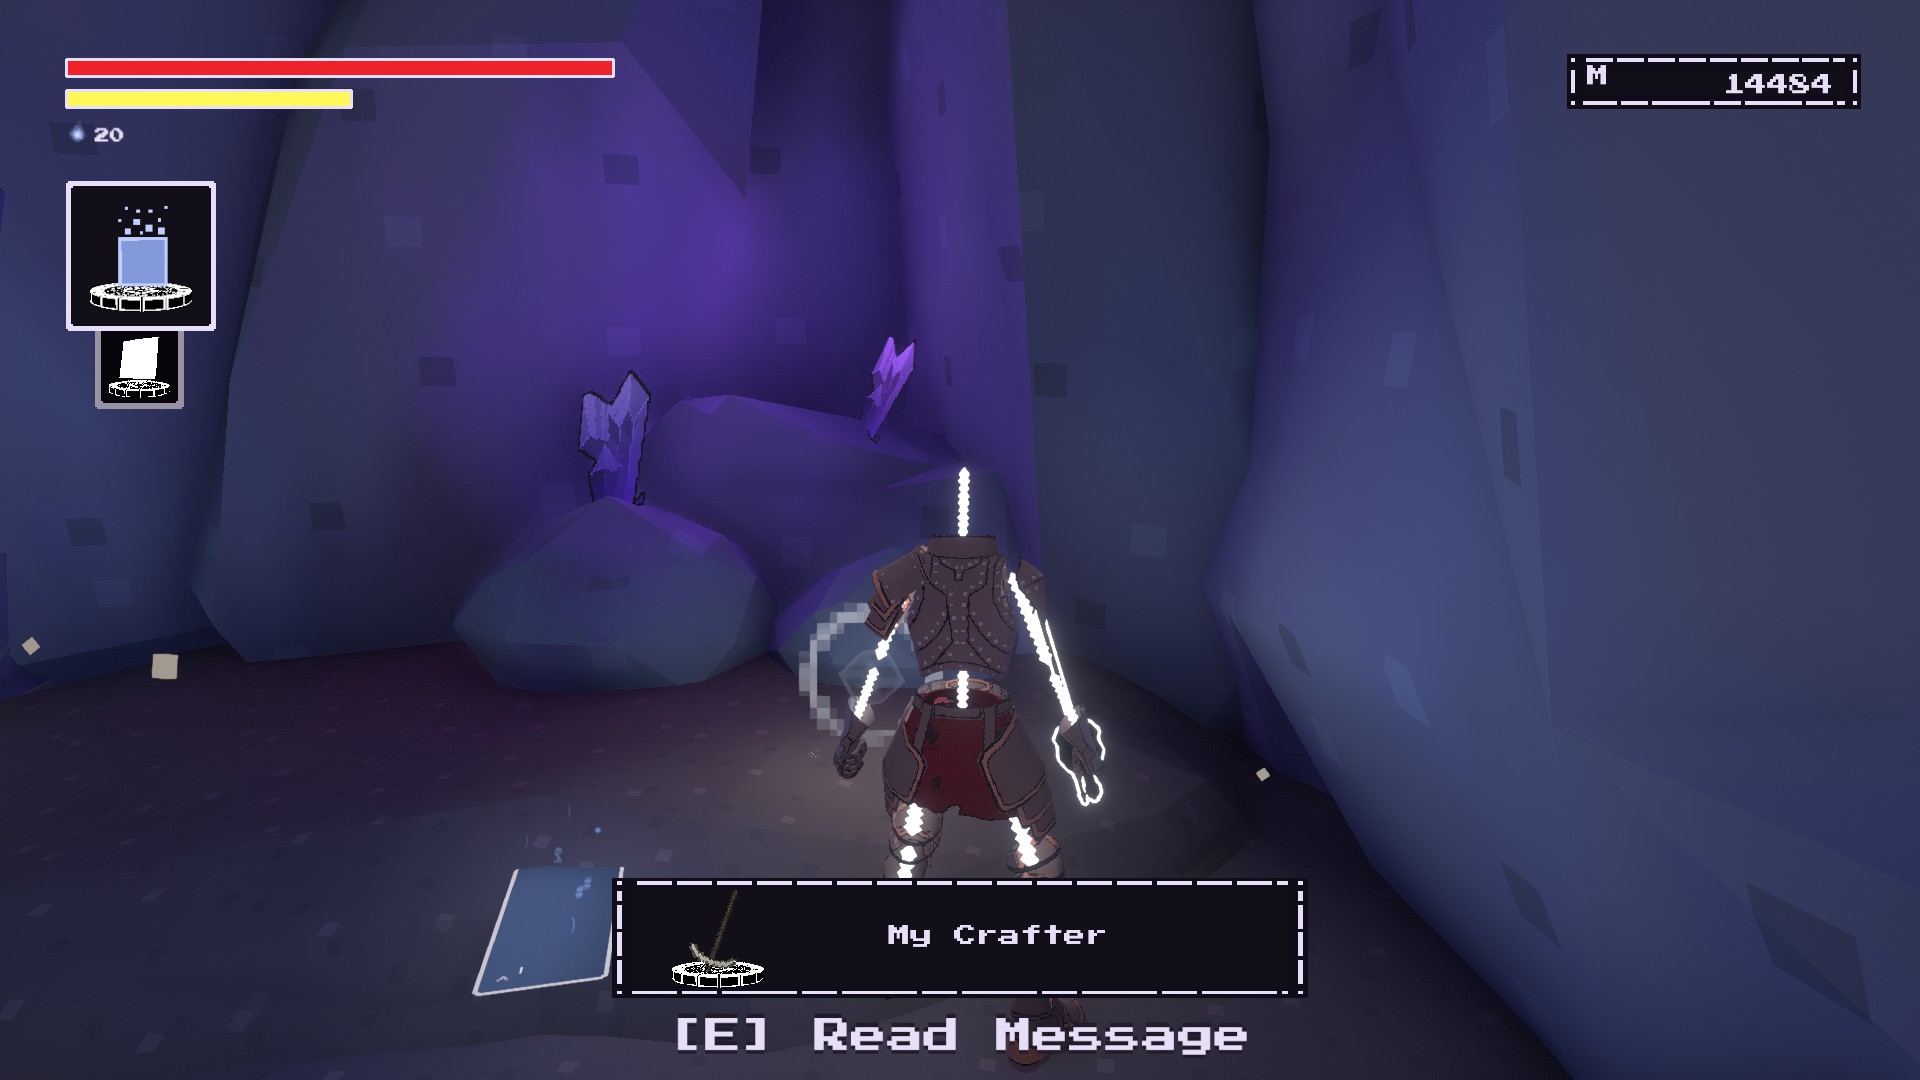
Starting from where you would need to restore the Sword of Service at
Warlock’s Wilds.
There should be a bridge leading to the third Crystal Rod tower.
Go down the tower and you should eventually find a beacon.There is also an anvil you can strike to summon the Blacksmith.Remember the axe here.
Predator’s Putter
WARLOCK’S WILDS #4
You need to buy it from the
상인.
Easymaker Key found in Quest Reward Vault.
소송 비용 1000 memory.
~ 안에
Warlock’s Wilds,
follow the lit pathuntil you reach this spot.
지금
follow the glowing red mushroomto another path.
Be wary of skeletons!You should see this golf areawhere you can restore the putter.
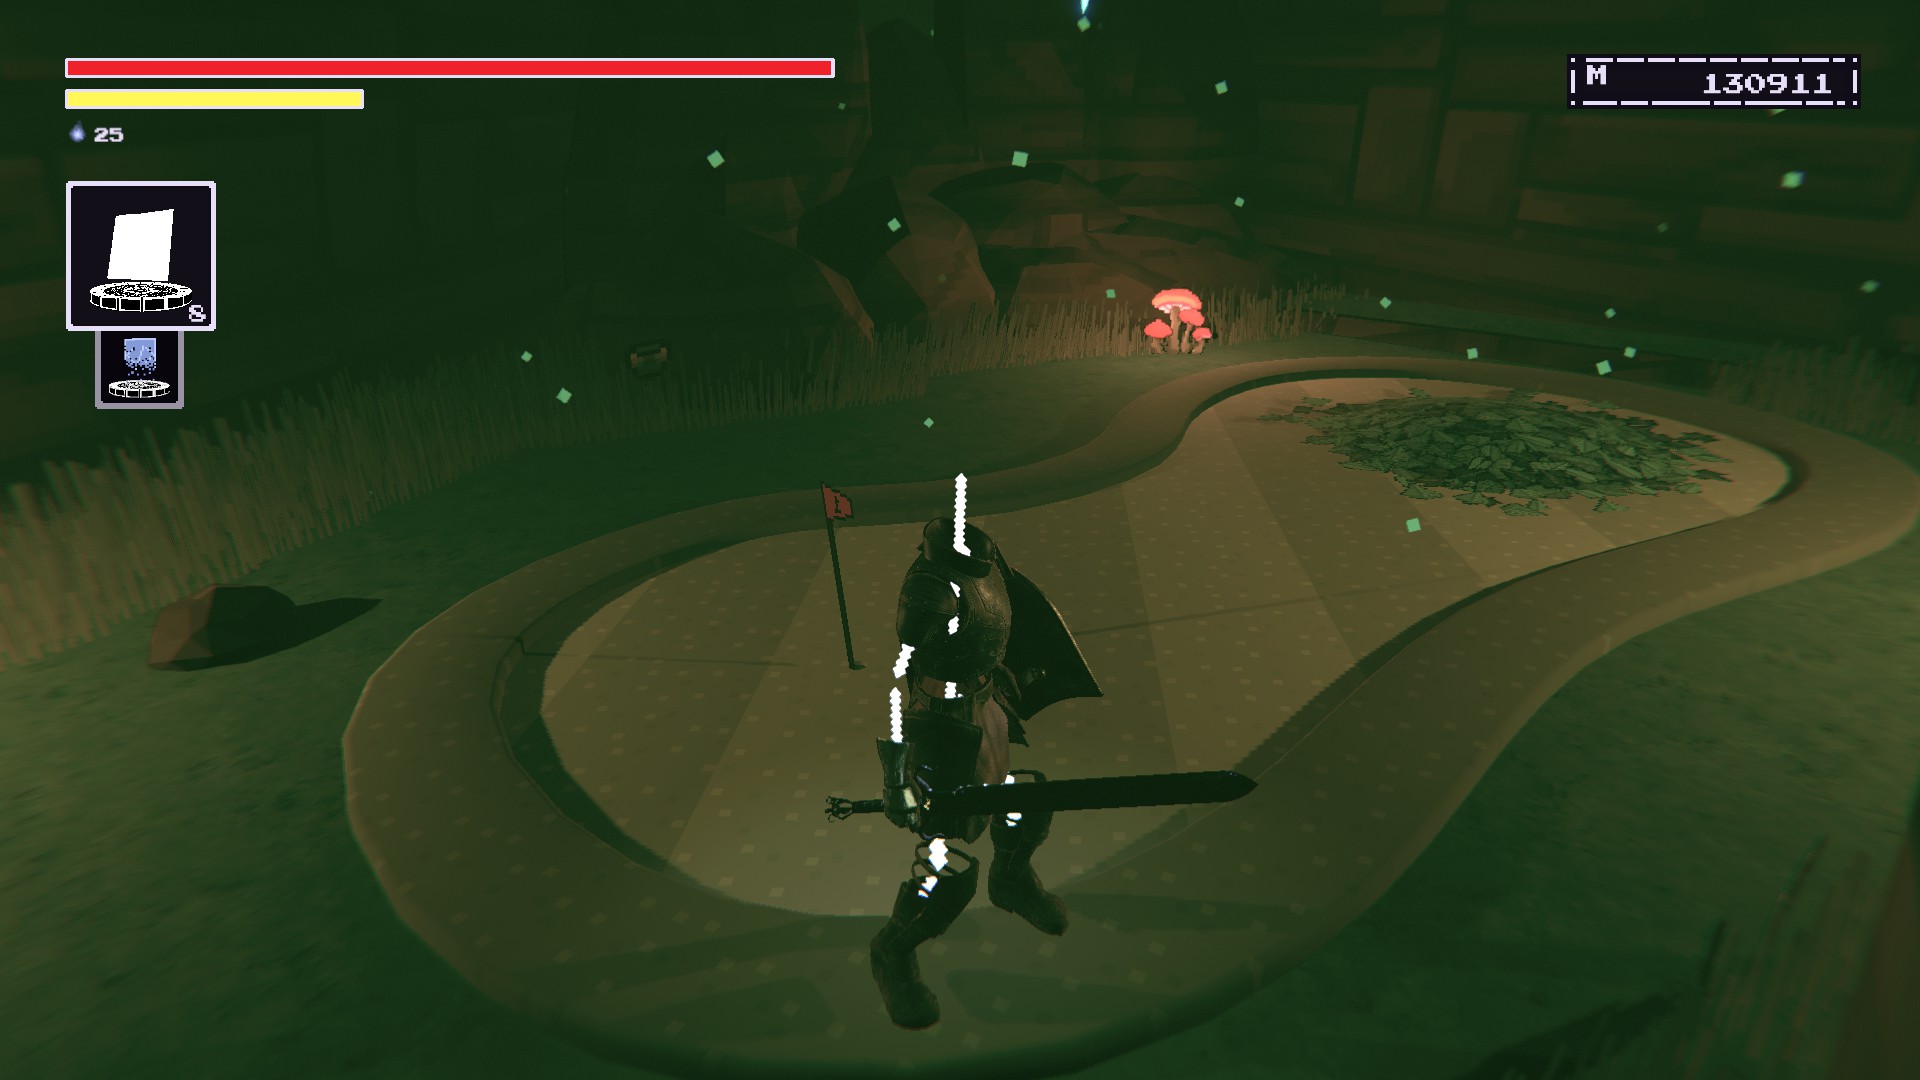
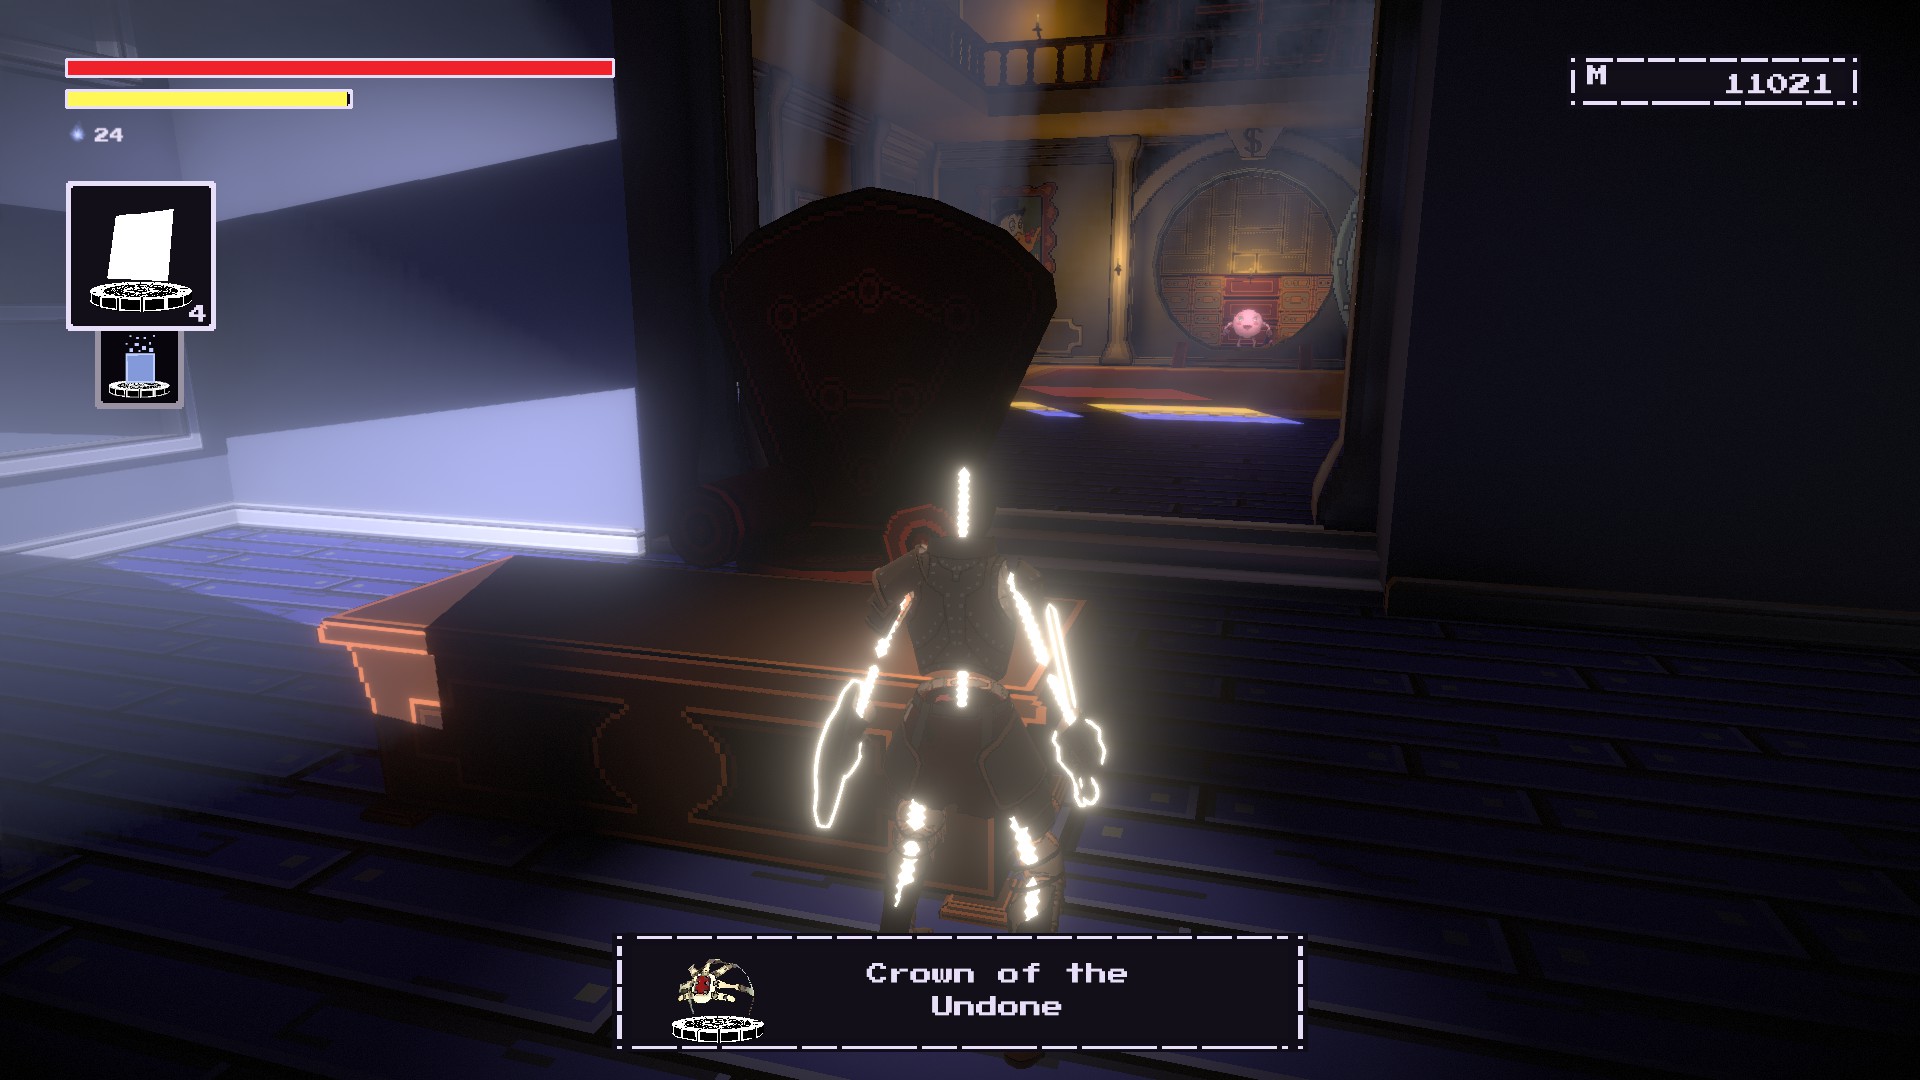
Crown of the Undone
WARLOCK’S WILDS #5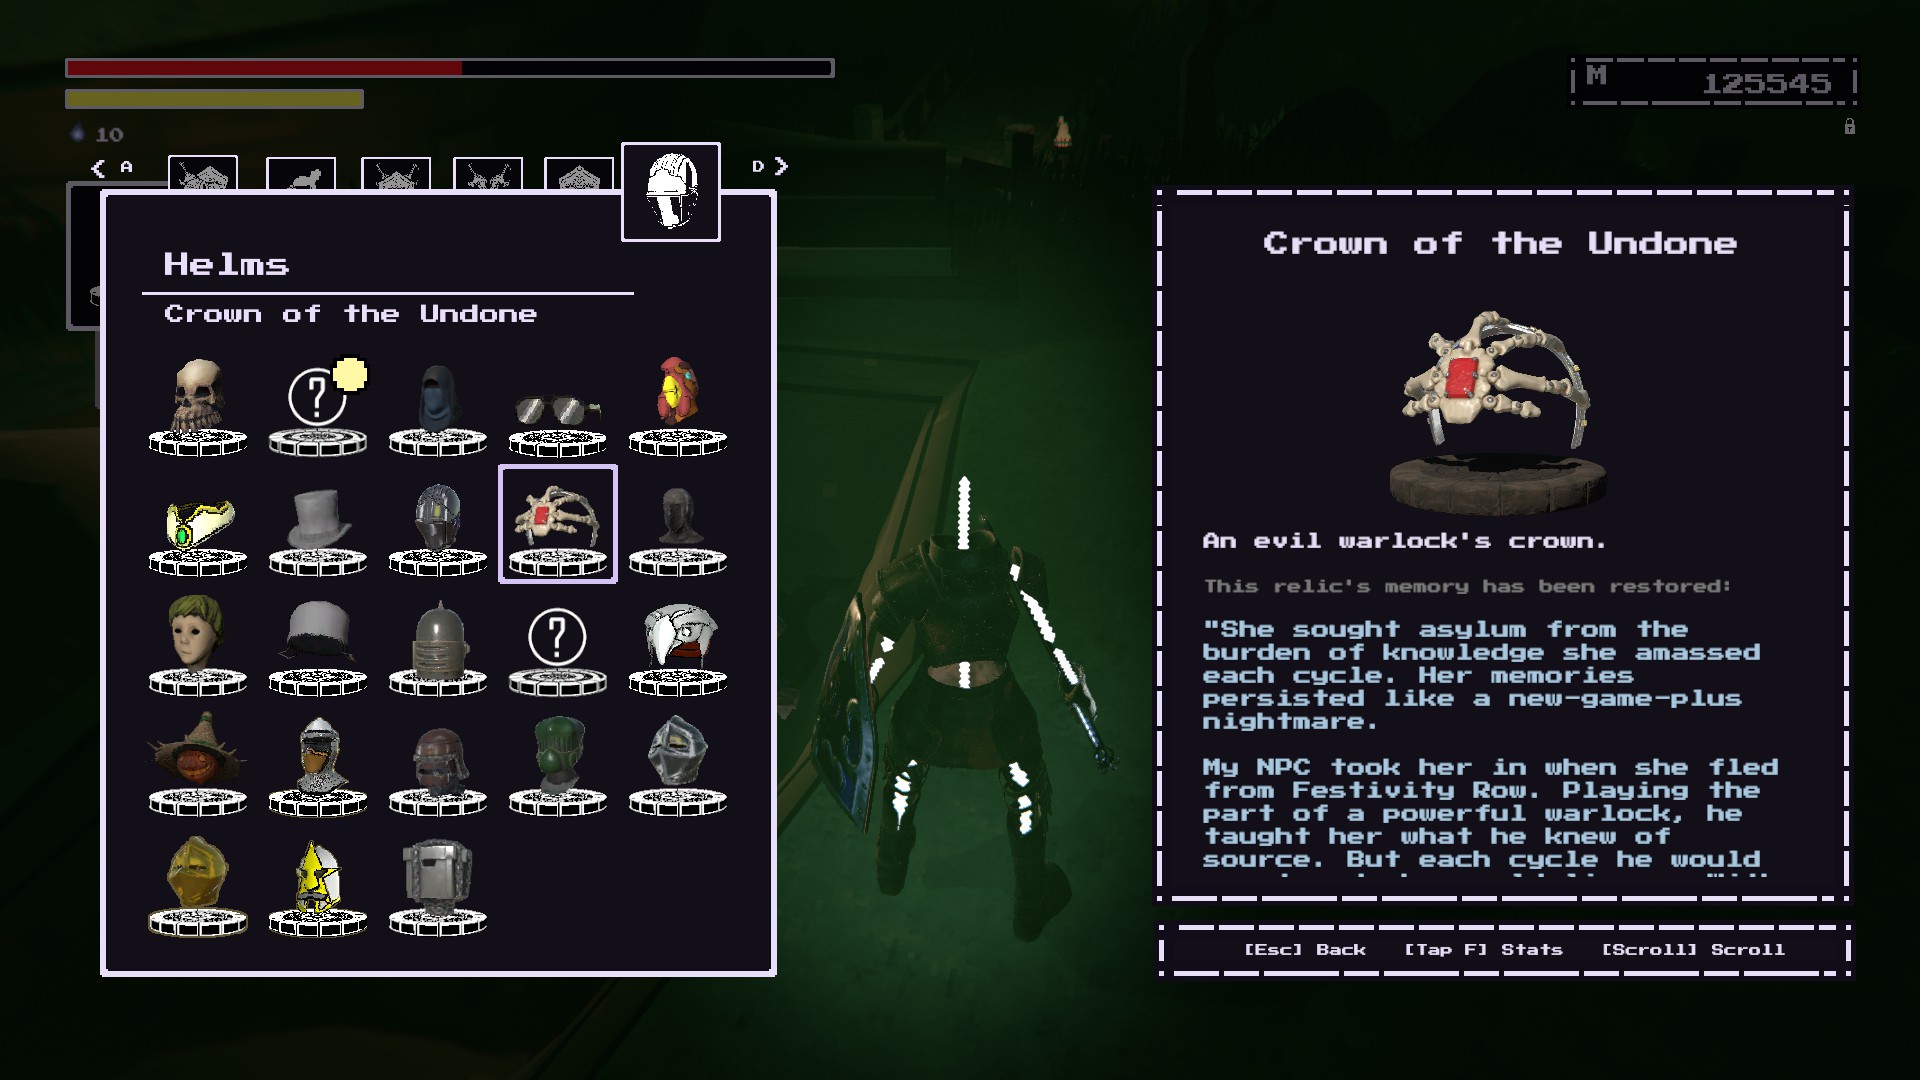
When you first arrive in the
Quest Reward Vault,
go to the right.
There should be an office desk where the item should be on.
Okay this one is going to be a rough ride but
it starts at the Warlock’s Wilds.
At the
Sword of Service’s memory location, there should have been a fairy NPC.
Kill herand she’ll give you a item;
This lets us navigate through the foggy maze below us.
Go through the log and go to the downward path towards the foggy maze.FOLLOW THE GLIMMERING WISPS THROUGH THE MAZE
Now you should end up at this location.
Advance towards the right side to see a grave.This is where you can restore the Crown, 하지만
don’t forget to kick down the grave for a shortcut!
Lost One’s Visage
WARLOCK’S WILDS #6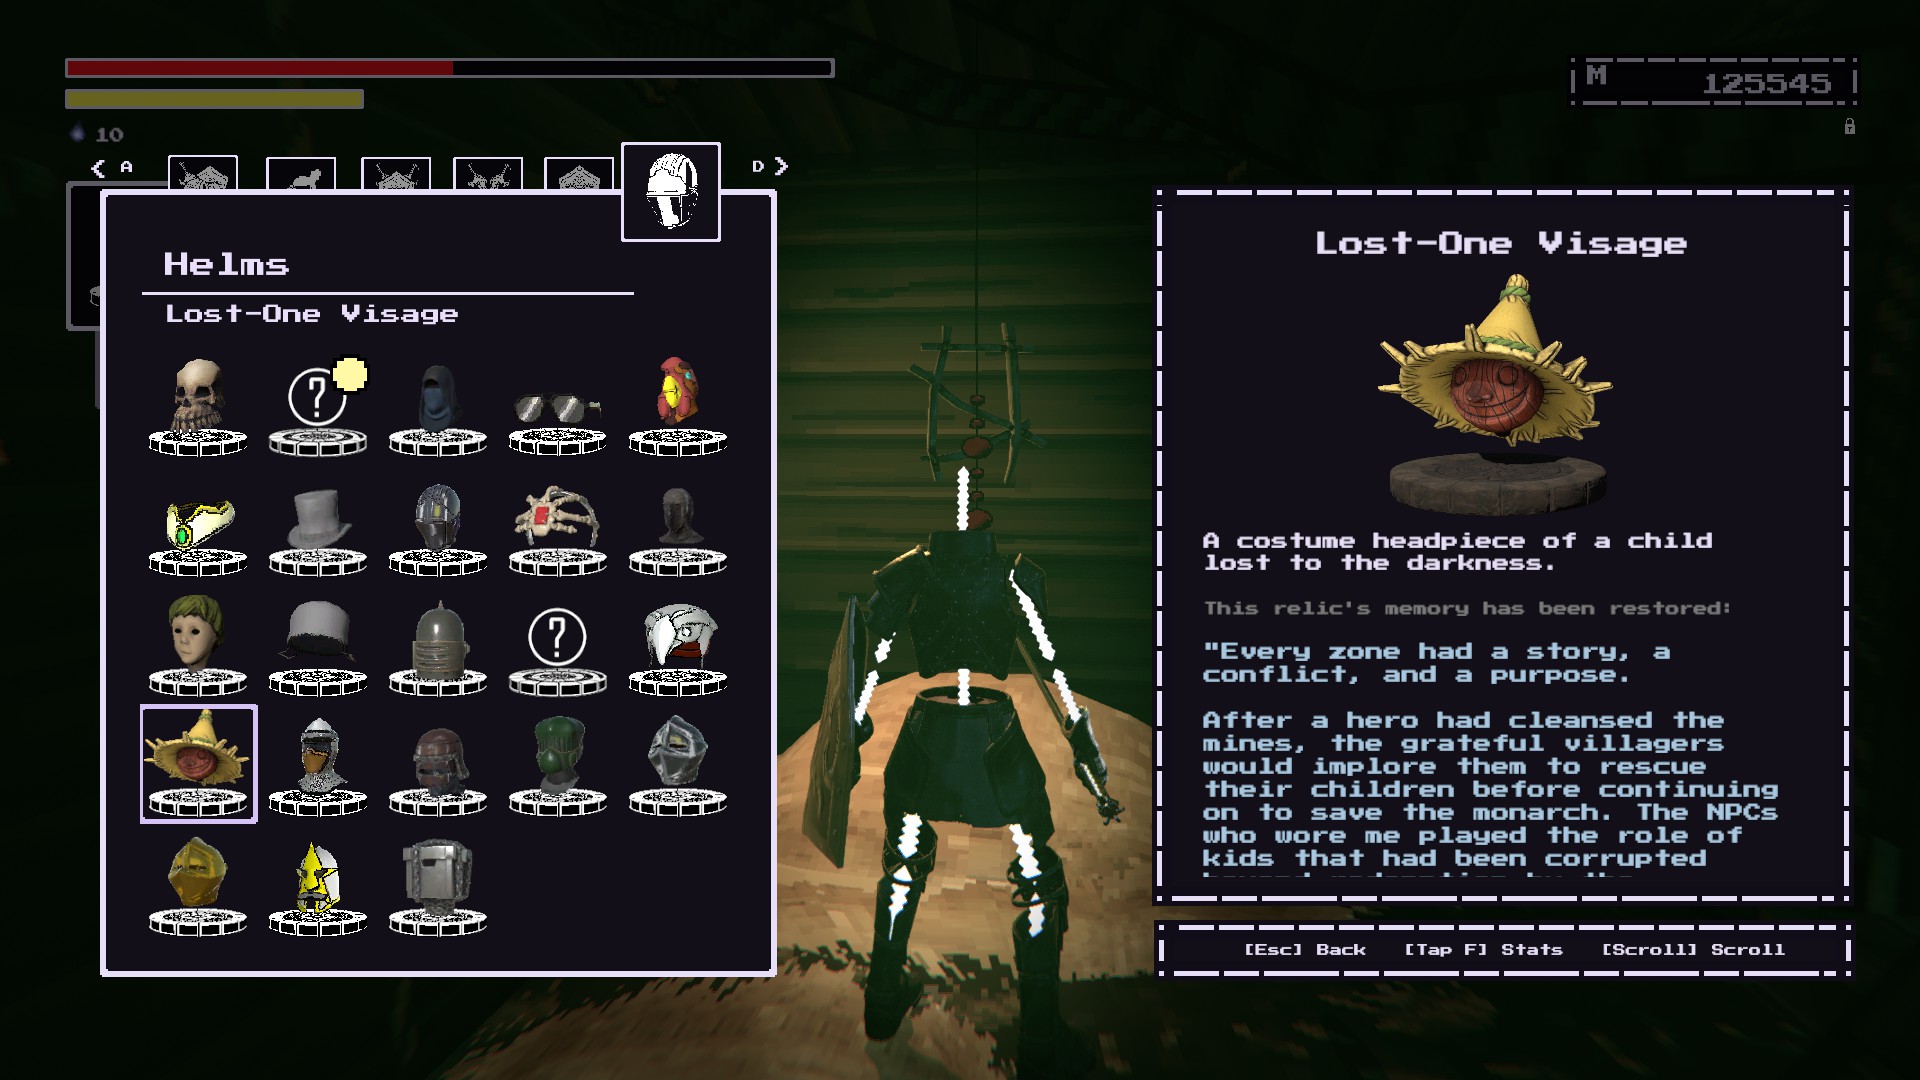
Farm these impish enemies known as Wild Ones.
Start at the
Warlock’s Wilds beacon with the Blacksmith.At the
Sword of Service’s memory location, there should have been a fairy NPC.
Kill herand she’ll give you a item;
This lets us navigate through the foggy maze below us.
Go through the log and go to the downward path towards the foggy maze.FOLLOW THE GLIMMERING WISPS THROUGH THE MAZE
Now you should end up at this location.
You should go left which will lead you down to a house.Go inside of this house and restore the visage.
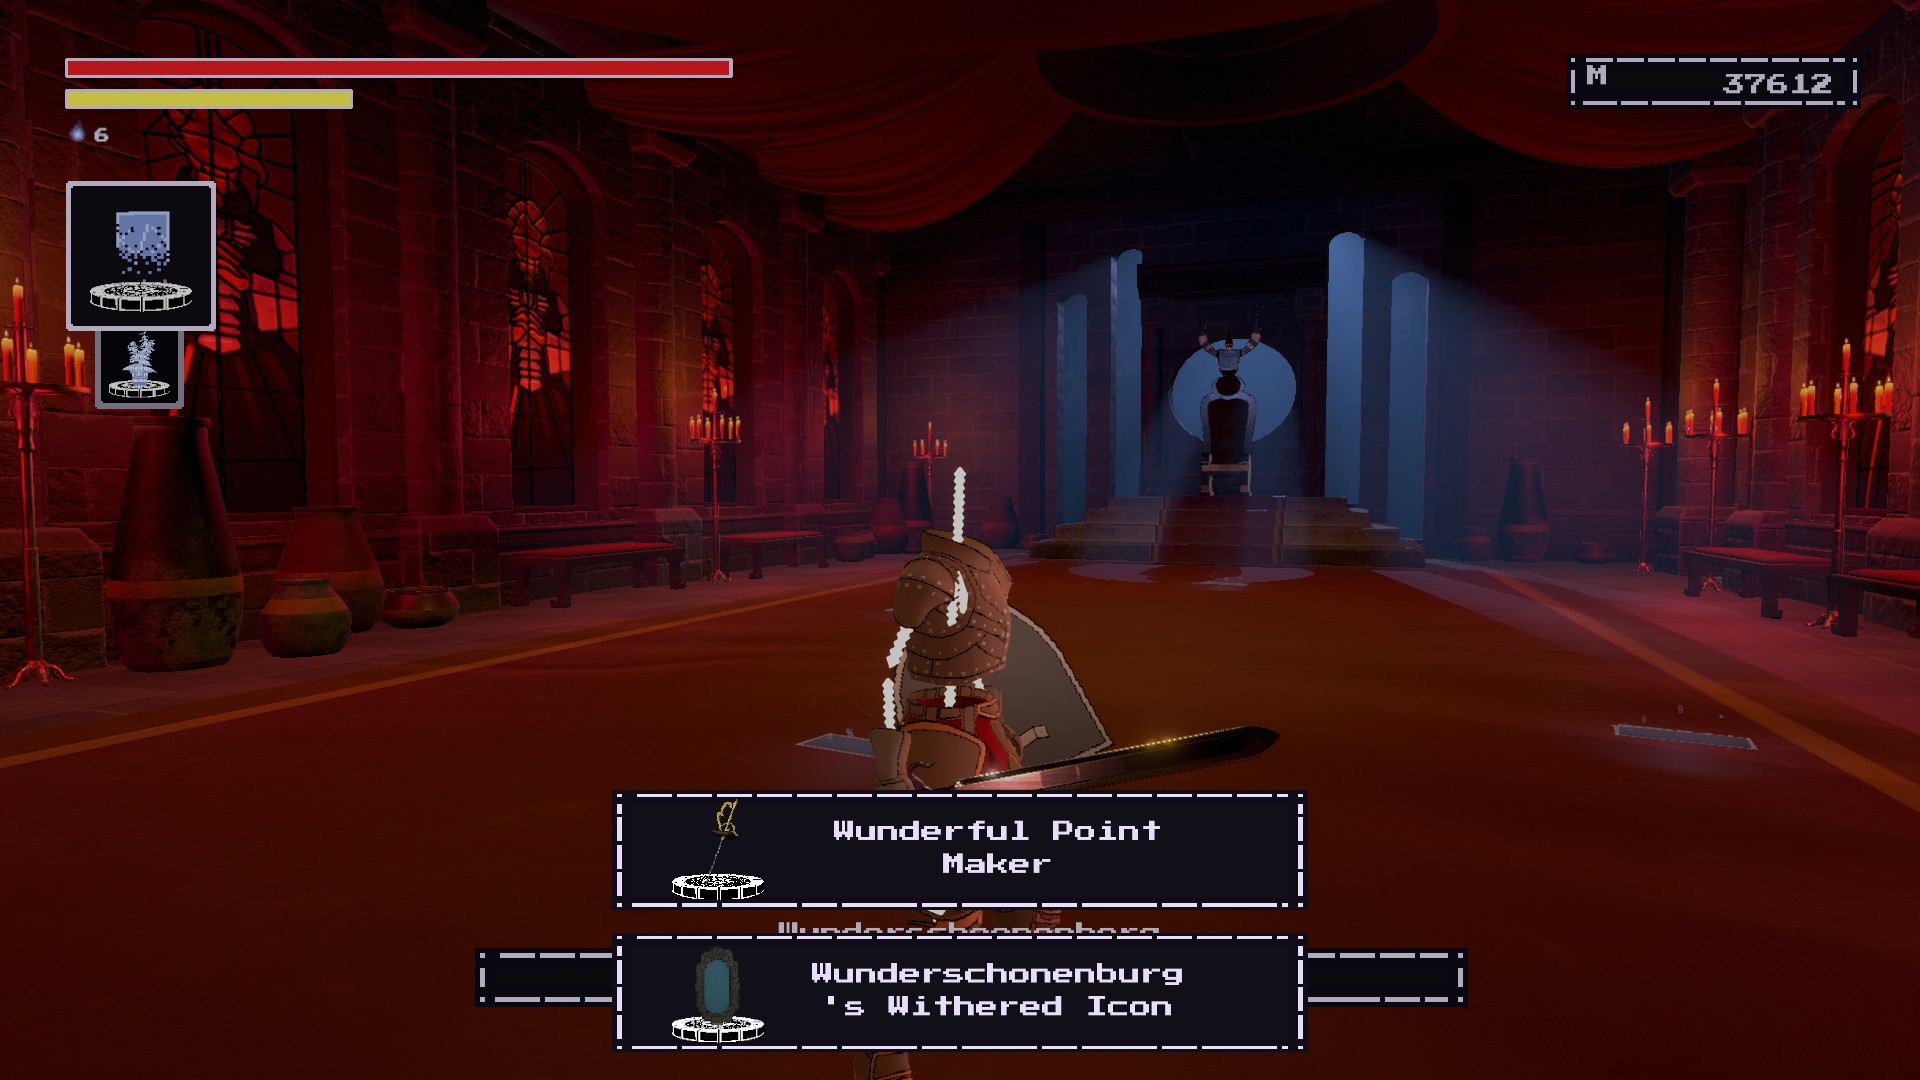
Wunderful Point Maker
KEEP OF THE STOLEN CROWN #1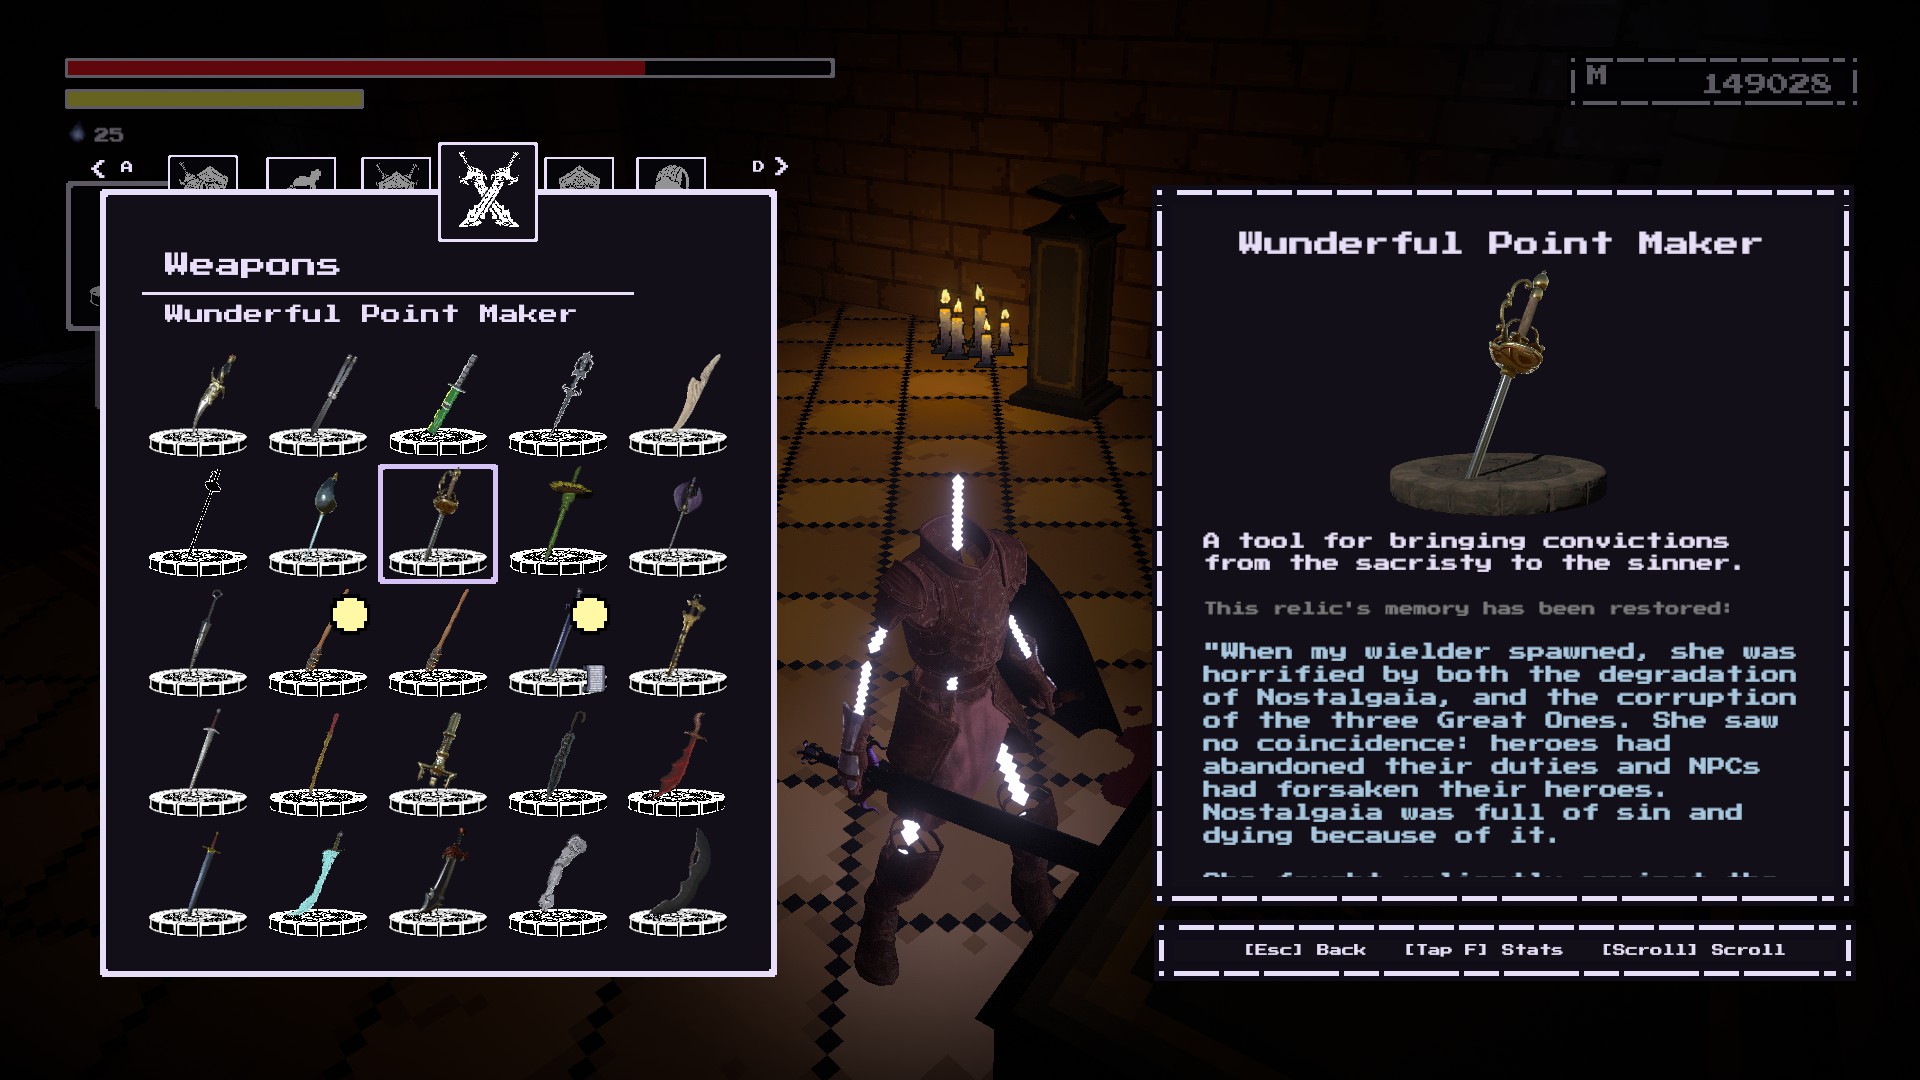
Obtained after
defeating Wunderschoenenberg.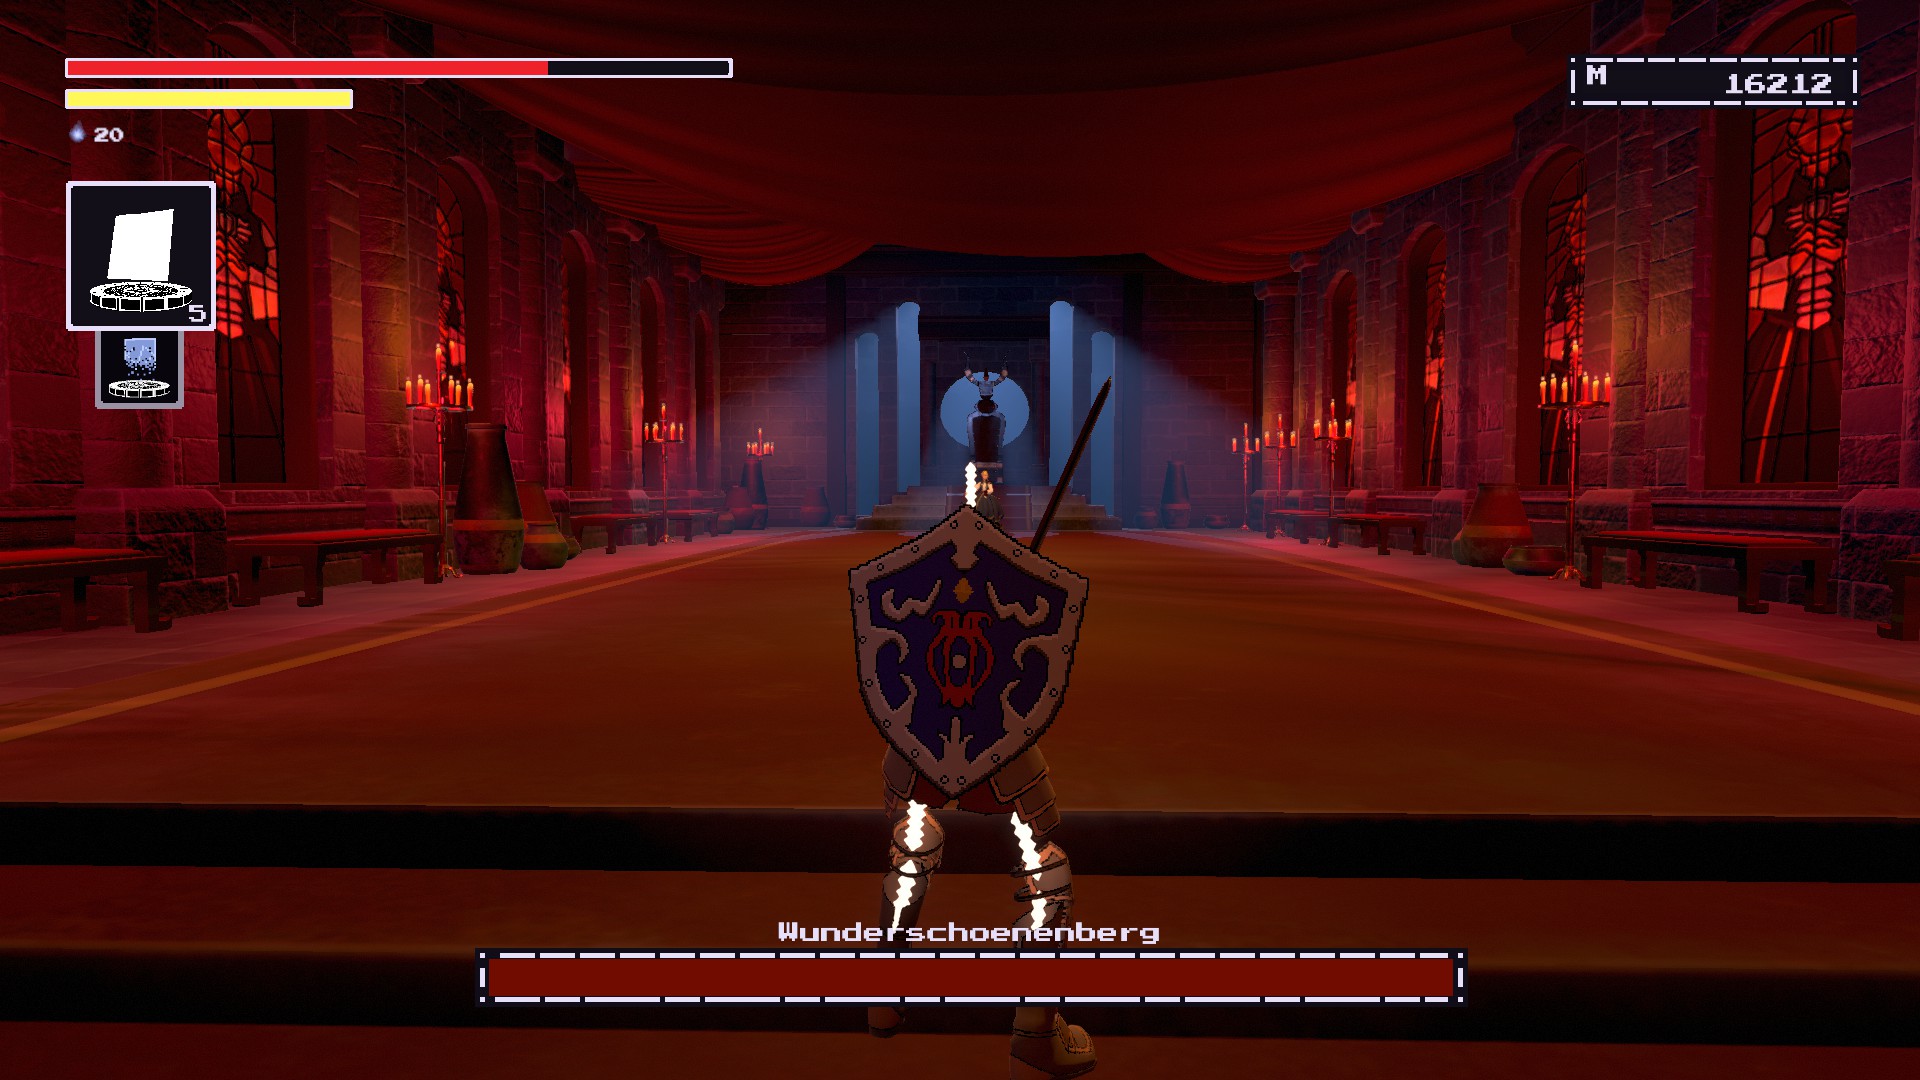
내에서
pink civilized section of Keep of the Stolen Crown, 따라가다
bridge with the Mermen & Werewolves.
Soon you’ll notice an unstable pink door on the left.
You will need to have Uprez and 7500 memory.
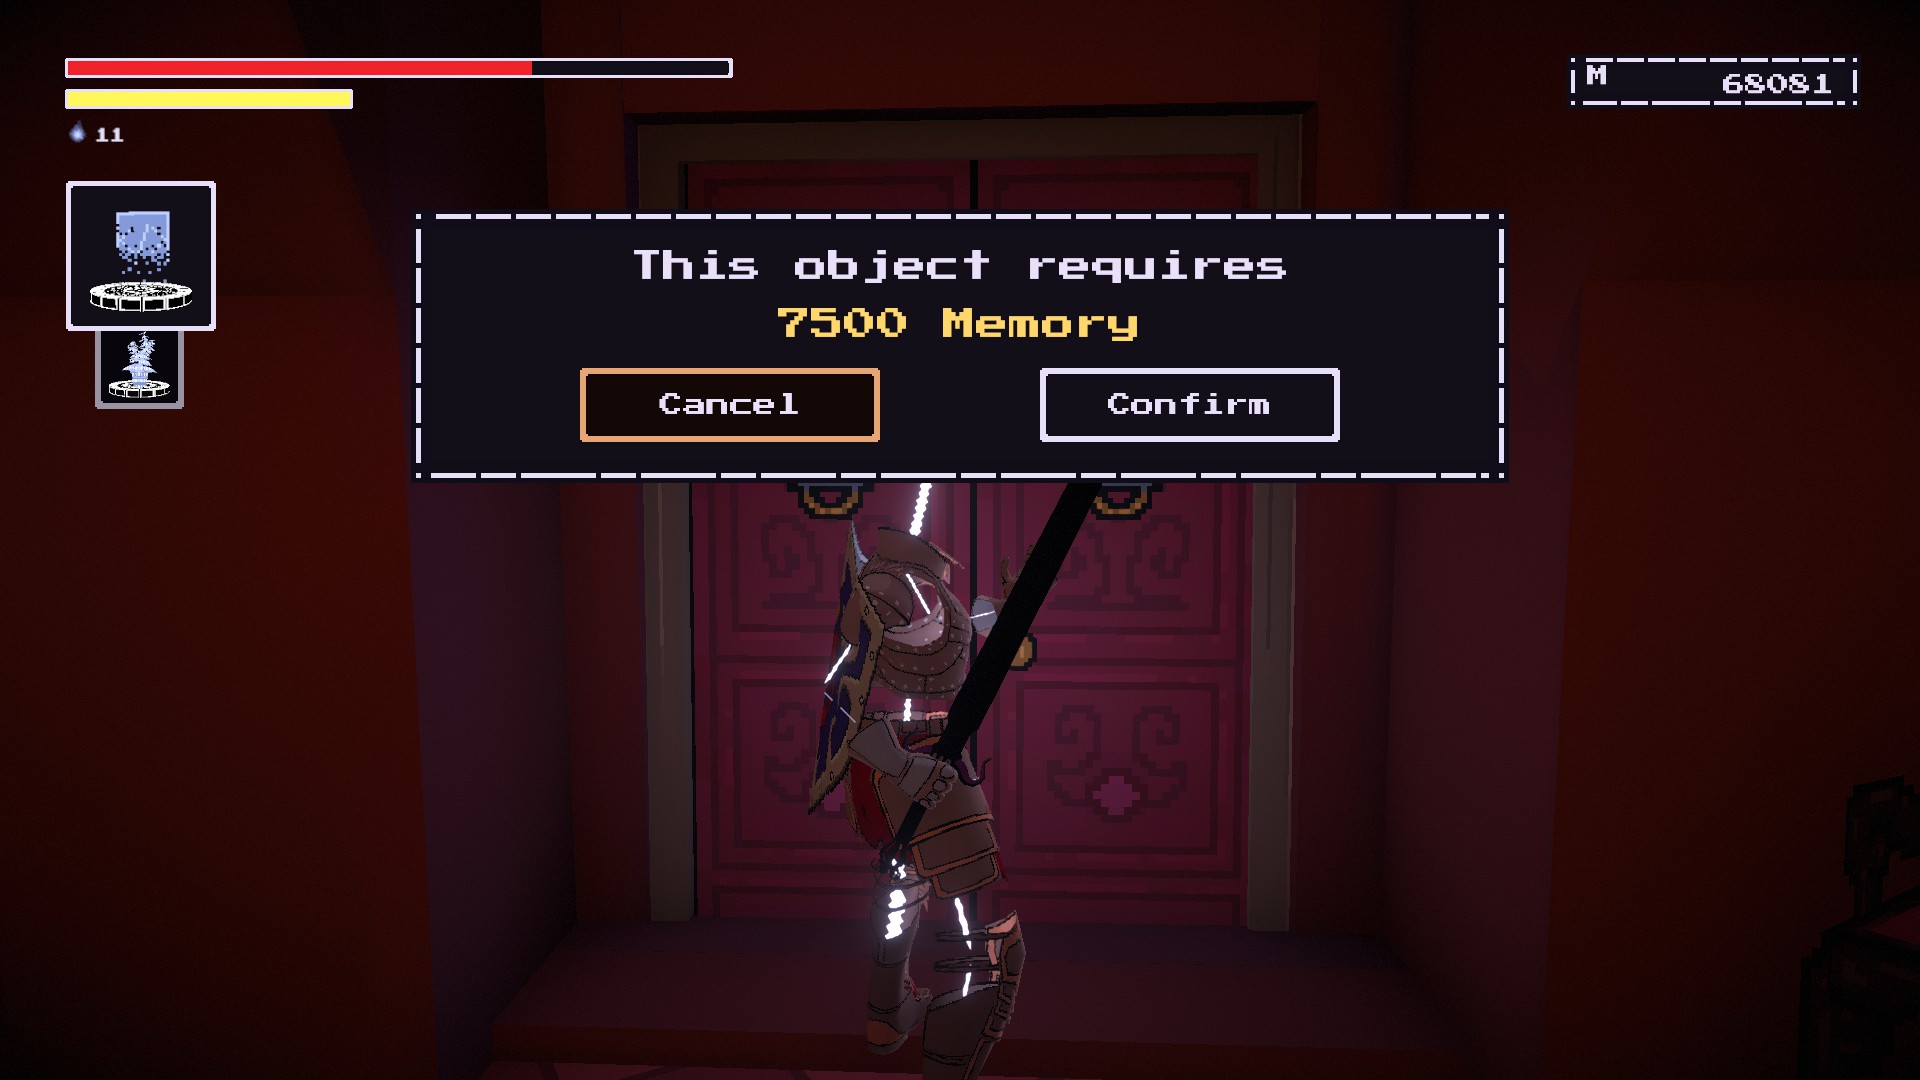
한번 개봉하면,
continue up towards the chapel building.
When you get inside, you should see a Security Code spell and
a table with a whip on it.
Remember the weapon here.
Usurped Usurper’s Bloodletter
KEEP OF THE STOLEN CROWN #2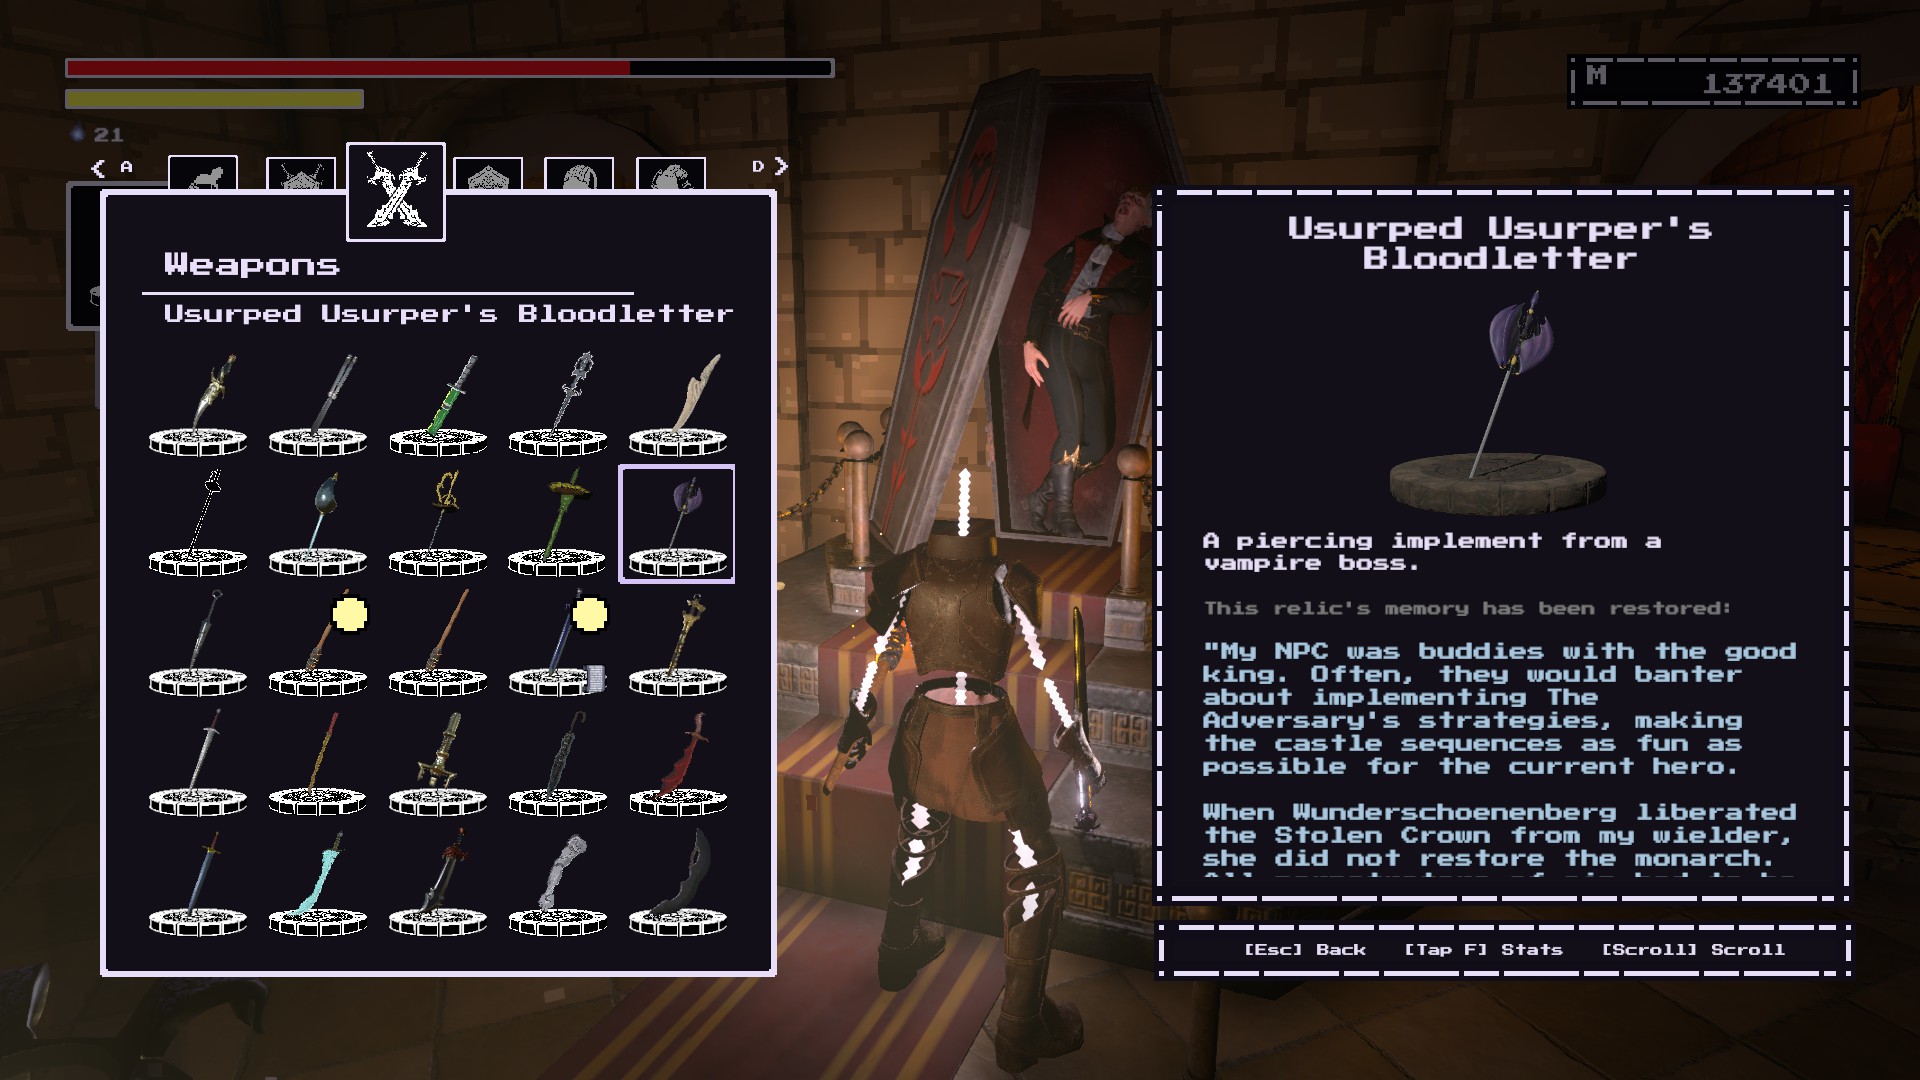
Near the end of the Rehabilitation Pits.
있을 것입니다
two accessible empty cells right before the spiral staircasethat leads into the castle.
One of them will have
a hole in a wall with this item.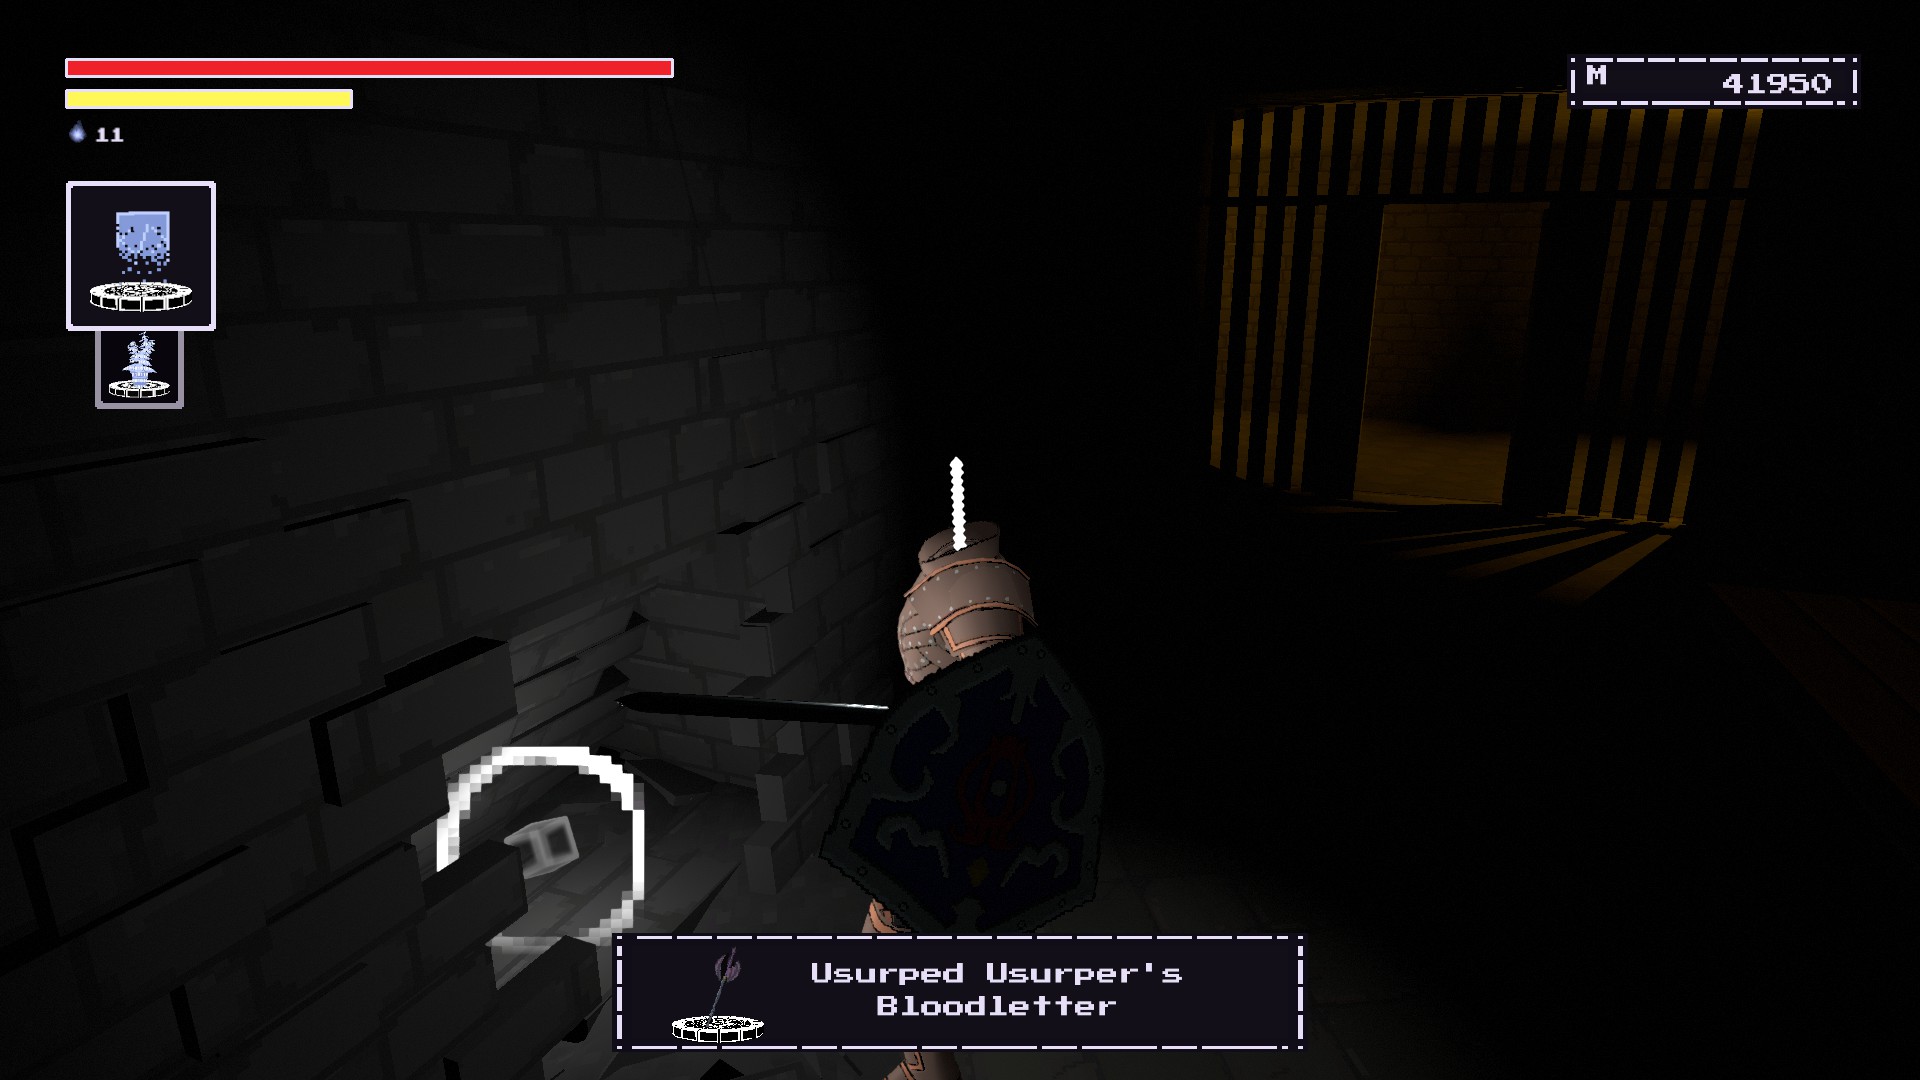
Progress through the
Keep of the Stolen Crownuntil you
reach the beacon.You should see
a coffin with a slain vampire in itnearby the beacon.
Remember the weapon here.
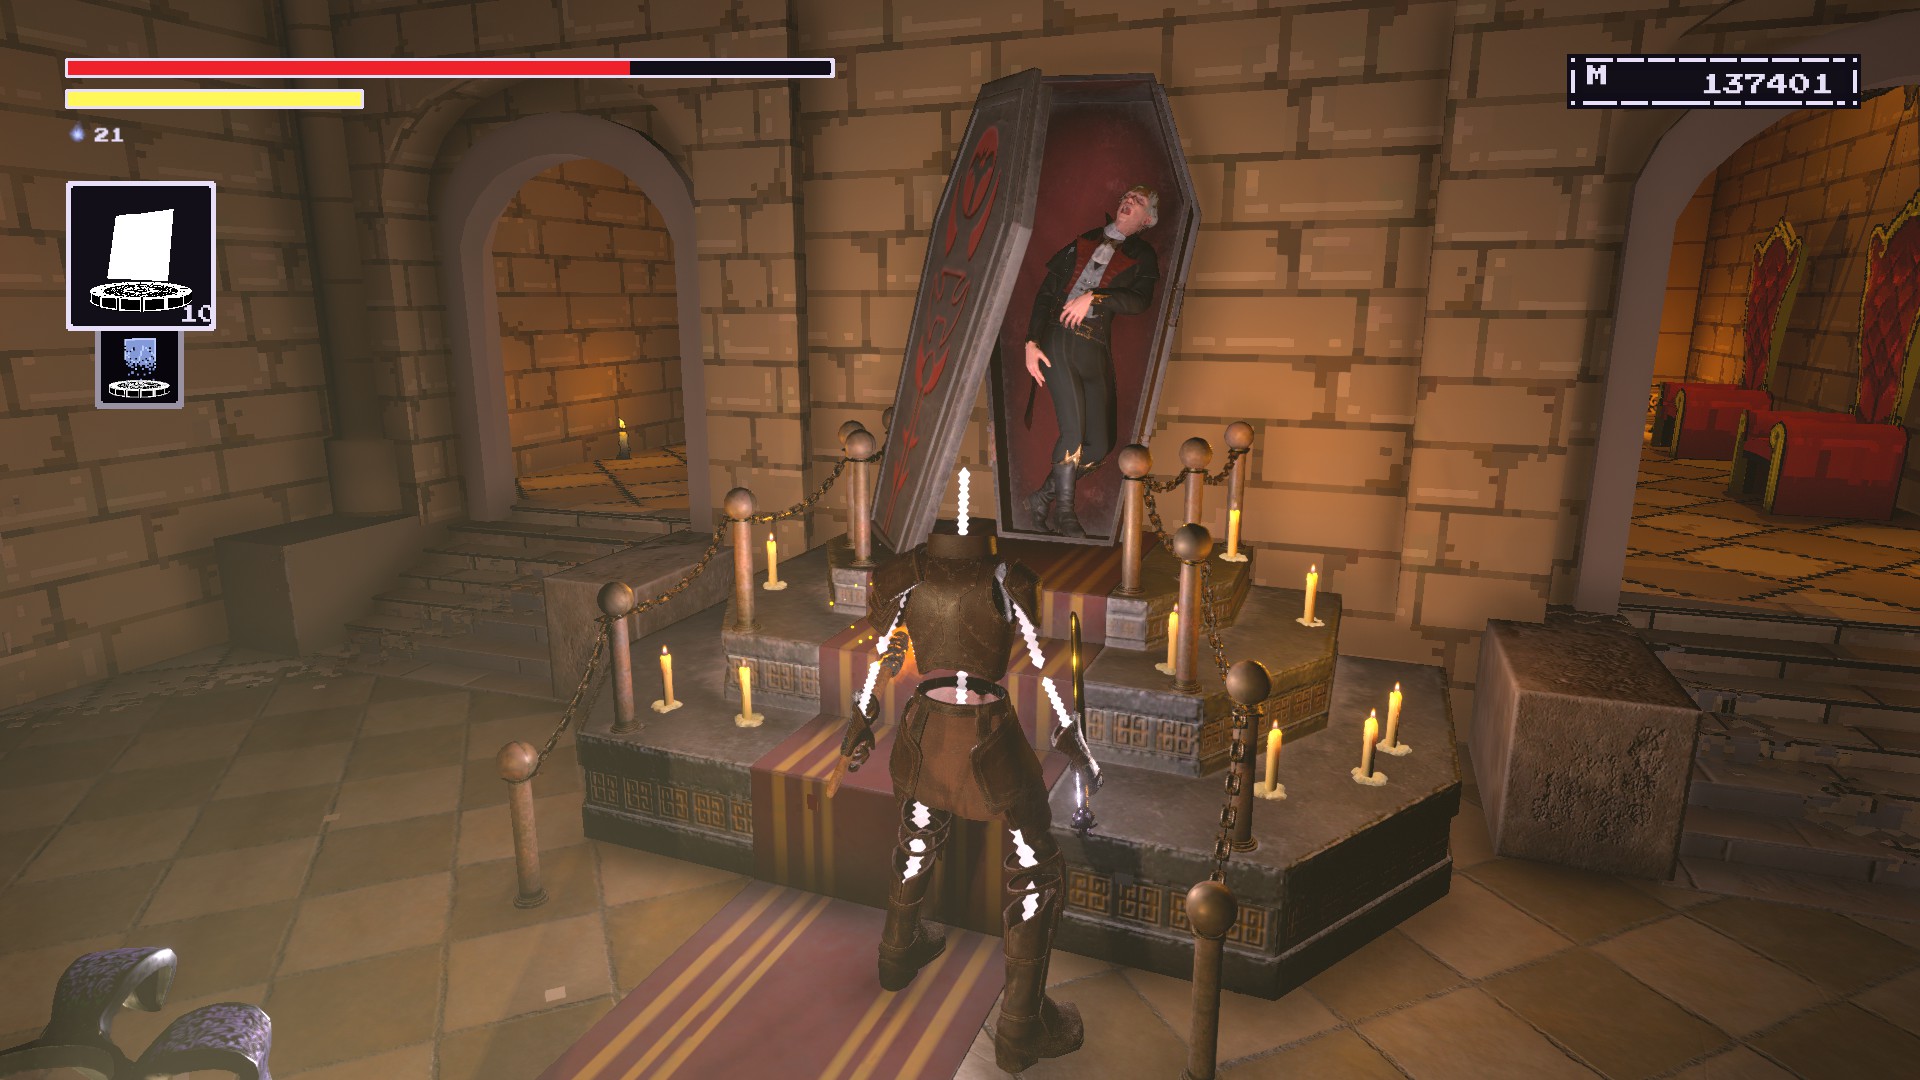
Hero Stumper
KEEP OF THE STOLEN CROWN #3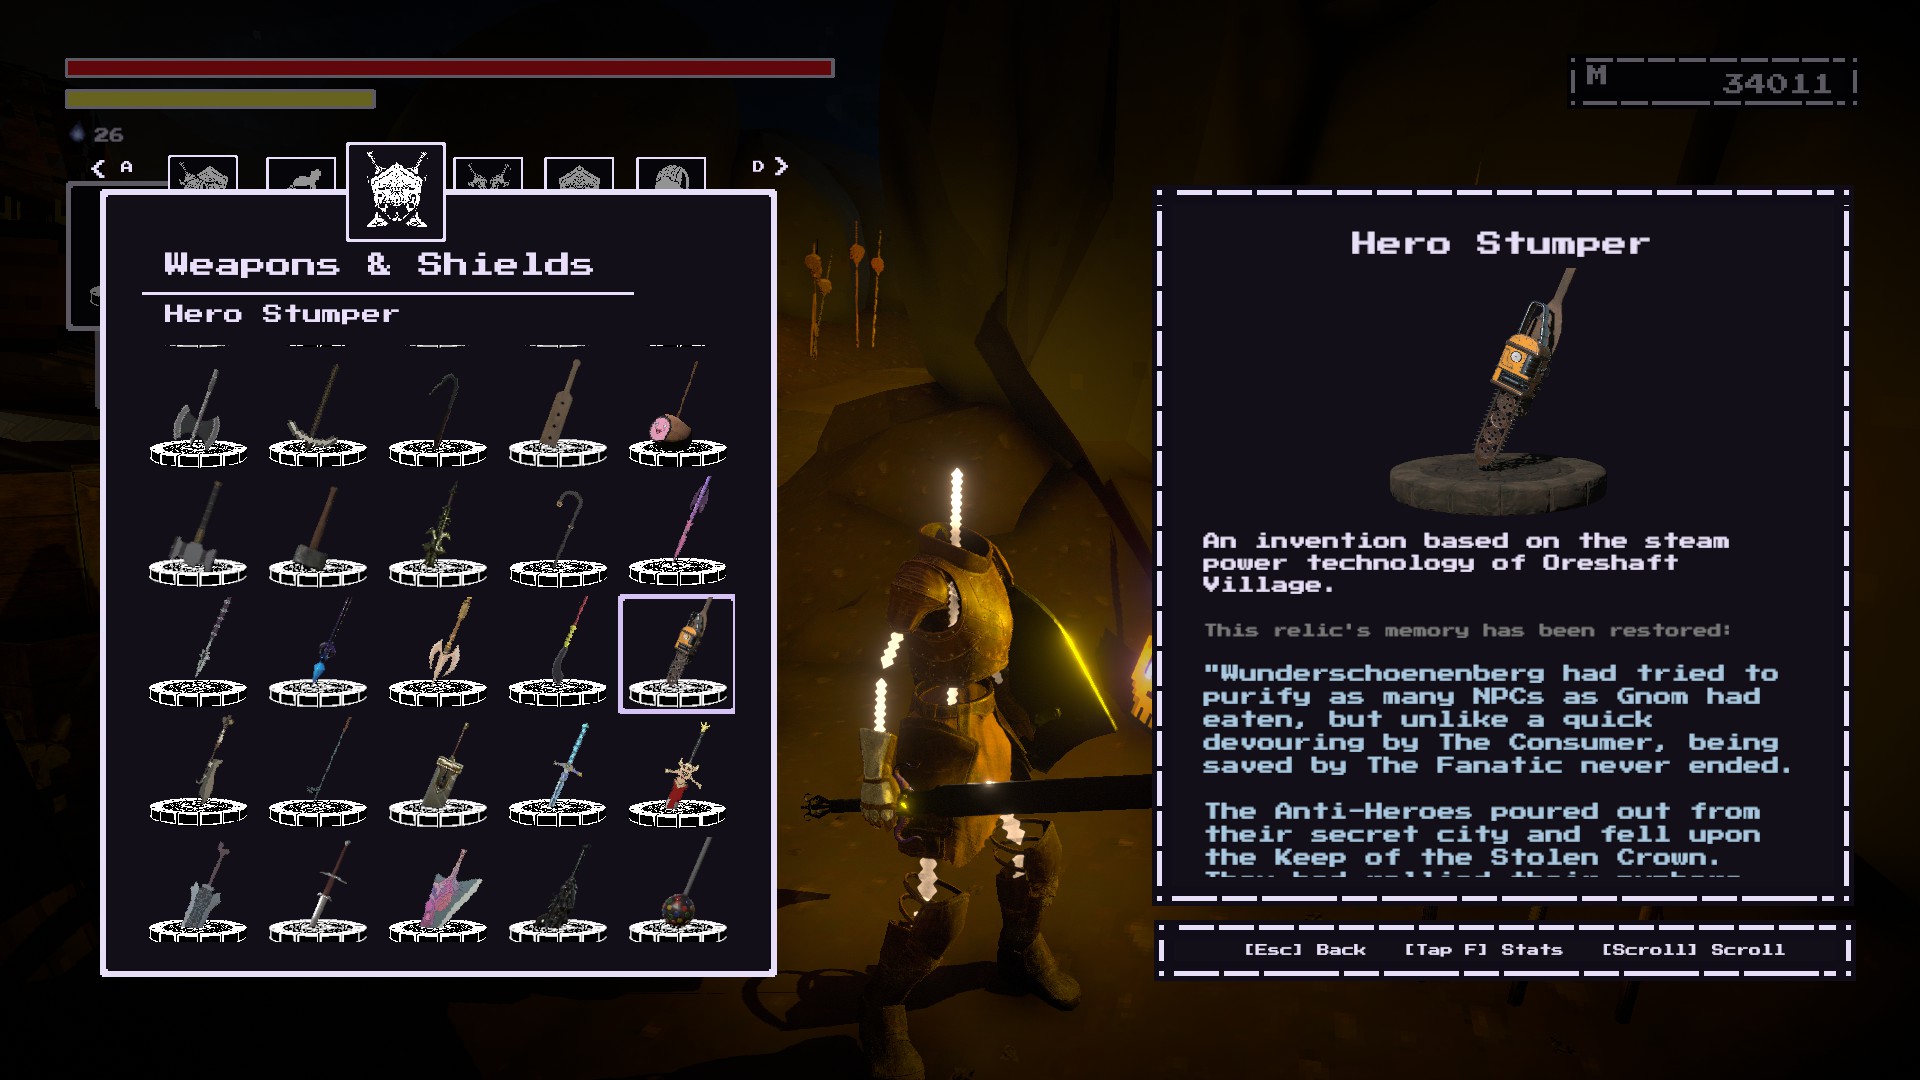
At the
Keep of the Stolen Crown, 에 가다
beginning of the blood waterfall staircase room.
Go towards the left sideand enter through the door with a Werewolf above it.
The weapon should be
within the hallway.
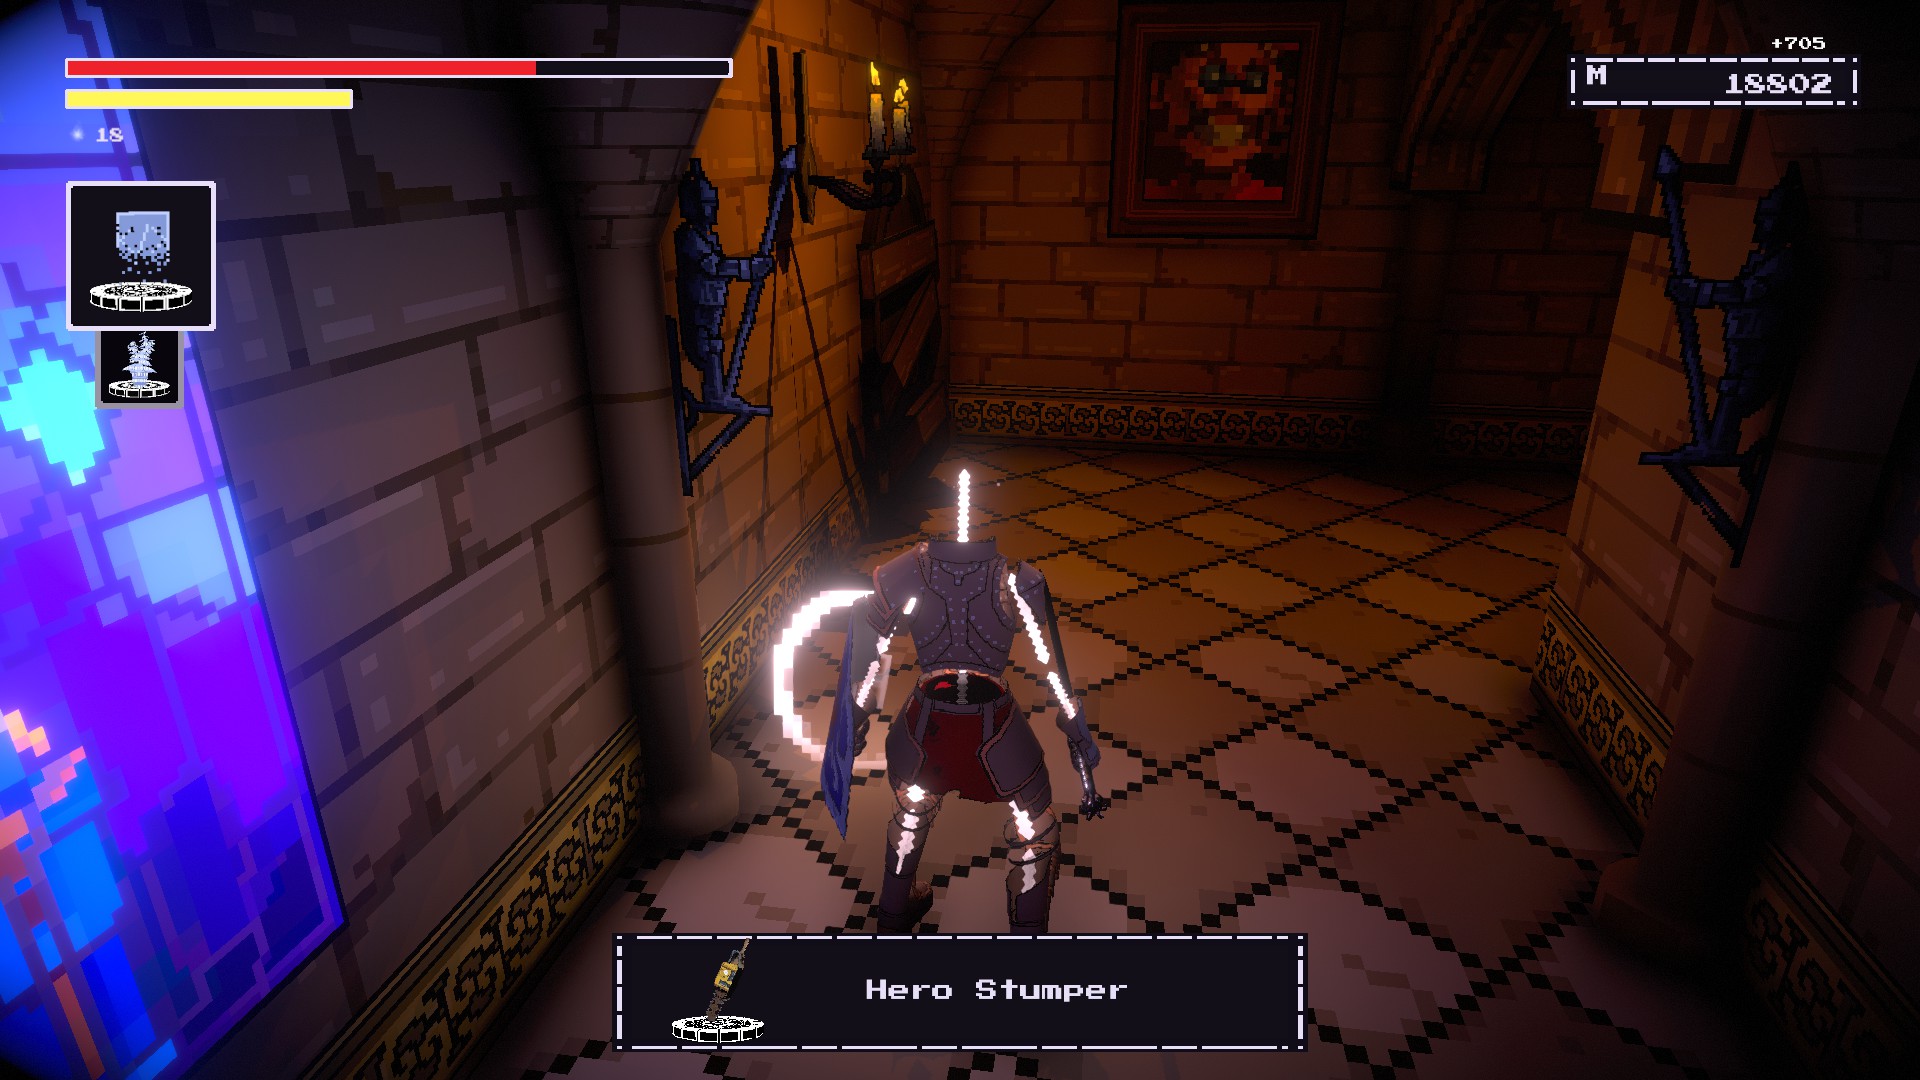
문자 그대로
outside of the Keep of the Stolen Crown.Just go to where the beacon in the moat isand remember the weapon.
Laid Pipe
KEEP OF THE STOLEN CROWN #4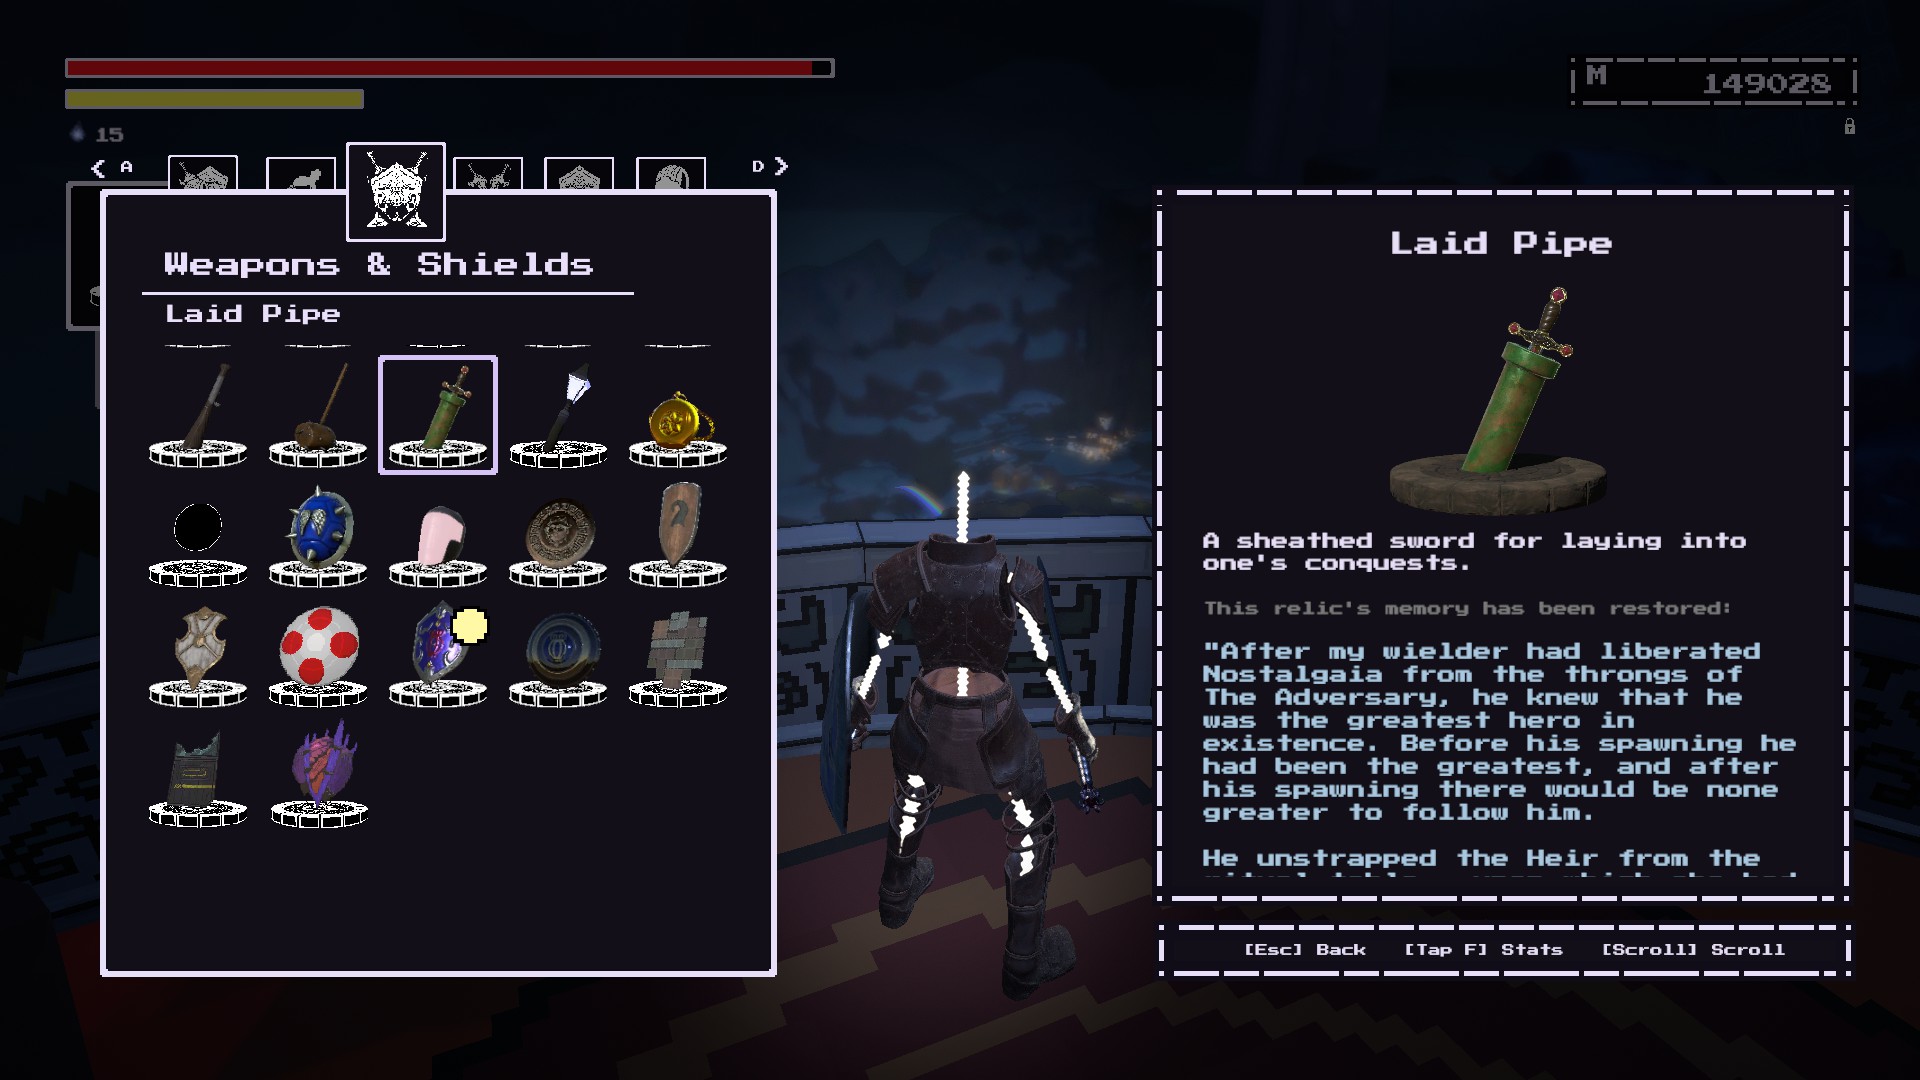
Obtained after
defeating Mercucio the Pipelayer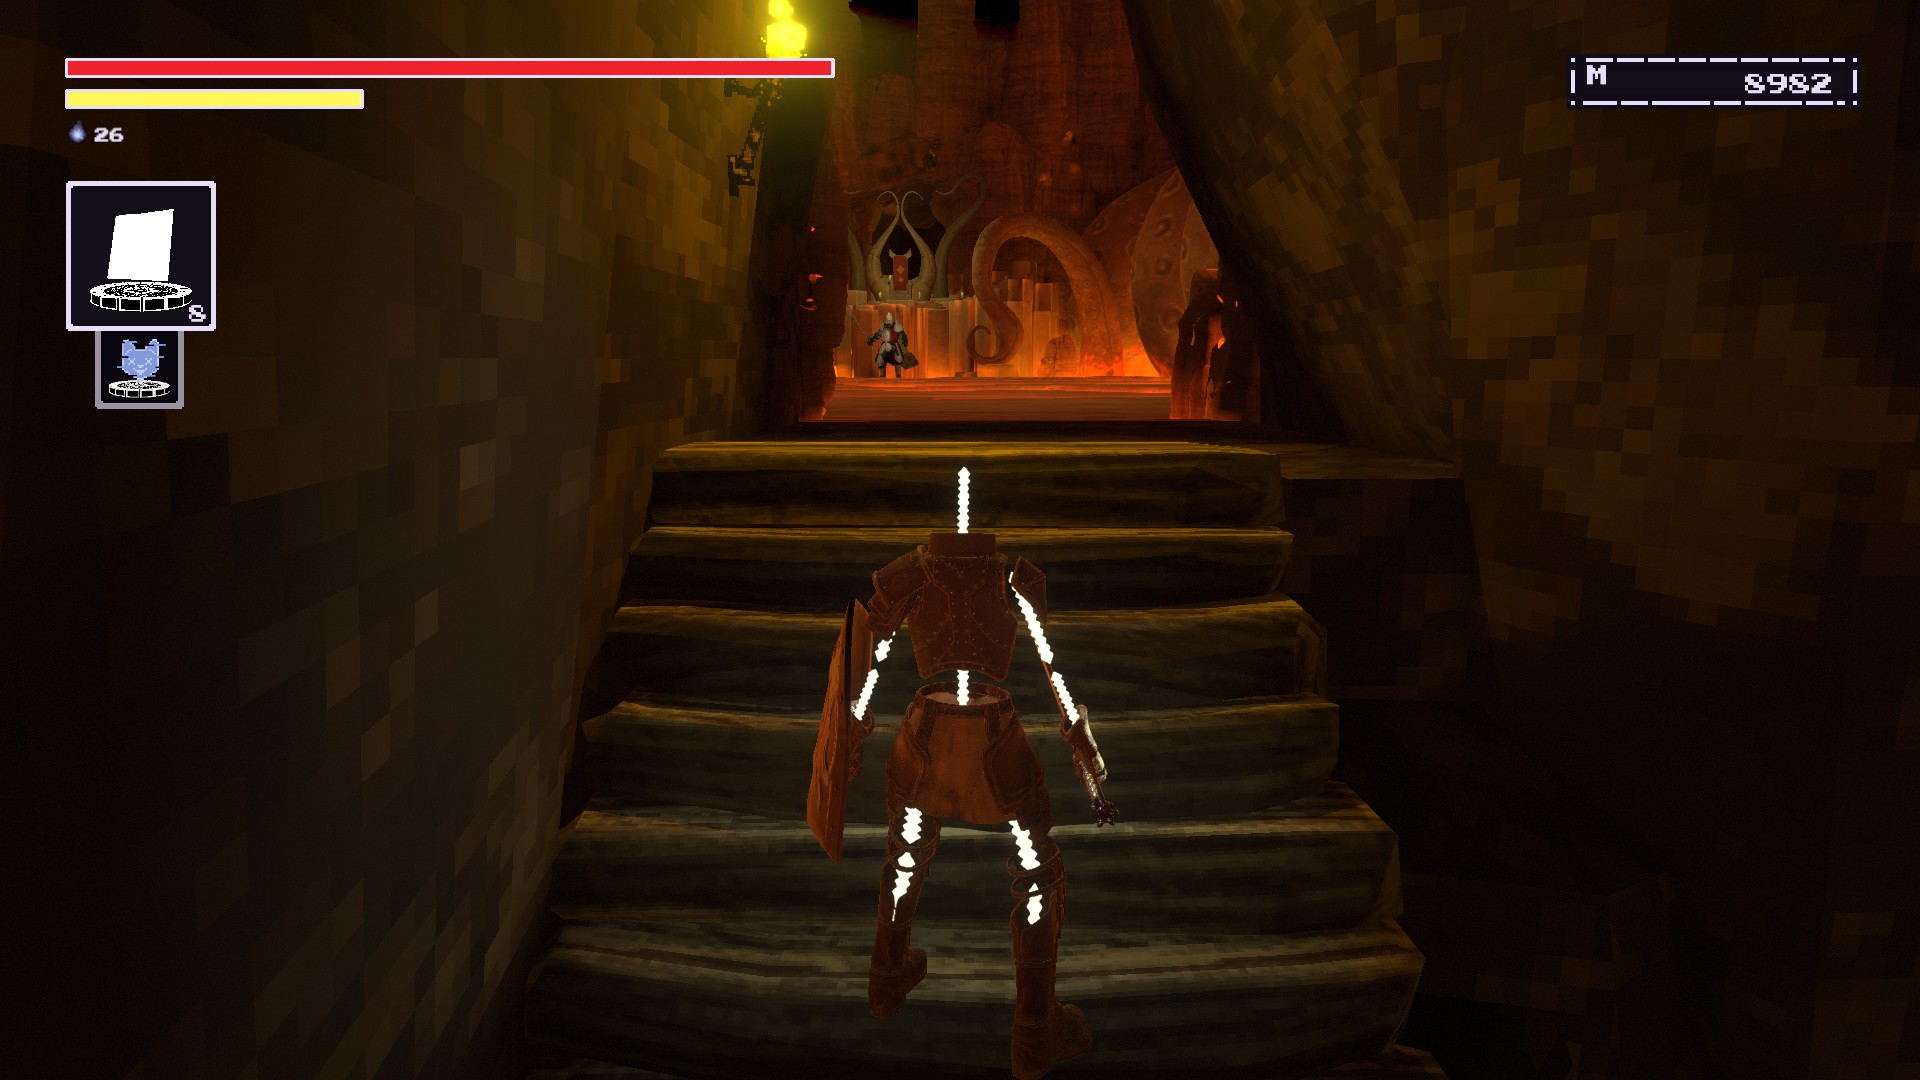
After getting this weapon, you’ll want to return to the
Keep of the Stolen Crown.Make your way back to the top where
The Monarch turned to dust.You’ll want to remember the weapon at this
balcony.
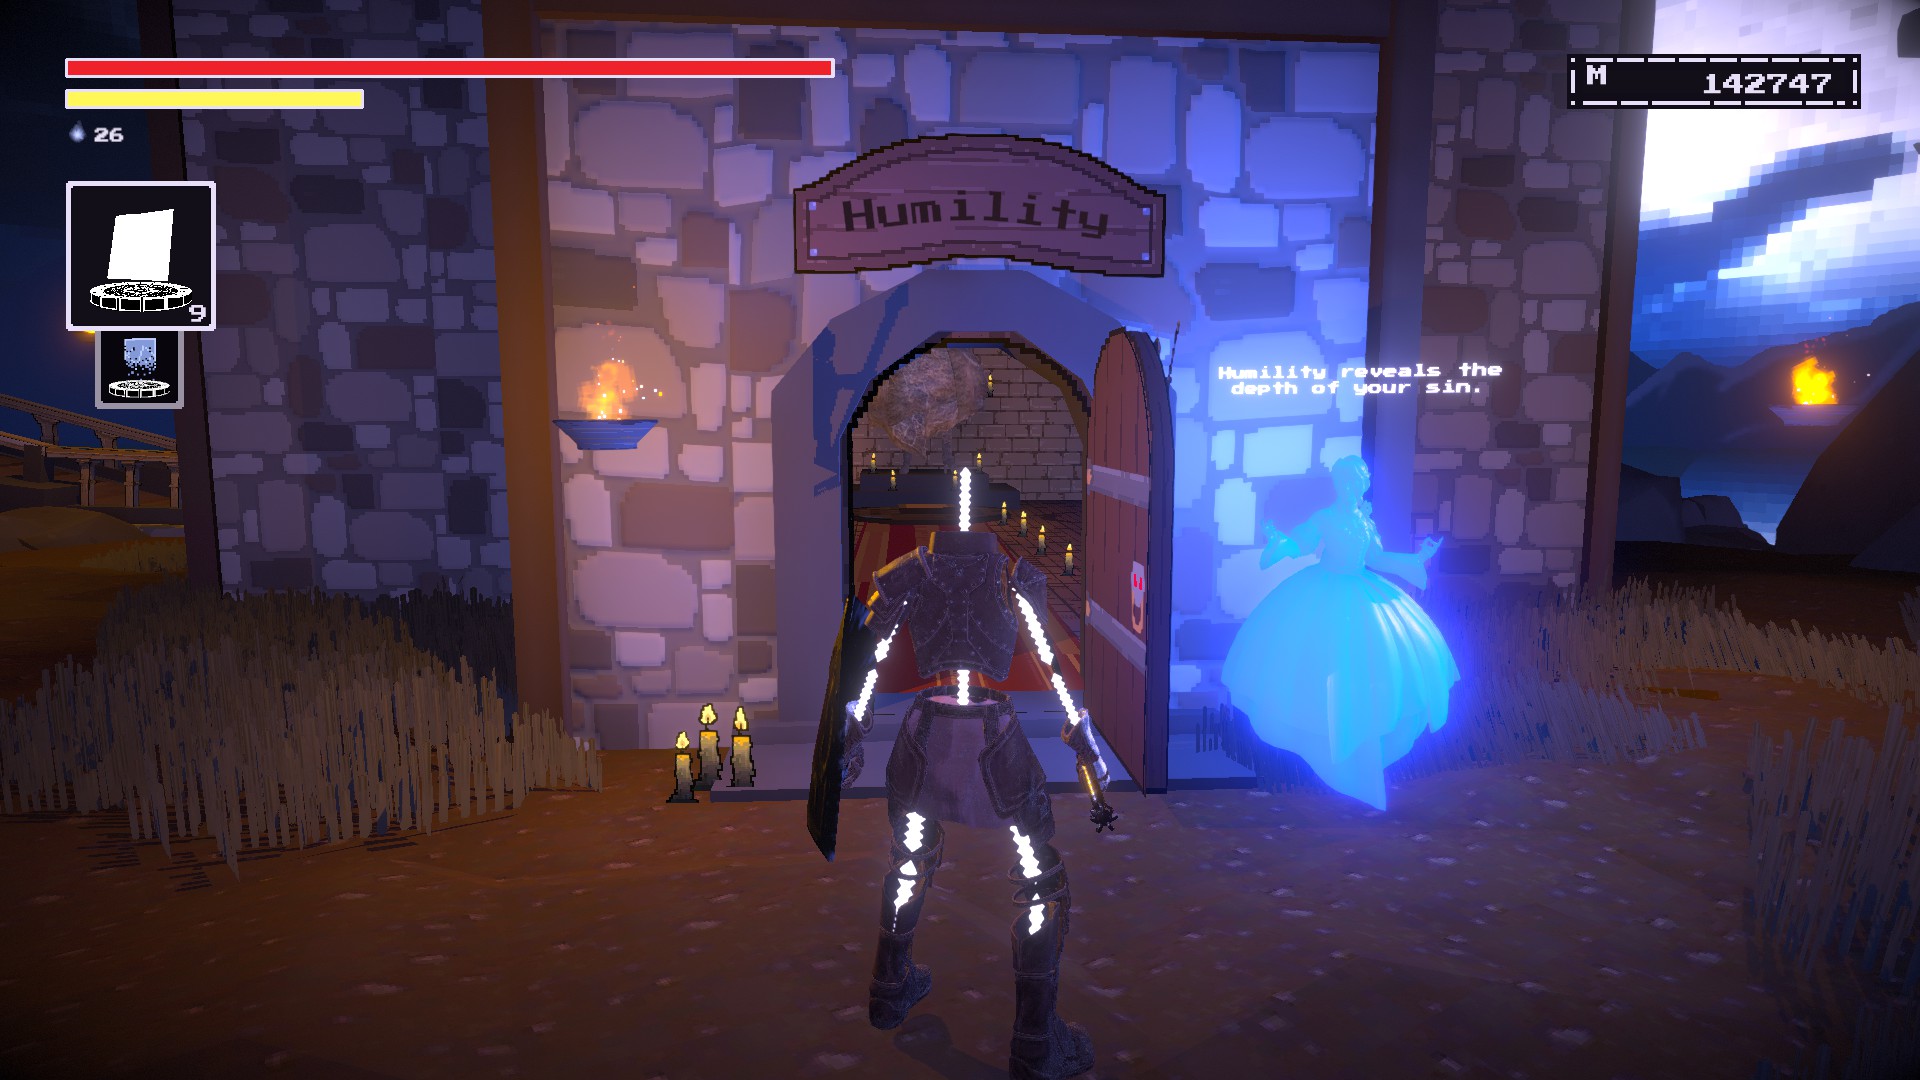
Tunic’s Tunic
KEEP OF THE STOLEN CROWN #5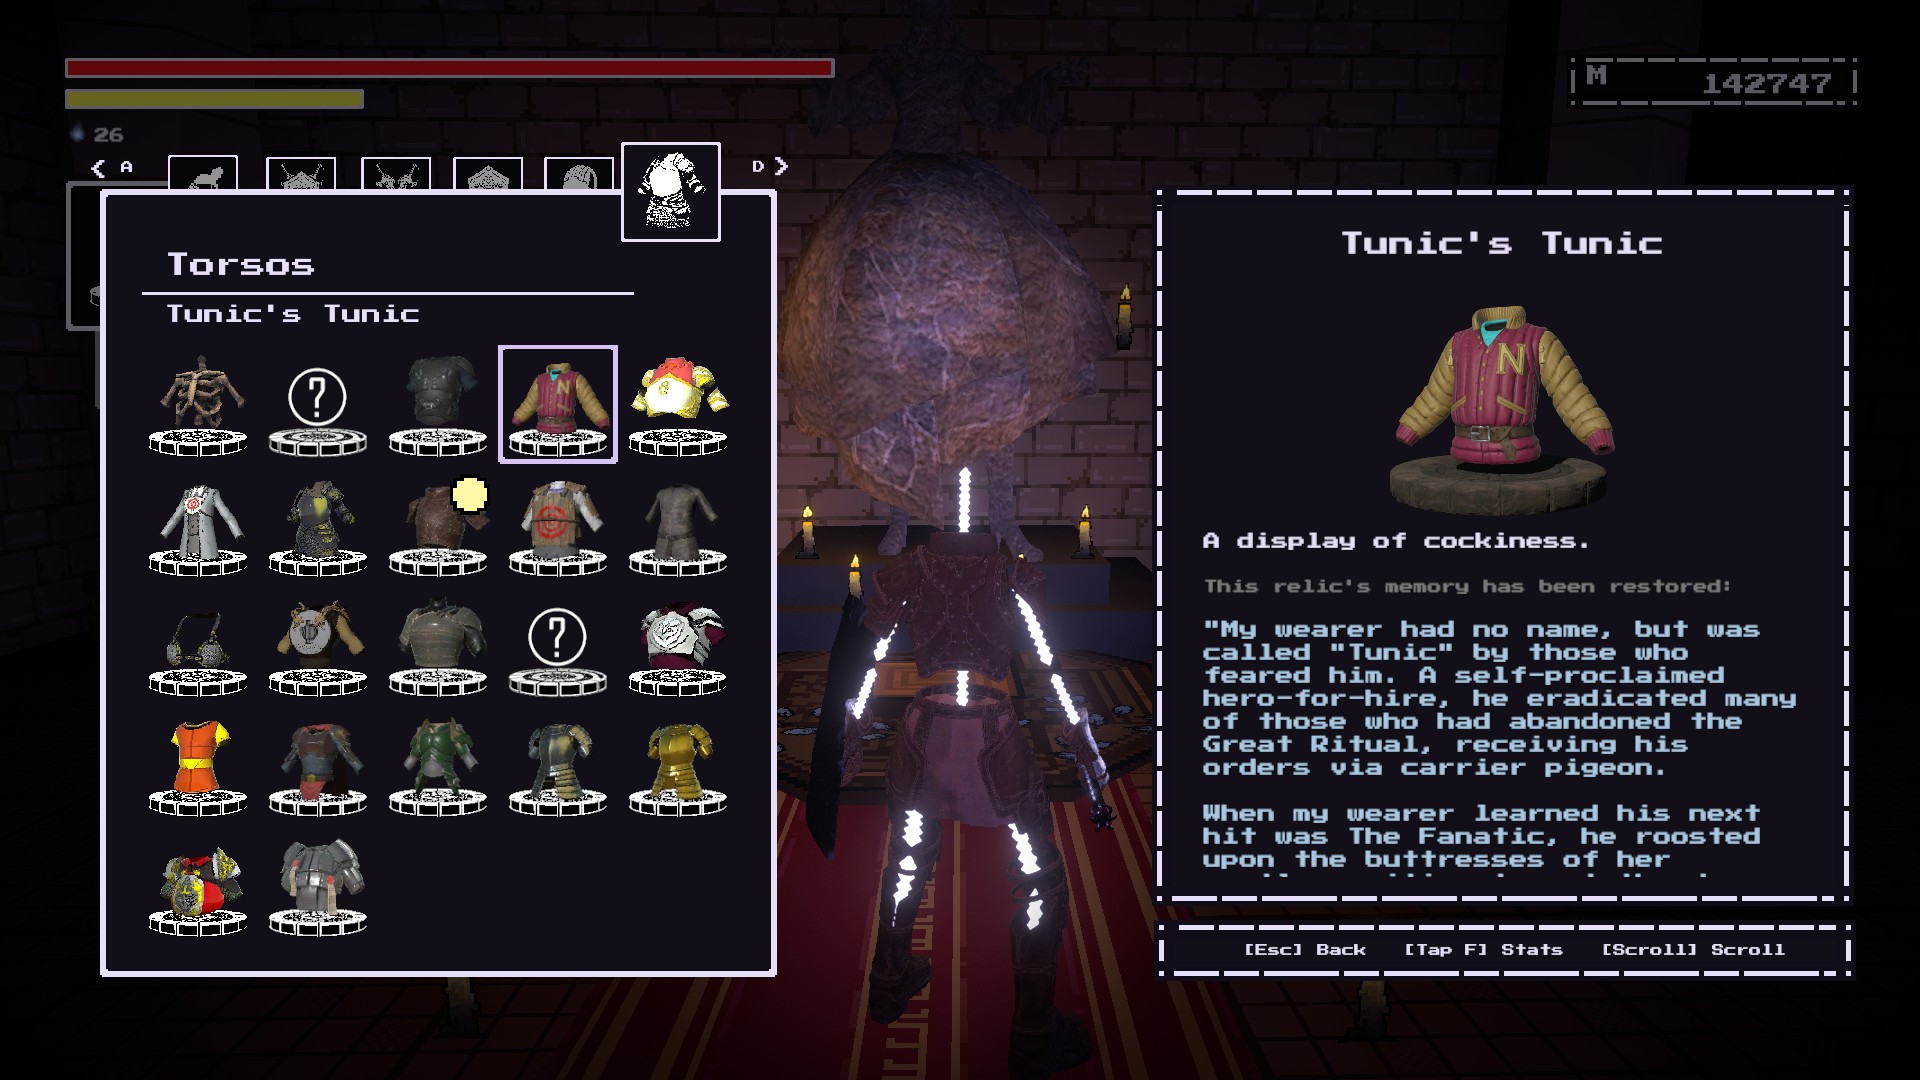
At the
beginning of the Rehabilation Pits.It should be
near the first cell room that players would walk into after going through a wall.
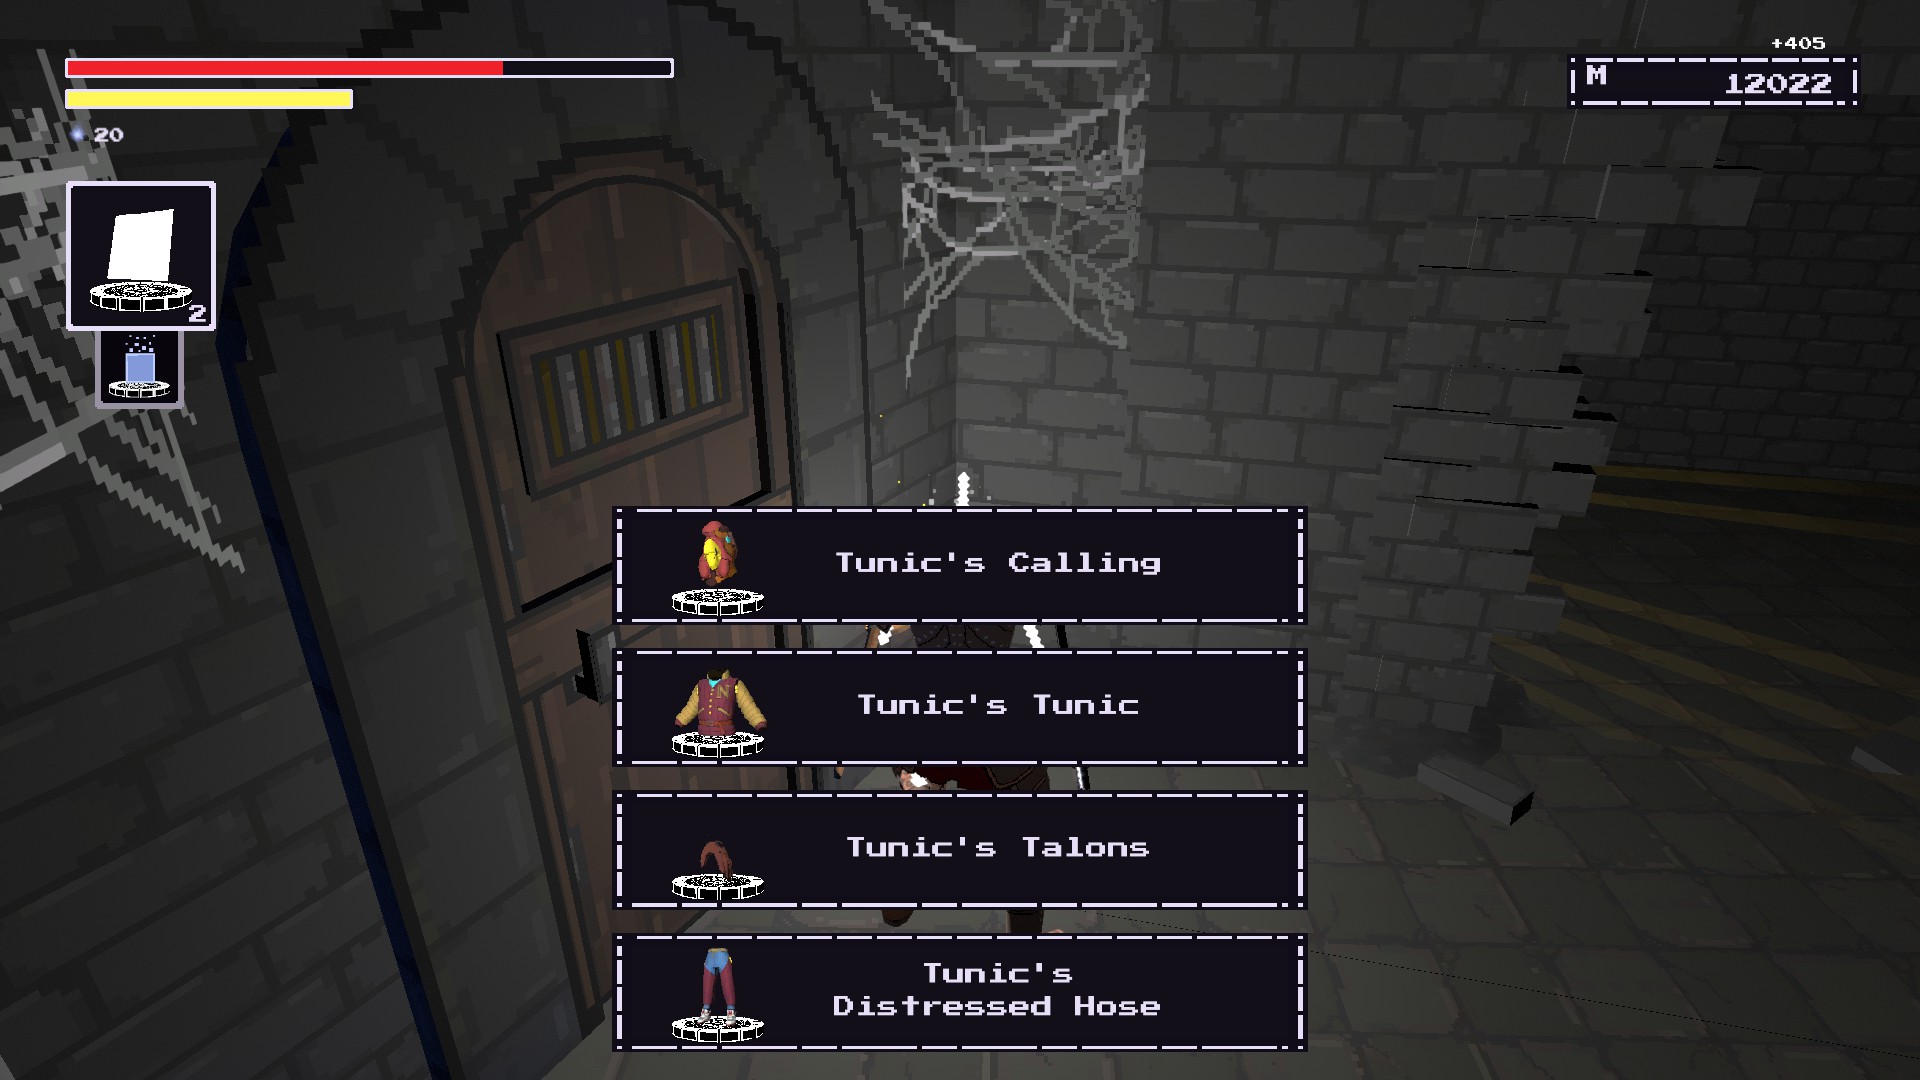
After exiting out of the
Chapel of Conviction at the Keep of the Stolen Crown,
notice how there is
a broken railing on the right of the walkway.
Walk off of it and
into the building with the broken roof.
Collect the Chapel of Humility Key!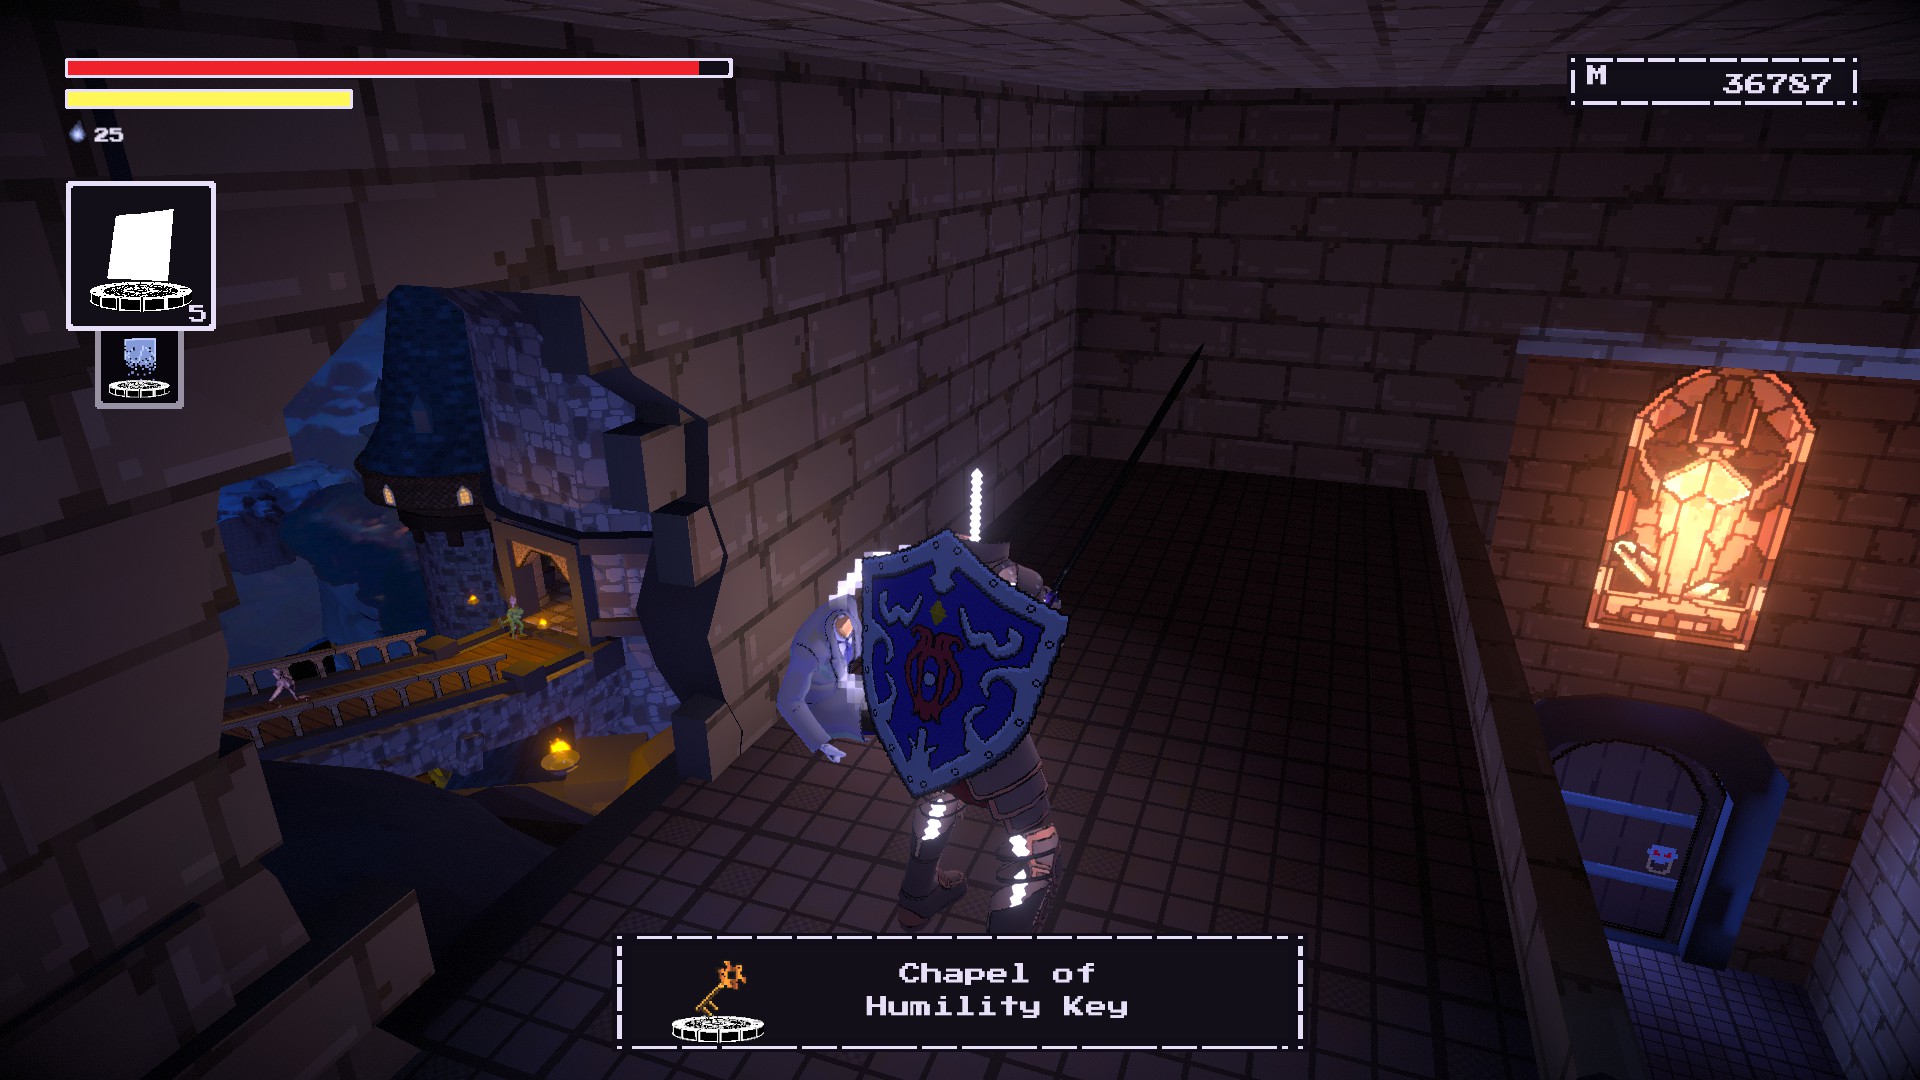
다음, you should go back to the
Chapel of Humility.
당신은 볼 것입니다
a statue of The Puritan, this is where you restore the tunic!
Bold Blade’s Bulwark***
KEEP OF THE STOLEN CROWN #6
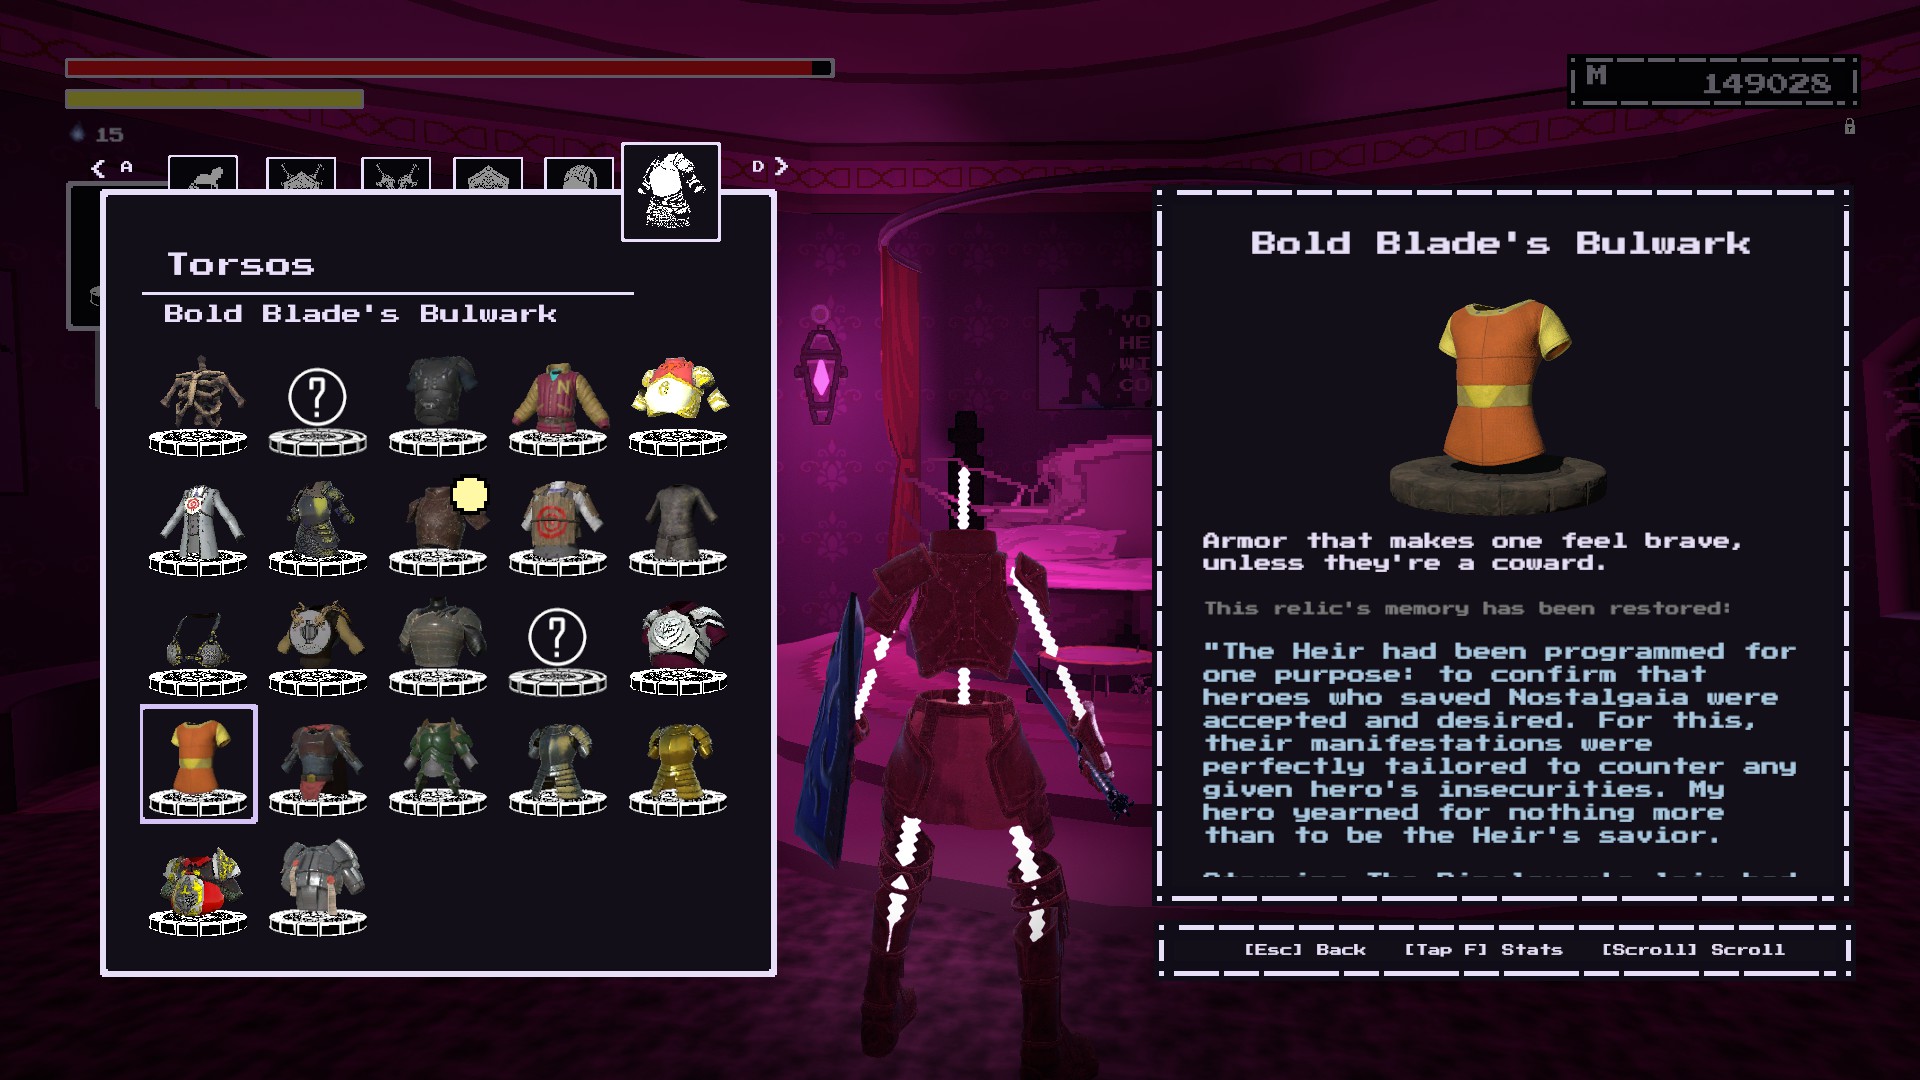
Okay for this one,
you have to progress Nhero’s quest in order to complete Blade the Bold’s.
I’ll give a quick summary of what to do for these two.
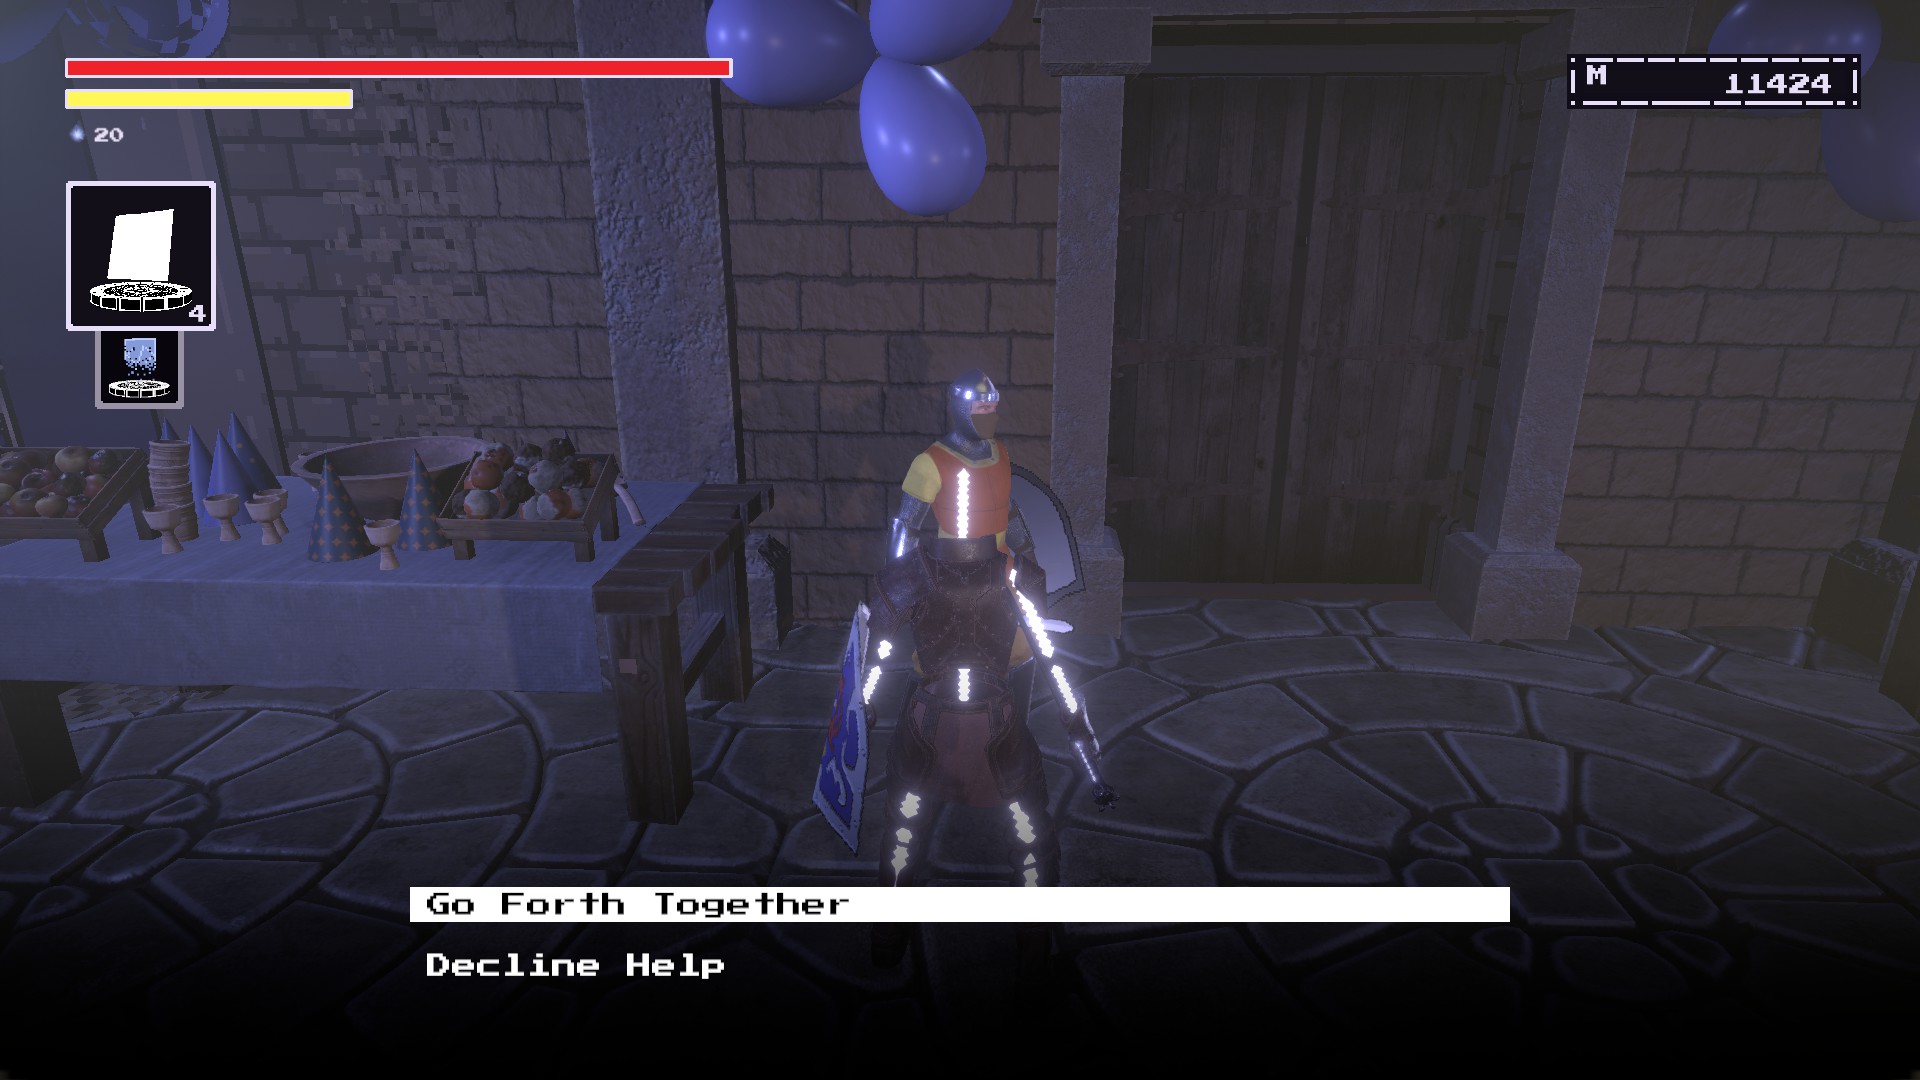
For Nhero:1) Find Nhero and Sco in The Depths before beating The Grinder.
2) Help them kill the spider monster before beating The Grinder (Try to not let them die).
3) Find Nhero at Festivity Row and give him the restored Shield of Inspiration before beating Gnom.
For Blade the Bold:1) Find him in a cell within the Quest Reward Vault.
2) Find his Withered Icon in the shortcut between Oreshaft Shelter and Warlock Wilds.
3) Give it back to him (Do not use it and give before beating Wunder lady!)
올바르게 수행된 경우,
you should see these two arguing at the moving staircase room at the
Keep of the Stolen Crown.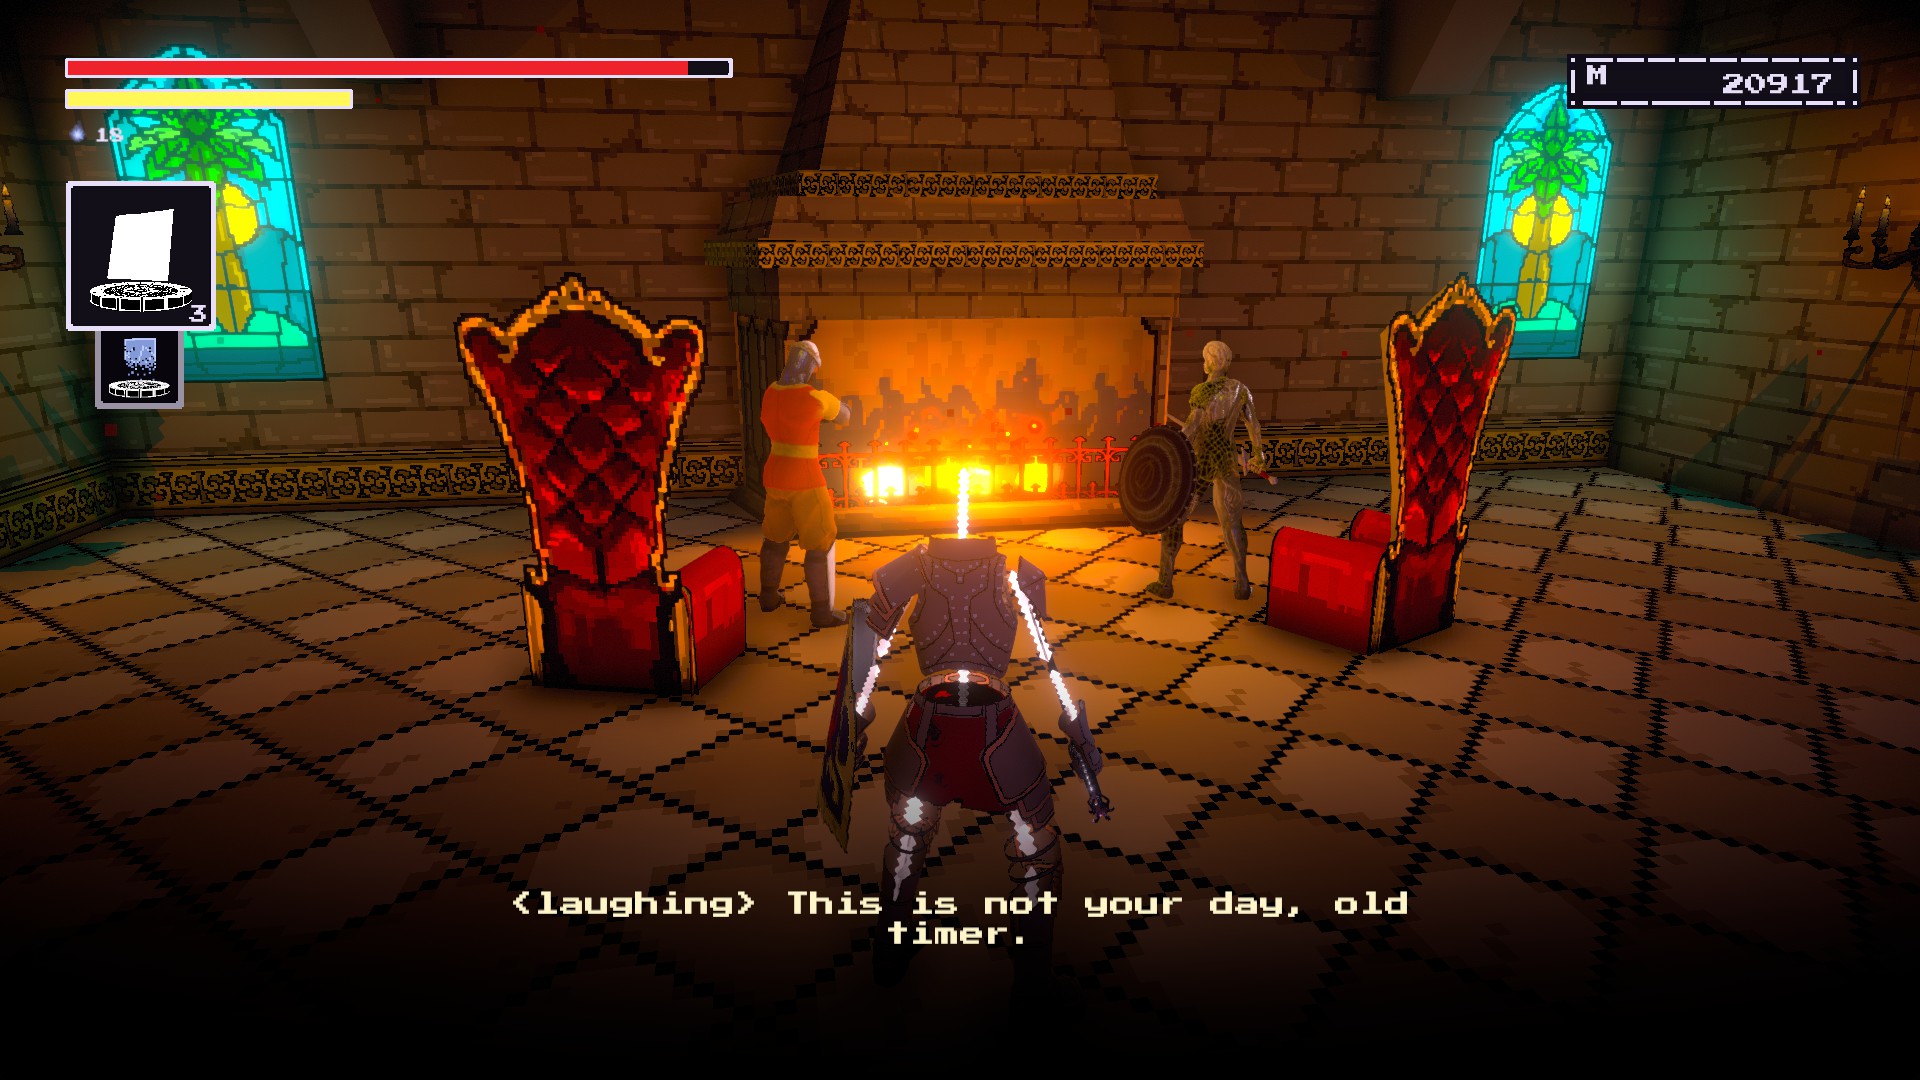
이후,
you should be set to get his gear.Progress through the story until
you confront the Narrator.Blade the Bold will be waiting for you and be willing to help you fight the boss.The gear should drop upon the defeat of the boss.
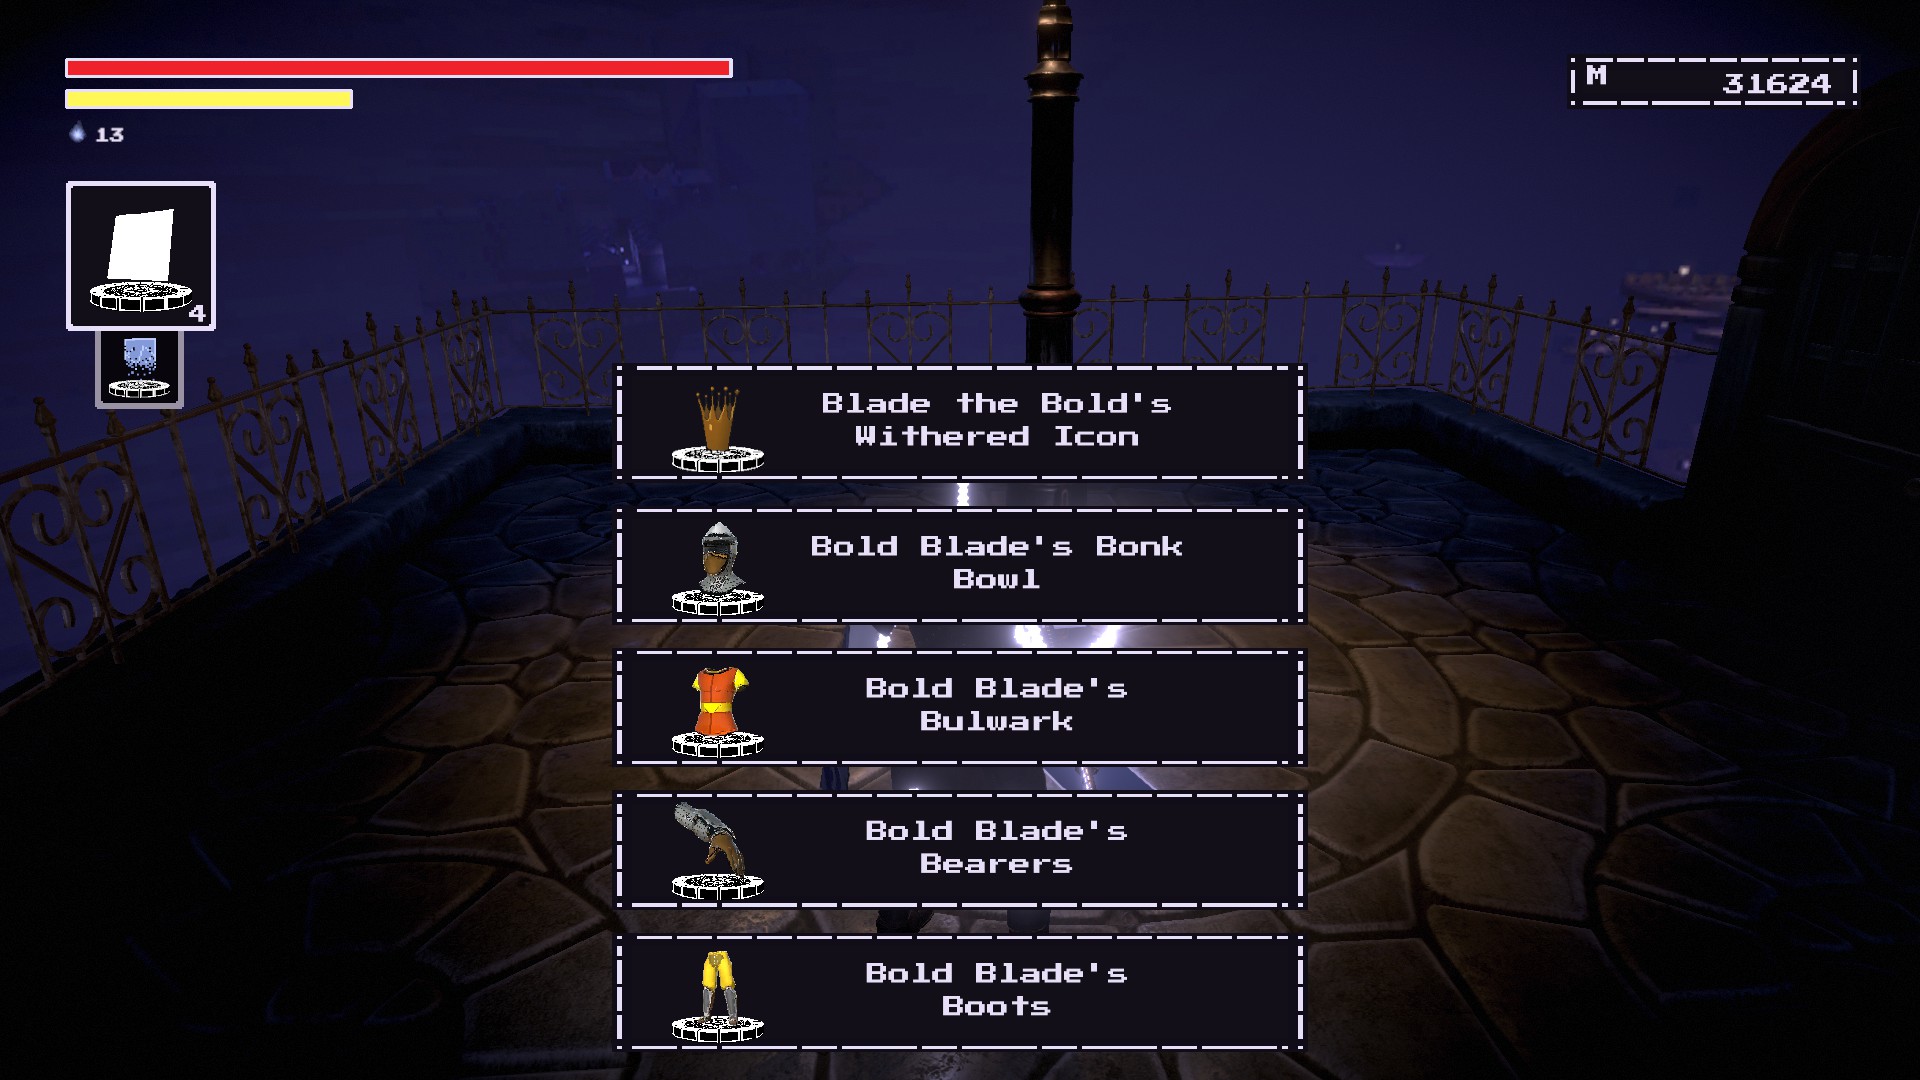
Return back to the
Keep of the Stolen Crown.
You’ll want to go to the area where you
“meet” the Monarch.
Next you should
ascend the nearby staircase that’s adorned in pink.
This will lead you to the
Heir’s Bedroom.
Remember the set in honor of Blade.

Civilization’s Form***
KEEP OF THE STOLEN CROWN #7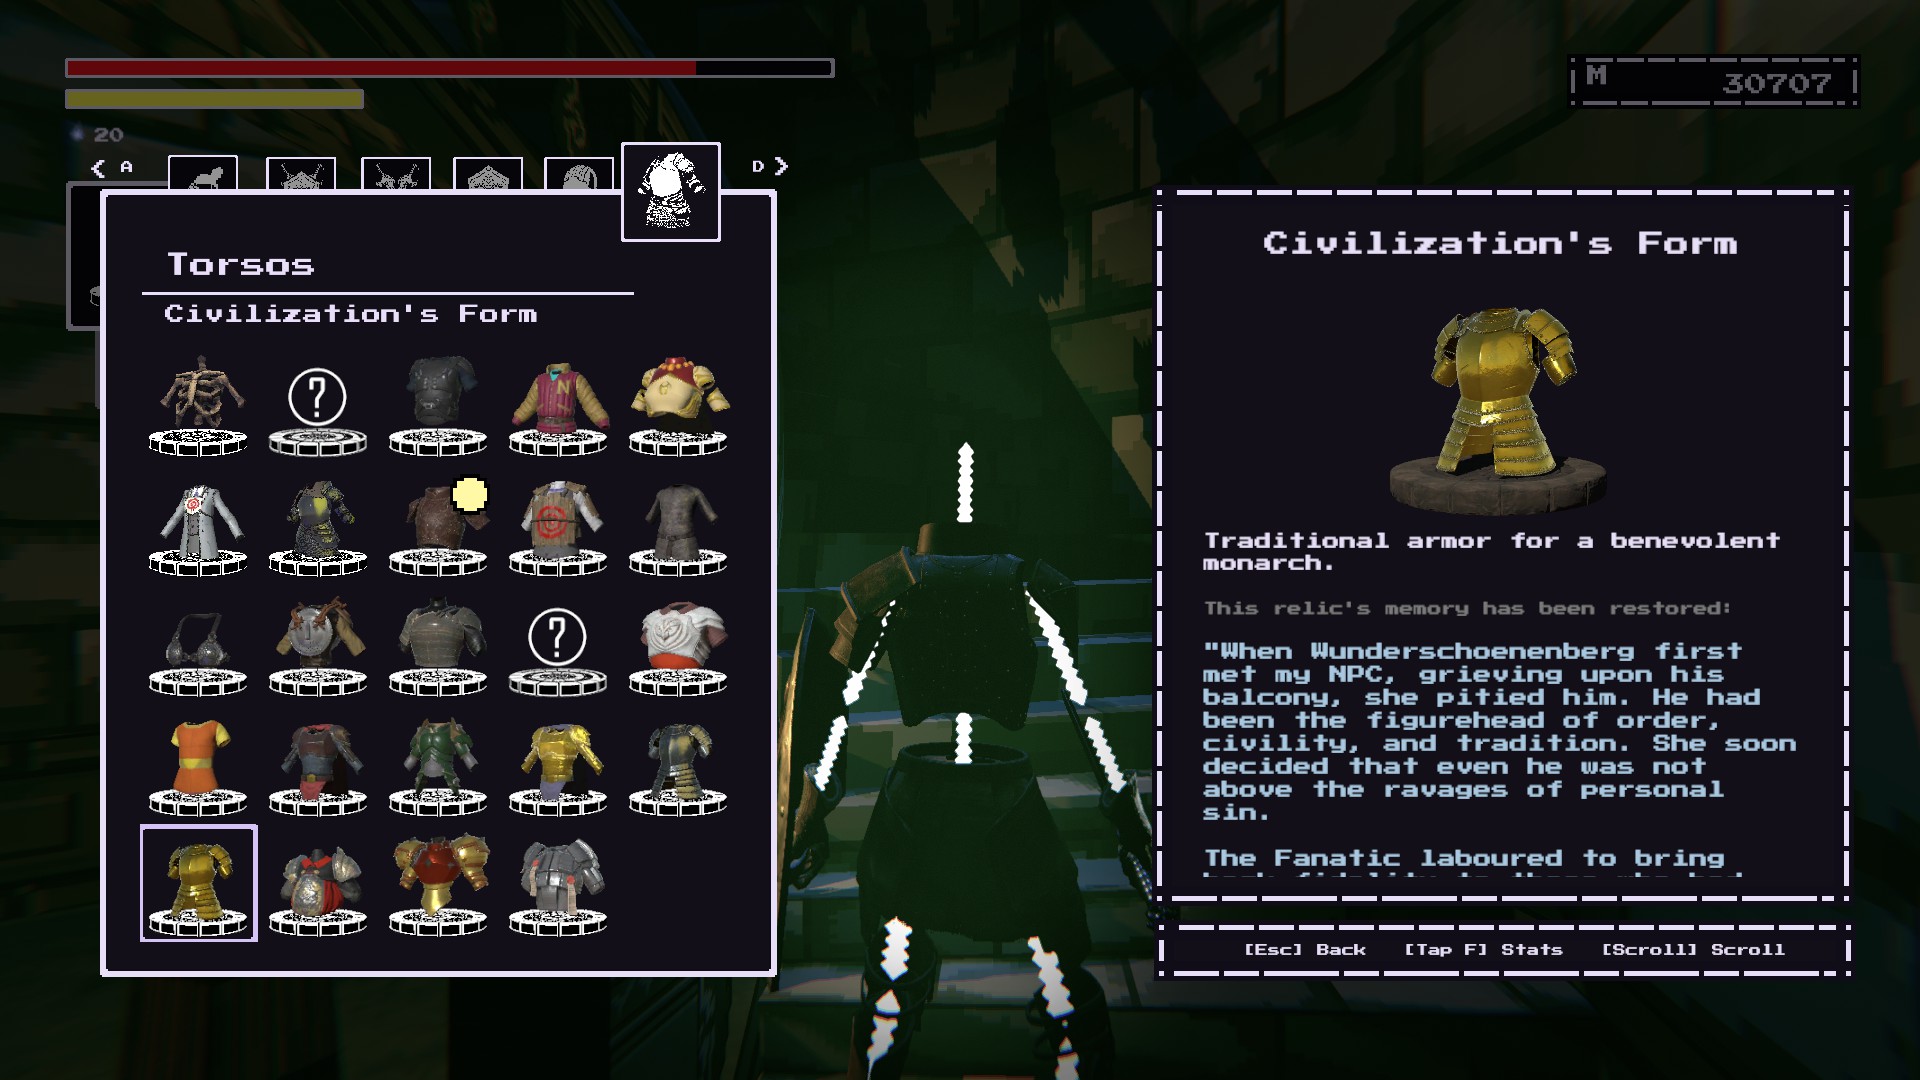
At the
Keep of the Stolen Crown, go through the moving staircase room as shown below.
(Or you can go through the same room where the Lute Hero’s Loot was to get there.)
Fight through enemies until
you reach a ledge that has the armor set in the middle.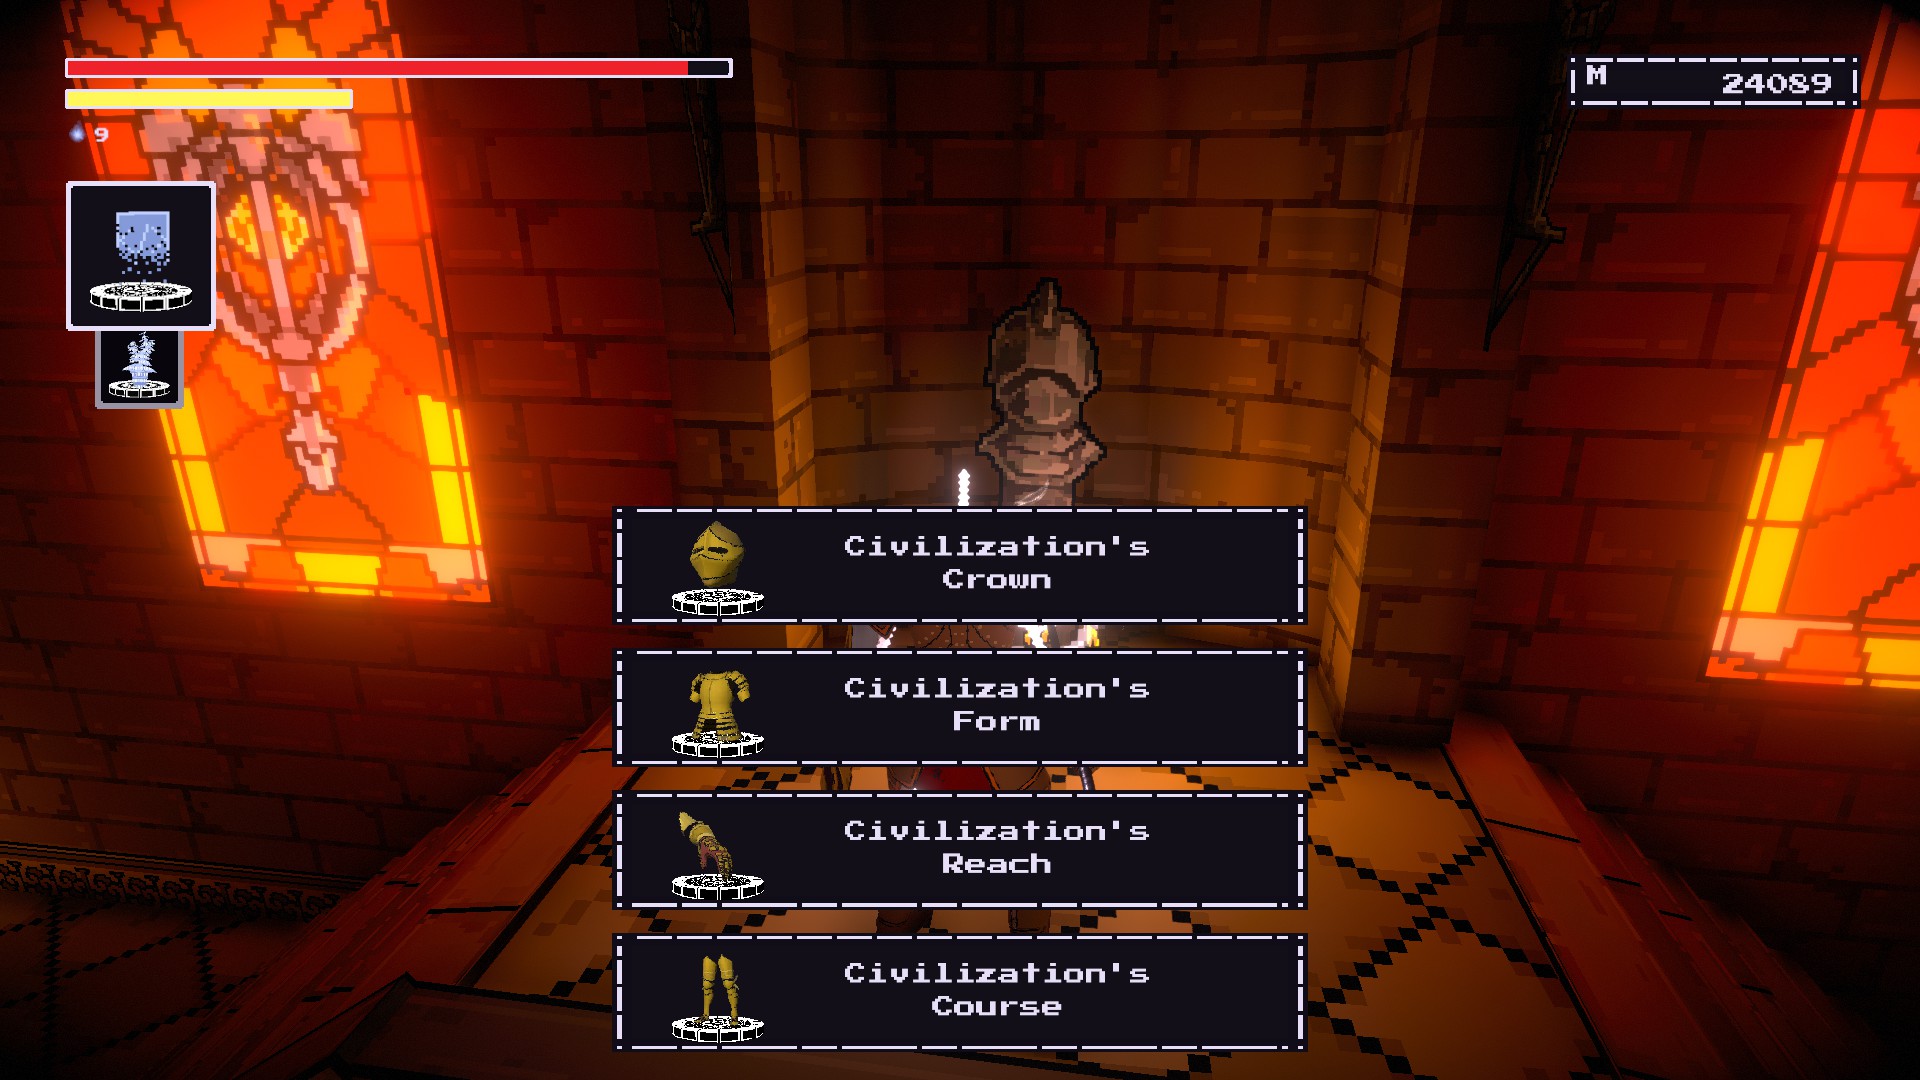
Progress through the
Keep of the Stolen Crown until you reach the
Chapel of Purity.
You can restore the armor set here!


*If you’ve been following Sco’s questline then you need to give the restored Civilization’s Form back to her before you beat Wunderschoenenberg.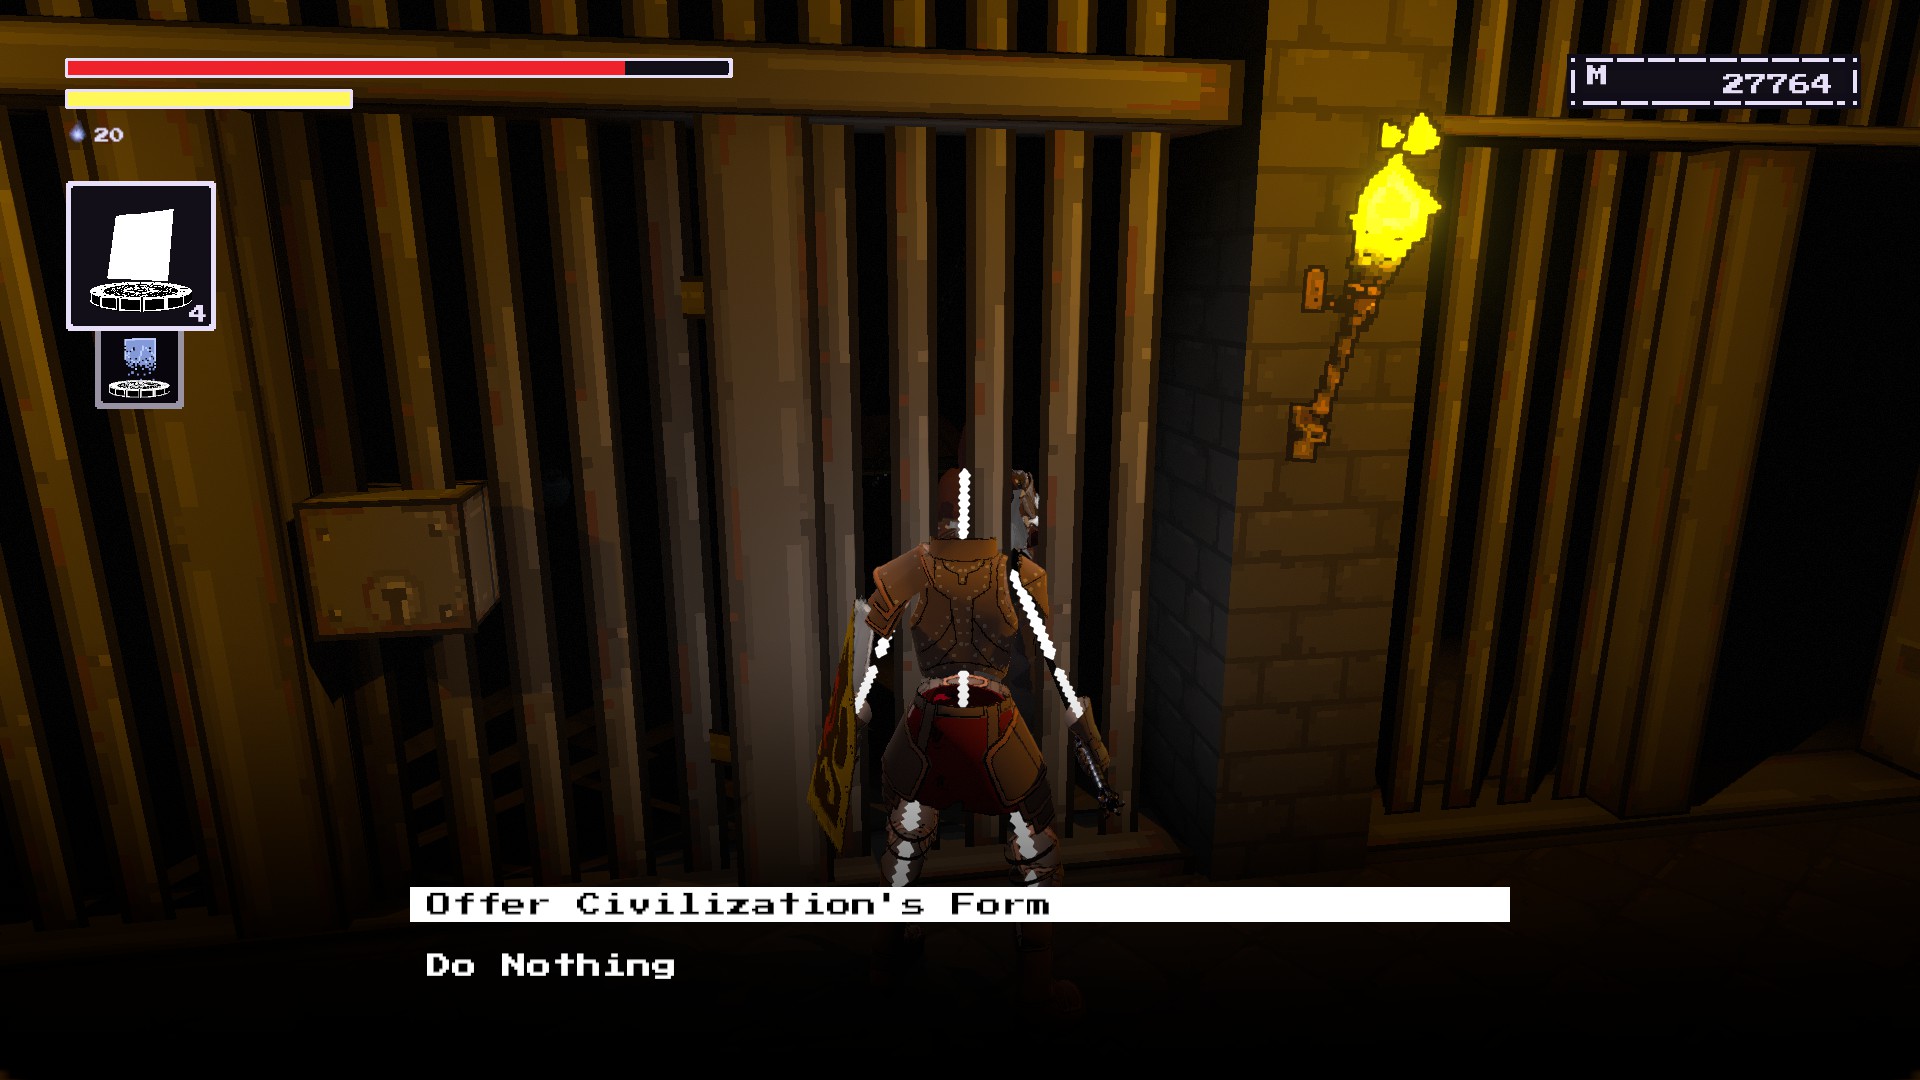
Devourer of Strife
REHABILITATION PITS #1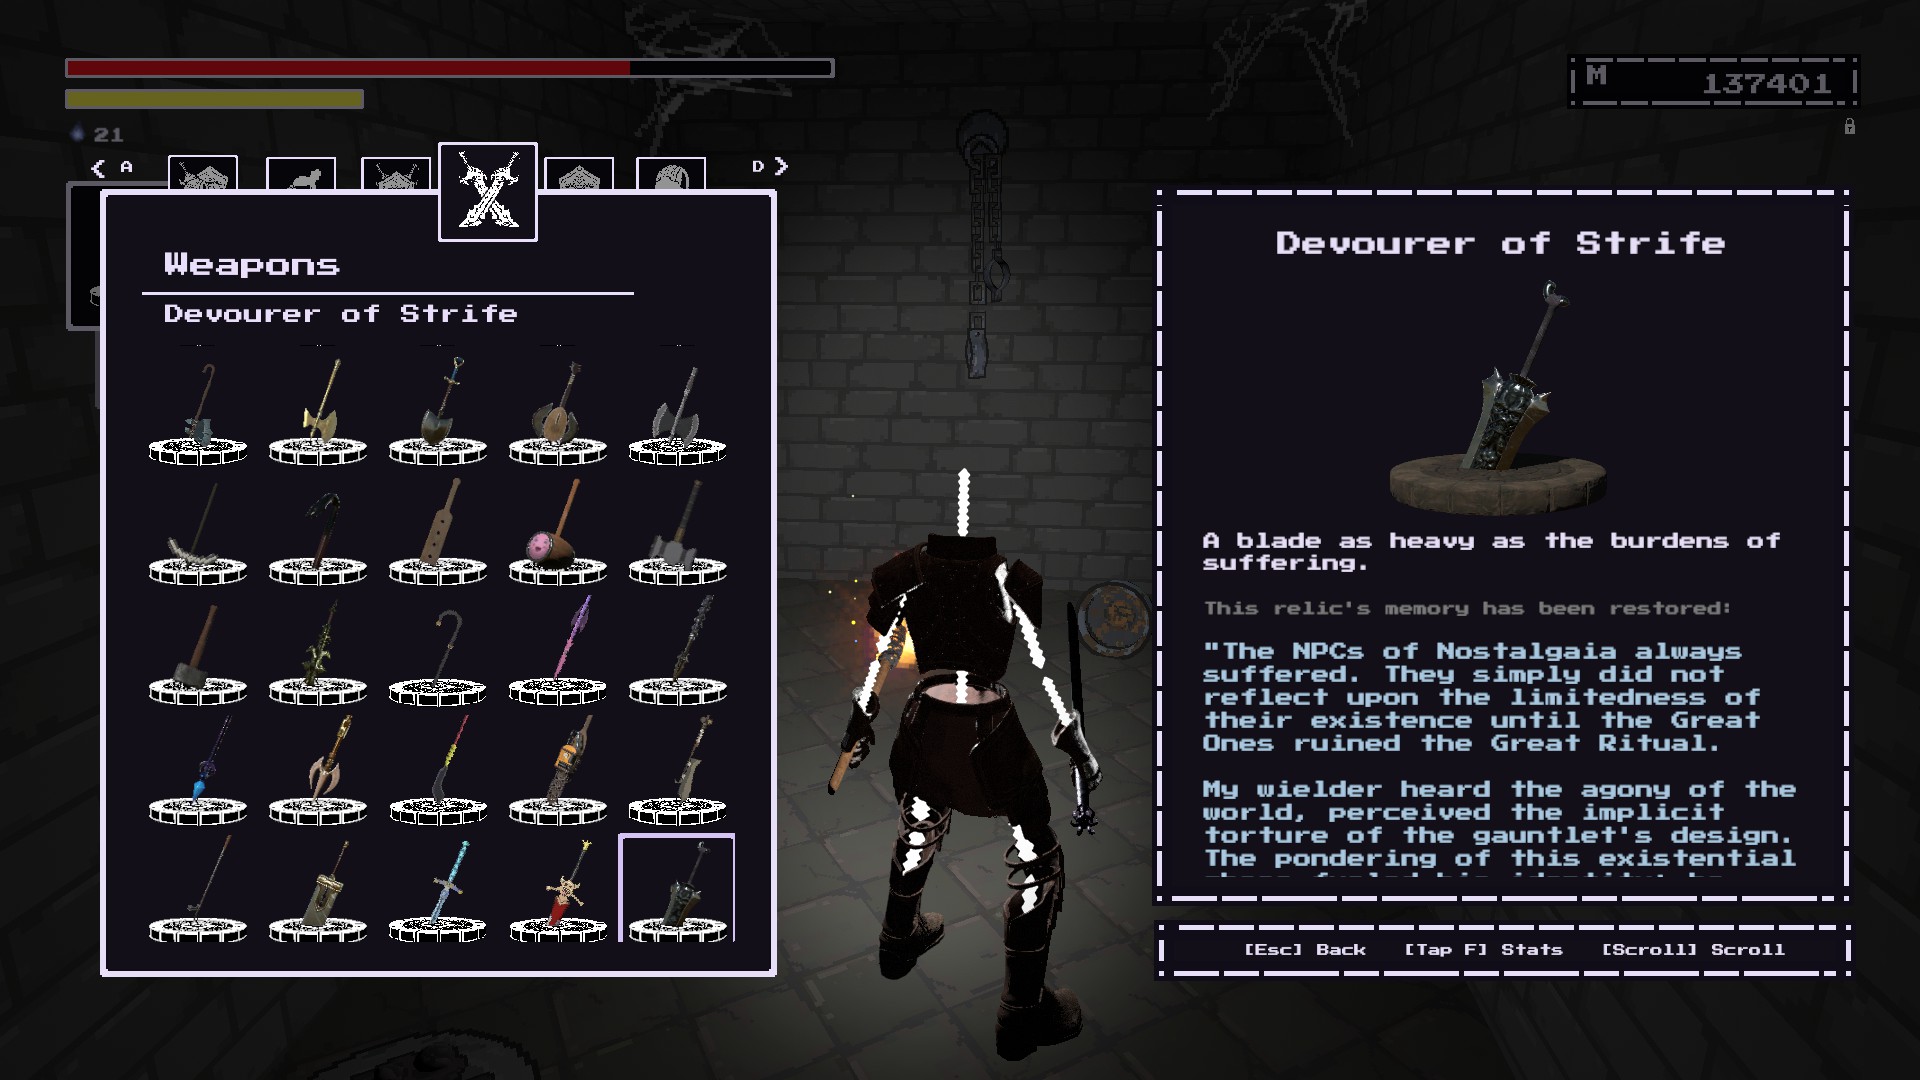
You need to buy it from the
상인.
Easymaker Key found in Warlock’s Wilds.
소송 비용 2500 memory.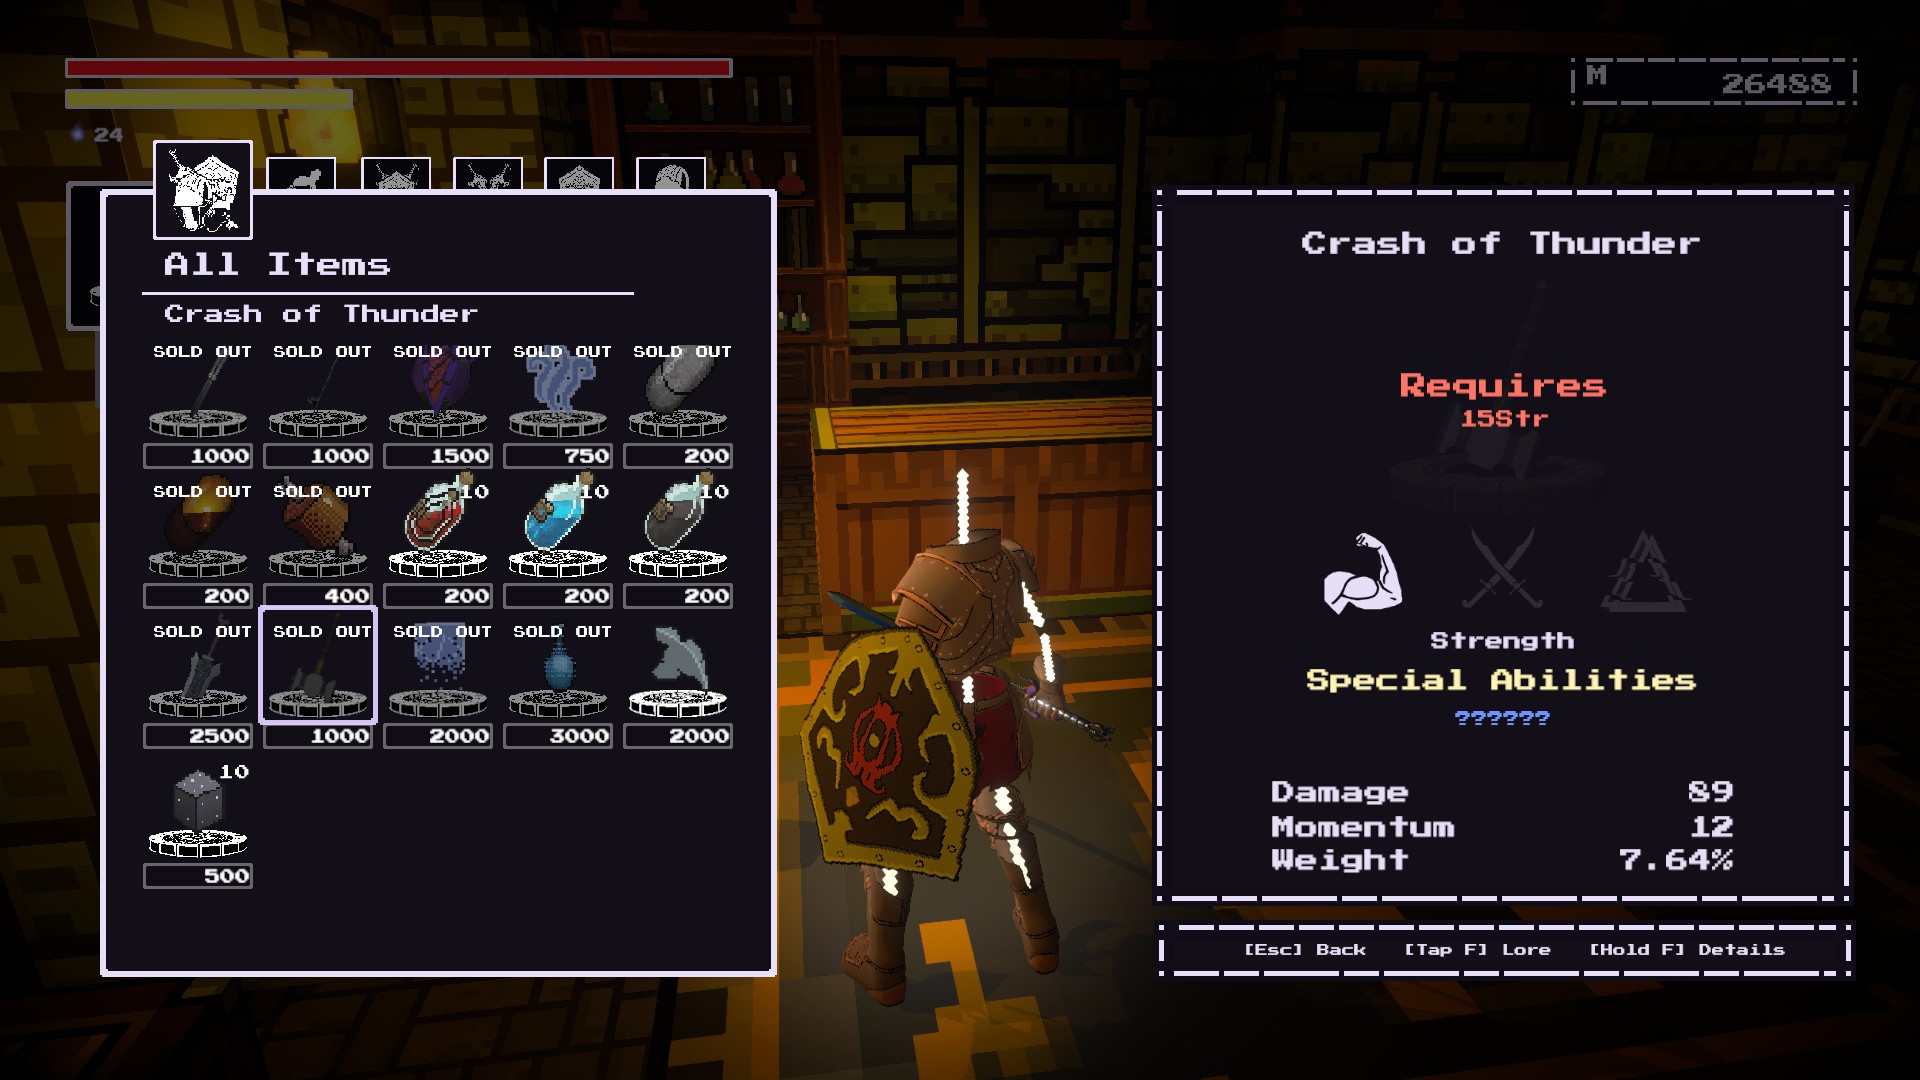
At the
Rehabilitation Pits, progress through the area until you reach a hallway of open rooms.
This hallway will have torchpoles and enemies in between.들어가다
the third room on the right.
You should be able to restore the item in
this room.
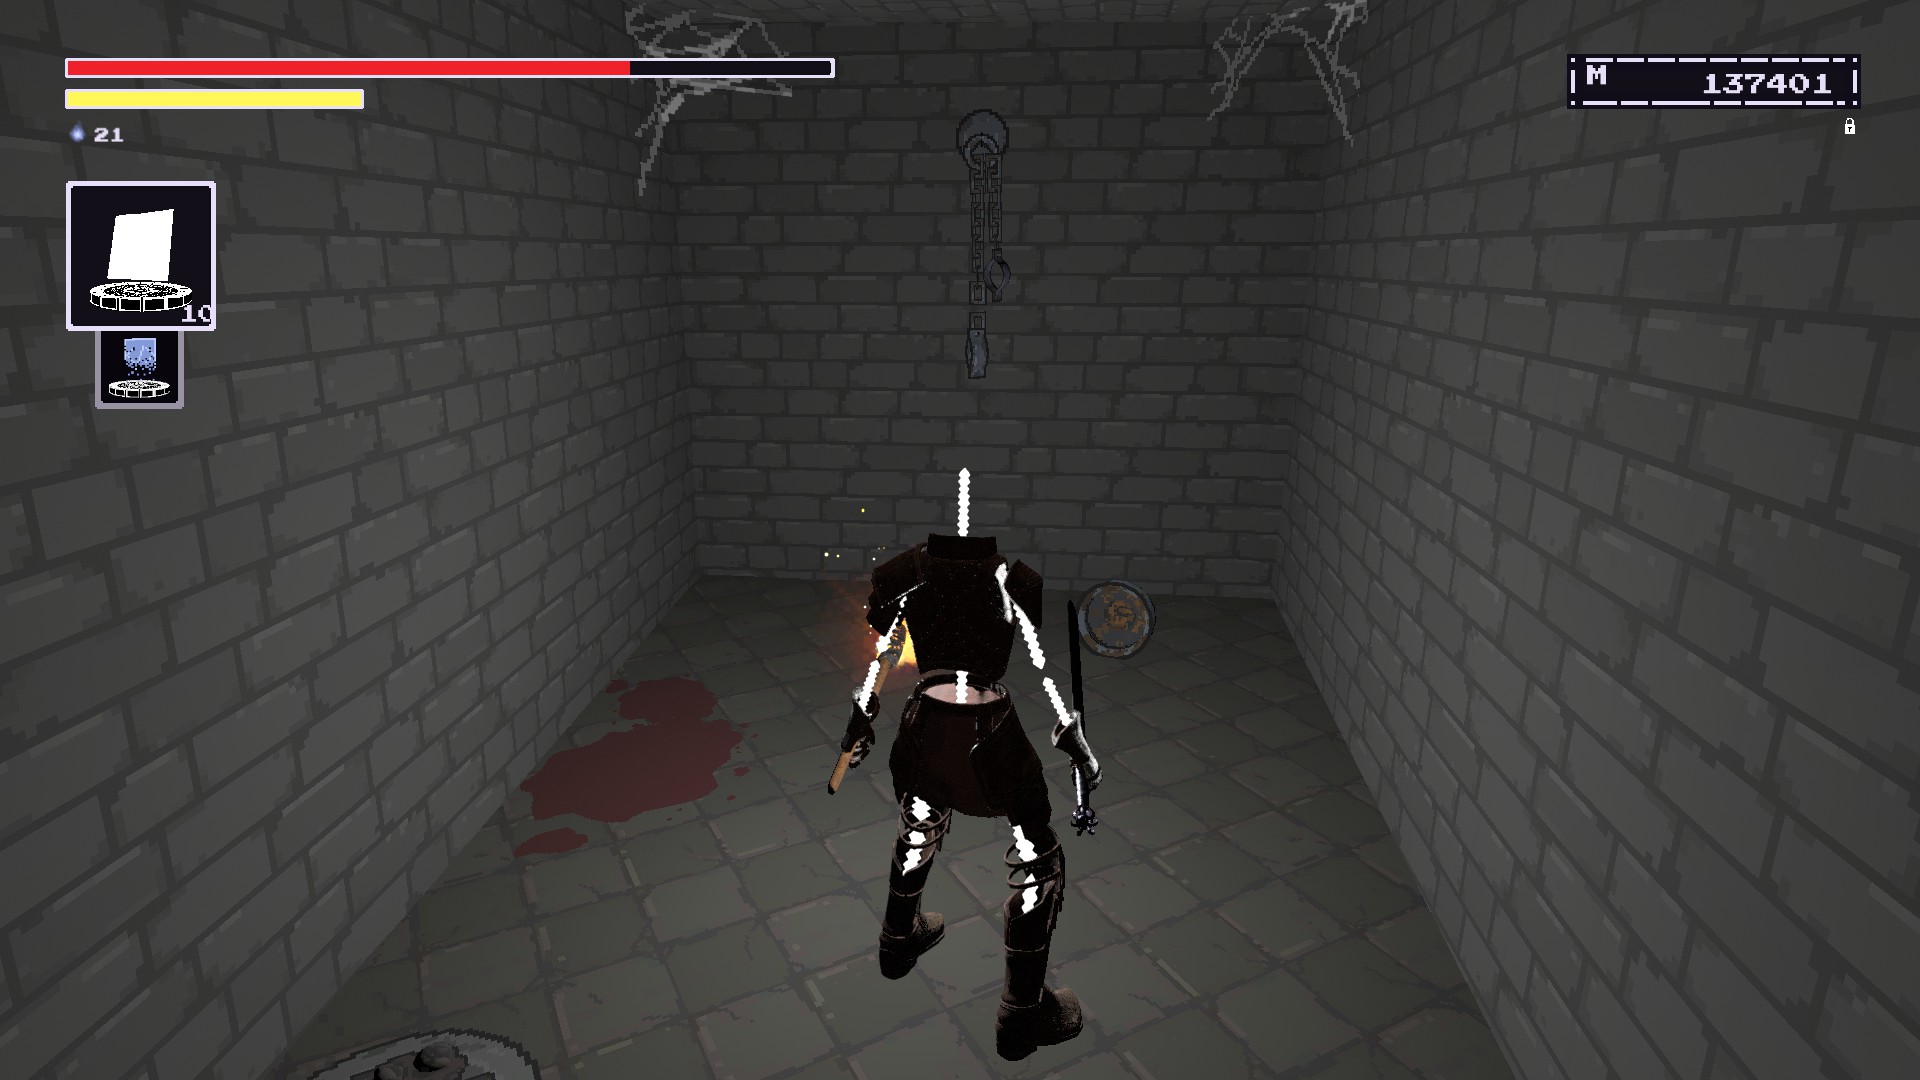
Run Home
REHABILITATION PITS #2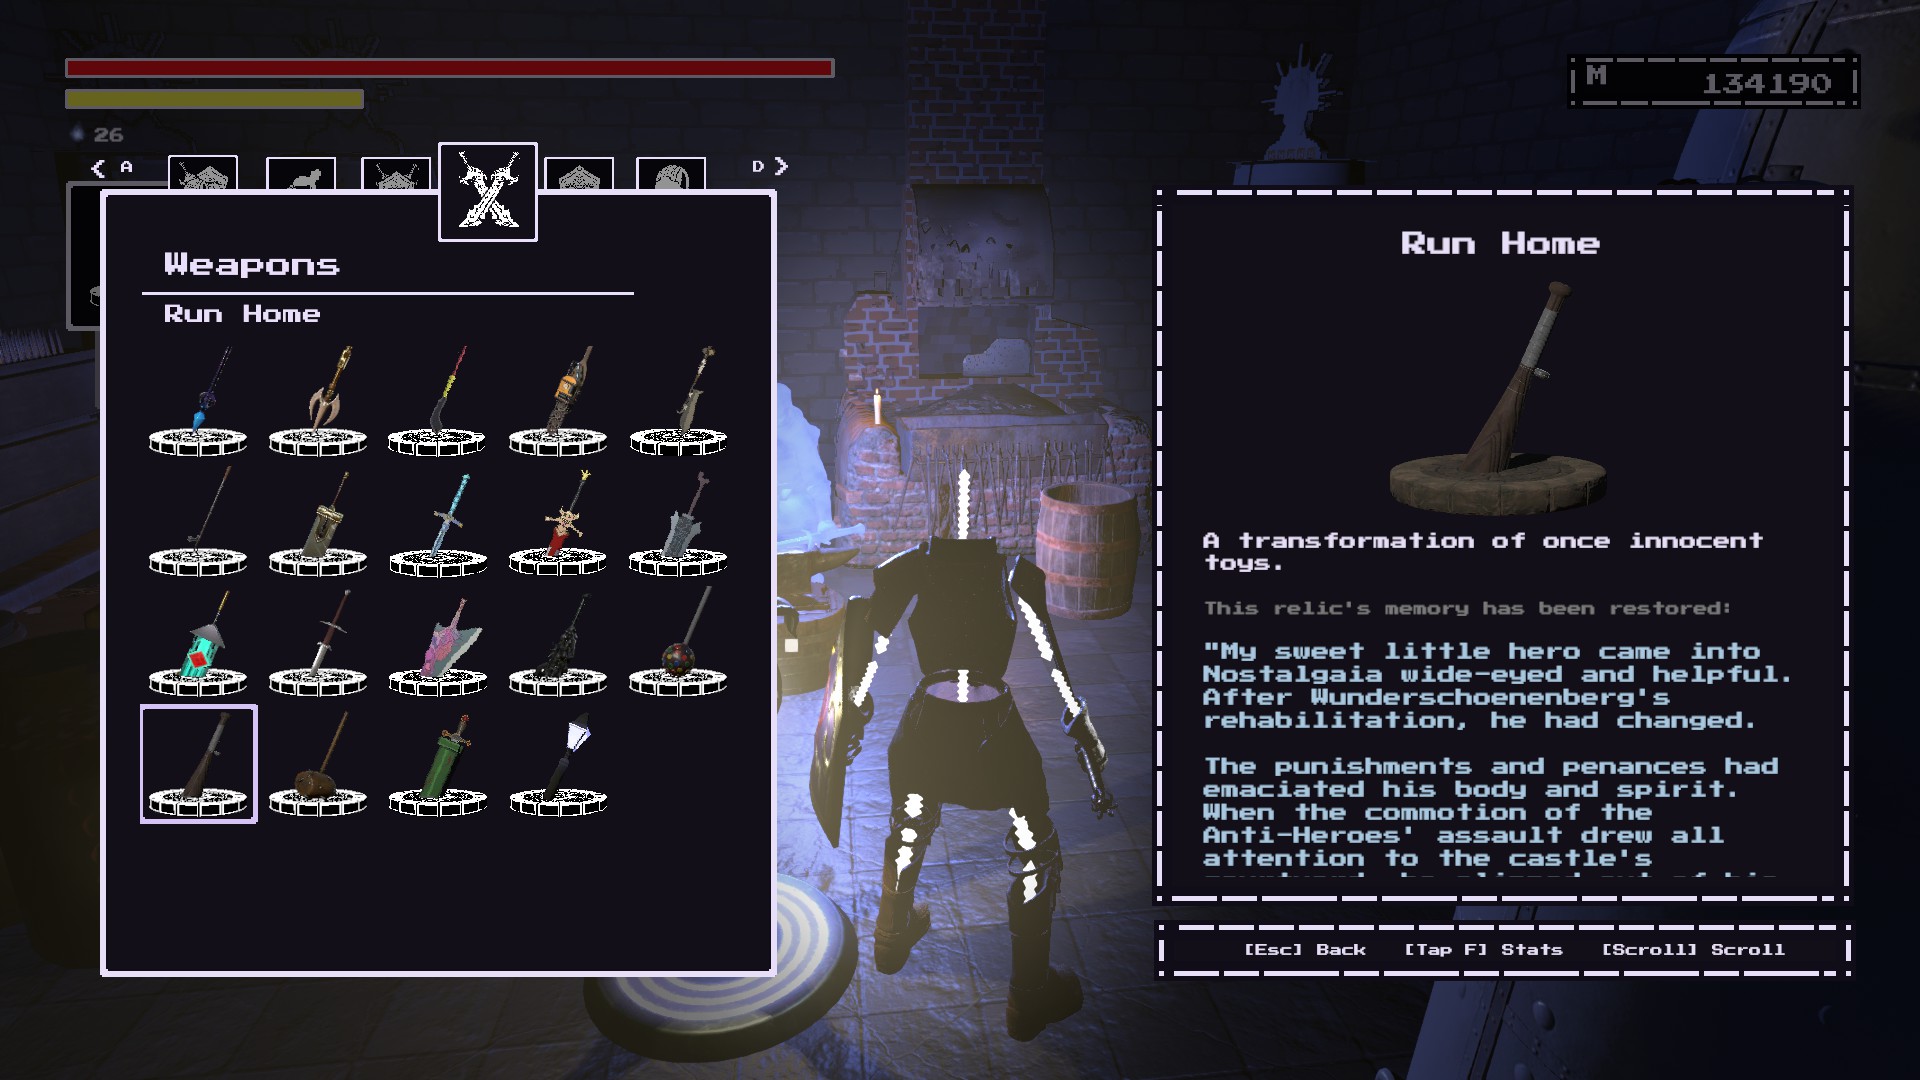
At the
Keep of the Stolen Crown, head towards the
Chapel of Purity.
Turn towards the left when you enter the chapel, the item should be near the door.
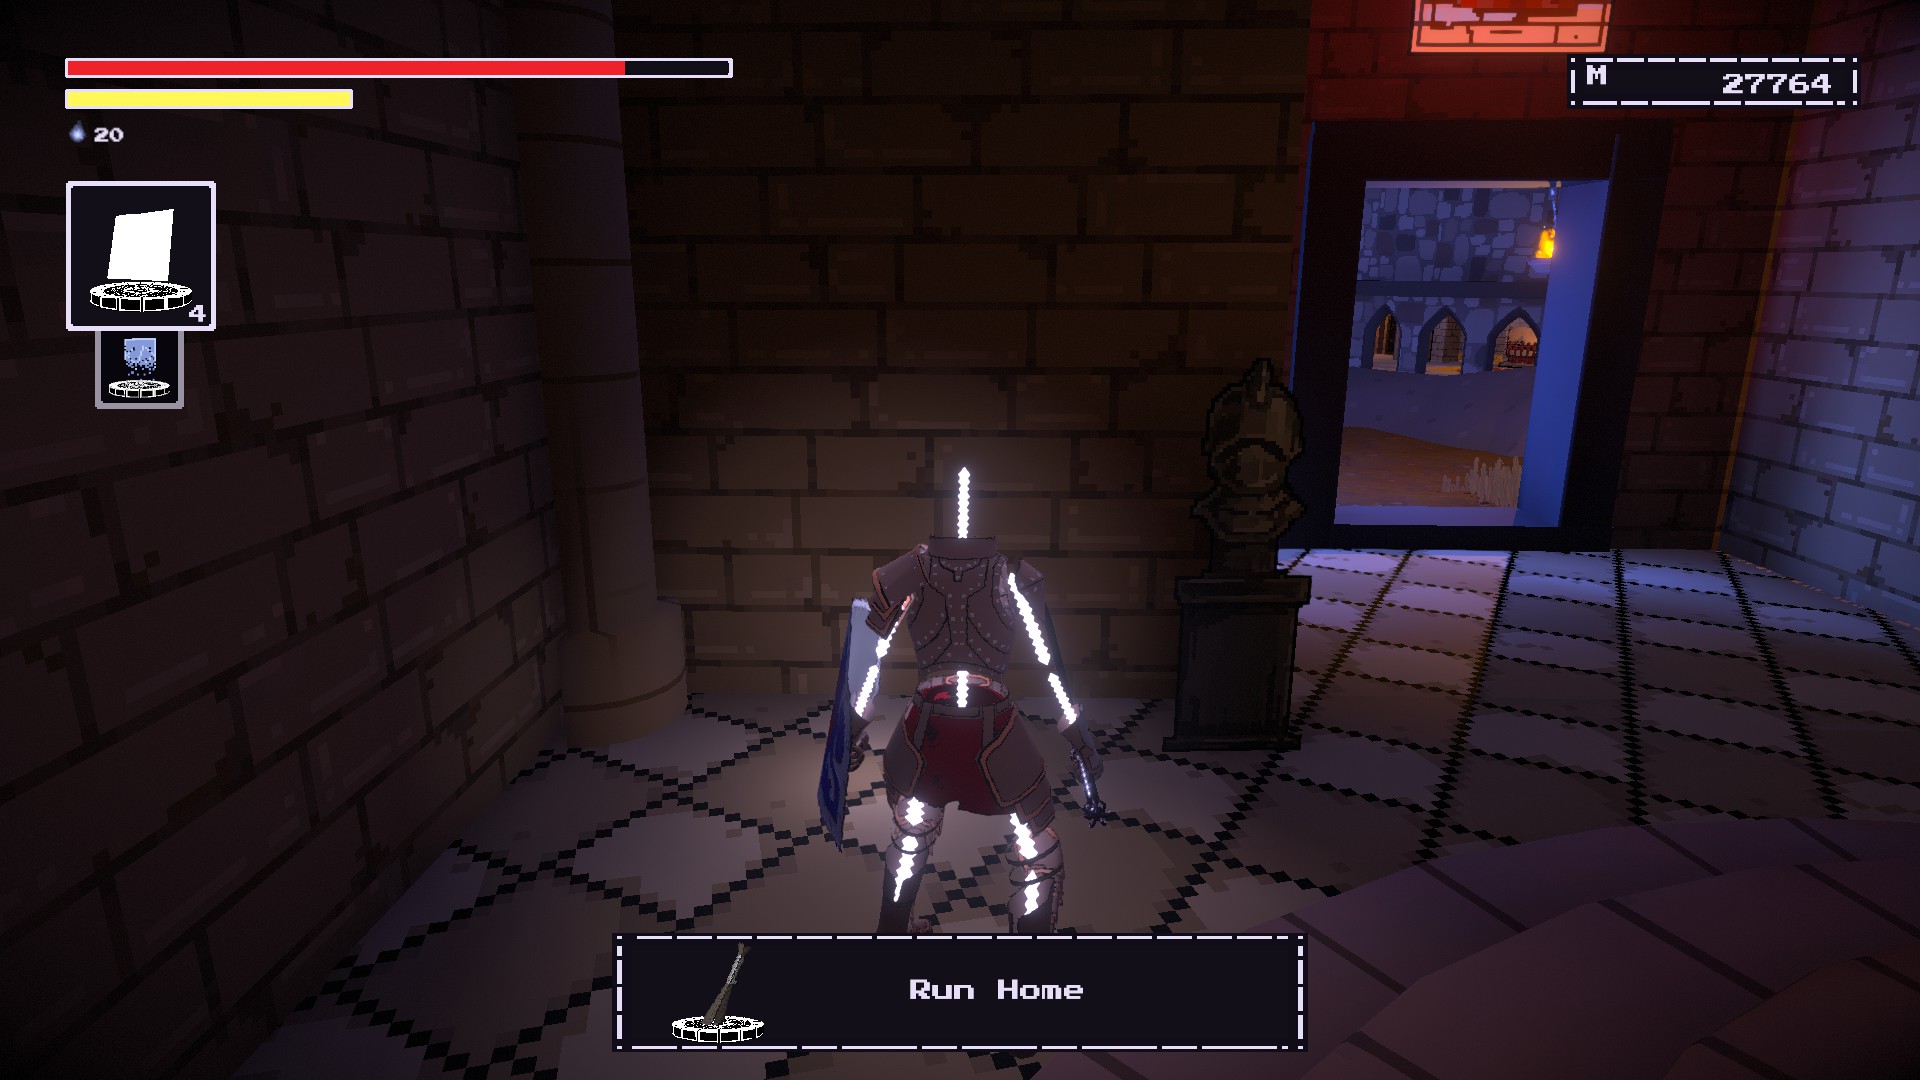
It is literally at the
Rehabilitation Pits Beaconwith the Blacksmith.
Remember the weapon here.
Plot Thread Scissors
NPC CITY #1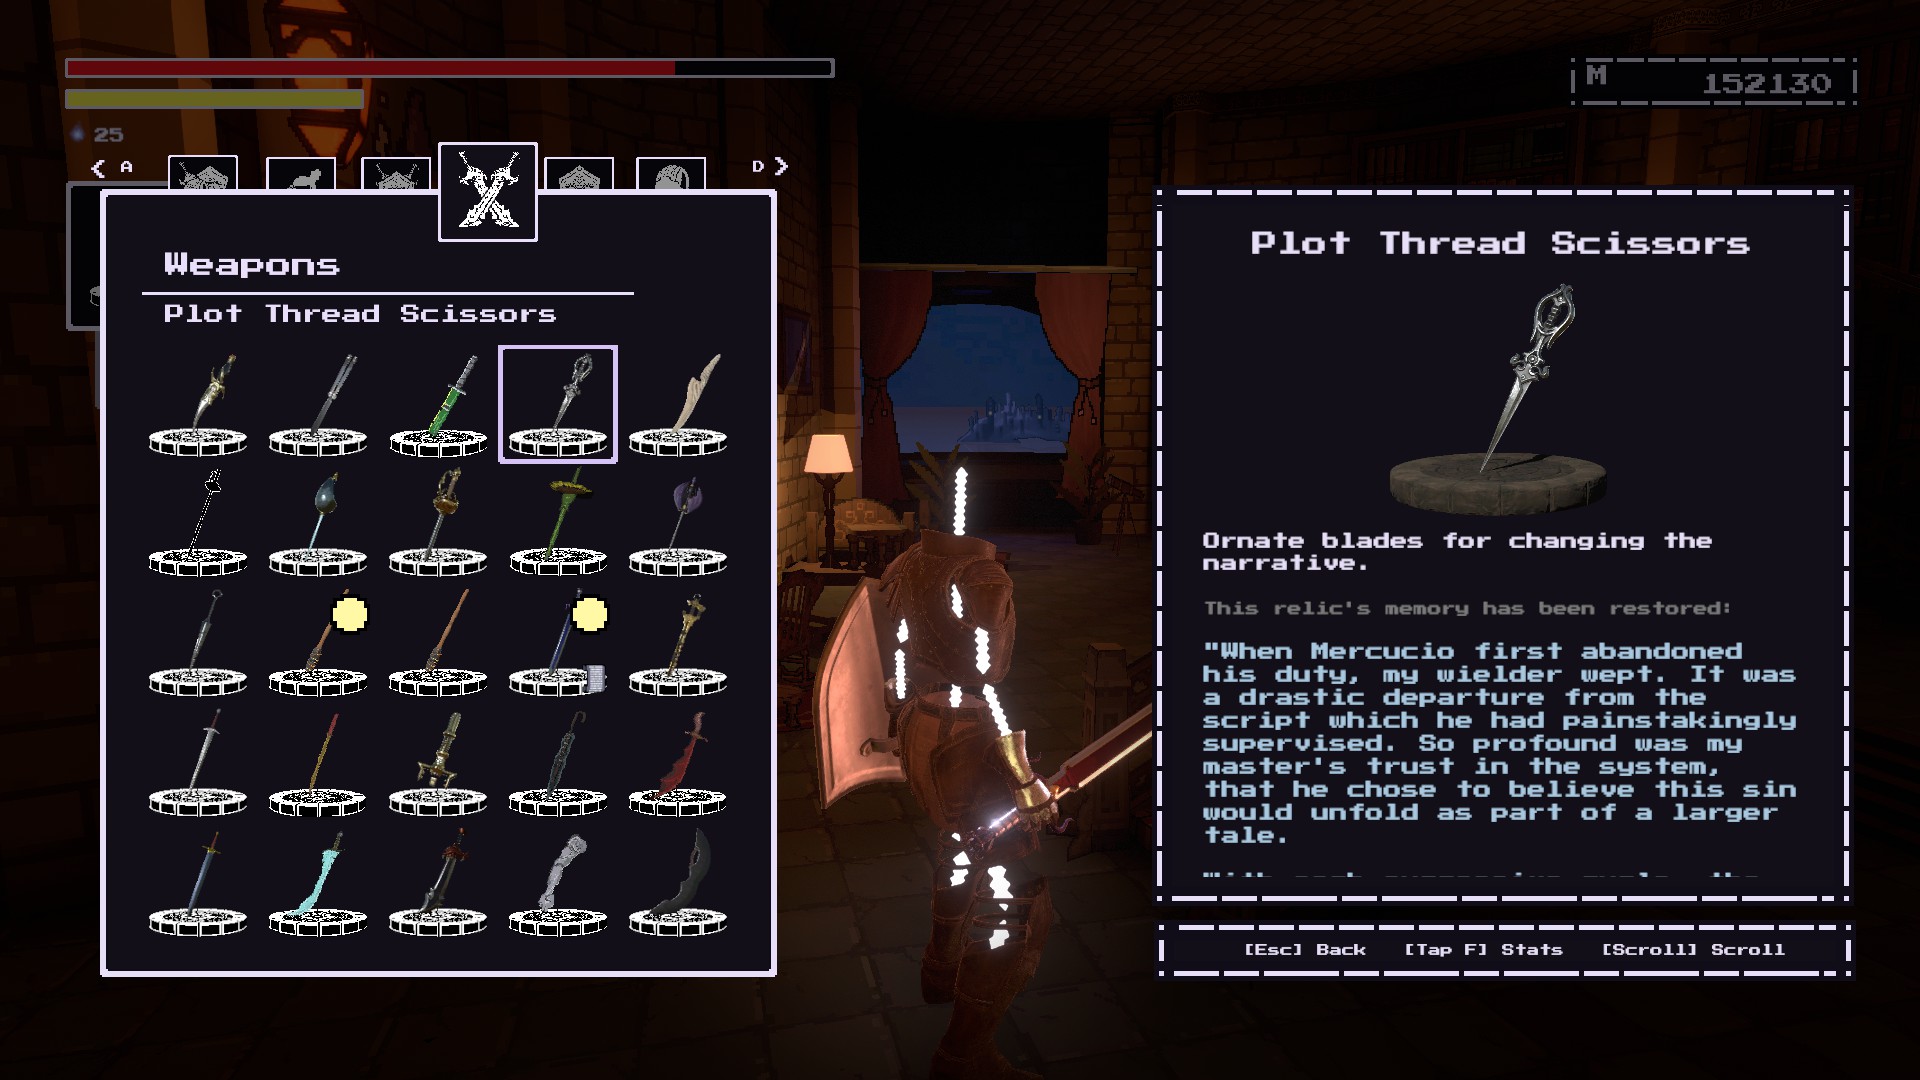
Obtained after
defeating The Narrator.(I’m really tired of censoring his name plus if you read this far then you already knew.)
The Narrator will urge you to go to his Study
via the tunnel near the NPC Staging Roomat the Hall of Heroes.
Eventually you’ll make your way into this
arena in NPC City.Prepare to fight the Potheads.
After dealing with the Potheads, you’ll soon fight Brendon Merkle.
Kick his butt and continue.
Now you’ve arrived at the
Narrator’s Study!
Memory Saber
NPC CITY #2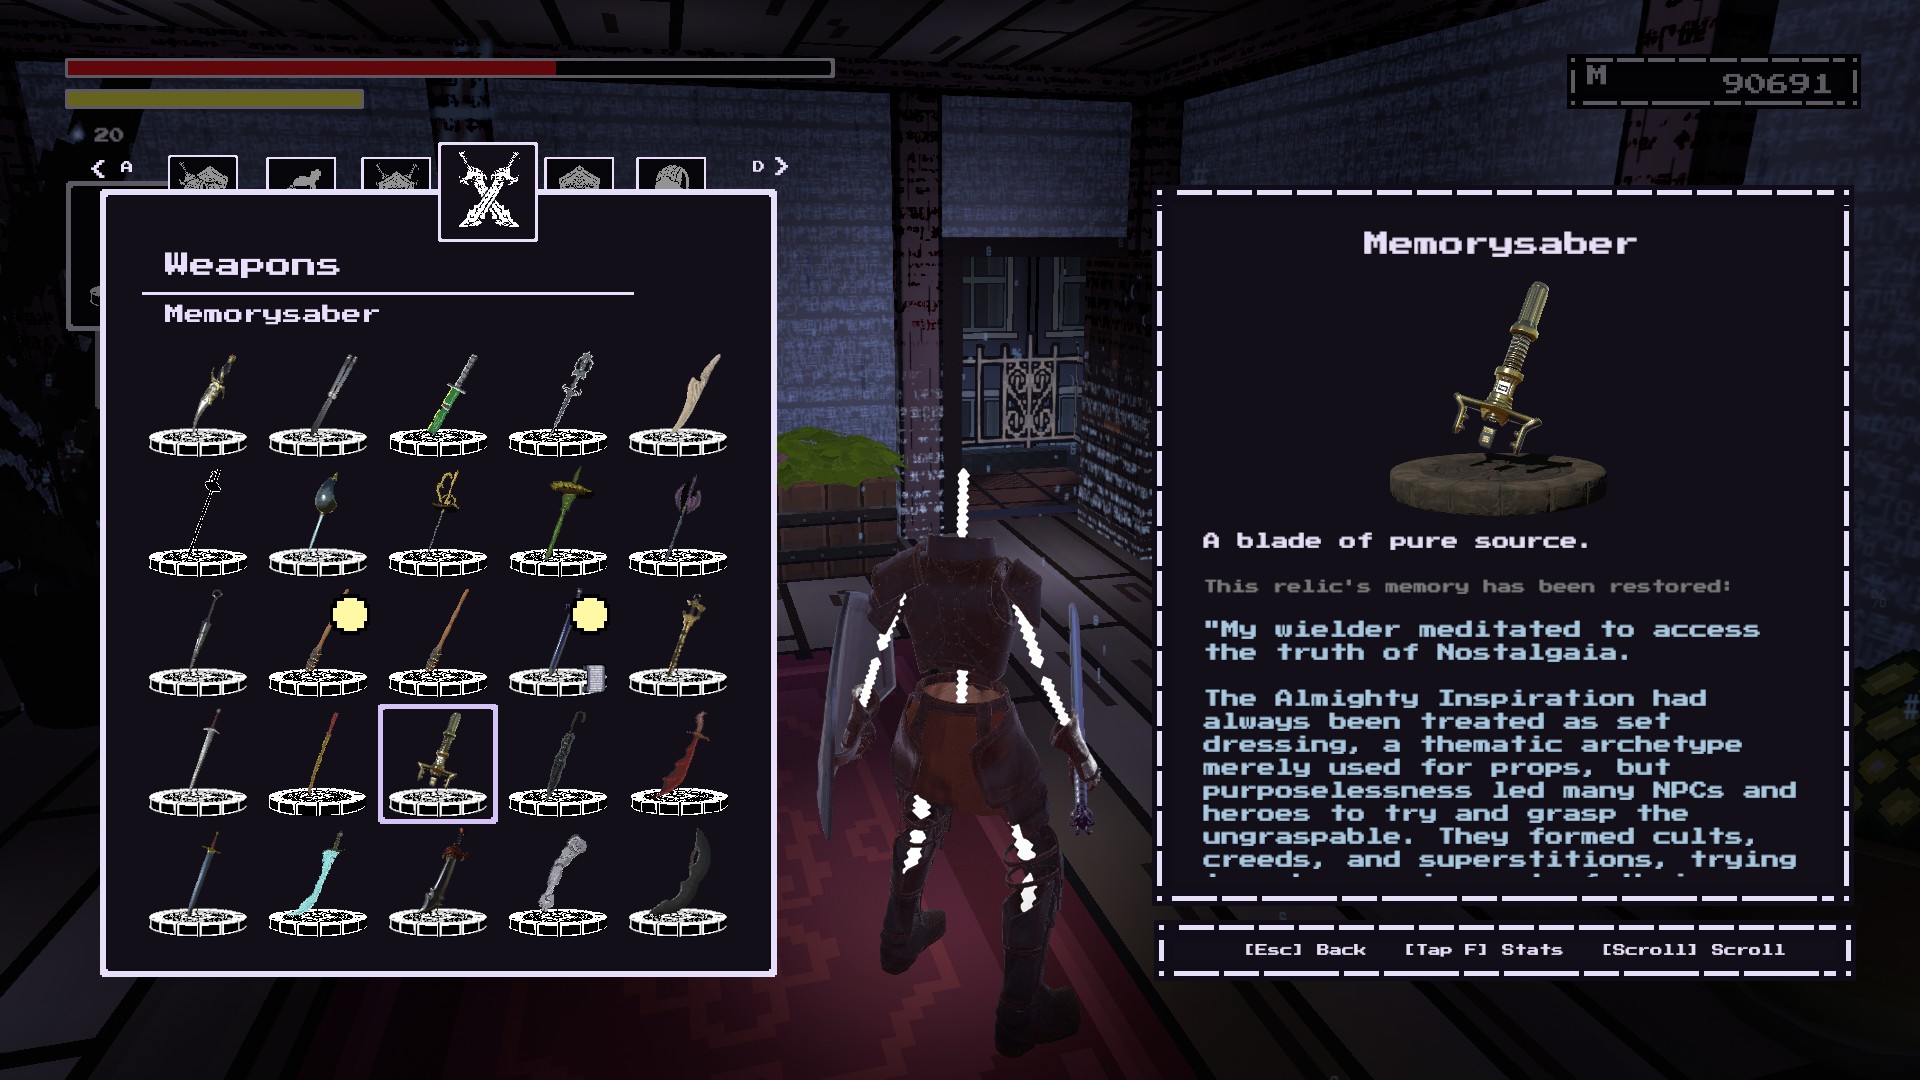
At the
start of NPC City.
Heads towards the
open building on the left.
The weapon will be on the pile of corpses.
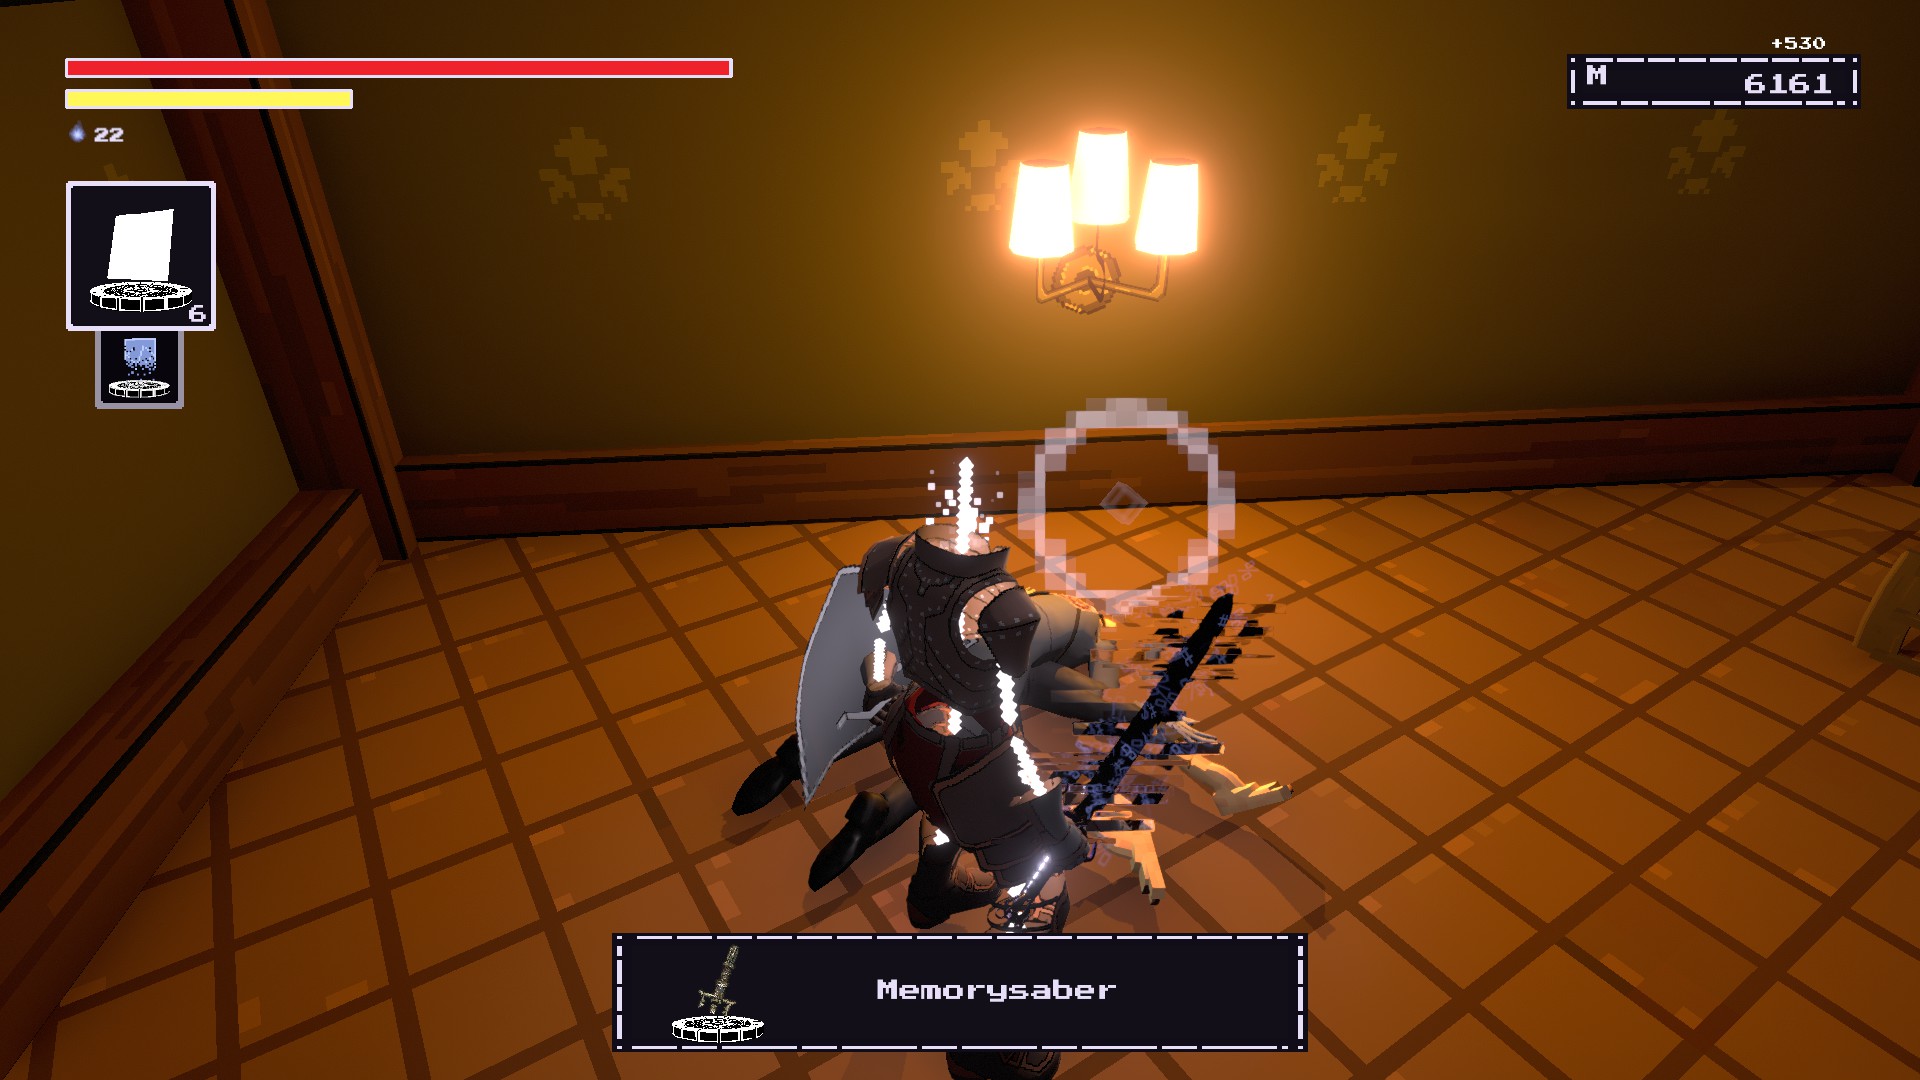
Go through the
NPC Staging Room at the Hall of Heroes.Progress until you reach this section of NPC City.
Look to the right and you’ll notice a flat wall.You will need to have
Flat Traversalto get this memory.
Do it and enter the glitched door into this odd room.
Remember the weapon here.
Perfect Fit
NPC CITY #3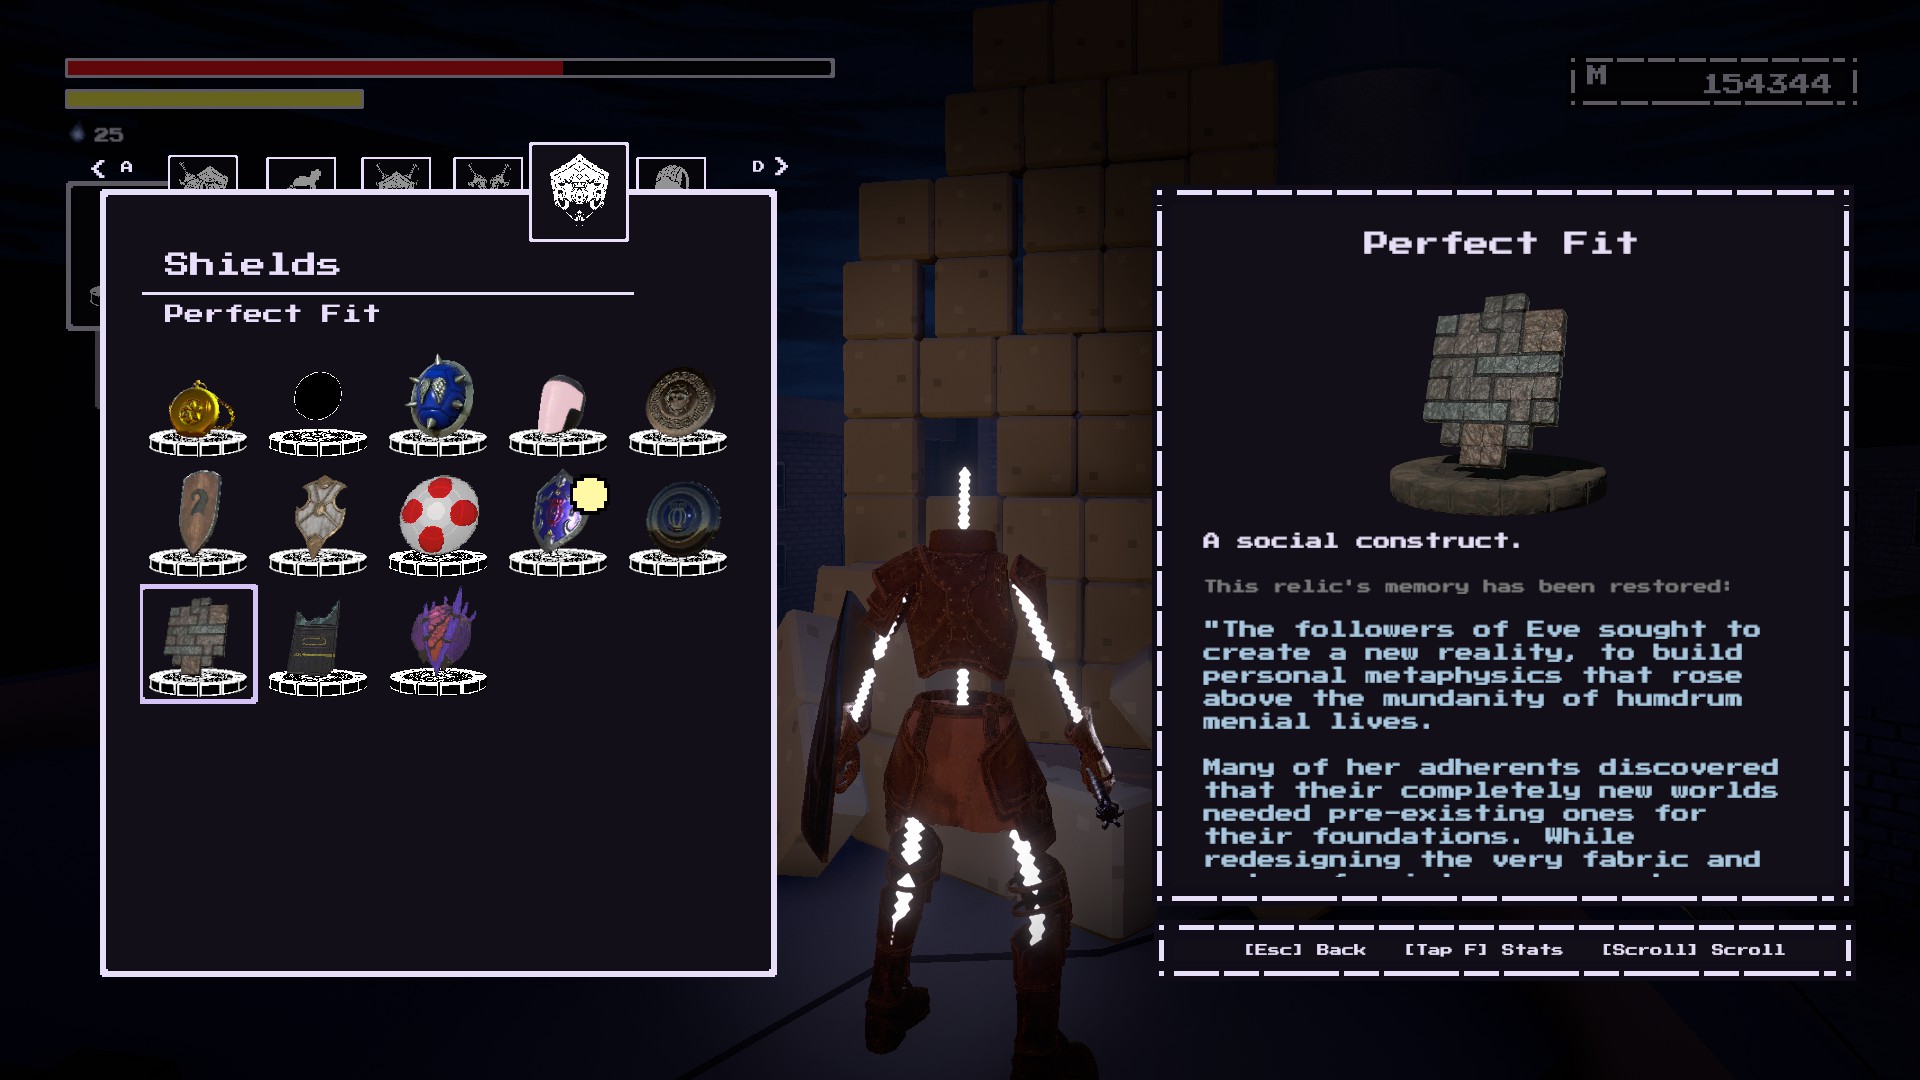
The process is fairly the same as getting the Tunic’s memory location.
After exiting out of the
Chapel of Conviction at the Keep of the Stolen Crown,
notice how there is
a broken railing on the right of the walkway.
Walk off of it and
into the building with the broken roof.
Collect the Chapel of Humility Key!
다음, you should go back to the
Chapel of Humility.
당신은 볼 것입니다
a statue of The Puritan내부에!
You will be given the option to “humble” yourself by kneeling behind the statue.
So kneel and wait for a few seconds until the pressure plate activates the door.Ascend the staircaseand the item will be waiting on the edge.
탐구하다
NPC Cityuntil you need to
climb a ladder onto the top floor of a building.
The floor should be infested with NPCs wielding axes and umbrellas while there’s one dude with a crossbow.
Towards the right side, you should see a flat wall. 당신은
need to use Flat Traversal여기.

You should be on top of the building where the Reservoir of Pain is.
있다
a noticably neat stack of bricks here, remember the shield here.
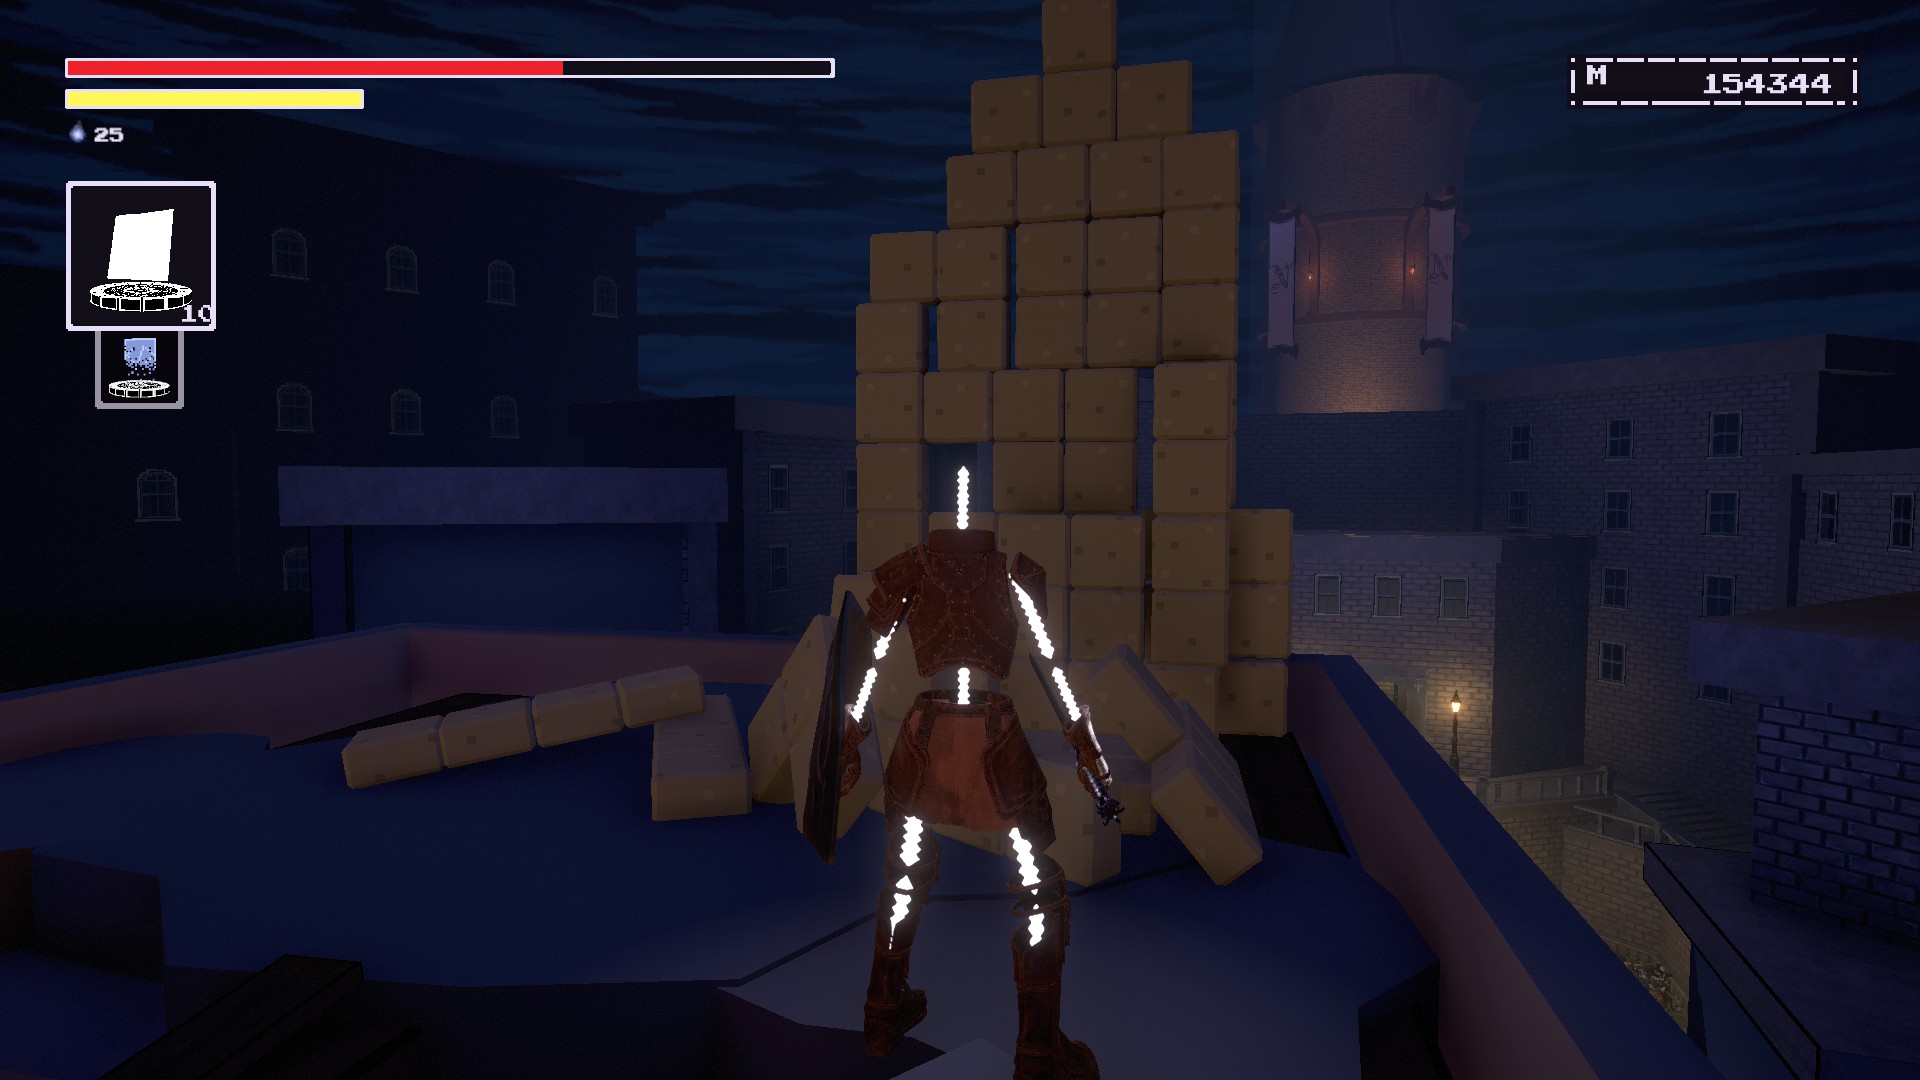
Anti-Hero Establishment
NPC CITY #4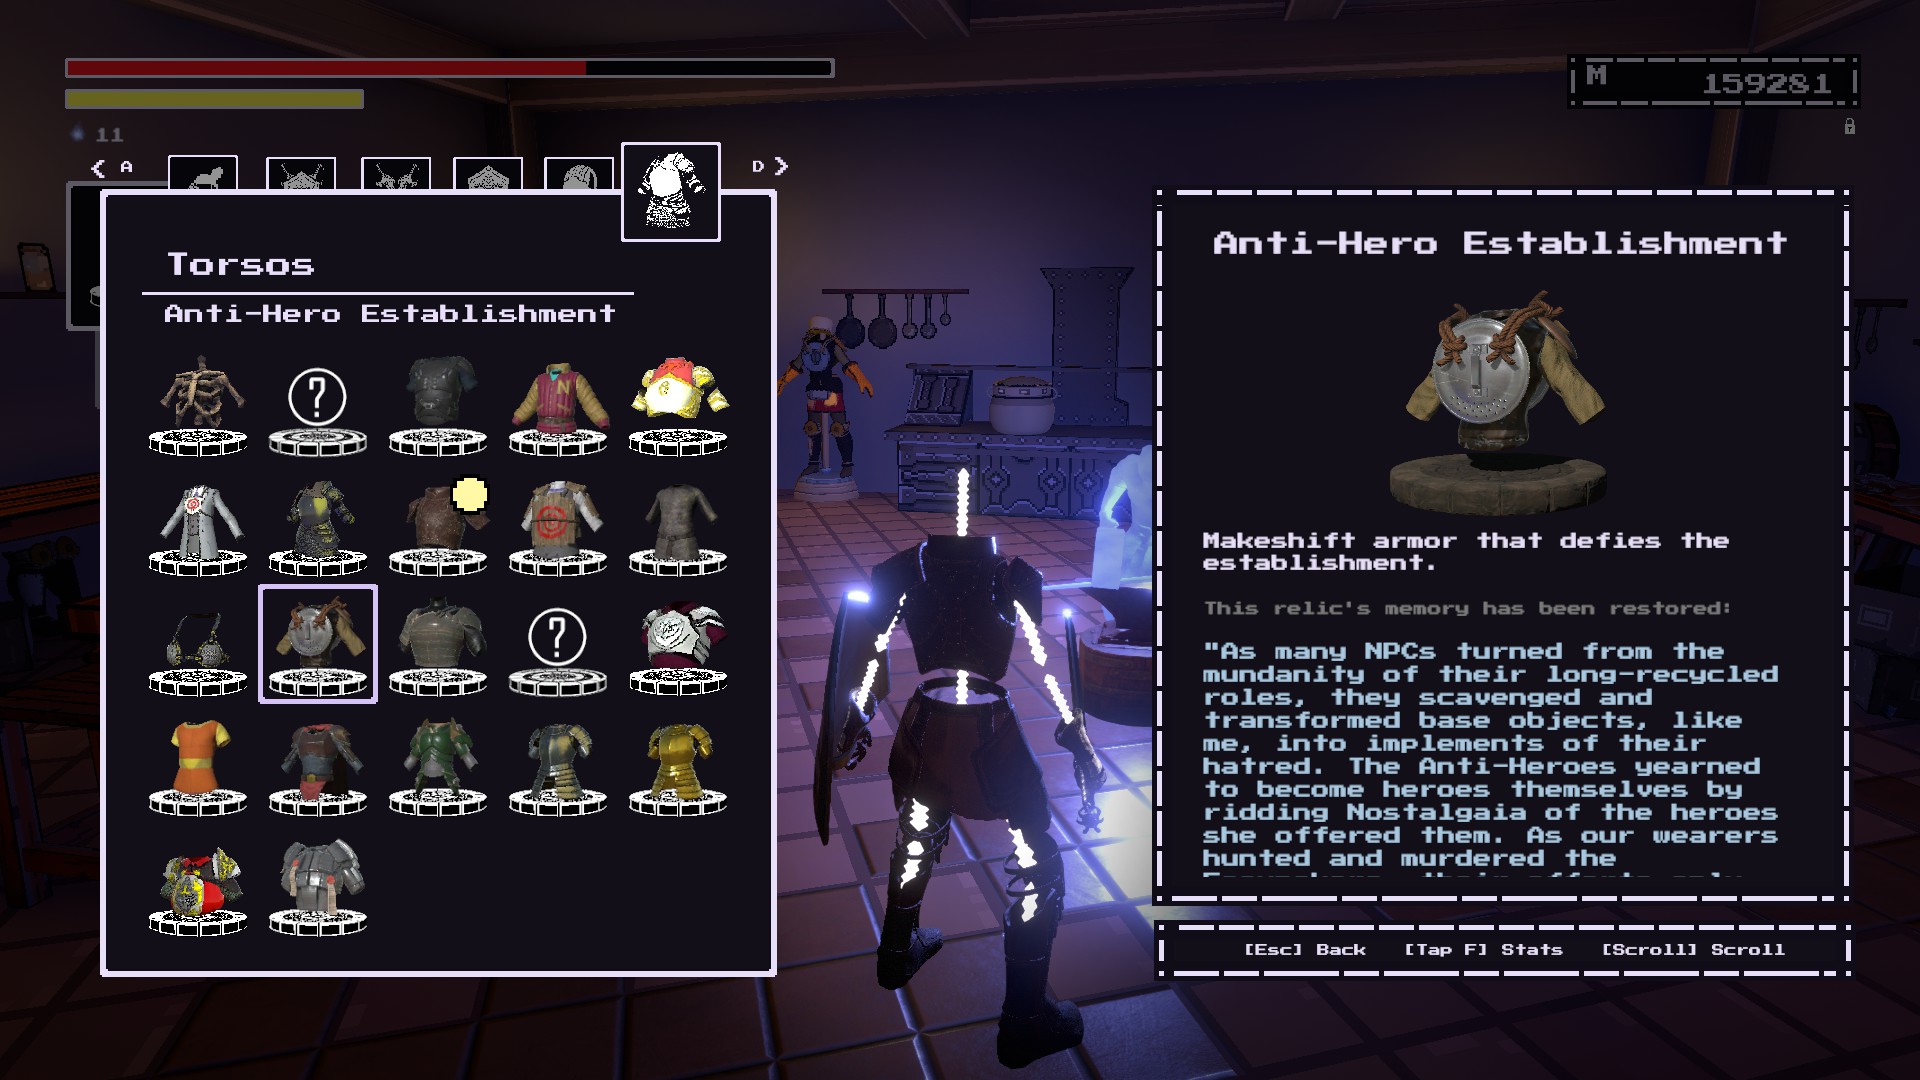
You should get it normally as the story progressessince these NPCs block crucial parts.
Oreshaft Village:
Festivity Row: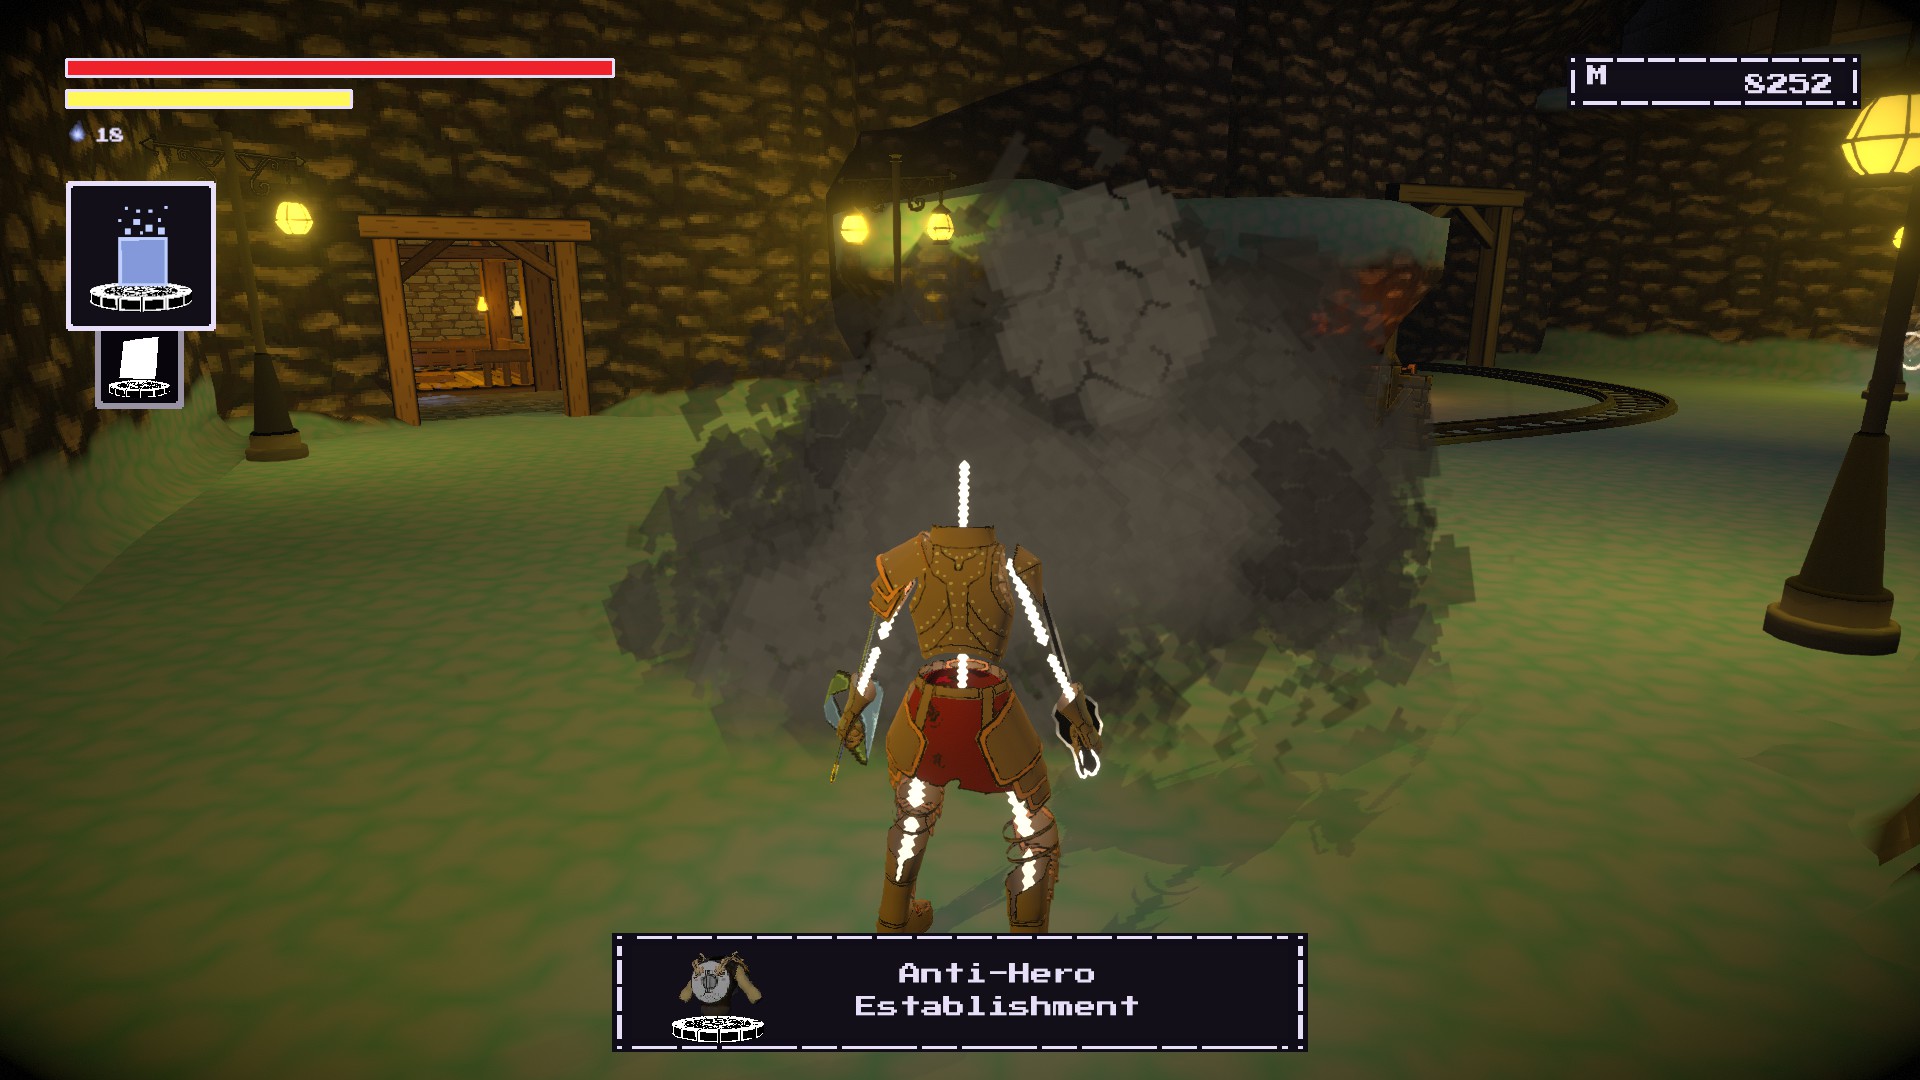
Warlock’s Wilds:
Keep of the Stolen Crown: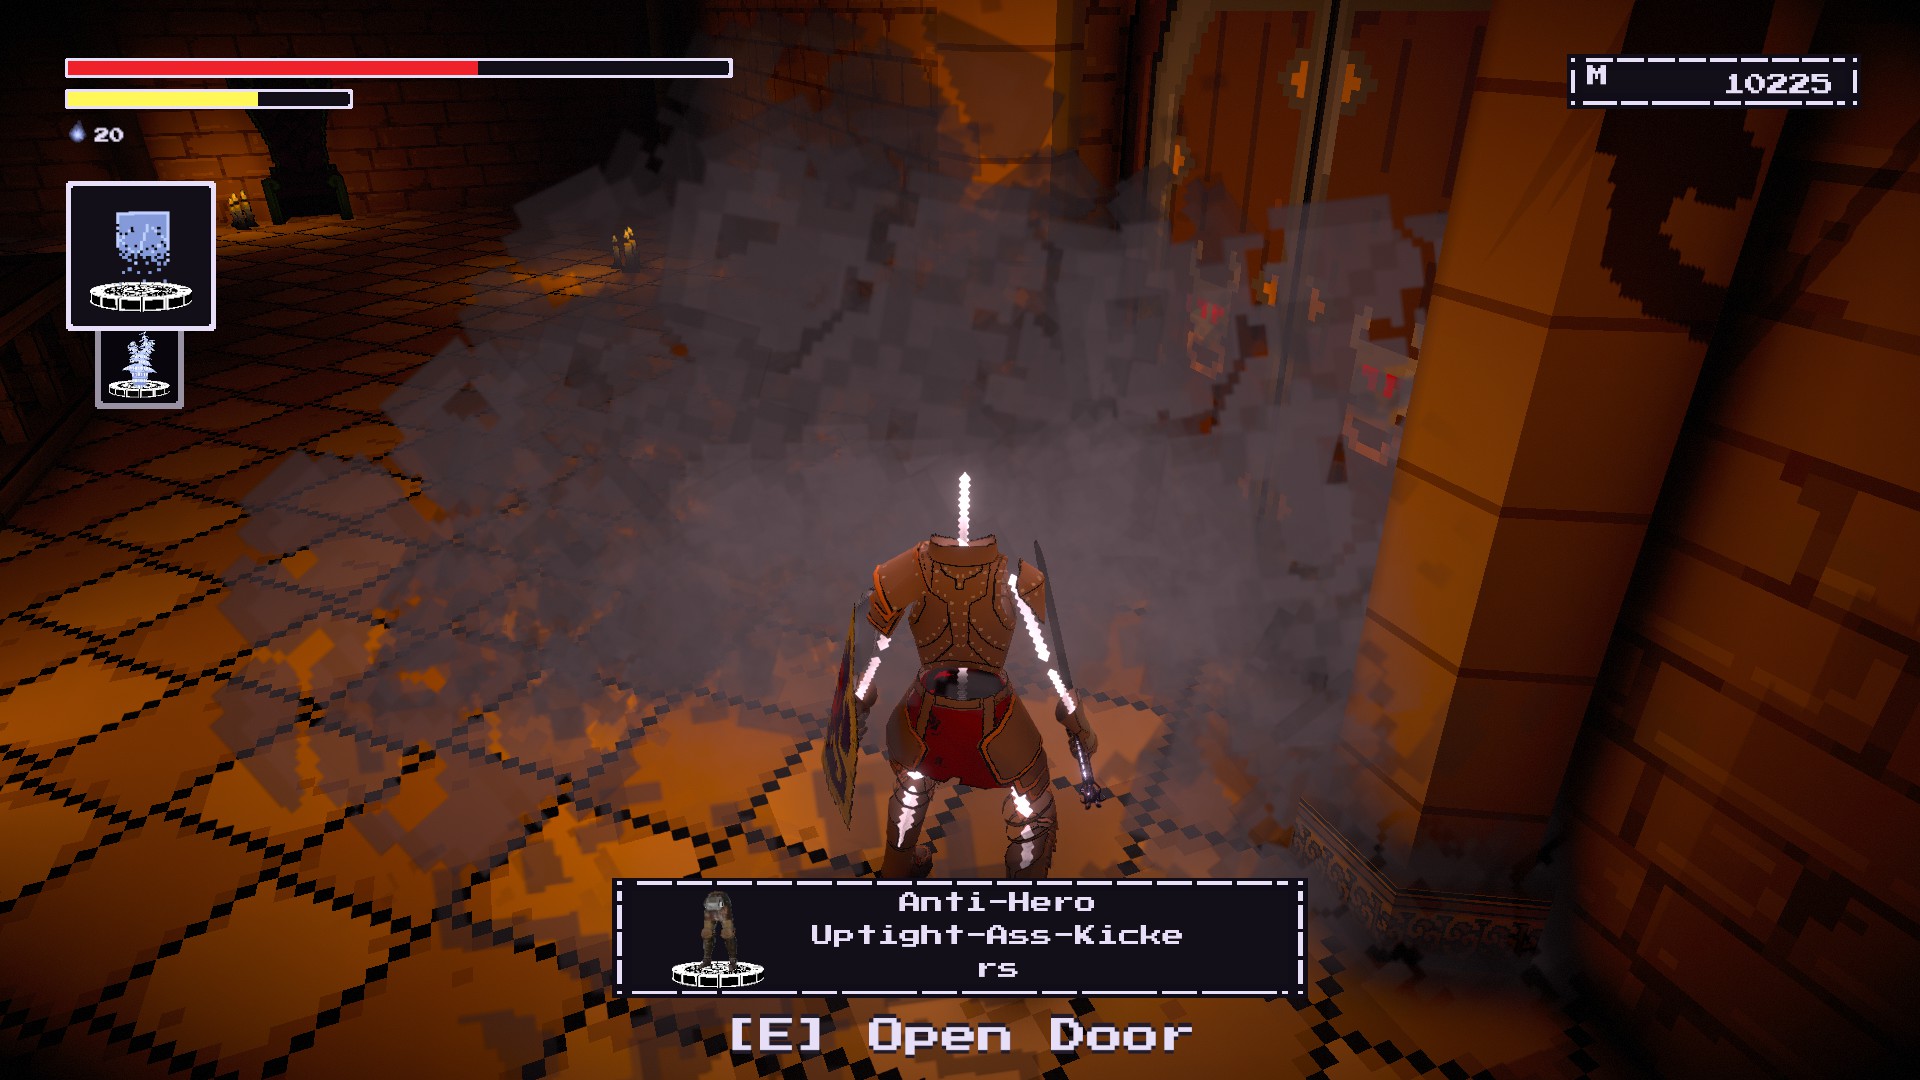
Progress through
NPC City~까지
you reach an elevator(Which will lead you down to Start of Sequence)
Do not go yet and turn around.You should see the last anvil with Anti-Hero gear in a room.Enter the room and restore the armor.
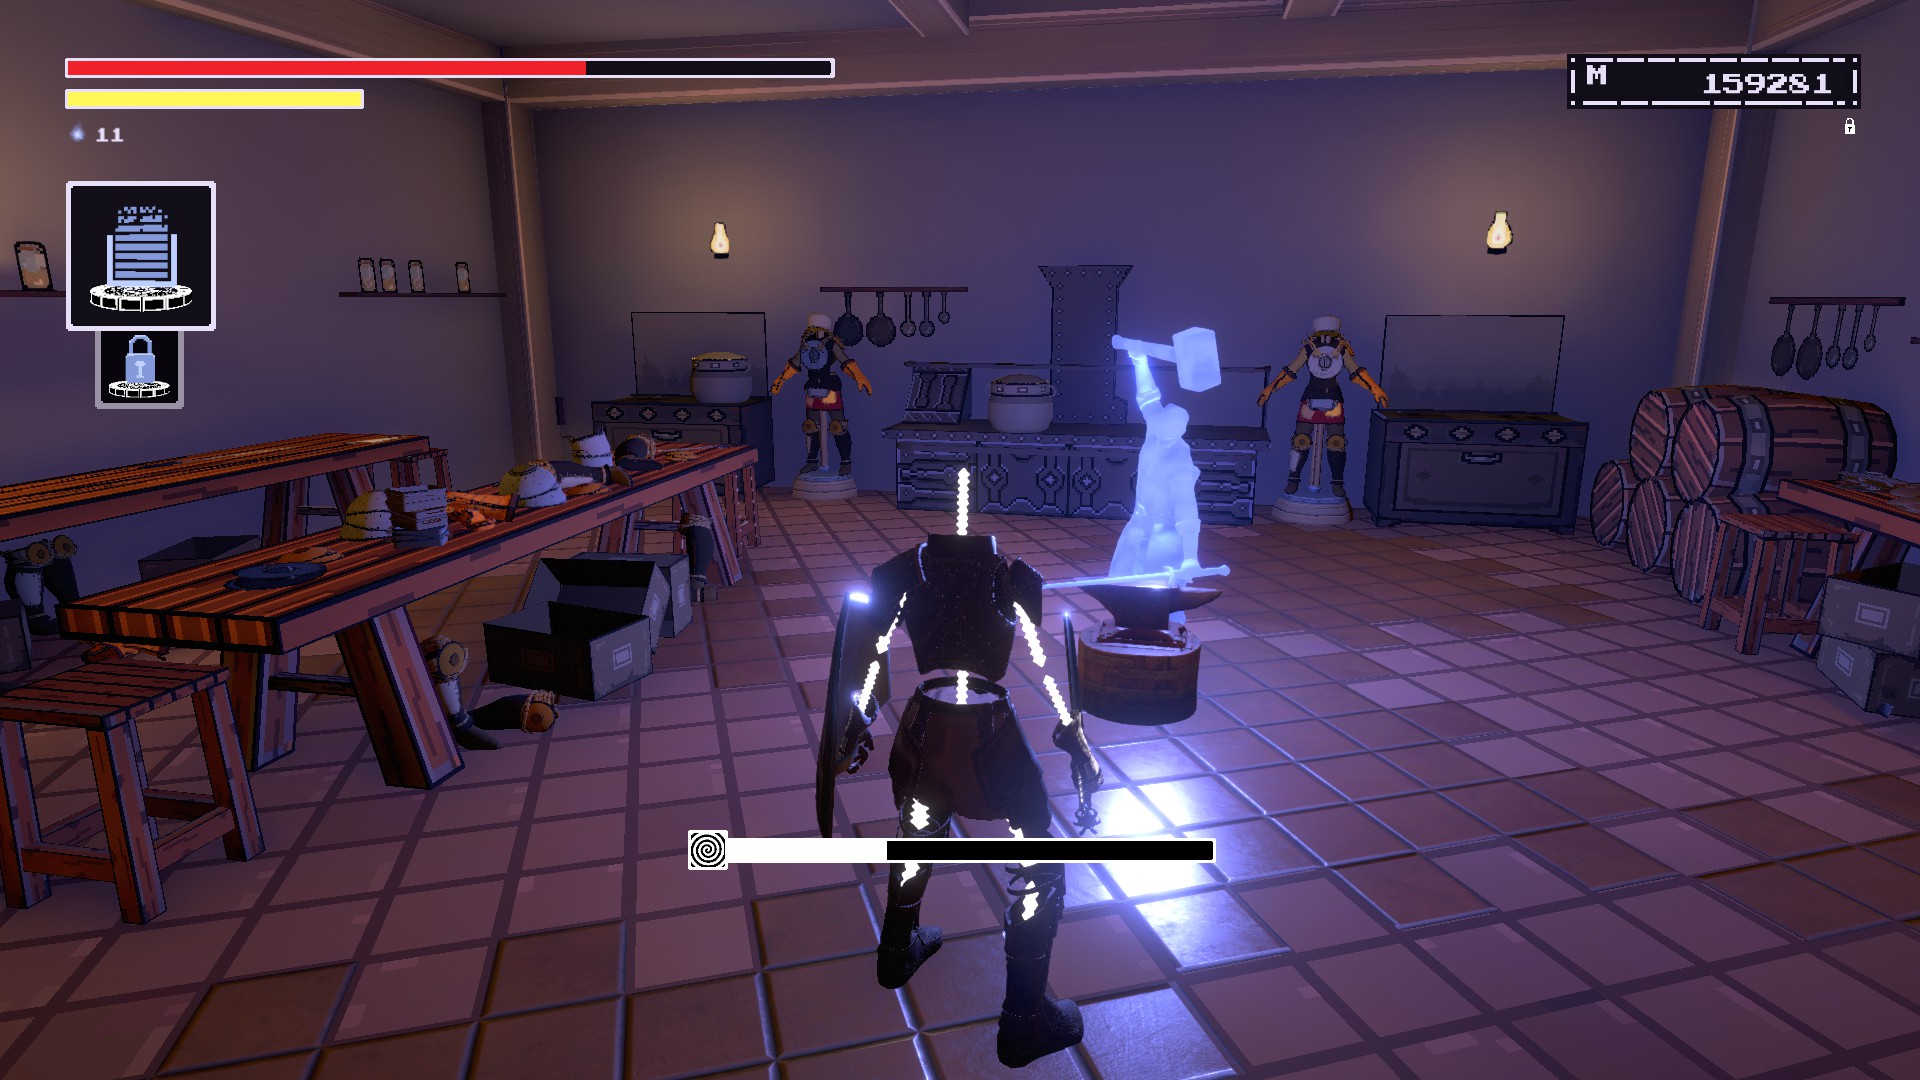
Dagger of Cycles
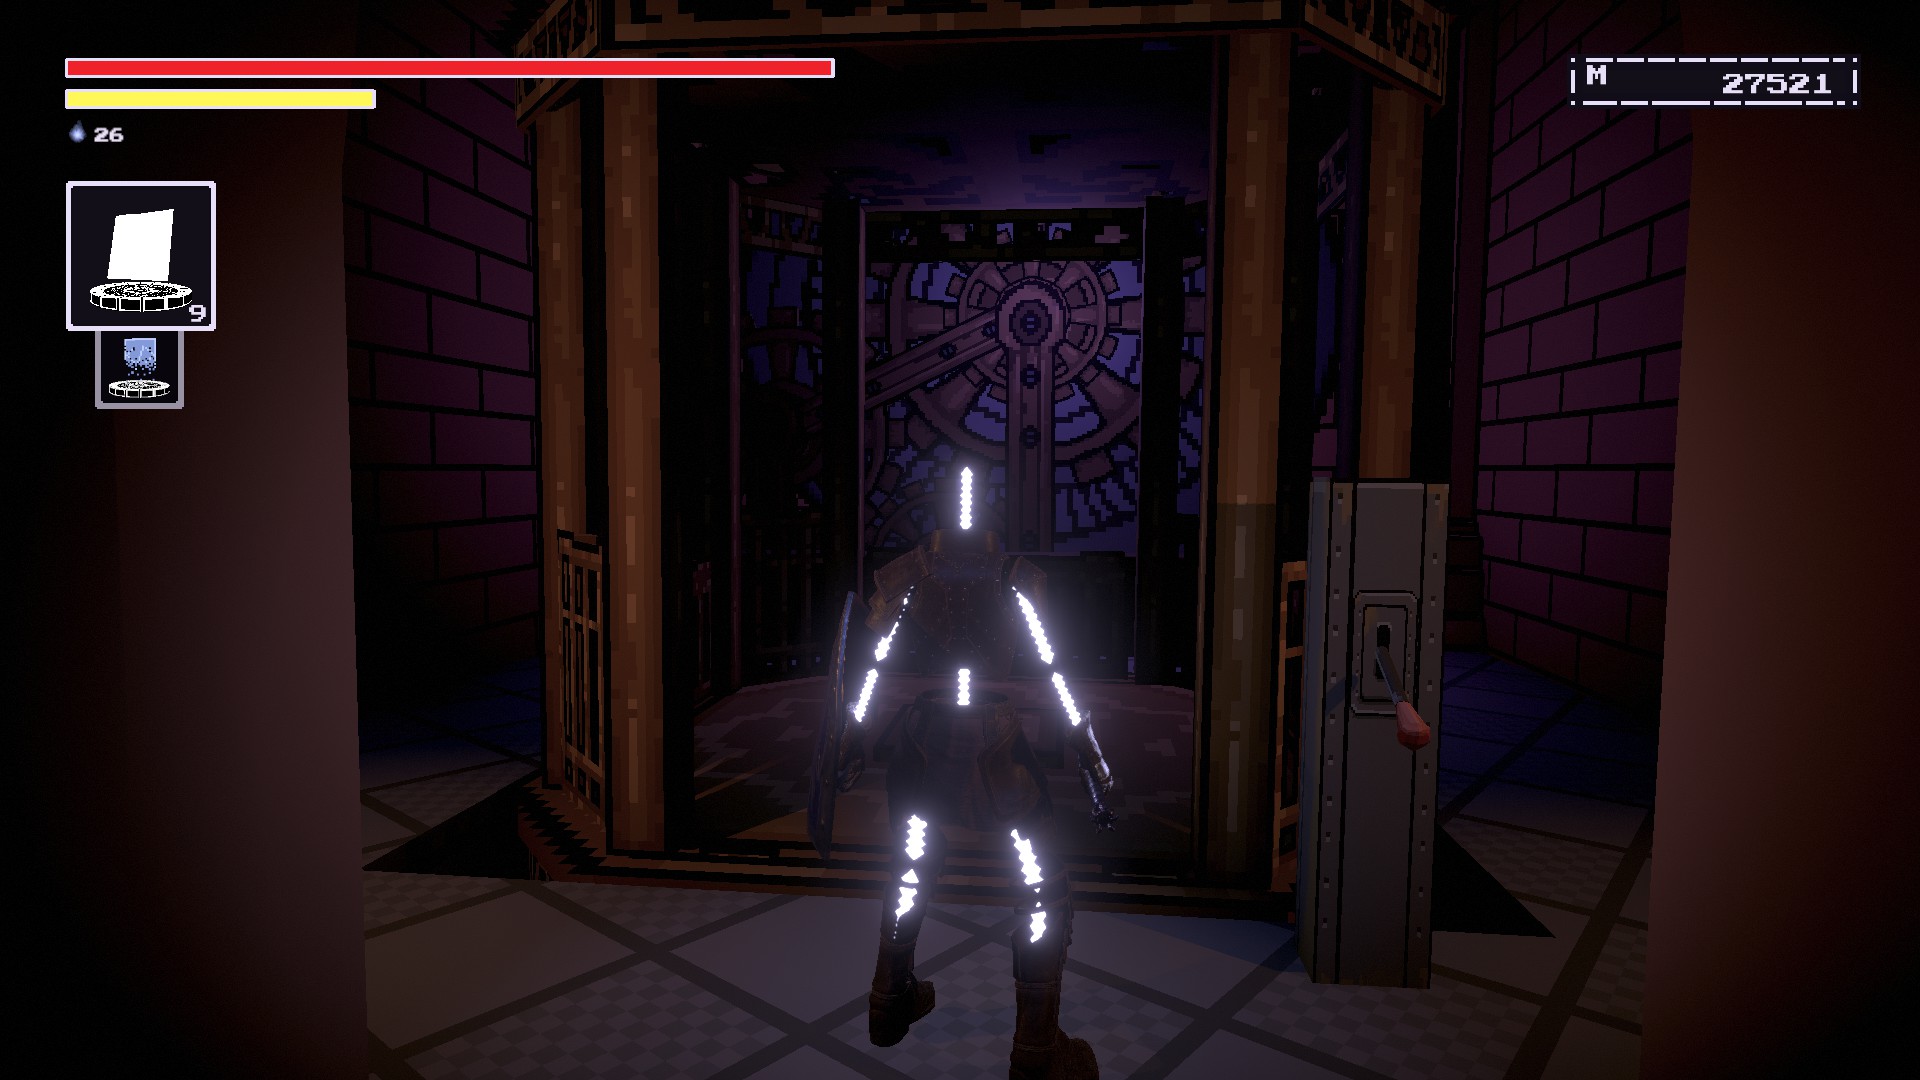
START OF SEQUENCE #1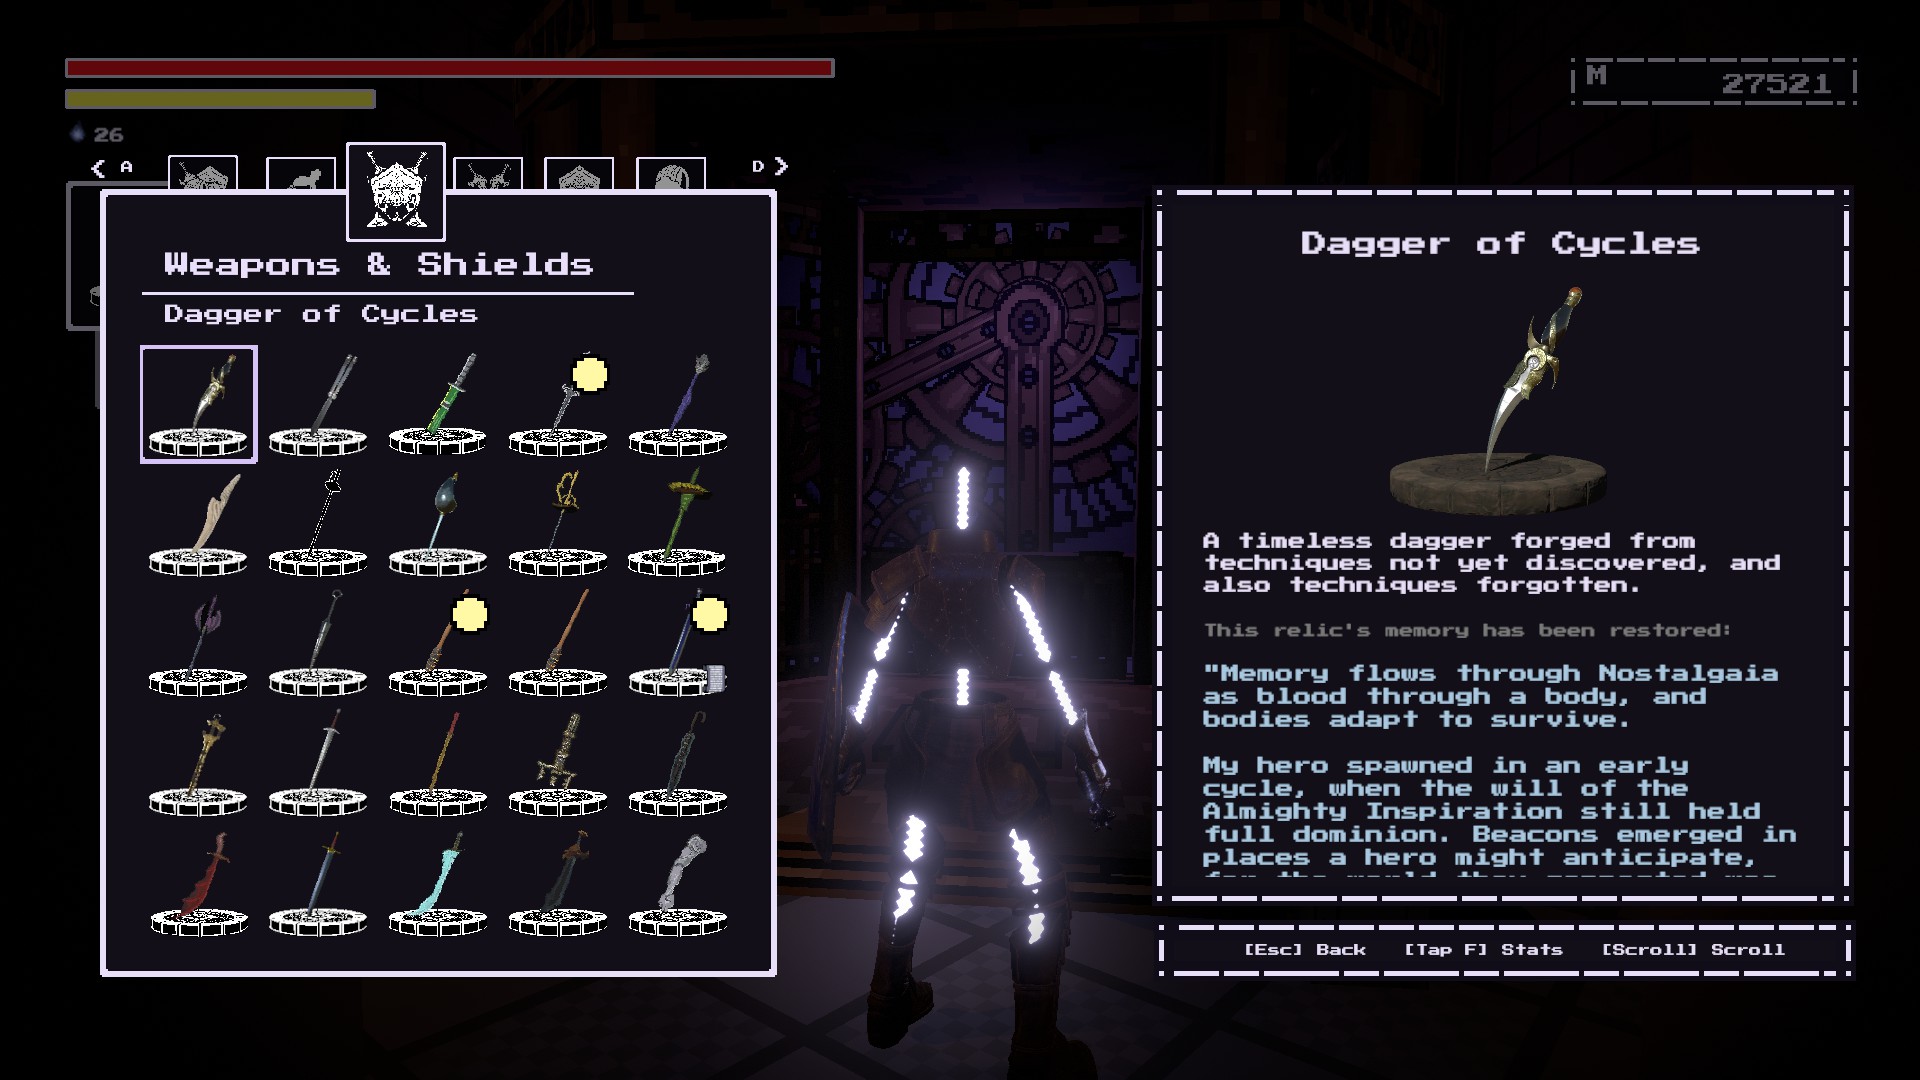
In the beginning of the game at the Narrator’s Library.언제
you are on the level that is bridged by bookshelves,
the item will be
on one of the shrines.
~에
Start of Sequence.언제
you ride the elevator에게
confront the Narrator, it is actually a
clocktower.
일단 당신은
reach the top, remember the dagger here.
Heirloom***
START OF SEQUENCE #2
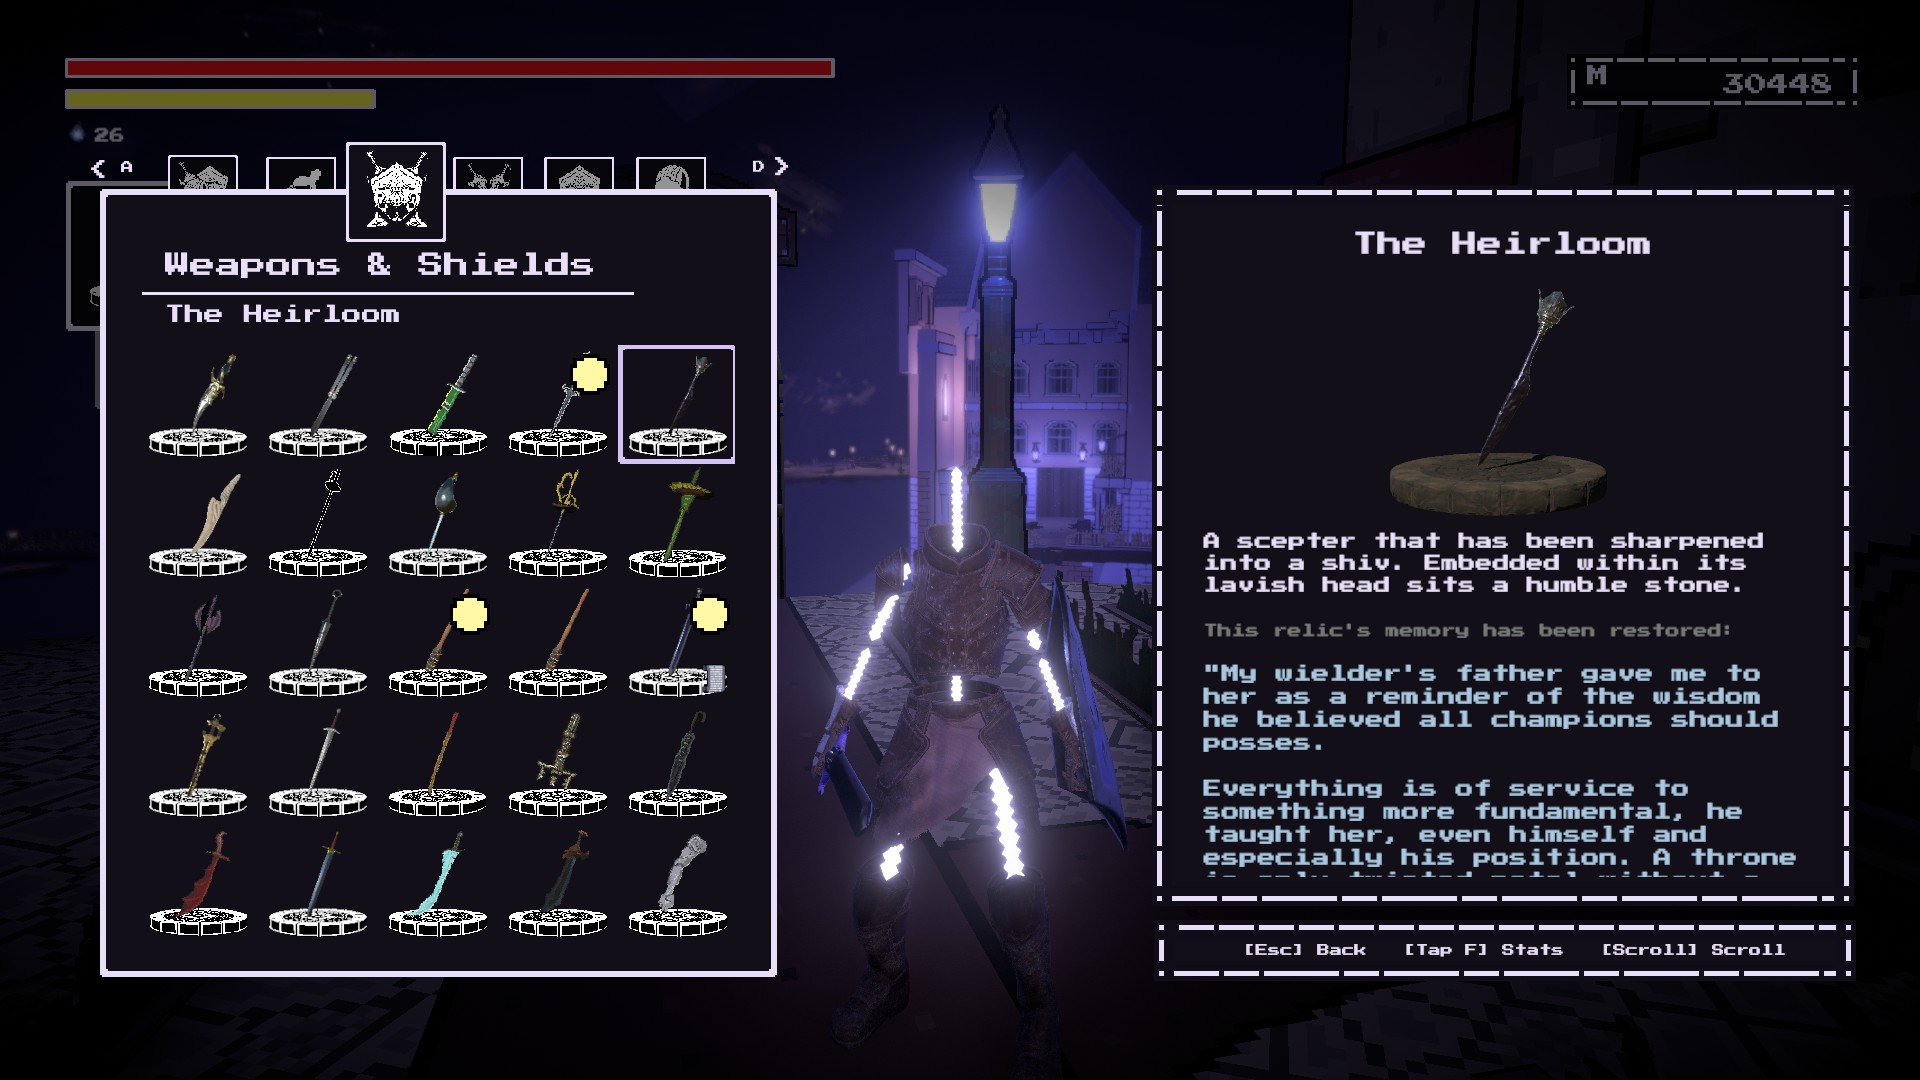
I’m not sure if you actually need to do this but
I’ll tell you how to start Vengeance’s questline:1) At Festivity Row, ride the elevator in the Spire to the top floor. She should appear.
2) Follow her up to the top of the Spire and battle her. Make sure to do this before beating Gnom.
(This could not be needed if anyone wants to tell me but it seems important.)
3) After beating Gnom, she’ll ask to parley with you.
4) Upon reaching the Keep of the Stolen Crown, she’ll be anxious to save the Monarch.
5) After beating Wunderschoenenberg and witnessing the death of the Monarch, the Old Man tries to console her near the entrance.이 시점에서, she’ll give you the Heirloom while she slips into depression.
~에
Start of Sequence, in the section with the elevator that takes you to
The Narrator.
Go through Start of Sequence until you’re at
this area before the clocktower elevator.

Look to the leftand you should see
a door.
Open it and you should be able to remember the weapon here.
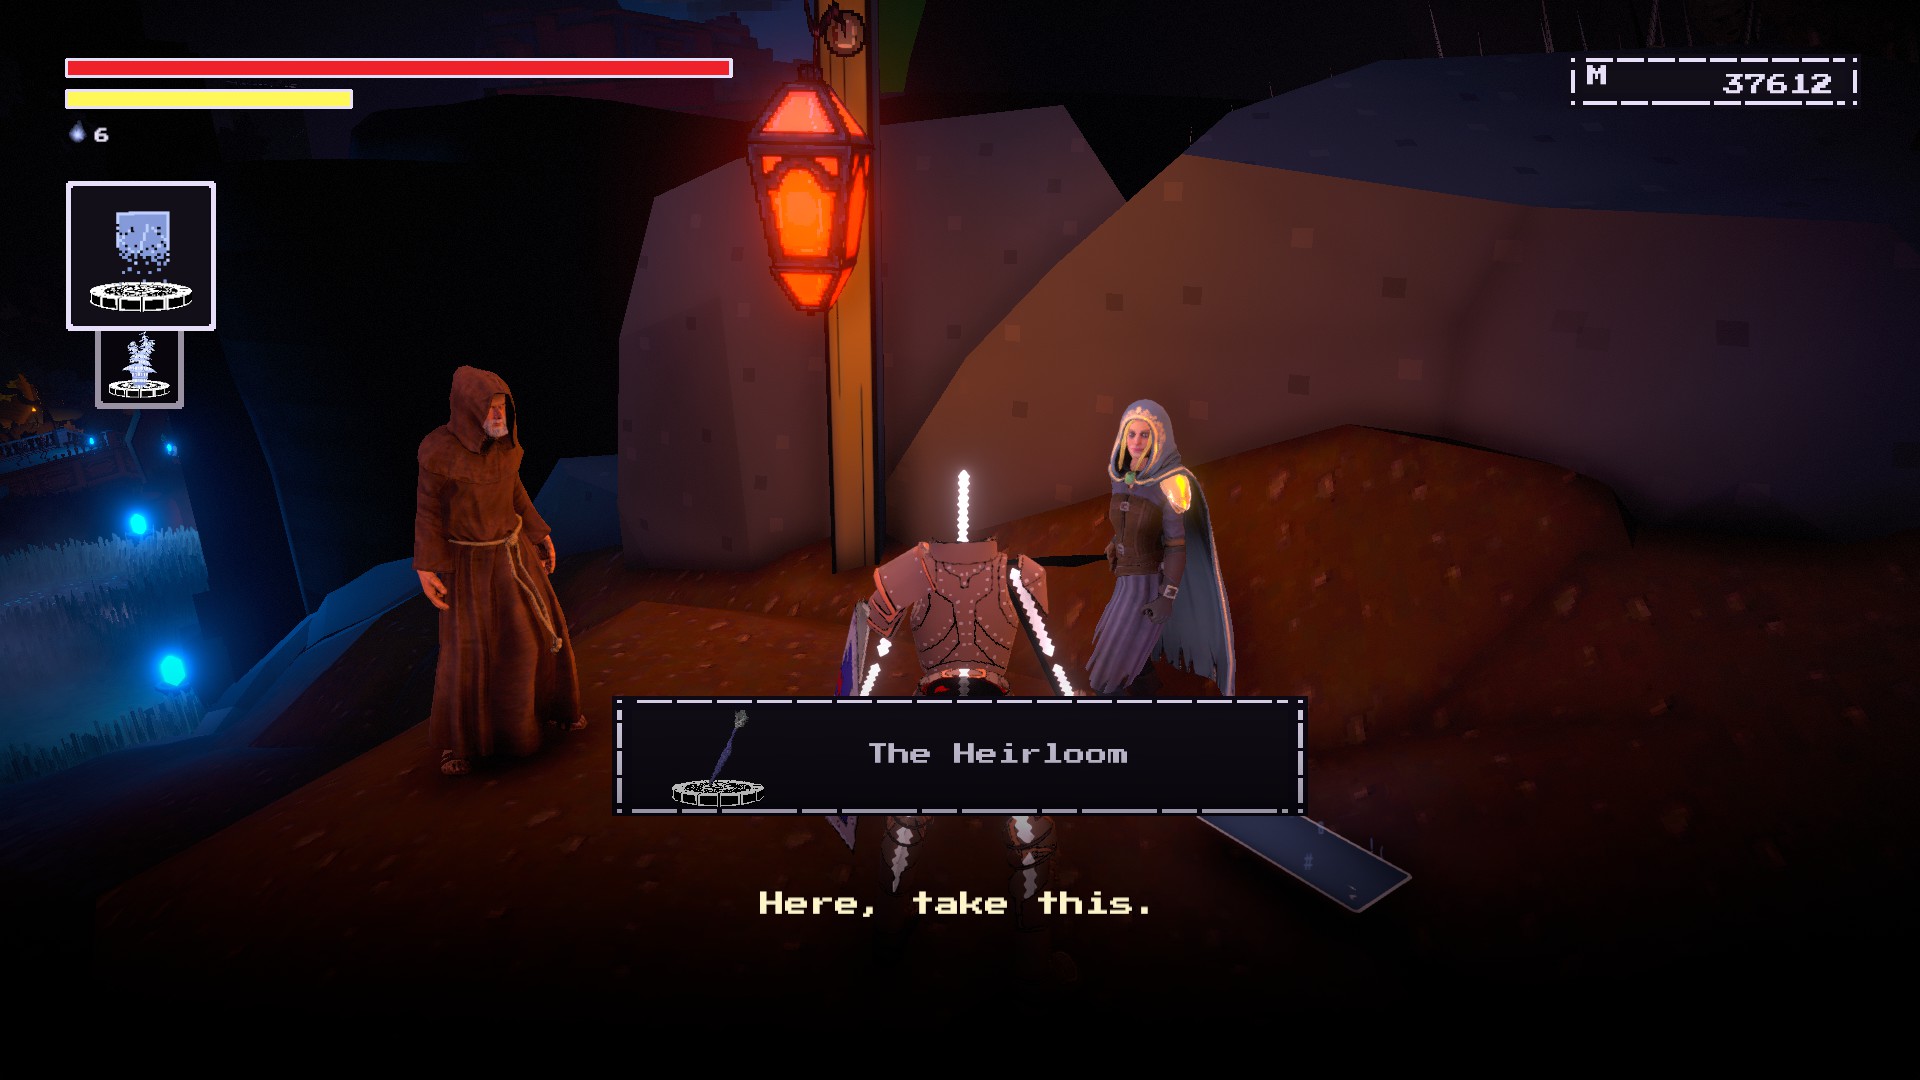
메모: Before defeating Mercucio, you should find a sulking Vengeance at the Heartflow Altar.
If you give a restored Heirloom to her and say that you won’t rule then she’ll be willing to help you fight Mercucio. You’ll complete her questline after killing Mercucio. Be wary that you won’t be able to get the weapon back but it should still count towards your remembered relics
Heart of a Hero
START OF SEQUENCE #3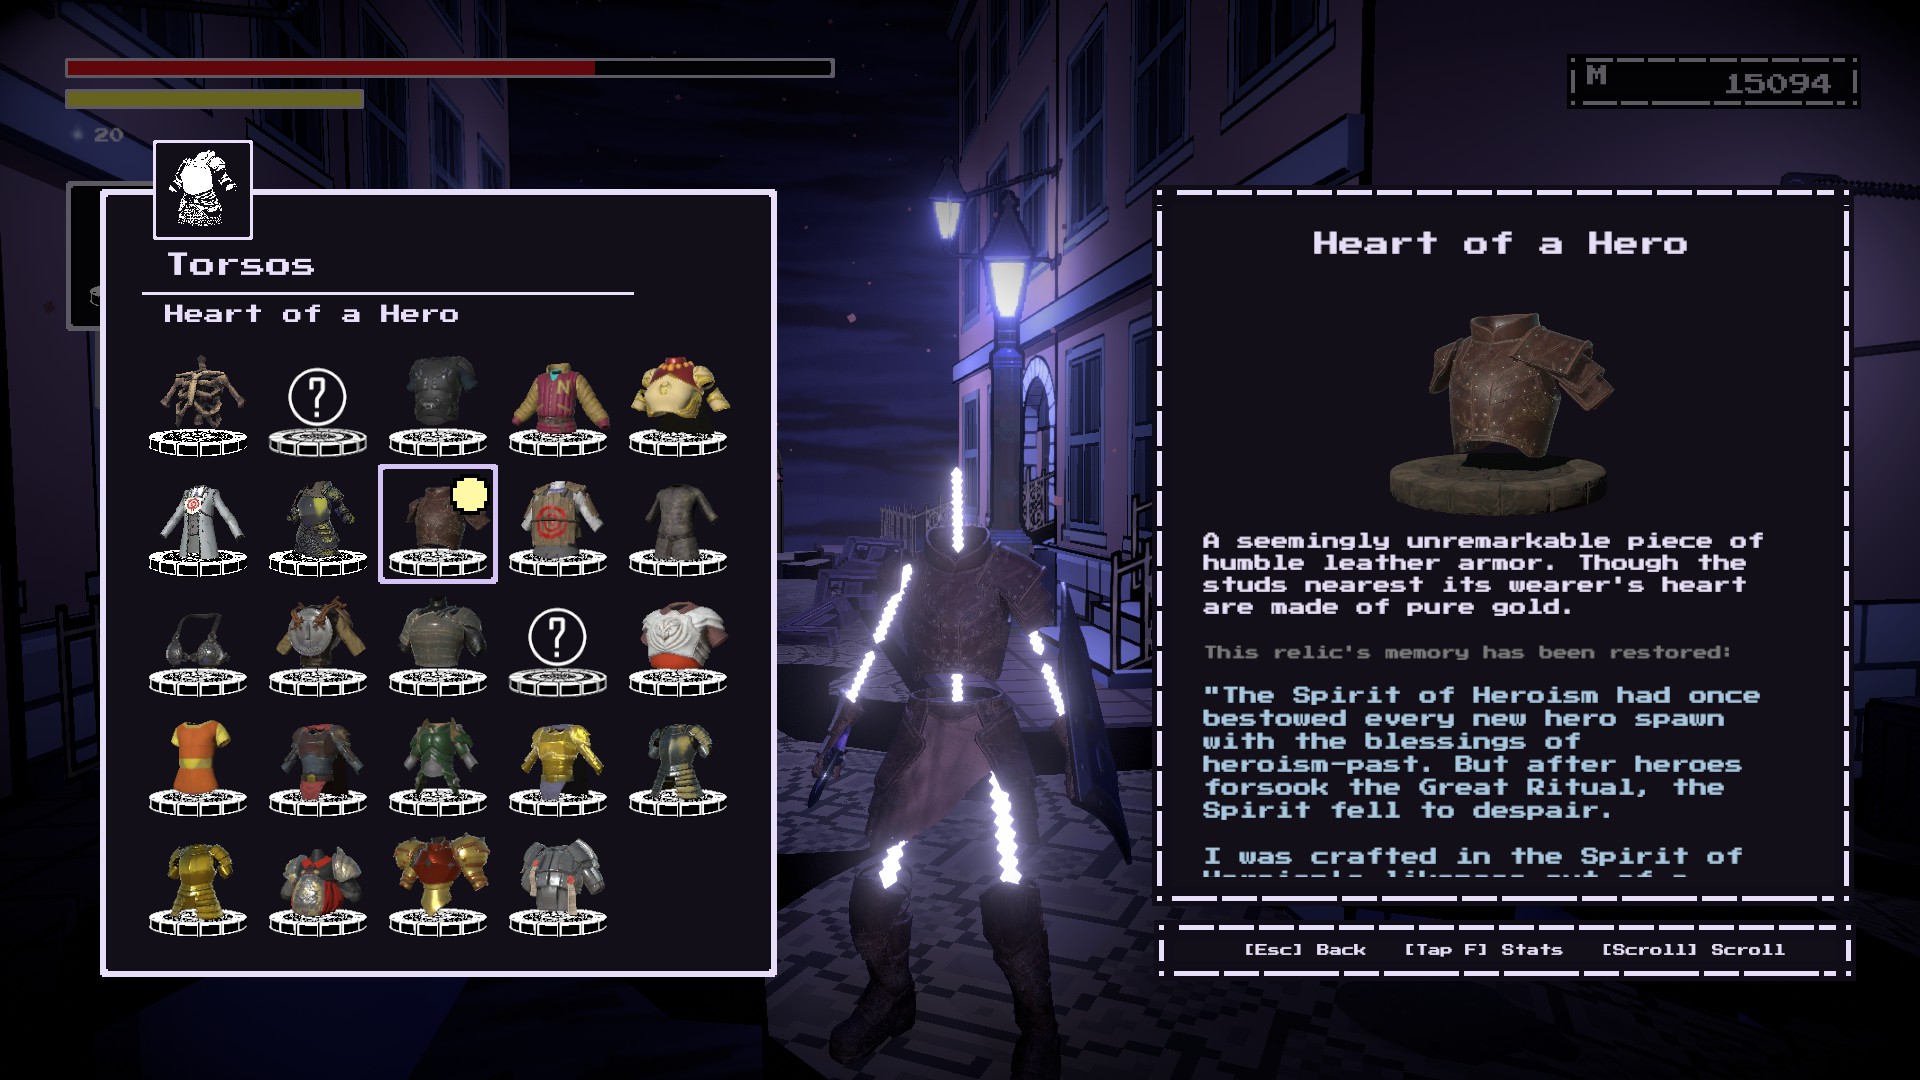
At Heartflow Altar to the right of this locked door저것
leads back to the Lair of the Adversary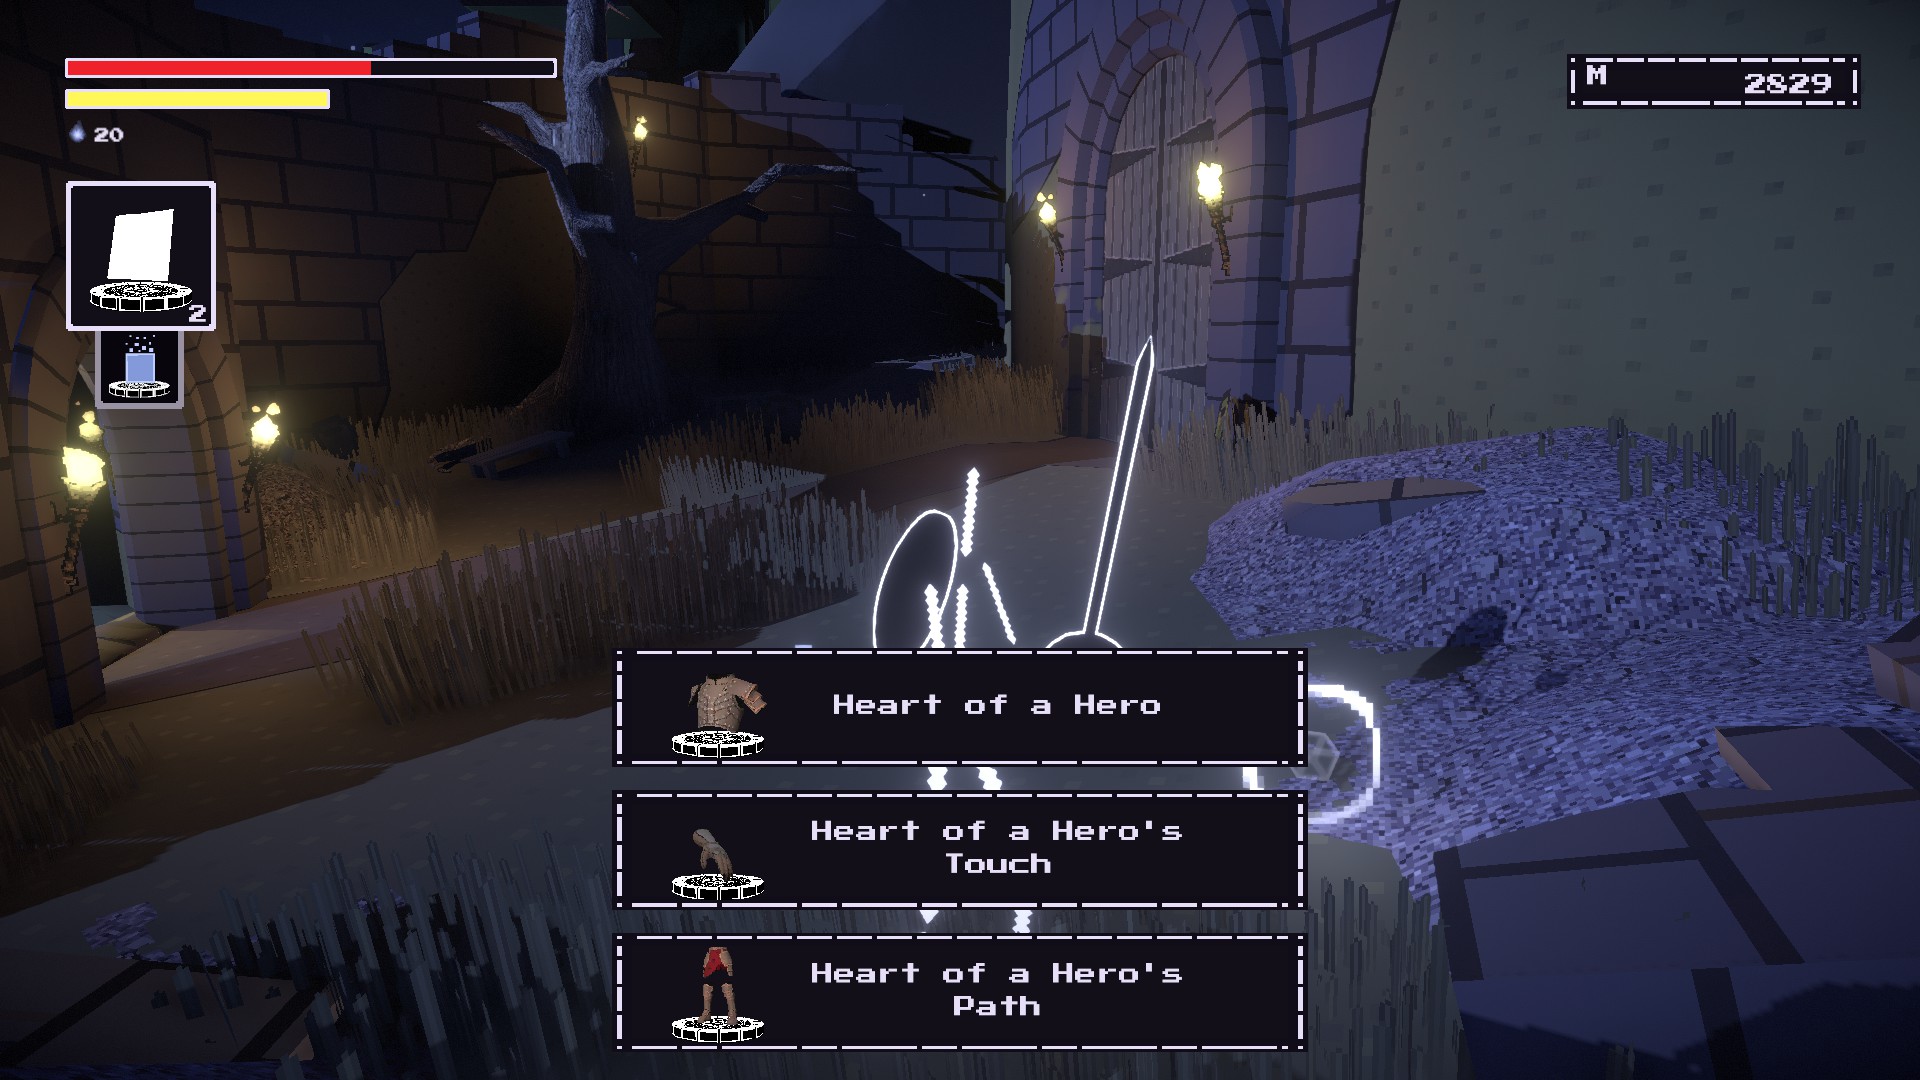
Once you reached the
Start of Sequence, make your way through the degraded enemies and stages.
Eventually you should reach this door labeled “Giving Back”
Enter it and you’ll see a glorious beacon
on top of a heart-shaped platform.Remember the armor here, 영웅!
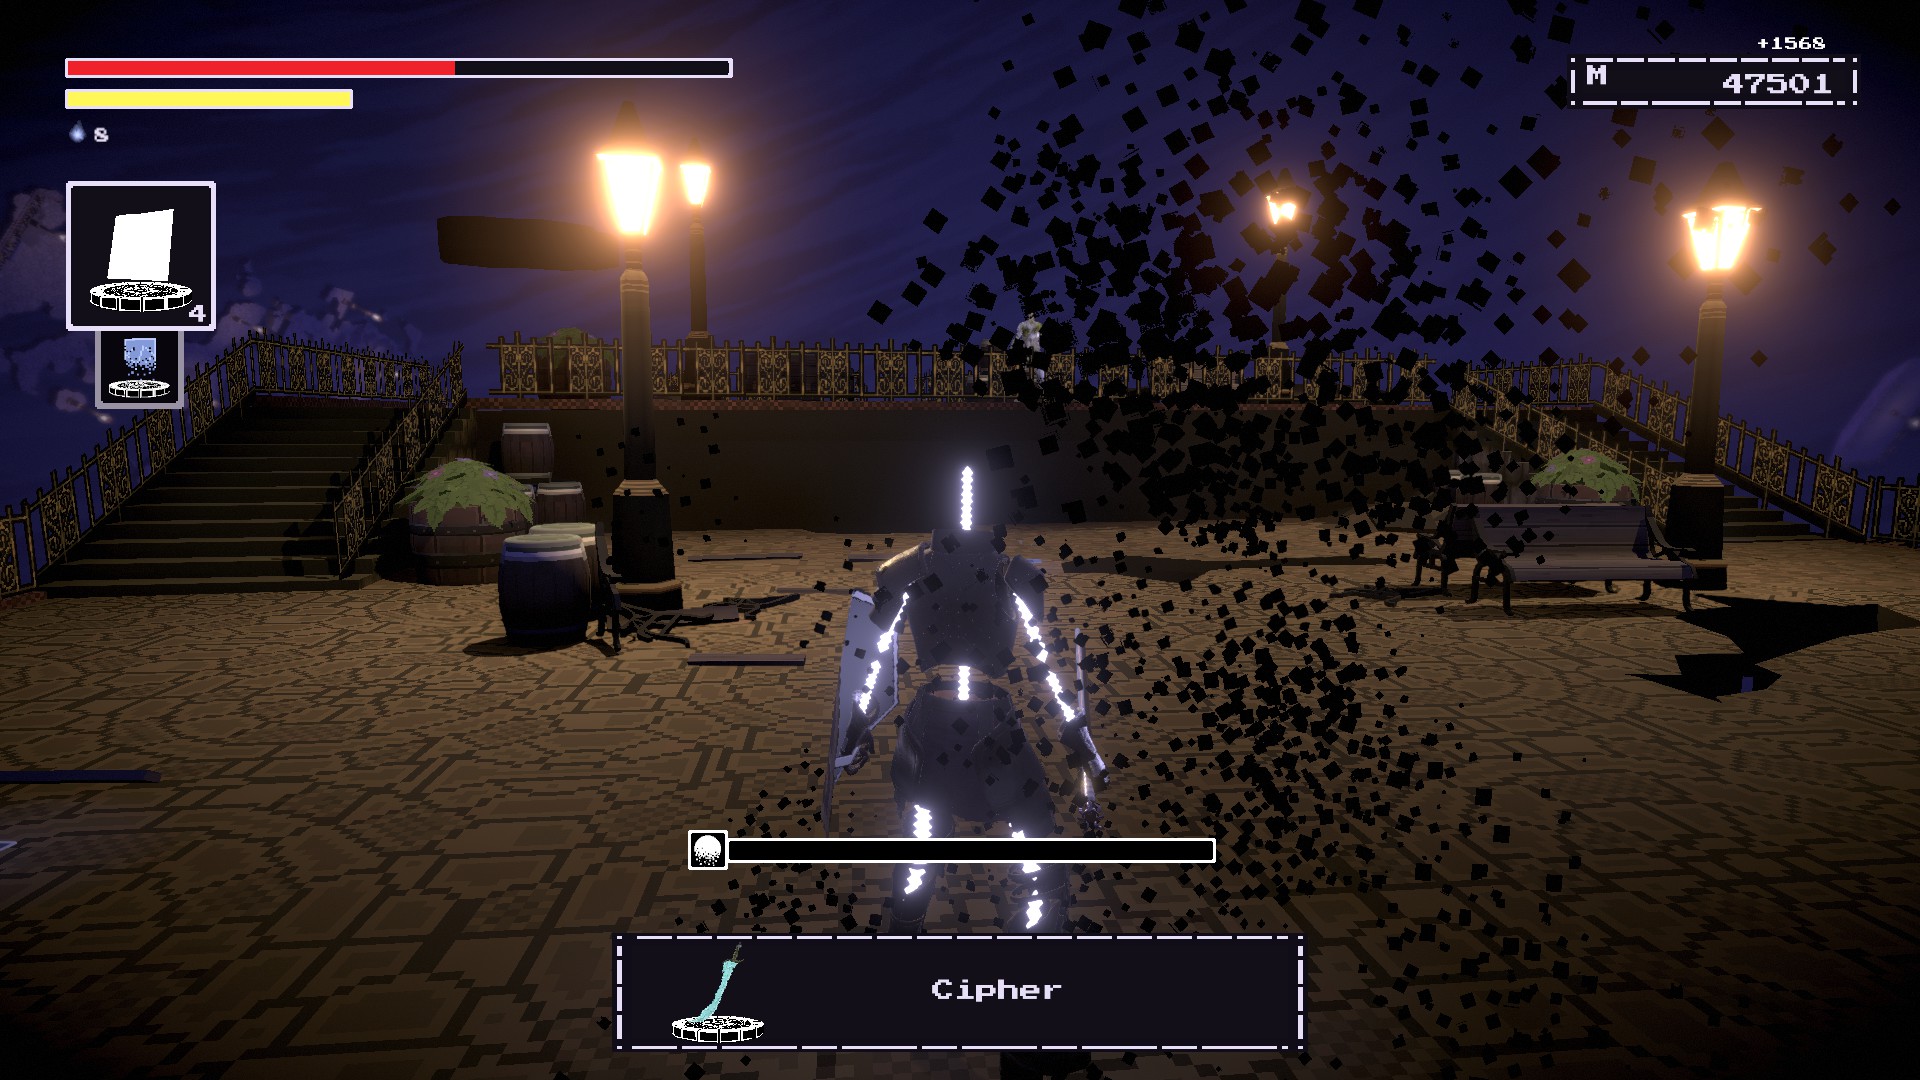
Cipher
LAIR OF THE ADVERSARY #1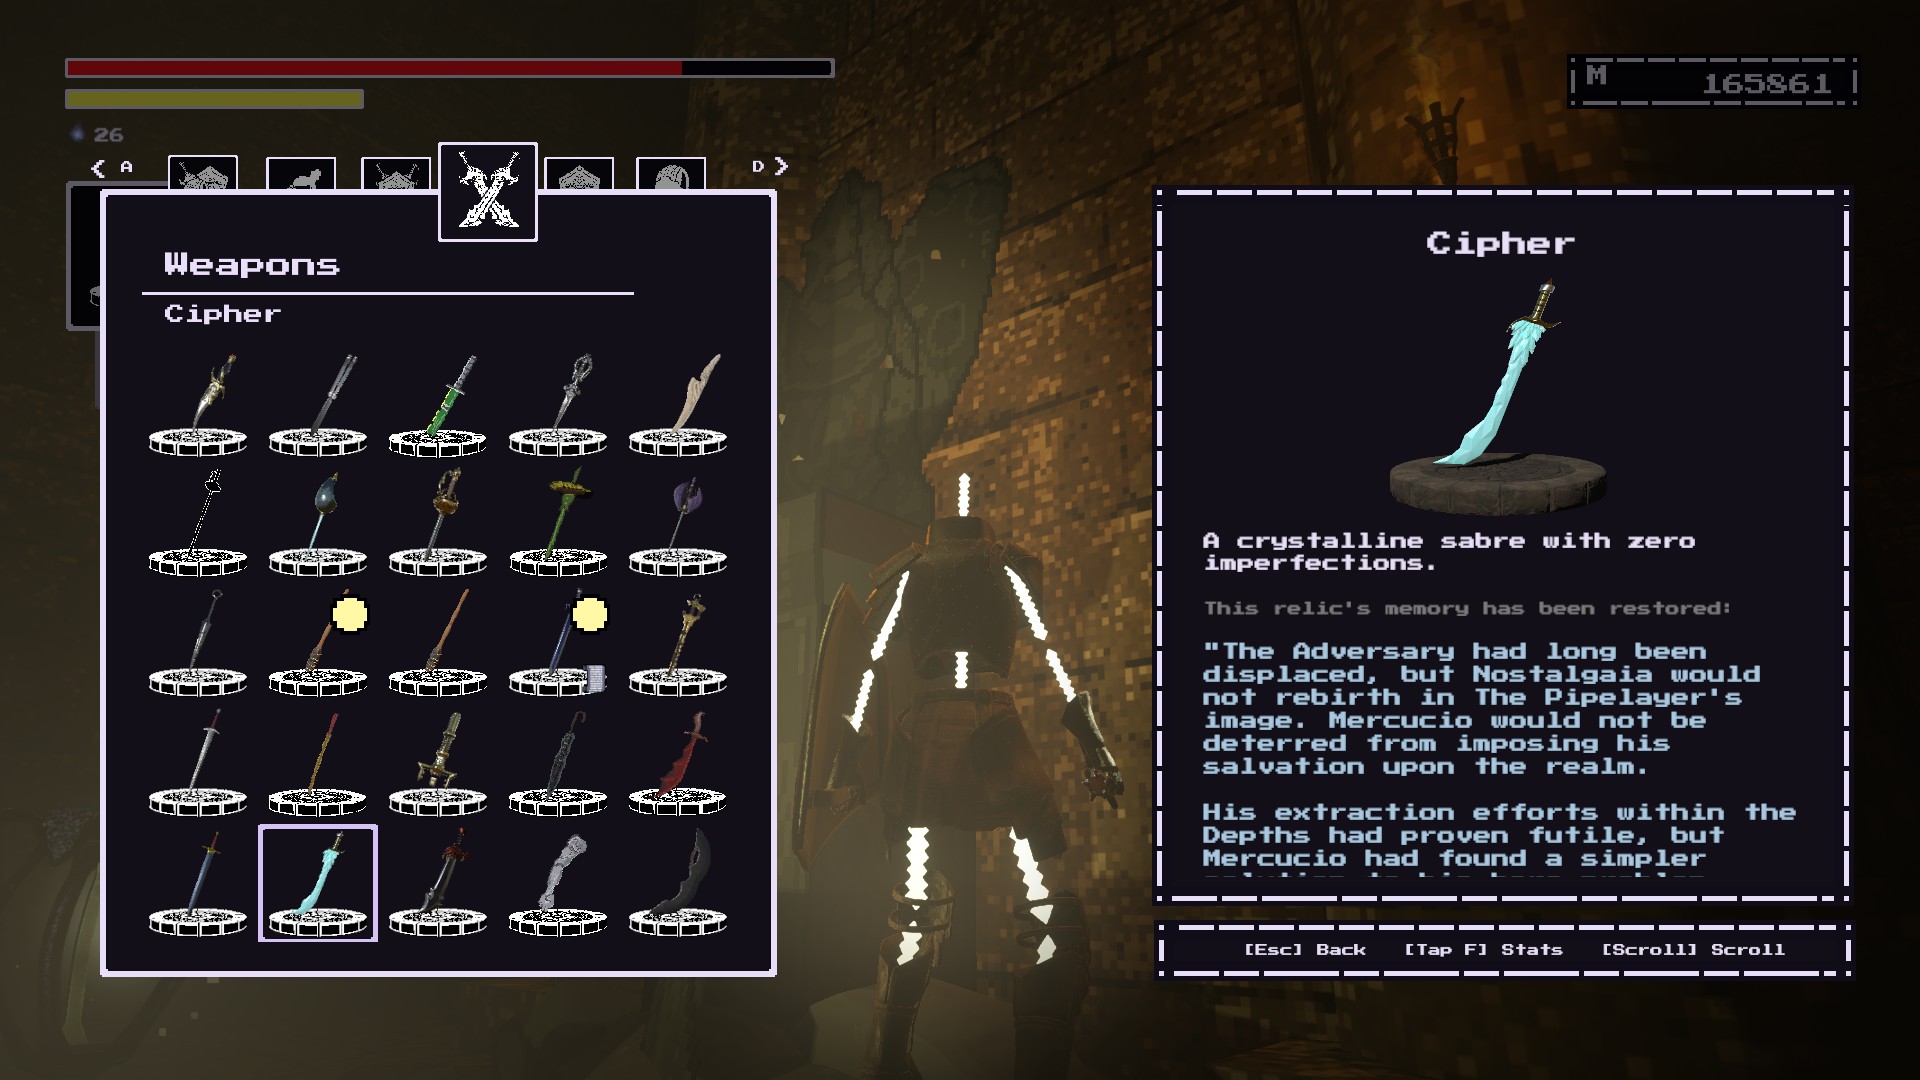
~에 Start of Sequence, there is a room with three ladders.
Left ladder is where you go for your train-ing.
Right ladder leads to a single enemy and an item.
Middle ladder that glows and leads to two degraded spiders.
Go climb up the middle ladder and fight them.
One drops the Cipher, the other will drop the Projector Shield.
At the Lair of the Adversary beacon. You’ll know that you’re at the right beacon if you see this incomplete statute of Mercucio.
Easymaker Chain
LAIR OF THE ADVERSARY #2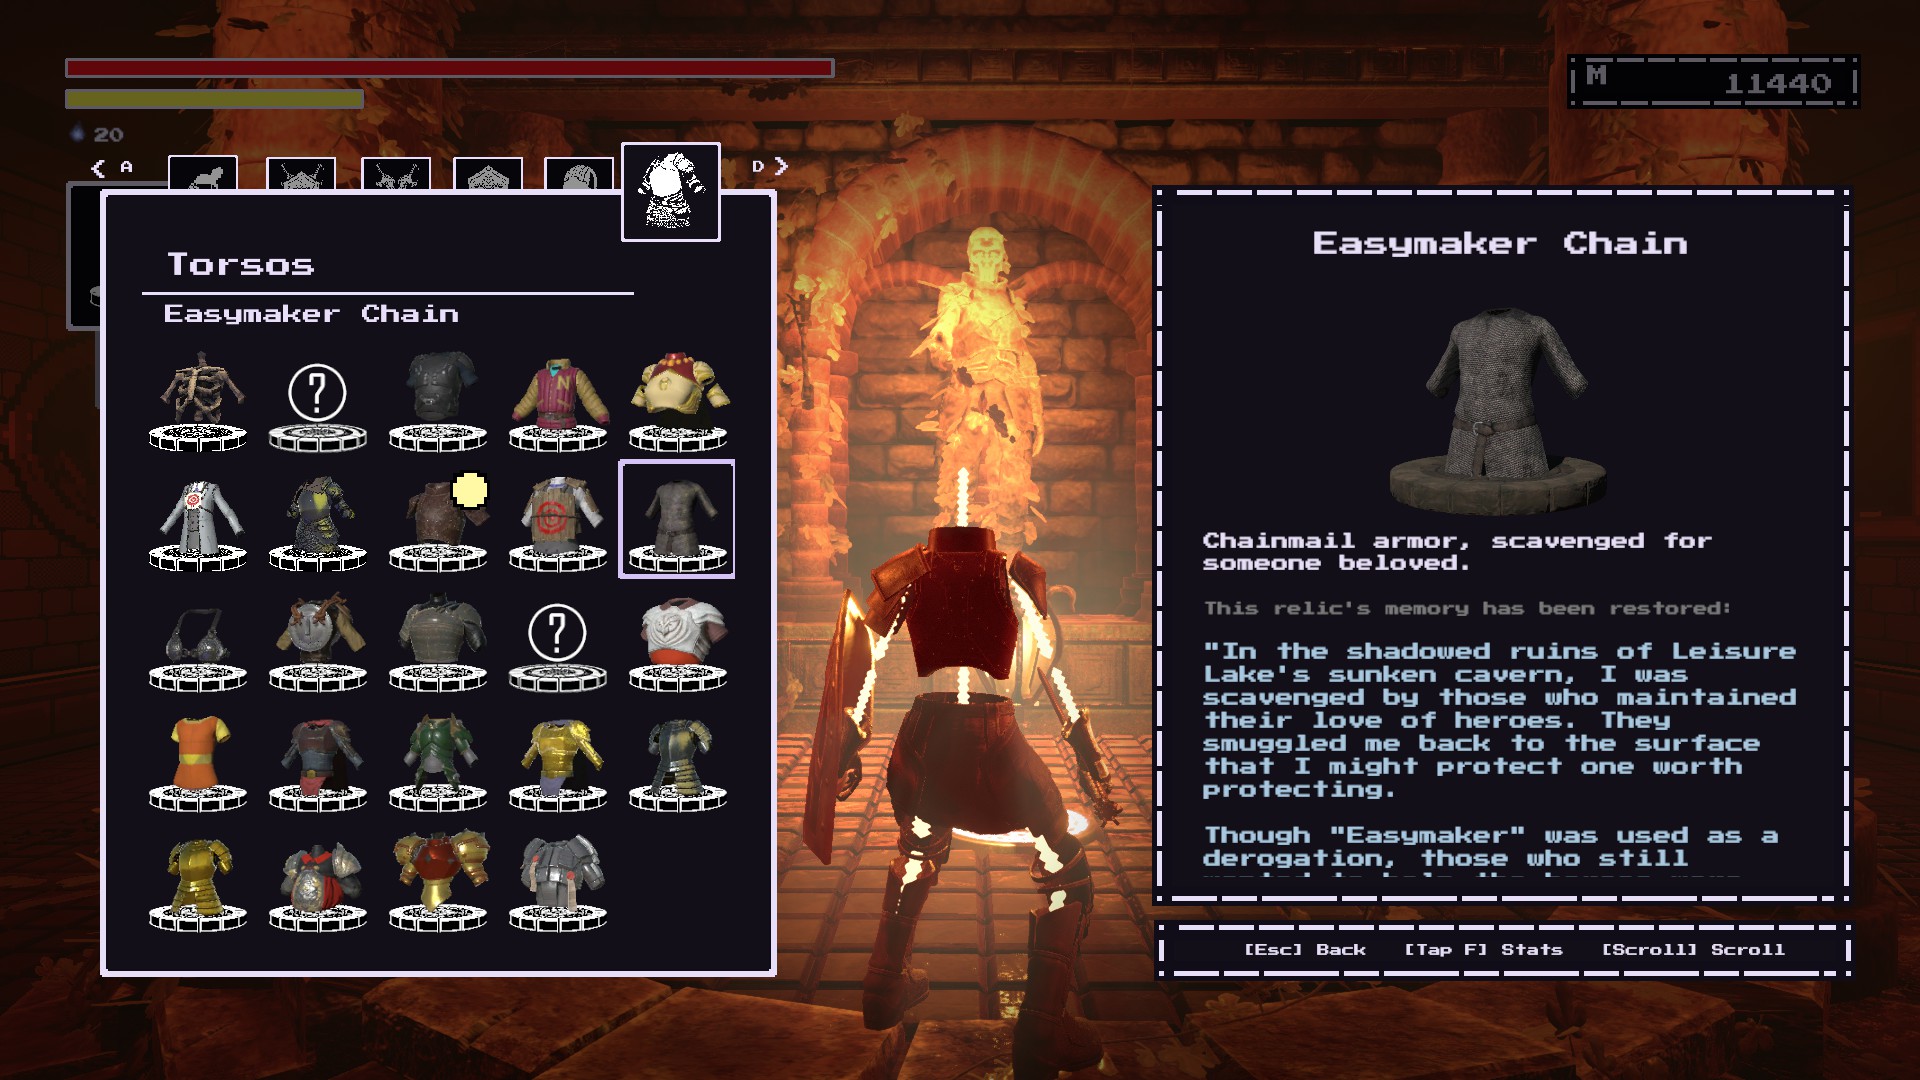
당신은 할 수 있습니다 buy it from the Merchant’s base stock.
No Easymaker Keys needed.
소송 비용 2950 memory in total.
Though it shows up in the game’s compendium as being in the Lair of the Adversary,
그만큼 armor is restored as default.
이는 다음을 의미합니다. all you have to do is buy it.
Please correct me if I’m mistaken on this one but better safe than sorry!
Savior’s Raiment
LAIR OF THE ADVERSARY #3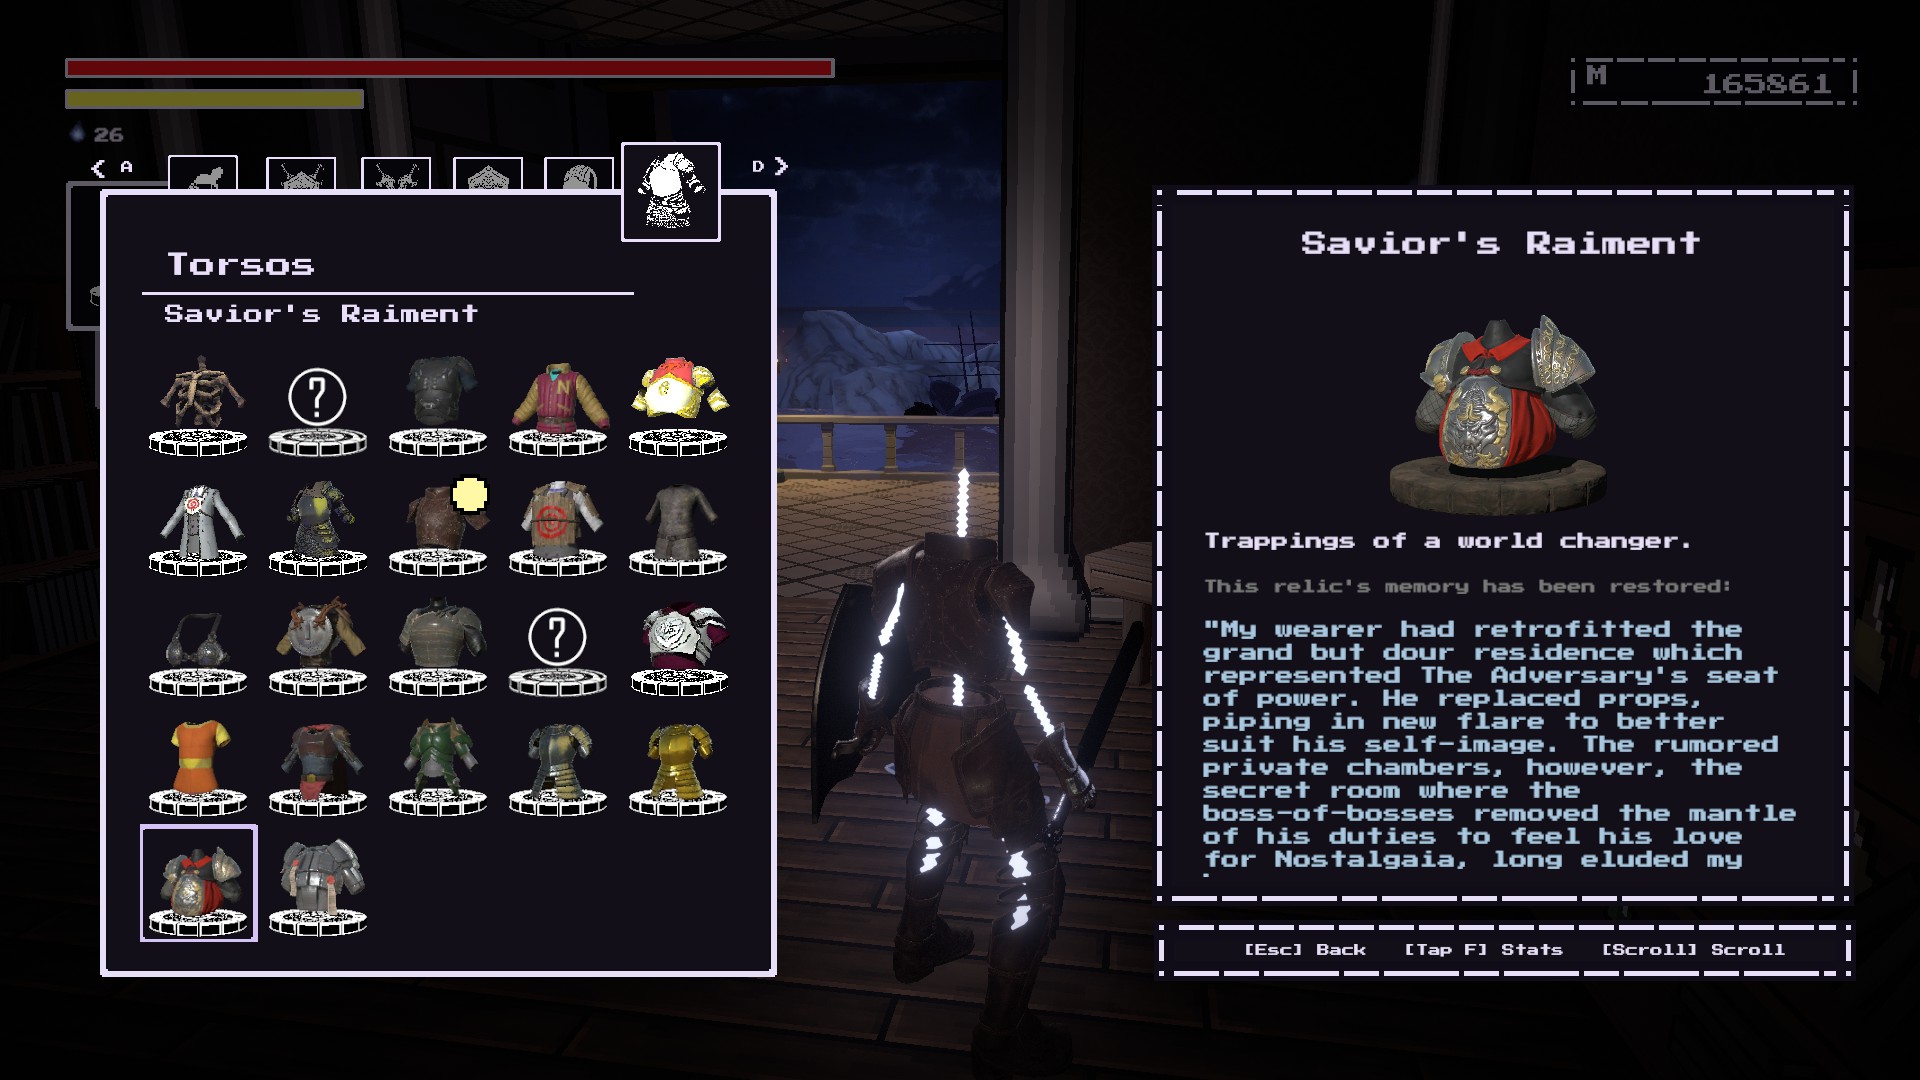
Obtained after beating Mercucio the Pipelayer
At the Lair of the Adversary, you’ll want to backtrack to the spiral staircase that is before the “fun bar” 영역. So around here as shown in this picture.
On your right, you should see a prison area with patrolling Cultists and Deranged Damsels.
Enter and look for an open cell at the end of the hallway.
There will be a hidden stairway that leads to the Adversary’s former office. Remember the Savior’s Raiment here.
Chainmail Bikini
LAIR OF THE ADVERSARY #4 (It doesn’t show up on the Compendium, but it’s still a Relic)
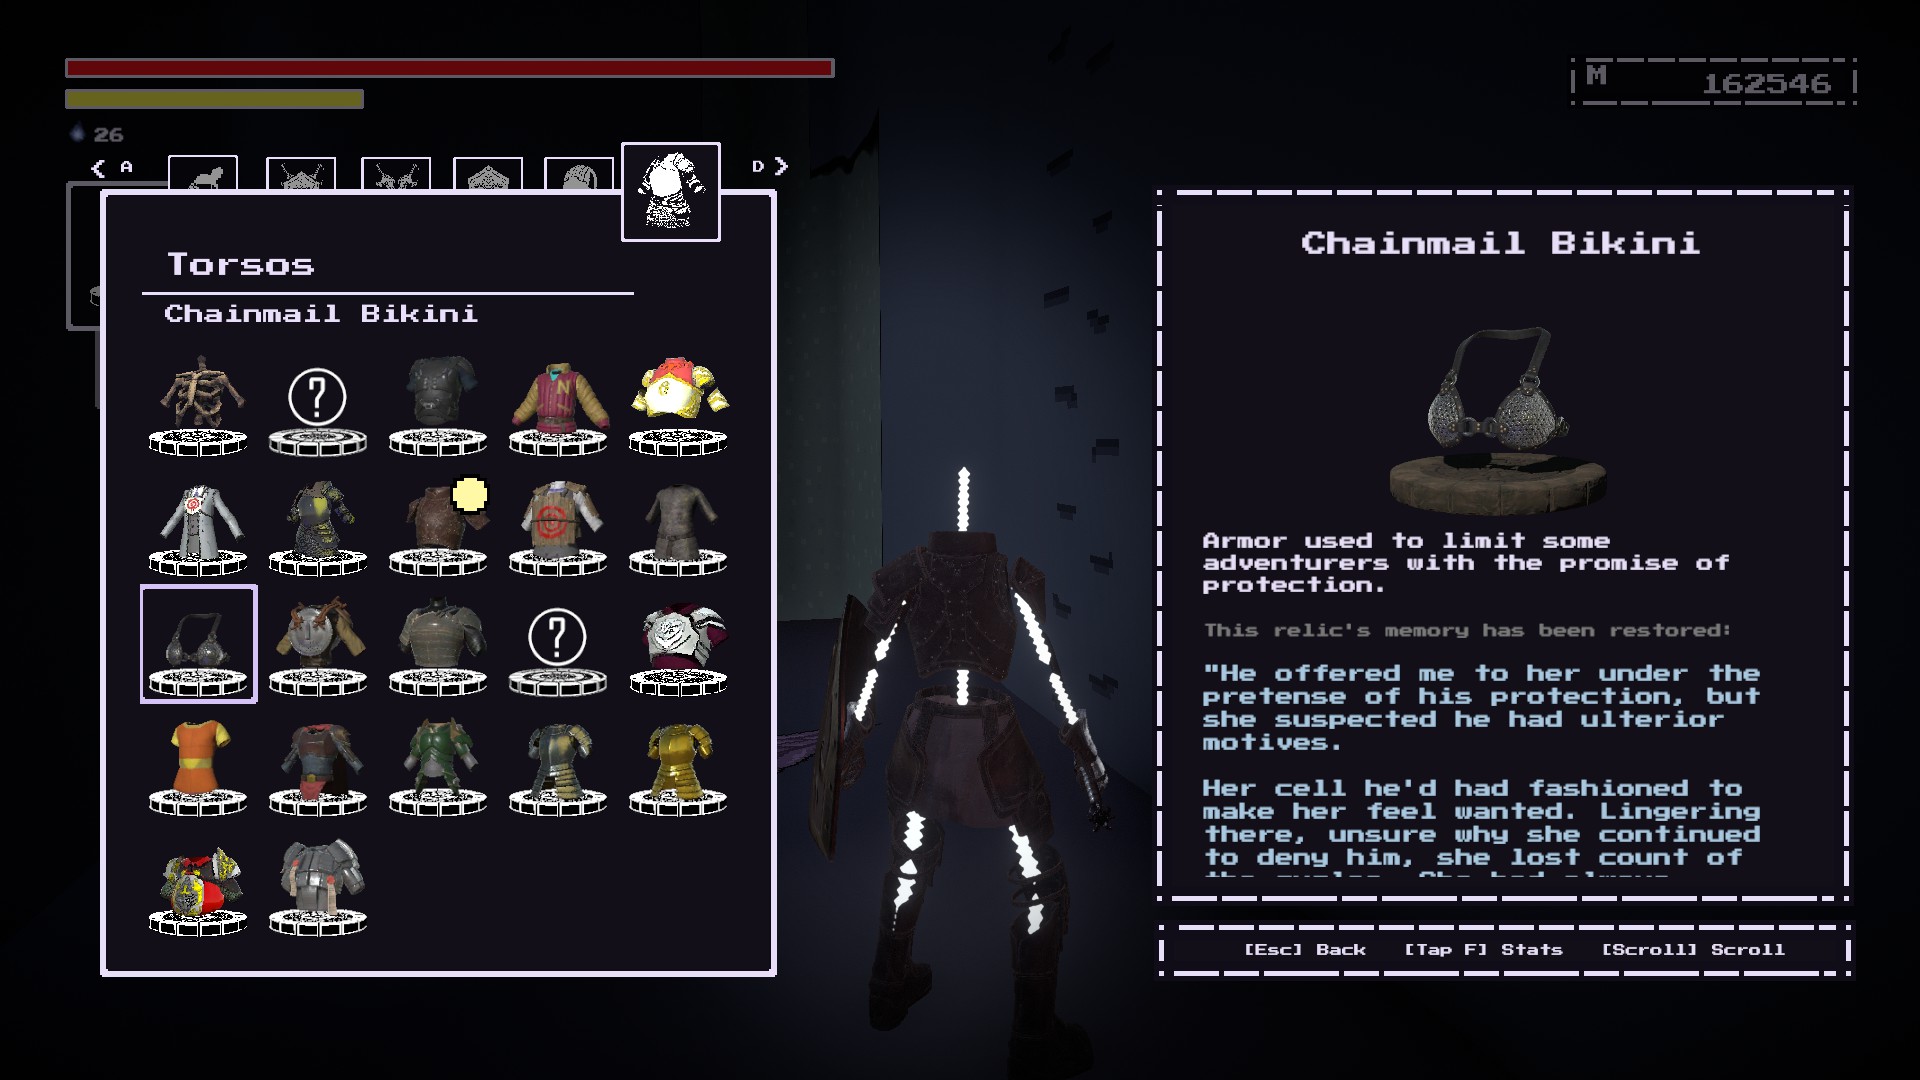
에서 Strip Club Area preceding the Mercucio boss room in the Lair of the Adversary. It’ll be near one of these curtained couches.
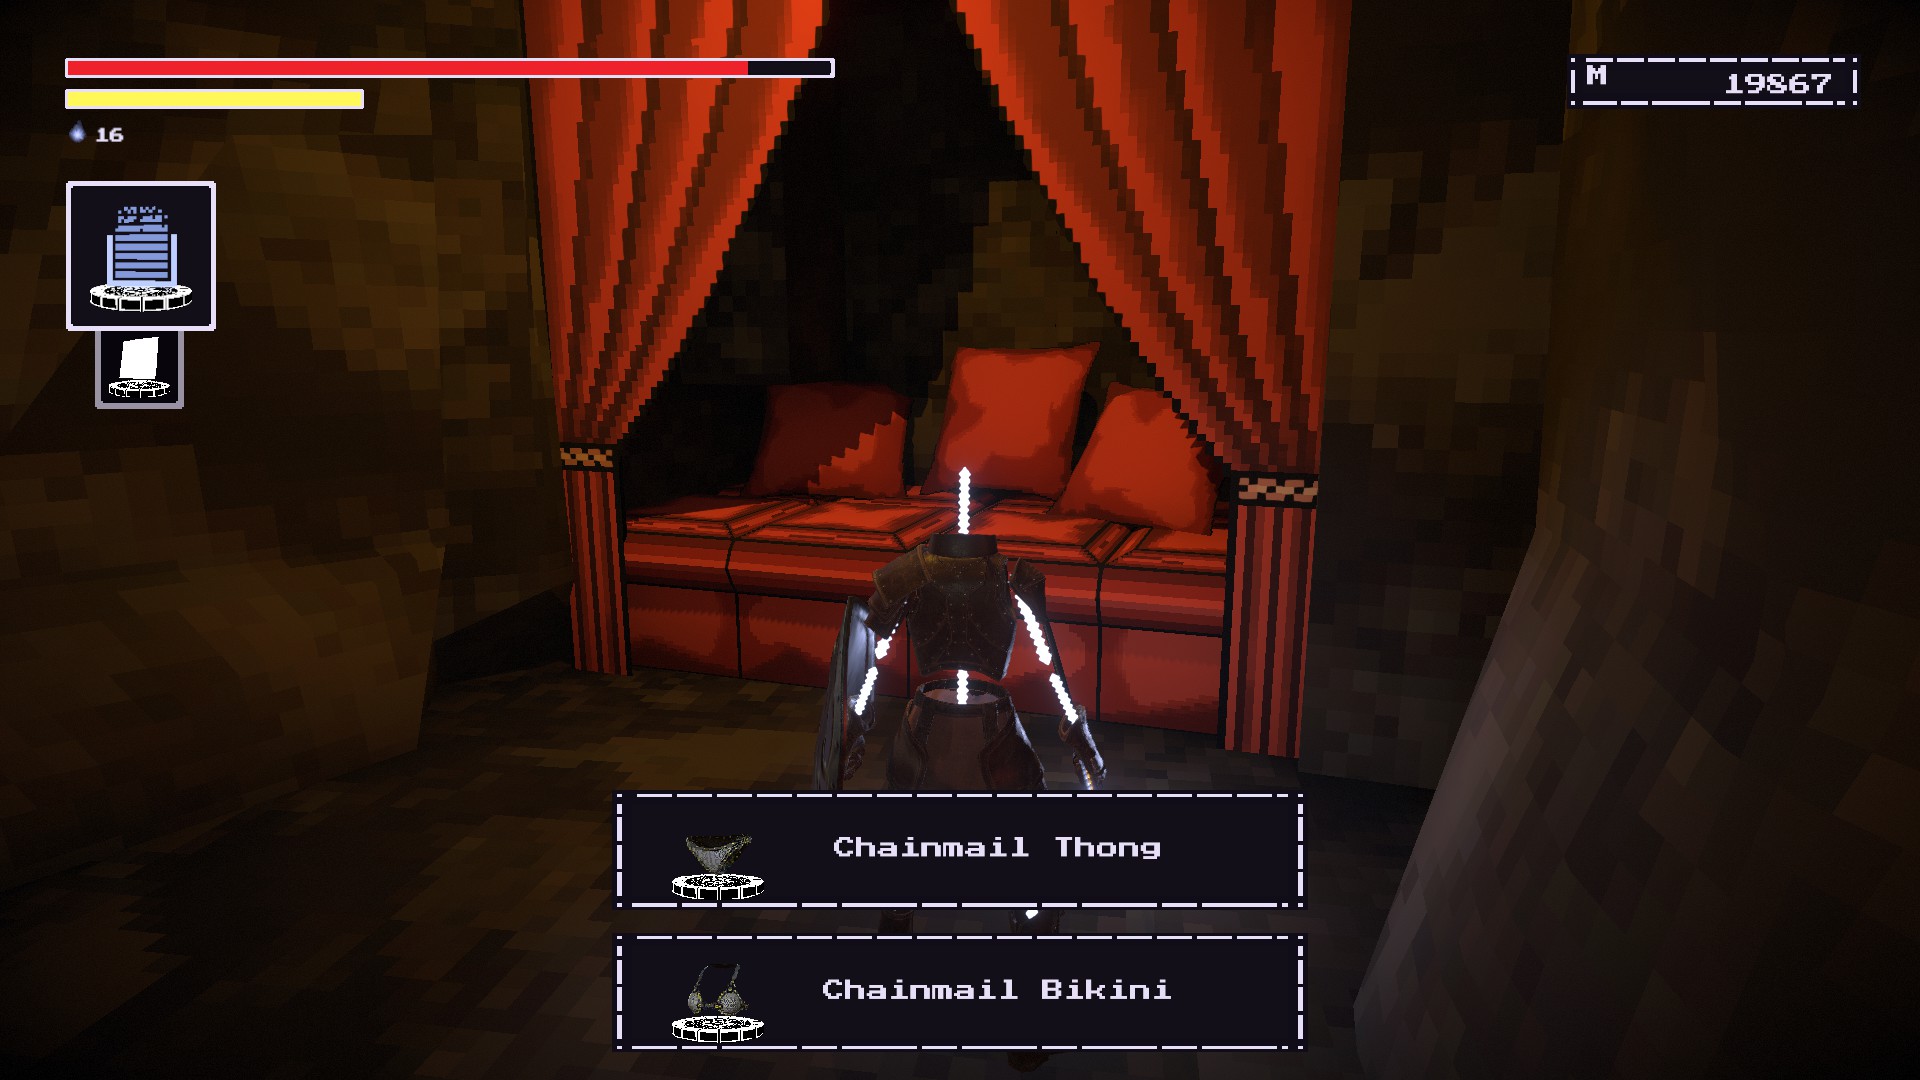
Fairly near where you’d restore the Savior’s Raiment.
At the Lair of the Adversary, you’ll want to backtrack to the spiral staircase that is before the “fun bar” 영역. So around here as shown in this picture.
Now look to your left and you should see an entrance.통과하십시오
You’ll be at The Heir’s Hideout and look towards the edge with the abandoned umbrella.This is where you’ll be able to remember this armor.
Datum Digging Dagger
COSTS MEMORY #1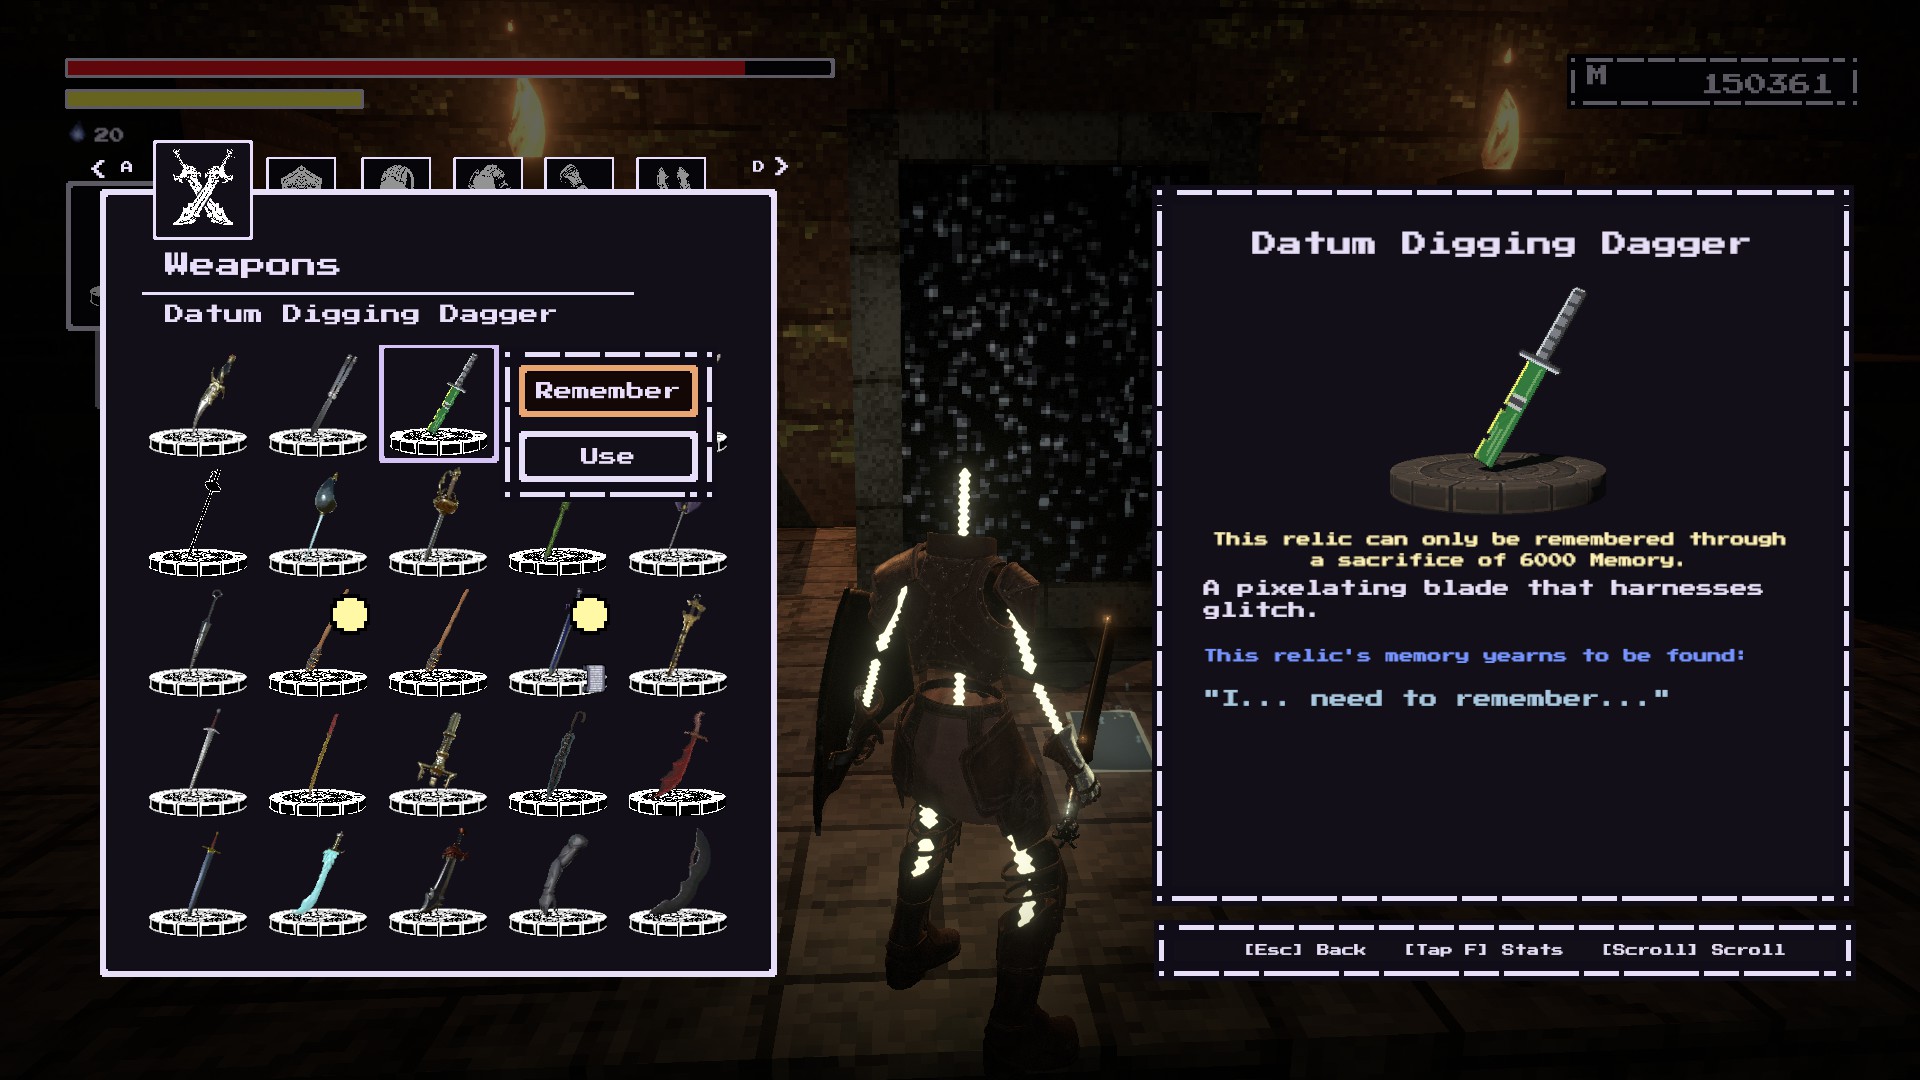
At the Rehabilitation its.
이쪽으로 이동 section with the miners and a single overseer as shown.
If you’re still confused, it should be near the ladder shortcut.
Go to this door where an Abomination will jump out at you.
Continue through the room and the weapon should be at the end.
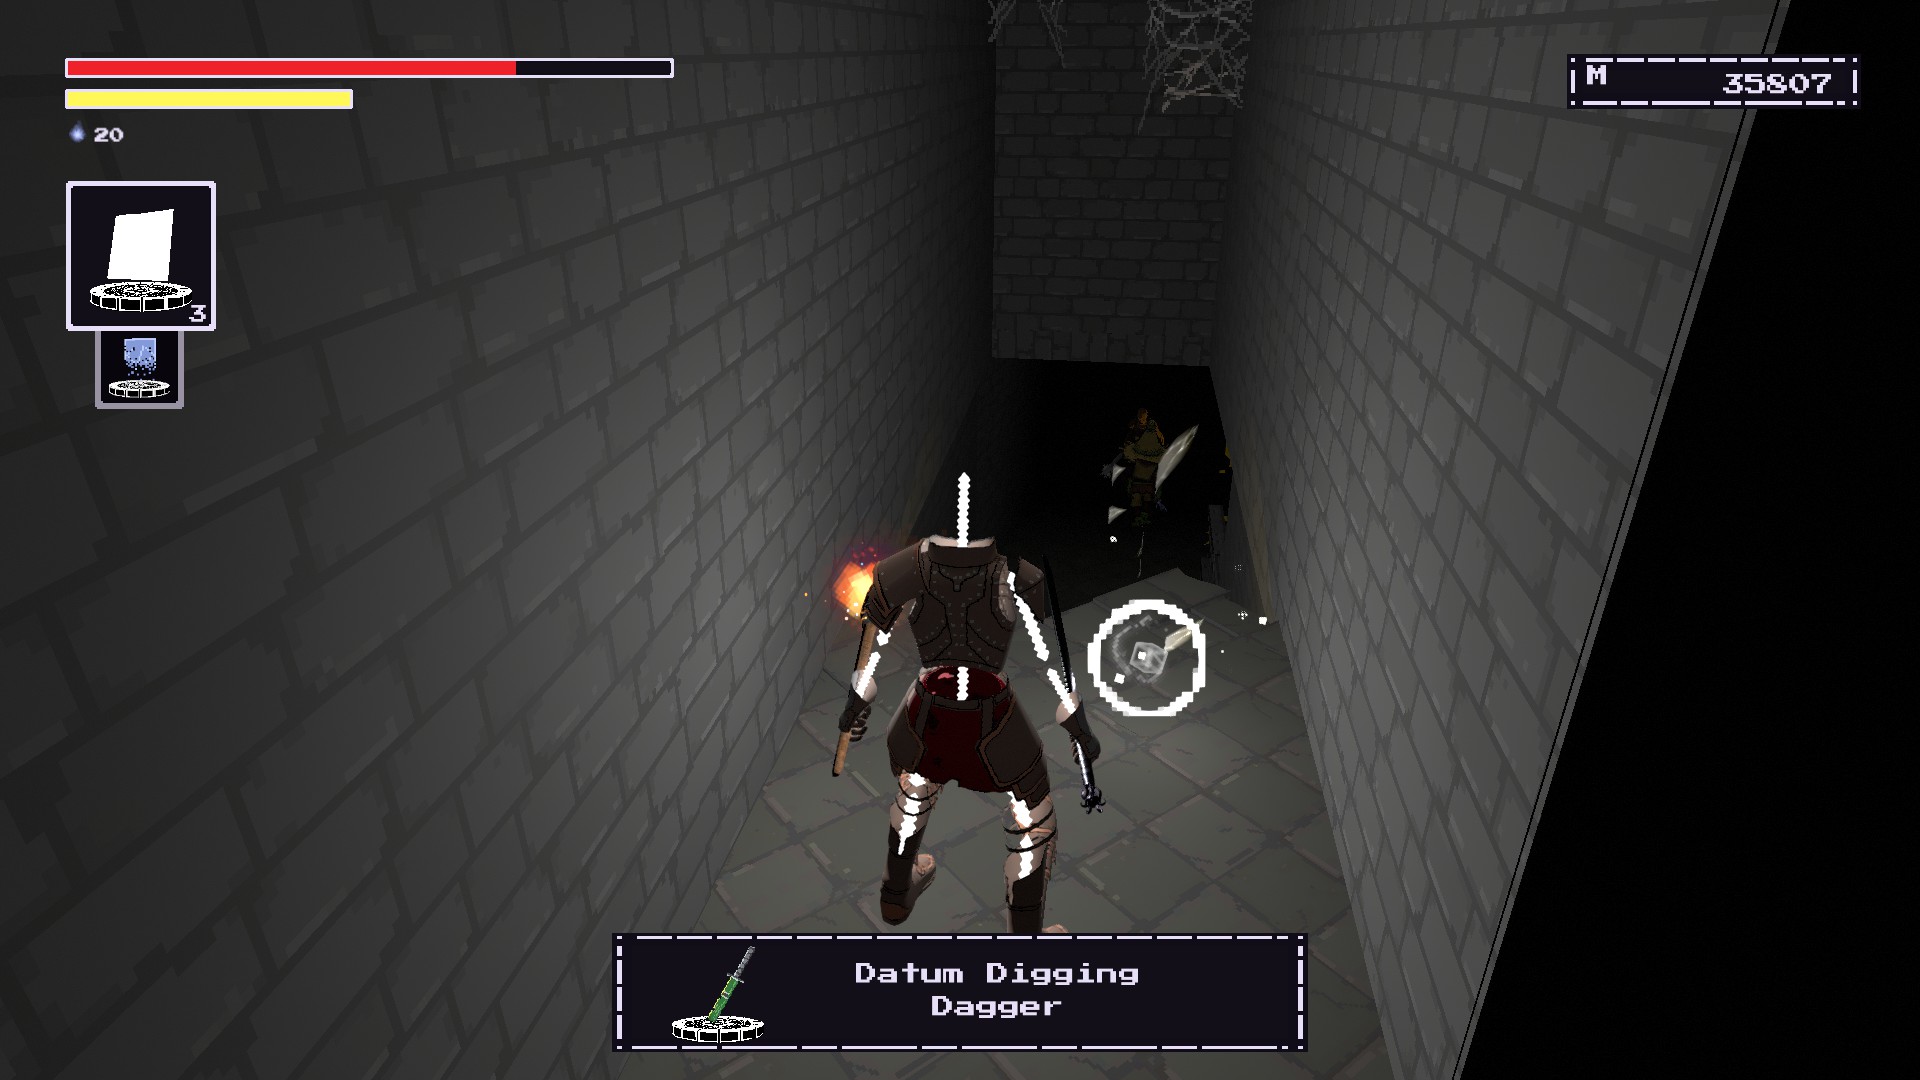
You need to spend 6000 memory to restore the weapon.
Brain Piercer
COST MEMORY #2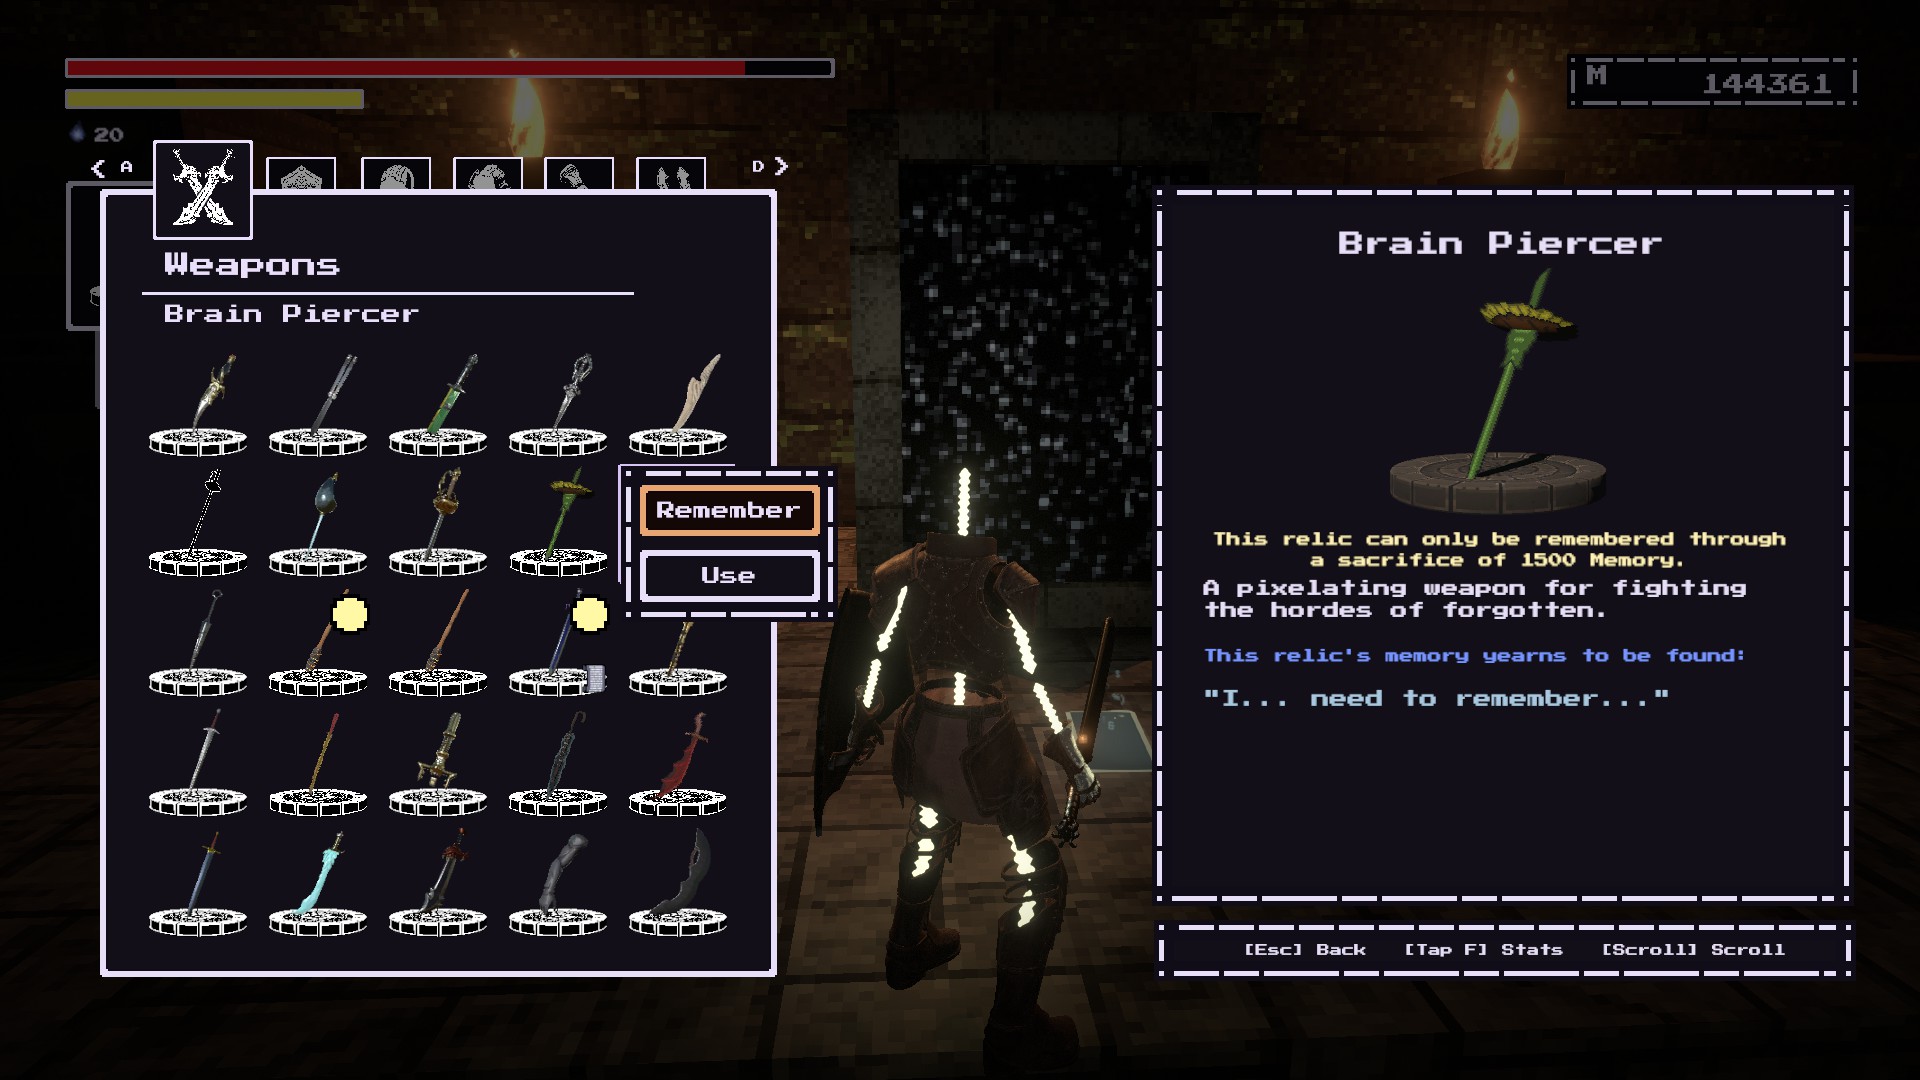
~에 Festivity Row.
It should be on a sitting corpse near the entrance to the Spire.
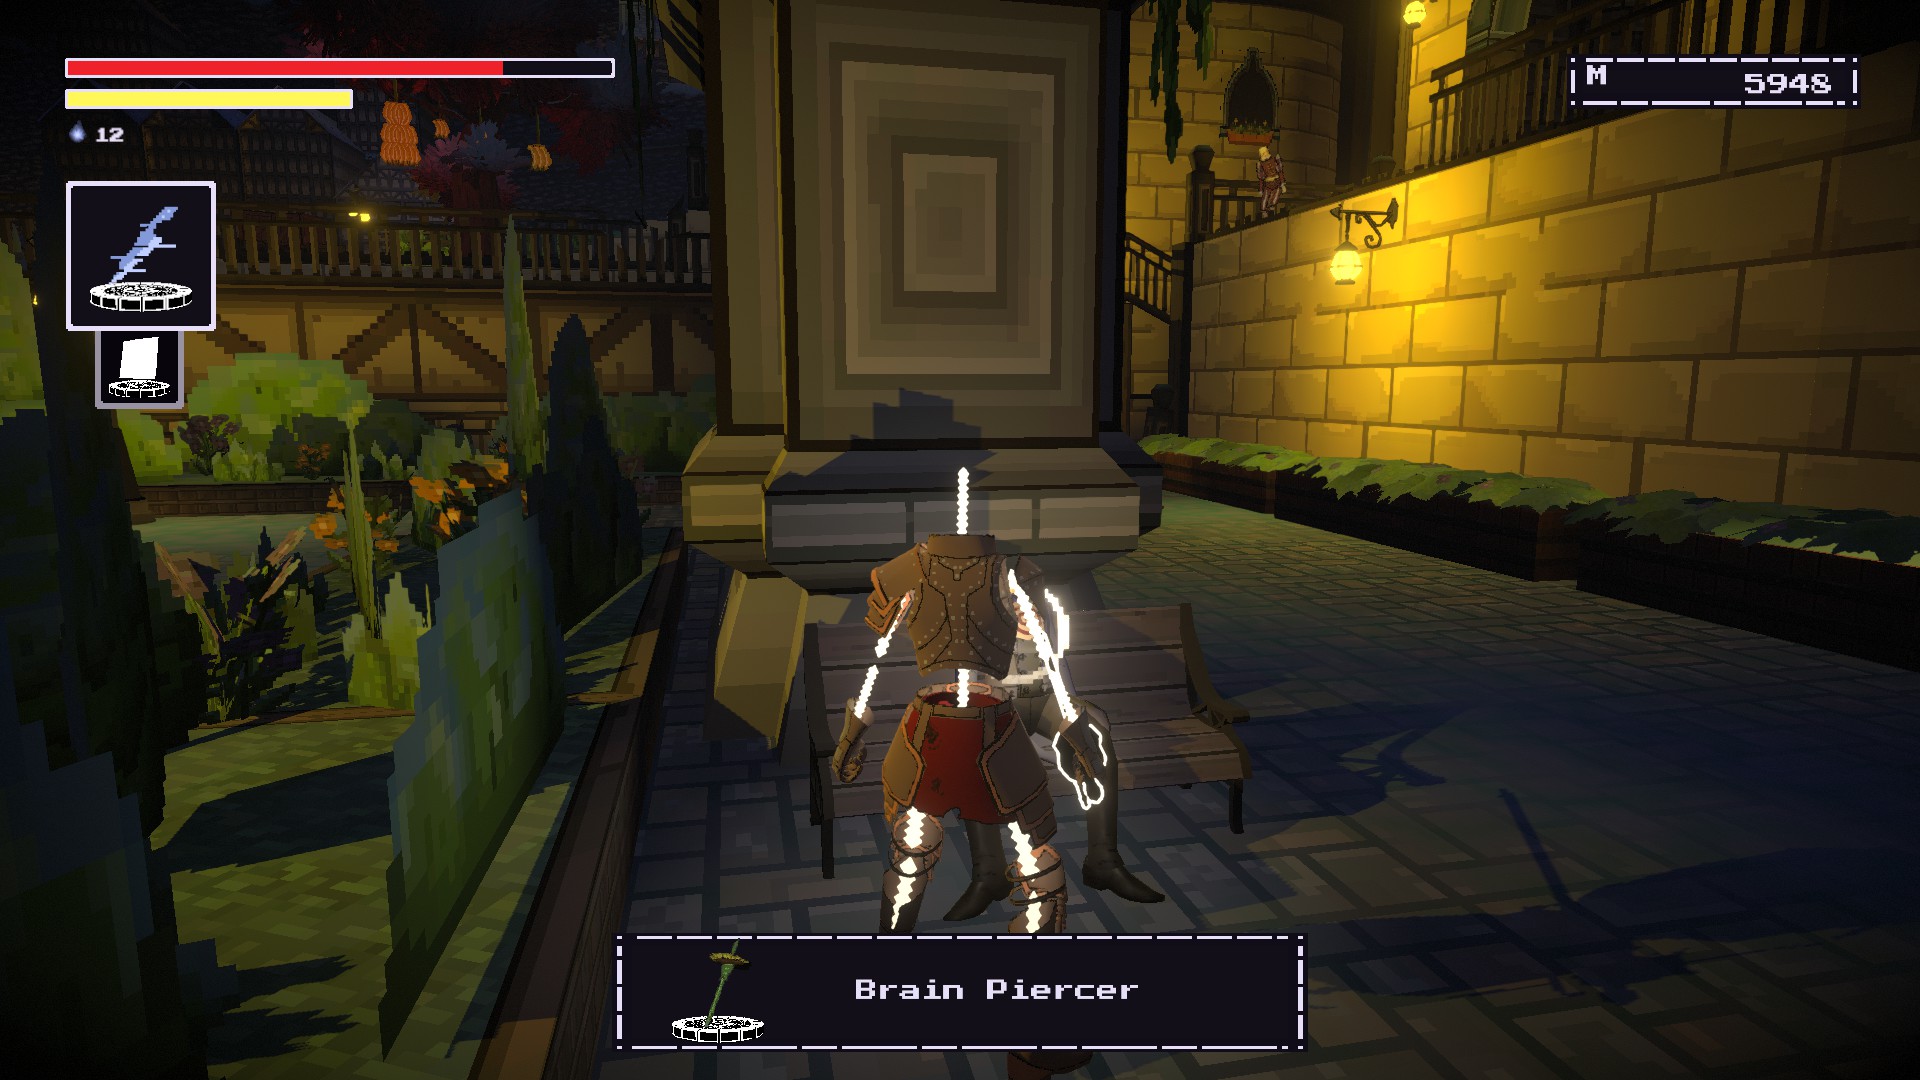
You need to spend 1500 memory to restore this weapon.
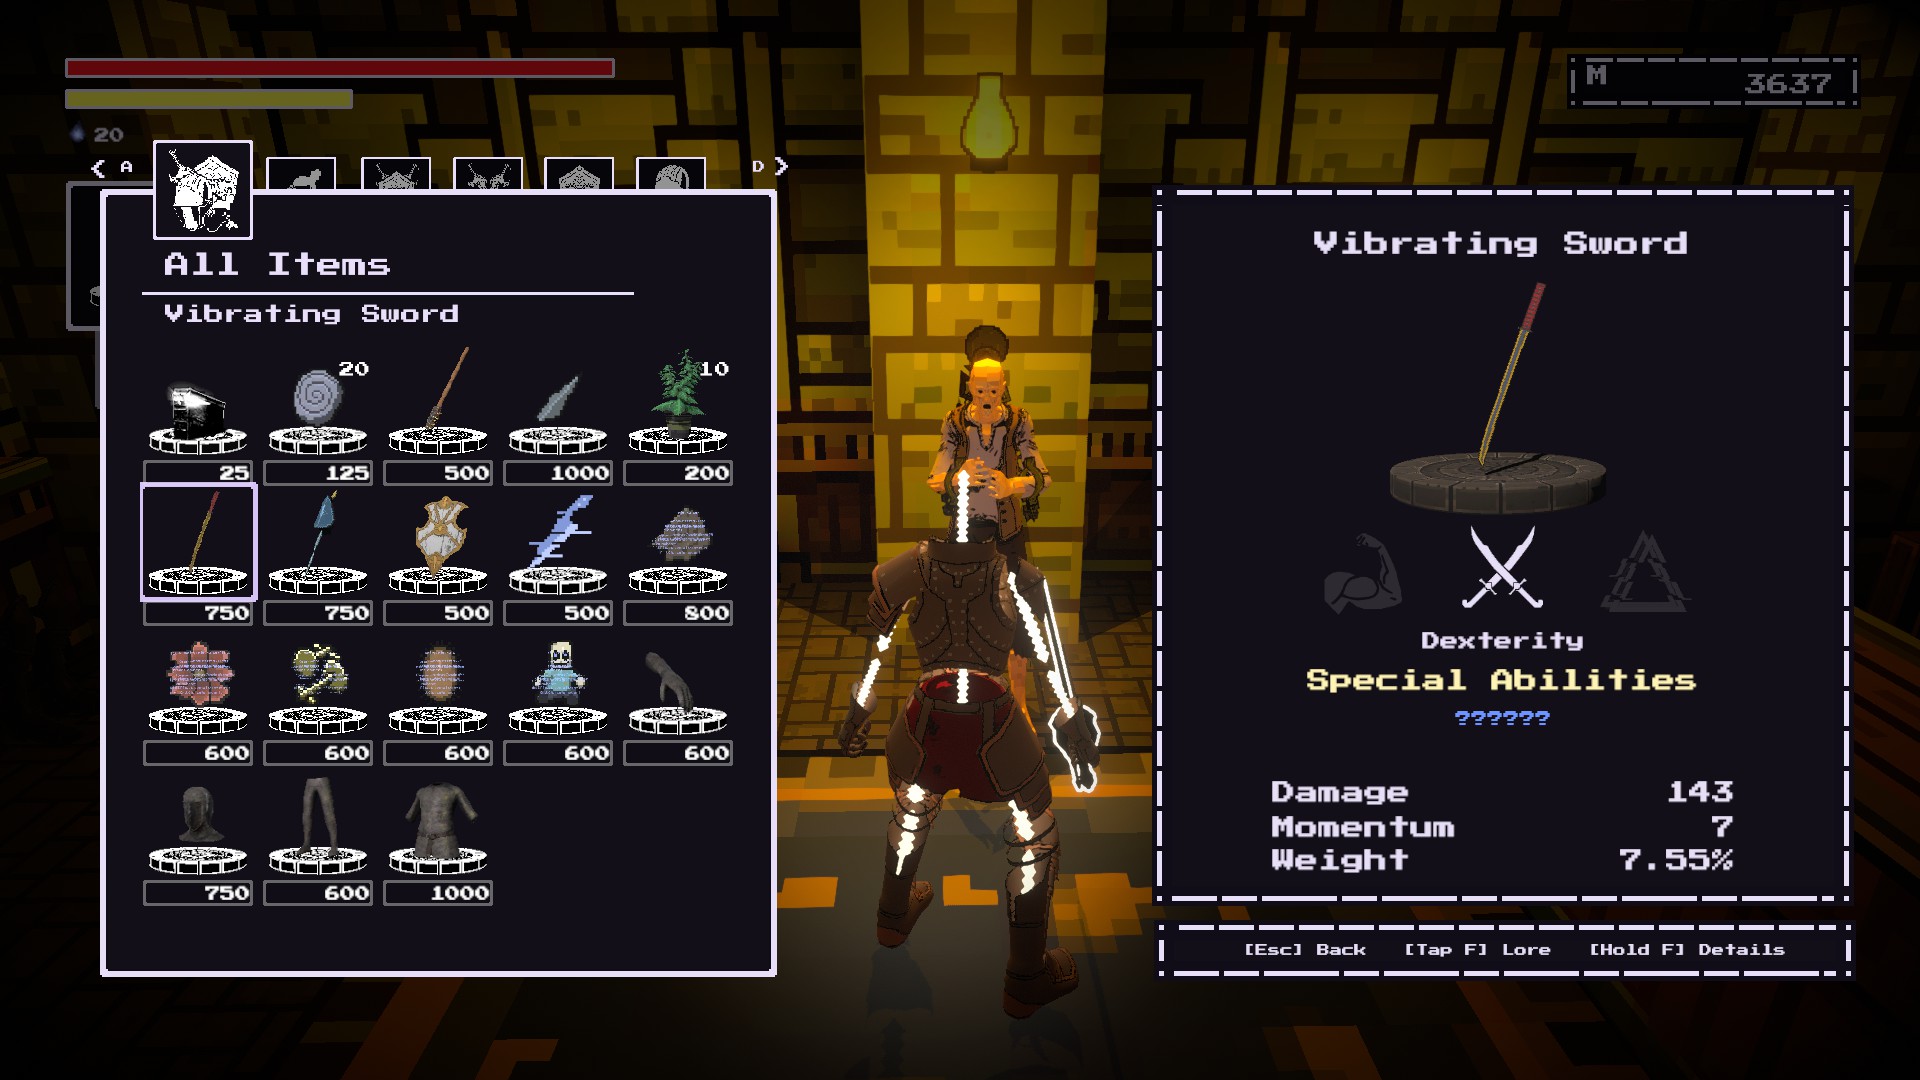
Vibrating Sword
COST MEMORY #3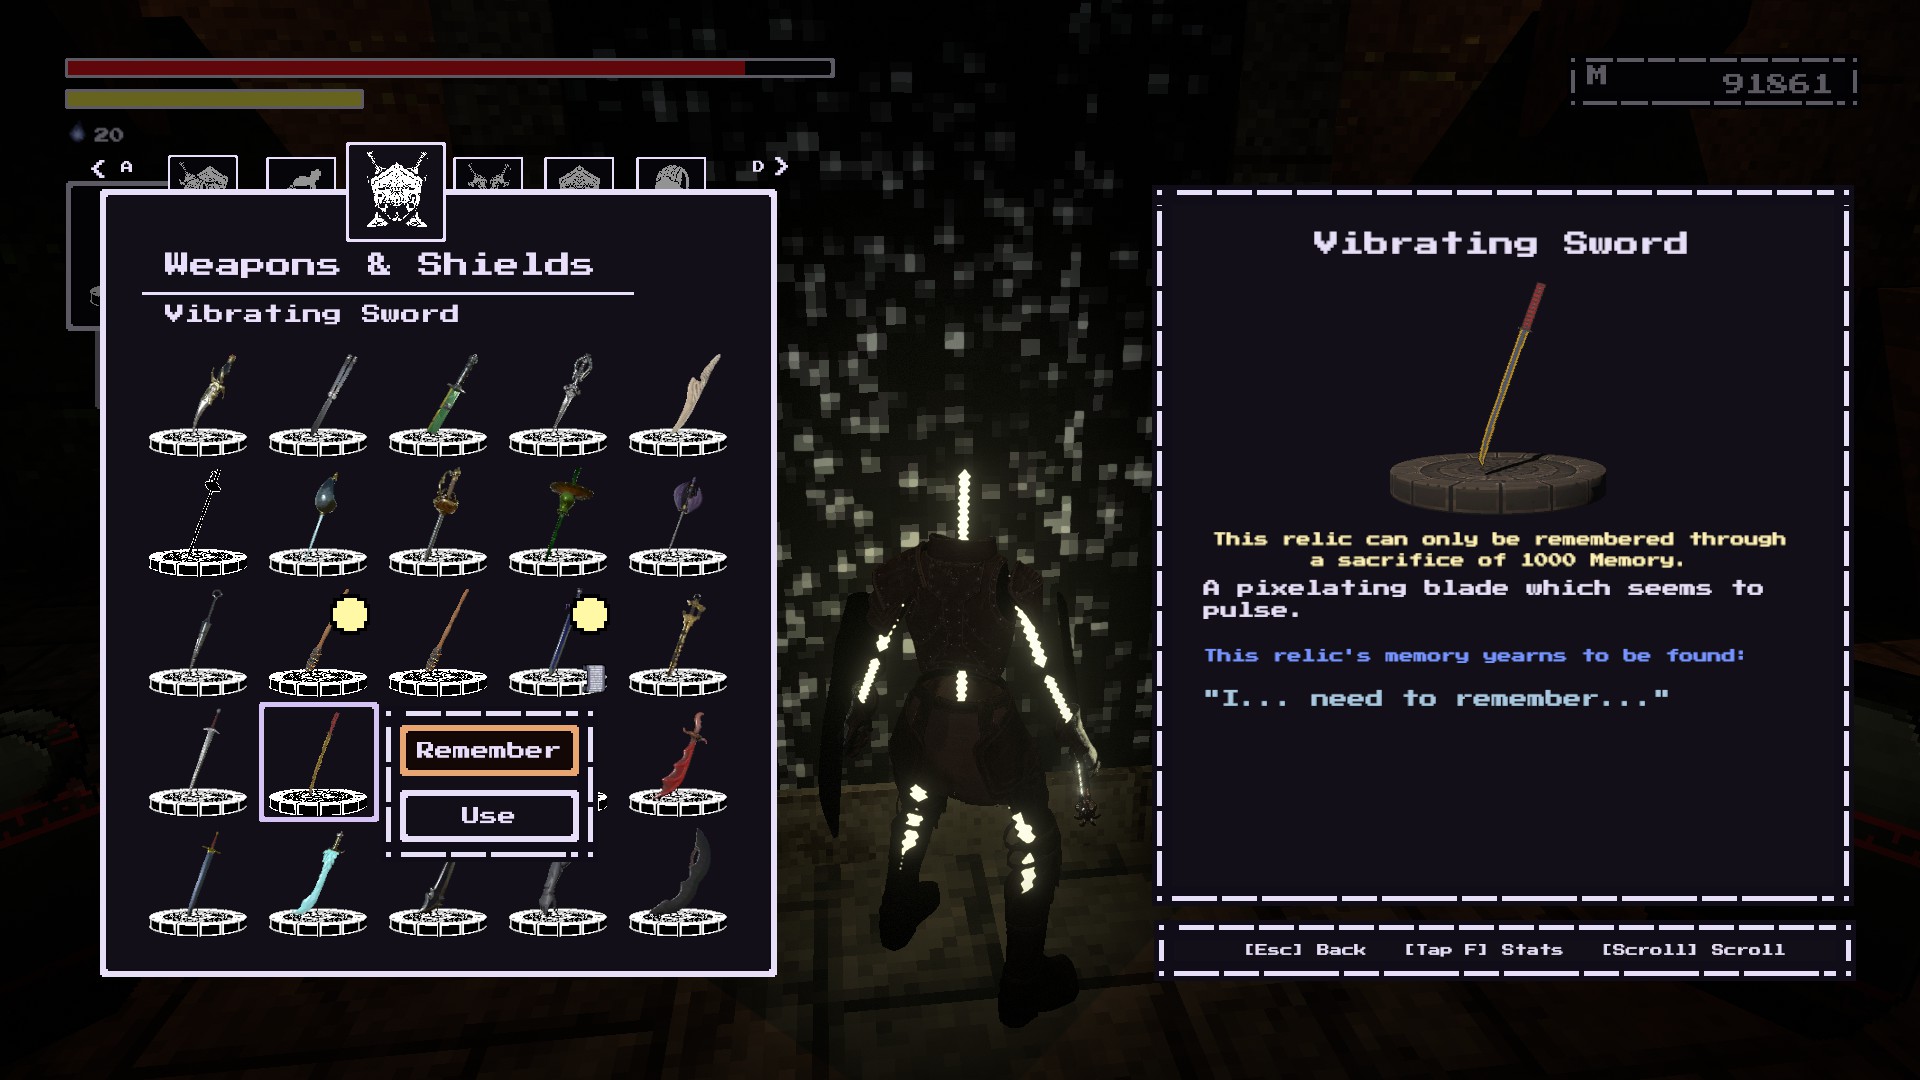
당신은 할 수 있습니다 buy it from the Merchant’s base stock.
No Easymaker Keys needed.
소송 비용 750 memory.
You need to spend 1000 memory to restore this weapon.
Drake Sabre
COST MEMORY #4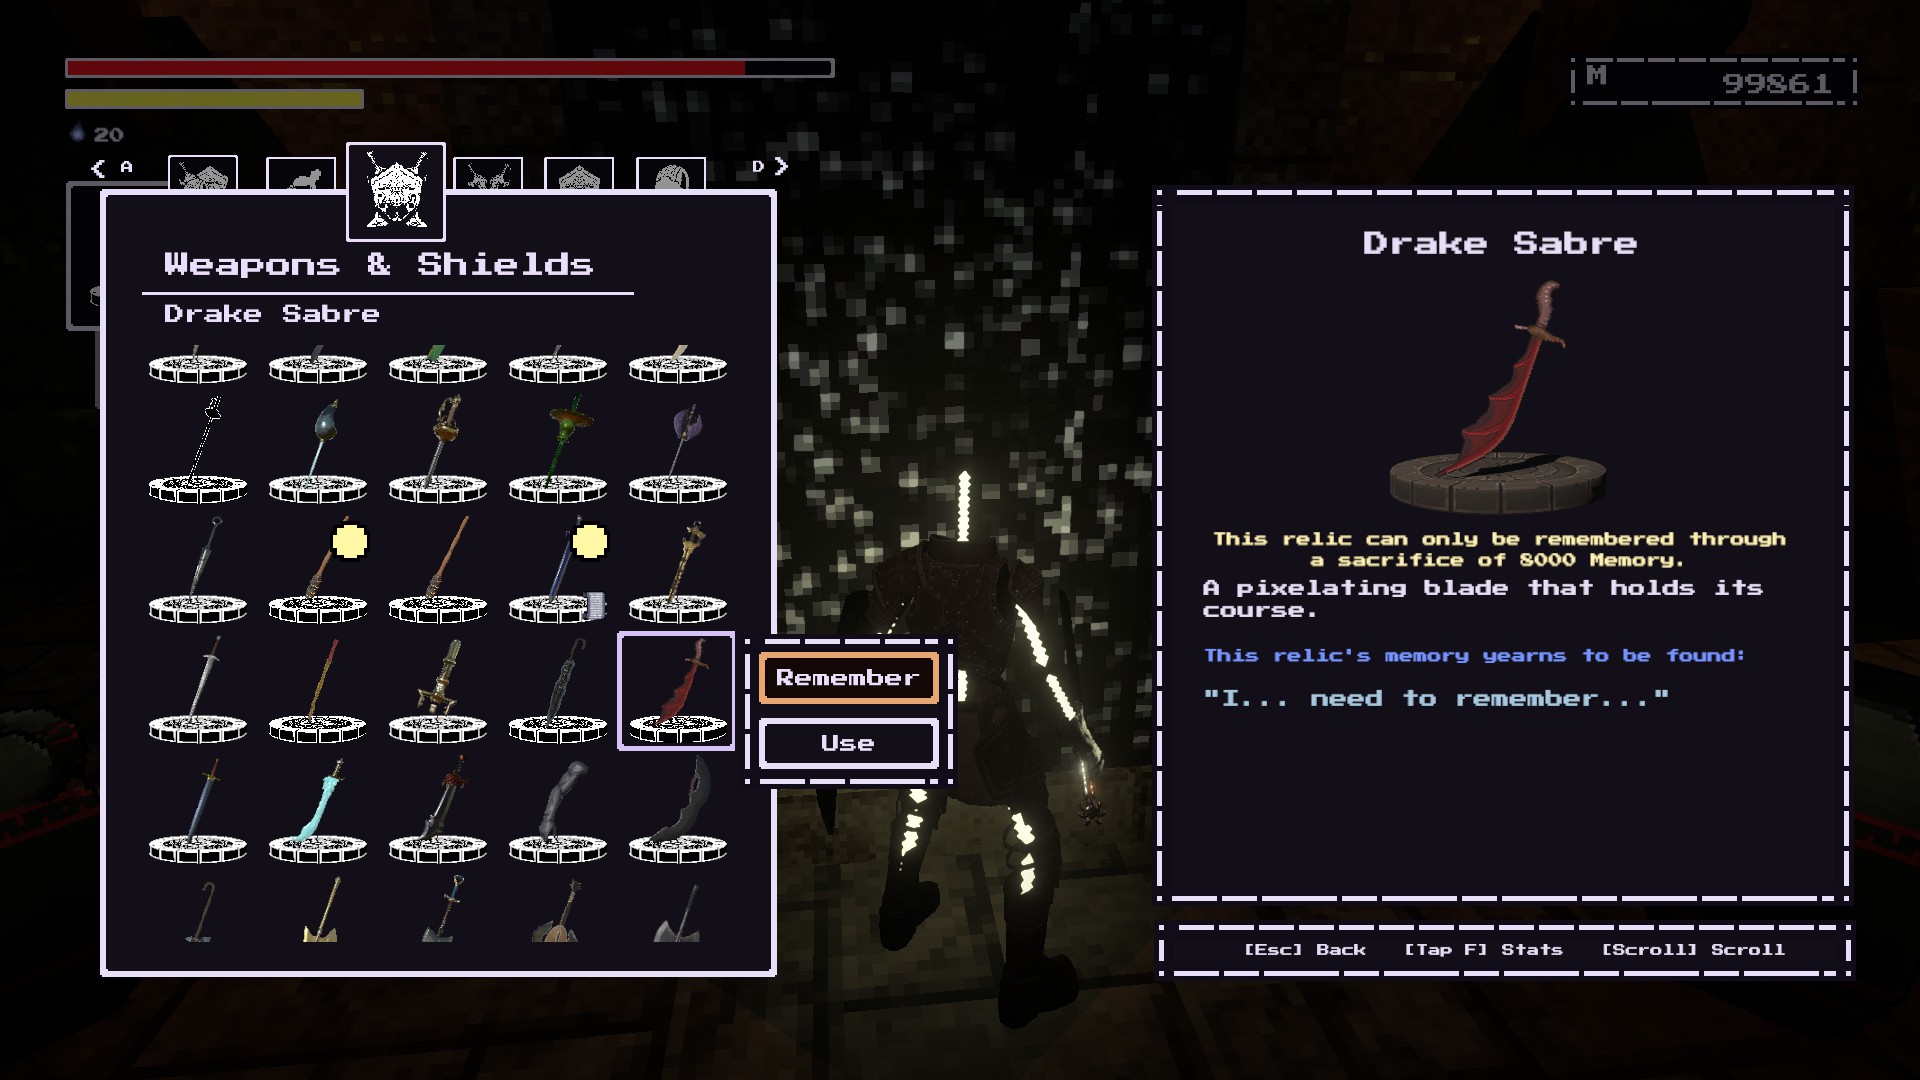
내 생각에는, 그것은 easier to go through NPC City because it’s near where the Easymaker Key is as shown here.
(It should be behind the building that has you climb a ladder into a room full of NPCs.)
All you’ll have to do is go through the door that will lead you to the item and into The Depths.
Alternatively you could go through The Depths and use Flat Traversal.
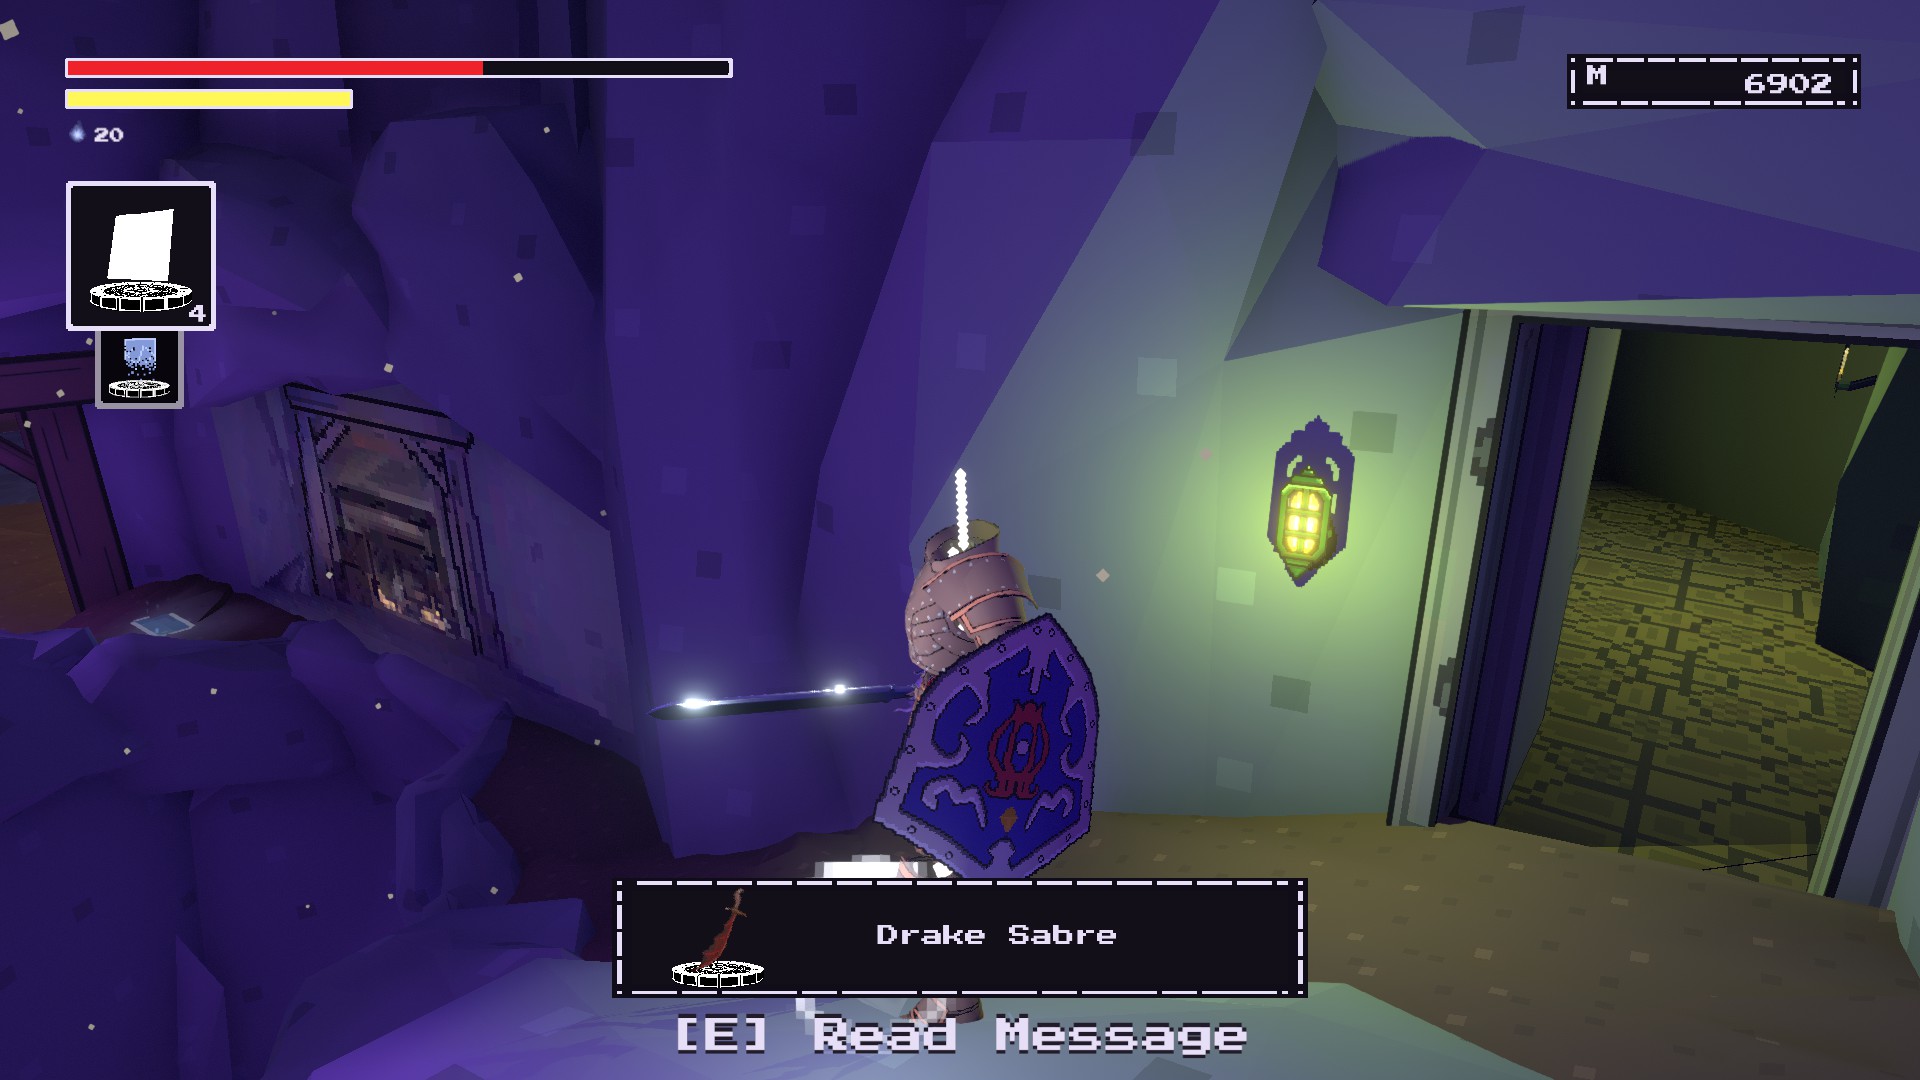
당신은 필요합니다 8000 memory to restore this weapon.
Crucible
COST MEMORY #5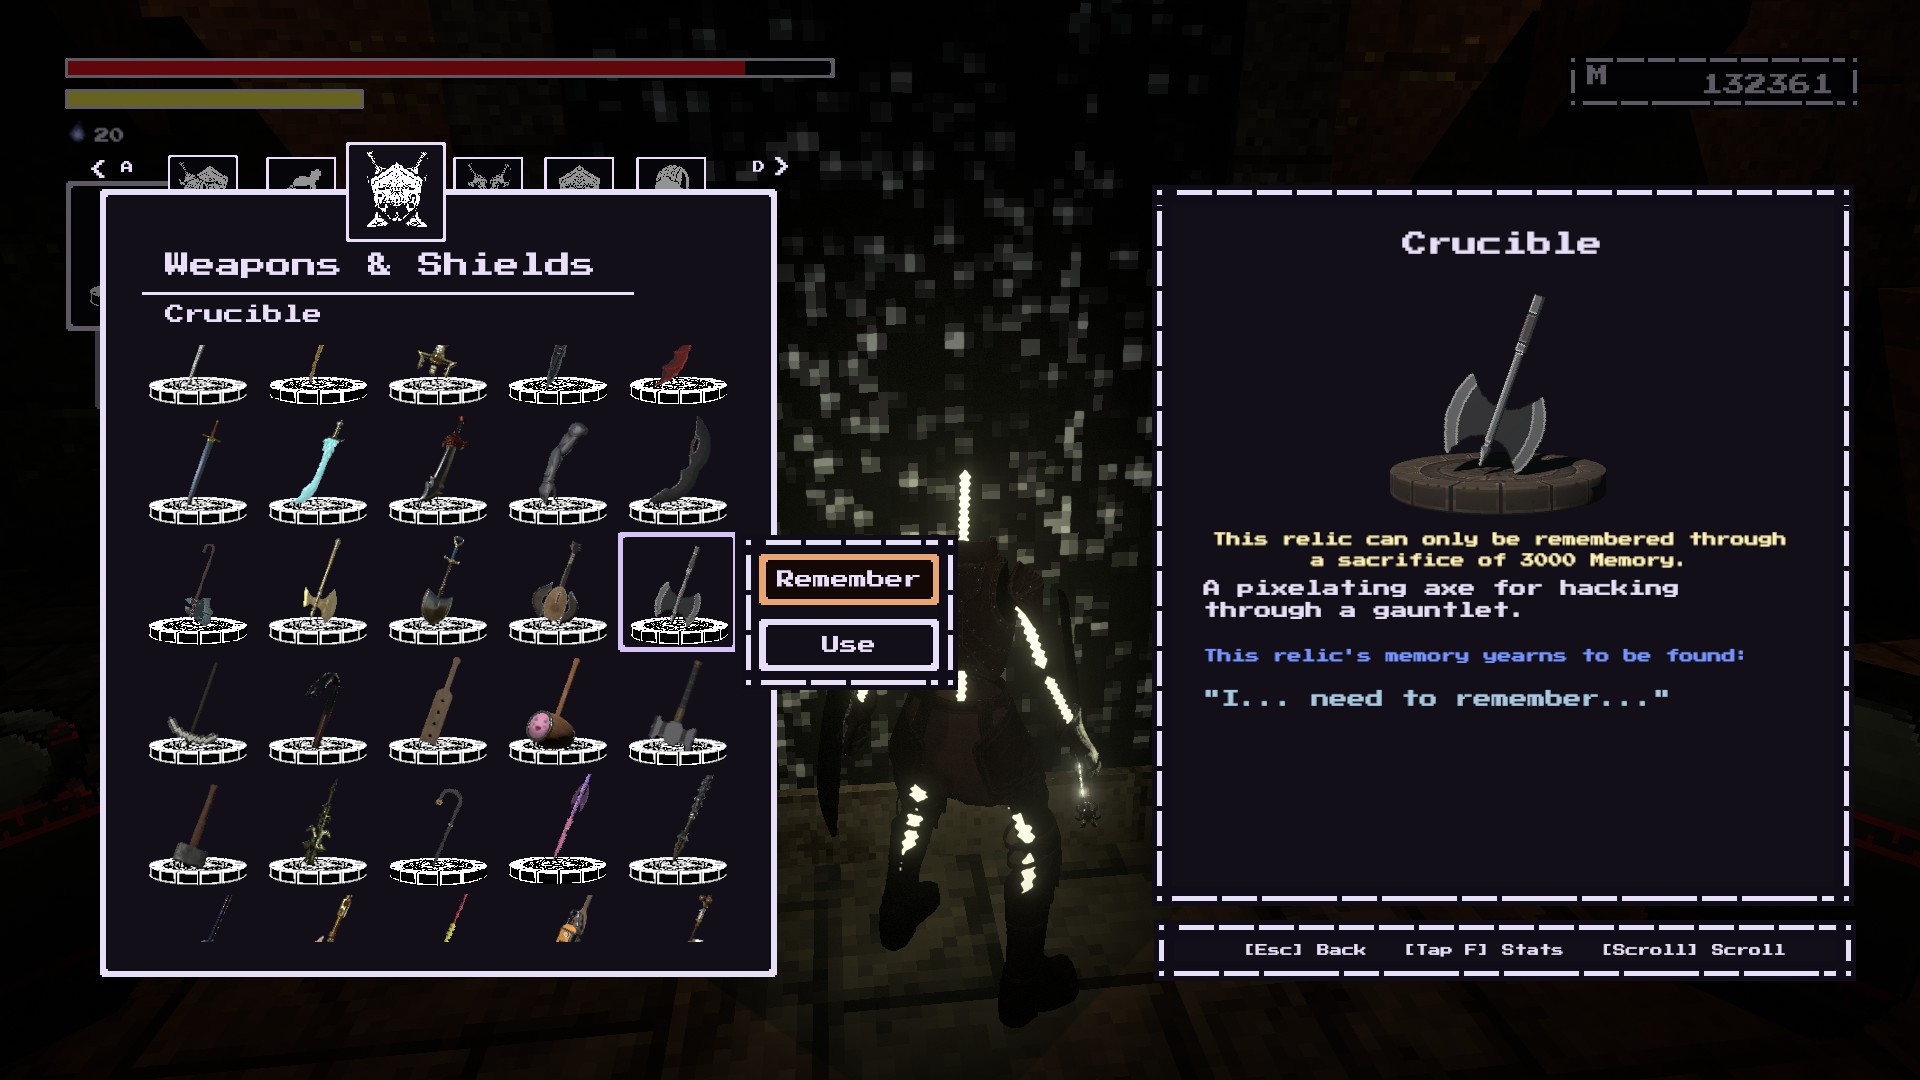
At the Quest Reward Vault, literally right before the Kitchen beacon. It will be the chest on your left.
Requires Uprez and 1000 memory to obtain.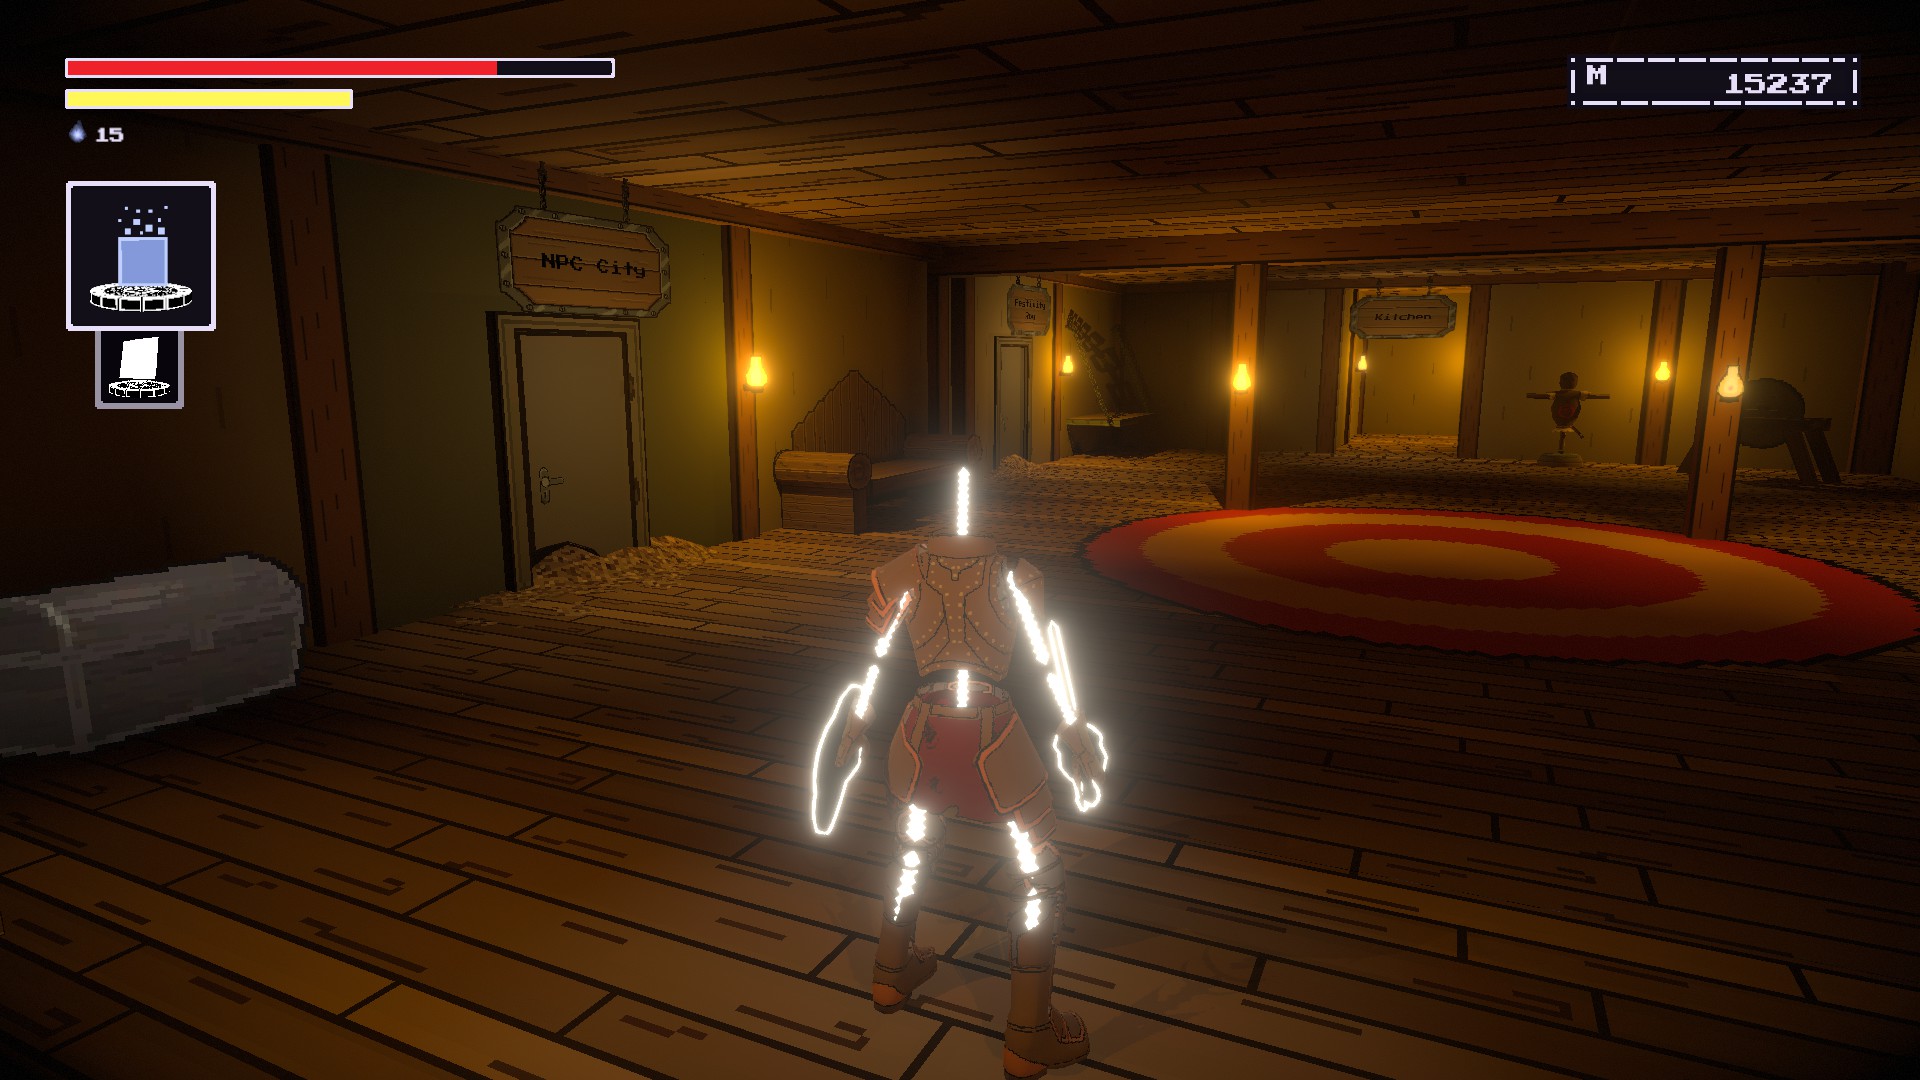
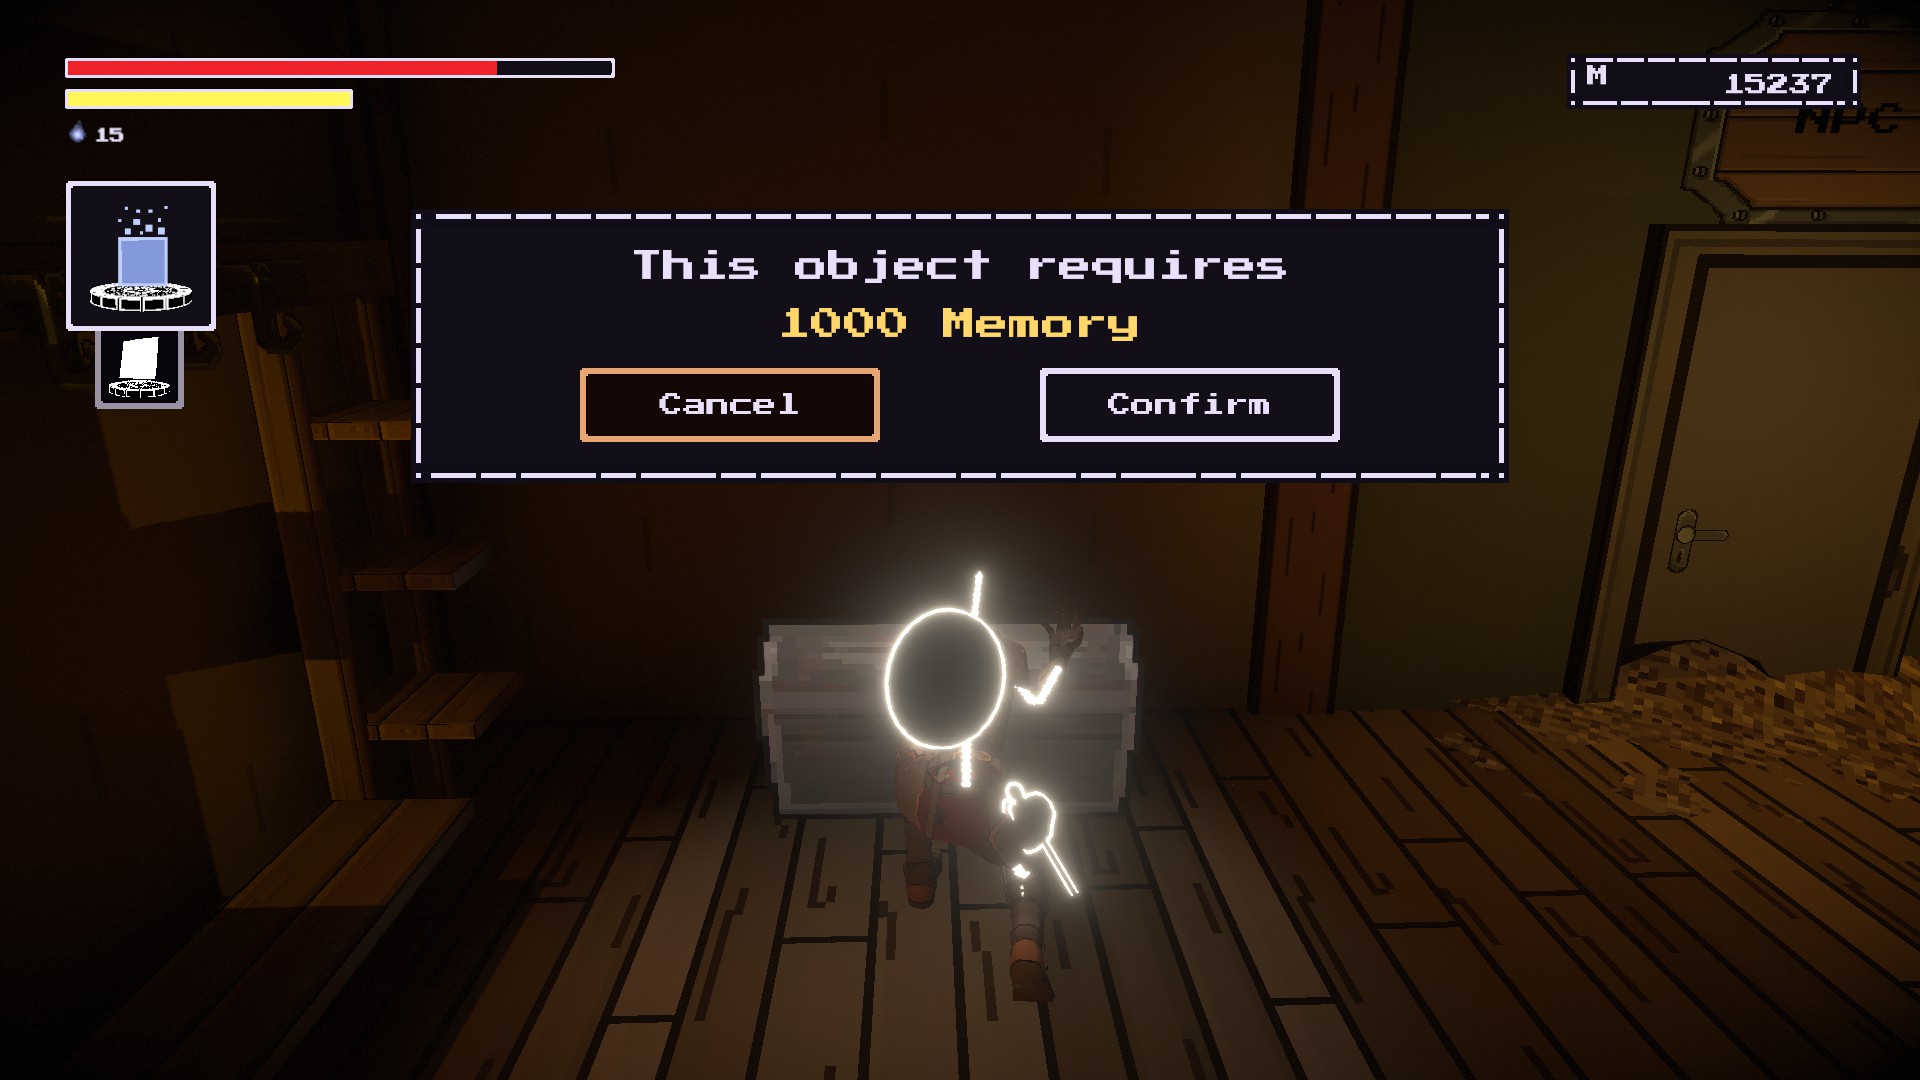
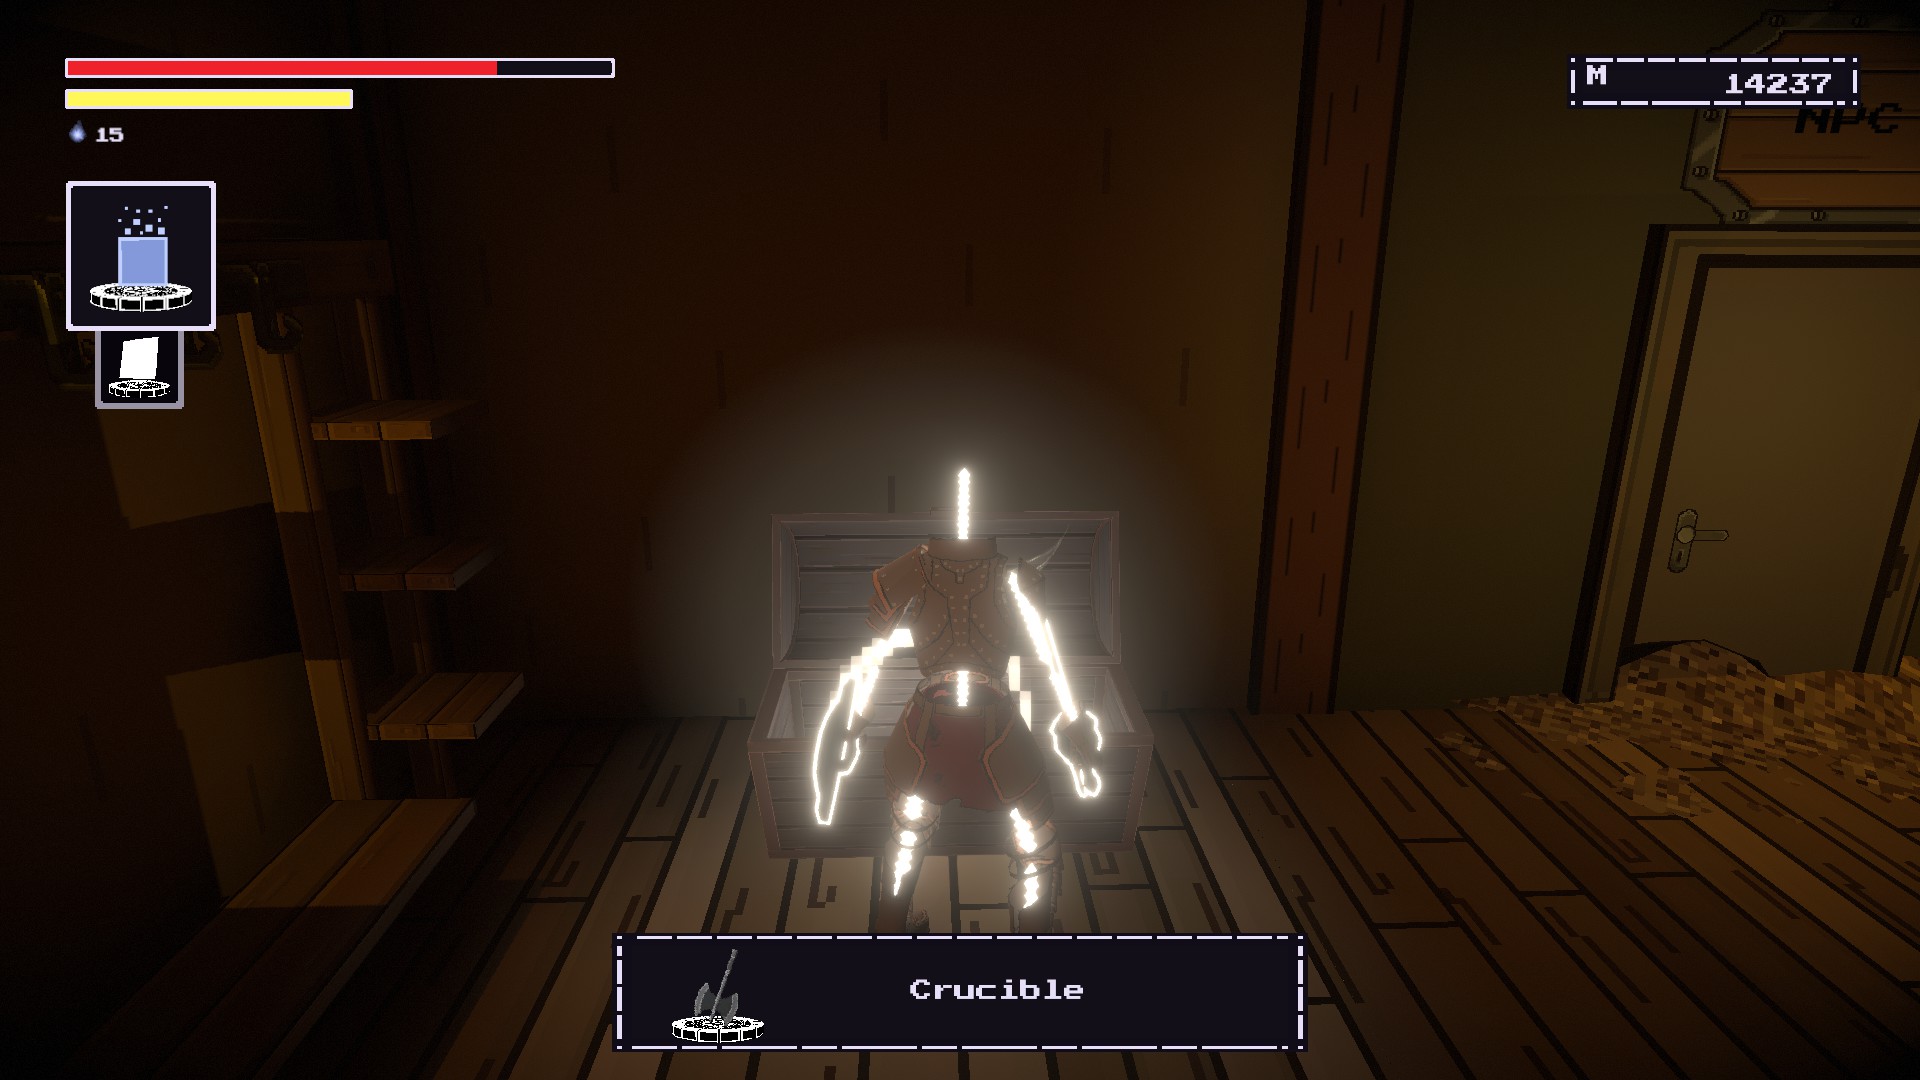
You’ll need to spend 3000 memory to restore this weapon.
Crash of Thunder
COST MEMORY #6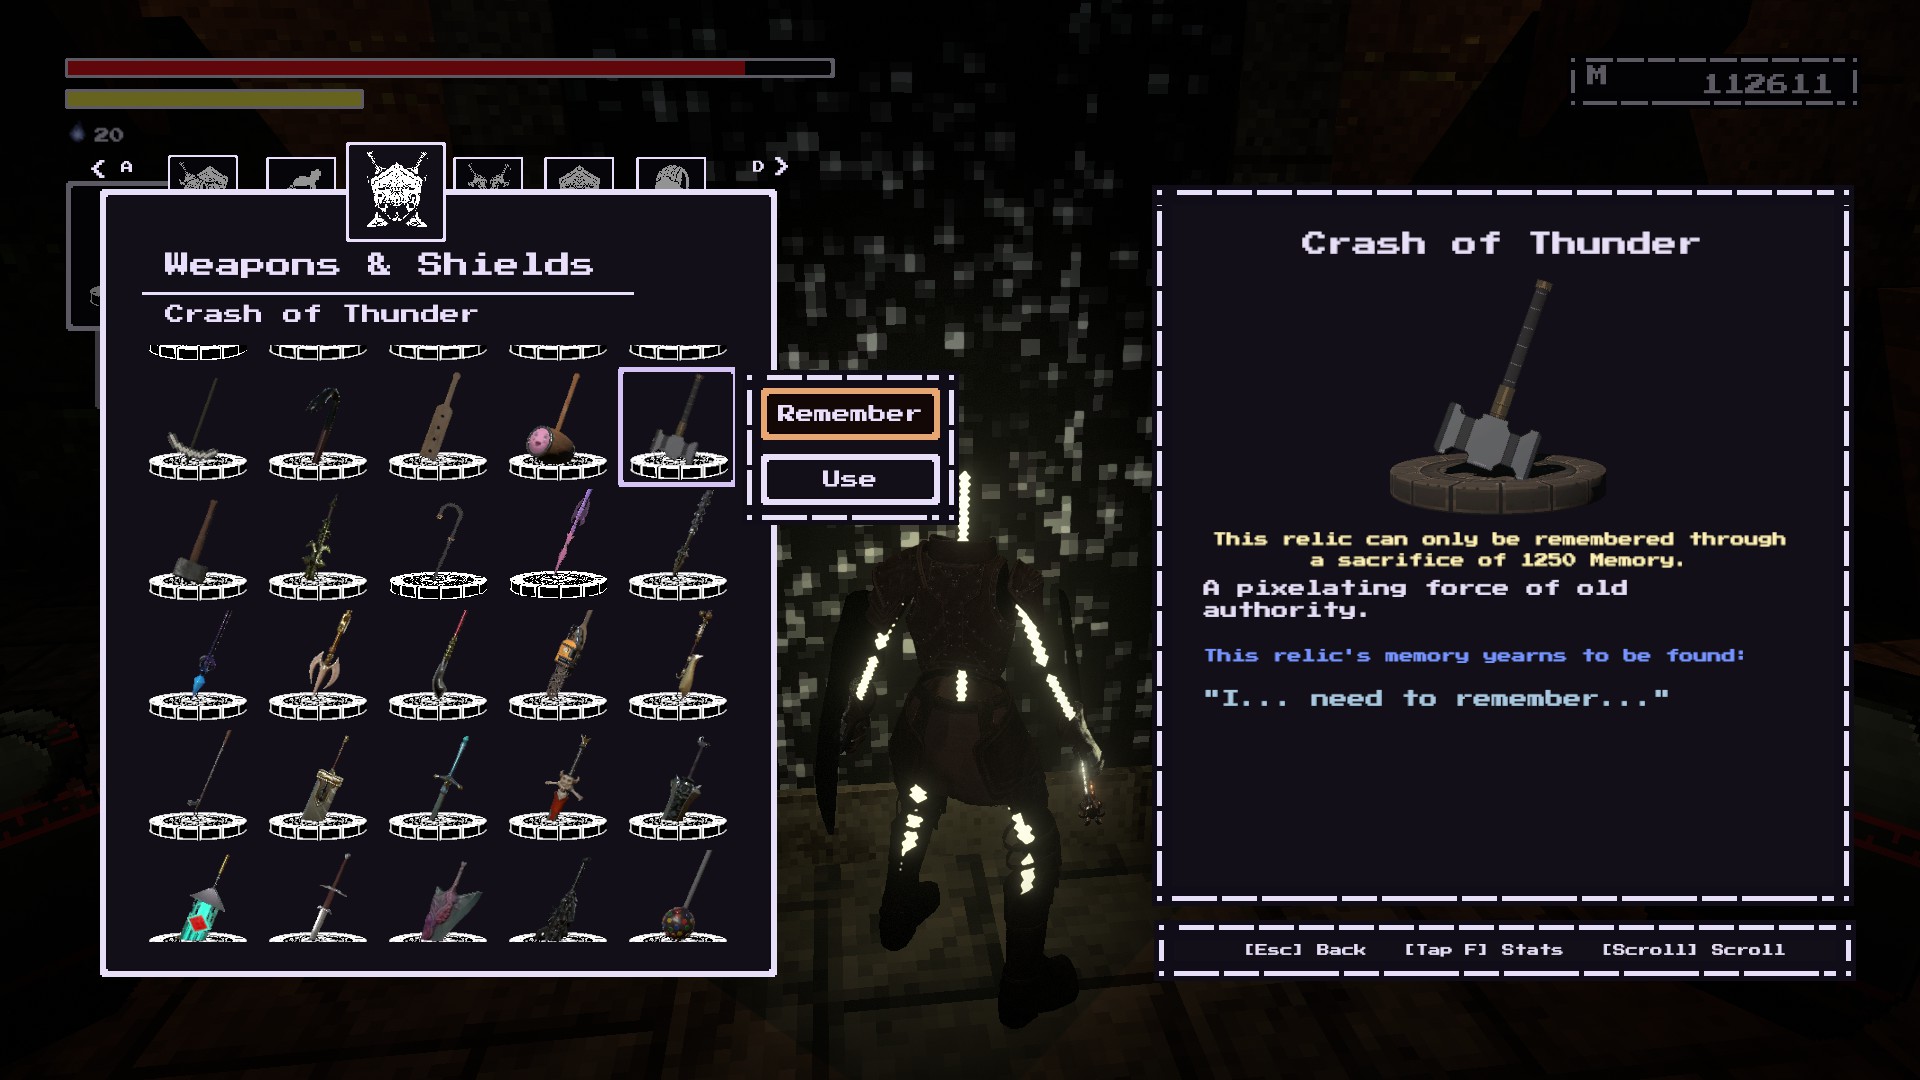
You need to buy it from the 상인. Easymaker Key found in Warlock’s Wilds.
소송 비용 1000 memory.
당신은 필요합니다 1250 memory to restore this weapon.
Quaker’s Strut
COST MEMORY #7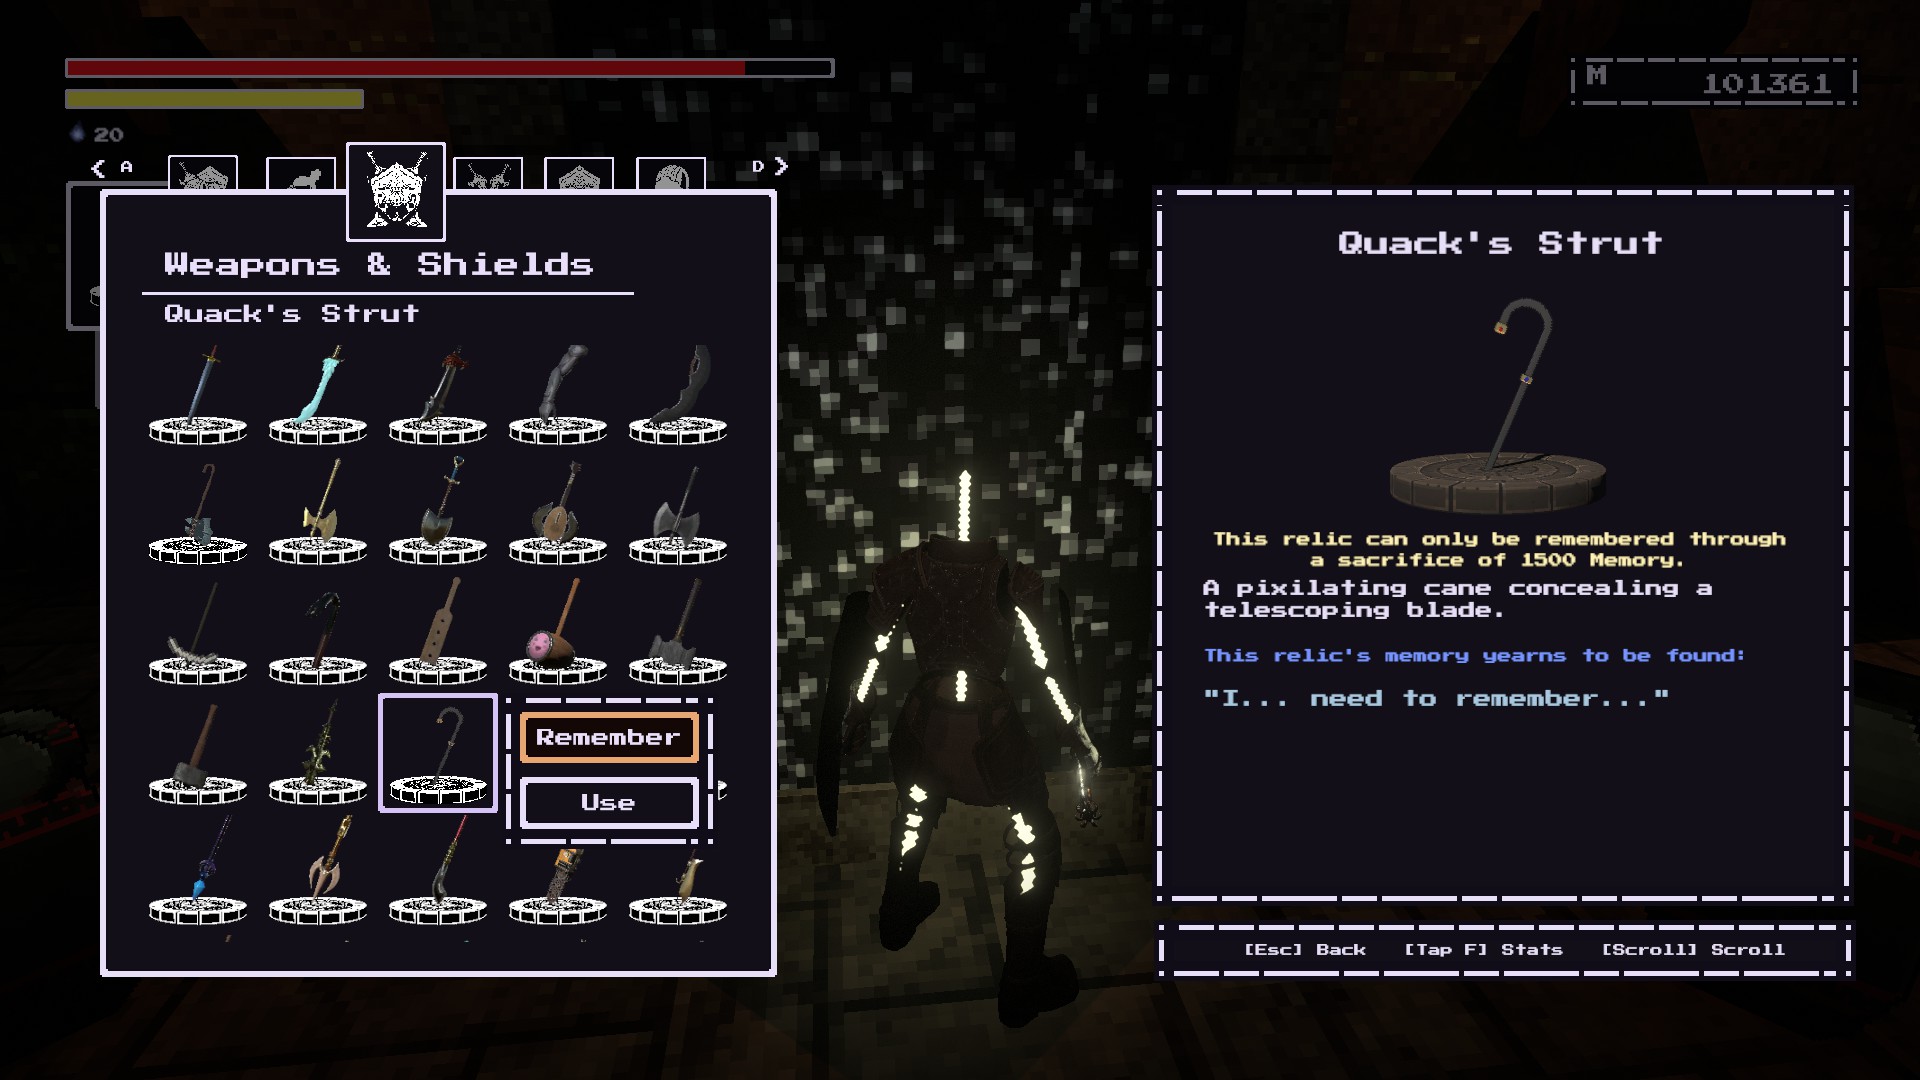
~에 Festivity Row.In the rafters above the Theater area.
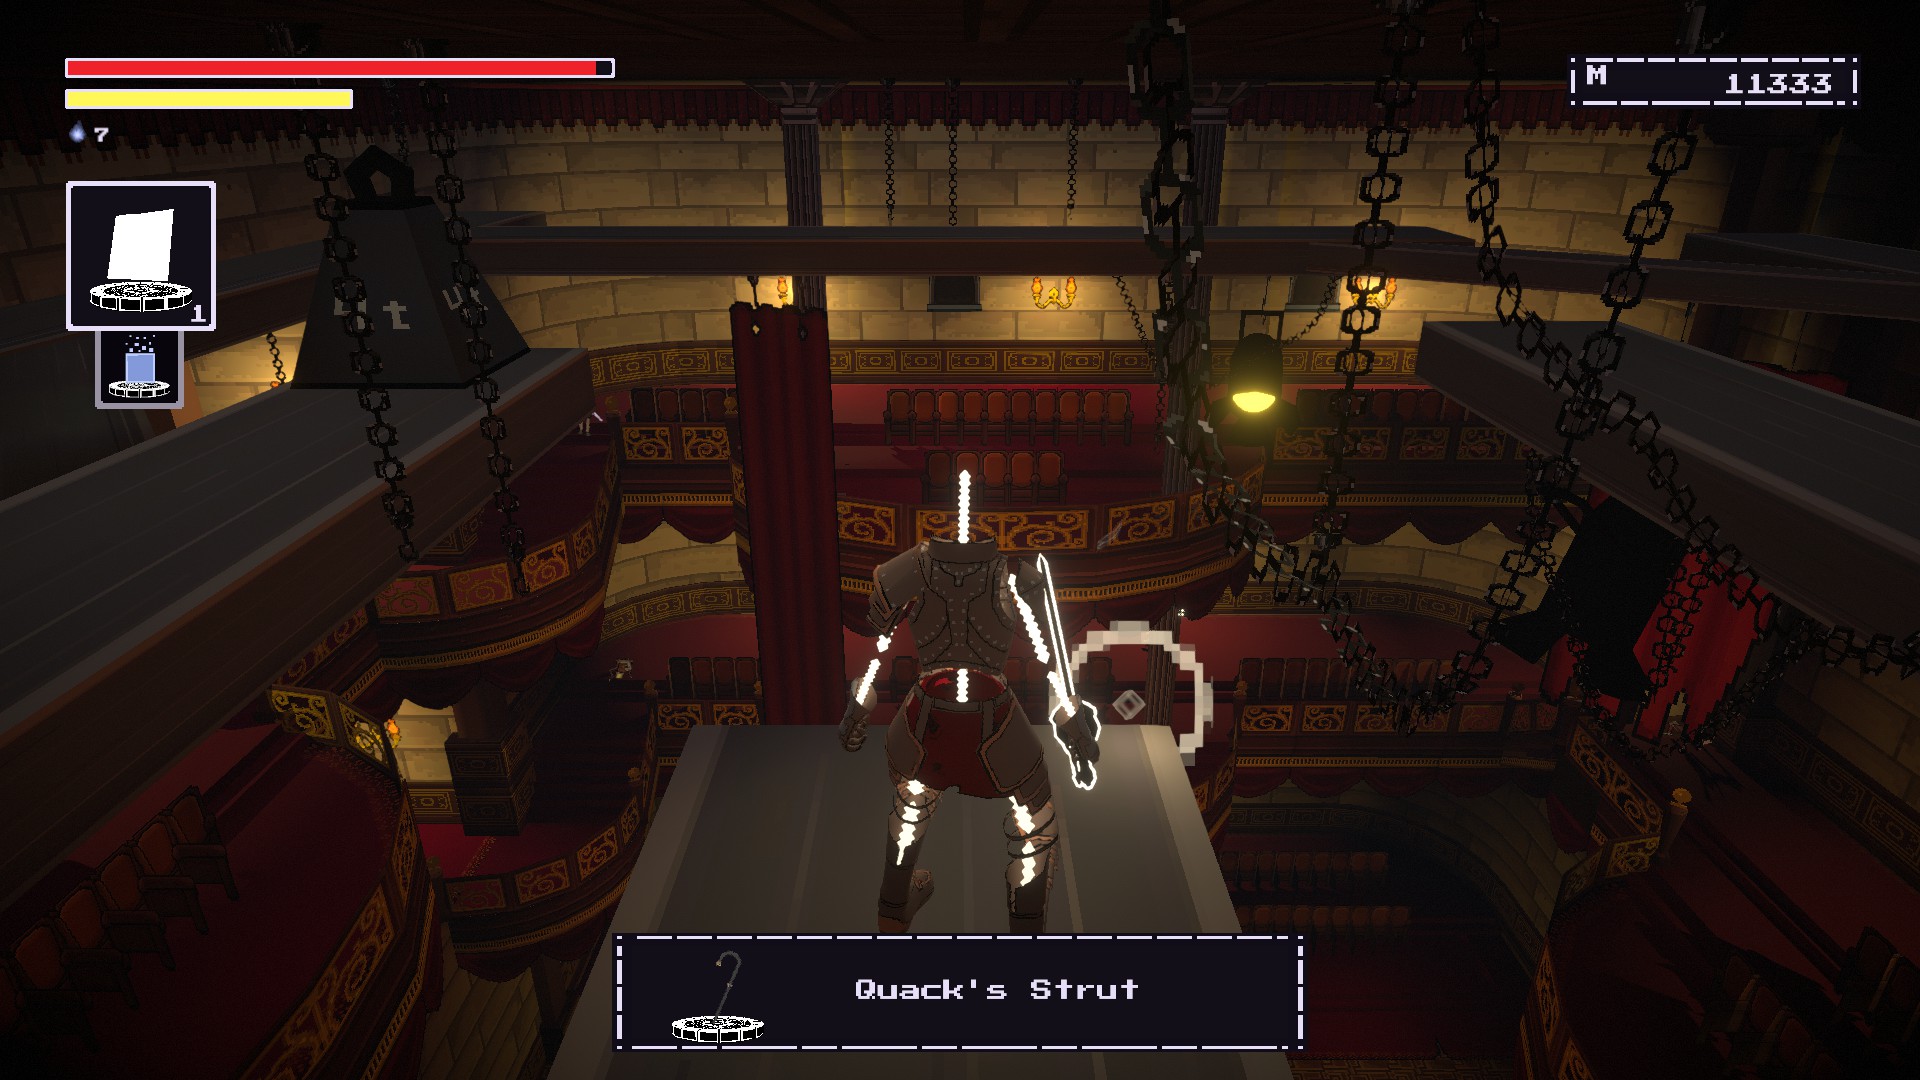
당신은 필요 1500 memory to restore this weapon.
Tempest Lance
COST MEMORY #8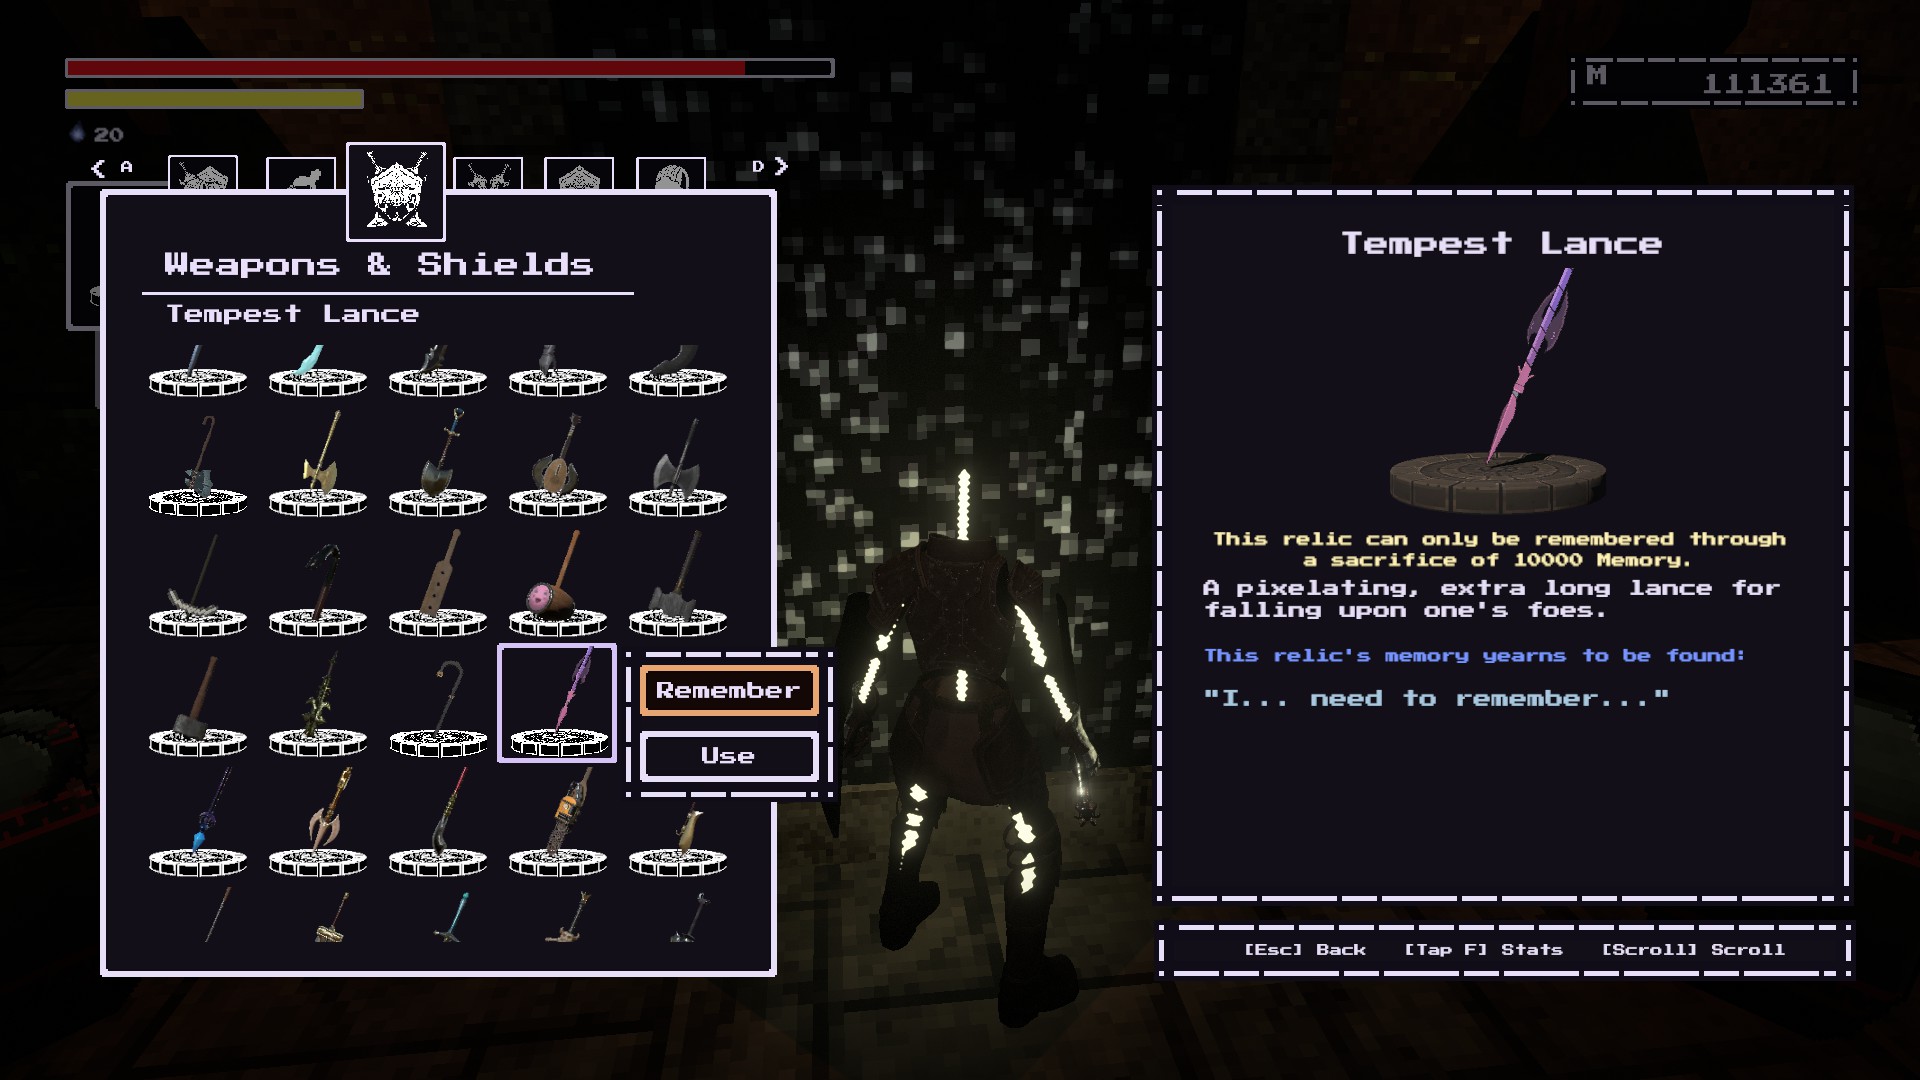
In the Unbreachable Maw. Start at the beacon that’s after the gauntlet of swinging axes.
Walk off the edge into the water below. Then you should explore the area until you’re in a room with a circle of items.
Climb onto the conveniently placed elevator.
You should be carried into a place where you see
fiery boulders rolling onto a path.Go onto this path and the Tempest Lance should be in the middle.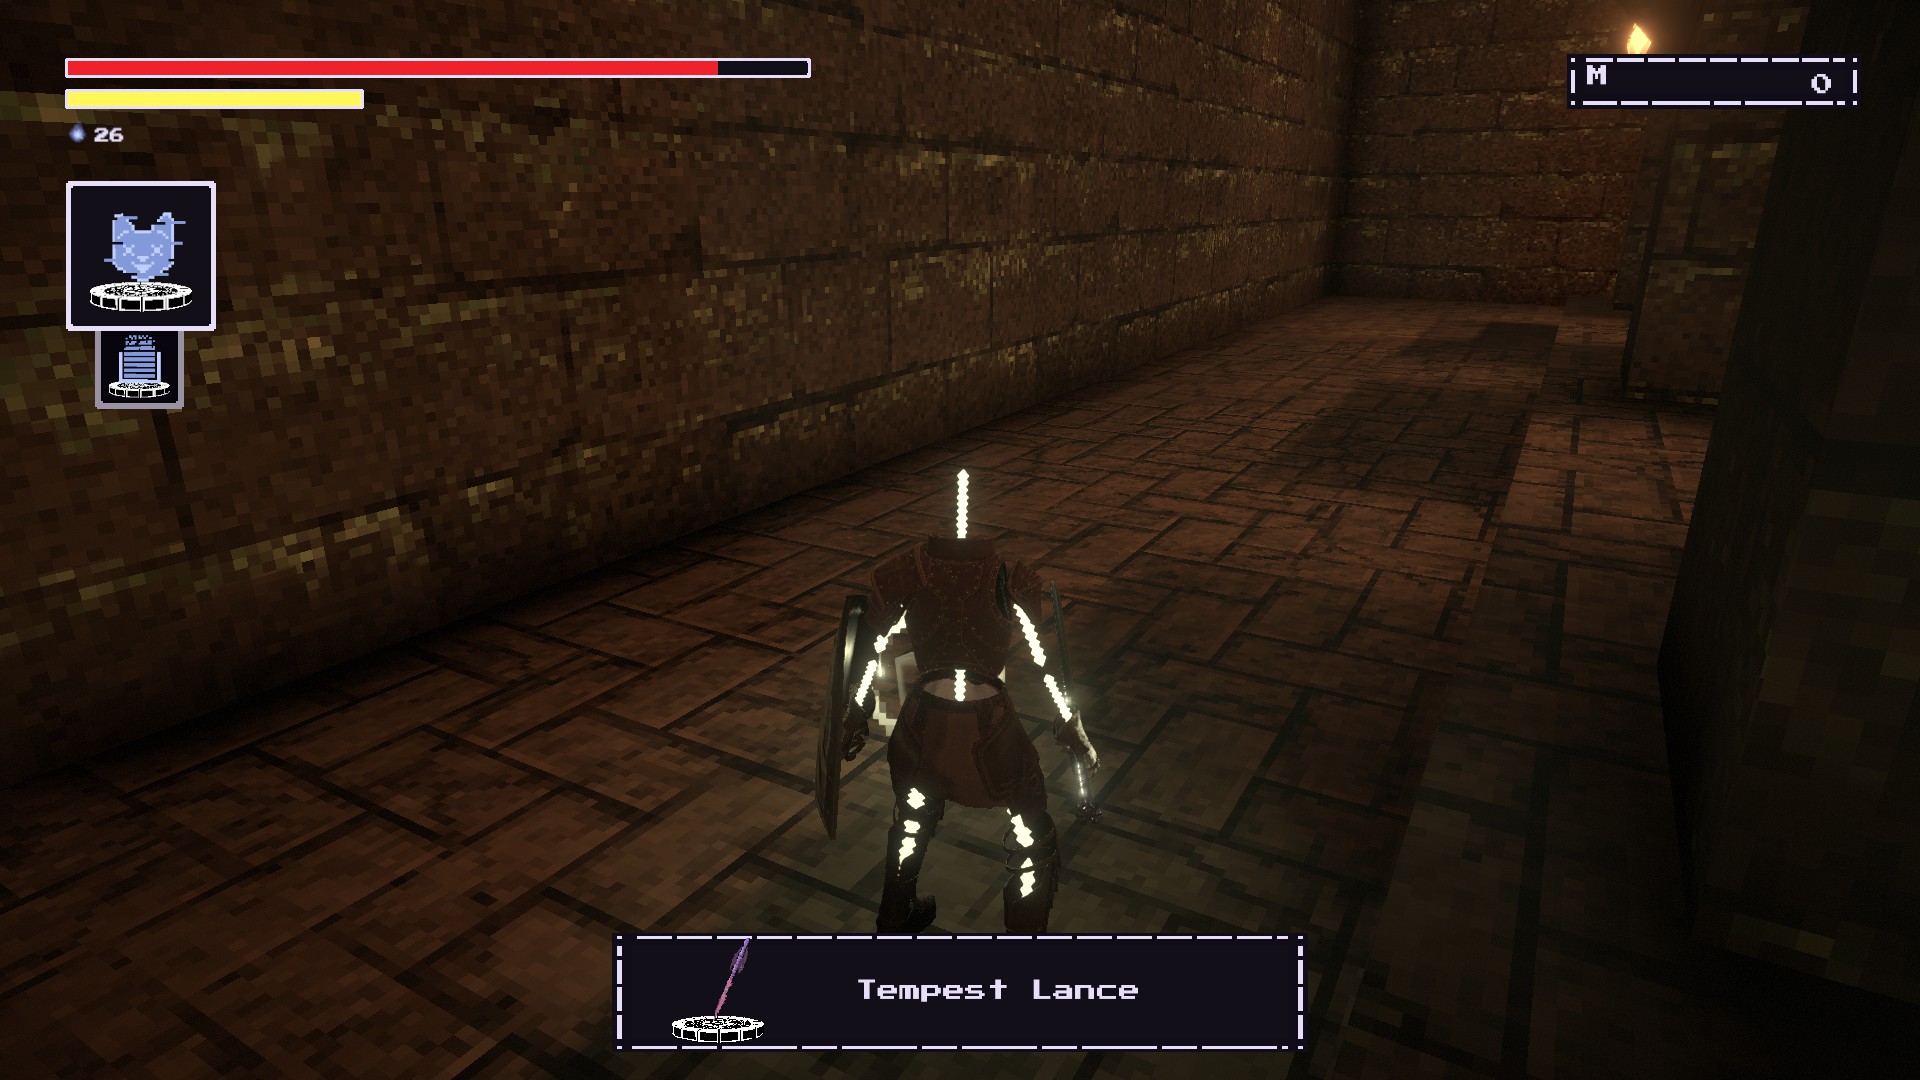
You need to spend 10000 memory to restore this weapon.
Caliber of Memory
COST MEMORY #9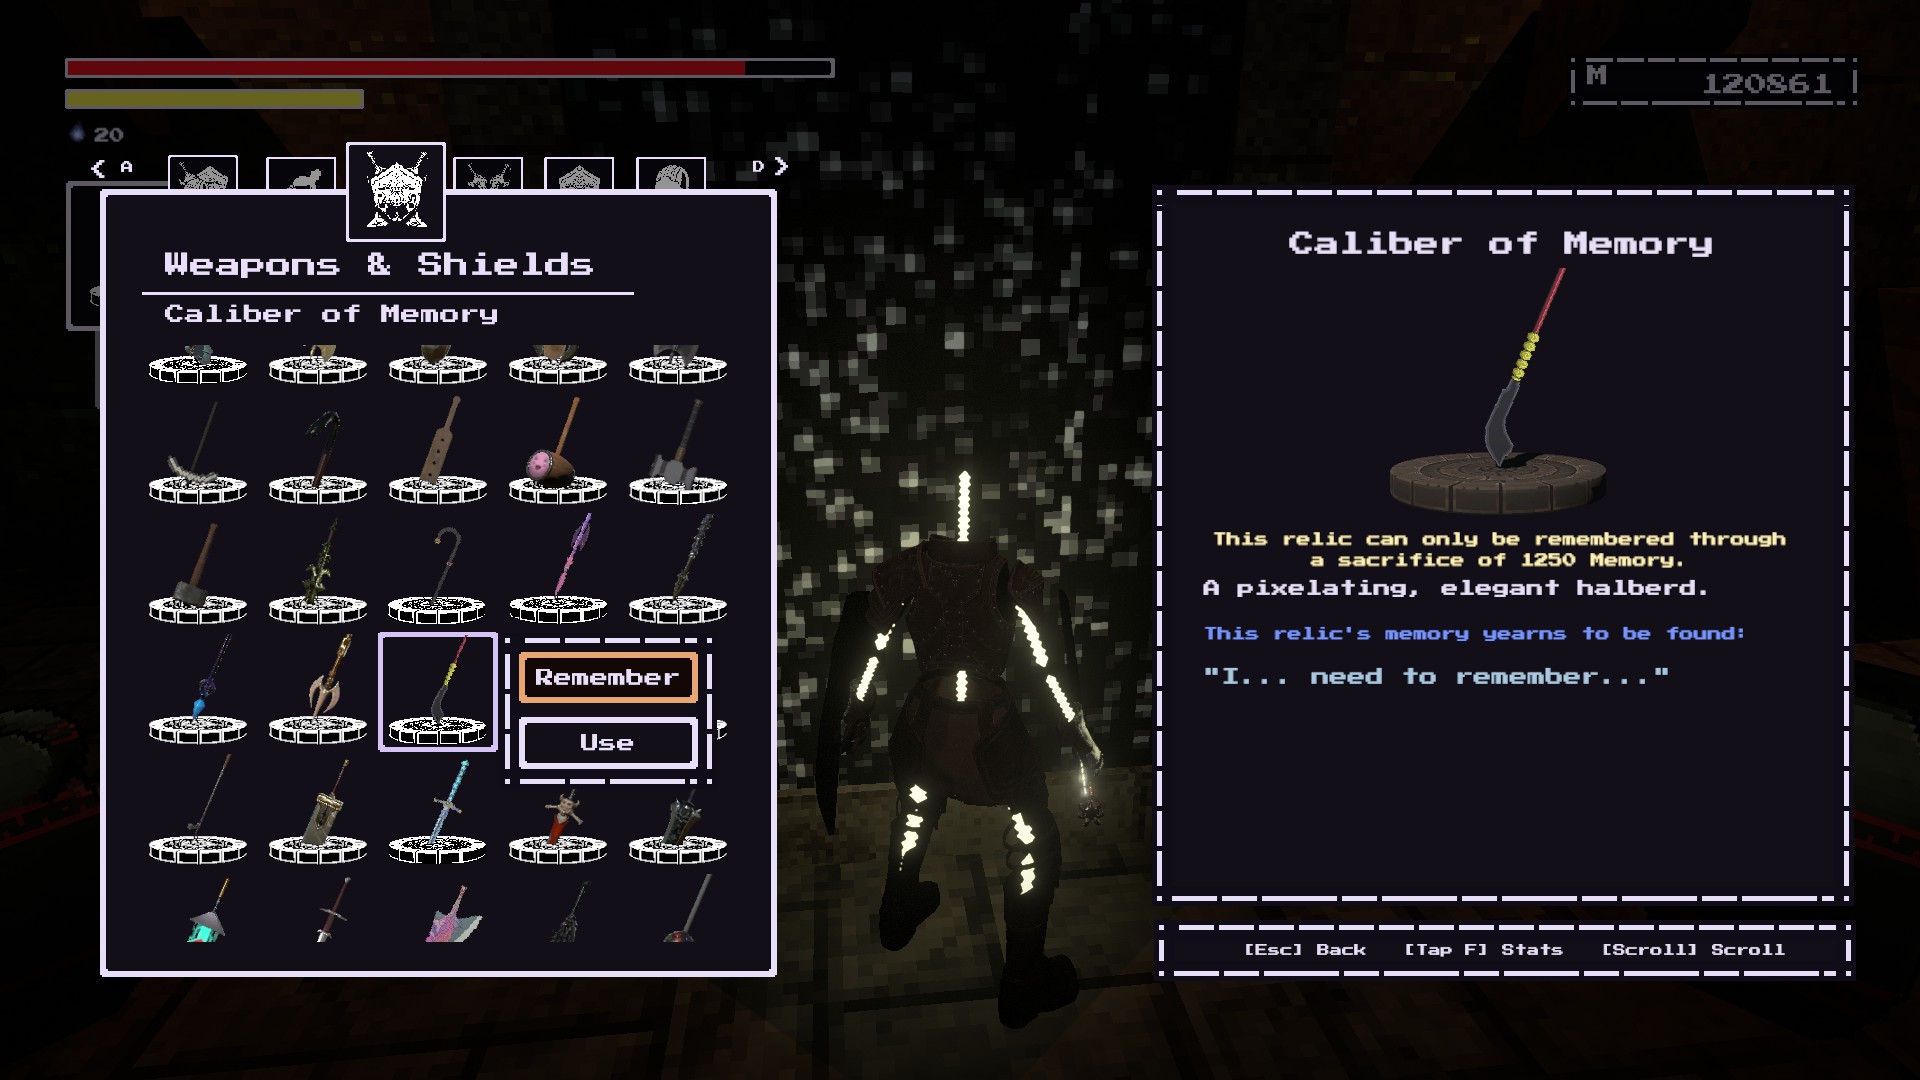
~에 Oreshaft Village. Right before the barn that leads up to Oreshaft Shelter.
Hidden in a building with NPCs lying in ambush 여기에 표시된대로.

당신은 필요합니다 1250 memory to restore this weapon.
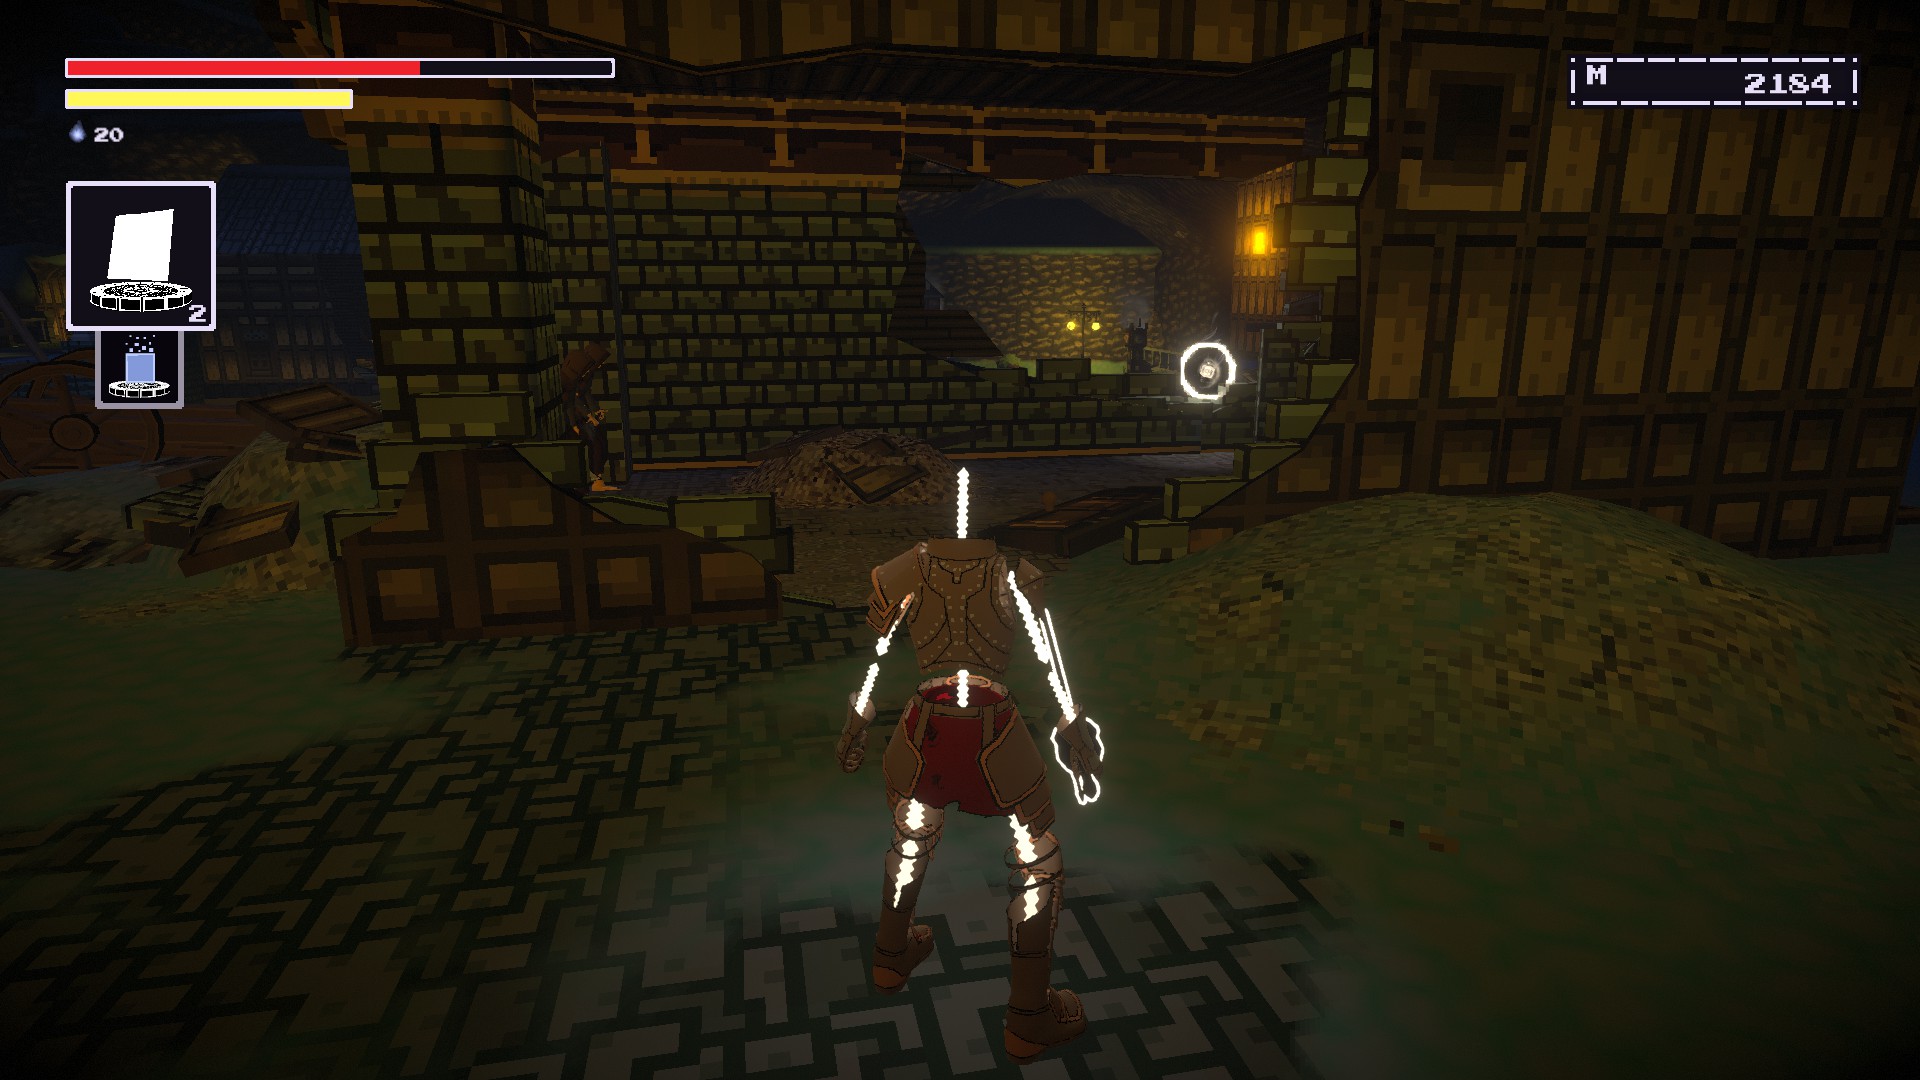
Udder Annihilator
COST MEMORY #10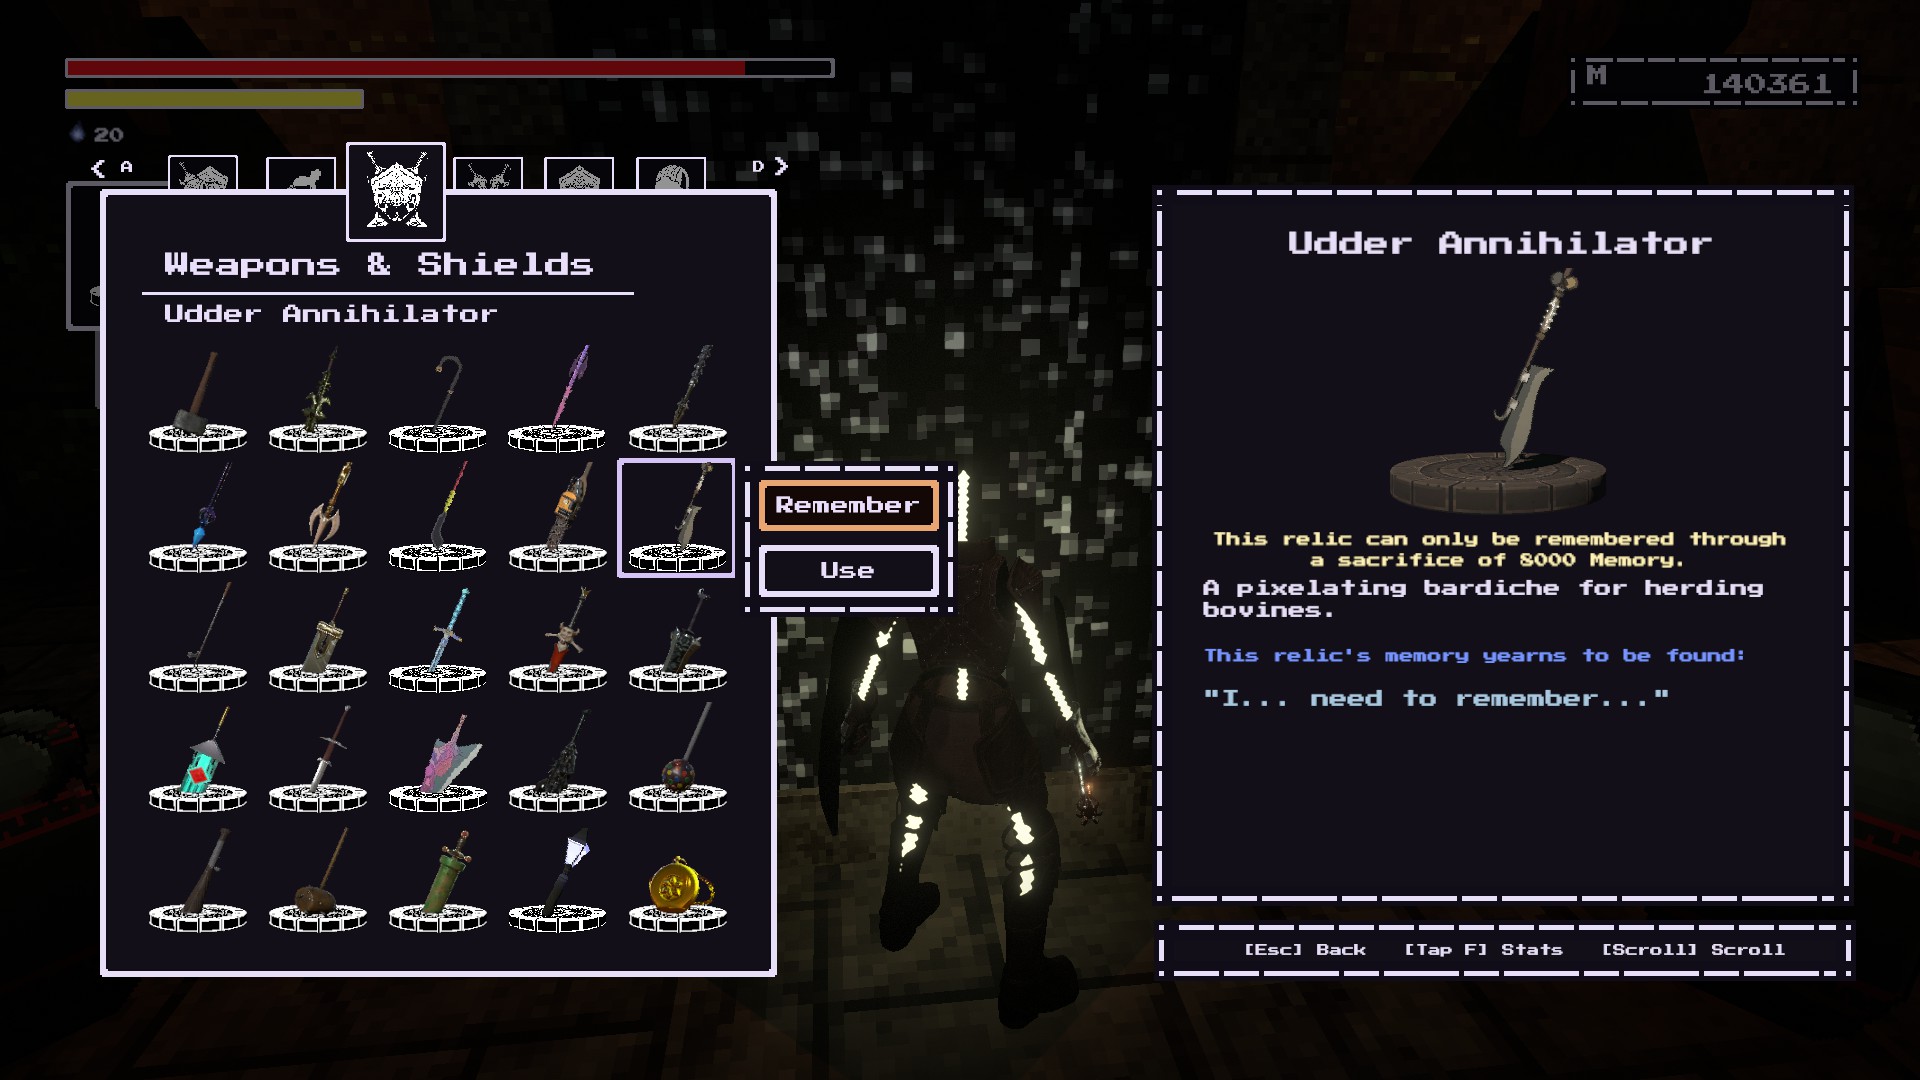
At NPC City.
Requires Flat Traversal to access.
It is right where the memory location is for the Perfect Fit.
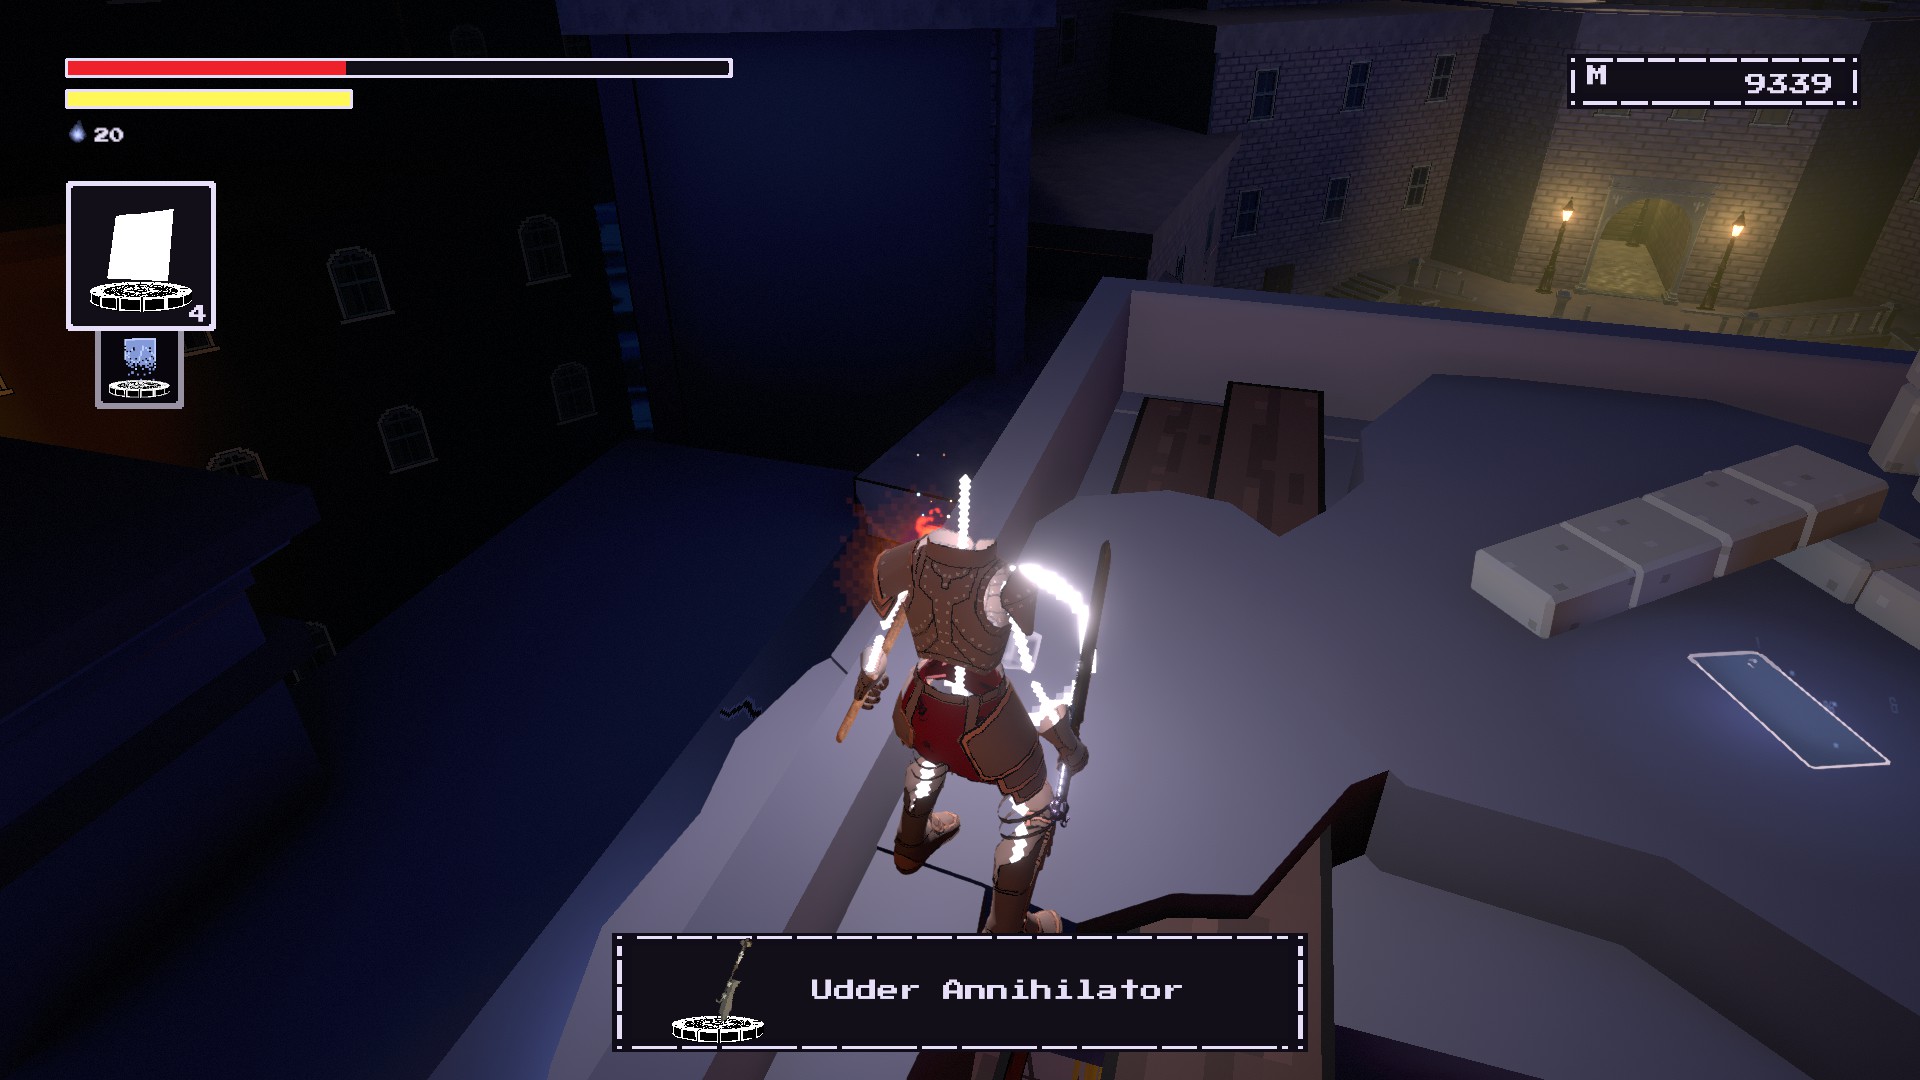
당신은 필요 8000 memory to restore this weapon.
Foreign Queen’s Chill
COST MEMORY #11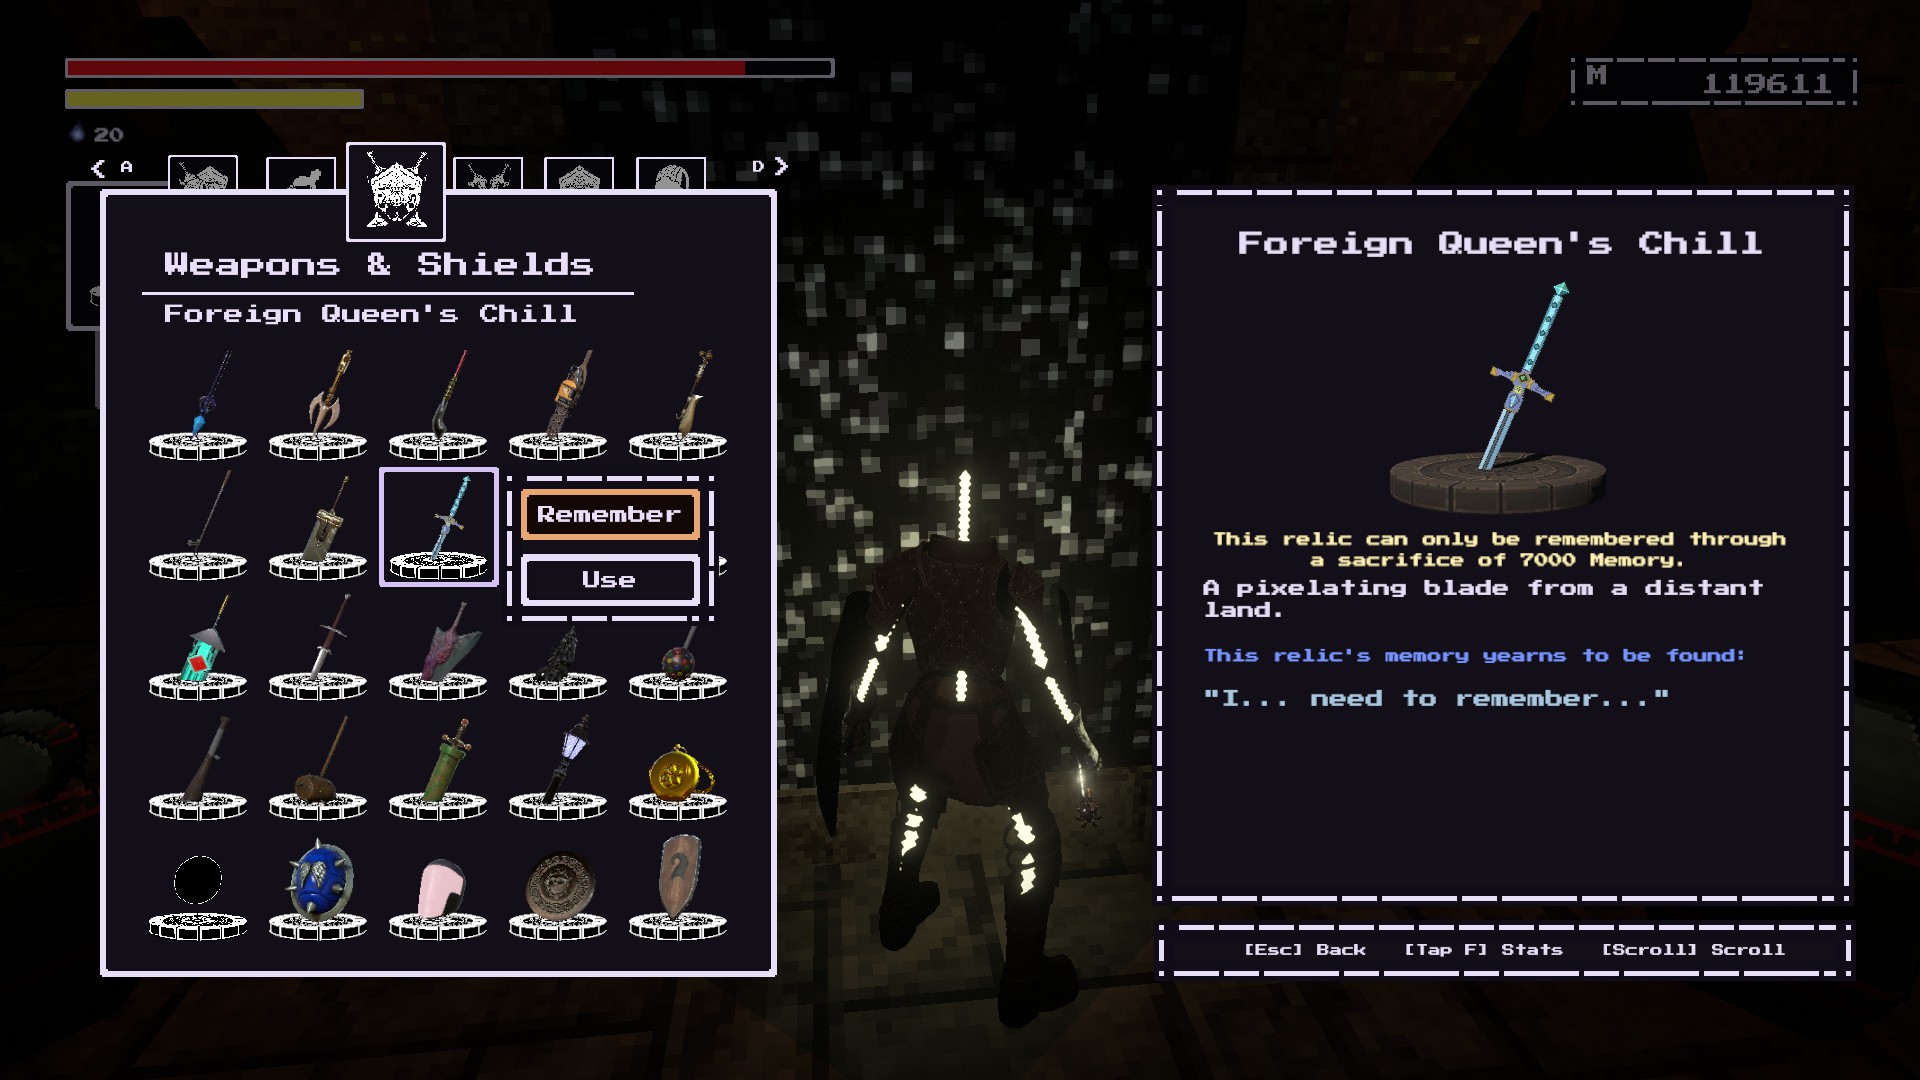
At Keep of the Stolen Crown. 에서 frilly, civilized area that precedes the Wunderschoenenberg fight.
It should be near a chair that is next to a Civilized Werewolf and a patrolling Civilized Merman.
당신은 필요 7000 memory to restore this weapon.
Demon Tear Jerker
COST MEMORY #12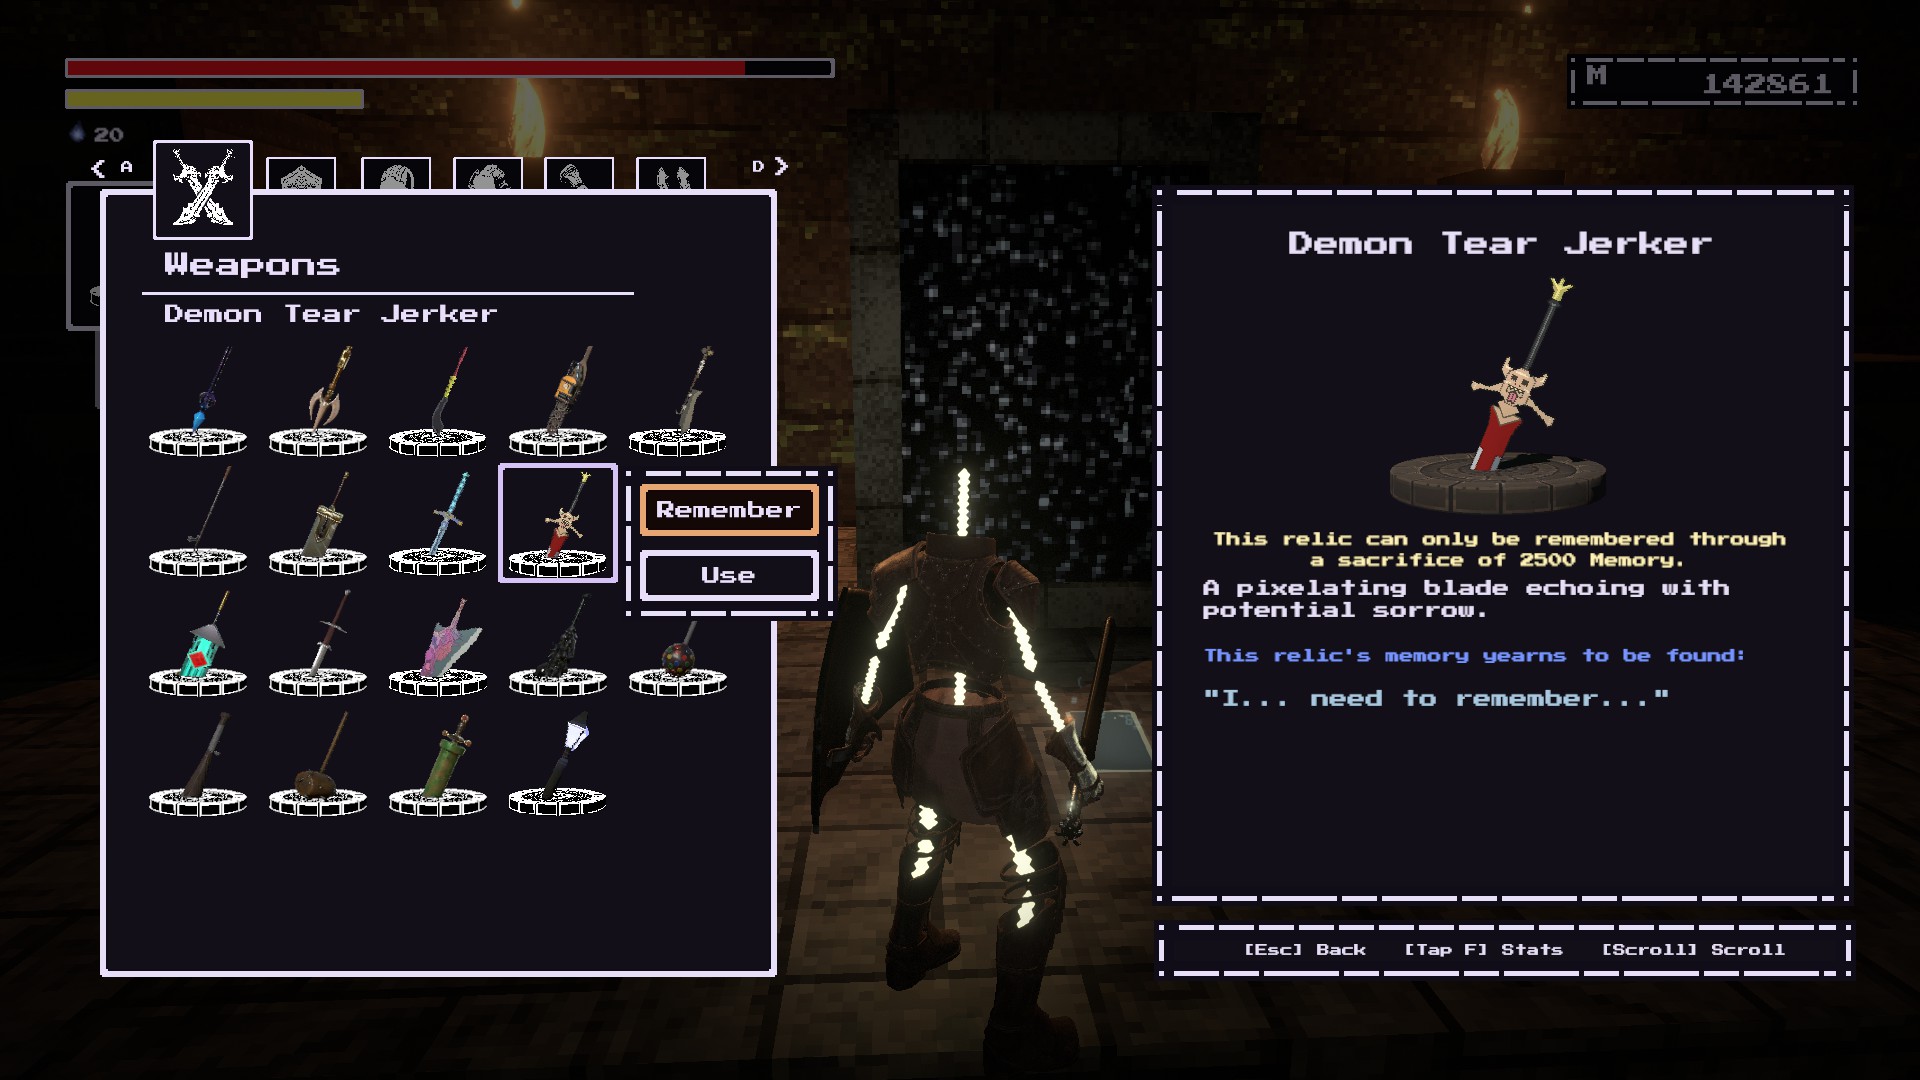
~에 Oreshaft Village. Go through the snowy pathway near the Merchant.
Continue until you’re right in front of the Entrance to the Unbreakable Maw. Item should be right here.
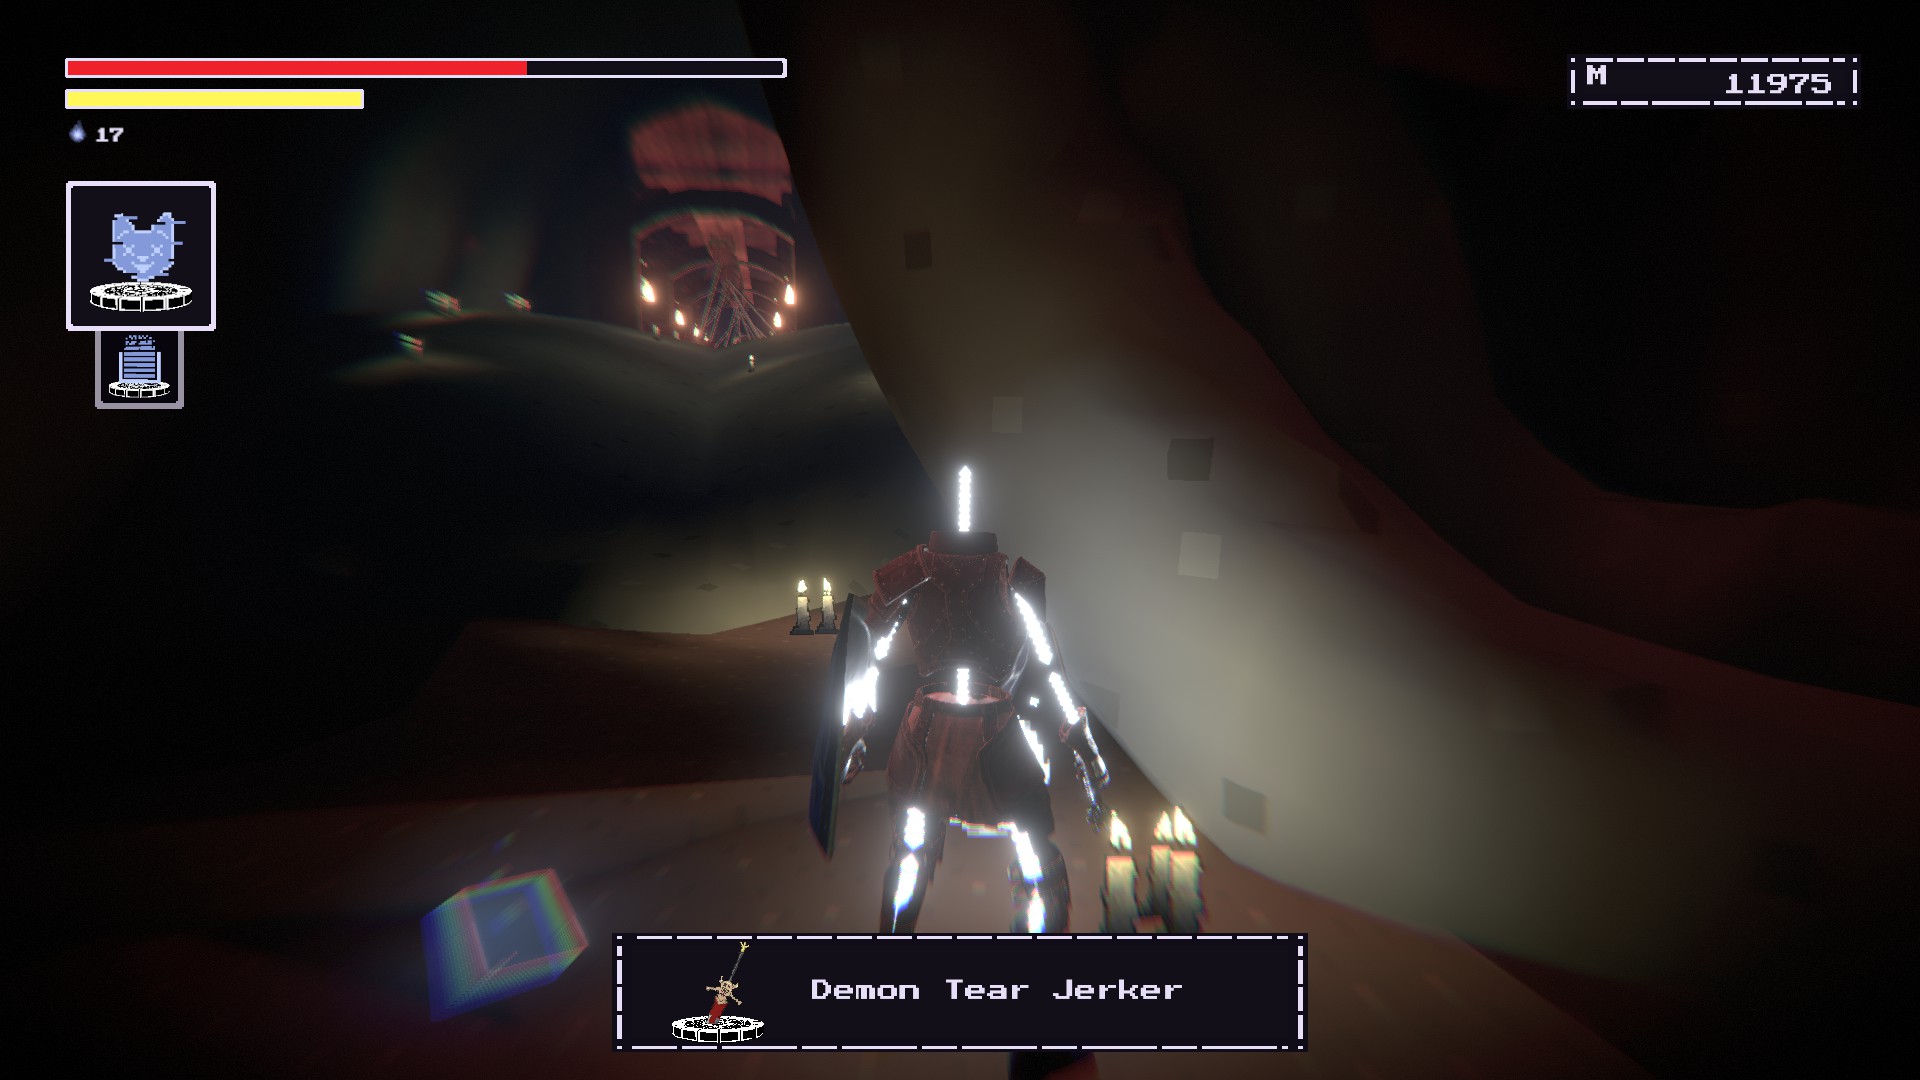
당신은 필요 2500 memory to restore this weapon.
Way Lighter
COST MEMORY #13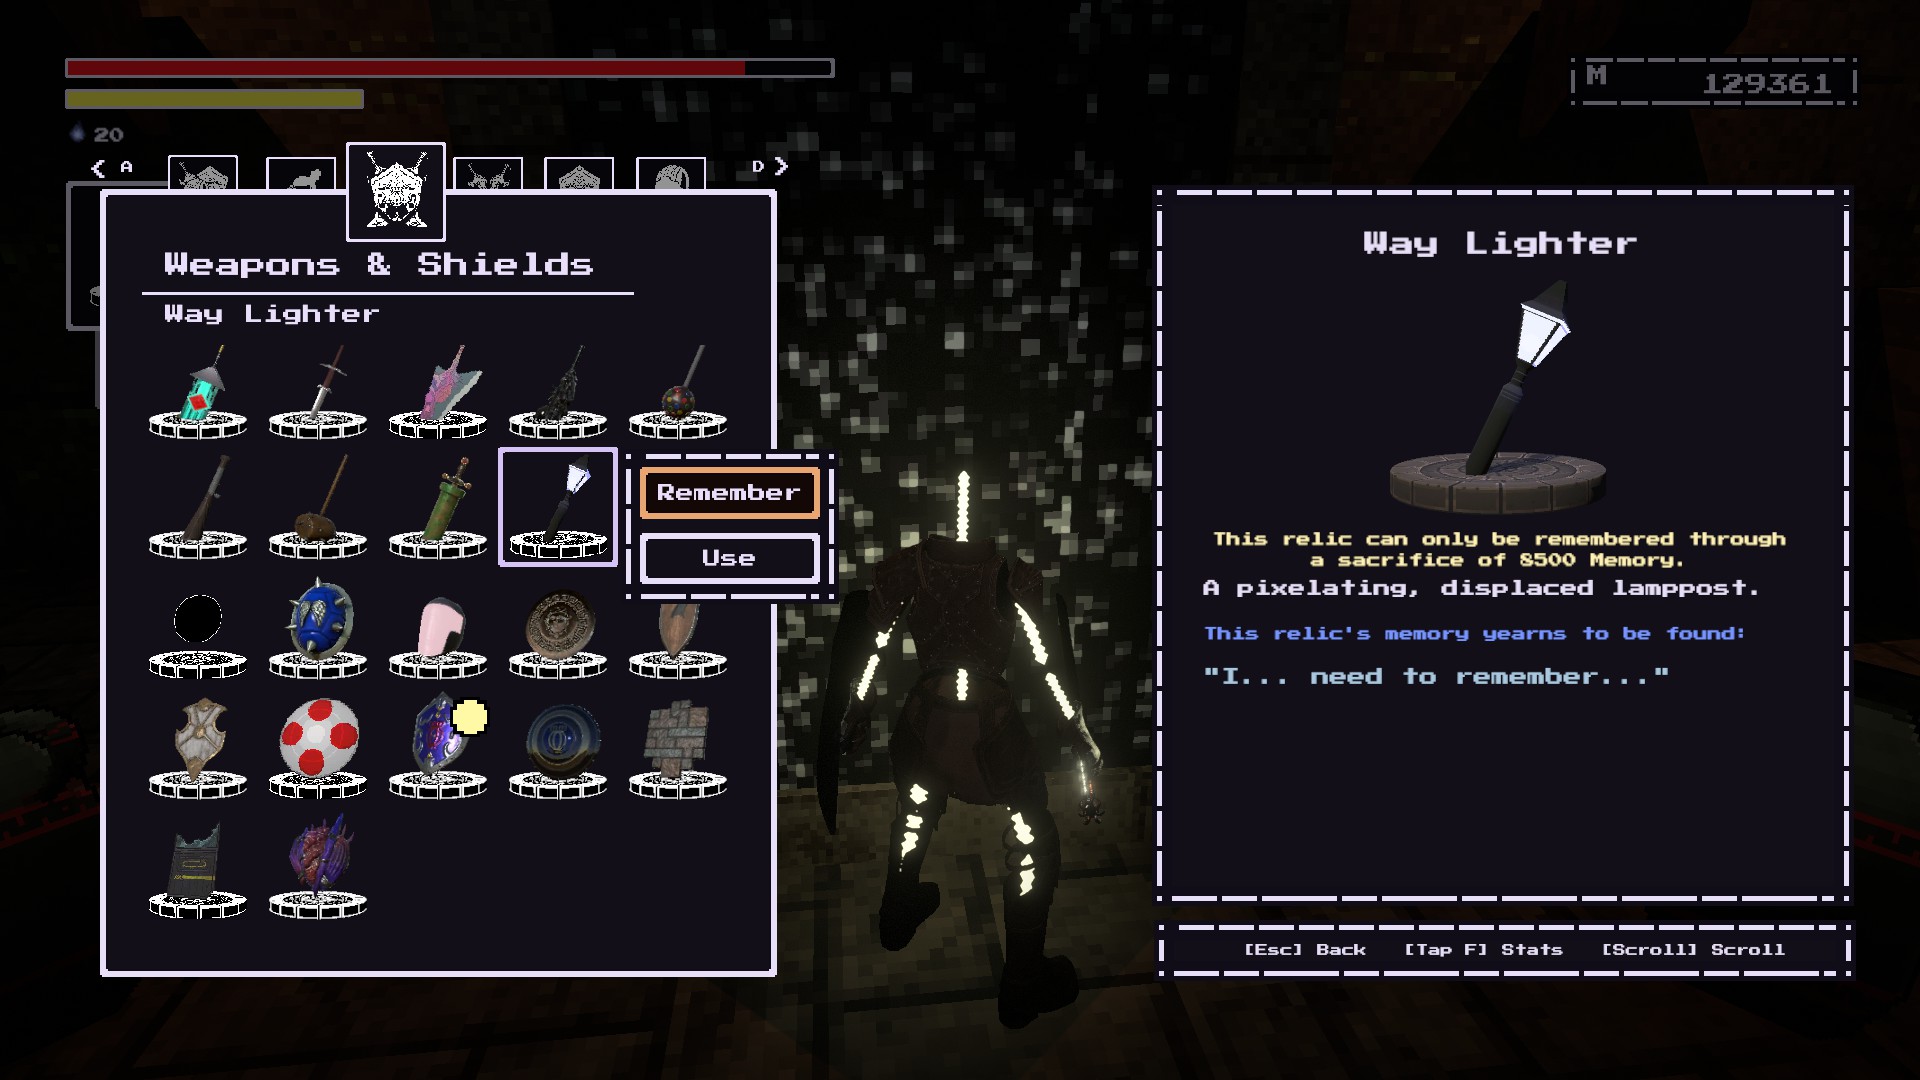
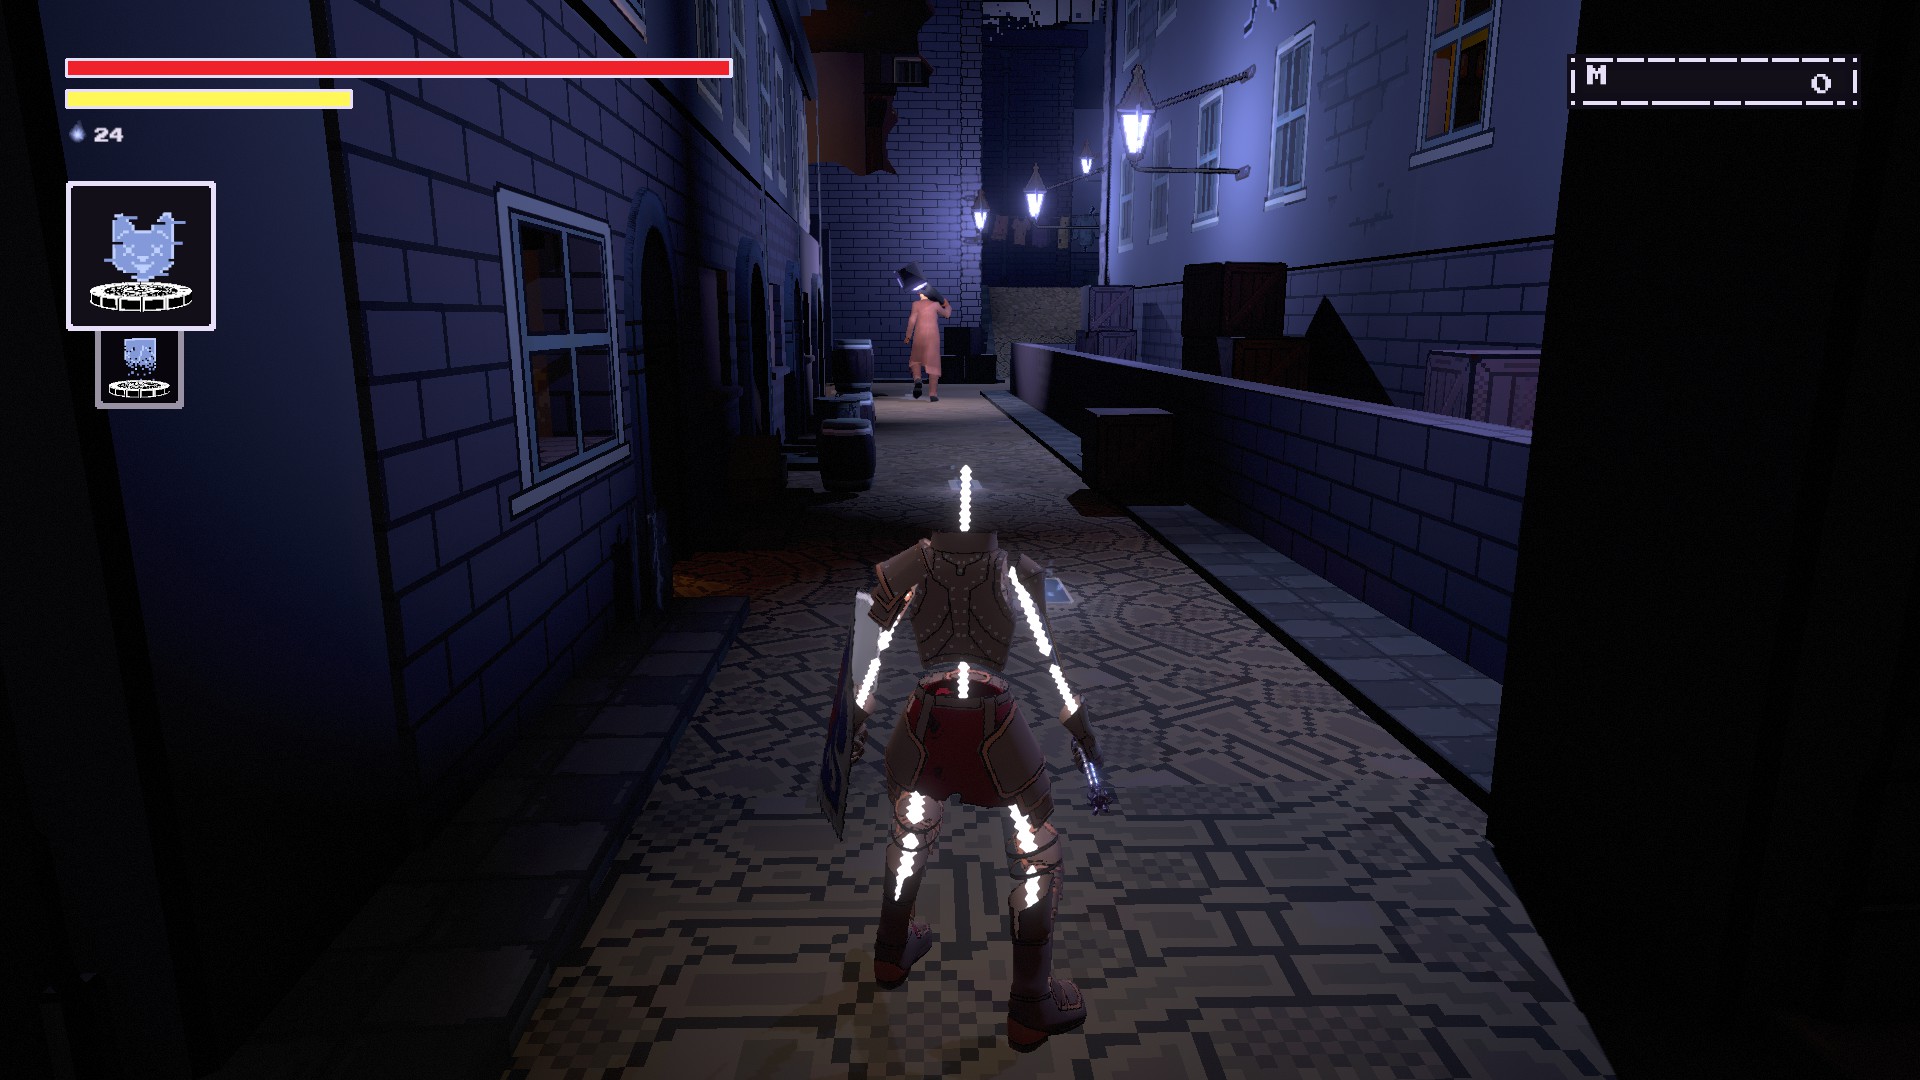
At the start of NPC City. You should see a patrolling Giant NPC with a Way Lighter weapon. Kill the NPC and the weapon should drop.
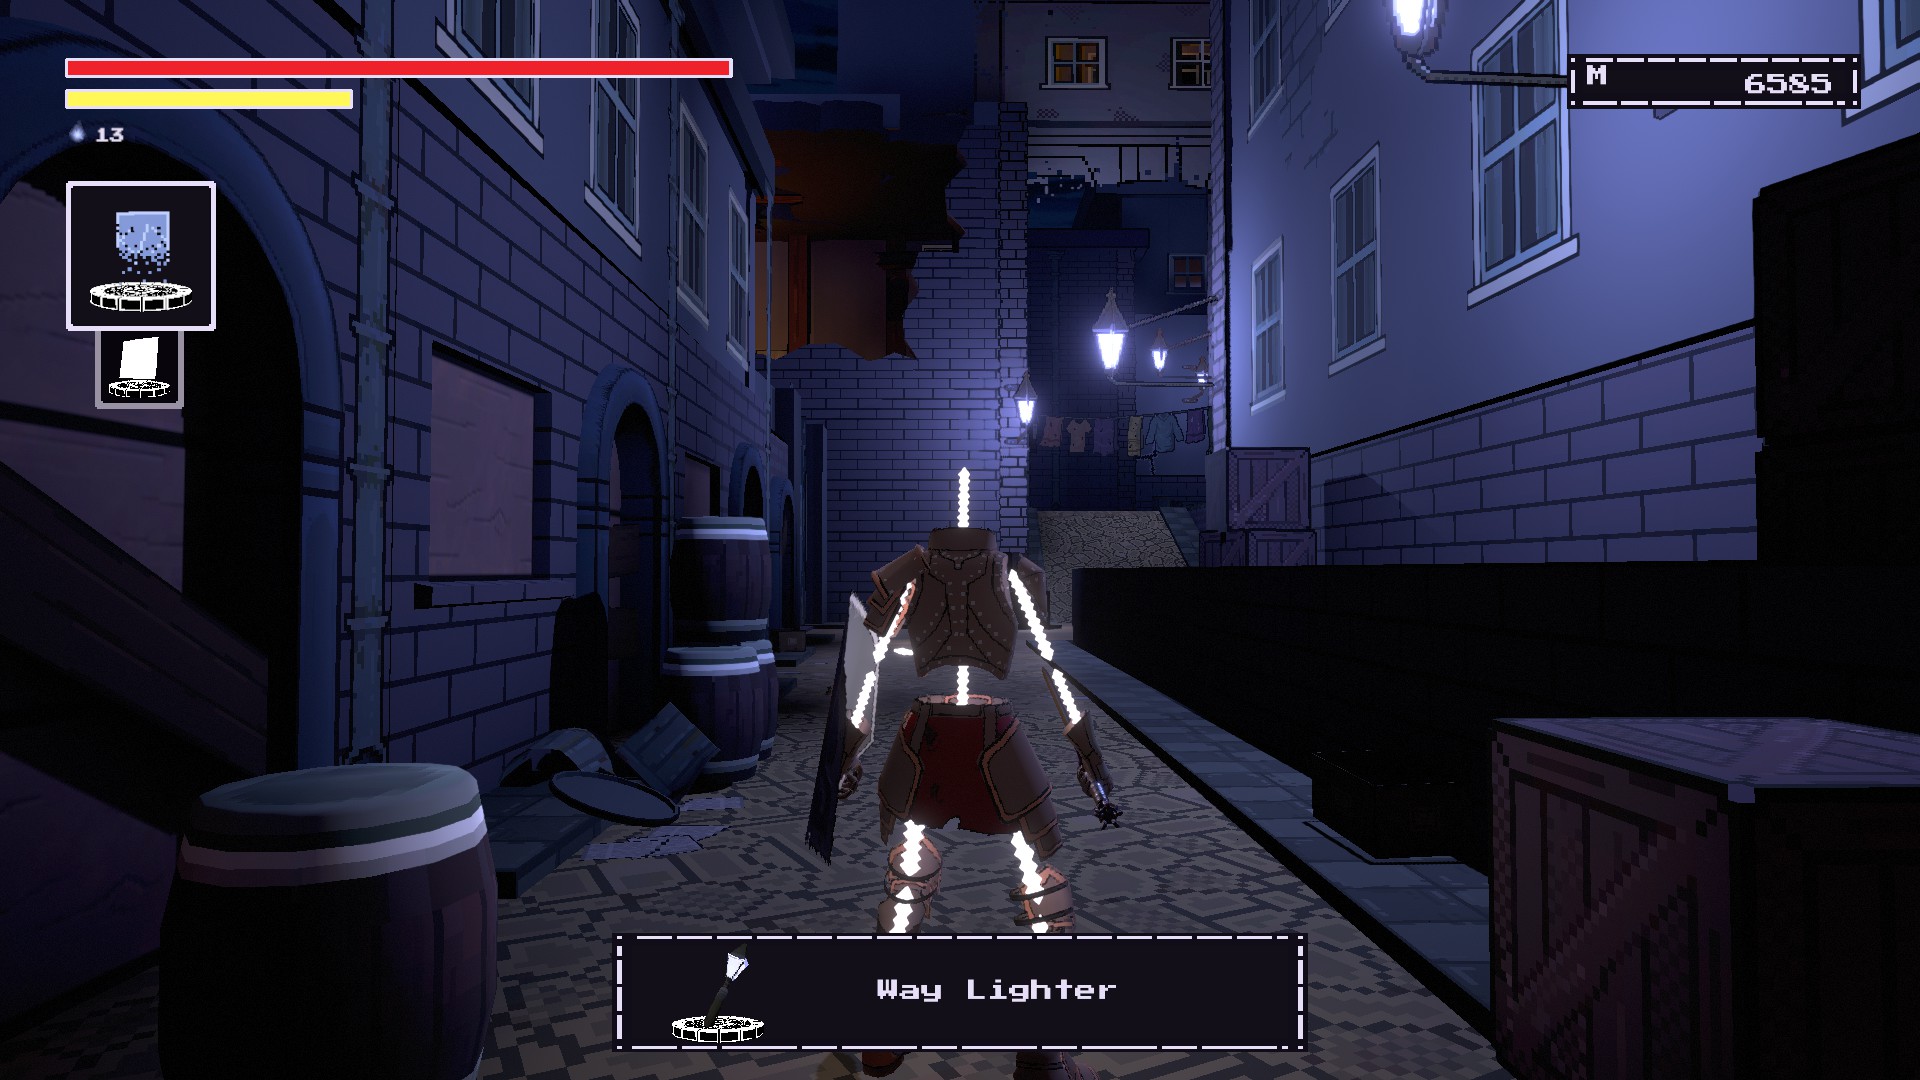
당신은 필요 8500 memory to restore this weapon.
Heaven’s Rim
COST MEMORY #14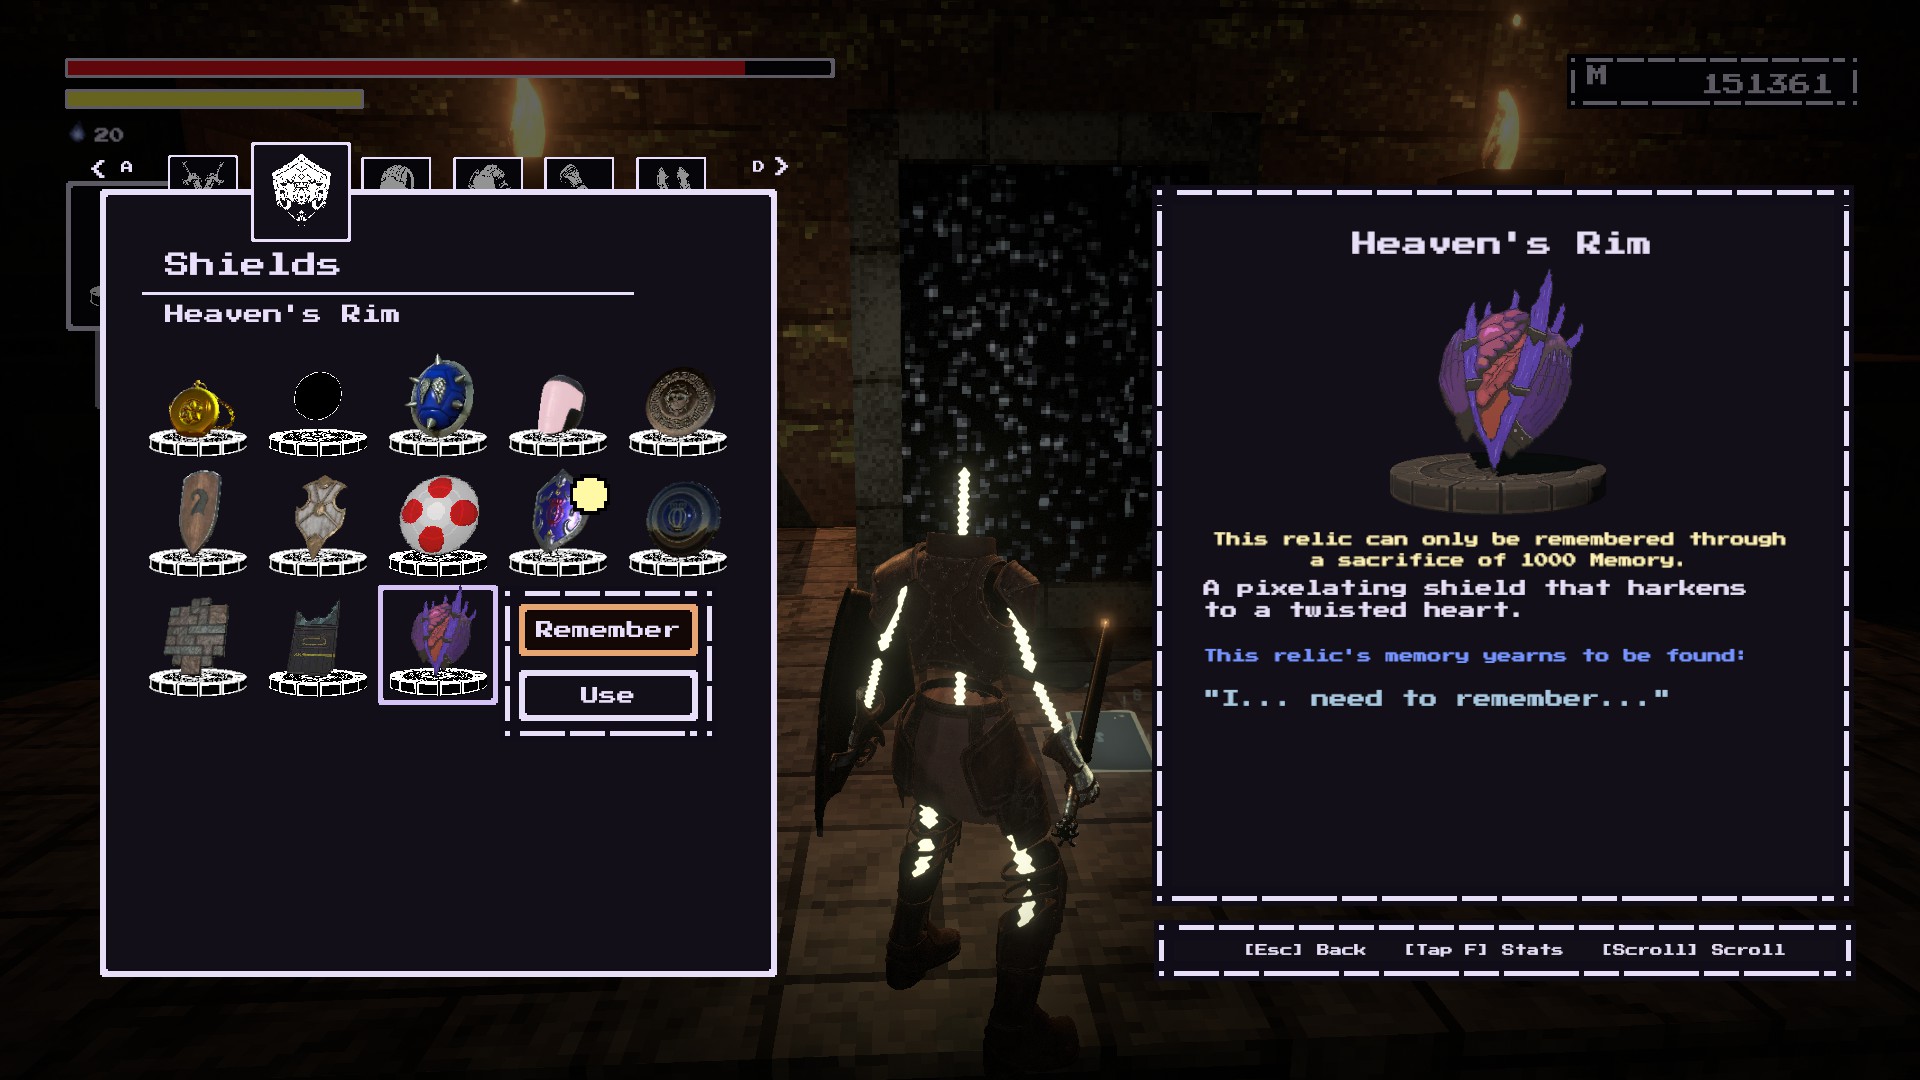
You need to buy it from the 상인. Easymaker Key found in Quest Reward Vault.
소송 비용 1500 memory.
당신은 필요 1000 memory to restore this item.
Unlikely Lenses
COST MEMORY #15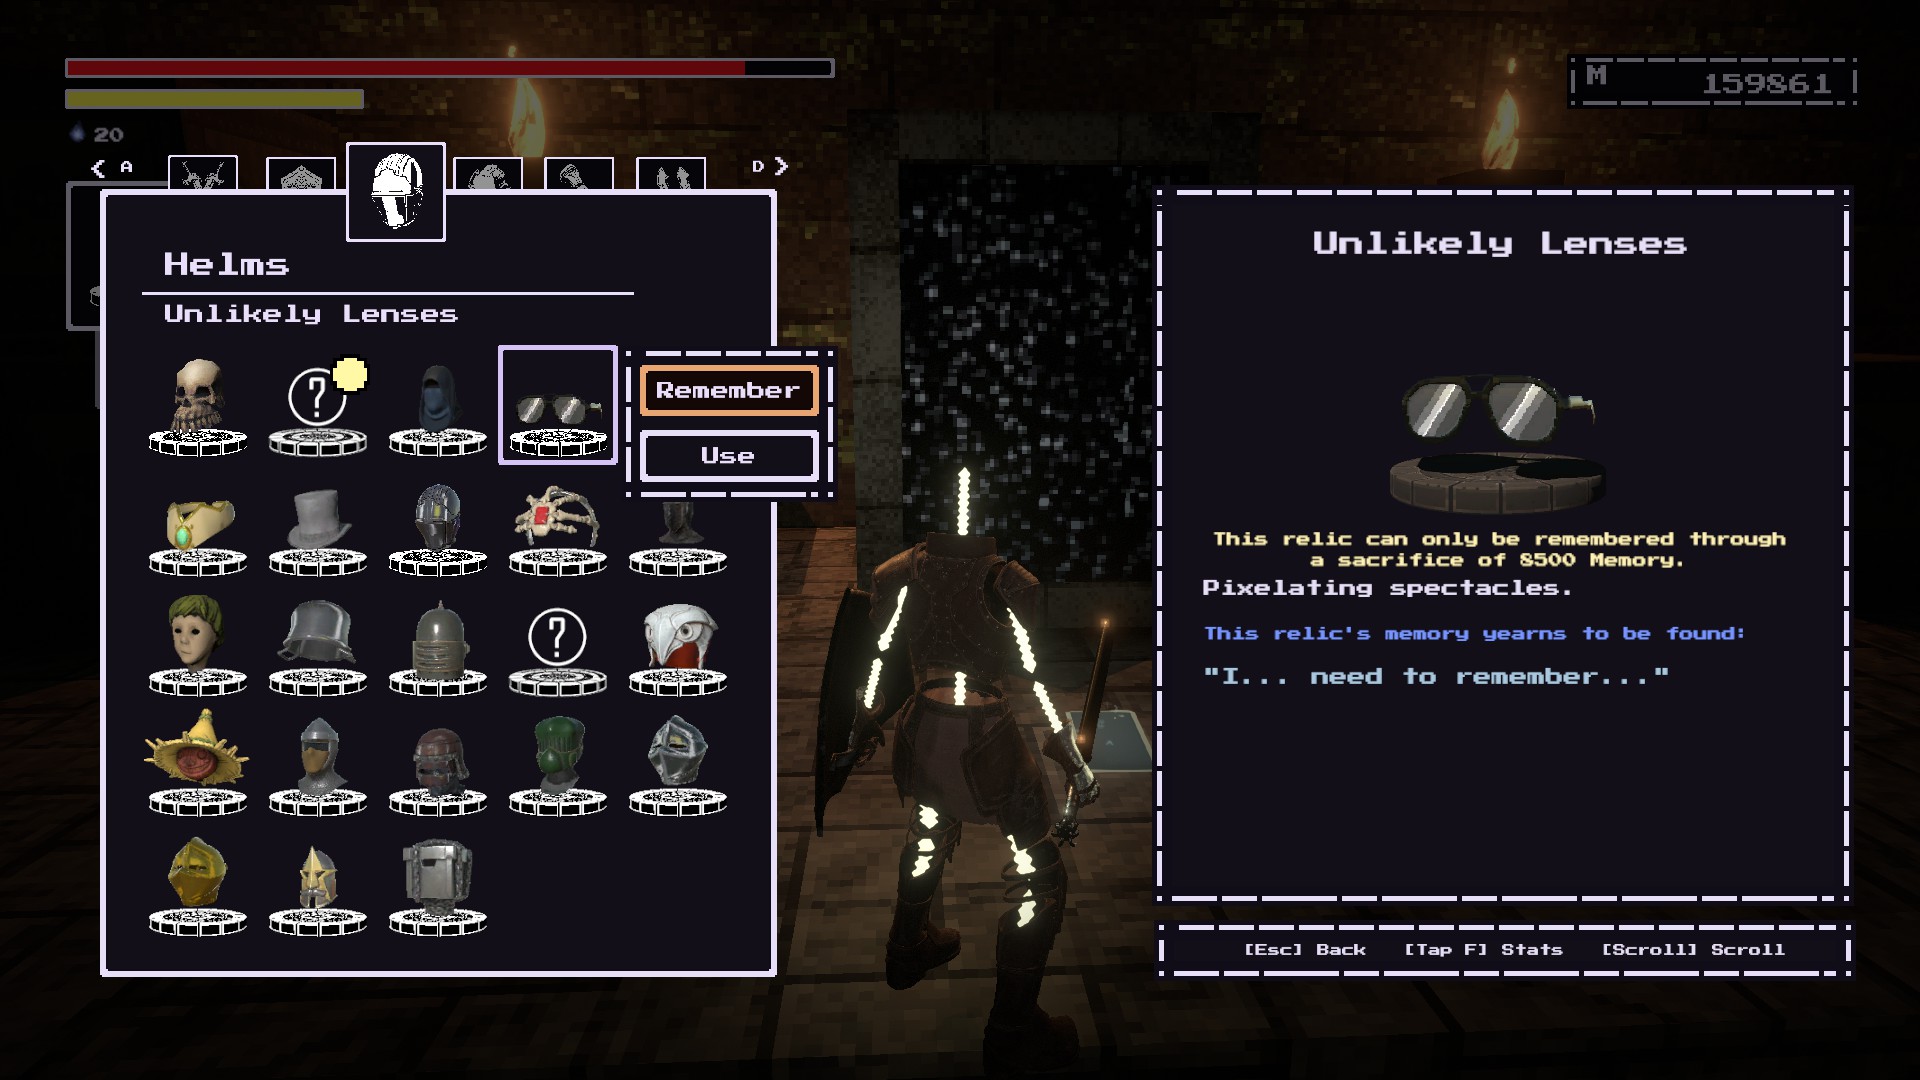
~에 Start of Sequence. After the Train-ing section, you should be in the section of the broken street.
There should be a Degraded Knight patrolling, 하지만 look towards the building on the left. 사용해야합니다 Flat Traversal. It will be in a chest at the end which requires Uprez and 2000 memory.
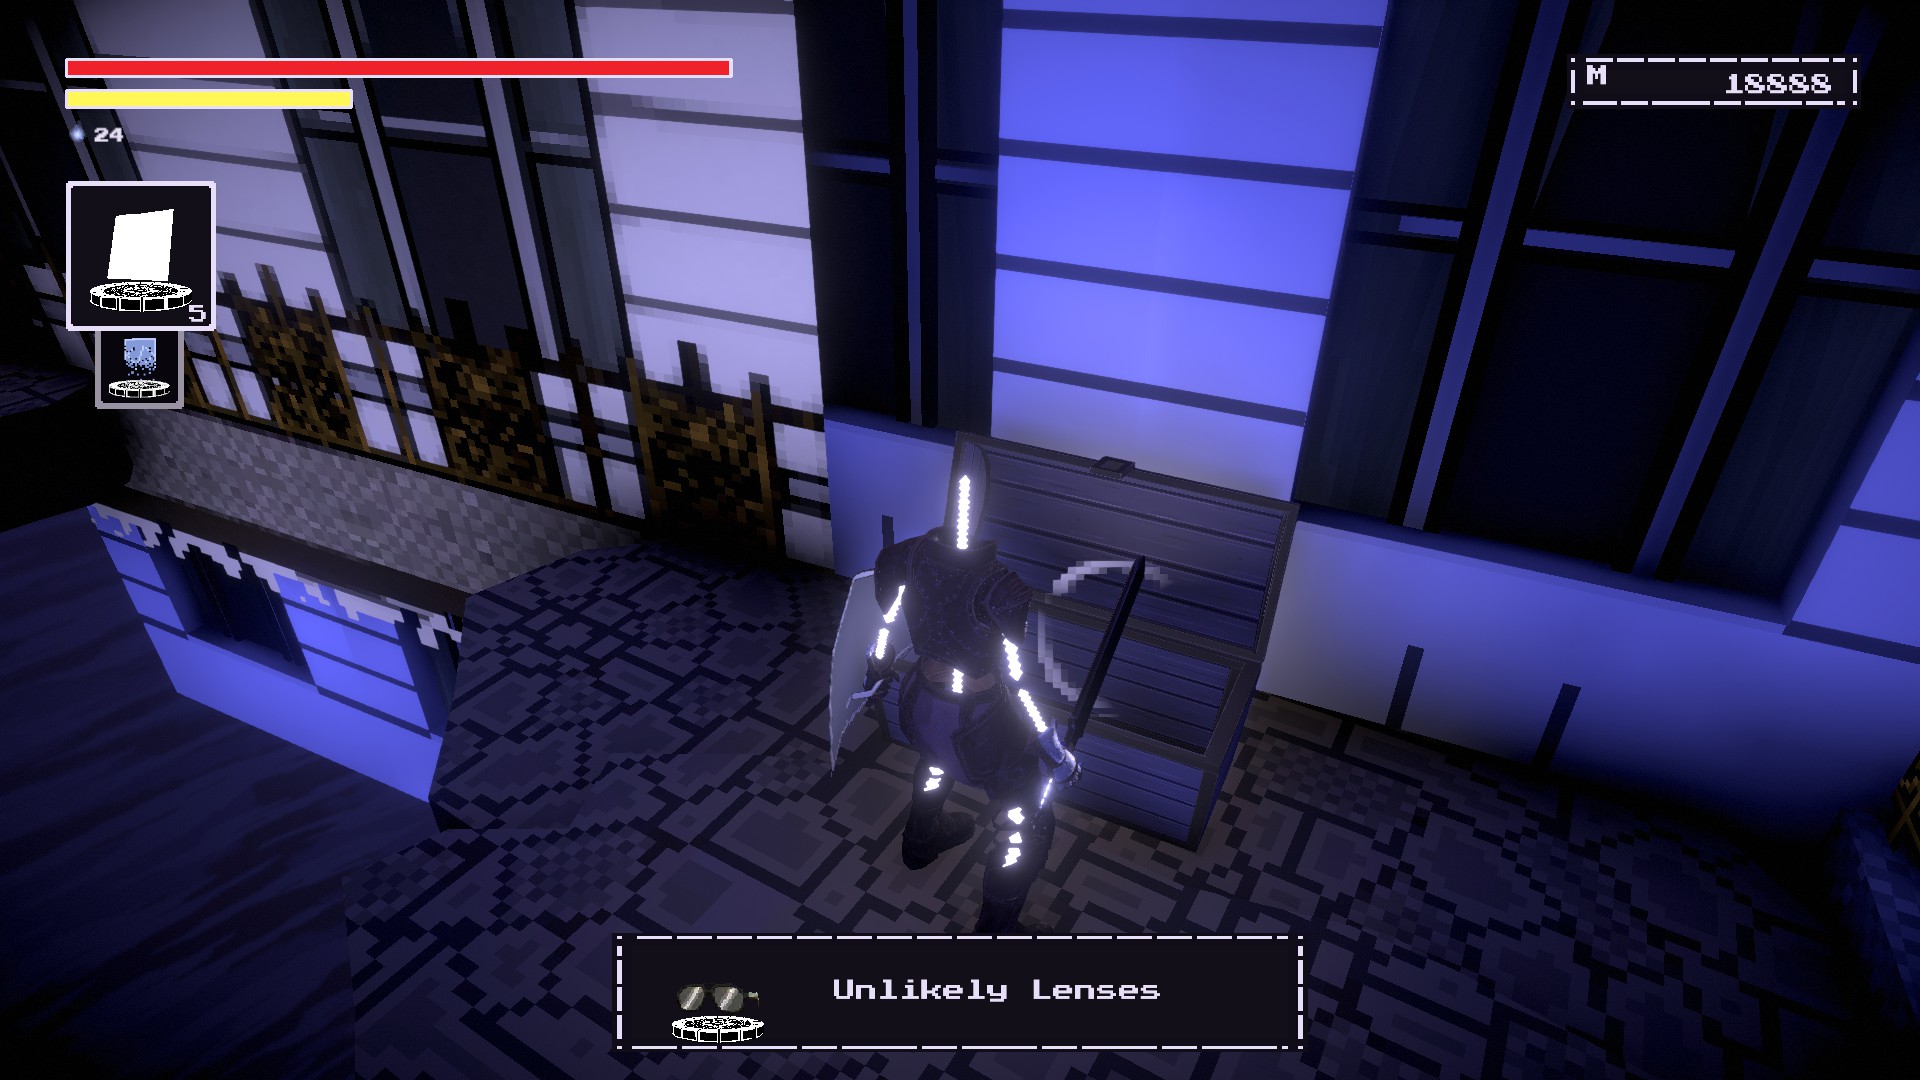
You’ll need to spend 8500 memory to restore these bad boys.
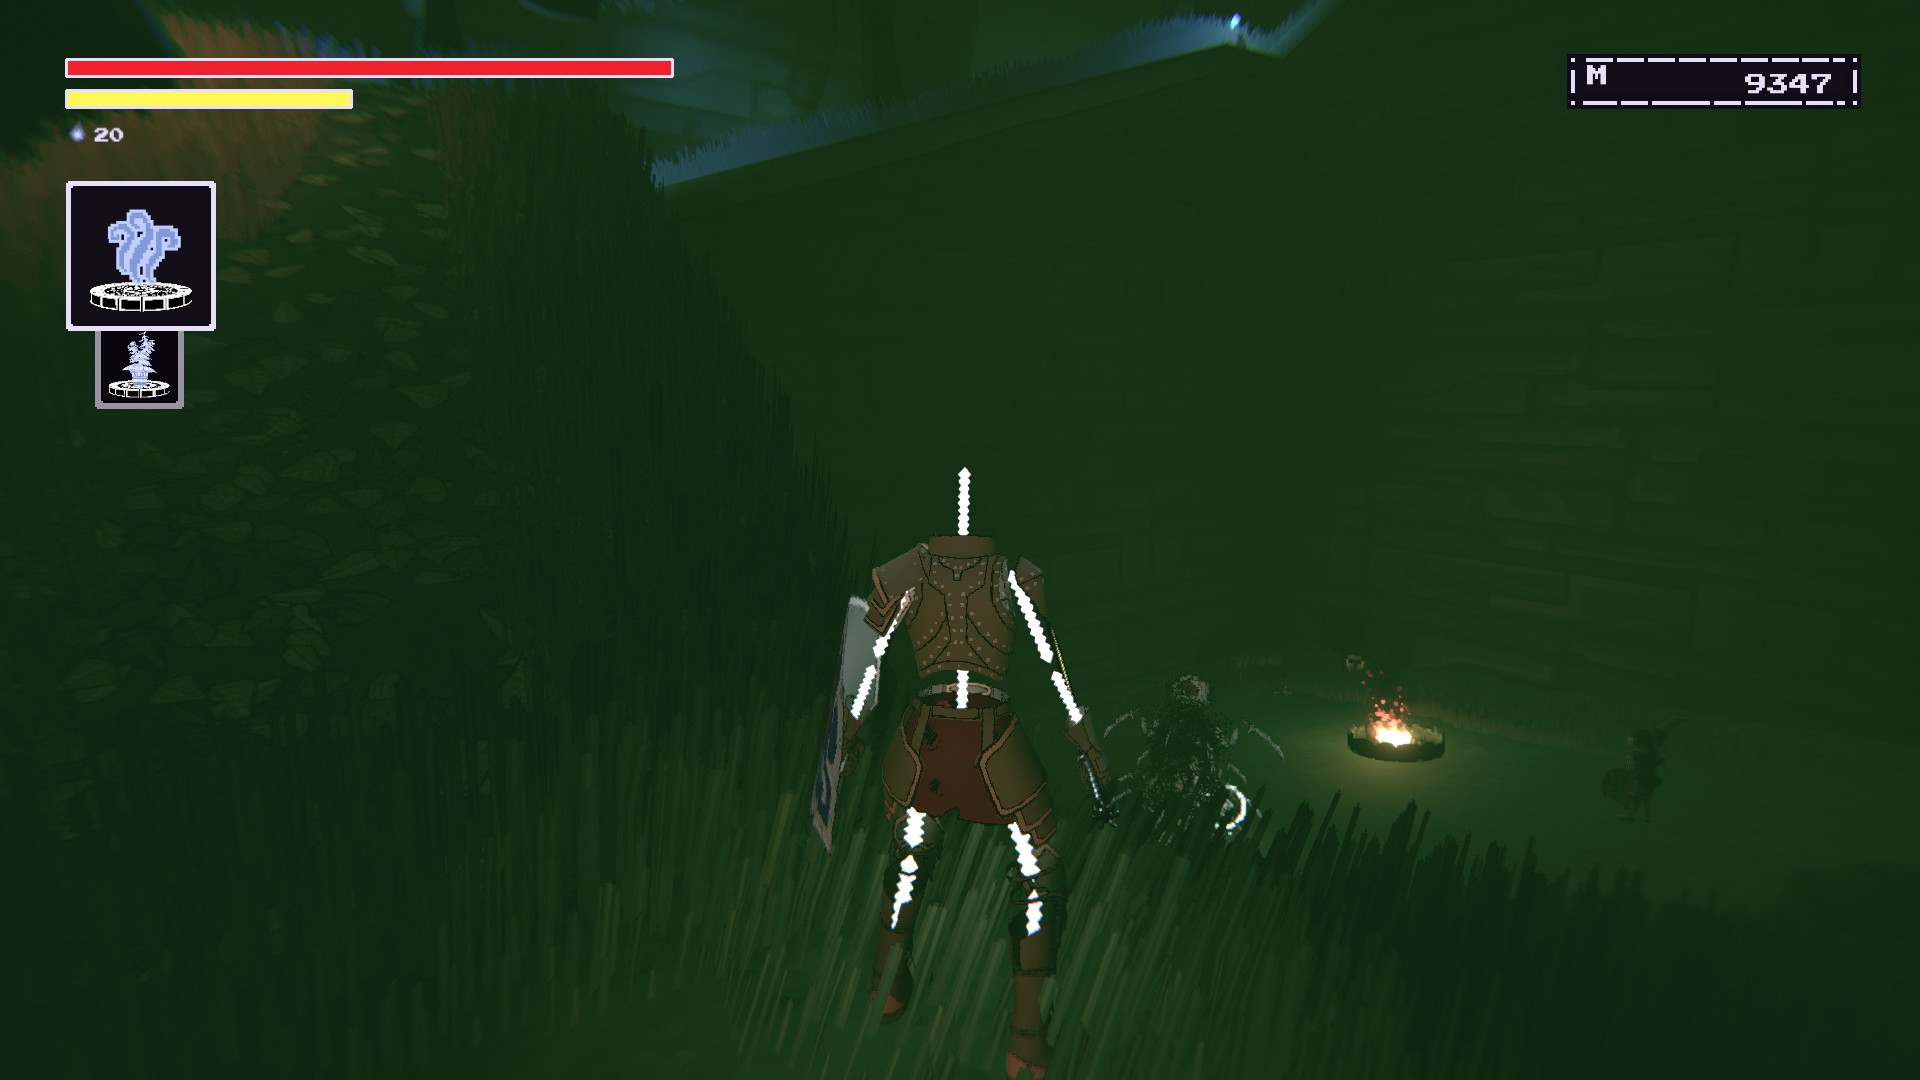
Red Racers
COST MEMORY #16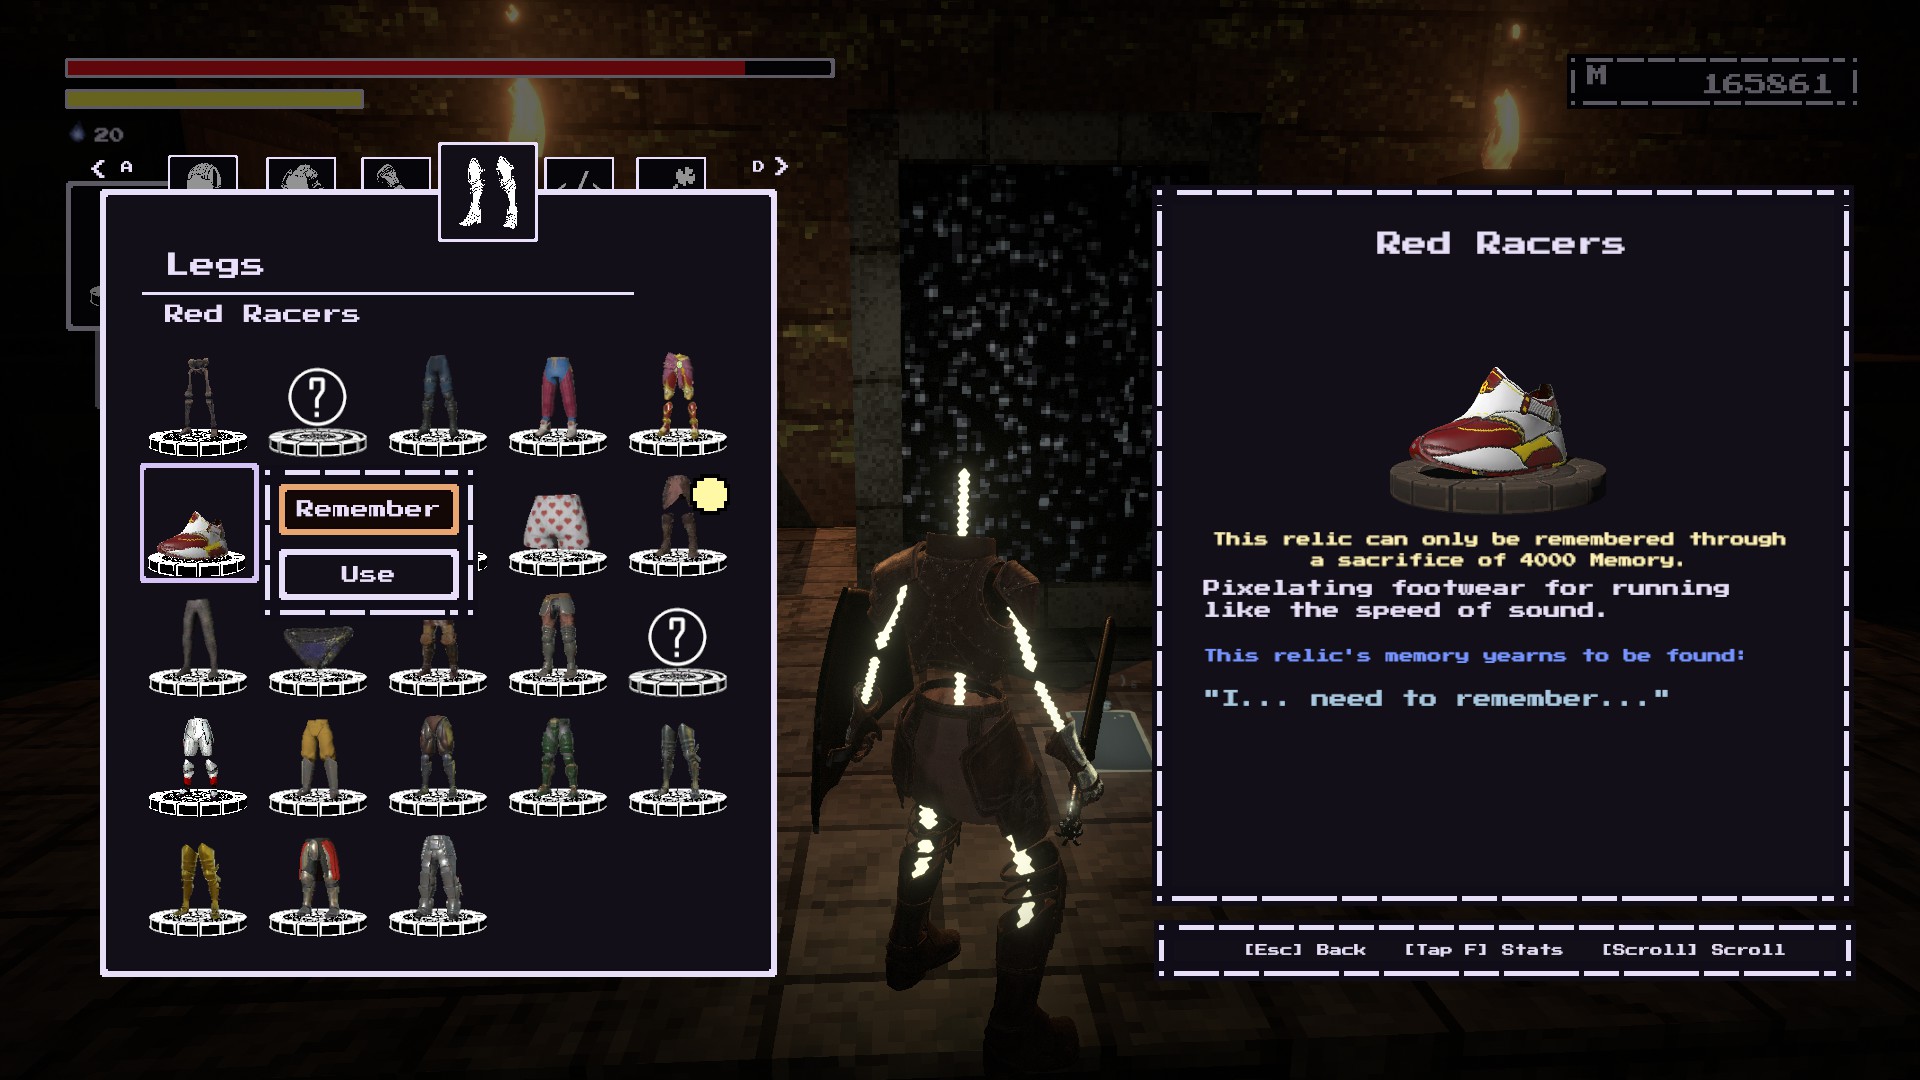
At Warlock’s Wilds. Before going up to the gates of the Keep of the Stolen Crown, there is another path that leads downward on the right. You should see a Skeleton Knight and a Degraded Spider enemy sitting by a campfire. Kill the Spider to get the shoes.
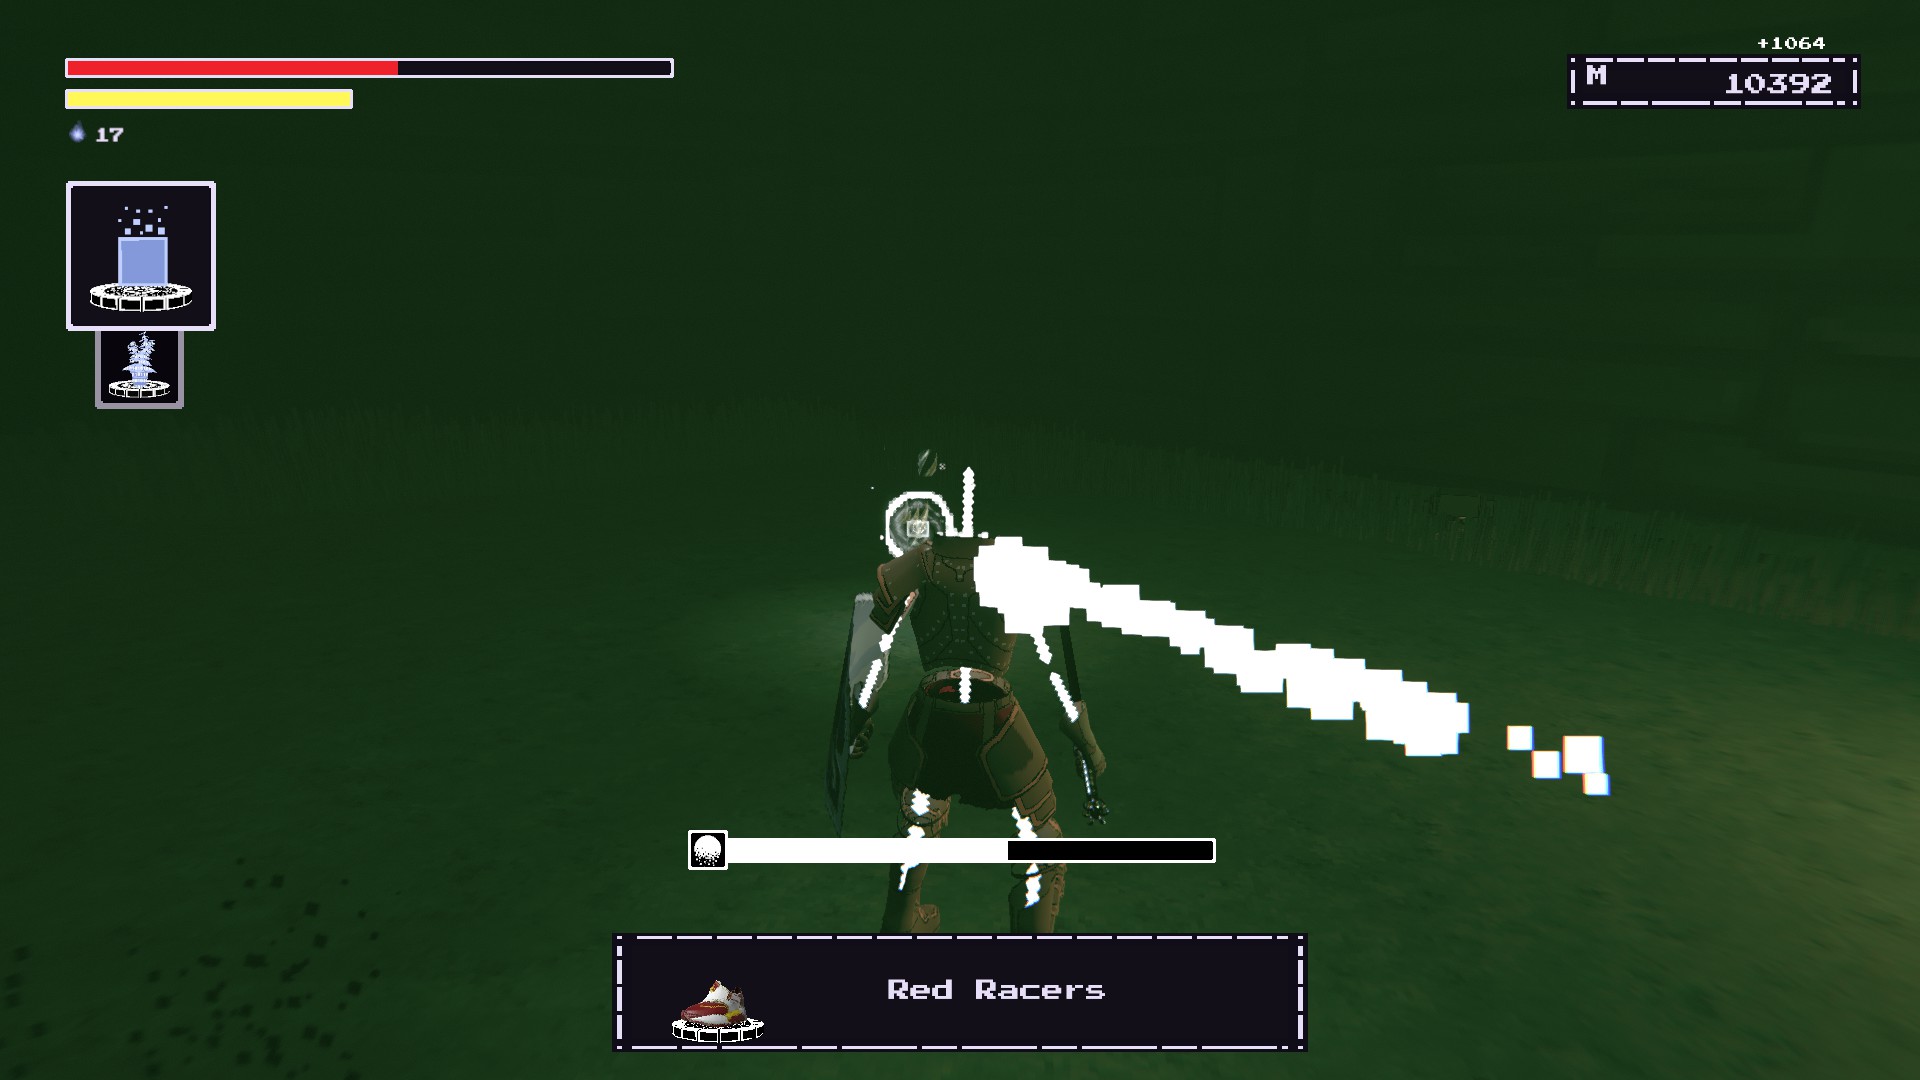
You need to spend 4000 memory for these babies.
Primal Pelts
COST MEMORY #17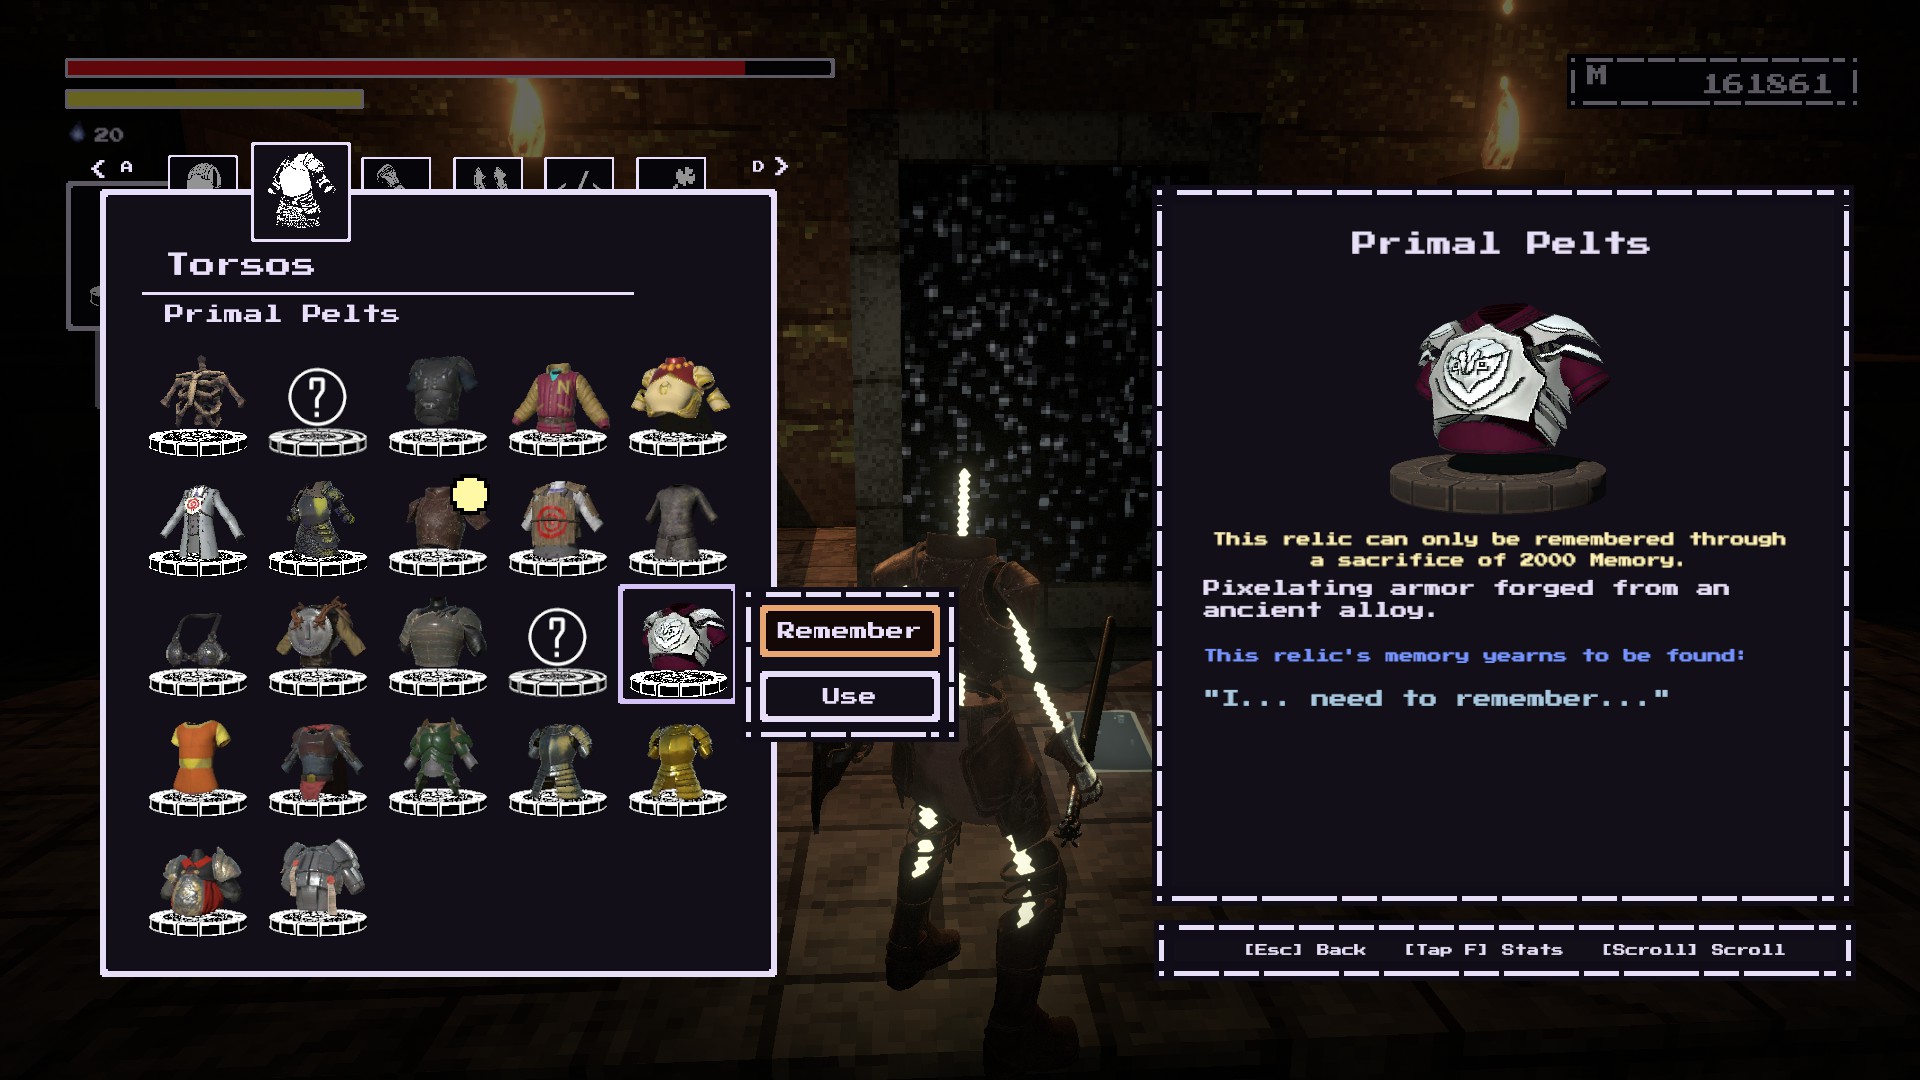
In The Depths. Progress through the Depths until you reach this area where you’d want to take the left path.
Now you’ll see three different paths.
Hard left leads to an area with a Degraded Spider.
Middle leads you up to the armor and back onto the main path. Then the main path itself.
Take the middle path and you should get the armor.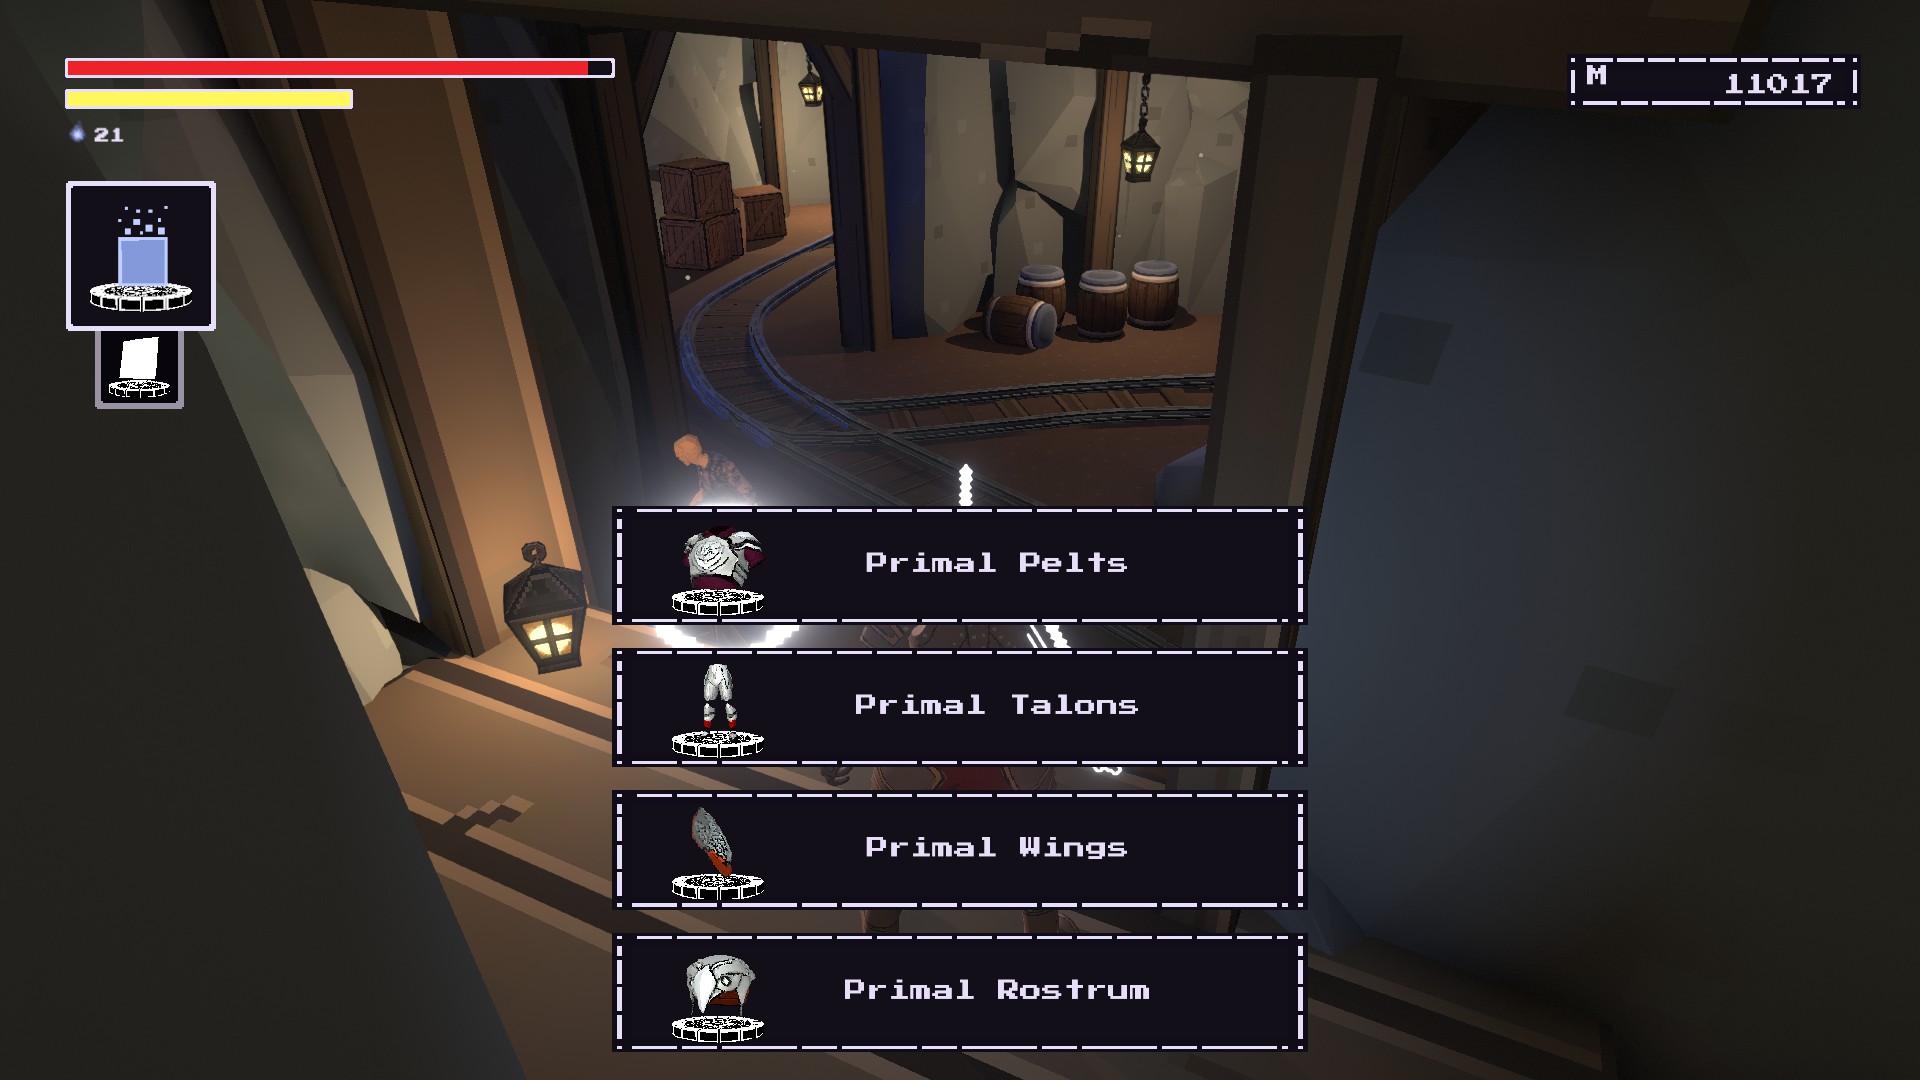
You’ll need to spend 2000 memory to restore the armor set.
Edge of Entropy
MYSTERY #1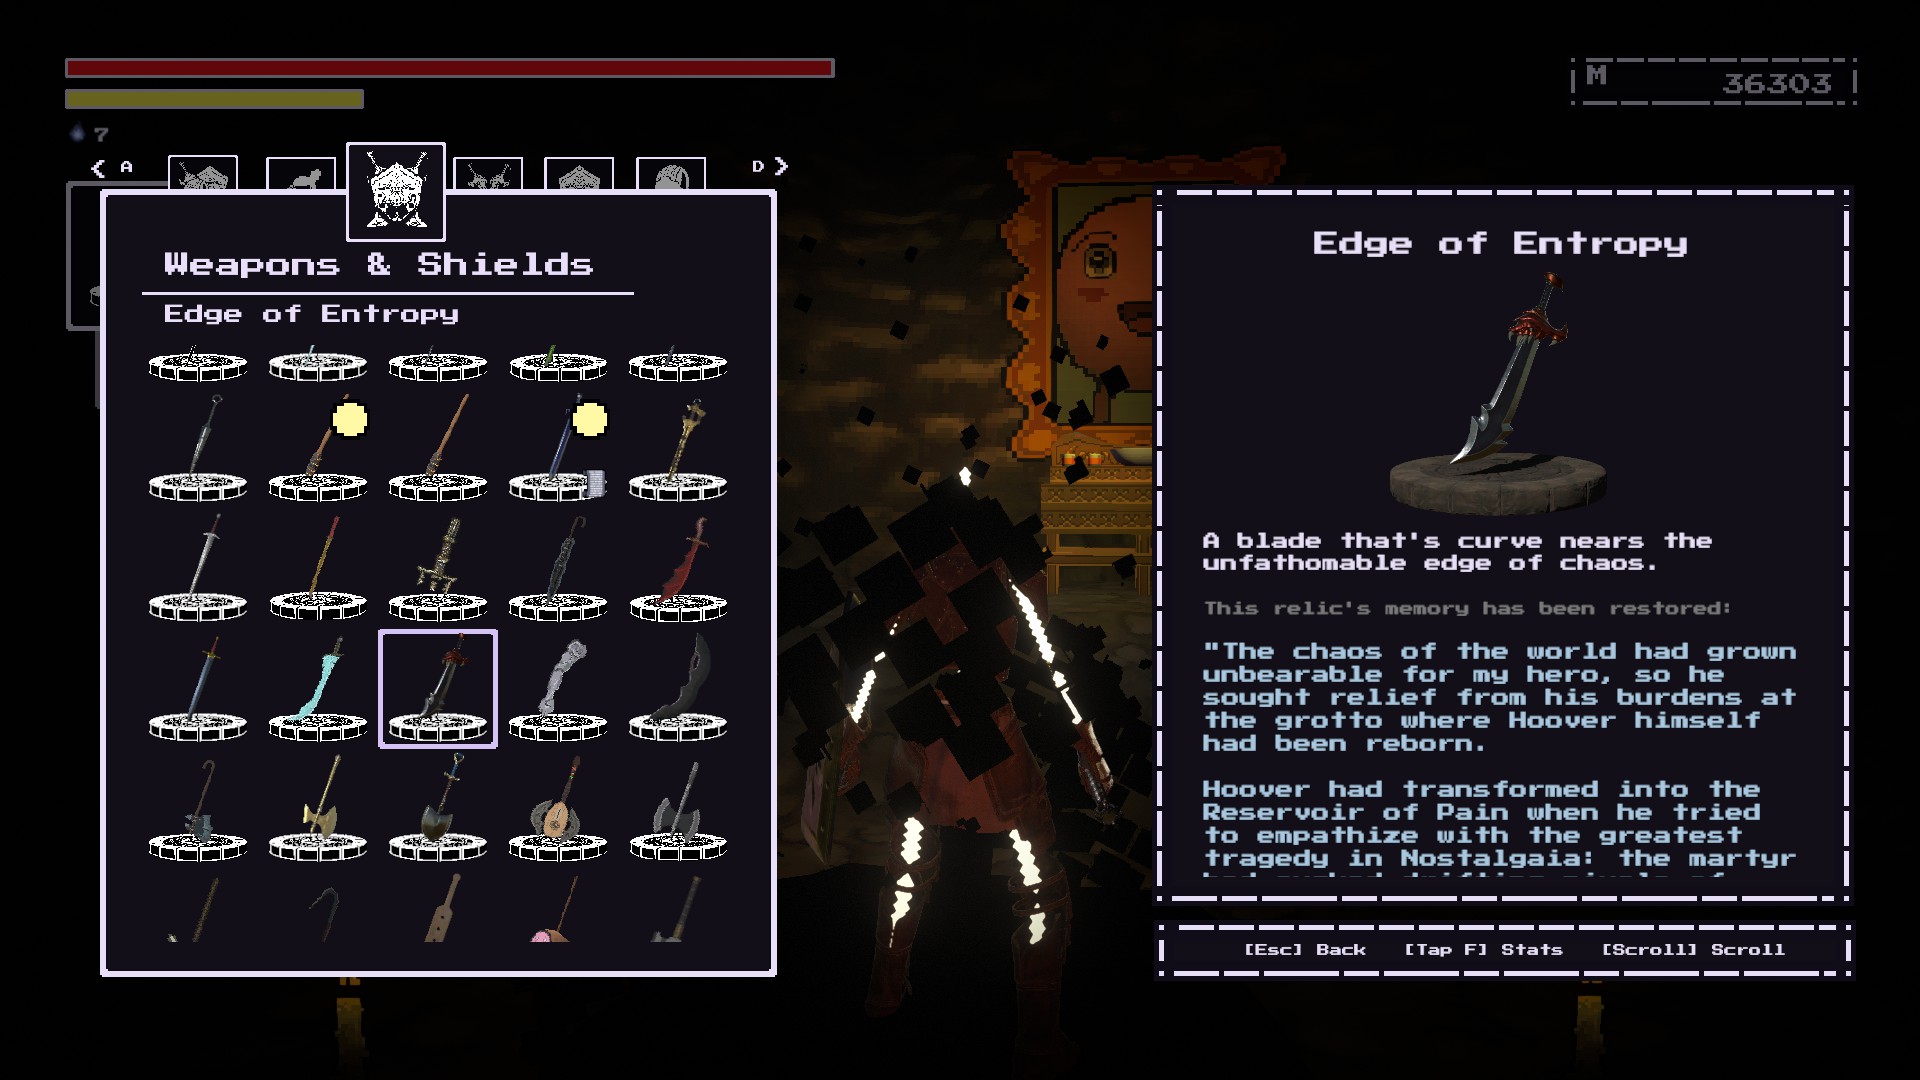
~ 안에 Oreshaft Village.
It should be right across the Gnom Statue.
Located near rubble under the bridge.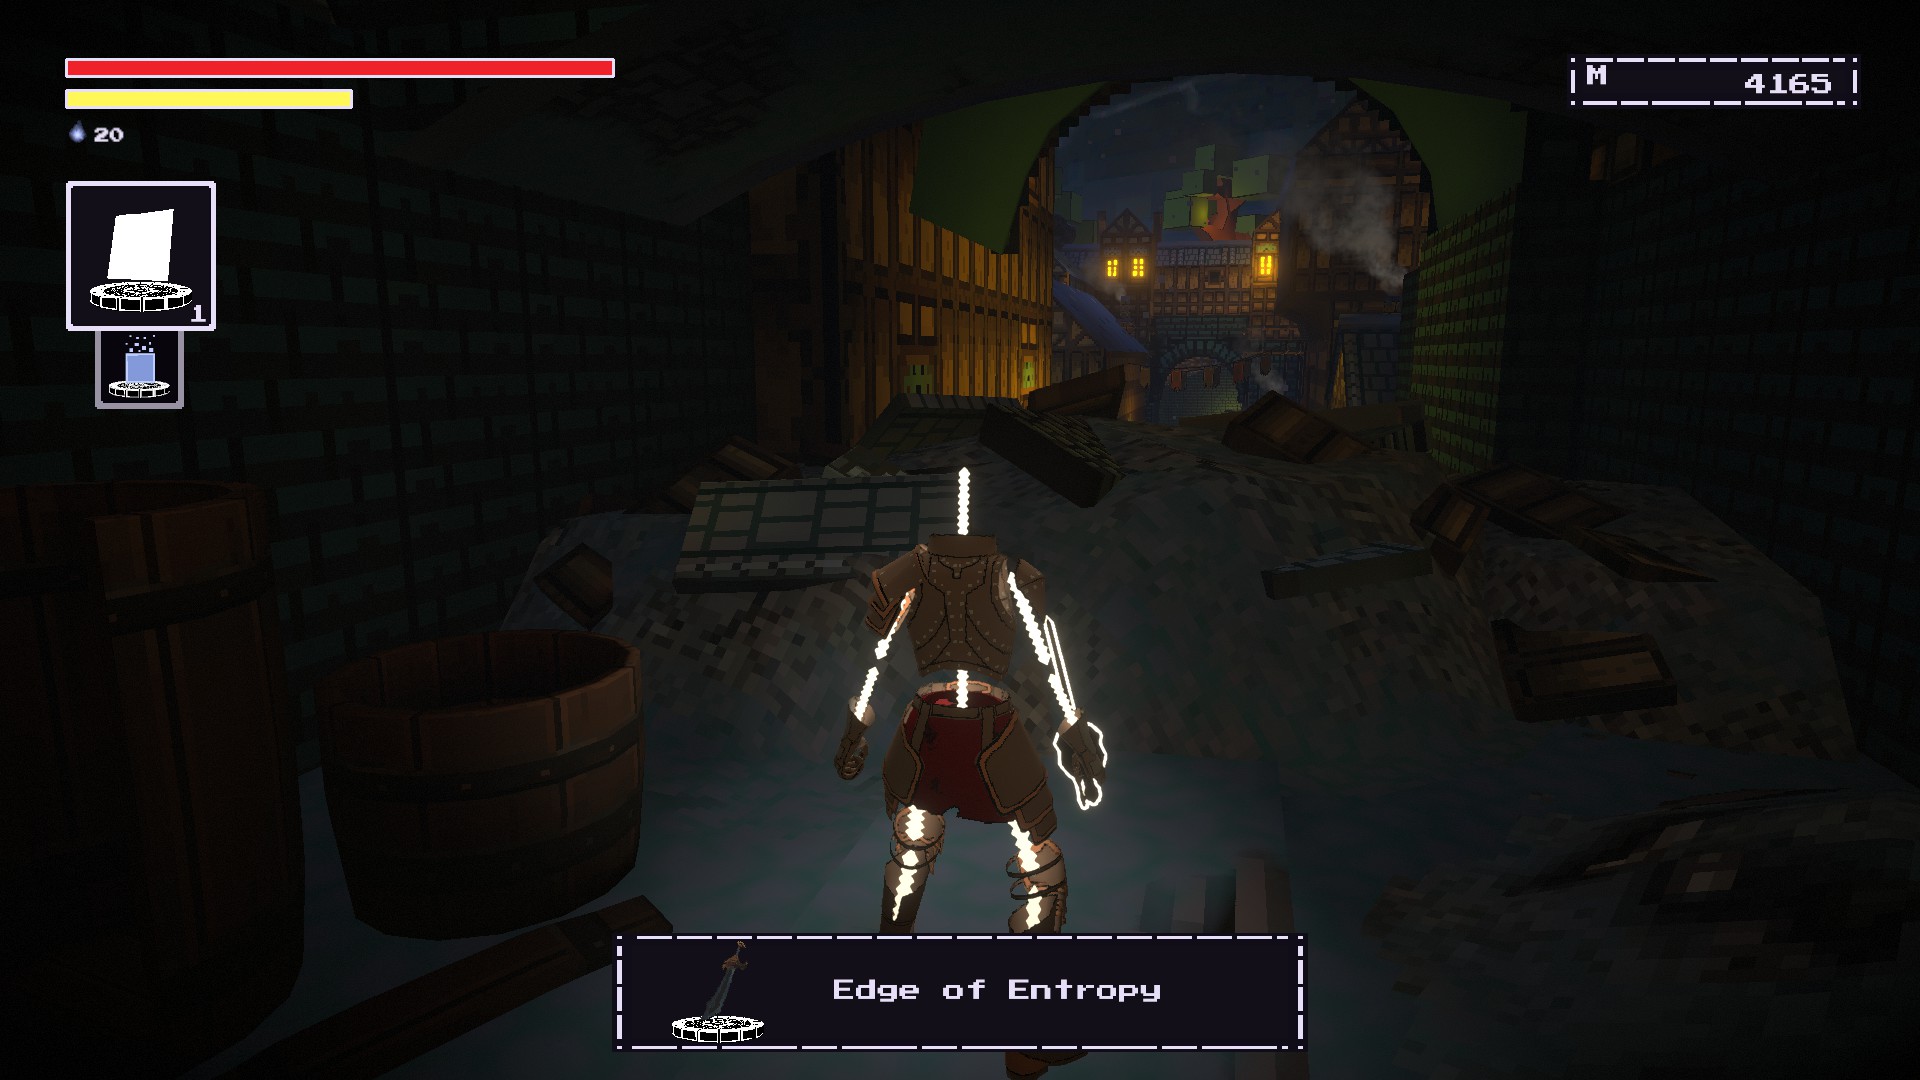
Once you’ve crossed over to the other side, you should notice this dark cave.
Enter it and you should notice void erupting from a circle of candles.
Remember the weapon right in this void.
Irrelevant Appendage
MYSTERY #2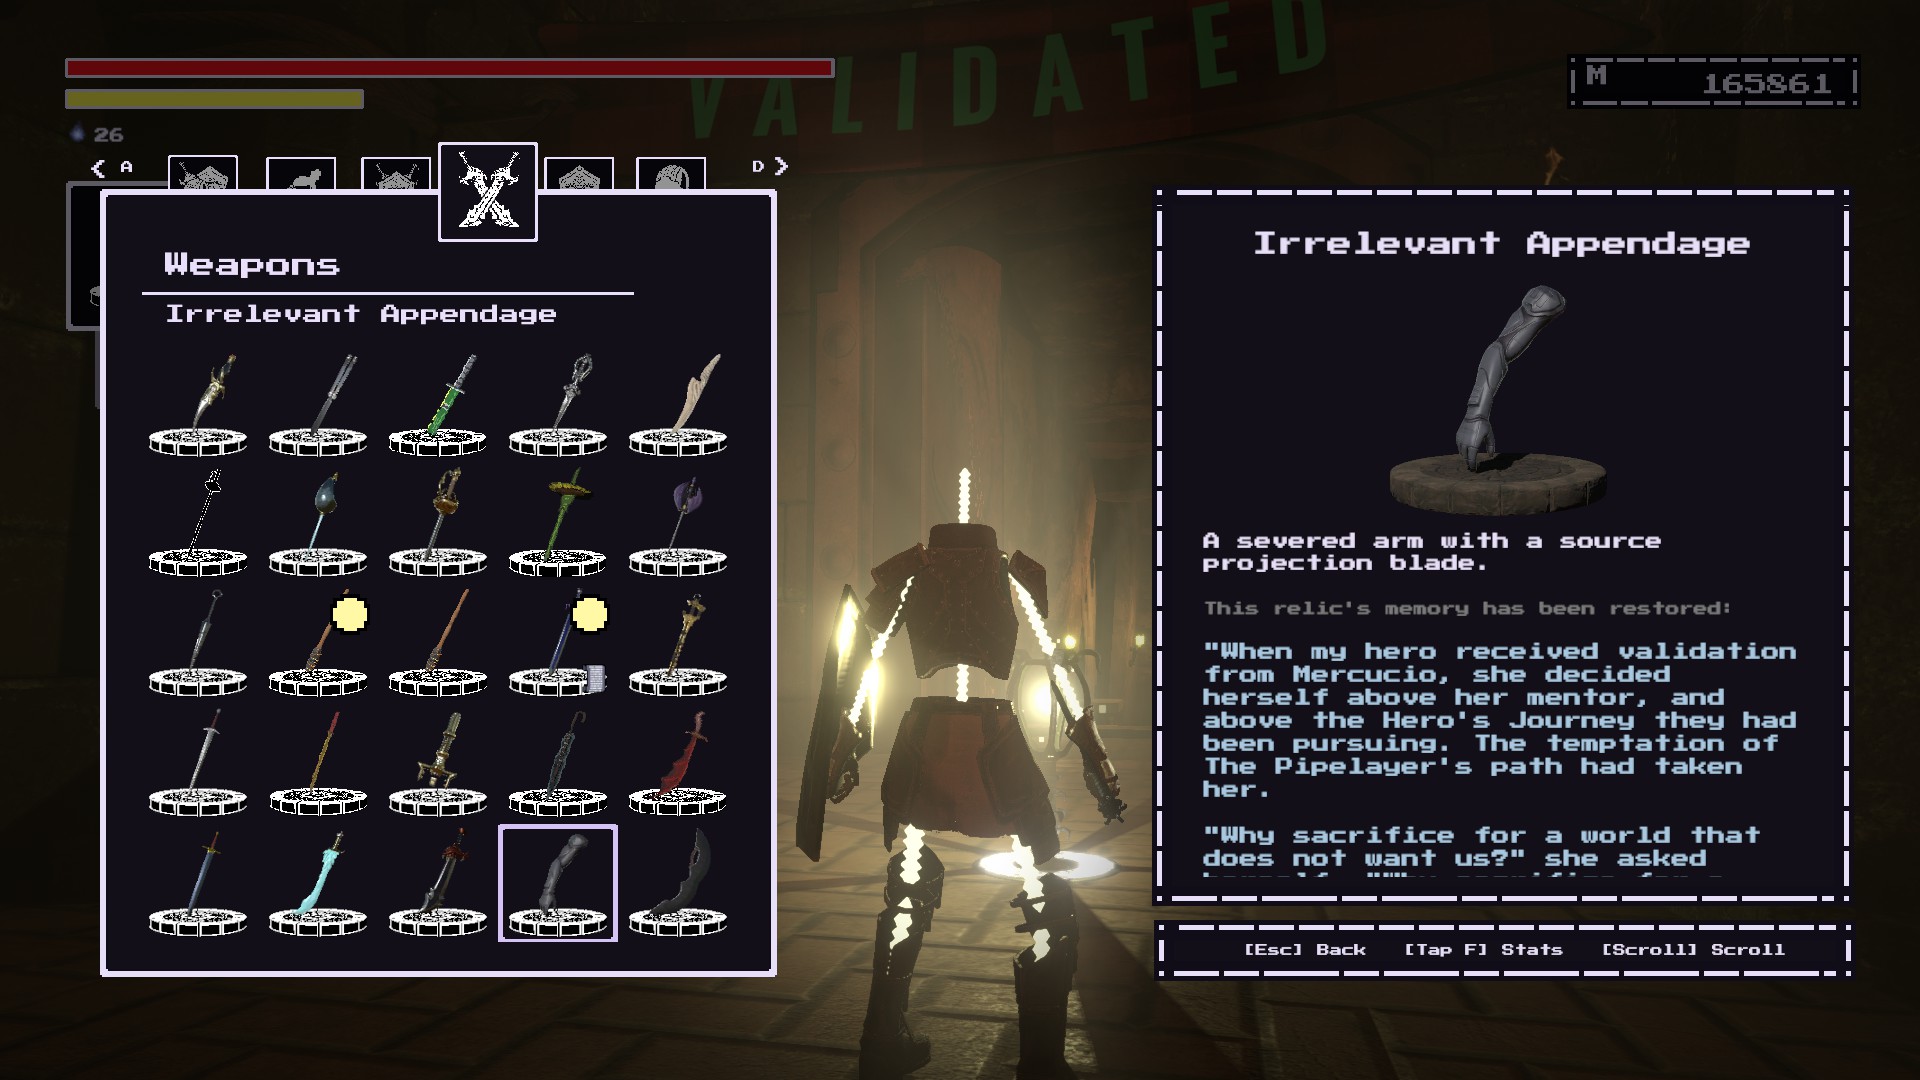
첫 번째, you must restore the Projector Shield. At the Unbreachable Maw. You can restore this item at the Validation Banner beacon.
SIDENOTE: You can use this item to get an armor set near Heartflow Altar!

Stern Glare
MYSTERY #3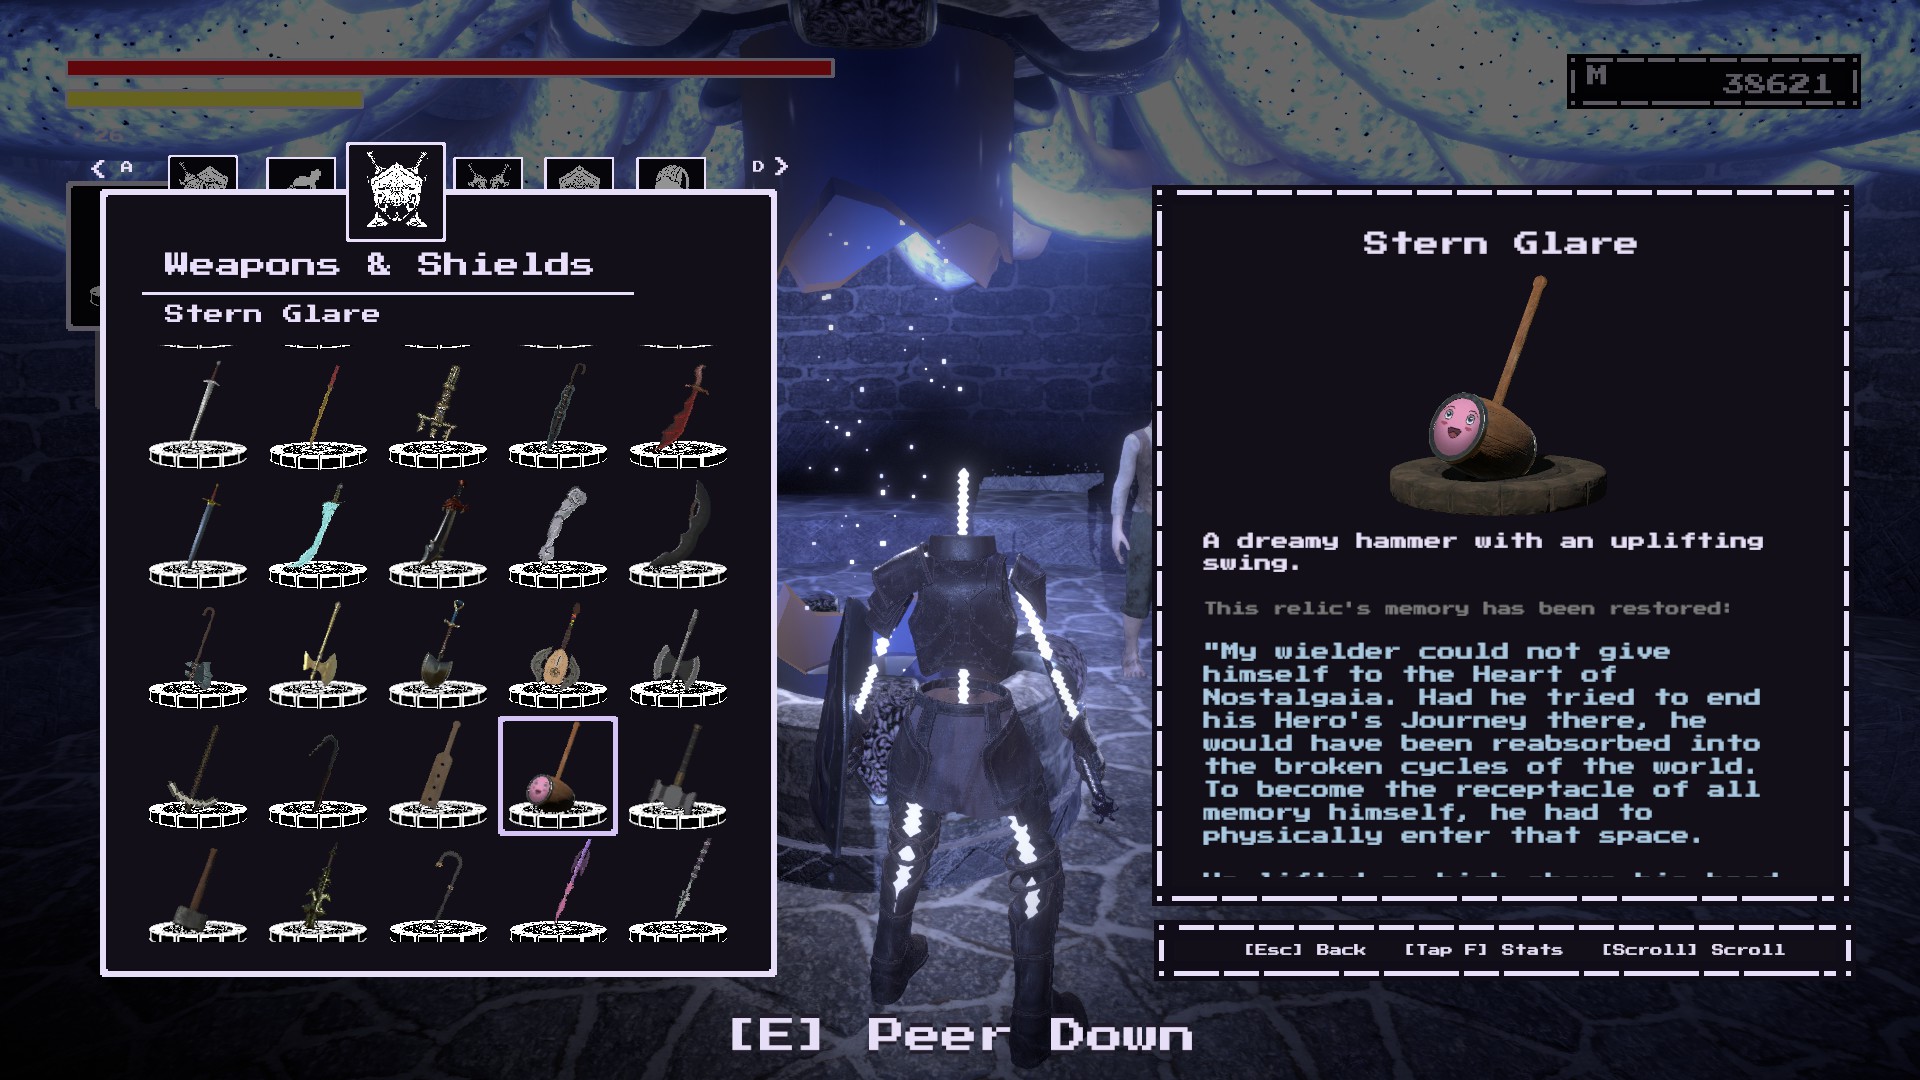
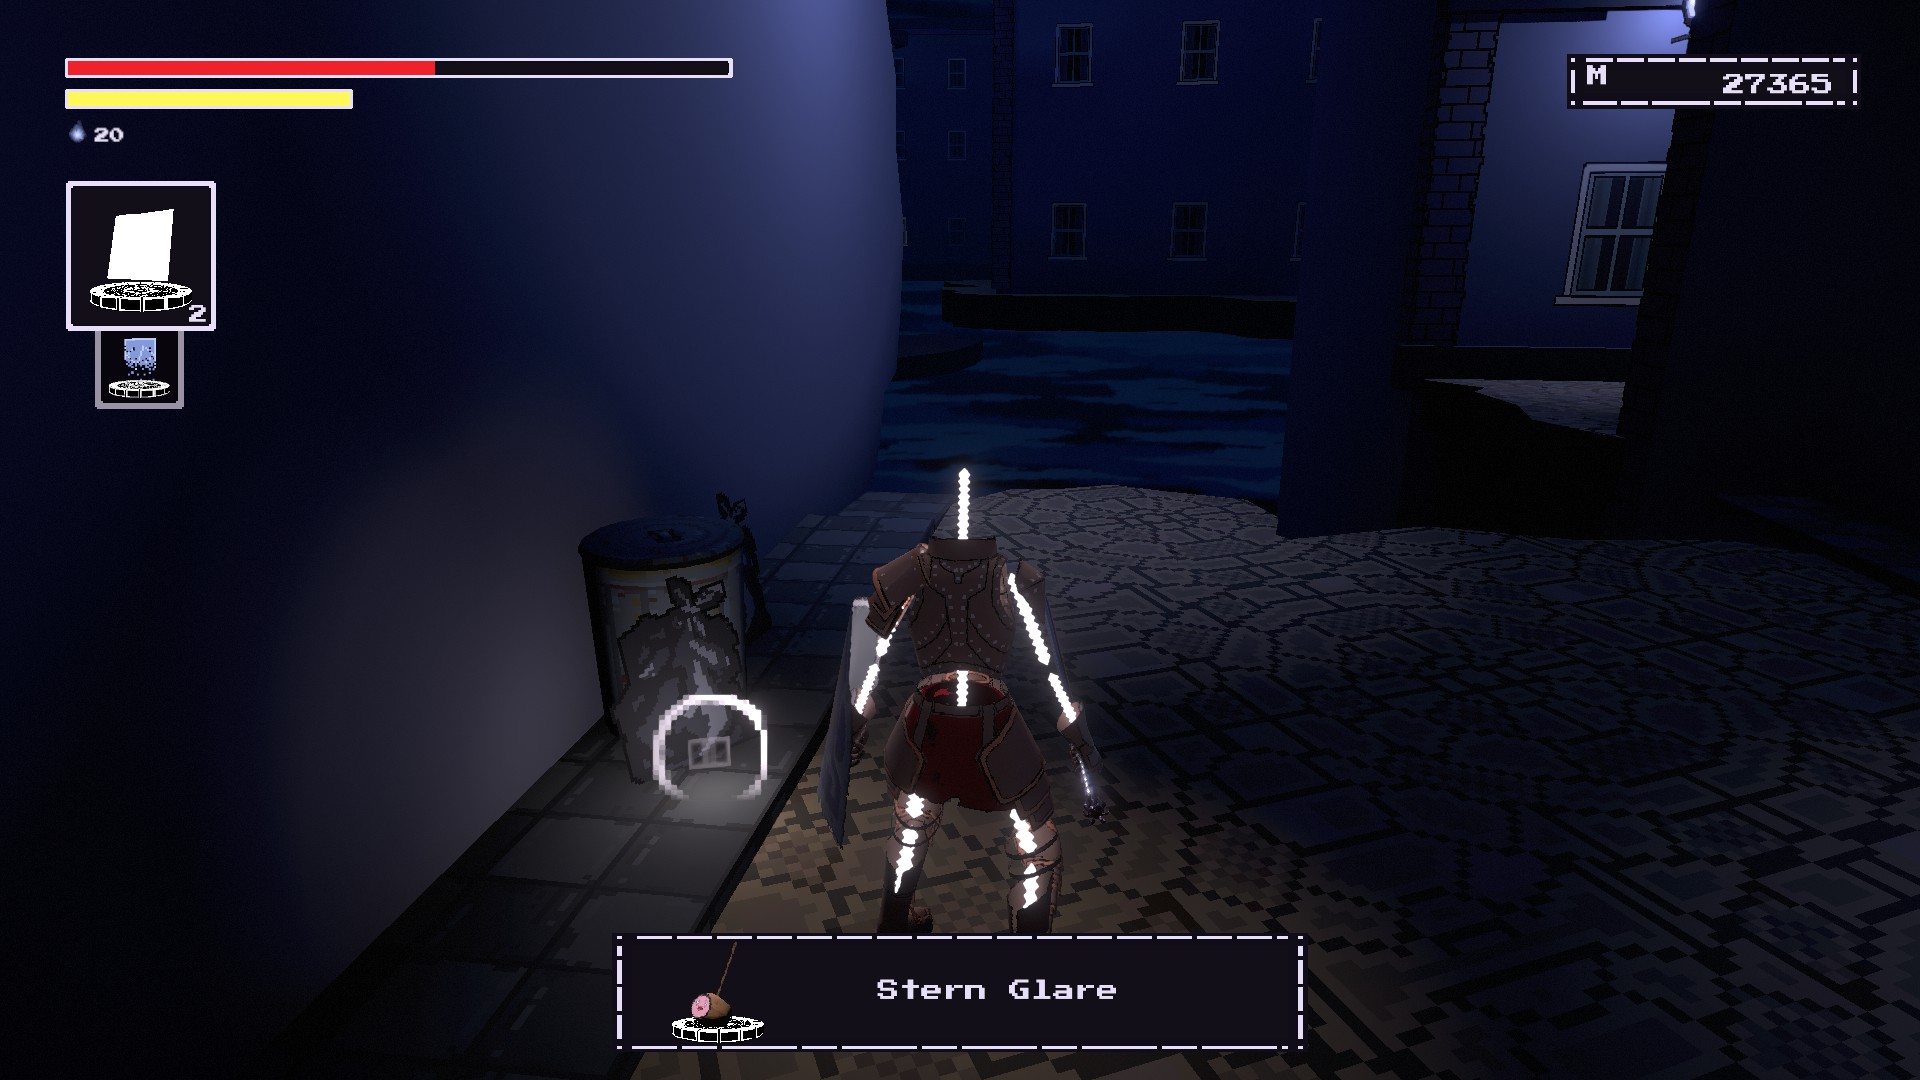
You will need to have restored the Edge of Entropy. Head back to the Heartflow Altar. Remember it near the Heart of Nostalgaia.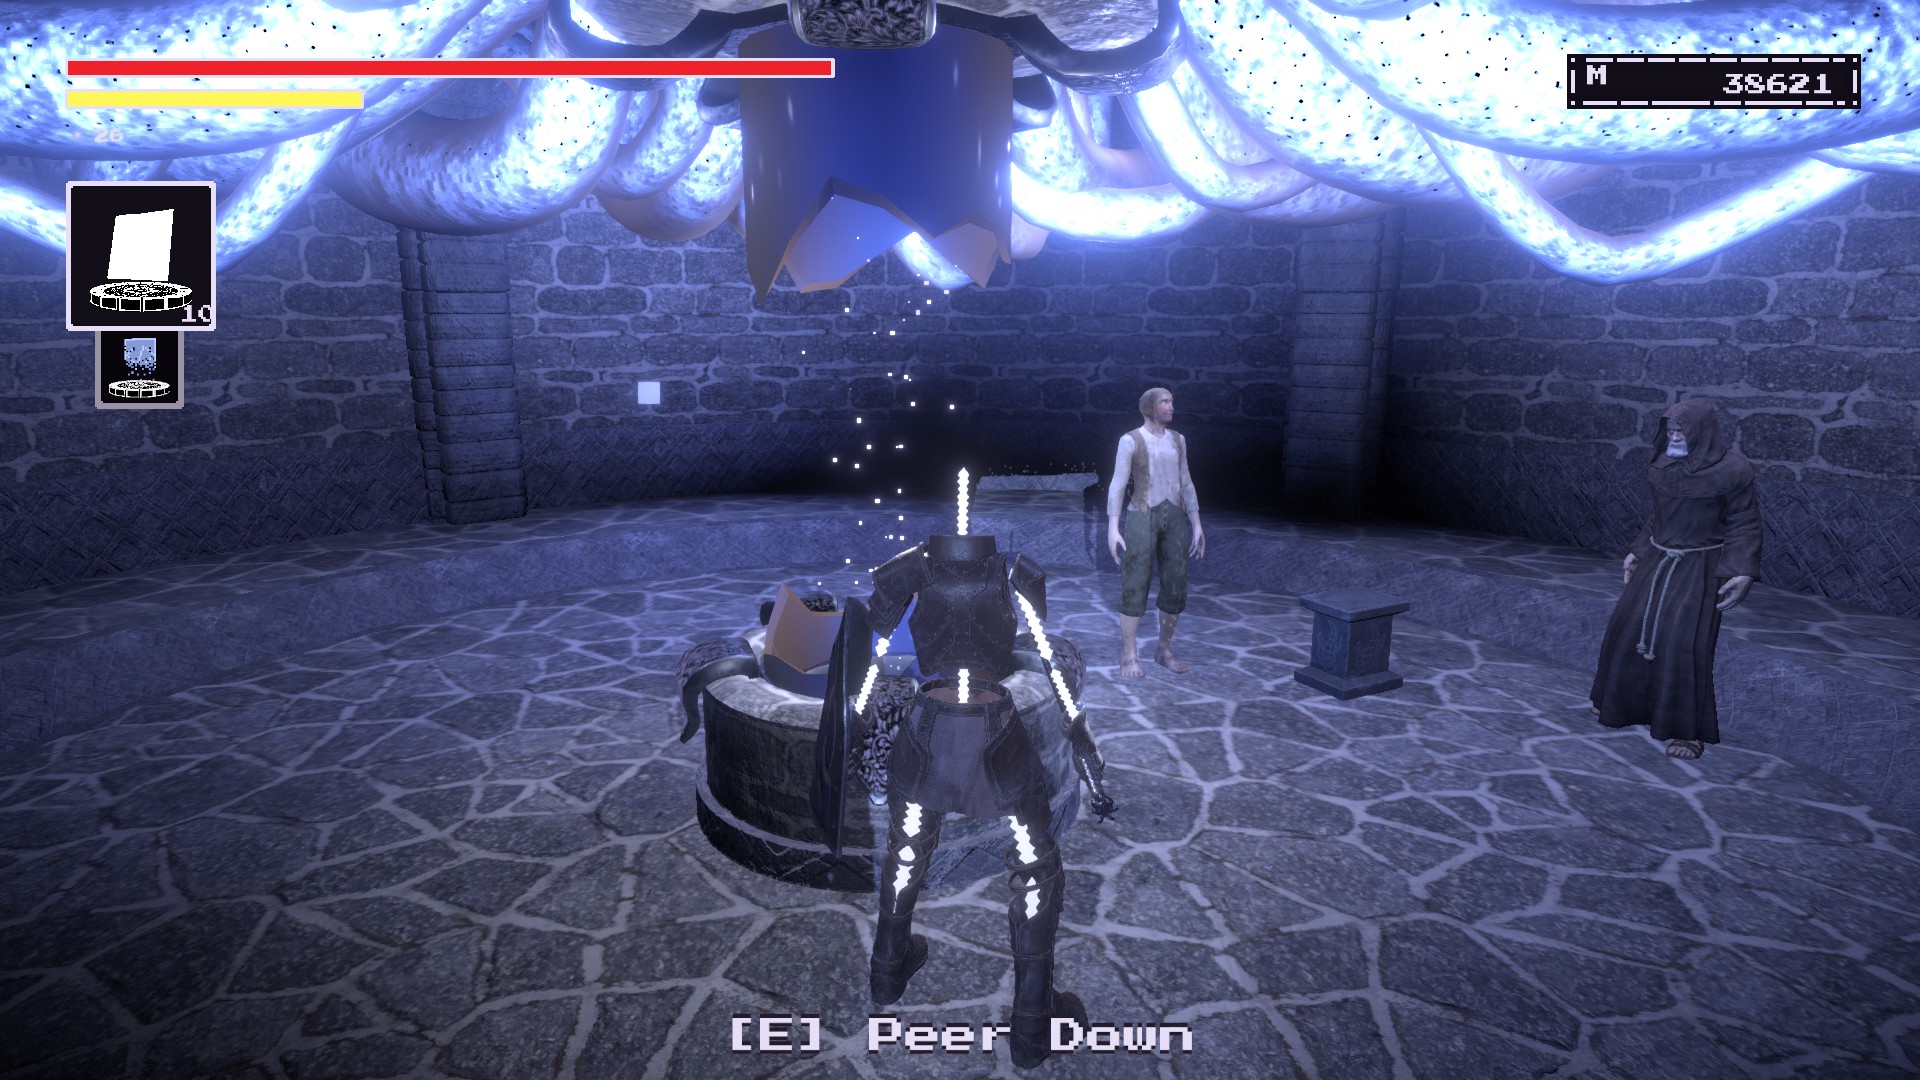
나쁜 꿈
MYSTERY #4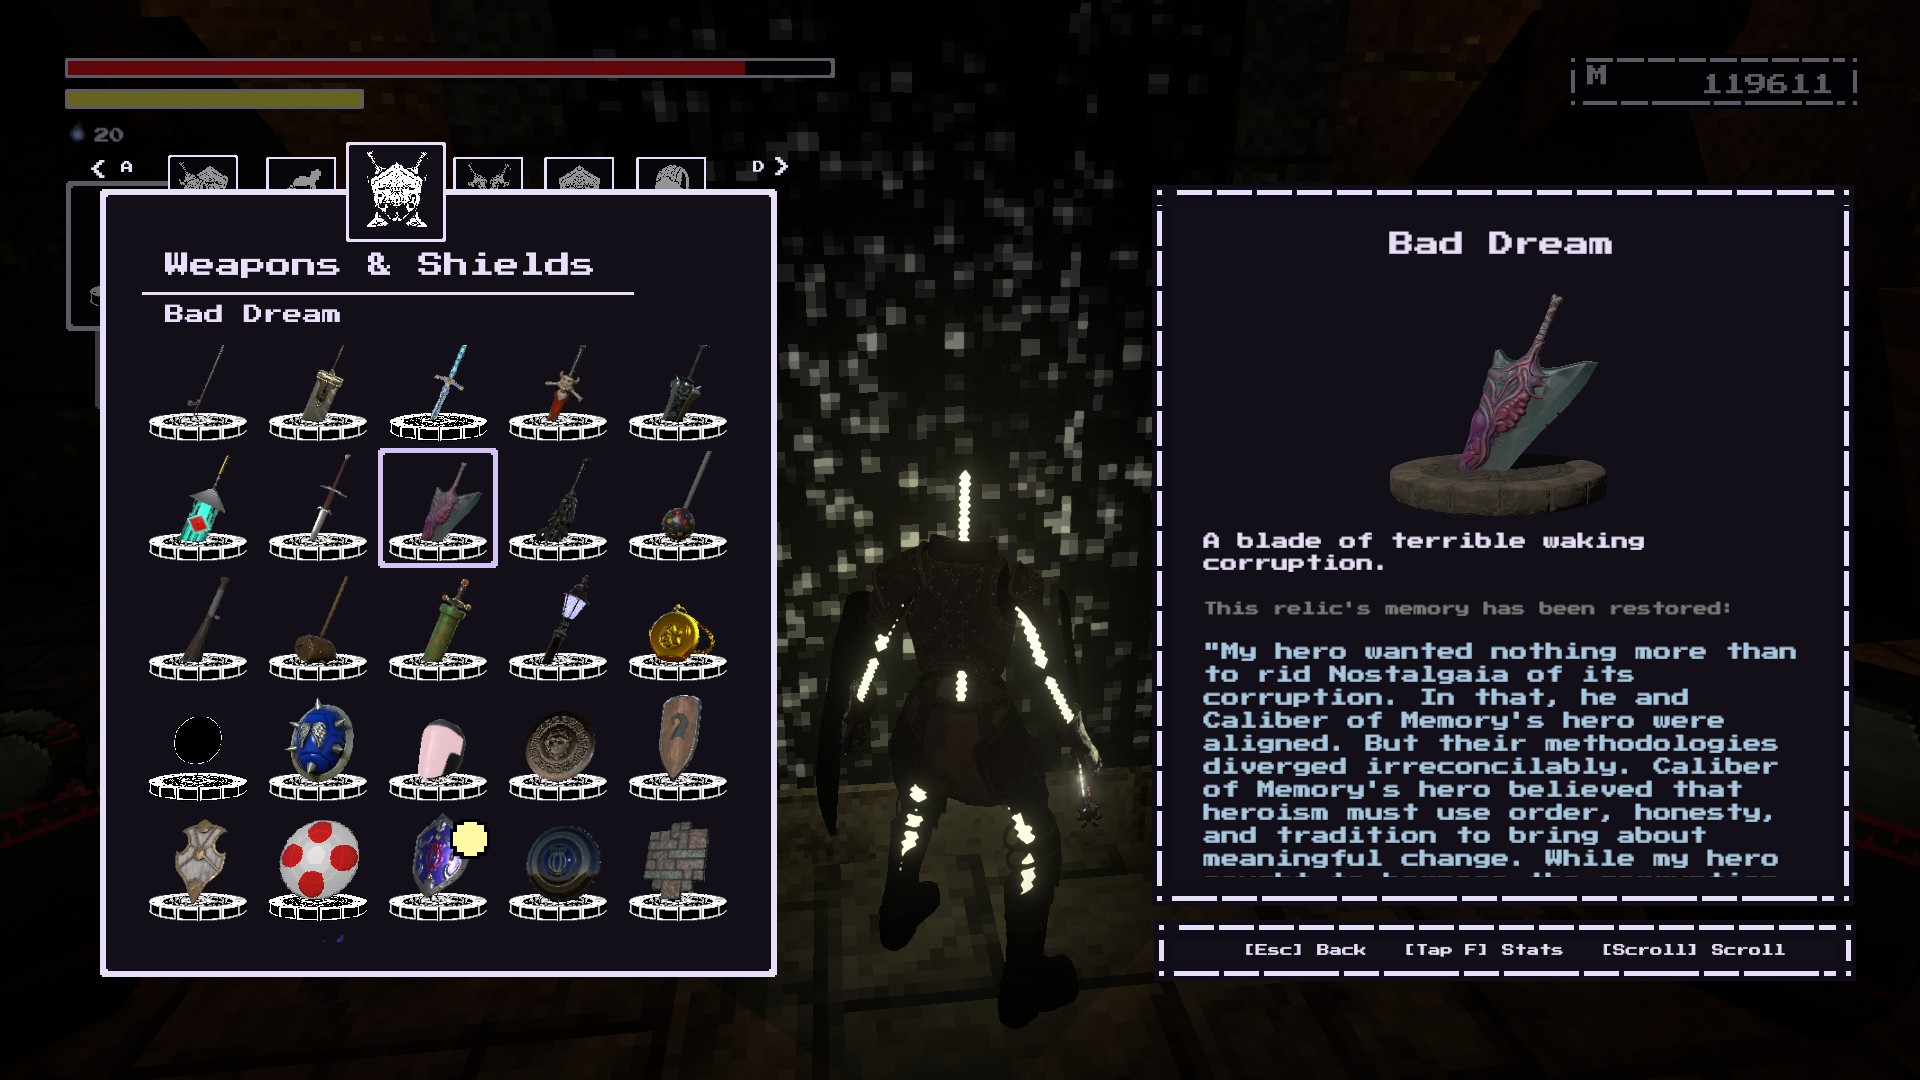
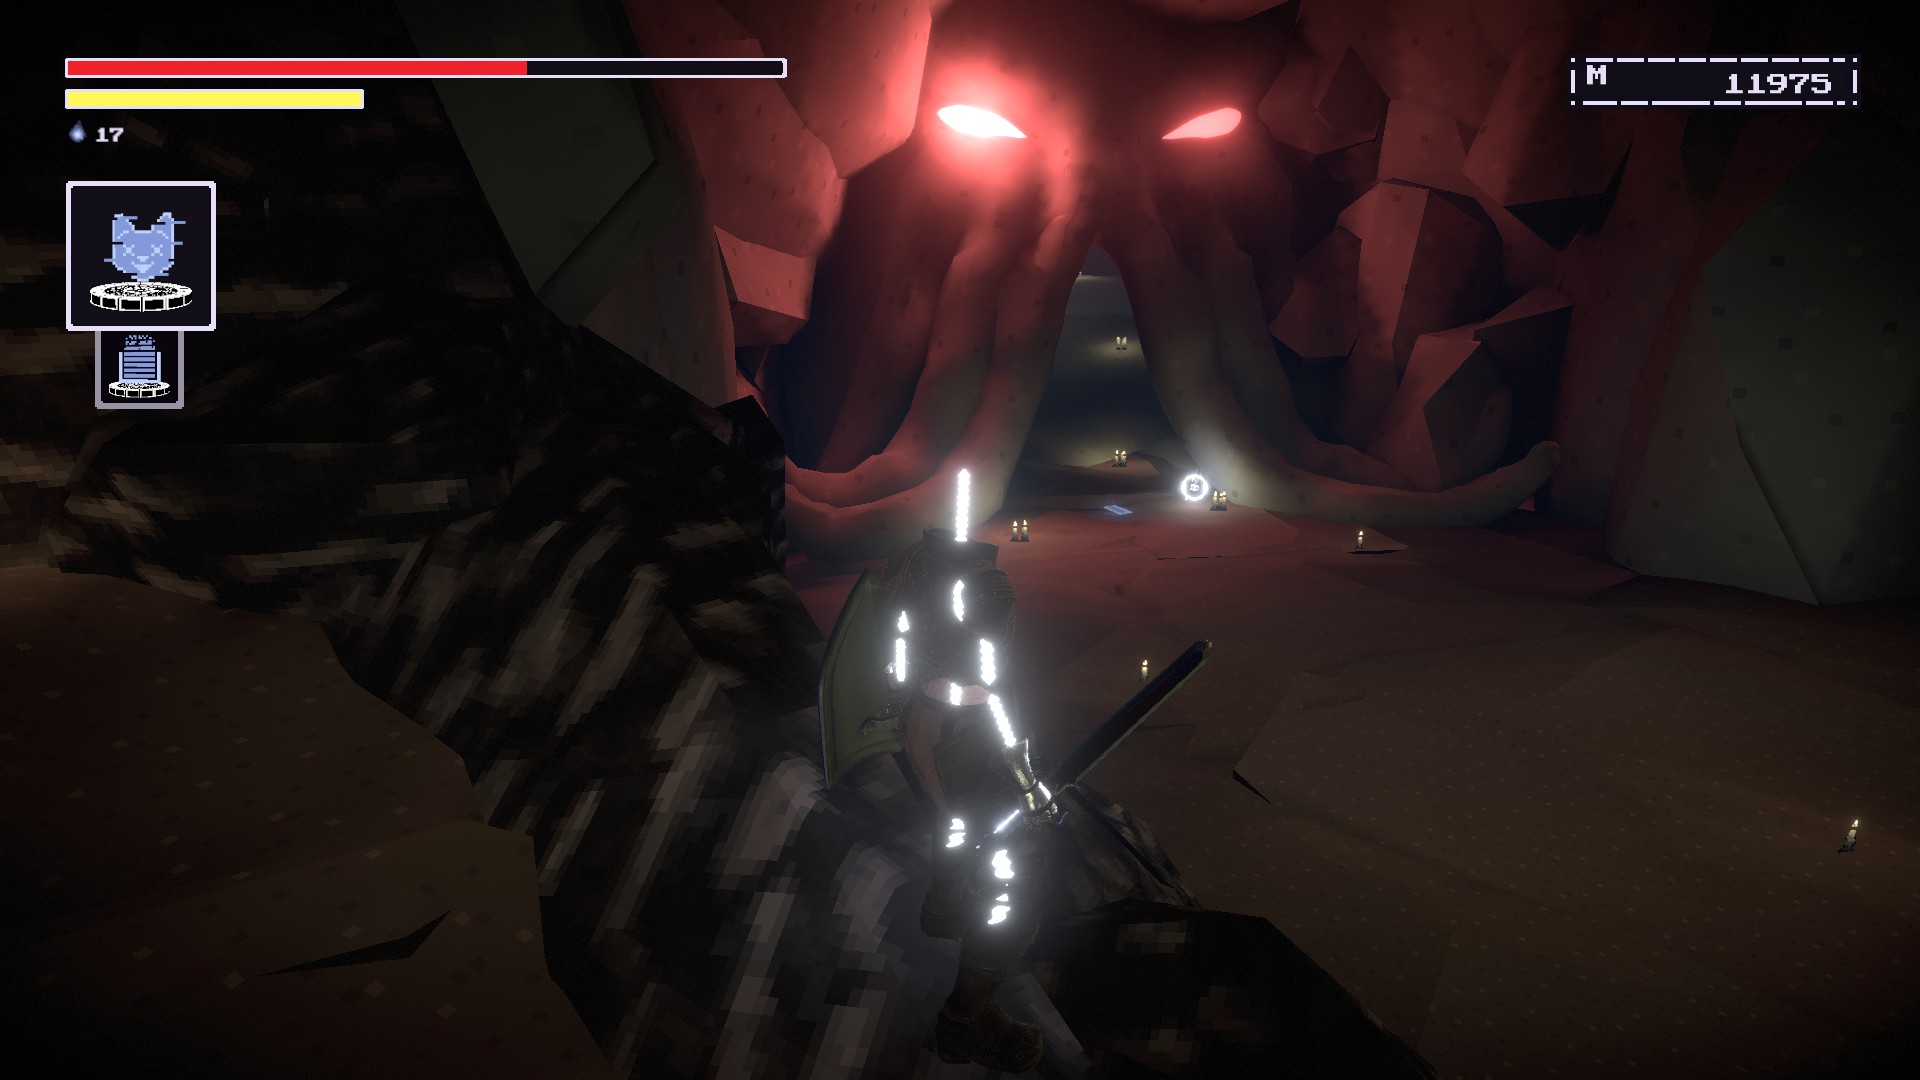
에서 Unbreachable Maw. Proceed through the area until you’re out of the darts section.
You’ll be in a room with slamming tentacles and Cultists with poisonous gases on the ground. Proceed until you reach this spot in the picture.
You should see that glimmering item just off to the side of the path.
Continue on the path and
you should be able to drop down onto the ledge on the left.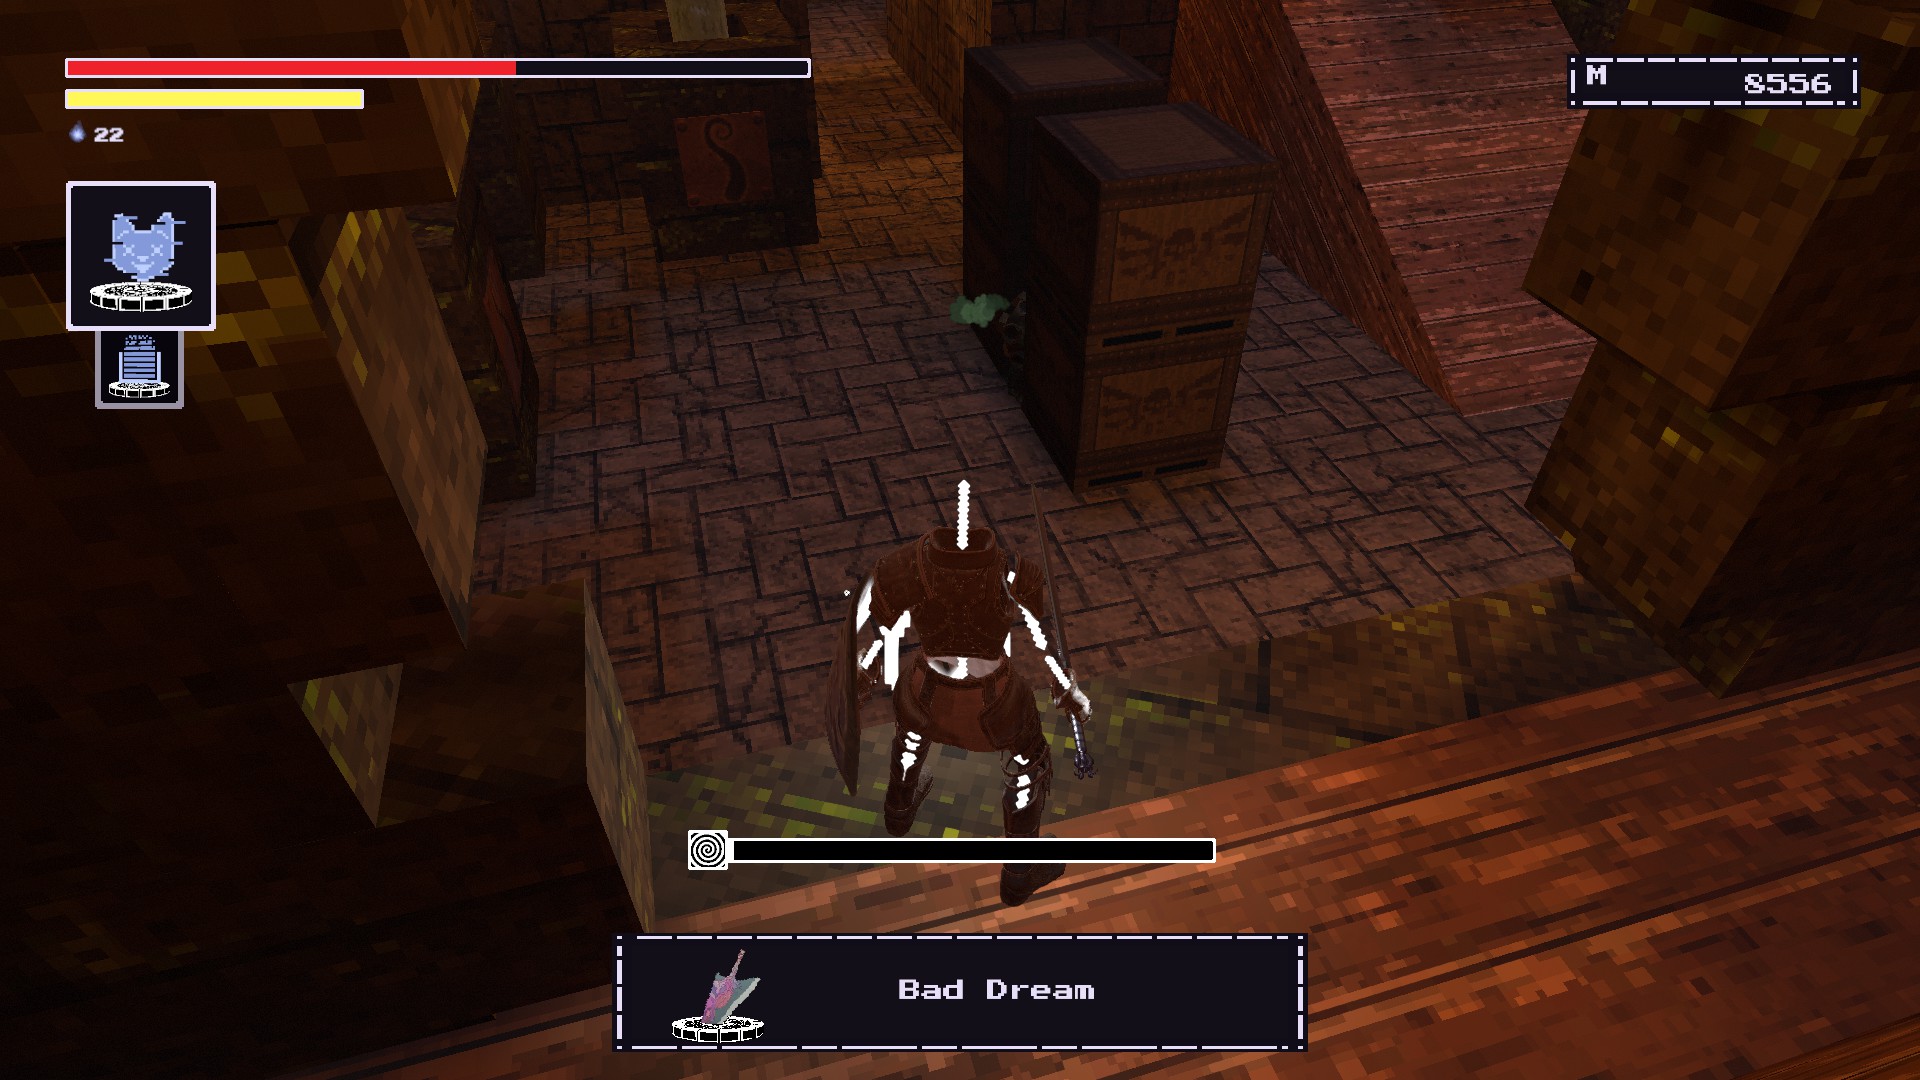
***첫 번째, you’ll need to restore the Caliber of Memory which is easy enough. The Bad Dream’s memory is in the Unbreachable Maw. 다시 돌아 간다 hazardous section with the darts. Stay on the right and proceed downwards where you’ll see this path.

Proceed through the path and keep going right. 결국, you’ll reach this ominous dark portal. (That you can’t actually go through.)
Remember the weapon right in front of this landmark.
Vincible Hammer
MYSTERIES #5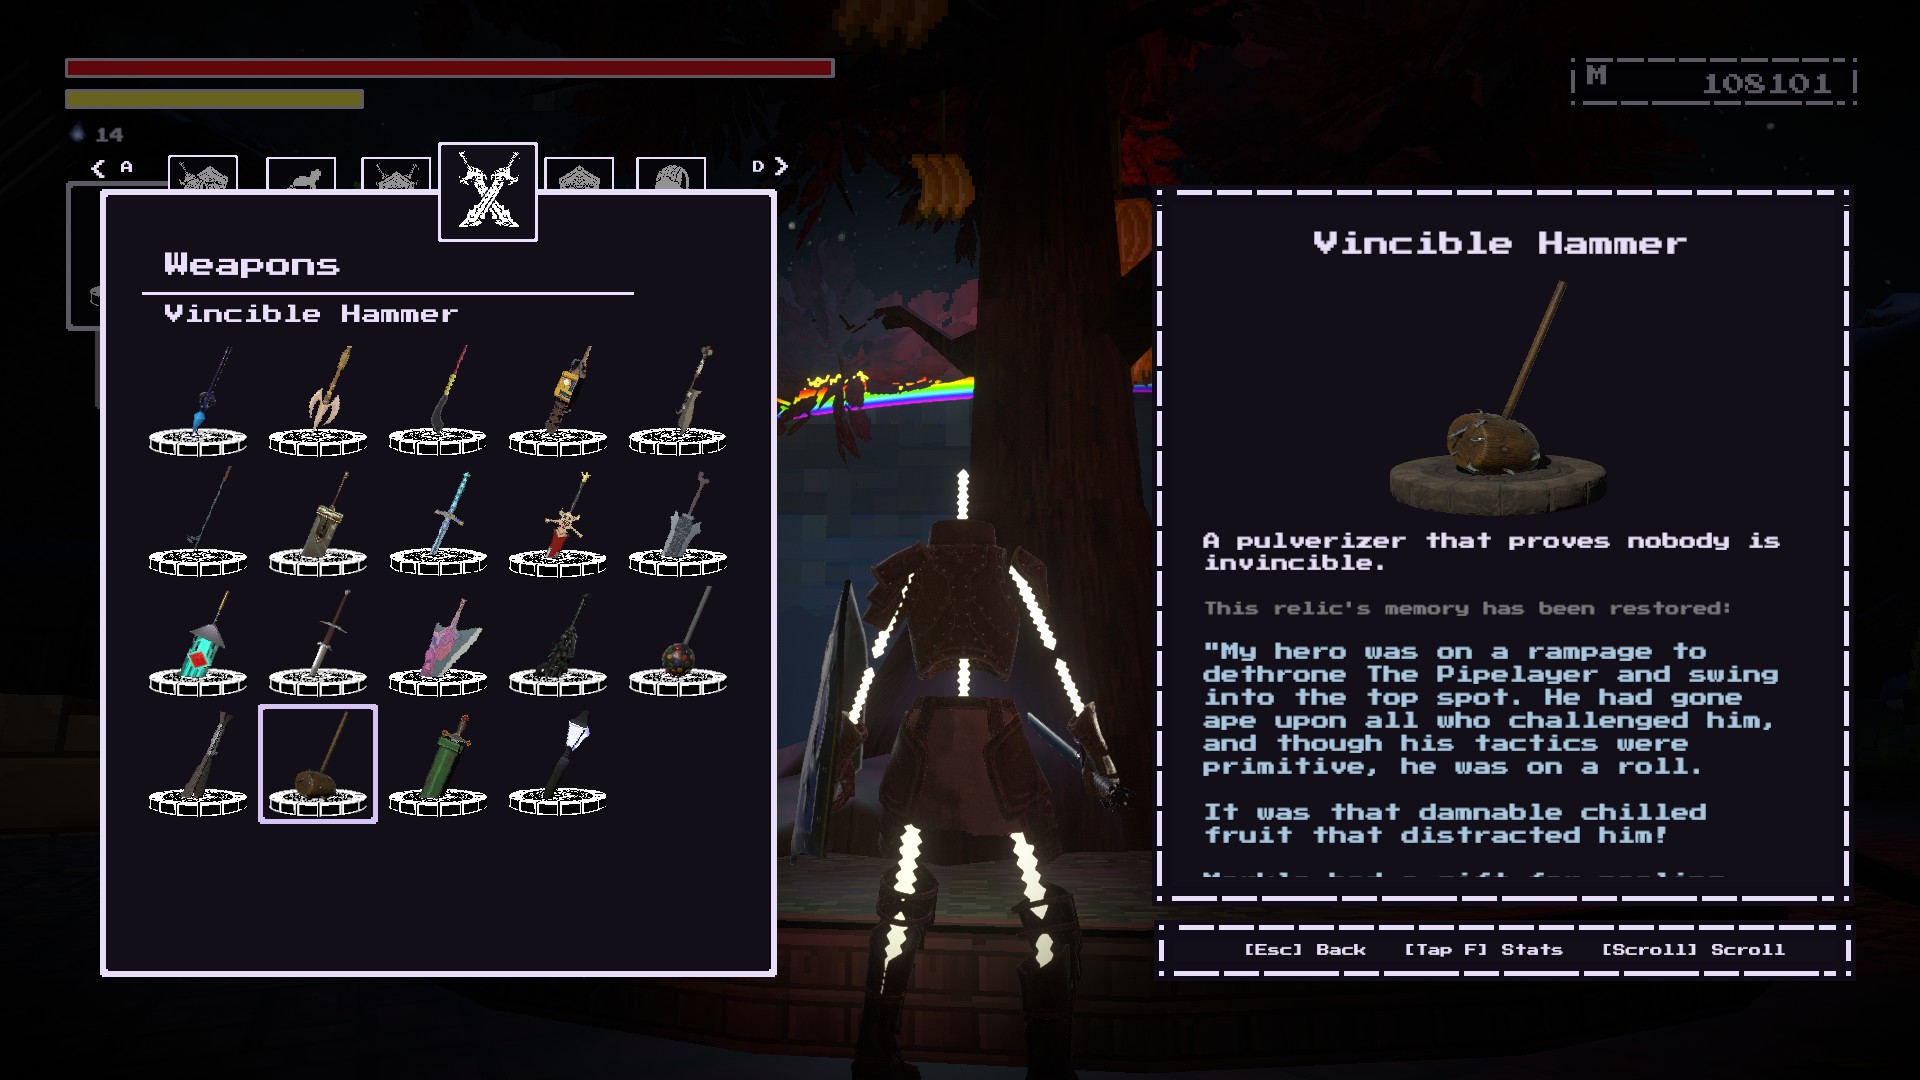
Obtained after killing Brendon Merkle ~에 NPC City.
첫 번째, you would need to restore the New Order’s Rule armor. The location to restore this weapon is in Festivity Row. Look for this Banana Tree and restore the weapon.
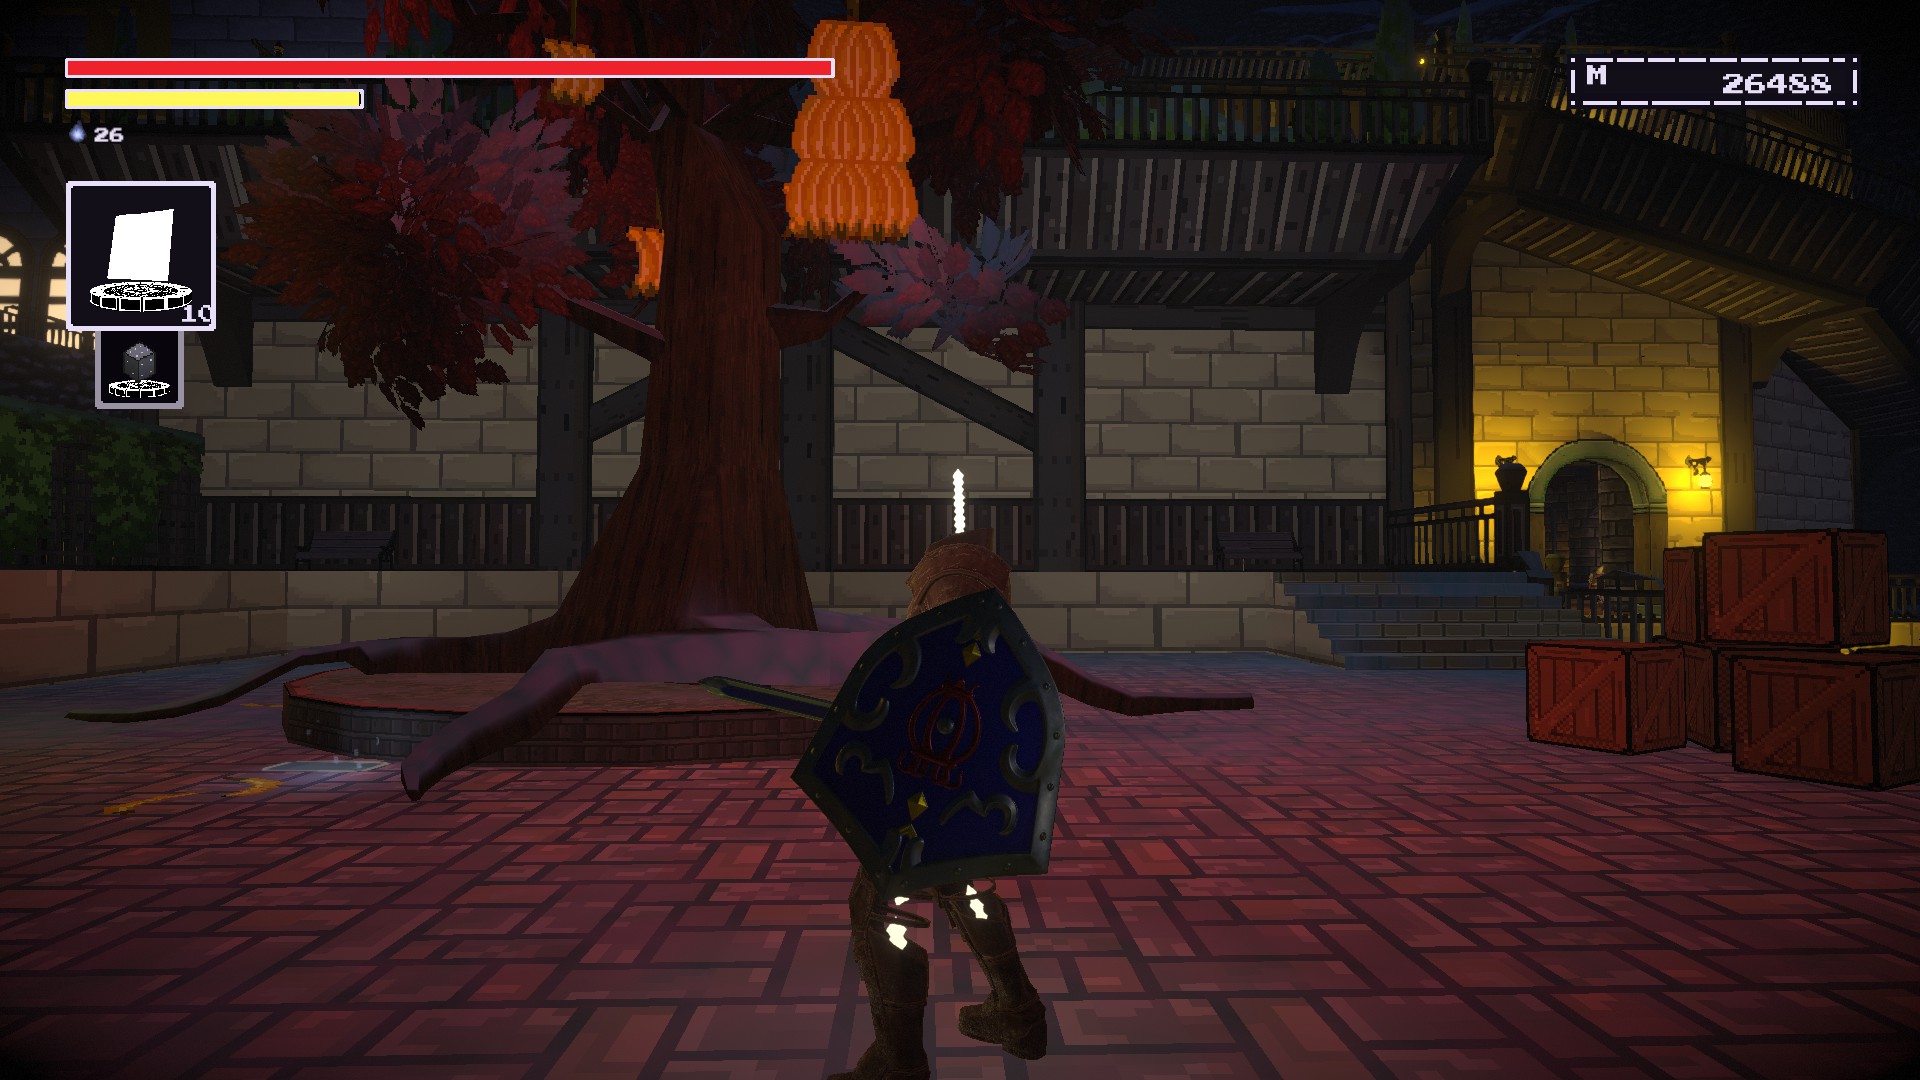
Servant’s Shield
MYSTERY #6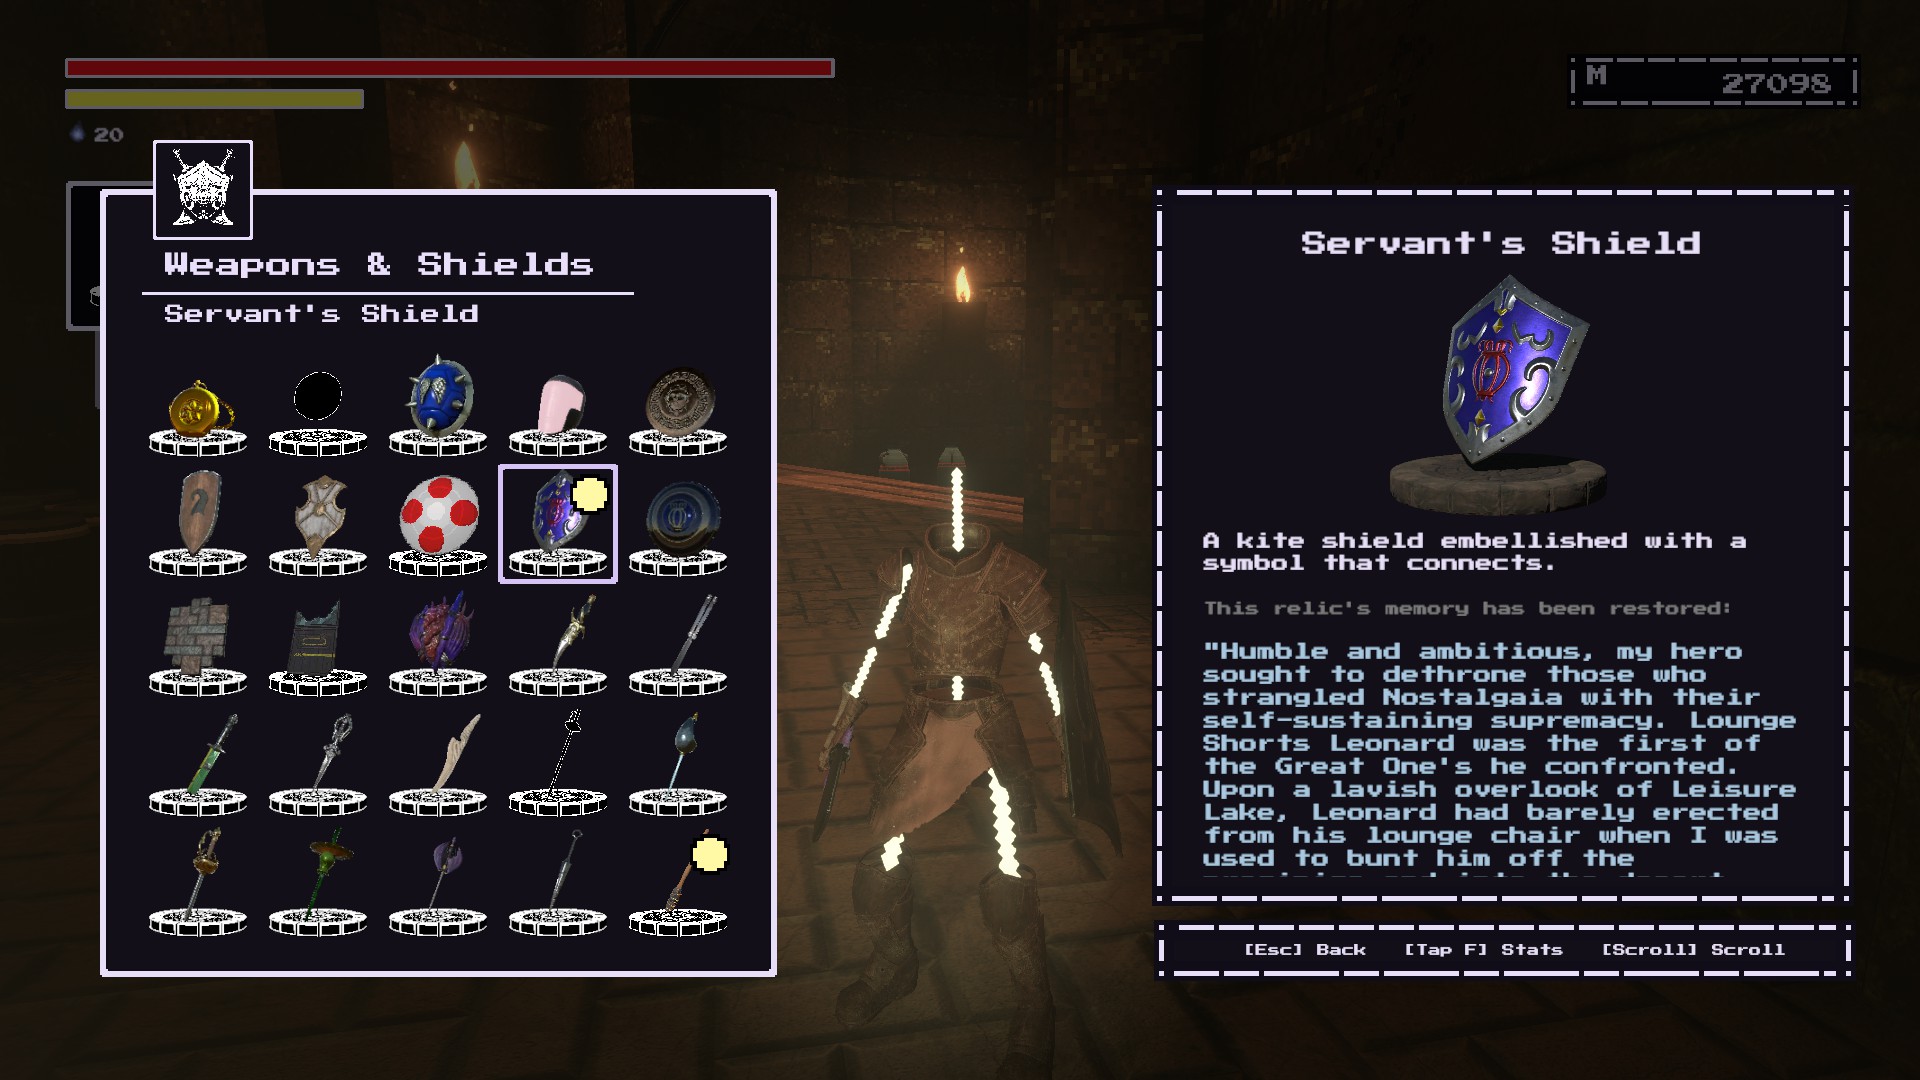
~ 안에 Warlock’s Wilds. 설립하다 near the Tower of the Second Crystal Rod to the bottom right. It should be right next to an opening curtained with vines.
(Look at where I put that small glittering coin)
첫 번째, you need to restore the Sword of Service. 이후, the memory location is found in Oreshaft Village.
Traverse through the snowy pathway that’s near the Merchant.
You should see piles of dead NPCs near the edge of the cliff.
Restore the shield here.
Amnesiac’s Hope
MYSTERY #7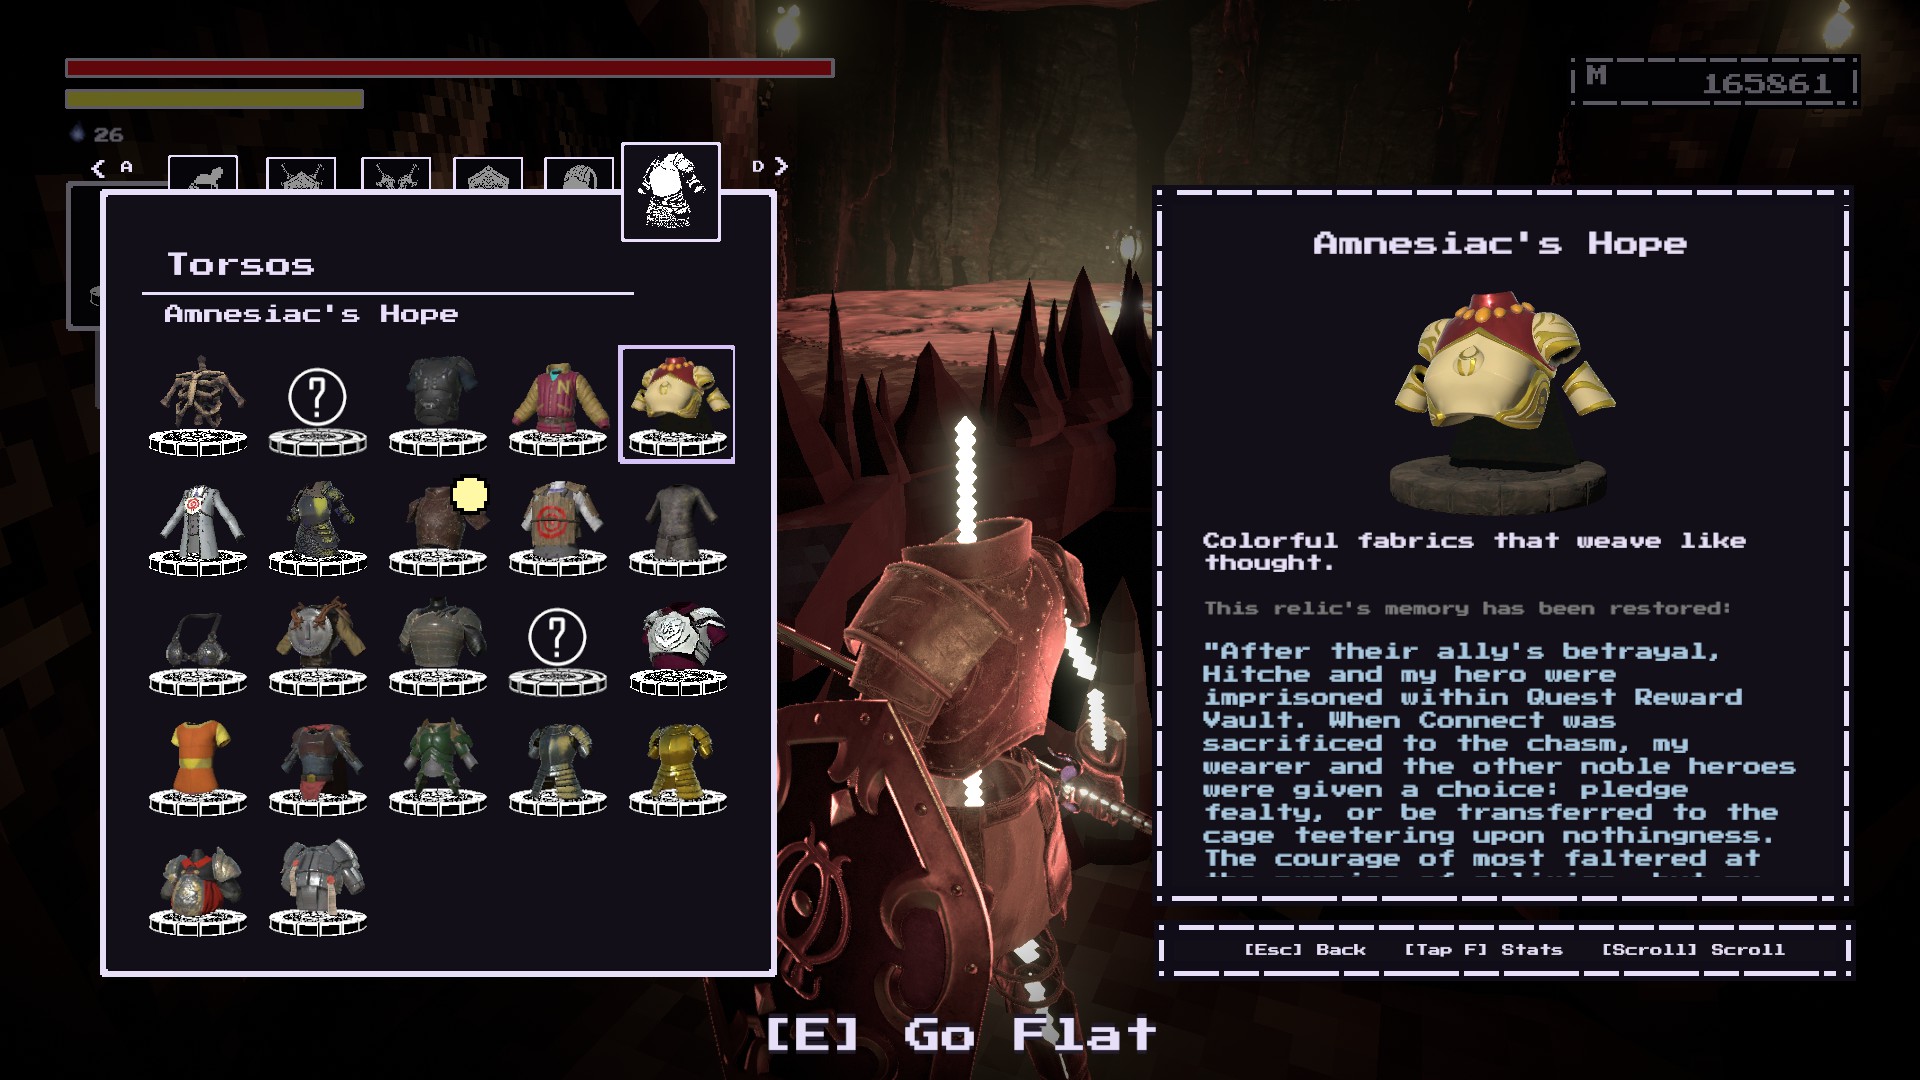
~에 Quest Reward Vault. Within one of the cells, you’ll need to pull the lever. (It should be the same room where Blade the Bold is imprisoned.)
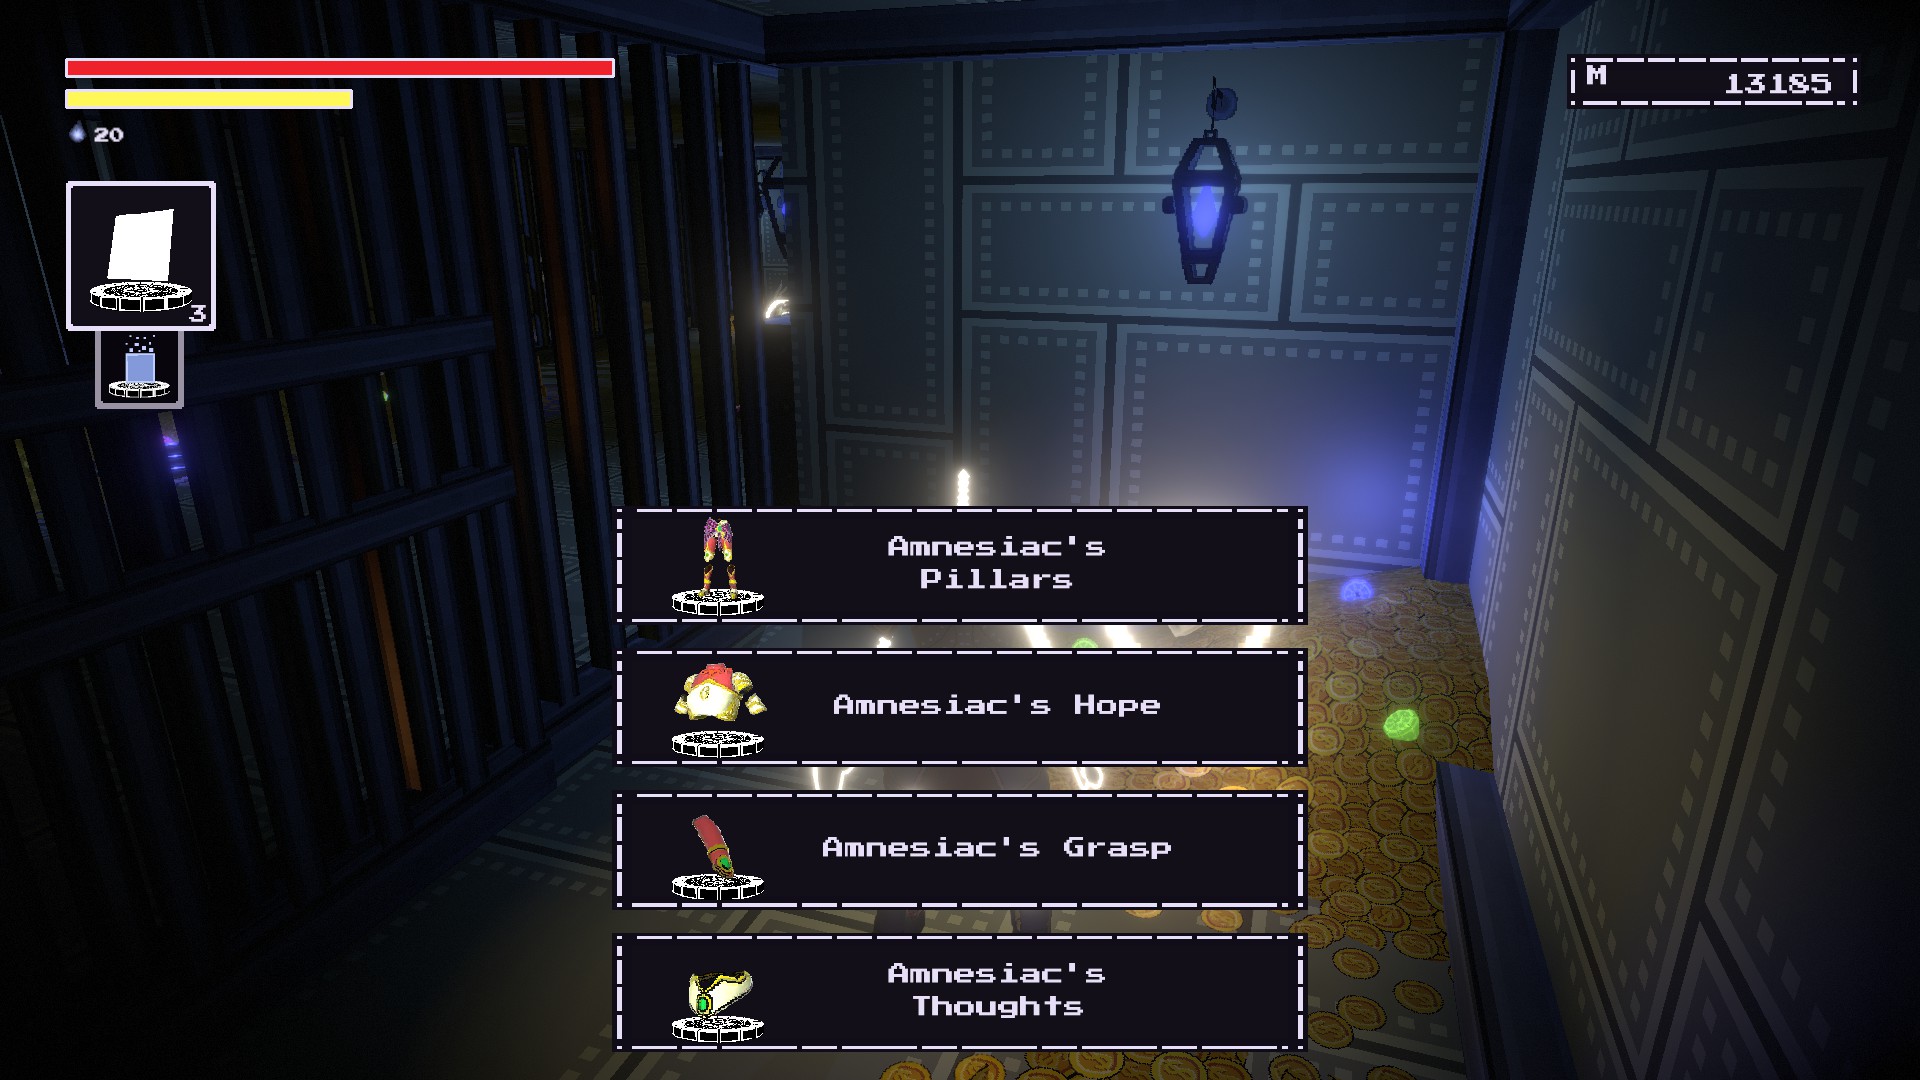
You’ll need to have restored the Cipher first. At the Lair of the Adversary. Specifically at the Chasm Beacon room.
(This is the beacon that is right before the Mercutio fight)
You should be able to restore the armor in this room.
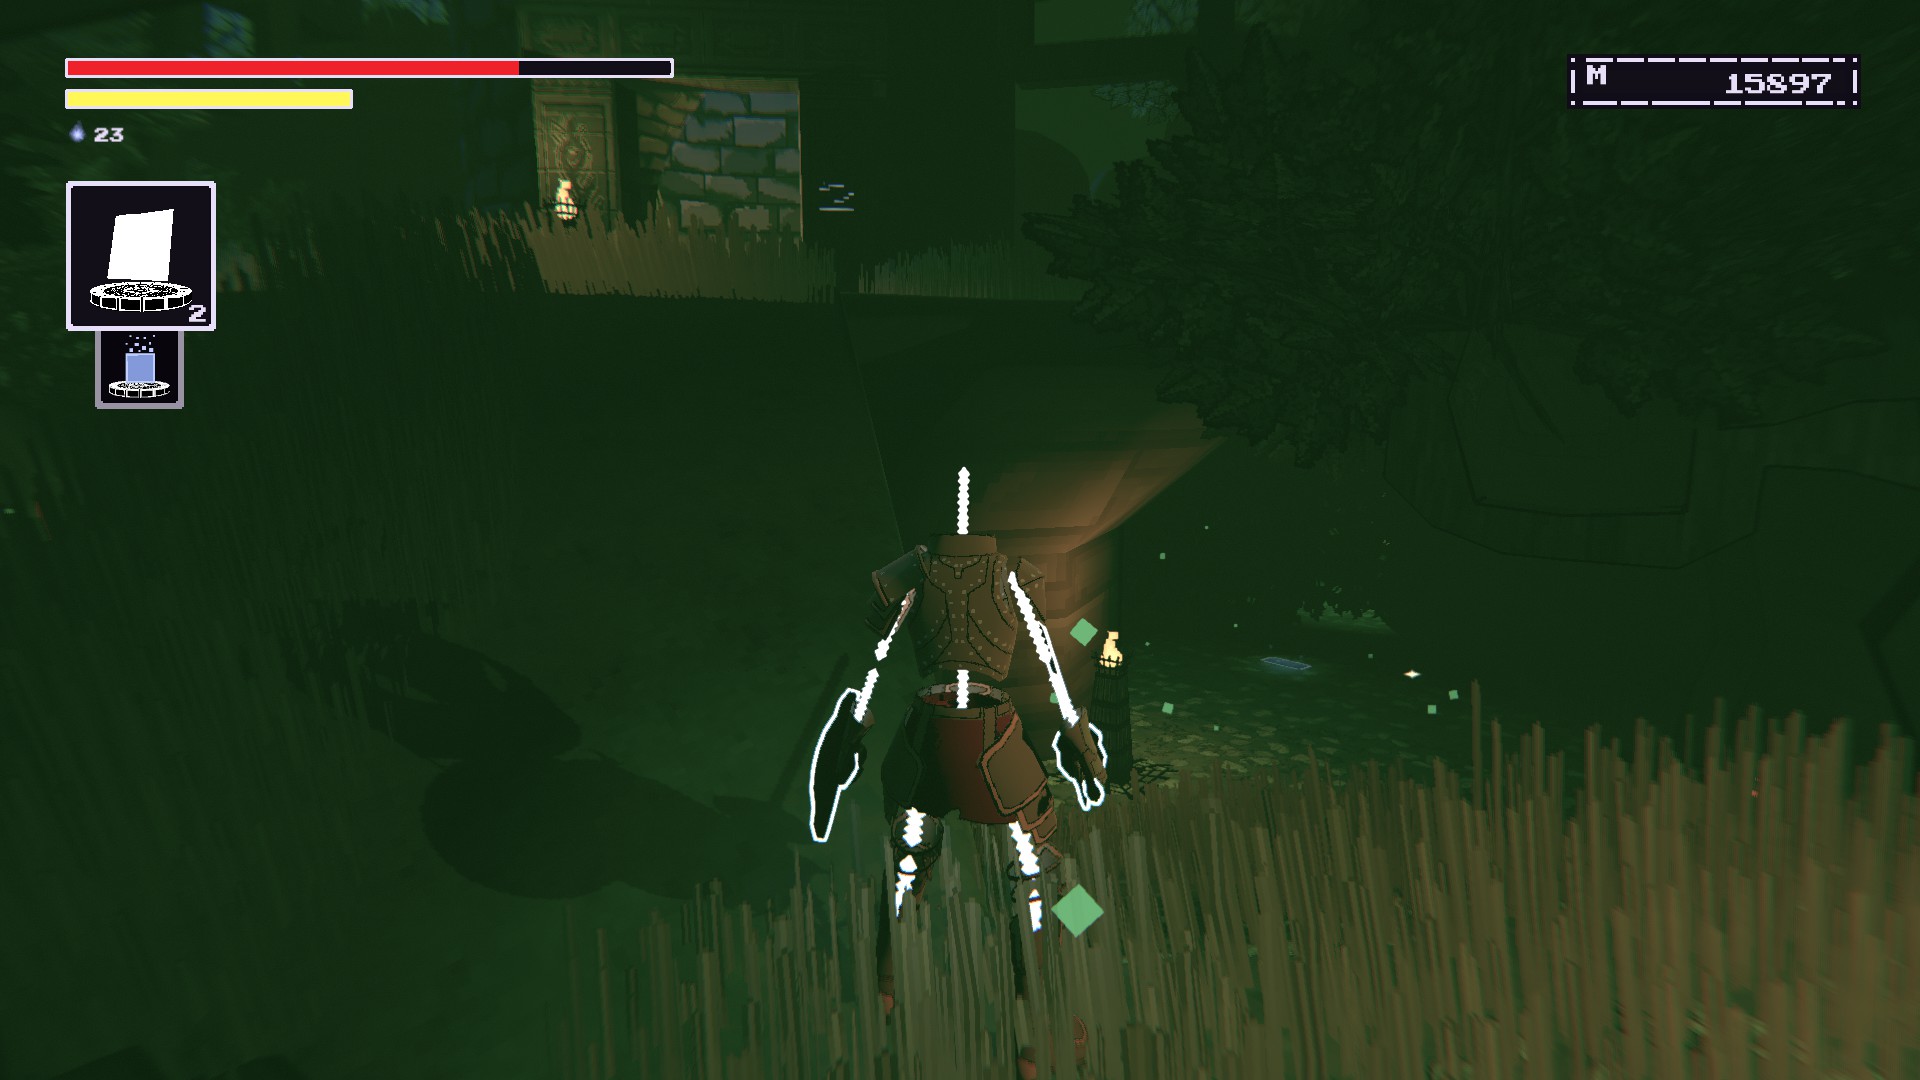
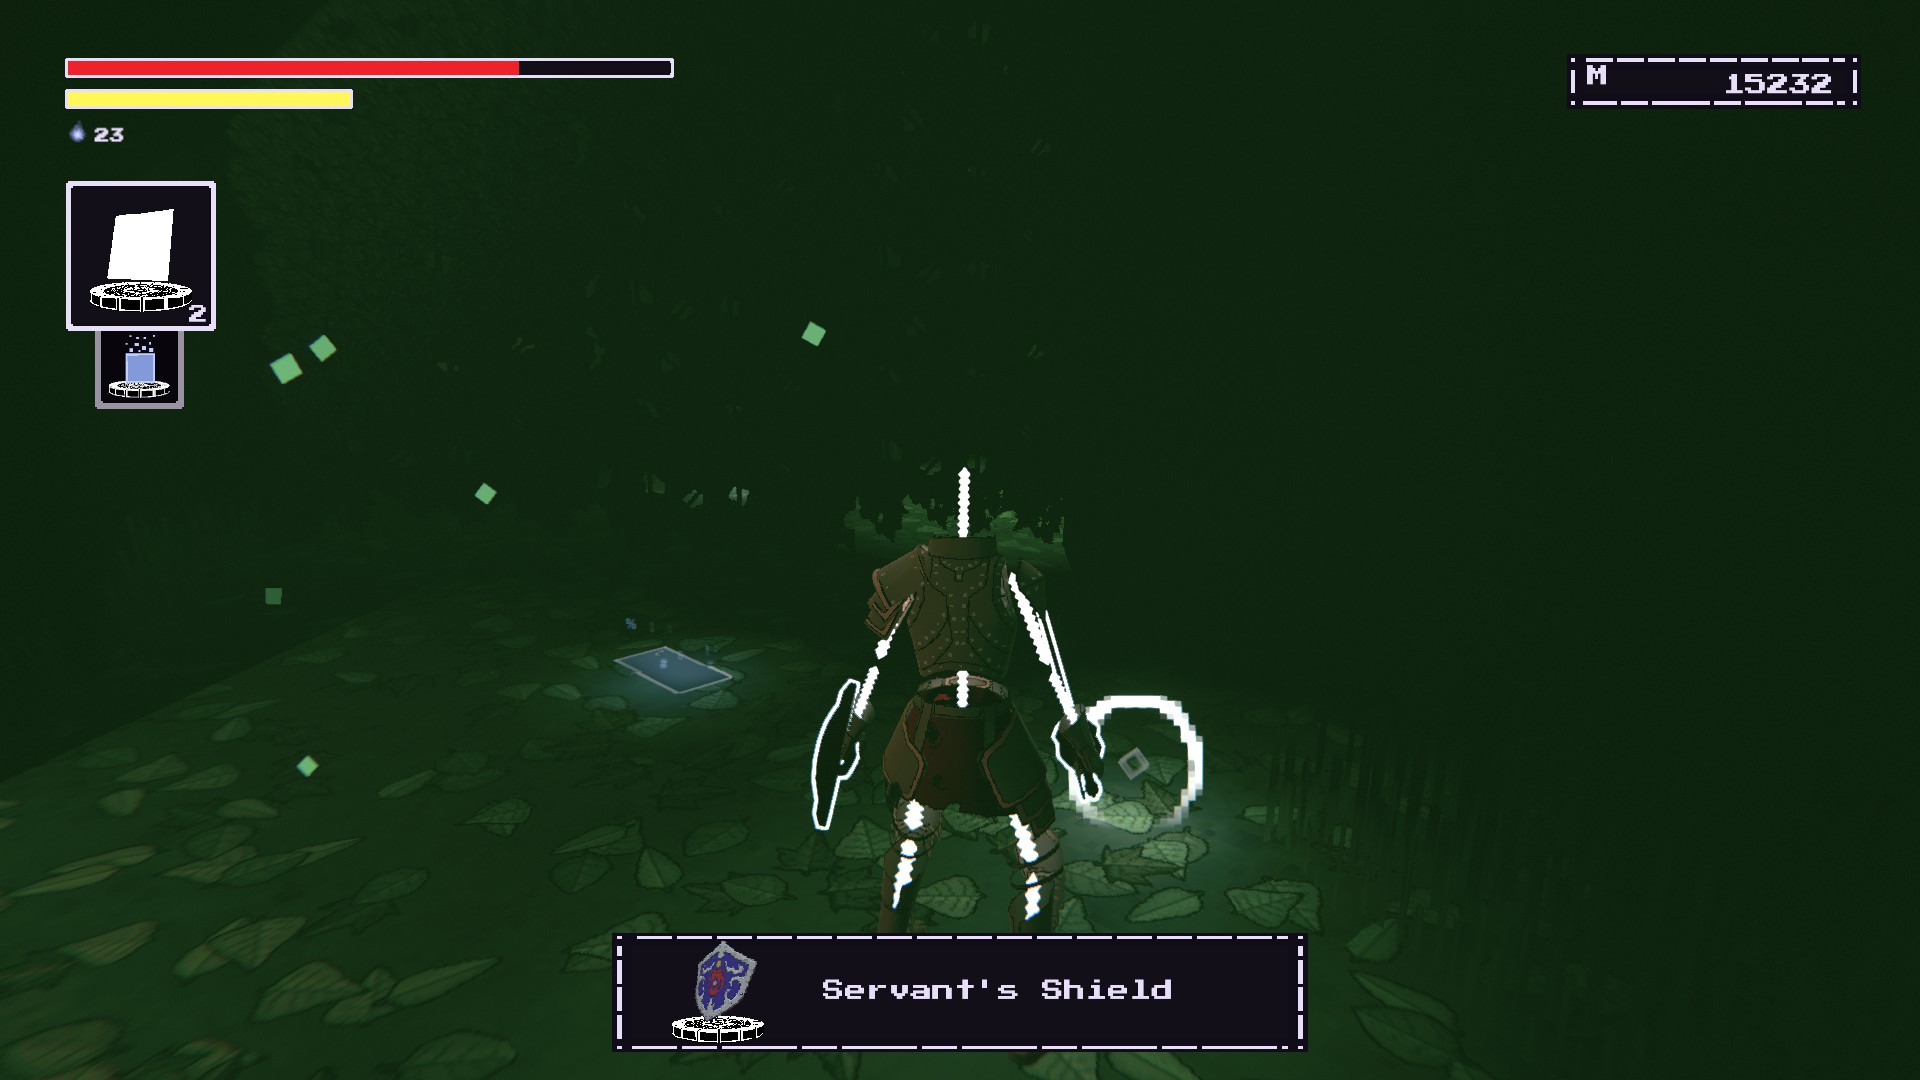
Leonard’s Lounge Shorts
MYSTERY #8
~에 the Depths. Start at the Depths- Staging Room Beacon. Go out into this area.

Head to the left and you should notice this broken bridge.
Go down to that bridge and claim your shorts.
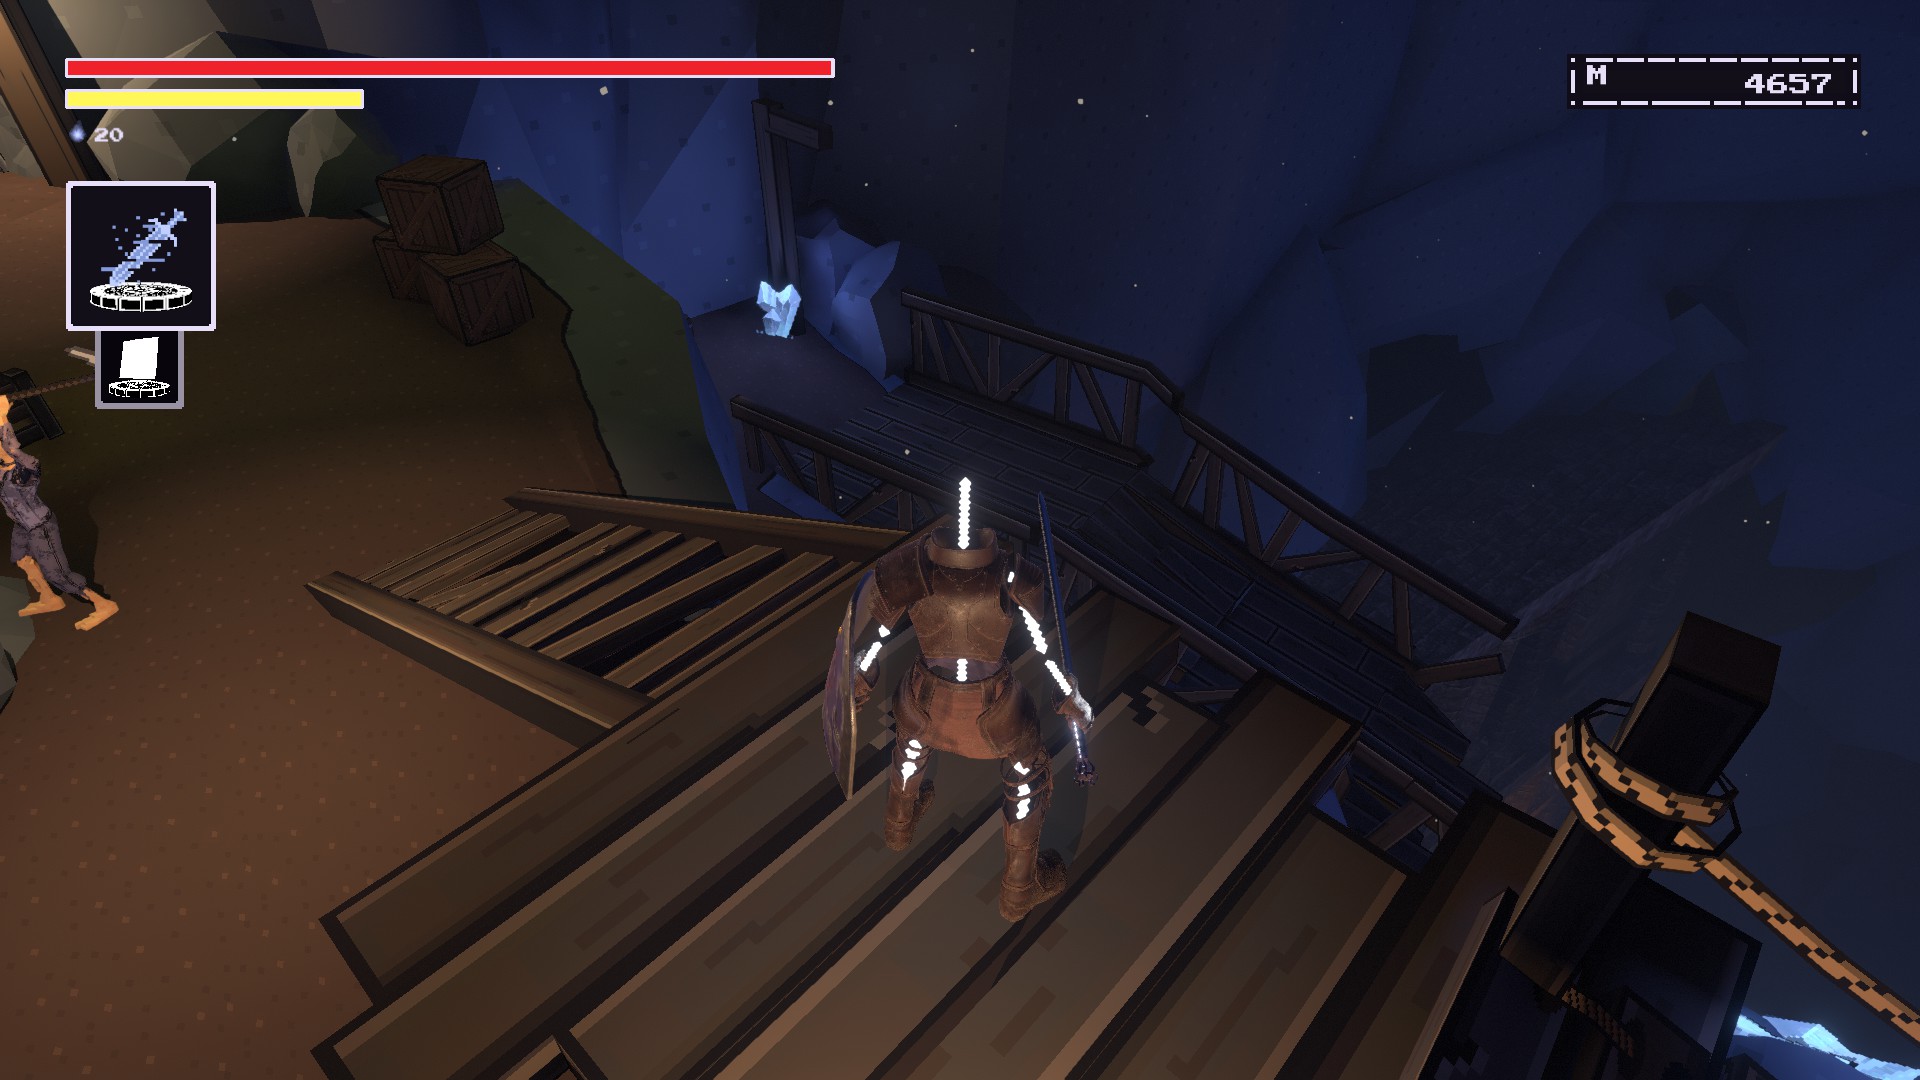
You would first need to restore the Servant’s Shield. ~에 Fesitivity Row. Before reaching the entrance to the Spire, there will be a 다리 이와 같이.
You’ll need to have Flat Traversal to get to the spot.
Once you make it, you’ll be able to restore the glorious shorts.
이것이 오늘 우리가 공유하는 모든 것입니다. 노스탤가이아의 마지막 영웅 가이드. 이 가이드는 원래 작성자가 작성하고 작성했습니다. AZRA3L 영원한. 이 가이드를 업데이트하지 못한 경우, 다음을 수행하여 최신 업데이트를 찾을 수 있습니다. 링크.