
- 제목: Tabletop Simulator
- 출시일:
- 개발자:
- 발행자:
Information about Tabletop Simulator is still incomplete. 이것을 사용하여 게임의 세부 정보를 입력할 수 있도록 도와주세요. 문의 양식.
Tabletop Simulator doesn’t have an elegant solution for a deck of cards that aren’t in a preset shape. This guide shows how to make your own card deck using custom models, an asset bundle, and some scripting so that you can make cards in whatever shape you want!
부인 성명
This guide requires slightly advanced knowledge of Tabletop Simulator, 단일성, creating asset bundles, and some light 3D modeling ability. It is not my intention to explain how to do those things. It also requires a little bit of LUA scripting, but there is a supplied example from the workshop that contains the commented version of the scripts, so modifying it for your needs should hopefully be easy. The intention of this guide is to show how to use those things to create a custom set of objects to mimic the behavior of a set of cards and a deck.
소개
Have you ever found yourself making a game with strange shaped cards, and when you go to make them you get some rectangular border around the edges of it? Unseemly. Maybe you imported some custom models only to find out that you can’t stack them neatly, shuffle them, and deal them out to your players. This guide aims to be the remedy for that. In it we will be creating an asset bundle that has the following features:
- Appear to be a stack of a custom model
- When the matching custom model is placed within it or removed, the stack will appear to gain or lose a copy of that model
- Only accept the matching custom model
- Only accept a maximum amount of the matching custom model
- All features of a bag (shuffle, 찾다, deal, 등.)
Essentially we are making a bag that looks like it is a normal deck of TTS cards.
단계 1: The Custom Model
Create a 3D model of your card in Blender. Do it however you wish. I generally create a custom card by importing an image of the card as a plane, creating a new vert, and then extruding it to draw the outline. Then I fill it to create a plane, and then extrude that plane to give it some thickness. There are other ways of doing it too. Then you UV unwrap the model and texture it. 다시, 거기’s more than one way to skin a cat here. You can either create one texture per card, or you can make a single texture atlas for all of the card faces and make multiple versions of the model and move the UV position of the face on the atlas. I think either is fairly valid, but I prefer to do a different texture for each card and only use one model. DO NOT FORGET TO TRIANGULATE FACES.

일단 완료되면, export your model as a .obj
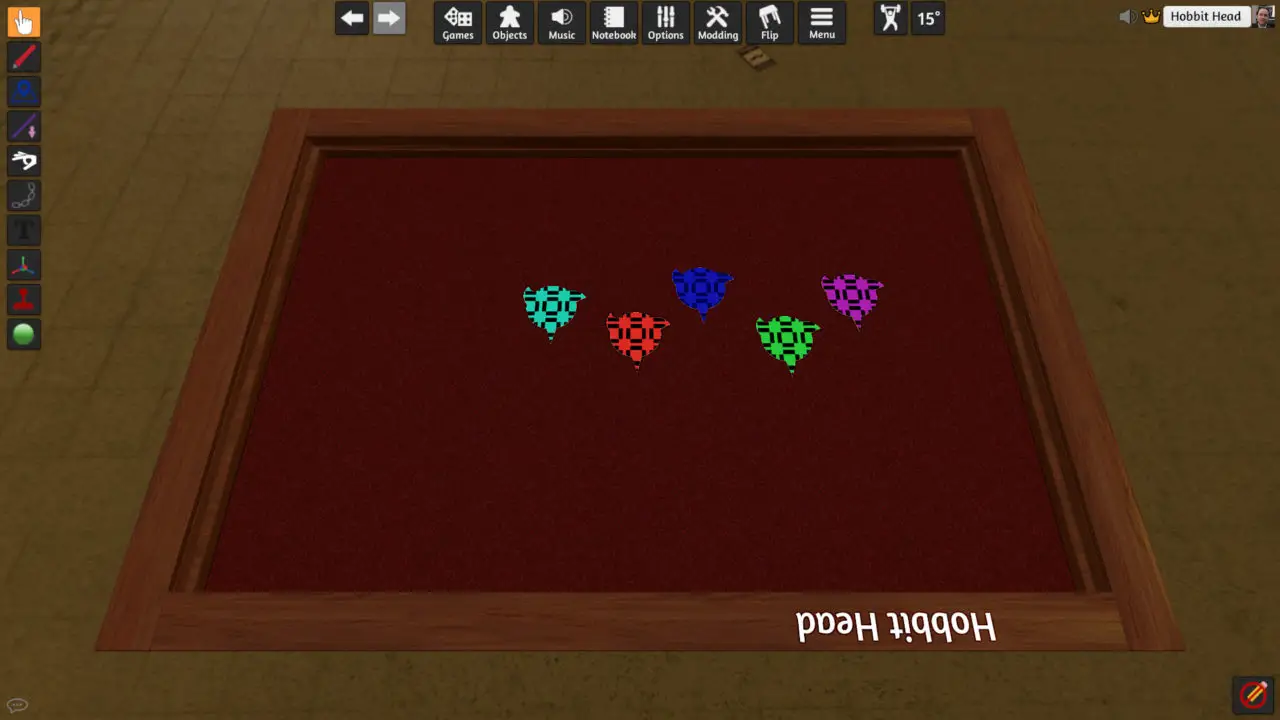
단계 2: Importing Your Cards
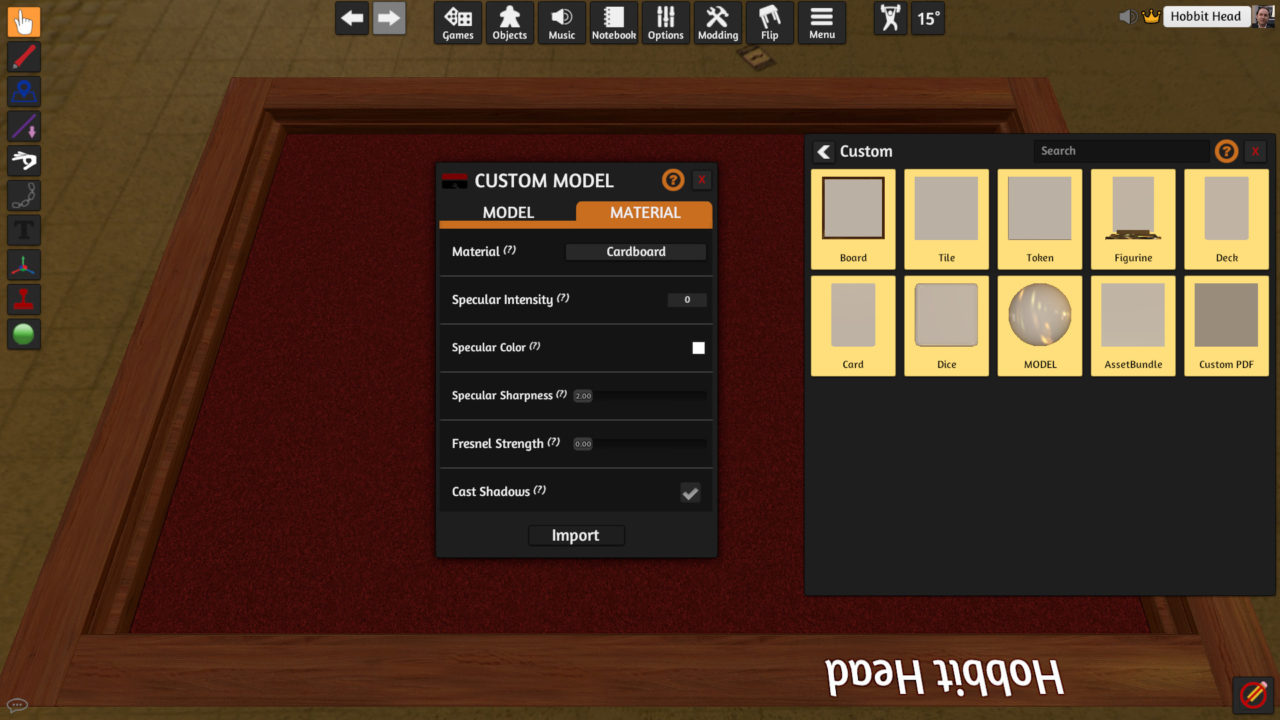
Import the model in TTS. Click on Objects, and then Components > Custom > Model. Select your obj in Model/Mesh, and your first texture in Diffuse/Image, and your obj again in Collider if you wish. Presumably you want these to be playing cards, so change the Material to Cardboard in the Material tab. Then import the model.

If you are using the same texturing method as me where you have a single model and a unique texture for each card face, then right click the model and choose Clone. Make as many clones of the model as you plan on having in your deck. For the example project I am only using five.

Right click each model and choose Custom. Replace the Diffuse/Image file with the various card face textures that you created so that you have all of your cards represented.
Save your project and then head back to Blender.
단계 3: Creating the Deck Model
일단 당신은’re back in Blender, have the model for your card open, and go to Object Mode. Look at your card from either the X or Y axis. Then right click on it and select Duplicate Objects (Shift+D). Immediately right click to keep the duplicate in the original position.
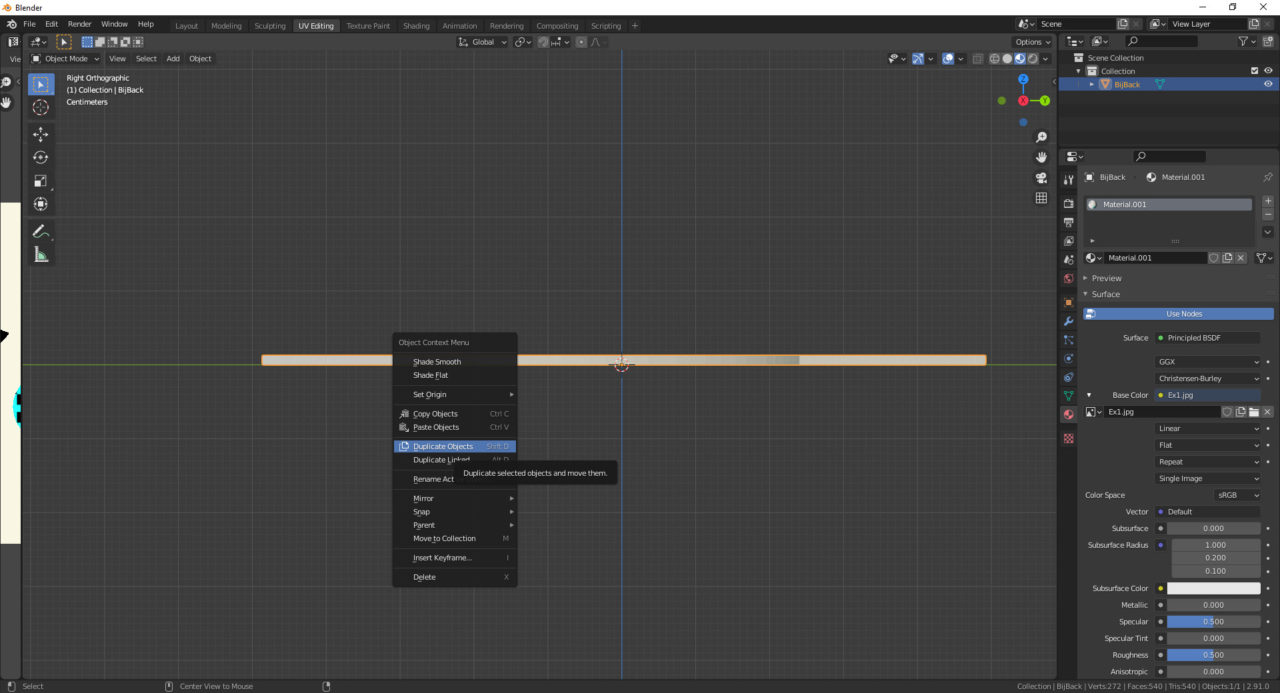
Then use the move tool to raise it up on the Z axis so that it is on top of the original model. I like to leave a very tiny gap between them to make them look more like a stack of cards in the finished product.
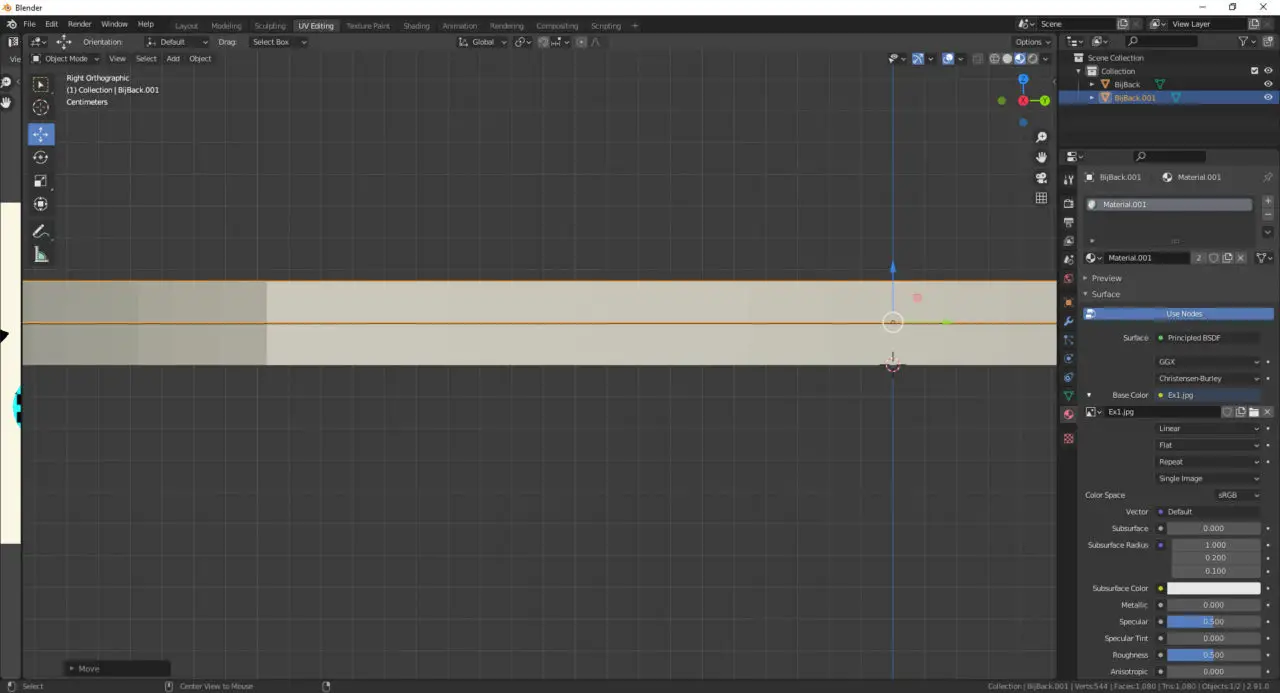
Repeat this for every card in your deck so that you have that amount of mesh groups of cards in your Collection.
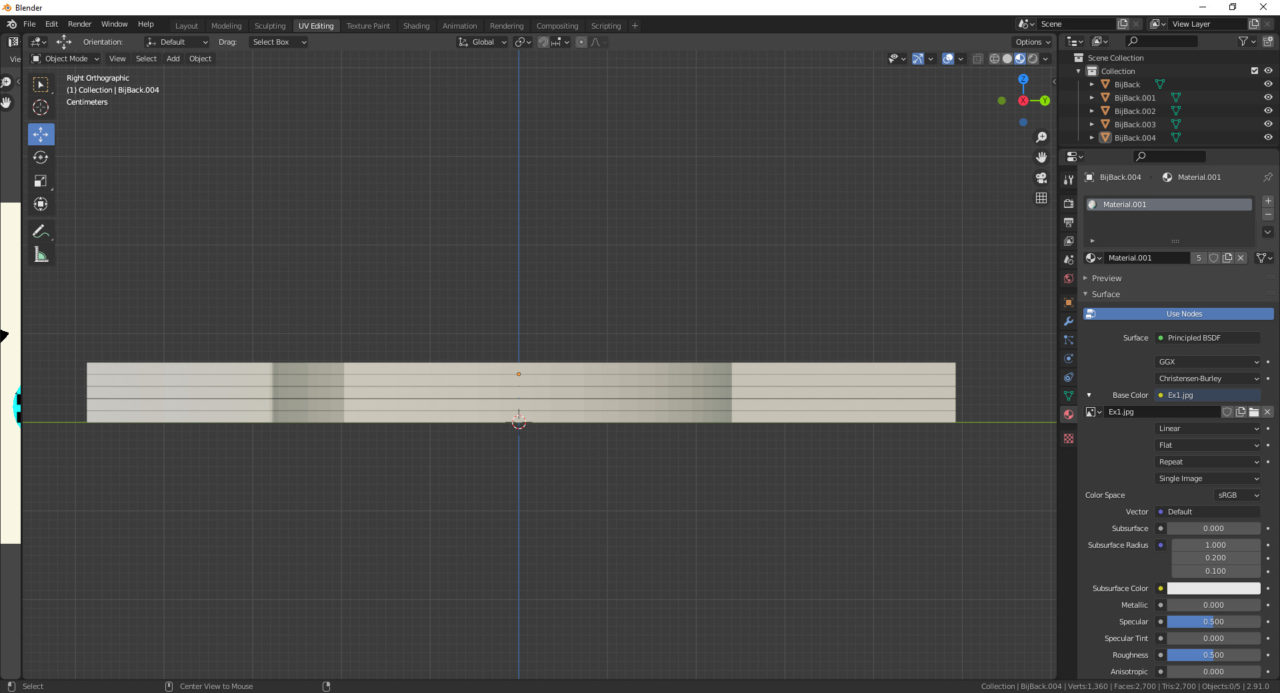
This time export the model as a .fbx so that you maintain the separate mesh groups. At this point I prefer to create a variant of the card texture that makes the face side blank, but that is entirely up to you.
단계 4: Setting Up the Deck in Unity
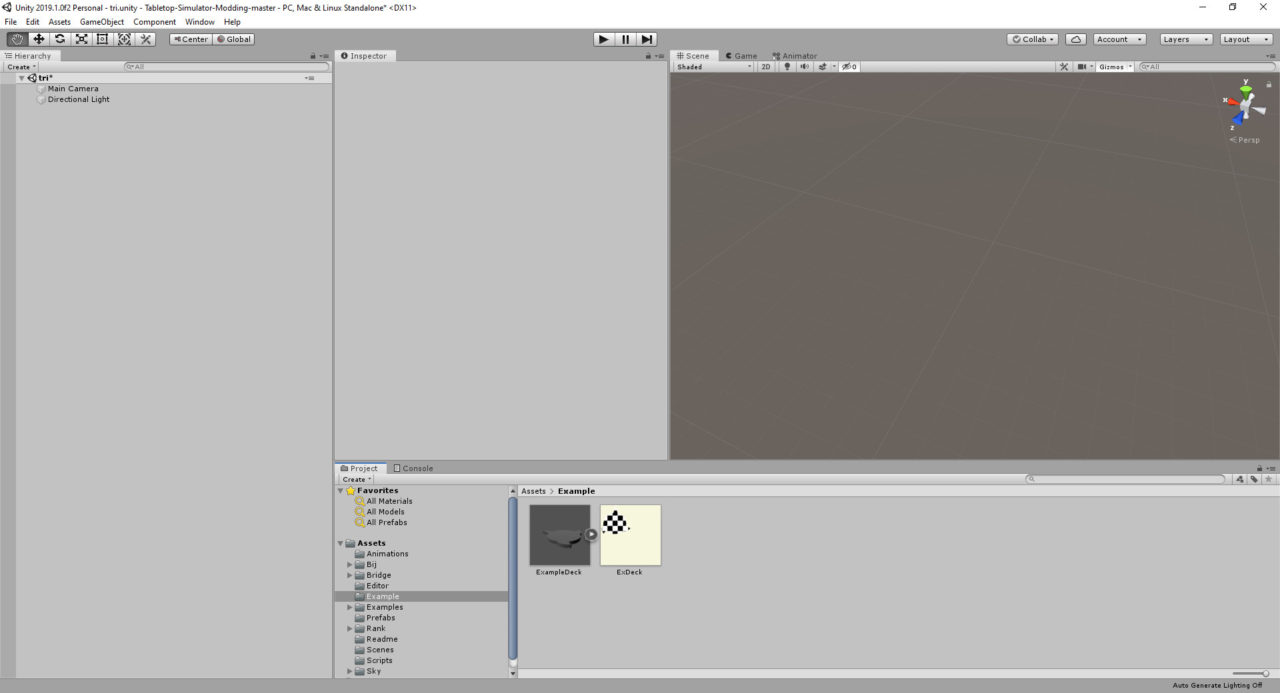
Open the TTS Modding project in Unity. Create a folder for your deck model and texture under the Assets folder. Place your .fbx and texture inside of that folder.
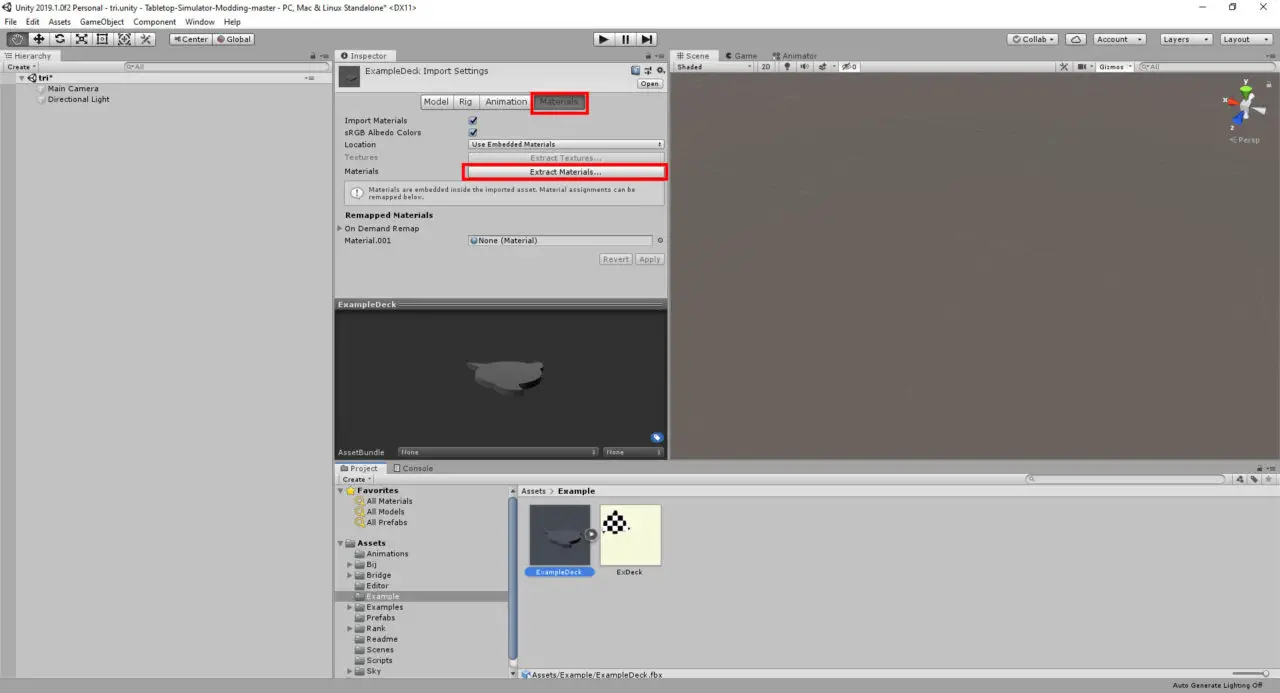
Click on your model and then click on Extract Materials in the Materials tab in the Inspector.
Open the material that appeared and drag your texture into the box next to Albedo, then click the Color selection and set the color to pure white.

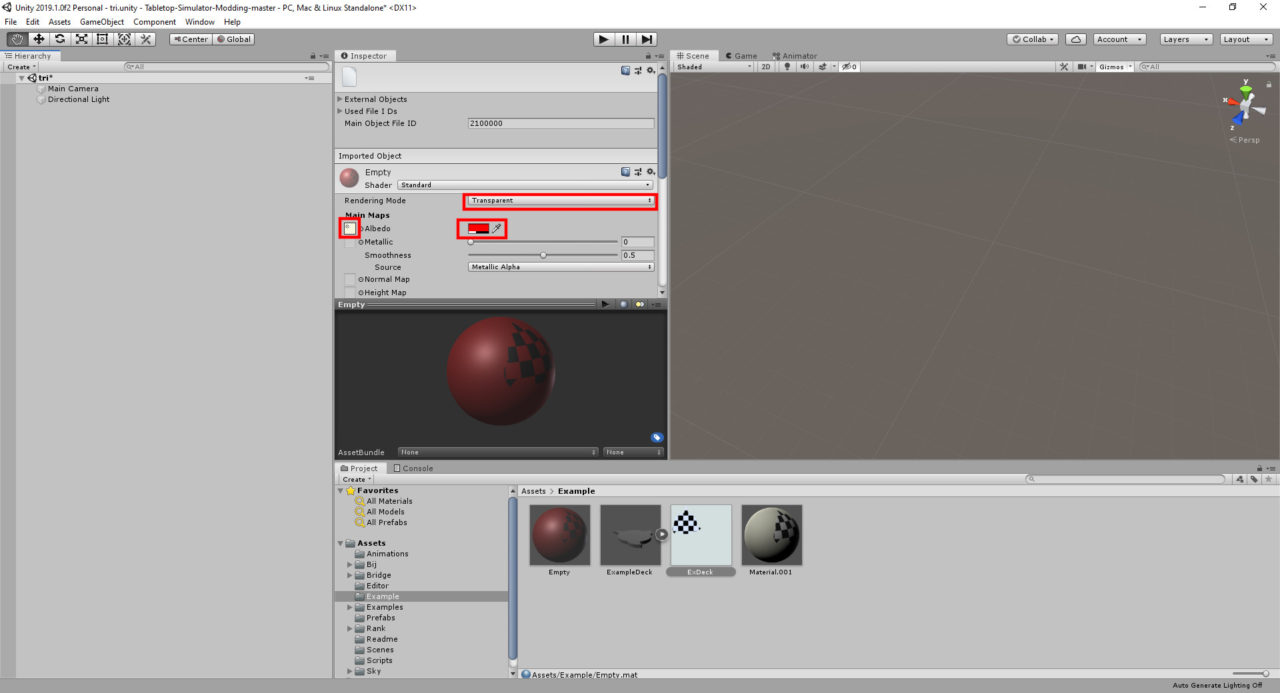
I like to give the deck some kind of effect when it is empty so that it is still visible to the player, but clearly has no cards in it. Create a new Material called Empty. Choose either Fade or Transparent for the Rendering Mode, apply the texture to the Albedo Map as before, and then click the Color selection. This time set it to red, and drop the Alpha on it down so that you can see through the Material.
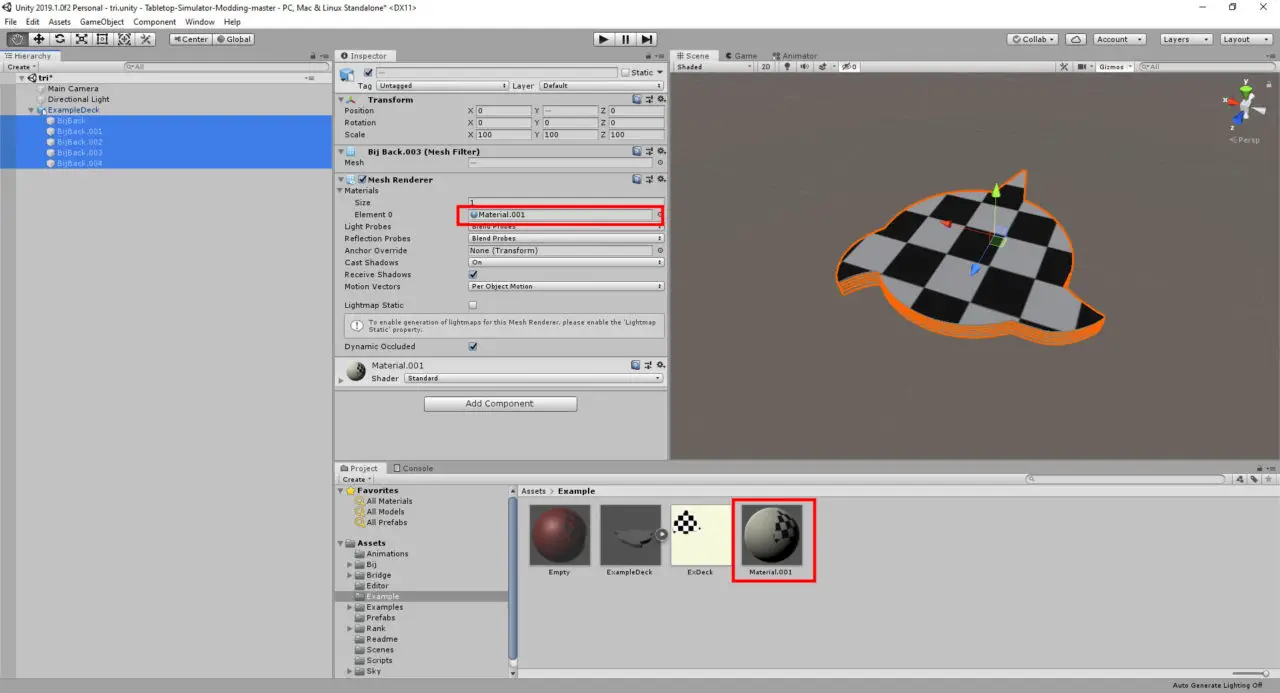
Drag the .fbx into your Hierarchy. It should already have its material applied, but if it does not for some reason then you will have to apply it. Expand the object. Select all of the mesh groups that are revealed when you expand the parent object, and then drag the material into the Inspector where it says Element 0 under Mesh Renderer.
Click the parent object of your model, and then click Add Component. Add a Box Collider to the object. Click on the button labeled Edit Collider and use the handles on the collider to pull it in close and tight to the object. I find this easier to do in the Isometric view (You can enable this by clicking on the view under the compass, it will probably be “Persp”).

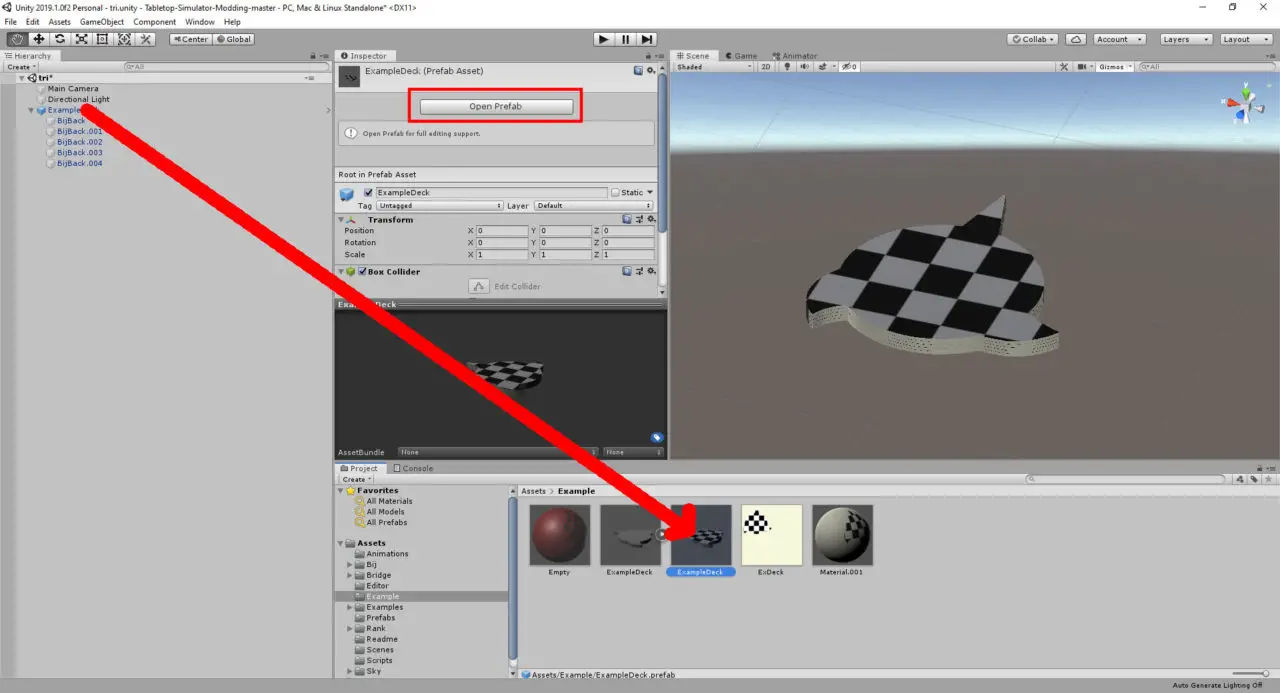
At this point drag the object from your Hierarchy into your Folder that you created for your model, texture, and materials to create a Prefab of it. Click on the Open Prefab button in the Inspector so that you are editing the Prefab exclusively.
Navigate to Window > 생기 > Animation to bring up the Animation window. Make sure the Parent Object of your model is selected. Click the Create button in the Animation window, and then choose a location to save your Animations (I prefer to add an Animations folder to the folder that I’m working out of for everything else so that the animation files don’t clutter the main folder). Name your first animation and save it. (Another preference of mine is to name it after the amount of cards that are displayed starting with a full deck. In this case I named it “5”)
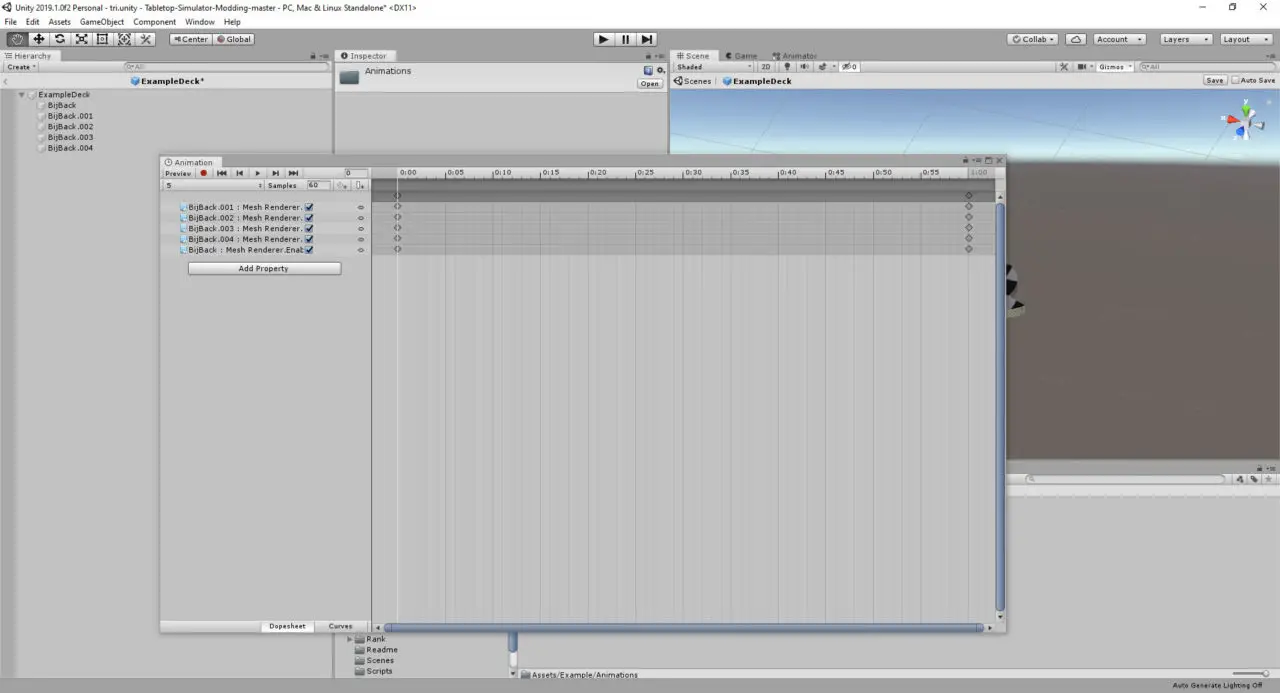
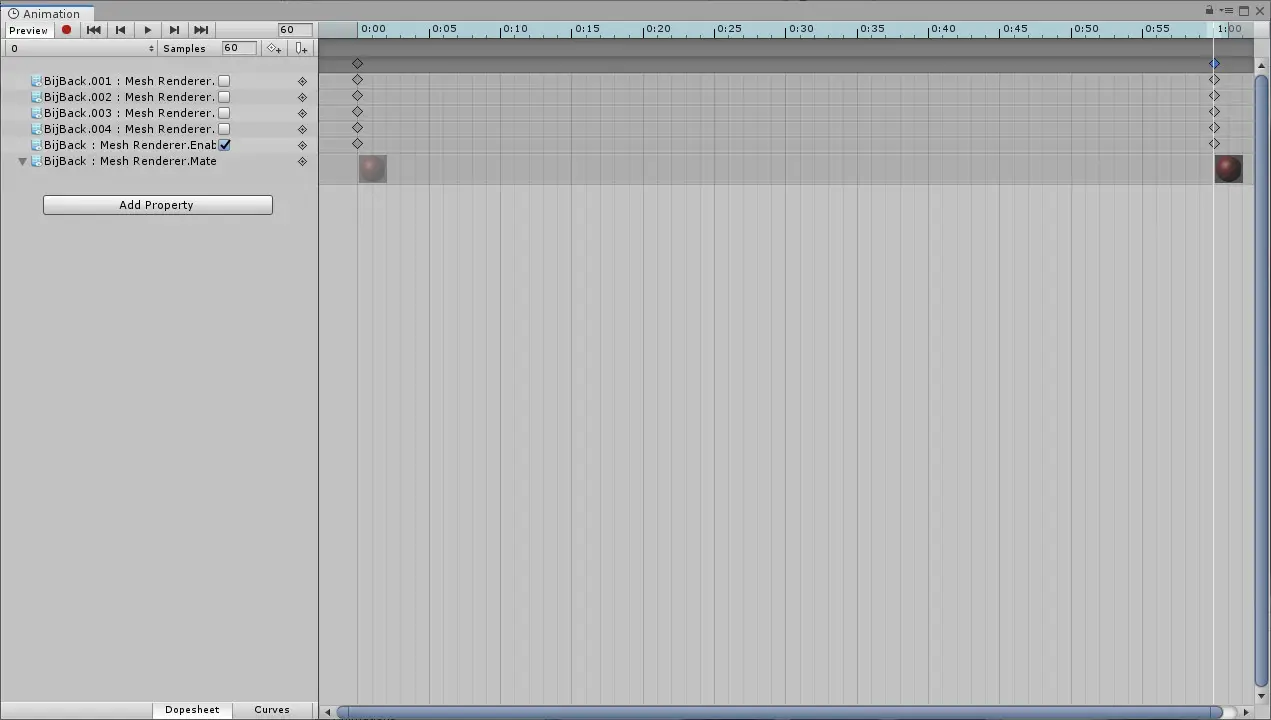
Click the Add Property button on the Animation window and select the first mesh > Mesh Renderer > 활성화됨.

Do this for every Mesh in your model so that it looks like this.
Press Ctrl + A to select all and then Ctrl + C to copy all of the Properties and Keyframes. Click the drop down that has the name of your animation and click Create New Clip. Save the new animation (With my naming scheme the new animation is called “4”).
Press Ctrl + V to paste the Properties and Keyframes from the previous animation. Click the checkbox next to the Mesh Renderer for the top most card in the deck.
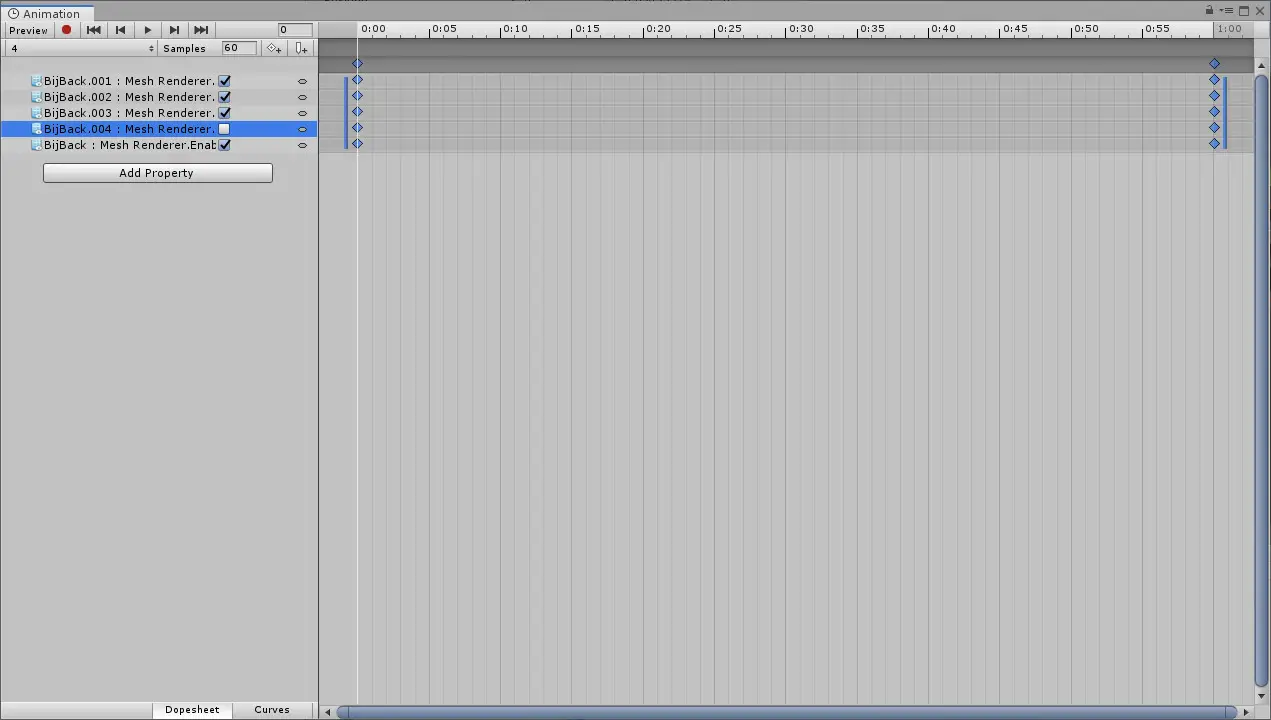
Move the cursor in the timeline to the set of keyframes at the end and then disable the checkbox next to the Mash Renderer for the top most card again.

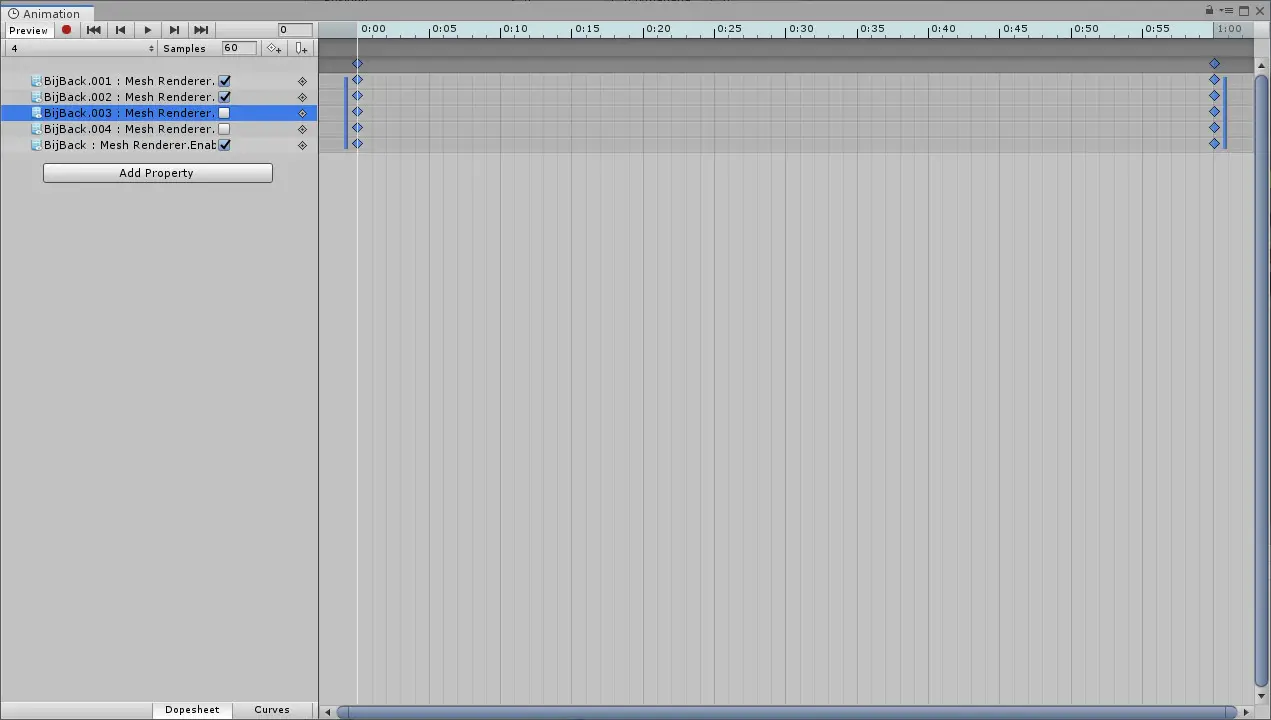
Select all and copy again, and create a new animation (this time I called it “3”). Paste in the Properties and Keyframes and repeat the same process as before, but this time disable the mesh renderer on the next card down as well.
Continue to do this until you are finished making the animation for when there is only a single card. Copy your properties and keyframes again and create a new animation (I call mine “0”). Paste in your Properties and Keyframes, but this time keep the last card enabled. Click Add Property again and select the Mesh for the final card > Mesh Renderer > Material Reference.
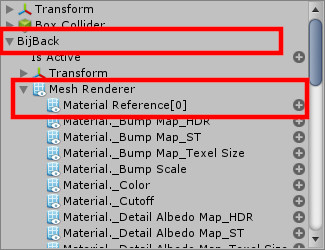
필요한 경우, click the arrow to expand the new property so you can see the thumbnail of the material. Drag and drop your Empty material into the first and last keyframes of the animation.
Press Ctrl+S to save your Prefab and Animations.
단계 5: Adding Components and Building the Asset Bundle
Make sure the parent object of the model is selected and click Add Component > 생기. Drag the animation file you created for a full deck into the Animation field of the component. Under Animations, change the Size to the amount of animations that you have (내 경우에는 6), and then drag each of your animations into the Elements that appear starting from the full deck down to empty.

Click on Add Component again and this time add TTS Asset Bundle Effects. Expand Looping Effects in this Component and change the Size to be the amount of animations that you have.
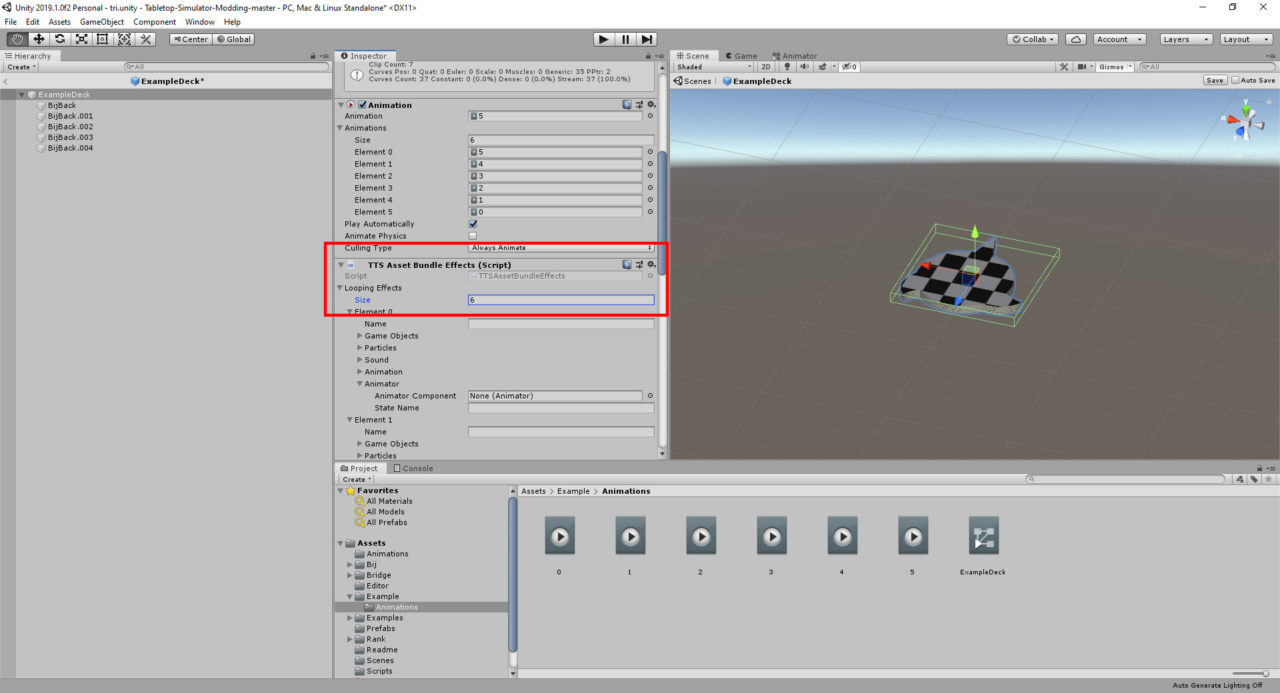
In each Element define a name for the Looping Effect (I just name it after the animation), expand the Animator section, drag the Parent object of the model into the Animator Component, and type in the exact name of the animation for that state in State Name. I prefer to do this from the full deck down to empty.

Press Ctrl + S to save your prefab again. Click on the prefab in the file manager so that it opens up in the inspector.
At the bottom of the preview window in the inspector it should say AssetBundle with a drop down menu. Click that and choose New. Type in a unique name in the text box that appears.

Right Click in the file manager and choose Build AssetBundles. Wait for this to finish.
단계 6: Setting Things Up in TTS
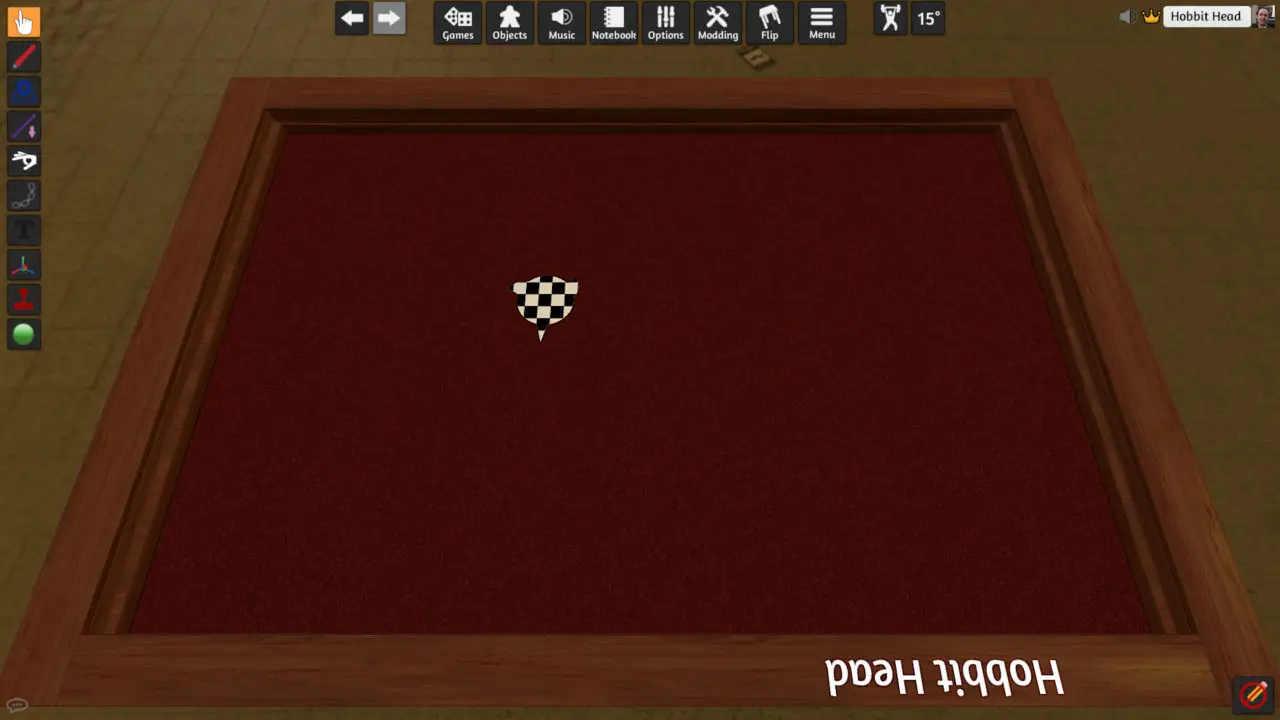
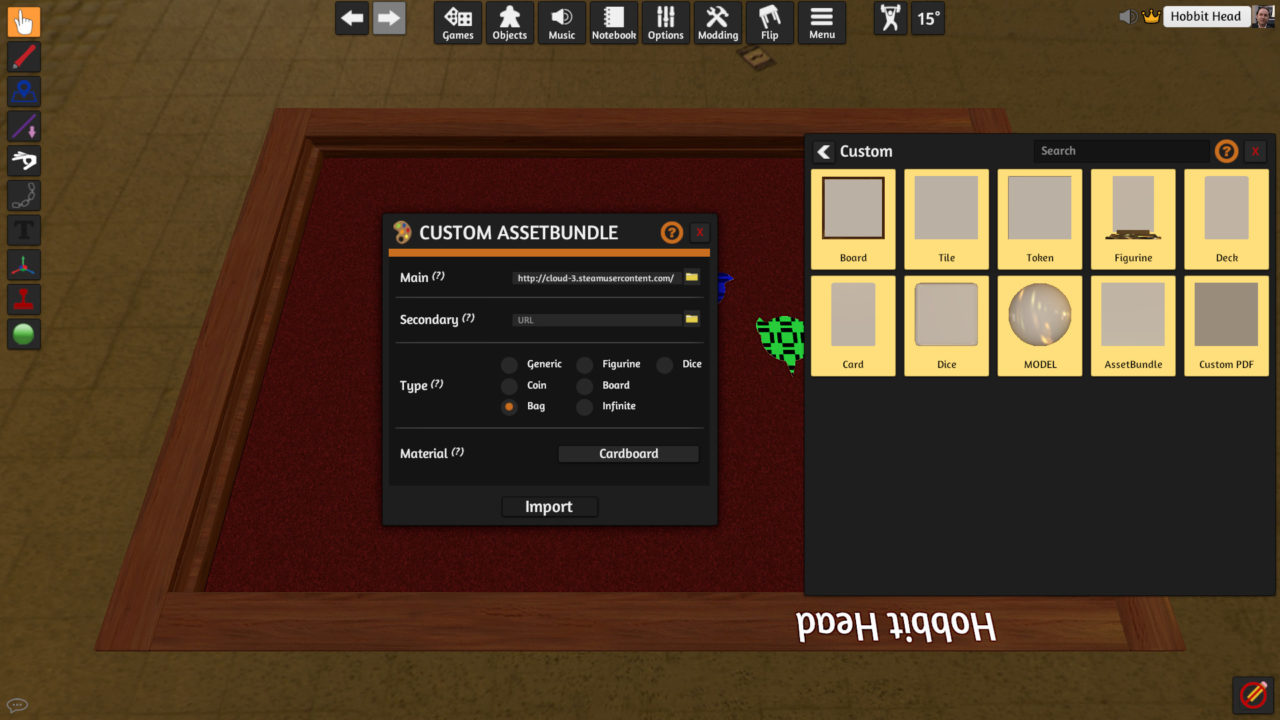
At this point you are ready to import into TTS. Go back in and select Objects > 구성요소 > Custom > AssetBundle. Browse to where the Asset Bundle was saved for the Main field. These get saved in the Unity project in a folder called “AssetBundles”.
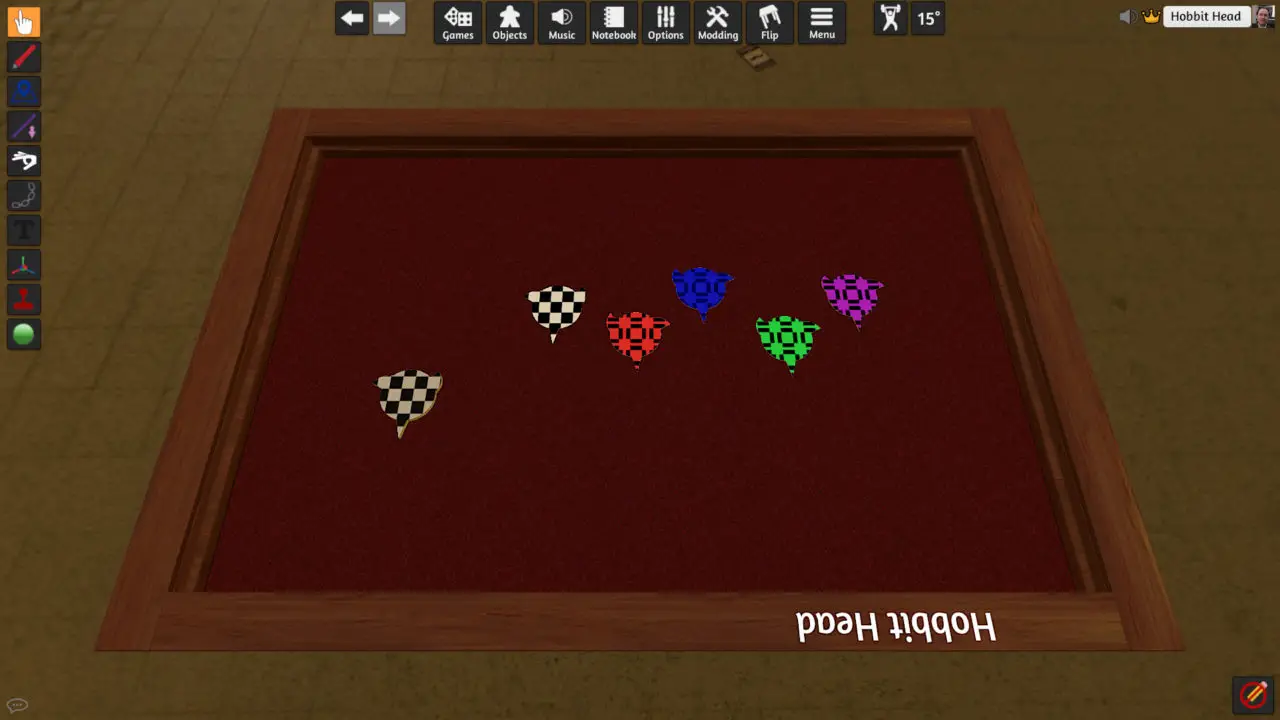
Select your Asset Bundle, set its Type to Bag, and change its Material to Cardboard.
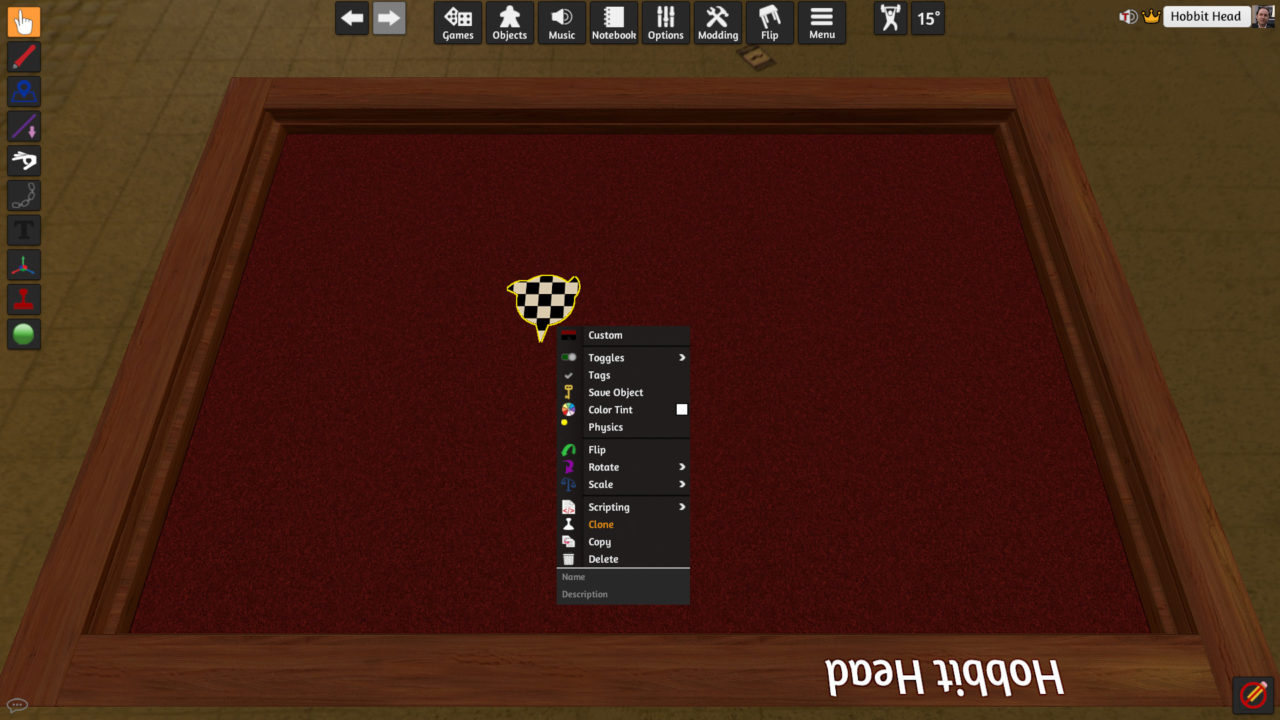
At this point you can right click on your imported Asset Bundle and flip through the looping effects to make sure your animations are showing up properly
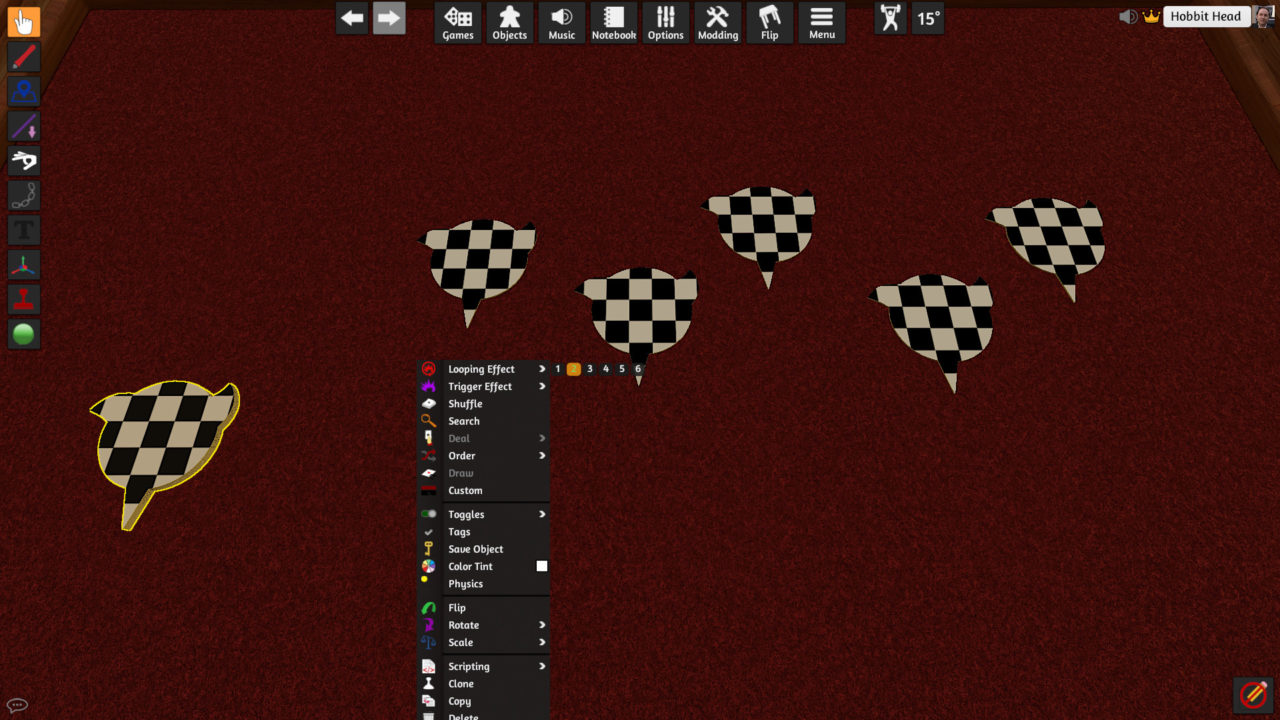
Sometimes the material on your Asset Bundle can appear a little dark, you might need to adjust your material in Unity, or change the color tint in TTS on your cards to match it. 당신한테 달렸습니다.
단계 7: Scripting
Now you have a bag with some animations, but we need to script up all of the features. The example Workshop item has a commented version of the script inside of it, so please refer to that on how to set yours up, but I will cover the functions here briefly.
The script starts with “function onUpdate()”, this makes the game run a check every frame. Below that we have the block of code that dictates which Looping Effect should play for each amount of objects within the asset bundle.
The line “if self.getQuantity() == 0 그 다음에” is stating if there are 0 items in the asset bundle, then do the following line.
The following line “self.AssetBundle.playLoopingEffect(5)” states to play the 6th Looping Effect if the above Quantity is found within the contents of the Asset Bundle.
The next line “elseif self.getQuantity() == 1 그 다음에” states that if there is 1 item in the asset bundle then do the action in the following line.
The following line “self.AssetBundle.playLoopingEffect(4)” states to play the 5th Looping Effect if the above Quantity is found within the contents of the Asset Bundle.
This continues until you reach a full deck. This would play LoopingEffect(0), or the first Looping Effect.
If you set up your Looping Effects in Unity so that a full deck uses the first Looping Effect, then it will always be LoopingEffect(0) in your script, and the number counts up as the amount of cards is lessened.
The second part of the script runs a check any time a player tries to add something to the asset bundle.
The first line “ 만약에 (obj.getVar(“objectType”) == “ExCard” “ looks to see if the card has a unique identifier in its script. “ExCard” can be whatever you want, but that exact identifier needs to get defined in each of your cards.
The next line “and self.getQuantity() < 5)” checks to see if the asset bundle has less than the maximum number of cards in it. Change the number 5 to whatever the maximum amount of cards you have in your deck is.
The following line “then return true end” will accept the item into the Asset Bundle if both conditions are met.
The final line “거짓을 반환하십시오” will reject any items that don’t meet both of the defined conditions.
Next open up the scripting editor on one of your cards, and add the following line:
“objectType = “ExCard” “. ExCard is the unique identifier that the Asset Bundle looks for when someone tries to add an object to it. This can be anything you want as long as it matches what was called in the Asset Bundle’s script. This line needs to be applied to all cards in your deck.
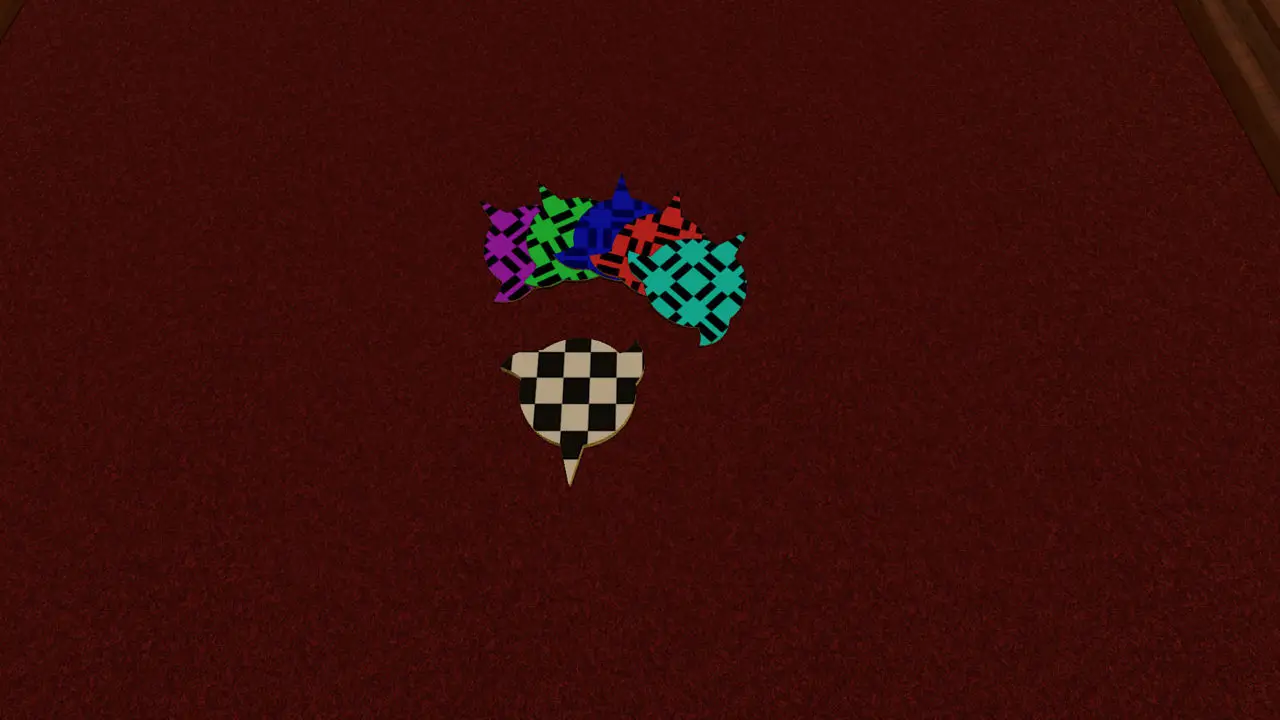
At this point you should be able to save your game, save the scripts, and it should all work! Go ahead and save your object and import it into your game!
이것이 오늘 우리가 공유하는 모든 것입니다. Tabletop Simulator 가이드. 이 가이드는 원래 작성자가 작성하고 작성했습니다. Hobbit Head. 이 가이드를 업데이트하지 못한 경우, 다음을 수행하여 최신 업데이트를 찾을 수 있습니다. 링크.