
This guide explains how anyone, no matter their experience level, can install ship modules that are currently marked as “unavailable” (grayed out) because of additional requirements.
노트
기억하다, for this to be successful, you still need to meet the Space Ship class requirements for modules. 예를 들어, you can’t install a Class B module if you have a Class A Reactor, 등.
Keep an eye on your “Flight Check” messages located at the bottom right corner in the ship builder window if you encounter any issues.
Don’t forget to register your ship if you want to make modifications to it.
Certain modules may only become available once you reach a particular level.
To gain access to certain modules, you may need to visit specific ship technicians.
How to Install Unavailable Space Ship Modules
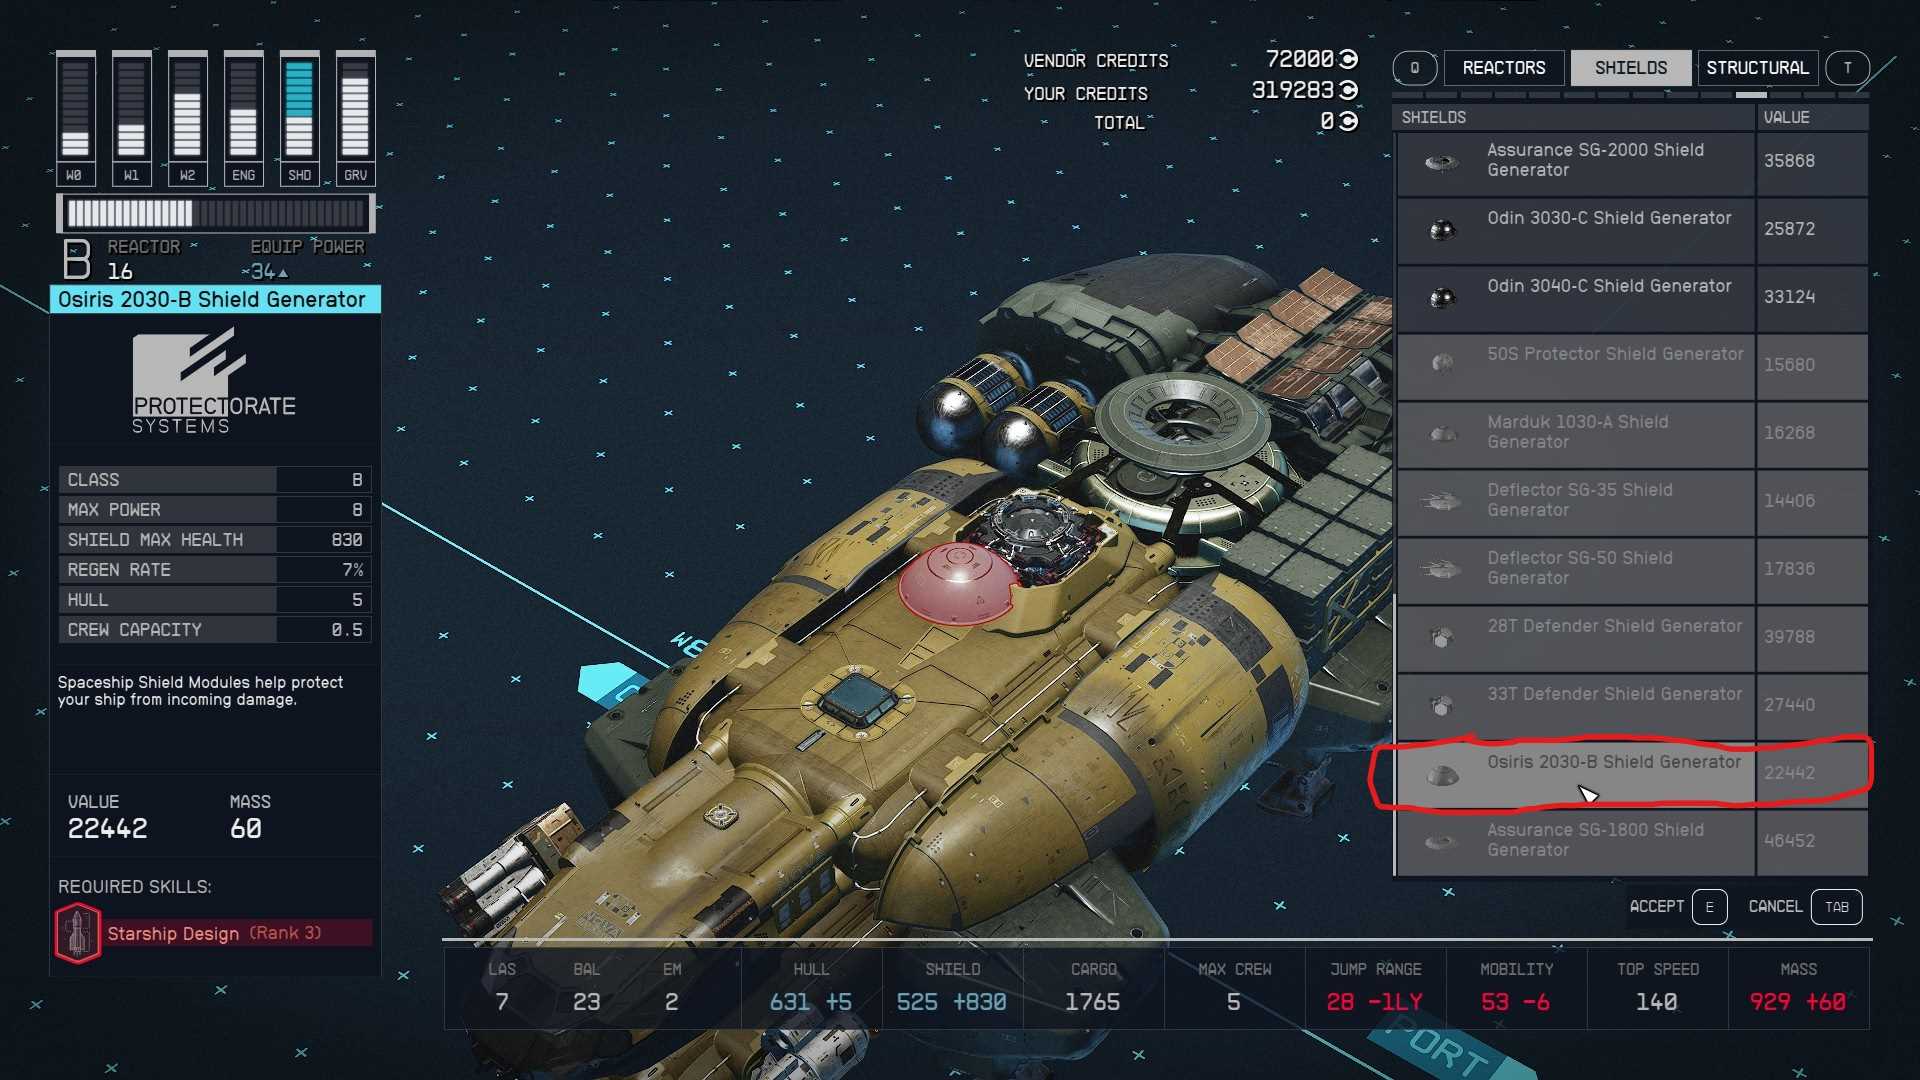
이 가이드에서는, we will switch the Shield module from Class B “Starship Design (계급 2)” to Class B, but now it needs “Starship Design (계급 3),” which I don’t have yet.
단계 1: 첫 번째, check the equipment list for the ship module you want to put in. I want to add the “Osiris 2030-B Shield Generator,” 하지만 필요해 “Starship Design (계급 3),” and I don’t have that yet.
단계 2: 다음, pick any other module you can choose (that you meet the requirements for). Position the camera or view of the spaceship so that the selected module appears red (it doesn’t attach to anything). 누르다 “이자형” on PC to select the module, but don’t attach or place it anywhere. Make sure you can still move the module around freely.

단계 3: 지금, 사용하여 “여” 또는 “에스” on PC, scroll through the different modules to find the one you want.

단계 4: Once you locate the module you desire, left-click to select or snap it into place. You can also press “지” on PC to switch between selected module installation configurations (port/starboard & forward/backward).
