
- 제목: Shatterline
- 출시일:
- 개발자:
- 발행자:
Information about Shatterline is still incomplete. 이것을 사용하여 게임의 세부 정보를 입력할 수 있도록 도와주세요. 문의 양식.
Handbook for expedition with detailed info about operatives and their abilities, 목표, encounters, contamination events, tricks and secrets, 적 (wip) and perks (wip).
소개
Expedition is a PvE co-op mode for three players, that uses gameplay loop similar to typical rogue-lite games. You traverse trough an open world with goal of extracting data from up to four objectives while dropping random loot in form of weapons, perks and abilities that you can unlock on the way.
As in other game Shatterline modes, you can earn experience for your weapons and operatives while playing Expedition. In addition to that you are also able to gain blueprints used for crafting epic and legendary mod gear.
As the game is in early access and receives new content, balance changes and bug fixes periodically, this guide will be changed and updated continuously as well. After every update there might be an outdated info. Feel free to comment if you spot some deprecated information. I will try my best to keep up with the game updates.
게임 플레이 기본 사항
As in your usual Rogue-Lite type of game, gameplay consist of classic progression sequence of getting random loot while facing random enemy encounters, culminating in failure or final boss fight, where both results yield rewards to make next run easier/more fun. Contrary to other games in the genre, more focus is put on gunplay and coop play, rather than finding synergies.
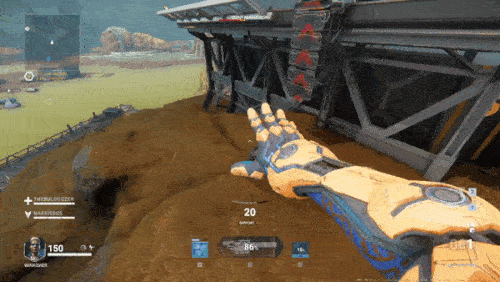
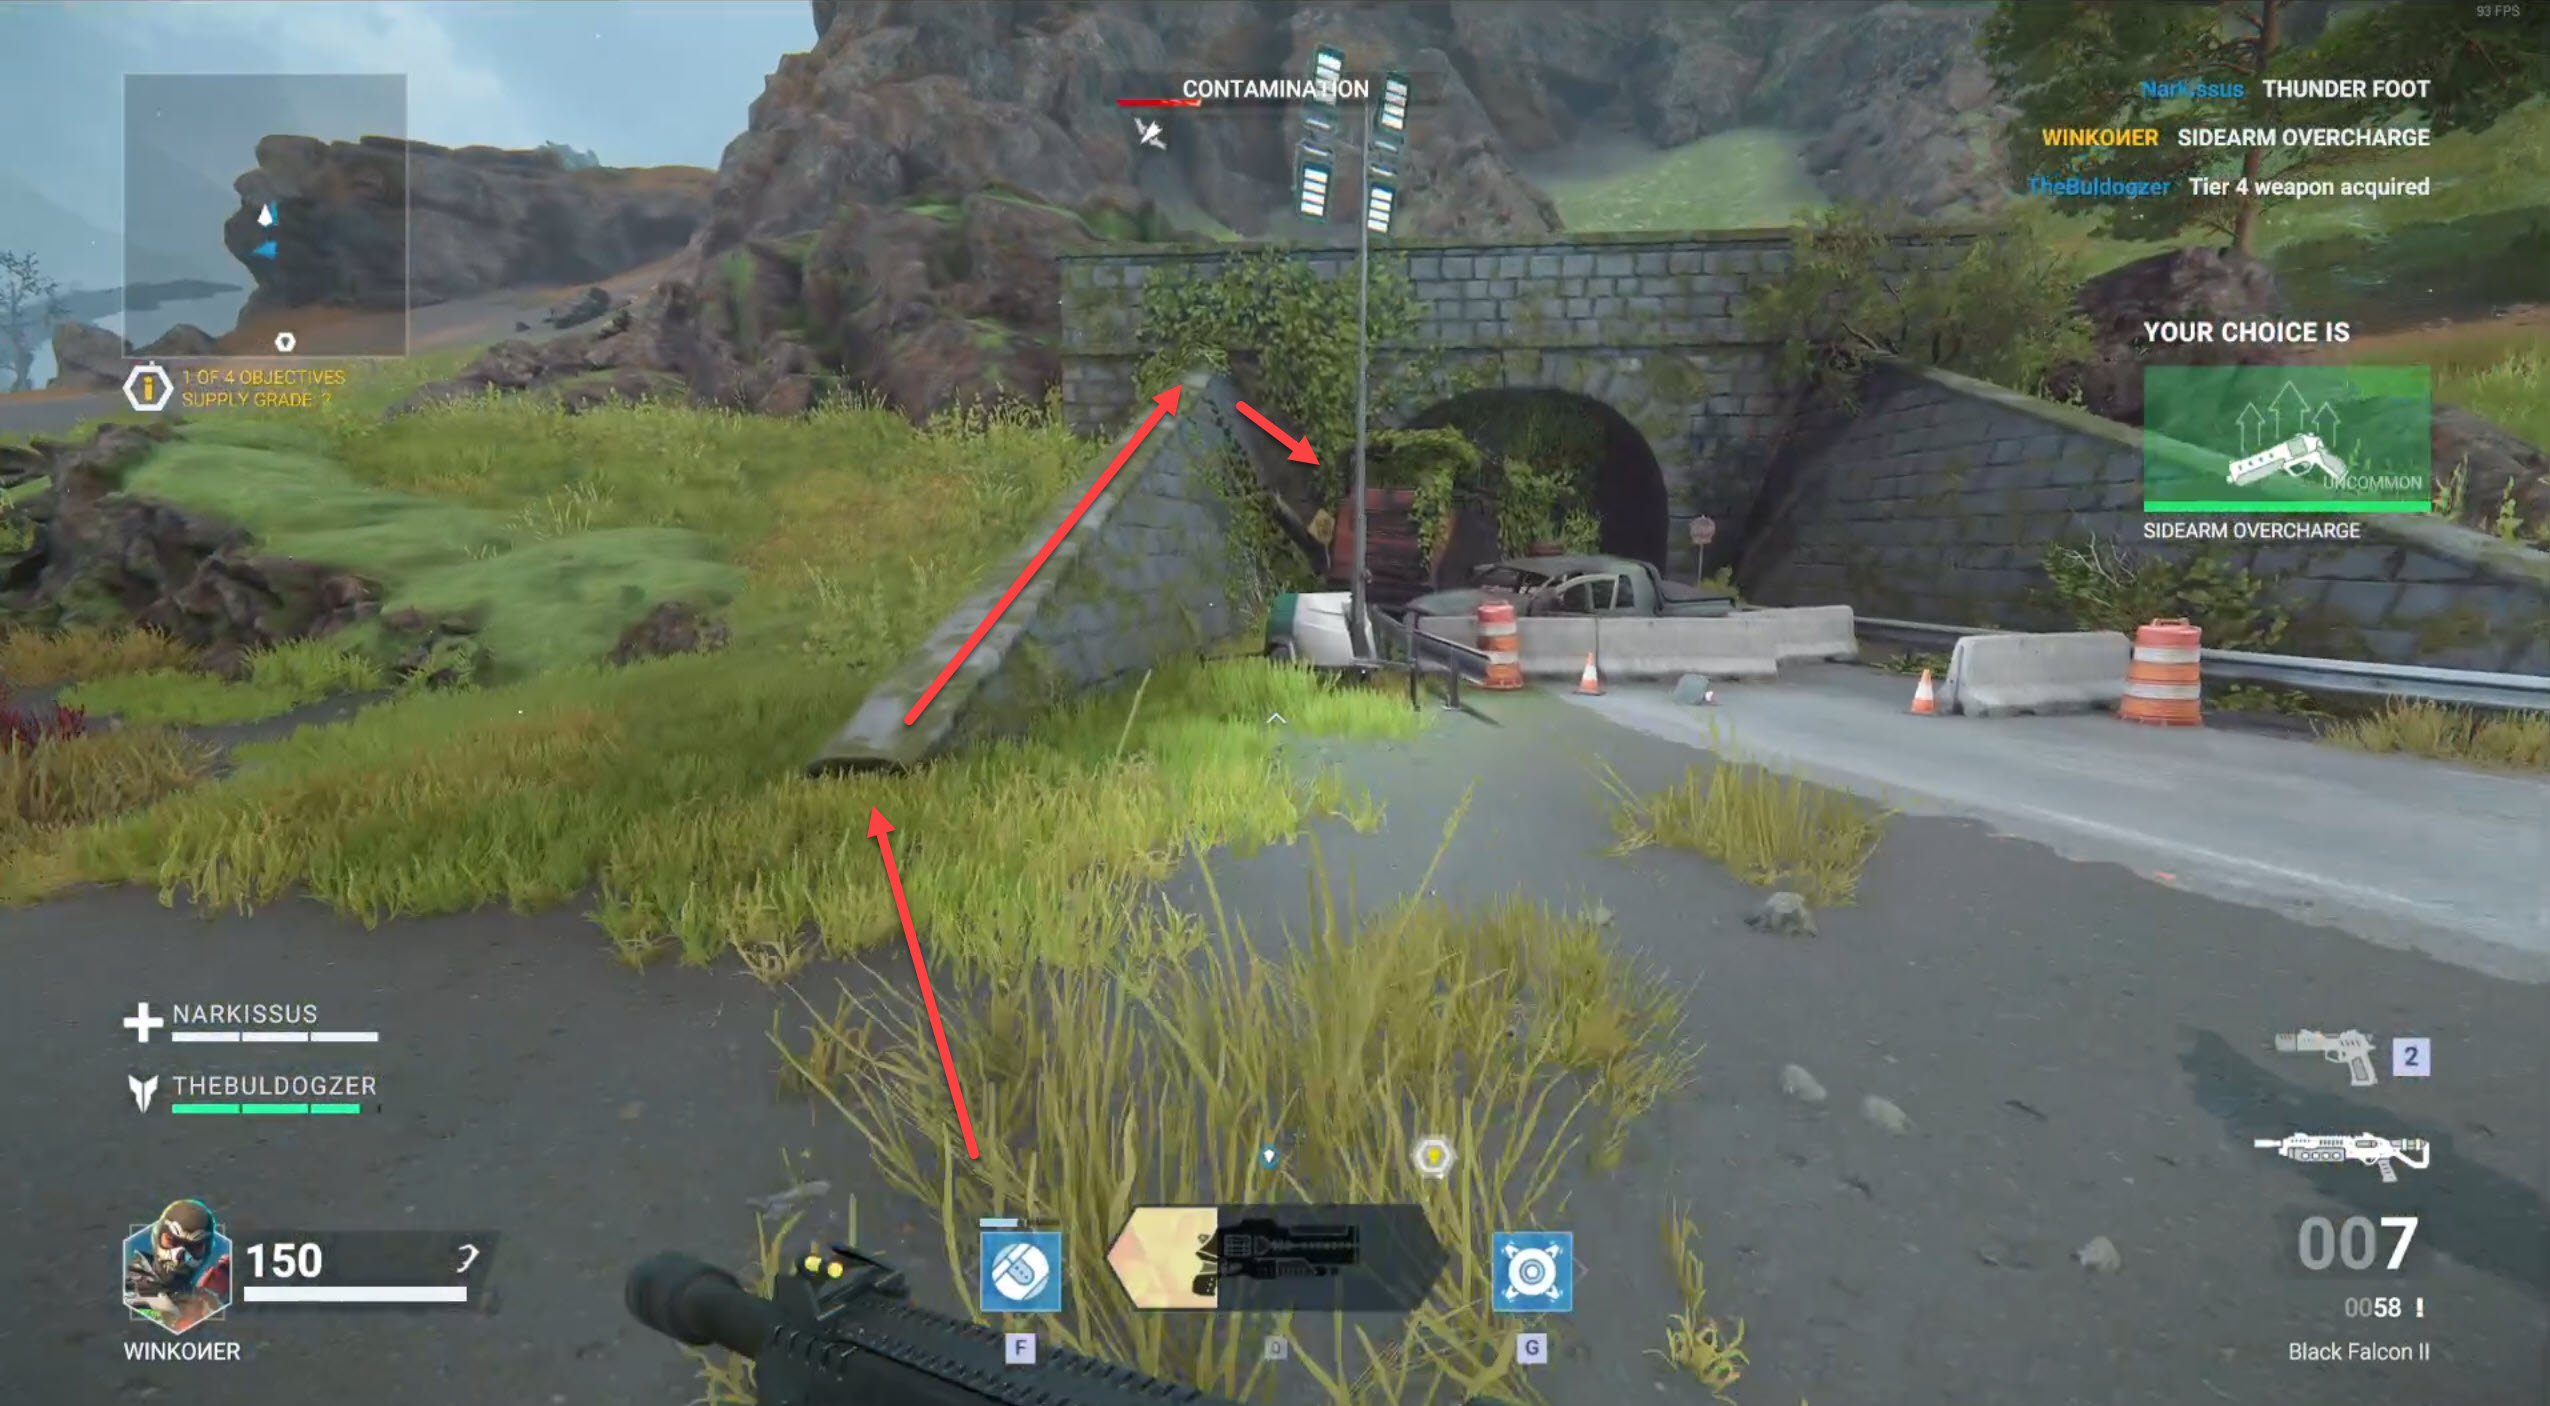
Supply dropsFirst thing you’ll see after launching expedition will be supply drop from which you can get loot in form of weapons, abilites and perks. Each supply drop will increase your chances of survival and successful expedition.
You can get supply drops for…
- beating encounters
- fulfilling objectives
- finding lost & secret supplies
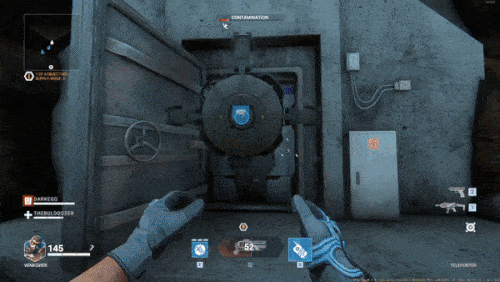
Lost Supply Drop
- lost supply is usually announced and marked on your map
- getting to lost supply usually requires specialized class (Recon for climbing ladders, Exo for kicking out doors)
Secret Supply Drop
- secret supplies are not marked on map and can randomly spawn in certain locations (see Secrets section for details)
- secret supplies are either hidden or placed behind crystals or reinforced doors requiring explosion to open
Standard Supply Drop
- 준다 1 ~의 2 possible rewards (무기, 능력, 특전)
- awarded for Encounters or can be found as lost and/or secret drop
Golden Supply Drop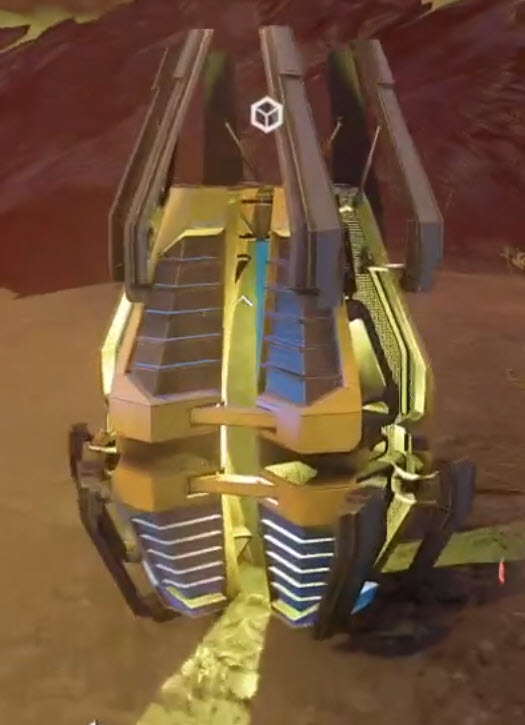
- 준다 1 ~의 3 possible rewards (무기, 능력, 특전)
- awarded for Objectives or can be found as lost and/or secret drop
Objectives are main checkpoints of the game and always consist of specific goal that needs to be accomplished while waves of enemies are spawned (see Objectives section for detailed info).
Fulfilling an objective provides:
- golden supply drop
- raising supply grade (higher grade = better loot in supply drops)
- expedition progress (3 objectives completed = path to final boss unlocked)
Between Objectives you will have opportunity to salvage extra loot by fighting off Encounters. These encounters are mostly easy (see Encounters section if you have difficulty doing any of them) and an option for player to get extra loot in exchange for expedition time. More time spent in Expedition raises Contamination leves, detailed info below.
Contamination is basically a timer for Expedition. Each second spend on the map provides a tick for the Contamination progress bar:
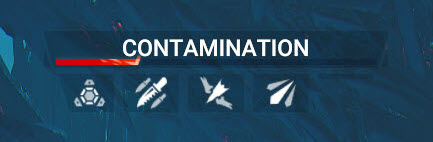
Contamination progress bar can be filled 5 times total. Each fulfillment unlocks a Contamination Event (see dedicated section for details). These Contamination Events are meant to make your time in Expedition more difficult and each Contamination will decrease your chances of survival and successful expedition.
Contamination levels are slightly reduced for beating Encounters or can be radically reduced by picking Decontamination perk from Supply Drop.
☣️ 주의하세요: For successful Expedition is a limit of 4 Contamination Events. If you take too much time and unlock 5th Contamination Event, the Expedition will result in Extraction scenario which gives reduced rewards.
There are four possible Expedition outcomes. You either finish three objectives and kill final boss or you wipe while doing so. You can also extract after every finished objectives or forced to, when you reach 5th Contamination level.
For each objective fulfilled you get following amount of rewards* upon successful extraction.
- 1/4 목표: 2 청사진
- 2/4 목표: 4 청사진
- 3/4 목표: 8 청사진
- 4/4 목표: 12 청사진 + 400 은 + 750 XP + cosmetic item
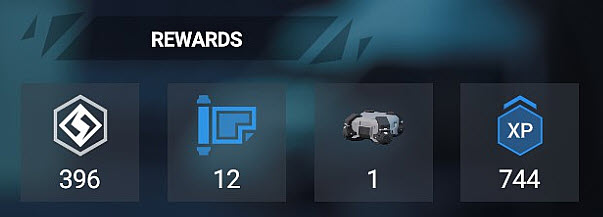
If you wipe your rewards get halved.
Operatives | Expedition Party
While some classes are better than others, all but D tier can be useful in Expedition. D tier is not recommended unless you want to gain some levels for PvP.
Also keep in mind that the tier list compares the Operatives as individuals. While both medics are good, you don’t need both of them in the group and it is much better to take any other class instead. I will line-out class advantages below, before getting into Operatives.
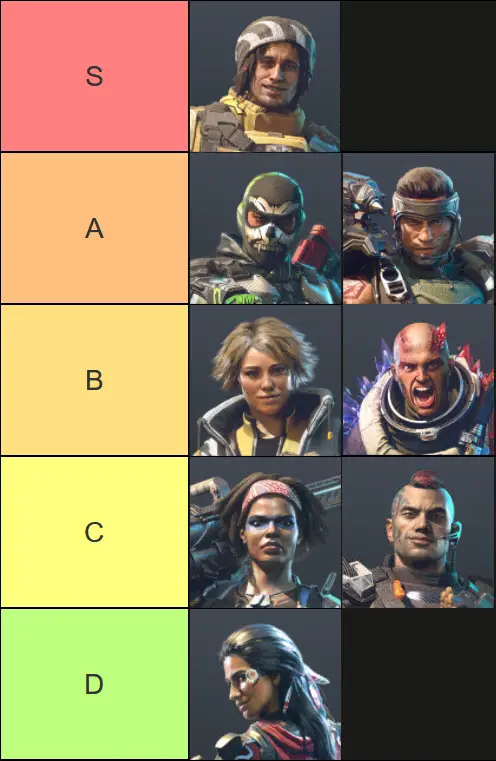
에스 | 위생병 – Most useful for obvious reasons. Every group should have one medic until you are Expedition veteran and/or have other classes maxed out, making the mode generally easier.
ㅏ | Exo – Gives access to lost supply hidden behind doors, besides one of them (see Secrets section) all are inaccessible if you don’t have Exo in your team.
비 | 정찰 – Can give you access to some vantage points with lost supply, 하지만 – there are often different ways to get to those, like using crystalline wall grenades, Orbit’s dash or some elaborate jumping (or falling from above) thus making the Recon class less beneficial than Exo.
씨 | 기병 – Way more useful in PvP, generally not recommended for Expedition party. That being said Orbit can be very useful at times, for reasons outlined below.
As of now I would say the most advantageous Expedition party is made up from
알약(for his medic skills and clutch potential),
Kitefor great damage output and ability to reach ALL lost supply (see Secret & 트릭) 그리고
Orbit또는
숫양.
⭐⭐⭐⭐⭐

Pill can be literal life saver thanks to his Med Drone (never exchange for Quantum Nullifier) which can sometimes save run even after you wiped out as he is able to revive yourself if you activated him before you went down. Med Drone is of course extremely useful in general when you need to revive a teammate who is out of your reach, which is especially useful during the final boss fight. Besides that Pill sports a Stasis Field grenade that creates AoE that paralyzes enemies, useful in critical situations against those pesky adamants making them easy to put down.
On top of that his ultimate Crystalline Shotgun is pretty capable, able to clean-up big groups of enemies, erase Stilt’s shiels or do lot of AoE damage in general.
💡 Activate Med Drone when low on health in critical situation in order to get yourself revived if things go awry.
⭐⭐⭐⭐

Kite is always useful to the team as a Recon (and better of the two) making you able to reach some climb spots as well as brach all doors with his Remone mine ability. Remote mine also does ♥♥♥♥-ton of damage and can easily wipe out group of strong enemies and crystalline
mini-wallcan attract some enemies to ease things up. His Crystalline Revolver ultimate does some serious damage and is very useful for some encounters and objectives.
💡 Don’t be afraid to use Remote-Mine whenever you can.
⭐⭐⭐⭐

Ram can kick out doors giving you access to more loot. While Gravity Strike is not as useful, Throwing Axe makes up double for that. As soons as Level 2 you will have three axes at your disposal and they do significant amount of damage by default (Axe into weakspot = Adamant one hit KO) and get even better on Level 8 when they explode as well, making the skill great for variety of situations. His ultimate – Hyper Dash – is great for clearing up group of enemies, putting down Gardeners instantly or dealing heavy damage to bosses. Also can be used for mobility if you are in a hurry.
💡 Throwing Axe is beast. If you have good aim, vanilla is better. Otherwise the TNT upgrade may be more desirable for you.
⭐⭐⭐

While being the worse of the two Medic classes, Malva is still pretty useful addition to the team as any medic is better than no medic. On Level 2 you gain two more Medkits to use for healing (I prefer them to the spray as you can leave them on floor as pickup for injured teammates), Drone Pinscher can be used for keeping some enemies busy and her ultimate Healing Station can provide for some great healing output making withstand a lot of incoming pain.
💡 Placing one or few Medkits during objectives is good idea so teammates can pick up heals when needed (instead you chasing them) while new medkits are being generated.
💡 Use Healing Station as tanking utility. During critical situations, staying inside Healing Station radius with enemies is usually safer than running away from both enemies and heal.
⭐⭐⭐

While trooper class is designed for PvP rather than PvE,
Orbithas proven very useful during the dozens of hours we spent in Expeditions. He heals faster, his Spy Drone can sometimes attract enemies and Swarm Grenade does solid damage to enemies or Stilt shields. His main strenght however comes from his ultimate, Crystalline Injection, which can proof extremely useful during near-wipe-out scenarios as it can clear any group of enemies overwhelming your proximity and provide you thick armor that can be used to do essential revive of a teammate. Orbit is a good choice if you already have both Exo and Recon in group but you don’t feel like playing Medic. In most situations he can also substitute for Recon as using his dash skill can get you to normally inaccessible vantage points.
💡 Save Crystalline injection for kills and revives during near-wipe-out situations or clearing out group of strong enemies.
💡 Use his dash skill together with jump to get to higher vantage points.
⭐⭐

Strix[ is not outright bad for Expedition but is worse than Ram in almost every way. Crystalline Grenade is weakest of the tree damaging grenade types, but her Wall Grenade can be used for luring enemies or getting to higher vantage points for loot. Her ultimate M.556 Volcano is very powerful and great for fast high damage output against groups of strong enemies or bosses.
💡 Use Wall Grenade to get to higher vantage points.
⭐⭐

As Mongoose was designed as pure PvP class, he’s currently lacking in the Expedition mode. Smoke Grenade is outright worthless in PvE (Flash Grenade unlocked on level 8 makes it better as it stuns enemies) and therefore his only perks are mediocre Frag Genade and R40 Supersling ultimate which, admittedly can do some serious damage to multiple enemies and/or bosses (great for wiping Stilt fast).
⭐

기본적으로, Brisa might be currently least useful Expedition party member, especially compared to Kite who does everything better. As Recon she can get you to some vantage points with extra loot but as outlined above, there are many other ways to do so. Her probably most useful ability is Tactical Cloak because it can give opportunity for some sneaky revive of a teammate, but that’s about it. Glass Mine is useless but can be replaced with more useful Shock Charge on Level 8. Ultimate Crystalline Rifle takes ages to charge up and frankly, it’s not that good either. She might be slightly more useful than Mongoose when fully leveled up, but still not really recommended.
Encounters
In this section I will give explain encounter and where applicable, will give some tips and pointers. I don’t know the official names of the encounters, so I will just come up with some generic names for them.
Mitosis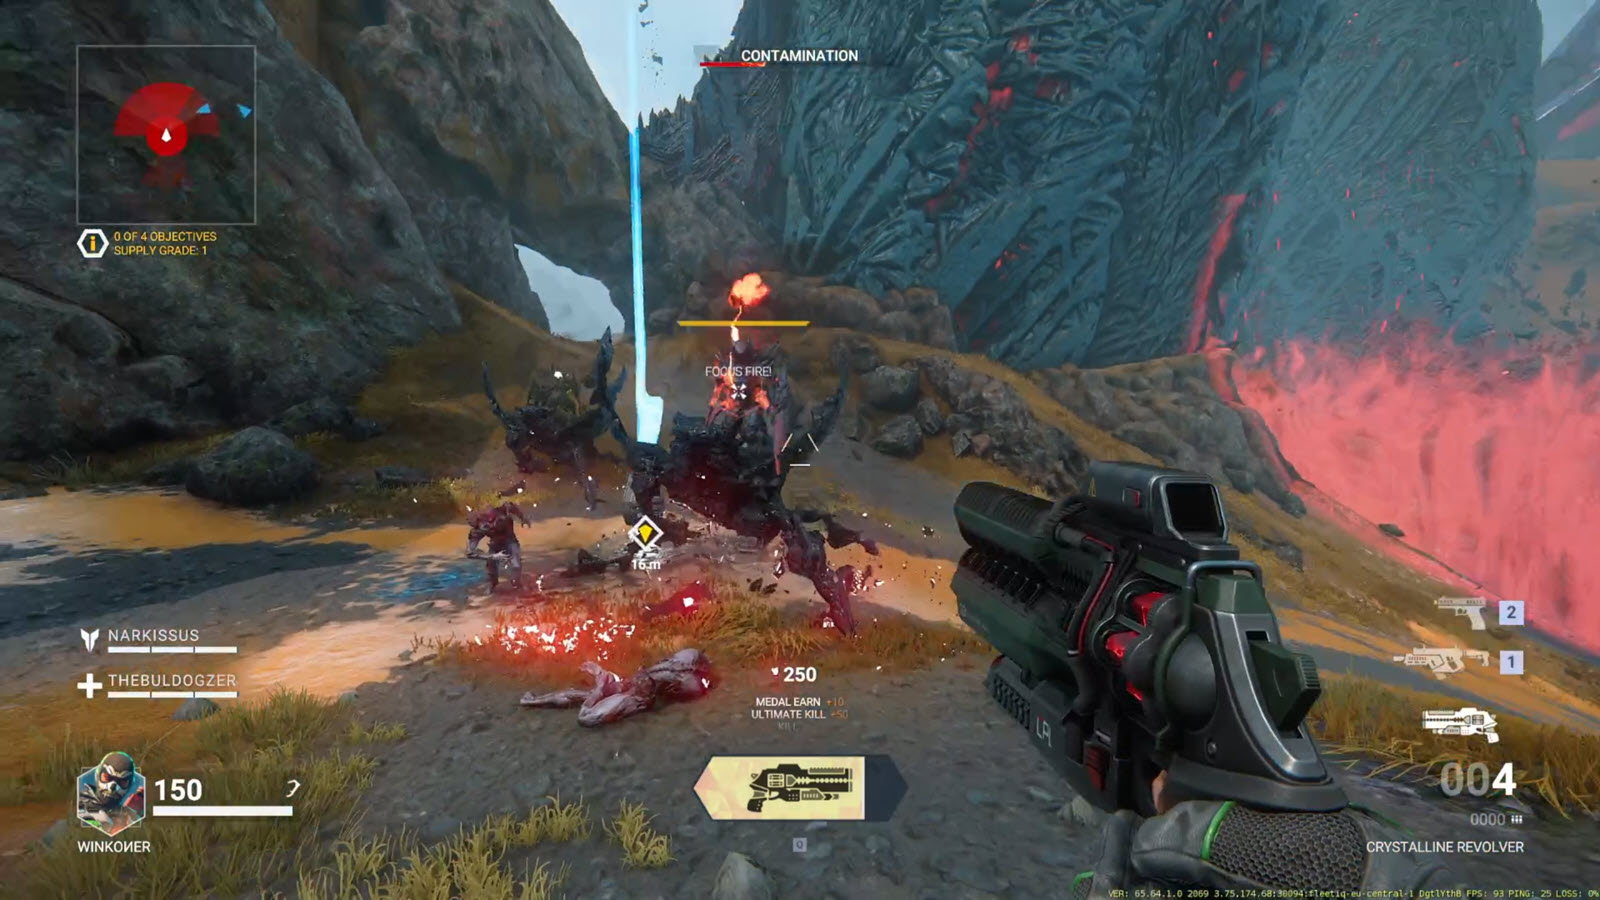
❔ Two platforms will appear spawning Glassheads and Adamants with mitosis effect.
💡 When the Adamants spawn, one will have flying “ballon” connected to him (with hint “FOCUS FIRE!). You have to do exactly that. If you kill the other green tinted Adamants they will divide into two lesser enemies with same effect. Instead of killing them, always focus the one with the baloon. When he’s dead, he’s dead and you can focus the next one which the balloon will attach to (I know it’s obvious, but I’m constantly running into people who don’t know this and then wipe on the multiplying enemies).
Eggshells
❔ Crystalline debris will slowly fall from sky spawning enemies upon landing.
💡 You need to shoot the eggshells before they land. The strenght of the hatched enemy depends on HP of the eggshells. I don’t have exact numbers but if you don’t damage them they will spawn Adamants, if you damage them approximately under 75% they will spawn Shardskin and if you damage under 50% (or destroy one of the two shells) they will spawn Splinter or Glasshead so always try to destroy at least one and it will be easy encounter.
Time Trial
❔ Flying crystalline formation appears above the loot supply drop, spawning enemies around.
💡 This one is timed. You need to clear the enemies fast. If you are too slow, another batch of enemies will be spawned. As they all spawn nearby, it’s a good place to use ultimate and get over it quickly.
Disco Ball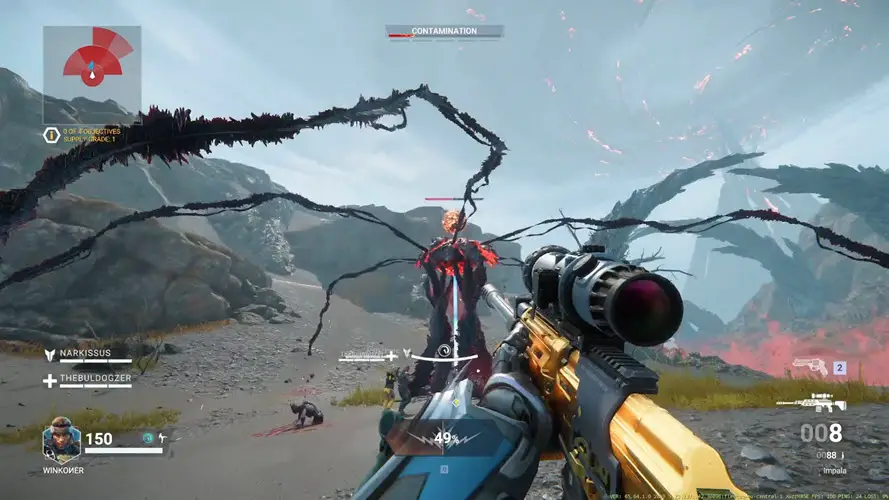
❔ Spawns glass ball in the middle that shoots and spawns enemies.
💡 Focus the ball and kill it as soon as possible. If you ignore the first enemies it’s over before first handful is spawned.
Crystalline Claw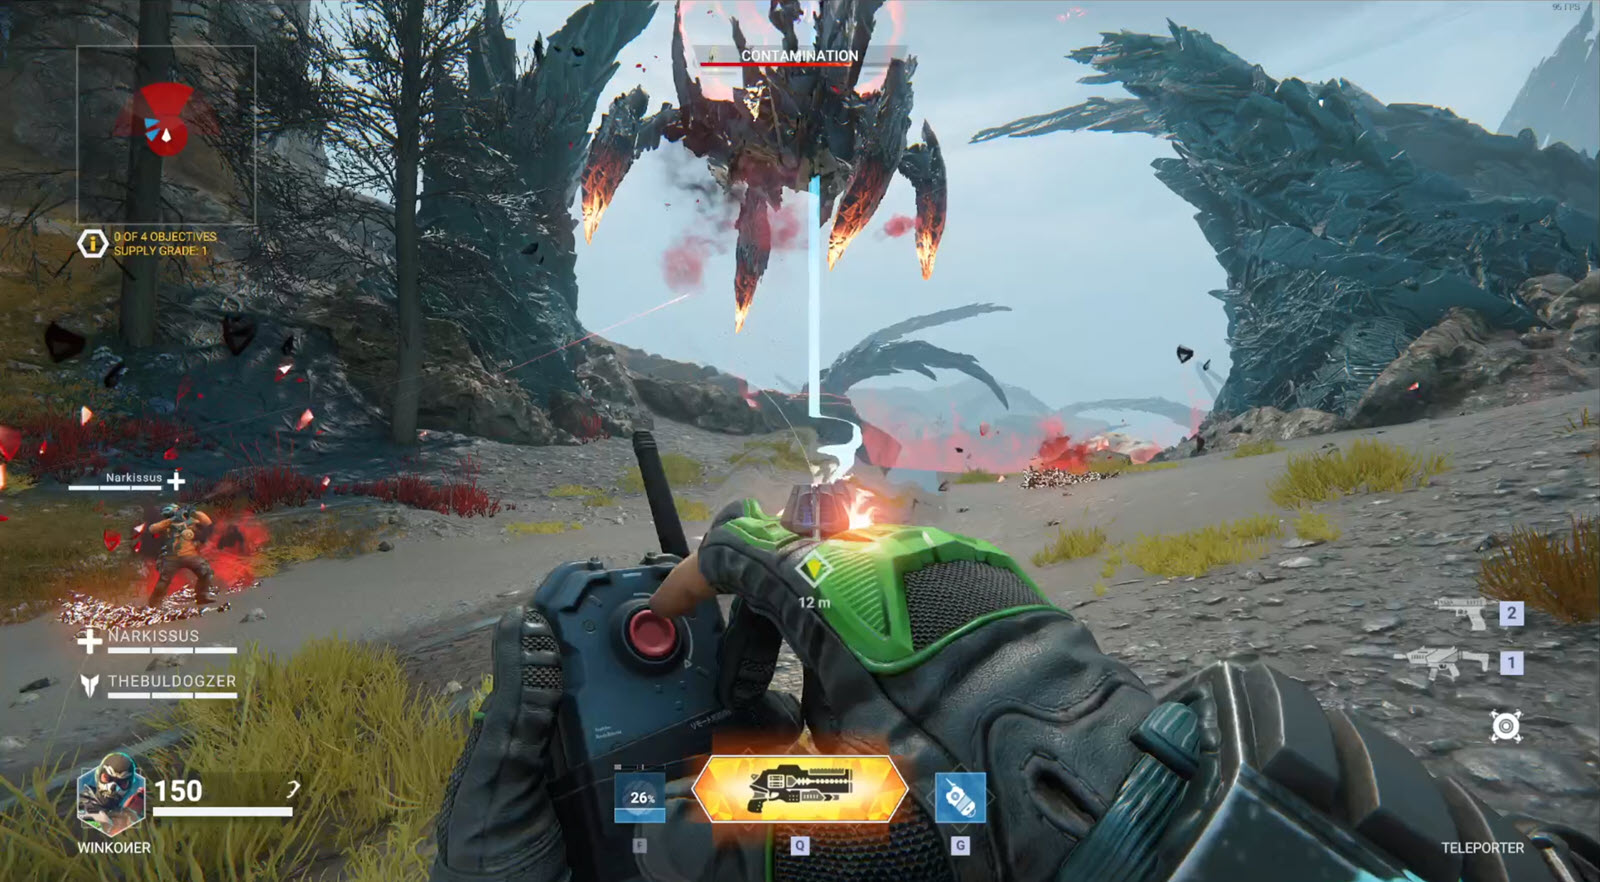
❔ Claw-like formation appears in air, rotating five stalagmites with invulnerable Spitfire on top and spawning enemies around.
💡 Just shoot off the stalagmites as fast as you can to kill the Spitfire and stop the spawn.
정원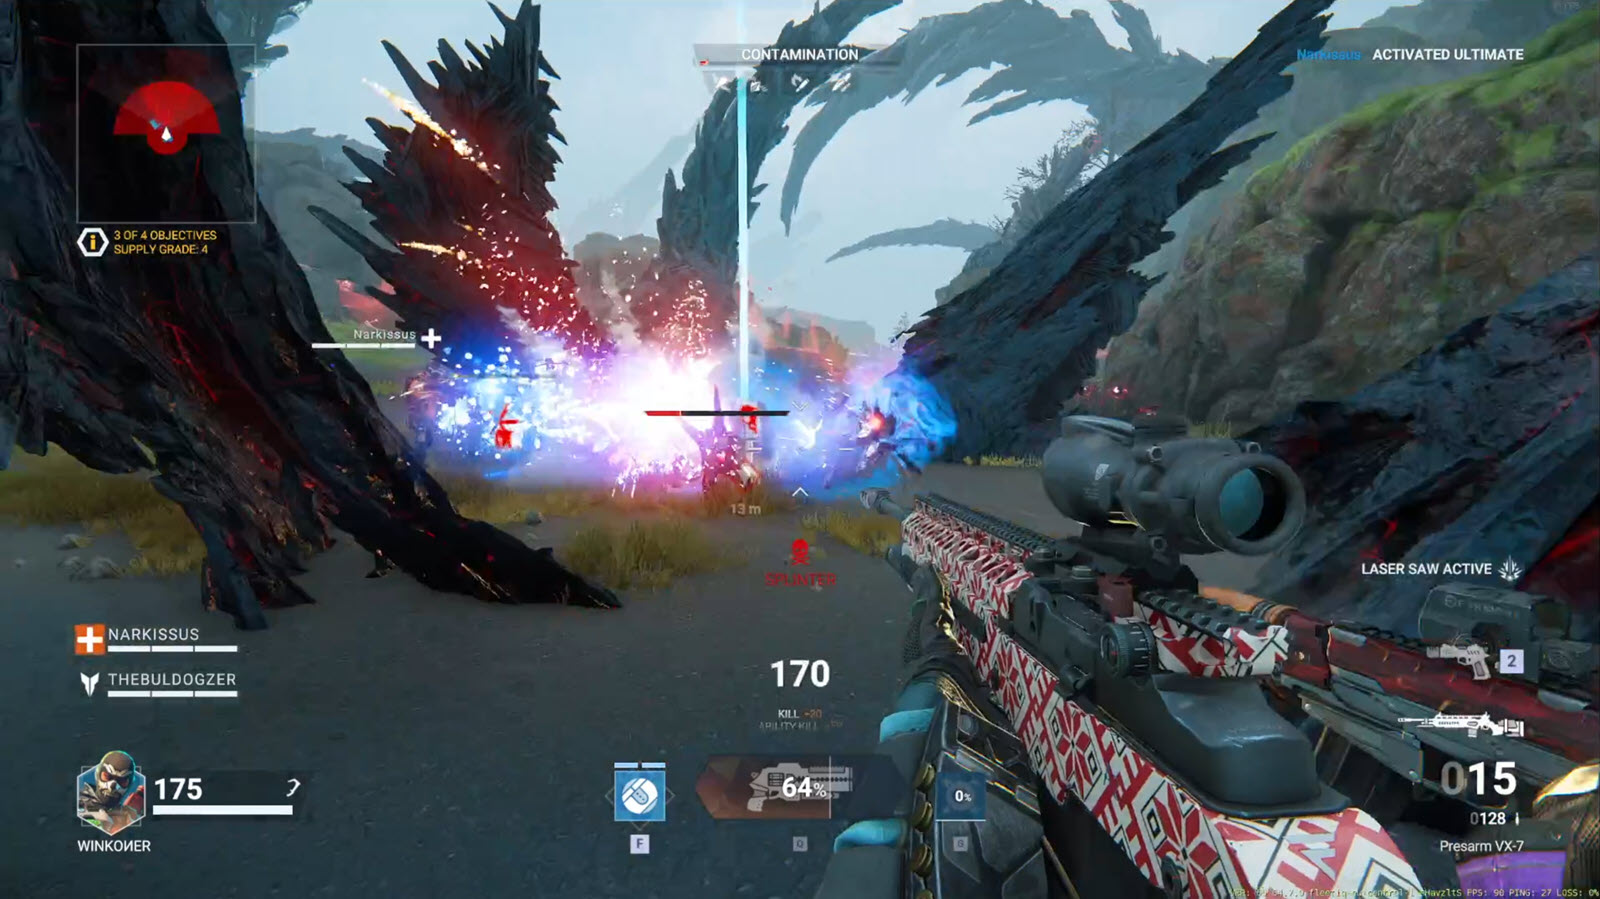
❔ Crystalline formation appears spawning Gardener and multiple enemies inside.
💡 꽤 간단하다, just kill everything that spawns. Good place to use ultimate and get over it quickly.
Crystalline Cocoons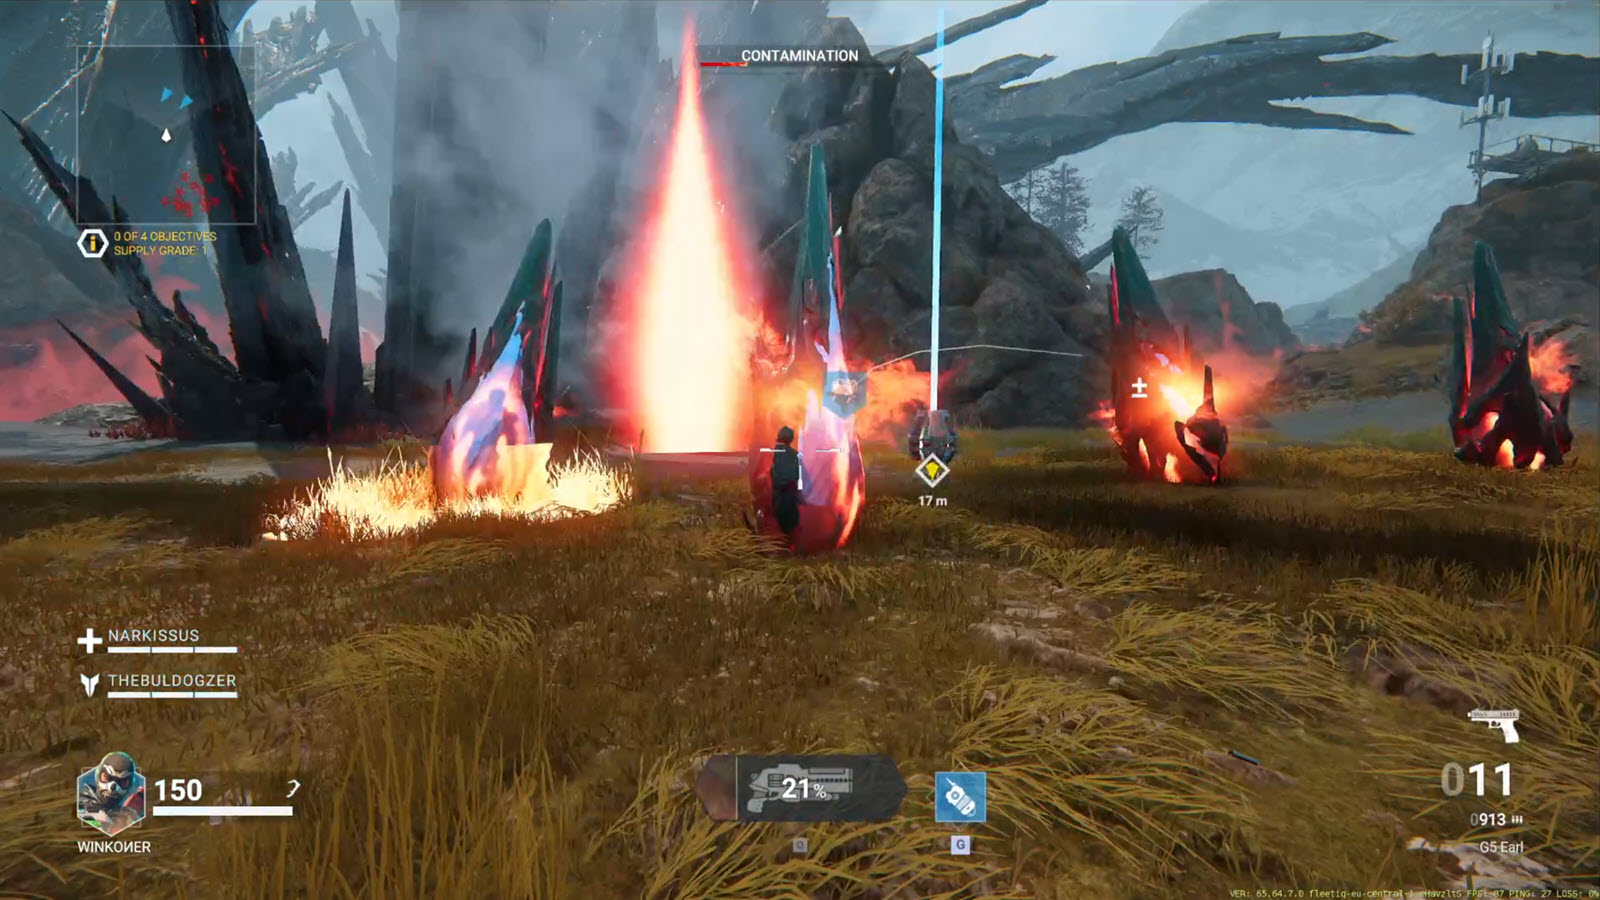
❔ Cocoons with timed spawn of enemies will start dropping from the skies.
💡 꽤 간단하다, you need to simply destroy the cocoons before they hatch. Focus on the ones that dropped earlier and you can beat this encounter without facing any enemies.
Strafer Drop Pod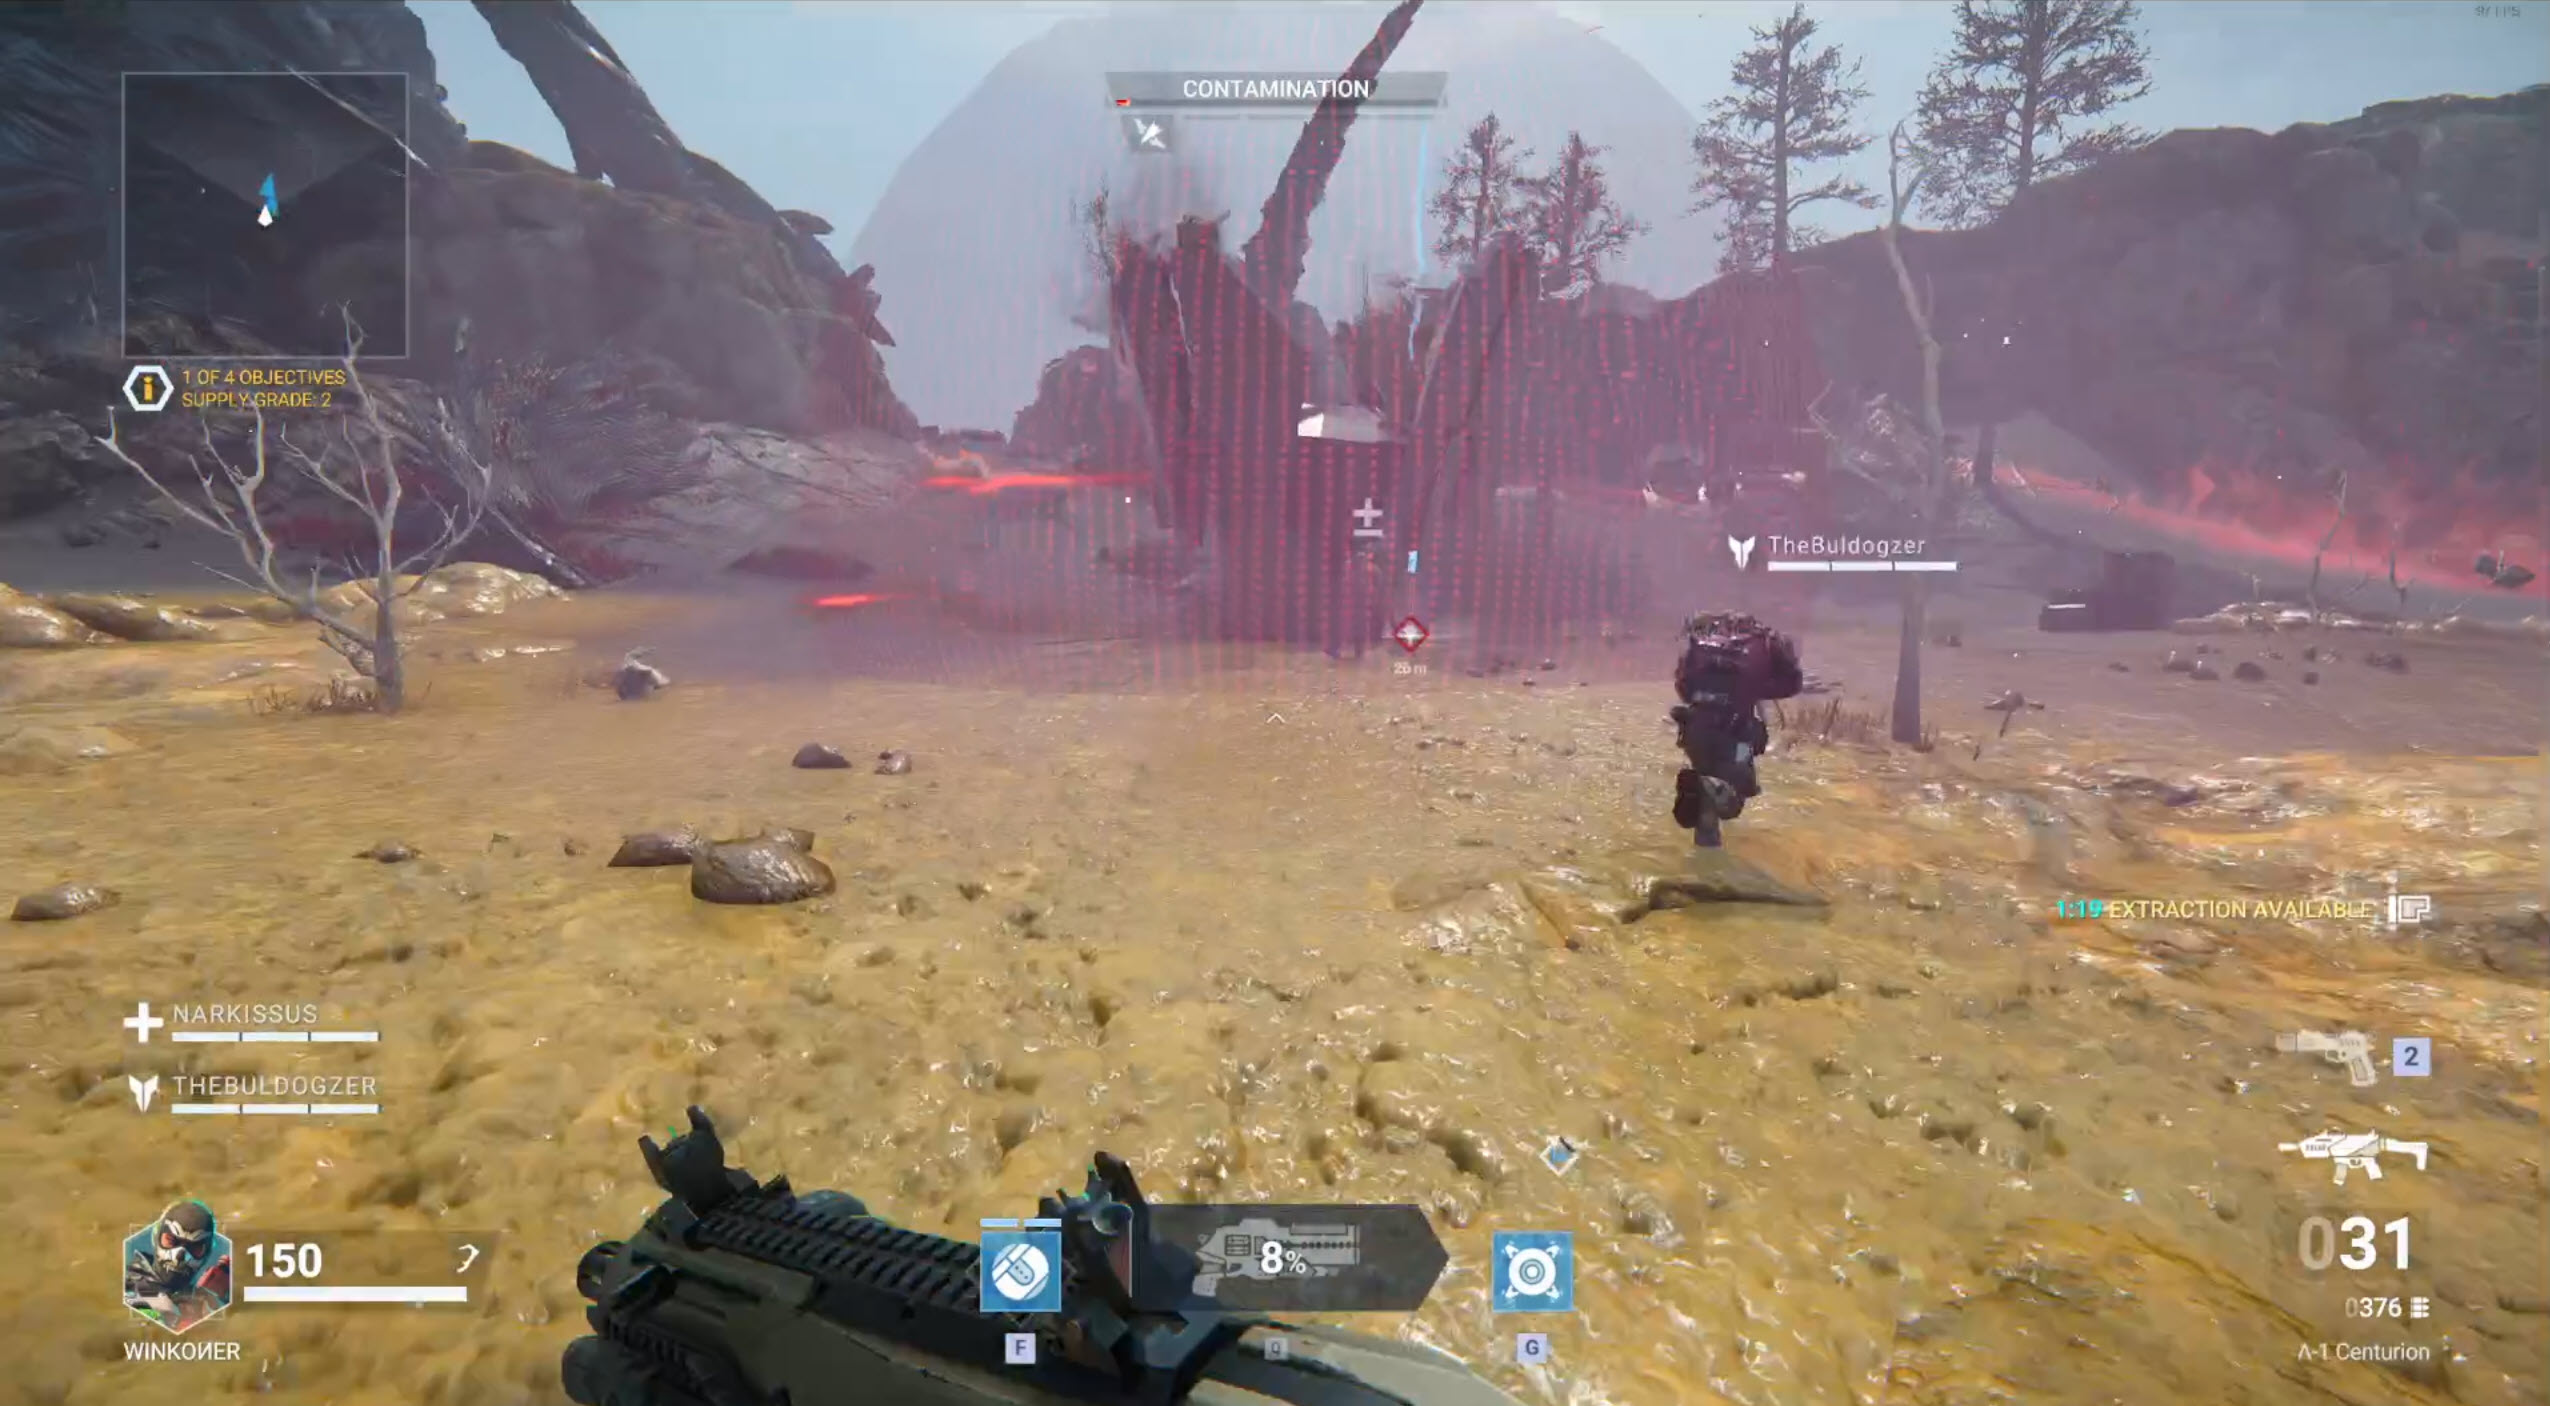
❔ Just a single-time spawn of Strafer enemies.
💡 Kill and move on.
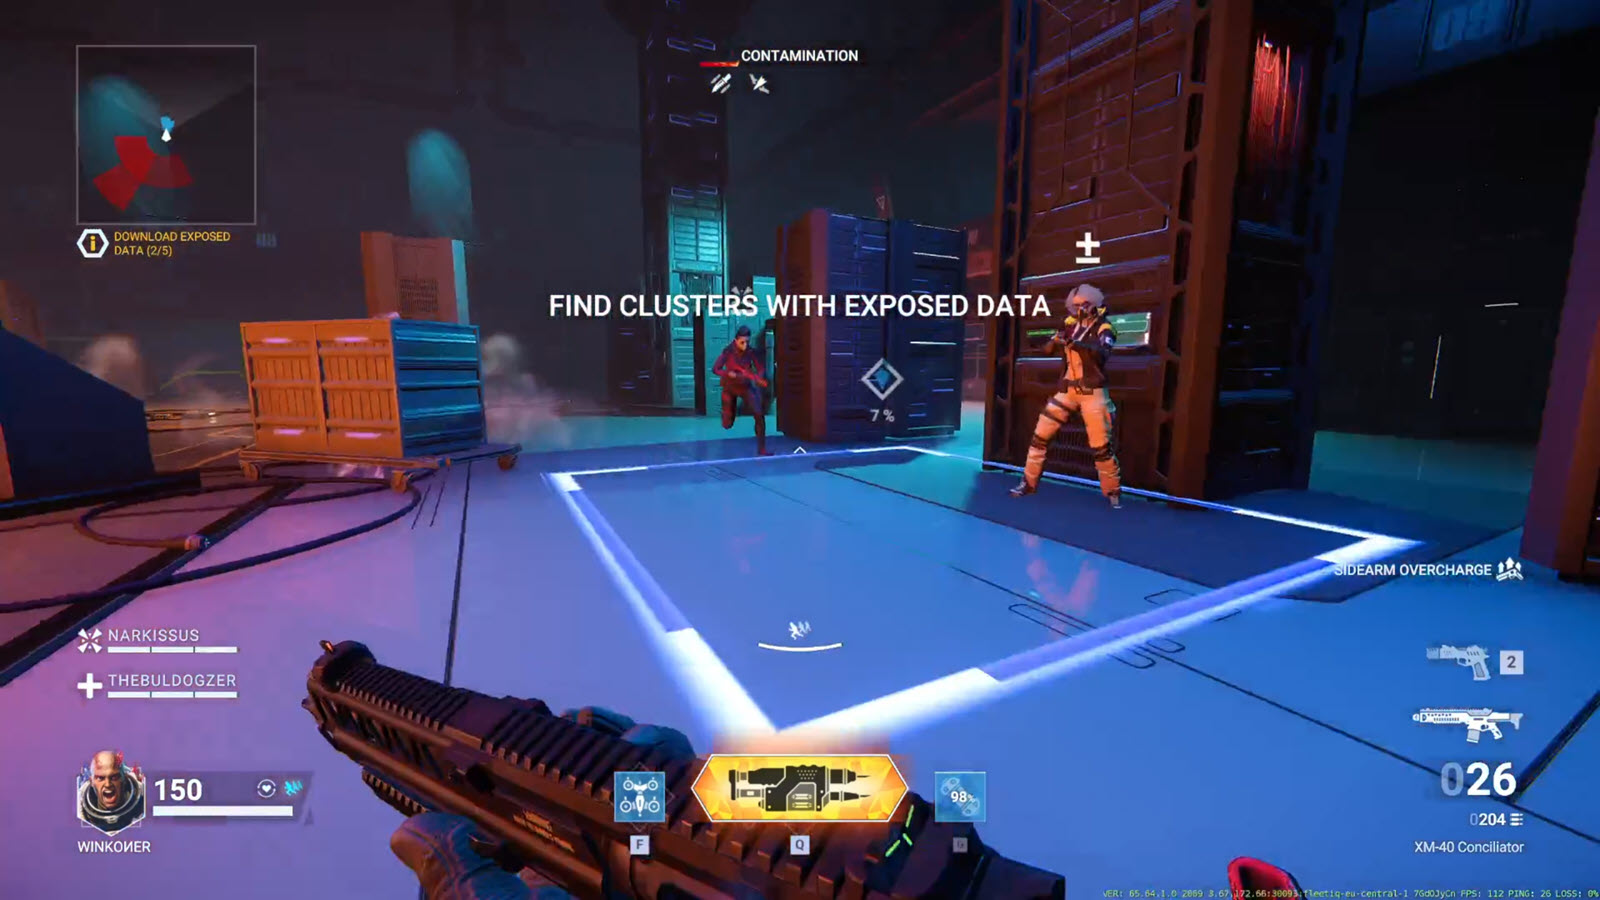
목표
Research Station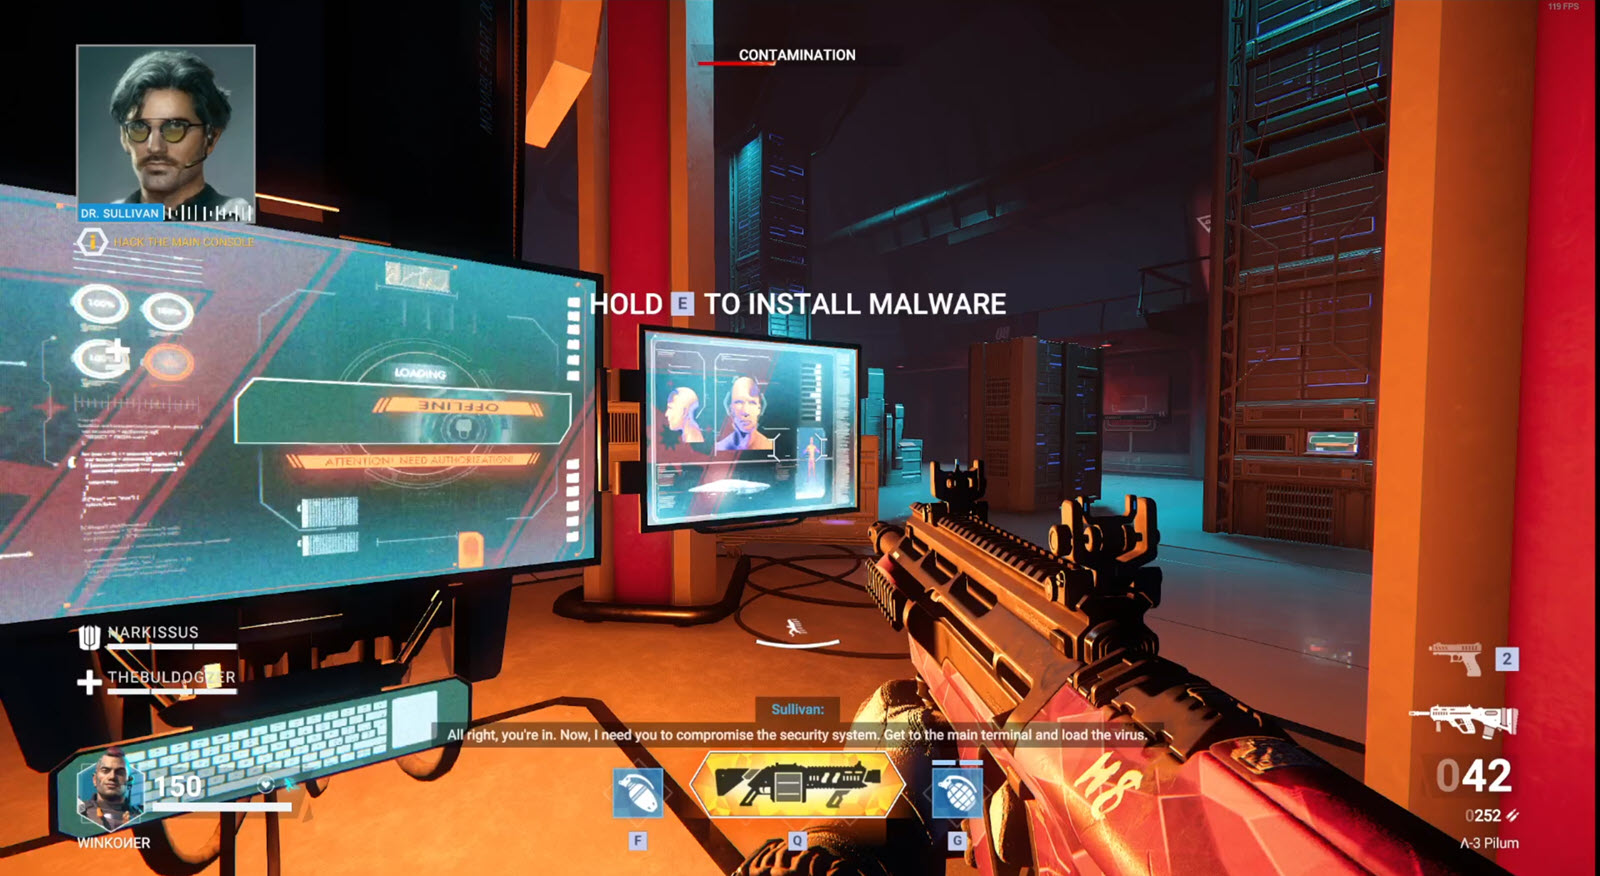
❔ Defend yourself while extracting data (capturing points) 총계 5 타임스.
💡 When big guys start spawning (파도 4 그리고 5) it is highly recommended to always clear out enemies first and extract the data after. You DON’T have to do this asap, the enemy spawn is limited. Be sure to look out for the Snipers and Rocketeers spawned on the balcony, as they do crazy damage sometimes.
⚡ Save your ultimate for last wave. Fifth wave can be overwhelming when one or two of you get downed so it’s a good place to wipe out big guys fast.
Cyborg Stilt
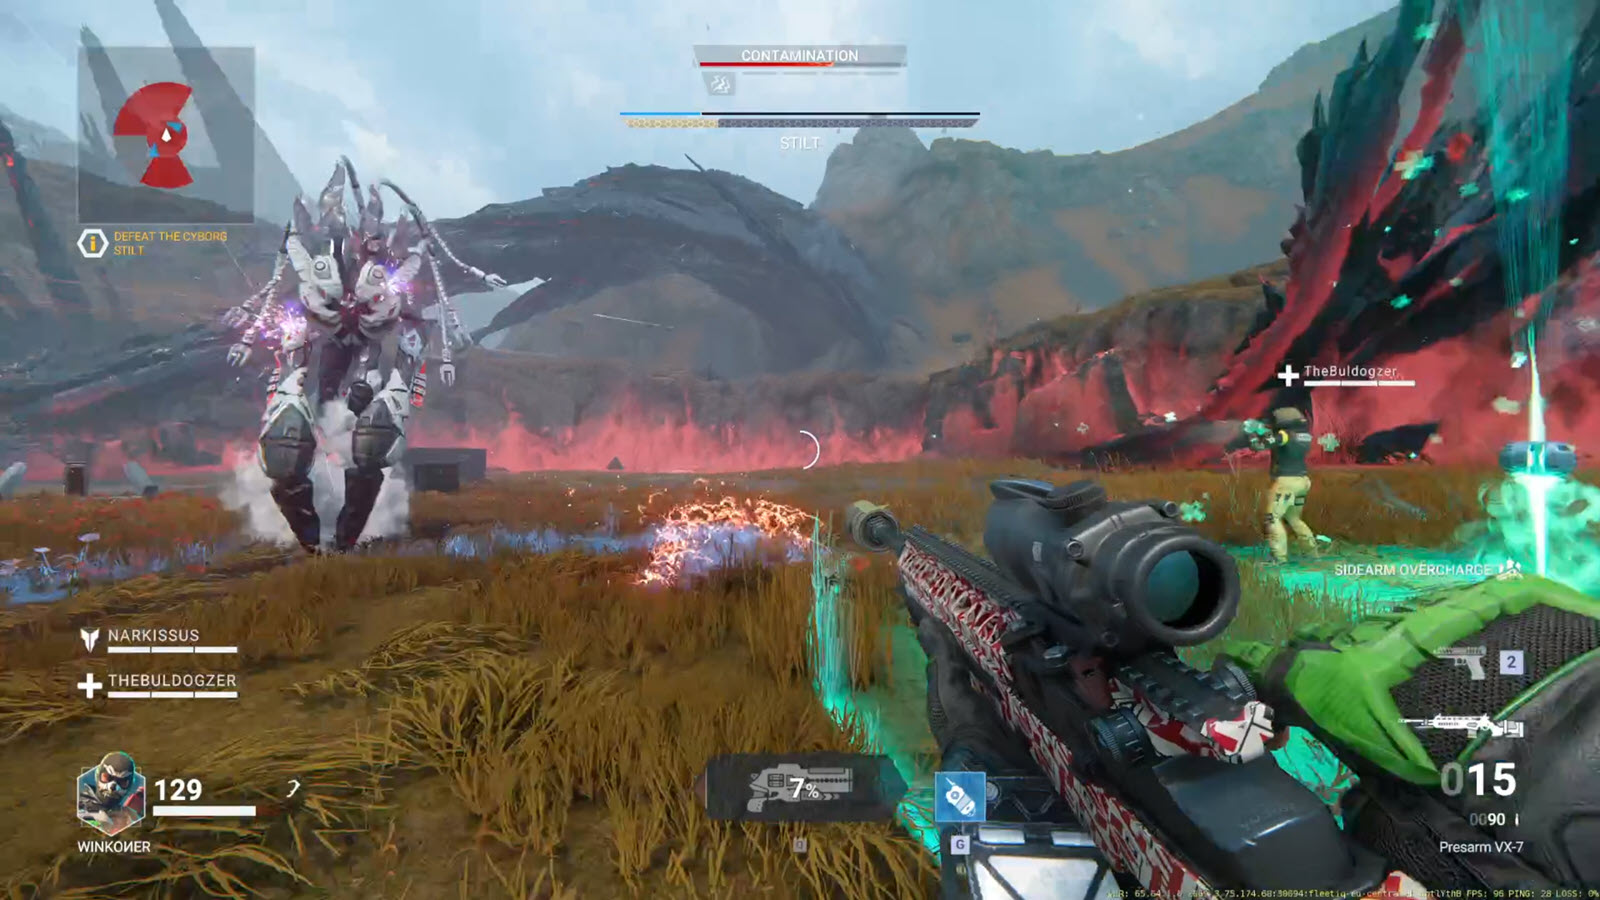
❔ You need to kill the Cyborg Stilt while groups of enemies are spawned.
💡 There is no damage limit so you can finish off Stilt in one quick succession as long as your damage output is high enough, but be aware that Strafer reinforcements are spawned in relation to his HP amount so if you leave him with sliver of HP, you will have to deal with big group of enemies. 그것은 말한다, it’s easier to kill the Stilt than facing the group of Minotaurs. So always focus Stilt and get rid of Snipers, there’s enough space to kite the rest.
⚡ Activating multiple damaging ultimates in order to kill Stilt in few seconds is recommended investment here. Besides ultimates, all explosives are useful to get his shield down (수류탄, C4, Sidearm Overcharge)
Fusion Reactor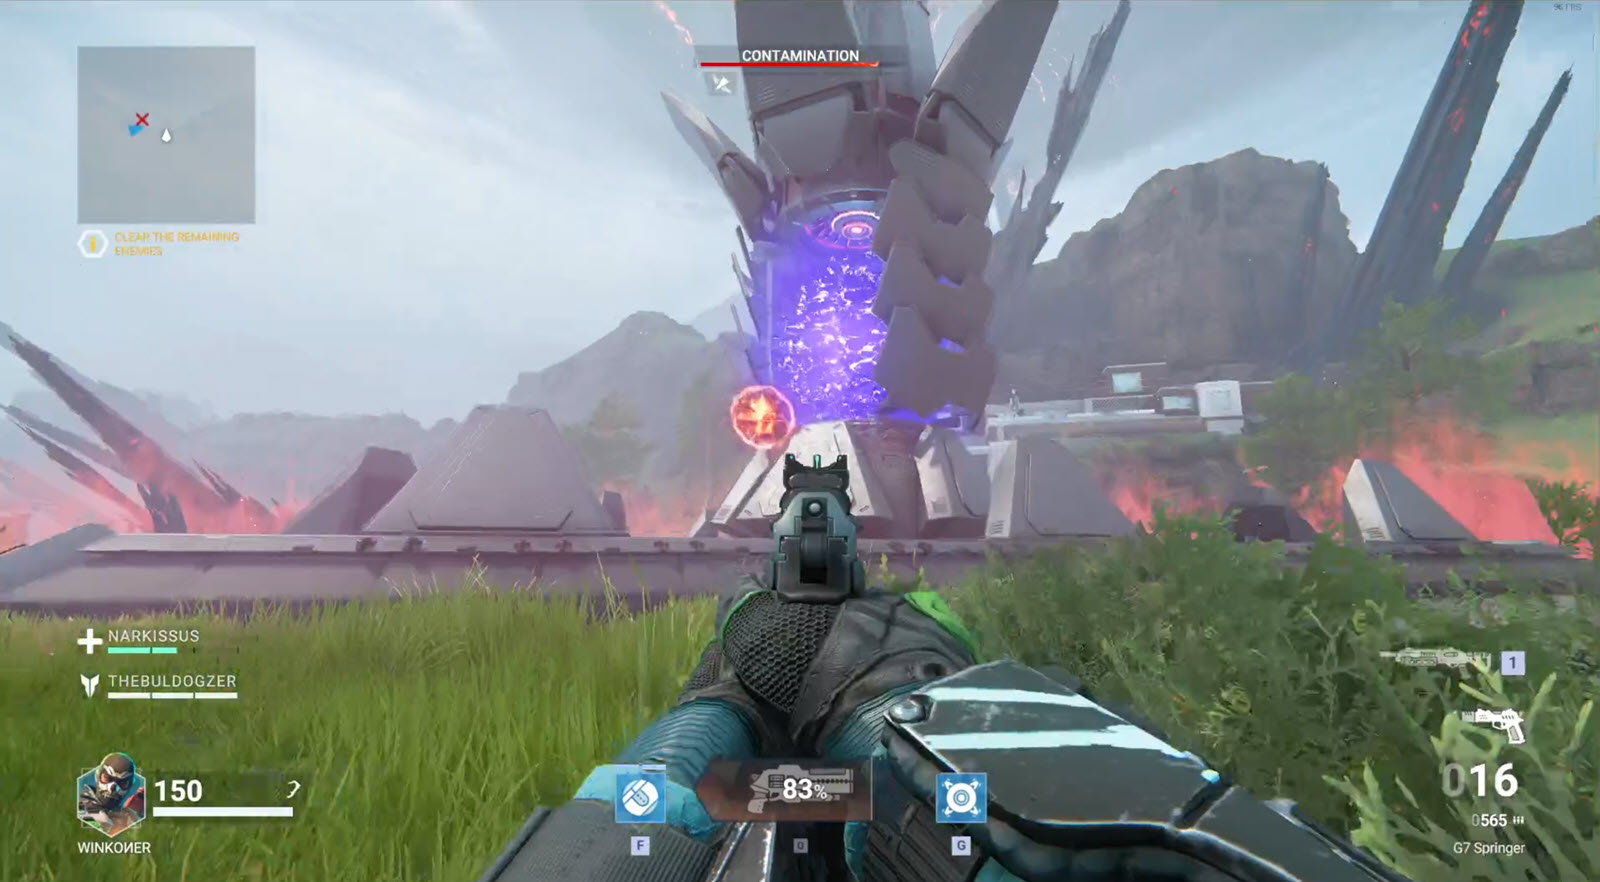
❔ You have to get the Orb of Ball Lightning into the reactor 3 타임스.
💡 While waves of enemies are spawned, you can quickly clean them off while the Orb is being generated. When one person is using the terminal to spawn the Orb, other two should focus on clearing seeker mines nearby as well as some leftover strafers. Then shoot the Orb with guns into the reactor core. Higher bullet dmg = higher velocity of the Orb.
⚡ Easiest way is to shoot the Orb from behind the terminal immediately as it spawns with a high-caliber sniper-rifle or shotgun. Also tell your teammates to stay away as the Orb can start following them.
⚡ 재미있는 사실: If you received Ball Lightning as Contamination, you can use it too! Killing two birds with one stone and finishing the objective much quicker.
Soil Probes Defense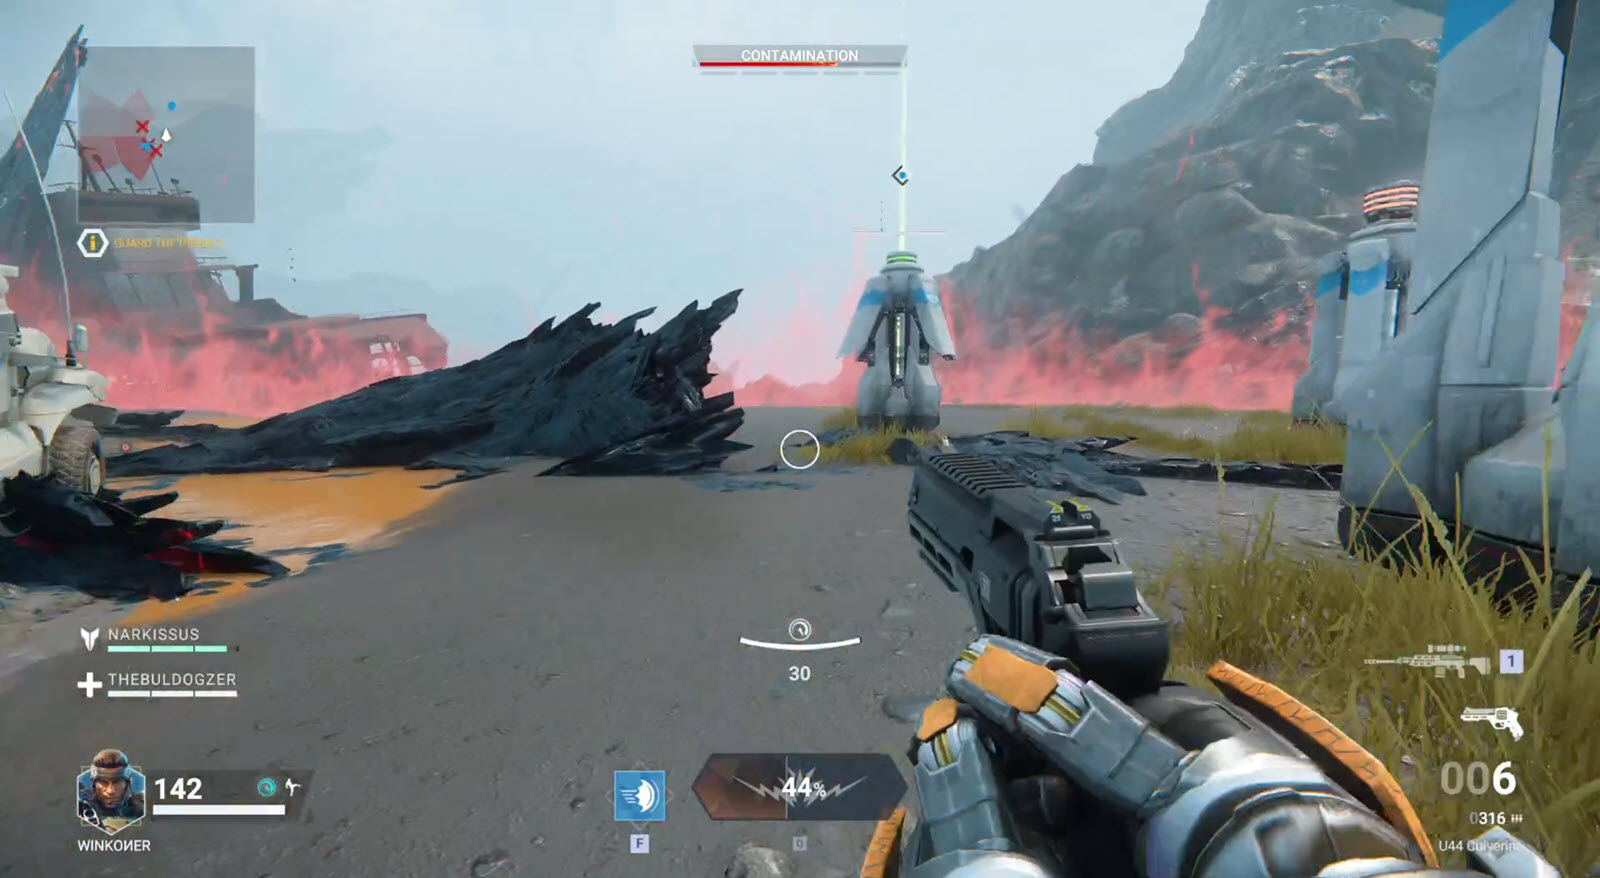
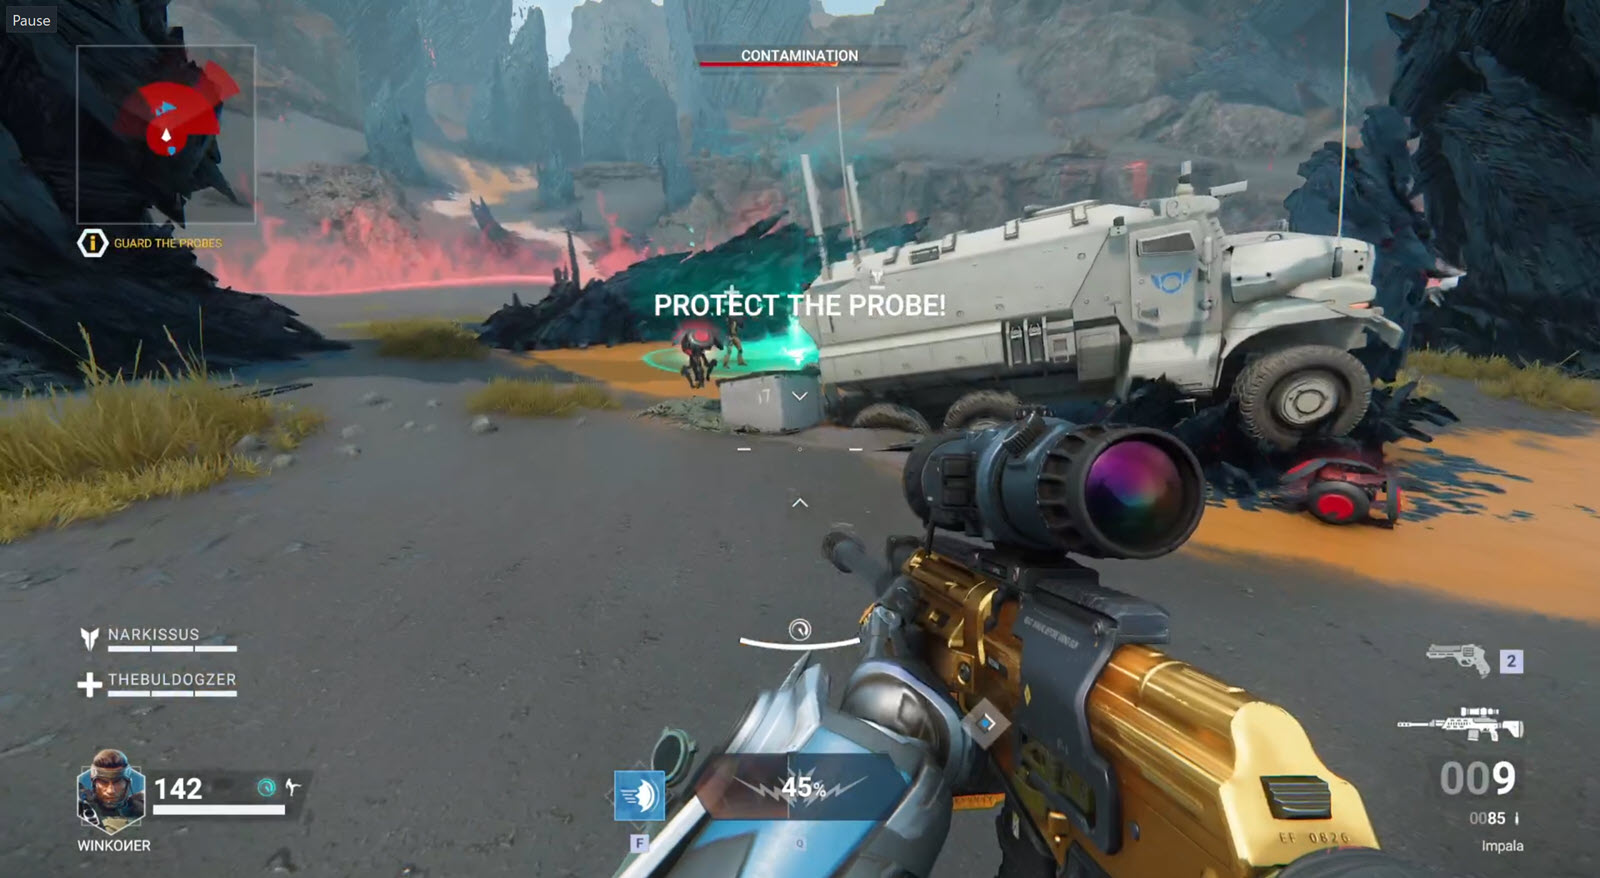
❔ Basic defense mission. Three probes (한 번에 하나씩) will be spawned for you to defend.
💡 Always be aware of the seeker mines that are spawned in the middle around the car. Mission won’t fail if probe will get destroyed, new one will spawn instead making the mission a bit longer. Defend successfully three times and objective is yours.
⚡ Wall grenades (Strix, Kite) can be useful here as they can block or draw enemies to it instead of attacking the probes.
Sample Extraction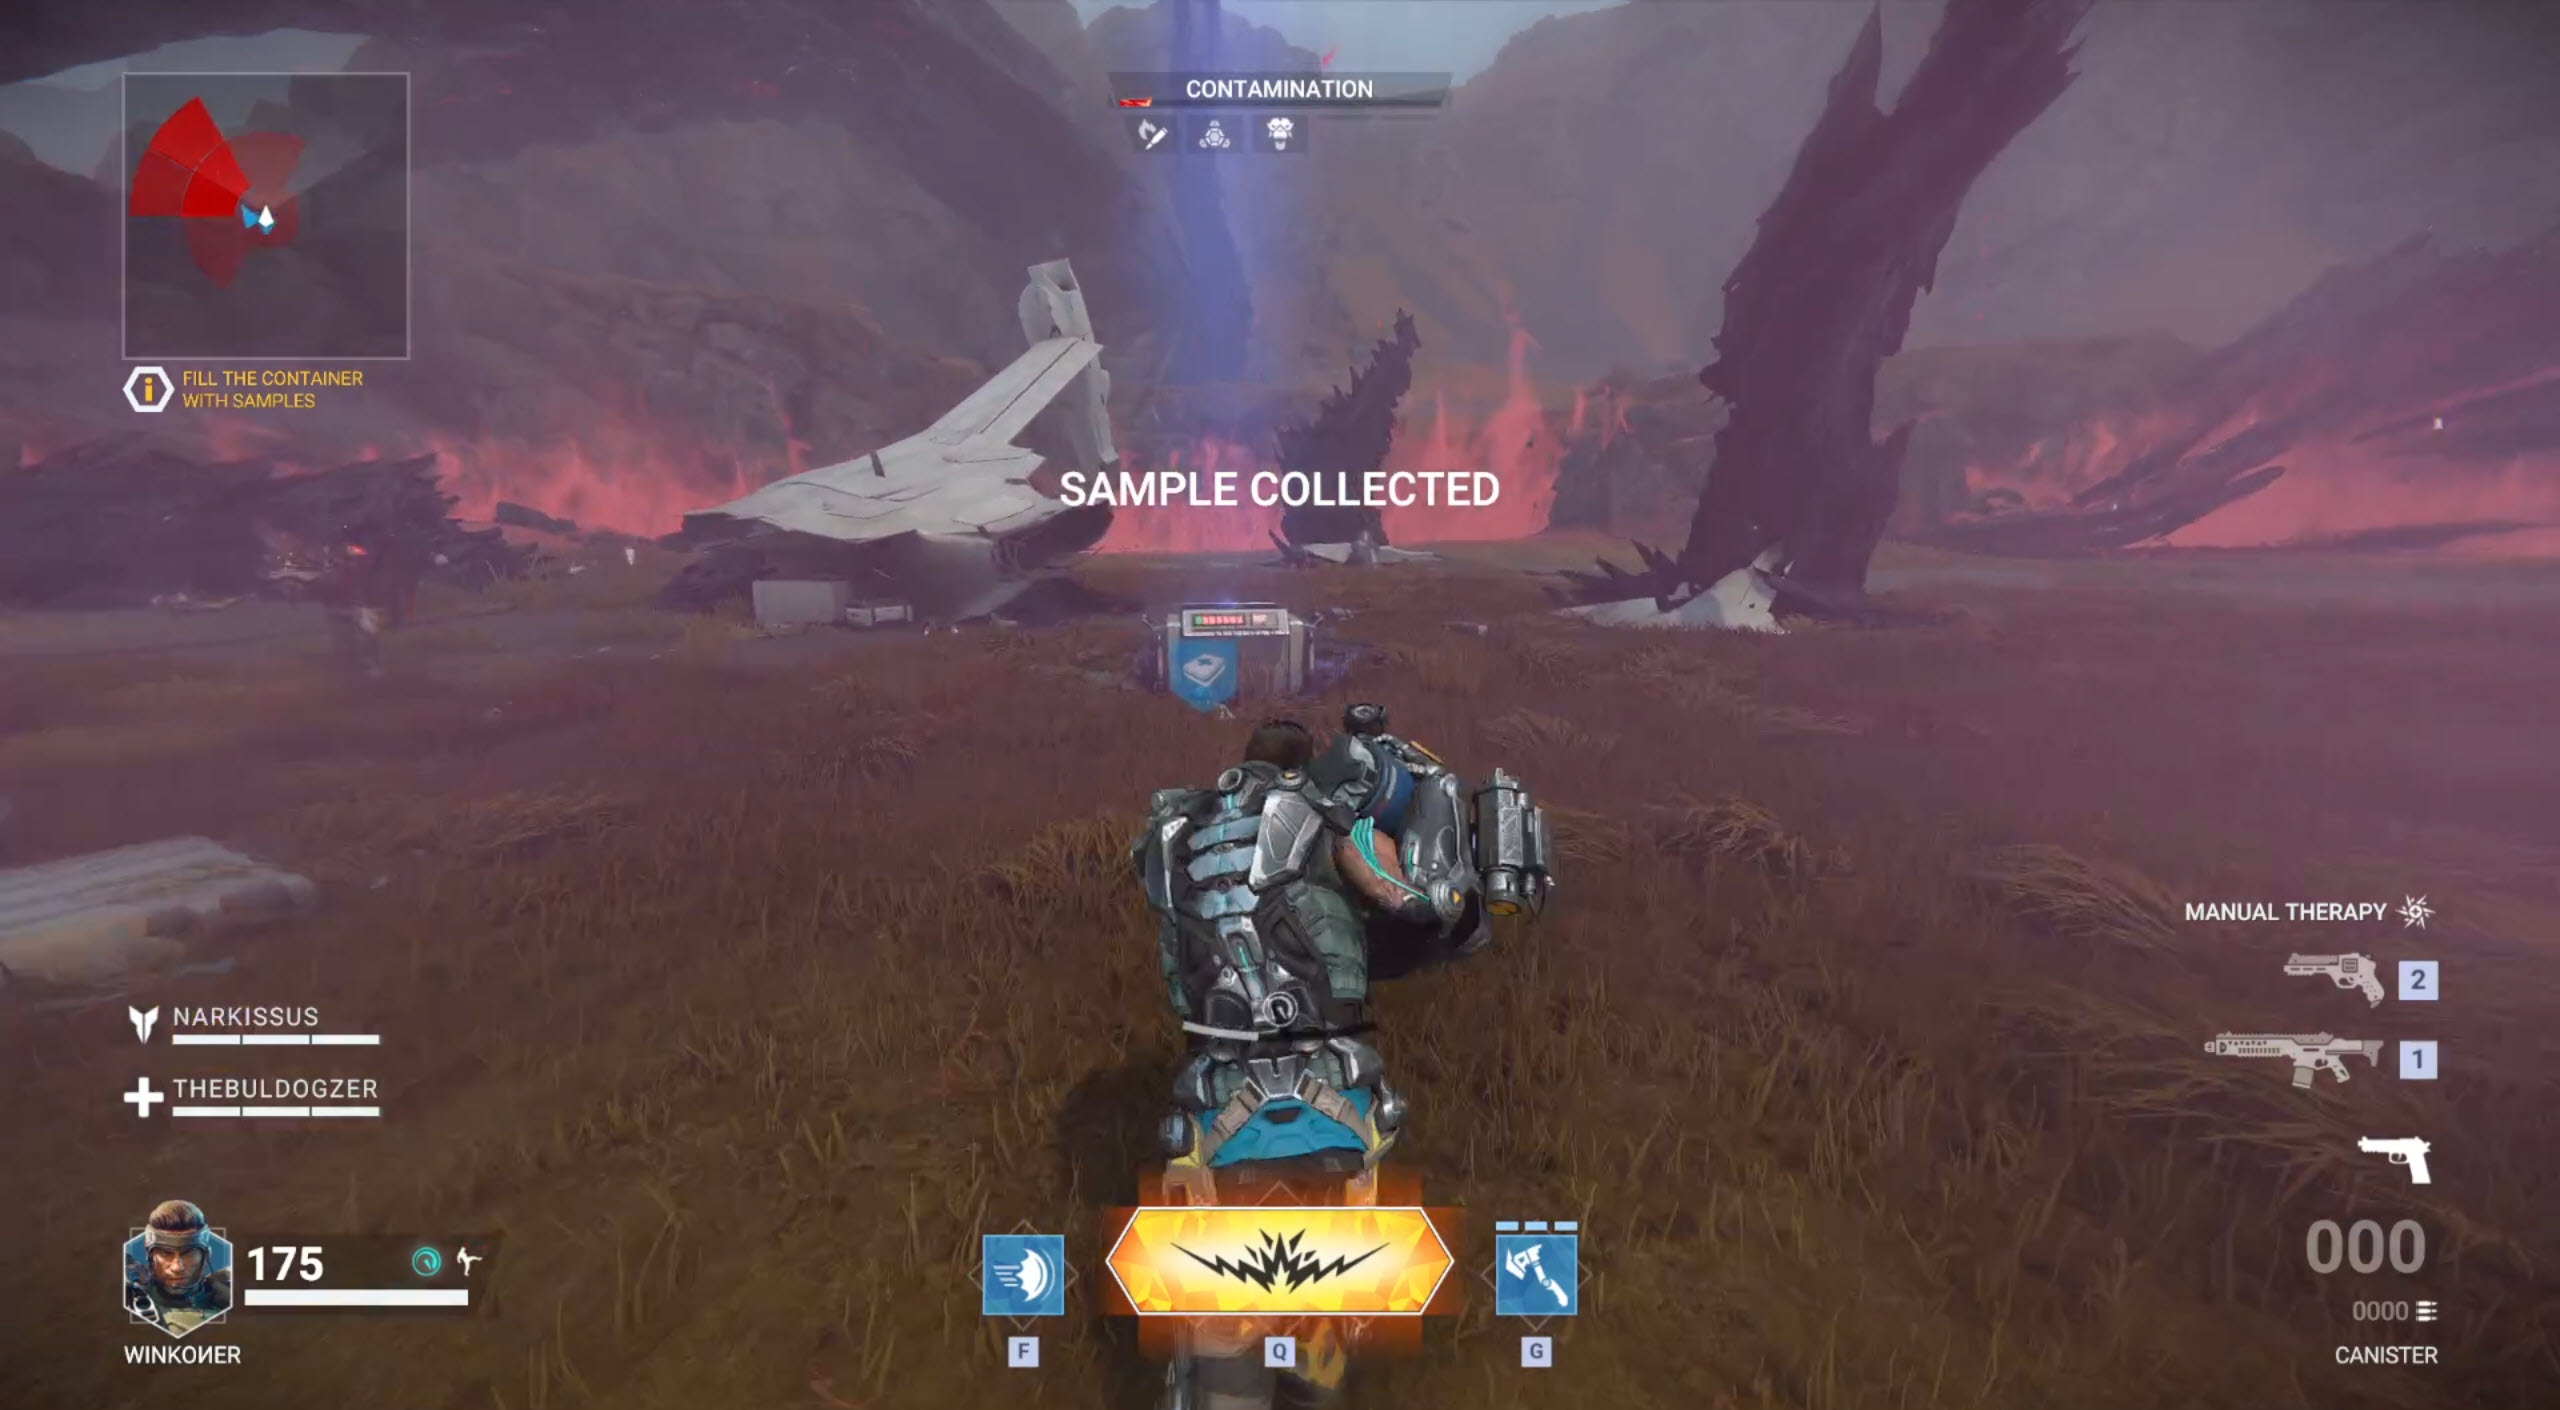
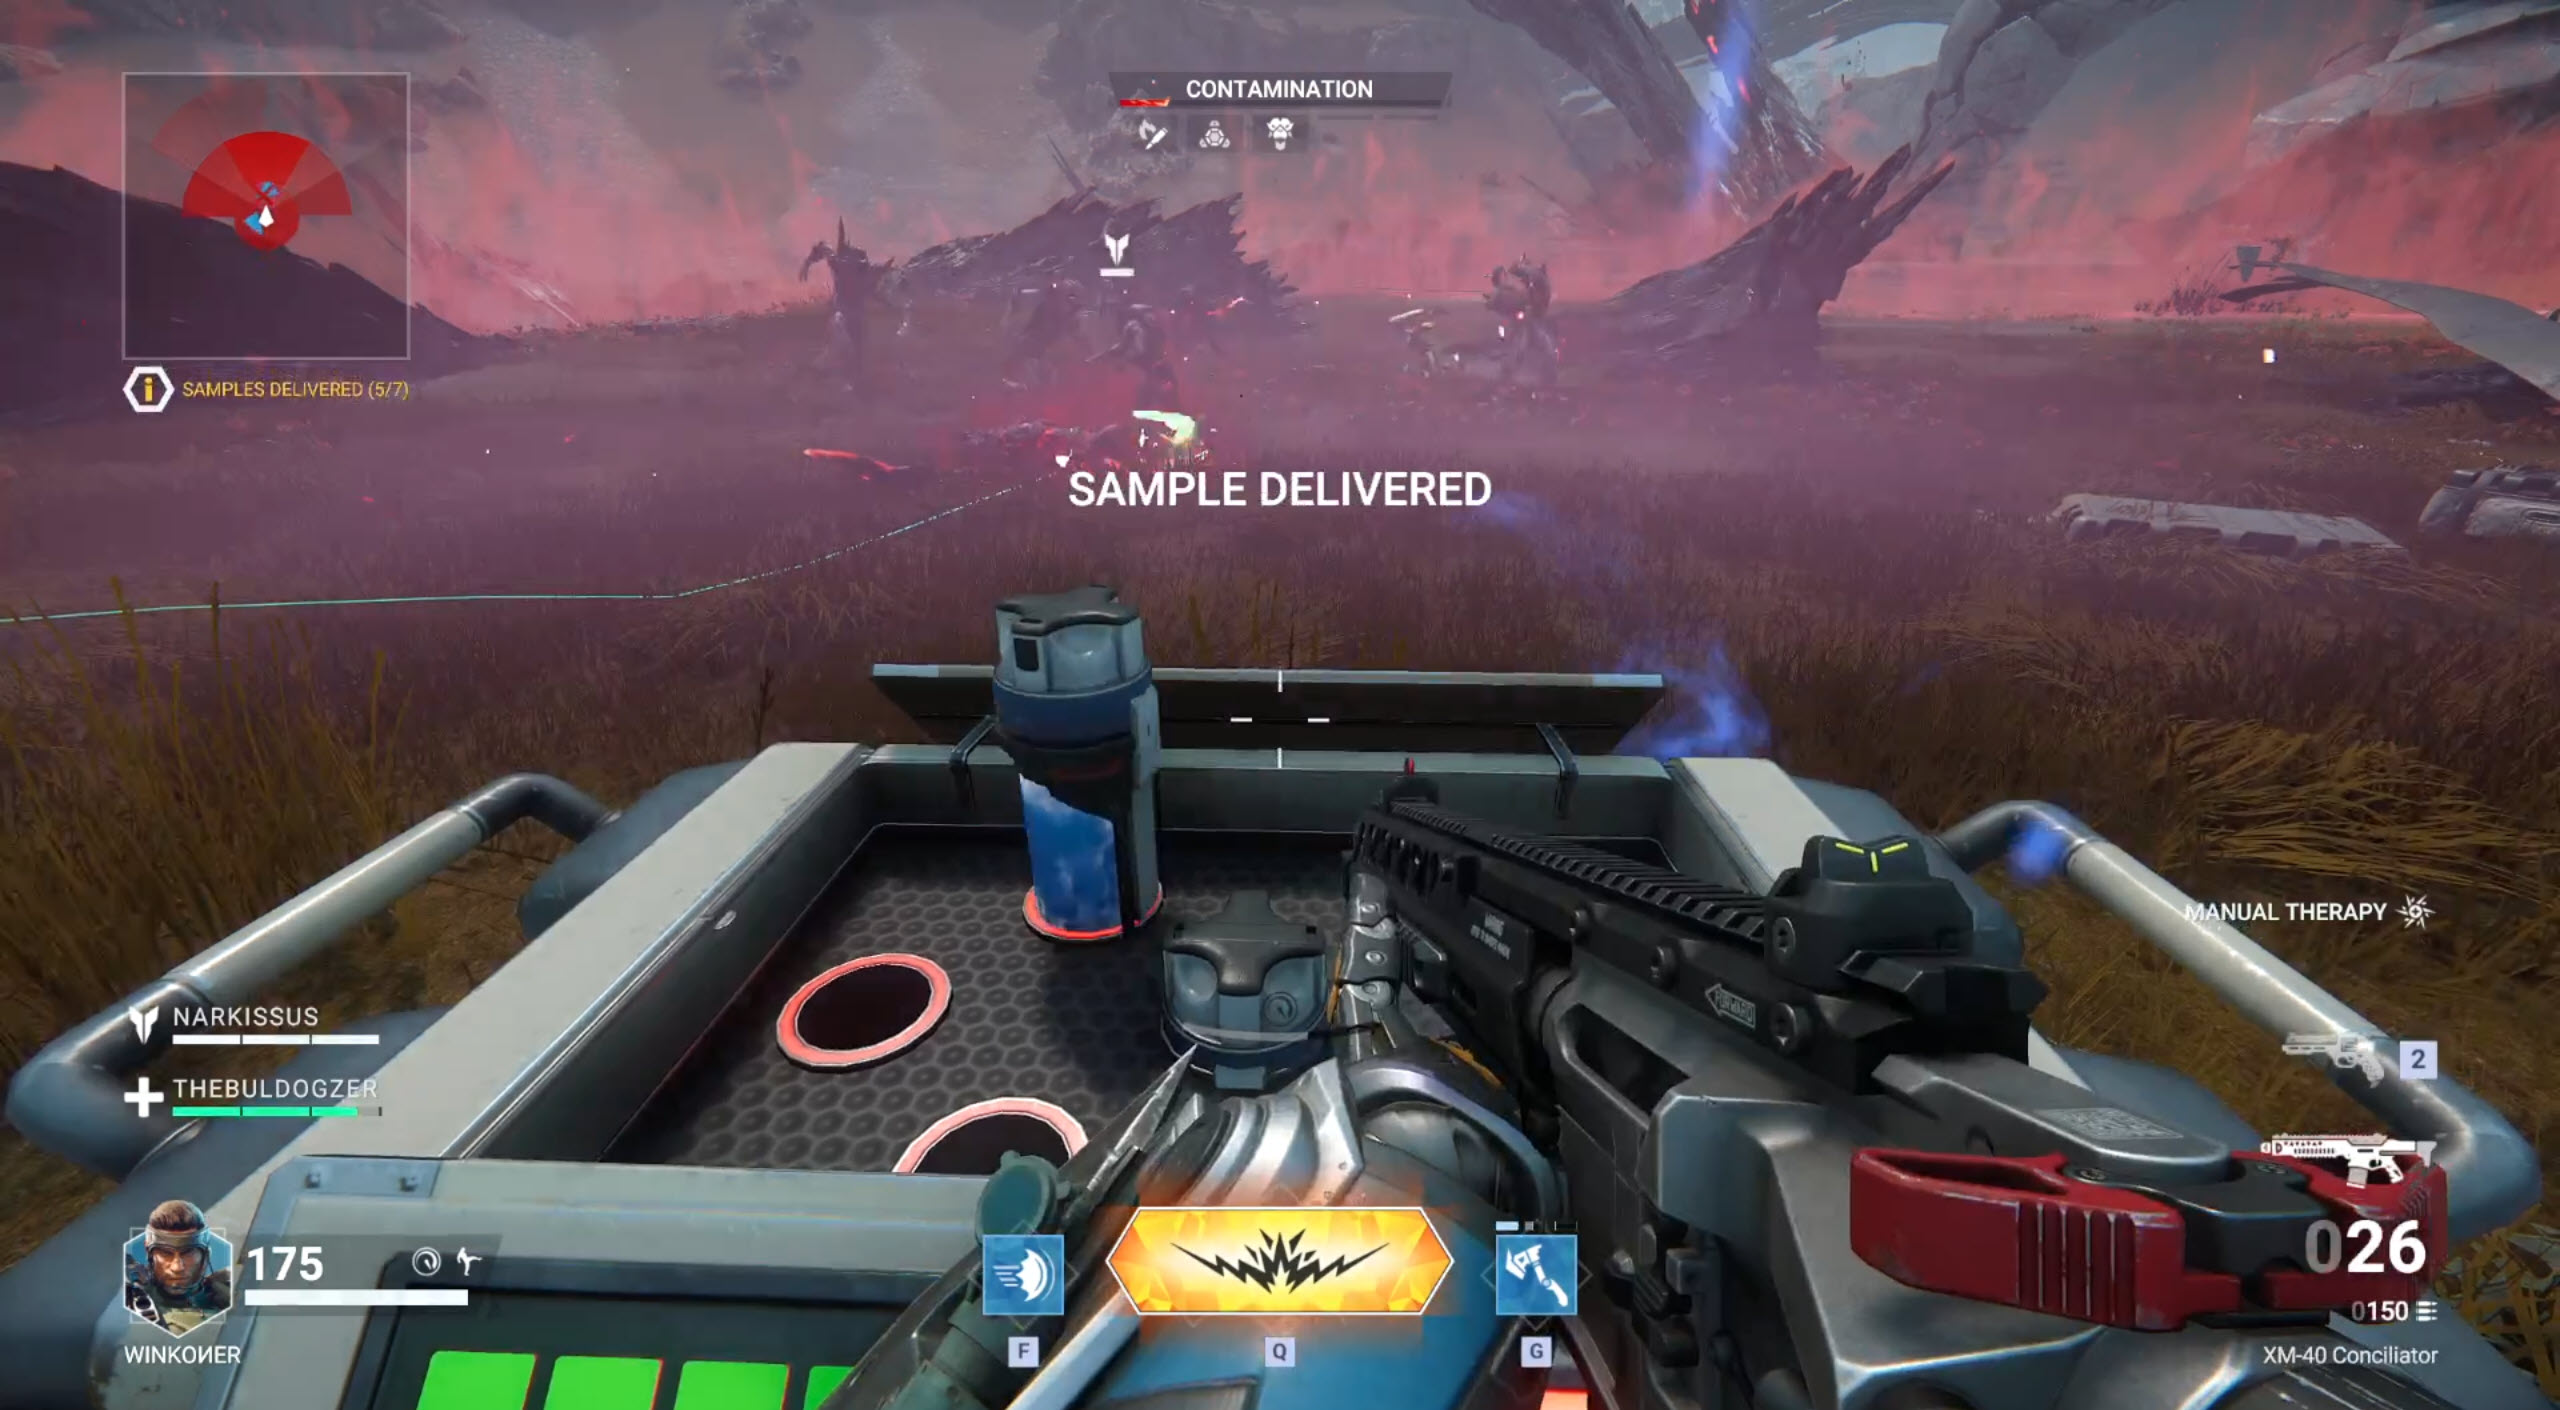
❔ You have to kill deliver 7 samples collected from killed Shardskins while waves of crystalline enemies are spawned at you.
💡 Be sure to not kill Shardskins if no one is nearby to collect the sample. If the sample remains on ground for too long it will spawn Spitfire and slow your progress.
⚡ Wall grenades (Strix, Kite) can be useful here as they can block or draw enemies to it, instead of attacking you while you collect samples.
Transmutator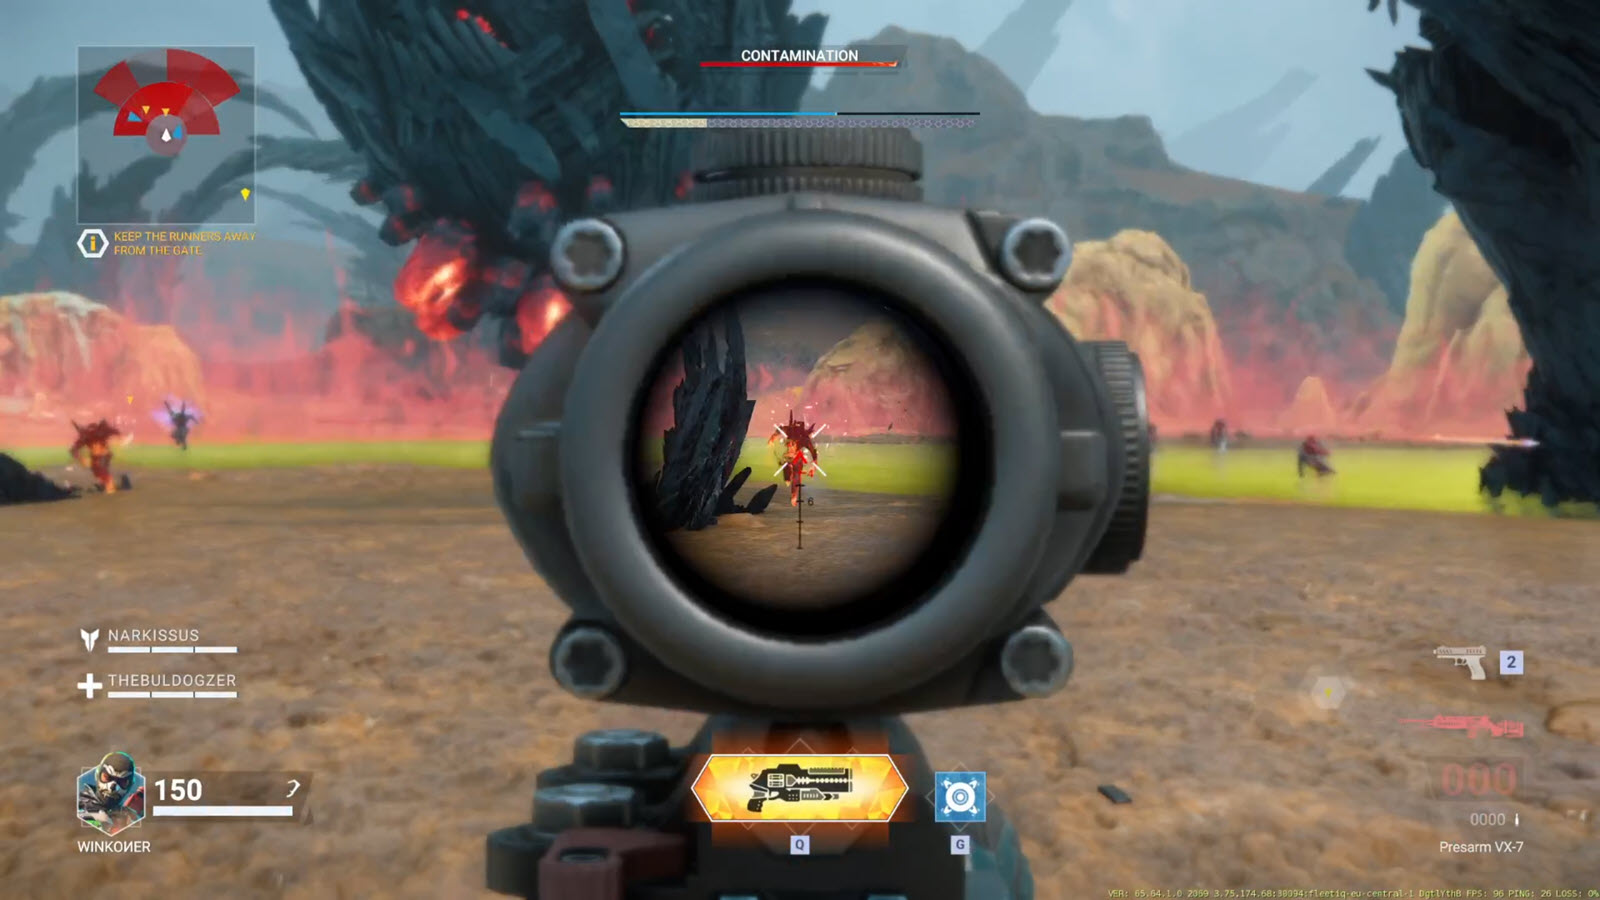
❔ You have to keep Runners from reaching transmutator gate and shoot the core when exposed.
💡 Safest formation is probably all three of you together near the gate. One person guarding gate and two people each at one side killing Splinters is also viable. One way or another, keep yourself moving as Splinters can get sometimes quite deadly here. Don’t let any runner near the gate and when the core is exposed, shoot it with everything you got but keep moving as it will try to strike you from above. Also don’t try use Ultimates on the core as there is damage threshold set and it cannot be done faster than in three attempts (contrary to the Grinder for example). If you let runner in, the Transmutator will spawn group of Adamants and Glass Hounds.
⚡ Probably only place where Brisa can be useful with her Glass Mine as it can stop runner when placed next to the gate. Pill’s Stasis Field grenade can stop the runners as well, but they are generally not hard to kill.
분쇄기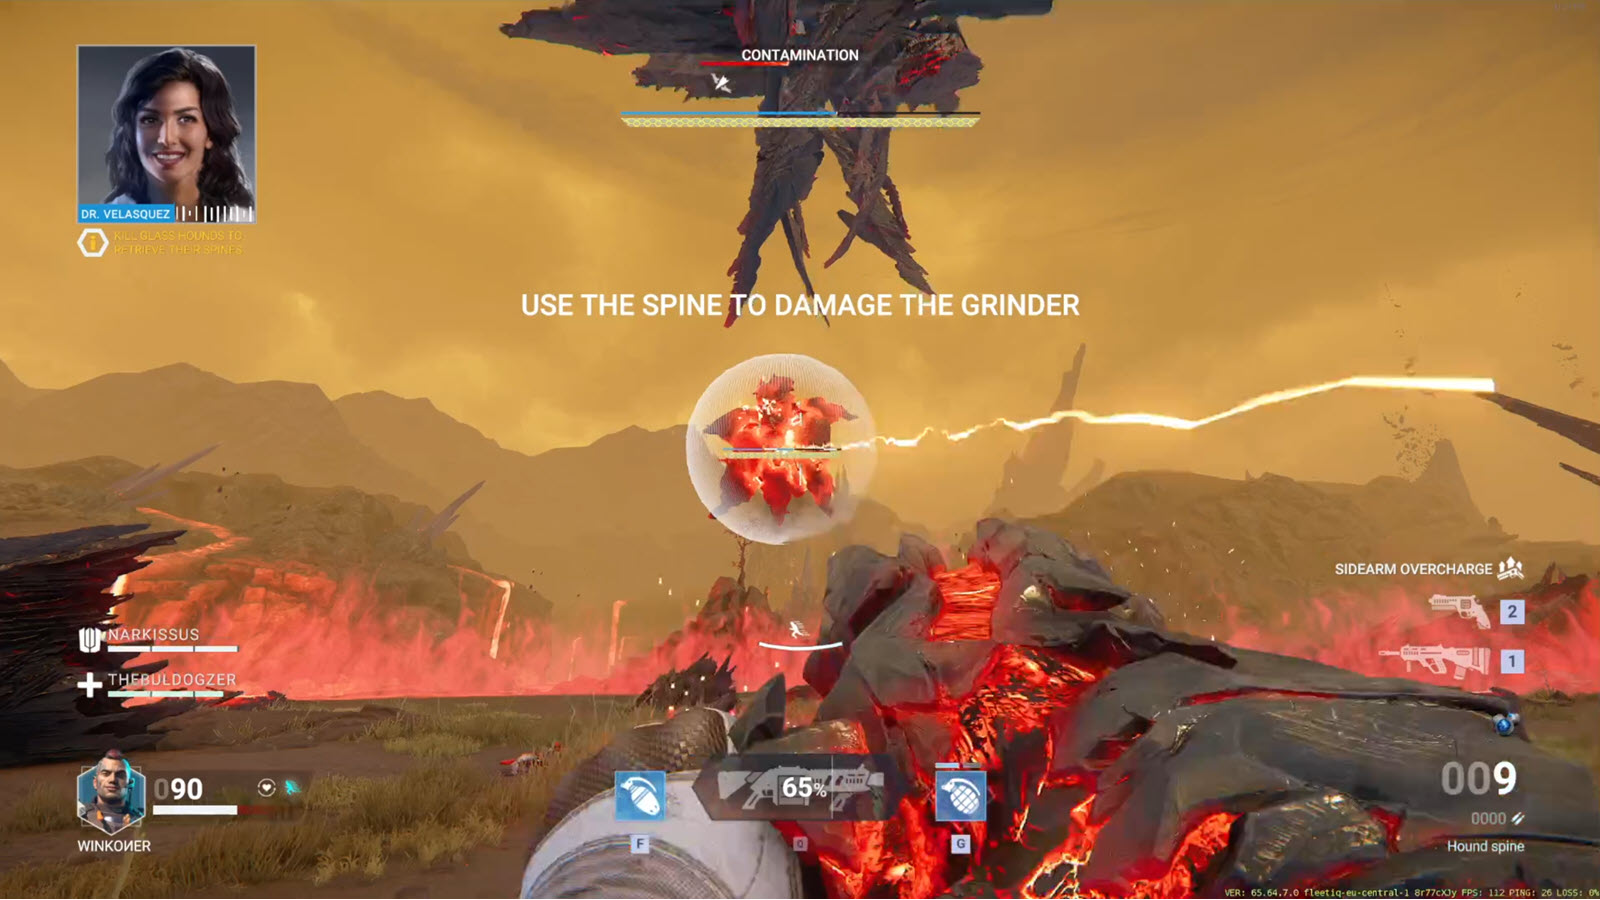
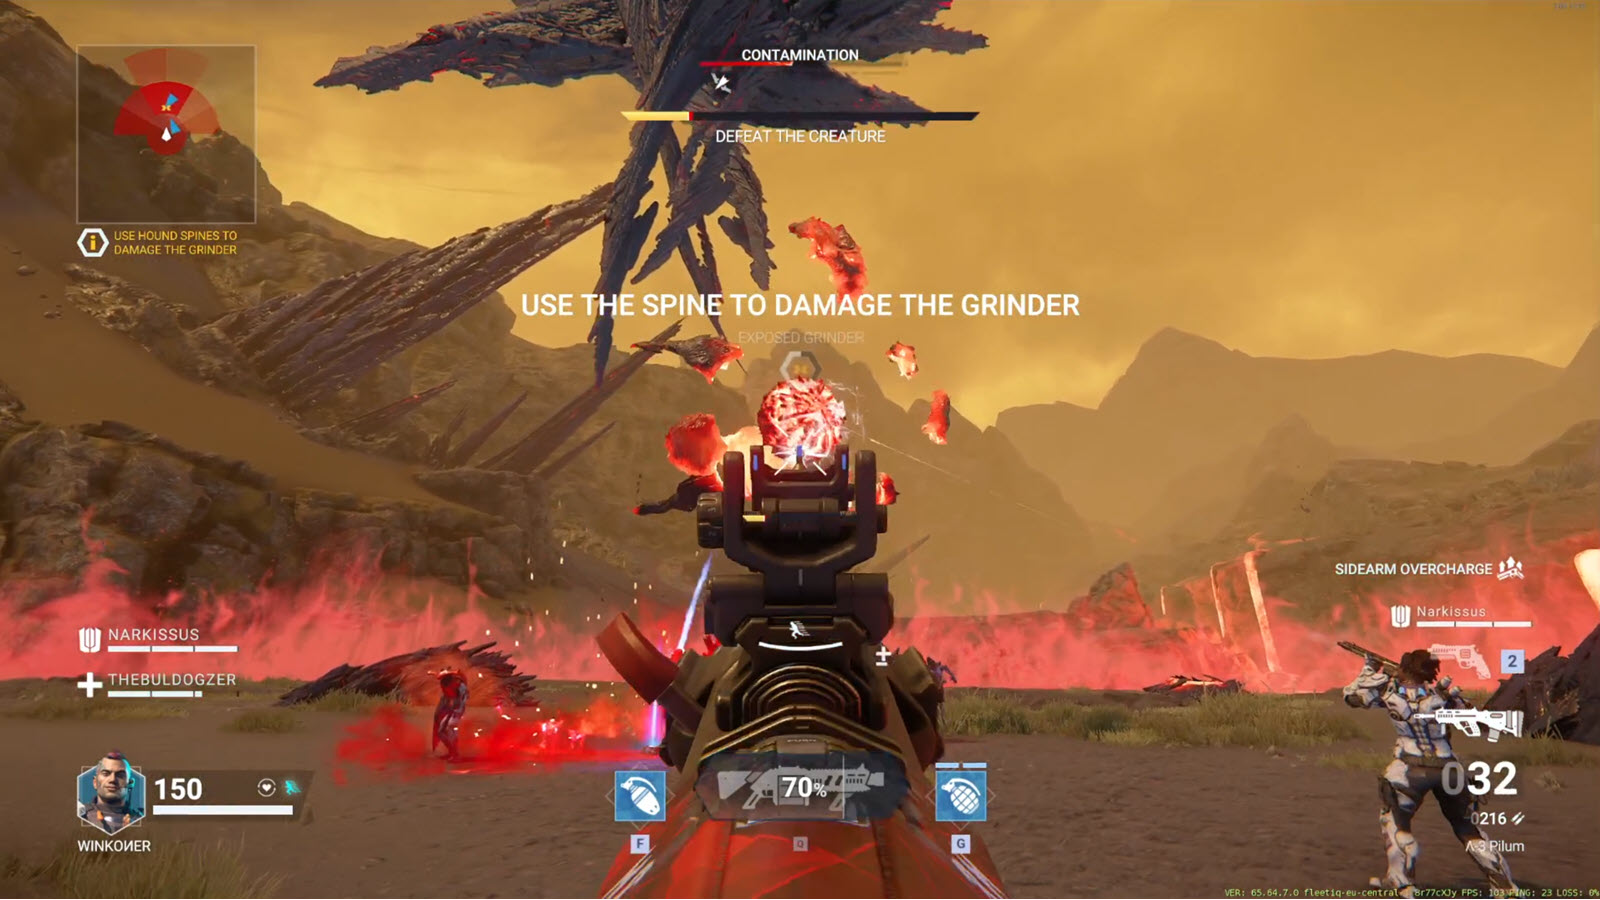
❔ Defend until bomber dog (glass hound) is spawned, kill it and use the dropped spine to shoot down the Grinder’s shield.
💡 Be sure to kill the glass hound every time, even if you can’t pick up the spine. Contrary to sample extraction, spine can evaporate on the ground without penalization, but if the dog reaches the grinder the grinder will start dealing out some damage (take cover if that happens). Grinder can be finished in 2 라운드, but not faster. There’s a limit for 50% HP in one go. No need to waste ultimate unless your damage output is less than half of its HP pool.
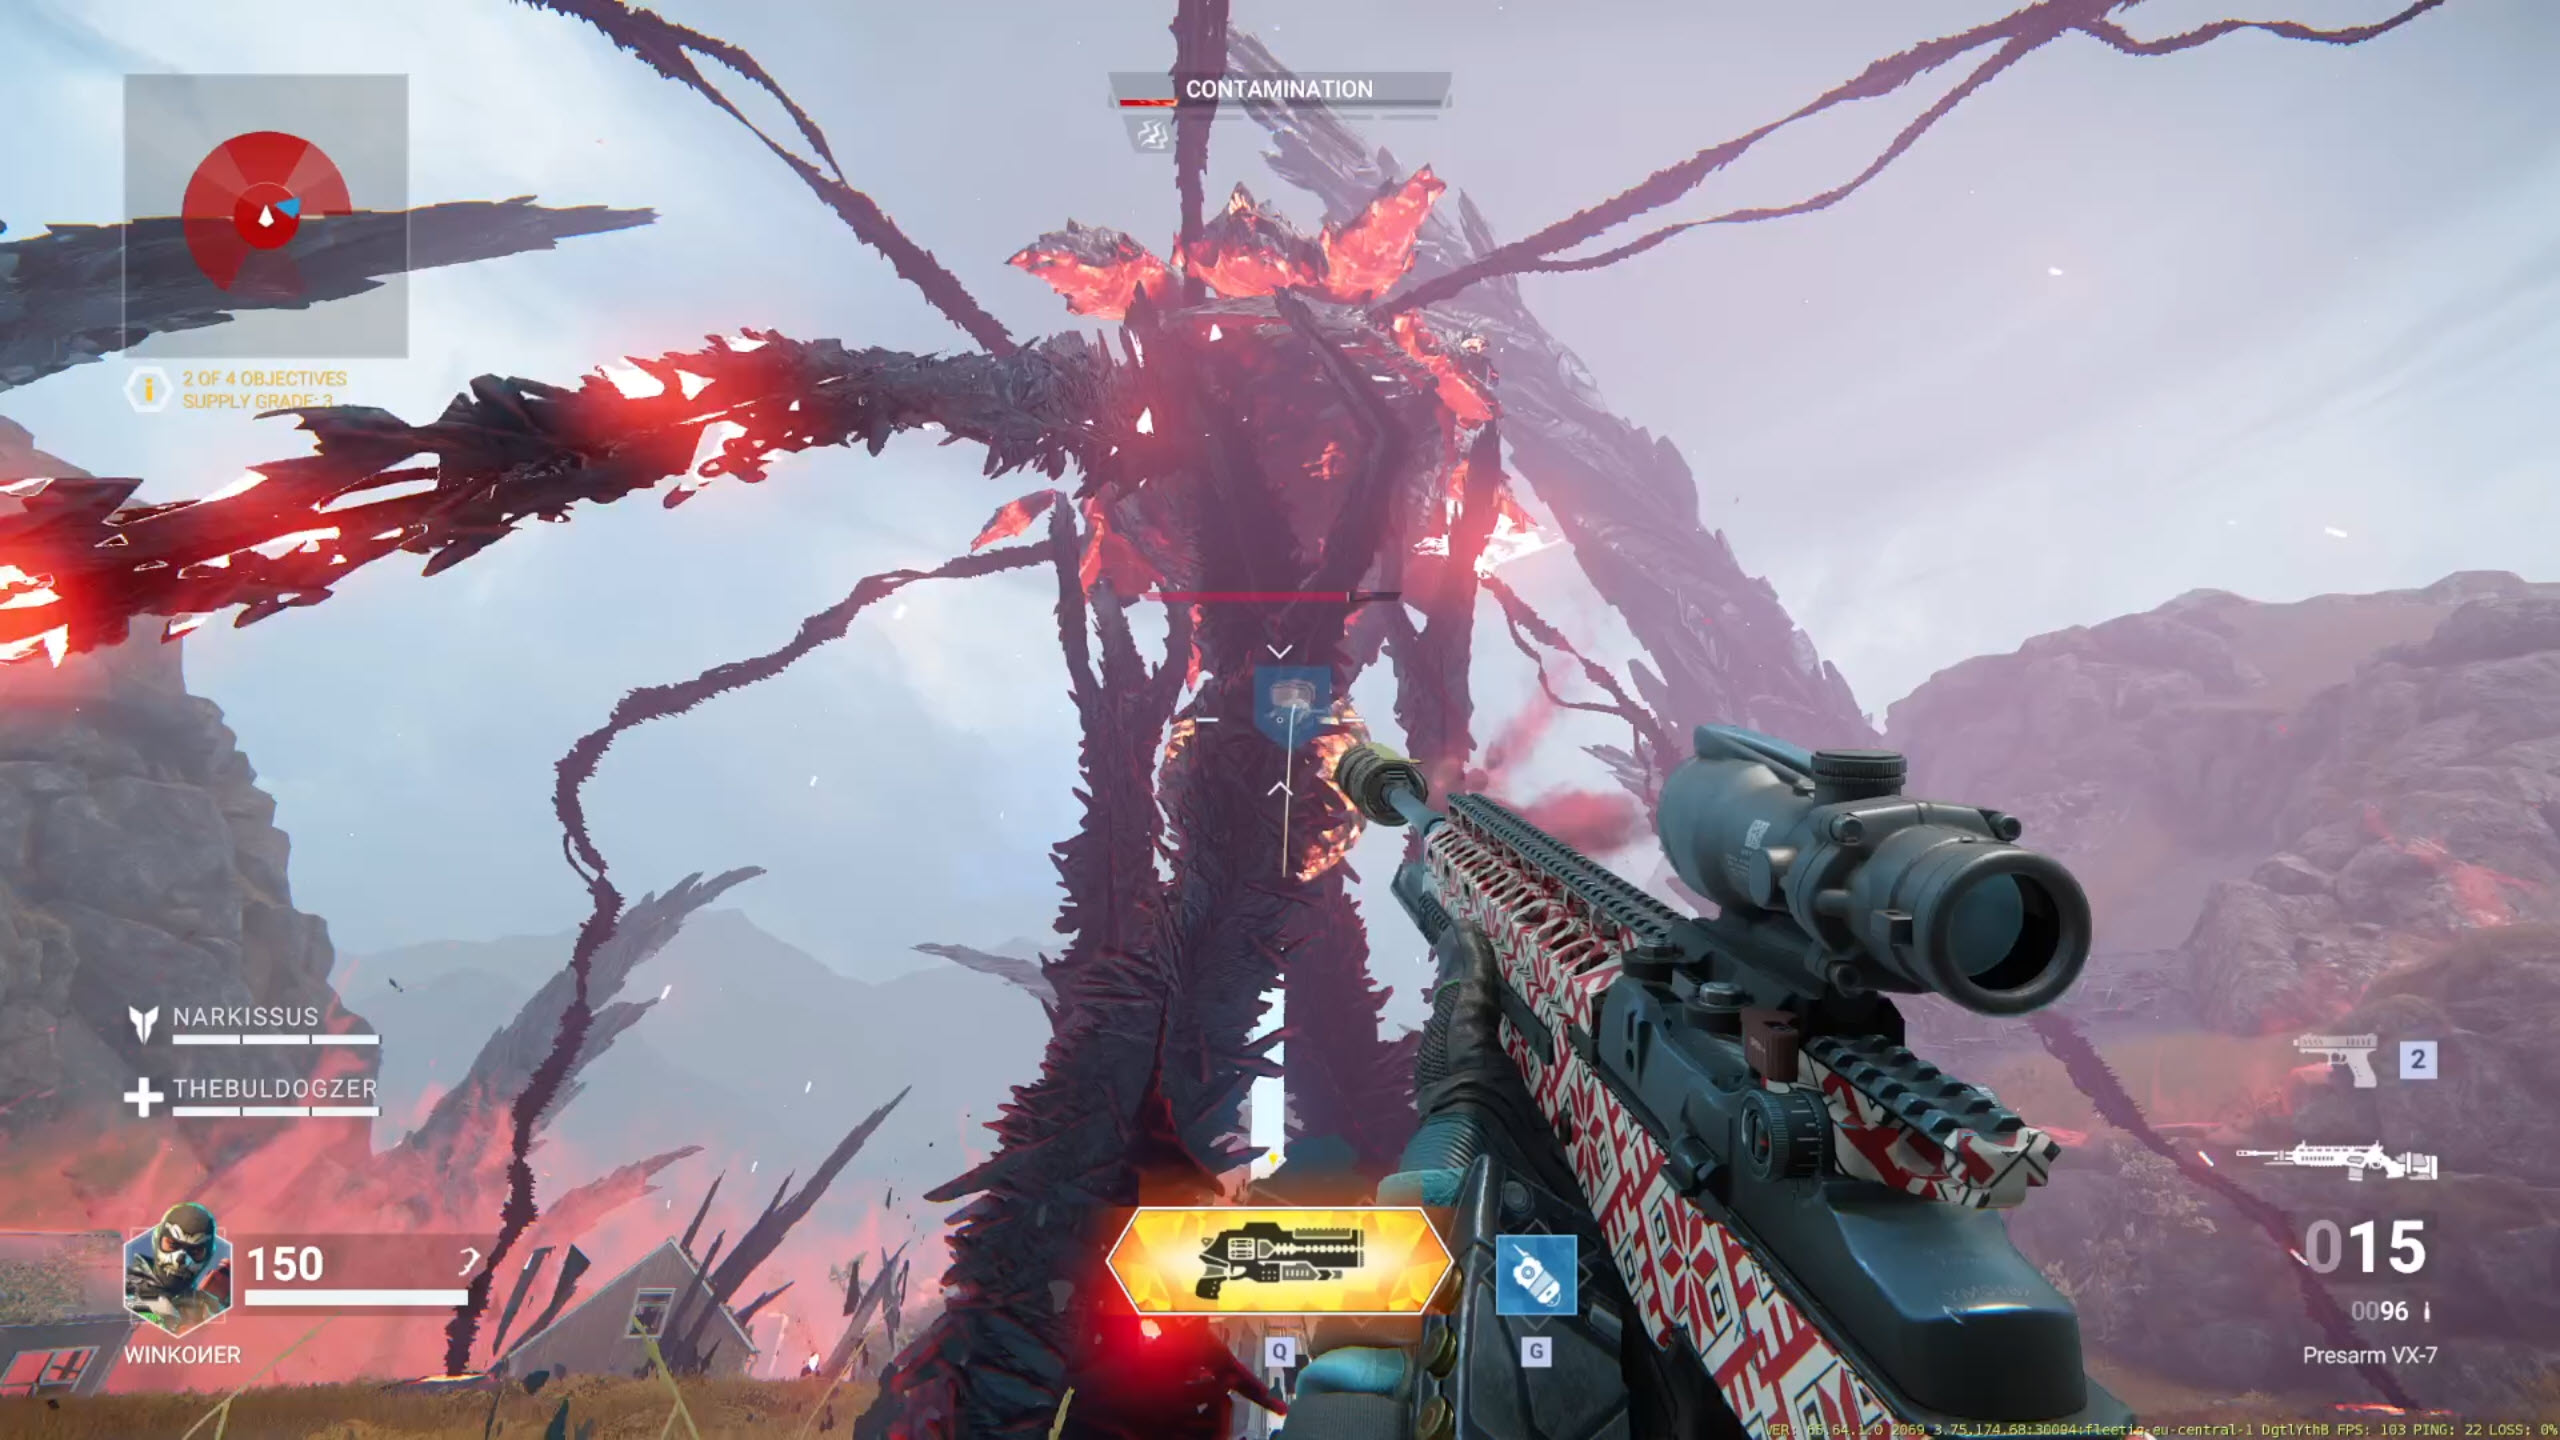
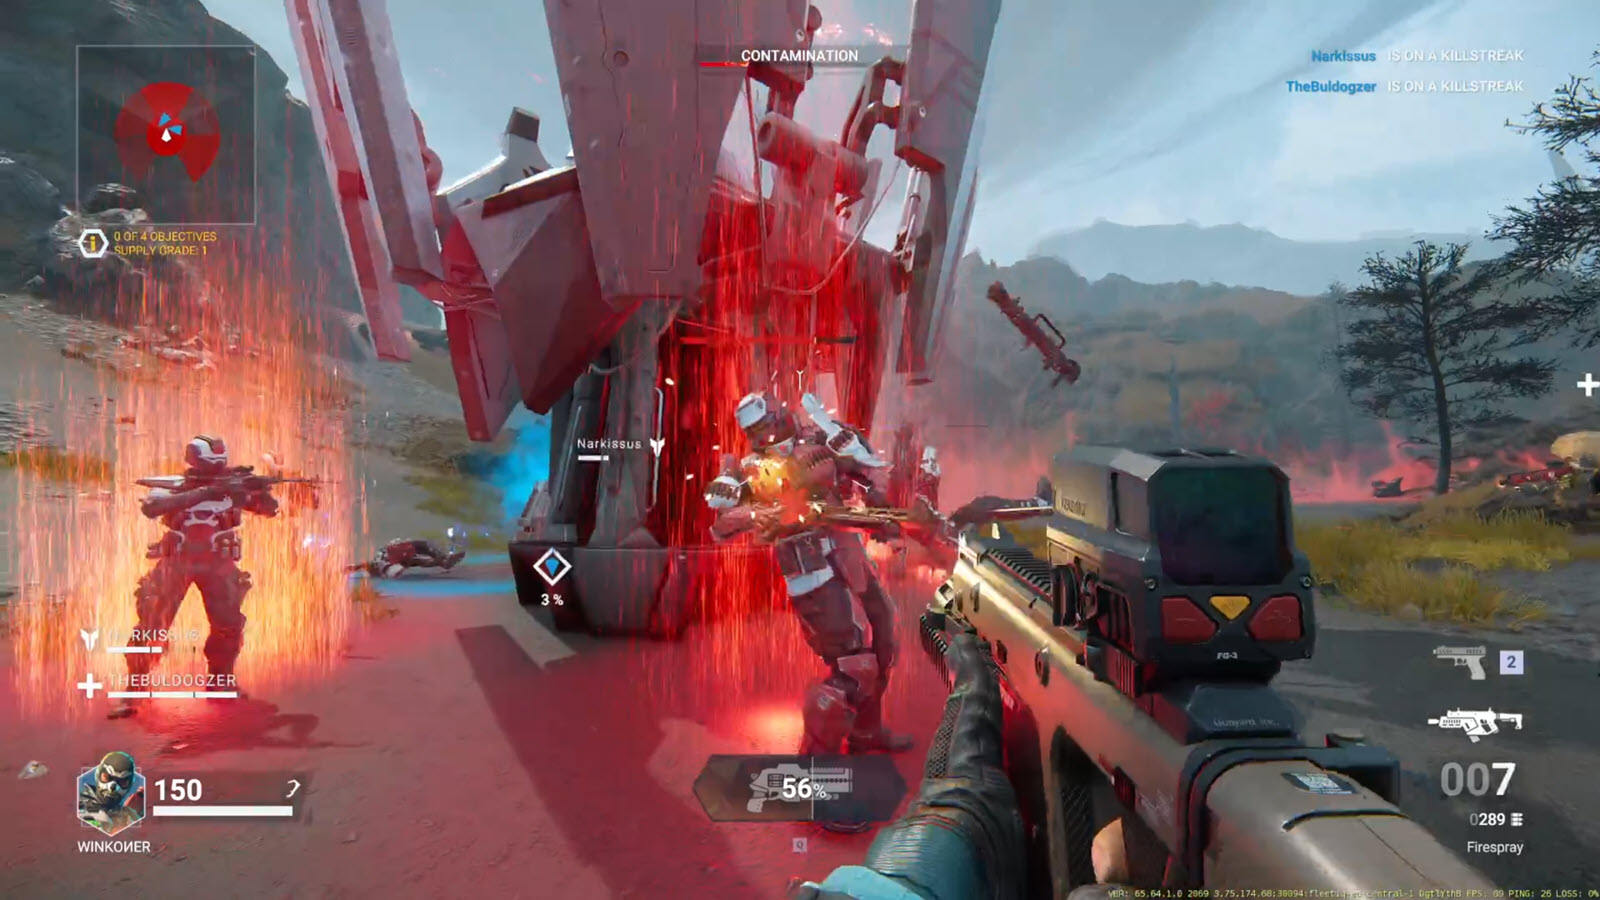
Envoy Chamber | Final Boss Fight
Envoy Chamber is always the fourth and last objective of your Expedition run (unless you reach 5th Contamination, in which case you will have to extract instead of fighting the boss).
Currently there are two possible scenarios for the fight in the Envoy Chamber:
- 여왕 + Stilt
- Behemoth + Stilt
⚠️
ALWAYS– and I cannot emphasize this enough – focus and kill Stilt first.
절대attack Queen or Behemoth first. Below I will outline how to deal with each enemy, 하지만
ALWAYSstart with Stilt.
Stilt has regenerating shield, ranged attack and spawns crystalline AoE beacons. Also far less HP than the boss. Kill him first or you will have a hard time fighting.
Before you can damage Stilt you have to get rid of his shield. This can be done with raw bullet damage but it is highly recommended to put down the shield using perks or abilities. Don’t hesitate to use ultimate skills, because in this case faster = better.
⚡
Ultimate abilities◼️ R40 Supersling (몽구스), Crystallone Shotgun (알약), Crystalline Revolver (Kite), Crystalline Rifle (Brisa), M.556 Volcano (Strix), Hyperdash* (숫양)
(*Ram’s Hyperdash can erase the shield in one hit, but I would recommend using it to deal much more HP damage instead, after the shield is down).
⚡
Standard abilities◼️ Frag Grenade (몽구스), Remote Mine (Kite), Swarm Grenade (Orbit), Throwing Axe* (숫양)
(*TNT version of Ram’s Throwing Axe does almost twice the damage as normal one)
⚡
특전◼️ Sidearm Overcharge
💡 중요한: Lot of people don’t realize this. You can shoot and destroy the Stilt crystals. I see people running and dying into them all the time. In case you have to run trough the crystals, or you are cornered with one nearby, or your teammate died nearby – shoot it quick and easy.
After you dealt with Stilt, killing the Boss is the easy part.
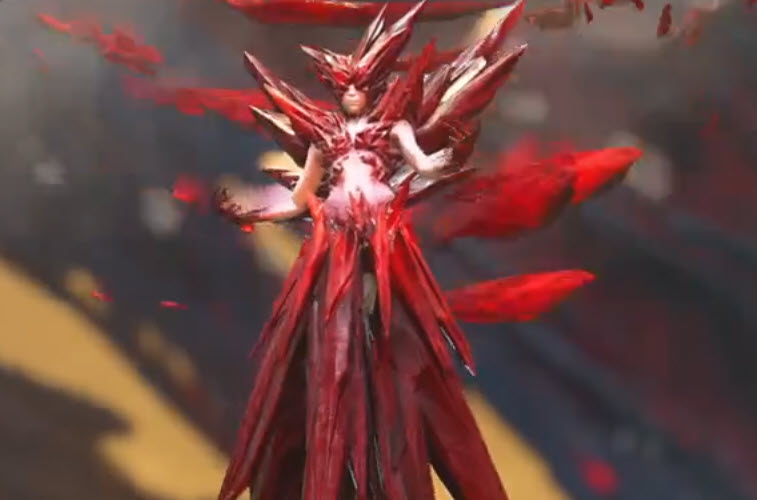
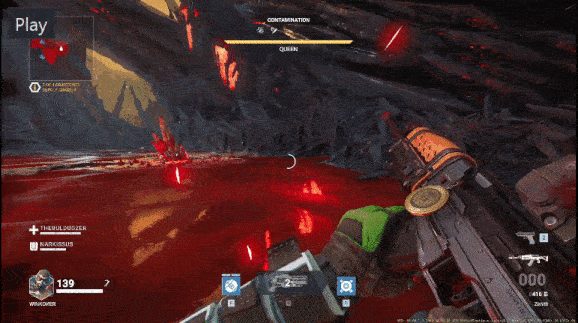
Fighting Queen is little longer than Behemoth and might seem bit harder, but if you are careful to dodge her projectiles and AoE casts you will realize she’s much less deadly. She will become invulnerable three times during the fight and starts spawning enemies. This is the phase that would become very hard if you didn’t kill Stilt first. But you did 🙂
1. After you killed Stilt, you can start shooting the Queen. After you reduce her HP by cca 20% she will become invulnerable and starts spawning enemies. You have to clear few waves of her spawn while she also flies around and shoots at you. Be constantly on the move and and deal with mobs asap. After you kill all the enemies she will become vulnerable again.
2. In second phase she will start casting huge AoE damaging circles. Always get out of them quickly as they drain a lot of HP. Continue shooting her until she is at 50% HP when she becomes invulnerable again and you will have to clean out the spawned enemies again, like before.
3. After she becomes vulnerable you will shoot her down to approx. 마지막 20% of HP. This time no new tricks, but she will spawn a few more Adamants then before. 하지만 이번에는, she will become vulnerable soon after their spawn. Now it’s up to you (and your abilities) to decide if you want to kill her straight away or clear the Adamants first. I would recommend cleaning Adamants first as at this point I find group of them much more dangerous then her and you will have to kill them all even after she dies.
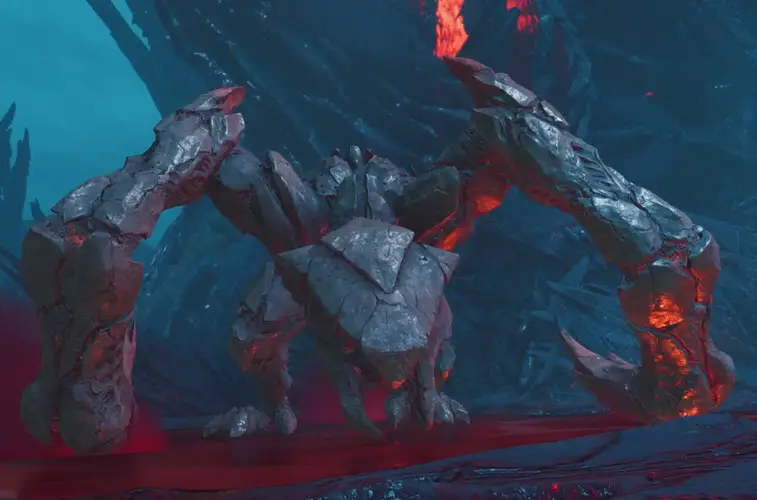
Behemoth fight can be much faster as it’s possible to kill him in just two phases with enough damage output. The fight is also much more straighforward, albeit Behemoth outputs much more damage and is able to kill you instantly if you are not careful.
1. After you killed Stilt, you can start shooting the Behemoth. He will always focus one player so if you are the chosen one be on the move and never get too close to him as his claw attack instakills you. As long as you are not too close he will try to get you with his ranged fire attacks which are easy to dodge and don’t kill you that fast. As you are trying to avoid him killing you, you and your teammates need to shoot his few weakspots on his legs, back and belly.
2. After shooting down all the lava scab weakspots he will go into rage mode, indicated by his fiery glow. Just shoot him with everything you have and pay attention where he goes after digging into the ground – watch fires travelling on the ground, indicating where he is. If he’s going at you, run and try to dodge-slide his unearthing as that outputs tremendous amount of damage and can easily kill you. Shoot him enough and he’ll become invulnerable, but also immobilized.
3. In this phase he will create fog around him and begins to spawn enemies. Simply kill all the enemy waves and he will get back to phase 1. Therefore just repeat what you did already. Shoot the scabs until enraged and then finish him off.
Please note that it is possible he will cool off during his rage mode if you don’t do enough damage quickly. In such case battle can get prolonged and you will have to shoot the scabs one more time. But if you listened to me and killed Stilt before, you can all focus him and should be able to do enough damage even with sidearms.
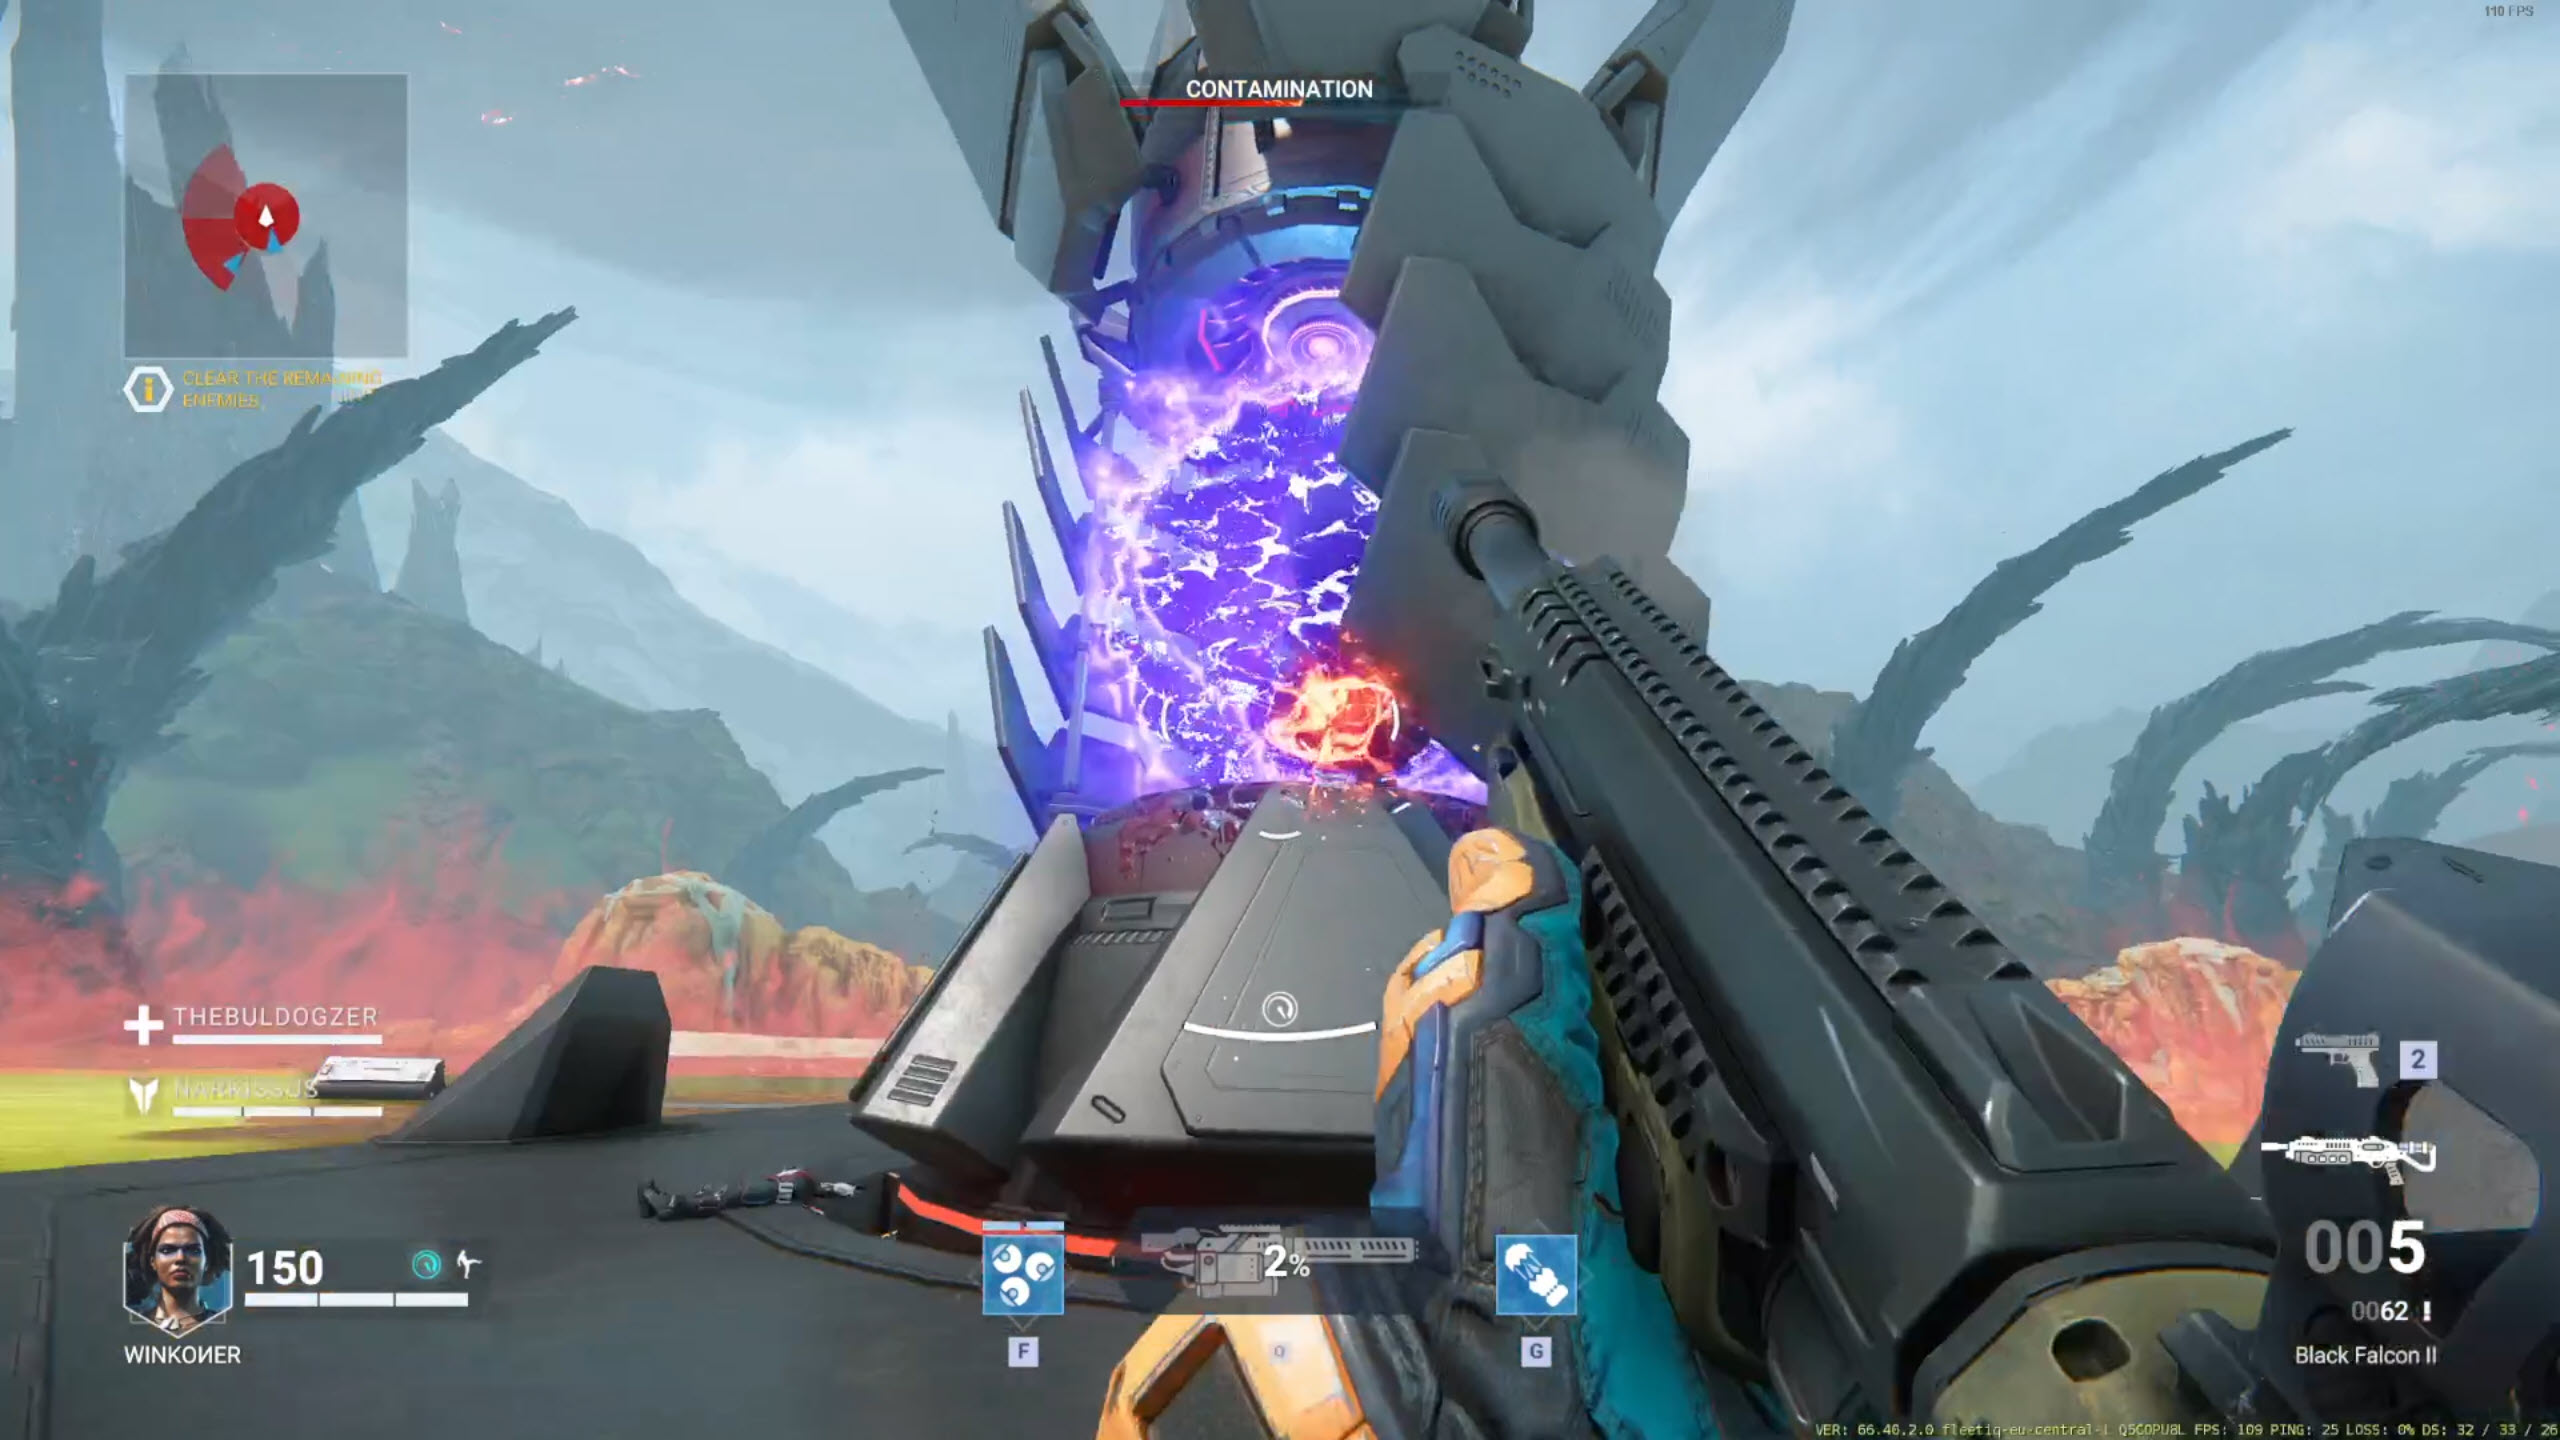
Contamination Events
Contaminationsare charged with time you spent within the run and serve as difficulty modifier that is gradually making your life harder as you go trough the Expedition. As displayed above, contamination charging is displayed with progress bar which – when fulfilled – will activate new contamination and starts over.
💡 You can lower contamination charge by picking up Decontamination perk (epic or legendary drop) from the Supply Drop, but note that you cannot reverse already activated Contamination and you can only lower current progress bar.
⚠️ 또한 참고, that for successful expedition run you can only obtain 4 contaminations before you reach Envoy’s Chamber. If you take too long and manage to get fifth contamination you will have to go to extract point instead of fighting final boss, resulting in less rewards from the run.
Dreaded chasers are on the hunt.
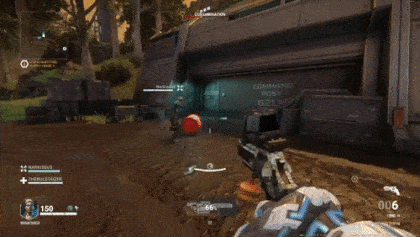
❔ 체이서 (see enemies section) will be randomly spawned multiple times during the run. Chasers are invisible until they try to attack you from close proximity. If they succeed they will restrict your player character until your teammate will kill the chaser or you get downed.
💡 Chasers cloak if they receive damage from other player than the one they are trying to attack, so if you want to deal with them quickly, bait them and wait for them to uncloak and then shoot them yourself alone.
Strafers equip energy shields, which grant them extra armor.
❔ Shielded strafers can be annoying and are able to end your run if you are reckless, but on the positive side – they don’t make your final fight harder.
💡 Shields eat AoE/splash damage as well so don’t be stingy with secondary abilities.
Nasty lighting orb follows the team.
❔ Easily the most annoying and dangerous contamination. This contamination will spawn Ball Lightning that will follow you troughout the whole run and will be constantly trying to get close to you, which will result in damage over time and restricted movement when too close. You have to shoot the Ball in order to push it away from you.
💡 More damage = greater push. Utilize shotguns or sniper rifles to shoot it further away. If you manage to shoot it away enough, it will despawn for a while giving you a breather until creeping back later.
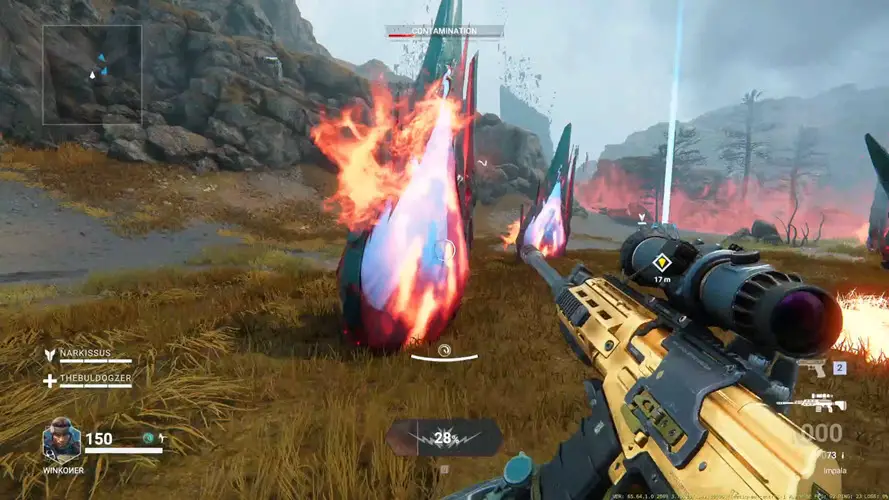
Crystalline shards fall down from the sky.
❔ You will be shelled by crystalline artillery periodically throughout the run. Avoid red circles on the ground.
💡 This contamination is fairly easy but always be careful if you are using scoped rifles. It’s easy to forget yourself in the tunnel vision of your aim and then get incapacitated by the Meteor Strike.
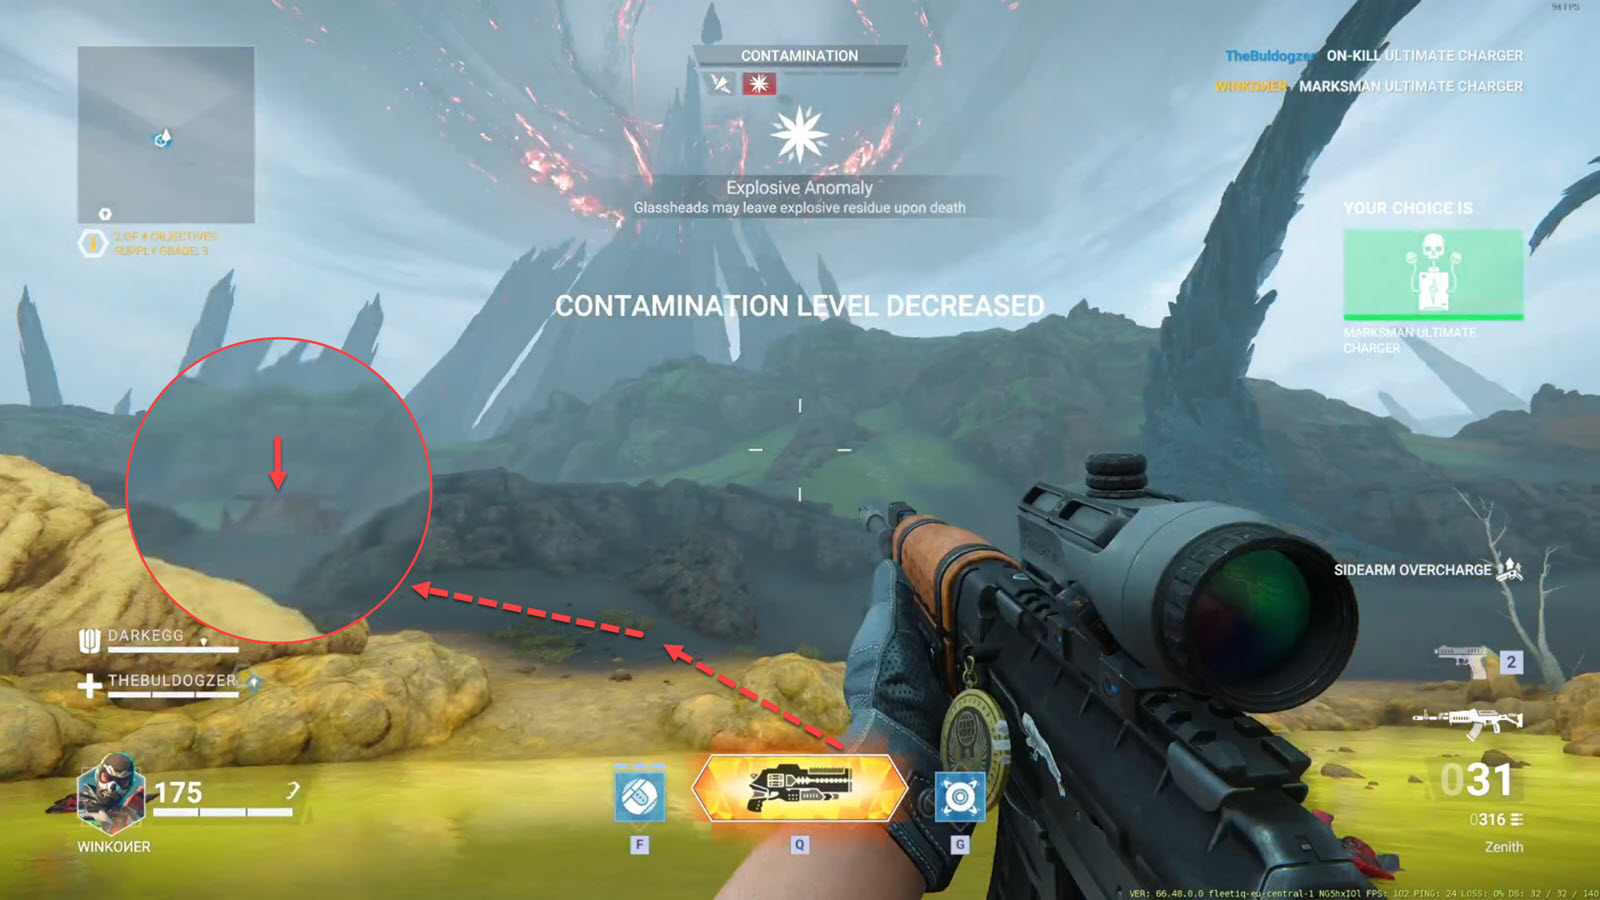
Glassheads may leave explosive residue upon death.
❔ Killed Glassheads will explode after they die.
💡 The explosion is timed (cca 3s) and area of effect is visible before the explosion so just don’t stand inside and you’re golden.
Ranged enemies equip incendiary ammo.
❔ 설명이 필요 없음. Enemies that shoot at you will now cause more damage.
💡 별로 할 말이 없다, just be more careful dodging projectiles from Crystalline enemies (including Crystalline plants) and don’t run into big groups of Strafers. This contamination can make Cyborg Stilt and Research Station objectives significantly harder the further you are into Expedition.
Enemies deal greater damage in melee.
❔ 설명이 필요 없음. Enemies attacking and close range will now cause more damage.
💡 Just don’t get hit lol.
❔ Aerial enemies will be spawned periodically, slowly approaching your party and then attacking kamikaze.
💡 Their spawns are signaled by specific sound (you’ll know when you hear it). When spawned, they can be shoot down from the sky before they reach you. They also can’t get to you inside the Envoy Chamber.
Crystalline fireflies crawl out of downed enemies
❔ 다시, pretty self-explanatory. When you kill an enemy, these little flying crystal flies will fly out from the enemy corpse.
💡 They can be shot, but are rarely dangerous. Just don’t stand near corpses when low on health and you will be fine.
Pulsating lava geysers break trough the soil.
❔ Lava will erupt in small zones around you as you go trough the map, dealing AoE damage to players standing inside. This includes the Envoy Chamber.
💡 Lava = bad. Don’t stand in lava.
Secrets and Tricks (물티)
There are few tricks you can use to get advantage in Expedition. Some of them might be perceived as exploits and patched out in future updates. I will keep this section updated to reflect possible changes introduce with future patches.
LaddersAs you know, there can be hidden Supply Drops on platforms above, reachable by ladders if you have Recon in your party. However these can be reached different ways as well. Actually few places are currently not build properly so some hectic bunnyhopping can suffice. However in most cases Strix and Orbit can both substitute for a Recon. You can either use Strix wall grenade to create a crystalline wall nearby and jump off it or you can use Orbit’s dash to extend your jump capabilites.
Breach DoorsTo breach doors that hide loot you need Exo in your party, except for cases when you don’t need him at all and that is where you have any explosive, like Moongoose’s grenade or grenade launcher, Kite’s C4 or Sidearm Overcharge (or even Happy Bullet) perk if you have it.
Reinforced doorsYou might run into bunkers with doors that look similar to the doors that can be kicked out by Exo, but in this case the icon is missing and Exo cannot open them. Not everyone knows these doors can be opened with explosion too. If you don’t have any of the explosives listed above, you can use explosive barrels that are usually placed nearby.
So while it may seem that you need one Exo and one Recon in party in order to reach all hidden loot, you can reach same result with combination of different operatives, 그 말은, you need to first unlock certain abilities within the Expedition run.
* Orbit can use his “옮기다” ability to extend his jump. This makes some ladder points reachable, 하지만 전부는 아니다.
* Ram needs to be lvl.8 to unlock explosive axe
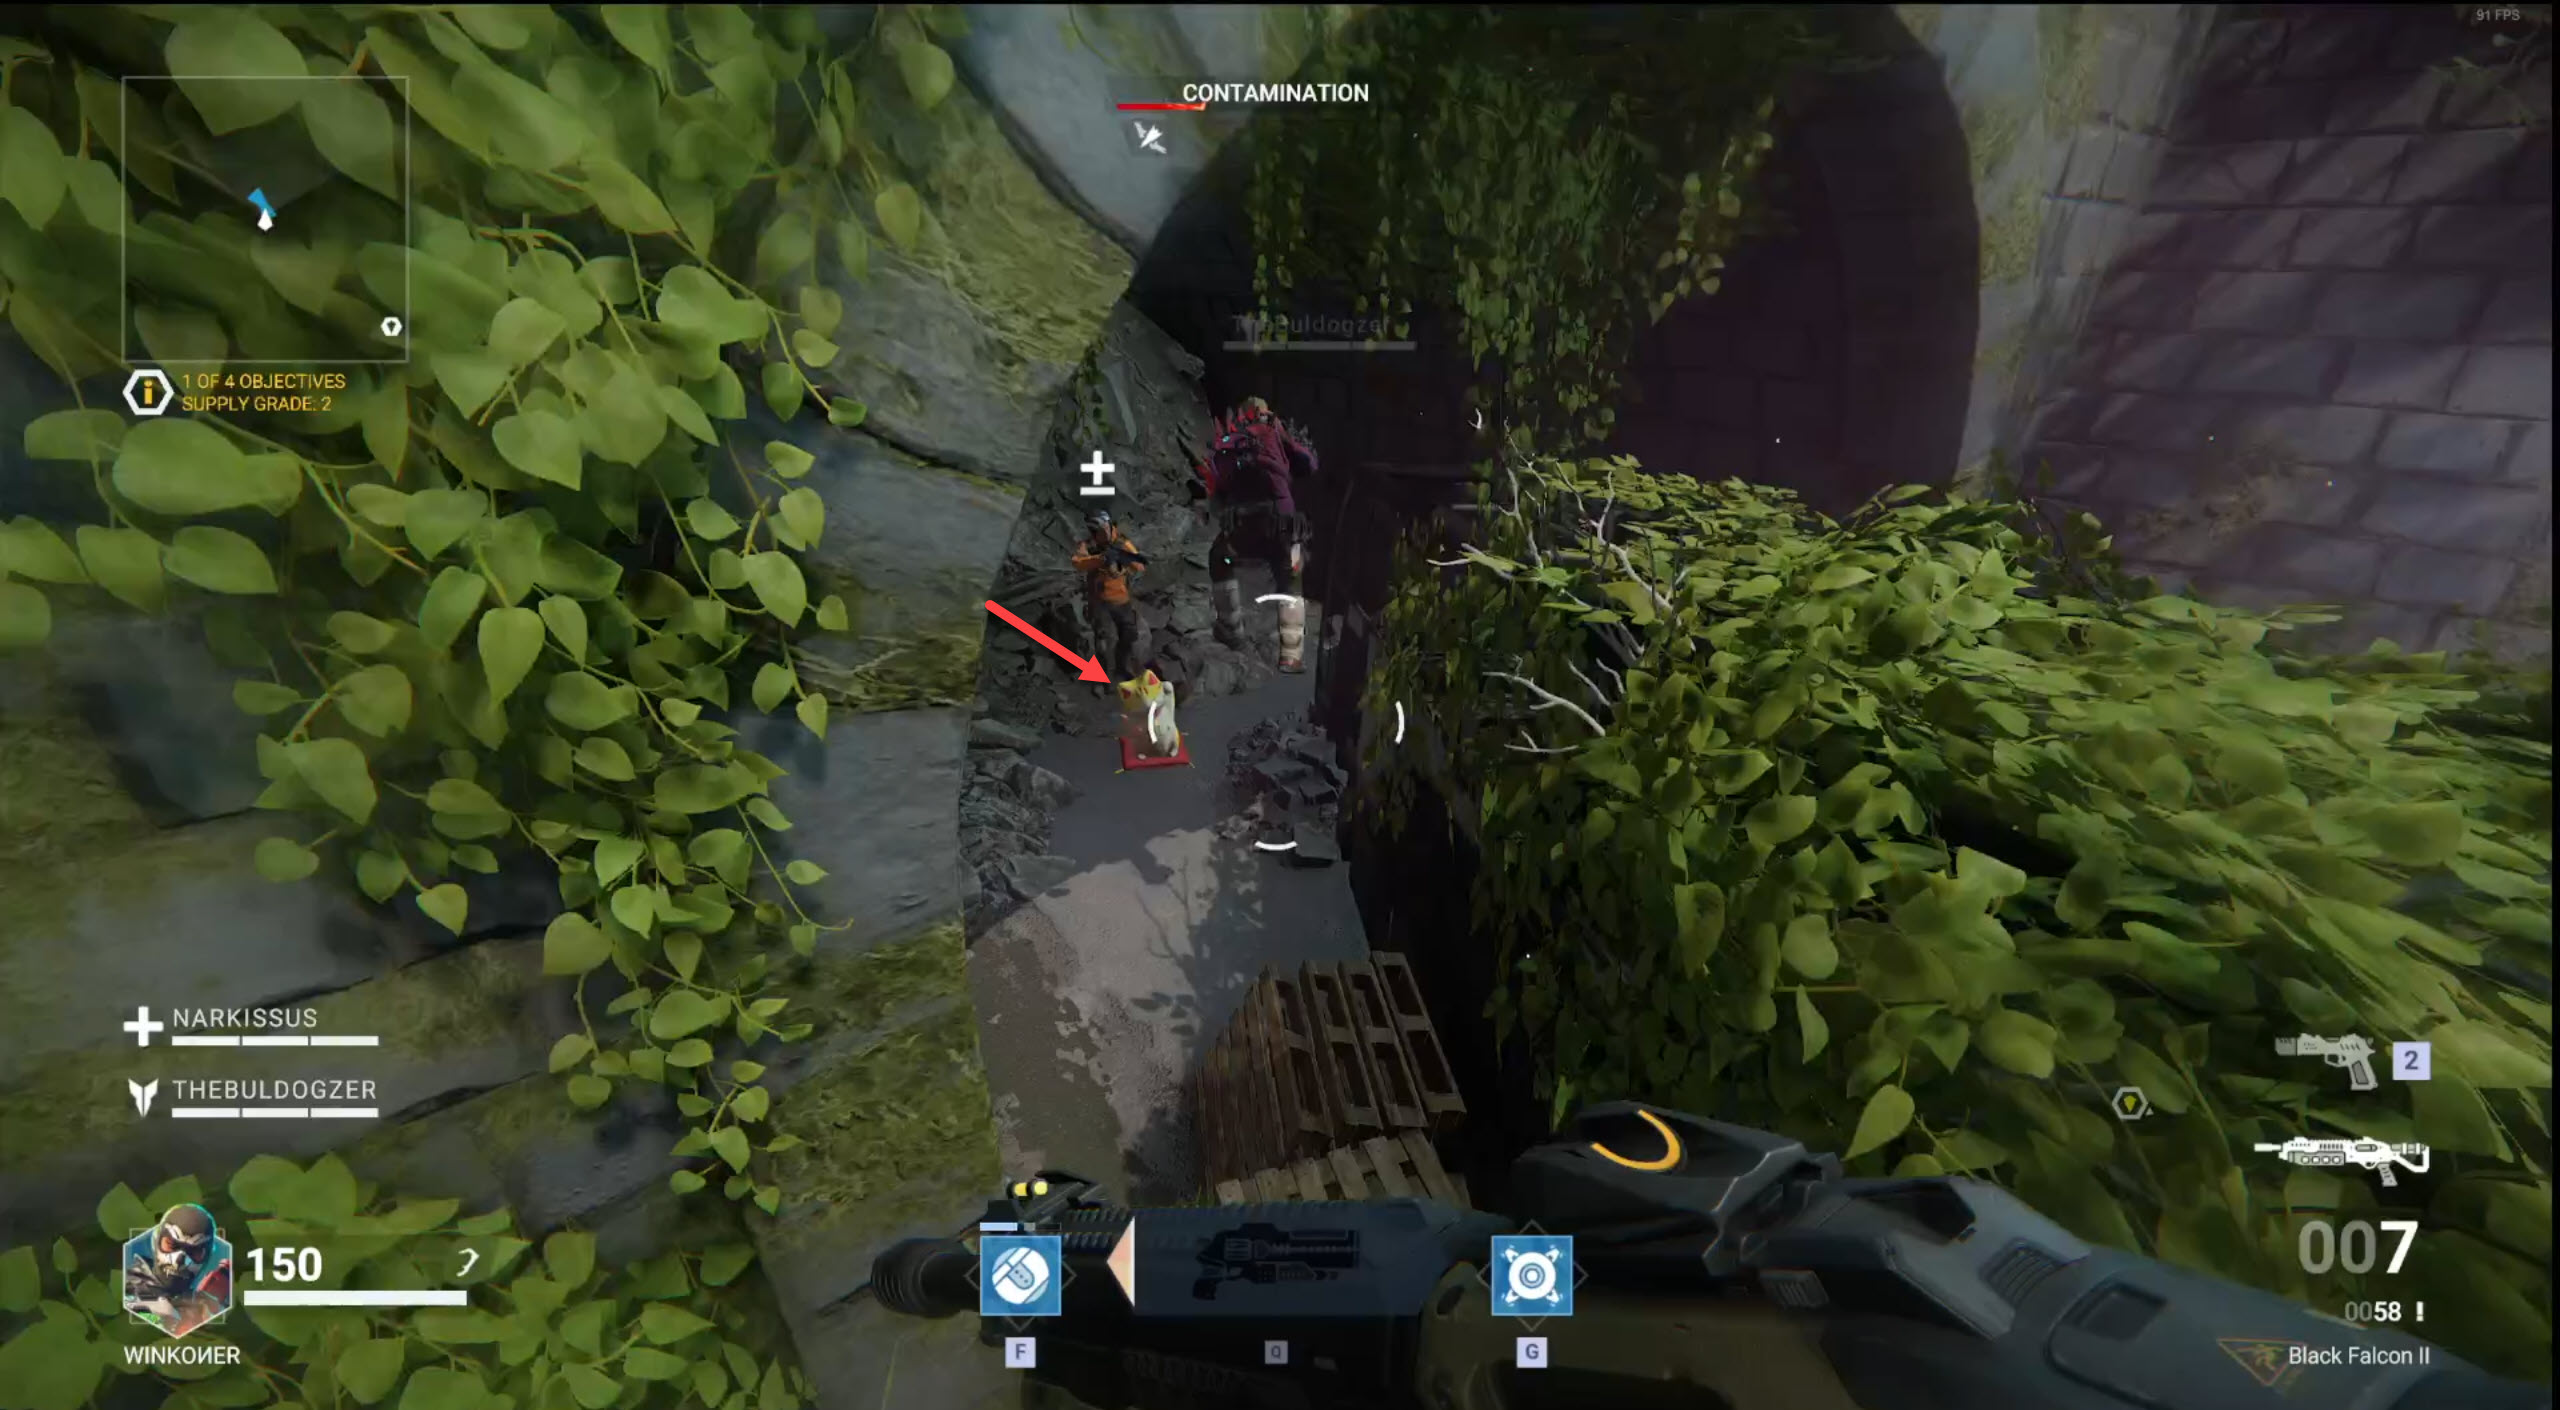
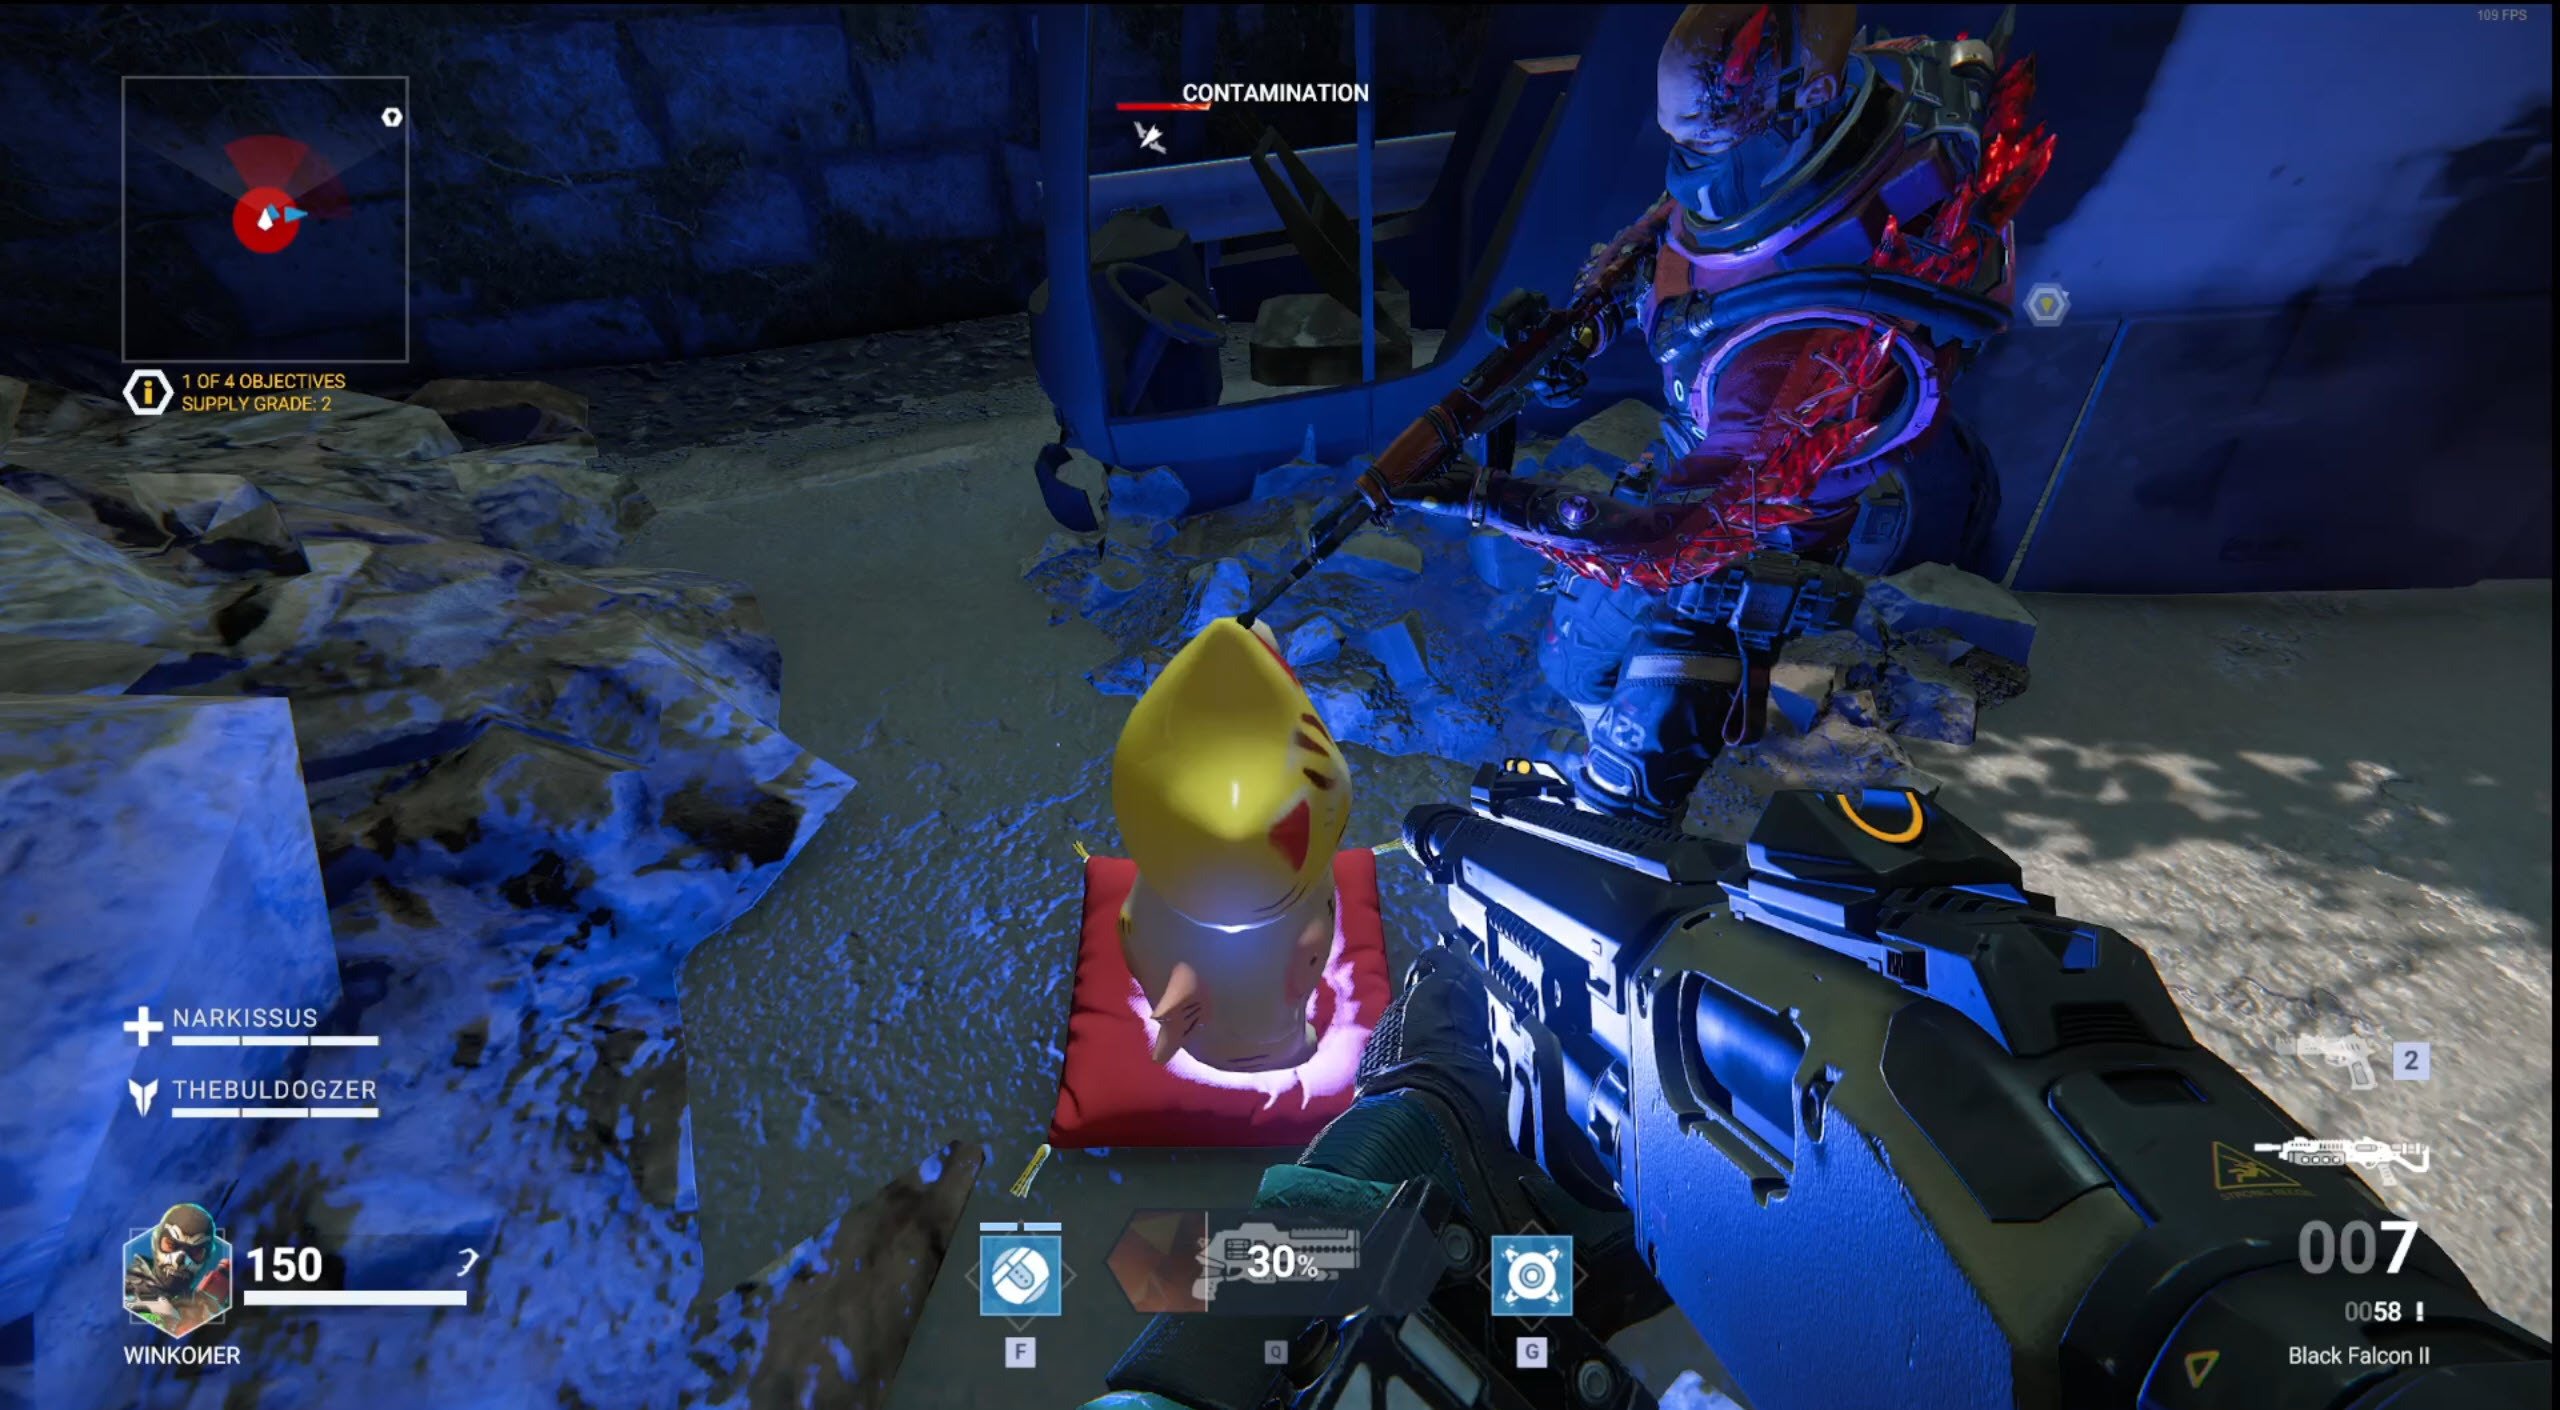
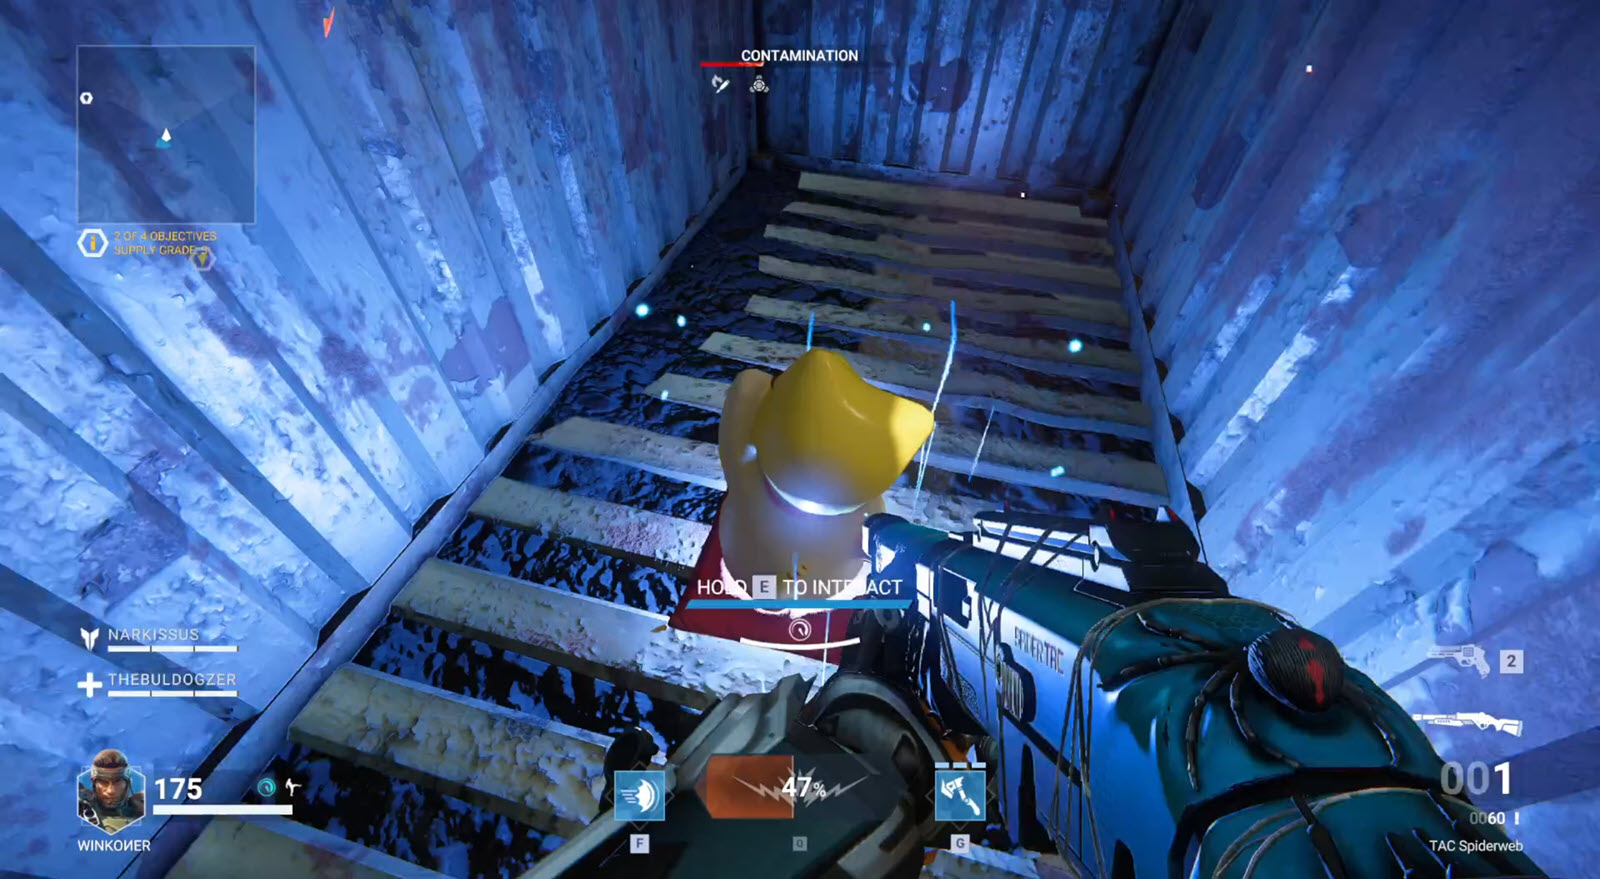
While lost loot is often marked by Dr. Sullivan for you, there are also few locations that are rarely (or never) marked, where you can find Supply drops or at least either Maneki Neko figurine or Crystalline Beaver.
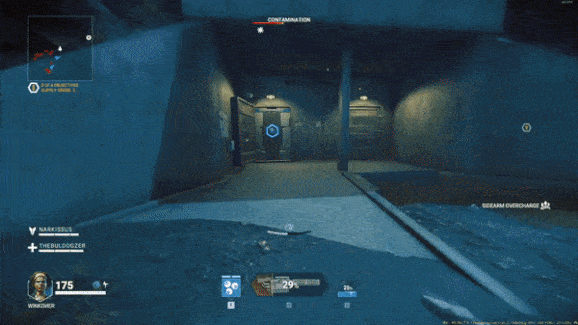
In a tunnelOne you can come across often is in this obstructed, impassable tunnel. You can access the potential loot via the ledge next to it.
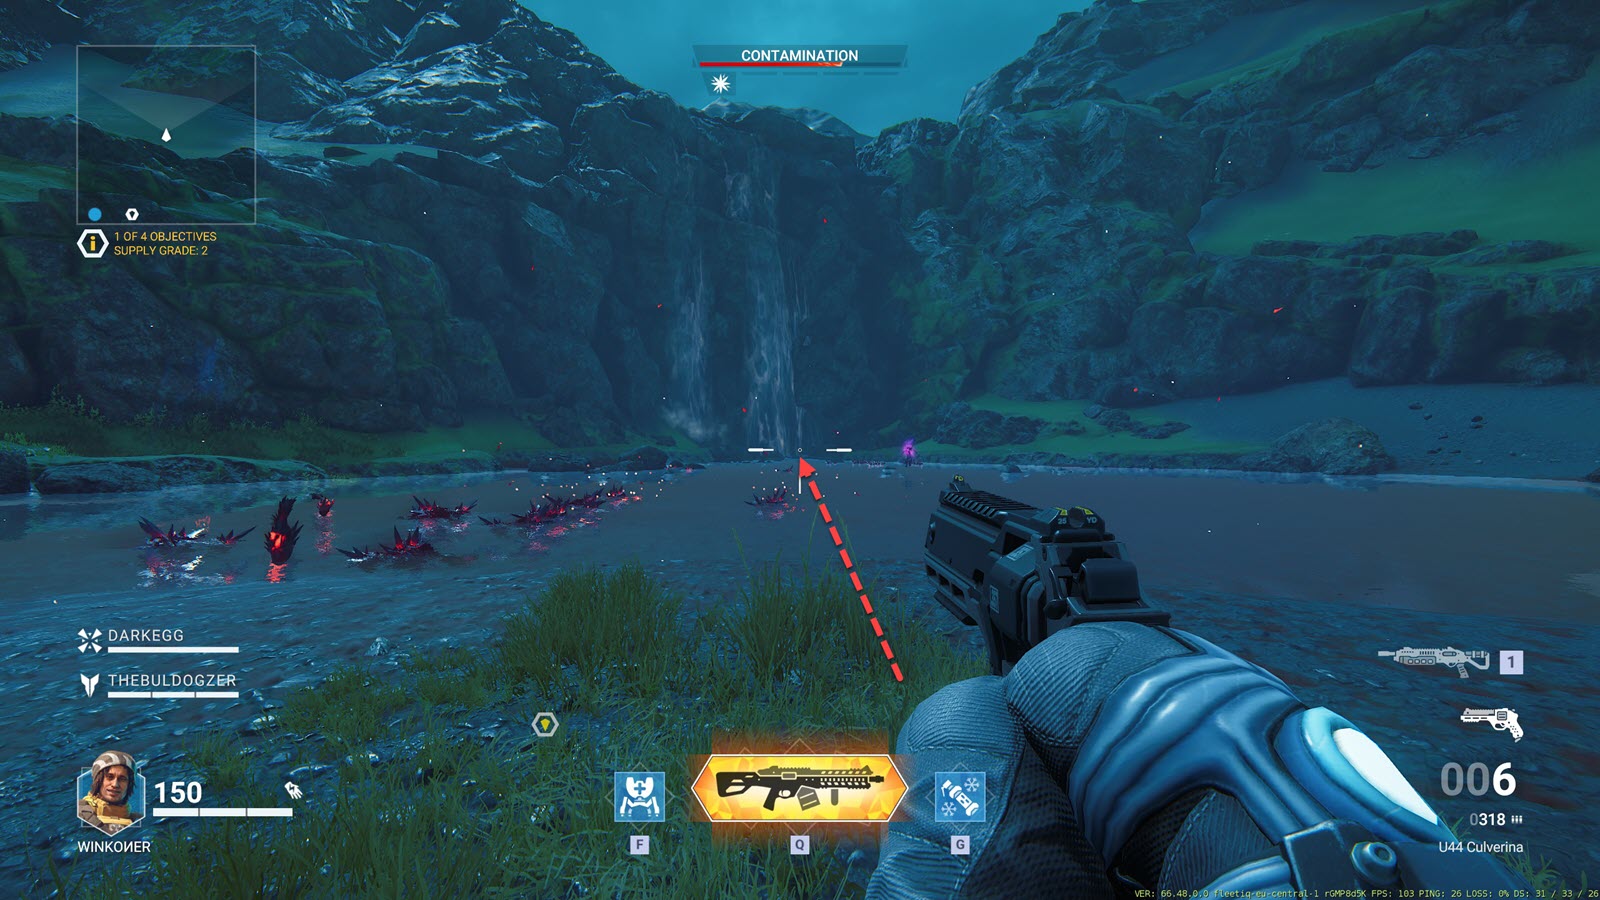
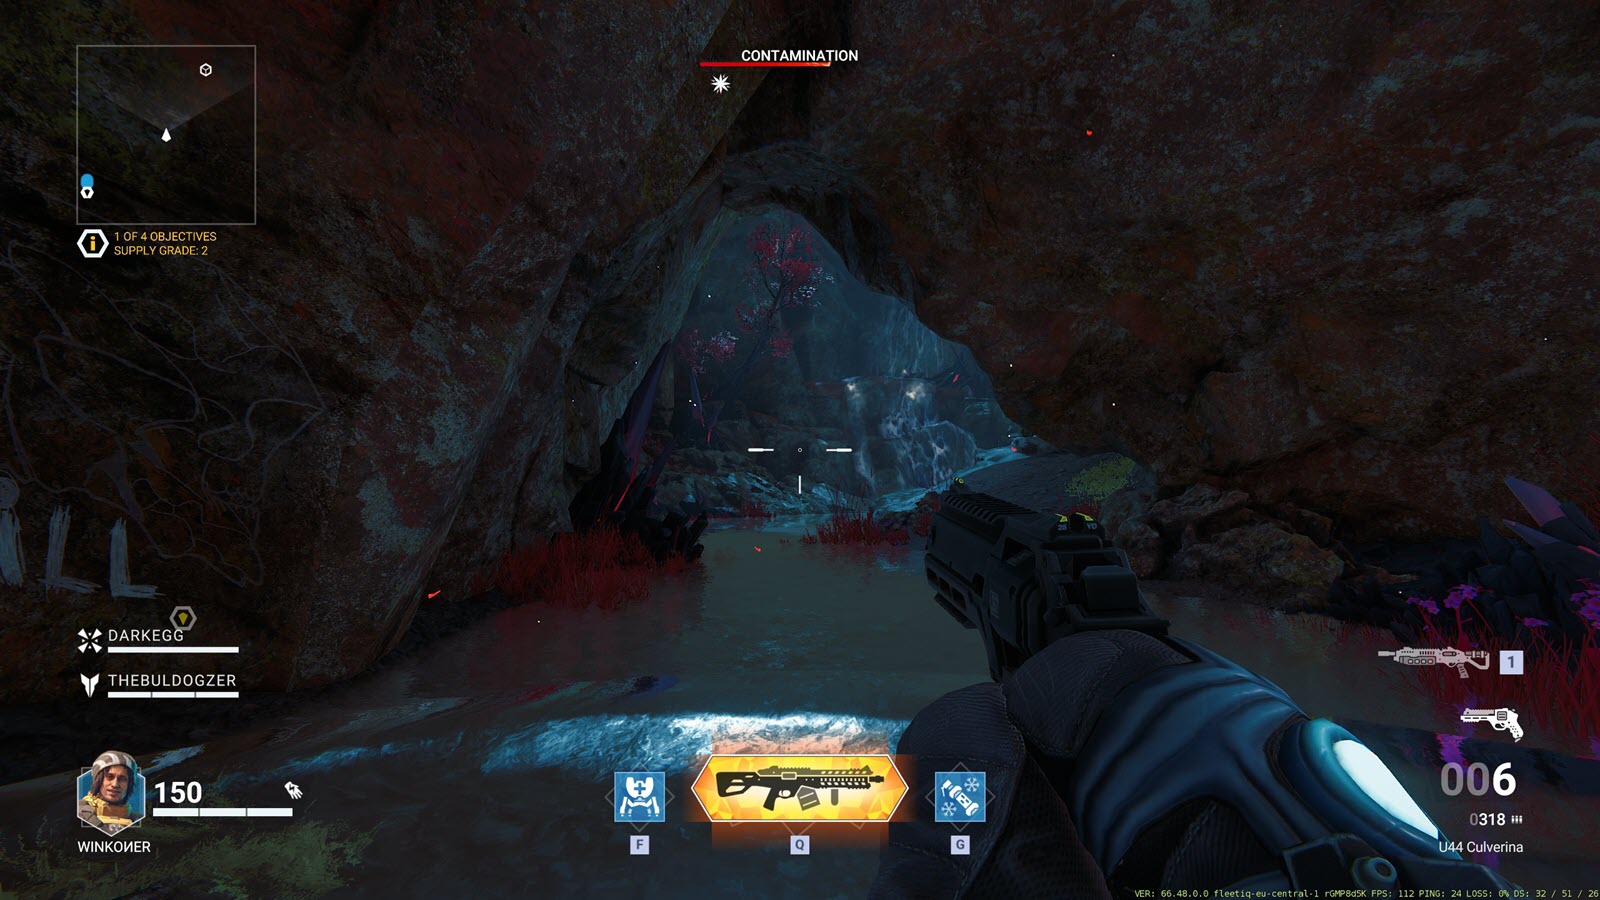
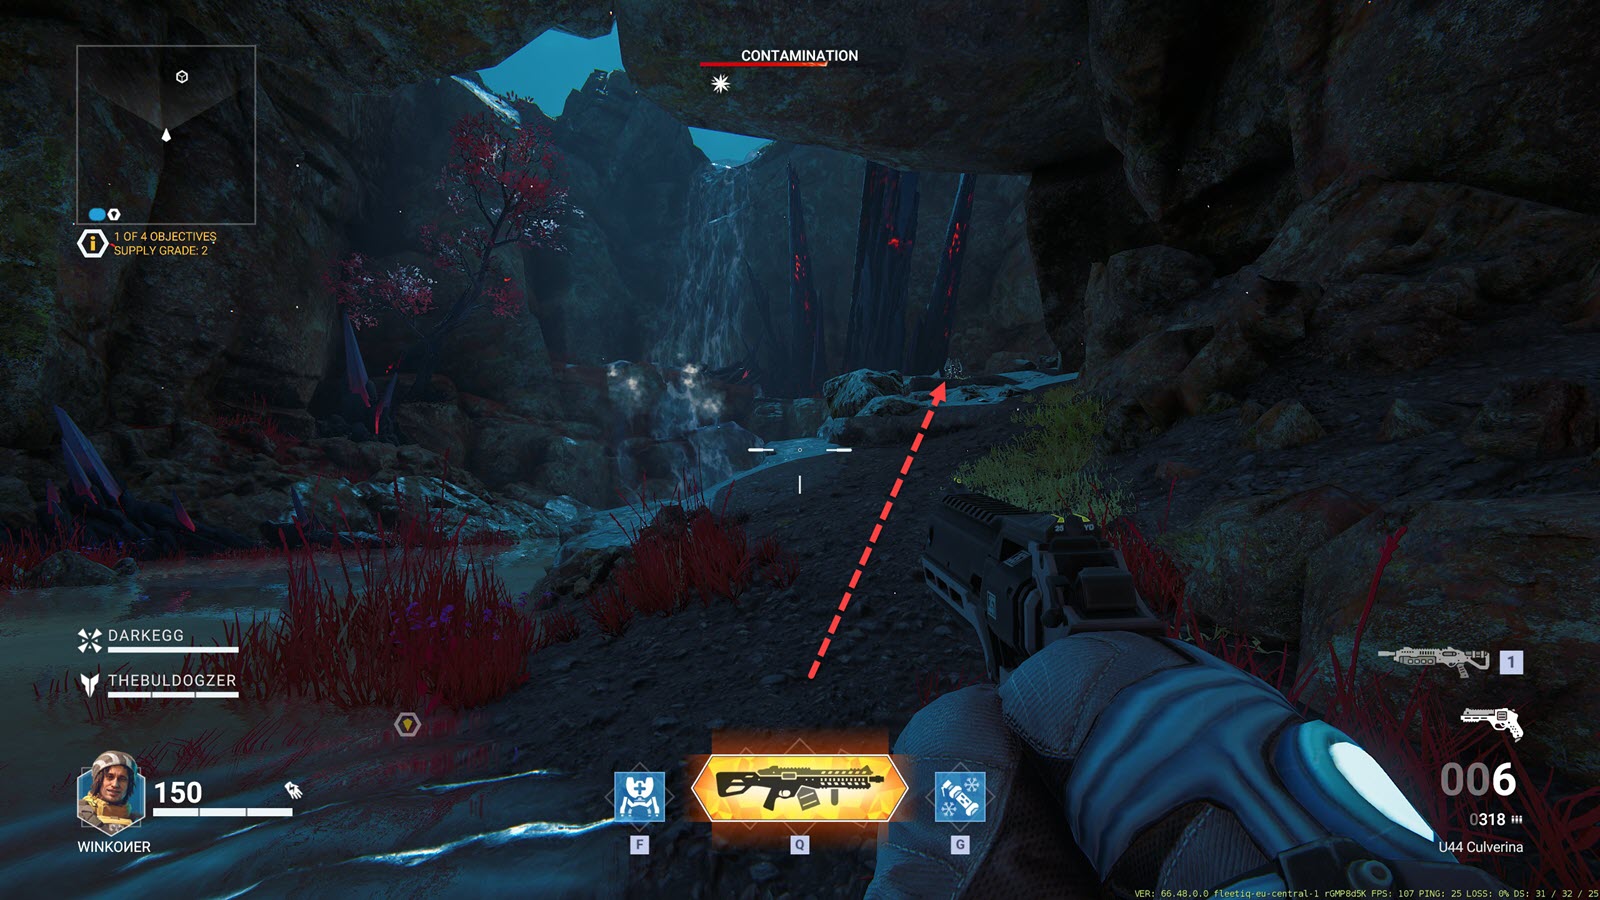
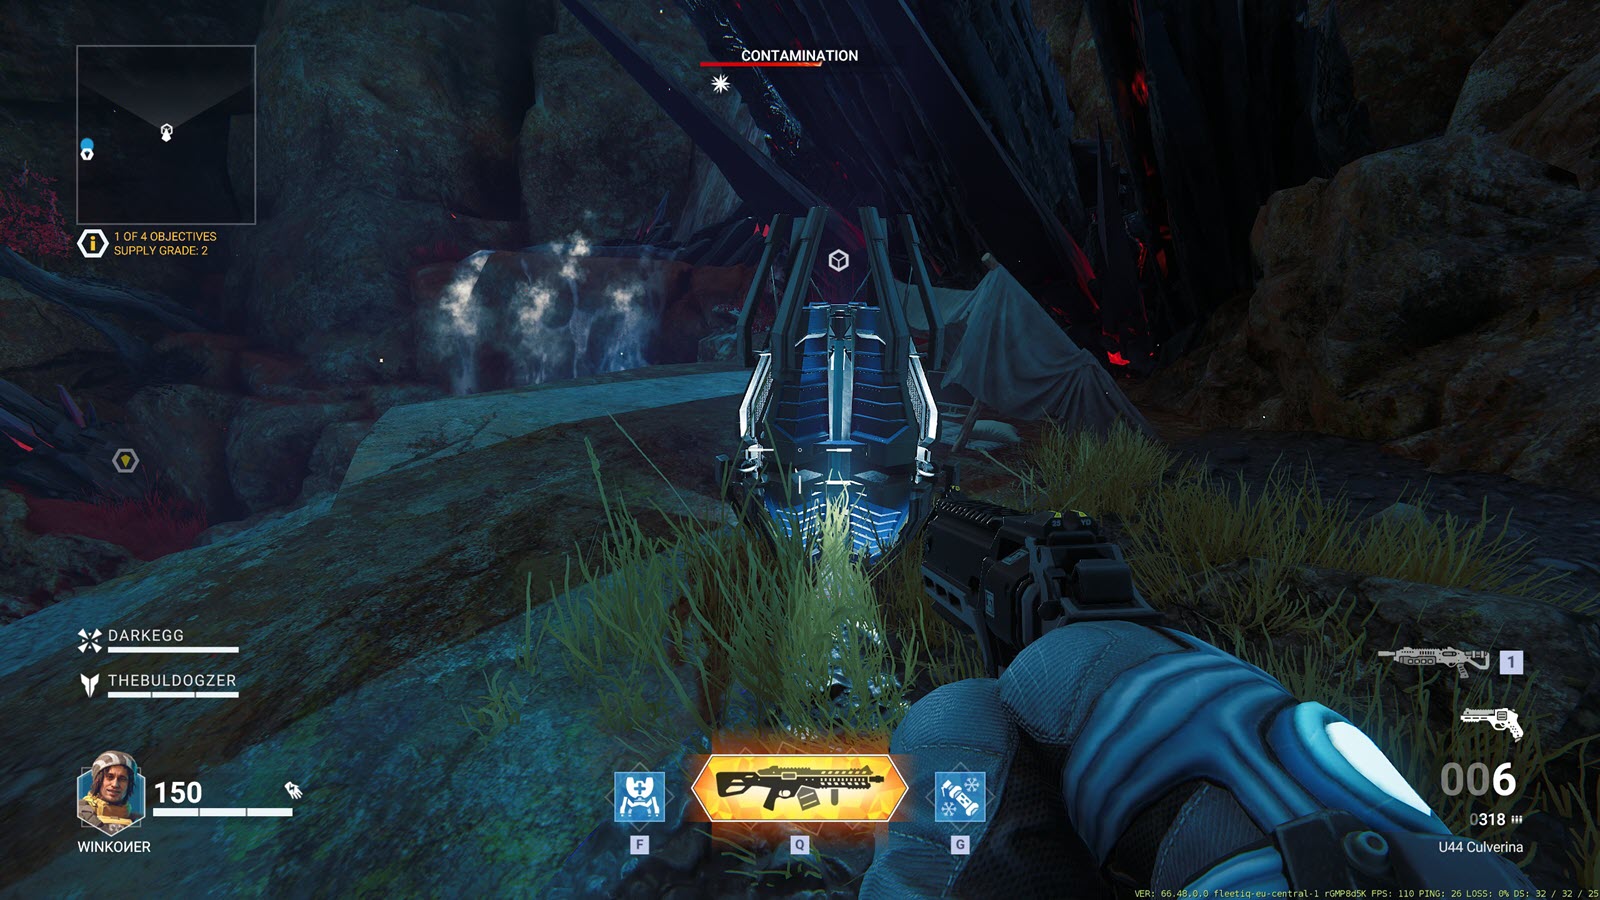
Behind a waterfallAs any good game, Shatterline has also a secret location behind the waterfall. This watterfall is nearby shallow lake you can come across (quite often Objective is positioned there). Simply go trough the cave and at the end, on the ledge, can be often loot spawned.
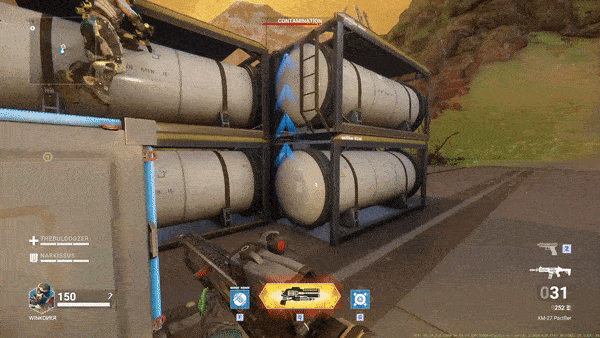
Containers near sulfur lakeOne of locations where will Objective lead often is yellowish sulfur (내 생각엔) lake. If you stand in the lake and look towards the Chamber of Envoy (the evil looking crystal mountain in center of the map) you can see rusty containers on your left.
There are destructible crystal obscuring the way inside one of the containers, shoot them down and you may get your hands on some extra loot. Also Gardener often spawns nearby.
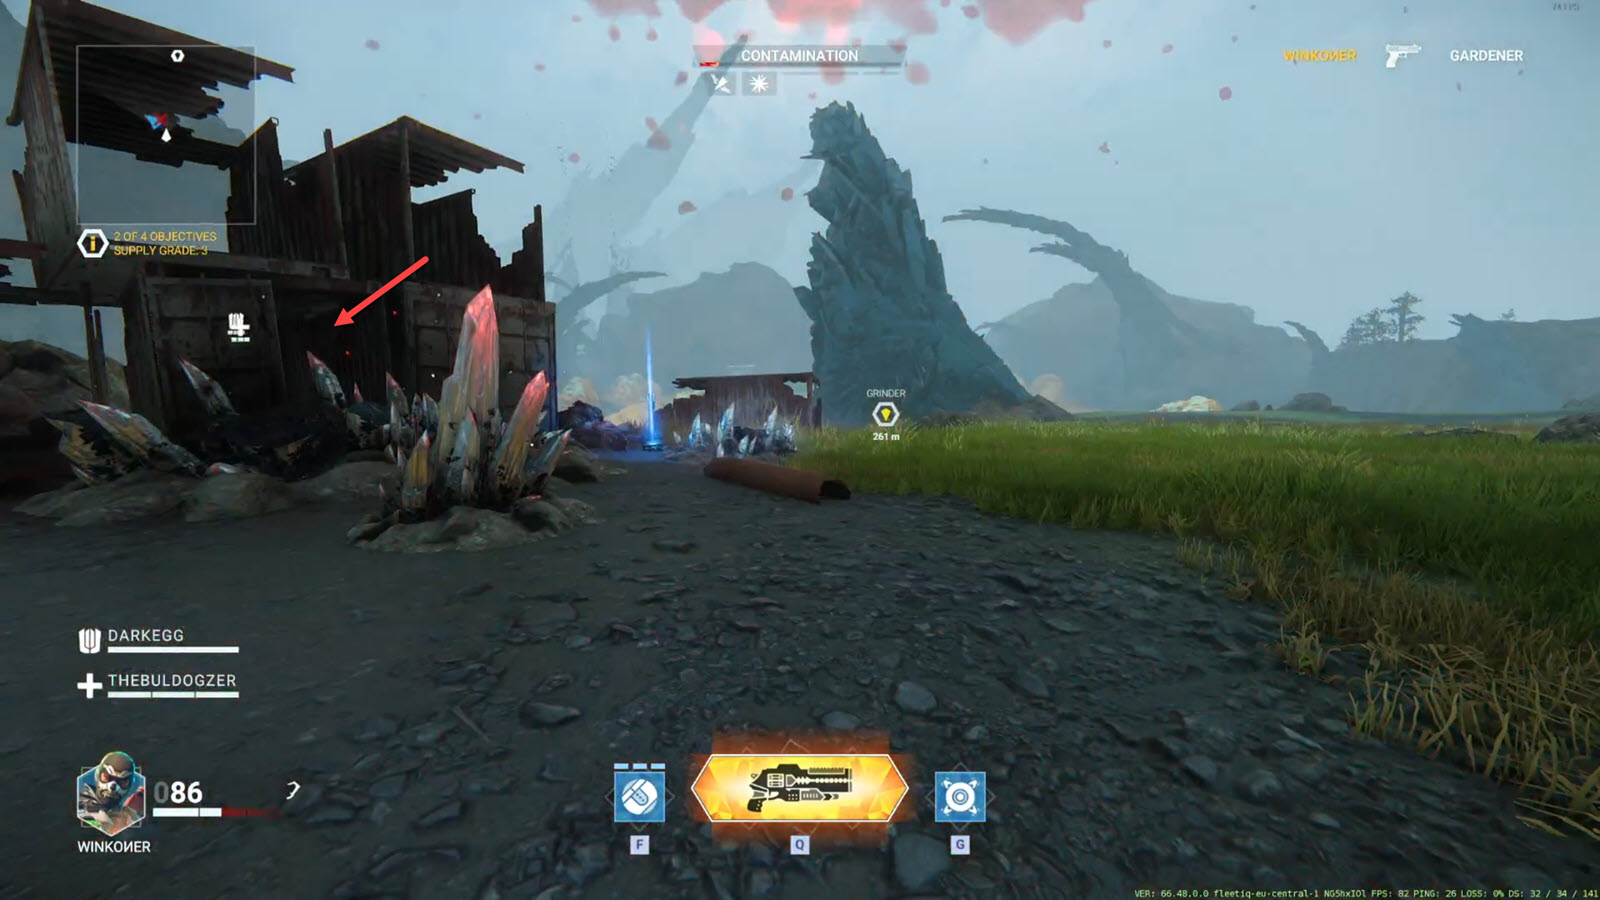
부인 성명: There are more locations I just need to gather screenshots first. I will be gradually adding more places.
적 (TBC)
TO BE CONCLUDED (working on getting footage of all enemies)
Perks and abilities (TBC)
TO BE CONCLUDED (working on getting screenshots of all possible perks)
이것이 오늘 우리가 공유하는 모든 것입니다. Shatterline 가이드. 이 가이드는 원래 작성자가 작성하고 작성했습니다. WINKOИER. 이 가이드를 업데이트하지 못한 경우, 다음을 수행하여 최신 업데이트를 찾을 수 있습니다. 링크.
Awesome stuff. Thanks for the clear explanation on this! Looking forward to perks and abilities.