
- 제목: RPG Maker MZ
- 출시일:
- 개발자:
- 발행자:
Information about RPG Maker MZ is still incomplete. 이것을 사용하여 게임의 세부 정보를 입력할 수 있도록 도와주세요. 문의 양식.
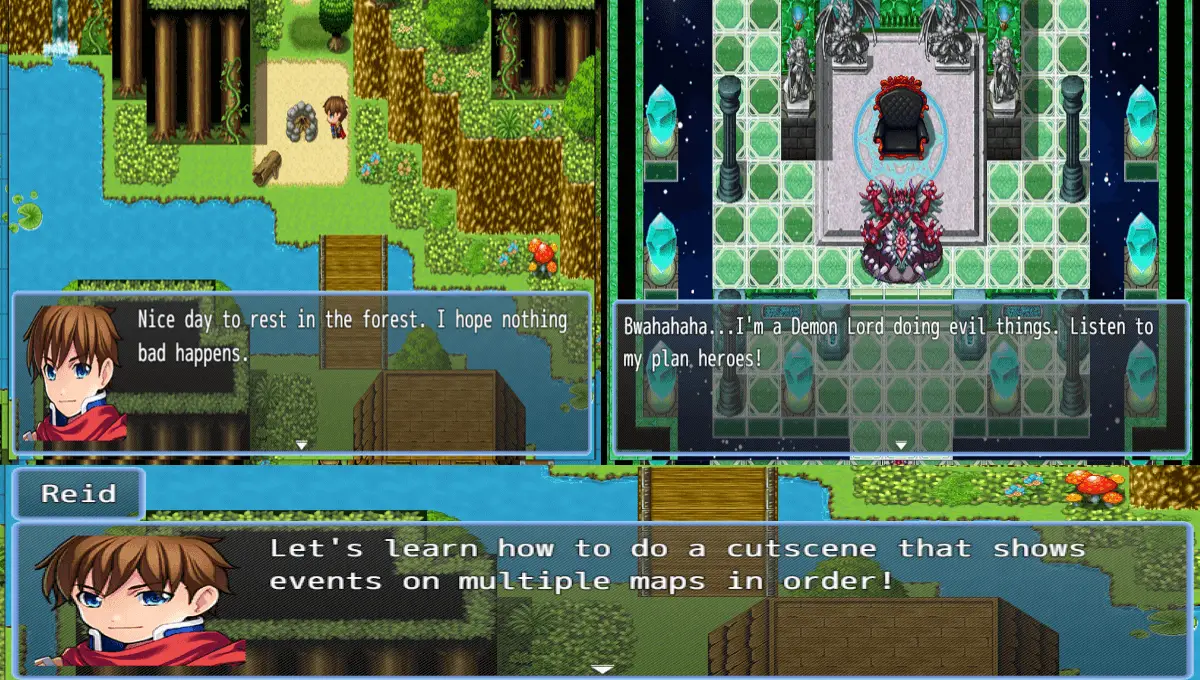
In this Official RPG Maker MZ Guide, we are going to teach you how to make a cutscene that spreads across multiple maps. The evil lord is plotting, so let’s flash over to his castle to see what he is doing!
소개
Sometimes in an RPG we wish to have a cutscene that starts on one map, then changes over to another map. In this tutorial we will show how one can do that using the event commands present in RPGMaker.
지도 1
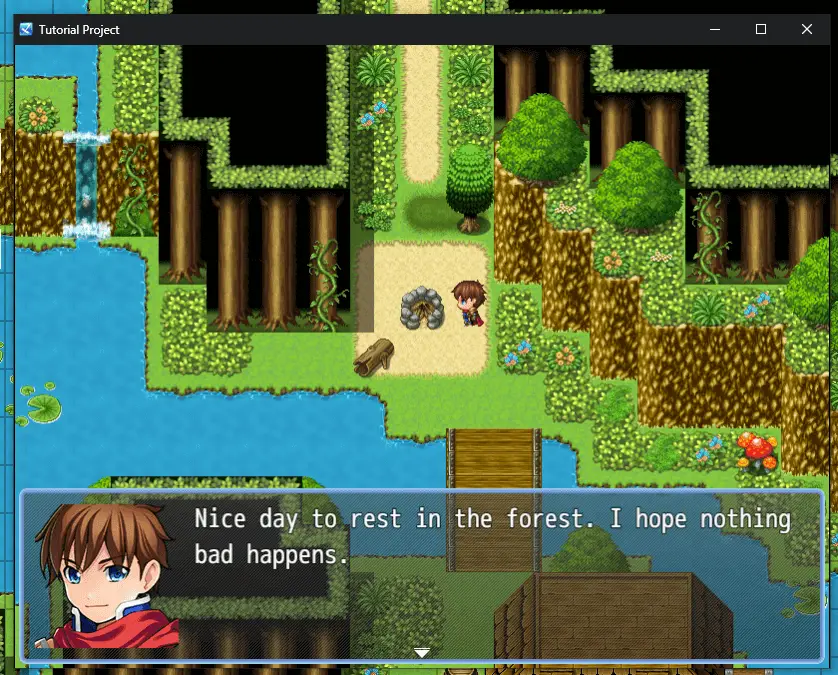
For our tutorial we are going to do a cutscene that takes place over three maps, then returns to the original map. 첫 번째, 허락하다’s set up our first map. In this map our heroes are resting in the forest. On that first map, we will have an autorun that controls the entire cutscene, and once we are done with our cutscene for resting in the forest, we first fade out the screen, increase our plot flow variable by 1, then transfer the player to the next map at the spot we want the camera to be at. It will look like the following when completed:
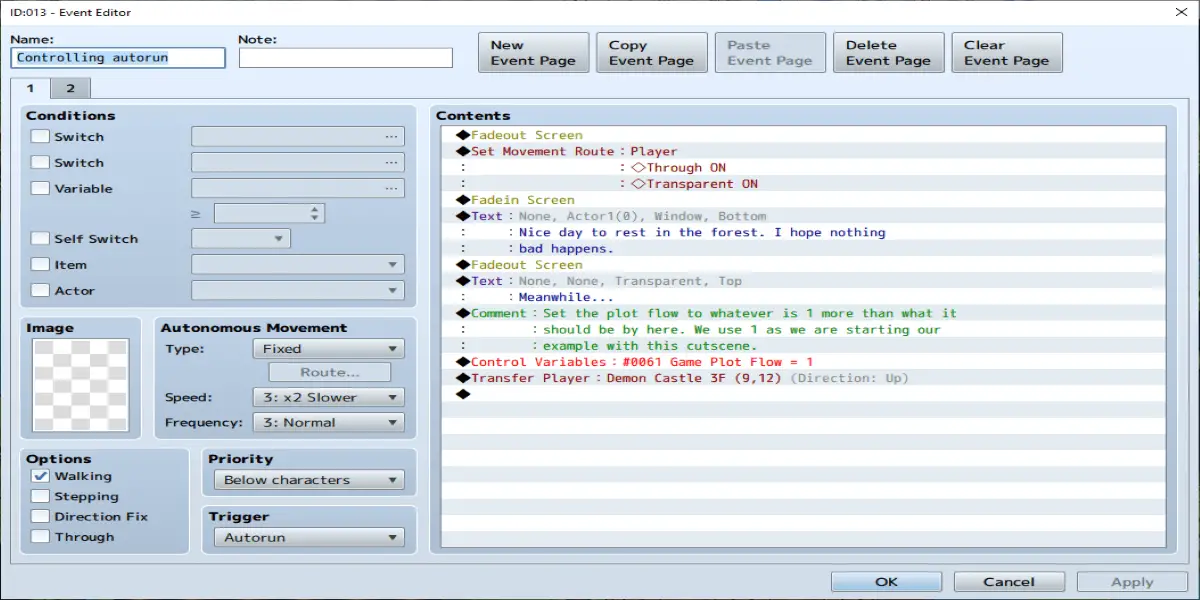
Notice that we did a set movement route player -> Through ON transparent ON too at the start of the cutscene. This is so that the player does not show up for this cutscene. If you want the player visible for the first cutscene, but not for the second, you will call the through ON transparent ON command after the fade out at the end of the cutscene instead.
Also before going to map two, add a page 2 that is set as follows:
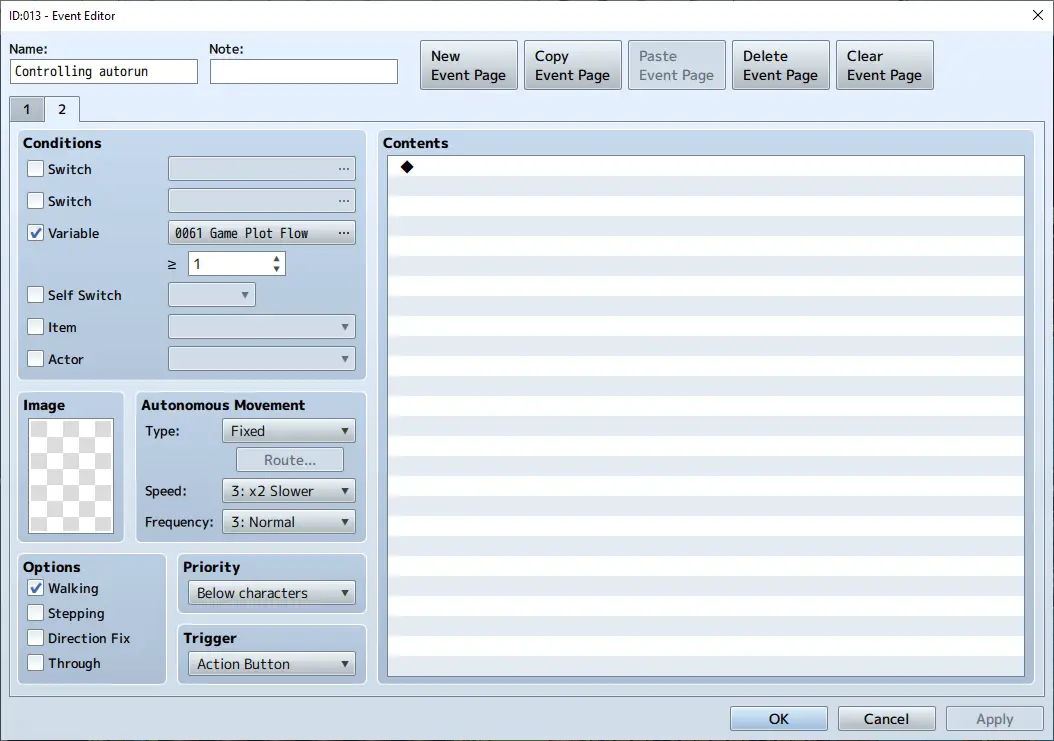
This page 2 is so when we come back our autorun doesn’t run again.
지도 2
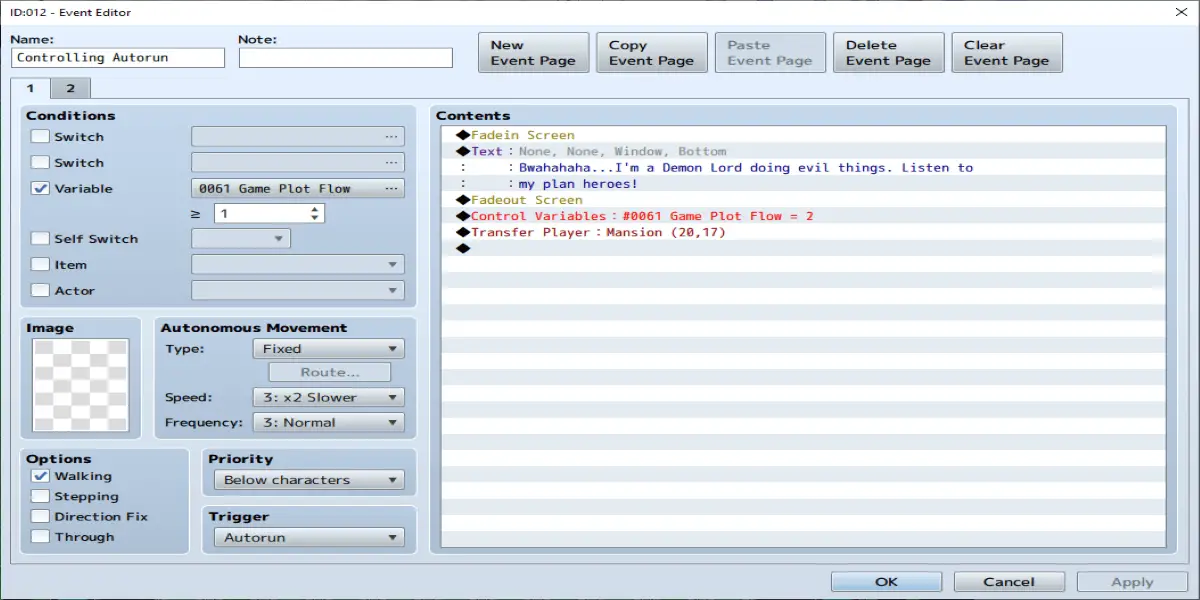
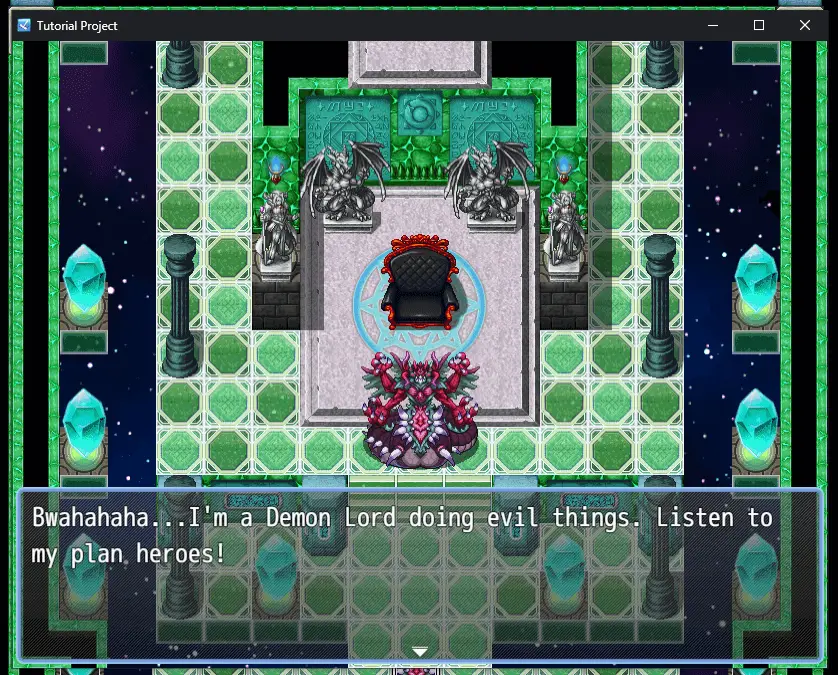
For this tutorial the next map will be a cutscene of a demon lord making evil plans. 이를 수행하려면, we will first make our event that controls the cutscene set to trigger when the plot variable is 1, or the same as we set it to in the last map. The reason for this is if you wish to debug and save mid cutscene you can quickly set that value to something that is never met like 234823947 and quickly save then change it back to 1 to test it from your save. Then we will fade in and show the demon lord doing evil things. Once we are done we fade out, increase our variable by setting it to 2 지금, then transfer to the next map. The cutscene will look like the following:
So far we have a cutscene that does this on the sample map Forest Map. The Reid you see on that map is from an event with the Reid sprite instead due to our use of Through ON Transparent ON.
Then transfers to the sample map Demon Castle to show this:
Now let’s wrap up work on map 2. First be sure to put a page 2 that is set to trigger when our variable is set to 2. Remember we set our variable to 2 when we changed maps. The reason for this page though is in case you wish to use this map for more cutscenes later, the event is already set up to not run this one again.
Reminder: Exact values of the variable setting for plot will depend on your game. We are using 2 here as we have 2 events so far in our plot, but if this is later in the game you will probably need to use other numbers.
지도 3
Now we want to show events on a third map as well. This map in our tutorial will be showing some people talking about recent dark events at a dinner table. We will again control this entire cutscene from one autorun. We will fade in, show our events, then when done fade out and set our variable to one higher than it was before. Since it is 2 지금, we will set it to 3. The cutscene will look something like this:
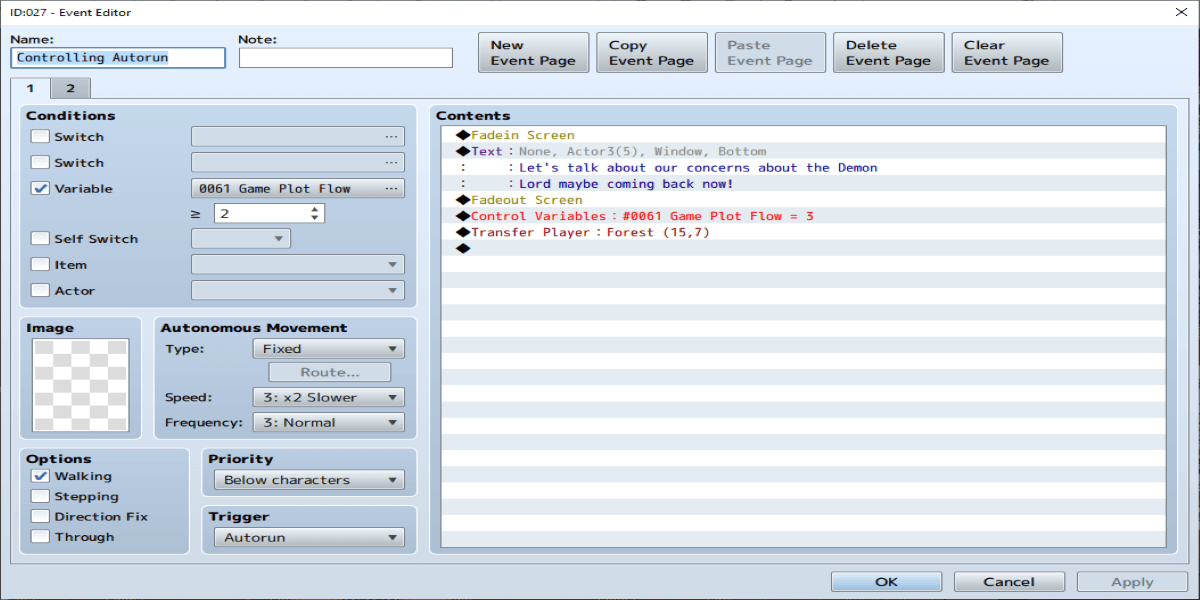
Since this is our last map for this cutscene before returning to our original map we end with a transfer event to transfer back to the first map. Also be sure to put a page 2 set to the condition to run when the variable is greater than or equal to the same value we just set the variable at, 이는 3 이 경우.
Back to Map 1
Now to wrap up the cutscene. Since we are back on the original map, we will need a new event to finish the cutscene. We can use another page of the autorun we used before. Thankfully we earlier put page 2 to activate when our variable is greater than or equal to the value we set the variable to at the end of the autorun. If we had not done that this entire sequence would start over and the cutscene would loop forever.
하지만, we need a way to run a new part of the cutscene too. The solution is to make a page 3 that is set to activate when the plot variable is greater than or equal to the value we set it at earlier, 이는 3 이 예에서. On that page 3 we will fade in, do anything more we wish to show for our cutscene, then we will wrap it up with a set move route event command -> Player -> Through OFF -> Transparent OFF. That last command is important as we hid the player earlier in our cutscene and without this command here the player will not be visible at all, and will walk through walls and events.
With all of this in mind, our page 3 on our controlling autorun event on the first map looks like this:
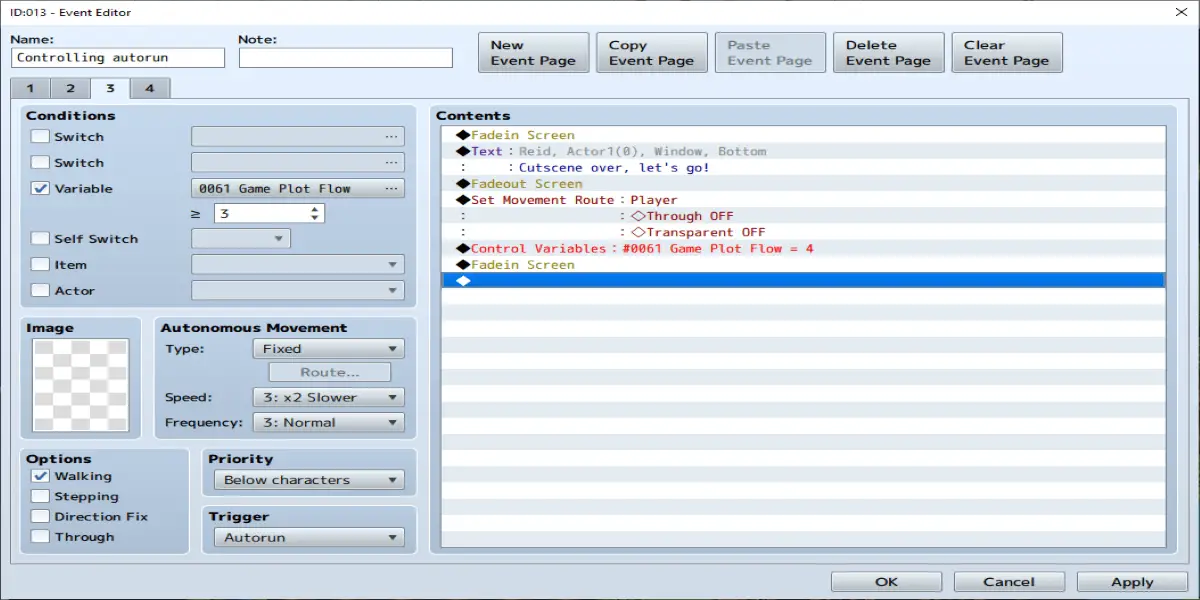
In this example we only had a single text box between the fade in then the fade out to make the player visible again. In that spot you would show any other parts of the cutscene you wish to show though. Also notice we end by setting the plot variable to one higher than it was before, which since it was 3 before we set it to 4.
Also notice there is a page 4 지금. 페이지 4 is set as follows:
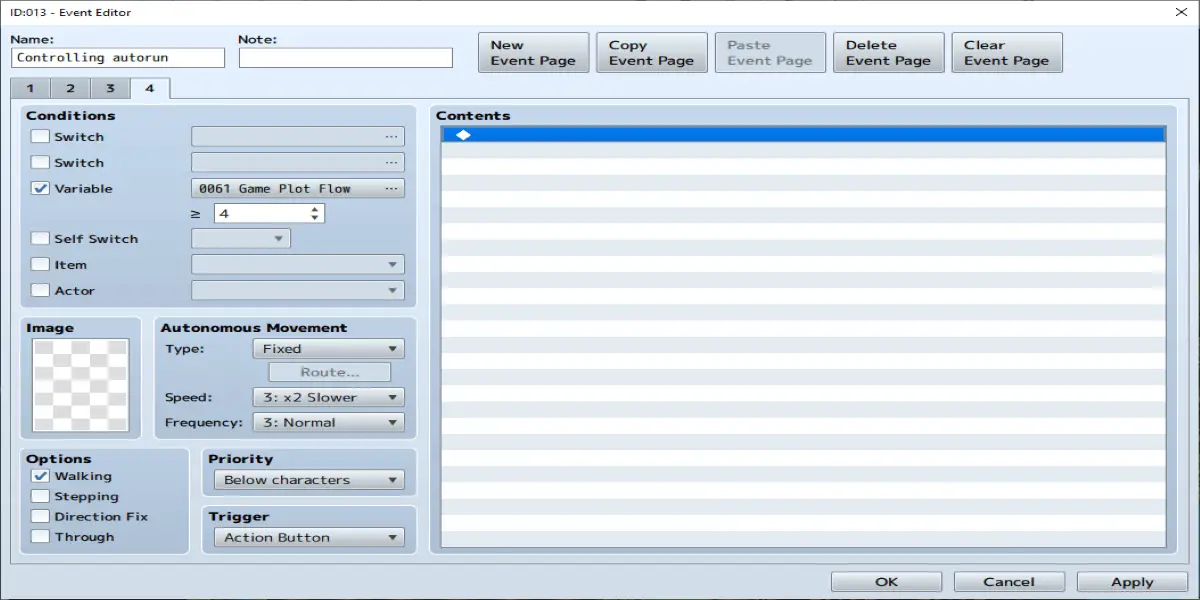
This is so our cutscene never runs again, and since our variable is now set to 4 it will never run again unless we for some reason set this variable to a number below 4.
결론
And that is how you set up a cutscene to run across multiple maps. With a combination of variables to keep track of where you are in the cutscene, as well as properly setup autoruns to run the events, you can do many powerful things. You can make an intro scene that spans 10 maps now if you need to. Or the ending to your RPG that shows scenes on all of the maps and how your party’s actions affected everyone there that you interacted with in your adventure.
With all of this in mind, what cutscenes will you make for your RPG now?
이것이 오늘 우리가 공유하는 모든 것입니다. RPG Maker MZ 가이드. 이 가이드는 원래 작성자가 작성하고 작성했습니다. degicagames. 이 가이드를 업데이트하지 못한 경우, 다음을 수행하여 최신 업데이트를 찾을 수 있습니다. 링크.