Are you a new Return from Core 플레이어? 이 가이드에서는, we will be showing you some of the most useful tips and tricks that were not mentioned during the tutorial of the game.
지도 시간
In the tutorial, you’ll kick things off with a Splitting Pickaxe boasting 450 내구성, but wave goodbye to it once you’re done learning the ropes. It’s sturdy enough for most mining tasks in the tutorial area, but not every block out there. If you fancy stockpiling starting materials, go ahead and use up all its durability before exiting the tutorial, via the hole the Train creates. 하지만, no pressure, as you’ll stumble upon plenty of Limestone and Copper Ore in the first Level regardless. Limestone pops out of any non-ore block, while Copper comes from Copper Blocks or gets extracted from Copper Veins scattered on the floor in Level One. Should your trusty Splitting Pickaxe call it quits, 두려워하지 마라; you can fashion a Stone Pickaxe to keep the whacking going if necessary.
재미있게, even if you bust your Splitting Pickaxe, you’ll still drop it during the cutscene when you bid adieu to the tutorial.
참고 사항: Keep an eye out for skeleton remains scattered about; give ’em a good smack for a few coins to give your character a leg up in Level One. 을 더한, they’ll cough up Bone Ashes, 어느, as far as I can tell, serve one purpose only: to complete a Side Quest in Core Town.
지구력
Ever pondered about the mysterious gauge wedged between your Health and Stomach indicators? 저것, 내 친구, is Endurance. Picture a curved blue meter, ready for action. Its primary function? Powering those swift Dashes you pull off. 처음에는, you’re granted three charges, 하지만 두려워하지 마세요, for you can beef up your Movement Talent to snag more. These charges gradually refill over time, though you can hasten the process through Talent upgrades or by gobbling up some tasty Food/Potion buffs. 지금, here’s the catch: while Dashes come in handy for dodging enemy assaults, 조심하다! On-hit effects still rear their pesky heads. 예를 들어, zipping into a Slime’s spit might spare you the damage, but you’ll still be slapped with the Slowed debuff.
Old Joe
When you start Level One, you’ll encounter Old Joe, the tutorial NPC. He’s your go-to guy for learning how to tackle Main Story Quests and scoring some survival gear. You don’t have to wait for him to hand over those helpful items though. Nearby, there’s a Crafting Table where you can whip up your own gear. 하지만, 조심해! Some of the items Old Joe hands out can’t be dropped or sold. You’ll need to stash them away since there’s no trash bin in sight. 나중에, when you find mini-dungeons, drop a storage container to stash these items, or try to ditch them before your auto-loot kicks in, though that’s a bit tricky.
오, and guess what? Old Joe moonlights as a merchant. Got any junk lying around? Sell it to him for some coins, which you can then splurge on handy starting gear.
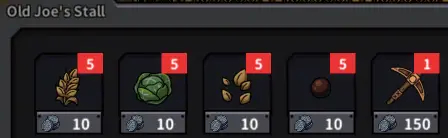
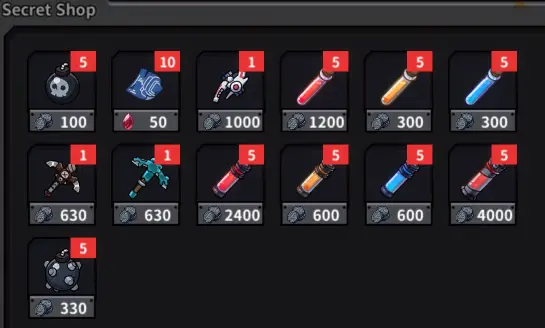
Keep an eye out for the red box with numbers next to each item at the merchant’s stall. This indicates how much stock the merchant has. You’re limited to purchasing that amount every day, with the stock resetting at 0:00 when the new day kicks in. With your starting coins, consider grabbing a Copper Pickaxe to replace the Splitting Pickaxe you misplaced. You can also stock up on food or seeds if necessary.
Even if you’re playing in a world with the fastest hunger rate, you can keep yourself well-fed by buying Wheat and Cabbage from Old Joe. Once he teaches you how to cook, whip up some tasty meals with these ingredients.
Shiny Blocks
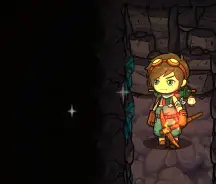
As you journey through the Level, keep an eye out for those shiny blocks. They’re pretty neat because when you smash them, they spit out all sorts of goodies – 항목, 괴물, you name it. Sometimes you’ll score some cool schematics for furniture or gear. 다른 시간, you might get your hands on some parts or junk that you can sell for a decent 2,000 동전. But watch out! Those monsters that pop out can be anywhere from super weak to ridiculously strong. 그래서, stay on your toes, or you might end up as a snack for the toughest ones out there.
Mini-Dungeons

Intimidating entrances might look scary, but they’re not too tough, especially if you’re on a mission to take down [엑스] foes. Once you step inside, you’ll find yourself in compact rooms packed with enemies itching for a fight. Just wipe them out, and you’ll move on. 대개, these spots span a couple of floors before you clear them, rewarding you with a mystery loot box. You can tackle each mini-dungeon once a day, with the clock resetting at midnight. They’re handy for snagging blueprints for special gear, like the Rat line in Level One, a neat alternative to the standard Iron gear.
Keep an eye out for special mini-dungeons on different levels. They might mix things up with puzzle rooms or zones teeming with critters ready to swarm you as soon as you’re near.
I Need Healing
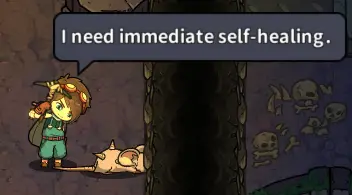
게임에서, healing options can be scarce early on, making your journey a bit frustrating. The primary sources of healing are the Healing Dose Type 1/2/3 물약, which you can find in chests or get from Monster Girls. Once you reach Level 2 affection with them, they’ll sell Type 1 doses, 최대 5 하루에, per Monster Girl. As your bond grows stronger, they might offer higher-tier doses like Type 2 or Type 3.
If you’re in dire need of healing, consider trying out certain food recipes like Grilled Steak or Mushroom Hot Pot, which grant temporary healing buffs upon consumption. In desperate situations, you can also benefit from standing near a Bonfire (0.25% healing per second), soaking in a Hot Spring (1% healing per second), or resting in a bed (1% healing per second). Respawning is another option, though it comes with the penalty of leaving a corpse behind, unless you’ve unlocked the Penniless talent. Without this talent, you’ll need to retrieve your items from your corpse or respawn point.
기억하다, dying multiple times can be part of the game experience, and there’s even an achievement for respawning a hundred times!

If you perish while retrieving your items, 걱정하지 마세요; you’ll create another corpse to reclaim your belongings. While I’ve seen up to three corpses, there might be a limit before you risk losing your inventory.
이것이 오늘 우리가 공유하는 모든 것입니다. Return from Core 가이드. 이 가이드는 원래 작성자가 작성하고 작성했습니다. 채팅. 이 가이드를 업데이트하지 못한 경우, 다음을 수행하여 최신 업데이트를 찾을 수 있습니다. 링크.