- 제목: Recettear: An Item Shop's Tale
- 출시일:
- 개발자:
- 발행자:
Information about Recettear: An Item Shop's Tale is still incomplete. 이것을 사용하여 게임의 세부 정보를 입력할 수 있도록 도와주세요. 문의 양식.
A comprehensive guide providing information about the contents of chests, including the loot tables and probabilities of obtaining specific items from them. The loot tables and drop rates may differ from one dungeon to another.
기본 역학
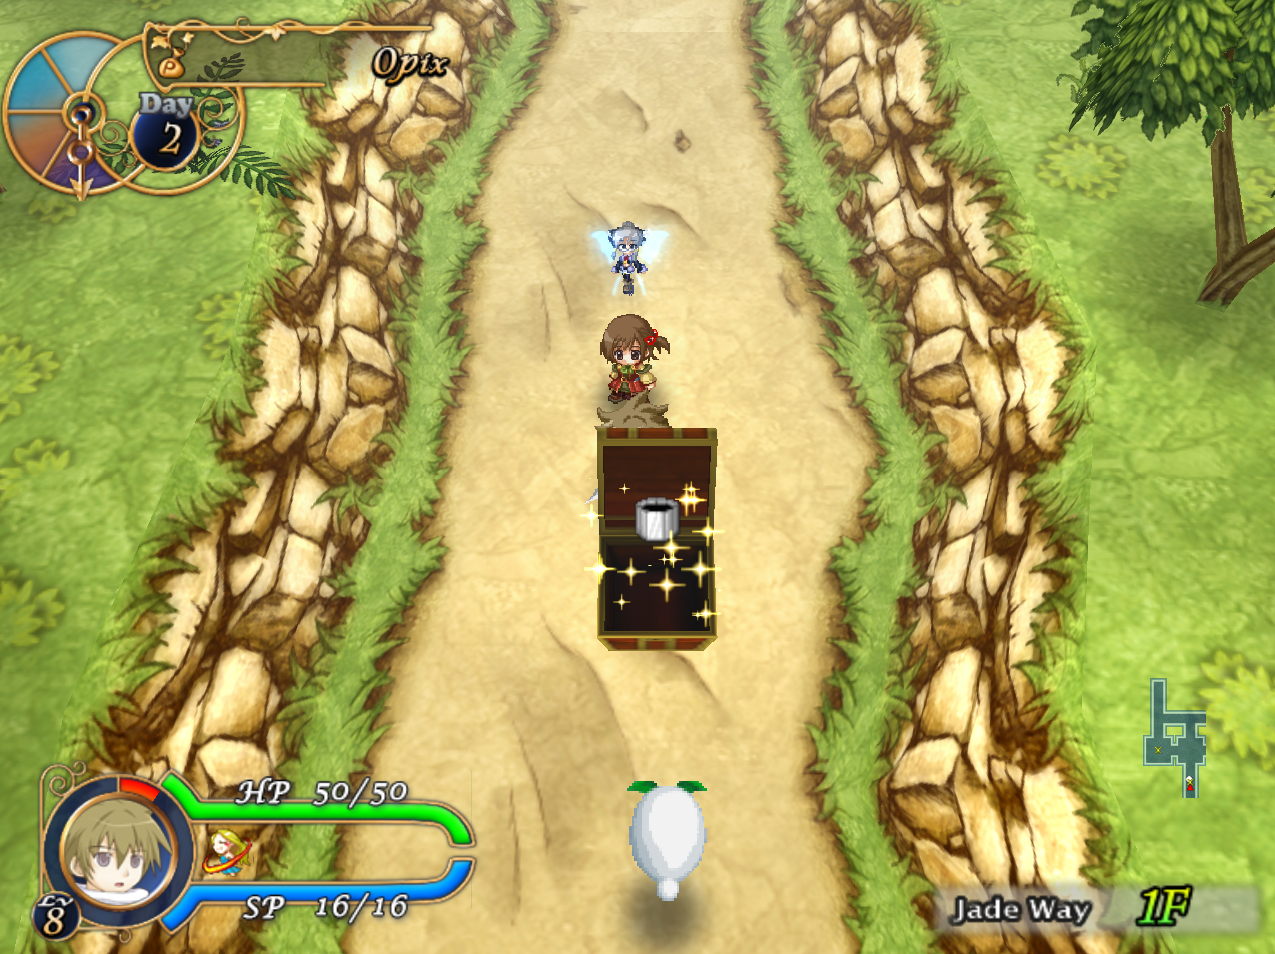
The mechanics of the game are quite straightforward. When you open a chest, you will receive loot. The loot is categorized into six tiers, which vary from dungeon to dungeon. When a chest is opened, the game first determines the tier of loot you will receive, and then it rolls from the specific loot table associated with that tier. Detailed information about these loot tables can be found in later sections of the guide.
Once you complete the Hall of Trials, a system of bad luck protection comes into play, increasing the frequency of higher tier loot. With each chest you open, the chances of obtaining higher tier loot progressively improve. 하지만, there is a limit to how much the bad luck protection can increase, which is reached after opening a sufficient number of chests. Exiting a dungeon resets the bad luck protection back to its initial values. 그러므로, the longer you remain in a dungeon, the higher the likelihood of receiving loot from higher tiers.
Trapped chests are predetermined during the generation of a floor in a dungeon. This means that whether a chest is trapped or not is predetermined, allowing trap detection abilities like Charme’s passive ability to function. It’s important to note that trapped chests have no impact on the bad luck protection system. If you are aware that a chest is trapped, there is no benefit in opening it. 그러므로, it is advisable not to waste time opening such chests.
Hall of Trials:
- You will always get tier 1 전리품.
Jade Way:
- 층 1 loot is gained at a 100% rate until 3 chests are opened. Then the rate decreases by 2% per chest. This is capped at 80%, which is reached after opening 12 가슴.
- 층 2 loot is gained at a 0% rate until 3 chests are opened. Then the rate increases by 2% per chest. This is capped at 20%, which is reached after opening 13 가슴.
The chest at the end of Jade Way is guaranteed to have a Very Odd Vase the first time you open it. On subsequent visits, it just acts like a normal chest.
Amber Garden:
- 층 1 loot is gained at a 96% rate until 2 chests are opened. Then the rate decreases by 4% per chest.
- 후에 4 total chests are opened, the rate decreases by 4.5% per chest.
- 후에 6 total chests are opened, the rate decreases by 0.5% per chest. This is capped at 75%, which is reached after opening 13 가슴.
- 층 2 loot is gained at a 4% rate until 2 chests are opened. Then the rate increases by 4% per chest. This is capped at 20%, which is reached after opening 6 가슴.
- 층 3 loot is gained at a 0% rate until 4 chests are opened. Then the rate increases by 0.5% per chest. This is capped at 5%, which is reached after opening 14 가슴.
The boxes that contain items in Tielle’s boss fight count as chests and use the same rates and mechanics. Boxes that do not contain items do not increase the drop rate. Finding Tielle first does not count the unopened boxes in your favor.
흑요석 탑:
- 층 2 loot is gained at a 96% rate until 2 chests are opened. Then the rate decreases by 4% per chest.
- 후에 4 total chests are opened, the rate decreases by 4.5% per chest.
- 후에 6 total chests are opened, the rate decreases by 0.5% per chest. This is capped at 75%, which is reached after opening 13 가슴.
- 층 3 loot is gained at a 4% rate until 2 chests are opened. Then the rate increases by 4% per chest. This is capped at 20%, which is reached after opening 6 가슴.
- 층 4 loot is gained at a 0% rate until 4 chests are opened. Then the rate increases by 0.5% per chest. This is capped at 5%, which is reached after opening 14 가슴.
Lapis Ruins:
- 층 3 loot is gained at a 96% rate until 2 chests are opened. Then the rate decreases by 4% per chest.
- 후에 4 total chests are opened, the rate decreases by 4.5% per chest.
- 후에 6 total chests are opened, the rate decreases by 0.5% per chest. This is capped at 75%, which is reached after opening 13 가슴.
- 층 4 loot is gained at a 4% rate until 2 chests are opened. Then the rate increases by 4% per chest. This is capped at 20%, which is reached after opening 6 가슴.
- 층 5 loot is gained at a 0% rate until 4 chests are opened. Then the rate increases by 0.5% per chest. This is capped at 5%, which is reached after opening 14 가슴.
Crystal Nightmare:
- 층 4 loot is gained at a 96% rate until 2 chests are opened. Then the rate decreases by 4% per chest.
- 후에 4 total chests are opened, the rate decreases by 4.5% per chest.
- 후에 6 total chests are opened, the rate decreases by 0.5% per chest. This is capped at 75%, which is reached after opening 13 가슴.
- 층 5 loot is gained at a 4% rate until 2 chests are opened. Then the rate increases by 4% per chest. This is capped at 20%, which is reached after opening 6 가슴.
- 층 6 loot is gained at a 0% rate until 4 chests are opened. Then the rate increases by 0.5% per chest. This is capped at 5%, which is reached after opening 14 가슴.
The boxes that contain items in Tielle’s boss fight in the Crystal Nightmare count as chests, unfortunately they use the same drop rates and mechanics as Lapis Ruins and use the same rates and mechanics there. Boxes that do not contain items do not increase the drop rate. Finding Tielle first does not count the unopened boxes in your favor.
The chests on floors 30 그리고 60 have entirely different mechanics, which are detailed in their own section.
층 1 전리품
옷
비옷
Wooden Armband
Wool Hat
Wooden Helm
Souvenir Charm
Treeseed Necklace
Old Muffler
Summer Sandals
Unthankful Statue
Scrap Plate
Metal Armor
Wooden Shield
Crafter’s Knife
Windbreaker
Cloth Robe
Iron Armband
Cloth Hat
Standard Charm
Shell Necklace
Cloth Cape
Leather Boots
백스크래처
Wooden Chestpiece
철갑옷
Common Shield
Warrior’s Helm
*Due mistakes in the RNG code, the Worn Sword is set to a 11/264 chance instead of the intended 10/264 가능성, and the Pot Stand is set to a 3/264 chance instead of the intended 4/264 가능성.
층 2 전리품
Thief’s Knife
Iron Spear
Tough Clothes
Thick Robe
Spiked Armband
Warm Hat
Popular Charm
Magnet Necklace
Adventurer’s Cape
Handknit Muffler
Thankful Statue
Hand Lantern
Sturdy Glove
Shell Chestpiece
Parade Armor
Big Shield
Parade Helm
Knight’s Blade*
Practice Lance
Spiked Gloves
Silk Clothes
Wizard’s Robe
Strongarm Band
Scale Hat
Sand Charm
Hard Boots
Picnic Basket
Steel Breastplate
Silver Armor
기사 방패
Silver Helm
Starsand Hourglass
Hurricane Bow
Grand Naginata
Silver Gauntlet
Golden Pedestal
Cat Statue
*Due mistakes in the RNG code, the Knight’s Blade is set to a 5/208 chance instead of the intended 4/208 가능성, and the Goldfish Bowl is set to a 1/208 chance instead of the intended 2/208 가능성.
층 3 전리품
Battle Sweater
Fur Robe
Power Wrist
Pirate Hat
Old Cape
Fleece Muffler
Golden Pedestal
Goldfish Bowl
Silver Photo Stand
Blazing Charm
Blue Teacup
Breaker Sword*
Giant’s Fist
Spirit-beast Robe
King-shell Chest
Armadillo Armor
Fairy Bracelet
Salamander Shield
Bone Helm
Shell Charm
Silver Watch
Cupid’s Bow
Flameguard
Sailor Suit
Hood’s Outfit
Sandwich Plate
Magical Hat
Cat Statue
클럽
Ace’s Bow
Platinum Halberd
Rending Claw
Chobham Armor
Pearl Shield
Full Helm
Golden Scales
Skull Candle
Messy Scroll*
*Due mistakes in the RNG code, the Breaker Sword is set to a 5/181 chance instead of the intended 4/181 가능성, and the Messy Scroll is set to a 2/181 chance instead of the intended 3/181 가능성.
층 4 전리품
Fur Robe
Power Wrist
Pirate Hat
King-shell Chest
Armadillo Armor
Salamander Shield
Bone Helm
Blazing Charm
Golden Pedestal
Blue Teacup
Cupid’s Bow
Catclaw
Spirit-beast Robe
Fairy Bracelet
Magical Hat
Violet Necklace
Silver Watch
Messy Scroll
Flameguard
Giant’s Fist
Sailor Suit
Hood’s Outfit
Sandwich Plate
Chobham Armor
Pearl Shield
Full Helm
Shell Charm
Skull Candle
Candlestick
Crystal Sword*
Ace’s Bow
Platinum Halberd
Spellclaw
Punch Unit
Rainbow Mail
Ancient Armor
Superarm Band
Jade Shield
Ancient Helm
Wing Charm
배틀 부츠
Golden Scales
Cat Statue
Old Teacup
Tuna Shanker
Crystal Rod
Harp Bow
Whalekiller
White Gauntlet
Hammer Arm
Gold Candy
Glass Flower
Sticky Pottery
Atou
Starstone Staff
Causmedia
Lesato
Dudely Mitts
Ak-kai Claw
Disc Unit
Perfect Shirt
Goetia Robe
Belenite Plate
Guardian Armor
Angel Bracelet
Hevelius
Ishtoril
Alleus
Mana Charm
Spirit Magatama
Druid Mantle
Legendary Scarf
Winged Boots
Soul Ring
Hawk Statue
Gentlecat Statue
Old Clock
Raccoon Statue
Lobster
*Due mistakes in the RNG code, the Crystal Sword is set to a 5/352 chance instead of the intended 4/352 가능성, and the Ferromin L is set to a 1/352 chance instead of the intended 2/352 가능성.
층 5 전리품
Spirit-beast Robe
Fairy Bracelet
Magical Hat
Violet Necklace
Winged Boots
Candlestick
클럽
Ace’s Bow
Spellclaw
Sailor Suit
Hood’s Outfit
Sandwich Plate
Chobham Armor
Pearl Shield
Full Helm
Shell Charm
Golden Scales
Old Teacup
Glass Flower
Platinum Halberd
Ak-kai Claw
Gatling Unit
Rainbow Mail
Ancient Armor
Superarm Band
Jade Shield
Ancient Helm
Wing Charm
배틀 부츠
Sticky Pottery
Crystal Rod
Harp Bow
Whalekiller
White Gauntlet
“Fall From Grace”
Drill Arm
Gold Candy
Old Clock
Atou
Starstone Staff
Causmedia
Lesato
Dudely Mitts
영혼 먹는 사람
Gumball Unit
Perfect Shirt
Goetia Robe
Belenite Plate
Guardian Armor
Angel Bracelet
Hevelius
Ishtoril
Alleus
Mana Charm
Spirit Magatama
Druid Mantle
Legendary Scarf
Raccoon Statue
Trailblazers
Hawk Statue
Gentlecat Statue
Welcome Bear
Pitted Pot
Lobster
Ferromin L
드래곤 팡
Megaflame Staff
Wyvern Wing
Cobra Spear
Dragon Buster
Fire-Dragon Claw
Gravity Cannon
Gothic Outfit
Gentleman’s Suit
달빛 로브
Valkyrie Plate
Legendary Armor
Fairy Misanga
Legendary Shield
Kitty Hood
Legendary Helm
Love Charm
Imperial Cape
Diana’s Heart
Soul Ring
Pharmacist Glasses
Miniature Castle
Remetogen
Filet Mignon
*Due mistakes in the RNG code, the Crystal Sword is set to a 9/439 chance instead of the intended 8/439 가능성, and the Omega Ferromin is set to a 1/439 chance instead of the intended 2/439 가능성.
층 6 전리품
Superarm Band
Jade Shield
Ancient Helm
Wing Charm
Demonbane*
Ak-Kai Claw
Ancient Armor
배틀 부츠
Sticky Pottery
Old Clock
Harp Bow
Whalekiller
White Gauntlet
Spirit Magatama
Druid Mantle
Legendary Scarf
Raccoon Statue
Dudely Mitts
“Fall From Grace”
Drill Arm
Perfect Shirt
Belenite Plate
Guardian Armor
Angel Bracelet
Hevelius
Alleus
Mana Charm
Hawk Statue
Welcome Bear
Starstone Staff
Causmedia
Lesato
영혼 먹는 사람
Gumball Unit
Goetia Robe
Trailblazers
Pitted Pot
드래곤 팡
Megaflame Staff
Wyvern Wing
Cobra Spear
Dragon Buster
Messiah Unit
Gothic Outfit
Gentleman’s Suit
Valkyrie Plate
Legendary Armor
Fairy Misanga
Kitty Hood
Legendary Helm
Love Charm
Imperial Cape
Diana’s Heart
Gentlecat Statue
Lobster
Gravity Cannon
달빛 로브
Legendary Shield
Pharmacist Glasses
Miniature Castle
Remetogen
Filet Mignon
Ferromin L
Assassin Blade
Heaven’s Key
Ancient Bow
Vacula Spear
Divine Finger
Dark Master Claw
Phalanx Cannon
Phoenix Garb
Eos Robe
Mythic Beast Plate
Stoneform Armor
Trinary Armband
Blue Line Shield
Ishtoril
Emperor’s Crown
Golden Helm
Victory Charm
Fruitdrop Amulet
Fisherman Flag
Dragon’s Mane
Iron Sandals
Heavenly Heels
Soul Ring
Dragon Ornament
Book of Adventure
*Due mistakes in the RNG code, the Demonbane is set to a 9/448 chance instead of the intended 8/448 가능성, and the Omega Ferromin is set to a 1/448 chance instead of the intended 2/448 가능성.
Crystal Nightmare End Chests Basics
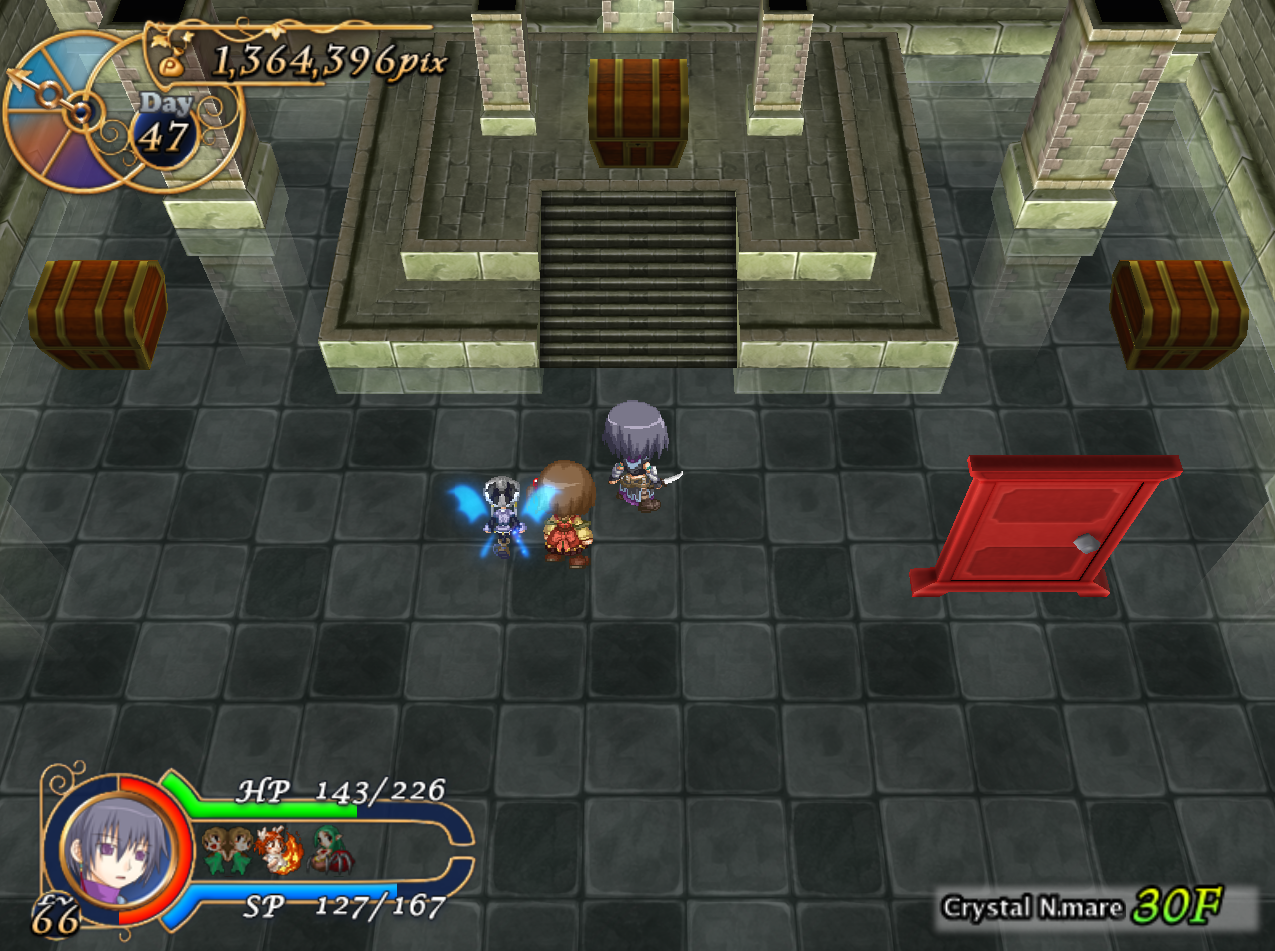
When you get to the end of the Crystal Nightmare on floor 30, or the end of its boss rush on floor 60, you’ll enter the room pictured above.
When completing the boss rush, you’ll always enter the room in the pictured state, ~와 함께 3 chests to open. However if you’re exploring the dungeon portion, the state of this room will differ depending on which floor you started from. If you started from floor 21, only the middle chest will be present. If you started from floor 11, only the middle and right chests will be present. And if you started all the way from floor 1, 모두 3 chests will be present.
Each chest actually has a different reward pool, which will be detailed in the sections below.
Crystal Nightmare End: Left Chest
This chest will only spawn if you started from floor 1. If you started from the boss rush, this chest will always spawn.
This one is simple. It’s guaranteed to give you tier 6 전리품.
Crystal Nightmare End: Right Chest
This chest will only spawn if you started from floor 11 or floor 1. If you started from the boss rush, this chest will always spawn.
This chest rolls combines all 6 tiers of loot together into 1 giant loot table. Resulting in an X out of 1892 chance to get any piece of chest loot in the game.
Due mistakes in the RNG code, the Worn Sword is set to a 11/1892 chance instead of the intended 10/1892 가능성, and the Omega Ferromin is set to a 3/1892 chance instead of the intended 4/1892 가능성. The RNG bugs from the other tables do not apply here.
Crystal Nightmare End: Middle Chest
This chest always spawns no matter what. 하지만, its behavior can differ depending on where you started the dungeon.
If you started from floor 21, 당신은 2 possible loot tables the game will choose from. The rare loot table, or every single possible chest loot (Same mechanics as the right chest), with both having an equal possibility of happening.
If you started from floor 1, 11, or the boss rush, 있다 3 possible loot tables instead. The rare loot table, or every single possible chest loot (Same mechanics as the right chest), or the ultra rare loot table, all having an equal possibility of happening.
The rare loot table is as follows:
- Soul Cleaver
- 드래곤 팡
- Megaflame Staff
- Wyvern Wing
- Cobra Spear
- Dragon Buster
- Fire-Dragon Claw
- Gravity Cannon
- Gothic Outfit
- Gentleman’s Suit
- 달빛 로브
- Valkyrie Plate
- Legendary Armor
- Fairy Misanga
- Legendary Shield
- Kitty Hood
- Legendary Helm
- Love Charm
- Spirit Magatama
- Imperial Cape
- Diana’s Heart
- Trailblazers
있다 22 항목, all with an equal chance of being chosen. 특히, this is the only way to get the Soul Cleaver, as it only shows up in this pool. 최상의 결과를 얻으려면, you’re better off doing floor 21 runs until you get this.
The ultra rare loot table is as follows:
- Legendary Sword
- Assassin Blade
- Heaven’s Key
- Ancient Bow
- Vacula Spear
- Divine Finger
- Dark Master Claw
- Phalanx Cannon
- Phoenix Garb
- Eos Robe
- Mythic Beast Plate
- Stoneform Armor
- Trinary Armband
- Blue Line Shield
- Emperor’s Crown
- Golden Helm
- Fruitdrop Amulet
- Fisherman Flag
- Dragon’s Mane
- Iron Sandals
- Heavenly Heels
있다 21 항목, all with an equal chance of being chosen. All the items from this pool are chosen from the rarest possible items from the tier 6 loot table. 하지만, there are some notable omissions.
- Ishtoril: Can be obtained in earlier tier chests.
- Victory Charm: ㅏ 2 ~에 448 chance from the tier 6 drop table, with no other way to obtain. 행운을 빌어요.
- Soul Ring: One of the rarest pieces of loot from tier 4, 5, and 6’s drop tables. Since this is on multiple drop tables, you’re more likely to come across this at least.
- Dragon Ornament: ㅏ 2 ~에 448 chance from the tier 6 drop table, with no other way to obtain. 행운을 빌어요.
- Book of Adventure: ㅏ 2 ~에 448 chance from the tier 6 drop table, with no other way to obtain. 행운을 빌어요.
- Omega Ferromin: Thanks to a bug in the RNG, this item is one of the hardest items to obtain from a chest, which makes this omission extremely unfortunate. Especially since you need at least 3 to be able to fuse every item. It does show up on the tier 5 drop table along with the tier 6 drop table, which is a small comfort.
이것이 오늘 우리가 공유하는 모든 것입니다. Recettear: An Item Shop's Tale 가이드. 이 가이드는 원래 작성자가 작성하고 작성했습니다. Araxxor. 이 가이드를 업데이트하지 못한 경우, 다음을 수행하여 최신 업데이트를 찾을 수 있습니다. 링크.