This guide was created to help individuals navigate Ready or Not in a tactical manner and have some basic knowledge on how to survive the OPs.
Pre-Game and Setup
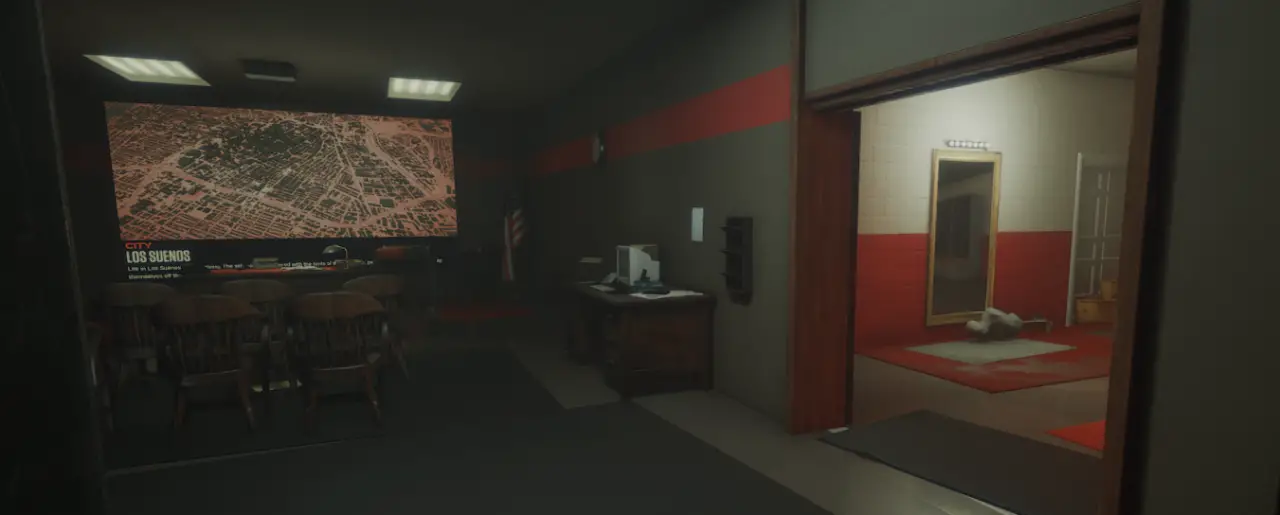
Ready Room
When loading into the Pre-Game session, you will spawn in the Ready Room. This room is where all missions are launched to get your feet into the field!
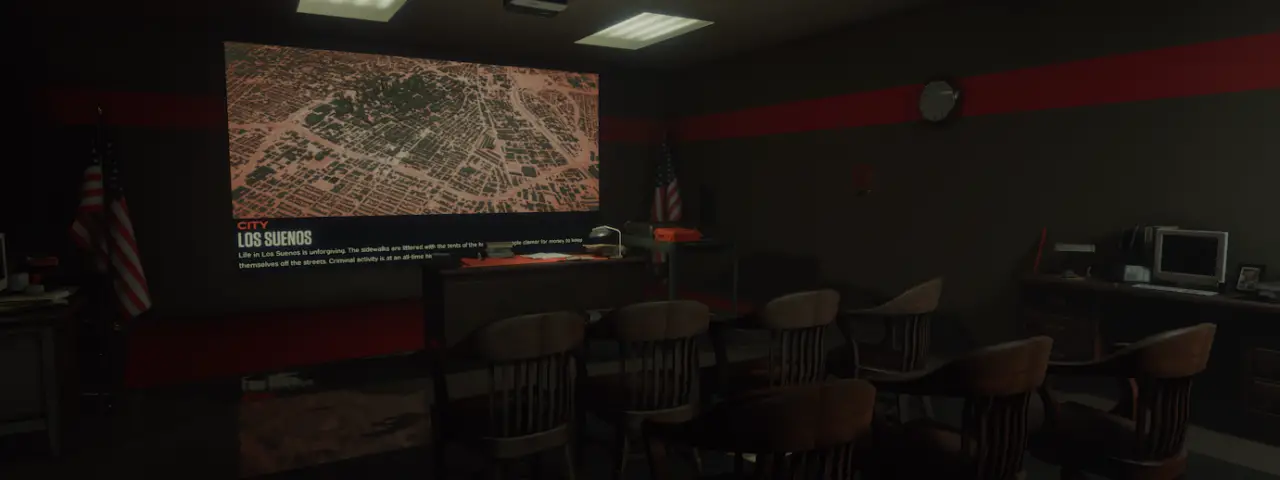
To select the raid mission, approach the commander’s desk at the front of the room to open the Mission Selector. Inside this selector you will see eight(8) individual locations to choose from. Six(6) of the eight(8) locations are developed locations that are able to be experienced in the Ready or Not universe.
These locations are as followed:
- 213 파크 홈스 (Twisted Nerve) @ 0330 – 3:30 A.M.
The detectives have been following a new lead to locate a source of methamphetamine storage in Los Suenos, tracing a potential “affordable housing” development in 213 공원 - 4U 주유소 (감사합니다, Come Again) @ 2300 – 11:00 P.M.
Respond to a robbery gone bad. Multiple civilians are inside, as local police are on-scene. The assailants are juveniles and expectedly skittish. - Wenderly Hills Hotel (Checkin’ ~ 안에) @ 1230 – 12:30 P.M.
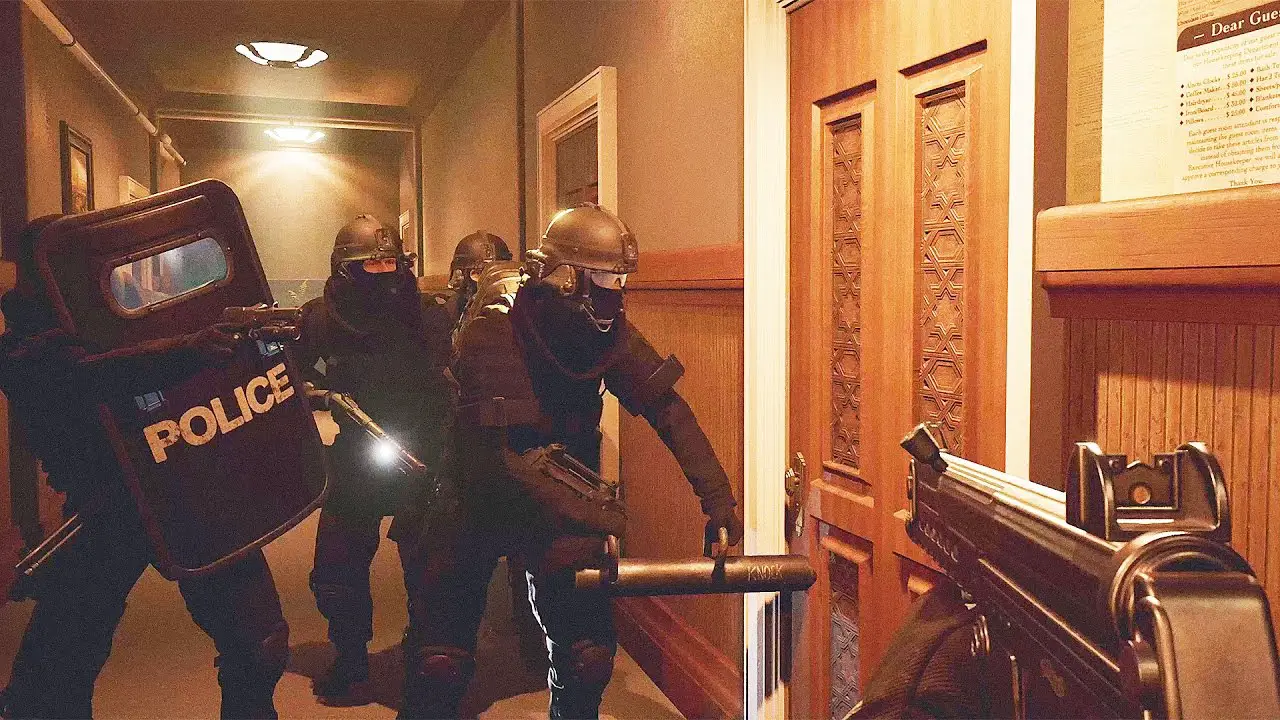
D Platoon is to deploy on-site and clear the key floors of this hotel. Multiple civilians inside. Very dangerous, deceptive suspects. Be on your a-game. - Cesar’s Cars Dealership (Buy Cheap, Buy Twice) @ 0440 – 4:40 A.M.
The team has been tasked with infiltrating the Caesar’s Cars dealership downtown, as investigators working the Port Hokan case have uncovered a paper trail leading to this particular workplace. Exercise extreme caution. - 호칸항 (숨바꼭질) @ 0215 – 2:15 A.M.
Joint strike operation between Metro SWAT, FBI HRT, and ATF. Rainy Weather. Your platoon has been tasked with clearing Warehouse One and the Void Shipping Services Facility. - 체리에사 농장 (Carriers of the Vine) @0300 – 3:00 A.M.
An officer has been killed in the line of duty. He lays dead on the driveway of Cherryessa Farm. Your team is to deploy and clear the strange compound.
Mission Types
Ready or Not currently features five(5) different operational mission styles. The styles are listed below:
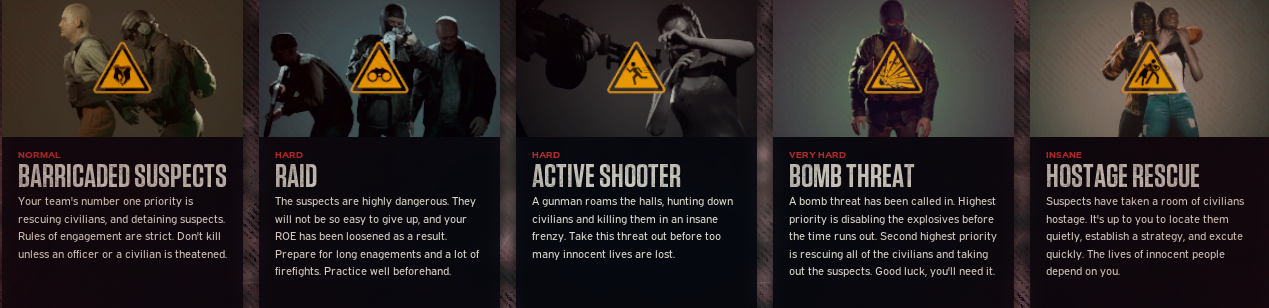
- Barricaded Suspects – 보통 난이도
Your team’s number one priority is rescuing civilians, and detaining suspects. Rules of engagement are strict. Don’t kill unless an officer or a civilian is threatened. - 습격 – 어려움 난이도
The suspects are highly dangerous. They will not be so easy to give up, and your ROE has been loosened as a result. Prepare for long engagements and a lot of firefights. Practice well beforehand. - Active Shooter – 어려움 난이도
A gunman roams the halls, hunting down civilians and killing them in an insane frenzy. Take this threat out before too many innocent lives are lost. - Bomb Threat – Very Hard Difficulty
A bomb threat has been called in. Highest priority is disabling the explosives before the time runs out. Second highest priority is rescuing all of the civilians and taking out the suspects. 행운을 빌어요, you’ll need it. - Hostage Rescue – Insane Difficulty
Suspects have taken a room of civilians hostage. It’s up to you to locate them quietly, establish a strategy, and execute quickly. The lives of innocent people depend on you.
메모: Not all mission types above are currently available for each location described above. The only location where all mission types are available is the 4U Gas Station
Operation Preparation
Before entering any operation, it is crucial that you are dressed for the mission type selected. There are currently two locations to customize your officer and gear at.
The first location is the 라커룸 to the right of the Ready Room area.
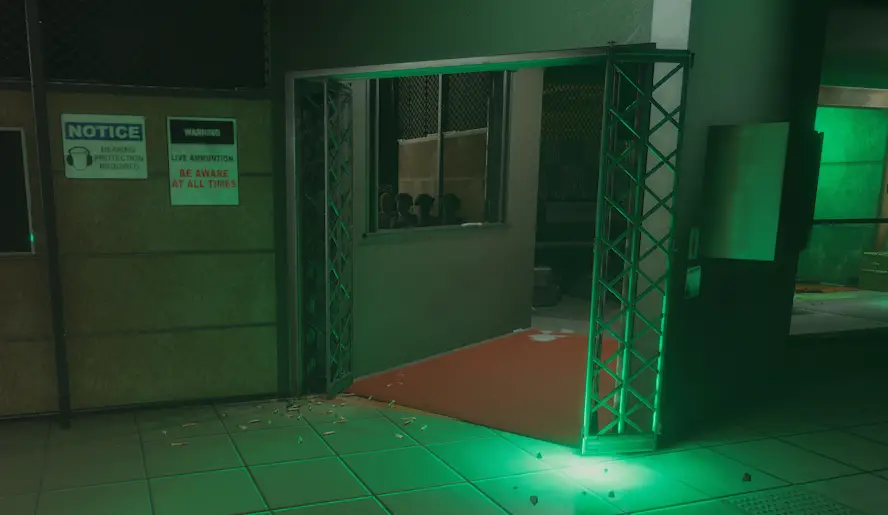
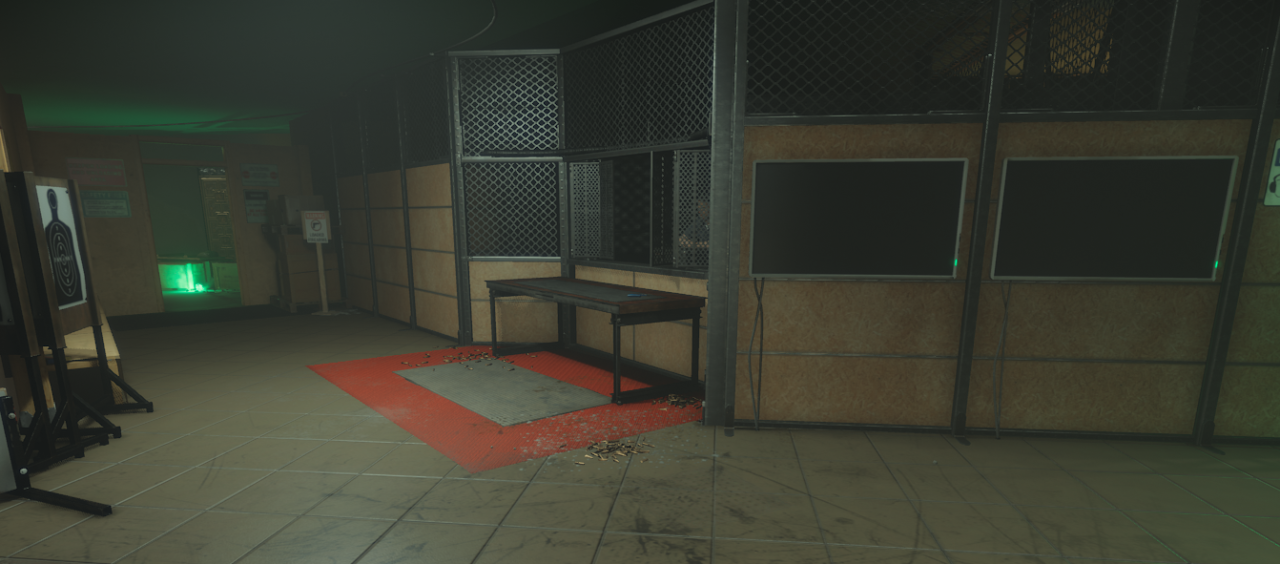
The second location is down the stairs to the left of the Ready Room on the first red carpet before the 사격장
장비
Once inside either the 라커룸 또는 Downstairs Loadout customization menus, you will be greeted with your officer previewing the gear you selected for his/her operation.
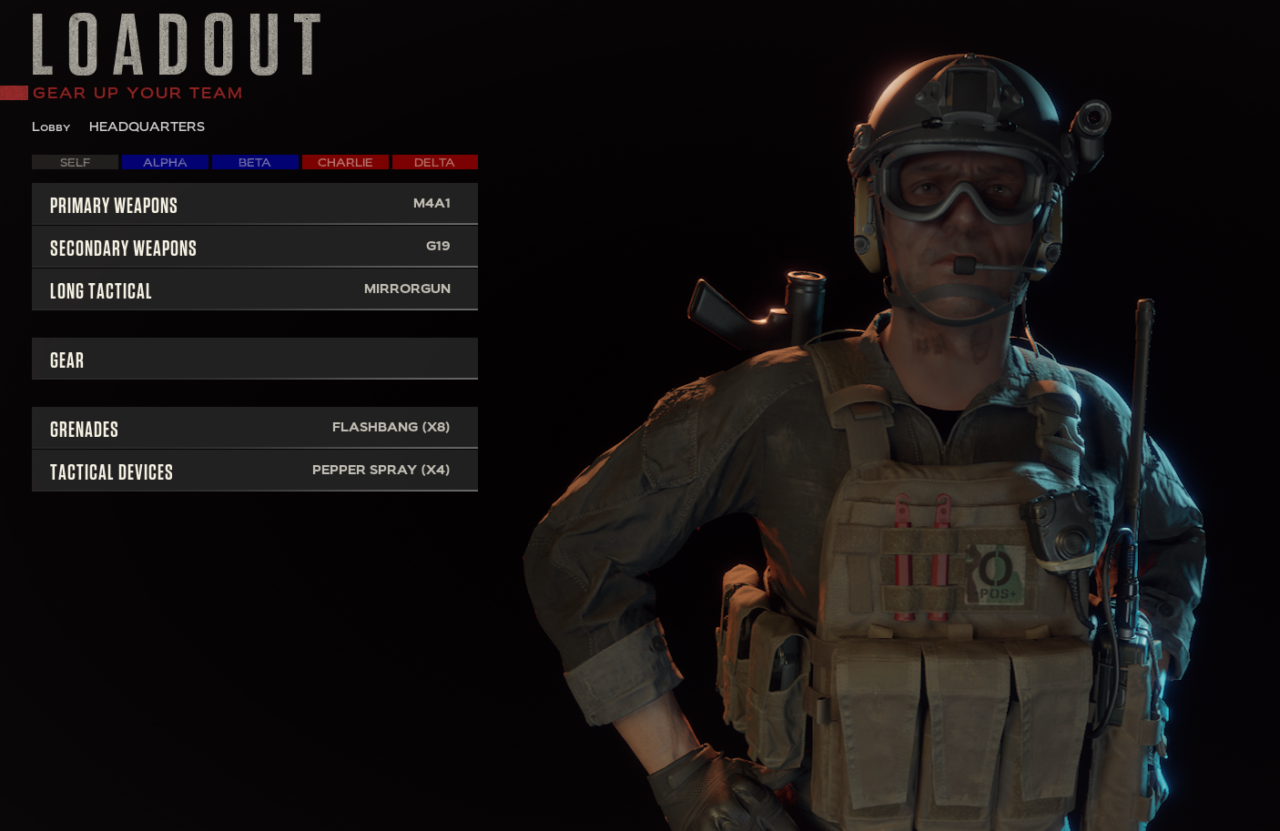
이 메뉴 내에서, you are able to adjust your officer’s Primary and Secondary weapons, as well as his Long Tactical equipment, 기어 (Armor and Facewear), 수류탄, and additional tactical devices.
To customize your weapons, visit the bench to the left of the downstairs Equipment Locker.
기본 무기
The Primary Weapon is the primary(윽) weapon you will be using for your operation. When selecting your weapons, your selection is important as each weapon has different capabilities in terms of lethality, 침투, ammo types, 그리고 더.
Below you will find the real-world applicable ballistics for each weapon, which have been well simulated by VOID Interactive.
Assault Rifles
TAC700
- Utilizes .68 caliber Pepperballs
- Semi-automatic or Fully Automatic
- 200rnd Hopper Capacity
- No Penetration, Very-Low Lethality
SA-58
- Utilizes 7.62x51mm
- Semi-automatic or Fully Automatic
- 20rnd Magazine Capacity
- High Penetration and Lethality
M4A1
- Utilizes 5.56X45mm NATO
- Semi-automatic or Fully Automatic
- 30rnd Magazine Capacity
- Medium-High Penetration, High Lethality
SBR-300
- Utilizes .300 정전
- Semi-automatic or Fully Automatic
- 30rnd Magazine Capacity
- Medium-High Penetration, High Lethality
SR-16
- Utilizes 5.56X45mm NATO
- Semi-Automatic or Fully Automatic
- 30rnd Magazine Capacity
- Medium-High Penetration, High Lethality
HK416
- Utilizes 5.56X45mm NATO
- Semi-Automatic or Fully Automatic
- 30rnd Magazine Capacity
- Medium-High Penetration, High Lethality
Submachine Guns
MP5A2
- Utilizes 9mm x 19
- Semi-Automatic, 3rnd Burst, Fully Automatic
- 30rnd Magazine Capacity
- Low-Medium Penetration, Medium Lethality
UMP-45
- Utilizes .45 ACP
- Semi-Automatic or Fully Automatic
- 30rnd Magazine Capacity
- Medium Penetration, Medium-High Lethality
MPX
- Utilizes 9mm Luger
- Semi-Automatic or Fully Automatic
- 30rnd Magazine Capacity
- Low-Medium Penetration, Medium Lethality
Shotguns
Beanbag Shotgun
- Utilizes “beanbag” Rounds
- Single Chamber
- 6rnd Reserve Capacity, +1 Chambered
- No Penetration, Low-Medium Lethality
M4 Super 90
- Utilizes 12g Buckshot Rounds
- 하나의, Self-loading Chamber
- 7rnd Reserve Capacity, +1 Chambered
- Medium Penetration, High Lethality
870 CQB
- Utilizes 12g Buckshot Rounds
- Single Chamber
- 6rnd Reserve Capacity, +1 Chambered
- Medium Penetration, High Lethality
보조무기
G19
- Utilizes 9mm Luger
- Single Fire/Action
- 15rnd Magazine Capacity
- Low-Medium Penetration, Medium Lethality
M45AI
- Utilizes .45 ACP
- Single Fire/Action
- 7rnd Magazine Capacity
- Medium Penetration, Medium-High Lethality
.357 Magnum
- Utilizes .357 Magnum
- Single Fire, Double Action
- 6rnd Capacity
- High Penetration, High Lethality
M9A1
- Utilizes 9mm Luger
- Single Fire, Double Action
- 15rnd Magazine Capacity
- Low-Medium Penetration, Medium Lethality
Taser
- Utilizes 2, 15′ Long Wired Probes
- Single Cartridge Use
- No Penetration, Very-Low Lethality
57 USG
- Utilizes 5.7x28mm
- Single Fire
- 20rnd Magazine Capacity
- High Penetration, Medium-High Lethality
USP45
- Utilizes .45 ACP
- Single Fire
- 10rnd Magazine Capacity
- Medium Penetration, Medium-High Lethality
Long Tactical Equipment
The Long Tactical Equipment are complementary equipment to the Tactical Devices, which allow potentially smoother and safer entry into a room or area.
Mirrorgun
- A wanded device that allows the user to view under and above doors, as well as around corners.
Breaching Shotgun
- A breaching tool utilized to blow locks off from doors, forcing the door to swing open.
Ballistic Shield
- A shield capable of stopping the majority of bullet calipers, rendering the user of the shield safe within a 3 foot wall of where the shield covers.
Rescue Shield – Not Available
- A full size deployable shield that covers the entirety of the user, which utilizes wheels to move the shield wall within the operation area.
Battering Ram
- A hardened steel ram used to break open doors via manual force from the operator.
기어 – Armor and Headwear
갑옷
가벼운 갑옷
- Light armor provides the carrier protection from most small arms calipers and protects the front and rear upper body of the wearer. Is the least movement restrictive.
무거운 갑옷
- Heavy Armor provides superior protection from small and heavy calipers and protects the entire front and rear torso of the wearer and partially protects the arms and legs. Is the most movement restrictive, slowing the wearer down.
Headwear
NVGs
- Night Vision Goggles that allow the wearer to see well within low-light areas and allow the wearer to see IR Markers and Lasers.
CBRN Riot Gasmask
- A device which creates a firm seal around the wearer’s face, which also filters air and remove any irritants such as CS or CN Chemicals.
Anti-Flash Goggles
- Scratch Resistant Goggles that are designed to help mitigate bright-lights
Ballistic Facemask
- A facemask capable of stopping most small-arms projectiles as well as less-lethal munitions such as Beanbags.
수류탄
플래시뱅
- A device that is capable of emitting a bright flash and disorients any nearby individuals through its loud bang.
CS Gas
- A grenade that is filled with CS Gas, used to fill a small area with the irritant, causing nearby individuals to have difficulty breathing, blurred vision, and burning sensations.
Stinger Grenade
- A grenade that is filled with BB-Sized rubber balls, which cause any nearby individuals who are struck by the rubber balls, to be stunned and disoriented.
Tactical Devices
C2 Explosives
- An explosive charge used to blow locks from doors, stunning or incapacitating individuals who are nearby the explosive.
Door Wedge
- A device placed under a door, preventing the door from being opened from either direction.
Pepper Spray
- A can of irritant used to blind and disorient individuals who are hit in the face or chest.