
- 제목: 프로젝트 플레이타임
- 출시일:
- 개발자:
- 발행자:
프로젝트 플레이타임에 대한 정보가 아직 불완전합니다.. 이것을 사용하여 게임의 세부 정보를 입력할 수 있도록 도와주세요. 문의 양식.
I have a Ryzen 5 3600 with an all-core overclock of 4.2ghz which can handle any game I throw at it and give me 60+ fps no matter what. But this game is weird and doesn’t utilize the CPU properly, here’s how to fix that!
Prioritize the Game
This is a basic fix that will give you a small boost in fps during CPU limited scenarios.
1. Open up “작업 관리자”
2. 이동 “세부”
3. 찾다 “Playtime_Multiplayer-Win64-Shipping.exe” (아니다 “Playtime_Multiplayer.exe”)
4. Click on it with right mouse button
5. Then go “Set Priority” 그리고 선택 “높은” (아니다 “Realtime”)
그리고 끝났어!
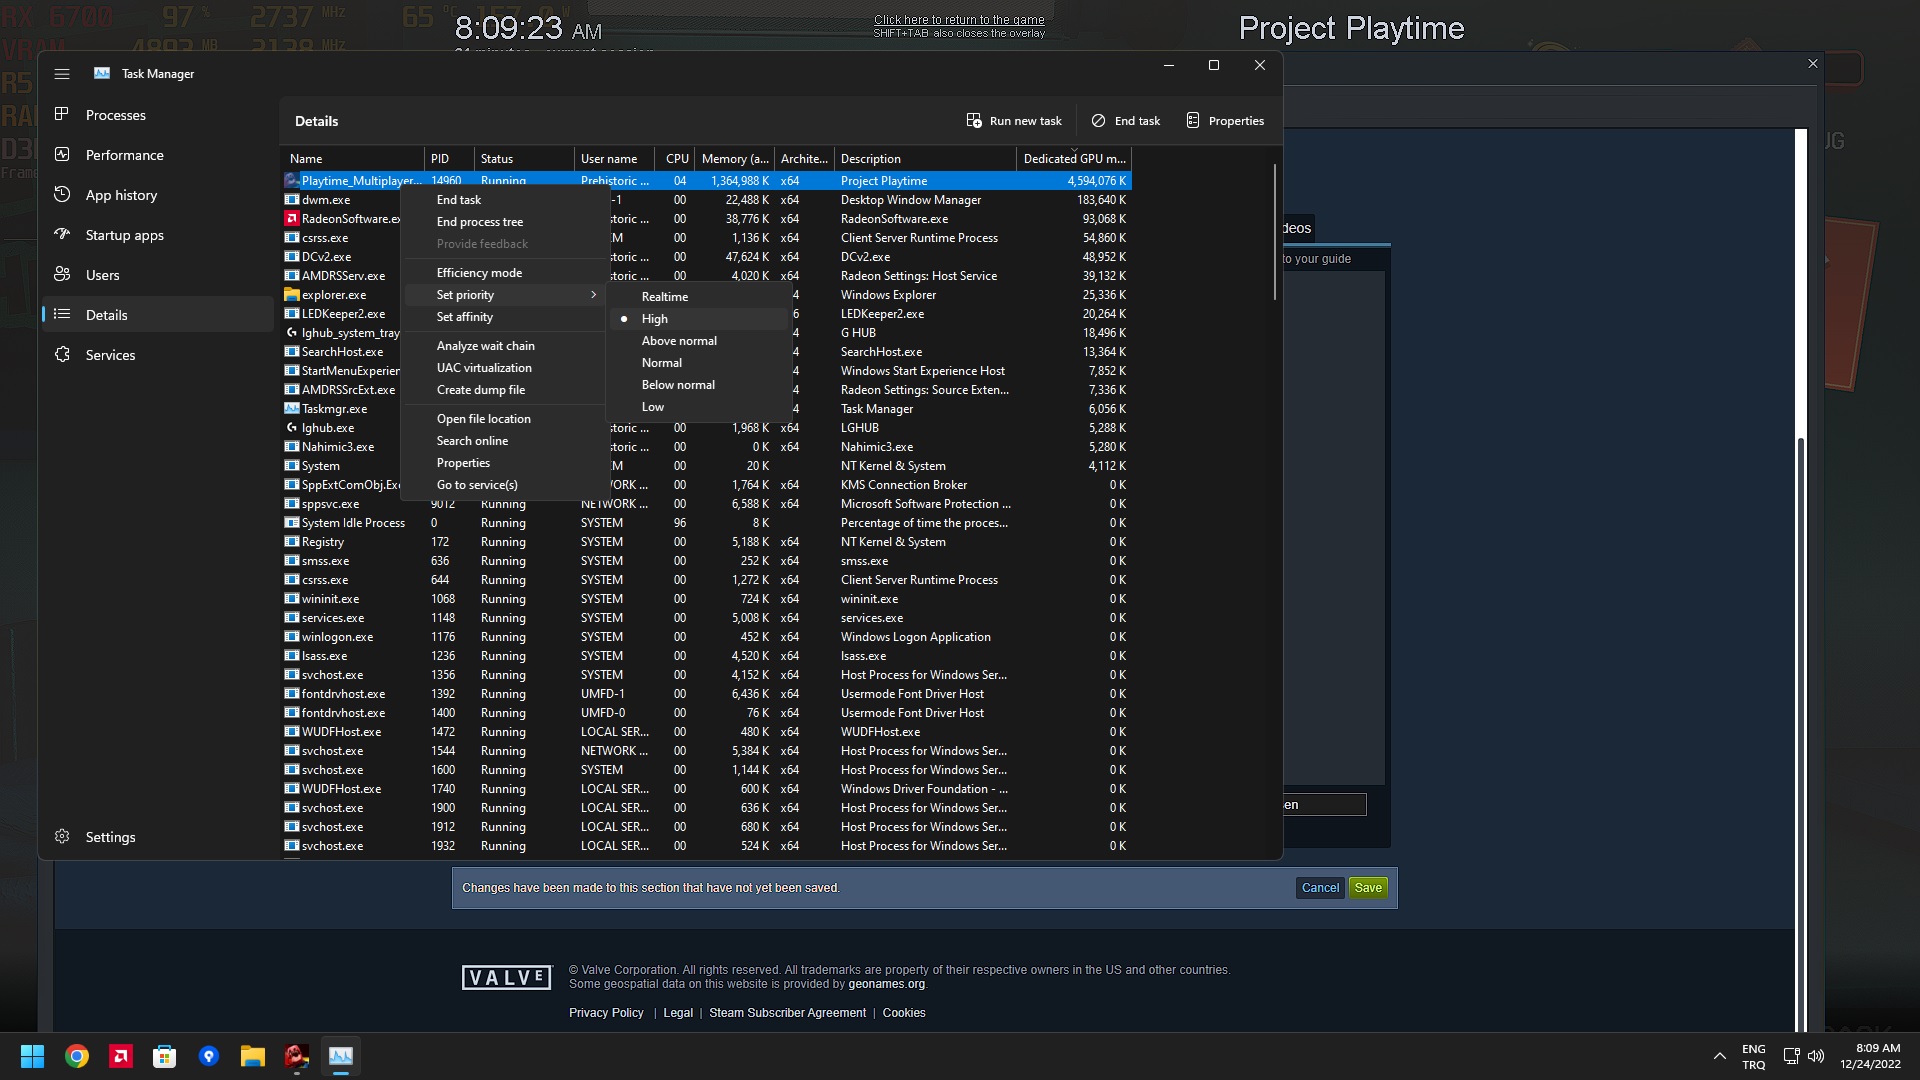
메모: You’ll have to apply this tweak every time you launch the game.
Switch to DirectX 12
This game comes packaged with the good old DirectX 11. Even though reliable, it is a high level API and compared to it’s successor DirectX 12 (which is a low level API) performs considerably worse in CPU limited scenarios. Even though there is no DirectX 12 옵션, we can just force it to use DirectX 12 since this is an Unreal Engine 4 게임. Here’s how:
1. Steam 라이브러리로 이동하십시오.
2. 찾다 “프로젝트 플레이타임”.
3. Click on it with the right mouse button and select “속성”.
4. 입력하다 “-DX12” 에 “Launch Options” 상자.

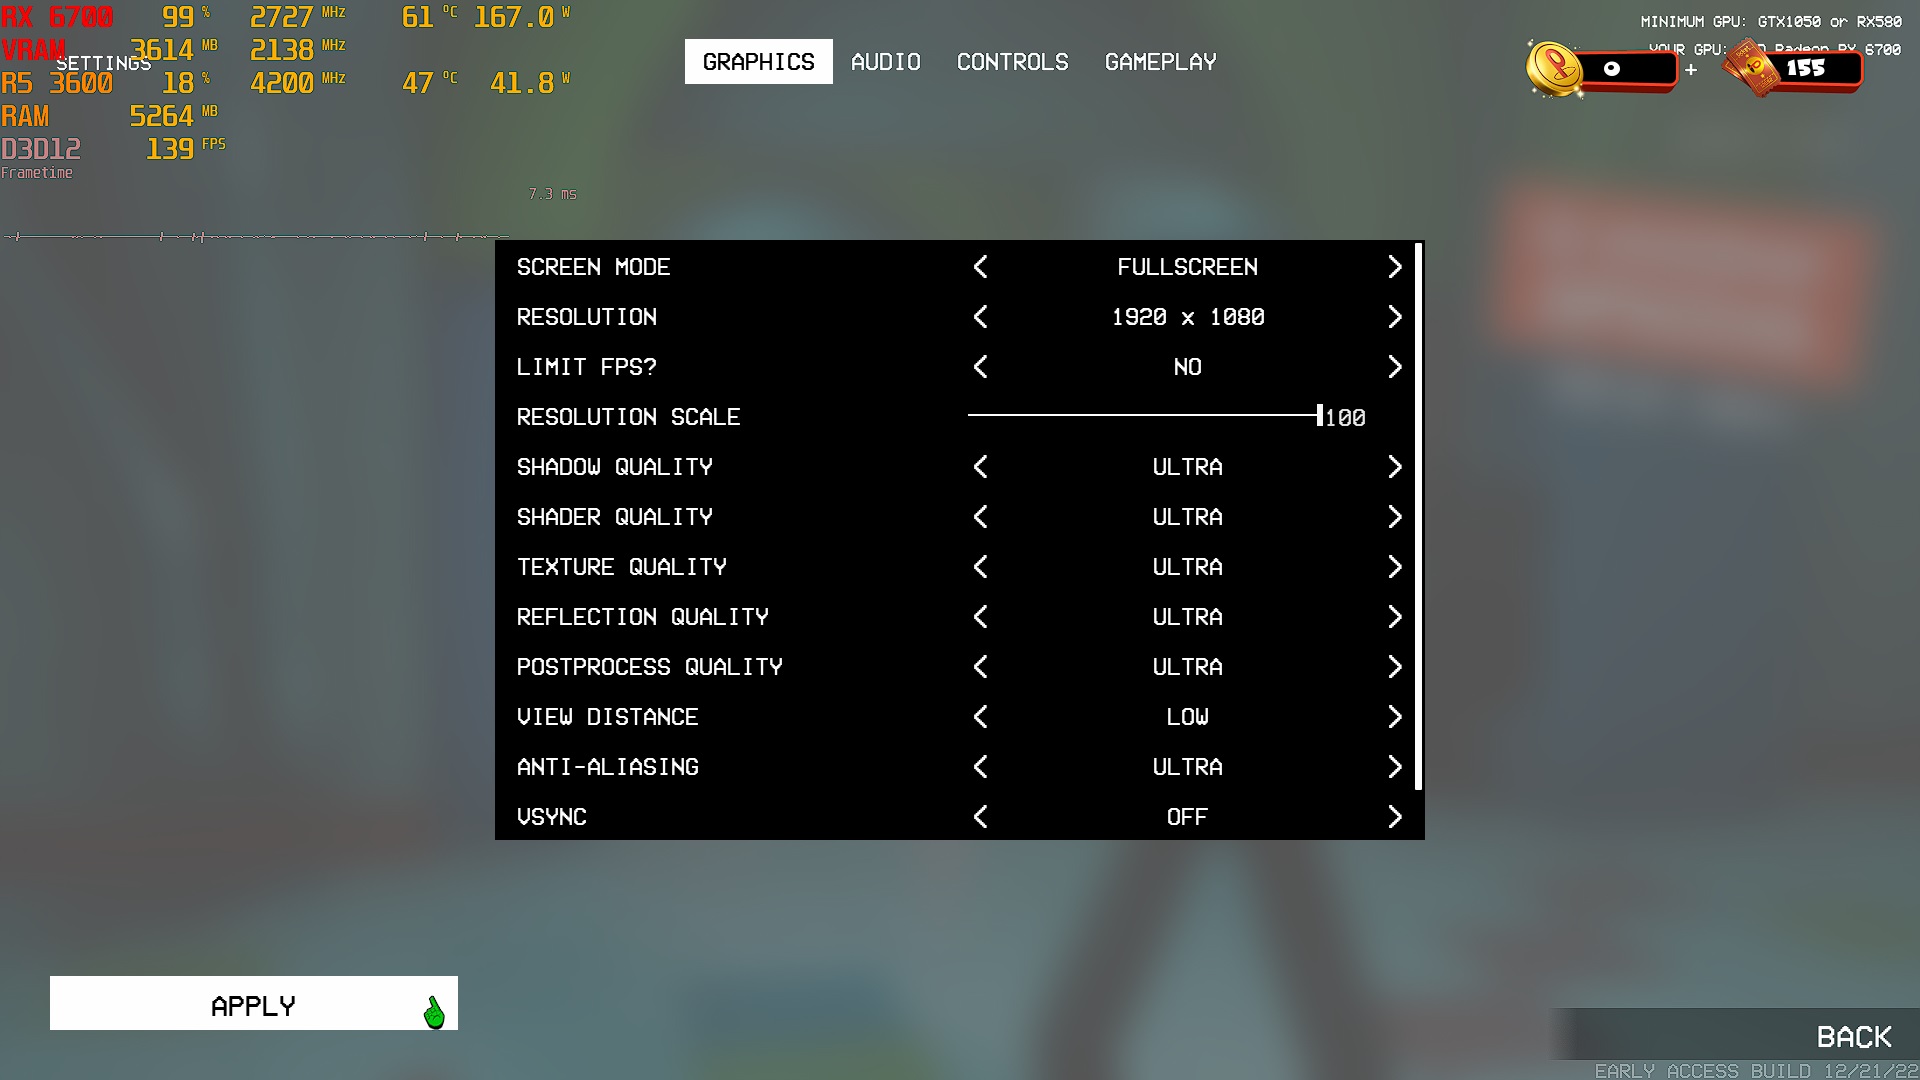
낮추다 “VIEW DISTANCE” 에게 “낮은”
I call this solution a last resort because the other two options will give you better performance without sacrificing anything visually. Most graphical settings are GPU-heavy with minimal to no impact on the CPU but there are some graphical settings that have a heavier impact on the CPU. In the case of “프로젝트 플레이타임,” the only one I could find was the “VIEW DISTANCE” 옵션. You can lower it with these steps.
1. Open the game.
2. 이동 “SETTINGS”.
3. 세트 “VIEW DISTANCE” 에게 “낮은”.
4. 클릭하세요 “APPLY”
그리고 끝났어!
결과
Before applying any tweaks I was dropping down to 30 fps range in certain parts and it was unbearable, now with these tweaks (마지막을 제외하고) I was getting a 100+ fps at max settings with a resolution of 1920×1080 and only on rare occasions it dropped to 80 fps range. I have a pretty decent CPU that is equivalent to i7-8700K and i5-10400f so seeing that inital performance was pretty disappointing but that’s the charm of early access, I felt like I needed to make this guide for people who aren’t as tech savvy as I am. I’ll update this post if I found new information!
이것이 오늘 우리가 공유하는 모든 것입니다. 프로젝트 플레이타임 가이드. 이 가이드는 원래 작성자가 작성하고 작성했습니다. Prehistoric Nerd. 이 가이드를 업데이트하지 못한 경우, 다음을 수행하여 최신 업데이트를 찾을 수 있습니다. 링크.