
This guide will show you how to unlock and get all achievements in Outlive. Note that this guide may contain spoilers of the game. 계속해서 읽으십시오. 이에 따른 위험은 귀하의 책임입니다..
스토리 관련

Fireman
Close the gas tanks to stop the fire

전공
Turn on the machines

엔지니어
Turn on the generators

조명
Turn on the lights
수집품

Inspector
Collect paper evidence

Chief Inspector
Collect paper sketch evidence

Easter eggs
Find the Easter eggs
Outlive Achievement Walkthrough
- When you wake up, hurry to your car and pick up the [카메라] 땅에서.
- Skip over the fallen tree, and go along the dirt road until you see a barrier. On the left side of it, there are wooden planks you can duck under.
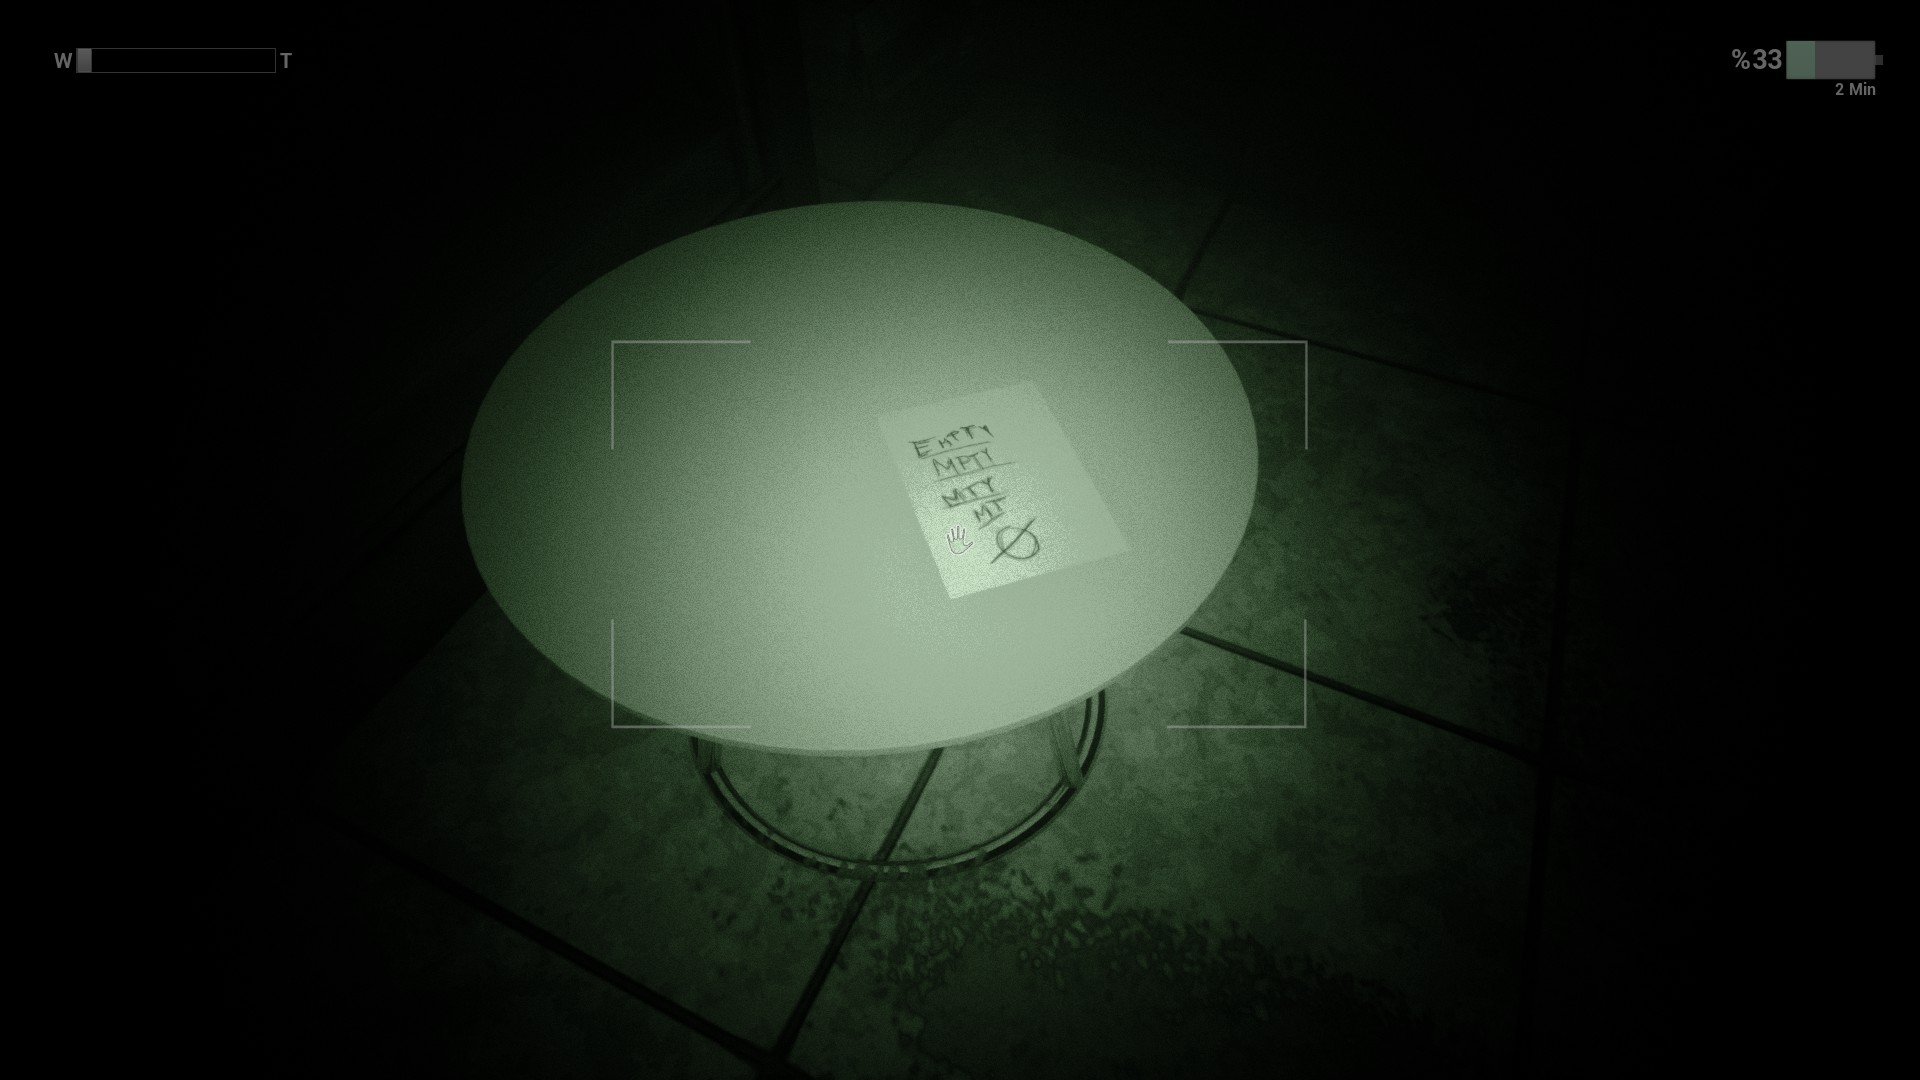
- Head towards the bright campfire and check on the orange barrel to your right. 거기, you’ll discover a [배터리] 그리고 [메모 1/8].

- Climb the small hill and take the [Lever] at the summit. Put it into the base and use it. Quickly go to the metal cart, hop on it, then jump onto the big box when you’re close enough. Leap over the fence.
- Right after you land, glance to your left to discover another [배터리] lying on the ground.
- Follow the straightforward path to the front of the building and open the door. It might take a few tries to get it to open.
- 내부에, turn left and open the top drawer to locate a [배터리] and some [진통제].
- Turn right and engage with the painting. This action will unlock a metal box on the chair to the left of the room. 당신은 찾을 수 있습니다 [메모 2/8] just beside the painting.

- Take a step forward to pick up another [배터리] from the chair, but be careful, as it triggers a trap. Open the box on the chair, close to where we found the painkillers, to discover a [열쇠] 내부에. Use the key on the lock located on the left side of the cabinet near the chair.
- Duck under the planks and seize another [열쇠] from the table. Return under the planks and unlock the silver door.
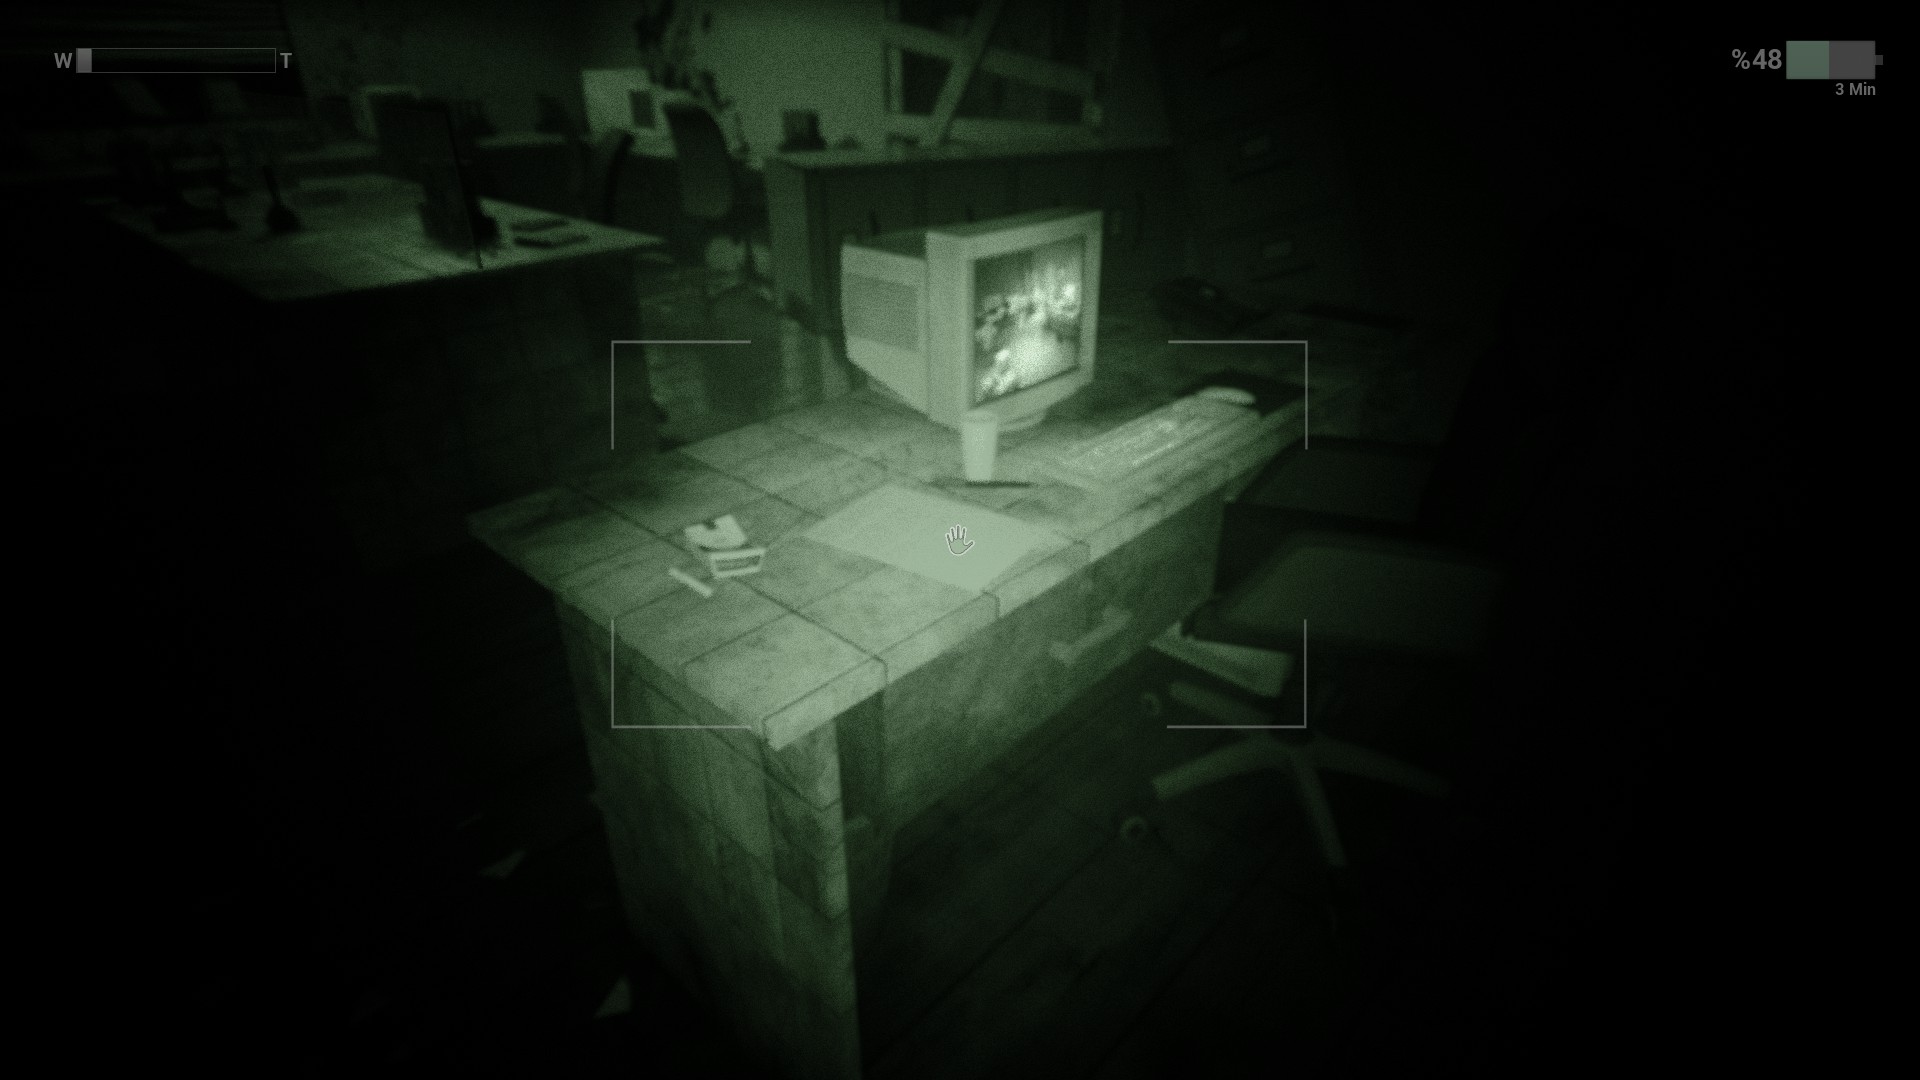
- Move behind the computer desk and open the left drawer to find [진통제].
- Turn around completely to find another drawer. In the top drawer, a [배터리]. In the third one, 당신은 찾을 수 있습니다 [열쇠]. Use this key to unlock the left side door.
- Once you go through, open the second drawer for a [배터리]. Deeper into the room, there’s an electrical breaker for you to switch on.
- Return to the original room and press the button with the green light to enter a new room. On a desk to the far left of the room, you’ll discover another [열쇠], 함께 [메모 3/8] directly beneath it.
- 마침내, return to the locked door with the gas valve and open it. Turn off the valve.
- If you want to save your painkillers, you can wait a bit for your health to naturally regenerate.
- Step outside the building, and now the gate to your left is open. Enter and check on top of an orange barrel near the back for more [진통제].
- Walk down the only path available and quickly duck under the boards to your left to find your next objective, 함께 [진통제] in the open crate you can hide in.
- Be cautious as there’s now a monster in the area. Wait until it starts heading back and stealthily follow it. Turn left to spot a hole you can crawl through, leading to the first valve we need to turn.
- Go back to where we’re missing a valve, but don’t crouch under the boards. 대신에, go to the opposite side to find a pipe you can crawl through. 여기, you can find the [Valve Wheel] on a barrel, and the doorway leading to our escape route. 하지만, it’s covered in fire for now. Grab the wheel and return to where we need to insert it. 일단 그렇게 하면, remember to turn it!
- Return to where you grabbed the wheel and crouch under the board to find another monster in a fairly large and open area. Use the various pieces of cover to stealthily navigate the outer edge of the area to reach the far side. Once you crawl through a square hole, stand up and look on top of the barrel for a [배터리].
- From the last battery, go right and look to your left to find another [배터리] in a hiding spot.
- Exit the hiding spot from the side you entered, then follow the path until it splits. Keep going forward, then follow the path right. You’ll notice an orange barrel on your left in a small area with a building, but there’s nothing here, so keep going for now.
- The path will lead you one way, which will empty out into another open area with a few buildings. You’ll also spot planks of wood creating a ramp upwards for you to climb. Before you do that, go to the back of the area and turn the third valve.
- Climb onto the boards and look down to find a familiar area. Wait for the monster to be on the far side, then drop down and make a break for the exit hallway, only to find it locked.
- Return to the building where we solved the poison gas puzzle and enter the lab. Go to the far left side to find an open cabinet with the [키카드] 그리고 [Polaroid Camera] 내부에. 둘 다 잡아.
- 일단 당신이 그들을 가지고, take a photo of the whiteboard and a nearby countertop by pressing P on your keyboard.
- 마지막으로, return to the locked door and interact with the keypad to exit.
- Descend two sets of stairs to find another [배터리] on top of a large case.
- Continue forward to find some [진통제].
- A bit further ahead will be our next objective; 발전기. The first one is in clear sight during a short cutscene. Turn it on, then turn the corner nearby to spot a [배터리] on the shelf to your left.
- Continue through the linear path until you come to a locked door. Look to the side of the room, and your character will mention a small pipe he can crawl through. Hold the crouch button to go prone and squeeze on through. Go through the next one to find another [배터리], as well as our next monster. There will also be some [진통제] next to the TV near the door.
- Exit the room and go through the door on your right. 입력하자마자, look left to find a [열쇠] on a severed hand.
- Continue through the room until you reach the far end. Look on the right side just past the bulletin board to find [메모 4/8].

- Open the only door available and step through for a brief cutscene. 기후, enter the room on your side to discover a [배터리] 바닥에.
- Move down two rooms and then through the doorway on your right to enter a room with several beds. 맨 끝에서, 당신은 찾을 수 있습니다 [배터리].
- Leave the room and crouch under the boards directly ahead of you. To your right as you enter, a [배터리] 그리고 [메모 5/8].

- Head to the back of the room and open the right door to locate generator #2. Turn it on.
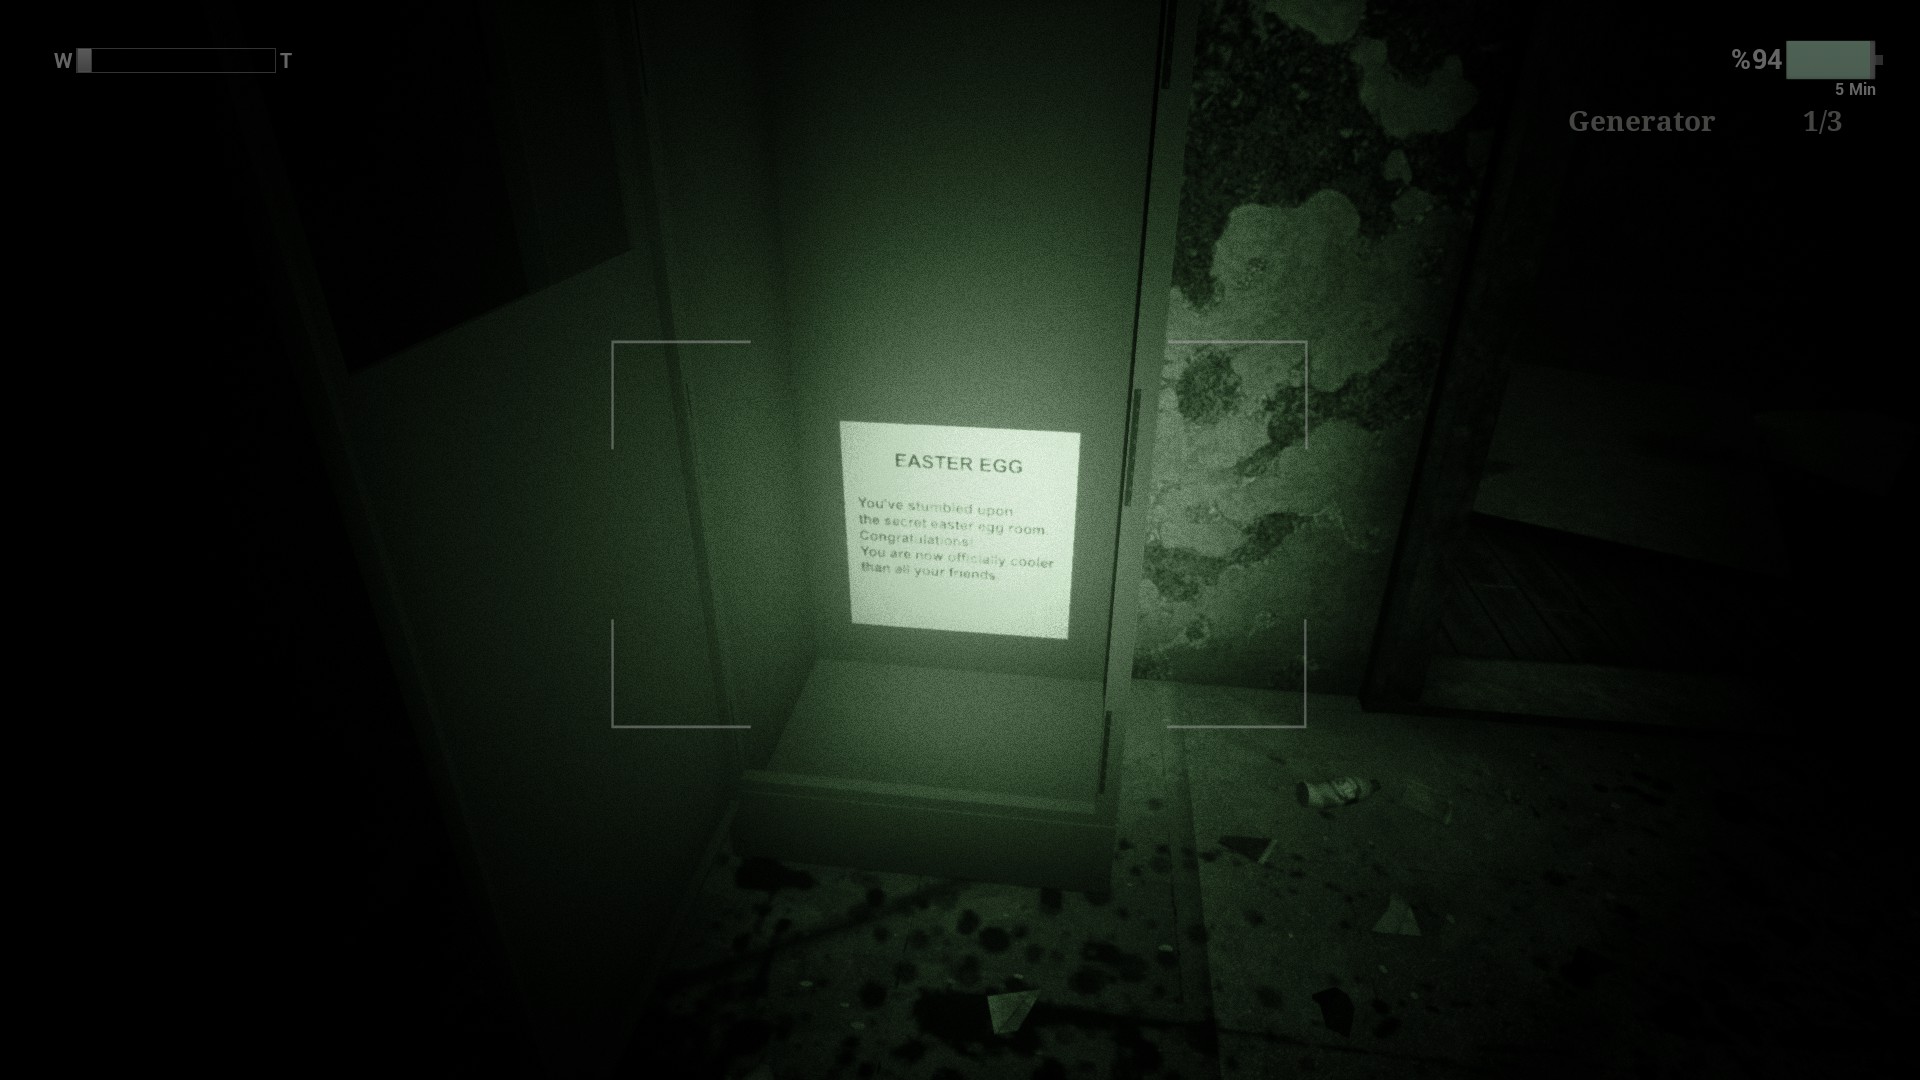
- Shift the couch and open the left door now. Right after you exit, glance left to see 2 사물함. Open the right one to discover [부활절 달걀 1/3]. 당신의 오른쪽에, you’ll find the knocked-over filing cabinet from the start of this area, 참조.
- Proceed down the far side of the hall and check the shelf to your left for a conveniently placed [열쇠]. This key will open the locked and boarded door to your right.
- Go through the door in front of you to find a man laughing at himself. Descend to where he was and take the stairs down. 길을 따라가세요, and you’ll reach another main objective: 기계!
- 잡아 [배터리] from the barrel in front of you, then look to your left and crouch under the boards to find the first machine.
- Head back out and go up the stairs to your immediate right. As soon as you reach the top, take note of the glowstick where a hiding spot is. Move a bit forward, and a monster will spawn in. Get into that hiding spot and wait for it to go down the stairs. Once it does, activate both machines to your left and right. You might need to quickly dip back into the hiding spot here. Once you’re safe, go to the far end of the room and turn on the last machine. Go back to the hiding spot and go all the way through; this will take you to the newly unlocked door. Inside is a ladder you can climb to reach the final generator.
- Once it’s powered on, the door in front of you will open back up to the main room with the door we needed to power. Go up to it and push the large button to open it. Be careful as there are monsters patrolling nearby. Once it’s fully opened, head in to escape the level.
- 길을 따라가세요, and you’ll get a cutscene of a silly little crawling guy. Just ahead of the vent he went into will be a [배터리].
- Continue until you go down two short sets of stairs. Around the corner will be [진통제], but you’ll notice that your path is blocked. Go back up the first set of stairs, then look to your left to find a series of crawl spots you can squeeze through. At the far side, take a picture of the contaminated room, then look around the corner to your right for a short scene involving a vent you’ll need to open. 그만큼 [드라이버] is conveniently down a set of stairs only a few feet away.
- Open it to find [메모 6/8] as soon as you enter.

- Crawl through the vent, then press the white button on the right end of the hall to open the sliding door. Enter and take [스케치 1/4] from the computer chair.

- Press the big red button to drain the contaminated room. Exit and go to the far end of the hall. Look to your left to find another vent you can crawl through.
- 가져 가라. [배터리] off the chair, then take a photo of the test tubes just ahead. There’s also [진통제] on the opposite side of the tubes.
- Drop down into the lower area and check the chair to your right to find more [진통제]. Crawl through the nearby crate and continue crouching forward to discover another [배터리].
- Walk ahead, and you’ll see more test tubes to photograph. 또한도 있습니다 [배터리] on the floor to your right as you enter the room.
- Crawl through the crate to your left and open the top cupboard to find a [열쇠] 그리고 [메모 7/8].

- Leave this room and look to your left to find an open doorway you can go through. Inside is a chained-up door we can now unlock. Open the door and check the floor to your right to find a [배터리].
- At the far end of the room, there will be a [키카드]. Before you grab it, push the white button to open the door, as doing so will spawn an enemy. Grab the card, then quickly exit the room and run right to find a crate we crouched through earlier. On the far end, there will be a pallet jack you can move and a door to use the keycard on, but don’t do that just yet.
- Loop back to the door the enemy came out of and sprint inside to find [부활절 달걀 2/3].

- 지금, move the pallet jack and open the door I mentioned.
- Open the door to your right and proceed until you reach a table. In the cabinets and drawers of this room, 당신은 찾을 것이다 2 [진통제] 그리고 [배터리].
- Turn back around and open the fuse box on your left. Pull the lever to power on the area.
- Use the card to open the door to your right, and you might notice where we are. Head all the way back to where our path was cut off at the start of this area and push the big red button to open the large door. Note that the monster inside can aggro you from out here.
- Trigger him, then hide and wait for him to go past you. Once he does, sprint into the room and climb into the pipe.
- 어떤 이유로, three of the story achievements will unlock at this point.
Fireman
Close the gas tanks to stop the fire
전공
Turn on the machines
엔지니어
Turn on the generators
- Upon loading in, go right to see a locked door. To its left is a shelving unit with a [배터리] on it.
- Head left and crawl under the shelves, then go through the door on your left. At the back will be another room with a [열쇠] 그리고 [배터리].
- Exit the room and crouch under the boards to your left to find another [배터리]. Walk towards the guy hunched over to find [진통제] 그리고 [스케치 2/4].

- Return to the locked door from earlier and open it. 당신이 들어가면서, look left for a [배터리], then open the door in front of you for [진통제].
- Exit and look to your left for a short scene of a button. 밀어넣어.
- 떠나기 전에, enter the room to the left for another [배터리].
- 지금, head back out and climb up the yellow ladder just ahead of you. 상단에, turn around and hit the red button. Wait for the sliding platforms to start moving, then cross them to the other side of the room.
- The Control Room is locked for now, so enter the Workshop to start. Drop off into the room and take note of the code underneath the ladder. 지금, head to the far left side of the room and open the door. Pop open the panel inside and flip all 3 스위치.
- Exit the room and push the button near the door to your right to create a shortcut, then climb up the ladder to the top of the Workshop. Push the button and hop on the platform to go across the room.
- On the far side, look left and input the code (1354) to open the door.
- Crawl through the crate and check on top of it to find [Photo Paper], then look right for a [배터리]. Photograph all 3 bodies in the room.
- Enter the door across from the last body to find [메모 8/8] on the table inside.
- Open the next room and move the couch to find a [열쇠] 그리고 [배터리].
- Exit back out to where you photographed the bodies and look for a fence door you can now open. 계단 맨 아래에는, look left to find a [키카드]. As soon as you grab it, hide under the stairs until the monster is out of view.
- Go through the door it came from and climb back up to the top of the Workshop. 거기에서, head to the Control Room. Open the door and flip the board inside.
- Go back to the lower Workshop and locate another door with a button we can push (you will have to hold left click on this one).
- There’s a bit of a helpful glitch with this one. You can hold left click, then look away and even move around while the door still opens!
- Once you can squeeze through, do so. Follow the linear path out of the facility.
조명
Turn on the lights
Inspector
Collect paper evidence
- 일단 밖으로, loop around the right side to find a corpse with a [열쇠]. 잡아, then open the nearby guard booth. Push the red button and get ready to run.
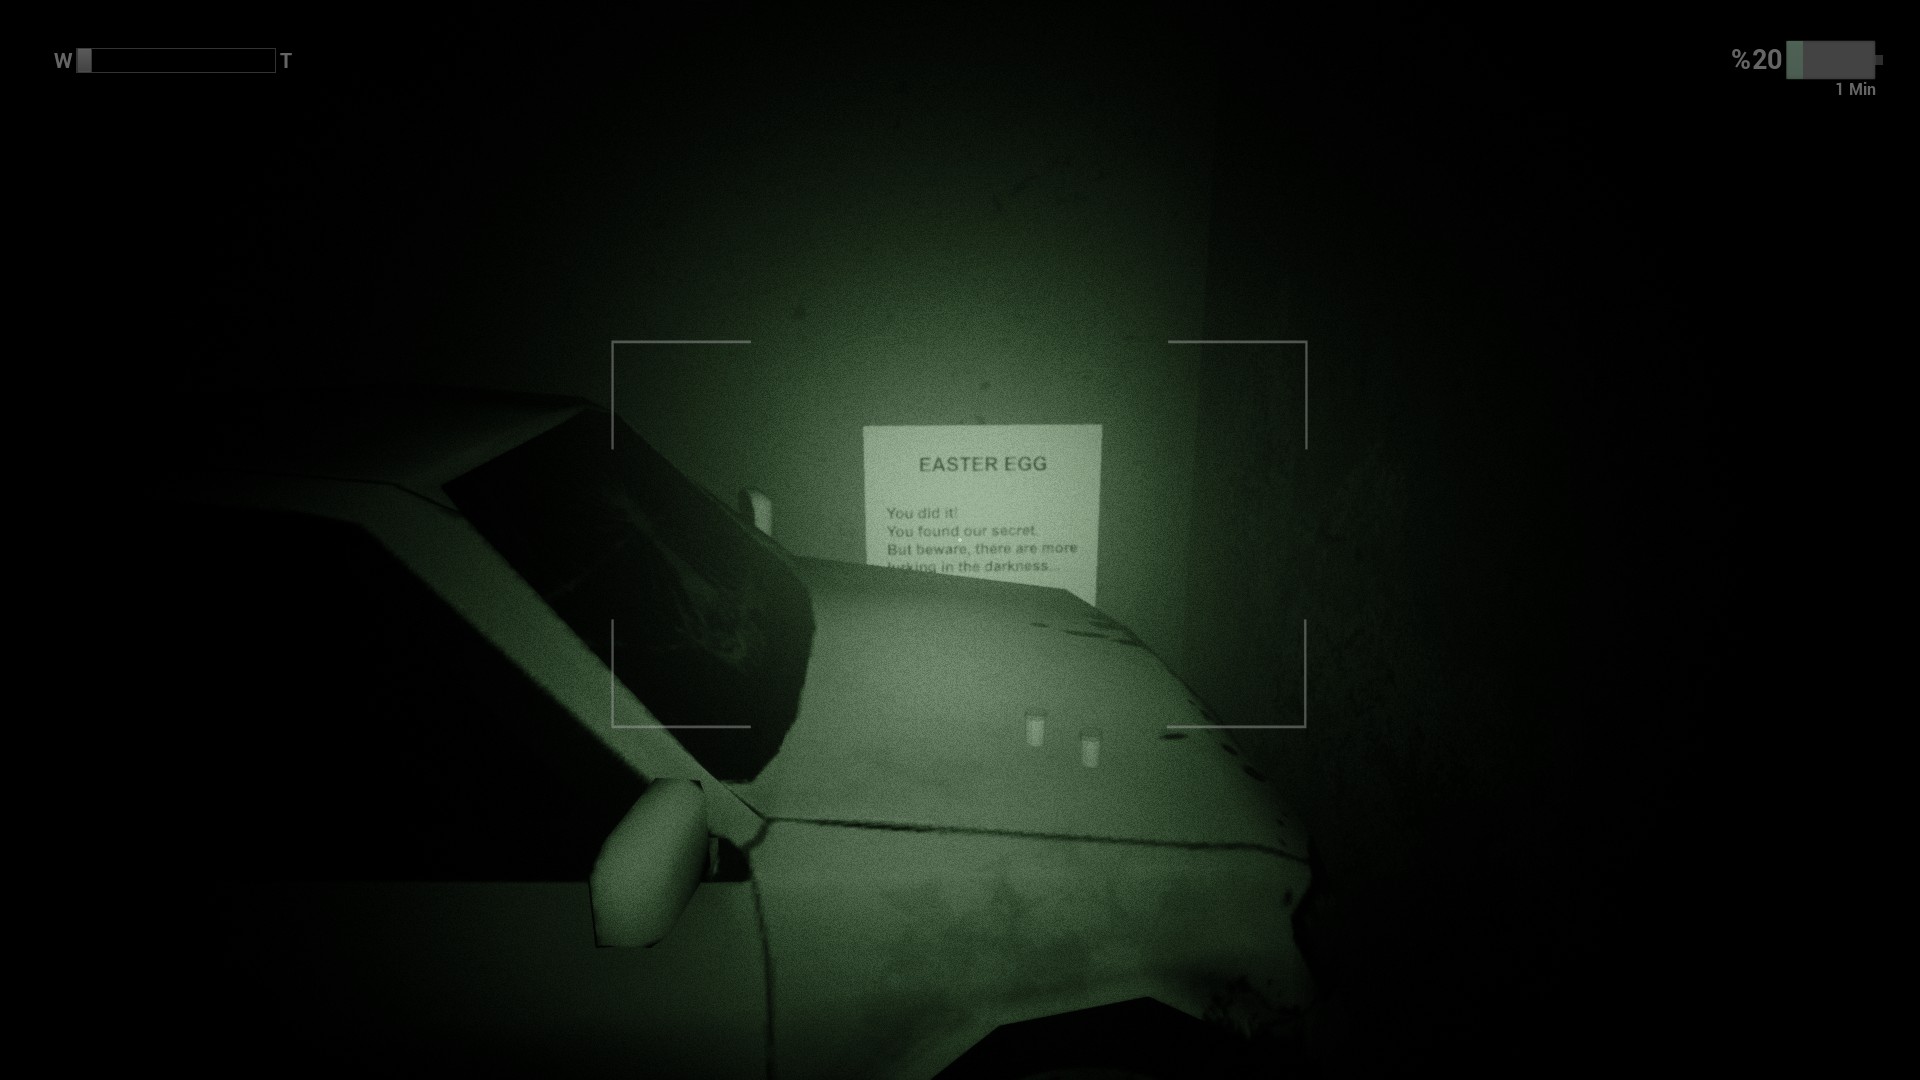
- Once the barricade lifts, sprint forward and crawl through the tubes on your left. Go down the road, and a shutter on your left will open. Enter the garage to find 2 [진통제], 게다가 [부활절 달걀 3/3].
- Go back through the pipe and sprint left to spot a hole in a wooden fence you can crawl through. Inside the wooden shed is a [배터리] and some [진통제].
- Go around the side of the shed to find another [배터리] and a hole you can crawl under. Follow the linear path and enter the garage with the blue car.
- Continue through the linear path until you hear a door open nearby, and the gasmask guy starts chasing you. You will need to juke him out and crawl under a nearby shelving unit.
- Enter the next room and look behind the standing divider to find a [열쇠] that opens the door to your right. 일단 통과, grab the crowbar and pry open the chained door behind you.
- Follow the linear path to a load zone.
- Walk forward and open the second door on your right, then open the right drawer of the desk to find a [열쇠]. Crawl through the nearby crate and open the chained door on your left.
- Go to the far side of the room and enter the open bathroom to find a [열쇠] in the toilet. As soon as you grab it, sprint out of the bathroom and into a hiding spot, or the gasmask guy will trap you in the bathroom and kill you.
- Once he’s lost you, go behind the reception desk and move the chair out of the way to unlock the door. Go inside and power on the unit from the short scene that will play.
- 일단 그렇게 하고 나면, make your way to the elevator and push the button. 내부에, climb up the ladder, then drop off onto the beam just below you.
- 앞으로 나아가다, and you’ll spot the crawly boy again. Enter the room he slides into to find a [배터리] on a chair.
- In the room to the right will be a [키카드], but don’t grab that just yet. 대신에, from the desk with the keycard, go out the door to your right and crouch under the metal shelving to find yourself in an employee break room. On the desk is [스케치 3/4].
- 잡아 [키카드] and quickly move to the other end of the hall. Crouch through the hole and open the door to find yourself in a metal staircase. Go down them, then underneath them to discover [스케치 4/4].

- Open the only door available and take the [Car Key] from the shelf to your left. Use the panel near the end of the hall to open the front doors.
- Enter the parking lot and run to the green car.
Chief Inspector
Collect paper sketch evidence
Easter eggs
Find the Easter eggs