- 제목: 잃어버린 노바
- 출시일:
- 개발자:
- 발행자:
Lost Nova에 대한 정보는 아직 불완전합니다.. 이것을 사용하여 게임의 세부 정보를 입력할 수 있도록 도와주세요. 문의 양식.
A short and quick guide to locating all the special Landmarks and unlocking all of the Artifacts in Lost Nova.
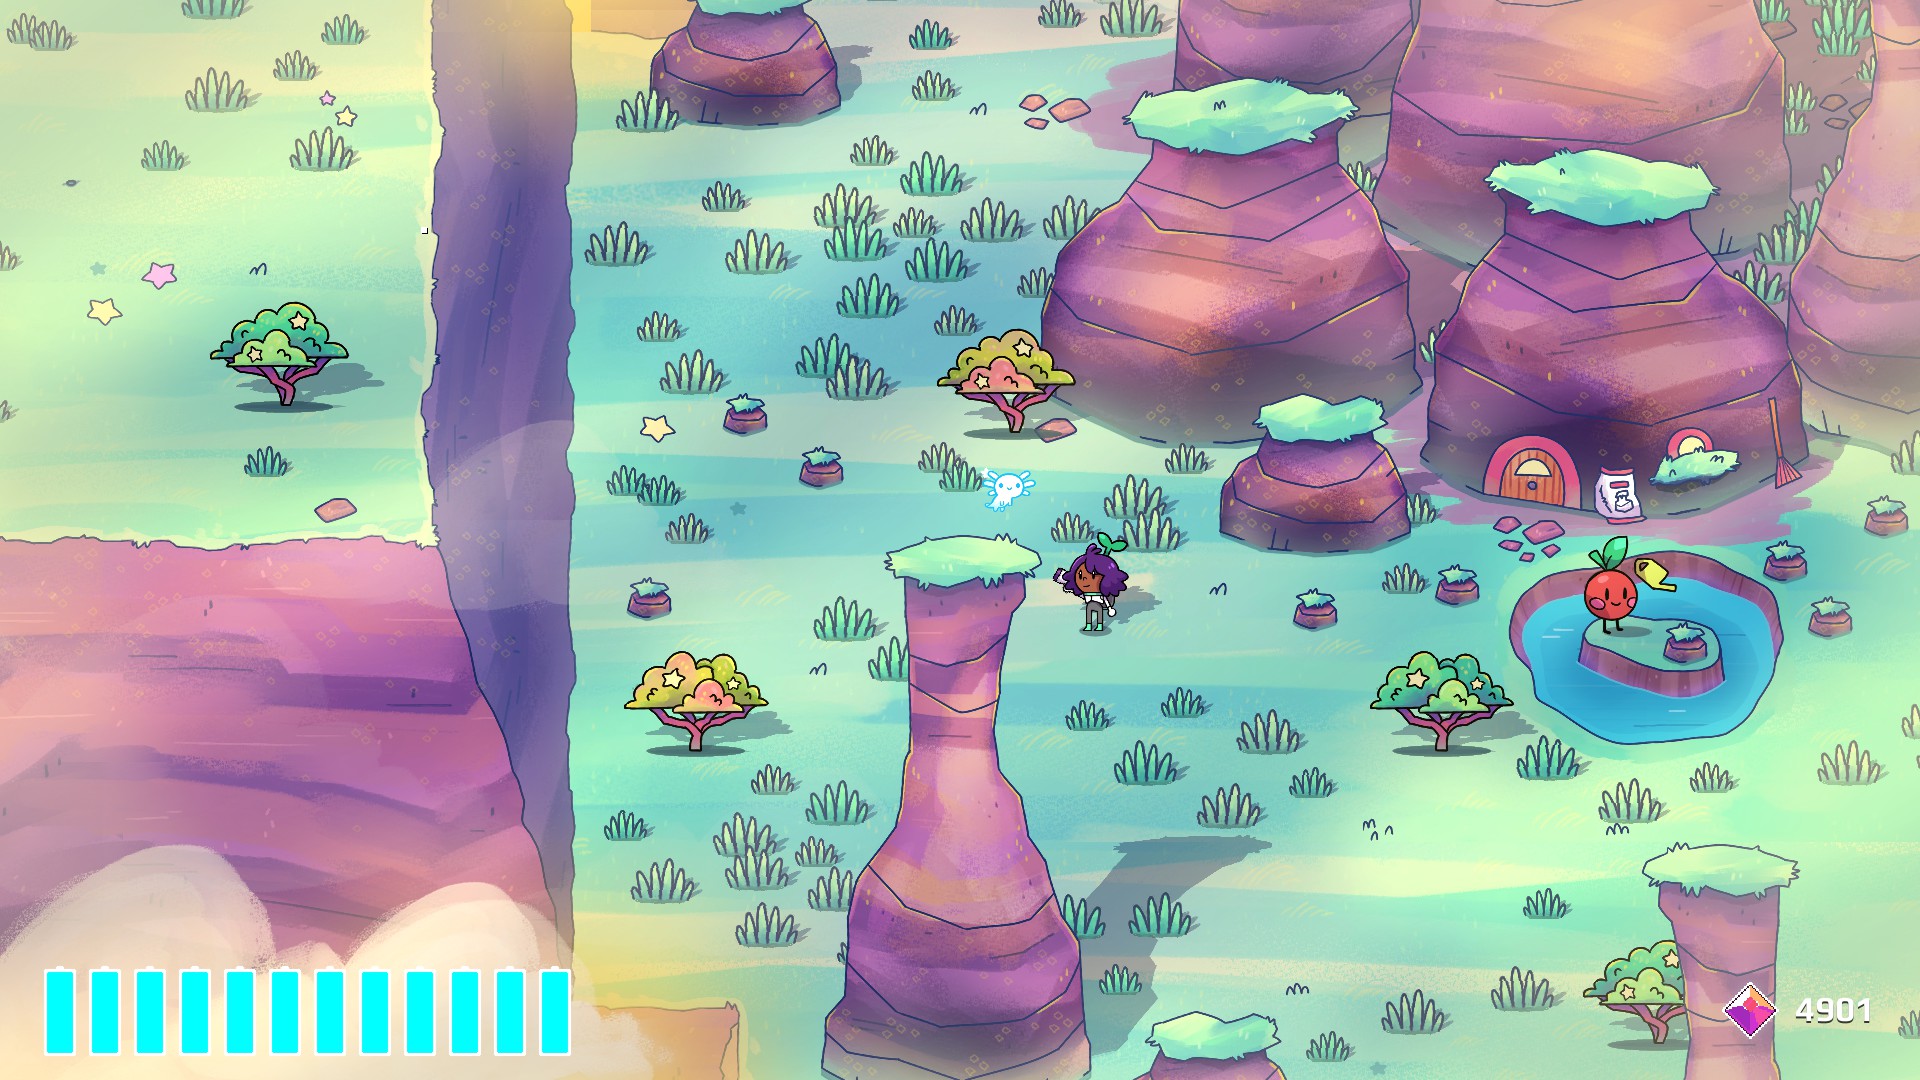
Sky Plains
The first Landmark you’ll probably come across is what I call the Flower Tree! It’s pretty easy to find by yourself, as it’s in the leftmost side of Sky Plains up on the cliff right next to the gardening apple townsfolk.
General Area
Jump right up onto the cliff on the left side of the plains.
Location on Map
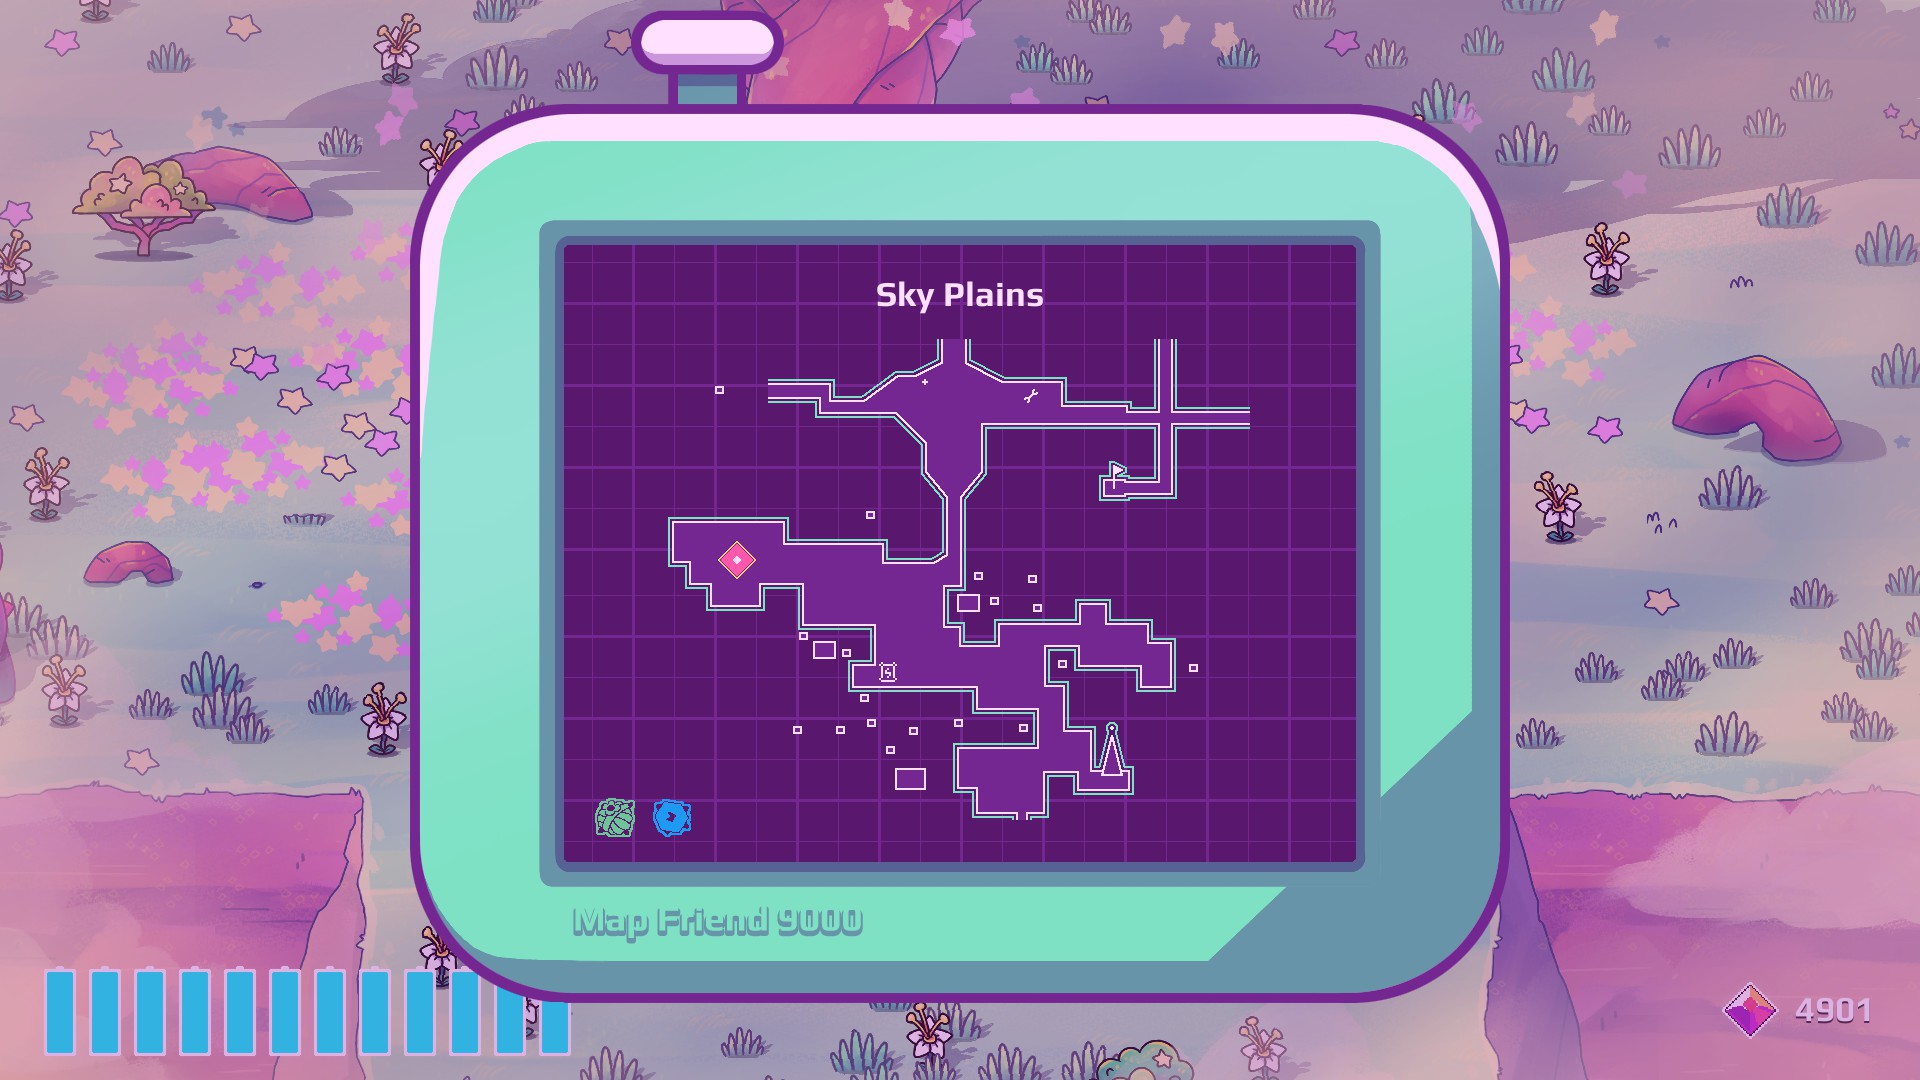
Flower Tree
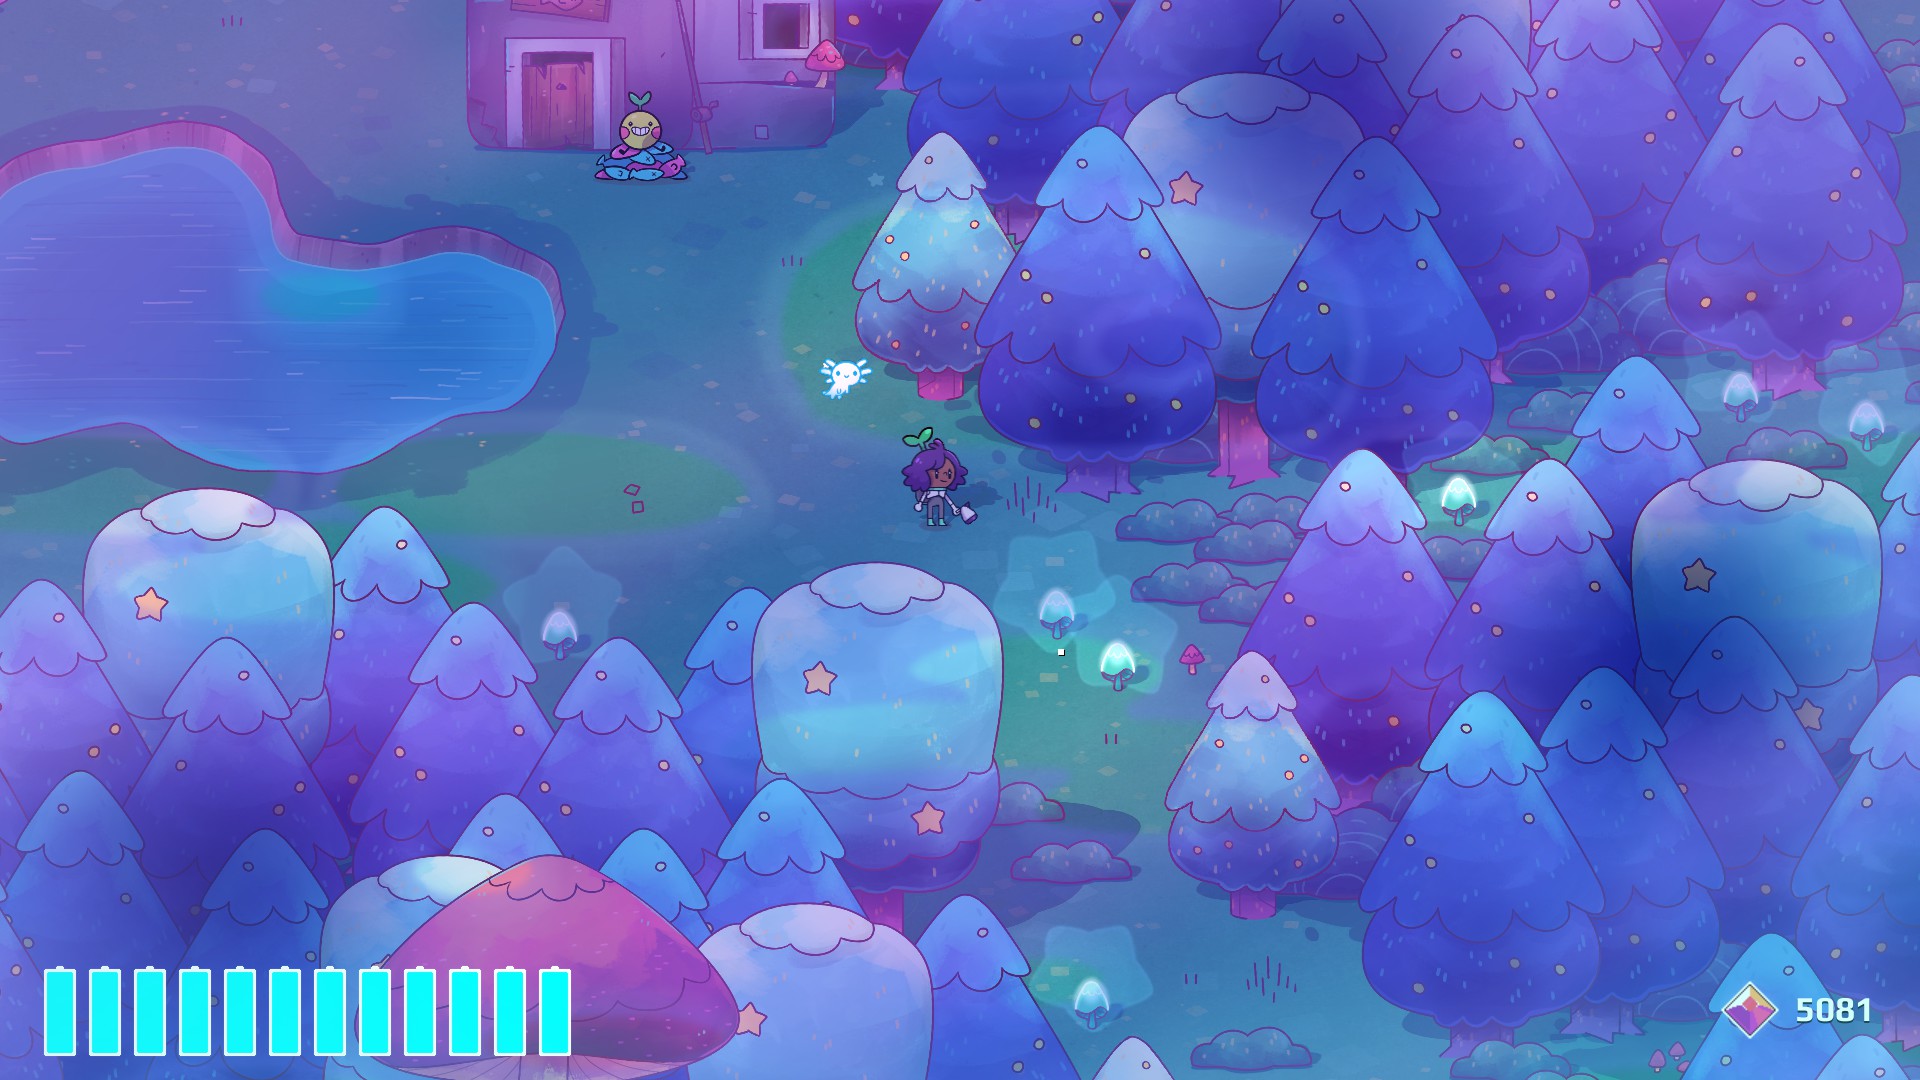
Roomwoods
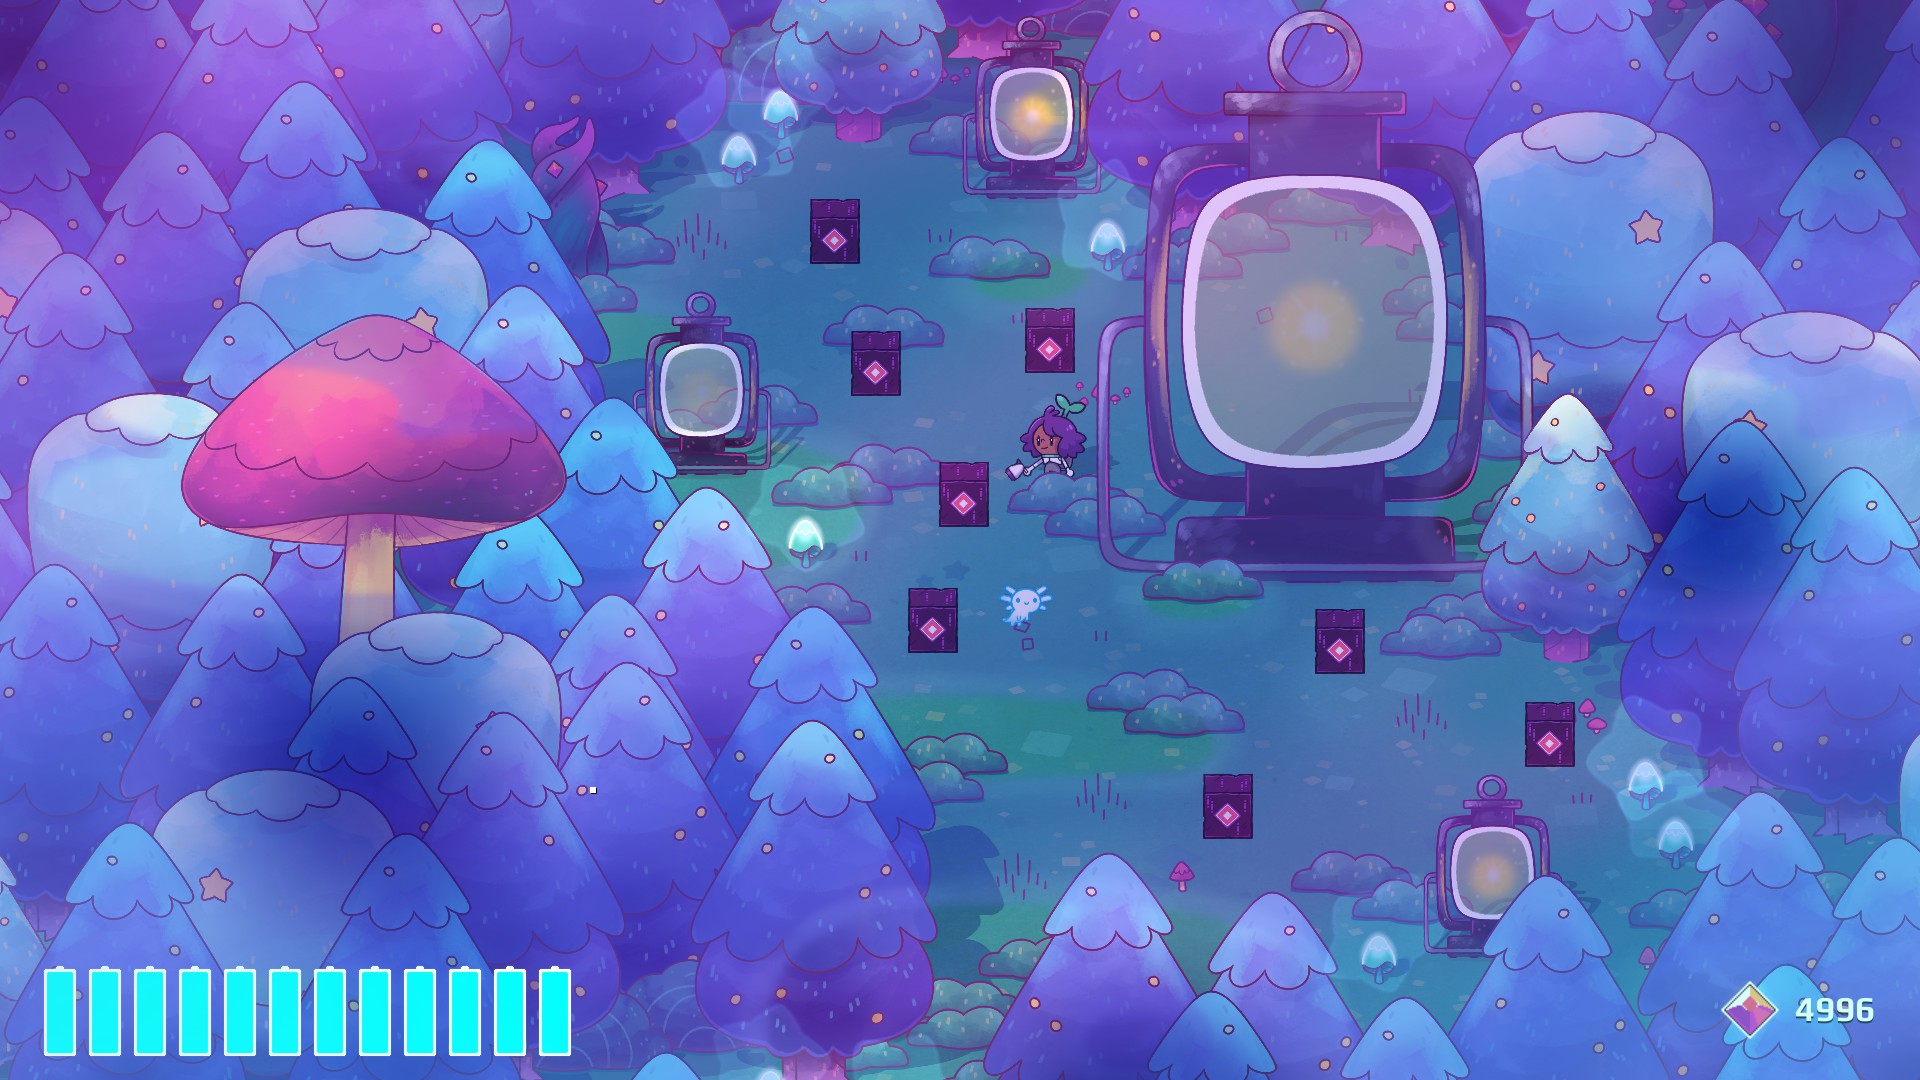
The next area of the game you’ll likely come across is Roomwoods, where the Lantern Forest resides. This one is a bit harder to spot, but by no means difficult. In the little clearing with the pond and fisherman apple in the upper right of Roomwoods, there’s a kind-of-but-not-really hidden path on the lower right of the clearing covered in bushes.
General Area
Follow the bushes and glow fruits on the right side of the clearing.
Location on Map
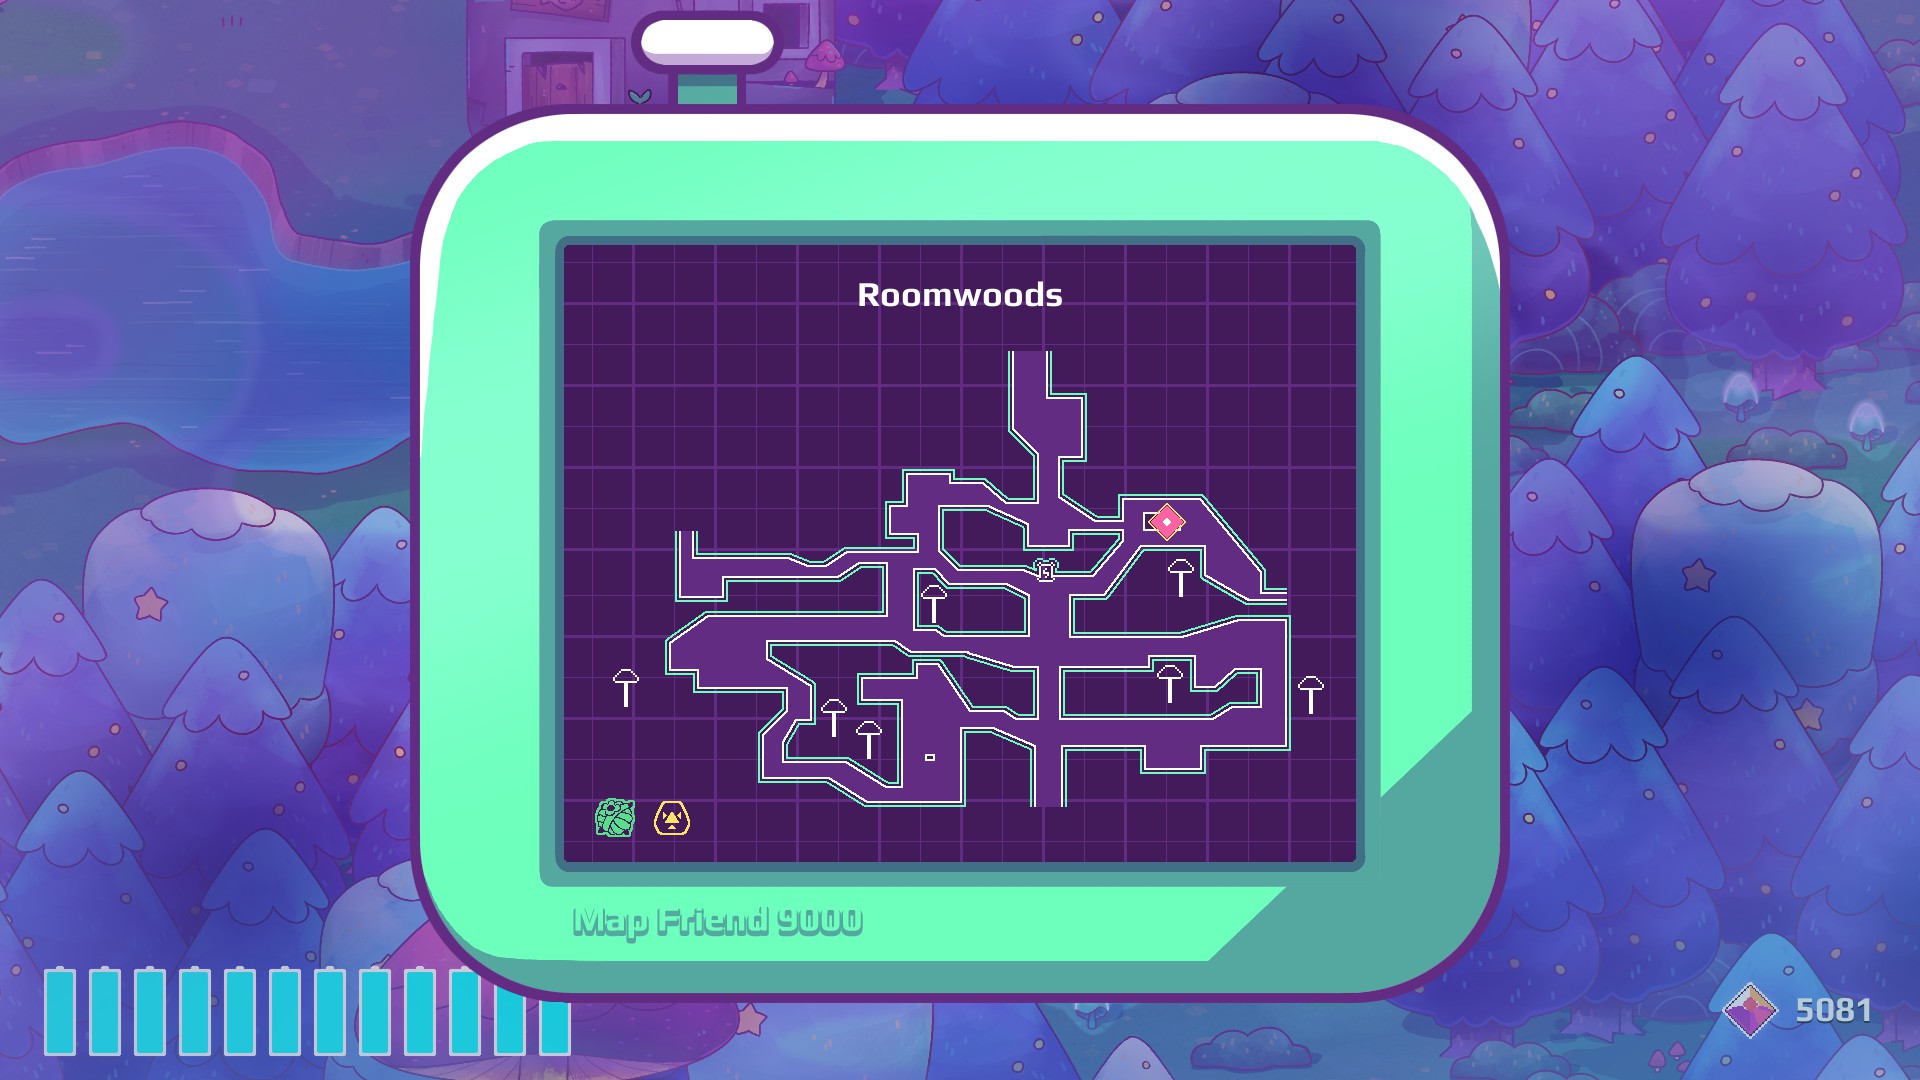
Lantern Forest
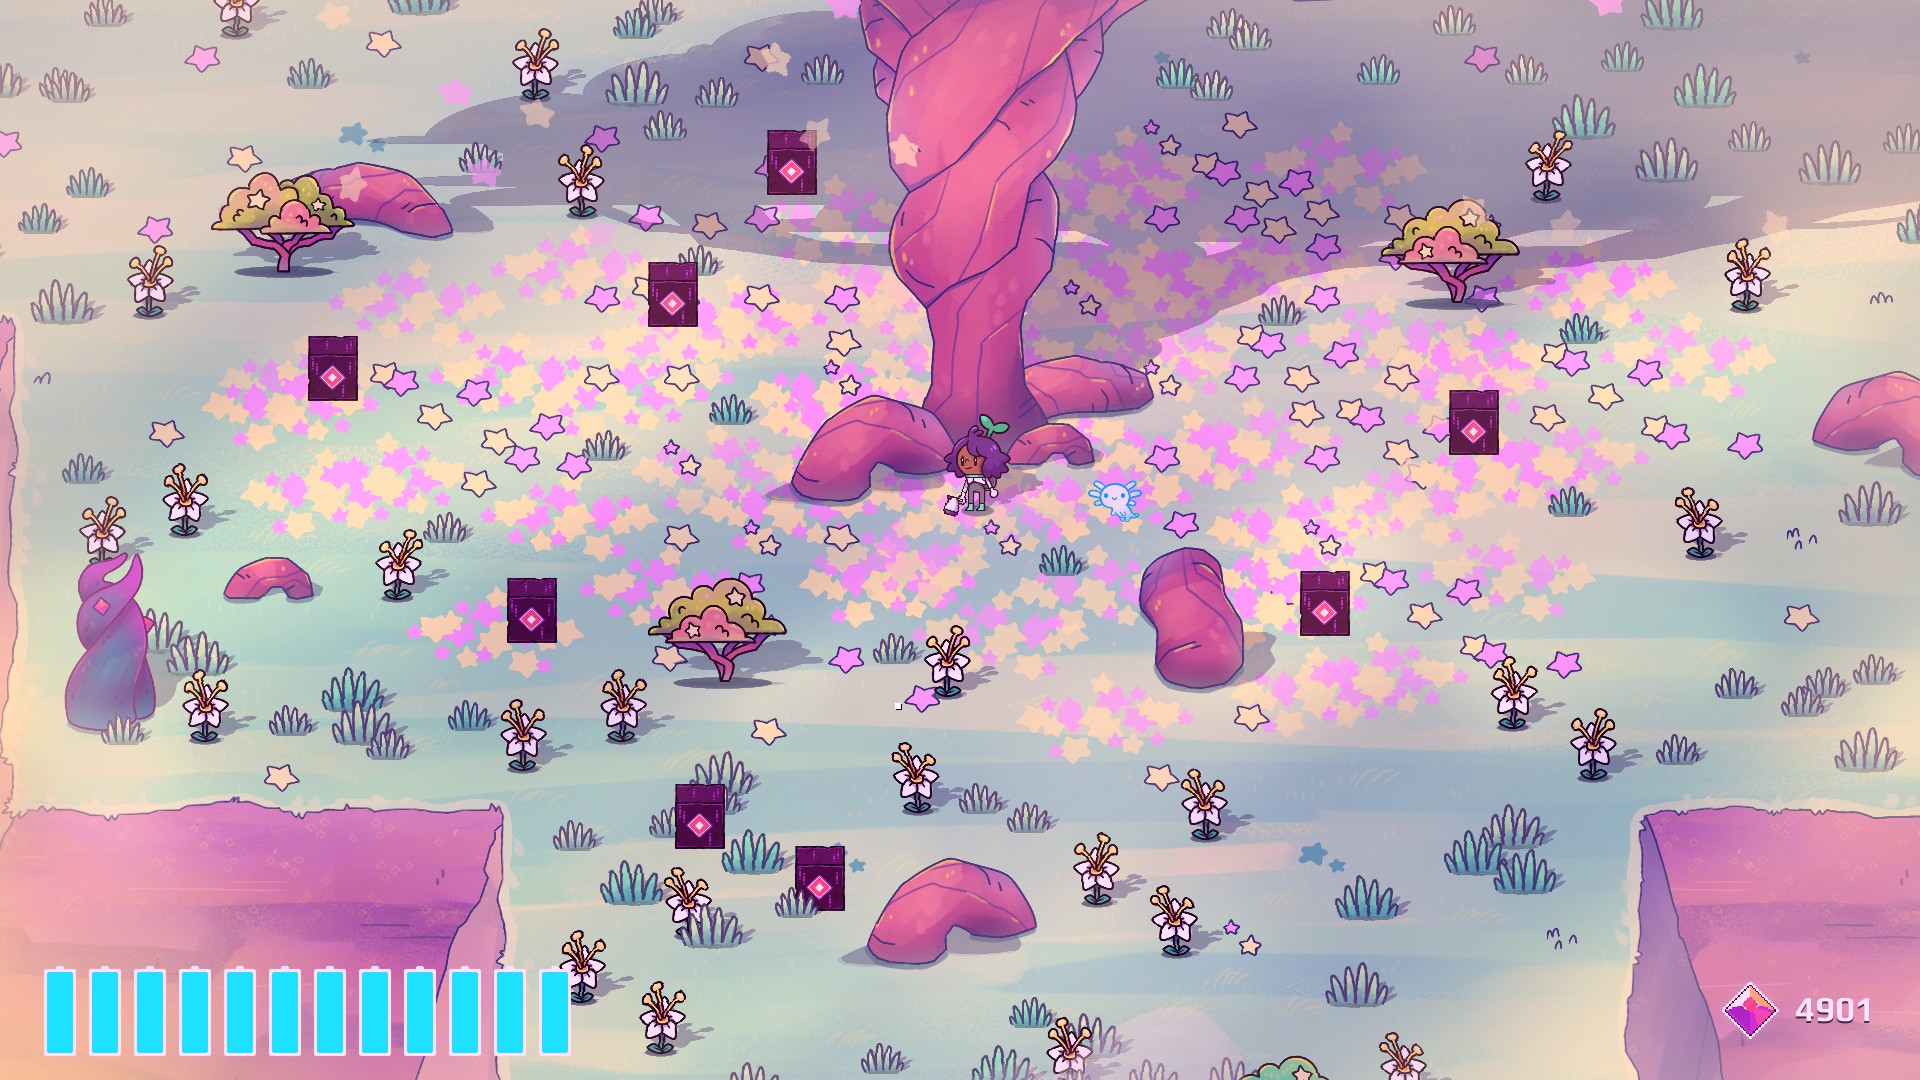
Painted Desert
Next up is the Painted Desert. This one I honestly don’t really need to do, considering the opening to the Landmark automatically gets revealed as you progress the area’s story. 하지만, for the sake of completion and the fact that players might not go back to the area, I’m including it still. In the Painted Desert in the top right of the area, there’s a small path for you to go up and to the left. If it’s your first time there, the group of apple construction workers will be there to progress the story for you and send you away. 하지만, if you come back to the same location later, the path will now be clear and you can continue forward to the Bunny Kingdom!
Upper right path you can squeeze through.
Location on Map

Bunny Kingdom
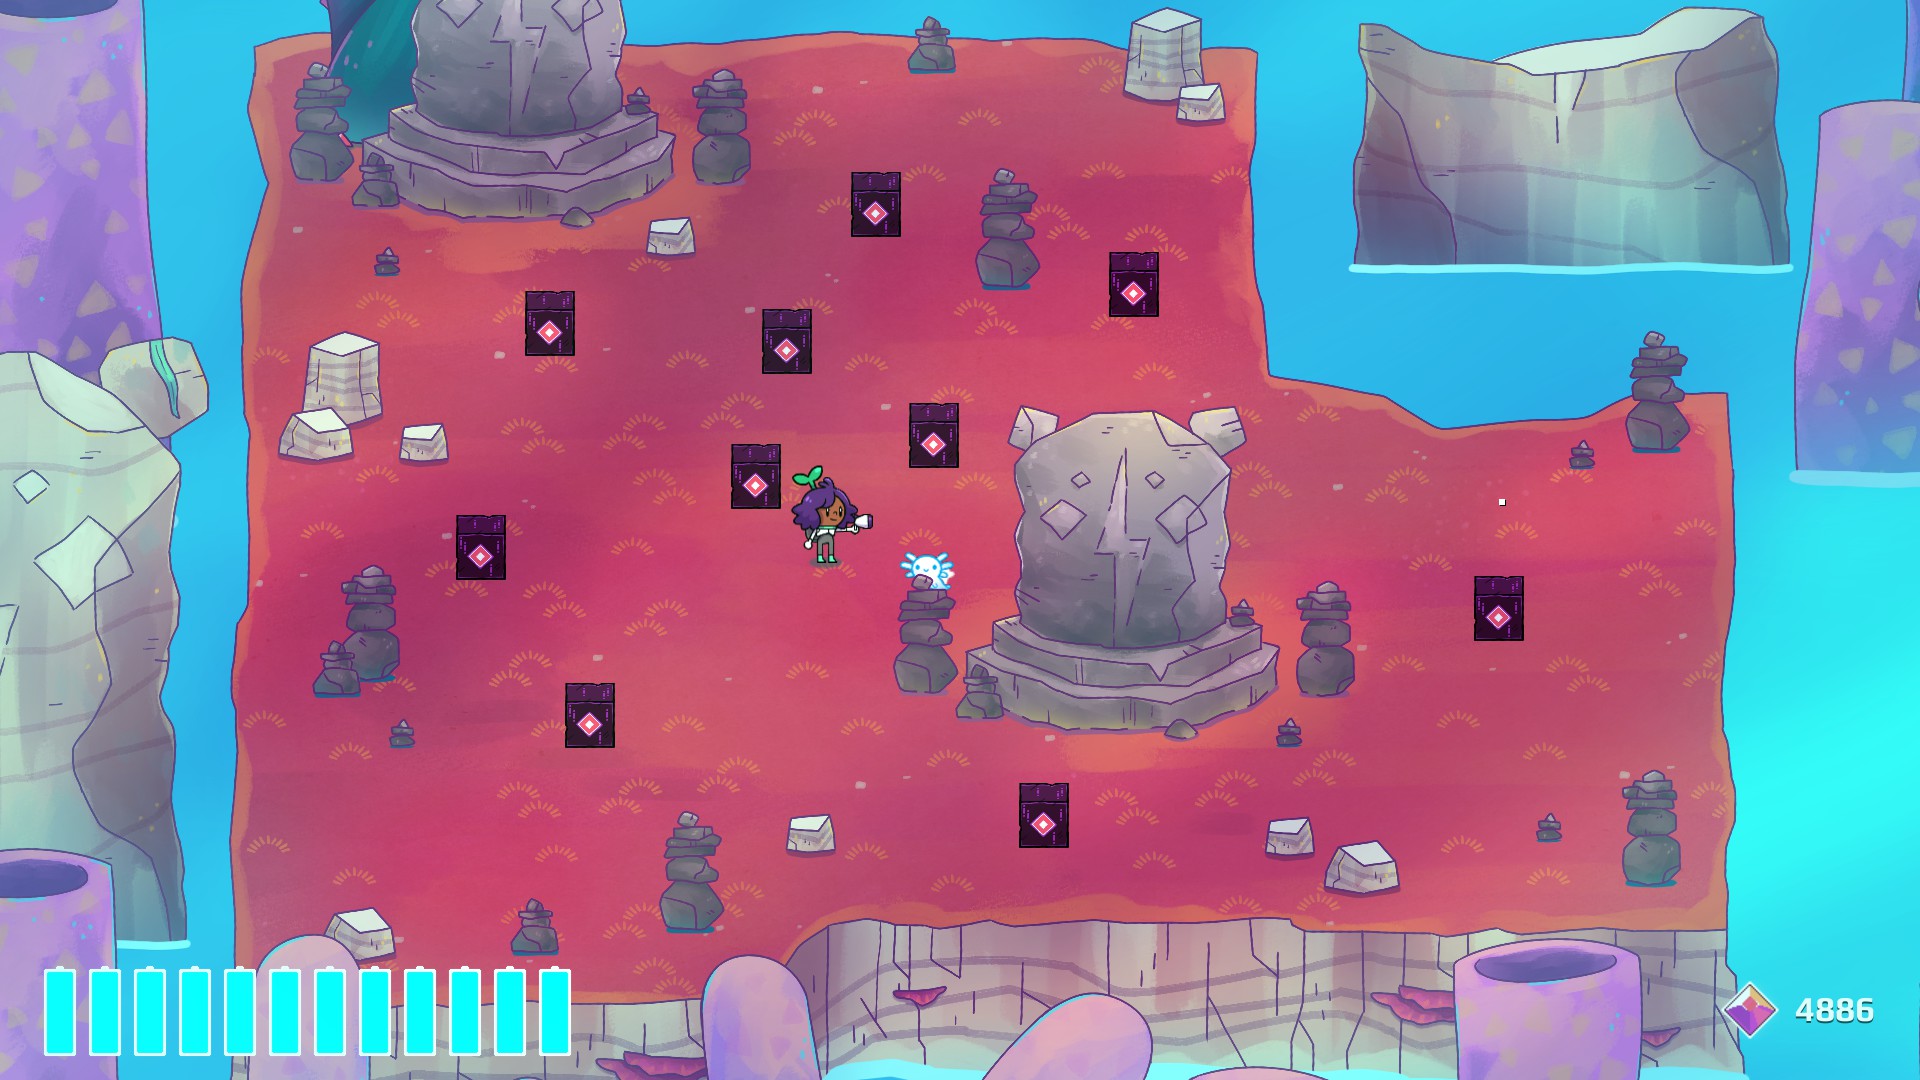
Coral Ocean
The Coral Ocean Landmark actually took me the longest time to find due to the nature of the area. As you might know, almost all of the islands here are constantly on the move, so I wasn’t sure if I had to find some way to melt the giant random ice block in the middle of the ocean or maybe find an island that’s always moving somewhere in the center. 고맙게도, it was neither of those and the Landmark island doesn’t seem to move positions! It seems to stay in the very bottom left corner of the ocean, easy once you know where it is. When you first enter this section of the map, I believe the fenced in coal island with the Forager (another great game on steam, if you didn’t know most of the NPCs in this area are from that game!) is close to it.
Yeah I know it’s all just water, pretend you can recognize this specific water.

Location on Map
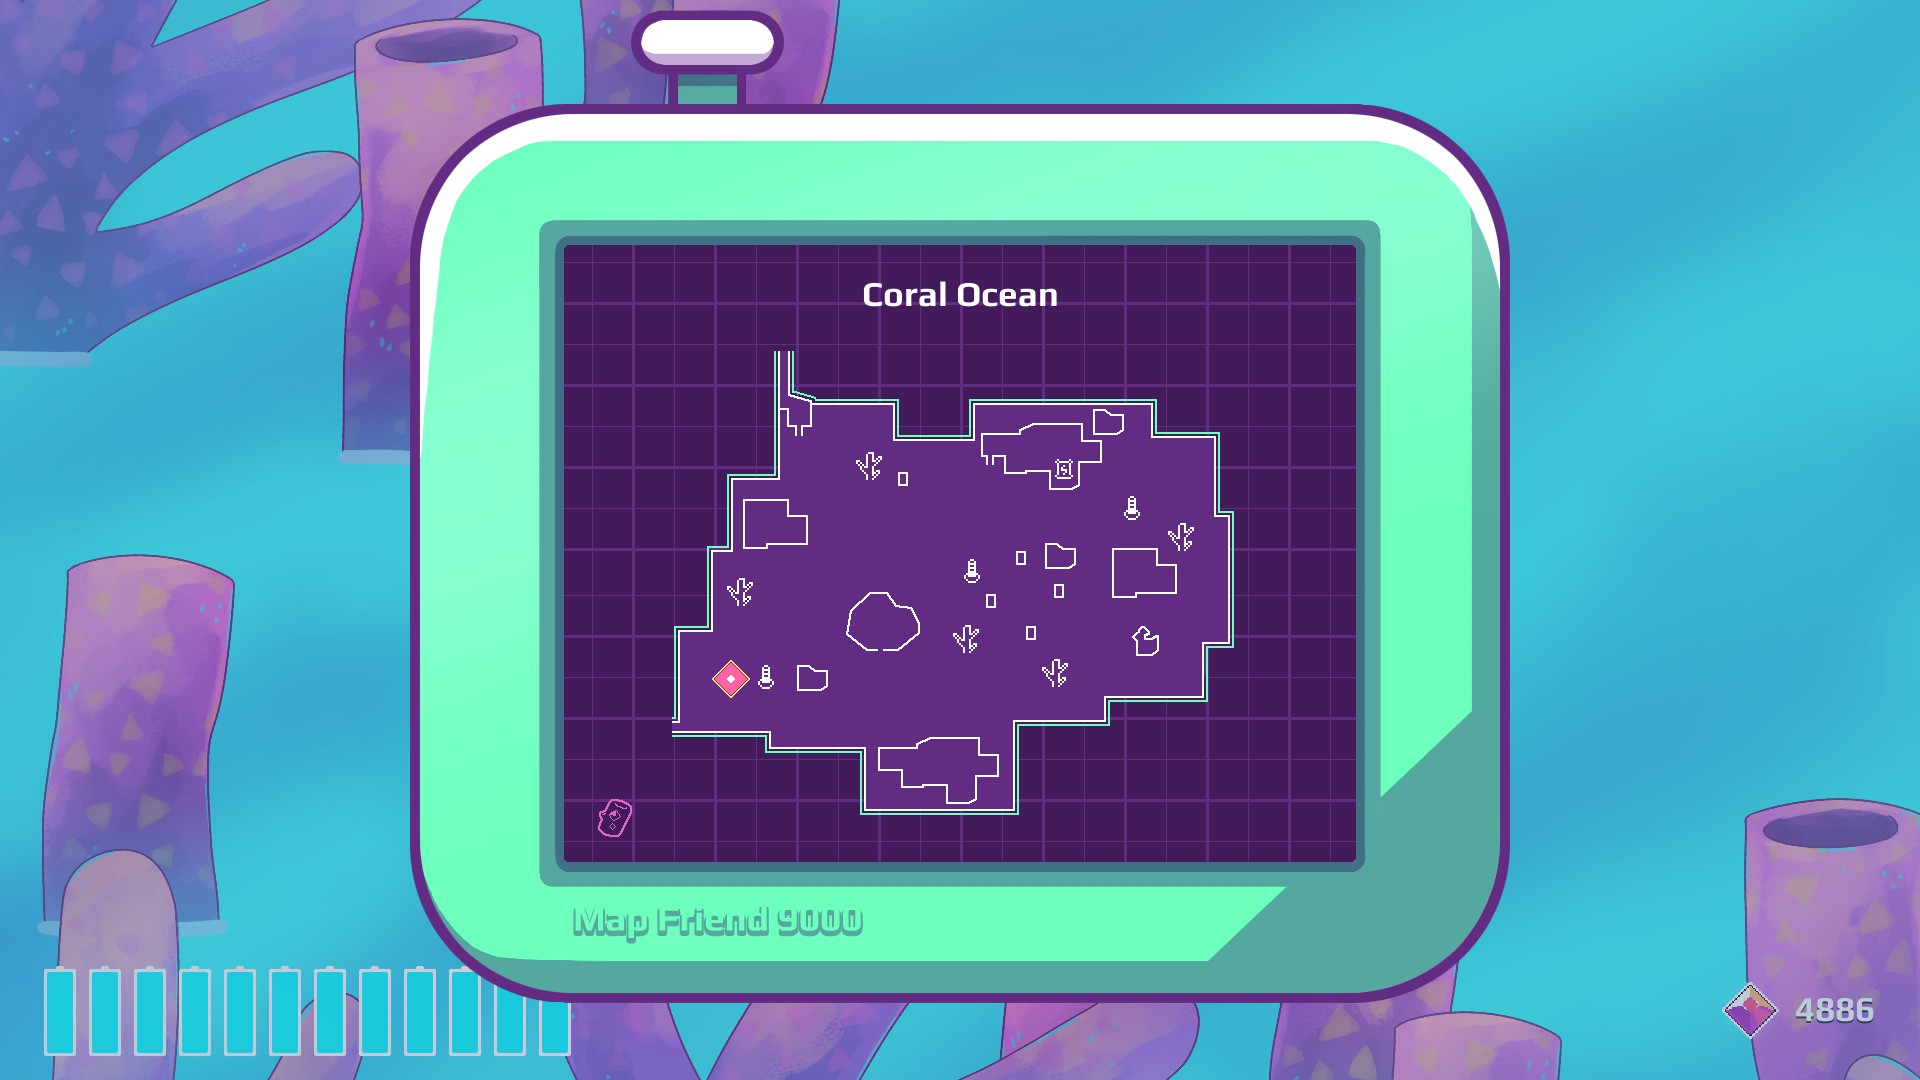
Bear Statue Island
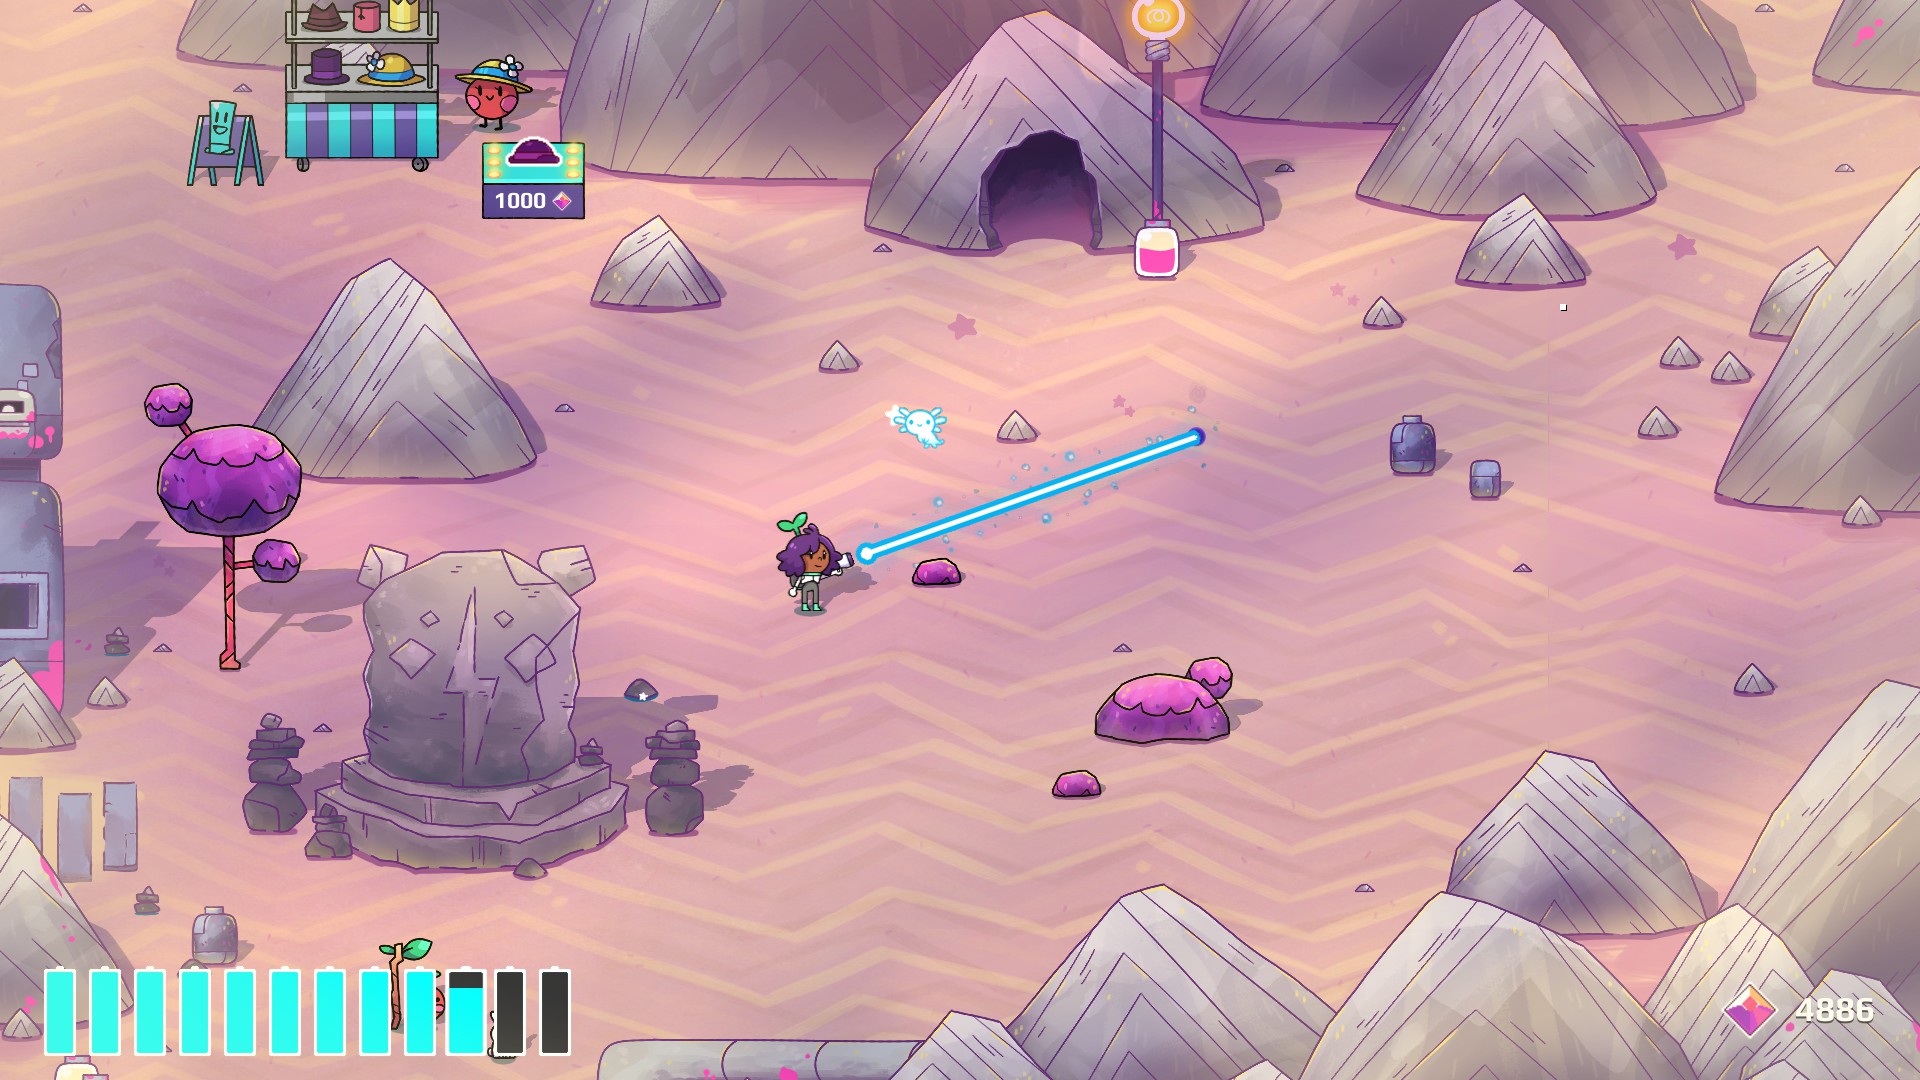
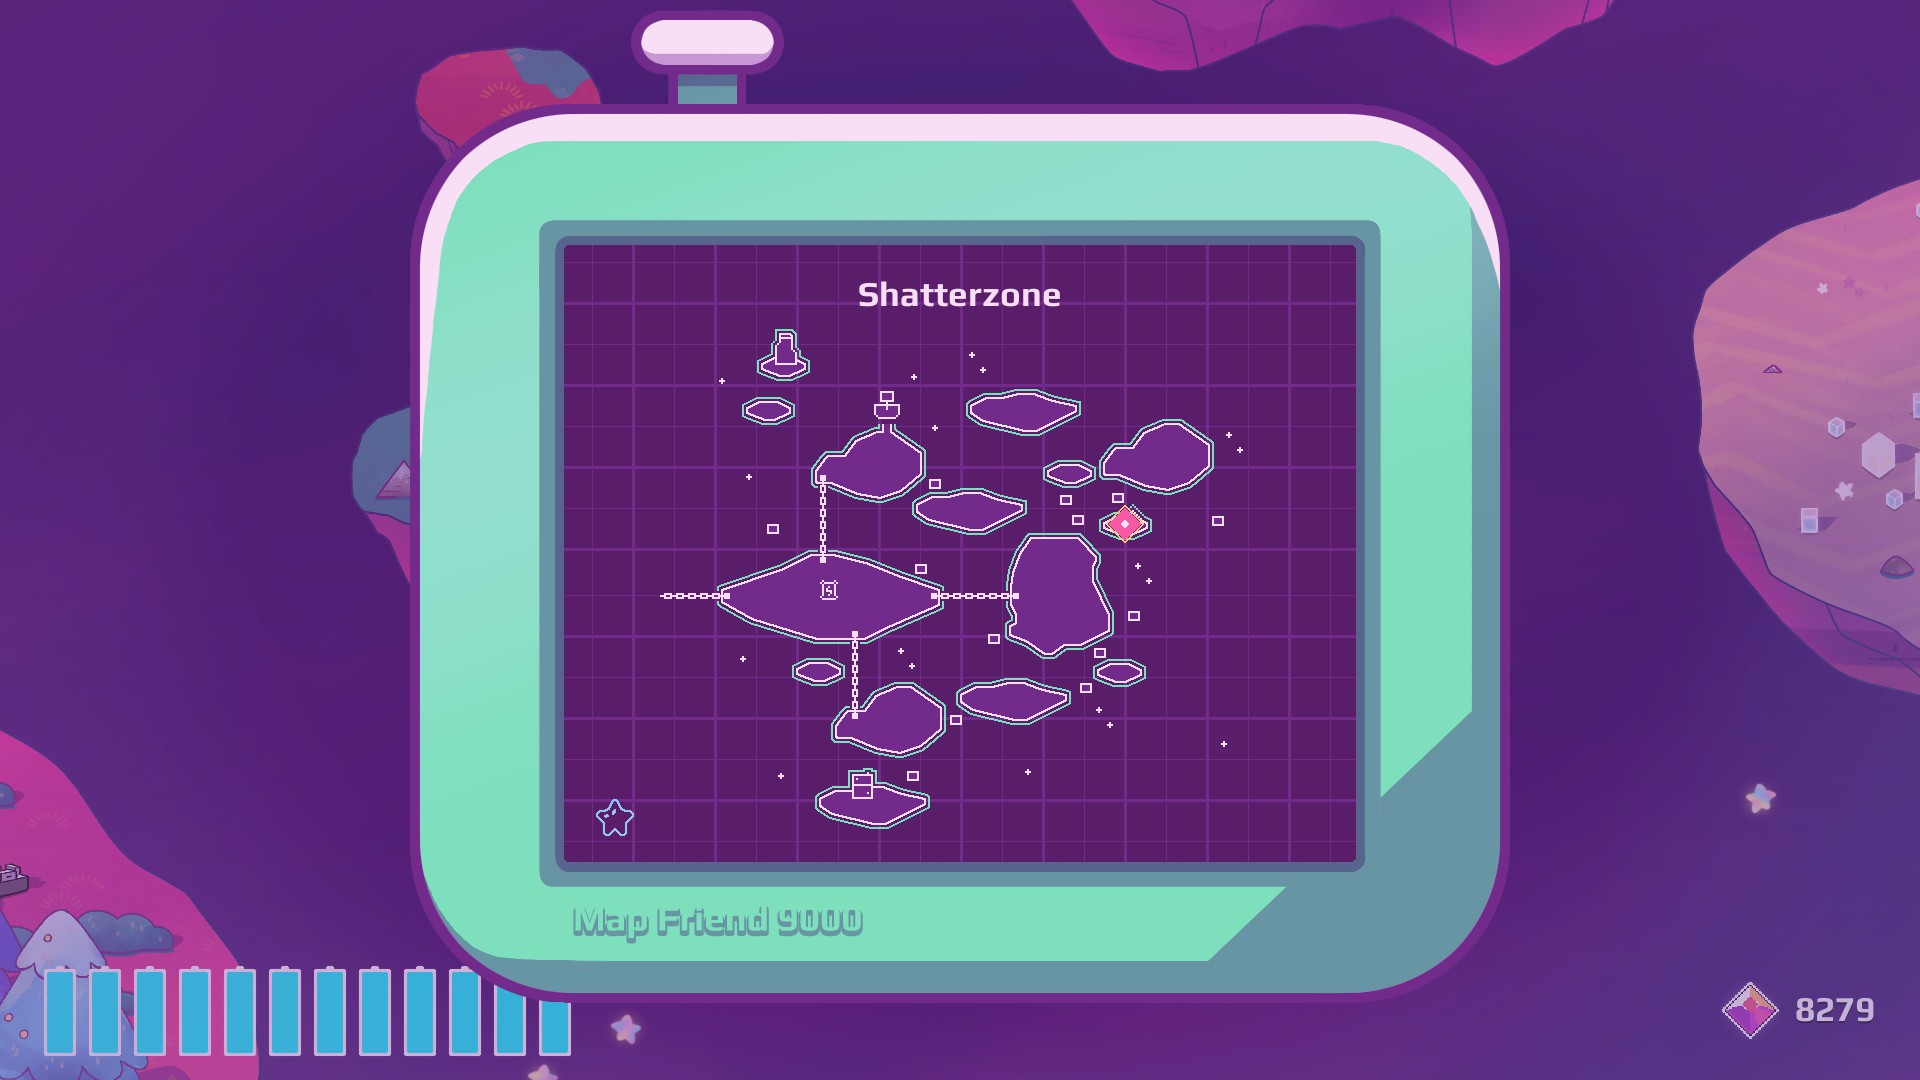
Shatterzone
While finding this one didn’t take me as long as the Coral Ocean one, it still took me longer than I’d like to admit. Thankfully when I came back to it later, I realized that it’s almost right next one of the story NPCs. When you’re giving hats to the different citizens, it’ll be to the direct right of the robot one.
After coming to the Shatterzone and talking to the hat vendor, go to the chain straight to the right and then jump up to find the rain cloud robot, with the Landmark being next to them after jumping to the floating island slightly above and to the right of them.

Location on Map
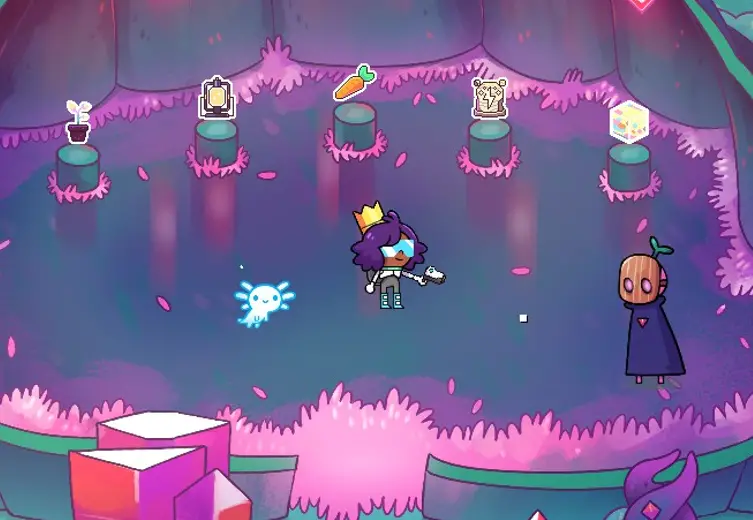
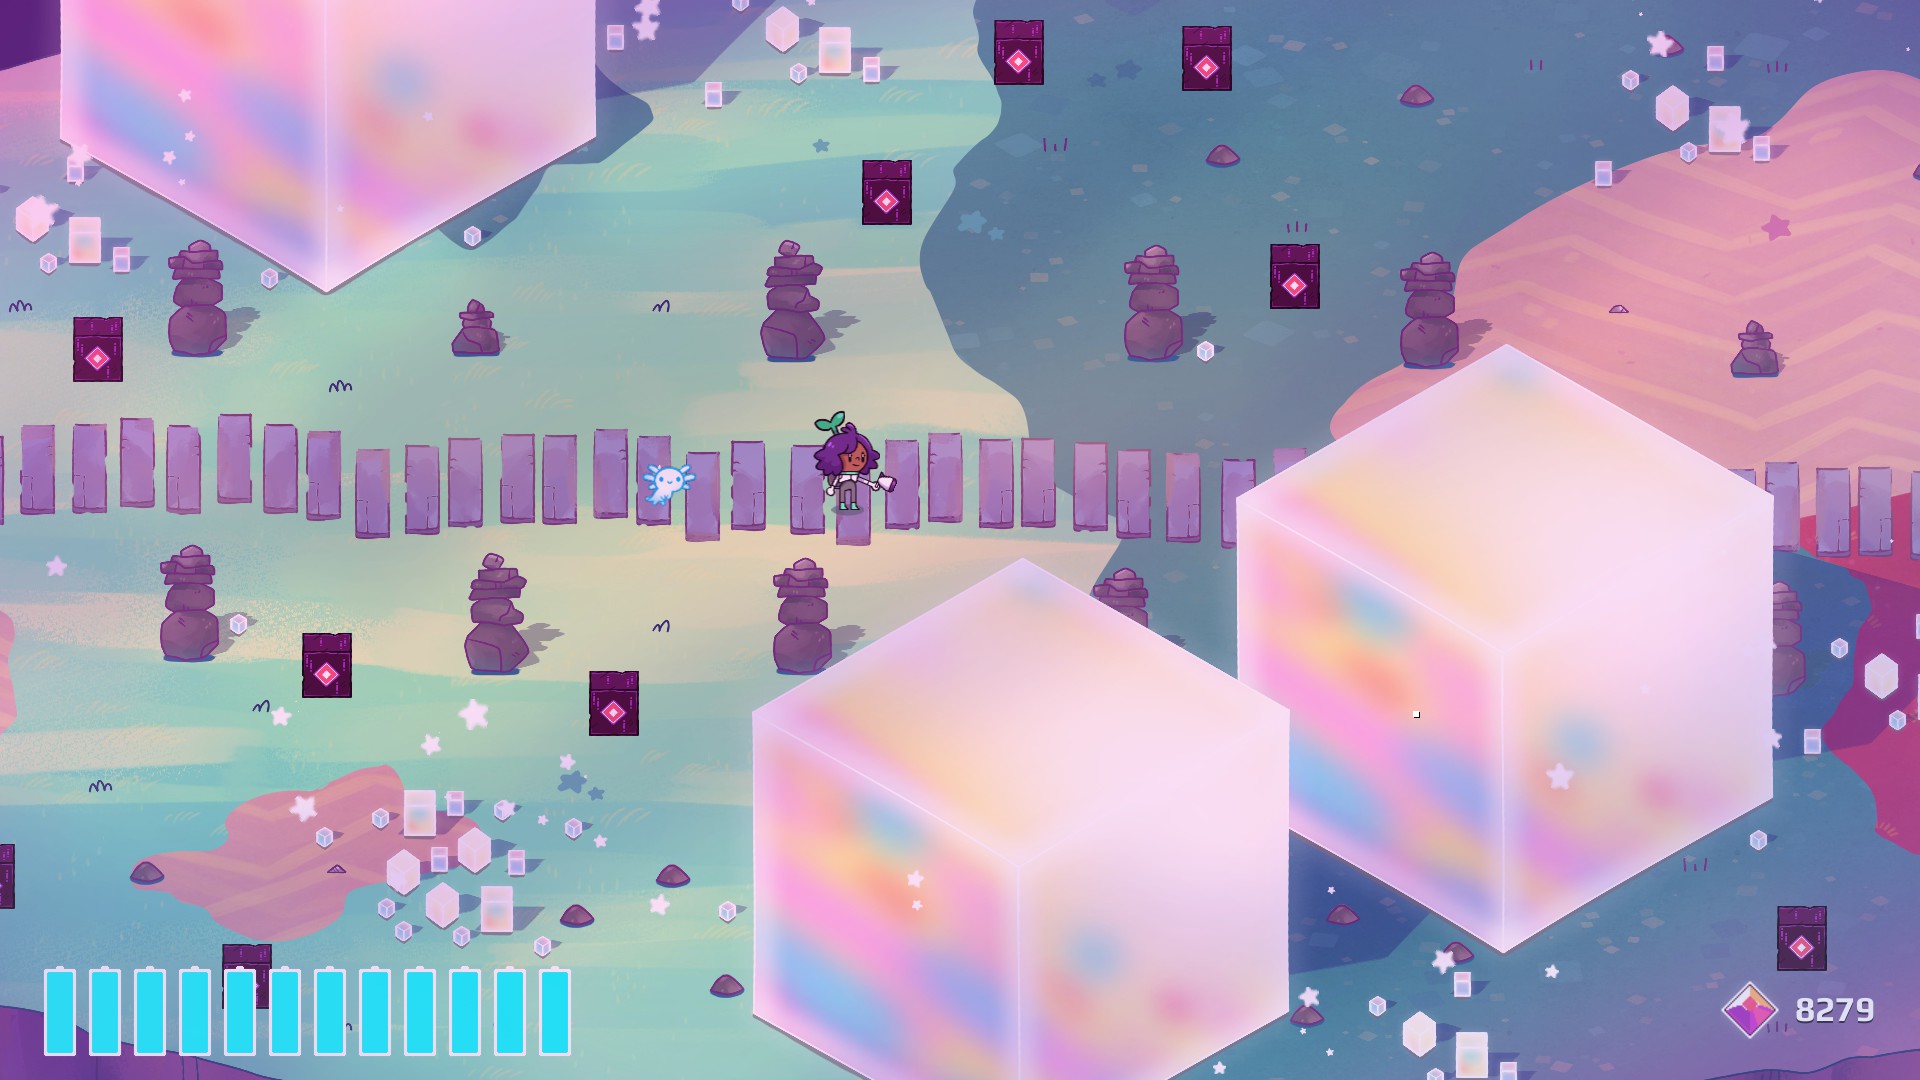
Cube Garden
유물
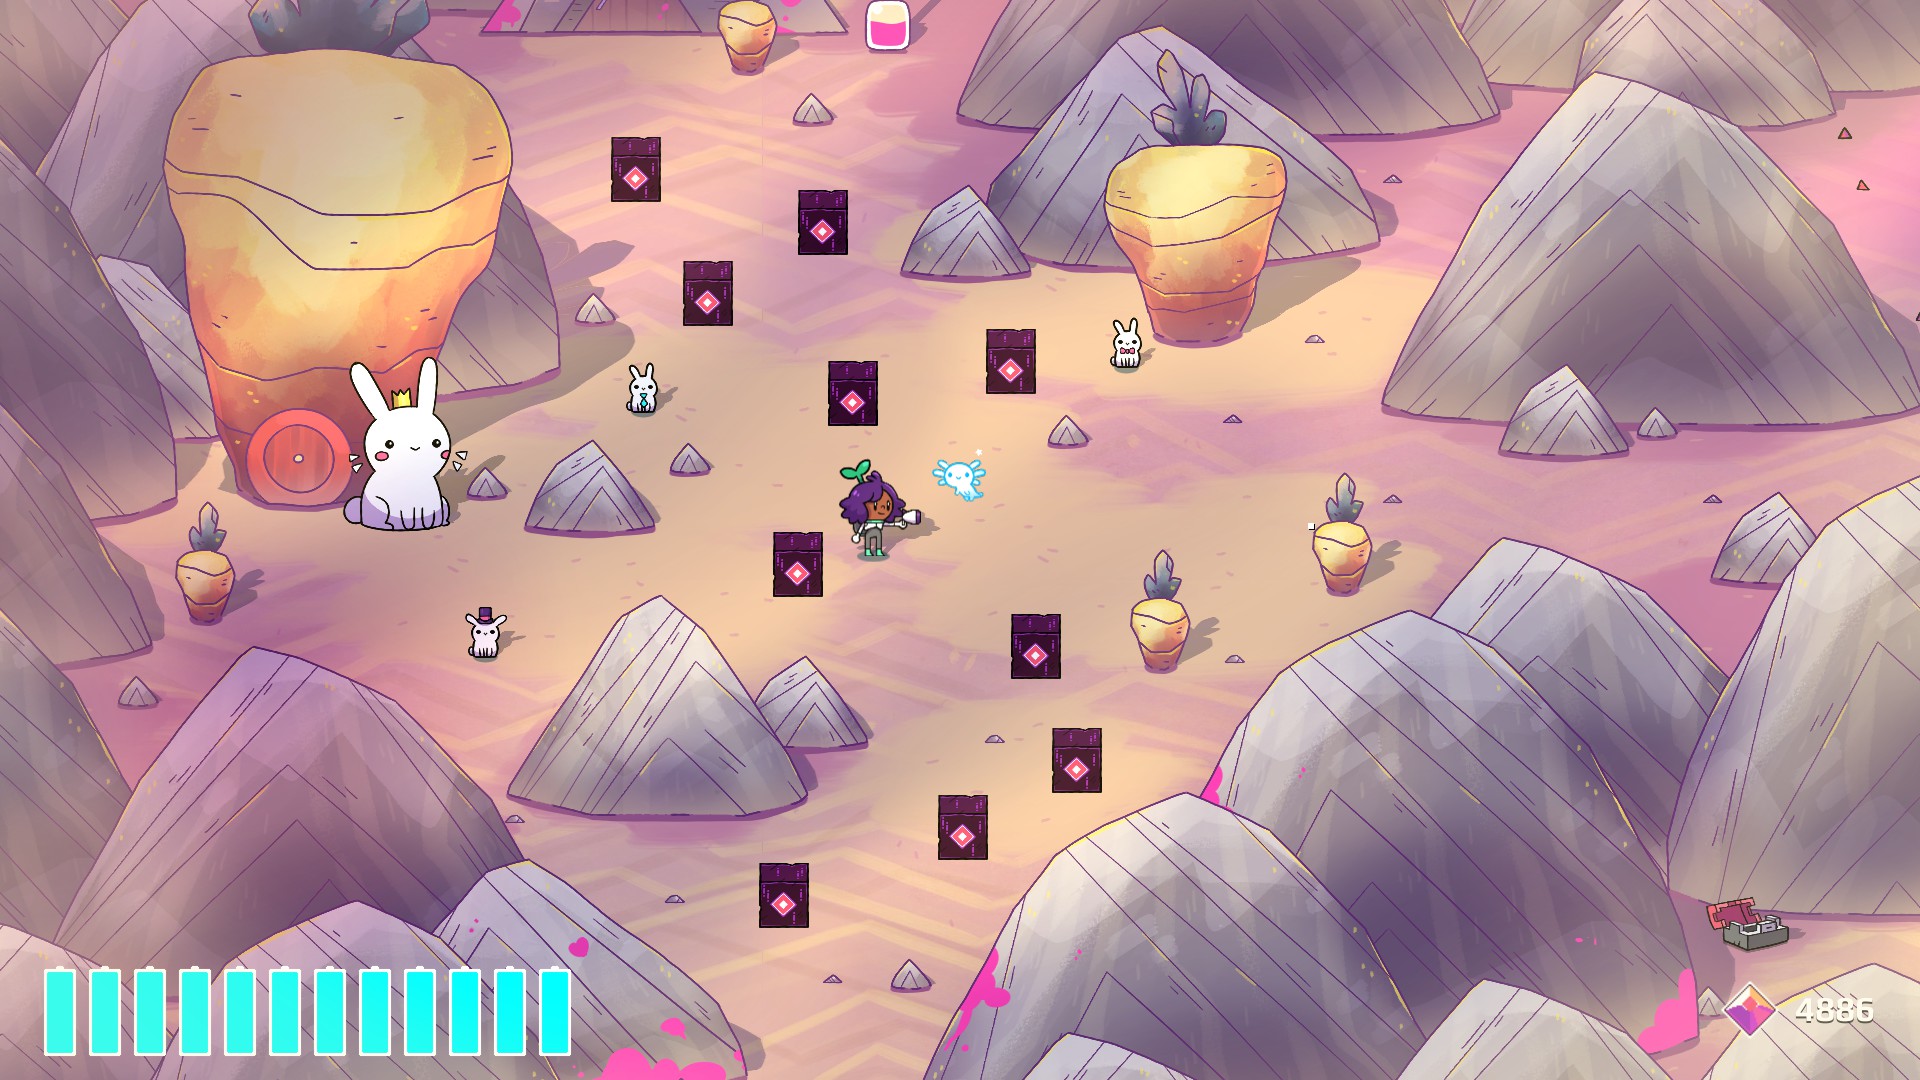
그리고 마지막으로, getting all the respective artifacts and unlocking the Archeologist achievement! As you progress the story, you’ll eventually see more NPCs arrive in the central hub of the world. When you see a cool, tall lad with what I think is a pumpkin mask, talk to and follow them. They’ll run past the mechanic store and stand to the right of it, 대기 중. Talk to them again and they’ll tell you to come back later. When you do come back, (what I assume to be) a giant tree has grown and they’ve inhabited part of it, turning it into a mini museum.
Once this happens, they’ll tell you that if you push the red stones from each Landmark into each other, it’ll drop valuable relics. As you follow their instructions, you’ll be able to unlock the Artifact for each area. 물론, each Artifact will require a higher amount than the last, 하지만 걱정하지 마세요, as when enough time passes the red stones in the Landmarks respawn and you can repeat the process. Once you unlock all the Artifacts, you can start trading in the red stone relics for the main currency, crystal cores!
Archeologist Achievement

My Completed Museum