- 제목: Let's Build a Zoo
- 출시일:
- 개발자:
- 발행자:
Information about Let's Build a Zoo is still incomplete. 이것을 사용하여 게임의 세부 정보를 입력할 수 있도록 도와주세요. 문의 양식.
This guide is here to help you with the Map Master achievement in Let’s Build a Zoo. This achievement can be a bit time-consuming, but we’ll make it easier for you. It’s all about mapping 56 standard animals’ Genomes. 이를 달성하려면, you’ll need to focus on breeding the animals in the game. 그래서, we’ll provide detailed information about breeding in Let’s Build a Zoo.
소개
I’ve achieved the Master Mapper, and I want to share some time-saving tips with you. But there’s a small correction to the achievement description. 대신에 “56,” you’ll actually need to map EVERY available genome in the base game, which is currently 63, 업적을 잠금 해제하려면.

One more thing to keep in mind: this achievement is a real time-eater. It’s the toughest one to get, and you’ll be busy managing your breeding facilities for quite a while. Just wanted to give you a heads-up on that!
General Breeding Explanation
Let’s talk about breeding in Let’s Build a Zoo. Each animal species has ten different variations. Take a look at this example with rabbits:
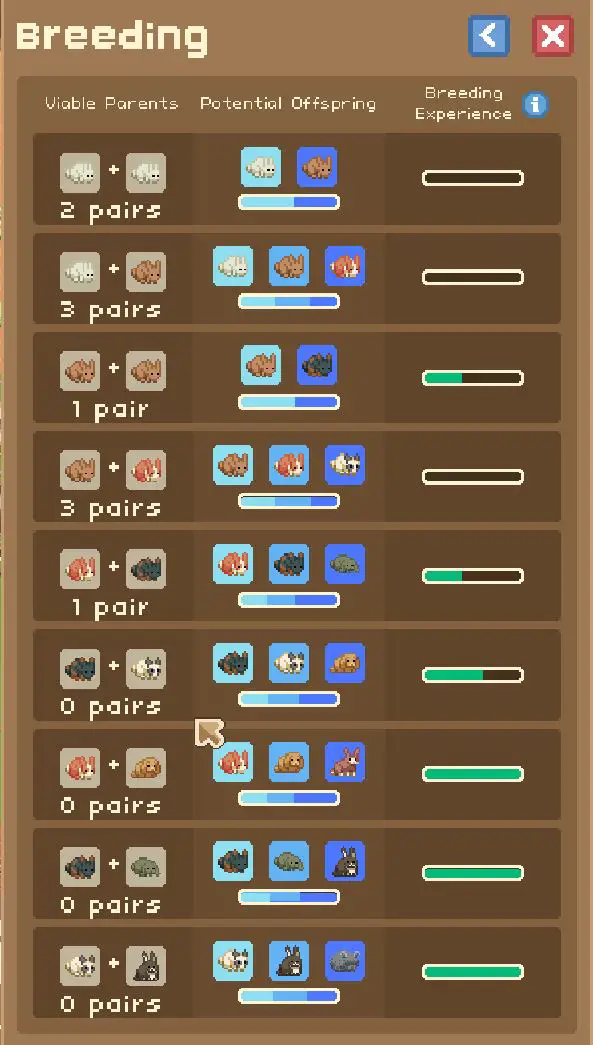
왼쪽에, you can see how many pairs of each animal you have for breeding. 오른쪽, you’ll find all the possible variations that these pairs can produce, including one identical to each parent and a new variant.
The breeding experience bar is important. It shows how many times you’ve successfully had offspring with a specific breeding pair. The higher the experience bar, the more likely you are to get the new variant as an outcome. Think of it as a way to protect against bad luck.
지금, let’s look at the rabbits. Some variants I got without ever using the nursery, while others took several tries. As you move down the breeding tree, it becomes less likely to obtain the new variant, so you might need to use nurseries for those last few.

To learn more about a species, click on one of your animals in their pen and go to the far-right tab, the species information tab. 여기, you’ll find additional breeding information.
The fertility rate is important because it indicates how likely a pair of animals is to get pregnant each day. 내가 아는 한, you can’t increase this percentage through any upgrade, and it applies to animal pairs in the nursery as well. 일반적으로, larger animals have a lower fertility rate, while smaller animals have a higher one. 그래서, if you’re trying to map a genome for a tiger, 예를 들어, they’ll spend more time in the nursery trying to get pregnant than rabbits.
The pregnancy period shows how long an animal will be pregnant before giving birth. 이것, ~도, follows a general trend of bigger animals having longer pregnancies. Research can affect this, but from what I know, it only applies to animals in the nursery, not those in the pens.
Starting a New Run
If you’ve just begun a new game, here are some tips to make progress towards the achievement while you focus on other tasks:
첫 번째, always make getting new animals your top priority, even more important than decorations, 시설, and other objectives. The sooner you have a pen for each species, the sooner they will start breeding passively. This will give you significant progress, especially for animals with shorter pregnancy times. Don’t worry too much about making your enclosures fancy at this stage; you can improve them and rearrange later when you’re ready to decorate. If you need a specific variant of an animal to complete a trade, prioritize breeding them in the nursery.

다음, when you’re ready to focus on this achievement, ensure that you’re running a game with good morality (적어도 40 good morality points). The nursery upgrade, which reduces pregnancy times to one day, is crucial for efficiently working on this achievement. It’s worth noting that you can still play with evil intentions to earn the 200 evil point achievement, just remember to switch back to good morality when it’s time to concentrate on breeding. You can do this quickly by adjusting your stores to sell ingredients with good morality, paying your staff maximum wages, and choosing good morality options.

제삼, don’t stress about the breeding process until you’re fully prepared to work on it, unless you need a specific variant for a trade. 하지만, remember to use your nursery whenever you think about it. You don’t need to micromanage it, but checking in from time to time and pairing new animals for breeding can be very helpful.
마지막으로, make sure to visit the animal shelter occasionally. Finding new variants there means one less you’ll have to deal with later in your breeding efforts!

How to Easily Map Genomes
연구
Let’s talk about some important research nodes that can greatly assist you:
Two of these research nodes demand good morality points. The pregnancy reduction requires a morality level greater than 20, and the release hub requires more than 40. 그래서, be sure to maintain a morality of at least 40. The release hub is particularly helpful for quickly managing excess animals, as breeding in the nursery can quickly crowd your pens.
Time Savers
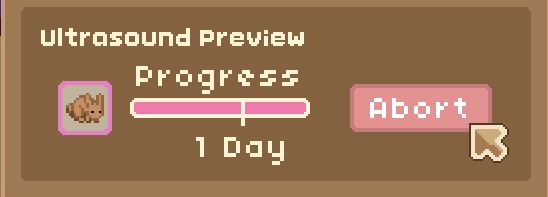
Set your nursing time to 0 날:

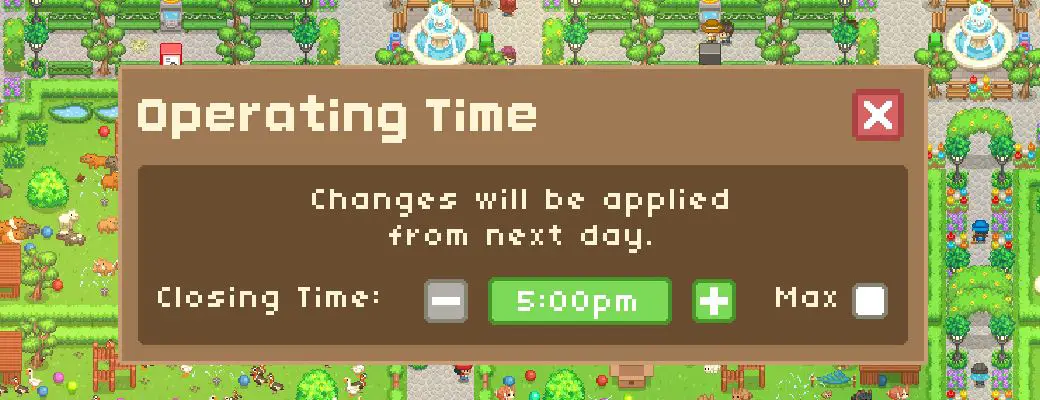
Set your Zoo’s hours to the minimum
We’ll go through the day faster to make the pregnancy happen more quickly.
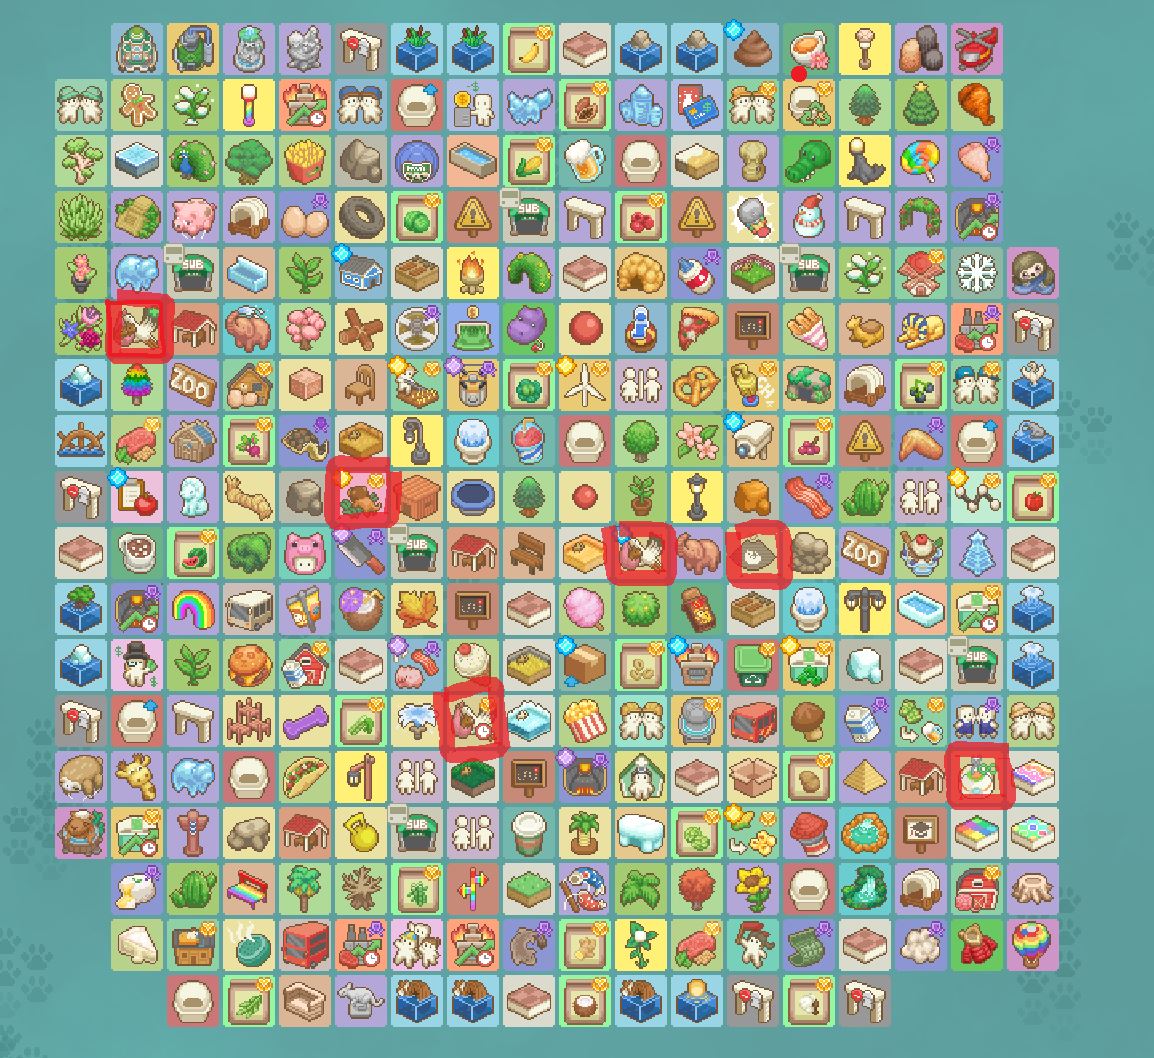
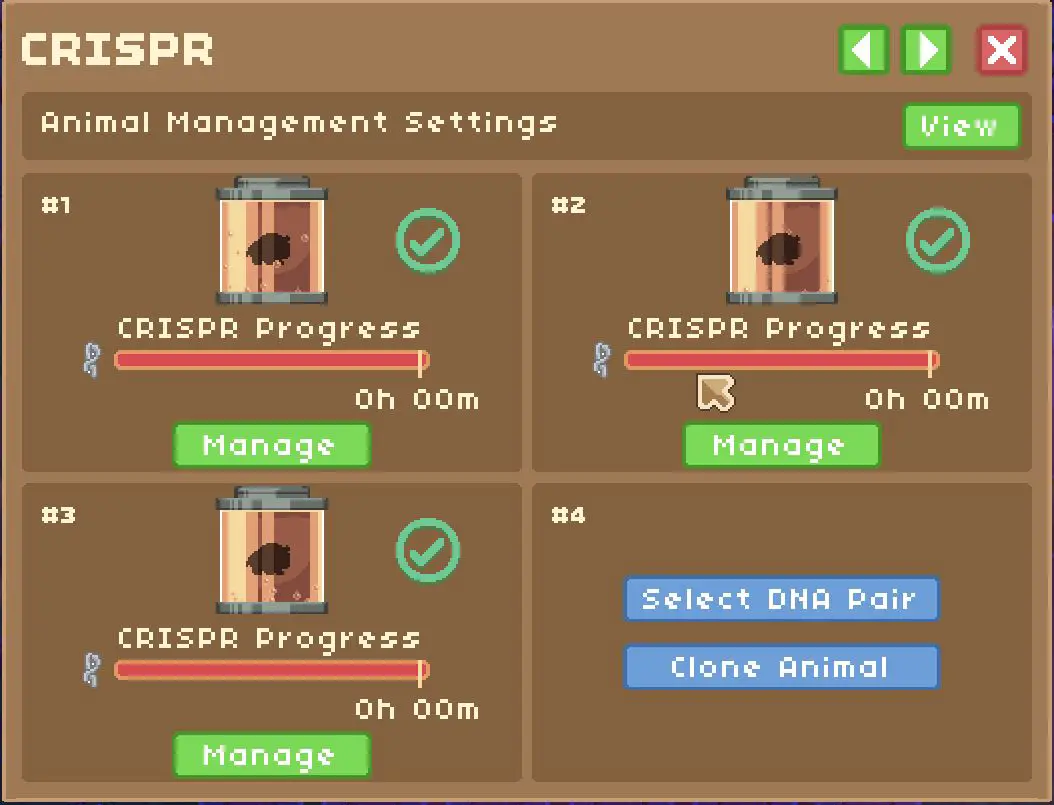
Here’s what you can do: Set up several nurseries and CRISPRS close to your release hub, like in this image:

You’ve got three nurseries and four CRISPRS, but you can build more if you want. Put any “new variant” pairs from different animal species into them. No need to focus on one genome at a time. The more new variants you have in pens, the more passive variants you’ll get.
Only abort pregnancies with undesired results if your experience bar is full. The experience bar is super helpful, especially with big animals that take a long time to get pregnant. Make the most of it!
Breed multiples of the same pair:

This will speed up your experience bar, helping you get the variant you need faster. This is especially important when you’re left with just a few genomes.
CRISPR early, often, and more than you think you will need:
With larger animals, it can indeed take a long time for one breeding pair to produce more pairs of the same type, affecting the speed of your experience bar. 이 문제에 대응합니다, use the CRISPR early as an additional layer of protection against bad luck. 또한, consider your animal’s breeding tree. If one variant is involved in five different breeding pairs, take that into account.
Remove any pairs that are not producing a new variant. Always prioritize breeding pairs that can create a new variant. When you have additional nursery room, only keep animals in the nursery that are not producing a new variant. 이 경우, creating more new breeding pairs can be useful.
결론
I hope these tips and tricks make it easier for you to achieve the Master Mapper goal quickly and without much trouble. If you have any questions or comments, 아래에 남겨 두십시오, and I’ll check back from time to time!

이것이 오늘 우리가 공유하는 모든 것입니다. Let's Build a Zoo 가이드. 이 가이드는 원래 작성자가 작성하고 작성했습니다. Scarabimi. 이 가이드를 업데이트하지 못한 경우, 다음을 수행하여 최신 업데이트를 찾을 수 있습니다. 링크.