
- 제목: amalur의 왕국: 다시 다시 반입
- 출시일:
- 개발자:
- 발행자:
Information about Kingdoms of Amalur: Re-Reckoning is still incomplete. 이것을 사용하여 게임의 세부 정보를 입력할 수 있도록 도와주세요. 문의 양식.
100% Achievement Guide for base game of Kingdoms of Amalur: 다시 다시 반입.
Quest Related Achievements

House of Ballads
Completed the House of Ballads storyline quests
This achievement can be gained by completing the House of Ballads questline started by speaking to a Fae named Hallam the White in the House of Ballads located northwest of Odarath. 있다 7 total quests listed below you need to complete in order to obatin this achievement:
1. Song of Sir Sagrell
2. Ballad of Bloody Bones
3. Two Knights and a Troll
4. What Lies Beneath
5. The Champions
6. Cursed Kingdom
7. The Hero and the Maid

House of Sorrows
Completed the House of Sorrows storyline quests
This questline begins by speaking to a Fae named Bisarane as part of the main story.
This achievement can be gained by completing the House of Sorrows questline started by speaking to a Fae named Bisarane. You will find him sitting on the ground leaving Mel Senshir as part of the main story and traveling eastward through Cursewood towards The Midden. 있다 6 total quests listed below you need to complete in order to obtain this achievement:
1. The Sorrows Call
2. Voices of the Dead
3. A House Divided
4. The Eldest
5. The Weeping King
6. Such Sweet Sorrow

Scholia Arcana
Completed the Scholia Arcana storyline quests
This achievement can be gained by completing the Scholia Arcana questline started by speaking to Docent Augra Tenet in the Scholia Arcana Embassy located in the southern most part of the Gardens of Ysa. 있다 7 total quests listed below you need to complete in order to obtain this achievement:
1. 불의 시험
2. The Ruin of Aodh
3. The Unquiet Bride
4. Shardfall
5. Lightning in a Bottle
6. A Crowded Mind
7. 시현

Travelers
Completed the Travelers storyline quests
This achievement can be gained by completing the Travelers questline started by speaking to Grim Onwig just outside of the Star Camp located between Glendara and The Sidhe. 있다 10 total quests listed below you need to complete in order to obtain this achievement:
1. The Guided Hands
2. The Silent Step
3. Jailbreak
4. Something Borrowed
5. Going Rogue
6. 거울, 거울
7. 상자 밖에서
8. Classic Misdirection
9. The Purloined Letters
10. Thick as Thieves

Warsworn
Completed the Warsworn storyline quests
This achievement can be gained by completing the Warsworn questline started by speaking to Ost Ordura located in the Gorhart Inn located in the town of Gorhart. 있다 9 total quests listed below you need to complete in order to obtain this achievement:
1. The Commendation
2. The Road Patrol
3. Rally Cry
4. The Heart of Sibun
5. Lock and Key
6. House of No Doors
7. The Isle of Eamonn
8. The Mystic Hammer
9. The Mountain Prison

No Destiny, All Determination
You have met High King Titarion, and have been confronted with the true scope of your powers
This is a main story related achievement and will be given upon completion of “The Coming Storm” 탐구.

Turning the Tide
A ruse has baited Octienne into betraying the necromantic nature of his experiments
This is a main story related achievement and will be given upon completion of “Enemies in High Places” 탐구.

Hero of Mel Senshir
You have defeated the great Balor
This is a main story related achievement and will be given upon completion of “Breaking the Siege” 탐구.

Destiny Defiant
You have defeated Tirnoch, and defied destiny
This is a main story related achievement for defeating the final boss and thus completing the game. It will be given upon completion of “계산” 탐구.

We Built this City
You helped the Kollossae in the Teeth of Naros break free from their fate
This is a quest related achievement and will be given upon completion of “승천” 탐구.

Beam Me Up
Used the Henge to enter Idylla
This is a quest related achievement and will be given upon completion of “Rites of Passage” 탐구.

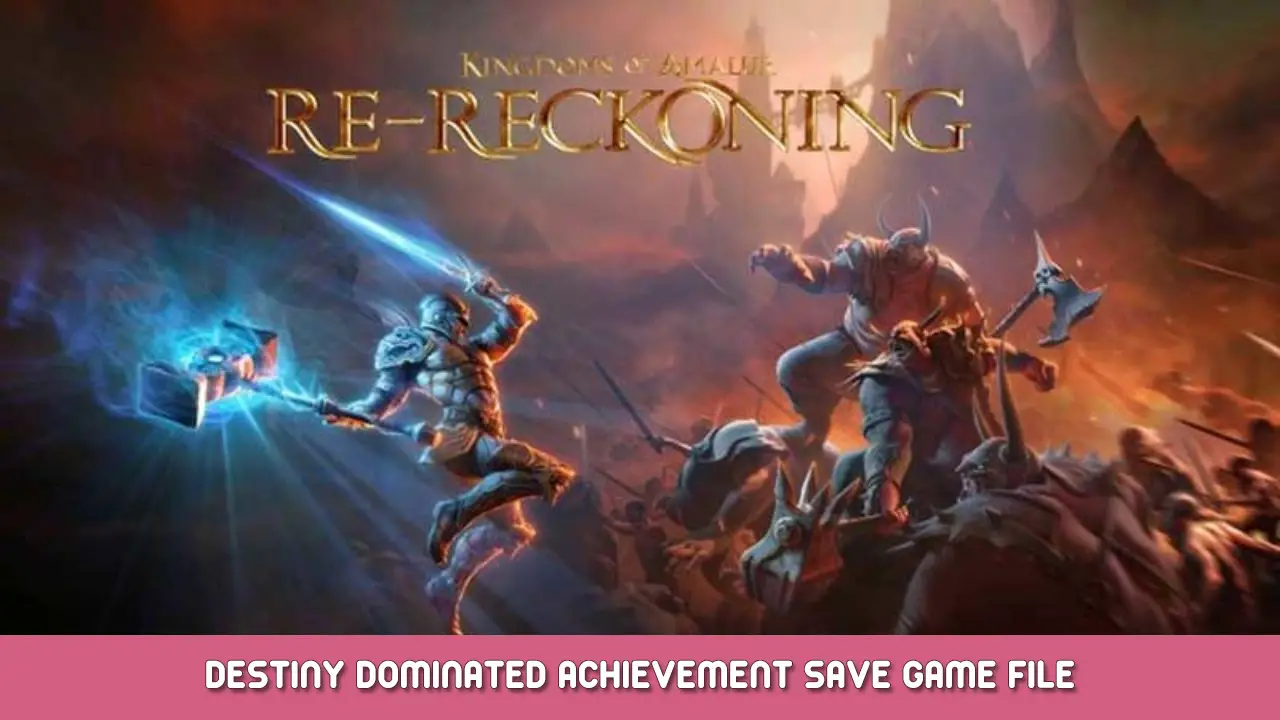
Destiny Dominated
You have won the game on Hard difficulty
To obtain you must select “딱딱한” under the difficulty options during the start of the game and not change it until this achievement unlocks after completion of the main story.

The Harder They Fall
너’ve bested Kahrunk without killing his attendants
Near the beginning of the Dead Kel quest line you will meet and have to battle Kahrunk a Jottun Warlord. Once you initiate the battle there will be 2 Kobolds fighting along side him that you need to ignore and kill Kahrunk first.

Mistaken Identity
–
*Hidden Achievement*
너’ve found a strange Almain who has been hiding in the sewers of Idylla
To do this you must have at least 5 points in the Detect Hidden skill. The Under Sewers are located close to the Eastern Henge in Idylla and can be found during the main quest “Shapen in Iniquity” where you must find Arkes Circlet. Once you have found the circlet, continue through the sewers where you will have a hidden door on your left that you need to enter. You will see the white arrow of an NPC on your mini map. To get to Almain, you must jump into the large hole that goes into his living quarters.

Reborn
–
*Hidden Achievement*
You were reborn from the Well of Souls, and have escaped Allestar Tower
This will be the first achievement you unlock and will be given once completing the games tutorial mission.
Combat Related Achievements

Reckoning Rampage
사망 5 enemies with a single Fateshift
The Fateshift meter is the purple bar below your health bar that fills up during combat and can be used once you complete the tutorial mission. Once you find a grouping of at least 5 enemies activate Fateshift and attack the group until all 5 enemies have a “context sensitive” button above their heads. Then to unlock the achievement press that key or button to “Reckon” one of the enemies where all 5 will be killed simultaneously.

Niskaru Slayer
사망 25 Niskaru
You will most likely unlock this toward the end of the game since Niskaru will be much more present in the game as you’re concluding the adventure. Niskaru are the bigger demon looking beasts in the world.

Out of Your League
Killed an enemy 4 levels higher than you
This will be easiest to accomplish when you first begin the game. You will know when an enemy is at least 4 or more levels above your level when the name above them is highlighted in red. Continue to travel out of the tutorial starting area until you locate an enemy with a red name and use Fateshift to help you more easily kill them. Once the enemy is defeated you will gain the achievement.

Cleaning Up the Streets
사망 50 산적
Bandits are a very common enemy thorughout the adventure and you will gain this achievement naturally through progression. Bandits are human enemies usually with red headbands.

Trapper
사망 25 enemies with traps
Traps are an unlocked ability located in the Finesse skill tree. Once you’ve applied the necessary amount of points to unlock you can assign to an ability to use in game. In order to gain this achievement you must kill the enemy and not just damage them. Maximizing the points in the Trap skill will aide in this achievement.

Foiled Again!
Parried 100 타임스
When an enemy is attacking you, raise your shield at the very last moment and you will parry the attack causing the enemy to flinch and time qill slow momentarily. If desired you can farm this on a few enemies to gain this achievement.

반격!
Landed 25 special attacks out of Parry
The Riposte ability can be unlocked in either the Finesse or Might skill trees and is available after 50 allocated points. To perform the Riposte move, you must first parry followed by an attack using the correct weapon for the class you unlocked Riposte in.

Would You Like Fries with that?
Landed 100 complete attack chains
A complete attack chains is accomplished when you continuously attack using the standard attack button for your weapon.

Shock and Awe
사망 100 enemies with abilities
Abilities are unlocked under the skill trees when leveling up that become mapped to your controller/keyboard. Simply ensure that the killing blow on an enemy is done by an ability 100 타임스.

And Then There Were None
사망 500 enemies with abilities
Continue from the “Shock and Awe” achievement until you kill 500 enemies..

Juggler
땅 5 consecutive hits on a launched enemy
I was able to unlock this achievement using an uppercut with a longsword to lift an enemy off the ground, and followed by shooting the enemy 5 times before he hit the ground.

They Never Saw it Coming
Backstabbed 20 적
The backstab ability can only be performed with daggers equipped. To backstab you must be crouched and be in stealth, then sneak up behind an enemy until they are highlighted in red and activate to perform a one hit kill on weaker enemies. 이렇게 하세요 20 times to unlock the achievement.
Discovery and Crafting Achievements

Elixir of Fate
Made a potion with the Essence of Fate
To create something using the Essence of Fate you must have a minimum of 5 points in the alchemy skill tree. Creating a potion will require 3 reagents along with an Essence of Fate at an alchemy bench.

It Didn’t Explode!
Made a stable potion by experimenting
This is performed by creating a stable potion at an alchemy bench without first finding the recipe. I unlocked this by just mixing 2 combinations of different reagents together and unlocked it easily. This is best done early in the game before you start finding recipes.

Green Thumb
수확 10 of each type of reagent
In order to unlock you must pick 10 of each reagent listed below out of the ground while exploring. If you are having trouble successfully harvesting reagents, you can add points to the alchemy skill increased your chances.
Black Cohosh
Bloodroot
Cripplespore Caps
Edelweiss
Eel Petal
Embereyes
Leechwood Bark
Prismere Dust
Sativa Fibers
Scarab Salts
Scarlet Flowstone
Scarwood Bark
Seaflax
Sky Blossom
Softscrabble Powder
Star Thistle
Tindertwig
White Flake
Ysa’s Breath

로어마스터
Discovered all Lorestones
있다 195 Lorestones in total in Kingdoms of Amalur. These are found in caves, dungeons and named locations within the game world along with being located around the game world. You can aide in finding them by maxing out the Detect Hidden skill where they will display as bright blue circles on the mini map.

지도 제작자
Discovered 100 위치
To unlock you need to find 100 named locations on the map throughout the game world. You’ll most likely achieve this naturally as you’re playing the game.

The Great Detective
Detected 25 hidden things
You must locate and activate 25 invisible walls usually in caves or dungeons or hidden caches located around the game world which can be found in piles of rocks or logs. You can aide yourself in this by placing points in the Detect Hidden skill to highlight these items on your mini-map.

독서광
Read 50 서적
To unlock you simply need to read at least 50 scrolls or books. These can be found in the game world or purchased from vendors.

Some of This, Some of That
Unlocked a two-class hybrid destiny
To unlock a hybrid destiny card you need to place points into at least 2 스킬 트리. You unlock the first hybrid once you have at least 6 points in 2 trees either Might, Finesse or Sorcery. Once this is done you can select the available hybrid destiny card.

It is Your Destiny
Unlocked a top tier destiny
있다 3 ways to unlock a Top Tier Destiny card by arranging your skill points in Might, Finesse and Sorcery. 옵션 1 is to place at least 109 skill points into a single skill tree. 옵션 2 is to place at least 55 skill points into 2 separate skill trees. 옵션 3 is to place at least 37 skill points into all 3 스킬 트리. Once you meet one of these requirements you will have access to a top tier destiny card which you need to equip to unlock the achievement.

Jack of All Trades
Unlocked a Jack of All Trades destiny
This destiny becomes available once you place at least 2 skill points into each of the 3 skill categories of Might, Finesse, and Sorcery. Once done a Jack of All Trades destiny card will be available to place on your character. Equip this card to unlock the achievement.

Breaking and Entering
Picked 50 locks
You will most likely earn this with natural progression through the story. This achievement can be unlocked by any combination of unlocking 50 chests or doors. Placing points in the Lockpick skill will aide you in this achievement.

오픈 참깨
Dispelled 50 wards
You will see chests located in the game world that have a glowing shiny purple aura around them which are held with a magic ward. Interact with these chests to attempt the dispel mechanic. Successfully dispelling 50 wards will unlock this achievement. Adding points to the Dispelling ability will aide you in this achievement.

A Wink and a Smile
You have succeeded at 50 Persuasion attempts
When in conversation with NPC’s you will occasionally see a dialogue option on the wheel in green with a percentage of success next to it. Adding points in the Persuasion skill is necessary to unlock this achievement. I tried to save often and before speaking to NPC’s in case a persuasion option was present that way I could reload if the attempt failed.

Diamond in the Rough
Crafted a Pristine Shard
In order to craft a Pristine Shard you must allocate at least 3 skill points into the Sagecrafting skill and have a variety of shards in your inventory. To earn this achievement go to an altar test out what the results will be from the combination of the differing shards you have. If your combination does not result in a Pristine Shard just undo the selections and continue to try differing combinations until the result is a Pristine Shard. Once that is available, create the shard to unlock the achievement.

Romancing the Gem
Crafted an Epic Gem
This achievement is very similar to “Diamond in the Rough” but for gems. In order to do this you must have at least 8 skill points in the Sagecrafting skill to crate Epic Gems. As with “Diamond in the Rough” continue different combinations of gems until you can create an Epic Gem.

Master of the Forge
Crafted an item that uses all 5 forge component slots
In order to craft something with 5 components you must have at least skill points in the Blacksmithing skill along with crafting materials. Once you meet these requirements to go a forge where you can create either a piece of armor or a weapon that utilizes all 4 of the component slots and a gem in the gem slot.

Shop Class
Crafted a piece of equipment with Blacksmithing
As the name of the achievement says you must craft a piece of equipment, either a piece of armor or weapon and equip it. This can be done at a blacksmith forge.

To the Victor Go the Spoils
Acquired 10 Unique weapons (Special Delivery weapons excluded)
Unique weapons have their name in purple font and are fairly common throughout the world through natural progression of the story. You don’t actually need to have 10 Unique weapons in your inventory, you simply need to collect 10 throughout the course of the game to gain this achievement.
In Game Action Achievements

완벽주의자
Awarded all achievements
설명이 필요 없음. Acquire all of the other achievements in the game in order to unlock this one which was most likely carried over from the Playstation 4 version of the game.

Good as New
Repaired a piece of equipment
To unlock this achievement you need a Repair Kit and a weapon or piece of armor with some damage that can be repaired. Once you use a repair kit in your inventory, select the damaged item to repair it.

큰 스펜더
Spent 200,000 금
You will have over 200,000 gold well before mid game. To unlock simply go to any combination of shops and spend at least 200,000 gold on anything you can buy.

Bull in a China Shop
Smashed 1,000 사물
To unlock this achievement you need to break at least 1,000 objects in the game world such as barrels, pots and crates.

Five Finger Discount
Stole and fenced an item
You can steal items located in homes or off of people when in stealth. Items will display their names in red when it will be stolen. After stealing something you cannot sell to any normal store and must fence the item in either Star Camp or Gelphyne Nargyfier.

Where’s My Wallet?
Pickpocketed 20 타임스
While in stealth, go up to an NPC and activate then to chance pickpocketing them. The percentage chance of success will be displayed next to the items. Steal something 20 times to earn this achievement.

Jailbreak
You broke out of jail
You can be placed in jail by pickpocketing someone while another NPC can see you. Once caught you will be placed in jail where you are given a lockpick. Simply use it to pick the jail cell door and break out to earn the achievement.

Crime Doesn’t Pay
Spent over 10,000 gold in crime bribes
I earned this and “A Life of Crime” simultaneously. Simply murder an NPC, get caught and then pay the bribe. You can also get caught pickpocketing or trying to steal but the bribes will be much less in value and will take longer. Once you have bribed at least 10,000 gold you will unlock the achievement.

A Life of Crime
Got caught committing a crime 25 타임스
As stated in “Crime Doesn’t Pay” simply pickpocket, steal or murder NPC’s and get caught at least 25 타임스.

Streaker
You spoke to someone while not wearing clothes
Simply remove every piece of armor or clothing along with any accessories you have equipped. Then when your character is wearing only underwear you must go up to and speak to any NPC to unlock.

I Regret Nothing
Fell to your death from the Idylla Concourse
This can be done as soon as you enter Idylla. A cutscene will play with Secandra discussing a big square hole in the middle of Idylla. Simply walk up to the hole and jump off into it where you will die and gain this achievement.
The Legend of Dead Kel Achievements

Message in a Bottle
Located all eight message bottles in Gallows End
You can travel to the island of Gallows End when participating in the Dead Kel missions. Located on this island you will find bottles washed up on the land that you need to activate. 있다 8 in total that must be found and are located as listed below:
1. Once you awake from the ship crash you can find a bottle located to the right side of the area.
2. To the left of the entrance to Souldeep Fasting.
3. At the bottom of the ramp leading to Tidal Pools. You need to jump from the platform the gallows are on in Cape Solace to reach this area.
4. 에서 “middle finger” of the northern shore of Scuttle Beach.
5. Directly across the river from Aubrey Gilcrest.
6. 에서 “outdoor” section of Mudhold Fasting, where the woman for the side-quest is located.
7. 에서 “outdoor” section of Undersea Fasting, the very farthest point of the dungeon.
8. Just outside the entrance to Brigand’s Hideaway. You must start the side-quest “The Exiles” after completing the main quest to access this area.

Keep on Rising
Gravehal Keep has been fully restored
You need to complete the quest “Gravehal Keep” from the dwarf Padrig Dower in order to obtain the option of restoring the manor. This achievement requires bundles of materials such as sailcloth, emberwood, beathstone, seasteel and bearhide that can be found in the game world so make sure to always add these to inventory when found. Once you meet the requirements of each upgrade, travel back to Padrig so that he can work on the upgrade. This upgrade will take 1 in game day to complete before you can speak to him again about the next upgrade. In total there are 7 upgrade quests you will have to complete in order to unlock this achievement.

Exterminator
사망 50 Scavs
Scavs are a rare enemy similar in stature to Niskaru but differing in color and located in Gallows End. Once I had completed all of the Dead Kel missions I was able to travel around the island back and forth between Souldeep Fasting and Undersea Fasting in order to find enough to kill and unlock the achievement.

Murder Most Fowl
사망 50 Pteryx
Pteryx are fairly rare large chicken like enemy creatures located in Gallows End. I was able to find them in Sewers of Idylla, Berenike’s Camp, Southern Passage and Shrine of Air.

Give Her a Hand
Found Aubrey Gilcrest’s severed hand
You will gain this achievement upon looting Audrey Gilcrest’s severed hand while completing the “Scattered Fragments” 탐구. Upon speaking to Aubrey you will recieve a single piece of a treasure map and are tasked with locating 2 more to complete it. Treasure map fragment locations are listed below. Once you find the other 2, go into your inventory and “사용” a fragment to combine them together. This will mark a treasure on your map and requires you to travel to that location and dig it up. Once done return to Aubrey where she will give you another single map fragment. Repeat this process four times to locate all of the treasure. Once this is complete you You’ll need to kill then loot a crab that has eaten her hand located near Mudhold Fasting.
Northern Coast
파편 2 – Mudhold Fasting – On the very left path, after jumping down, you’ll come across a few skeletons. In the chest in the right corner.
파편 3 – Mudhold Fasting – 마지막에는 (맨 아래) of the dungeon, the outer part, in a pile of wreckage between two torches.
Jawbone
파편 2 – Souldeep Fasting – After opening the very first fate door, 드롭다운. The very first chest on the right. You can’t collect this fragment until you’ve started the Until Death Main quest.
파편 3 – Siren’s Den – Follow the path on the left. In a chest at the very end, 왼쪽 상단에.
Cape Solace
파편 2 – Cliffbreak Fasting – Follow the path on the right. After a second encounter with a few Scavs, in the chest on the left.
파편 3 – Brigand’s Hideaway – Follow the path on the left. Once you’re in the water, keep swimming on the right side. After a small swim, you can continue swimming or go left to land. Go on land and follow the path until you have to jump down. It’s in the pile right behind you after jumping down. You can’t collect this fragment until you’ve completed the Main quest line and started the ‘The Invaders’ side quest afterwards by talking to Alder Malloi in Cape Solace.

Manic Pixie Dream Elf
Wooed Rast Brattigan
This achievement can be gained after the completion of the Dead Kel questline and speaking to Rast located in Camp Solace. Starting with your very first interaction with her when washed up on the beach, always speak to her and select the “멋진” dialogue option that is on the right area of the dialogue wheel during conversation.
이것이 오늘 우리가 공유하는 모든 것입니다. amalur의 왕국: 다시 다시 반입 가이드. 이 가이드는 원래 작성자가 작성하고 작성했습니다. 사장 302. 이 가이드를 업데이트하지 못한 경우, 다음을 수행하여 최신 업데이트를 찾을 수 있습니다. 링크.