- 제목: Grow Defense
- 출시일:
- 개발자:
- 발행자:
Information about Grow Defense is still incomplete. 이것을 사용하여 게임의 세부 정보를 입력할 수 있도록 도와주세요. 문의 양식.
This guide is the ultimate guide about everything that might be useful for those who still figure out how to beat the game and won perfect game achievement.
업적
Common Achievements
- Unlock the mage tower
- Reach Experience Level 40
- Complete round 200
- 가지다 1 million gold in your pouch
- 마스터리 레벨 도달 3
Mega Bosses
- Defeat The First Boss
- Destroy your first Mega Boss
- 패배시키다 5 Unique Mega Bosses
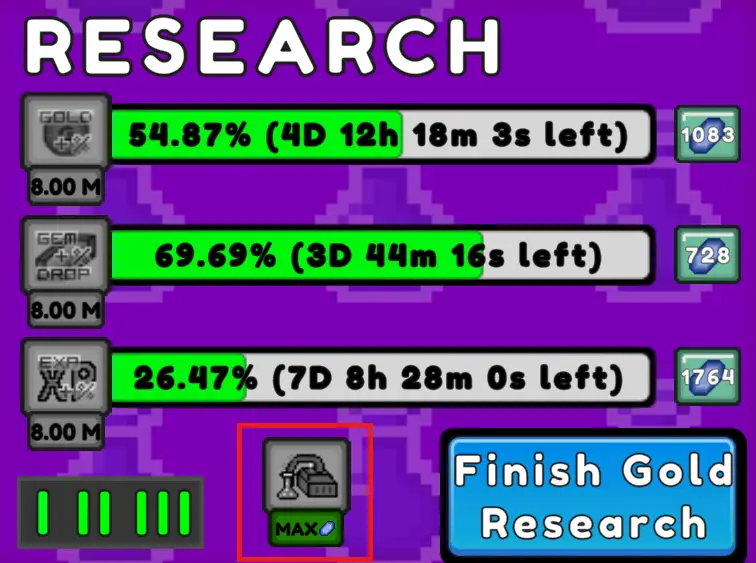
Researches
- Complete your first research
- 완벽한 10 researches
품목
- Max an Items Level
- Find your first legendary item!
- 맥스 5 Legendary Items
보석 & Power Gems
- Stock up over 50 보석
Finger Bang (Mouse Clicking)
- Finger bang the screen over 100 타임스
- Finger Bang the screen over 100000 타임스
Secret Achievements
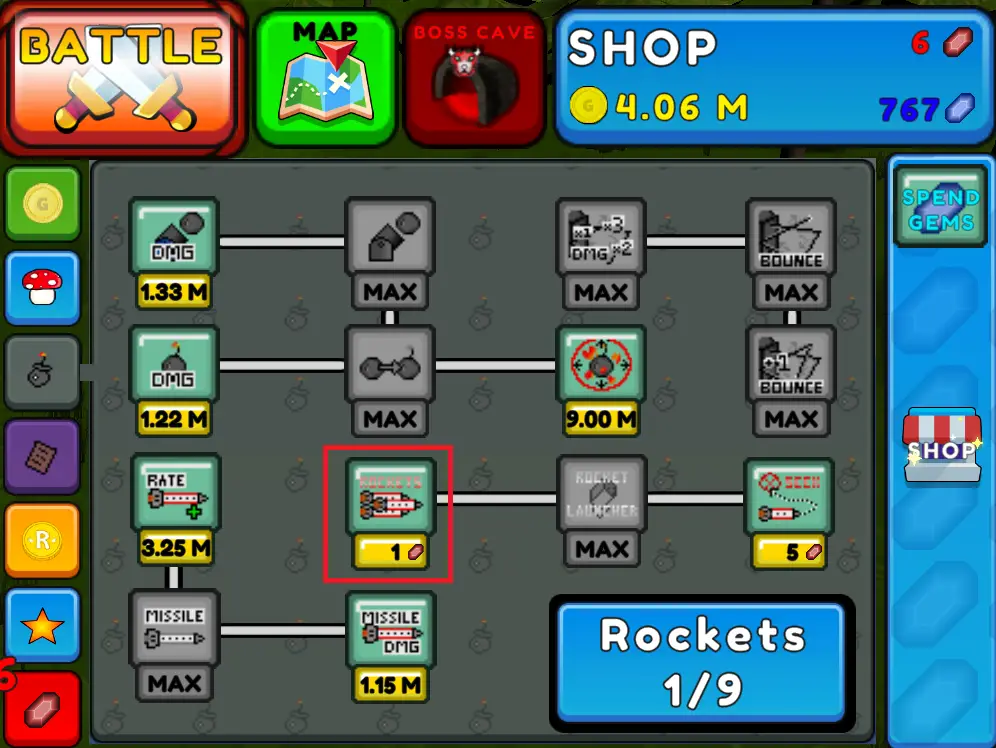
- Max out Rockets for the Rocket Launcher

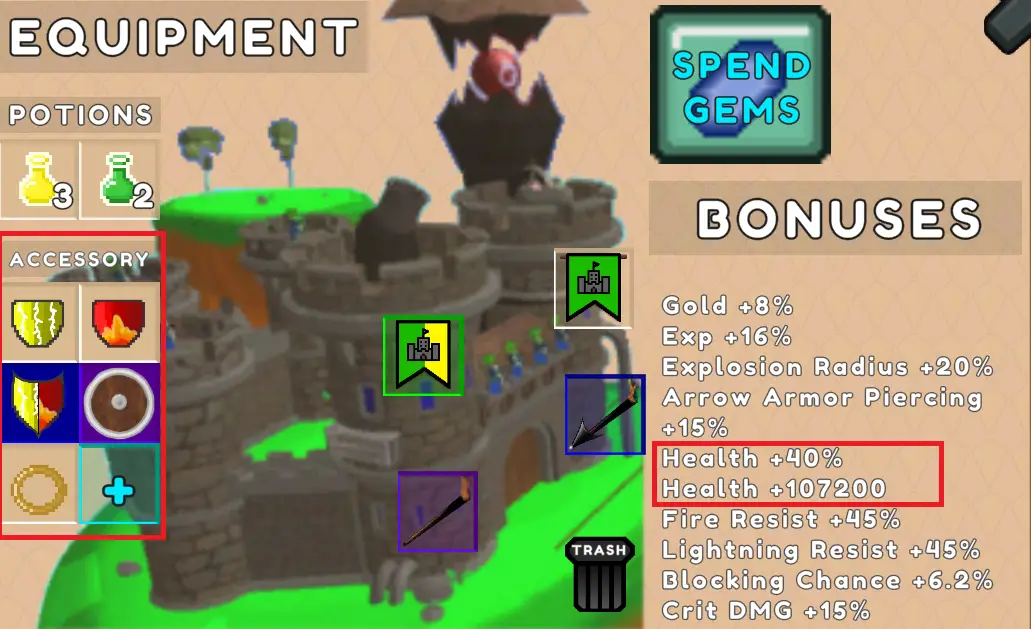
품목 & 지도
The inventory consists of 3 types of equipment which are Accessory, Banner & 토치.
Each type will have limited slots hence not all items can be equipped.
Available Accessory Slot: 2 [Can be upgraded max to 6 slots by spending Gems]
Available Banner Slots: 2
Available Torch Slots: 2

- Additional 1st Accessory Slot – 2000
- Additional 2nd Accessory Slot – 4000
- Additional 3rd Accessory Slot – 6000
- Additional 4th Accessory Slot – 8000
섬 (파도 1-500)
종범
- 우드링, Arrow Damage + 5%, +0.03% 레벨 당
- Bronze Ring, 건강 + 20%, +0.2% 레벨 당
- Pearl Ring, Finger Damage +5%, +0.03% 레벨 당
- 철제 반지, 비판적인 + 5%, +0.025% 레벨 당
- 금반지, 금 + 10%, 0.1% 레벨 당
- 백금 반지, All Damage + 5%, 0.1% 레벨 당
Banner
- Gold Banner, 금 +5%, +0.03% 레벨 당
- Experience Banner, Exp + 5%, +0.03% 레벨 당
토치
- Explosive Torch, Explosive Damage + 5%, +0.03% 레벨 당
숲 (파도 500-1500)
종범
- 번개 방패, Lightning Resist + 10% & HP + 10000, +0.15% 그리고 +150 레벨 당
Banner
- Dual Banner, Exp and Gold + 5%, +0.03% 레벨 당
토치
- Piercing Torch, Arrow Piercing +7.5%, +0.075% 레벨 당
- Radius Torch, Explosion Radius + 7.5%, +0.125% 레벨 당
Mountains (파도 1500-2500)
종범
- Fire Shield, Fire Resist + 10% & HP + 10000, +0.15% 그리고 +150 레벨 당
- Dual Shield, Fire/Light Resist +10% / HP + 10000, +0.1% 그리고 +150 레벨 당
- Blocking Shield, Block Chance +5% / HP + 20000, +0.05% 그리고 +600 레벨 당
Snow Peak
종범
- 실버 링, 치명타 피해 + 10%, +0.1% 레벨 당
- 루비 반지, Laser Damage, +5%, +0.03% 레벨 당
- 에메랄드 반지, 경험 + 5%, +0.1% 레벨 당
Sky Zone
종범
- 우드링, Arrow Damage + 5%, +0.03% 레벨 당 [Duplicated]
- Pearl Ring, Finger Damage +5%, +0.03% 레벨 당 [Duplicated]
- Bronze Ring, 건강 + 20%, +0.2% 레벨 당 [Duplicated]
- 철제 반지, 비판적인 + 5%, +0.025% 레벨 당 [Duplicated]
Banner
- Gold Banner, 금 +5%, +0.03% 레벨 당 [Duplicated]
- Experience Banner, Exp + 5%, +0.03% 레벨 당 [Duplicated]
토치
- Explosive Torch, Explosive Damage + 5%, +0.03% 레벨 당 [Duplicated]
Mega Bosses
1st Mega Boss

- Midas Glove, Finger Damage and Gold +10%, +0.2% 레벨 당
- 특수 효과 (not upgradable): Clicking an enemy +25% 금
2nd Mega Boss

- Diamond Arrows, Arrow Damage + 11%, +1% 레벨 당
- 특수 효과 (not upgradable): SuperCrit change +10% and SuperCrit damage multiplier + 1.5
3rd Mega Boss

- Rubber Eye, Laser Damange + 10%, +0.2% 레벨 당
- 특수 효과 (not upgradable): Laser Bounce Damage +50%
4th Mega Boss

- Missile Banner, Explosive Damage + 11%, +1% 레벨 당
- 특수 효과 (not upgradable): Equips Another Missile Launcher
5th Mega Boss
- N.A.
- 특수 효과 (not upgradable): N.A.
Main Weapon Selection
The main weapon upgrade will impact how far the progress you can go with minimum effort to conquer higher wave.
Finger (Mouse Click/Hold)
- Most basic weapon
- Less Cost
- Medium Damage
- Good Weapon for Early Wave once unlocked Constant click upgrade
- Works well with legendary item Midas Glove (Obtain from 1st Mega Boss) with more 25% Gold from monsters which been clicked
- 제안: Upgrade few levels till constant click skill unlocked, keep upgrading to level 90-100
화살
- The great weapon for early wave
- Medium Cost
- High Damage to single target
- Good Weapon for Early Wave / Mega Bosses
- Works well for early wave with several items buff for arrow damage/critical damage
- Critical Damage ✅
- 제안: Mainly focus the upgrade of increase archer amount and arrow fire rate. It is suggested spend remaining money for the arrow damage when player level under 300 (due to the Mastery Skill, ultimate will required to use mushroom to wipe the point spent).
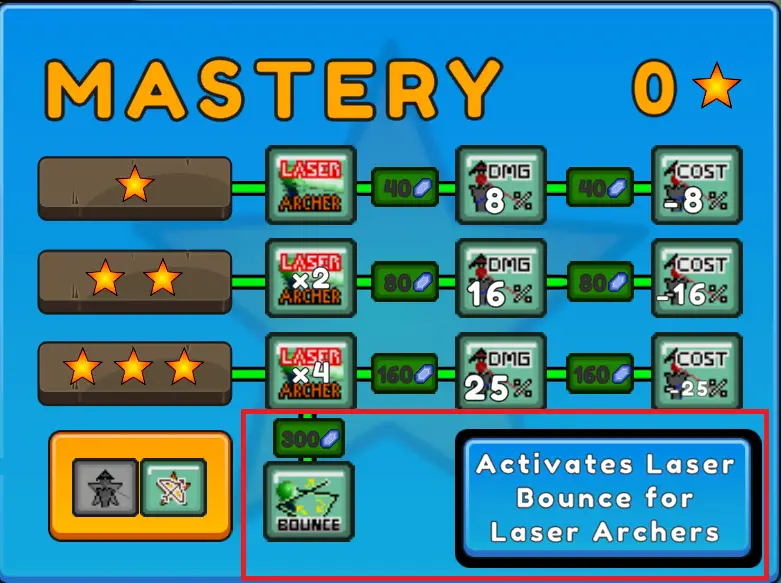
원자 램프
- The best ultimate weapon
- High Cost
- Late game best weapon for wave clear
- Laser Mastery: Transform Archers to become Laser Archers & Activate Laser Bounce
- Critical Damage ❎
- 제안: The laser bounce is necessary to be upgraded once decided not to use arrows. The laser is the ultimate wave clear weapon because starting from Forest Map, there are the healers which arrows unable to handle and difficult for wave clear. 하지만, the items and mastery upgrades are high cost hence it is suggested to have at least 1B Gold before deciding transform arrows to laser for the wave clear.
미사일
- Not useful weapon
- High Cost
- Critical Damage ❎
- 제안: No suggest to spend gold on the missile upgrade, unless you want the secret achievement Barrage From Above, but it only required one time for this.
Cannonballs
- The great weapon for early wave
- High Cost
- Critical Damage ❎
- 제안: Can spend few gold for cannonballs when early wave clear, but it is still not suggest to spend gold on this due to the unnecessary upgrade will drag the wave clear progress
보석 / Power Gems Spending
The gems & power gems are rare items but it’s obtainable from game progress or spend real money for better game experience.
보석 (파란색) are obtainable from
- Drop from monster killed with low rate
- Perform Local Save per day (10 보석)

- Drop from mega bosses (Guarantee 1-3 보석 )
- 12 Hours Treasure Rewards (1-10 보석)
- Per Level up (1 보석)
Best Place To spend Gems (파란색) ~에
- Unlock Research Task Slots up to 3
- Buy Inventory Slot, it is suggested to have at least 5 empty inventory slots for the item dropped especially when doing wave clear
- Buy Accesory Slot, it is expensive but worth to buy it as it is significantly increase the game progress with more items equipped (gold/exp/damage buff)
- Unlock Auto-Merge items skill at least 1 if you are afk player (depends on how often you check inventory for new item dropped and item merged)
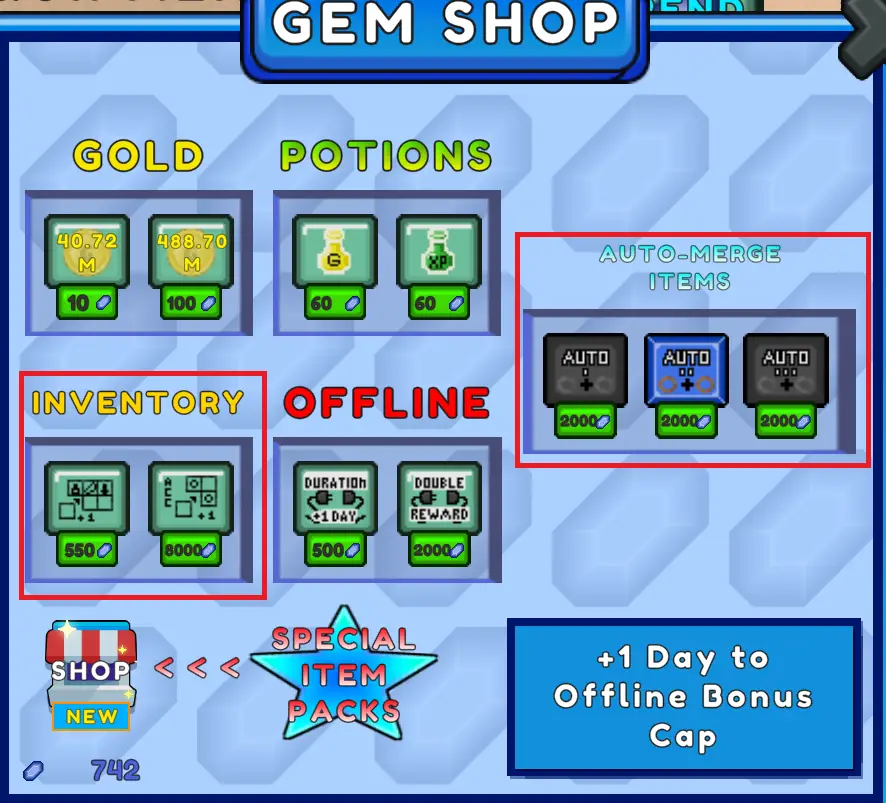
- Exchange Gems to Power Gems

- Increase Offline Rewards
- Skip the rounds/researches by spending gems [Strongly not recommend due to the waste unless you have massive gems]
Power Gems (빨간색) are obtainable from
- 각 25 wave clear (1 보석)
- The map with wave clear approximately 500 but to be confirm the factor of different maps (10+ Power Gems)
- Achievement Rewards
- Exchange Gems (파란색) to Power Gems (빨간색) and it’s last through Rebirth: 100 Gems => 1 Power Gem
Best Place To spend Power Gems (빨간색) ~에
- Increase the damage per weapon upgrade

- Unlock the Rocket Launcher for the Bomb Tower, not recommend unless it is for the one time achievement
Rebirth Mechanism
Rebirth is a process of “soft reset” your game progress but you could able to utilize the Rebirth Tokens that earned from Wave Clear & Mega Bosses.
Performing Rebirth will reset
- Game Progress (모든 지도), starting from Island wave 1
- 경험 & Gold Upgrade
- 재능
- 지배(ies)
- Power Gems Usage, reset the power gems obtained from wave clear but exchanged via Gems
If rebirth will reset your game progress, why still doing it? Because you will able to access Rebirth Shop which bring you the massive buff through spending Rebirth Tokens. Here you go the Rebirth Shop Upgrade and you will know it why it’s suggested to perform rebirth instead of stuck at certain progress.
Rebirth Shop Upgrade
- Increase Gold Earned, 5% per upgrade
- Increase Experience Earned, 5% per upgrade
- Increase Overall Damage, 5% per upgrade
- Reduce Monster per wave, -1 per upgrade
- Multiply Amount of Rebirth Tokens gained per Zone, +10% per upgrade
- Multiply Amount of Rebirth Tokens gained from Megabosses, +10% per upgrade
보시다시피, whenever you feel the game progress is starting difficult, you can start thinking to perform Rebirth as it will give you the buff for next run. Hence the time required will gradually reduced if you have constantly utilize the Rebirth Tokens for the upgrade.
My priority for the Rebirth Tokens utilization:
초기 게임
Rebirth Tokens Multiplier > 경험 > 금 > 손상 > Reduce Monster per wave
게임 후반
경험 > 금 > 손상 > Rebirth Tokens Multiplier > Reduce Monster per wave
Rebirth Tokens Multiplier can be consider as the tokens earned is double/triple when it’s 100%/200%.
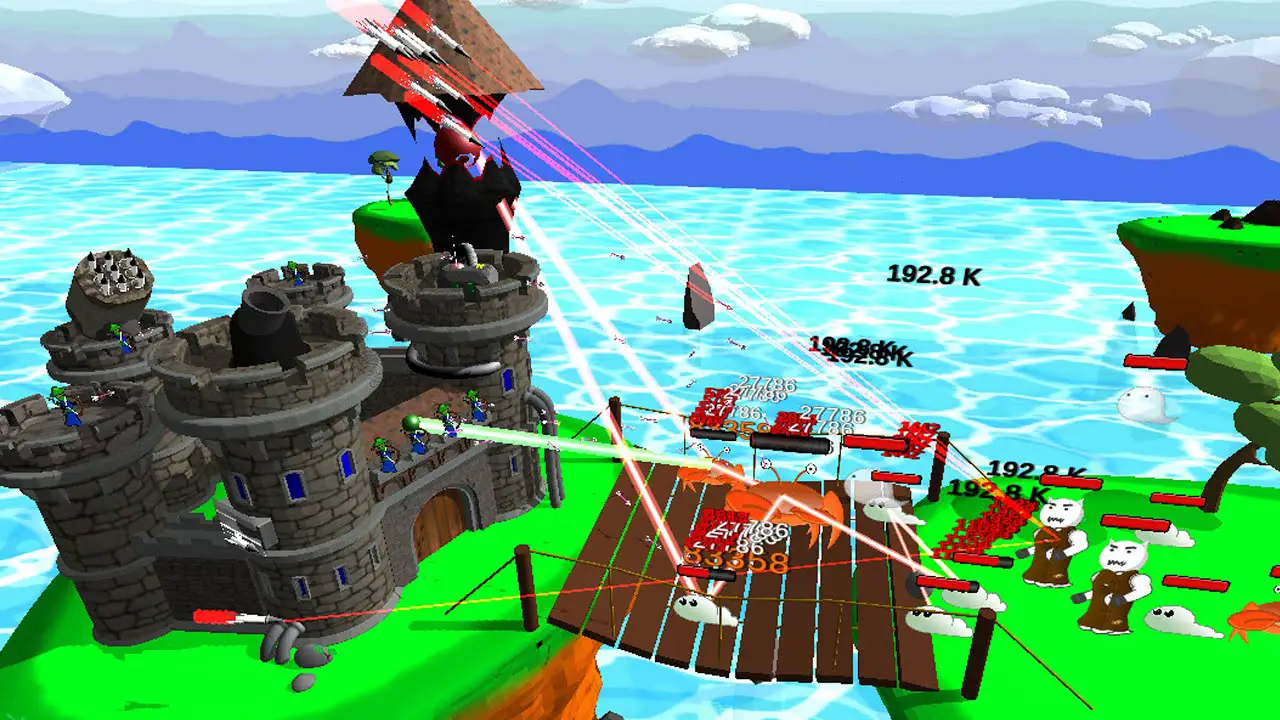
Ultimate Guide
The below is my strategy for pushing game progress with minimum effort.
For early wave/after rebirth, I will mainly focus on finger click upgrade and further constant click upgrade (hold mouse) because of significant damage dealt. The plus point is Midas Glove because of the majority damage dealt is from finger clicks which means the gold rewards + another 25% from monsters. I will spend gold till the finger click upgrade till 90-100 level and starting save gold for the next weapon.
추신: You will need to spend the talent points & power gems buff for your primary weapon upgrade even it’s a small cost of the mushrooms that will be required if you want to reset the points spent. But believe me, you will have more than enough mushrooms if you are following my guide.
Once you starting felt tired (if you don’t have auto clicker), you can starting transform to select arrows as your main weapon for upgrade and wave clear. Please be reminded the talent point and power gem upgrade is also needed to be reset. The arrows upgrade such as arrow archers number is up to 7, so it is advisable to upgrade as soon as possible. The next thing need to be concerned is fire rate, it could be expensive because of the gold required is significantly upgrade compared to damage upgrade. But it have a limit upgrade so no need to worry which you are thinking you are spending too much gold on arrows upgrade instead of preparation for the laser weapon upgrade transformation. 이 시점에서, you should be able to conquer first 3 mega bosses because of arrow weapon have massive DPS to single target. That’s an only exception which you have too low health to withstand the damage from mega bosses, hence you may need to equip the items that can increase your health.
At this moment you will thinking it is difficult for wave clear, so it is the best time to rebirth. Rebirth reset the wave progress and every upgrade but it does lasts some important things such as items dropped, gems and most importantly is you can utilize your rebirth tokens which obtained from waves/ mega bosses. The priority of the rebirth tokens spend will be Experience > 금 > Multiplier of Rebirth Tokens obtained from Zone/Mega Bosses. But to be honest, I will suggested to spend the Rebirth Token on Multiplier of Rebirth Token at least 100%, because indeed it’s an investment if you are constantly performing Rebirth in game.
And you managed to utilize the Rebirth Tokens for Experience/Gold/Damage Buff, but be reminded each Rebirth you start from wave 1 with player level 1, which meant you can continue earn your gems (파란색) from each time level up. I have also stated the best place to spend gems so you know what to do :디.
After you experienced several times of rebirth, I believe you have some legendary items and some items with max levels. 하지만, the most important items will be the legendary items that dropped from 3rd mega bosses – Rubber Eye. The Rubber Eye increased the laser weapon damage and also the laser bounce damage. Hence this is the key point you can starting move your battlefield to Forest Map. Why the laser bounce damage is important because of the healers at the new zone is troublesome, if you lack of AOE damage, you might required spend massive unnecessary gold for the damage upgrade.

Here is the another trick which might be useful when you can’t beat the bosses / mega bosses.
You can equipped the items that increase the Health Point before start the wave/raid.
In between, you can gradually un-equip the items that boosted health points and equip the items that boosted damage/critical.

Items that boosted Health Points
- Bronze Ring, 건강 + 20%, +0.2% 레벨 당
- 번개 방패, Lightning Resist + 10% & HP + 10000, +0.15% 그리고 +150 레벨 당
- Fire Shield, Fire Resist + 10% & HP + 10000, +0.15% 그리고 +150 레벨 당
- Dual Shield, Fire/Light Resist +10% / HP + 10000, +0.1% 그리고 +150 레벨 당
- Blocking Shield, Block Chance +5% / HP + 20000, +0.05% 그리고 +600 레벨 당
이것이 오늘 우리가 공유하는 모든 것입니다. Grow Defense 가이드. 이 가이드는 원래 작성자가 작성하고 작성했습니다. 사장. 이 가이드를 업데이트하지 못한 경우, 다음을 수행하여 최신 업데이트를 찾을 수 있습니다. 링크.