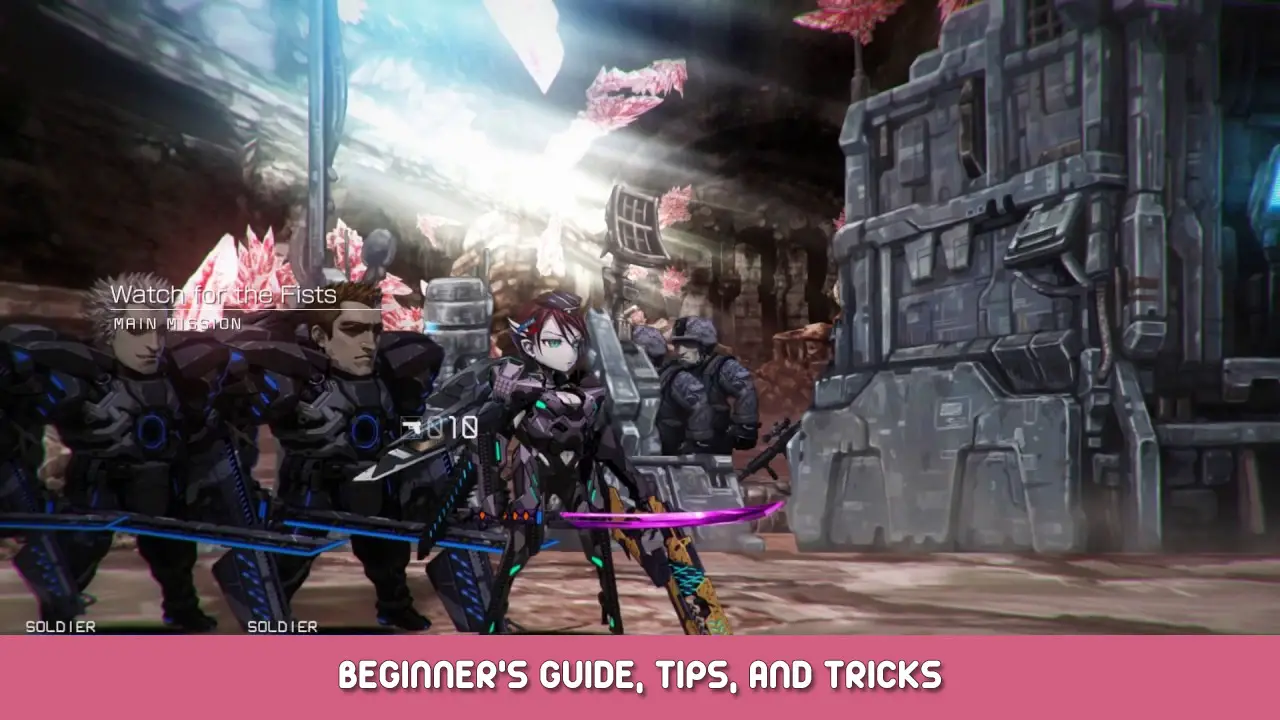
- 제목: EARTH'S DAWN
- 출시일:
- 개발자:
- 발행자:
Information about EARTH'S DAWN is still incomplete. 이것을 사용하여 게임의 세부 정보를 입력할 수 있도록 도와주세요. 문의 양식.
A general list of notes. From basic how-to, to an analysis of obtuse features.
소개
Please note that this guide has some unmarked spoilers- though the especially pertinent items will be marked.
나’m not gonna go on with a big dumb blurb about what you already know. 그것’s a weird game, with a weird story. 그것’s also a fun game that doesn’t like talking about itself, so that leads to a lot of reading tea-leaves about how it works and how to do well at it. 나’m not an expert, just someone who’s done a rather exhaustive playthrough, and bothered to write some notes.
Notes at the top of a section are more basic, notes at the bottom of it are more niche, 더 진보 된, or spoiler-tastic.
임무
여기’s a good start: I have no idea what’s up with your allies following you around.
I suspect it had something to do with a 4-player co-op feature that got scrapped fairly late in development. 어느 쪽이든, they don’t have much mechanical purpose, other than the fact that their disappearance means you’re within range of enemies. If they appear, it means you aren’t in any danger of being attacked (or doing damage even with homing weapons).
그것’s a good idea to open your map at the start of a mission. Not only will it tell you the direction you’re going in, and how far you have to go, 하지만 그것은’ll highlight any objectives that might be scattered around the map.
Missions that can be replayed to gain further unique rewards will be named in white. Missions with nothing new to give appear as gold.
전투
Finishers are performed by doing a standard attack while close to an enemy that is at low health and glowing red, hold forward if you’re still having trouble. Finishers are either ground-based or aerial, depending on the enemy type. If you’re below 50% HP, performing finishers has a decent chance to heal you. All bosses need to be killed with a finisher.
Throws are preformed by doing a standard attack while on top of an enemy. Throwing enemies is very useful. It is a fantastic way to interrupt and enemy attack, which can and will carry you through the first few Elite fights, if you dare to try them as they become available. 그렇지 않으면, it’s also good for extending a combo, and gaining a few I-frames during a tight spot.
You can slide by pressing a down-diagonal and jump at the same time. This move does not seem to have many I-frames at all, if any, but is very useful for getting behind an enemy, and can often be better than dashing or jumping. As a final note, it can be used to extend your combo against an enemy on the floor, though the timing is pretty tight for this.
The gun can be aimed in 7 지도 (never directly downwards).
비슷하게, your boost can be used in all 8 지도 (can be directly downwards).
The boost dodge can be used to give yourself a LOT of air time, when used in combination with jumps. 일반적으로 말하자면, most attacks can’t hit you, if you’ve dodged upwards.
당신은 0 I-frames on knockback. This makes burst-attacks ranged attacks, like missiles, very damaging. 다행스럽게도, these can be hit back with most weapons. Lasers however, 할 수 없다.
Use your meter. If you have it, spend it. The Exceed damage bonus is quite strong, and the bonus to your range in most cases pays off for itself. You do get a bonus for not using the Exceed unit once in a mission, but it is quite small, and generally not worth holding yourself back.
Exceed burst will prevent you from being affected by all status effects. Try to
always keep 50% in reserve if you’re dealing with enemies that can inflict the
really bad effects like:
– 마비
– Frozen
– 죽음
If you’re vulnerable to these status effects convert your HP to meter, 가능하다면.
Boosting is faster than jogging, and faster than running. For all Race missions, try to use all but one dashes if you’re in a room with enemies. Keep the last as a spare, in case something shows up in your way, or spend it if you know there’s nothing in front of you.
The sword spin has some limited, but effective use. It’s generally better to knock back missiles,
but if you can’t manage it, or you’re up against bubbles, or lightning, the sword spin makes you effectively invincible until you stop. Keep in mind that you can’t spin the sword forever, and it will automatically end after a few seconds.
Blocking, used by the ‘longsword’ is a good way to increase your survivability against moves you
know you won’t be dodging. 하지만, seeing as there’s no mobility tradeoff for using the heavier
weapon-type it’s generally better to dash or slide under attacks.
The parry is not an offensive move; Royal Guard this is not. 대신에, it is used to nullify all damage melee one attack does, and instantly reduce the break meter of an enemy. Its use is rather niche for most battles, but it can be good against bosses, Reptilians, Panthers, and Slayers.
Your boost does a very small amount of damage when it hits an enemy that has its guard broken. 일반적으로, this isn’t important, but it can be an annoyance when you break an enemy’s guard, as repositioning towards them can count as a 1-hit combo that will reset their guard meter.
메뉴
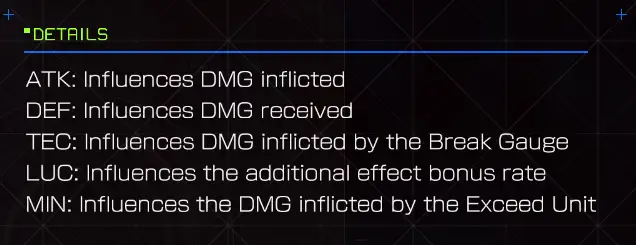
Avatar armor, while cool, is entirely cosmetic. 짓다 “갑옷” if you want a proper defense boost.
There is no real bad way to customize your skills. Turn off skills for weapons you won’t be bringing into missions, to save on points. Skill points cap at 200 which is only a concern for endgame. If you’re doing most missions, points will not be hard to come across, so you probably won’t have to do much in the way of planning tradeoffs.
일반적으로 말하자면, I like to stack one attack with damage, and a ranged attack with TEC. I then break guard with the ranged weapon, and use the high damage attack as a finisher or a general damage dealer. For most of the game, even stacked bonuses are pretty nominal.
Just be certain to remember what skills you have when you go into a mission! Nothing sucks harder than getting 5 minutes into a mission, switching a weapon to extend a nice combo, and just standing there because you can’t attack with that weapon and skillset.
Counter Attack time does not actually occur in real time, as you will see when it starts becoming 12 그리고 48 시간. I feel like it probably did in an earlier prototype for the game, but not any longer. 대신에, it decreases by after you complete a mission. The exact amount seems to be based on how long the timer has remaining but I’ve seen it count down as much as 23, and as little as 2.
비슷하게, while a Counterattack will thrust you into a mission, it’s really just a gauge to test if you’re ready to unlock the next few challenges. There is no punishment for failing a counterattack or simply aborting the mission. These missions sometimes indicate extreme difficulty spikes, and are probably the single biggest filters the game has, so don’t be depressed if you can’t complete one your first go around.
Crafting weapons is a little less involved than it first appears. 일반적으로, a weapon can get an element, and a bonus effect. Using multiple elemental materials or status effects will cause a random one will be selected out of its materials.
Less enemies are weak to an element than you might think. It’s essentially just Fire and Ice enemies being weak to their opposing element. A lot of enemies are resistant to them however, and as a bold and rather baffling design decision
no enemies in the game are weak to Lightning or Dark elements. Plenty are resistant to them, particularly boss variants, so avoid them if you can. Conversely this means that weapons without elements are good all-rounders. Only a select few enemies are strong to physical damage: Reptillian (Cthulhu gunners) and Rock Fist types.
Disassembling weapons does not net good rewards (잘, almost…). Use it to clean up your weapons list, not to get materials back.
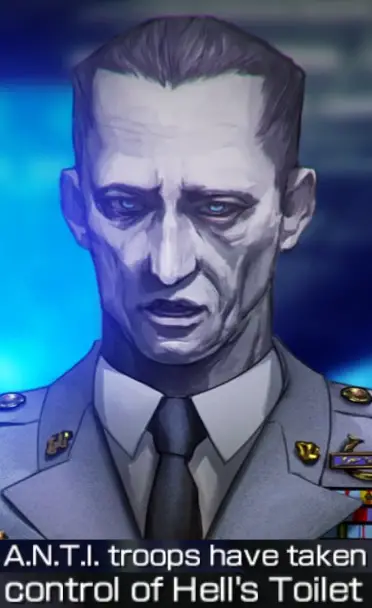
The game will use ‘longsword’ and ‘broadsword’ interchangeably. This class includes things like hammers, and lances. 만약에 “Hell’s Toilet” doesn’t tell you anything, this game has a rather eccentric script, and an equally eccentric translation.
If you find yourself lacking a certain kind of material, you can use the Journal to find what enemy type drops it. To do this quickly, move the cursor to the right while in a crafting menu, and select the item in question, it will highlight how this material is obtained (normally by highlighting the material). This game is fairly grindy, and it may take several kills to get what you’re looking for. Keep in mind that a lot of late-game materials come from boss variants and Elites.
Equipment upgrades really go up in price after about the fifth level-up. If you have something new try boosting it to about level 5 and rolling with it from there. Only if you really like it, should you invest into it more.
Invest in healing, 가능하다면. While the base heal rate is pretty abysmal, by the time you get to Alaska you can pretty easily have 8 healing a second. Not great for combat, but excellent to have in the background between battles, or while coin hunting.
일반적으로 말하자면, set your skill “뇌” to Balance. There is a temptation to go for Attack or Technical, but the health loss really is not worth the cost for casual play. You can be easily one-shotted by some bosses if you go for pure damage, and that translates to some very flighty fighting while attacking even regular enemies.
There is no direct points benefit for playing at the “Ability Limit” for the skill “뇌”, though you may wish to use it if you find you’re killing enemies too quickly to get good combos off. I think this can therefore have a positive benefit for your score indirectly. Defensive can also do this, for a bit less of a trade off, and a LOT more room for error.
Roughly halfway through the game you get the ability to carry two weapon loadouts into a mission. Take liberal advantage of this, even if it’s nearly two identical loadouts. Two different guns on the go means you can essentially fire infinitely, reloading the other weapon as you’re firing. A status oriented weapon set and a damage oriented set are good for different situations, 그리고 물론, different weapon sets for different battlefield situations.
The easiest means of obtaining improvement materials are by fighting the Zombie-type enemies that show up in Dark Cave. Their gear gives huge boosts in resources. Most missions have them spawning infinitely, so they can be farmed with ease. 안타깝게도… Zombies are a god-awful enemy type.
Skill capacity caps at 200 전철기. This is generally only a concern during endgame, and only if you plan on having a Skill Slot handle multiple weapon types. If you need to find room to accommodate all your nice new skills, start turning off old ones. TEC+1’s and HP+5’s in particular are good starting candidates.
무기
Most guns fire differently than the others. Flamethrowers and machine guns are one of my favorites as status dealers and combo extenders, but you may find others more to your liking. The only gun type I wouldn’t recommend are sniper rifles. 일반적으로 말하자면, they’re much too slow to combo with, don’t do any sort of damage not better dealt by a closer-range weapon, and do not readily cancel their shot with a dodge.
The ‘ammo’ feature of the ‘longsword’ is almost universally useless. As far as I can tell, these probably do very minor things like increasing damage, break damage, 치명타율, swing speed, 등. but they amounts are so minor, they are utterly impossible to decipher, even while looking for them. There is one very minor exception to this, which are the spear-type longswords, which have a decent shock wave attack that can hit at good range when they have ammo.
Something tells me the bow is the most underappreciated weapon in the game. The damage doesn’t seem great at first, and while it seems like it would be excellent for styling, the up and down attacks really lack the ability to be easily chained. 하지만, for every arrow inside an enemy, the kick attacks will do more damage. From what I’ve played, this seems to hit a soft after about 10 화살, and a harder cap at 30 but by that point, it shouldn’t matter. Quick kicks doing 300 damage each are no joke, and make the bow a prime weapon of choice for defeating most bosses. Against a single target, it can probably out DPS a ‘longsword’.
The reward for completing the first Arizona mission is the Shuriken weapon. It’s a little half-baked, as you don’t get many across the game, but it is a very fun styling weapon that can hit a lot of enemies very quickly. The Blue Flower’s orbs in particular are fantastic for breaking enemy guard if you pump TEC, and can be used as a passive ability with another weapon set to get free guard breaks while styling.
The default Claw Exceed unit is by far the best one for most situations. It gives good burst damage
and can do insane break damage. Draw will ‘draw’ you towards an enemy, 어느, while good for styling, is incredibly situational, benefits you only when you are already in a good situation, and provides no innate damage or break bonus. Decoy does so little it may actually be bugged, I have never seen effective use with it. 내 생각엔’s supposed to attract enemies into attacking it, but seeing as most enemies don’t have an anti-air move, 그것’s a rather strange inclusion.
Dual-Guns most likely will require a dedicated hour of grinding to obtain (보다: Completionism segment below on Gun Mastery) which might seem a bit ungodly. Even more unfortunate, the style is pretty much just a novelty. Unlike Bow, there’s no means of inflicting major damage with guns, and the break bonus is not particularly absurd, nor easily to capitalize on. Worse yet, it even lacks the utility of the Shuriken, restricting it almost exclusively to a status-dealer and combo maintainer. As those, it performs decently, and can be a good complement to the ‘longsword’, which otherwise struggles due to its low hit rate. Perhaps most unfortunate of all, is that there’s no spectacle to Dual-Guns: 당신은 할 수’t fire them at the same time.
적
Elite enemies are no joke, and the first few can easily one-shot you when they first appear. They are also, excellent enemies to practice your combos on.
It’s generally a lost cause to break the guard of flying enemies, as they don’t naturally hit the ground, their guard meter seems to reset incredibly quickly. It can however, still be a useful tactic later on in the game to take off a bit of heat before going in for your own attack, as their patterns become quite aggressive.
You shouldn’t be too afraid of flamethrower-type attacks, unless you are vulnerable to the status effect they inflict. If they’re doing chip damage, it’s better to face-tank it and inflict damage rather than dance about afraid to commit to attacking anything.
All missiles will destroy themselves over time / 거리, 하지만 그것은’s better to block or reflect them.
Zombies are by far the worst enemy type in the game, entirely due to their god-awful grab attack. 여기’s what you need to know for when you’re first trying to deal with them:
- It has about a 20-frame windup (faster than it takes to do an Exceed burst, so be sure to trigger that from range).
- It crosses about a third to half of the screen (depending on the zoom level) at about running speed.
- It does very high damage when you can first encounter it (equivalent to a panther slash).
- It can be triggered from off-screen (IE: you can dash into it).
- It interrupts nearly all your actions, though it can sorta be parried to stop the actual grab proc.
- It can often inflict annoying debuffs like Paralysis. 이런 일이 발생하면, dash directly upwards, then sideways to be as far as you can from the enemies to do an Exceed burst.
- There is no limit to many times in a row they will do the grab attack.
- It heals them while it happens, though this isn’t generally a concern.
- You can’t slide under it to evade.
The best methods to deal with them:
- General keep away strats. Zombies will only do a grab if they are within a certain range, and it is less than the range that the grab will chase for. If you have a ‘longsword’, mash that X button. At the correct range, there’s essentially nothing the enemies can do about it. Resist the temptation to style if you can. There’s no points advantage to doing so, and it’s not worth the risk of closing the distance and getting grabbed.
- Never do a running attack or slam attack with the sword. Their grab takes priority.
- If available, use fire weapons for extra damage. Avoid dark and lightning.
- If available, use confusion weapons to reduce pressure.
- As a minor note, I believe only one Zombie can start a grab attack while on-screen at a time. It’s exceedingly rare for two or more to charge you at once. Small mercies.
보스
Bosses are the game’s major filters, 그리고 (reasonably enough) some of the hardest challenges in the game. Most are serious damage sponges, 그래서’s better to first learn how to dodge their attacks, rather than how to inflict damage.
Cerberus-type: Attacking a side will do damage to one of the heads. Breaking one head will remove one attack the boss can do, but also give it a fire-burst pattern which
moves in a figure eight. Dodge upwards if you can, these bosses have a very difficult time hitting you up in the air.
Rock Fist: Dodge back for a regular punch, up for a glowing punch, and up if there’s a spin-attack incoming. Use a gun to keep the pressure up and be sure to use Exceed!
In phase 2, stay close to the boss. A simple dash upwards and then arieal combo will do good damage, dodge the fire, and the impacts.
Lorelei: Will move to heal when one of its limbs are damaged, and will do so more often earlier in the battle. 후에 3 또는 4 heals it will stop healing. Use ranged weapons to keep damage up while it attacks, and target the main body as often as you can. Use Exceed to go for big damage once it hits 25% 이하.
거대한: Bow destroys. Stay at the far end of the platform when it’s charging an attack. Devolves into a bit of a DPS-race at the last phase. Remember that it’s better to take geyser damage than it is to take a hit from the boss itself.
Crawly Ogre: The boss fight is a serious battle of attrition, with several segments to get through before you actually get to the boss itself. While dealing with the tail, prioritize canons first and foremost over anything else. Enemies spawn infinitely until all canons are taken out, and even hazards like Dungbeetles are less of a threat when they are left to the end. Canons will gain laser pointers shortly before they attack. Use this opportunity to quickly land on the ground, do direct their fire downwards, or gain jumps / dash for an evasion. Prioritize canons if you can as well, generally: 미사일 > 빔 > Machinegun.
The boss fight itself is not too absurd. Stay close to inflict damage, and time your dodges / 패리 / reflects as it attacks. Stay on the ground, especially against the boss variant.
죽음: Becomes vulnerable to damage when a Zombie-type is killed. Is the only enemy in the game that casts the Death status effect, which will instant-kill in about 10 seconds if its not healed. Equip Death Cut to hedge your bets, or use good timing with Exceed if you want to be fashionable about it.
Big Foot: Stand behind the boss at all times for back attack bonus. Be especially careful of the silly slide move’s follow-up attack. The bellyflop kick may most damaging single-hit attack in the game.
Gigantes: A bit of a pushover. Use dash to stay close to the boss, and go for back attack bonus damage. You can also stand on this boss, 당신이’나는 좋아한다. 거기’s little advantage however, as it has dedicated attacks to knocking you off its head.
Kraken: Tentacles respawn, and they respawn quickly. Destroy one to make room for the fight, then continue the battle while staying behind the boss for as long as possible. As tentacles attack, dodge upwards.
검투사: Stay close so that you can rapidly switch sides and always be hitting it’s 뒤. Use Exceed at all times to inflict as much damage as possible. Completely disengage or guard with the ‘longsword’ when the falling spears attack begins. More spears appear closer to it, than away from it. 조심하세요, this boss can easily kill you when it reaches a low percentile- it can and will do over 1K damage in combo hits.
Nephilim: 당신이’ve gotten to the boss, the worst part is already over. On your first time through the level, it may well have been a 45 minute long slog through all the combat zones, including what might be a very rough one with a bunch of Raiders early in.
Treat this boss as a vertical battle, with a good number of aerial attacks to its forehead. Hug as close to the boss as possible, and wail on it between attacks. When a tentacle appears, dash upwards (아니면 아래로) to avoid it and proceed to hammer away. When it charges a beam, move up to attack it in the forehead. Ignore enemies the boss spawns, unless you have the Exceed finisher and need a top-up of HP. Remember that you can dash-cancel at the end of an aerial attack string to come back up and continue attacking. All and all, this is a mercifully easy fight.
Final Boss: Here comes a big one. You might find the most hazardous part is the floor, and all the knockback you’ll be getting if you get hit. For the first part, you can quickly get to the main section by making direct boost upwards and then over to the platform to the upper right. If you go directly, you risk getting spiked by the left arm. 그렇다면’s too risky, use the left route.
The safest place to attack the boss’s body is in the belly of it’s head, as you will be able to dodge most of its attacks from there just be sure to not complete any air combos with attacks you can’t dash-cancel! The same goes for the core, once that comes free. Through-out this fight, hit back any missiles that come at you for a major damage boost.
The second phase is quite short, as it doesn’t have much HP- but it is quite a cluster-♥♥♥♥ of attacks and it can be hard to reach through them all. 거기’s a lot of different patterns, but the important ones are missiles (excellent way to do damage while also staying defensive) and the beams – which circle the arena in a clockwise pattern. Try to slot yourself between them, or where the first one shot out from (usually bottom left if you’re on the main platform). When its HP finally runs dry, go in for the kill!
Good luck and… have a safe landing.
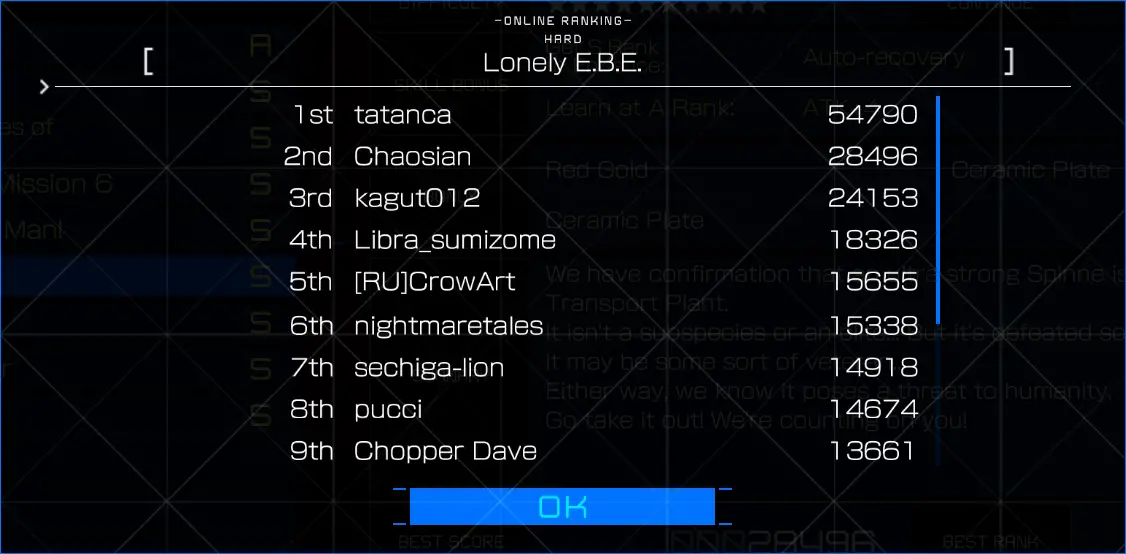
Post-Mission Scoring
Most point bonuses can be safely ignored. First strike, brilliant boost, multi-combo, use a ton of skills, recover items, recover gas cell, and use a throwing item are essentially gimmies that will occur in every mission.
Point bonuses do not stack and you cannot have multiple of the same type. Things like juggling and back attacks are hard bonuses you get for doing an action once.
Points List
If you find more about one of these, or find another, feel free to leave a comment.
S Ranks
Combat points isn’t the only indicator of final rank. You can do a mission, get an E in combat, and complete the mission with S- but it is one of the largest sources of points, and getting it high is integral for some levels.
So here’s what you really want to know, 무엇? “How do I get points?”
나’d like to think that this game has a big, involved scoring system running in the background that’s really in-depth and complex, taking into account your attack variety, amount of damage you took, and speed… but sadly, that just isn’t the case.
The single greatest indicator for score is your “Max Hit”, which comes up in the combat text that appears after you stop attacking enemies for a few seconds. 그것’s very easy to miss, and I only noticed it after I first beat the game. In order to keep that number high, 그것’s best to keep a berserker-mode mindset. Never ever let up, always be up in the face of the enemy, attacking, and when you have to back up, keep pressure on with a gun or ranged weapon. 너’ll see that hit count go way up, and your ranks will benefit as a result.
See the last note in this section for a related cheese for easy S-ranks.
The most economic score bonuses are the ones related to only doing left or right hand attacks, for 1K. 일반적으로 말하자면, guns and the second sword are auxiliary weapons. If you’re shooting for an S rank, such as if you’ve already an A, try to go without using them. Using just a ‘longsword’ is a good way to earn this. If you do use a gun, at the very least get the Juggle bonus of hitting an enemy while it is in the air.
For the S-Rank achievement, 오직 60 S ranks have to be achieved for final mission scores. Seeing as there’s 101 missions in the game, there’s quite a lot of leeway involved.
Missions that don’t lock you into a combat zone, generally have very easy requirements for S Rank. If you’re struggling at all, try to go through the level without using a Left-handed weapon.
If you have a mission where there’s only one target, like an Elite Mission, do not kill enemies along the way. 그것’s much better for your score if you kill “모든 적” with a finisher so as to earn the related point bonus, which is one of the best in the game.
Race Missions in particular do not have a very high rank requirements. Simply completing them at a good pace should give S ranks.
Wanna read something revolting?
Easy S ranks:
- 선택 과목: Obtain Dual-Guns style. (보다: Completionism, below for how to grind that out.)
- Build two automatic guns, Thousand Leaves is an optional choice for its high fire rate, large magazine, 정확성, and middling damage.
- Enter the mission you’re having trouble with.
- 전투 중, empty all rounds into an enemy with one gun. 그 다음에, as the gun is reloading, begin firing the other machine gun. 이 방법을 사용하면, 그것’s very easy to end up with a Max Hit count in excess of 200, which will boost your score up so high, 너’re almost almost guaranteed an A or S, depending on the fight.
Completionism
Weapon Master Skill progression advances when you press the trigger button, NOT how many hits strike an enemy. This makes automatic weapons (화염방사기, Machinegun) very poor choices for ranking up gun mastery. 하지만, it does mean you don’t need to even be in a fight. Find a quiet area, and just swing your weapon around- 원한다면.
Gun Master, is unique in that you can easily grind it while also gaining lots of materials, and at no risk of damage.
- Obtain the gun “Under Snow”.
- Unlock missions in Dark Cave.
- Select any mission in which Zombie-type enemies spawn infinitely, such as Empty Death.
- Proceed to the room “Massive Underground Network Center” roughly in the middle of the map- it is a large hub room that connects to four others.
- On the far side of the room, there is a ledge that leads to the right-half of the room, and not far from that, a ledge that leads up and to the right to “Collapsed Link Road 1”.
- Stand on the ledge, with one foot on it, and another off it.
- Mash shoot. 경고를 받다, this will take a very long time to gain mastery, but thanks to the infinitely spawning zombies below, requires minimal effort.
- In this position, a zombie will likely try to repeatedly wander back and forth trying to grab at you from under the ledge, which will, annoyingly, prevent you from hitting it sometimes.
- 가능하다면, draw two into position under you, this will increase the odds that you’ll be hitting something at all times.
Once you complete all optional missions, a special bonus mission is earned.
금화

There is always one Golden Coin hidden in every room.
Golden Coins can be obtained during combat, and do appear in combat-locked zones (albeit rarely).
일반적으로, it’s best to collect a coin the first time you enter a room, so as you don’t forget what you
have and haven’t collected. 당신이’re stressing out a bit, you get a tracker on your map at that shows what rooms you missed coins in, once you beat the game.
Golden Coins will carry over between mission areas. You won’t need to re-scout rooms between New York and Dark Cave, 예를 들어.
Golden Coins are almost universally placed in generous locations. Try checking the floor, at the location of a natural jump or natural landing, or a short distance above the floor. Only a few are lined up with something in the background, such as the top of a tree in a forest.
이제 당신은, are the hero.
(Check your weapon crafting list once you get all the coins.)
Deep Lore
What does A.N.T.I. stand for?
ㅋㅋㅋ
What does E.B.E. stand for?
lmao
What happened to the Commander?
Although he’s still there giving orders at the start of every mission, he sorta drops off the map after Alaska. Given his degrading condition however, 그것’s most likely he succumbed to the rage that can consume A.N.T.I. 군인.
What the hell happened in that ending?
As the boss is destroyed, the Home World follows, and you with it. What is revealed after the credits however, is that you are still alive and well, brought back by the Doctor. She reveals that this is part of the A.N.T.I. procedure: they obtain a volunteer brain injected by E.B.E. cells and implant it inside the host body of another, which destroys the personality and memories of the host. The combination body however, is extremely strong, and becomes an A.N.T.I. soldier. This has likely happened many times, potentially making all your deaths while playing, canon. From the flashbacks, it seems that your first host body was gravely injured during a battle, and that the Doctor found them and preyed upon them to create you. 거기’s also some hints during optional missions that A.N.T.I. troops are also made using dead bodies, 그리고 그것’s possible that these are all from hosts recovered from the battlefield, volunteers, 또는 “volunteers”.
Other Oddities
There are pink blocks at the top of the center shaft in the Power Plant. 내 지식으로, these can’t be destroyed.
The first ‘longswords’ are called “probes”. “Probe Ein”, “Probe Zwei”, “Probe Drei”, “Prove Vier”. There are improved versions that share the names “Ein”, “Zwei”, “Drei”, 그리고 “Vier”, but none of them look like their probe counterparts.
어떤 이유로, you can stand on Big Foot and Gigantes.
It’s possible to walk behind some pink blocks. 예를 들어, load up a boss fight mission in Dark Cave. Rather than walking forward, turn around and to the beginning of the area that leads to the Dark-Cave specific wing. You will be able to walk through the pink block that locks off the area, despite it being solid from the other side.
There is no Journal entry for Big Foot for some reason, perhaps due to related story reasons. Its variants however, do appear.
Enemies struck by confusion have a habit of flipping around back and forth between you and an enemy. I think this is a bug related to targeting range.
If you pause the game during a music transition, you will also pause the transition of the music fade. You end up hearing two different songs playing at different volumes.
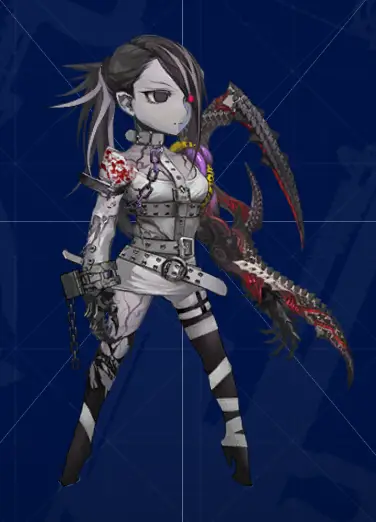
Female main characters are better than male ones. This is because they have a smaller visual profile and are easier to see on the already crowded screen. They also always have their tits out.
“Your liver is cold.”
이것이 오늘 우리가 공유하는 모든 것입니다. EARTH'S DAWN 가이드. 이 가이드는 원래 작성자가 작성하고 작성했습니다. Chaosian. 이 가이드를 업데이트하지 못한 경우, 다음을 수행하여 최신 업데이트를 찾을 수 있습니다. 링크.