- 제목: 무기로 부름
- 출시일:
- 개발자:
- 발행자:
Information about Call to Arms is still incomplete. 이것을 사용하여 게임의 세부 정보를 입력할 수 있도록 도와주세요. 문의 양식.
This guide will show you the basics of making a mission mod in Call to Arms.
기초
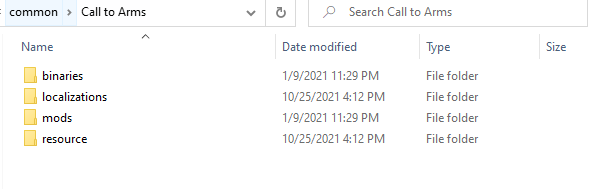
For this example, the campaign will be called “campaign1” and the first mission “mission1”. These will be placeholders for your mod actual campaign name and mission. In this guide change these to your actual campaign and mission names. You will also need to know the Call to Arms folder location which will be in
씨:\프로그램 파일 (x86)\Steam\steamapps\common\Call to Arms
단계 1: 지도
In the location of your mod make a “resource” 접는 사람, inside that make a “지도” 접는 사람.
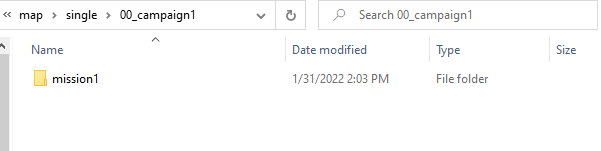
then make a folder called “single” inside of that. Then make a folder for your campaign starting with “00_” so it appears above the built-in campaigns. So for this example, that folder would be “00_campaign1”. This folder will be where you place you place your missions. So in our case, we put the map with mission inside the “00_campaign1” 접는 사람. So our mod should have a folder tree like this
mod_folder\resource\map\single\00_campaign1\mission1
단계 2: Environment
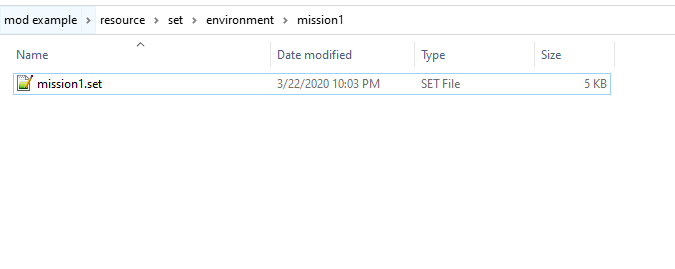
If you didn’t make your own environment for your mission and used a built-in one skip to Step 3. If you made a custom environment for your mission make a folder tree like this “resource\set\environment”. Then put your environment .set file in that folder like this:
단계 3: Localization
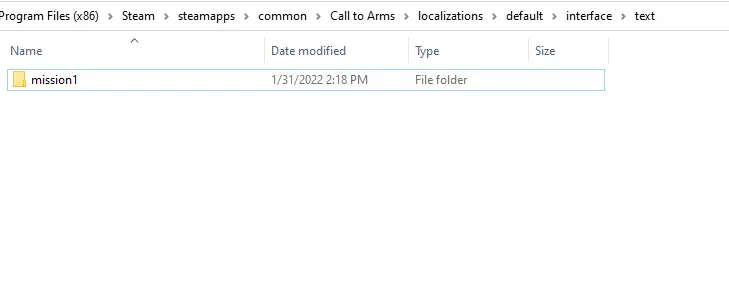
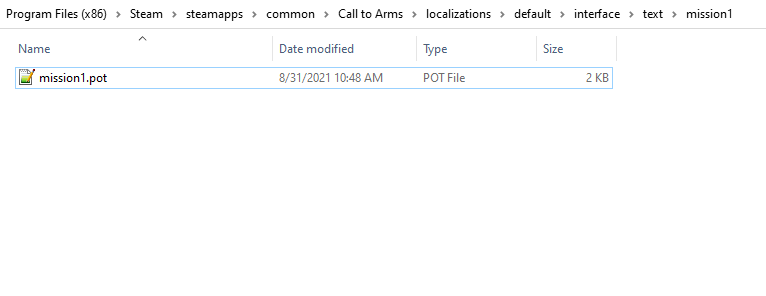
You now need your localization file for the mission, for our example, we would find it in “Call to Arms folder\localizations\default\interface\text\mission\mission1” inside should be the localization folder named whatever you named your mission.
It should have a file with a .pot extension and look something like this:
단계 4: Localization Placement
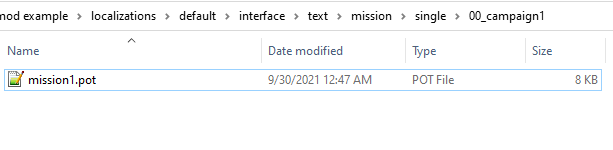
Next make a folder tree in your mods folder that looks like this “mod folder\localizations\default\interface\text\mission\single” then in “single make a folder with your campaign name for our case it would be named “00_campaign1” this is where you will put your mission1.pot 파일.
단계 5: Localization Repositioning
Edit the mission1.pot file with a text editor like notepad or notepad++, each line of text in your mission will be listed here and look something like this:
msgctxt "mission/mission1/some_text"
msgid "Important mission text!"
msgstr ""
You want to change this to make the msgctxt for each of the lines go to the new location so edit each “msgctxt” line to refer to your new mission location. So for our example it should be changed to:
msgctxt "mission/single/00_campaign1/mission1/some_text"
msgid "Important mission text!"
msgstr ""
This is an important step or the mission will not recognize any of the text, Do this replacement for every line of msgctxt there are in the file. Make sure to leave the last part untouched so if the next line says:
msgctxt "mission/mission1/some_more_text"
msgid "Even more important mission text!"
msgstr ""
We would change this to:
msgctxt "mission/single/00_campaign1/mission1/some_more_text"
msgid "Even more important mission text!"
msgstr ""
단계 6: Mod.info
Now go back to your mods in the main folder and make a new text file and rename it to “mod.info”.
Open this with a text editor and paste this in:
{모드
	{이름 "Mod Example"}
	{tags "지도,모드,사명"}
	{desc "Mod Description}
	{minGameVersion "1.228.0"}
	{maxGameVersion "1.268.0"}
}
변화 “Mod Example” to your mods name, and change “Mod Description” to a brief few words about your mod, keep it as short as possible preferably only 4-5 words.
그만큼 “minGameVersion” should be the current version of the game which shows up in the top left of the game when you first start it up.
“maxGameVersion” Should be the current version +40 like in the example above.
단계 7: Mission Descriptions
Your mod should “기술적으로” work by this point but we need some more polishing to really finish it.
첫 번째, go to where you placed your .pot file and open it with a text editor and add these lines above the rest.
msgctxt "mission/single/00_campaign1/mission1/date"
msgid "Middle Title"
msgstr ""

msgctxt "mission/single/00_campaign1/mission1/place"
msgid "Bottom Title"
msgstr ""

msgctxt "mission/single/00_campaign1/mission1/name"
msgid "Name For Campaign Screen"
msgstr ""

msgctxt "mission/single/00_campaign1/mission1/name_big"
msgid "Top Main Title"
msgstr ""

msgctxt "mission/single/00_campaign1/mission1/story"
msgid "Mission Briefing"
msgstr ""

msgctxt "mission/single/00_campaign1/mission1/outro_completed"
msgid "Mission accomplished!"
msgstr ""

msgctxt "mission/single/00_campaign1/mission1/outro_failed"
msgid "Mission failure!"
msgstr ""

msgctxt "mission/single/00_campaign1/mission1/outro_start"
msgid ""
msgstr ""
Replace the text after msgid with what you want those areas to say, leave “outro_start” alone though.
Make sure the msgctxt points to the correct location as stated in step 5.
단계 8: Campaign Description
In the same folder as your missions “.냄비” localization file, make a new text file and name it “campaign.pot” and add this text to the new file.
#, fuzzy
msgid ""
msgstr ""
"Project-Id-Version: 무기로 부름 (운동)\N"
"언어: en\n"
"MIME-Version: 1.0\N"
"Content-Type: text/plain; charset=UTF-8\n"
"Content-Transfer-Encoding: 8bit\n"
"Plural-Forms: nplurals=INTEGER; plural=EXPRESSION;\N"
"POT-Creation-Date: \N"
"PO-Revision-Date: \N"
"Last-Translator: \N"
"Language-Team: \N"

msgctxt "mission/single/00_campaign1/campaign/title"
msgid "Campaign Army ex US Marines"
msgstr ""

msgctxt "mission/single/00_campaign1/campaign/name"
msgid "Name of Campaign ex US Campaign"
msgstr ""
Change each msgid to what you want as your campaign titles. This will be displayed as the titles of your campaign. Make sure the msgctxt points to the correct location as stated in step 5.
단계 9: The .dds Files
I’ll be taking the simple approach on this but you can make custom images for your missions. For the simple version go to your call to arms folder and select map_basic.pak and open it with winrar/7zip or equivalent. 딸깍 하는 소리 “지도” 그 다음에 “single” 그런 다음 “00_usa” from here copy background.dds and header.dds and copy them into your campaigns folder. For our example “\mod example\resource\map\single\00_campaign1”
Then also copy “header.dds” to your missions folder, if you want a loading image you can take a screenshot ingame. You need a photo editor with support for .dds, “paint .net” (not a link its the name of the program) is a simple program for this. Open your screenshot with the program and save the file as preview.dds, then move that to your mission folder, for our example “\mod example\resource\map\single\00_campaign1\mission1”.
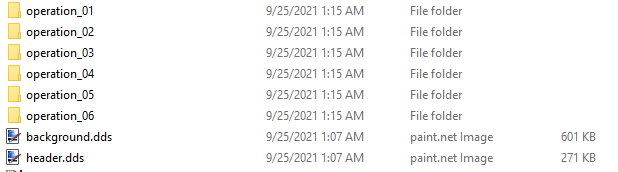
Here is an example of some missions with the .dds files in place
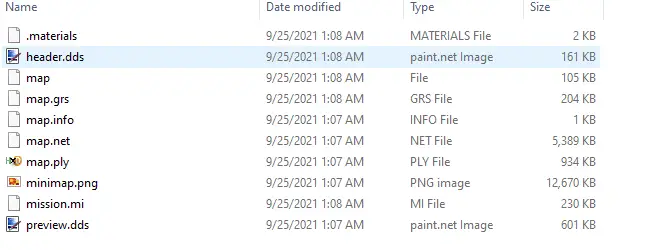
The minimap.png file is the minimap picture for the map I won’t explain that here but there are other guides to make minimaps for your maps if you want to. If you have a minimap.png file put it in its corresponding mission folder.
단계 10: Upload
If everything is done correctly your mod should be prepared to be played. Now we just have to upload it.
The uploader is located in:
씨:\프로그램 파일 (x86)\Steam\steamapps\common\Call to Arms\binaries\x64
and is called “call_to_arms_workshop.exe” open that and click create on the right side. 을 위한 “upload directory” chose your mods main folder, 그만큼 “Preview image” needs to be a 512×512 jpeg file.
지금은, make the “제목” of the mod just “test1” 그리고 “설명” also just “시험”, this uploader is very picky and may not upload the file if the title and description are more complex than that. Don’t worry though, it can be changed to something better after upload. 을 위한 “Visibility” 선택하다 “사적인” 지금은, then click which tags apply to your mod, click the checkbox next to I accept the terms of the steam workshop contribution agreement. Then finally click publish and if everything goes well it should finish and appear in your workshop, only visible to you.
단계 11: Finishing Touches
After all this go to your steam profile and select Workshop Items, then click the mod you just uploaded. On the right side of the mods page click “Edit title & 설명” and you can now edit your title and description to your liking. You can also click “Add/edit images & videos” to add some pictures and videos of your mod. A few pictures can go a long way to inform people about your mod and make them more likely to want to play it. 마지막으로, once you get the mod page looking like you to want select “Change Visibility” 그리고 클릭 “공공의” people will now be able to play your mod and hopefully enjoy it!