
If you want to recruit Minthara in 발더스 게이트 3 without facing unnecessary trouble, 이 가이드는 당신을 다뤘습니다. The main issue addressed here is the “Enemy of Justice” 상태, which arises in Act 2 if you knock out enemies who witness you committing murder and they’re pivotal characters in Act 2.
알려진 문제
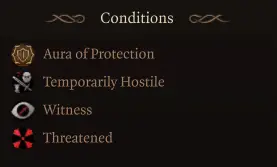
To make sure Minthara has the condition “Temporary Hostile,” and she doesn’t have the condition “Witness.”
If Minthara has the “Witness” 상태, it triggers the “Enemy of Justice” condition bug when starting Act 2.
How to Recruit Minthara
To stay on the safe side during the quests, it’s best to avoid using Long Rests and Fast Traveling. Here are the steps to follow:
- Accept the quest to defeat the 3 goblin leaders and assist Halsin. After saving Halsin, instruct him to remain in the prison area and proceed directly to confront Minthara.
- When confronting Minthara, ensure that you make her Temporarily Hostile.
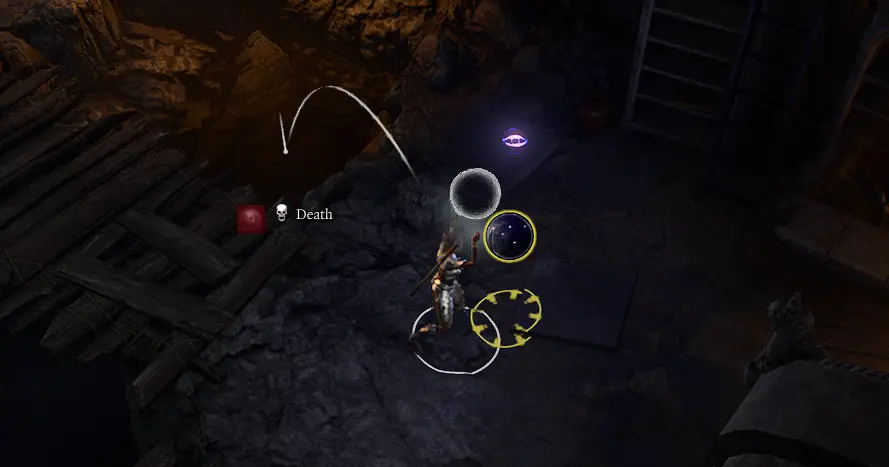
To easily achieve the Temporary Hostile condition and prevent the arrival of goblin reinforcements, it’s recommended to dispose of the Scrying Eye by throwing it into the abyss.
예:
- Once in combat, your objective is to incapacitate Minthara by toggling Non-Lethal Attacks in the passives tab. Ensure you do not kill the goblin guards around her to avoid triggering the Witness condition. After successfully incapacitating Minthara, you can proceed to eliminate the remaining goblin camp members while adhering to the guideline of avoiding Long Rests and Fast Traveling.
Remember to toggle the Non-Lethal Attacks off after incapacitating Minthara. Any witnesses to the altercation may cause trouble later, so it’s crucial to act discreetly.
Ideal conditions:

Non-Ideal conditions:

- Complete the quest assigned by Halsin and engage in dialogue with him and the other main supporting characters at the Grove. Once these conversations are concluded, you can safely proceed to perform a Long Rest.
- Upon encountering Minthara at Moonrise Tower, head directly to the basement. 여기, you can choose to save her either through dialogue or by engaging in combat.
Once all tasks are completed, exit Moonrise Tower without utilizing Fast Traveling. Return to your camp, and with any luck, Minthara will be present without any bugs or issues.