
This guide will be showing you the steps on how you can create Arma Reforger dedicated server. Follow these steps to create your very own dedicated Arma Reforger server using SteamCMD.
Hosting a Server (Rental Service Providers)
You can alternatively host a server at a Game Server Hosting Provider.
Your server will be started instantly!
Server Requirements
- 윈도우 10 or Server 2016+ & 64-조금
- 쿼드 코어 프로세서 (requires up to 2 full cores)
- Up to 16GB memory (currently uses around 4GB memory minimum)
- 5GB 디스크 공간 (install folder)
- A copy of the V Rising early access game from Steam
Server Setup
- Create a folder C:\ArmaReforger
- 다운로드 SteamCMD for Windows
- Extract the contents of the zip to the folder
- Create a file called FetchServerFiles.bat and place the following code in there:
@echo off
start "" 씨:\Users\UserName\Desktop\ArmaReforger\steamcmd\steamcmd.exe +login anonymous anonymous +force_install_dir C:\Users\UserName\Desktop\ArmaReforger +app_update 1874900 +quit
- Fetch server files from Steam by running the FetchServerFiles.bat
Starting the Server
To start the server, create a batch file called StartServer.bat with the following
cd C:\Users\UserName\Desktop\ArmaReforger\
start /wait /REALTIME ArmaReforgerServer.exe -config "씨:\Users\UserName\Desktop\ArmaReforger\admin\server.json" -윤곽 "씨:\Users\UserName\Desktop\ArmaReforger\saves"
Change the above file path to where your folder/file set is located on your computer/server.
More launch lines can be found 여기.
Make sure -profile is set as it will determine where your save game is placed.
Configuring Your server
이제 재미있는 부분이 온다, setting up your Arma Reforger game server to your liking.
To modify game server settings you will need to create the following json file
server.json
You can create these files in your ArmaReforger\ 접는 사람
Edit the following to your liking
{
 "dedicatedServerId": "ar-gm-%profilename",
 "지역": "EU",
 "gameHostBindAddress": "YOUR SERVER IP",
 "gameHostBindPort": 2001,
 "gameHostRegisterBindAddress": "YOUR SERVER IP",
 "gameHostRegisterPort": 2001,
 "adminPassword" : "YOUR ADMIN PASSWORD",
  "게임": {
   "이름": "YOUR SERVER NAME",
   "scenarioId": "{59AD59368755F41A}Missions/21_GM_Eden.conf",
    "playerCountLimit": 16,
    "visible": 진실,
    "비밀번호" : "YOUR SERVER PASSWORD maybe?",
    "gameMode": "",
    "supportedGameClientTypes": [
    "PLATFORM_PC"
   ],
   "gameProperties": {
   "serverMaxViewDistance": 1600,
   "battleEye": 진실,
   "fastValidation": 진실
   },
   "개조": [
  ]
 }
}
The IP will be what your PC is or the dedicated server you are running this on.
If you wish to change the game mode you are playing simply change the following location:
“scenarioId”: “{59AD59368755F41A}Missions/21_GM_Eden.conf”,
With one of the following items.
: ”’ {90F086877C27B6F6}Missions/99_Tutorial.conf (지도 시간)”’
: ”'{ECC61978EDCC2B5A}Missions/23_Campaign.conf (Conflict)”’
: ”'{59AD59368755F41A}Missions/21_GM_Eden.conf (Game Master – Everon) ”’
Once this file is setup to your liking simply run the start bat you made above
How to Join a Server
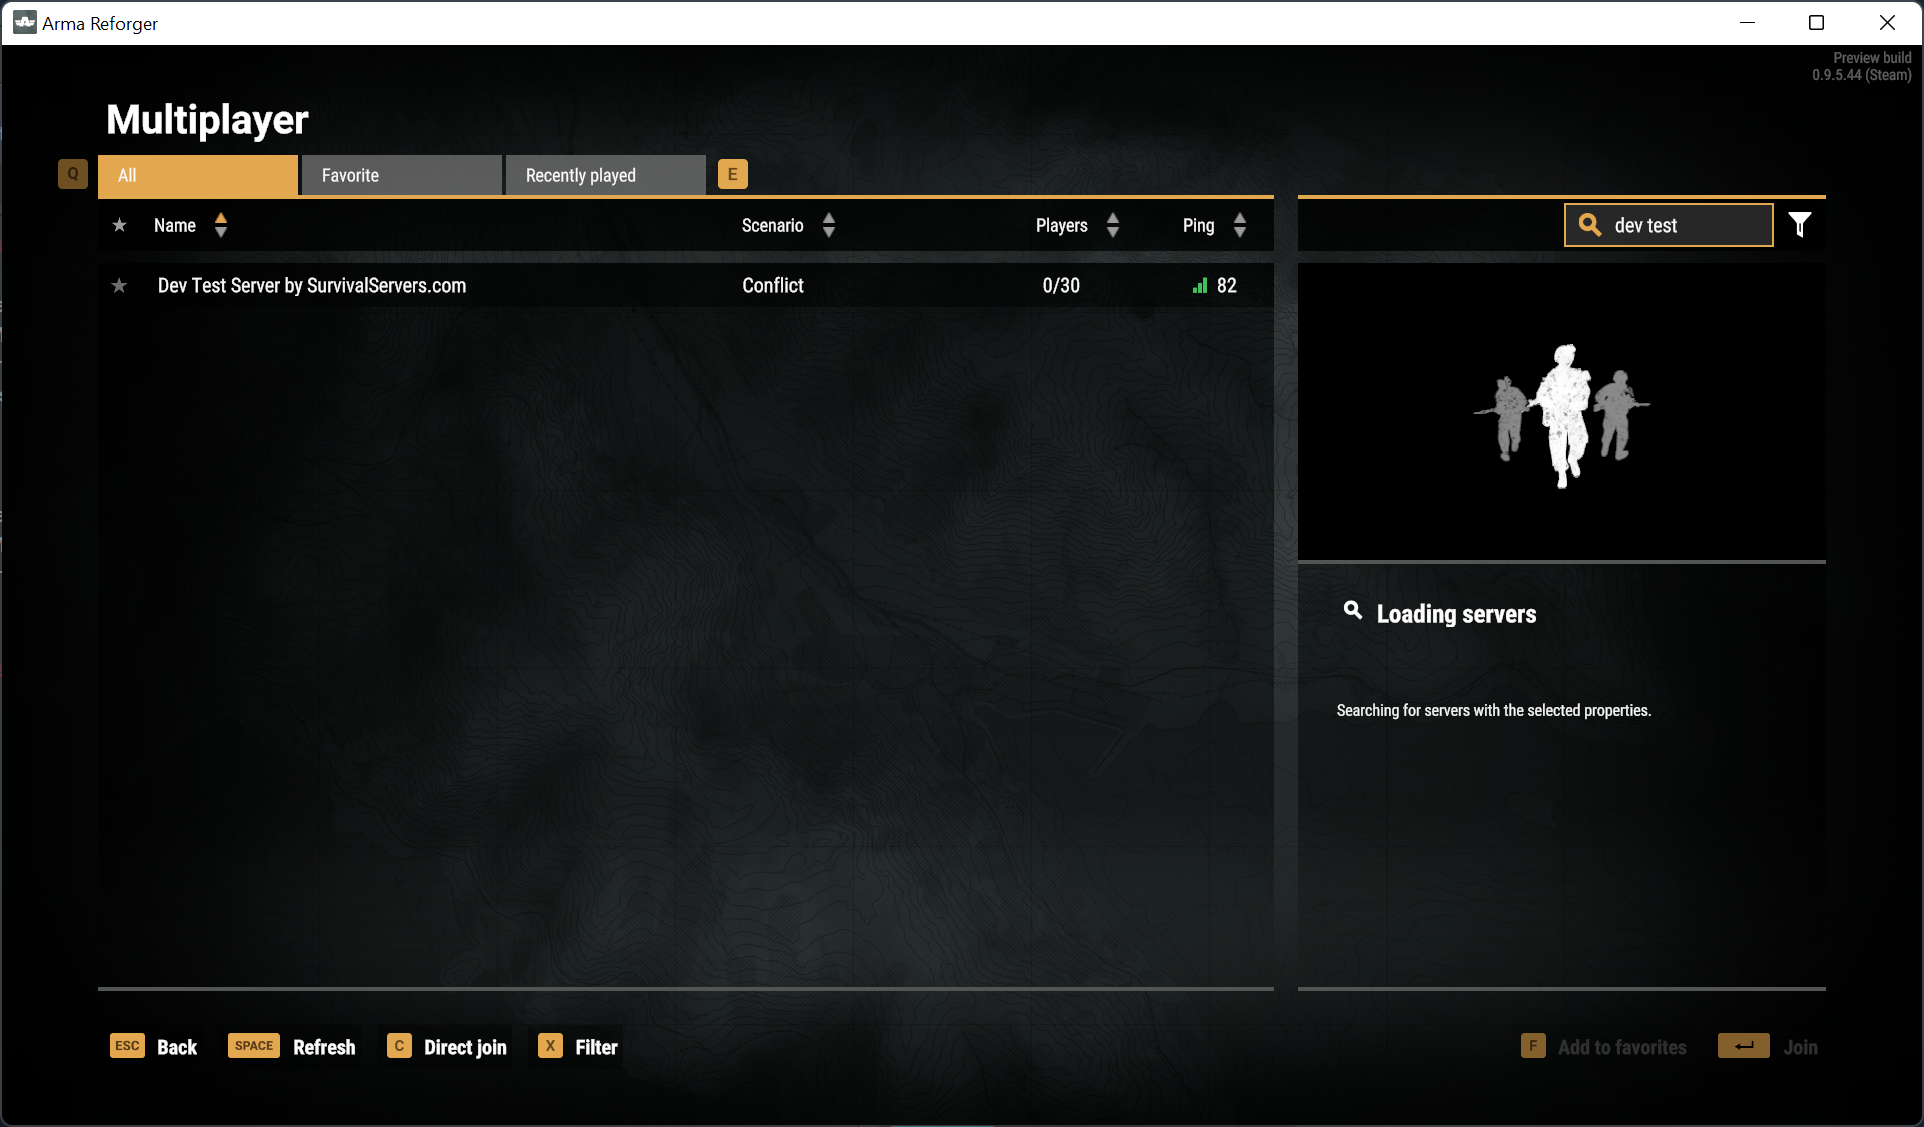
To join your Arma Reforger server follow the below guide.
- Launch the game in steam
- Click the Multiplayer option in the listing
- In the top right do a search by the server title you set in the server.json file
- Click your server in the list and then click Join at the bottom right.
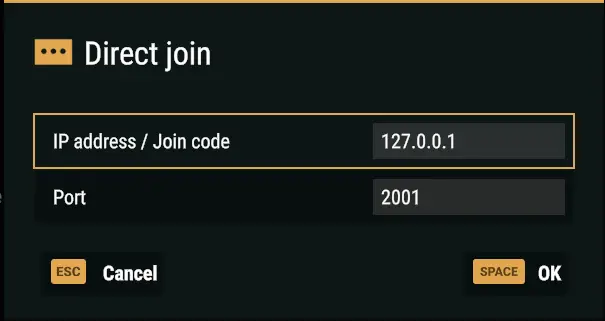
- Launch the game in steam
- Click the Multiplayer option in the listing
- Look for and click Direct Join at the bottom of the page and click it.
- Enter your IP and port you set in the server.json file
If your server does not come up you may need to port forward.
Add an incoming rule to your Windows Firewall to allow TCP/UDP port (game port) 27015, (Steam query port) 27016 (or whichever ports you decide to use)
You may additionally need to add a forwarding rule to your network router. 당신은 사용할 수 있습니다 PortForward.com to read how to do this.
이것이 오늘 우리가 공유하는 모든 것입니다. 아르마 재련자 가이드. 이 가이드는 원래 작성자가 작성하고 작성했습니다. TheMartian. 이 가이드를 업데이트하지 못한 경우, 다음을 수행하여 최신 업데이트를 찾을 수 있습니다. 링크.