Here’s a guide that combines all my experience with designing splines and state regions for the games Anbennar and Realms of Exether in ビクトリア 3. You’ll discover how to tweak state regions, establish hub anchors, link splines, adjust provinces, and steer clear of typical mistakes.
State Regions Introduction
If you’re diving into modding, whether for a total conversion or just tweaking your hometown’s placement, understanding how Victoria 3 manages state regions is crucial.
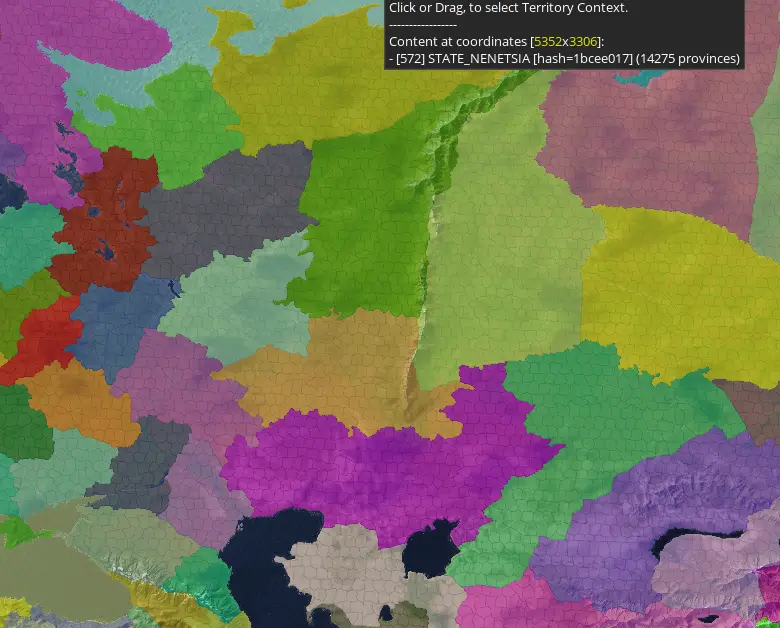
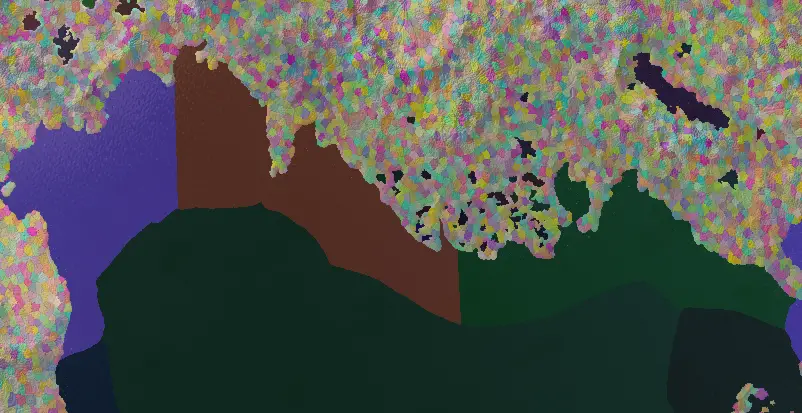
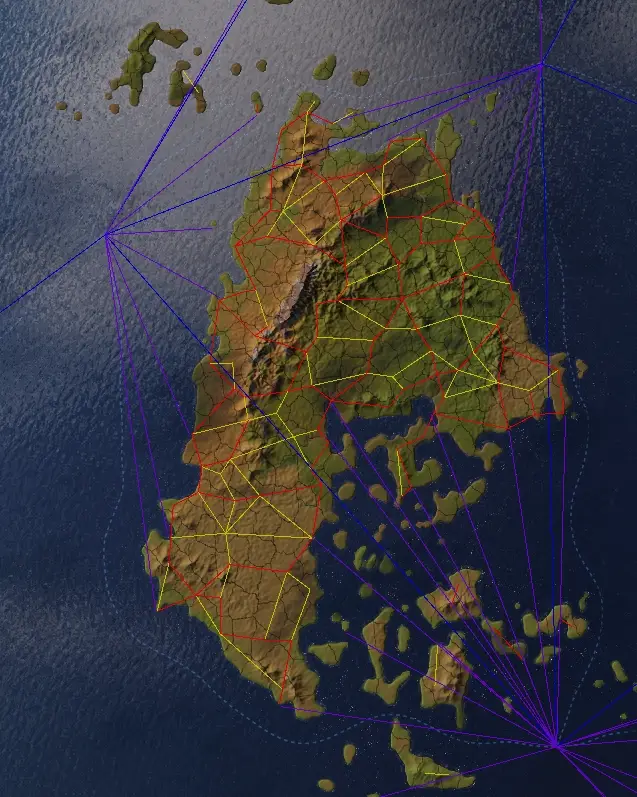
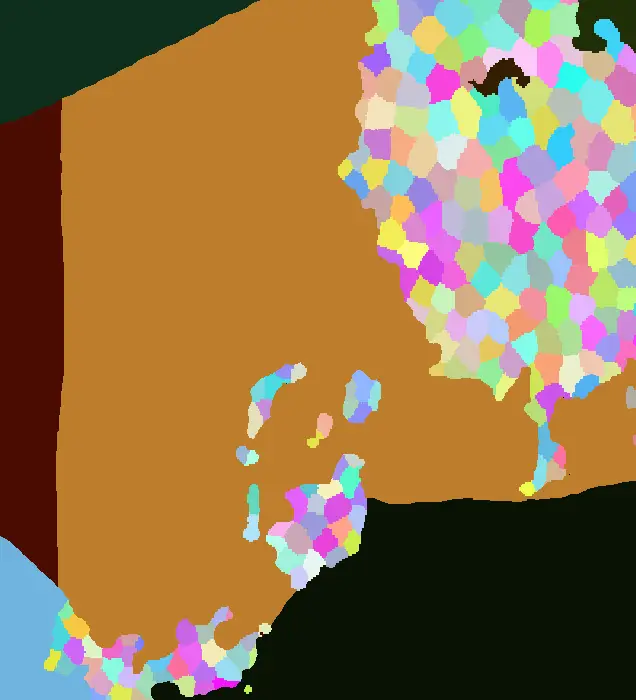
ビクトリア 3 divides landmasses into parcels called state regions, essential for territorial acquisition in wars and construction of buildings. Each state region has a unique numerical ID and consists of provinces with their own IDs. These province IDs are represented by the hexcode of the province’s color in the provinces.png file, located within Victoria 3\game\map_data.
通常, state regions feature 4-5 cities: 4 for inland states (HUB_NAME_STATE_city, _farm, _, mine, _wood) と 5 for coastal ones, which include an additional port (HUB_NAME_STATE_port). The placement of these settlements is determined by their locators, accessible at Victoria 3\game\gfx\map\map_object_data in the generated map object locators. While these locators are generated files, you can manually edit them by adhering to the specified format.
の roads and connections for these cities are dictated by their hubs, とも呼ばれます anchors. 理想的には, hubs align with their respective locators, but deviations are possible. 例えば, 提供された画像の中で, the mine locator is situated in a remote mountainous area, yet the road bypasses it. This intentional mismatch creates a sense of isolation for the city, but as long as the hub remains properly connected, there are no issues with market or military access.
Mapping Hubs to their States
When creating a hub, it’s assigned the first available hub ID リストの中で, typically starting with 1. If the ID is higher, there may be some extra hubs present. To link a hub to a specific state, prepend the state’s numerical ID to the hub’s ID. 例えば, a hub associated with state 1234 would start with 1234. さらに, hubs must be assigned to a specific locator, with the association determined by the 最後 2 数字 of the hub’s ID. それで, for state 1234’s port hub, the ID would be 123403 (00 for the _city, 03 for the _port).
今, while an inland state requires at least four city locators, implying a minimum size of four provinces, a naval province needs a minimum of five provinces. しかし, this isn’t the whole picture. Regions with states that are too small can appear overly “busy” once fully populated with roads and city localizations. While this suits urbanized regions, it may not be suitable for less developed or remote areas. 例えば, compare the states in France and Germany to those in Russia, particularly across the Urals.
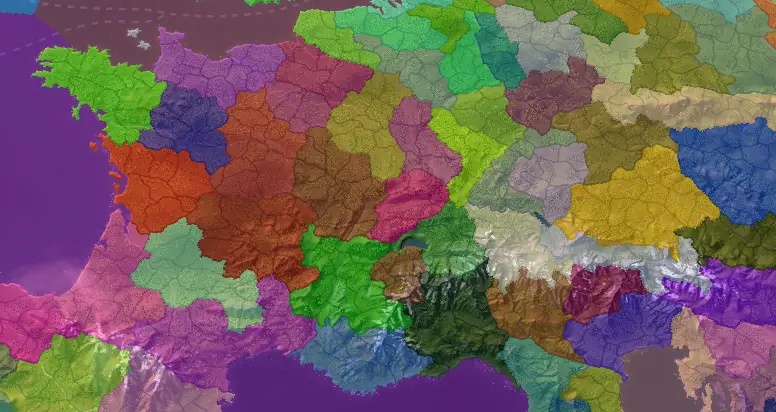
The states across the Ural region are notably massive! Don’t hesitate to create large states in remote and sparsely populated regions at the start of the game.
Naval States and Hub Types
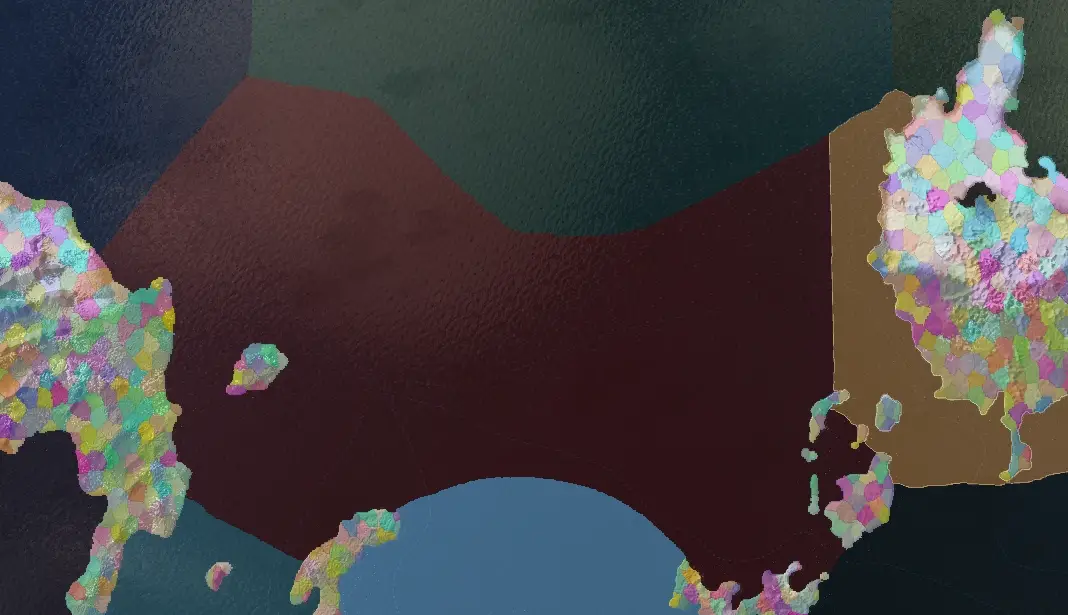
If you’ve explored the game files, you’ve likely observed that ports are equipped with two hubs: one for land connections and another for naval connections. A keen eye may notice that one hub (for land connection) を持っています hub type of 0, while the other (for naval connection) を持っています hub type of 1. Hub types are how Victoria 3 distinguishes between land and sea traffic, and crossing them can lead to odd errors and potentially crashes.
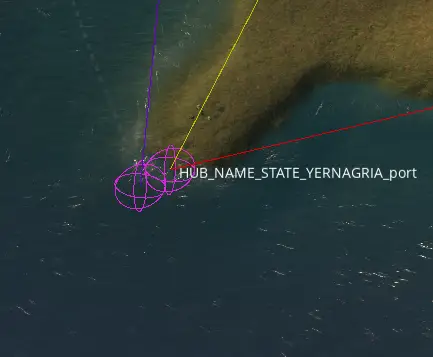
The hub in the water, indicated by a purple line, serves as the naval hub, while the one on the mainland, と red and yellow lines, acts as the land hub.
Naval states differ from land states in two major ways: they comprise only a single naval province and have only one hub—a single naval hub. With a single province, naval states should be sizable. Determining the appropriate size for naval states can be challenging; as of version 1.6, convoy raiders can cover more sea states than a regular defending fleet. したがって、, using vanilla as a guide for naval state sizing may not be optimal. For coastal states, exceptions are made for naval areas with extensive coastline borders to prevent too many states from plugging into the same regions. Logical and intuitive coastline borders are crucial since they serve as one of the few interfaces between players and sea states. Since convoy cost is calculated based on the number of hops through different naval hubs rather than distance, ensuring consistent application of rules across all sea zones is essential. While matching vanilla convoy costs exactly may not be necessary, maintaining consistent global convoy costs is vital to ensure certain continents aren’t unfairly split up.
An example from Realms of Exether illustrates ideal coastal state sizing. These sea states strike a balance—sufficiently large to prevent unfair advantages for convoy raiders yet sizable enough to avoid significant nerfs if Paradox decides to alter convoy raiding mechanics in the future.
Starting up the Map Editor
はじめに, 追加 “-map_editor” と “-filewatcher” to your launch options on Steam or in the launcher.json ファイル. If editing the .json file, ensure to include a comma between “-map_editor” と “-filewatcher”. さらに, it’s advisable to boot in debug_mode. This launches the game directly into the map editor. While you can activate the map_editor after booting from debug mode, doing so may result in peculiar terrain visibility issues that hinder map editing.
Editing Splines
Once you’re in the map editor, start by pressing “0” and enabling the “auto-refresh” と “draw city spheres” options in the bottom right. This makes the city locators visible on the map, crucial for spline editing. 次, プレス “9” to enter the Spline Network Strip tool.
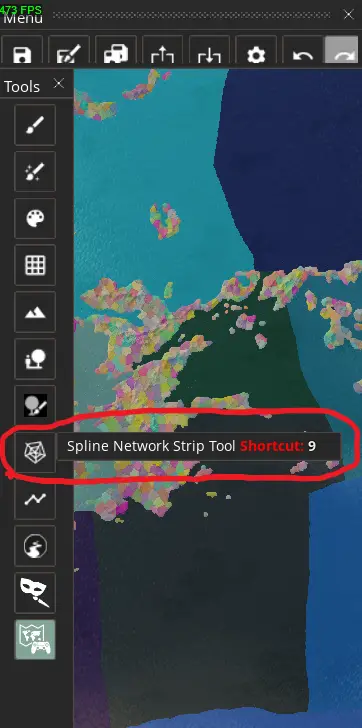
Once you’re in the map editor, start by pressing “0” and enabling the “auto-refresh” と “draw city spheres” options in the bottom right. This makes the city locators visible on the map, crucial for spline editing. 次, プレス “9” to enter the Spline Network Strip tool.
今, how should you connect the splines? The only hard-and-fast rules to follow are that every hub inside a state should have a path to connect to the other hubs within the state, and that every state should have at least one hub connection to every other adjacent state. さもないと, you may encounter peculiar military access problems (unless intentionally creating an impassable zone). さらに, hubs between nonadjacent states should never connect, even if they appear to. If issues arise, consider relocating hubs/locators or adjusting state/province borders to ensure proper adjacency. “Invalid strip” errors typically result from hubs connecting two nonadjacent states.
Notice that there are several spline types available. 私の知る限りでは, only dirt roads, railroads, coastal naval, and naval splines are fully implemented. For land, use dirt roads and railroads. Railroads won’t be present at game start in these locations, but they’ll appear on the map once built. Railroads can be constructed in areas lacking rail splines, providing bonuses but won’t affect troop movement. Use dirt roads in mountainous or jungle regions to simulate “difficult terrain.” 例えば, compare rail splines in France to those in Greece.
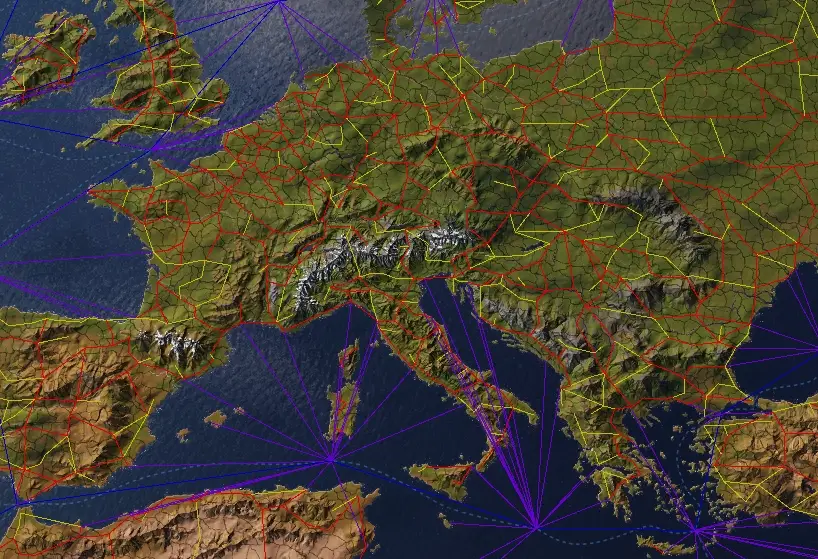
- Red indicates railroads.
- Yellow represents dirt roads.
Consider this network I created for Exether. Railroads act as the country’s backbone, while dirt roads serve as ribs.
When drawing new splines, establish a road hierarchy: important connections and most coastal land connections should be railroads, while dirt roads connect more remote cities. Most cities should have at least one rail connection, except in remote areas. 一般的に, give colonizers more rail connections at game start than countries expected to be colonized.
Editing State Regions and Provinces
To edit states, navigate to the bottom of the toolbar and select the bottom button, “Map Content Editor.”
Ensure to drag the left edge of the new tab that appears on the right to reveal hidden extra information.
ここから, you can transfer not only provinces between states but also individual land sections between provinces. This allows for cleaner borders or lining states along rivers, among other adjustments.
When editing provinces, changes are saved to the provinces.png file. Editing states saves changes to the file in the state_regions folder. If you remove all provinces from a state, you must delete the state’s entire entry from the state_region file to avoid crashing when refreshing city locators. さらに, remove the state’s entries from files in Victoria 3/common/history/pops, common/history/buildings, and common/history/states, redistributing them across consolidated states. の “州” history file is crucial as it determines split states—when a single state is controlled by multiple countries. If consolidating two states into one, simply copy over the state history from the deleted state as a second argument beneath the first create state. しかし, if splitting a state across multiple states, keep close track of which province went where to correctly assign split states.
Province Editing Guide
Let’s break down the process of editing a naval province step by step:
初め, we enter the map content editor and activate province selection mode by pressing “Q”. それから, we choose the province we want to enlarge and switch to pixel painting mode by hitting “B”. このモードでは, we draw the new border thick enough for easy selection later.
次, we save and exit Victoria 3. Opening the provinces.png file in an image editor like Paint, we use the color selection tool (eyedropper) to select the border we drew earlier.

それから, using the paint bucket tool, we fill in the area we want to extend the province border to. After saving the changes, reopening Victoria 3 will reveal the adjusted sea province borders.
When creating an entirely new sea province, it’s crucial to update the game files accordingly. This includes adding the new province to the sea_starts section in the default.map file and defining it as a state with a unique ID in the state_regions folder. さらに, assigning a new naval hub anchor is necessary. This is achieved by creating a new anchor using the spline network strip tool and setting the spline type to “coastal naval route” または “naval route”. The ID for the sea state’s hub should be “00”. 同様に, for ports, the naval hub ID should also be “00”. Despite sharing the same ID as the state’s city, this does not cause a mismatch error since the city hub has a different type of 0.
これが今日私たちがこの目的で共有するすべてです ビクトリア 3 ガイド. このガイドは元々、次の者によって作成および執筆されました。 JudasIsCarrying. このガイドを更新できなかった場合, これに従って最新のアップデートを見つけることができます リンク.