- タイトル: アウトバウンド・ゴースト
- 発売日:
- 開発者:
- 出版社:
Information about The Outbound Ghost is still incomplete. これを使用してゲームの詳細を記入するのにご協力ください。 お問い合わせフォーム.
List of all hidden figments, their levels, and where to find them.
序章
The Outbound Ghost features a lot of different figments, the party members you obtain as you play through the game. There’s eight (technically nine) unmissable characters that join normally during the storyline, but a further twenty-five can be recruited by finding and defeating powerful boss versions of regular enemies via hidden tombstones.

Many of them require some means of accessing them, such as the Jump Feature or solving a torch puzzle. When these are necessary, I’ll include that information, otherwise it’s just a matter of locating them within the given areas as you traverse the Outbound lands.
I should point out that this is simply to aide you in finding them, not to assist you in combating them. If they do have some significant ability that springs to mind, しかし, I’ll try to mention it.
章 1
There are four hidden figments scattered throughout the first chapter of the game. Although you may see one or two others, they are out of reach for the time being.

The unfortunately named mining figment requires you to snuff out all the torches in the large cave you pass through during the first half of Strand Beach; this reveals a hidden staircase.
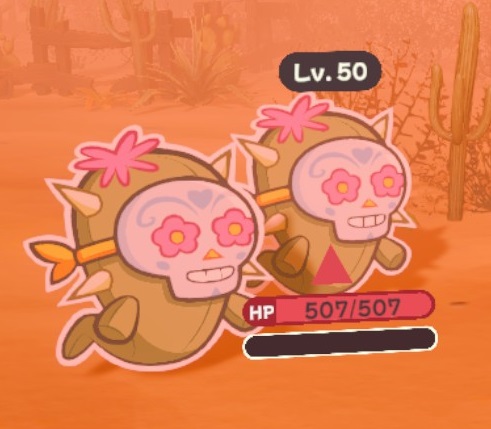
A trio of Brutish Apparitions who enjoy beefing up each others defences.

The pesky purple pilferer is not-so-well hidden in a very visible cave entrance towards the end of Strand Beach. This was the first figment I found, 結局のところ, because I had missed a torch in the other cave my first time looking.
A ghoulish group of Sneaky Apparitions; beware their mimicry.

A useful healer, they can be found on the other side of a locked gate in the Mansion of Delusions, provided you can find a handy key or two.
A malodorous Magical Apparition flanked by a pair of flunkies.
After a bit of bogging around in the Soggy Swamp, you’ll cross a bridge and find a campfire. If you want to harness you inner Dr Blight then extinguish the surrounding torches to lower a ladder nearby.
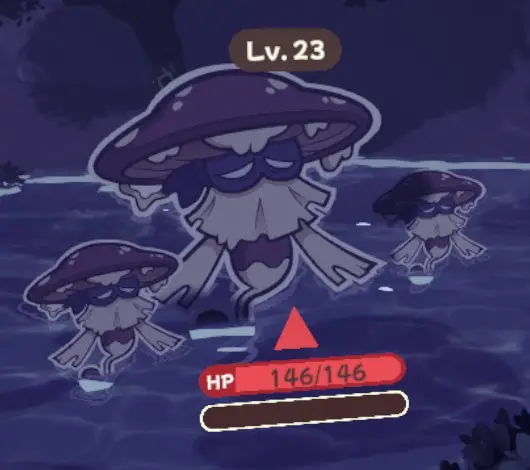
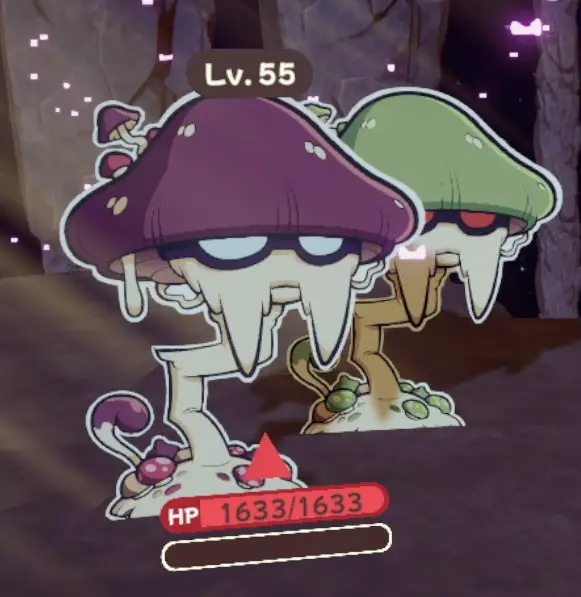
Some feisty Fungal Apparitions fight furiously with potent poison.
章 2
There are six (or seven depending on who you ask) hidden figments in the second chapter. Most can be found as you go, but two will require backtracking and are reasonably strong.
You’ll have likely started finding strange Send Help Membership Cards, which you then show to a little green ghost with bushy eyebrows. His name is Sandelp and he’s slightly a jerk. You’ll first encounter him in Central Outbound but won’t have the amount he requires. Just remember what he looks like cause you’ll see him again.
* No Image at this time *Despite being a figment of an enemy you encounter, the Leafy Apparition to be precise, I do not consider this to be a Hidden Figment as it is a required fight to proceed in Central Outbound. しかし, for the sake of completeness I’ll include its mention here.

While climbing up the Rocky Pass, you’ll encounter several broken bridges and Jump Pads. Stick to the lower path to meet a sickly sucker sitting in plain sight.
通常, V stands for Vendetta, but this time it’s Vampiric Apparition in threes! Like always, these jerks can steal life points.
Roughly halfway along the Ravenside Path you’ll pass some fun floaters and then a broken bridge with a Jump Pad. Follow that instead of taking the stairs to a cave that wraps around to an earlier section. Before reaching the Warp Crystal you’ll see a campfire and off to the left is a tired tombstone.
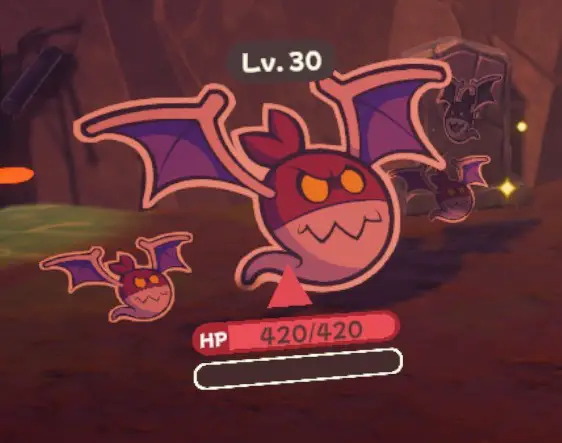
The boss bat’s baddies will both use Life Link as soon as their turns come up, so you’ll have to pulverize those pests first.
This is almost unavoidable. の終わりに Ravenside Path you’ll four obvious torches that need to be lit, lowering some rocks to reveal a hidden hideaway.
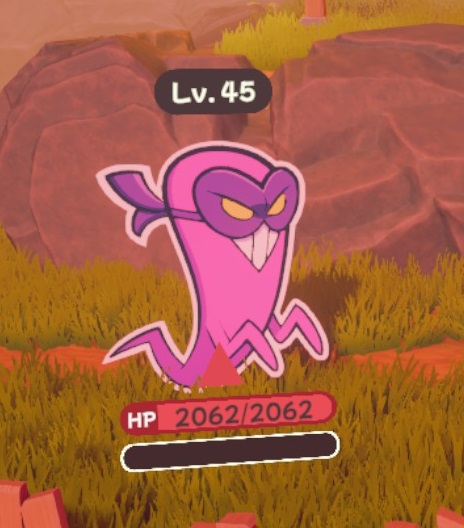
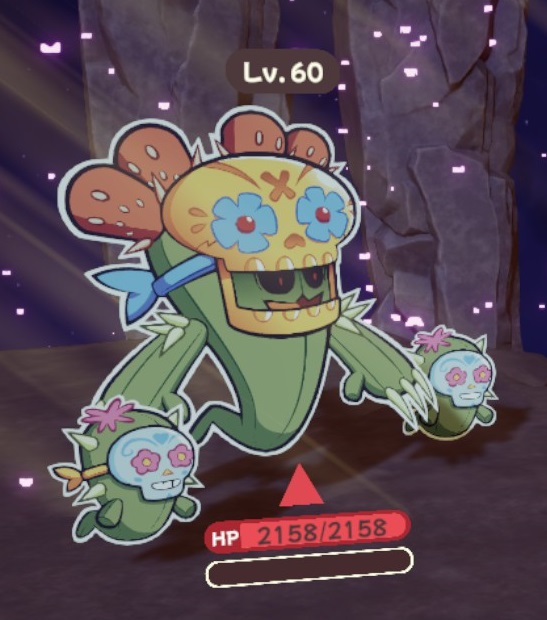
Fear is an apt name for the Armoured Apparition. You’ve seen these things before, they’re a huge pain and now it’s got a huge HP pool. Absolutely bring someone like Siphon who can use Leech attacks which bypass defenses, and possibly someone who can use Burn. Keep your defenses up and stay alive until you can outlast this freak.

の Drylands are huge, but thankfully this one’s easy to find. You’ll come upon a huge stone cross during the story, to the left of a forked path. If you venture to the right instead, しかし, there’s an oasis where you can find Sendalp. If you have enough S.H.M.C.’s he’ll launch you over the broken bridge to a small island. 私 考えるhe wants 10.
While the Armstrong Apparition is all alone, they pack enough of a punch to pummel you painfully if you’re not prepared. Stay healed up.

You may have seen this in the Snowy Pass earlier, but Sandelp wanted more S.H.M.C.’s than you currently had. もう一度, I believe it’s 10 カード. You could’ve backtracked earlier but it’s safer to wait until you’re stronger. In case you forgot where, which is understandable, it’s just before that big icy cave; you see a Jump Pad near the previous screen’s exit.
The Chill Apparition loves to put you on ice which can prevent your allies from getting their turns, on the other hand it does build up AP for when they finally go.
Doubt
Most people probably saw this when they first trekked through Eris’ 森 way back at the beginning of the game, but couldn’t reach it. You’ll need the Jump Feather plus some decent levels. I made the mistake of coming back here at the start of Chapter 2 and getting wrecked.
The Sketchy Apparition has a nasty triple strike that can take you by surprise if you’re too weak.
章 4
いいえ, it’s not a mistake, there’s no hidden figments unique to chapter 3. The chapter itself is very short, but feel free to return for any figments you may have missed or opted to wait on earlier.
章 4, 一方で, is kind of a monster.
You can not fast travel at all during this chapter, and the areas open to you vary between sections. しかし, nearly all of the following figments require you to have the Shield Bash ability which you’ll pick up as you go.
There are a total of six that become available in this chapter.
As you enter Deep Toterwald keep an eye open for some bushes near a campfire, which I initially missed my first time in there. Cross the little bridge and there’s your prize.
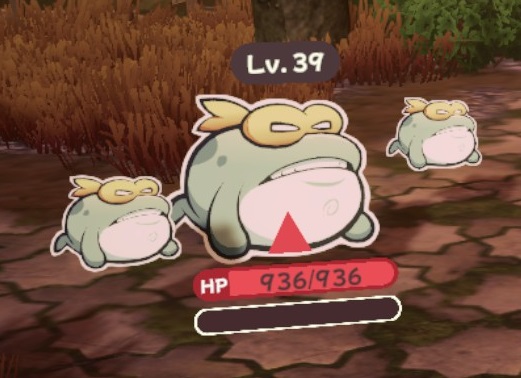
The rather rotund Ranine Apparition loves to use quakes that hurt your party, while the tinier toadies spam power & defence increases.
Easily one of the best figments in the game; they’re fast and have great offensive skills. As you follow the
Deep Toterwald兆候, there is one in particular that shouts “NOT THIS WAY!” just after
three wagons, at a fork in the road. Travel north and loop around east until you reach a campfire; the tombstone is just over the side past the anvil.
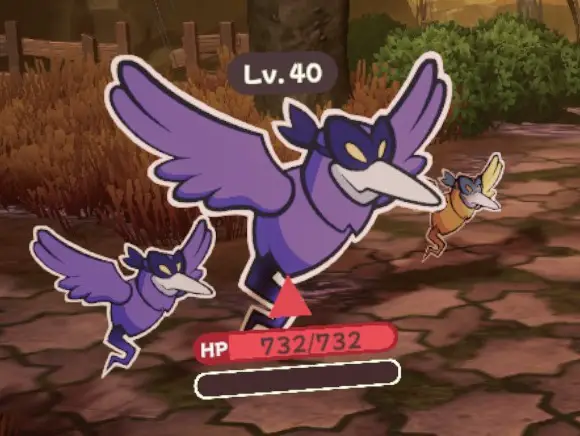
A trio of Corvid Apparitions with strong attacks and fast turns, they can use smoke to mess with your timing bar (if you haven’t turned it off).

Given the other figments’ names, this one stands out as being a virtuous trait. Somewhat easy to overlook is a bush to your right on the Rundoyer Outskirts. Just use the Jump Pad and it’ll be over by the campfire.
The pair of frigid Beaked Apparitions love to freeze you then extend that by several turns, だから気をつけて.
People will have obviously seen the crystals requiring Shield Bash during their trip through the Outbound Trail 章で 2. ありがたいことに, you’ll appear not far from the tiny ghost and her sister sitting near a campfire. Right there are the crystals and the battle behind them.
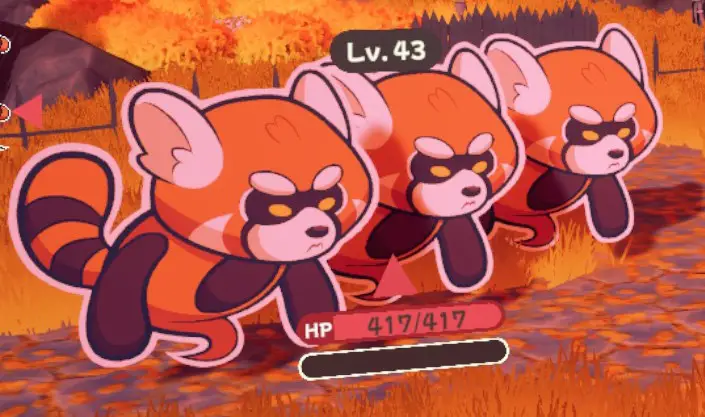
Several large Ursine Apparitions that like to use boosting blows.

Although it’s very hard to miss along the wharf in The Toterwald, you’ll need that Shield Bash to reach them.
The Giggly Apparition enjoys playing with fire, much like his buddy Flame Hyanard but with less burning to the ground.

Get your Shield Bash ready and hike your way back through theMansion of Delusions. Inside of a well you will easily recognize some familiar crystals among the weathered wine barrels.
Let’s be honest, the Greedy Apparitions are a joke and so is the figment that joins you. まだ, we’re out here to “Catch ’em All”, so just cause they’re useless doesn’t mean they’re getting left behind!
This figment is behind a very, very obvious wall of crystal in the
Drylands, which is a very long ways away from the very end of chapter 4 as that is the only time you can go all the way there. So while I’m advising you to wait until afterwards, I’m listing it here because it は technically available before the final battle.
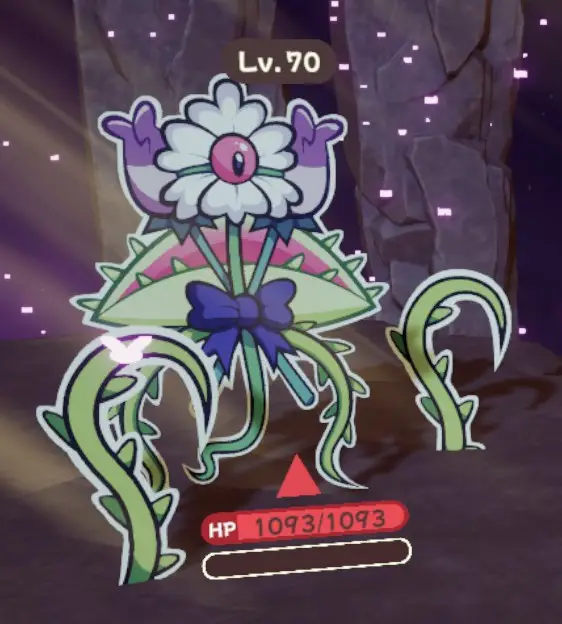
These two Spindly Apparitions love their wind blades.
章 5
The credits may have rolled, but our quest for completion is not yet over! The following five Apex Figments are familiar faces that’ve been seriously working out. Do not take them lightly.
一方で, much like Avarice they’re all pretty much letdowns. Every one of the former foes have a mere four skills. They do have good stats but you’ll have to give them aspects if you want more out of the things…

If you exit out of the Southern Outskirts into the Strand Beach you may remember a large house in a small clearing. Inside with no obstacles is the Sanguine Apparition you encountered back in Chapter 1.
Focus on the little jerks that keep using Life Link first, it’ll also stun him.
If you Map Warp back to Soggy Swamp, you’ll be back at Lori & Craig’s encampment. In the back is the pair of Parasitic & Capped Apparitions from the tail-end of Chapter 1.
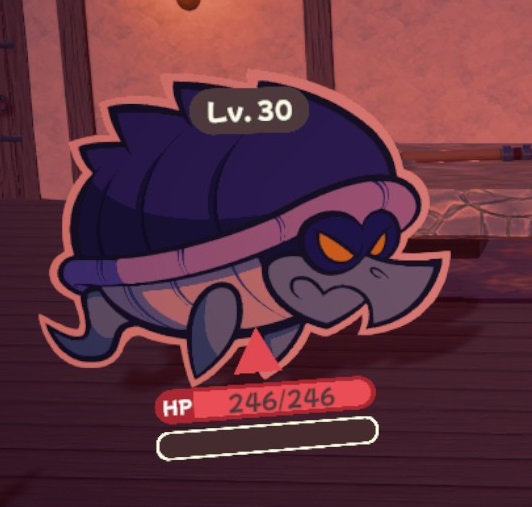
Try to take out the gross, green growth first; it’s got much less HP.
Put on your hiking boots and grab some water, it’s back (また) に Drylands. Further into the desert, past where you fought Repel, is another little cluster of crystals that seemed completely pointless at the time. 残念ながら, this is where the Barbed Apparition from Chapter 2 waits to have its revenge.
Eliminate those smaller squirts speedily cause they’ll keep putting wind blades around the boss!

Tucked into the back of the Icy Cave, past the exit back outside, is a furiously Flightless Apparition frustratedly flapping its wings.
Also it loves to freeze you solid, だから気をつけて.
You no doubt saw this creepy Carnivorous Apparition upon starting Chapter 5 と, 私のように, were shocked to see the boss’ レベル. It is quite tenacious, like a weed.
Ignore the Stems and focus on the boss, or else it’ll just keep reviving them.

I have no idea what to make of this guy, but he likes to go “まあ!” which was amusing as heck for some reason. Upon returning to the Deep Toterwald you’ll bump into him along the path where he’ll run off elsewhere. Encounter him again in the next section, off to the left by a dead end, then again if you return to the campfire by Pride. この時, しかし, go down over the ledge to find him waiting.

他とは異なり, Ligrou is not the boss, but rather a pair of Feline Apparitions. I had not planned this guide at the time, nor can you revisit this boss. Just keep in mind there’s two or three of these things and not just the one that’s showing here.

The epitome of joke characters. Has only a single move which costs 0 SP and is completely random, 楽しむ!
真剣に, けれど, you may have encountered Bol on your travels. The first time you find the bugger will be down a frozen well in Snowy Pass, near a hill leading to a house blocked by crystals. After speaking with him, head over to the 墓地 and pop into the little rinky-dink house. それに続いて, に戻る Flower Field just outside Escales, roundy man will be in the back. ついに, make your way back to Southern Outskirts and locate an easily overlooked well on the eastern side of town.
Get all that? よくやった, now go to that annoyingly empty house on the hill in Strand Beach, that you reach via the Jump Pads. Inside is a familiar stony object with a pathetic Level 1 Bol. Cough in their general direction and pat yourself on the back… We’re done!
これが今日私たちがこの目的で共有するすべてです アウトバウンド・ゴースト ガイド. このガイドは元々、次の者によって作成および執筆されました。 Hiroshi Mishima. このガイドを更新できなかった場合, これに従って最新のアップデートを見つけることができます リンク.