Have you ever desired to play The Forest with a field of view (視野) greater than 95? This guide will demonstrate how to adjust and expand the FOV limits in The Forest. このガイドでは, I will provide instructions on how to modify the FOV limit in The Forest. デフォルトでは, the game restricts the FOV to a minimum of 60 そして最大の 95 度. If you want to utilize values outside of this range, you will need to make changes to the game files.
Installing dnSpy
To modify the FOV limit, you will need to use dnSpy to edit the game files.
始めるには, を訪問する dnSpy repository’s latest release and locate the download links. Choose the appropriate link for “dnSpy-net-win64.zip” and extract all the files to a folder of your preference. You can delete these files once you have completed the necessary modifications.
After extracting the files, 打ち上げ “dnSpy.exe” to proceed with the next steps.
Accessing the Game Files
今, we will navigate to the game files that require editing.
Locate the directory where The Forest game is installed. You can find it by right-clicking on The Forest in your Steam library, selecting Properties, going to the Local Files tab, and clicking on the Browse button.
Within the game directory, 次のパスに移動します: The Forest/TheForest_Data/Managed.
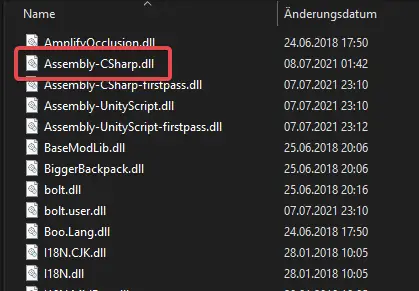
内部 “Managed” フォルダ, you will see various .dll files. The only file you need to edit is “アセンブリ-CSharp.dll”.
To open this file, simply drag and drop it into the dnSpy interface.
Editing the FOV limits
Now we will move on to the more intricate part of the process, where we will edit the code responsible for limiting the FOV values in the menu.
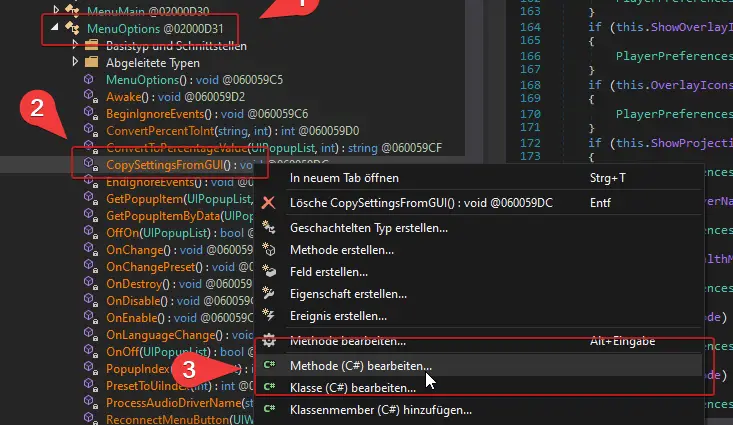
初め, we need to locate the appropriate class that handles mouse input. This class is named “MenuOptions.”
To find this class, navigate to the left side of dnSpy and expand “Assembly-CSharp” -> “アセンブリ-CSharp.dll” -> “{ } -” -> “MenuOptions.”
次, we will decompile and modify the “CopySettingsFromGUI()” method. これをする, expand the MenuOptions class and right-click on “CopySettingsFromGUI().” From the context menu, 選択する “Edit Method (C#)…” 続行する.
In the newly opened popup window, you will now have access to edit the code. Look for the specific code line, which should be approximately around line 160:
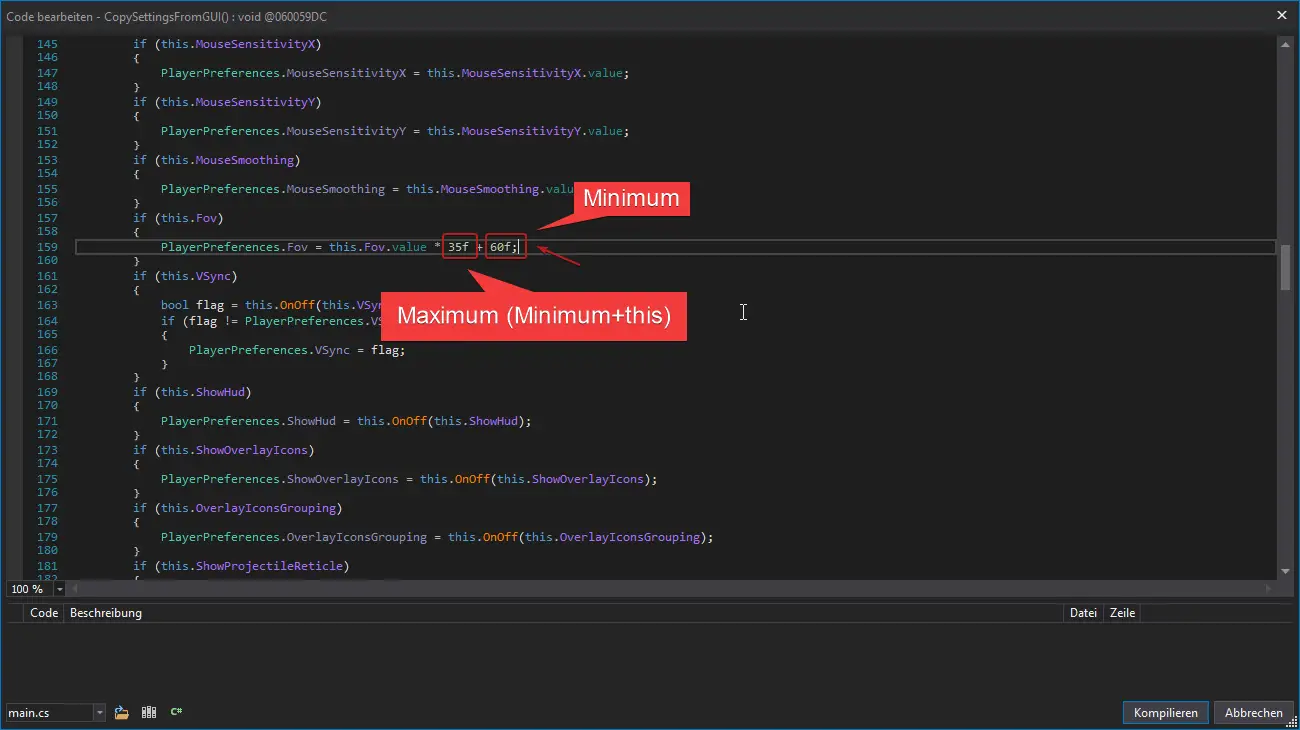
These values determine the limits for the FOV slider. The value on the right (デフォルト 60) represents the minimum FOV, while the value on the left (デフォルト 35) corresponds to the range. Adding these two values together gives you the maximum FOV value (60 + 35 = 95).
Let’s say we want to set a new minimum FOV of 90 and a maximum FOV of 130. その場合, we need to adjust the minimum (right value) に 90 and the range to 40 (90 + 40 = 130) 以下に示すように:

Once you have made the necessary adjustments to these values, をクリックしてください “Compile” located at the bottom right of the popup window.
しかし, our task is not complete yet. We need to repeat this procedure for another function.
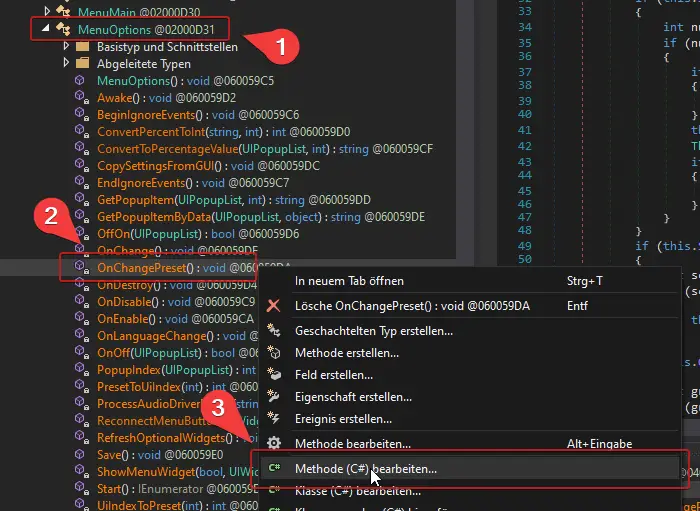
この時, we will edit the “OnChangePreset()” method. Right-click on it and select “Edit Method (C#)” once again to proceed.
Scroll down and find the specific line of code, which should be approximately around line 470:
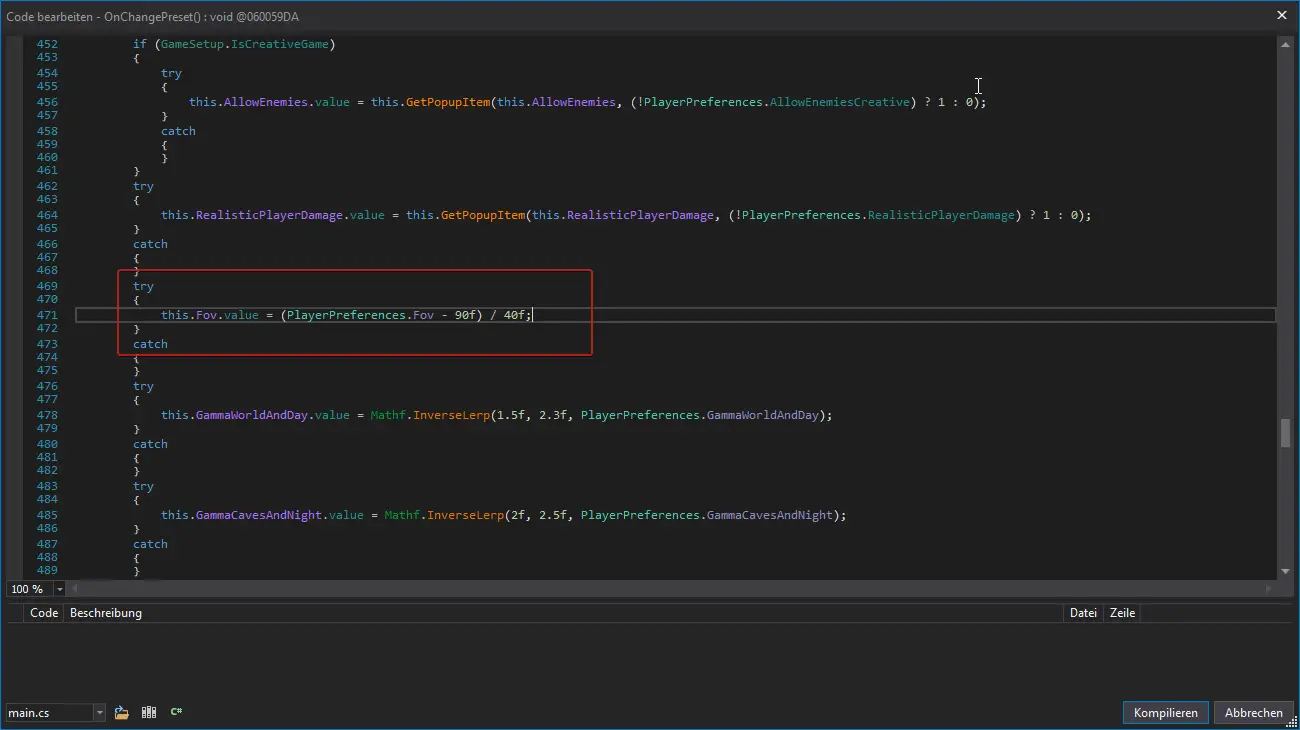
Simply insert the same values you used previously (90 と 40 in our example) in this line of code. After making the necessary changes, をクリックしてください “Compile” located at the bottom right.
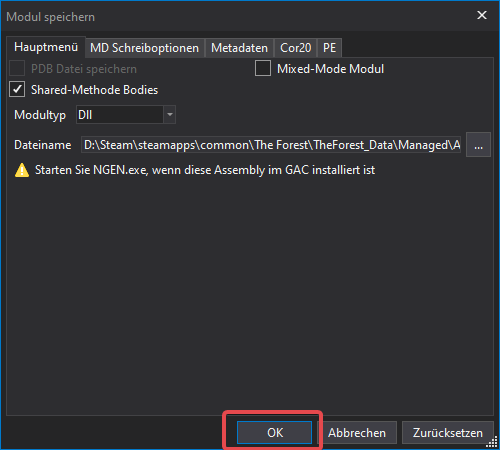
The final step is to save the modifications you have made. これをする, click on the save button in the toolbar, which is depicted in the image below:
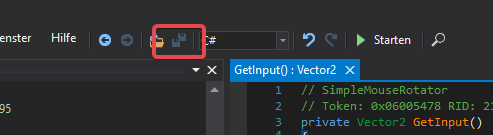
それから, クリック “わかりました” on the upcoming dialog to confirm the save.