- タイトル: Skybox3D
- 発売日:
- 開発者:
- 出版社:
Information about Skybox3D is still incomplete. これを使用してゲームの詳細を記入するのにご協力ください。 お問い合わせフォーム.
This guide will show you the things that you need to understand in Broadcaster and Telestrator Mode in Skybox3D.
序章
When getting on board in Skybox3D we will see different tools available, しかし, when broadcasting content for a stream or for a tournament we may need to keep it simple. それ’s why we have these two options ready for you to use Broadcaster Mode y Telestrator Mode. Both options will allow you to have great content and a much more dynamic experience for your stream.
Broadcaster Mode
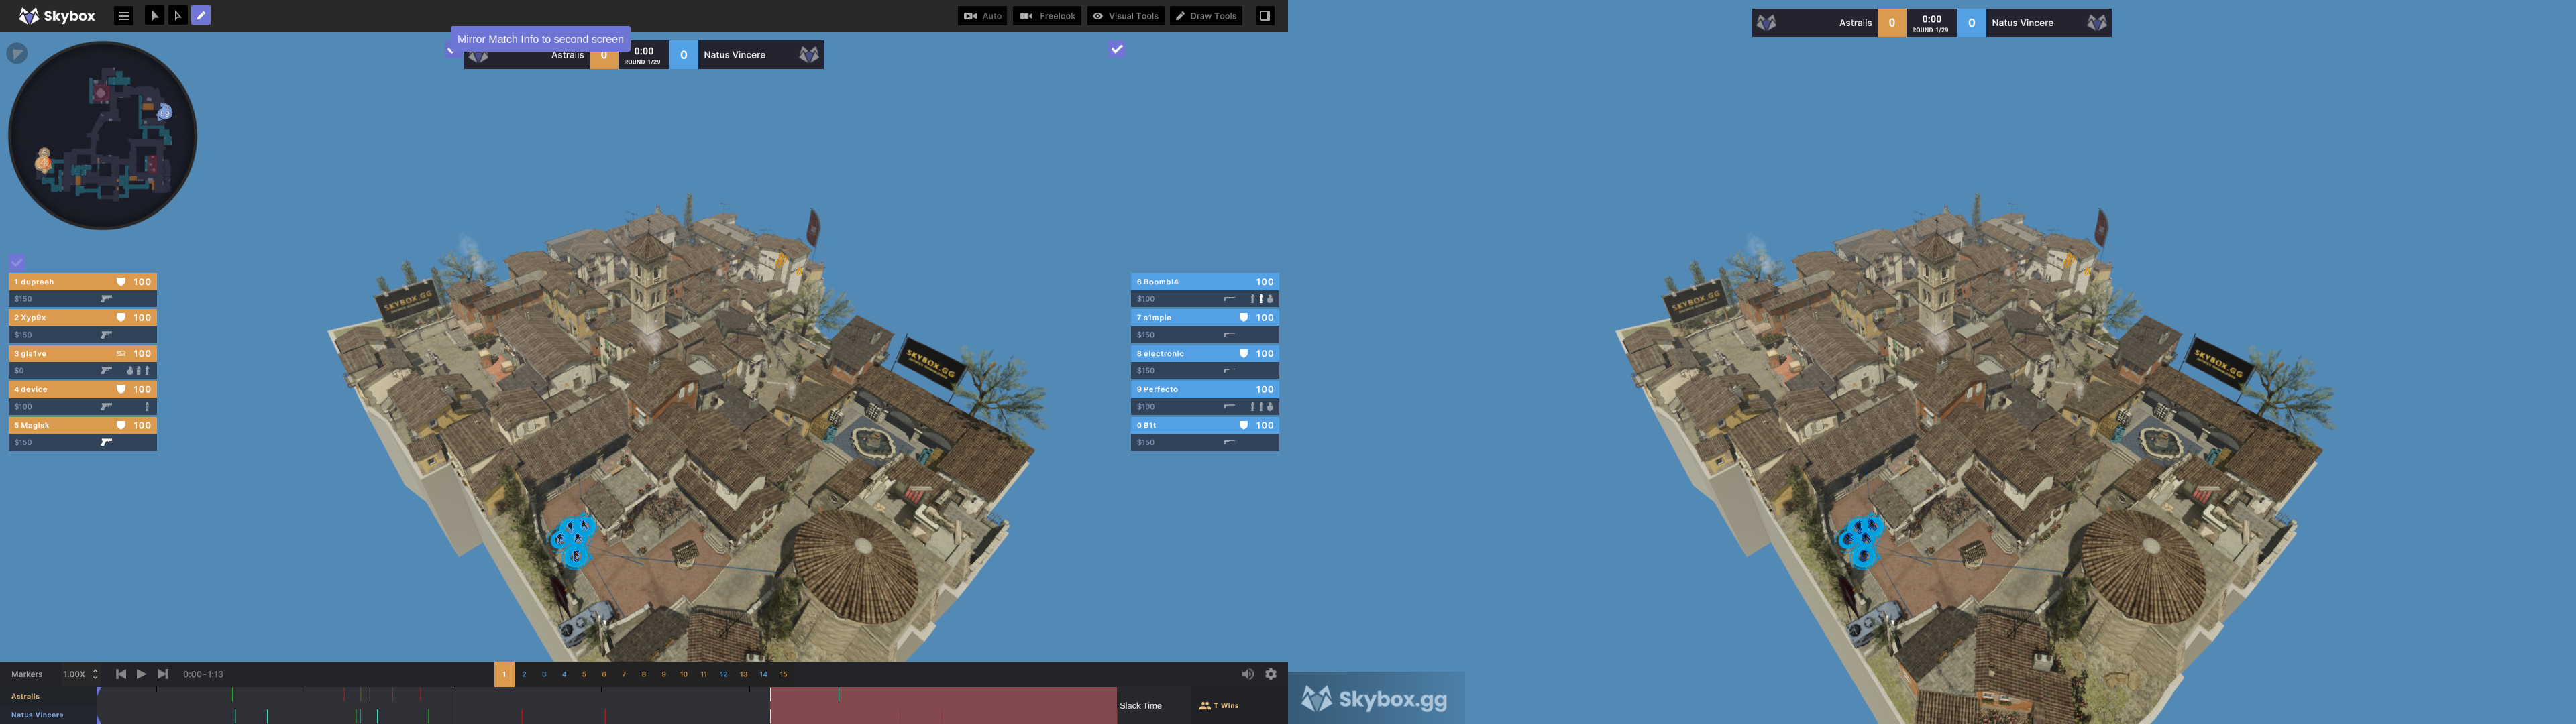
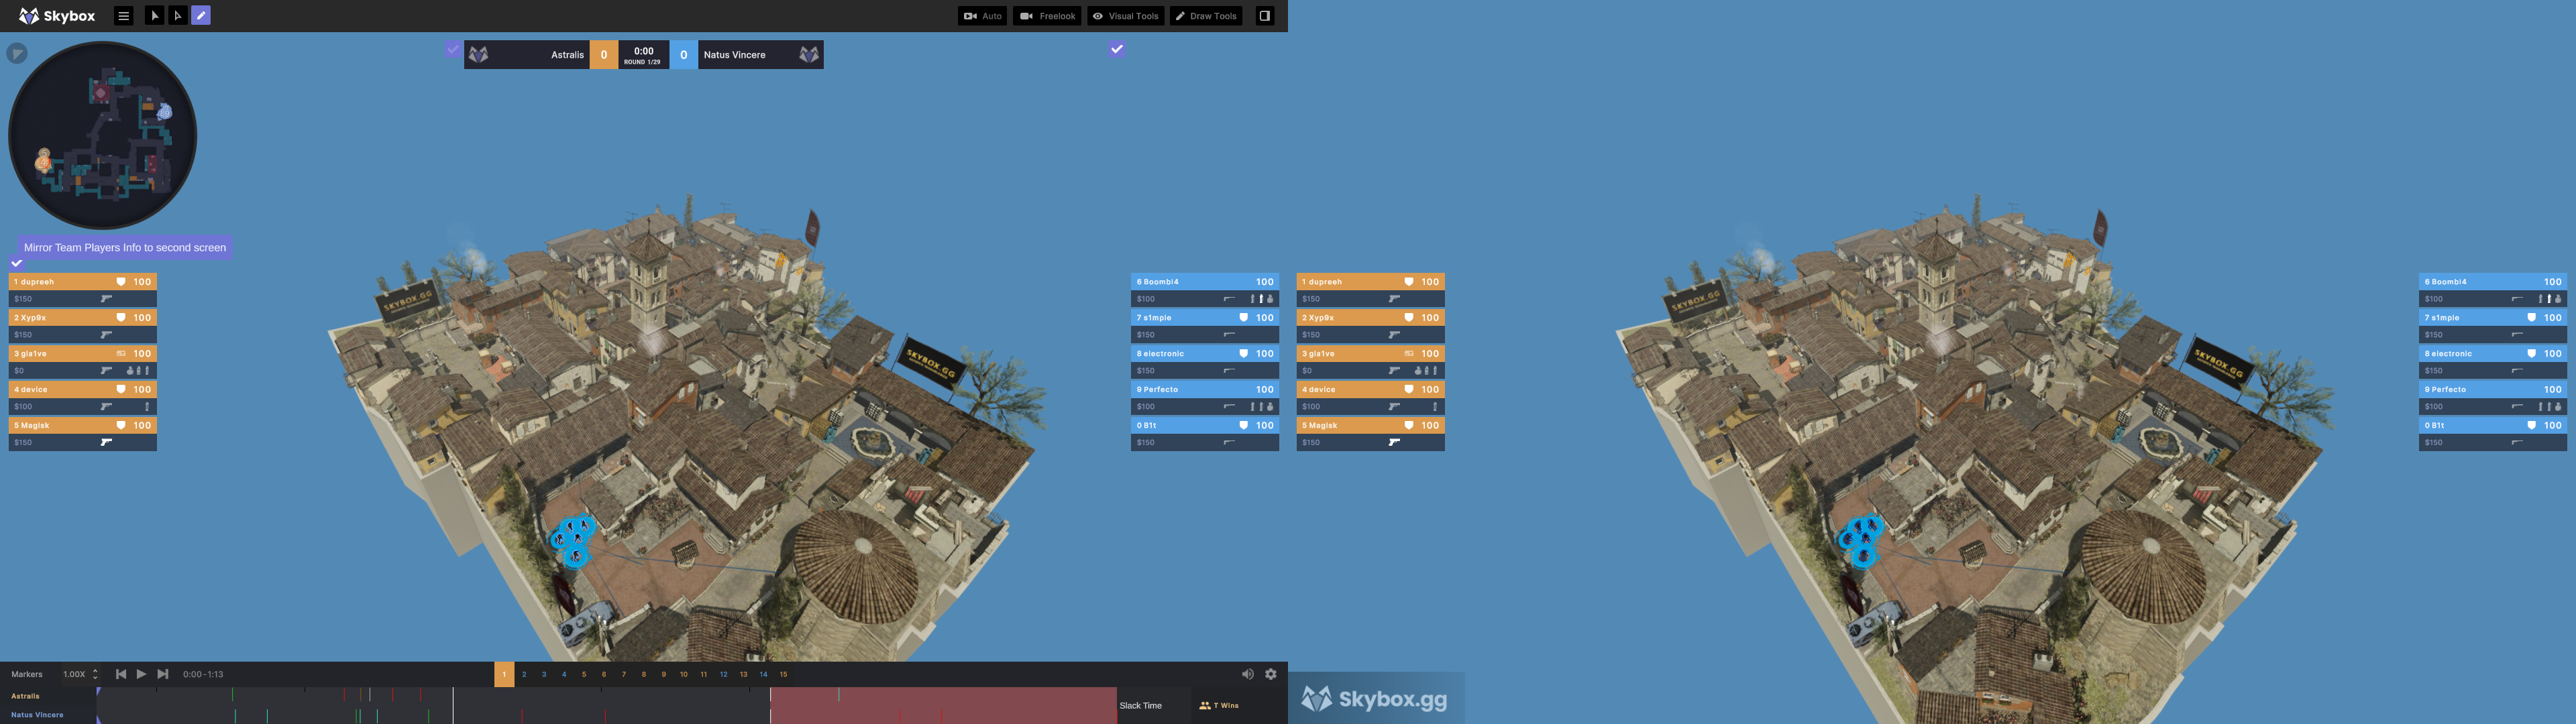
Once you enter Skybox3D you have the classic view, この場合, we will press shift + B, and you will see that the broadcaster mode turns on (You need a broadcaster subscription). This feature will allow you to personalize what you want your audience to see. To do this we just click on “Broadcast Screen”, a new window will show up with a clear view of the content without any elements.
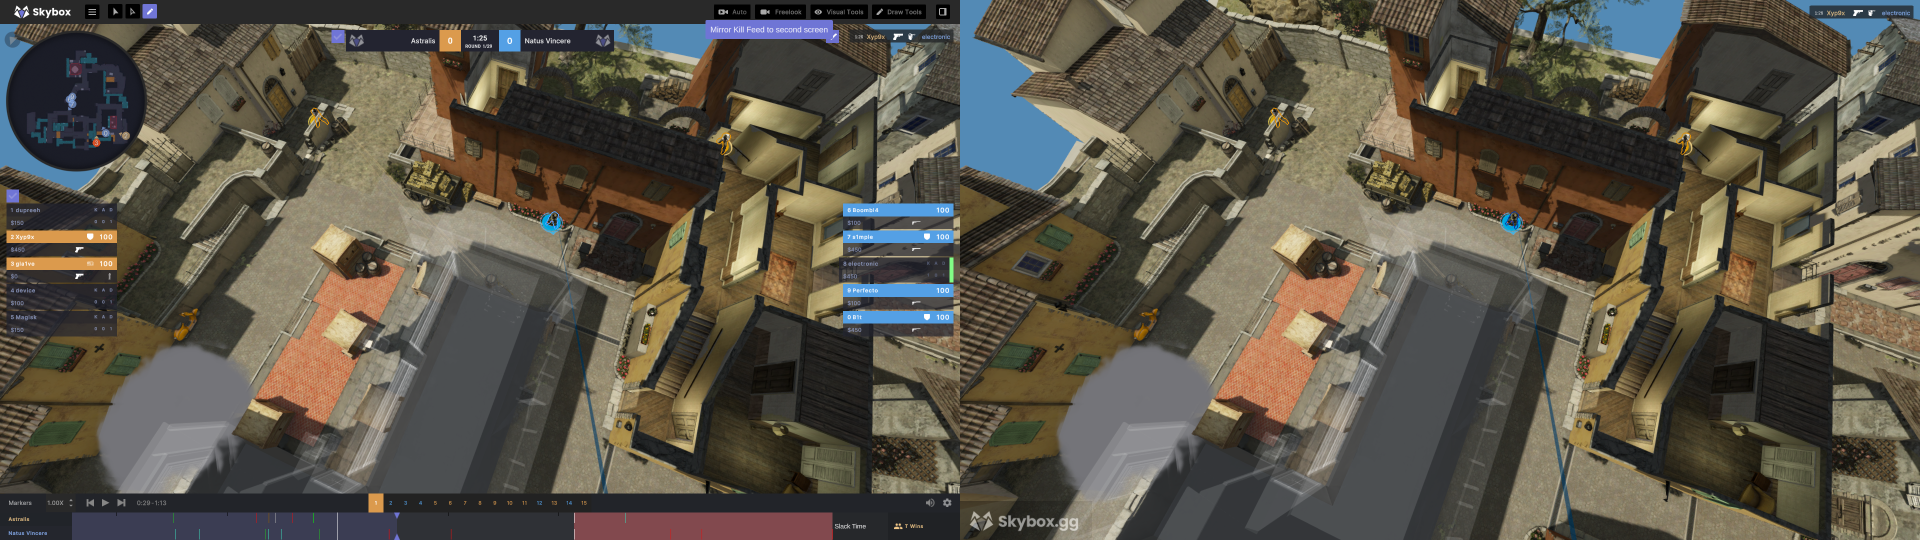
Back to our main screen, we will notice some purple boxes next to some elements with a check icon on them. This will grand the possibility of turning on or off that element on your broadcaster screen. You can turn on and off the match bar, kill feed, and players’ information.
Telestrator Mode
This mode will make even more simple the way we show content in our stream or tournament. This feature is compatible with touch screens. You can set your own camera positions, draw and have an interactive screen available to create wonderful content.
しかし, 初め, we need to set up some things in our Broadcaster Mode, we will go to our View Mode, in the menu you need to go down until you see “Static Camera Positions”, place yourself on the map wherever you want to set a new camera position and press “Create Position”, あなた’ll see the camera you just created in a menu, click the pencil tool to rename it, これはとても重要です. Create as many positions as you need, once you’re done with it, we can jump into Telestrator Mode by pressing Shif + T.
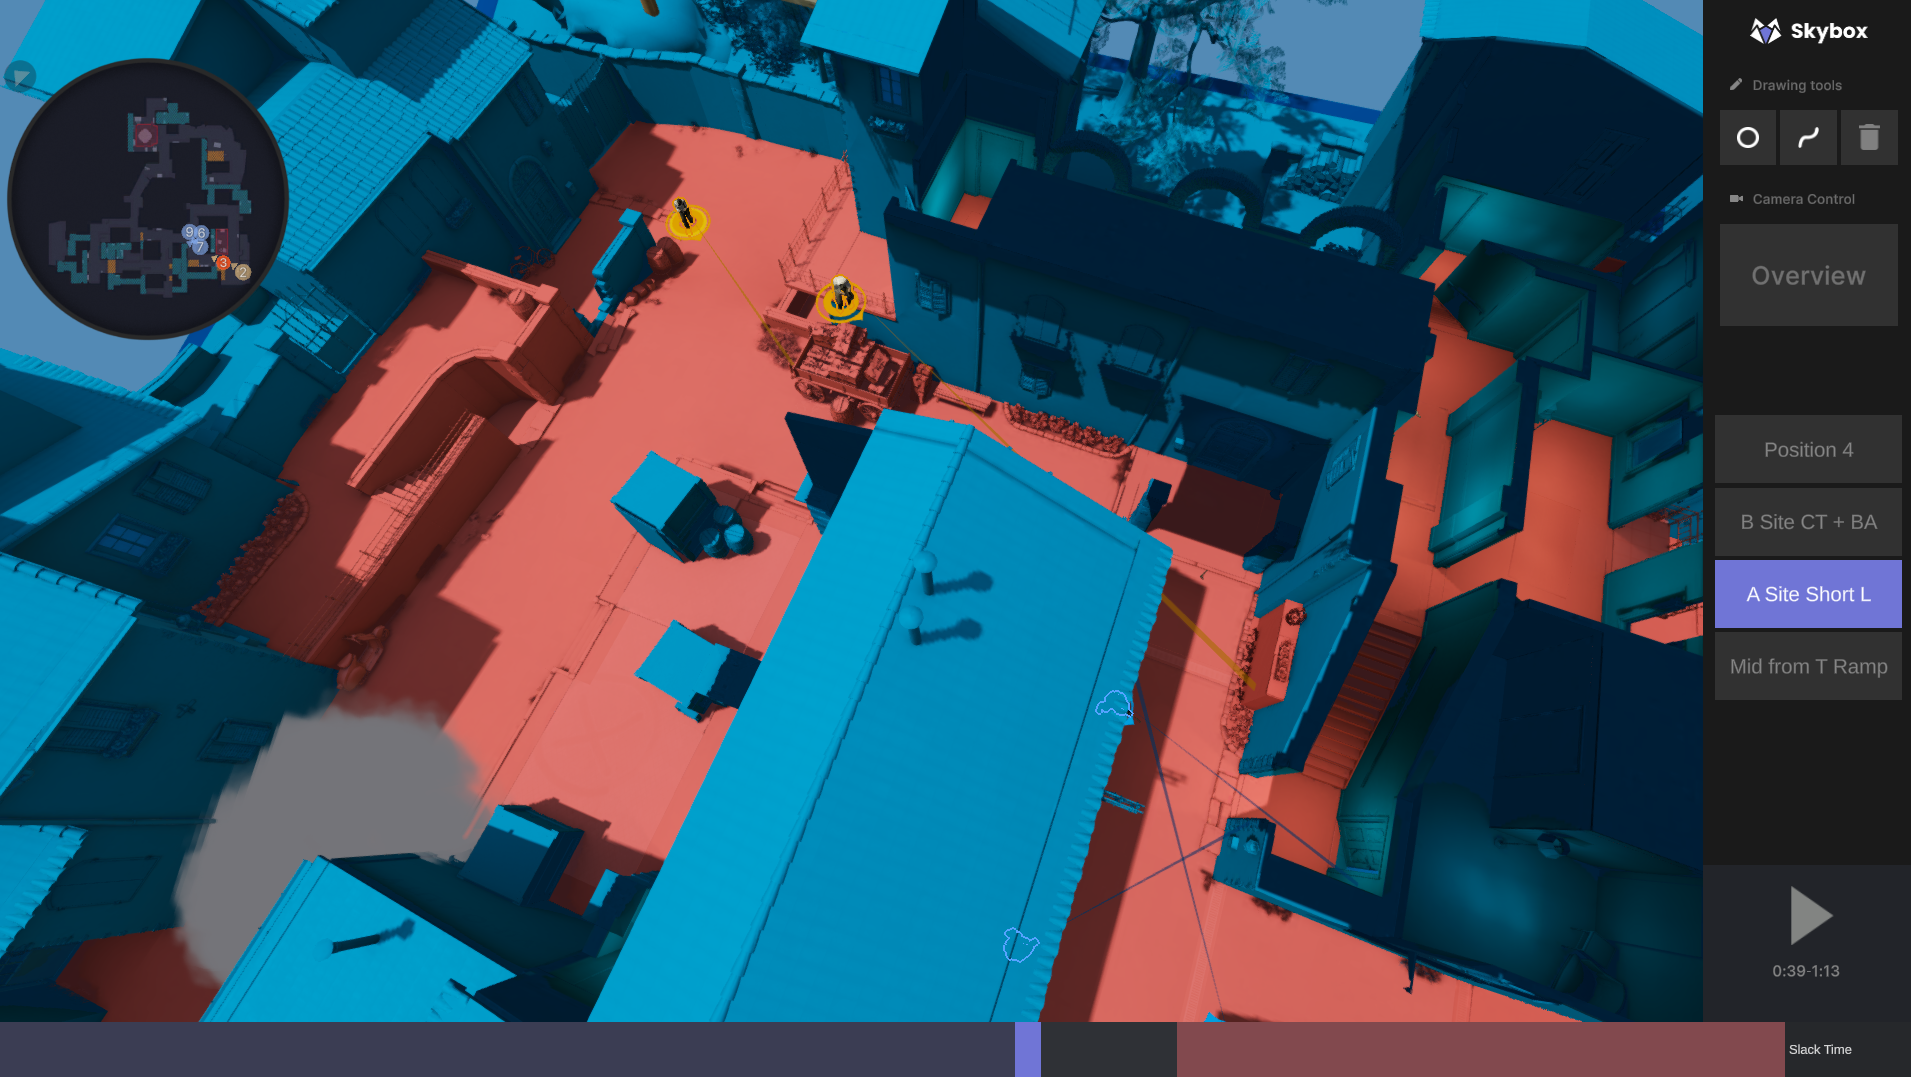
As soon as you enter you’ll see a simple view with the map in 3D, and some tools to your right. From here you can see the camera positions you’ve created with their corresponding names if you forgot to do so, the camera will show just “Position #”, It might be a little confusing. Then you can go to the overview mode and free mode with just a click. ついに, you will see the drawing tools to be used while watching the replay.
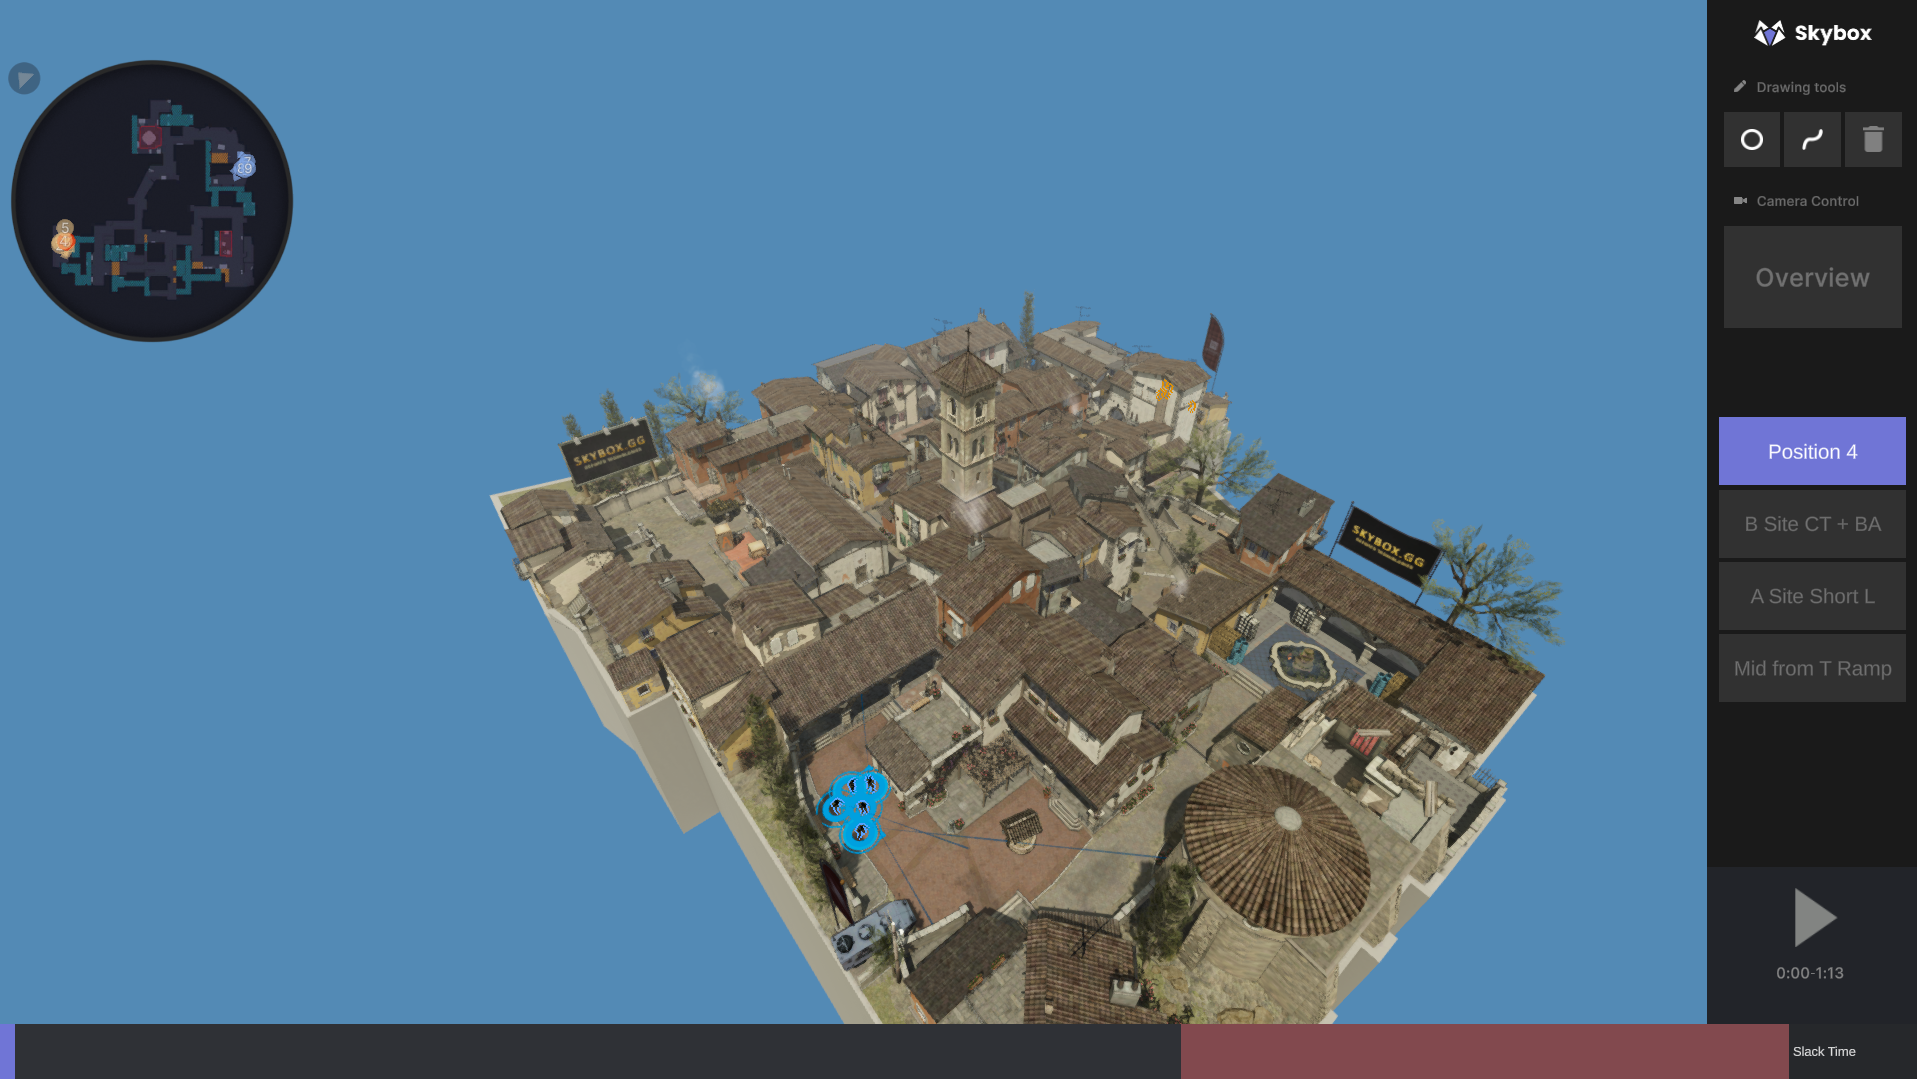
ヒント: you can use all the visual tools’ shortcuts to interact with the Telestrator mode.