This is a step-by-step illustrated guide to how I make nearly perfect corners at any angle in Satisfactory.
序章
Sometimes you want to extend two rows of foundation blocks toward each other and have them meet at a corner. If everything’s aligned to a common grid and the rows will meet at 90°, you’re all set. But in any other case, there’s a significant chance that the rows won’t meet at a precise corner.
There are basically two approaches to solve this problem. The first is to re-work one of the rows of foundation blocks and extend the other toward that direction using a curve technique. You might be able to get the re-worked row to end up very close to where you need it.
There is a very popular method developed by DC_Wan Kenobi for making curves in rows of foundation blocks and this method sometimes works as well for making nice corners. You can find his tutorial video ここ. I think this is an excellent method and I use it quite often. 基本的に, the curve is an extrapolation from a fixed starting point.
The second method, which is described in this guide, is to extend the two rows of foundation blocks to see where they intersect, and then work backwards from there to the original rows of foundation blocks. This is an interpolation method between two fixed starting points.
So there are two distinct use cases between the two methods. I think both of these approaches (and others people have developed) can be used effectively, depending on what you need to do in the game. I’ve done a small comparison of the two methods at the end of this guide to illustrate the difference to help you see which method, if either, works best for your situation.
This guide will show you how to make [ほぼ] perfect corners when you have two existing rows of foundations/walls you want to join, no matter what the angles are.
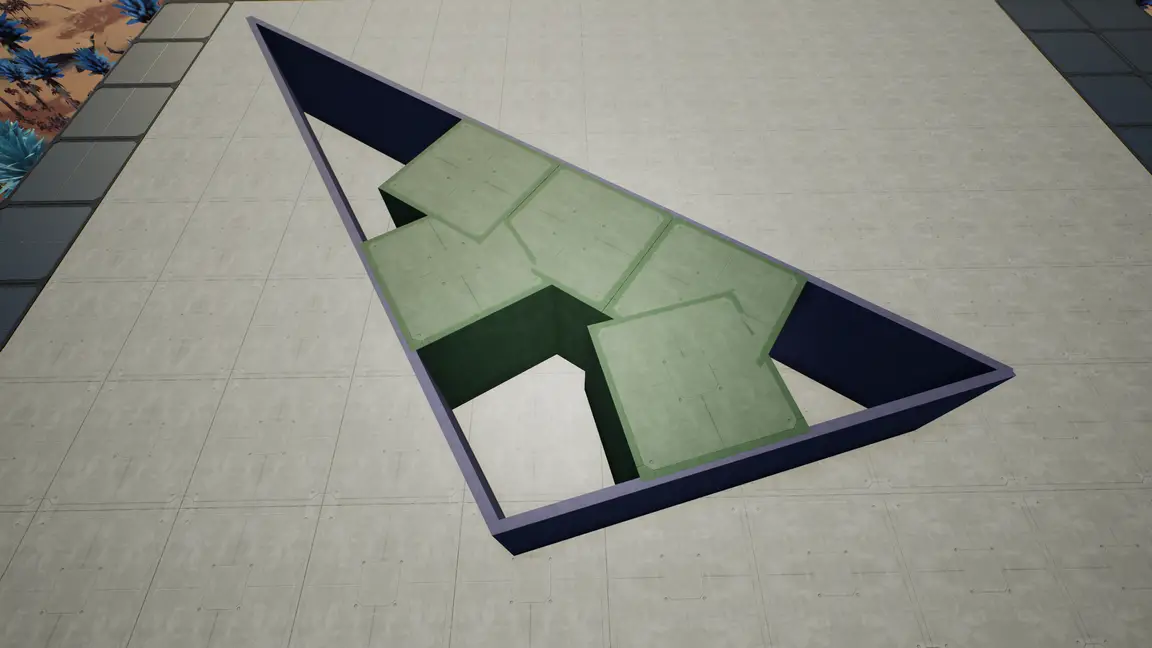
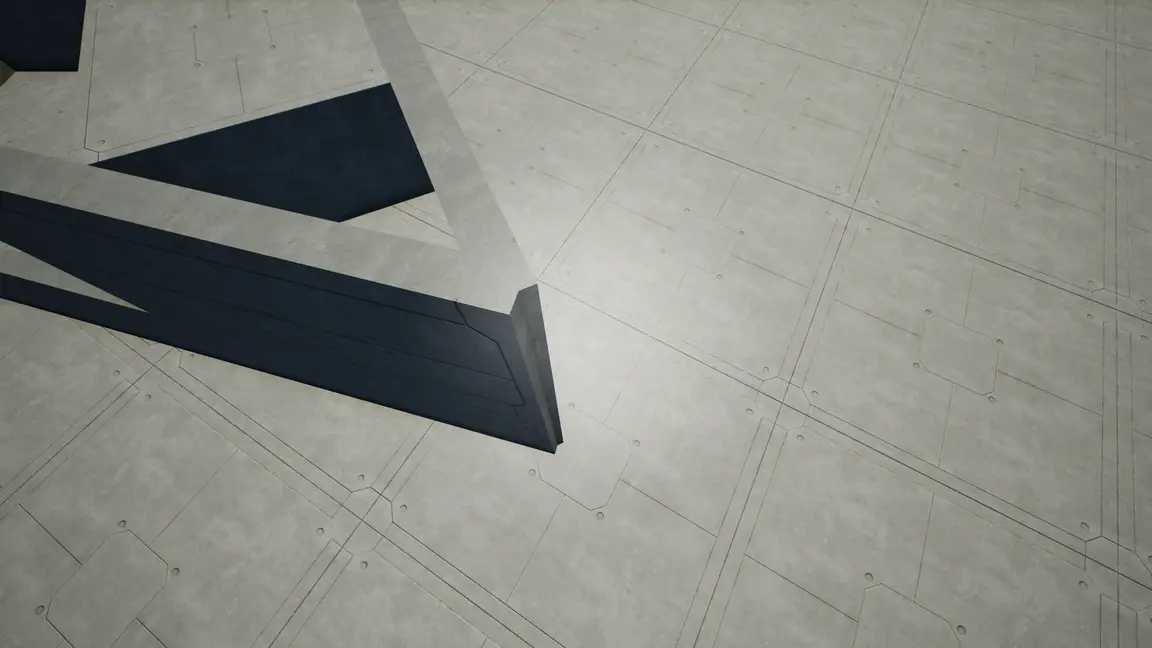
Here is an example of an enclosed triangle. The foundation blocks were used as guides to define the edges of the triangle giving three corners at different, unknown angles:
制限事項
This technique can be used for walls on the interior or exterior of rows of foundation blocks. But as shown in the image in the introduction, if the walls come together at an angle less than 90° there won’t be any way to fill in the area between them with foundation tiles that don’t protrude beyond the walls. If the angle is greater than 90° これは問題ありません — foundation tiles will simply overlap and clip into each other.
私. 使用事例
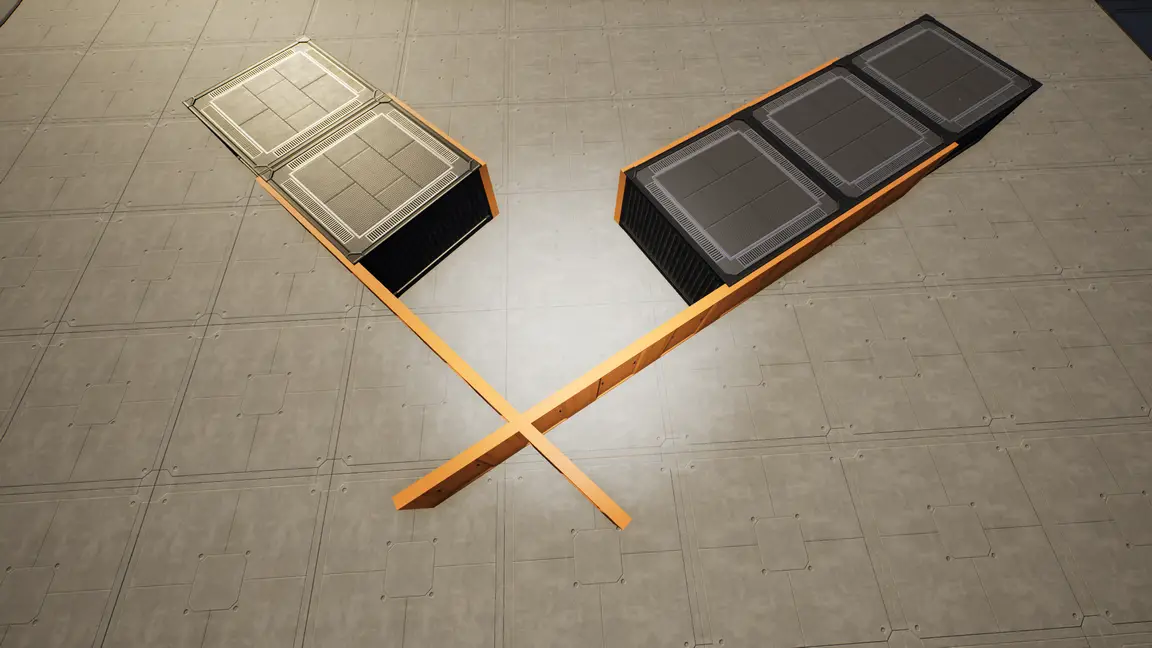
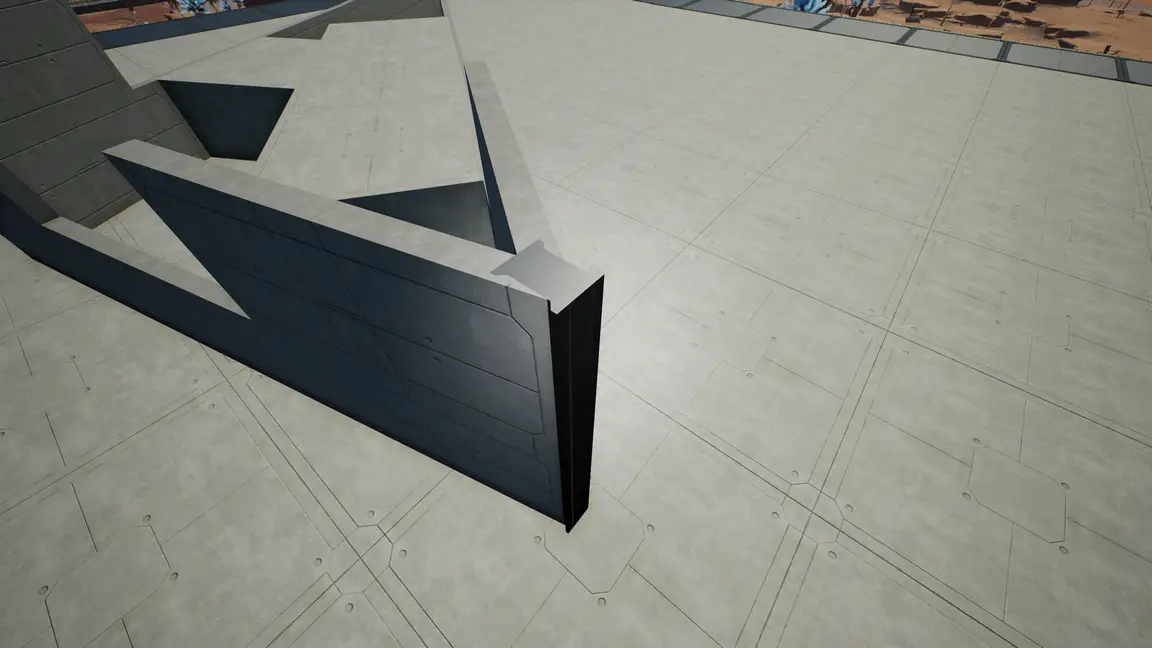
The use case used for the example in this guide is to bring these two rows of foundation blocks together with as perfect corners as possible:

Ⅱ. Find the Point of Intersection
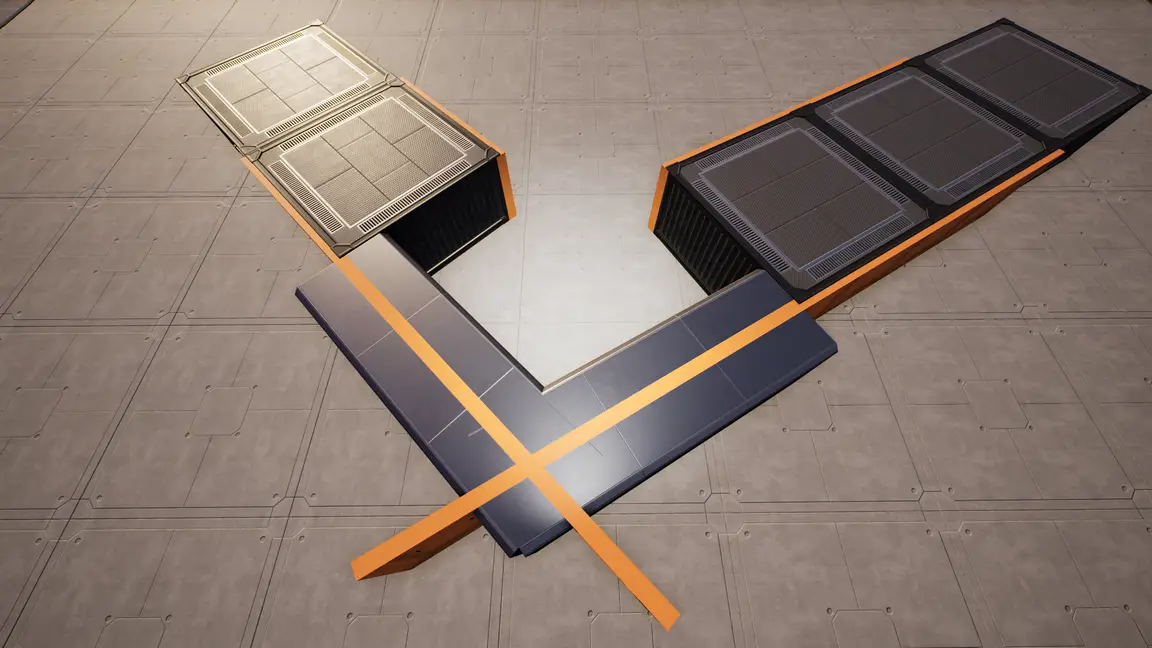
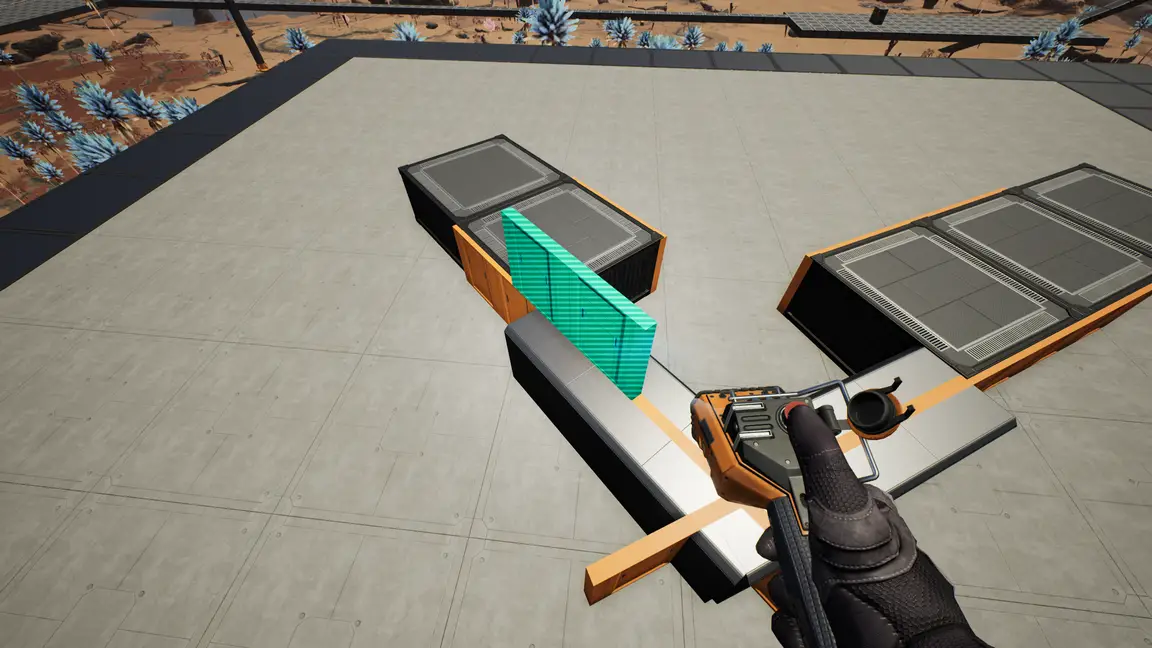
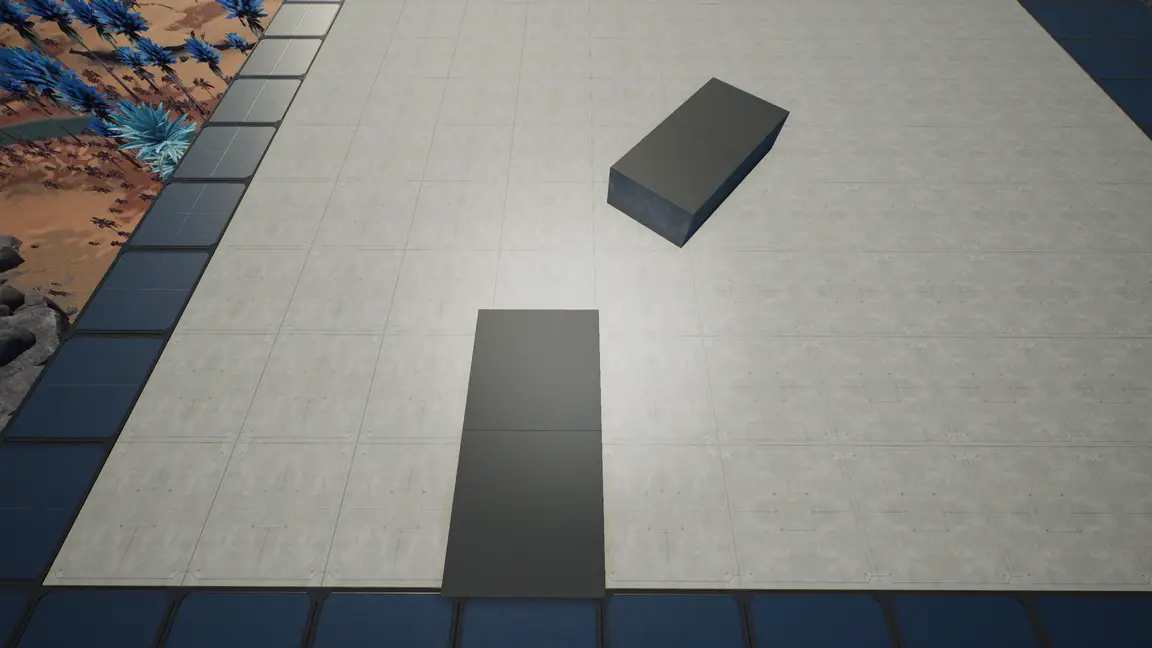
ステップ 1:Run walls along the sides of the rows of foundation blocks so they intersect. If you’re not using foundation blocks, then just extend the walls themselves so they intersect:

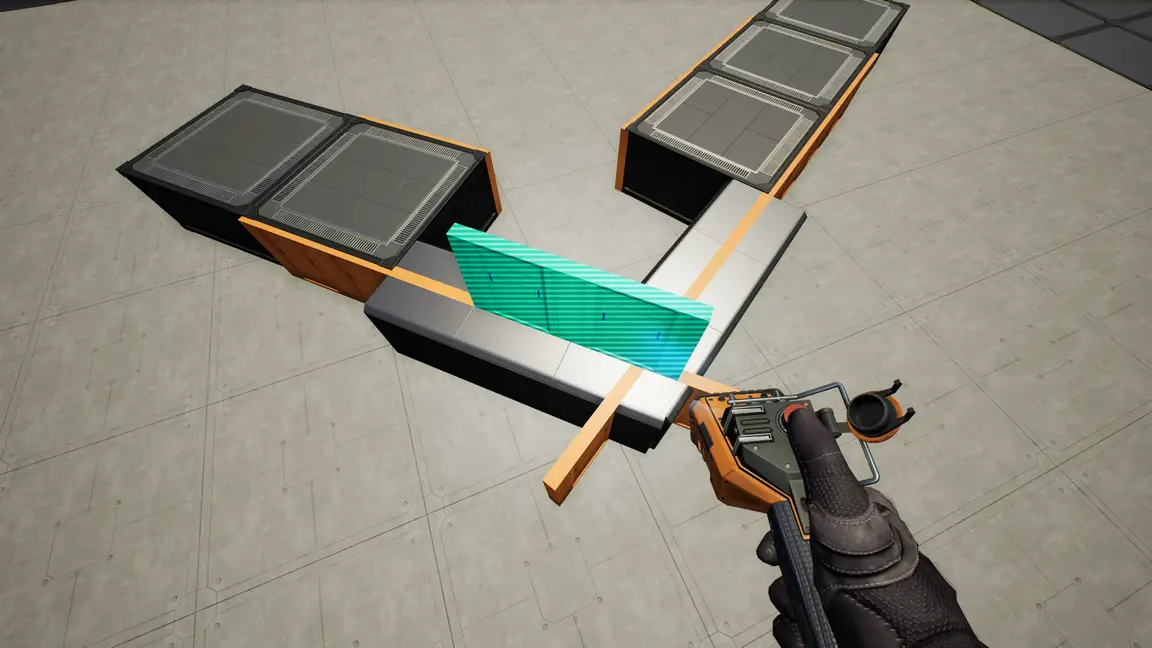
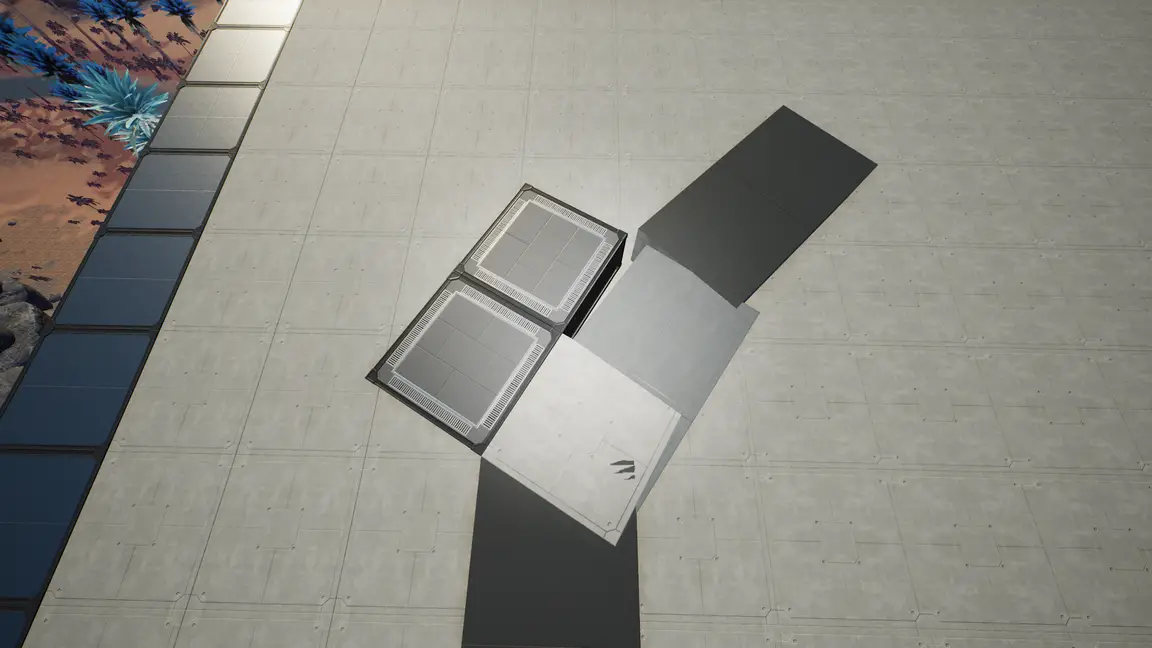
ステップ 2:Remove foundation blocks so the intersection is clear. I’ve also removed the intersection of the walls on the interior since we’ll be focusing on the other intersection:
Step 2a:If you’re not using foundation blocks, you need to temporarily add them, one step back from the intersection as shown in the picture, その上. Snap the foundation blocks to the walls so they are properly aligned.
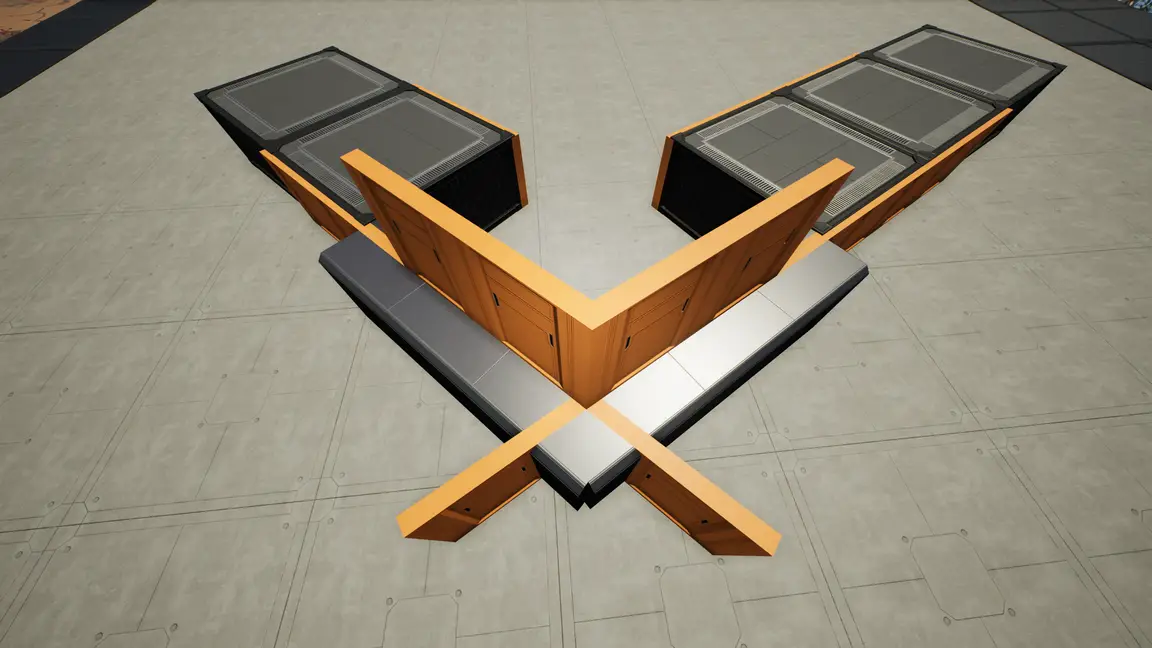
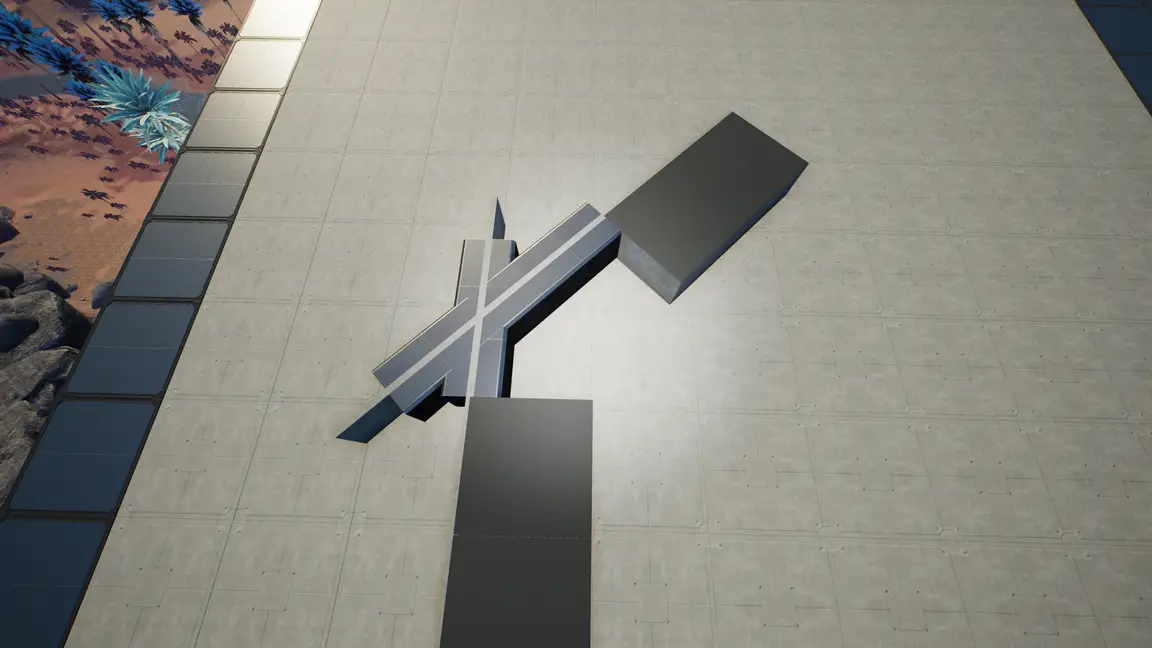
Ⅲ. Place Pillars
We’re going to use pillars to freely move wall pieces and get them to meet at a corner.
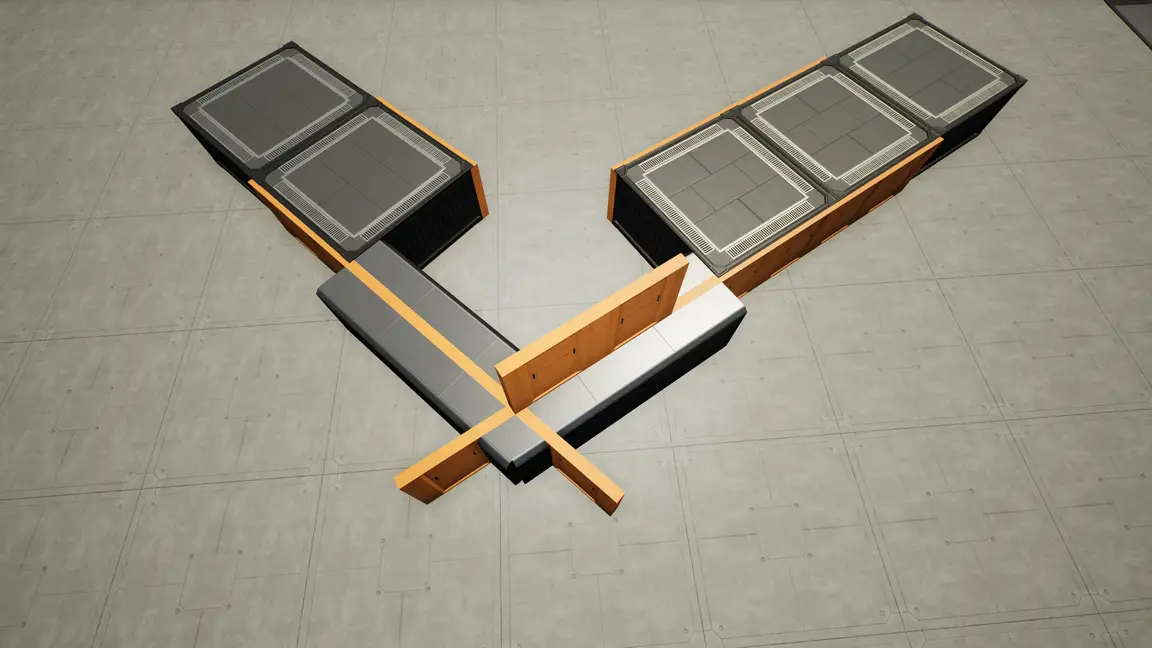
ステップ 3:Place pillars with their centers on the edge of the foundation block as shown. The pillars are oriented so they are attached horizontally to the foundation blocks, not vertically. You want the top face of the pillars to align exactly with the top of the foundation block and to extend beyond the intersection of the walls. Using zoop mode when placing the pillars is the easiest way to do this:
It may take you a while to get the pillars precisely positioned. If the game insists on snapping them in places you don’t want, sometimes it helps to remove some of the wall sections and then replace them after the pillars are positioned (clipping through the pillars).
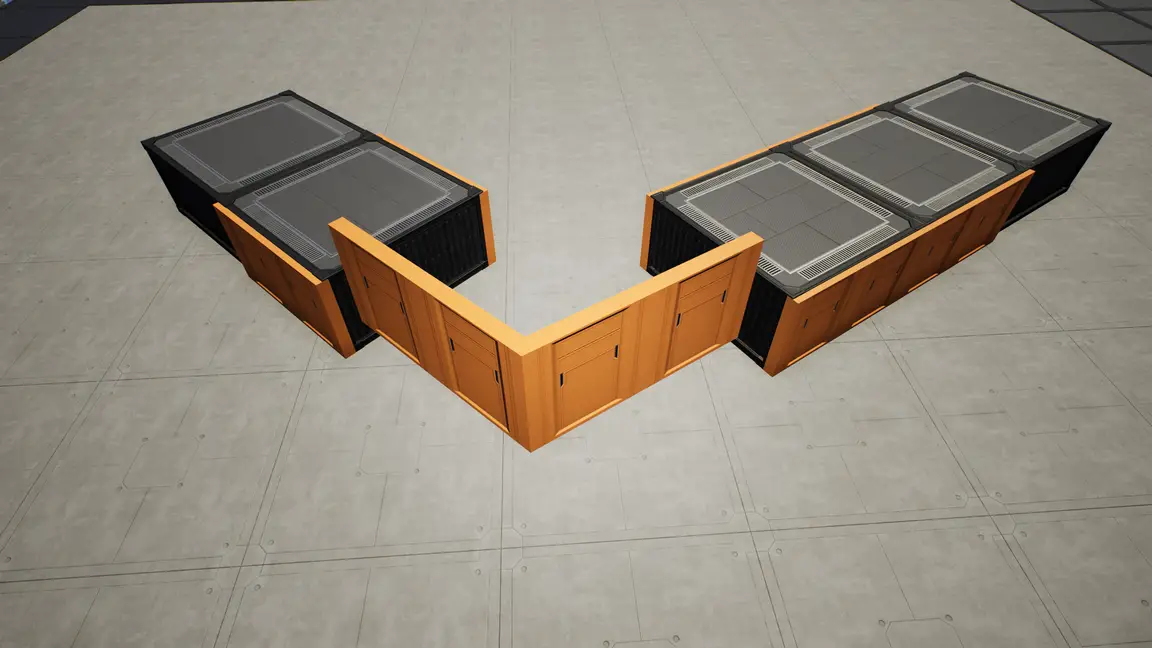
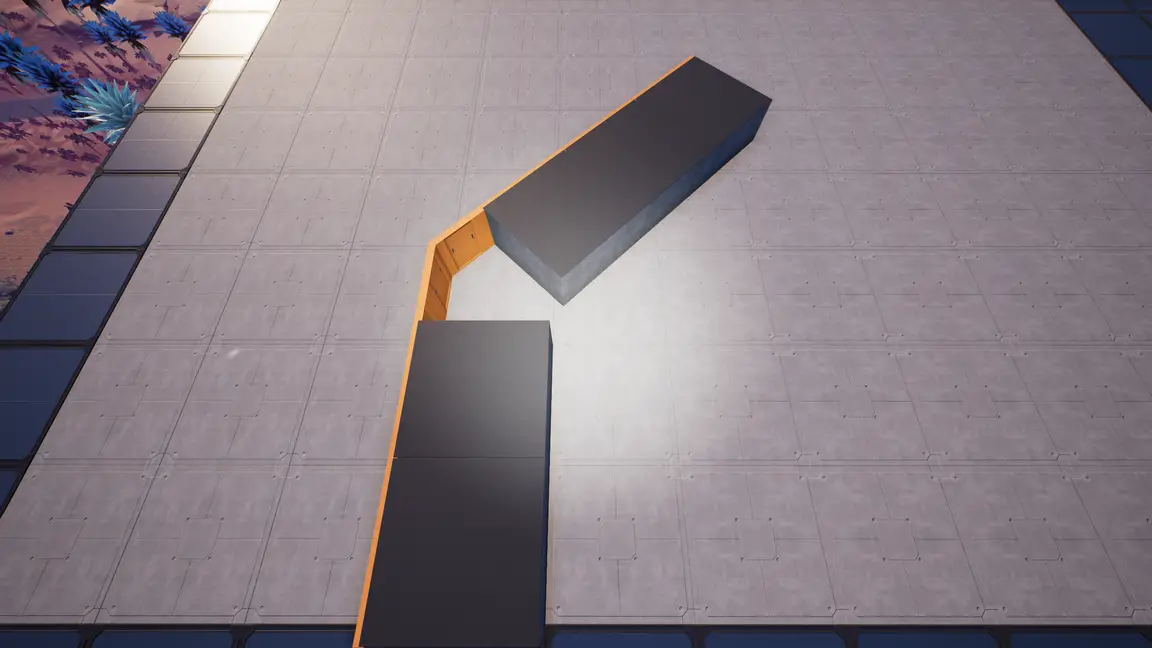
Ⅳ. Place Walls to Form a Corner
Once the pillars are placed, you can use them to freely slide a wall piece. The walls that are embedded in the pillars will be a guide for you to follow:
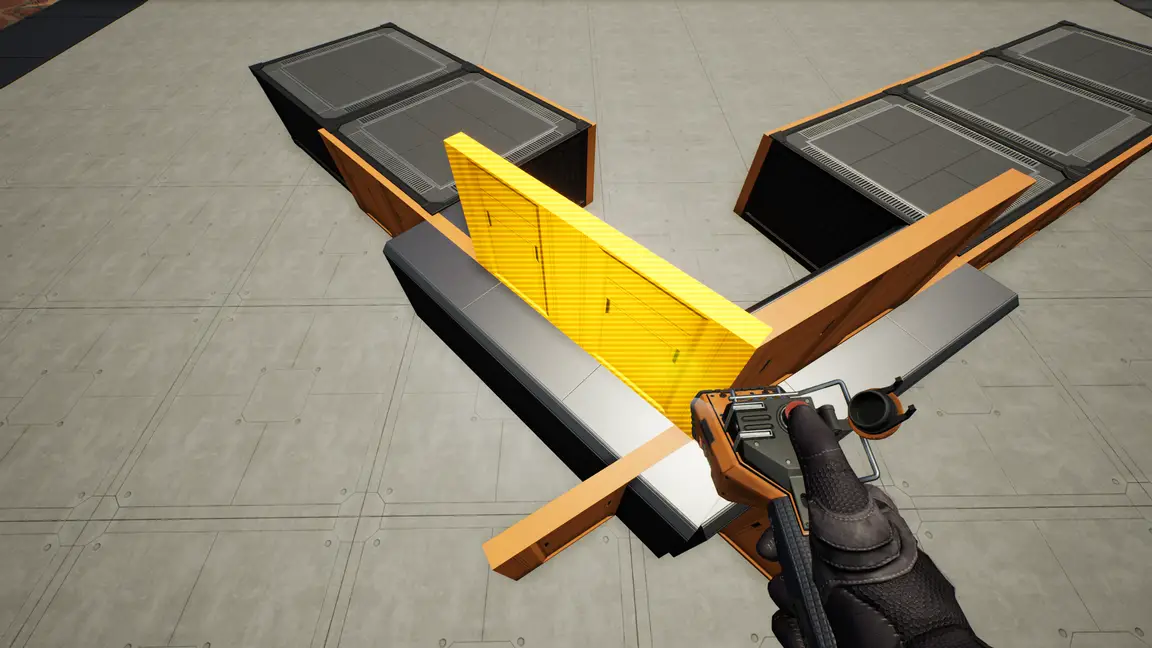
ステップ 4:Place wall pieces to form a corner, sliding them along the pillars until they are in the proper positions:
You may need to remove the walls forming the corner and replace them a couple times to get them to line up into a perfect corner. If the walls aren’t sliding to the locations you want, adding more pillars might solve that problem. You might also need to remove/replace foundation tiles and/or walls used for the guides. What accommodations you need to make, もしあれば, will depend on your specific situation.
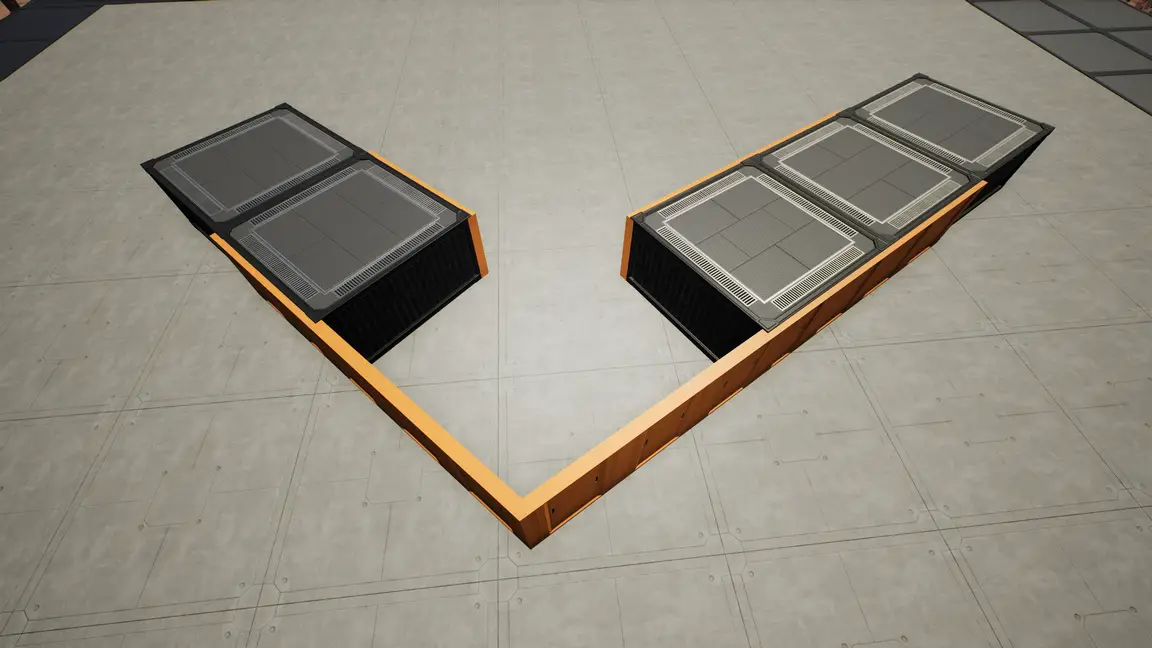
V. Remove Pillars and Intersection Guides
ステップ 5:Remove the pillars and the walls used as guides to mark the intersection:
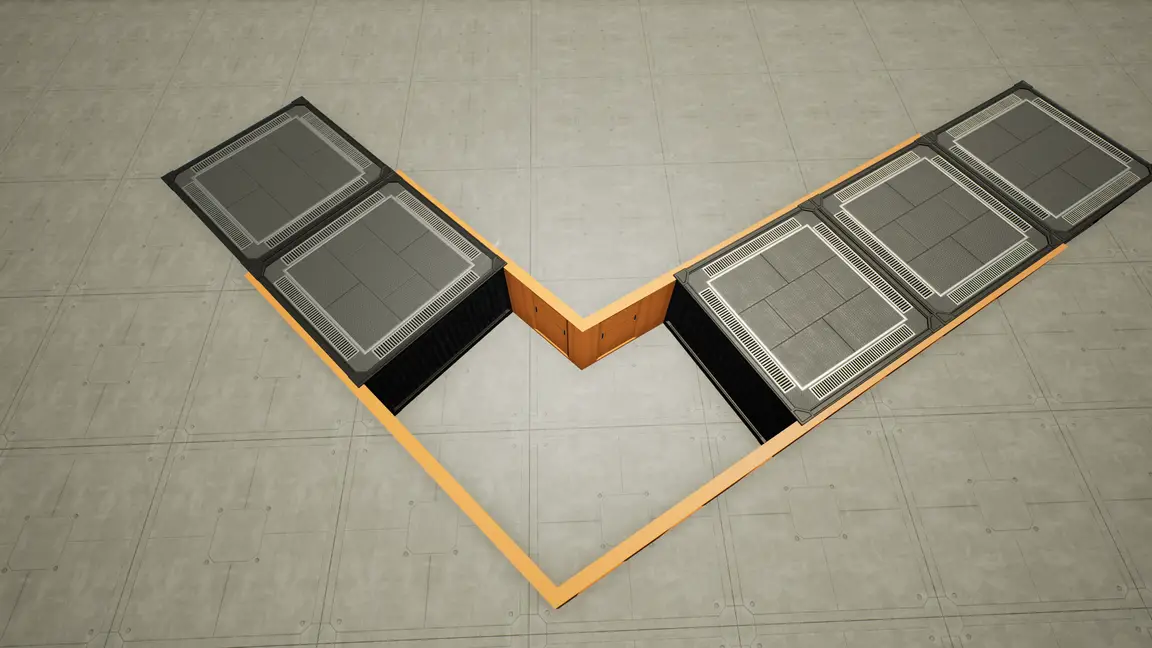
vi. Complete the Corner for the Original Wall
ステップ 6:Using the walls just placed to form the corner, snap walls below them to form the corner for the original wall. Extend the original wall toward the corner to fill the gaps (they will clip/overlap at some point) and remove the walls placed to form the corner above the original wall:
ステップ 7:If you’re filling in the area with foundation blocks, you can now use the walls forming the corner to snap them into place. I’ve colored them in the picture to make them easier to see:

VII. Interior Corner
The same technique works for the opposite edges to form the interior corner:
Since the original walls forming the interior corner can be extended to clip into the foundation blocks, if you don’t mind the look of the clipping, it might not be worth the bother for you to make the corner and instead just let them clip.
viii. Small Angles
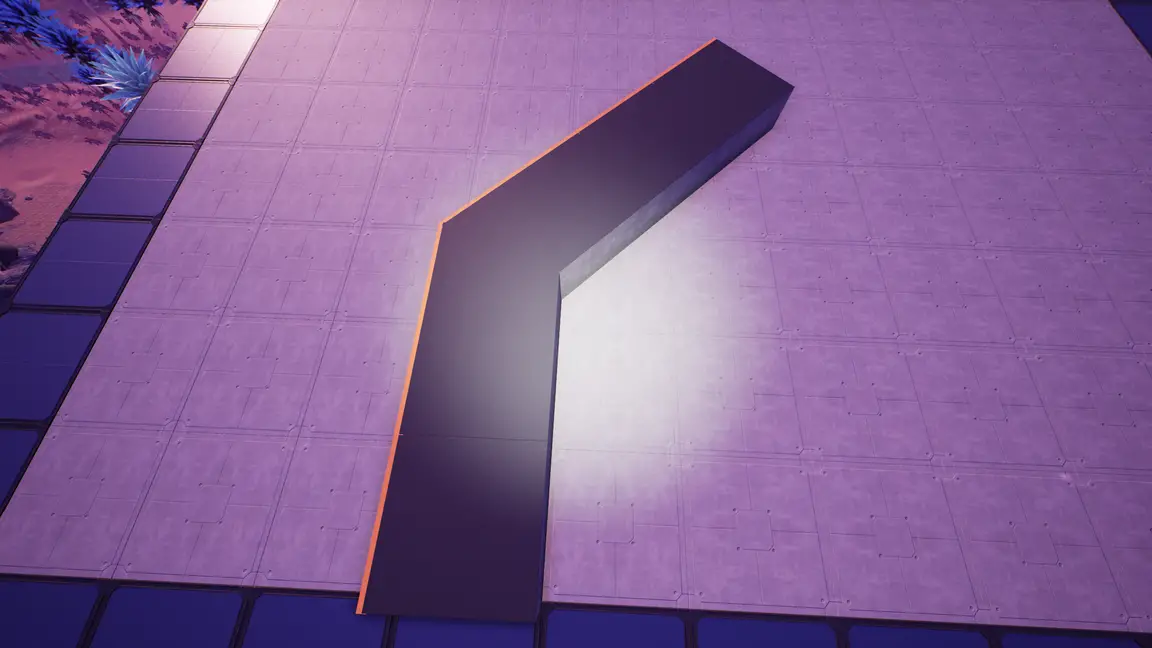
When the walls meet an angle less than 90°, you will be able to see the edges of the wall:
If this looks too unfinished, you can add a beam at the edge of the walls to give it a more finished look:
IX. Detailed Method Comparison
It helps to use an example to see the different use cases addressed by the method in this guide and DC_Wan Kenobi’s method to better illustrate that they aren’t simply two different ways of doing the same thing.
The goal is to connect the two rows of foundation tiles at a corner:
Using DC_Wan Kenobi’s method of making curves starting at the lower row of foundation blocks, with the minimum angle of turn, you get two possibilities where the foundation edge will run (the row with the FicSit material would use the right-side edge, the other would use the left-side edge):
You can see that there is no way to connect the corners of the two original rows of foundation tiles. But this is not the use case for this method that DC_Wan Kenobi describes in his tutorial.
Using the method in this guide, you can connect them:
ここから, you can add additional foundation tiles to fill in the pathway: