
- タイトル: Rogue Company
- 発売日:
- 開発者:
- 出版社:
Information about Rogue Company is still incomplete. これを使用してゲームの詳細を記入するのにご協力ください。 お問い合わせフォーム.
Rogue Company is capped to 150 FPS by default. This guide explains how to change that setting.
Setting Framerate Limit Above 150 FPS
デフォルトでは, Rogue Company has a framerate cap of 150 FPS. There is no in-game setting for this, so if you want to set it higher or lower, you’ll need to make the following changes to your config file:
ステップ 1: に移動します:
C:\ユーザー[ユーザー]\AppData\Local\RogueCompany\Saved\Config\WindowsNoEditor
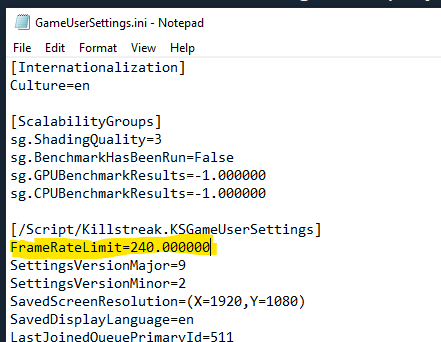
ステップ 2: 開ける GameUserSettings.ini
ステップ 3: 下 “[/script/killstreak.ksgameusersettings]”, add the following line:
FrameRateLimit=240.000000
You may change 240 to whatever value you’d like. ご了承ください 0.000000 does NOT seem to uncap the framerate.
ステップ 4: 保存して閉じます. ゲームを起動する.
ノート: If you find that the file reverts, you may need to set GameUserSettings.ini to read-only. Right-click the file, click Properties, add a checkmark to “読み取り専用” そして「OK」をクリックします.
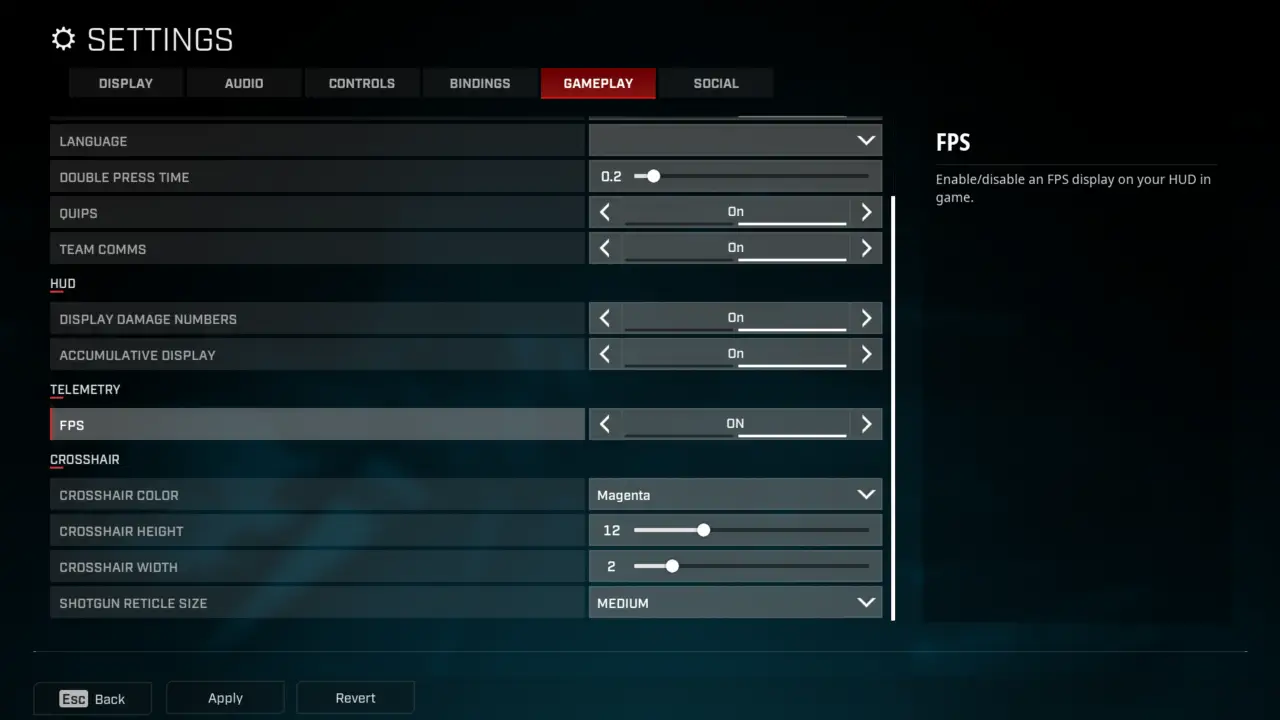
Verify Your FPS
To enable the in-game FPS monitor and verify your change, simply navigate to Settings – Gameplay and set Telemetry – FPS: の上.
Your current FPS will be displayed in the upper-left corner while in a match or in the Shooting Range.
これが今日私たちがこの目的で共有するすべてです Rogue Company ガイド. このガイドは元々、次の者によって作成および執筆されました。 plagueseason. このガイドを更新できなかった場合, これに従って最新のアップデートを見つけることができます リンク.