- タイトル: ファンタシースターオンライン 2 ニュージェネシス
- 発売日:
- 開発者:
- 出版社:
Information about Phantasy Star Online 2 New Genesis is still incomplete. これを使用してゲームの詳細を記入するのにご協力ください。 お問い合わせフォーム.
This guide’s intention is to improve the handling of the Force class with a controller, as the multitude of Techniques prove to be a challenge with the limited count of buttons on a controller and the lack of direct access to the Sub-Palette (like pressing 1, 2, 3… on the keyboard). After applying the steps in this guide, you will have a very efficient way of making use of a controller in regard to the Force class.
序章
Playing Force with a controller can be quite a hassle at first. The class seems to be less user-friendly than classes that don’t use Techniques. Normally you would assign one button per Action 1, 2, 3 and Weapon Action. Then you have the Sub-Palette for the rest of actions like Photon Blast or Active Skills. There are simply too few buttons to accommodate for all the six Technique elements and using the default way to call the selected Sub-Palette item isn’t ideal for hands-on combat either, because you have to switch away from the Techniques in order to heal, revive or use Active Skills.
My approach gets rid of all the mentioned shortcomings. For this to work, you have to use my custom controller configuration (“Ultimate Force” by VaniKa) and change the controller button assignments in-game.
前提条件
You should reset mouse and keyboard bindings to their default values as the controller profile uses them to directly trigger certain actions. If you don’t want to reset, at least make sure these assignments use default values:
アクション 2 must be assigned to / on the keyboard (US layout).
アクション 3 must be assigned to the mouse wheel click (ボタン 3).
The Sub-Palette items 1, 2, 9 と 10 must be assigned to the number keys 1, 2, 9 と 0.
Changing camera distance and height must be assigned to /, *, – と + on the numpad.
If Action 2 does not work with LT+X, then it must have to do with the keyboard layout. In that case you can modify the controller profile for LT+X to trigger the right keyboard key for Action 2. If that proves to be difficult you can re-assign the keyboard key in-game and trigger that instead with LT+X.
重要: As this solution relies on triggering keyboard key presses with the controller, you have to disable direct chat in the game. Disabling direct chat means that you have to press a specific key first to enable chat mode.
In-game settings
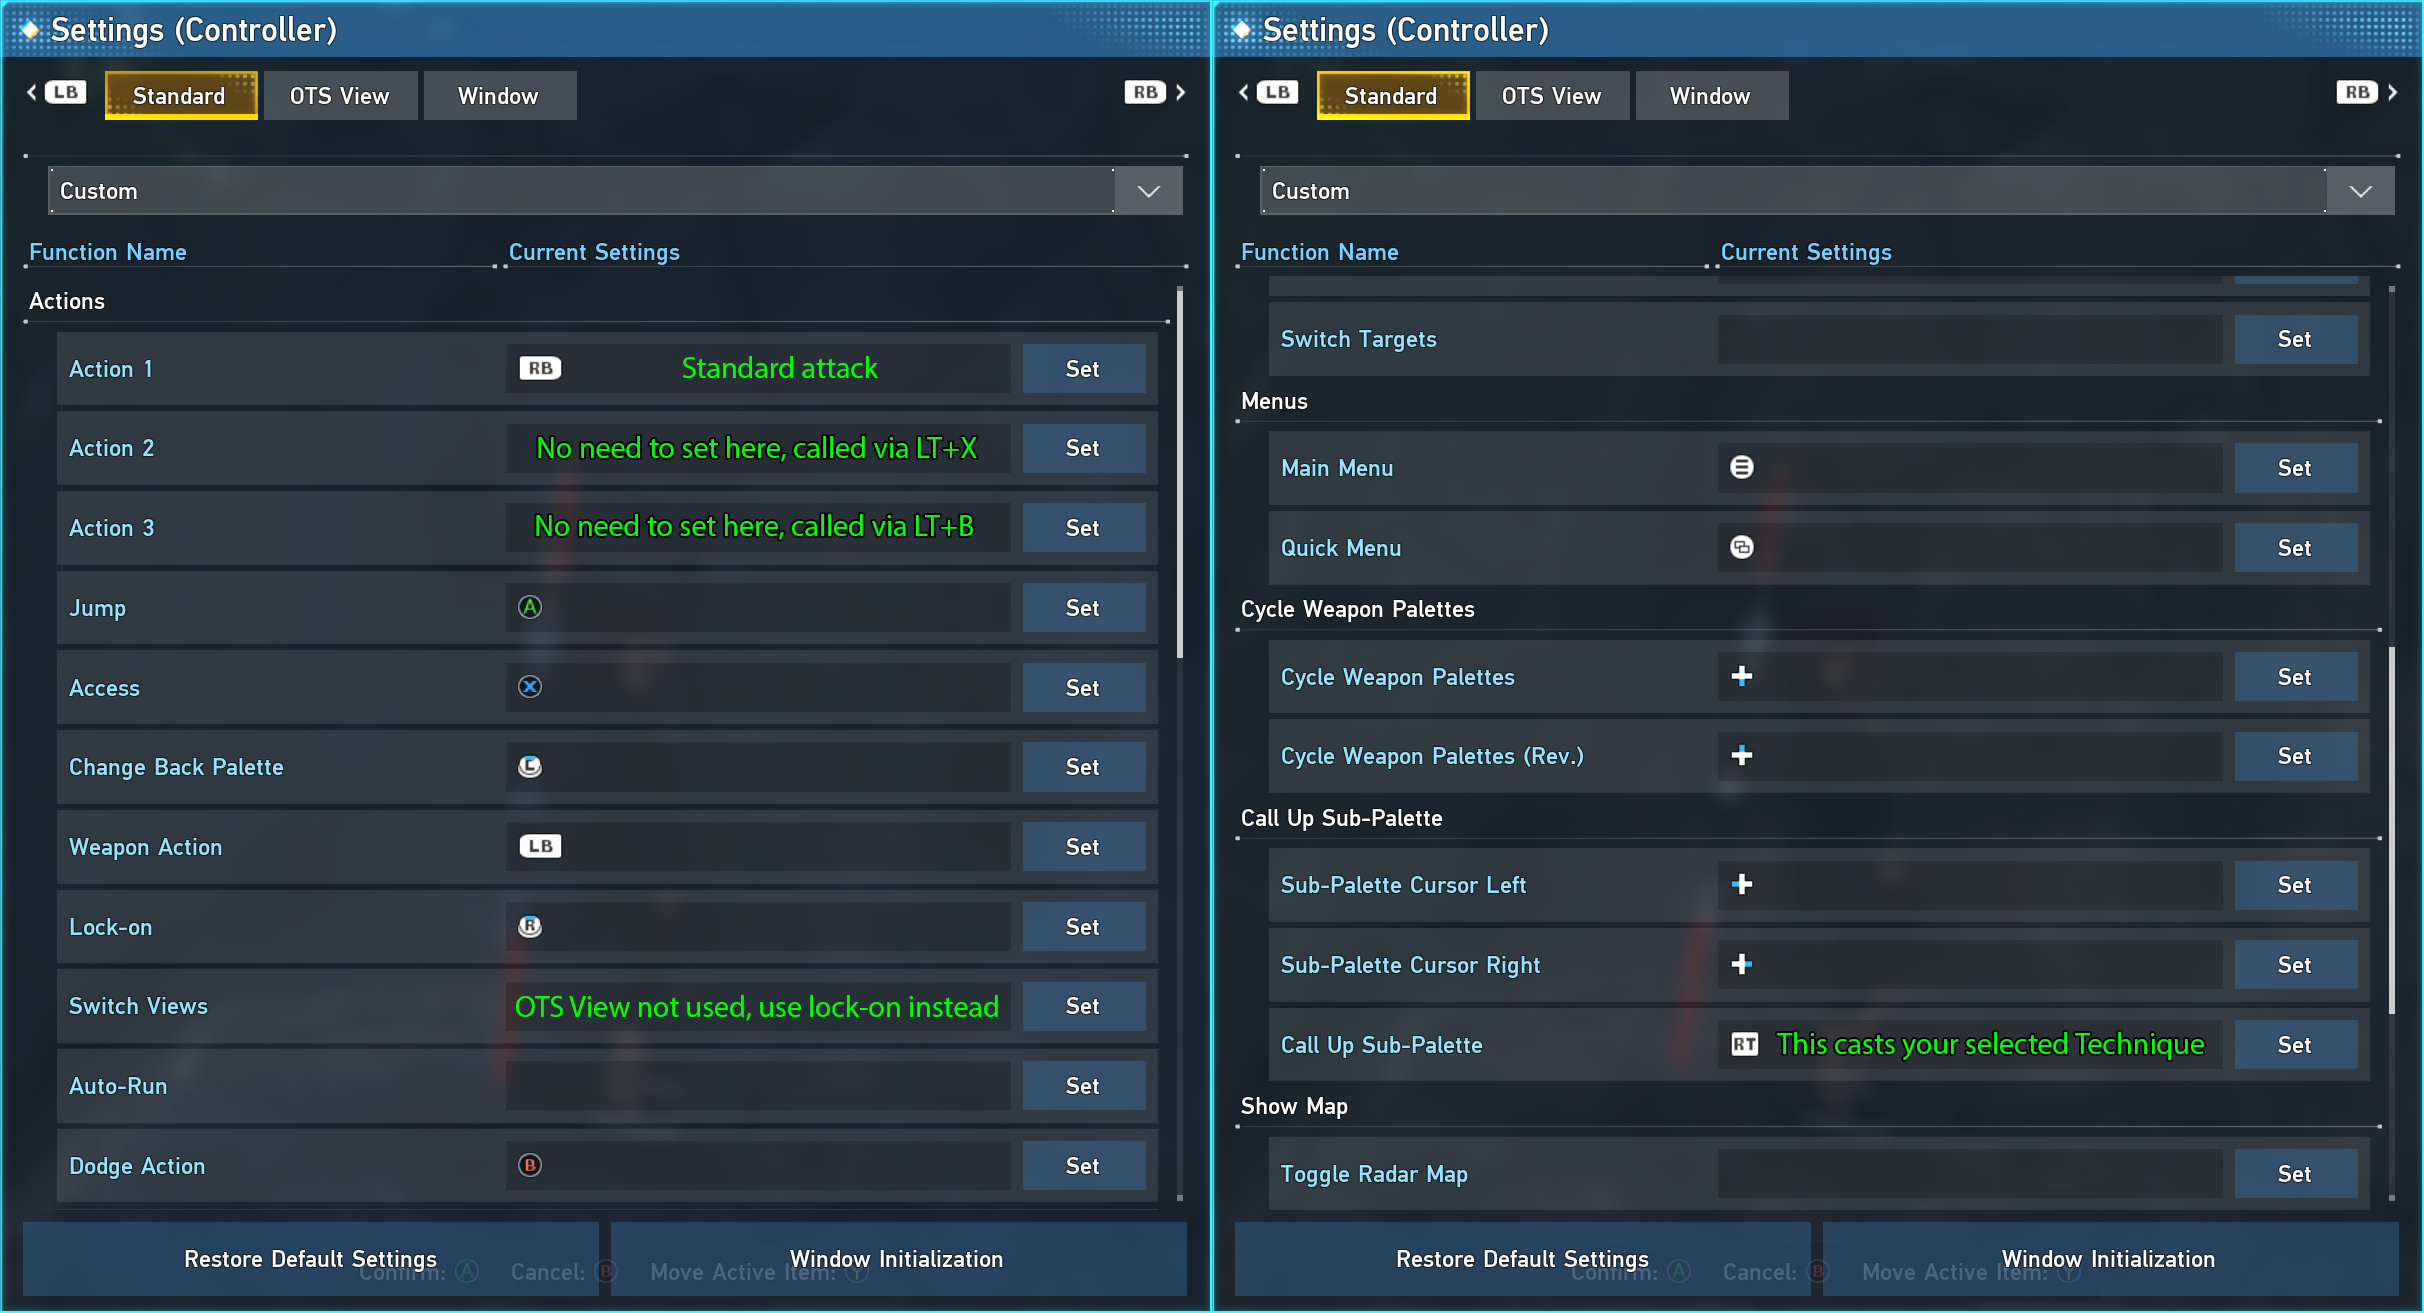
Use these controller button assignments to make my configuration work:
Controller Profile
My profile is called “Ultimate Force”, by VaniKa. I have published a profile for three controller models, Xbox ワン, プレイステーション 5 and Xbox One Elite. Here are the links to each profile:
Xbox One Controller:
スチーム://controllerconfig/1056640/2935266115
プレイステーション 5 コントローラ:
スチーム://controllerconfig/1056640/2935210693
Xbox One Elite Controller:
スチーム://controllerconfig/1056640/2935255132
Explanation and recommendations
The main problem when using a controller is that you can’t directly call a specific Sub-Palette item. You have to select an item first and then you can use a button to call it. This is remedied by making a part of the Sub-Palette directly callable without having to change the selected item. This applies to the items 1, 2, 9 と 10 (first two and last two items).
アイテム 1 is called by pressing the Y button. You should put your Restasigne (癒す) ここ. アイテム 2 is called by holding Y for a longer time. You should assign your Reversasigne (revive) ここ. Note that you can still normally use the Y button in the game’s UI. The trick here is to send both the Y button press and the 1 key press when pressing the Y button.
LT (left trigger) functions only as a shift button. It modifies both the D-Pad and the Button Pad (あ, B, バツ, Y) to work like this when held:
LT+Y: Sub-Palette item 10 (you should put your Photon Blast here)
LT+X: Weapon-Palette Action 2 (you can put a Compound Technique or an Active Skill here)
LT+B: Weapon-Palette Action 3 (you can put a Compound Technique or an Active Skill here)
LT+A: Sub-Palette item 9 (you can put a Compound Technique or an Active Skill here)
You can double the possible assignments for LT+X and LT+B by assigning different actions to Action 2 と 3 in your Front and Back Weapon Palette and switching between the Front and Back Palette (left stick click).
LT+D-UP: Move camera closer
LT+D-DOWN: Move camera further away
LT+D-LEFT: Move camera higher
LT+D-RIGHT: Move camera lower
Here are my Palettes as an example:
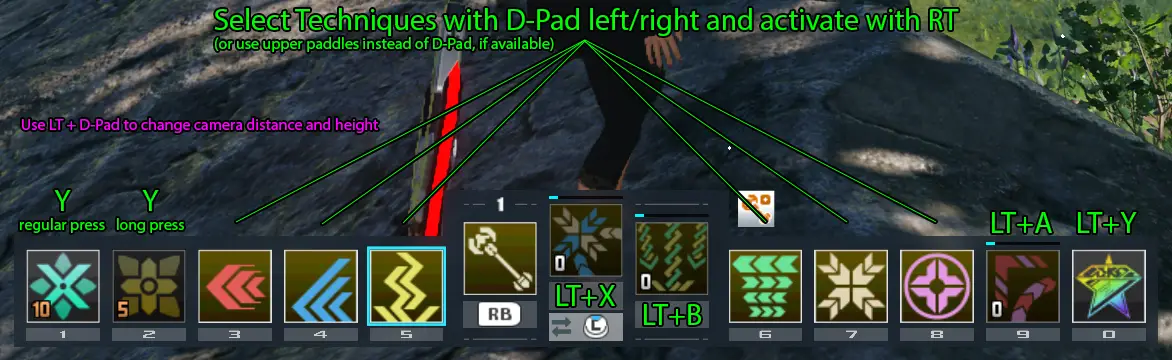
All elements fit onto the Sub-Palette (アイテム 3 に 8) and can be called by selecting one and pressing RT (right trigger). I find RT best because it goes easy on the finger and can be used while moving the camera. Shooter games also use RT as the trigger button. And there’s lots of shooting in NGS as a Force.
You basically only switch the selected Sub-Palette item to select a different element. お勧めします, you put your preferred Techniques on the first Sub-Palette and if you need a different (less often used) Technique of the same element, you switch to a second Sub-Palette, where you put your secondary Techniques on.
This way you can use all Techniques and elements, all active skills, all Compound Techniques and Photon Blast in a very convenient way, while your every-day fighting mainly consists of simply pulling the trigger.
If you have a controller with paddles (like the Xbox Elite Series 2) you can make switching Techniques more convenient by using the paddles. This way you can keep your left thumb on the left stick while changing Techniques.
楽しい事実
You can directly open the map by holding the Main Menu button (メニュー). The small map with the coordinates is opened by holding the Quick Menu button (ビュー). Both maps can be closed by pressing the Cancel button (B).
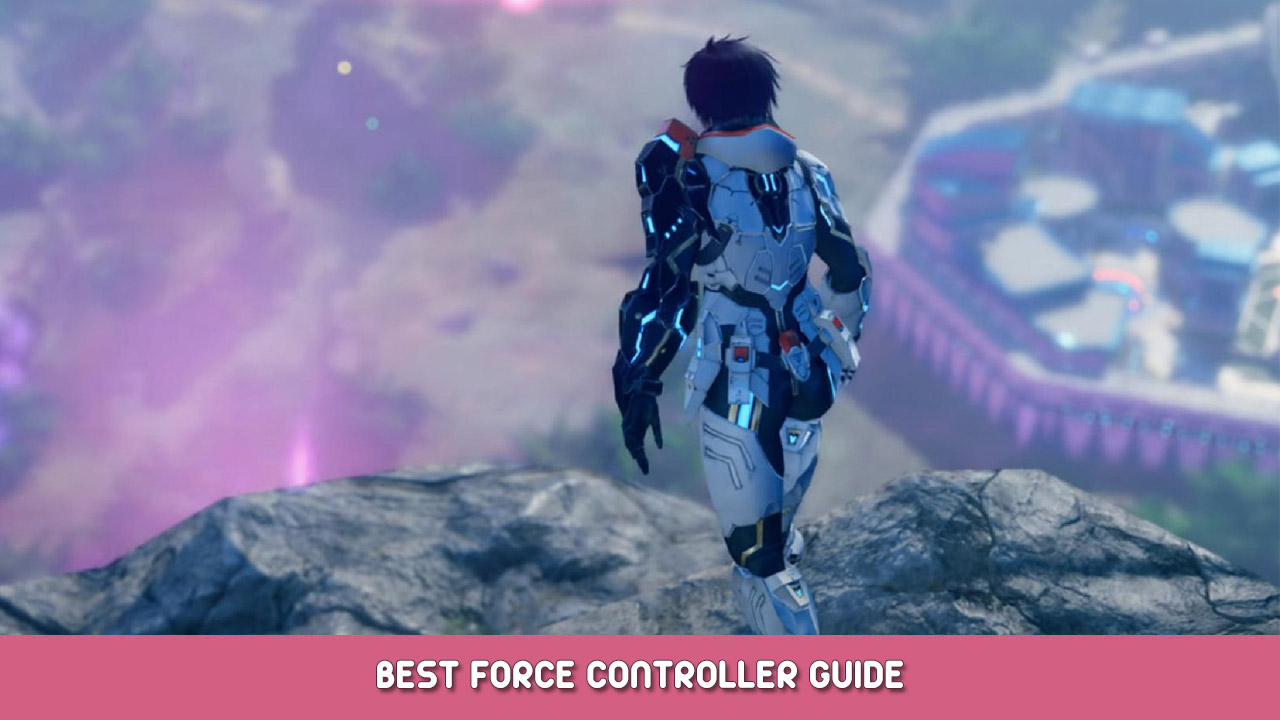
これが今日私たちがこの目的で共有するすべてです ファンタシースターオンライン 2 ニュージェネシス ガイド. このガイドは元々、次の者によって作成および執筆されました。 VaniKa. このガイドを更新できなかった場合, これに従って最新のアップデートを見つけることができます リンク.