

- タイトル: オークは死ななければならない! 3
- 発売日:
- 開発者:
- 出版社:
Information about Orcs Must Die! 3 まだ不完全です. これを使用してゲームの詳細を記入するのにご協力ください。 お問い合わせフォーム.
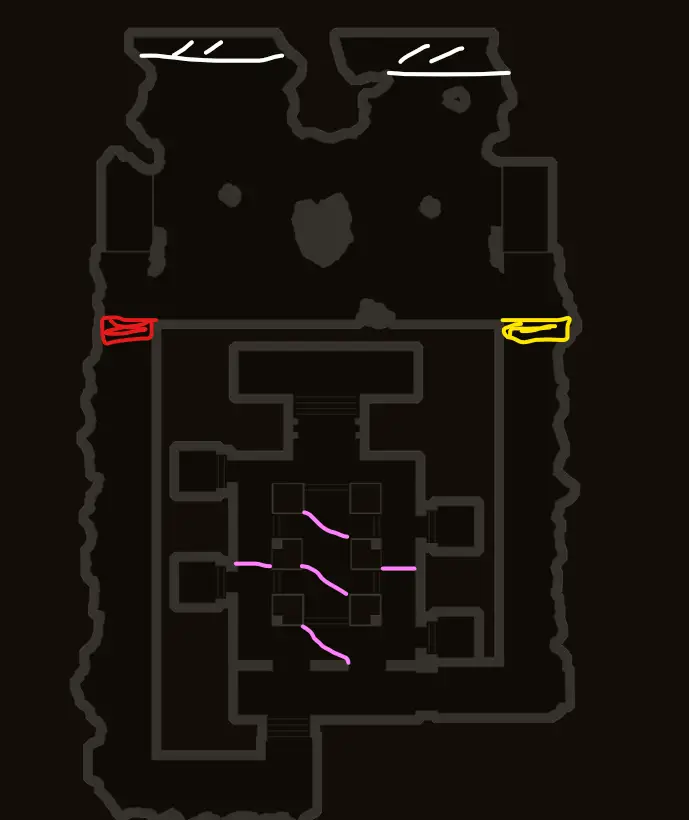
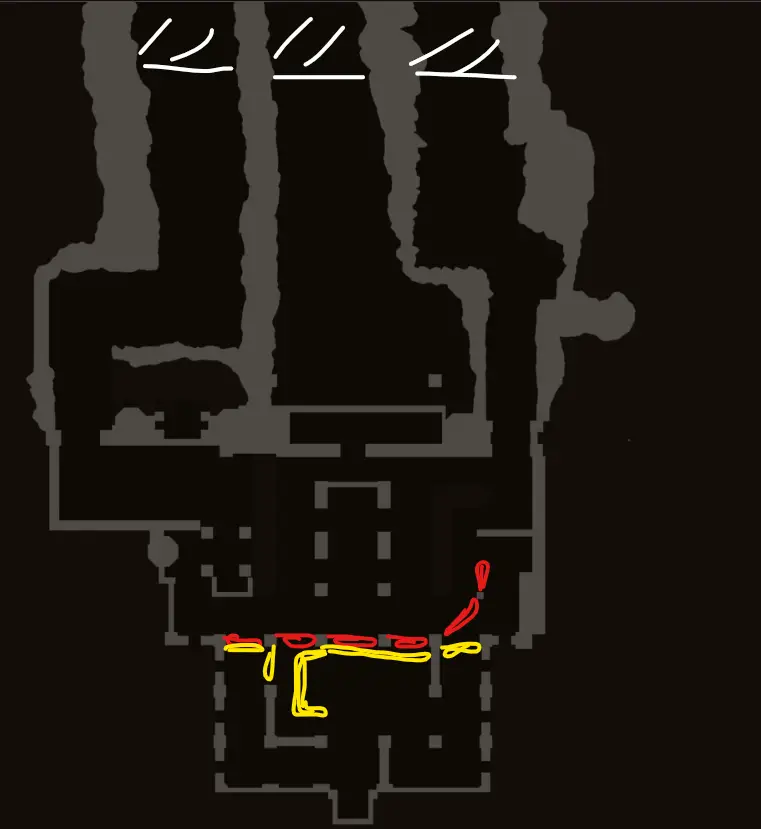
There are plenty of ways to cade on these maps, some extremely intracate. We won’t be going over that but this is to show case routing all enemies to the same kill box on maps that have paths for this. Not all options will make par time but most will.
White is the gates, where enemies spawn.
Red lines are cades as an option 1
yellow lines are a cade as option 2
Green is where enemies wont walk but look like they should (only on one map)
teal is special circumstances (only on one map)
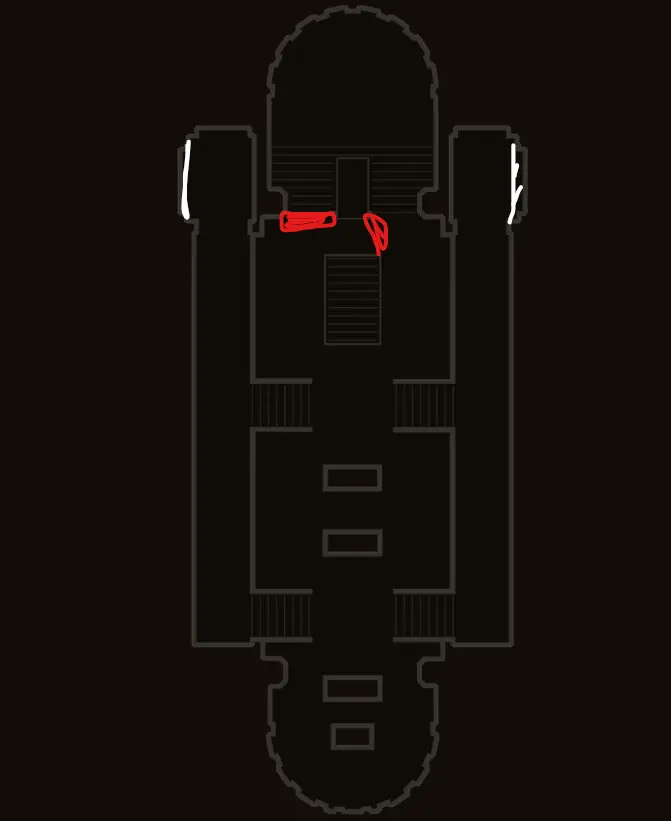
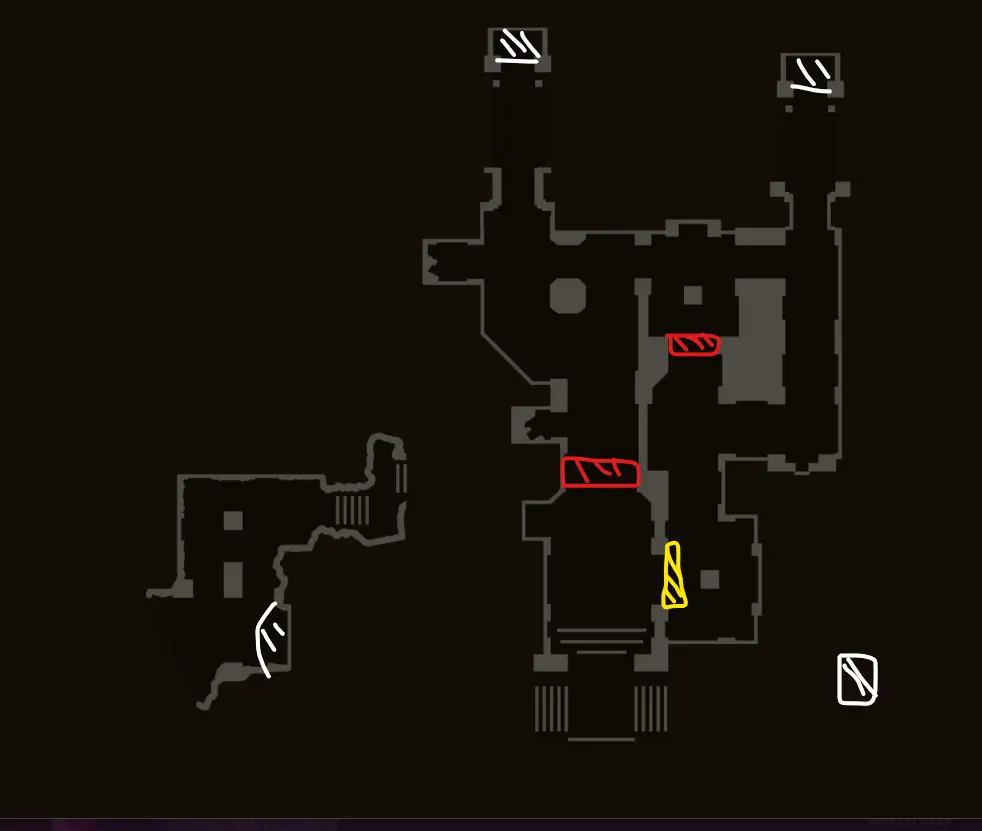
hidden dock
Sapppers show up on this map. The outside yellow and red cade locations will not get targeted by sappers if placed exactly where shown so long as the sappers have another thing to attack. The cades in the middle will need some kind of protection from either side. A brimstone on the upper level behind the cade and a kill box before the cades will do the trick.
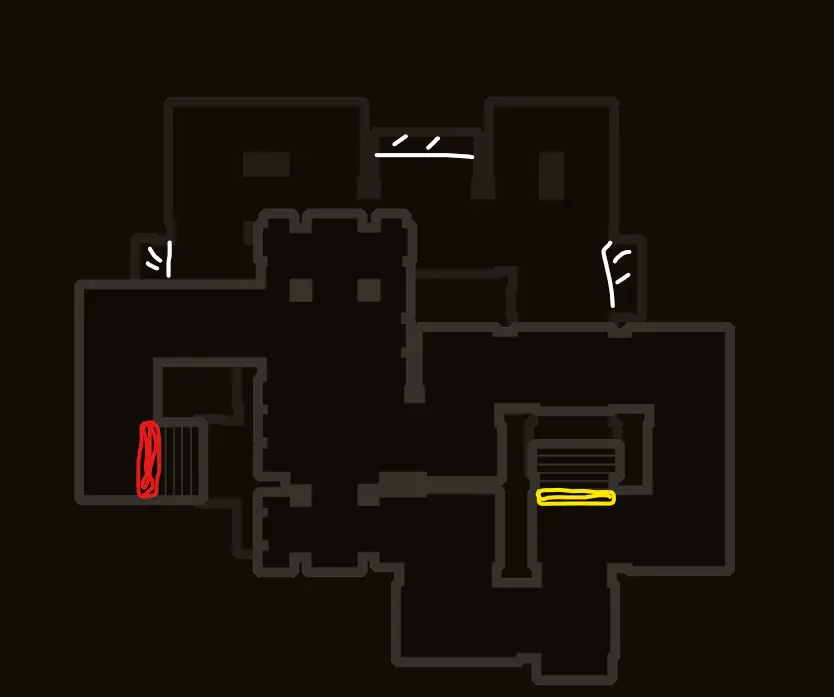
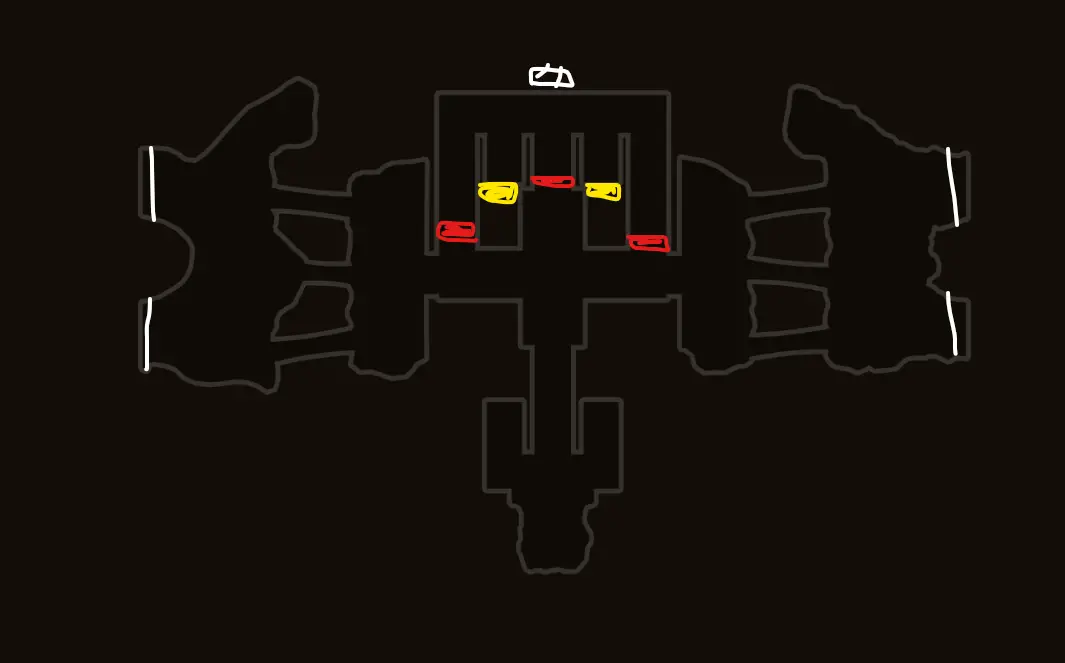
split stairs
単純. build cades just on top of the stairs touching the stairs at any level and sappers wont attack the cades. They will try to go all the way around the map to attack them.
lava pits
They cannot and will not go through the green area. With this map you really should not need to use cades to route since you have such a great killbox area inside and a long bridge to kill on. I’ve never routed in the back but you could if you wanted to.
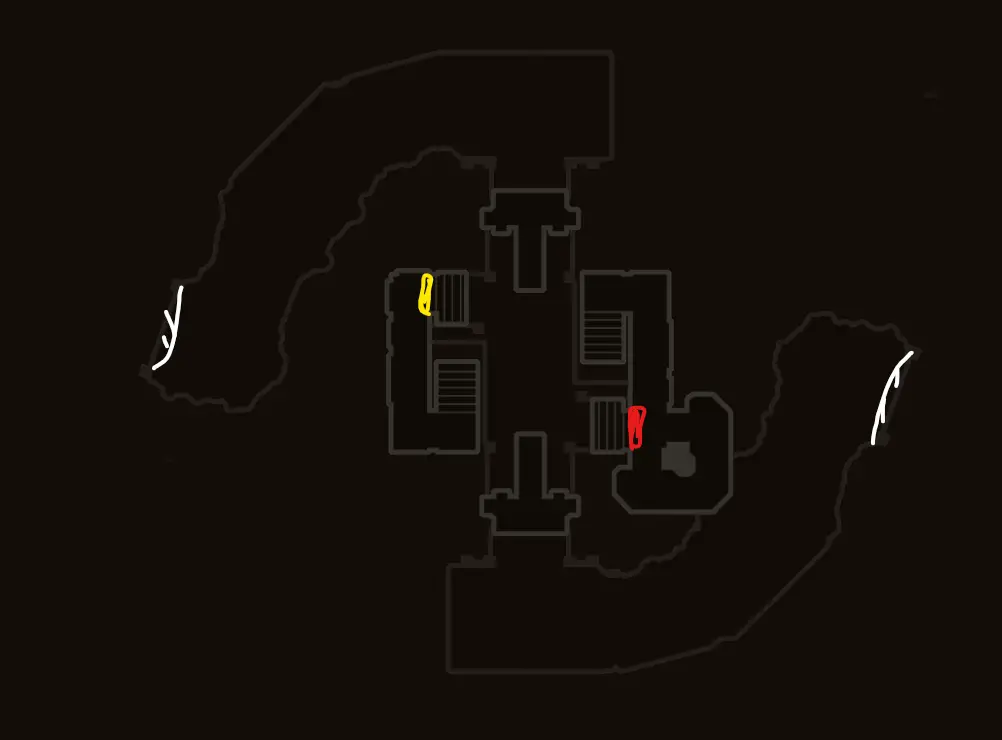
cliffside
this is the first map you need to worry about sappers targeting your routing cades. sappers usually dont like stairs but on this map they dont mind. blocking off the top of the stairs by the rift can make enemies walk for a good while before they enter into a kill box so you might want to move the cades farther out down the stairs to save time when you have more money.
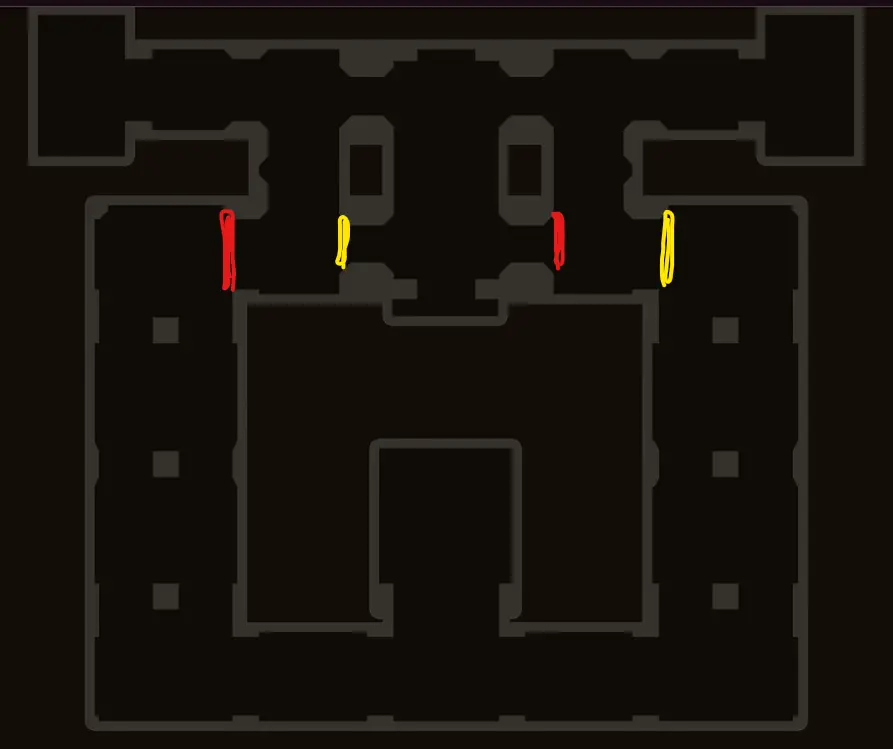
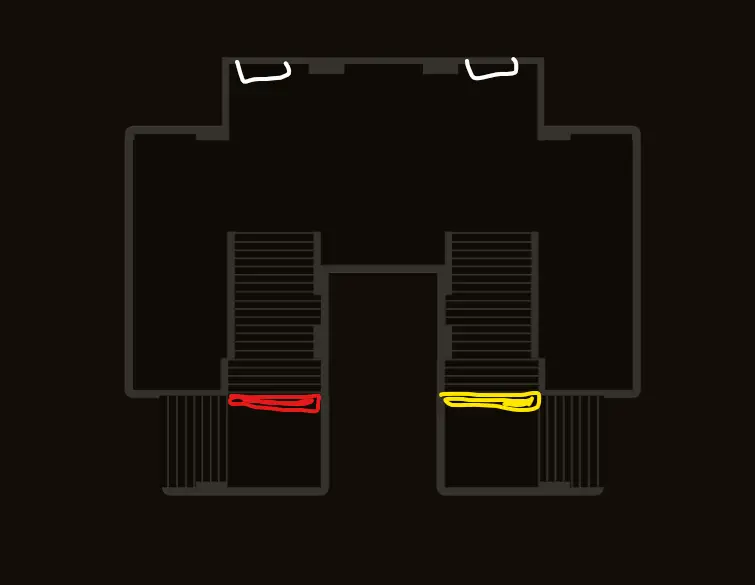
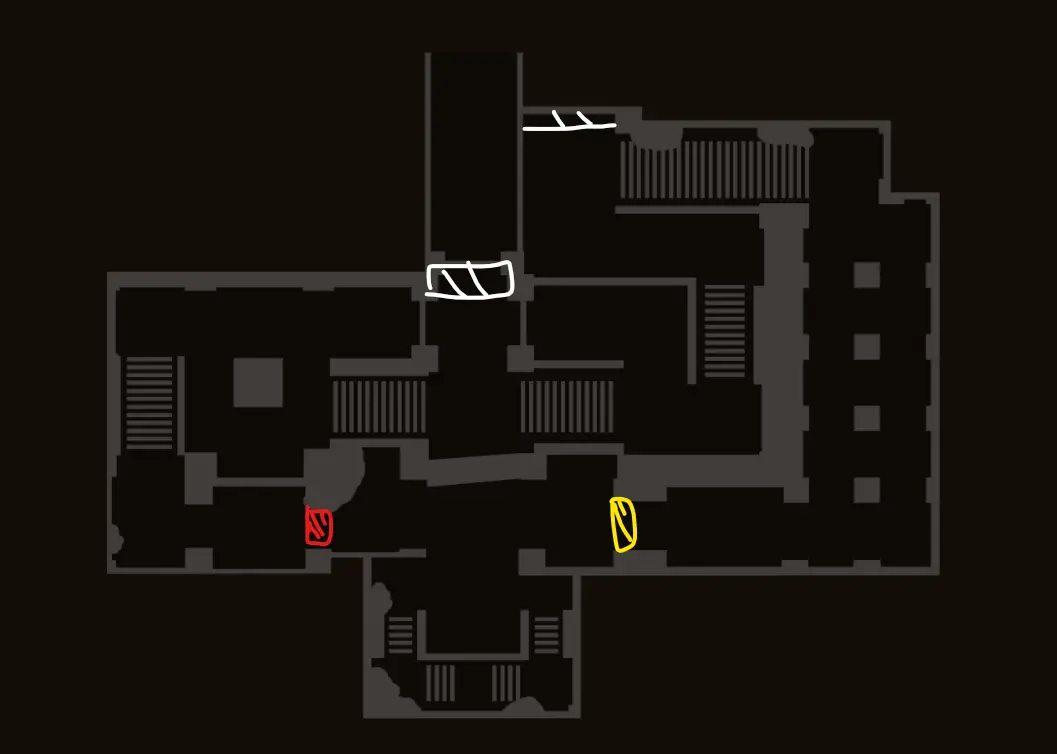
Front Lawn
If you are building indoors follow the pink line. When the enemies break either left or right gate they will stop attacking the other door and act like it’s a cade so you dont need much to route, just make sure the gate you want breaks. Naturally the left/west door breaks first.
Otherwise if you are killing outside, blocking the right gives you more space to kill on left, blocking left is faster to kill on right.
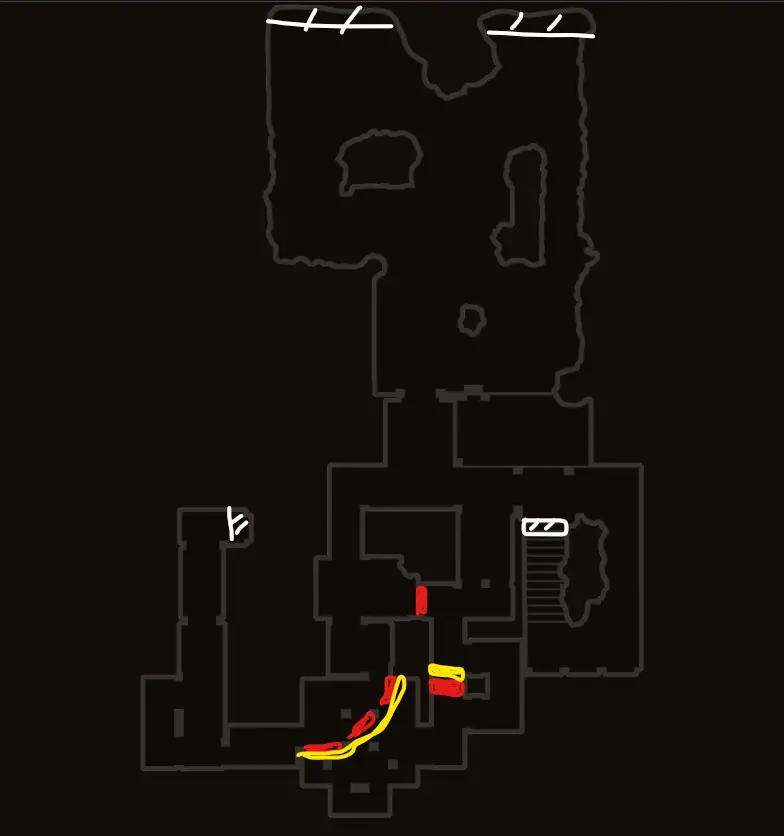
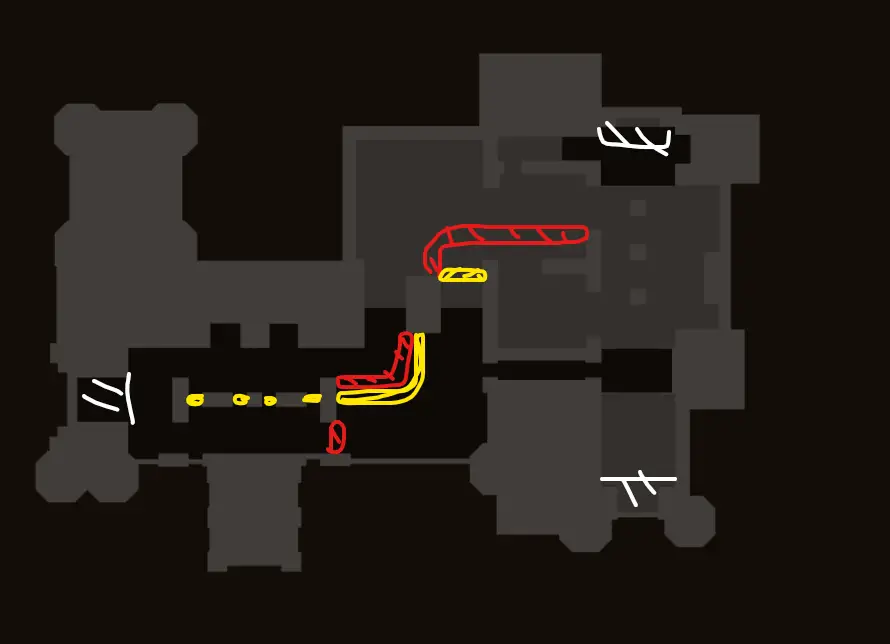
Coastal Hallway
yellow cades can force everything down the hall however they now get targeted by sappers whos checkpoint is at the top stair just before the cades. If you can take the sappers out this is the easiest cade location. The red cade does not need the same kind of anti sapper support as they dont go up those stairs but it might be a more difficult kill side. This map has lots of potentials on routing.
mage tower
top of first set of stairs on either side but know that mogrifel comes from the top spawner always so it might be best to be fighting there and put the cades on the red spot.
masters courtyard
use yellow if you want to fight upstairs. you get ceiling but takes longer (still makes par time) or red if you want to use ground level (もっと早く).

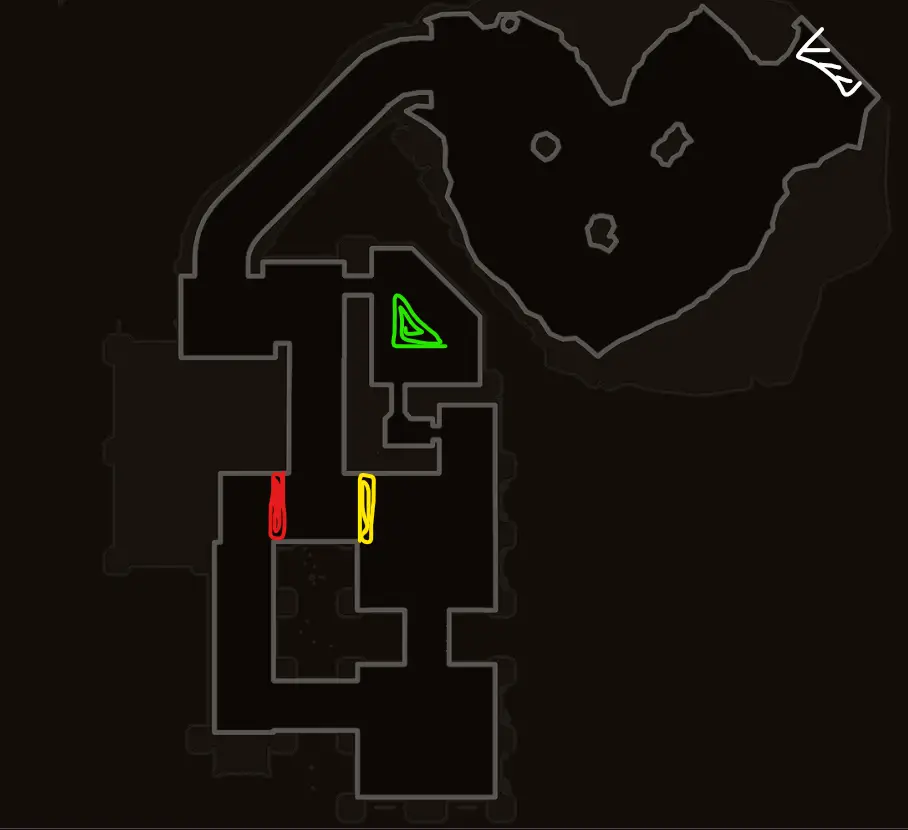
dragon boneyard
red cade places take longer but gives you more trap space overall.
Colosseum
あまり言うことはない. you really dont need many cades for this, nor would I suggest it.
order temple
white circles are rift spawn locations.
Red is cheapest option, either will bring enemies to the left of the rift giving you plenty of ceiling space for killbox.
canyon keep
red is a short and sweet path but a bit pricier. you dont need to spend money wave 1 since its flyers only so that should not matter. basically you want to keep enemies off the top paths. You can probably take them all down 1 side or something but you get a nice kill area on the first level.
Order Enclave
if you use Red put a brimstone in front of it for sappers out of left gate. If you use yellow flyers might cause you issues.
northern rampart
cades are not needed but useful for a leak or 2 with cades in the back
frostbitten
I usually run red so I can killbox on far right side in order to use portal but yellow is cheaper. Its not practical to route SW and SE enemies together so I would not recommend.
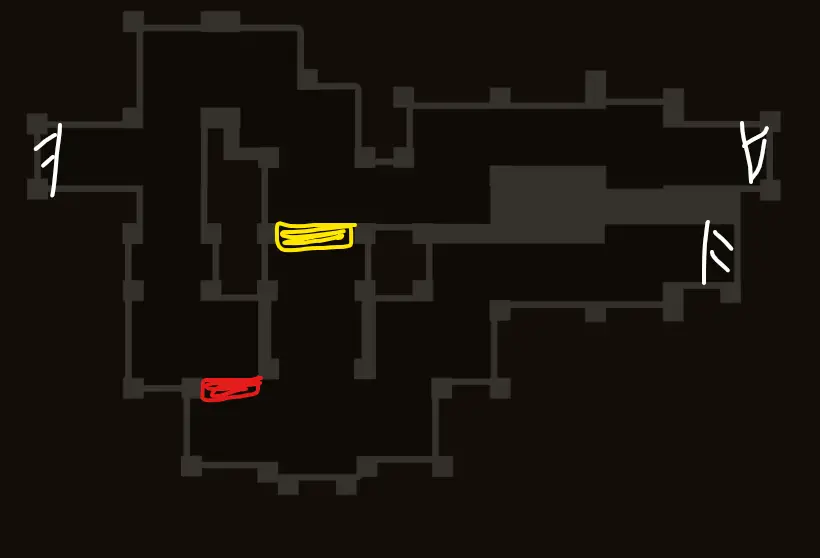
untrained grounds
never used yellow but its something you could do. Red is something I use in my games but killing both left and right sides seperatly is optimal for par time
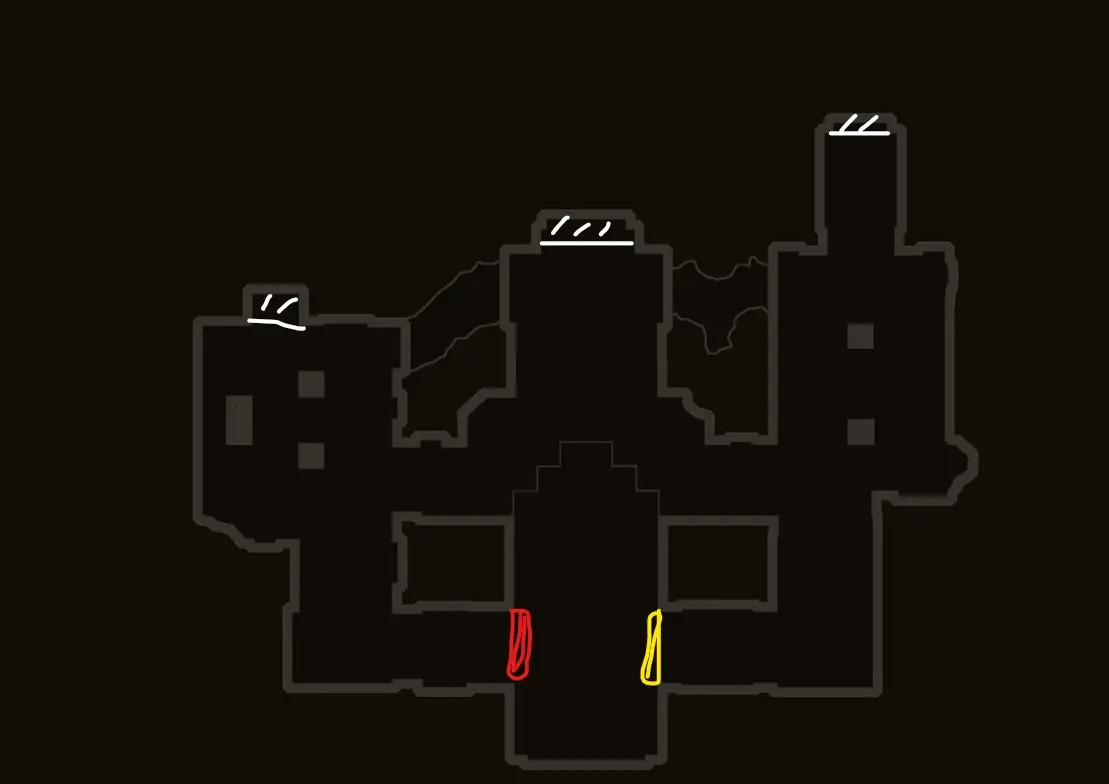
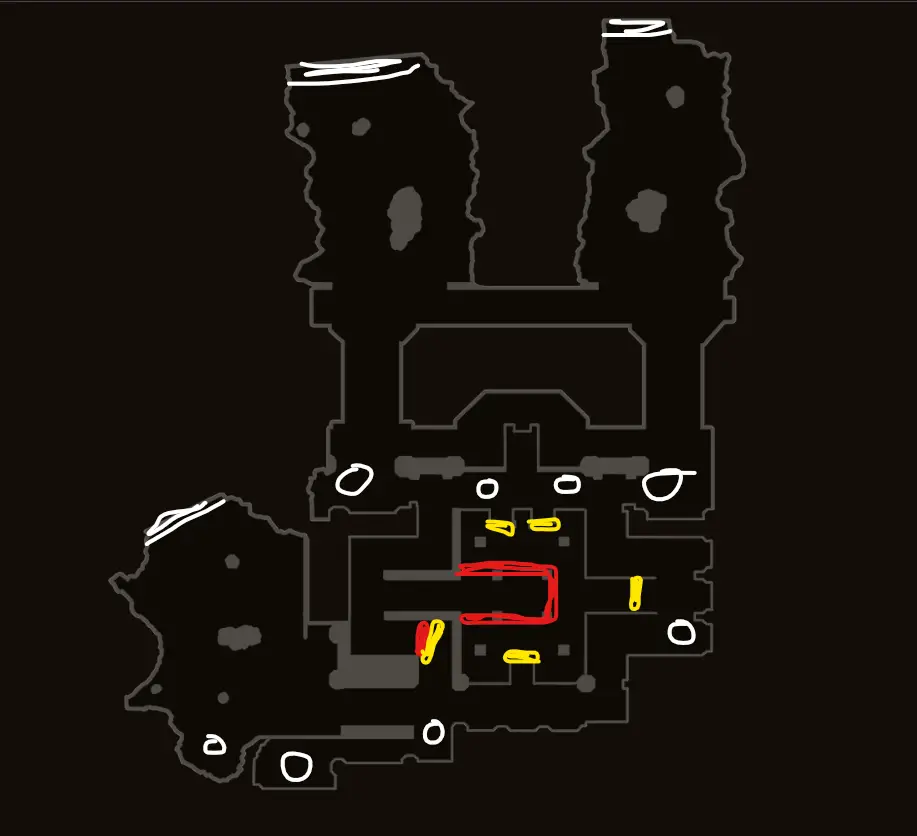
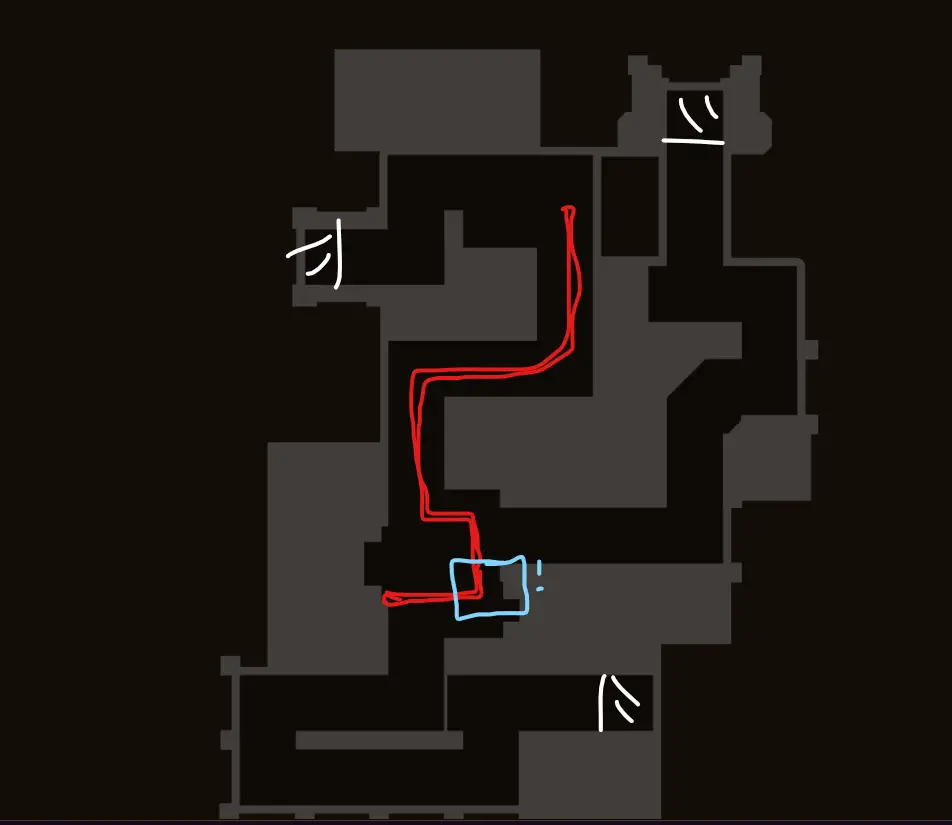
sand sea castle
for par time dont re-route, this is for endless.
The blue box, you wont be able to let the earth lord from bottom gate get to it or he wont be happy he cant fit and will start attacking your cades. Stop him before this point luckily there is only 1 earth lord per round? I dont think its every round but on those rounds it should not be too hard to deal with.
desert wall
either works. I find yellow to be easier. both are tight on par so use good damage traps. Yellow puts you in a good place to get flyers as well.
これが今日私たちがこの目的で共有するすべてです オークは死ななければならない! 3 ガイド. このガイドは元々、次の者によって作成および執筆されました。 MotoManDan. このガイドを更新できなかった場合, これに従って最新のアップデートを見つけることができます リンク.