
- タイトル: Hundred Days
- 発売日:
- 開発者:
- 出版社:
Information about Hundred Days is still incomplete. これを使用してゲームの詳細を記入するのにご協力ください。 お問い合わせフォーム.
This guide will give you a step-by-step set of instructions on how to best succeed in the early game. I will talk about which technologies to grab, what to avoid, and how to produce consistently good wine at the start to set yourself up for more success in the future.
基本
Before I get into the nitty-gritty, I wanted to give a very simple rundown of the game and its mechanics.
Hundred Days is, 本質的に, a card game. Your cards represent tasks you can do, the board represents the amount of time you have to do those tasks. A bigger board means more time, which means you can fit on more tasks. Actions such as weeding, 粉砕する, or bottling are relatively small. Something like harvesting is a much more involved task and will take up the majority of your board in the early game.
それで, just make sure you are managing space well and fitting in as many tasks at once as possible. As you get more vineyards, より多くの機器, and more things to manage this will become more difficult, but it is fairly easy to manage the early game as long as you pay attention. Let’s get into some more detail on the game and what you need to look out for.
The cards
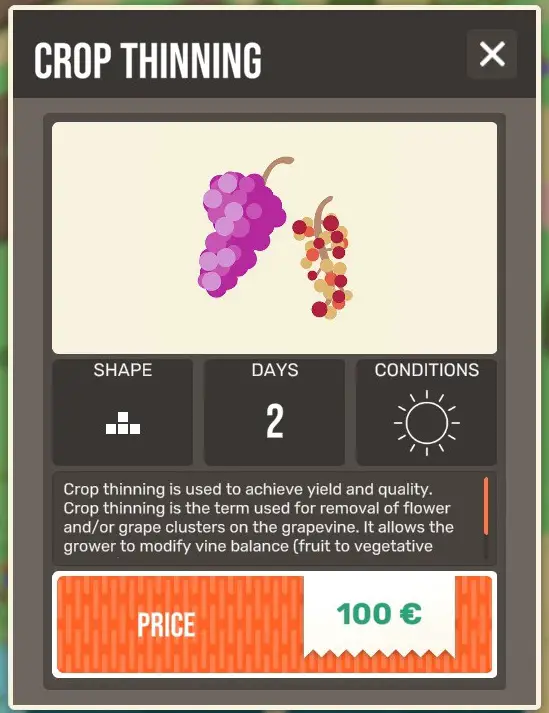
ここ, you can see an example of a card you’ll see in-game. We only care about 4 things on this card. 形状 (what shape it takes up on the grid), the days (how many turns for the task to complete), the conditions (what kind of weather conditions are required for the task to be completed), and the price (how much it costs to complete the task). Some tasks, such as bottling, do not require any specific conditions. Some do not have a price. Most tasks will have different shapes, though plenty of them are shared. Just pay attention to those 4 markers and you’ll be fine.
The buildings
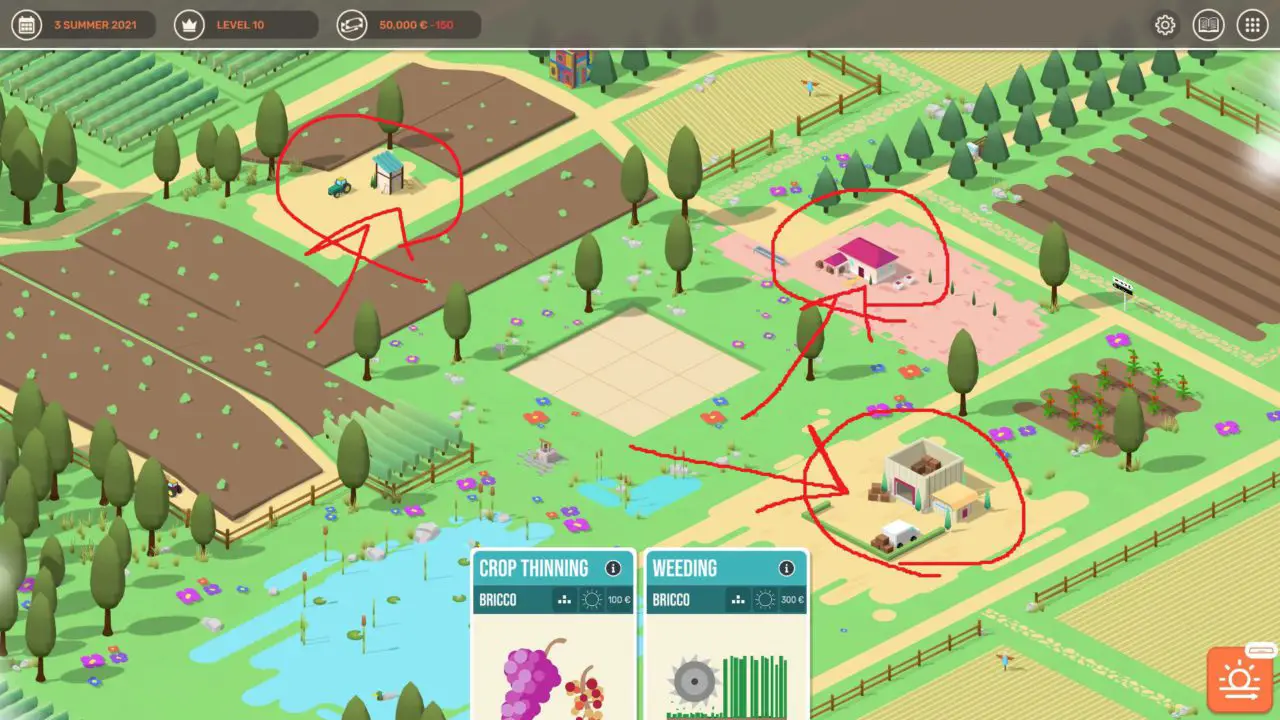
あなたが持っている 3 buildings to manage as part of your winery. Each one can be upgraded several times, costing more money per turn as you upgrade. You have the tool shed (左上), winery (右上), and warehouse (左下). このガイドの目的のために, we won’t be buying anything in the warehouse or tool shed, but I’ll briefly mention what each building does.
Toolshed
This building houses most of the tractors and other pieces of machinery you’ll be using later in the game. It’s also where you’ll find employees and other grapes, 2 key mechanics for later on into the game.
倉庫
This is where your wine gets stored, along with housing operations such as your marketing department and tasting room. Once you start producing chardonnay wine, you’ll want to increase your storage space and even potentially buy the shop upgrade, but I don’t wanna get too deep on the timing for that here.
With all that out of the way, let’s actually get into the guide for the early game and walk through the steps you need to get your winery to grow!
The Actual Guide
ステップ 1: Buy the first board upgrade and Aging in technology. それから, in your winery, buy the Small Cask.

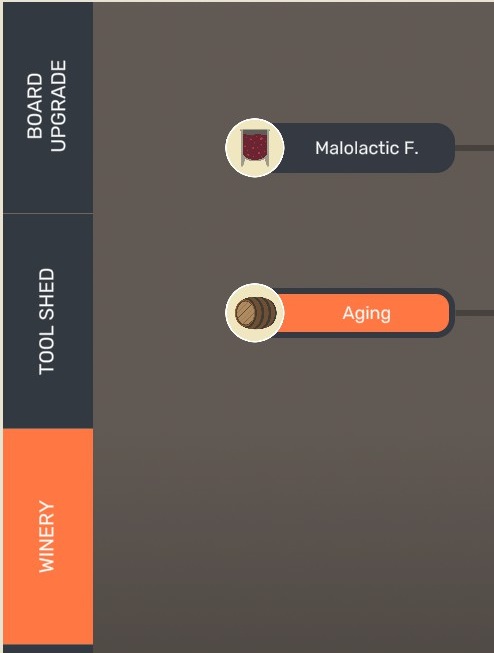
これら 2 techs are the most important for early game success. Aging lets you use barrels to age your wine, increasing your body without increasing tannins. 少なくとも, it allows you to produce 80/100 barbera wines, as long as you’re not using low-quality grapes.
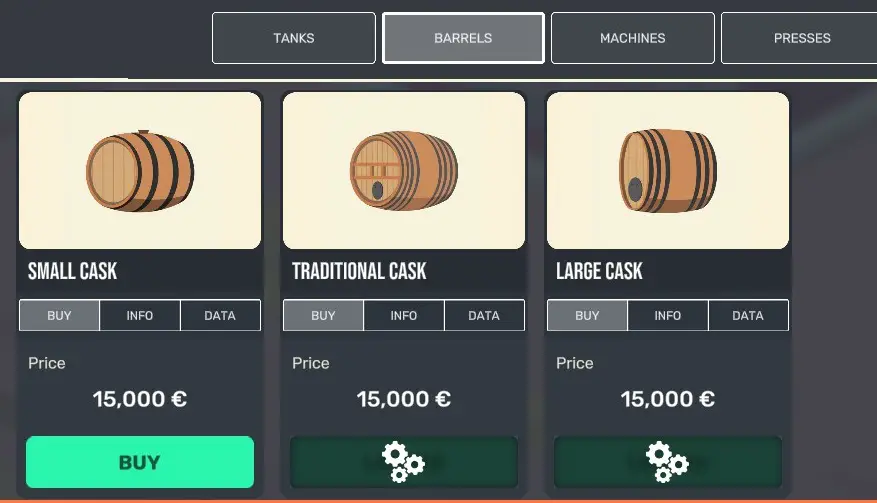
Don’t forget to actually buy the casks, さもないと, you won’t be able to age your wine.
Optional Step: Buy additional storage
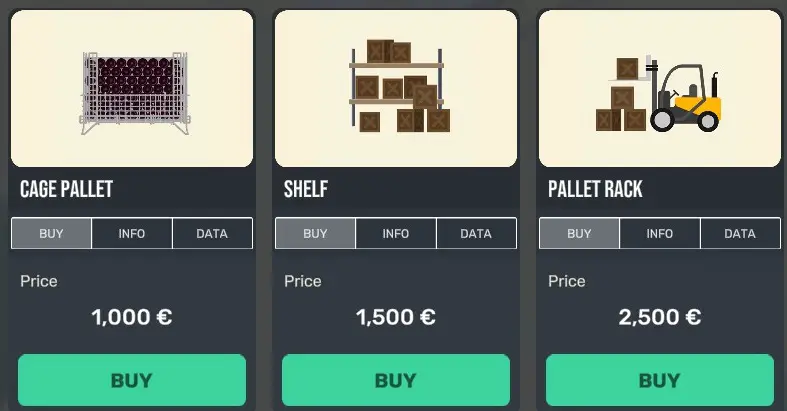
This is not necessary at the start, but you can buy more storage if you want to right now. I would recommend the pallet rack over all else, as it is the densest storage you can get while being more efficient in terms of price. この例では, I will not be buying the extra storage space.
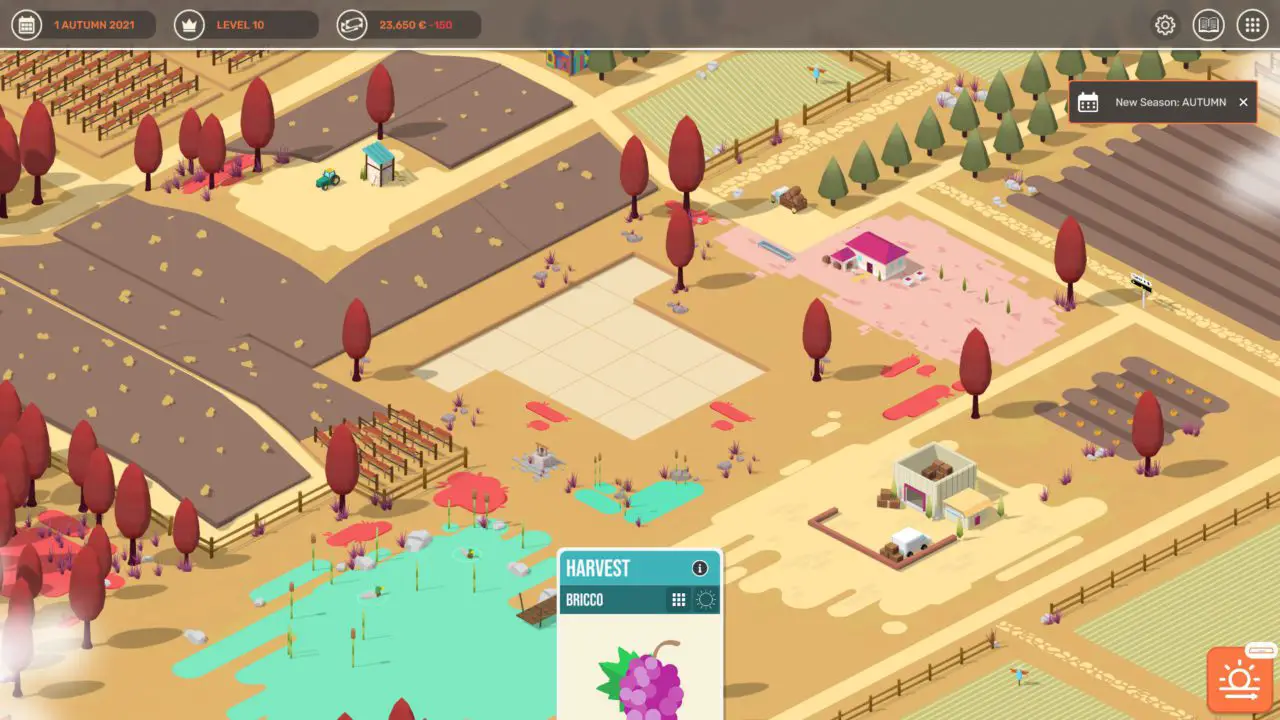
ステップ 2: Play your cards as they come up
Not much is going to be happening until you reach your 1st harvest at the start of Autumn. Once you do reach the start of Autumn, しかし, you will get your first harvest card, which you want to play ASAP.
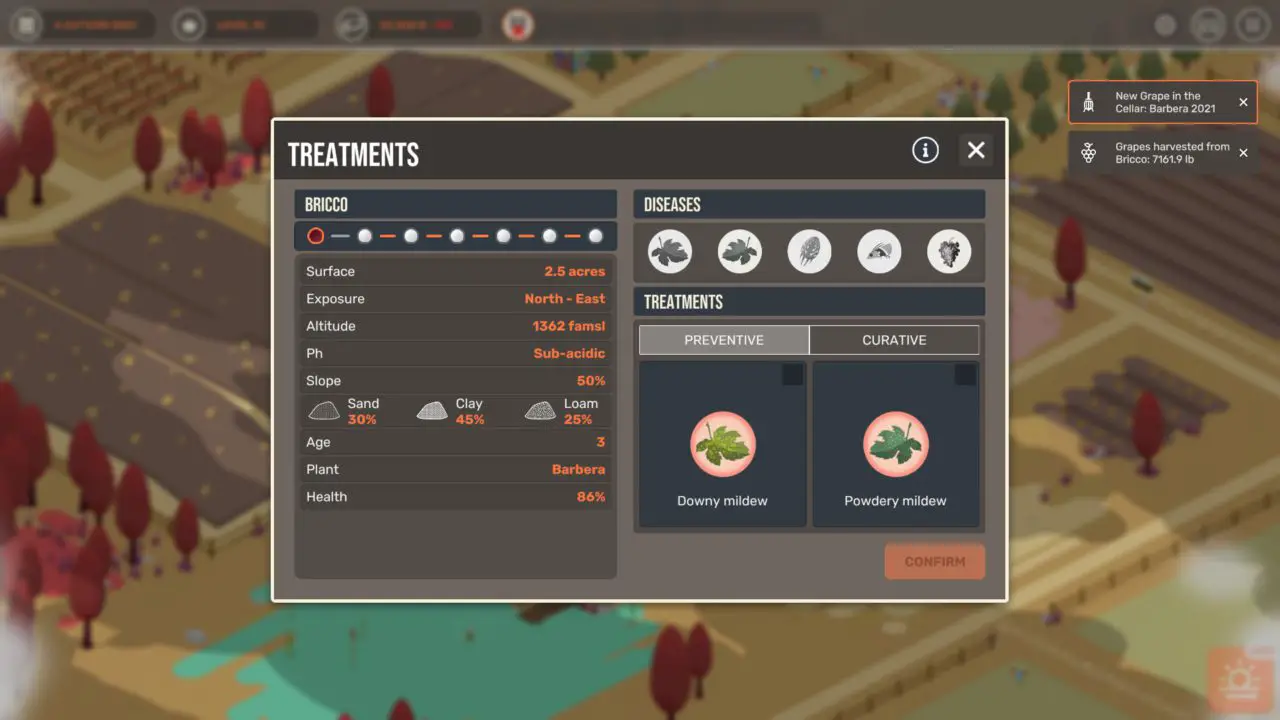
Optional Step: As you’re crushing your grapes, treat your plants for downy and powdery mildew
また, you won’t have much to do at this stage, and treating your grapes for these diseases is both completely free and relatively quick. Pay attention to the little shield icon at the top of the screen so you know when to renew the protection.
ステップ 3: When you get your first pruning card, set the number of buds to Very Low.
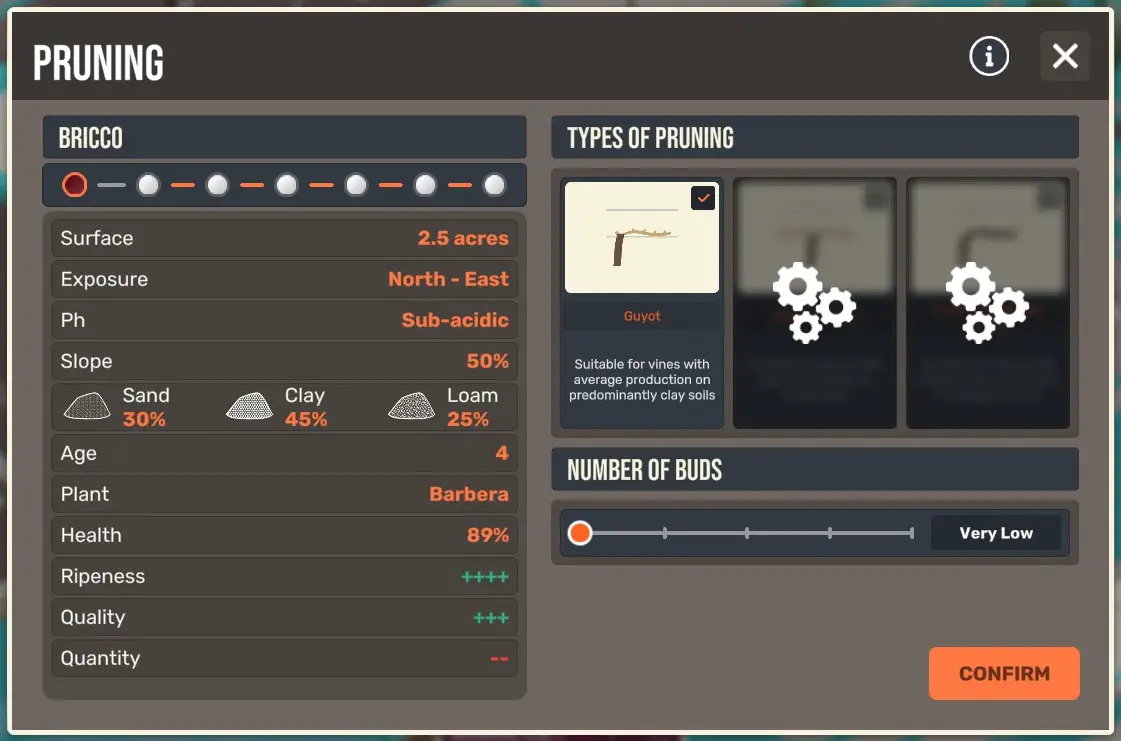
This just makes your wine better, which is far more important than shoving out more bottles, especially with barbera. You can certainly keep more buds on the plant, but this has consistently gotten the best results for me.
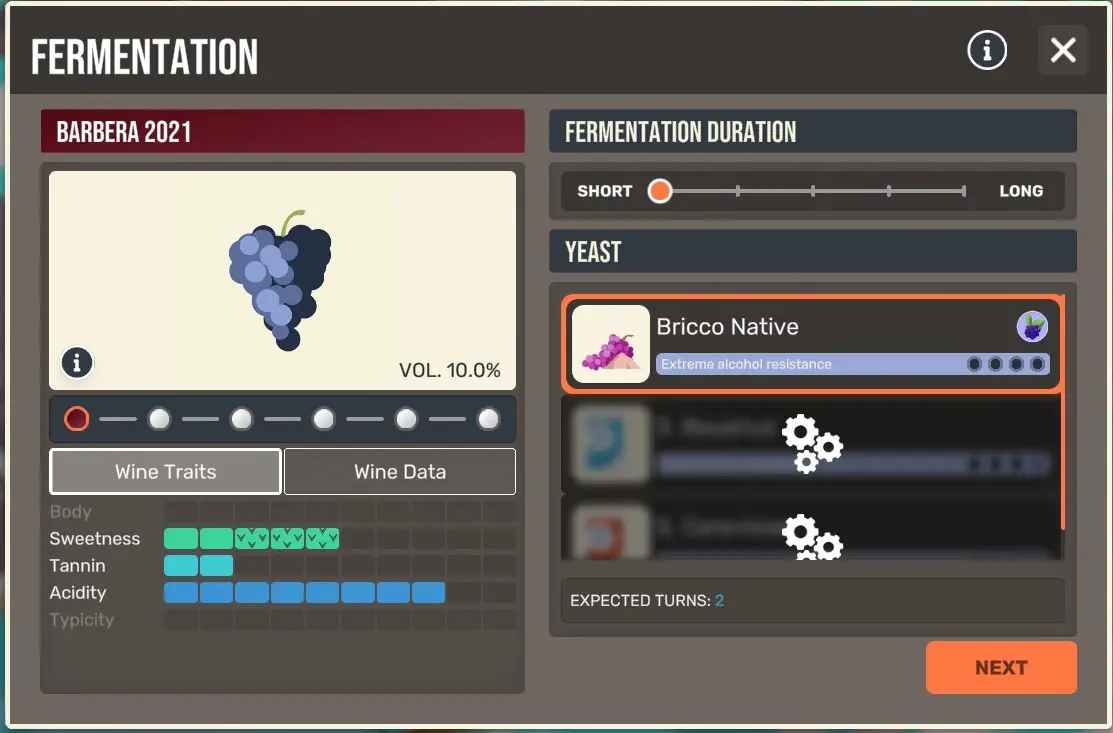
ステップ 4: During your fermentation, set the duration to the shortest time possible and pump over once per day.
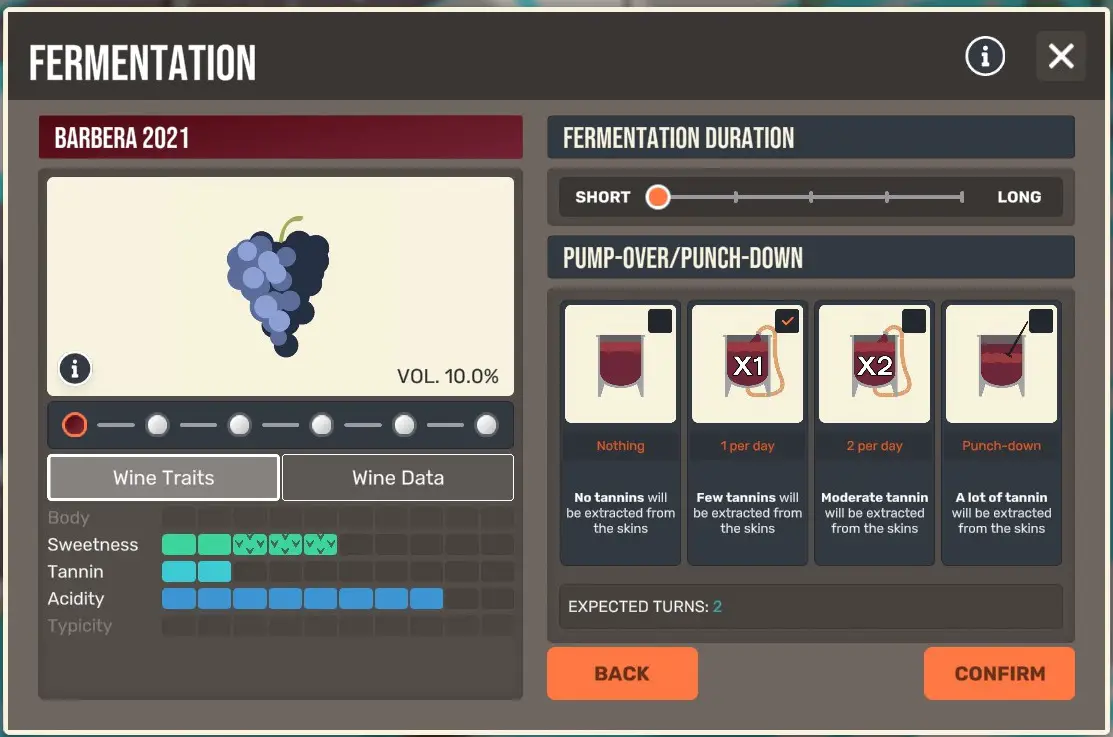
This is completely anecdotal, but I have found doing no punch-down increases the chances of faults showing up in the wine, usually reduction or mercaptan. It may increase tannins later down the line, but I think it’s worth it to avoid negative flavors.
ステップ 5: Press the wine to where you get the most body possible while also adding the fewest tannins
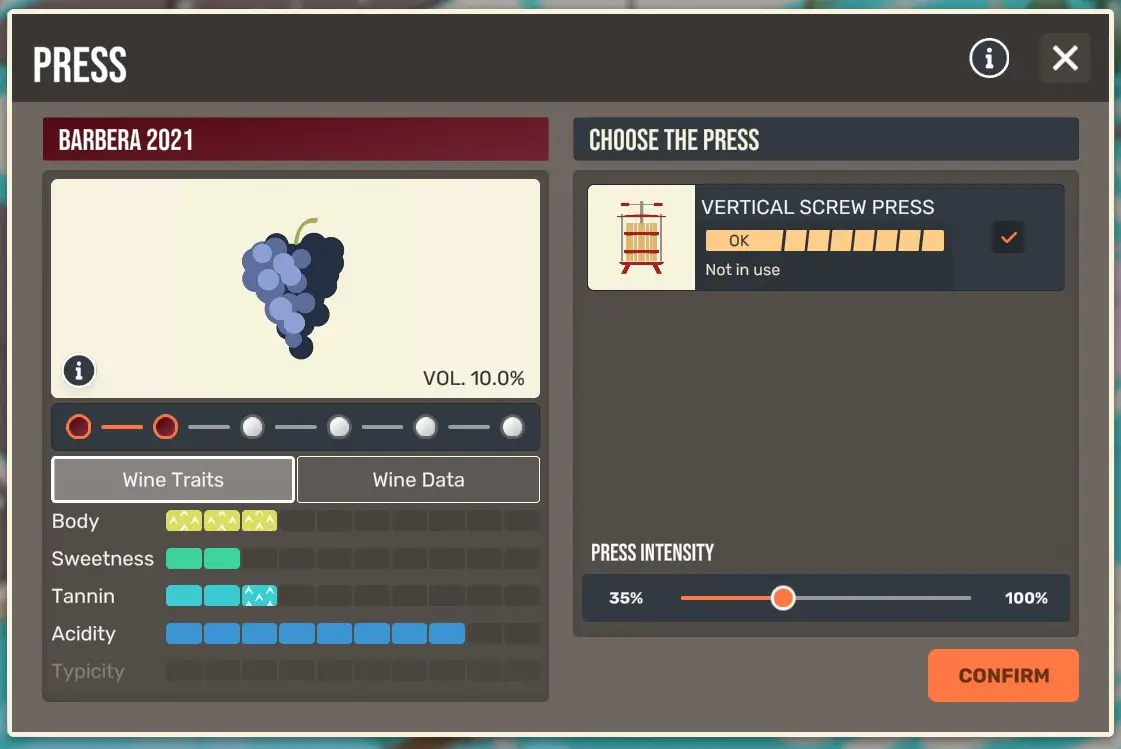
基本的に, you want to get a good amount of body without adding too much tannin. I’ve found that going to 35% gives me the most body while also only adding a single point in tannin.
ステップ 6: Age it for the maximum allowed time.
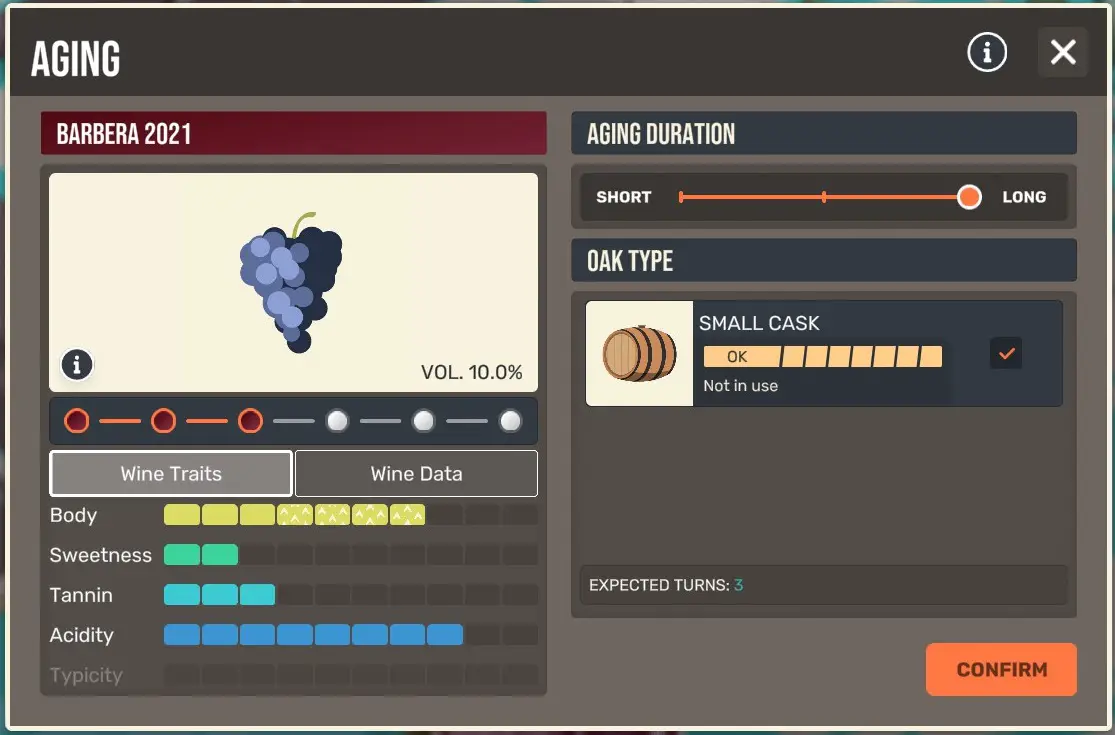
Barbera is optimal when it has 8 体. That is basically impossible to do without having large casks, but this gets you pretty close.
One thing to keep in mind is that you should clean your equipment as soon you are able to do so. Clean equipment means lower chances of faults and breakdowns, which can both put a damper on wine production. それで, clean as you go and you’ll be in good shape.
ステップ 7: When bottling, choose a green bottle.
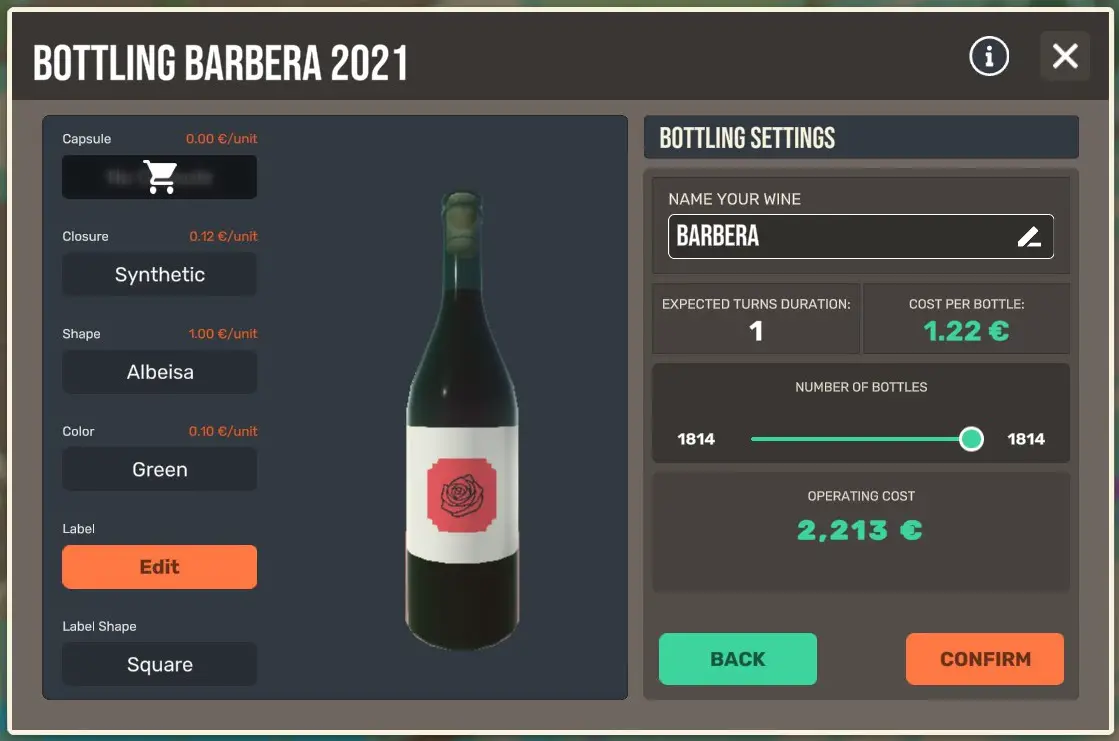
You really want to start off on the right foot with your first wine, and this is something that can save you from other faults. Oxidation is the big one you’ll be avoiding by using a green bottle, and it is not that much more expensive compared to dark or even clear glass. Bite the bullet and use green glass.
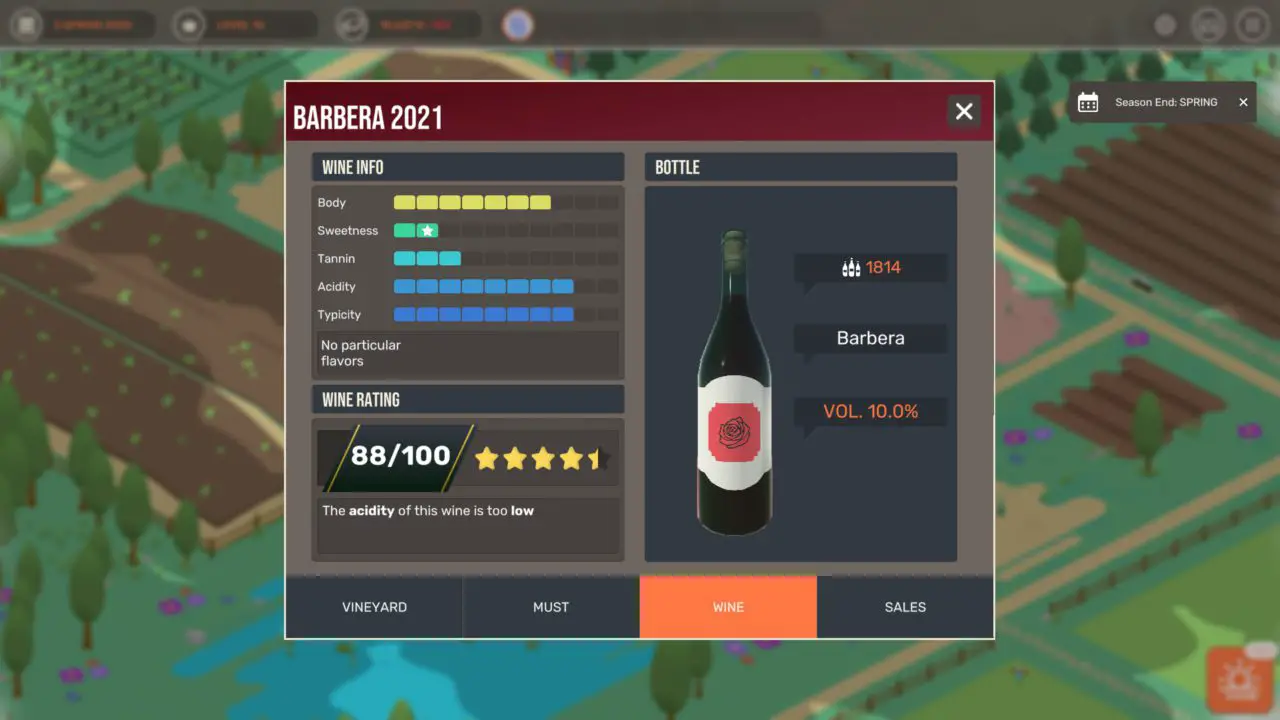
おめでとう! You have successfully made your first wine, and it should be a pretty good one, あまりにも! You likely won’t get 100 on your first go-around unless you get very lucky with flavors, but anything above an 80 is a great base to work off of. 今, sell that wine, reap the profits and keep up the cycle!
Continue Your Journey
それで, this section is meant to be a catch-all area for helpful tips I didn’t mention up above.
The shop is a massive trap, stay away from it until you have multiple vineyards.
Might seem a little extreme, but I’m serious. The shop is a technology you can find in the warehouse section, which you then need to build in your warehouse. 表面的には, it seems like it would be useful since it says it attracts new customers. But that might as well be a lie because as far as I can tell, all it does is handle orders automatically. This might seem helpful until you realize it costs 500 euros a turn.
Your entire winery before any upgrades costs 150 a turn to manage. それで, once you have a second vineyard up and running, usually you want to be producing chardonnay there, then the shop might be worth it to deal with the massive amount of bottles you get from a chardonnay harvest. さもないと, stay away. The same goes for the commercial office, though that does have some value. それ,s still very expensive, しかし, so it’s best to wait until you have more wine being produced.
Upgrade slowly, and focus on getting the first few board upgrades before looking to expand your vineyards.
Board upgrades are one of the most powerful things you can buy in the game since it just allows you to do more stuff, which is super valuable. I’d recommend getting the first 3, 少なくとも, before looking to expand your winery into other grapes.
As I answer questions in the guide, I’ll add more stuff down here, but those are some of the big ones that I think are important. One thing to remember, every saves is different. You will have to deal with situations I haven’t talked about here. Just keep calm, and take it slow. Wine takes a long time to make in real life, and it’s the same here.
ご質問がございましたら, shoot them to me in the comments, or join the Hundred Days discord and ask any questions you may need!
これが今日私たちがこの目的で共有するすべてです Hundred Days ガイド. このガイドは元々、次の者によって作成および執筆されました。 CLG Rampage. このガイドを更新できなかった場合, これに従って最新のアップデートを見つけることができます リンク.
What about loans, do you have any tips?
This game is insanely dificult. It’s like studying a degree or so.
pour les vendanges du barbera de bricco, faites les dès que possibe afin que l’acidité ne baisse pas sur pieds. Par contre, quand vous continuez sur le chardonnay à principe, par exemple, surveillez l’acidité de vos vignes, il ne faut pas les faire dès qu’elles apparaissent, à la fin de l’été pour que le sucre augmente et l’acidité baisse un peu, ce qui permet, d’ailleurs, de gérer les 2 vignobles sur un petit tableau de bord, avec au moins un vieux tracteur à chenilles…