- タイトル: ディープ・ロック・ギャラクティック
- 発売日:
- 開発者:
- 出版社:
ディープ・ロック・ギャラクティックに関する情報はまだ不完全です. これを使用してゲームの詳細を記入するのにご協力ください。 お問い合わせフォーム.
The guide below provides an overview of a basic Salvage Uplink defense positioning with the Engineer class, using his Bug repellent upgrade on the platform gun – it is the main component of this build.
Basic principle
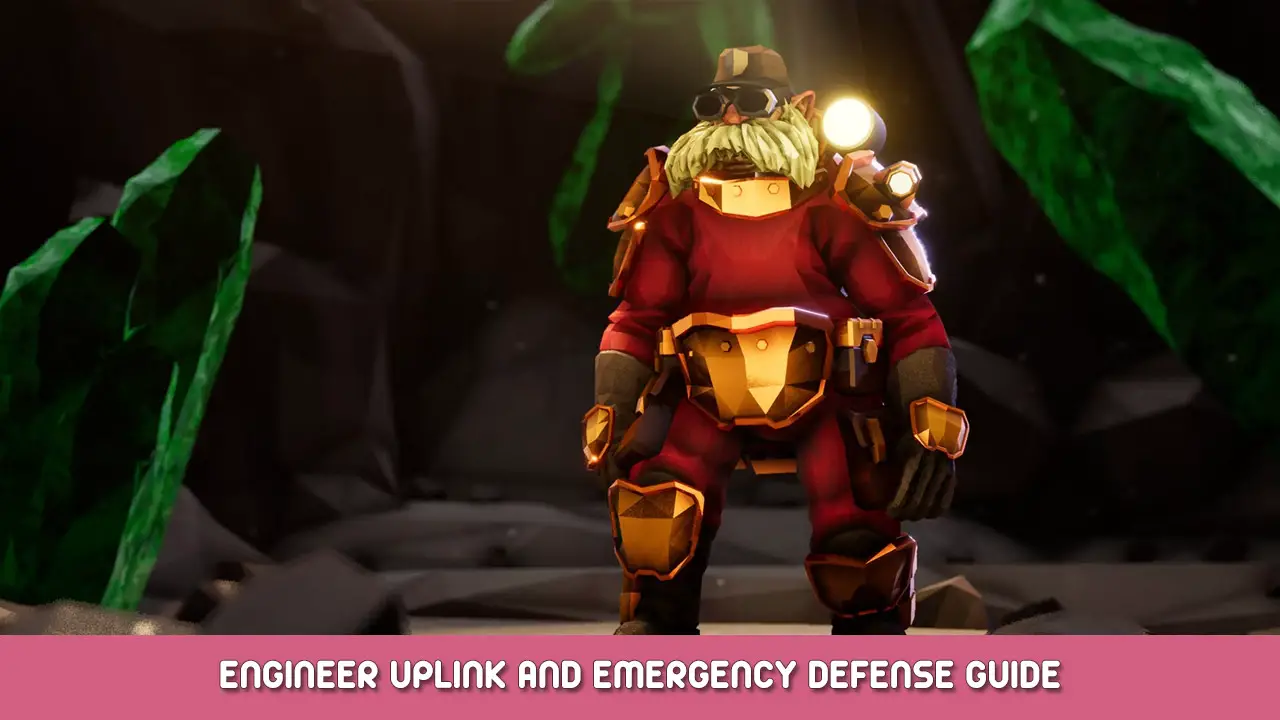
- Do note the “wings” sides are slightly angled outward – this creates slightly better flank visibility.
- Turrets can be double-placed on a single side – しかし, 1 per side is preferable to balance DPS and act as an early warning system.
- If you are inside a tunnel, you can block off 1 end to create an artificial “壁” 必要に応じて.
- Engineer Mines can be used, しかし, they should be placed far out from the position to avoid damaging teammates nearby.
Weapon and equipment builds
We can be a bit flexible with the builds we can utilize. Do not be discouraged if you cant replicate exact builds – these are only relative propositions.Here are some theoretical suggestions:
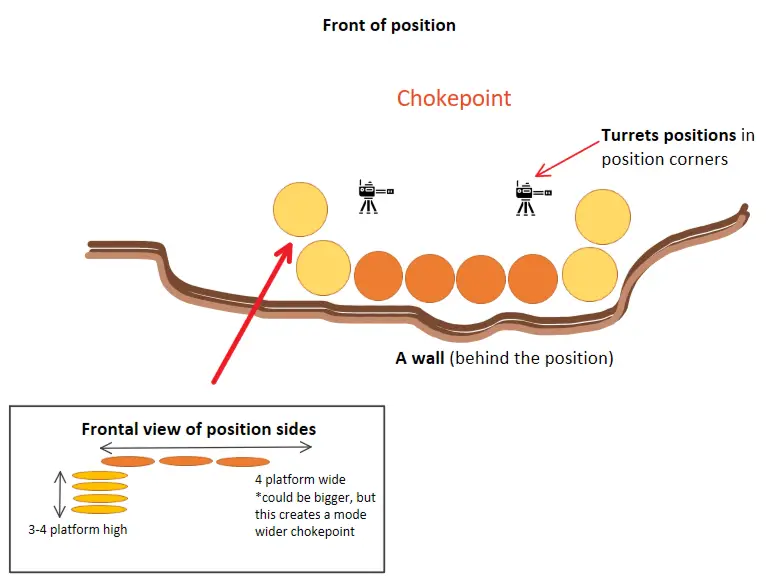
主要な武器
2, 1, 2, 1, 1 + Cycle Overload or Mini Shells overclocks
This Warthog aims to maximize DPS with long reloads, as well as consistent Armor breaking on heavier targets.
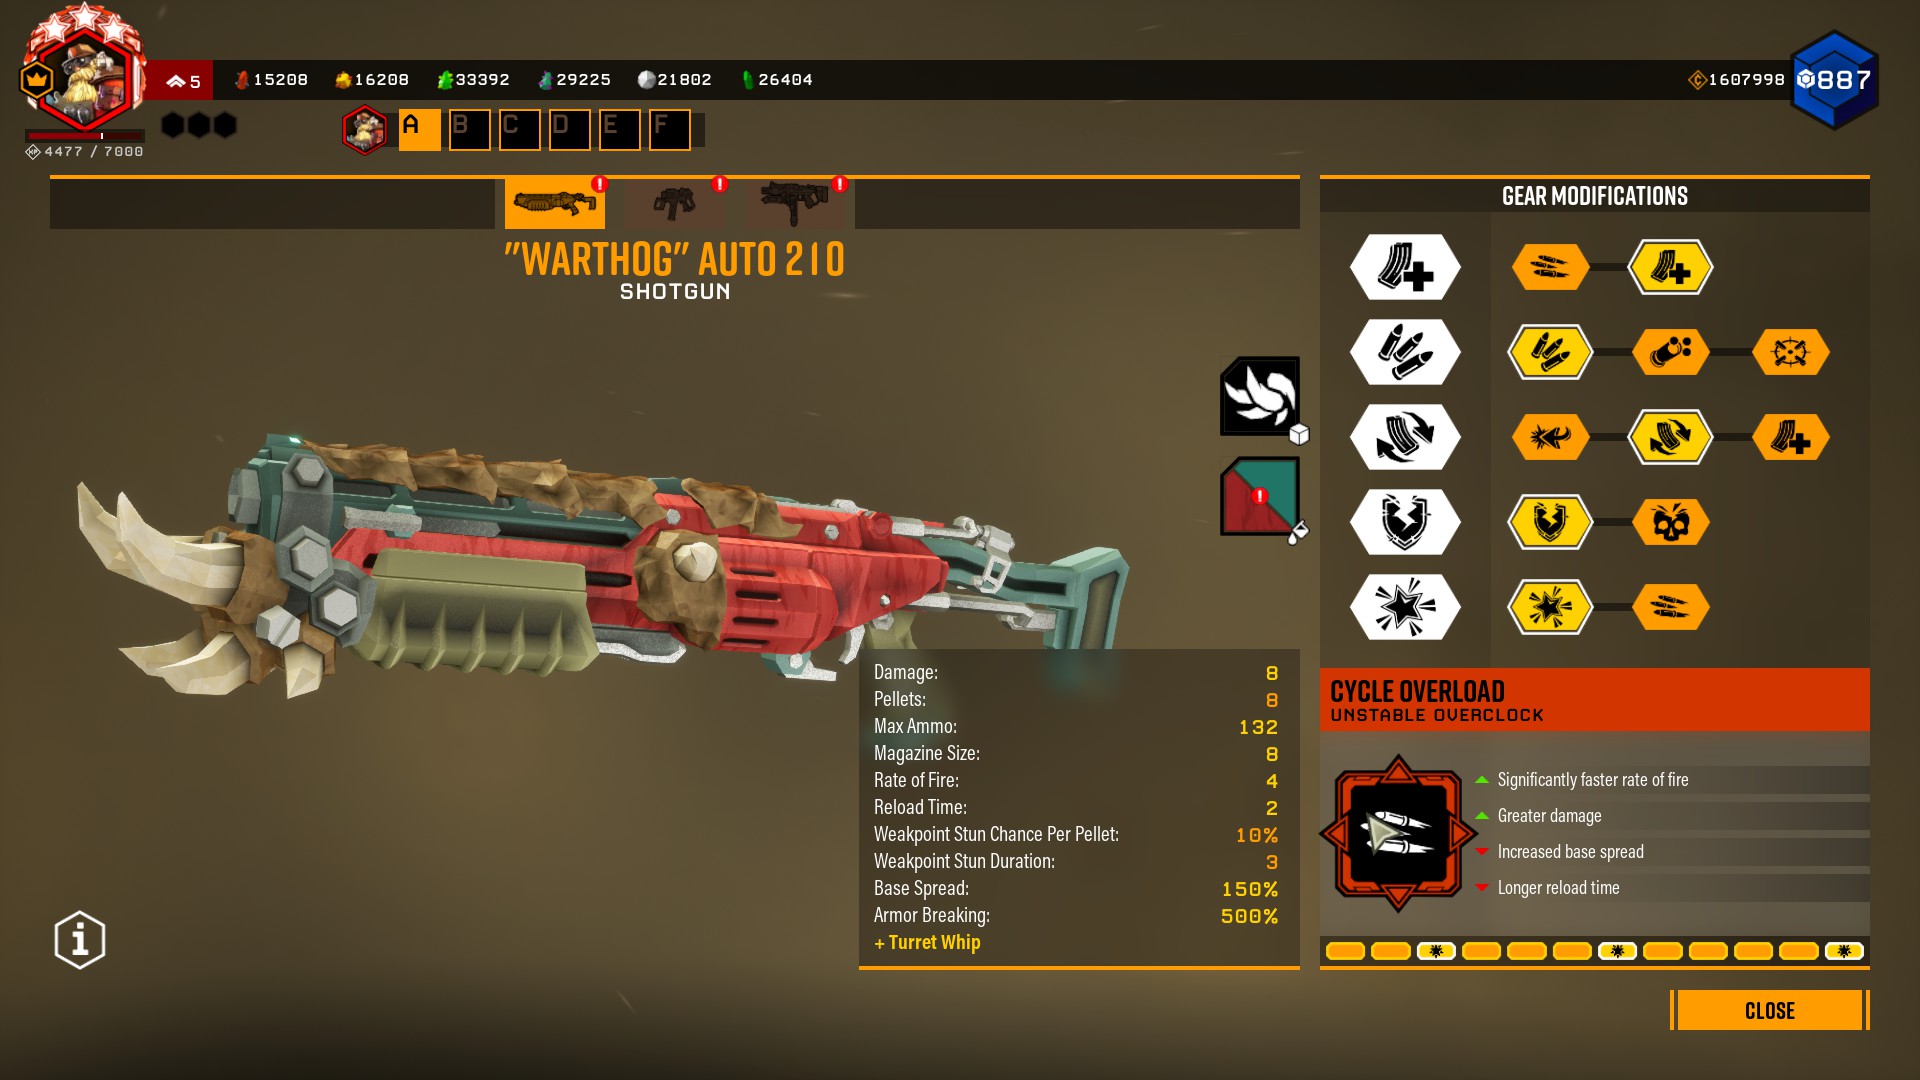
3, 2, 2, 1, 2 + Light weight rounds overclock
This SMG aims to maximize ammo efficiency; this allows you to stay in the fight longer, inside and outside the defense position.
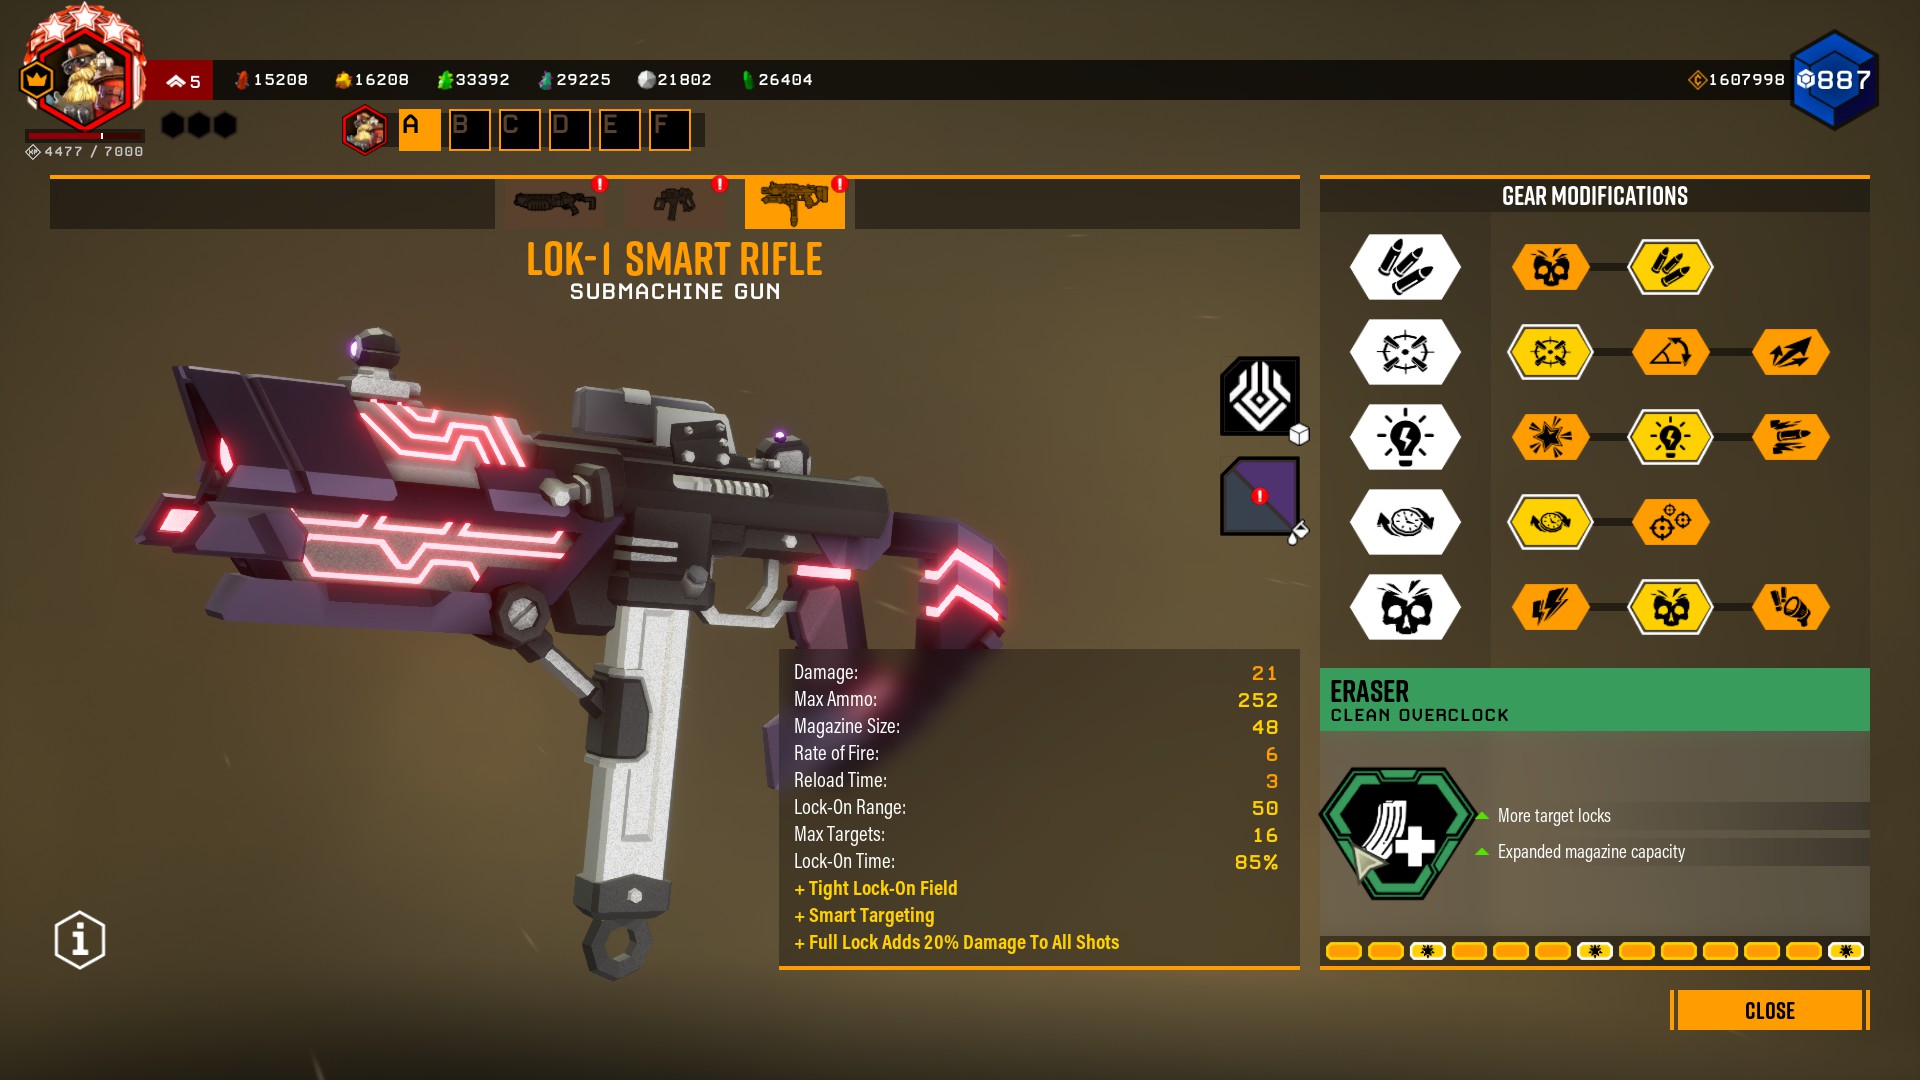
2,1, 2, 1, 2 + Eraser overlock
This Smart rifle aims to maximize quicker and faster targeting, chipping away from approaching targets for turrets and allies to shoot.
二次武器
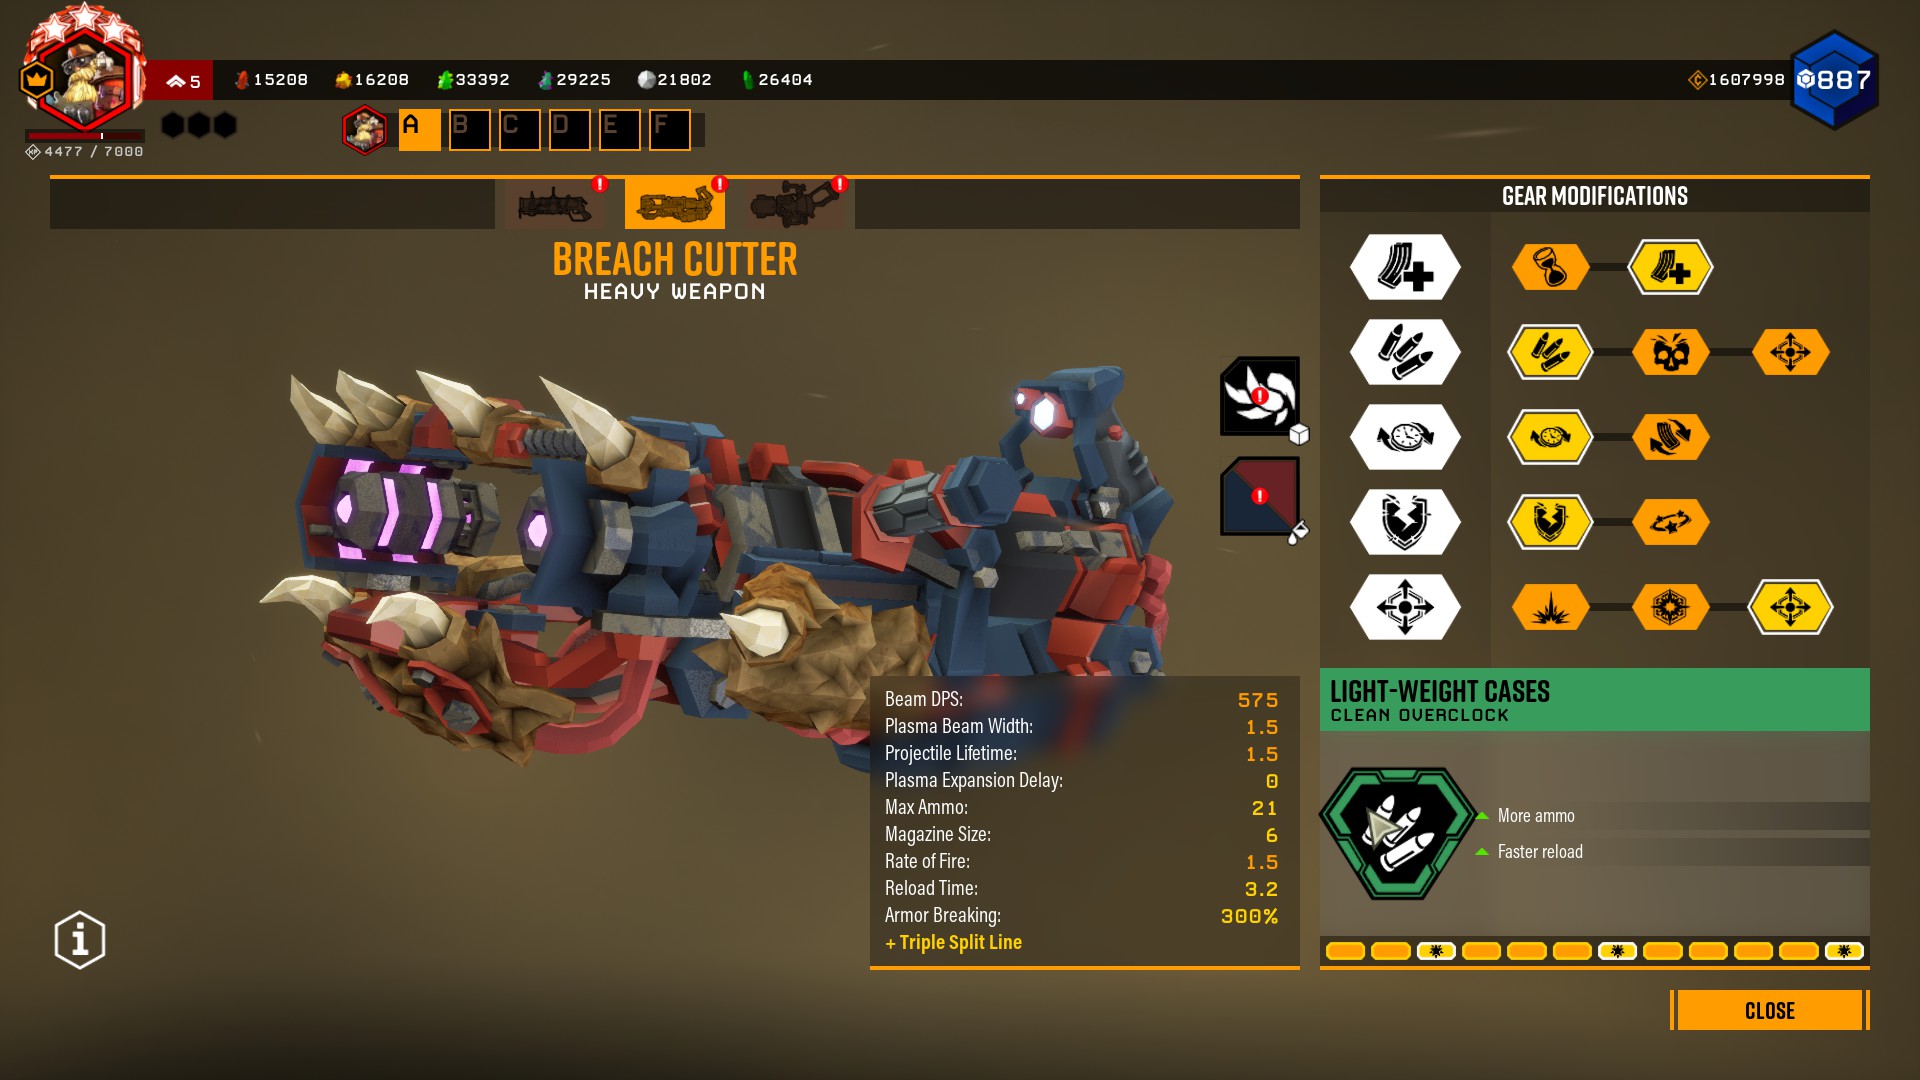
2, 1, 1, 1, 3 + Light weight cases overclock
This build aims to maximize the size of the plasma beam, effective for wide crowd control as they approach the position.
装置
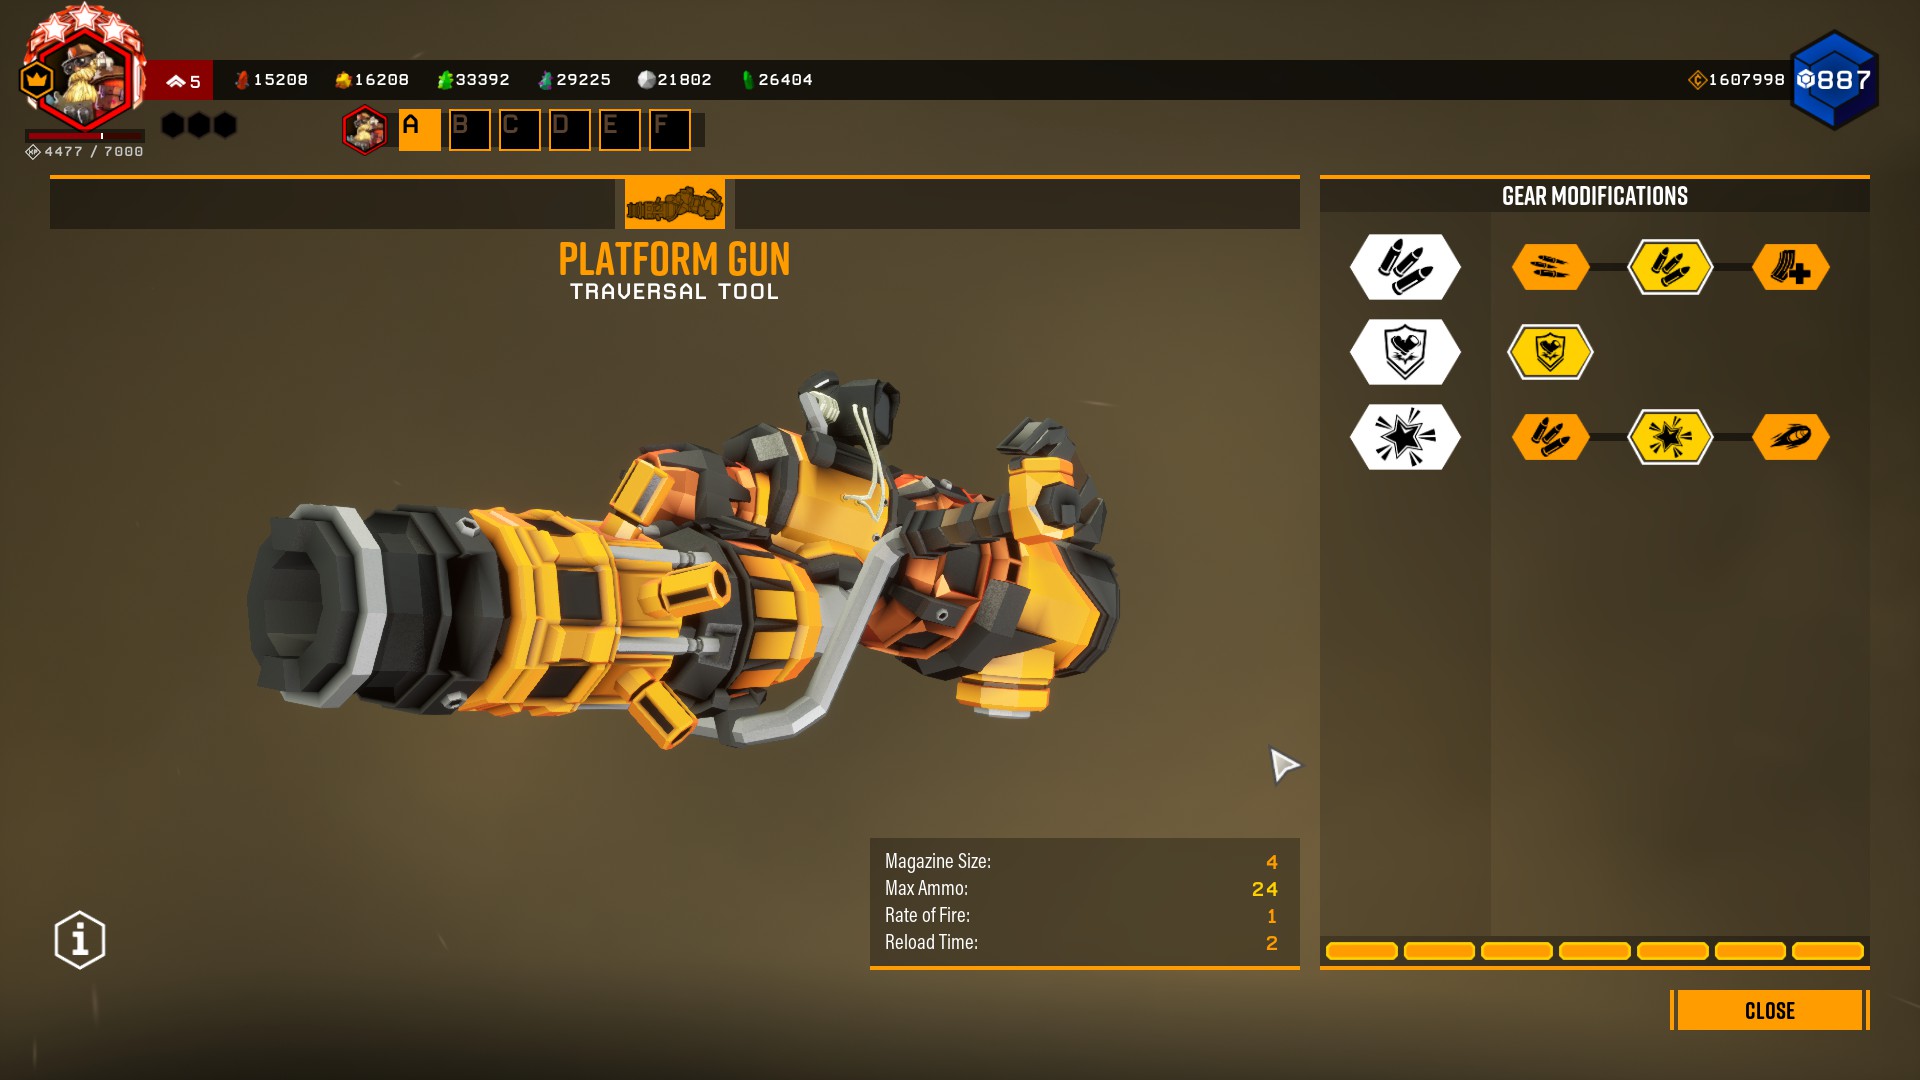
2, 1, 2
IT IS ESSENTIAL you have the Bug reppelant upgrade. This will allow to drive majority of enemies into the frontal position chokepoint.
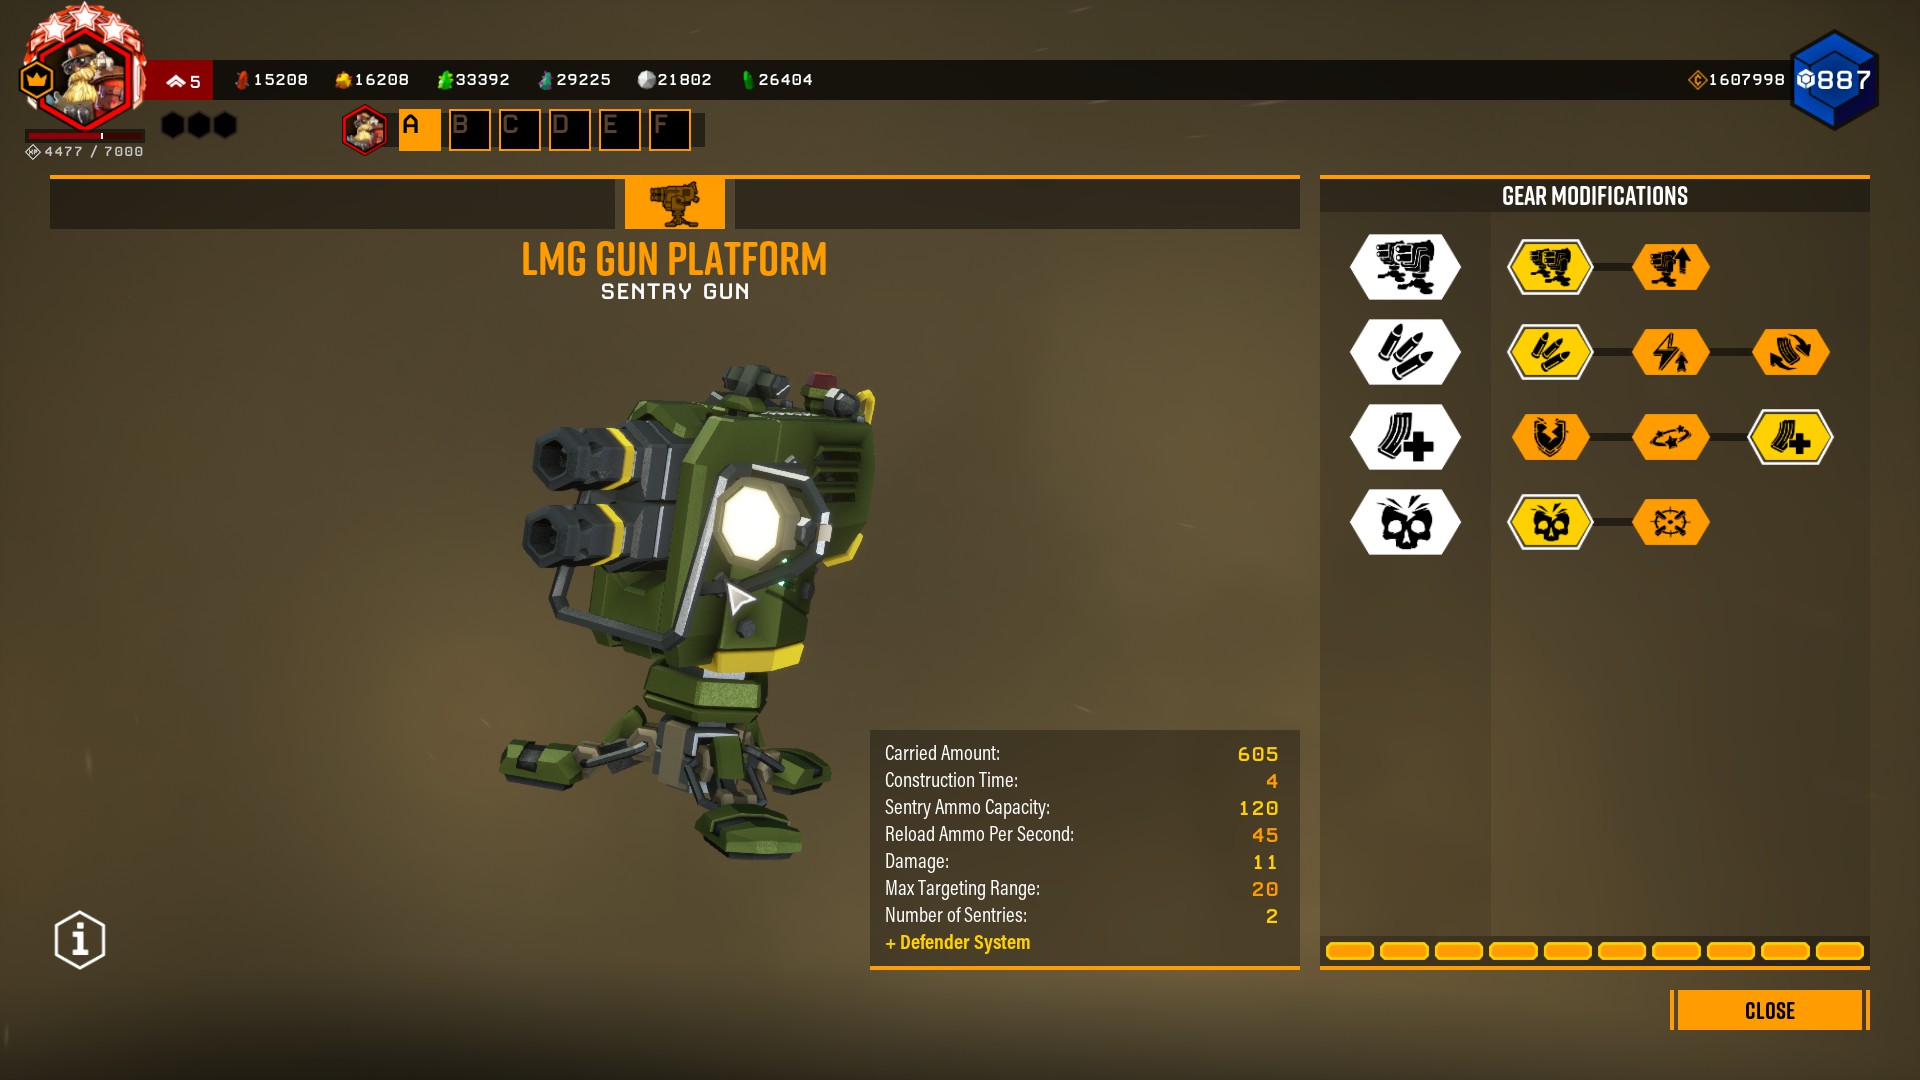
1, 1, 3, 1
This maximizes ammo – meaning your position has firing turrets for longer periods of time.
方法
Lets use a basic Salvage mission uplink spawn as an example.
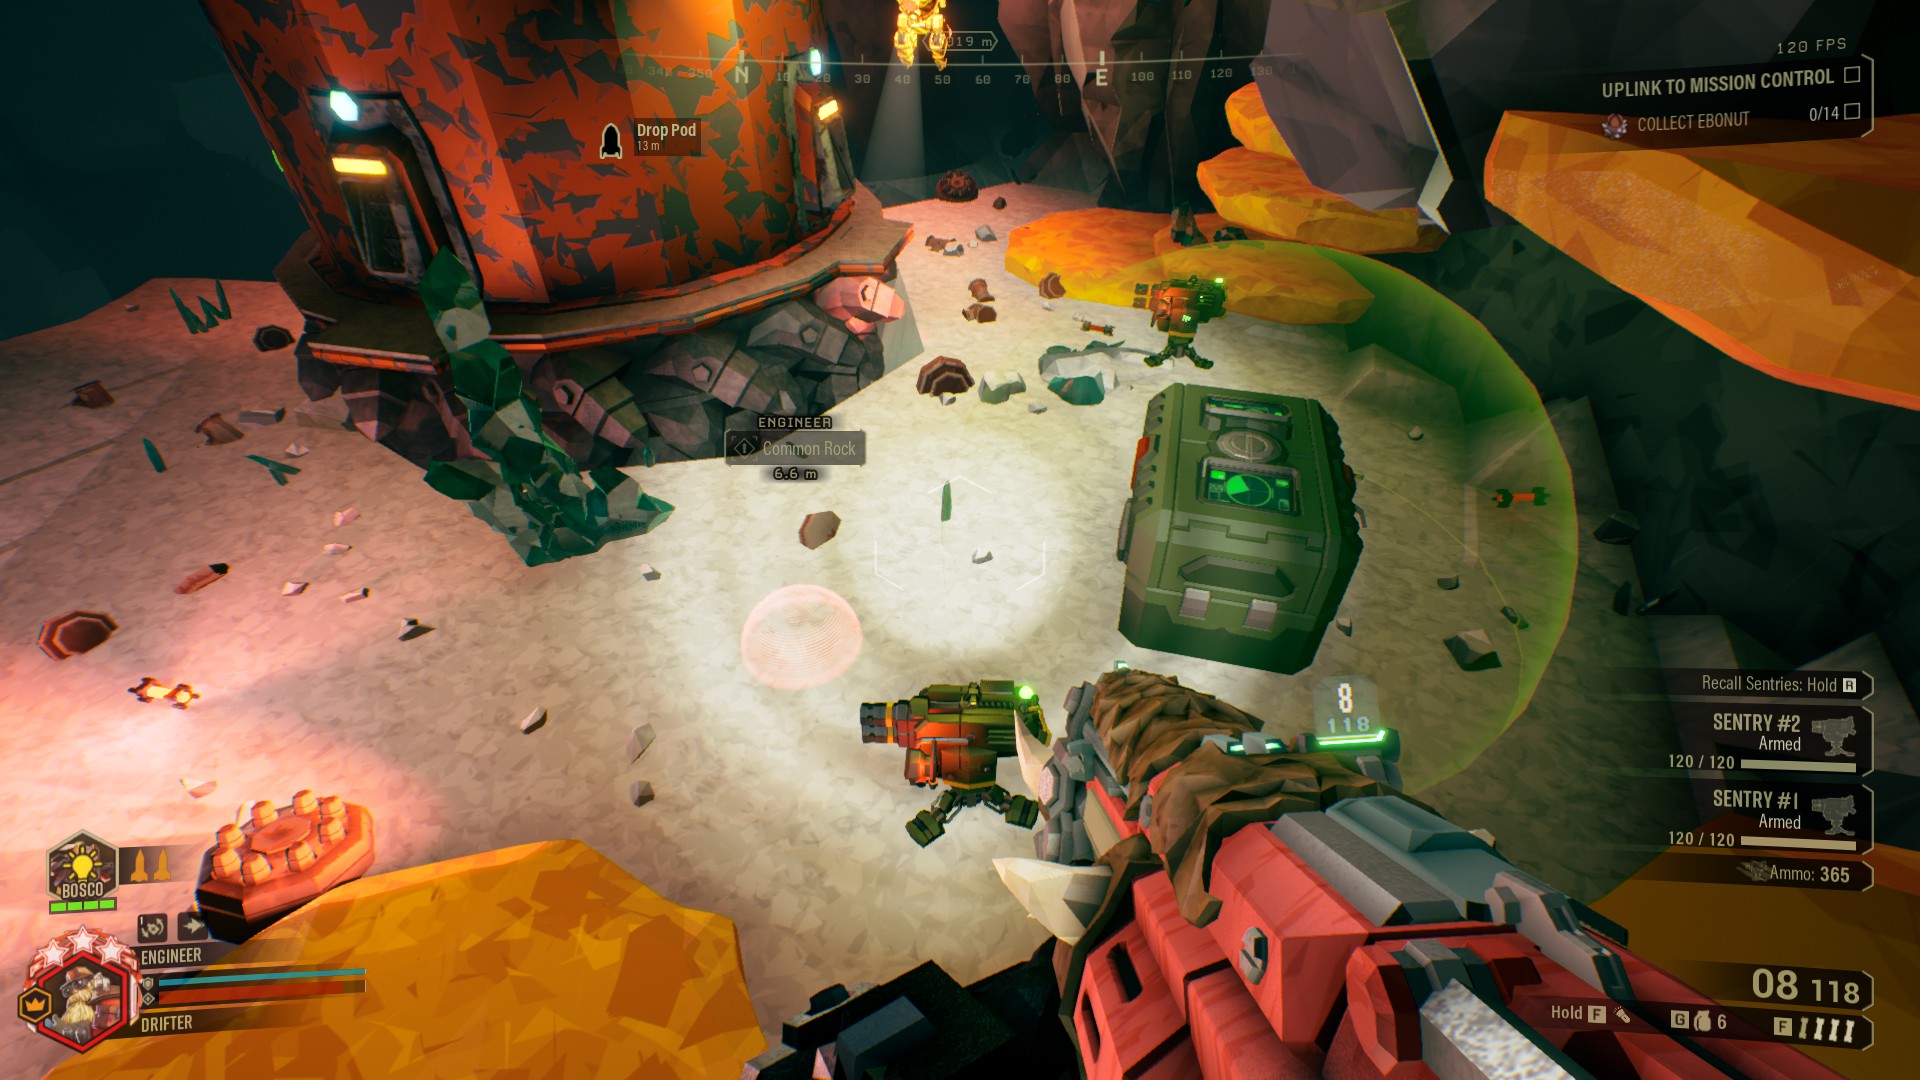
まず最初に, we identify our chokepoint – この場合, we have a wall behind us for reference. Here we want the targets to come from the side of the Pod.
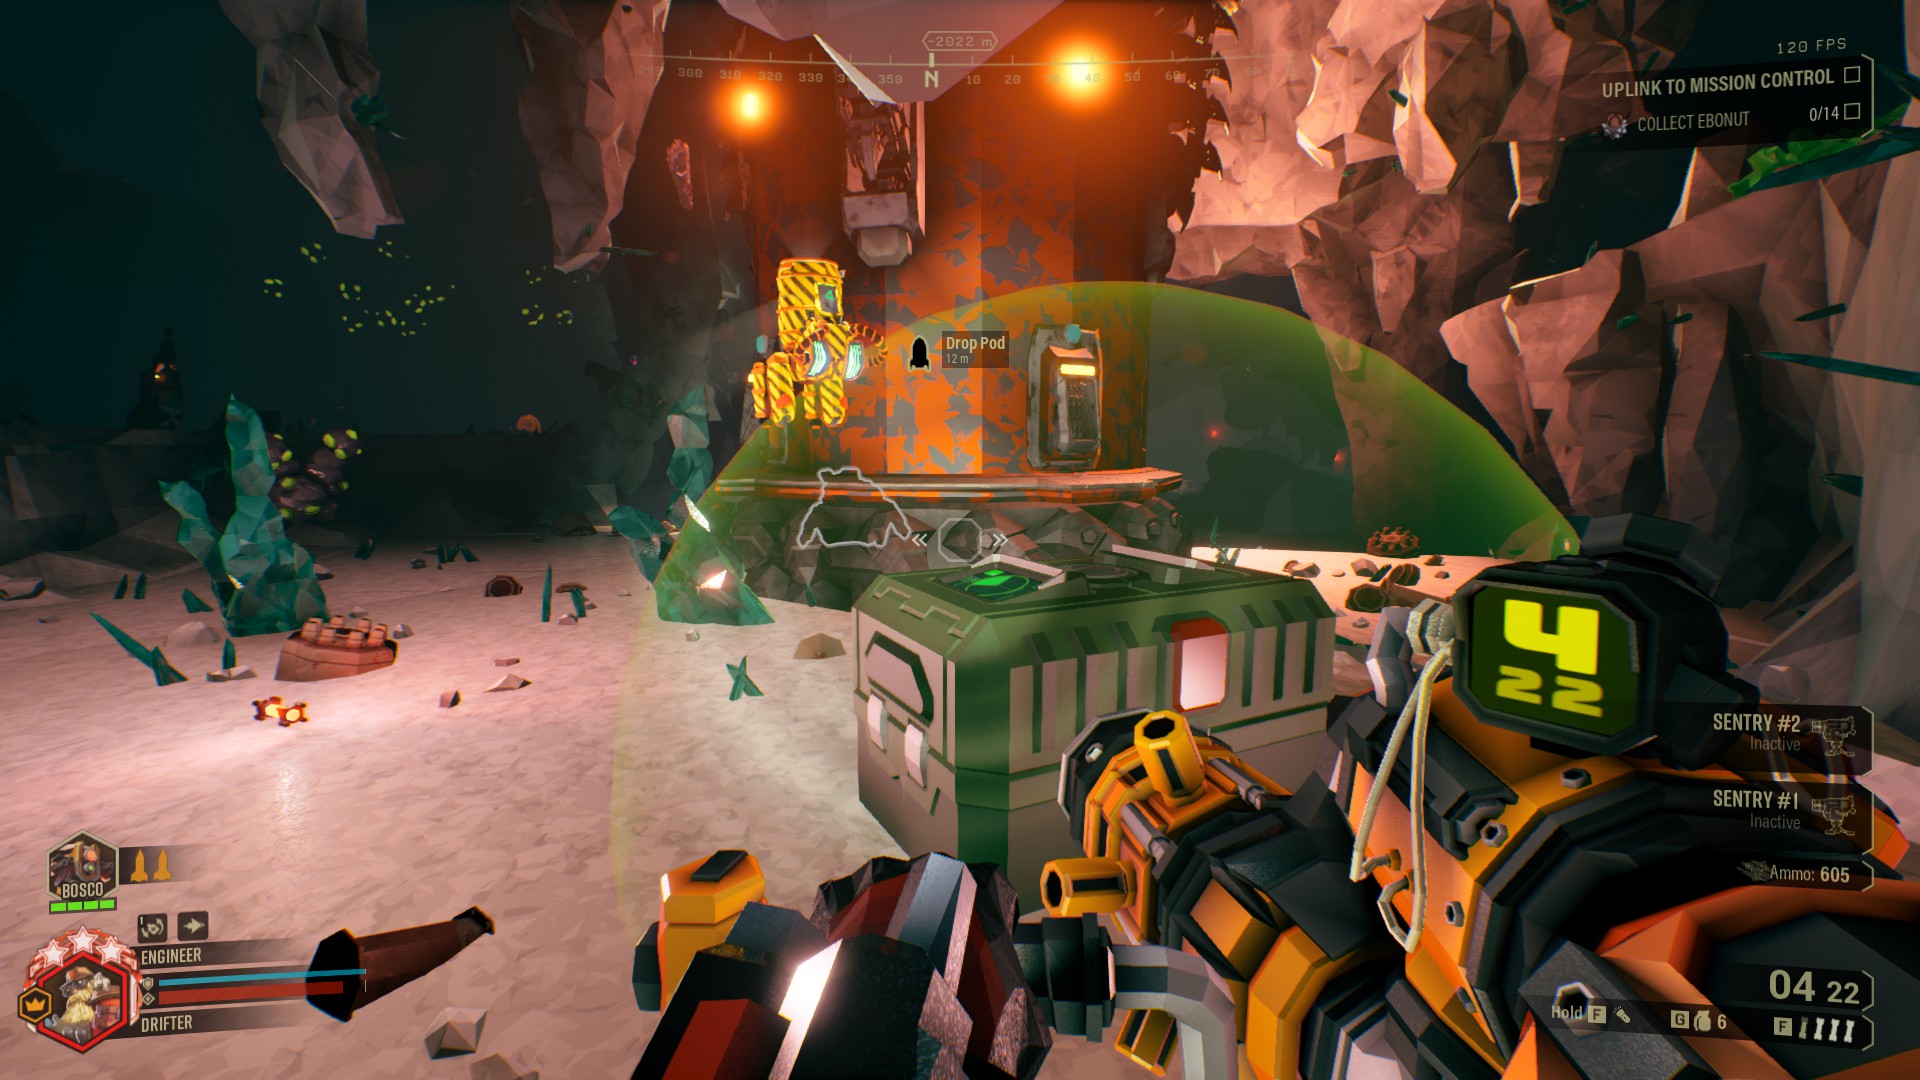
2番, we create a roof of the position – 通常 1 & half dwarf height, 4 platform wide. This roof tells most bugs that they cant approach us from above using the wall.
Do note, that ranged units will stay away from the roof, but will be motivated to shoot you from a distance.
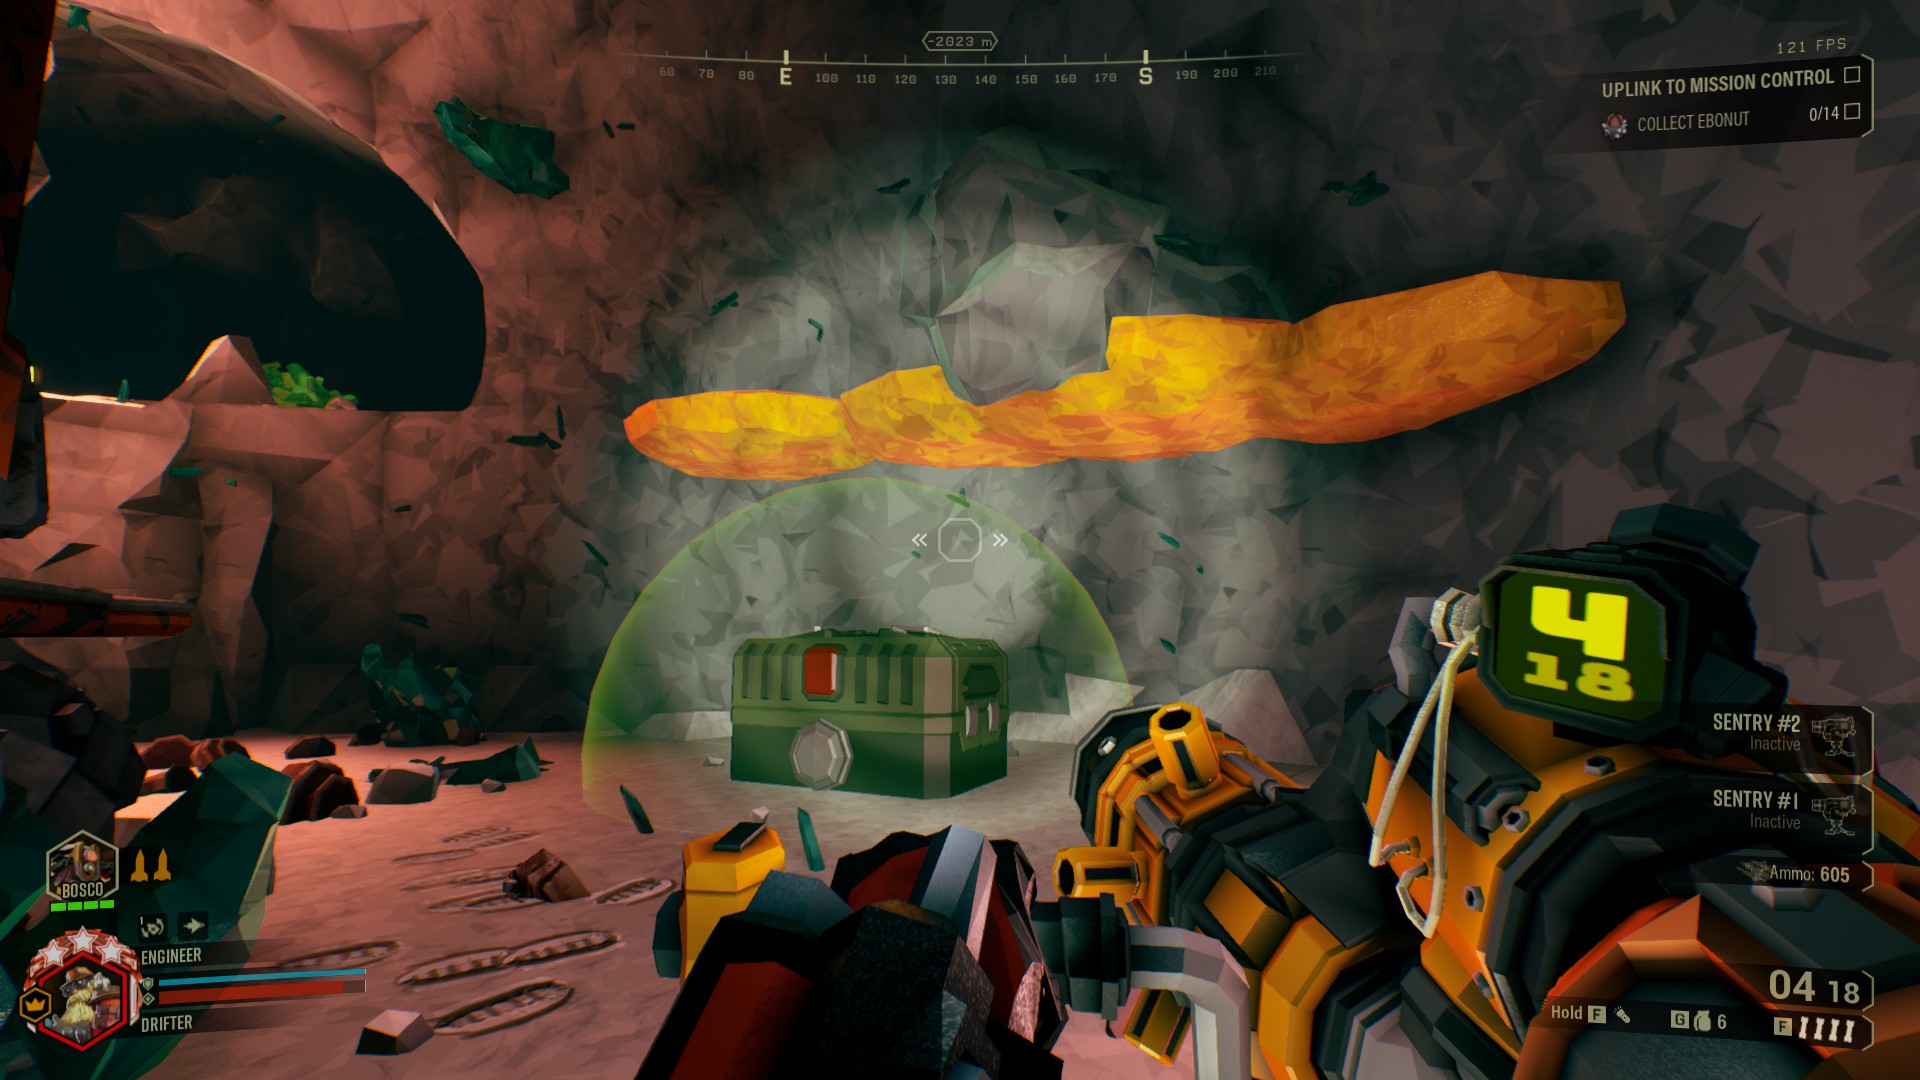
次, we do the position sides. The curved design is recommended as shown in the photo. The curved design gives more movement room, and having better flank line of sight. Typically the height would be 4 プラットフォーム, including the platform that is on ground level. We do this on both sides.
This tells the the bugs that they cant crawl sideways on the wall to reach you. また, ranged units would want to shoot you from beyond the platforms.
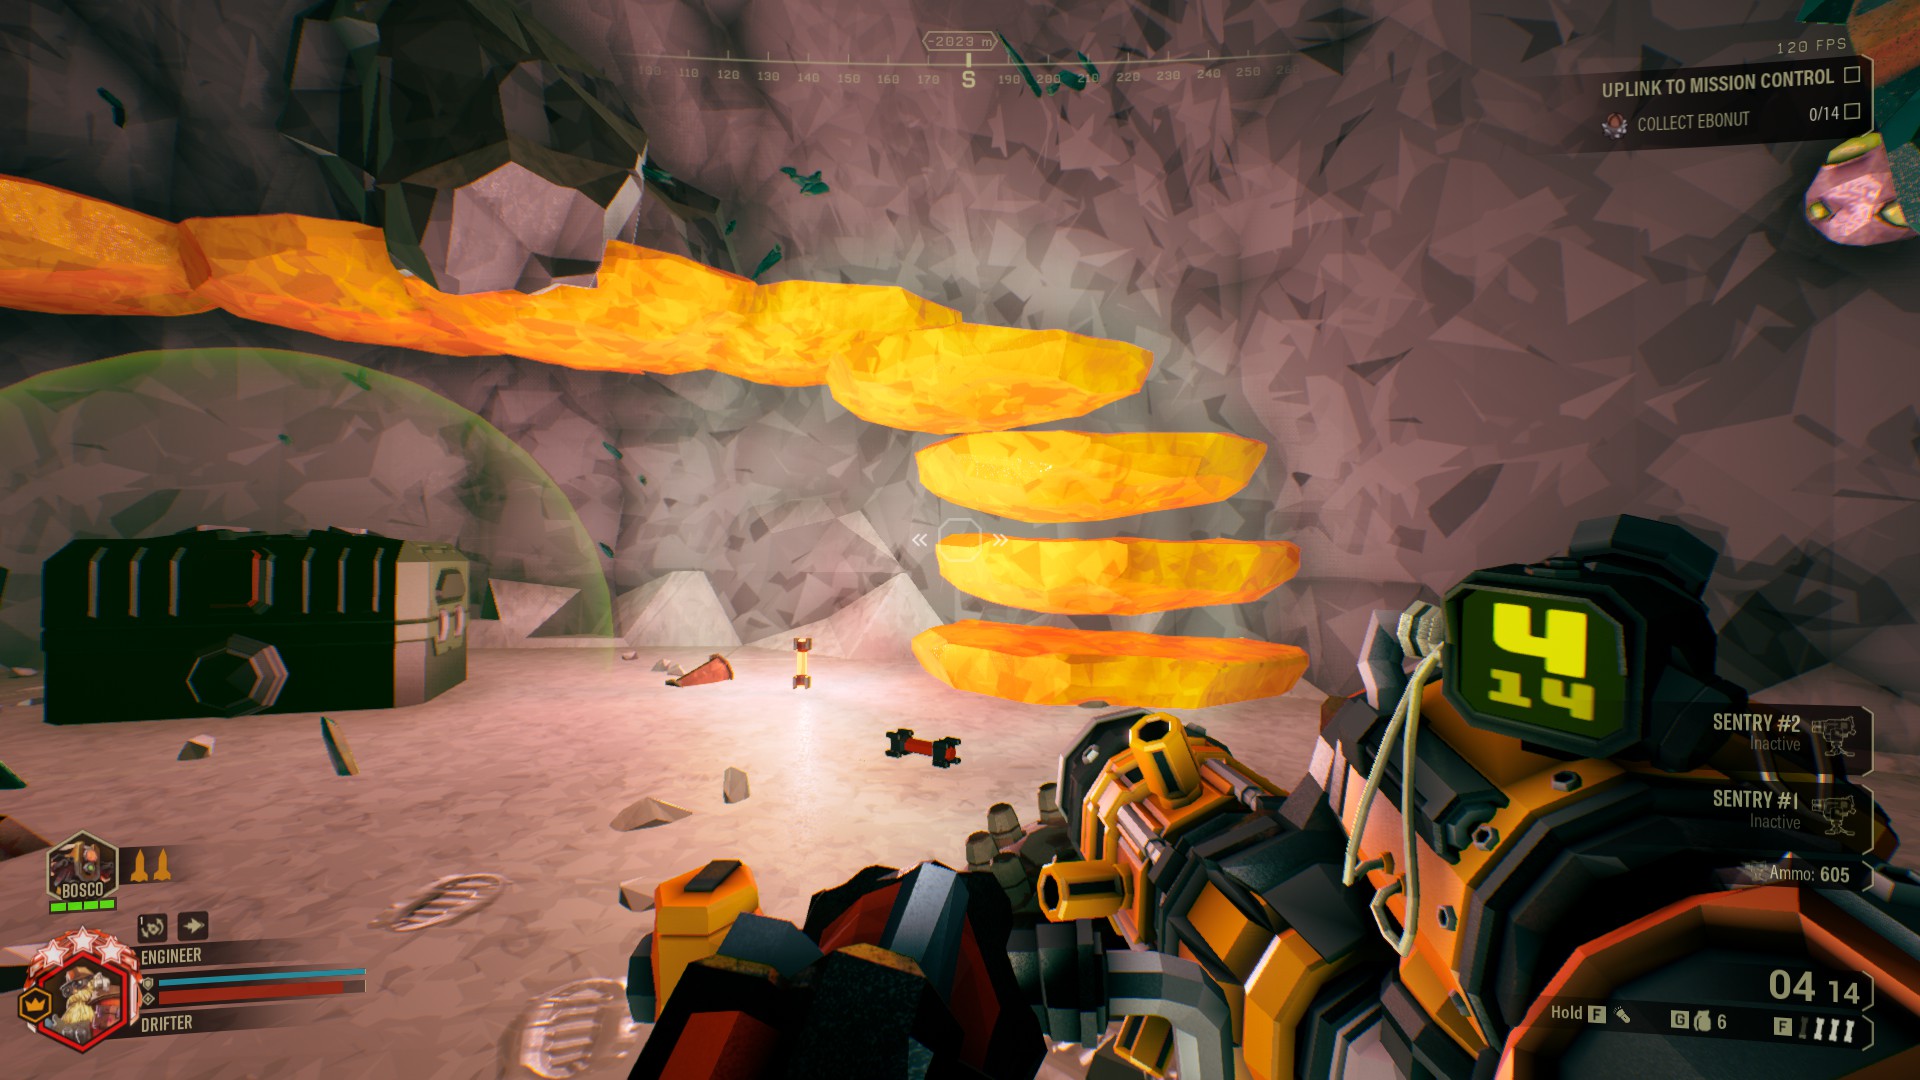
次, it would be best to put 1 Ground level platform near your position columns. Essentially you are extending the length of your ground level platforms.
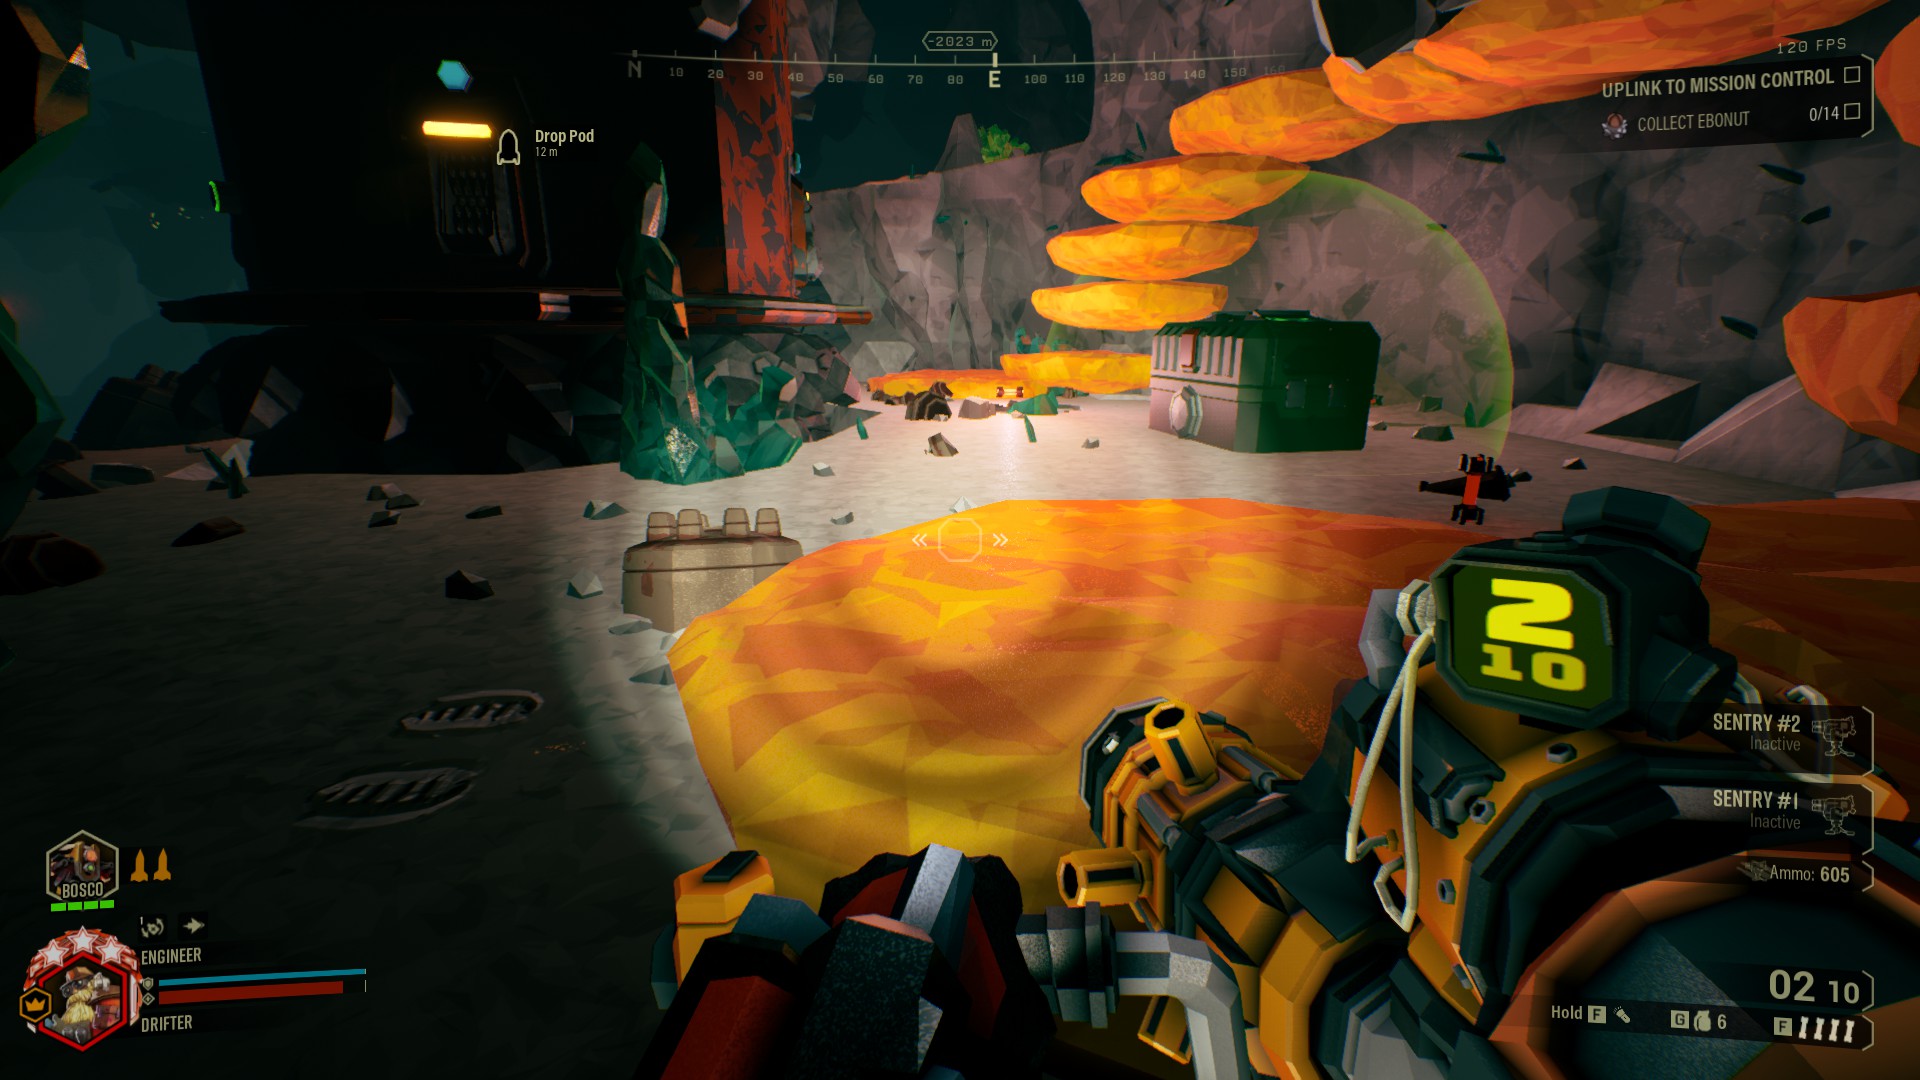
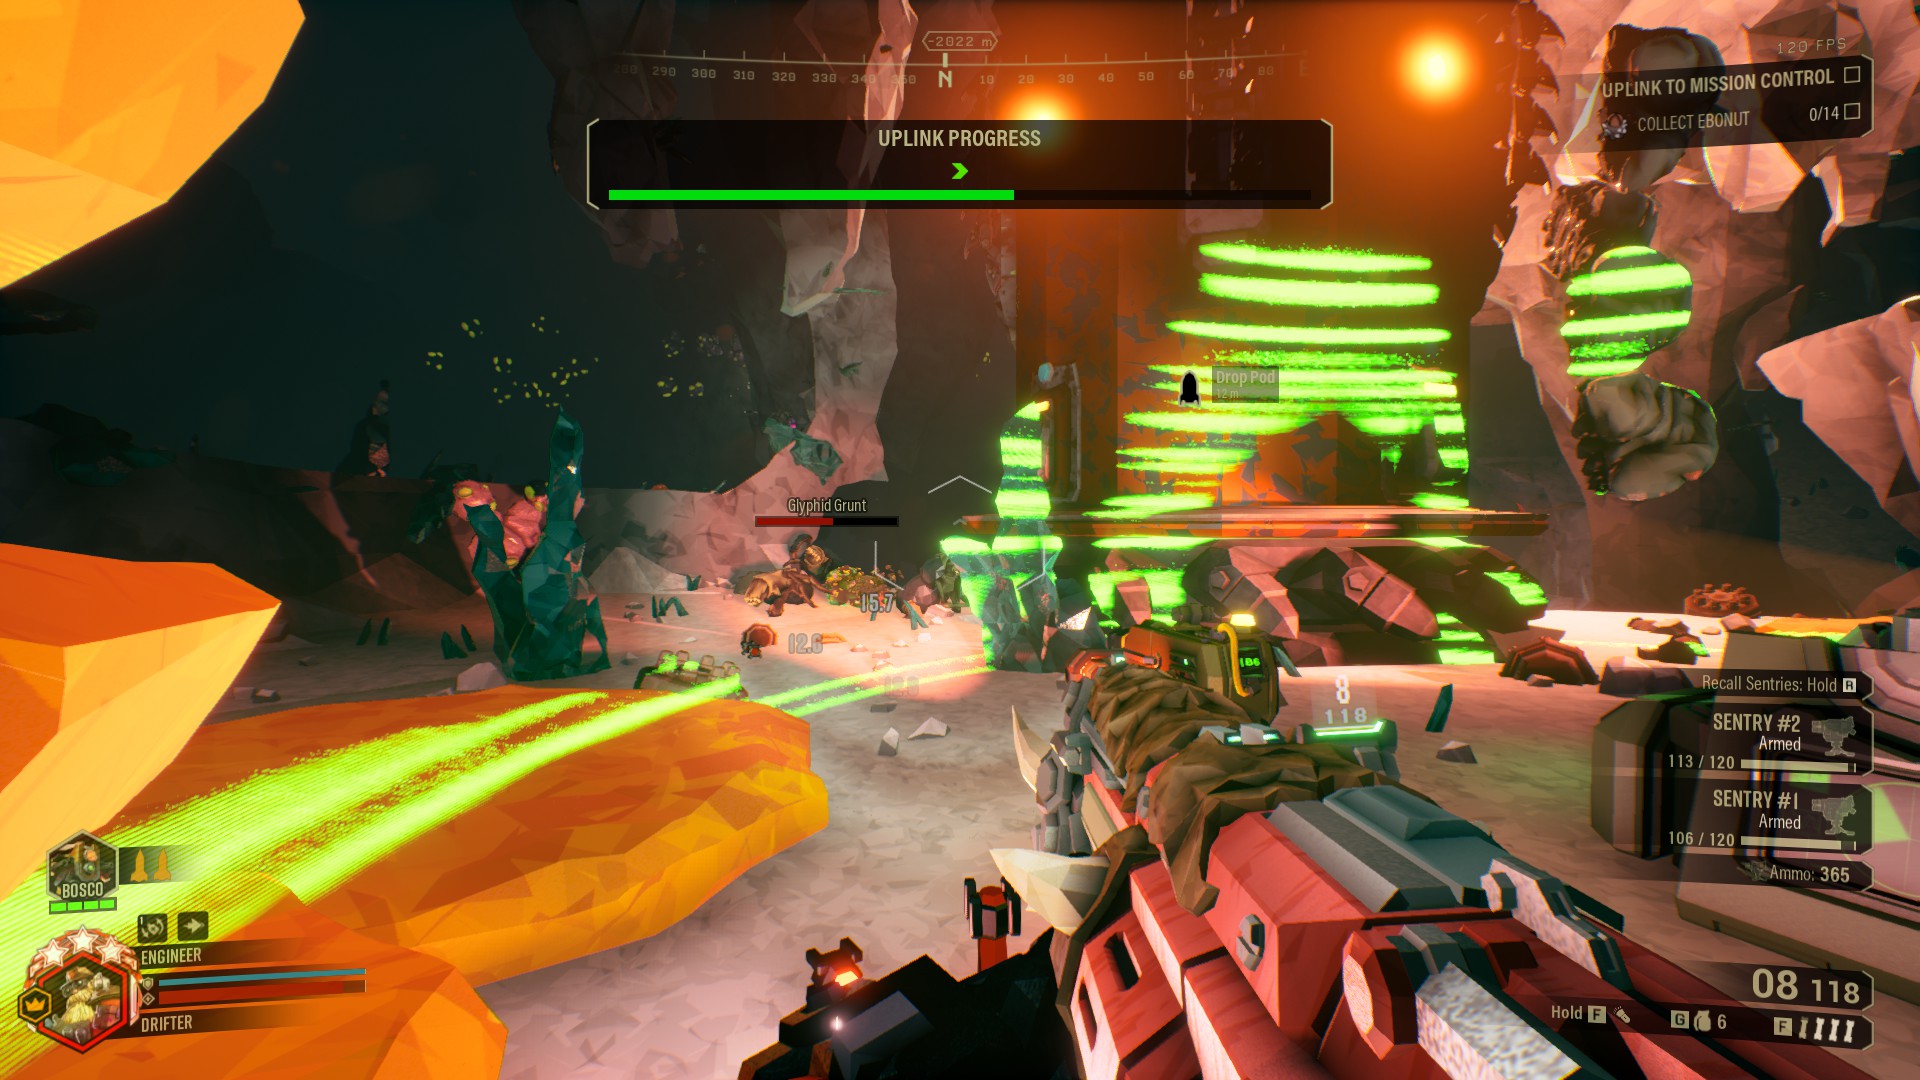
次, we place the turrets near the sides of the position – 1 turret per side.
Important to note, we should stay inside the position area, and obviously, the uplink area. DO NOT stand on the platforms, as for this programs the bugs to go over the platforms to you since it becomes the new shortest path in their instinct.
これが今日私たちがこの目的で共有するすべてです ディープ・ロック・ギャラクティック ガイド. このガイドは元々、次の者によって作成および執筆されました。 ドリフター. このガイドを更新できなかった場合, これに従って最新のアップデートを見つけることができます リンク.