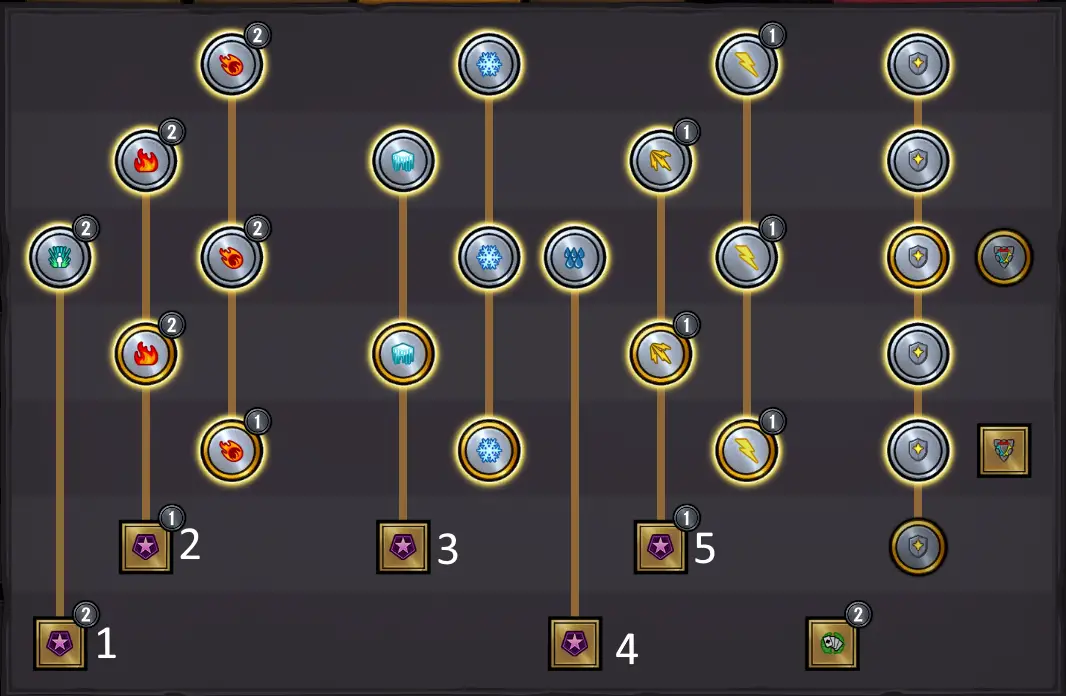
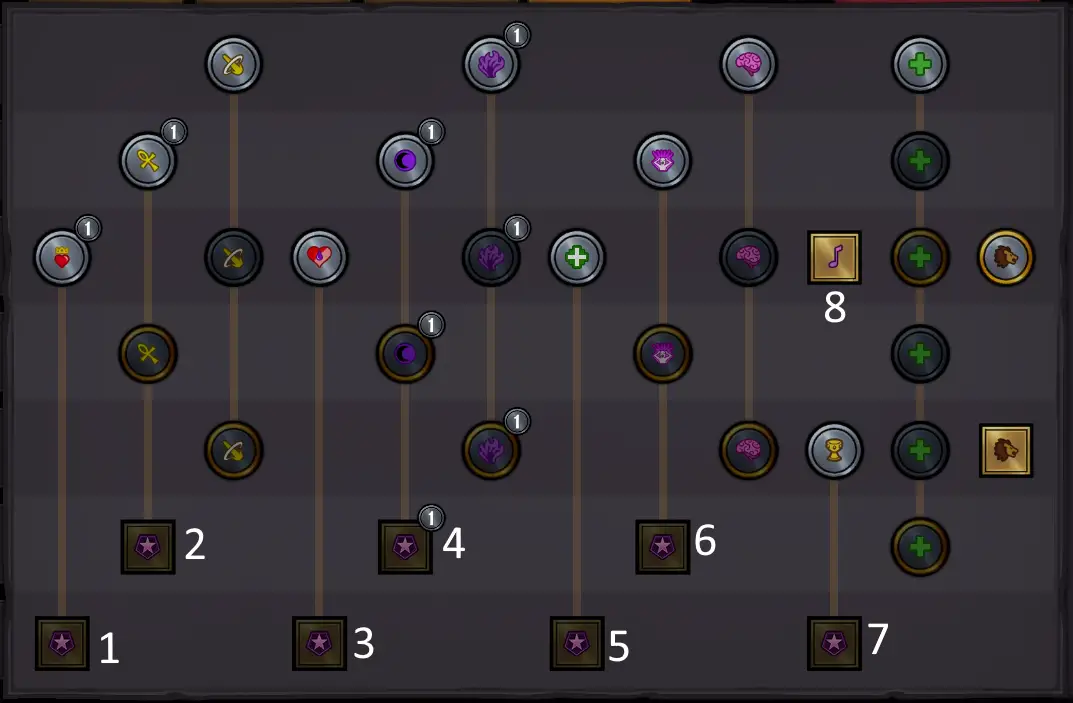
My personal recommendations on how to setup your Perk Points. Perks to always take and stuff to avoid, all listed here for you 🙂
序章
I have played AtO quite a bit during early access and think I’ve got a good grasp on how the game mechanics work. In this guide I’ll tell you my recommendations for the new Perk System. I usually play on around madness 6-10, so my recommendations are based for that difficulty rating. But before we start, I would like to give a few notes on how the game works, which are not that well explained in the game itself, (I would have loved to have known these when I started the game).
重要な注意事項
- Block is not affected by resistances (If a monster does 100 火災によるダメージ, そしてあなたは持っています 50% fire resistance, you will still lose 100 ブロック. Resistances only start taking effect once you take damage to HP.)
- On Hit Effects (例えば. like some weapons have) only take effect if you deal damage to the HP of a monster. As long as you only hit block, the On Hit will not take effect. (The same is true for taking damage effects. These only trigger if your hero loses actual HP)
Categories
それはさておき. Let’s get on with the
Perk System: I will split this guide into multiple categories:
- Always take (I take these on every character no matter what, there may be exceptions. Or depending on play style you can )
- Always take once (meaning at least one party member should take this)
- Good optional stuff (Depending on the hero or the build you play, you might want to take these)
- トラップ (These may not sound like it, but they are actually pretty bad)
- Unique Perks in Detail (Just a few notes on the unique options we get to pick now)
Always take
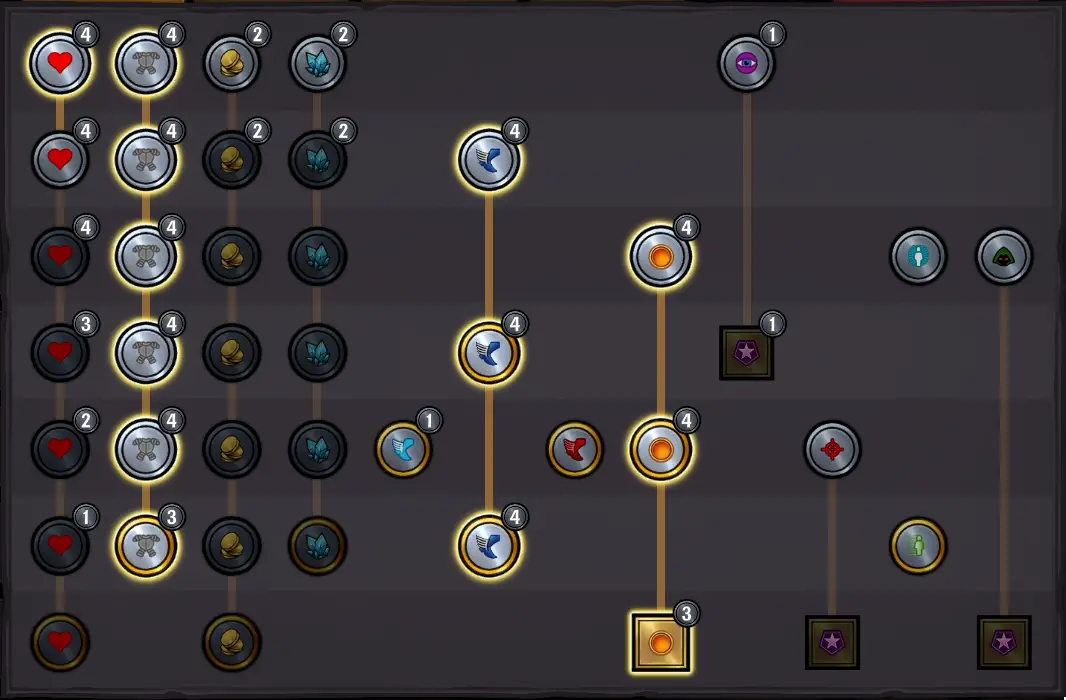
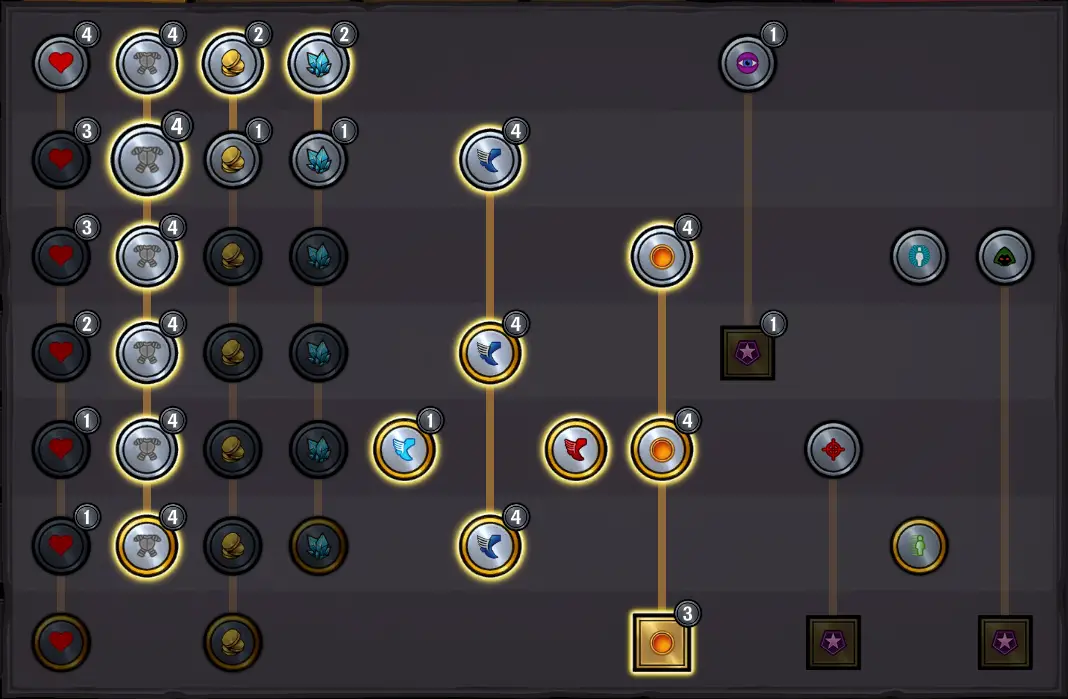
- The most important perk you can take is エネルギー. Being able to play your cards, especially having a good first turn is the bread and butter of AtO. This is a no brainer.
- スピード comes next. To a new player it may sound weak as it only influences the order of the units. The longer the fight goes this keeps mattering less. しかし! If you can finish the fight in very few rounds, this can mean that you could act twice and your opponents only one time. 基本的に, you have had twice the time to deal damage or heal up, while the enemies only get one. If you act before them, you get to deal damage before they playing annoying trigger cards. Another thing is block, If your tank is able to act before the enemies, you can play a group block card and don’t need to worry how the hell you are supposed to heal all that damage.
- 抵抗 and a bit of HP. これは非常にシンプルです. As long as your characters are alive, they can deal damage, and resistances helps every character to stay alive. Resistances are better than HP, because it also indirectly improves all healing. あなたが取るなら 20% ダメージが少ない, this means you have to heal ~20% less. (Mathematicans calm down, I know these numbers are not perfectly right, but you get the jist of it.)
- This is not on the screenshot, しかし、 Inspire Perk on the Elemental Tab has a lot of good options. If you have someone who provides Inspire, you can take option 2 (+2 cards from Inspire). If you are worried about the boss fight take option 3 (Immune to stress). If you are unsure, オプション 1 (+1 card at start of match) is always good!
Take once
There are some perks which have “All heroes gain…” so you only need to take them once.
- Vulnerable stack to 12 and reduce by 1. Vulnerable is the best status effect in the game. So increasing the cap for it is good and making it only decay by 1 per round is awesome. IMO, this is simply the best perk. いつも, いつも, always have at least 1 hero take it!
- Resistances up by 35%. There’s one on each tab “物理的な”, “エレメンタル”, “Mystical”. If you are planning on using these buffs (which you should on higher difficulties), these are some extra % for your heroes to survive. Note that the higher you get with your resistances, the more effective each % は.
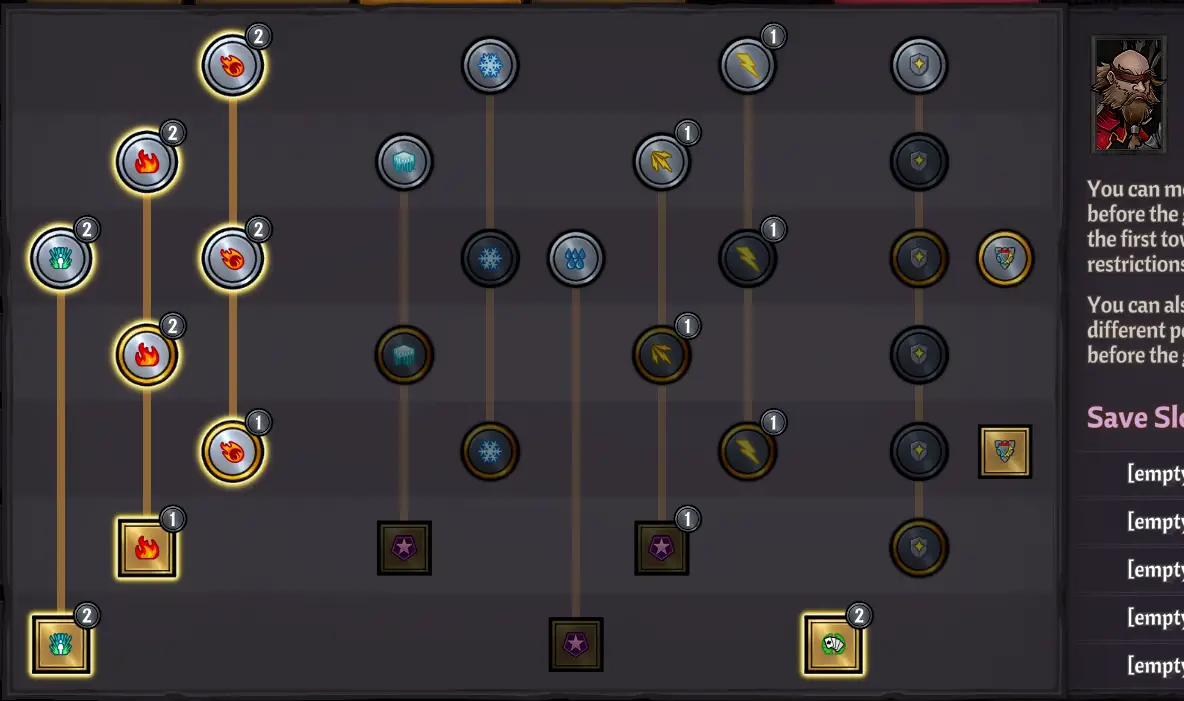
Good Options: Damage Dealers
(Example for Cornelius)
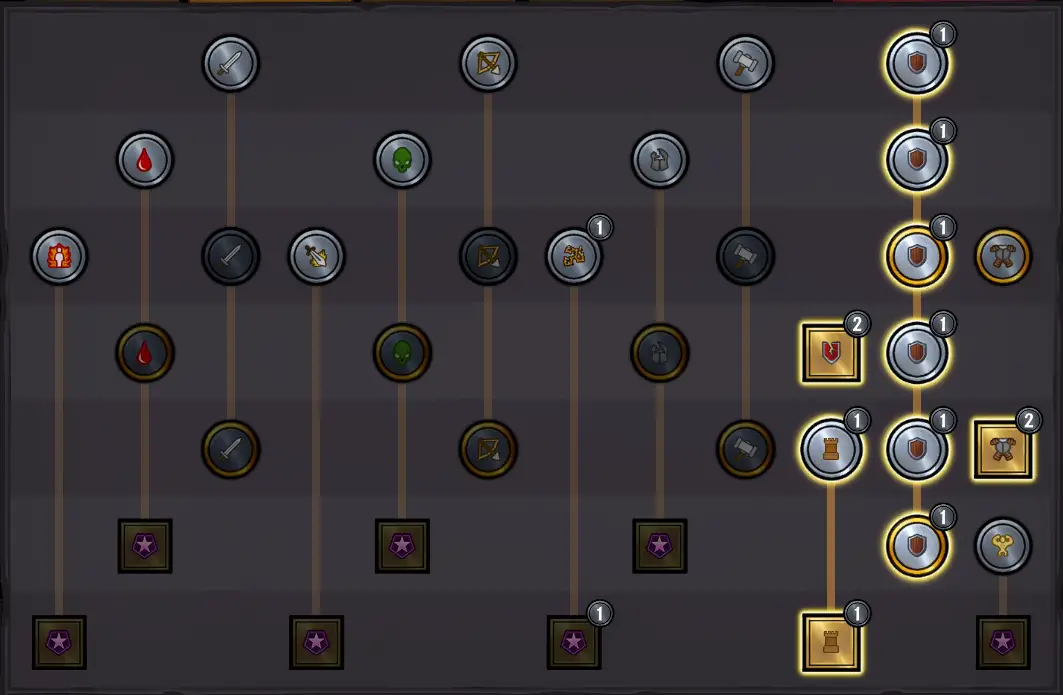
- Your primary damage and charges. This is actually another “Always Take” for the damage dealers. You only might to consider skipping this on your tank and maybe healer.
- Powerful stack up to 12 and only decay by 1. If you have some source of Powerful (which again you always should as it is free damage) always take this. This makes it much easier and faster to stack up and you can even get up to +60% ダメージ, いいですね.
- Shards & 金. If you want to play without chests / 用品, you need to take at least some of these. I usually fill up remaining points here.
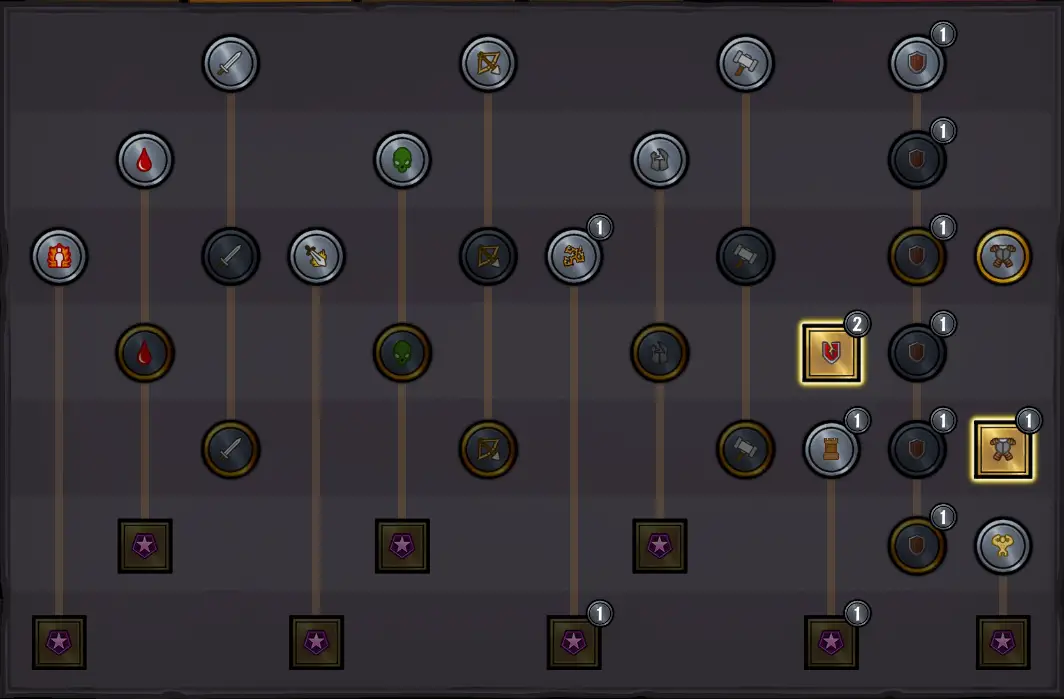
Good Options: タンク
(My page for Magnus)
- 速い と 遅い 料金. I like playing Piecing Howl (Slow and Vulnerable on all) as well as Push Forward for defense. With these two I often manage to have my whole team act before the enemies. This is by no means a must, but is definitely not a bad option out there.
- ブロック: Who would’ve guessed this? Block is the number one job for your tank, so he should do it well. As simple as that. While Entrench is still the go to to get Fortify on your heroes, the huge amount of +Block you can get from this, makes Barricade and even better card than it already is.
- Fortify: Take option 3 to get even more block for free. (This makes the good cards Entrench and Citadel even better)
- I know you can play the tank class as damage dealers as well, but these are the options if you want that character to help protect the team.
- ノート: Since tanks have lots of base HP, i usually don’t take HP for them.
Good Options: Healers
(example page for reginald)
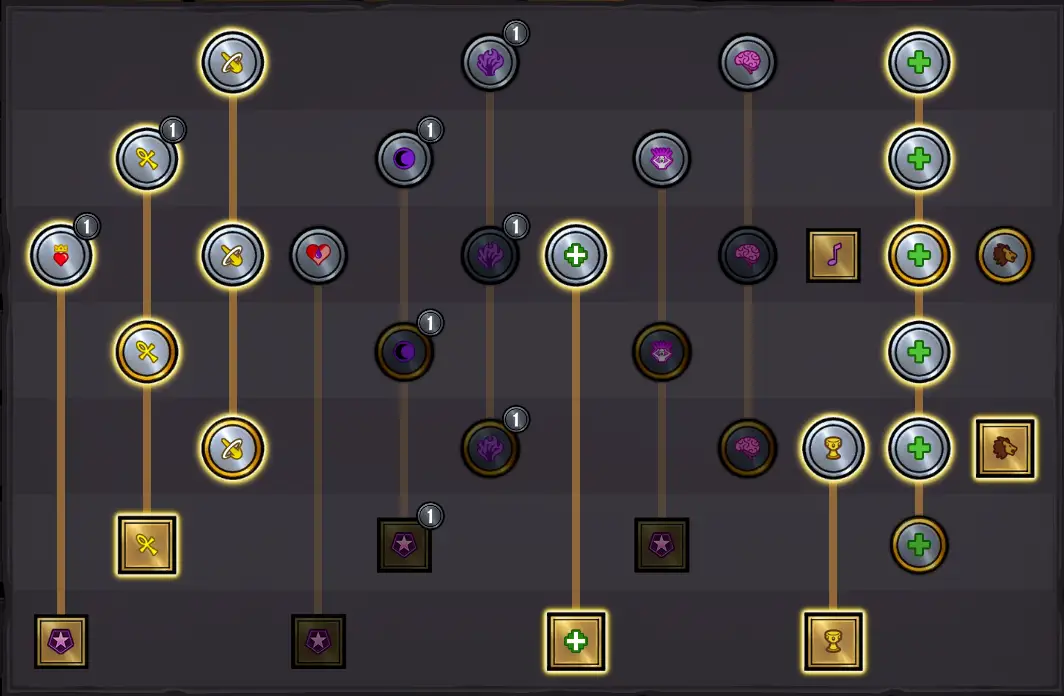
Every healer is very different and requires a unique rune page, which can even vary depending on how you play them (例えば. healer Malukah vs. damage Malukah)
- 癒す: かなりシンプル. If you job is healing, それから + Heal is what you want.
- 再生: Regeneration has two very good special perk options: Healing on the side and increased healing received. Both are very strong. (see below for more info on it).
- 祝福してください: If you are planning to bless yourself, take increased healing done here. If you are planning to bless the whole team, I would recommend to take the not decay option, although the holy resistance is kinda useless. If you take it though, make sure to take the upper route in chapter 4, where enemies actually deal holy damage.
トラップ
- Burn dealing cold damage. Normally burn is basically a COMBO in itself. It deals Fire damage and decreases Fire resistance. If you take this feat, you remove the combo from it, forcing you to stack Chill on enemies as well for maximum damage. 地獄いいえ!
- Bleed at end of turn. +1 additional Bleed is not worth the drawback of dealing it’s damage after the enemies turn. Especially a healer will probably heal himself for much more or could even dispel the bleed. Nononono.
- +50% 毒ダメージ, but decays completely. If you don’t finish the enemies turn 1, this perk is a downgrade to your damage. Yes it can’t be dispelled, if it dispells itself, but then the enemies will dispel another status effect you may wanted to keep on them.
- This hero starts with 1 Reinforce / Insulate / 勇気. This feat is very expensive with 3 ポイント, and you should try to play a card giving this effect to all your heroes anyway. And remember that this status effect doesn’t stack!
- Vitality giving mind resistance. There are just too few enemies dealing mind damage.
- Insane reducing max HP. As damage this is useless, because it only matters if the enemy is at full HP and has block. Otherwise if your enemies manage to heal back up to full HP you have a problem anyway.
Special Perks in Detail
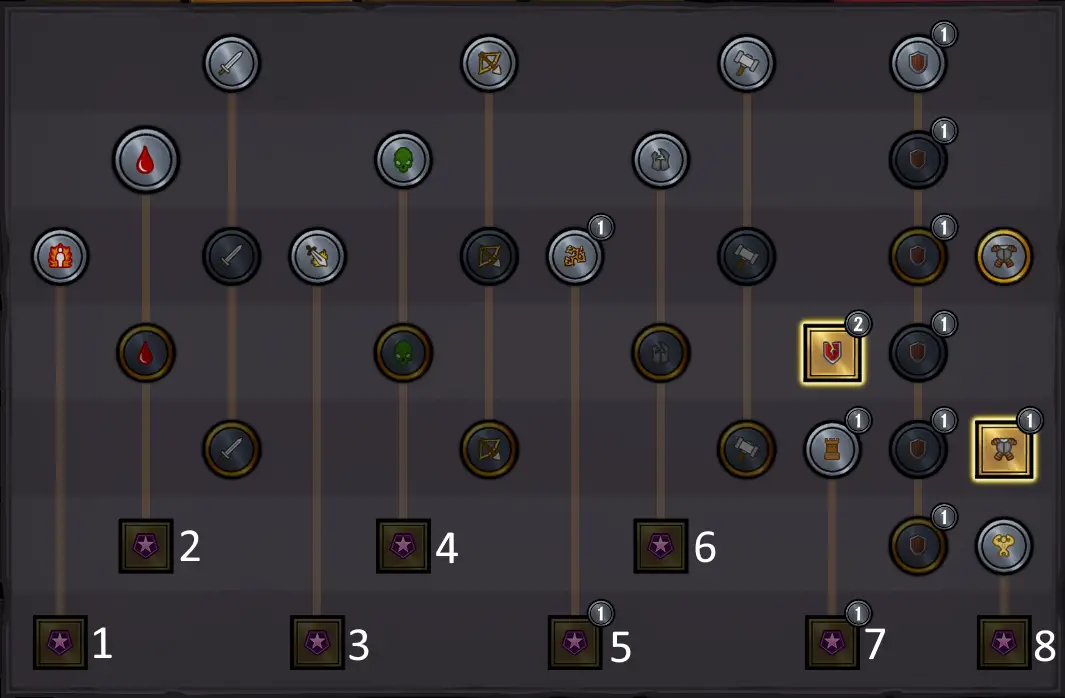
- フューリー: I am actually not quite sure here. I consider the last one the best, but i haven’t played with Fury very often. Should be the best if you can ensure to dispel it. (+5% ダメージ, but take more damage, considering you can survive it.)
- 出血: Just take +1 出血. I have no idea why you would want to pick option 2 または 3. +1 further bleed stack on option 3 is absolutely not worth the downside of end of turn.
- シャープ: Any option is fine. Take third option if you have multiple characters with sharp.
- 毒: 取る +1 充電, except you have another dark focused hero, then option 2. オプション 3 is a big no.
- いばら: Avoid option 2. Take option 3 if you have another character with poison. Take option 1 if you are unsure.
- 割れ目: オプション 3 if you are worried about getting enough vulnerable on the enemies. Otherwise take option 1 または 2. Both are fine IMO.
- Fortify: オプション 1 on Heiner. オプション 3 is not bad, you can take it if you want. オプション 2 would be ok on non-tanks, but you don’t want to take +1 fortify on them. Since you will usually play an entrench in your tanks deck, I usually don’t take this one.
- 挑発: I don’t play Taunt, because for me it was always a “pls kill me” バフ. (You can write your opinion on this in the comments 😉 )
- 強力:As written above. Take option 2 at least on one hero. +1 charge can be helpful as well.
- やけど: As a fan of Cornelius I am pretty sad about this one. オプション 2 can be ok for self-burn Cornelius. オプション 1 is my default. オプション 3 is just absolutely awful. Burn reduces Fire resistance, so it’s damage will go up the more you stack it. If it now deals cold damage, you do not profit from that and you will be forced to stack Chill as well. Just a big no!
- チル: My opinion is “Don’t play chill. it’s not good.” Maybe option 2 (increased blunt damage) can make chill good in the right team, but I am not confident in it. Are there any good self-chill decks out there for option 4? Please tell me.
- 濡れた: オプション 1 と 2 can be good in the right combinations.
- Spark: Actually all options are good, but Option 2 is just so OP (applying 30% of Spark to the sides), that you always want to take it. 理論的には, once you have Wilbur’s buff “Spark deals damage to the target as well”, you could spark all enemies once to 6 (if they don’t dispel) and only play block and heal. In the meantime Spark will just stack up higher and higher and kill everyone without you doing anything more. (You will lose a lot of score, if you really play it like this, but the fact that you theoretically could, just shows how strong this perk is)
- 活力: オプション 1 (+8 HP) looks best here, オプション 2 (remove bleed) for Fury builds. オプション 3 (Mind resistance and no decay) looks bad. If you play with capped status effects, you actually want it to go down so you can regain it again. Also there are not that many enemies dealing mind damage.
- Sanctify: You can play all options, but Option 3 is best. When you have Sanctify capped at 50, it will deal ~12 damage per hit for free, which is very nice if you play repeat or jump cards.
- 減衰: I am not to sure about this one. I usually don’t build for decay, but option 2 (reduced healing by 75%) と (オプション 3) reduced Shadow resistance doesn’t sound to bad.
- 暗い: オプション 1 (+1 充電) for Malukah or Option 3 (+25% explosion damage) for damage. I think option 2 (dark explodes at 35 on this hero) is made with Malukah in mind, but you should be able to dispel it in time, even if it explodes on 25.
- 再生: Make regeneration great again (it wasn’t bad to begin with actually). Both option 1 と 2 are really great. If you think about it, オプション 1 bascally triples the regeneration for the 2 center heroes, as well as giving heroes healing outside of their and your healers turn, which can be very useful! オプション 2 (increased healing received) is really good as well as it applies on all heroes.
- 非常識な: Insane perks are actually not that insane. Badum tss! (sorry for that one) I would simply go with the charges (オプション 1). Unless you hit enemies for the first after they get block, オプション 2 is completely useless. オプション 3 also is way to specific and not even THAAT great. It could be your heroes are immune to insane and I would still be unsure whether that’s worth it.
- 祝福してください: All options are fine, it depends on how you are planning to use bless in your team.
- Stanza: I haven’t tested Gustav yet, but for the scouts so far there was one important rule: Avoid Songs at all costs. (When all stars align, you may be able to actually cast the song cards, but even then they are not that great, that it is worth the risk of not being able to do something useful on your turn. Have to see if the Bard will be able to do this more consistently. I’ll update this, once I’ve got an opinion on him.)
Winners and Losers of the change
Concluding this, here is a short list of which heroes have benefit or lost the most due to this change. (in comparison to the early access version). Simply skip this if you haven’t played in early access.
マグナス: Around equal. You must now decide if you want to go damage or block with him.
ハイナー: Around equal. The Perk granting Blunt + Fire damage for Fortify was definitely made with Heiner in mind and is very good, but he does a lot of different things: 火 + Blunt damage, 割れ目, Fortify. It will be hard to get everything you want for him with just 50 ポイント.
グルクリ: Benefit slightly. Grukli is very focused on bleed and Fury stacks. The perk system gives him more options to focus on his strengths.
Andrin: Around equal. Similar to Heiner, Adrin can do a lot of different things, but he also can focus in one direction.
スルス: Around equal. The Stealth build may have benefit slightly.
Evelynn: Lost a lot. Evelynn so far, was an adaptive mage, with different spells. Her biggest strength was that she was equally good with all elemental damage types, so you could pick the right tool against the right enemy. Now that you have to focus on one type, makes her versatility very weak.
コーネリアス: Benefit slightly. Since you only need to spec into fire and burn for damage, you have a lot of points to put into other good stuff.
ウィルバーBenefit greatly. Willbur was already a great mage to begin with. Now with Spark having the best special perk (Spark spreading to neighbors with 30%), Willbur is the big winner of this change.
レジナルド: Benefit quite a bit. There are very good perks for regeneration as well as bless. And he is able to focus on holy damage and heal and can neglect dark and mind.
オティス: Benefit slightly. Both builds from ottis focus hard on one thing, sanctify or shields. Sanctify has good unique perks and you can buff the shields by quite a bit now.
恥を知れ: Around equal. While Malukah focuses on Dark damage only, there are too few good Dark and Shadow cards, which forces her to take some other damage types as well.
無視する: Around equal. Nezglekt only focuses on mind damage and Sight for his healing. Unfortuantely the unqiue perks for that aren’t too great.
読んでいただきありがとうございます. Tell me your opinion in the comments and have a great day!
