- タイトル: A Token War
- 発売日:
- 開発者:
- 出版社:
Information about A Token War is still incomplete. これを使用してゲームの詳細を記入するのにご協力ください。 お問い合わせフォーム.
A guide detailing more specific and advanced tactics to help players progress more readily.
Identifying Dangerous Spaces
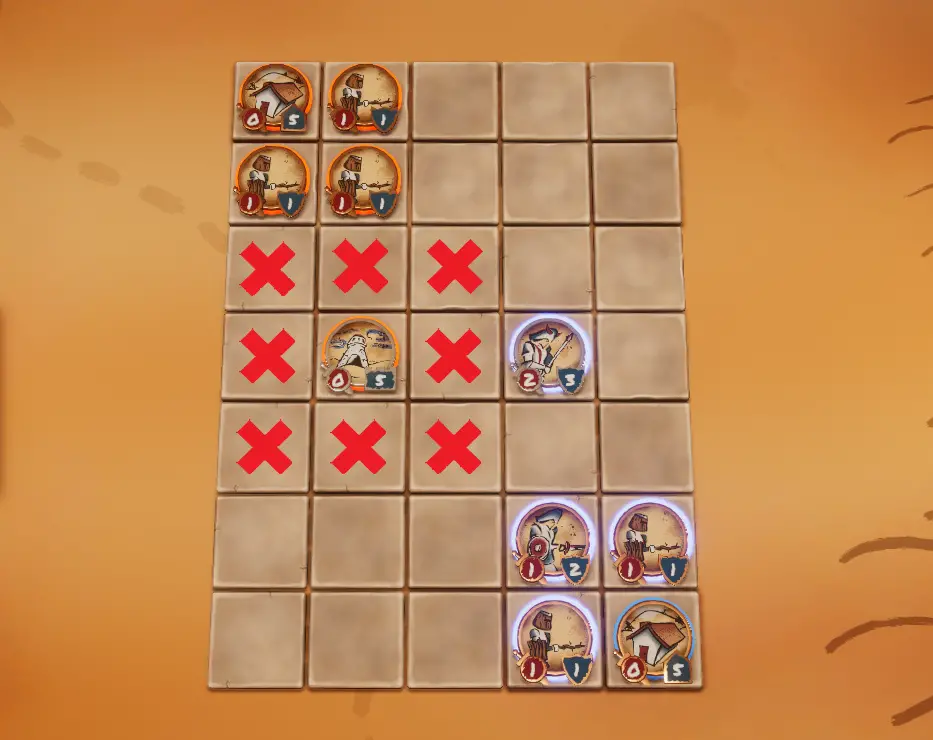
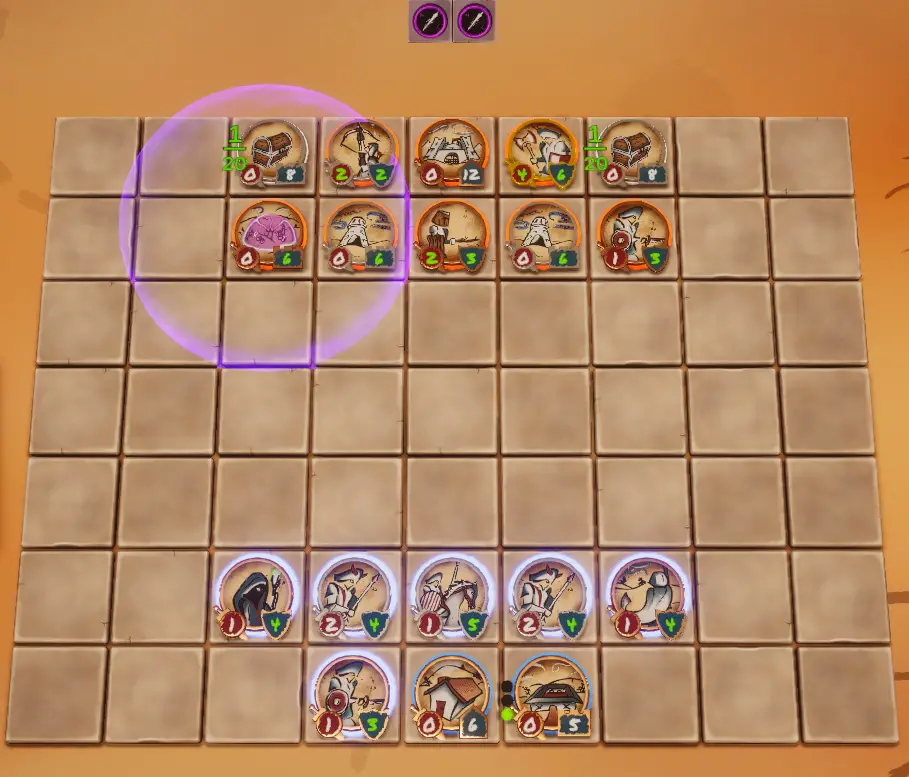
Once you know the basics of how to play, one of the simplest tactics you can employ is to identify dangerous spaces, and then decide if you do or do not want to interact with them. The most obvious way to see this tactic in action is to look at Towers since they effectively control a set number of spaces. The first time you’ll encounter a Tower is on the second level, appropriately named “The Watchtower.” The initial setup looks like this:

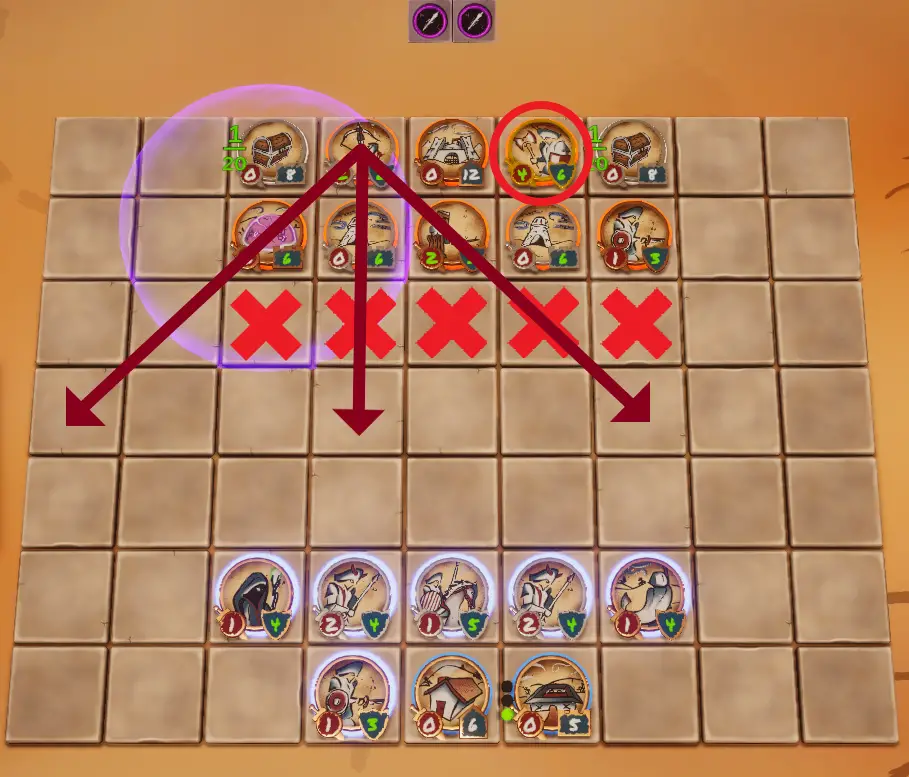
When facing this scenario, the first thing to do is identify the spaces the Tower is controlling, since those spaces are going to be dangerous to move into, adding some markup, those spaces can be identified like so:
一般的に, this idea is to not end your turn in one of these spaces, since the Tower can dish out a fair amount of damage. In scenarios like this, it’s often best to not even try to take on the Tower and instead, simply go around. This can seem counterintuitive, but victory is achieved by destroying the enemy Stronghold, not the enemy Units. このシナリオでは, instead of running at the Tower you can make an aggressive move around the Tower and position your Big Grunt to take out multiple enemy Units.

Being able to identify dangerous spaces and figuring out when to engage with them is one of the simplest but most important tactics in A Token War.
Key Units and Positions
After you can identify dangerous spaces, it can seem difficult to figure out where to actually move, rather than just where to not move. One of the most effective ways to figure out where to move is by identifying the key Units and positions in the enemy setup. 例えば, on the fourth level “Funnel of Doom” there is a very obvious key Unit for the enemy, the Archer in the top left.
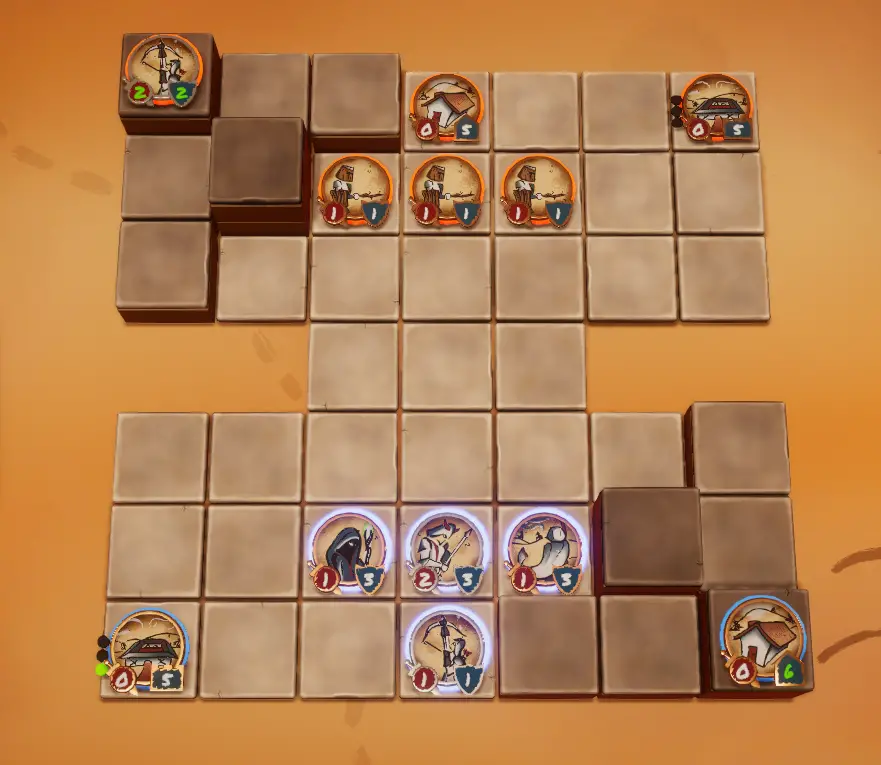
From the high ground, the archer obviously controls a lot of space. Using the same technique as with the Tower, we can identify the spaces the archer controls, as well as the spaces the archer doesn’t. Using a bit of markup we wind up with something like this:
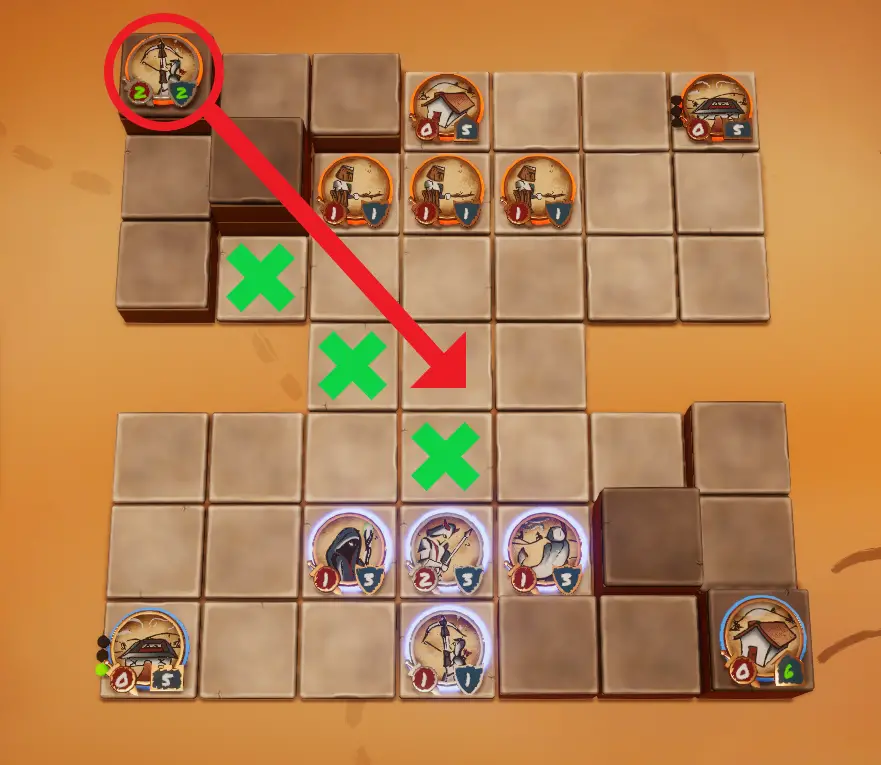
Unlike the Tower, しかし, the Archer is free to move. This means that simply going around it isn’t necessarily an option. その代わり, we are going to have to find a way to take out the Archer, but without being able to move directly adjacent to it, we’ll have to move to an intermediate space, like one marked in green.
These spaces are immediately safe from the archer and can be used as staging areas to later attack. It’s also important to take note of how much damage the archer can do from the different elevations and move in a Unit that will survive one turn, such as a Scout or Big Grunt. 例えば, making the move illustrated here will leave the Scout alive and allow you to destroy the archer on the next turn, regardless of where the archer moves.

After taking out the Archer, you can take advantage of the key position that the Archer occupied, namely the high ground next to the enemy Stronghold. If you can occupy this position and prevent the enemy from retaking it, you have a permanent tactical advantage. High ground is a good place to look for tactical advantage, but it isn’t the only place. Key Units and Structures can themselves represent key tactical positions, as well as anywhere that has a clear line of sight on the enemy Stronghold.
ノート: The first battle of the second zone (の “Forest Gates”) has a very important key position you can try to occupy, as well as several spaces to generally avoid. Here’s a hint, sometimes you can just bust through a wall, you don’t have to go around it.
Luring Units and Putting it all Together
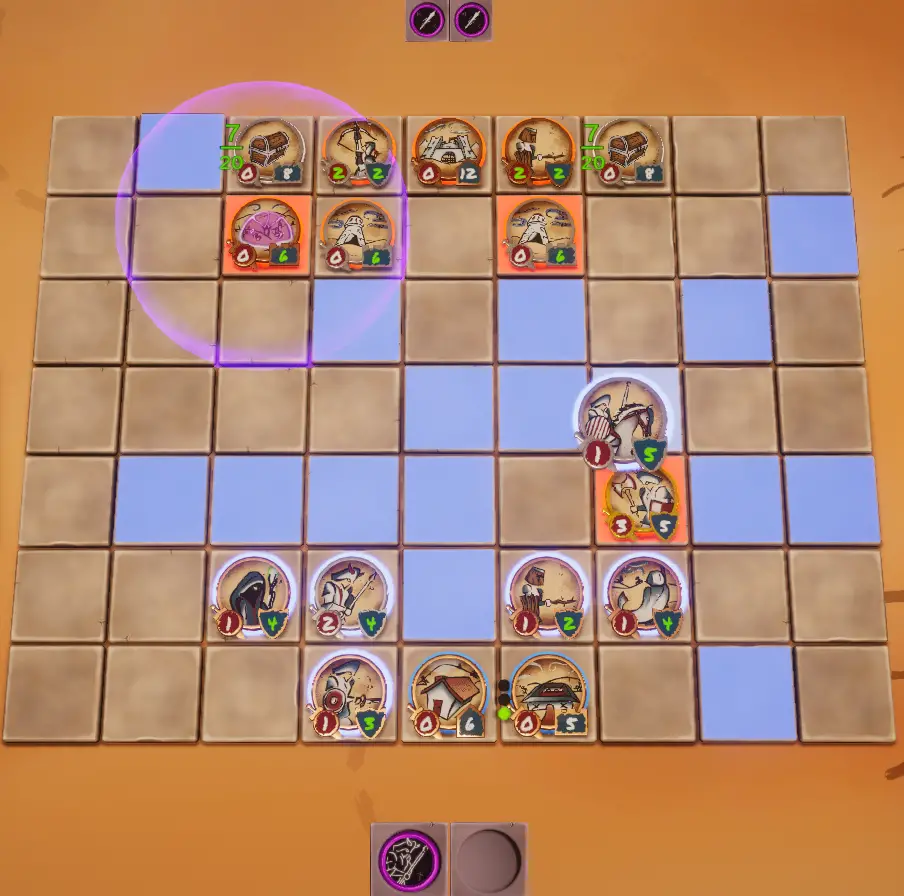
Let’s take a look at the final level in the first zones “At the Gates.” This level is effectively a final exam in terms of tactics, requiring you to put all the previous tricks into practice. Here is what the initial setup may look like (it will vary somewhat for each player on each run.)
Taking this setup in, there are a few things to consider. There are multiple Towers, controlling a lot of space. There’s an archer with mediocre sightlines and a Huge Grunt, lurking in the back. The Towers are right next to Stronghold, so they can’t be completely avoided, and the Huge Grunt is always going to be a problem.
From this perspective, it should be clear that the Huge Grunt is a key enemy Unit and the spaces in between the Towers represent a key enemy position. Adding some markup to the image, we can see the dangerous spaces, the zones controlled by the Archer, and the key Units.
After performing this exercise, it should become apparent that the right side of the board can be moved on more freely since there isn’t a ranged Unit keeping watch over it. しかし, any single unit will likely be destroyed quickly by the Huge Grunt. Recognizing this, it’s important to realize that sacrificing a couple of Units is to be expected, as long as you are effectively luring a much stronger Unit to its demise.
例えば, we can use our Big Grunt in this setup to draw out the Huge Grunt on the right-hand side of the board. The Big Grunt will be lost, しかし, the Huge Grunt can be brought into a much more treacherous position.
Once the Huge Grunt is handled we have removed the key Unit from the enemy’s position, which should make our job easier. The next target should be the Archer, since it is the next most problematic Unit, and once destroyed we can begin working on one of the Towers since we need to clear a runway to the enemy Stronghold.
これが今日私たちがこの目的で共有するすべてです A Token War ガイド. このガイドは元々、次の者によって作成および執筆されました。 UpRoom Games. このガイドを更新できなかった場合, これに従って最新のアップデートを見つけることができます リンク.