- Titre: Rage de superjumpworld
- Date de sortie:
- Promoteur:
- Éditeur:
Information about SuperJumpWorld Rage is still incomplete. S'il vous plaît, aidez-nous à remplir les détails du jeu en utilisant ceci formulaire de contact.
Dans ce tutoriel, we will explore the process of designing a fundamental game level, focusing on aspects that were not addressed in the brief in-game tutorial.
What is a Level Editor?
A level editor provides an avenue for self-expression and enables you to unleash your creativity by crafting unique elements for a game. With this tool, you have the opportunity to extend the lifespan of the game and enjoy endless possibilities as you continue to engage with it repeatedly.
Editor Overview
Upon launching the level editor of the game, you will be greeted with a user interface similar to the one depicted below.
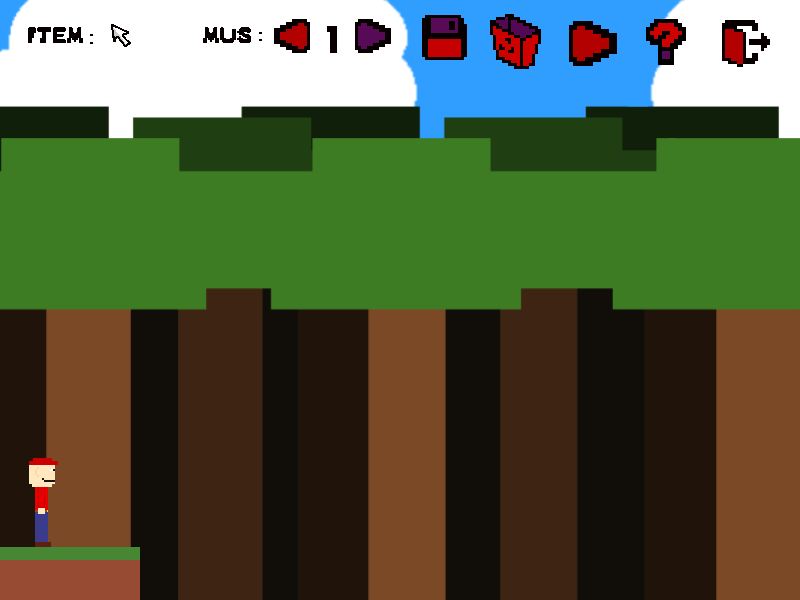
You have first, the item selector.

You can utilize the mouse scroll wheel or the up and down arrow keys to select an object from the available options and position it within your level.
You have next the music selector

En outre, the level editor grants you the ability to choose the music that will accompany the gameplay within the level. En outre, the user interface includes various other buttons that serve different functions, completing the array of available tools at your disposal.

The user interface consists of several buttons, each serving a specific purpose:
- A floppy disk icon allows you to save your project, préserver votre progression.
- A trash icon provides the option to erase your current level, allowing for a fresh start if desired.
- A play icon enables you to test and experience your level firsthand, ensuring its functionality and gameplay.
- A question mark icon grants access to a concise in-game tutorial, providing guidance and assistance.
- A door icon serves as an exit button, allowing you to leave the level editor and return to the main game.
En outre, you can navigate within the level using the right and left arrow keys, exploring different areas. En outre, the player character can be repositioned by dragging and dropping it to change its starting position.
Place Things on the Level
To add objects to your level, simply select the desired object from the available options. Once selected, the object will appear attached to your cursor, allowing you to place it within the level as desired.
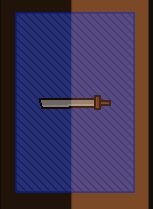
When selecting an object such as a knife, par exemple, you will have visibility of its hitbox or trigger area. This visual representation allows you to accurately determine the object’s interaction boundaries within the level.
To place an object within the level, simply left-click at the desired location. Inversement, to delete an object, cliquez avec le bouton droit sur. It is important to exercise caution when deleting objects because if your mouse is hovering over multiple objects before right-clicking, you may inadvertently delete them all simultaneously.
Feel free to add as many objects as you wish to create a rich and detailed level design. There are no limitations on the number of objects you can place.
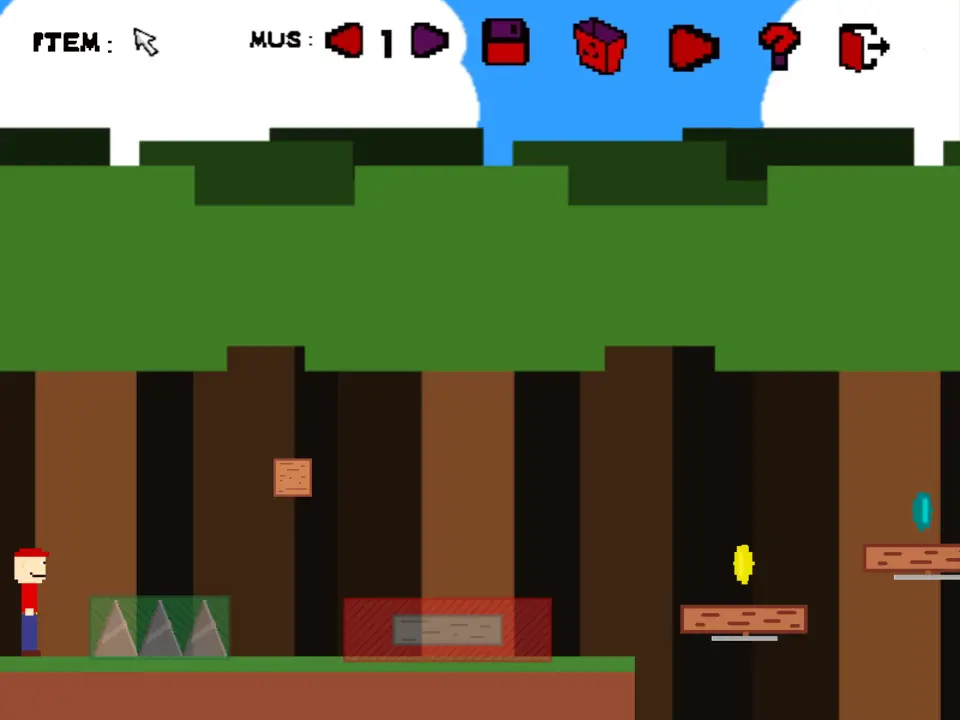
And make a level that for example looks like this.
Objet’s Settings
If you want your level to be more interactive, you can change the settings of some objects. Nous’ll take a look at each object and its settings that you can change.
D'abord, le joueur. By right-clicking on it you’ll see this little menu.
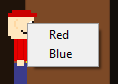
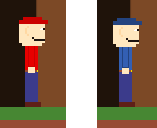
You can choose the color of the player that will be used in your level between red and blue.
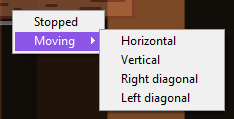
Suivant, the platforms. By placing one you can choose if they’re staying still, or moving, and choosing its direction.
It will place the object with the setting you set. To edit the platform, tu peux’t just delete it and replace it.
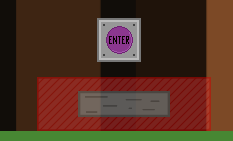
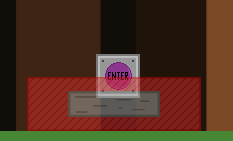
And the last, the button. When placing one you’ll see this menu.
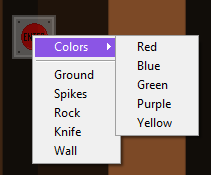
You can choose a color for the button and it’s setting, clicking the button again with a left click will bring up this menu again.
You can set these settings:
- Sol: Will delete all of the ground
- Pointes: Will bring up the nearest spikes TOUCHING the button
- Rocher: Will fall the nearest rock TOUCHING the button
- Couteau: Will throw the nearest knife TOUCHING the button
- Mur: Will break the nearest wall
By touching the button I mean the hitbox/trigger area. If you select the rock setting for example and your level is looking like this.
Cela a gagné’t work as the rock’s trigger area isn’t touching the button. To make this work, the layout of the elements should look like this.
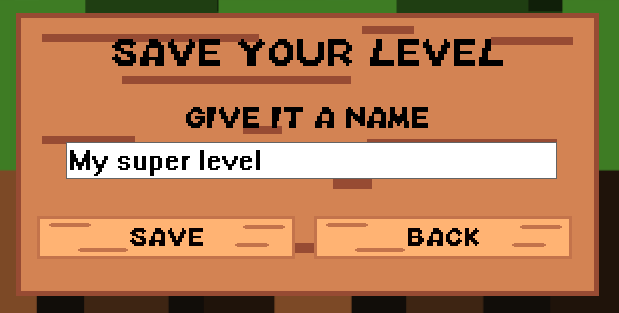
Save and Test the Level
Once you finished your level you can save it by clicking the save icon.

Name your level and then save it.
To test your level you can click on the play icon.

You can also go to the menu and go to the « your levels » menu where you can see all of your levels.
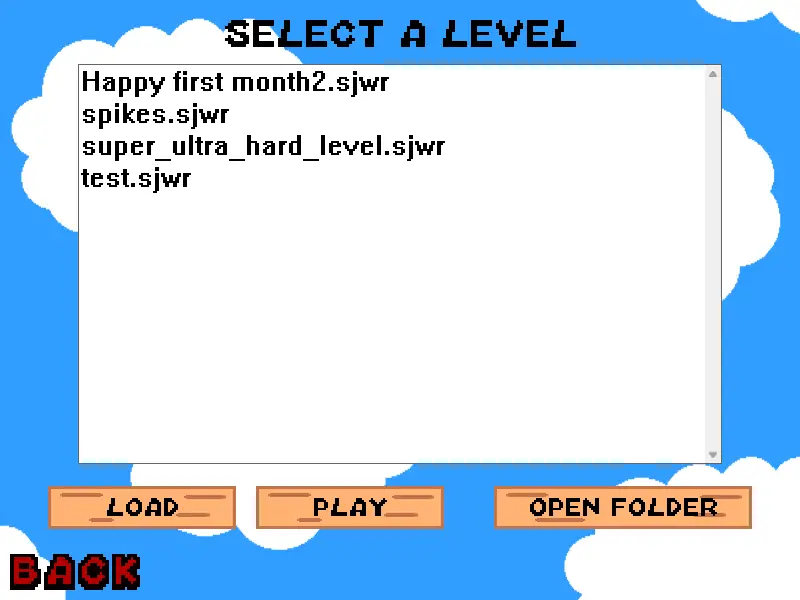
Toi’je verrai 3 buttons at the bottom.

- Charger: To load the level in the editor
- Jouer: To play the level without entering the editor mode
- Open folder: to open the folder where all of your levels are
Et enfin, to publish your level, go to the publish menu.
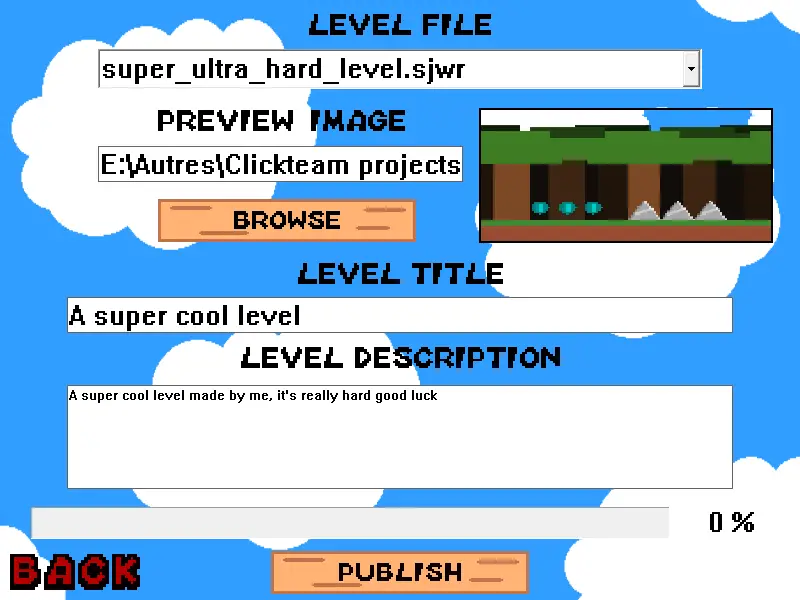
Select the level you want to publish, select a thumbnail for it, put a name, a description and hit publish to publish it the Steam workshop.
C'est tout ce que nous partageons aujourd'hui pour cela Rage de superjumpworld guide. Ce guide a été initialement créé et rédigé par $traker. Si nous ne parvenons pas à mettre à jour ce guide, vous pouvez trouver la dernière mise à jour en suivant ceci lien.