- Titre: Ligne de roulement
- Date de sortie:
- Promoteur:
- Éditeur:
Les informations sur la ligne de roulement sont toujours incomplètes. S'il vous plaît, aidez-nous à remplir les détails du jeu en utilisant ceci formulaire de contact.
This is the official guide on how to use the auto-drive AI system for trains, and how to set up your signals and maps to make the most of the AI controls.
What is train AI?
The new train AI system is split into two main parts:
- Auto-drive
- Auto-switch
Auto drive, when enabled, will make locomotives automatically start & stop based on signals. When they encounter a red signal they will start to slow down and then come to a stop and wait for the signal to turn green. On green signals, they will continue on at their maximum speed. They will also stop before reaching a dead end. When this AI mode is enabled the locomotive will also react to AI trigger sign-posts. (AI trigger sign-posts will be discussed in a later section of this guide).
Auto Switch is slightly more complicated, when this is enabled the locomotive will check the track ahead for any turnouts which can be changed to clear the path.
So if the locomotive encounters a red signal it will see if it can divert the path ahead till the signal turns green.
Combining these two systems together you can create automated sidings, yard sorting, and all sorts of creative AI-driven train behaviour.
The key to making the most of the AI system is in your use of signals! When AI-drive is enabled signals act as stop-go lights for the train to listen to, and creating track and signal systems where trains can successfully pass each other, stay out of each other’s way and avoid deadlocks can be a bit of a logical challenge.
This guide will go over a few examples of how you can set up your track and signals to make the most of these new tools!
Sorting trains into a one-way yard
This is a good simple example to start with since it only requires one signal!
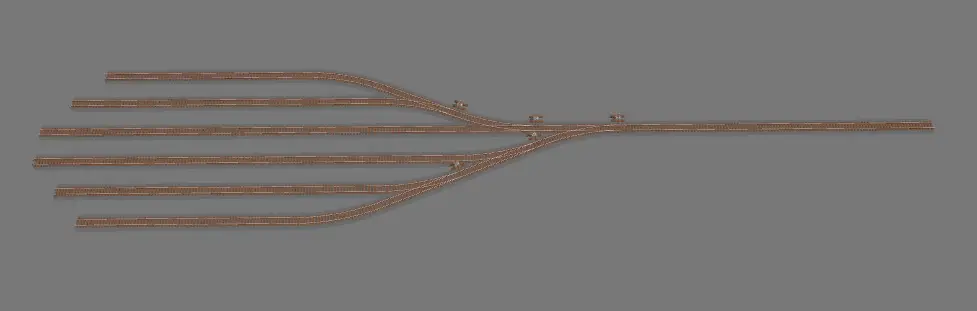
Something you might want to use the auto-switch feature for is to let AI-driven trains fill up a staging yard automatically. Using this signal setup each train will choose an empty track and auto-switch the turnouts to make sure it ends up in the right spot.
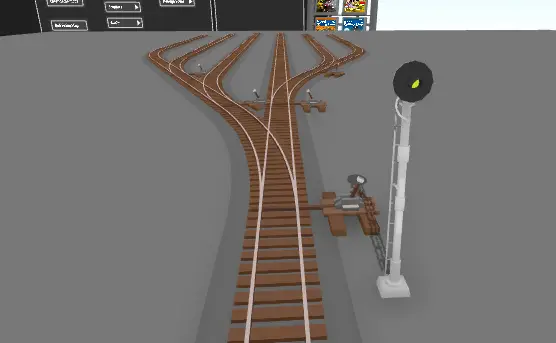
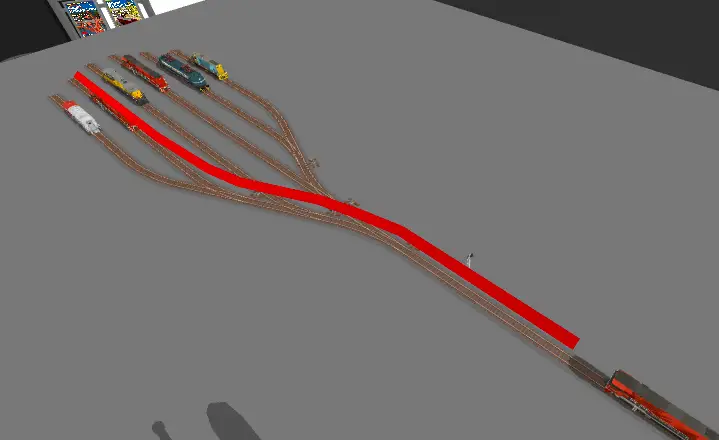
Pour commencer, make a quick fork-shaped yard like this:
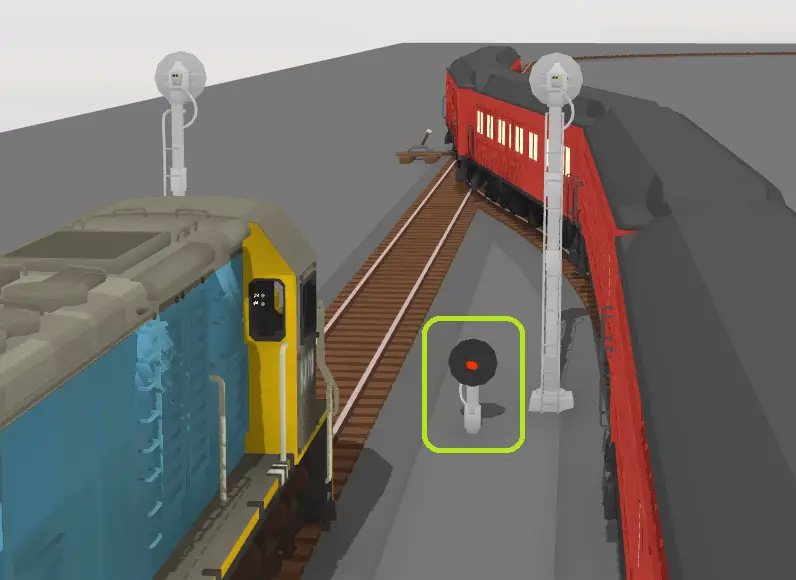
Then place a signal down at the entrance to the yard. This signal will act as a point for the incoming train to stop and decide which track it should follow.
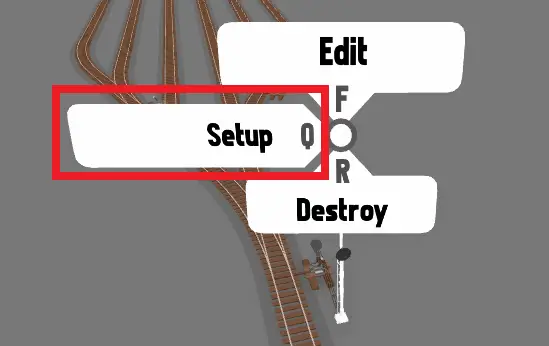
Press Q to « Installation » the signal. This will open a popup window that gives you a few options to customize how this signal behaves.
Réglez le « red range » value to something high enough that the whole length of the yard is covered. Any trains inside the red range will cause the signal to display red, which will stop future oncoming trains from using that track.
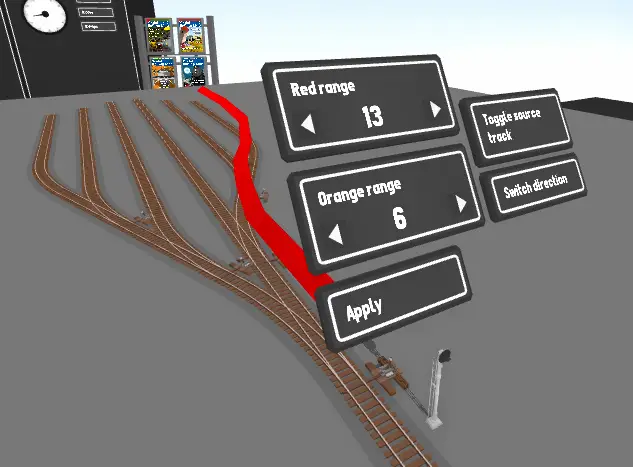
You can press the « toggle source track » button to swap between various nearby track options, and you can press « toggle direction » to swap the direction the signal is checking.
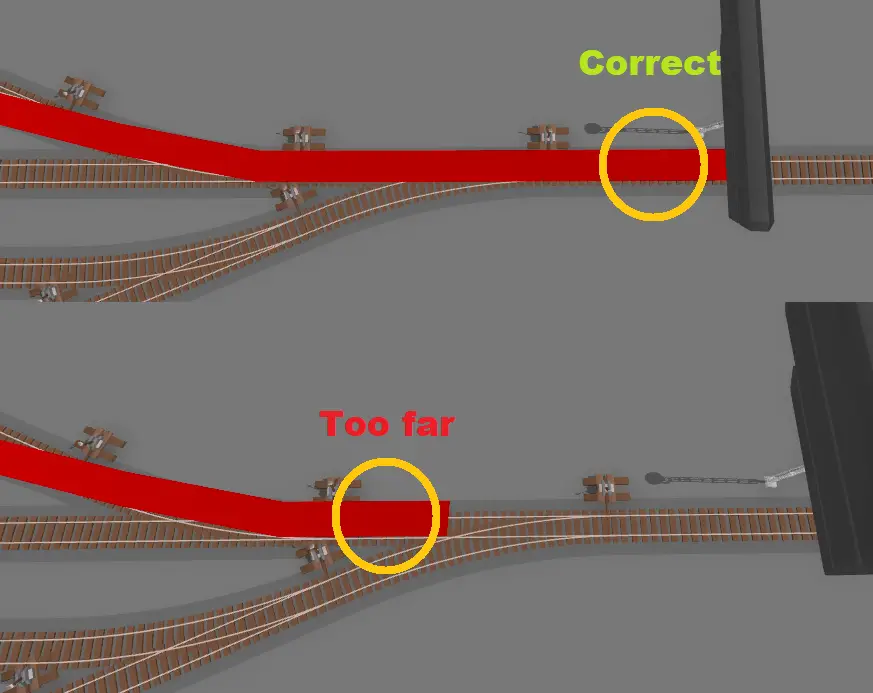
Make sure your signal is attached to the track BEFORE the beginning of the yard. If your source track is beyond the first turnout it will only detect trains beyond that point. You want it to be before the first turnout so it can detect the entire yard:
Once you have set the signal up, presse « Appliquer » to close the signal edit menu, and then place down a locomotive on the track approaching the signal like this:

Enabling AI drive
You can enable AI-drive from within the cab of any locomotive, simply toggle the « AI drive » bouton. Once the AI drive is active you won’t be able to manually control the speed anymore and the AI system will take over driving the locomotive.
You can also enable AI by selecting a train on large scale with a handheld controller and pressing « Oui ». Pressing Y in miniature will enable/disable AI on the last train you were in control of.
S'assurer « Auto Switch » is also enabled, since this will allow the train to toggle the turnouts ahead to create its own path:

Once you enable AI and send the train on its way, it should go down one of the empty tracks in the yard and automatically come to a stop at the end.
Any trains using AI-drive will automatically stop before hitting dead-ends.

You can repeat this process with a bunch of different trains and see how the AI-drive & Auto-switch modes combine to automatically sort each one into an empty track!
Conseil bonus:
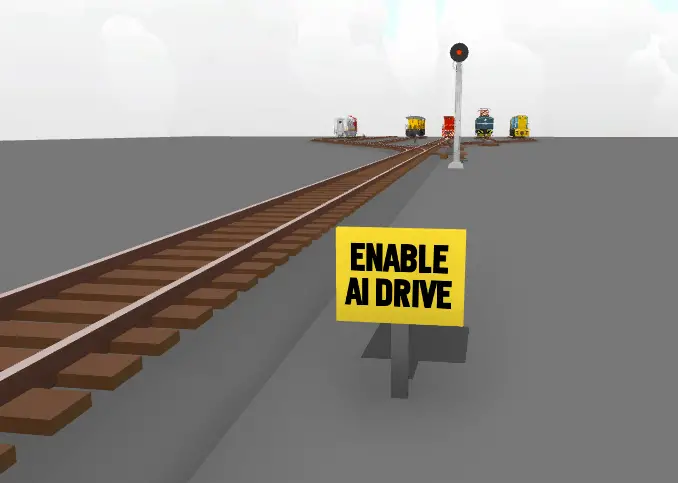
Something you can use to make these « auto-sort » AI yards even more interesting is to put an AI trigger sign before the entrance which automatically enables AI.
This guide will explain AI trigger signs more in another section, but if you place down the « Enable AI drive » sign it will cause trains to automatically switch over to AI driving when entering the yard. This means you can manually drive trains towards the yard, then just leave them to automatically sort themselves without even needing to enable AI!
Creating a passing siding
Another useful track design that makes use of the AI system is an AI-controlled siding. This section of the guide will explain how to set up a simple siding that AI-controlled trains can use to pass each other.
Pour commencer, create the basic track for a single siding like this:

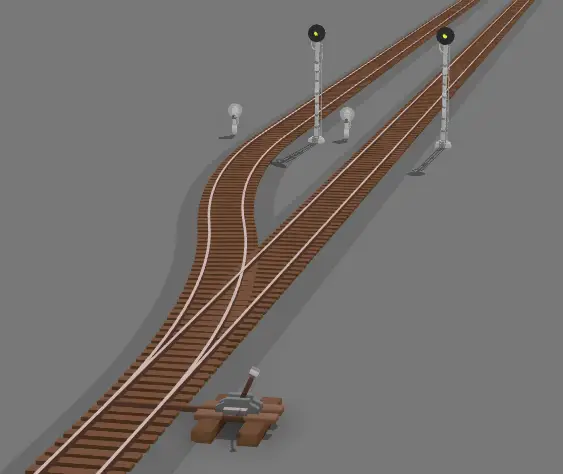
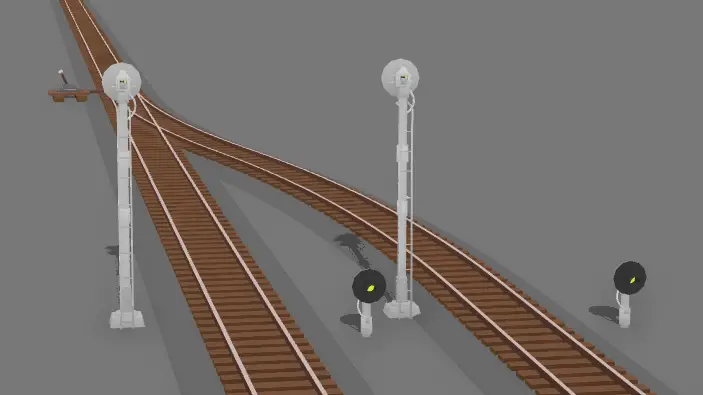
Next you want to add two pairs of signals at each end so that there are signals facing in and out of the siding for both tracks.

Setup the signals facing into the siding so that they cover the length of the siding, but dont go beyond the turnout which merges the tracks back together, comme ça:
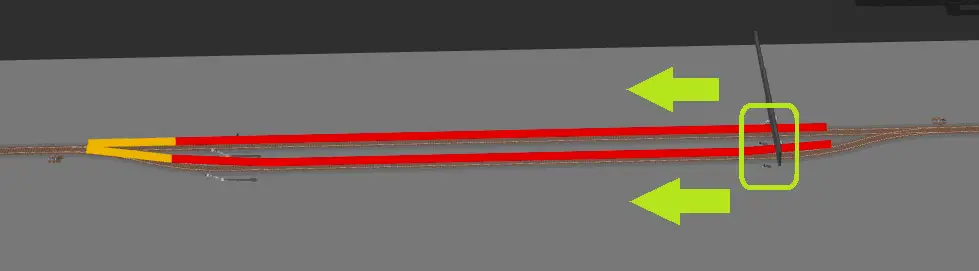
Deuxièmement, setup the two signals which face out of the siding so that they cover any track beyond the siding which trains can potentially occupy.
Par exemple, if you had another siding or yard further down the track, these signals should cover the whole section between this siding and the next one down the line.
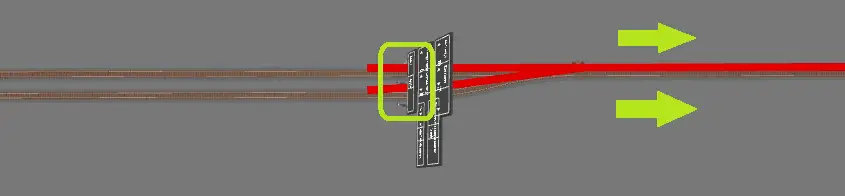
If this is all set up correctly then placing a train on one of the siding tracks should cause the entry signal for that track of the siding to turn red, while the other stays green:
And if you place a locomotive outside the siding it should cause both of the exit signals to turn red:
Running trains
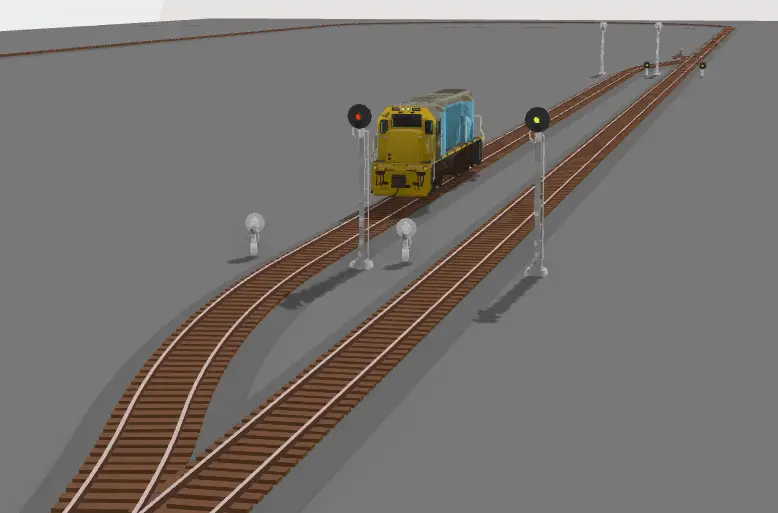
Now that your signals are set up this siding is ready for AI trains to use! You can test this out by parking a train on one of the siding tracks and then running an AI-driven train towards the siding (make sure the train has Auto-switch enabled!).
The AI-driven train will automatically switch the turnout and choose the empty track of the siding, comme ça:

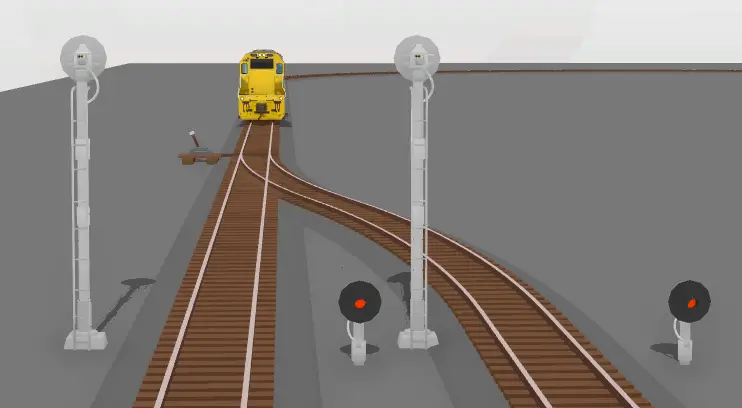
If you enable AI on the parked train as well, it will wait for the red signal to go green before it leaves the siding, donc c'est gagné’t collide with the other train using the other track:
Using this method of placing signals at each end of a siding you can create even more complex track designs and make larger and larger yards.
Par exemple, if you make a loop with two sidings (both using the same signal method used in this guide) then you can make two AI-driven trains loop endlessly without ever collidiing!

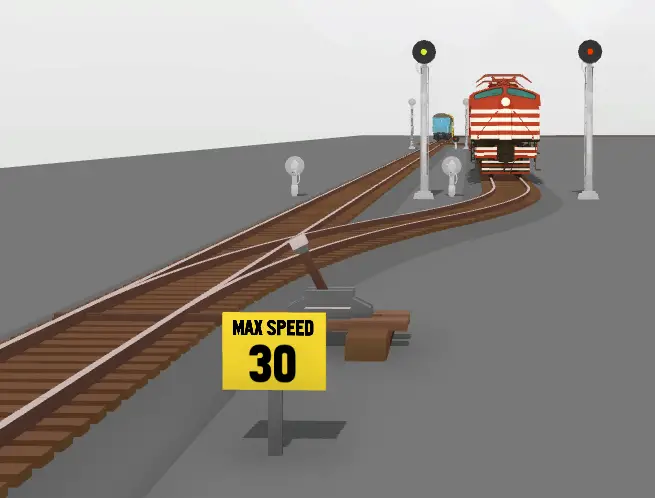
If you are having issues with trains entering the siding too fast and not stopping in time for the signals, you can add a lower speed limit sign to slow the trains down before they reach the signals:
AI-trigger signs
The other core part of this AI system is AI-trigger signs! You can place these down by your track to cause various different effects on trains.
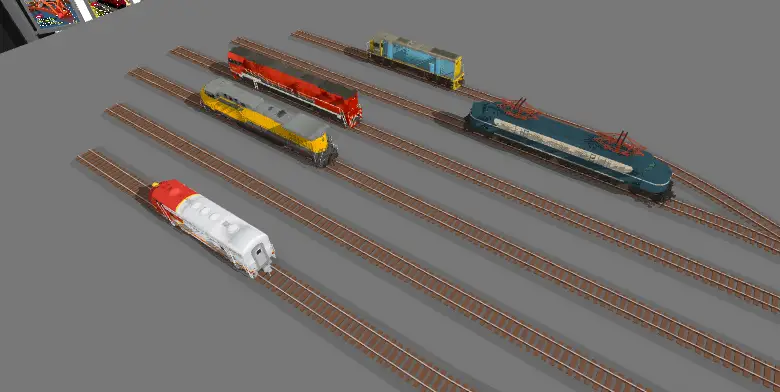
You can find all the different AI trigger signs in the « track addons -> AI triggers » tiroir:
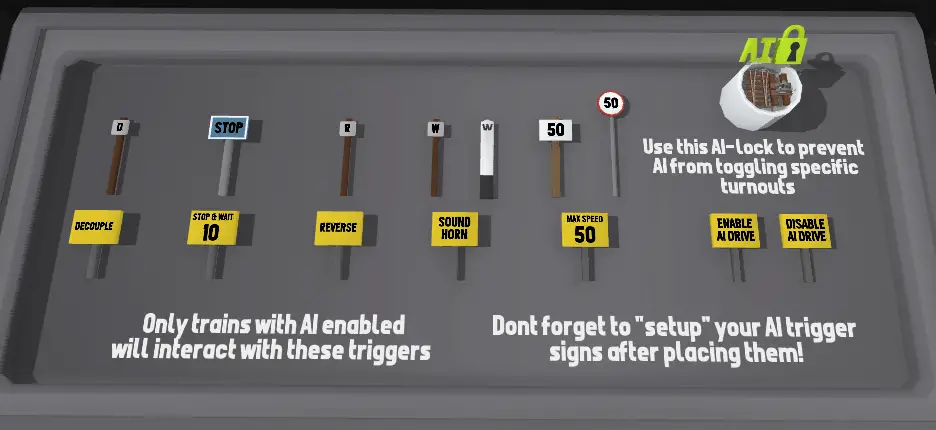
The signs above the yellow ones are just visual variations of the signs below them, so they work in the same way.
Par exemple. the blue « ARRÊT » sign is just the « Stop and wait » sign with a different look.
Using these signs
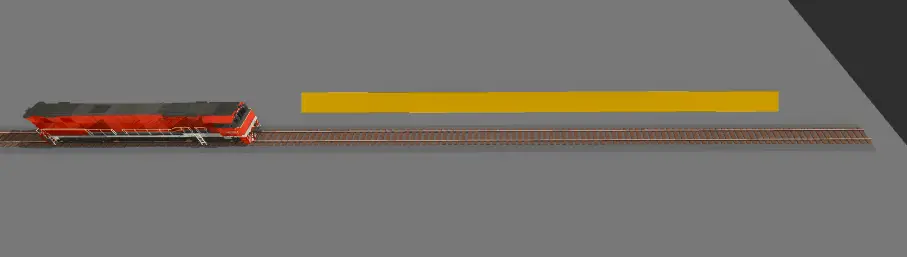
To make use of these signs, simply place them down next to the track you want to affect:
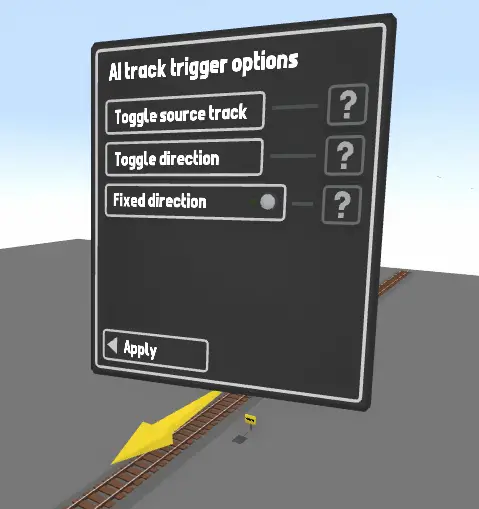
You can then press Q to open the options menu for the sign. From here you can change things like the source track and direction (just like signals).
You can also set whether the sign has a fixed direction (only affects trains moving in that direction) or if it affects trains going in both directions.
Some signs (comme le « speed limit » et « Arrêt & attendez ») have an extra value that you can edit, like the value used for the speed limit, or the time the train should stop & wait for.
Some signs will also have an « AI-driven trains only » option (comme le « sound horn » signe). You can use this option to make trains react to this sign even when AI-drive isn’t enabled.
Par exemple. you might want to use the « decouple » sign for all trains, not just AI ones.
Different sign types
All the different sign types are:
- Speed limit – Causes the train to speed up/slow down to the chosen speed. This will be written as either Mph or Kph depending on which option you have selected in the main settings menu (Pause menu -> Misc -> Mph instead of Kph).
- Arrêt & attendez – will cause the train to come to a stop, then only resume driving once the chosen amount of time has passed (in seconds).
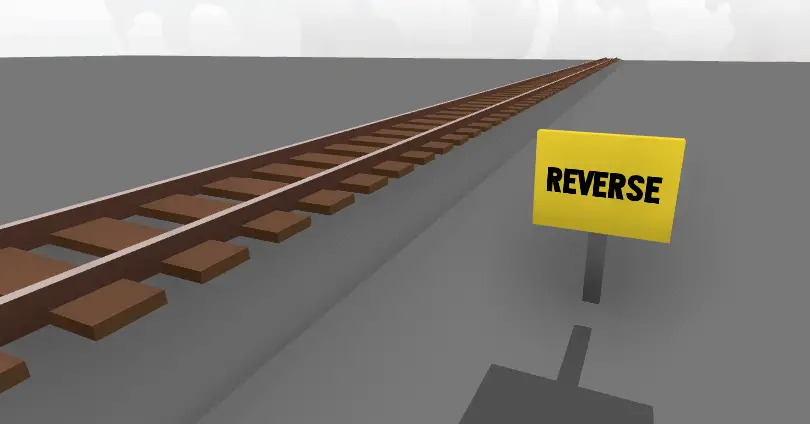
- Inverse – the train will slow down to a stop and then reverse in the opposite direction.
- Sound horn – the horn/whistle will be triggered.
- Decouple – the wagon behind the AI-driven locomotive will be decoupled.
- Enable AI drive – automatically enables AI on any locomotive which passes the sign.
- Disable AI drive – automatically disables AI, and the locomotive will continue to maintain the same speed but with AI disabled.
AI-lock for turnouts
In the top corner of the drawer you’ll notice an « AI-lock » peintre.
If you use this on a turnout it will prevent it from being switchable by the AI « auto switch » système. This is very useful for when you have side-tracks that you don’t want AI to use. If you set these to be « AI locked » then all AI trains will ignore it and continue on without toggling the switch.
You can paint a turnout once to enable AI-lock, and again to disable it.
Using the helpful AI debug UI
As you start making more complicated AI scenarios, something you’ll find very useful is the « AI debug UI » option.
You can enable this in the « Pause menu -> Misc -> Show train AI debug »

When this option is enabled, any trains using AI-drive will show a coloured line on the path ahead of them which indicates what their AI is doing.

Par exemple, when a train is parked at a red signal, you will see a red line which shows how far down the track it is checking for possible turnouts which it can switch to create a free route.
This line will flick between different routes until it finds an empty one, at which point it will turn green:
The line will turn orange when a dead end is detected or the train is slowing down before approaching a red signal:
You can use this debug UI for yourself to get a much better idea of what the AI is doing where problems are occurring.
Advanced technical data
For those wanting a bit more in-depth detail about how the AI system works, here are some statistics:
- The AI system works in track segment lengths, so one section of track = 1 « distance unit » for the AI system. If you use smaller track segments then the distance at which AI has influence will be smaller. Par exemple, if your track is made out of lots of very short track pieces, you may find that trains struggle to stop in time for signals since the distance is too short.
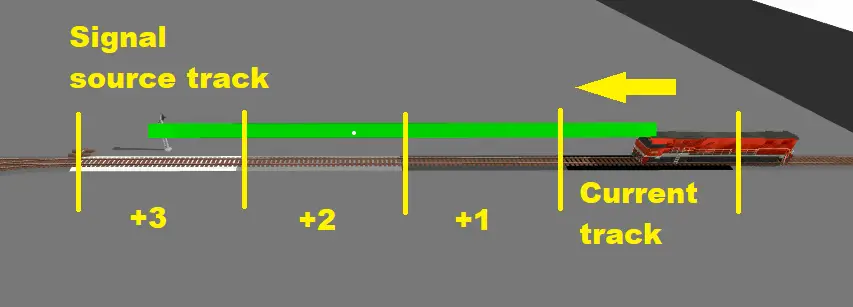
- Signals and AI-trigger signs will take effect based on the track segment that they are assigned to, not their physical position. The AI system works entirely based on track, so you can move a signal further away from the track it has influence on, and trains will still react to it like it is right next to the « source track » set in the signal’options.
- Locomotives will check 8 track segments ahead of them for any signals or dead ends.
- They will slow down to a « prudence » speed if a red signal is less than 4 segments ahead.
- They will stop completely when a red signal is 1 segment ahead.
- Once a signal turns green the train will sound its horn, then wait for 4 seconds before starting up again.
- The AI system updates every half a second, meaning it checks the track ahead for new obstacles on a half second timer.
- Trains will only react to AI trigger signs once when they encounter that segment of track. The trigger won’t be reacted to again once the train re-enters that same segment of track.
- Multiple triggers on the same segment of track will be activated at the same time.
- If a train reacts to a « inverse » AI-trigger sign it will ignore that same sign for 20 secondes.
C'est tout ce que nous partageons aujourd'hui pour cela Ligne de roulement guide. Ce guide a été initialement créé et rédigé par Francs. Si nous ne parvenons pas à mettre à jour ce guide, vous pouvez trouver la dernière mise à jour en suivant ceci lien.