- Titre: Accueil derrière
- Date de sortie:
- Promoteur:
- Éditeur:
Information about Home Behind is still incomplete. S'il vous plaît, aidez-nous à remplir les détails du jeu en utilisant ceci formulaire de contact.
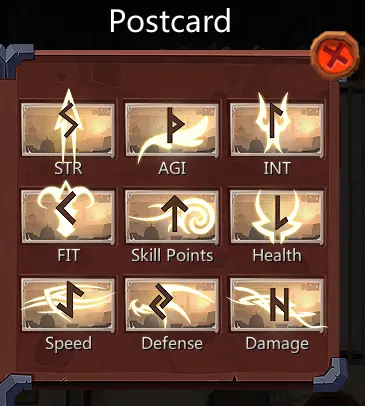
This guide will be showing you where to find all postcards in Hello Behind. Obtaining all of these postcards in a single run
Zone 1 Cartes postales
Ici’s a tip for you: Always remember to save your progress regularly. It might be necessary to reload the game a few times to collect the postcards.
The first and second postcards can be discovered before you reach the initial checkpoint. Si vous avez’t managed to find both of them by that point, you might have to reload or begin the game again.
First Postcard

The first postcard is called ‘Santé,’ and you can find it before reaching the village. Là’s a man called ‘Weird Refugee’ toi’je rencontrerai. Il’ll take three items from you, et toi’ll need to fight him.
A helpful tip: Si vous ne’t encounter him before reaching the village, il’s best to reload your game. Saving your progress regularly can prevent you from having to restart the entire game. After defeating him, toi’j'aurai le ‘Santé’ postcard, which increases your maximum health by +10.
Second Postcard

For the second postcard, you should talk to the local teacher. After answering his questions correctly, he will reward you with a postcard named « Points de compétence, » qui vous accorde +1 Skill Point.
Here are the correct answers to the teacher’questions:
- Sphère
- Pesanteur
- Beaucoup
- Robinet
- Soude
Third Postcard
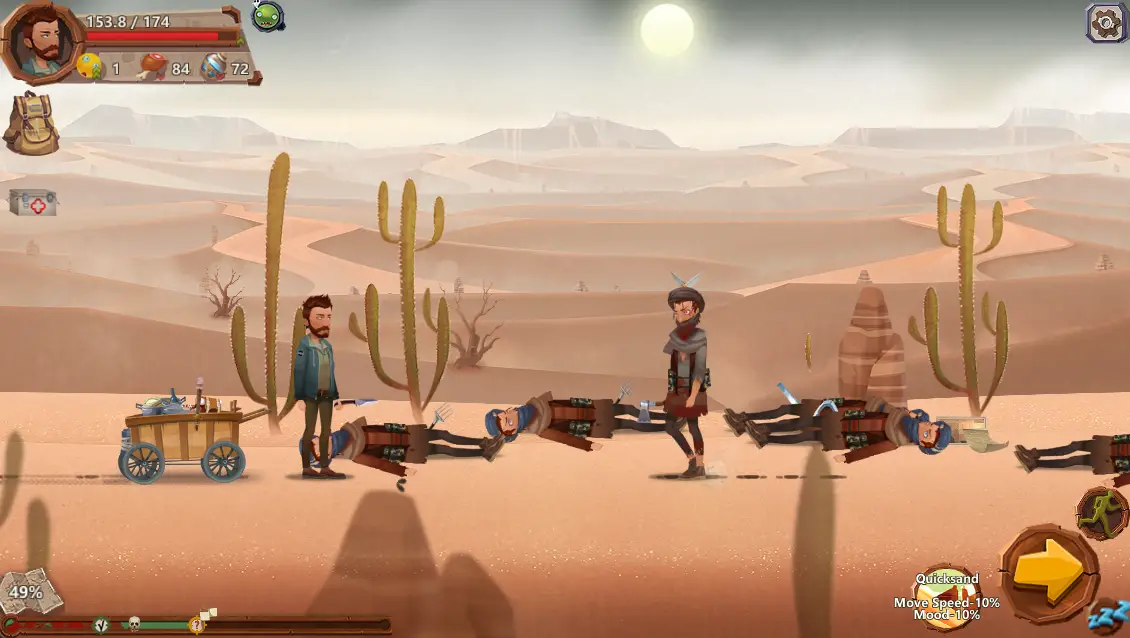
The third postcard, connu sous le nom ‘Dommage,’ can be obtained after you pass the first checkpoint in the game. Ensure you save your progress after leaving the first checkpoint. The postcard can be found anywhere around the second checkpoint, donc ça’s advised to save between checkpoints 1 et 2 à environ 35%-40%.
Look out for a character known as the ‘Bandit Leader,’ surrounded by corpses. Check near the heads of the third and fourth man from the left, close to the cactus. Toi’ll find the postcard on the ground next to a note. Il’s important to collect both the postcard and the note before moving on. ‘Dommage’ accorde un +1 to Damage.
Fourth Postcard

For the fourth postcard, ‘Aptitude,’ proceed further and save your game just before reaching the last checkpoint in the area, ideally at approximately 98-99%. Dans cette section, toi’ll face four bandits before encountering the leader who wields a chainsaw.
Search for the postcard on the ground in front of the fire where the leader is standing. It can be easy to miss, so be sure to keep a sharp eye out for it. Si c'est le cas’n'apparaît pas, you can reload your saved game and try again. ‘Aptitude’ provides a +1 bonus to your Fitness.
Zone 2 Cartes postales

Excellent travail! You should have all four postcards by now. Dans la zone suivante, there are three more postcards for you to collect.
Fifth Postcard
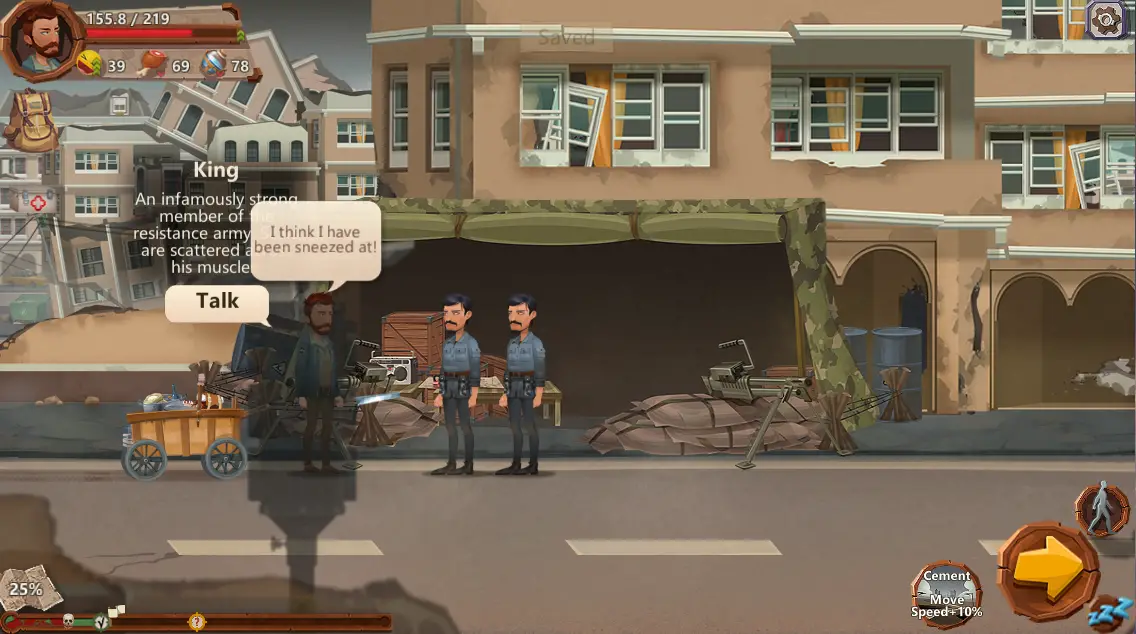
For the fifth postcard, ‘Force,’ ici’c'est ce que tu dois faire. D'abord, save your game before reaching the first checkpoint at around 25%. Alors, find a man named ‘Roi’ Et lui parler. Il’ll mention arm wrestling. Challenge him to an arm wrestle, and when you win, il’ll give you the fifth postcard. If you happen to lose, enfiler’ne t'inquiète pas, just reload your game and try again! ‘Force’ provides a +1 boost to your Strength.
Sixth Postcard
To find the sixth postcard, ‘Vitesse,’ continue your journey. Toi’ll discover it on the ground while bombs are falling, so be cautious not to overlook it while dodging the bombs. You can come across it anywhere between 25% à 50% of map exploration, roughly between checkpoints 1 et 2. Be mindful of your saves, juste pour être en sécurité!
Collecting the sixth postcard will grant you a +5% increase in your movement speed.
Seventh Postcard
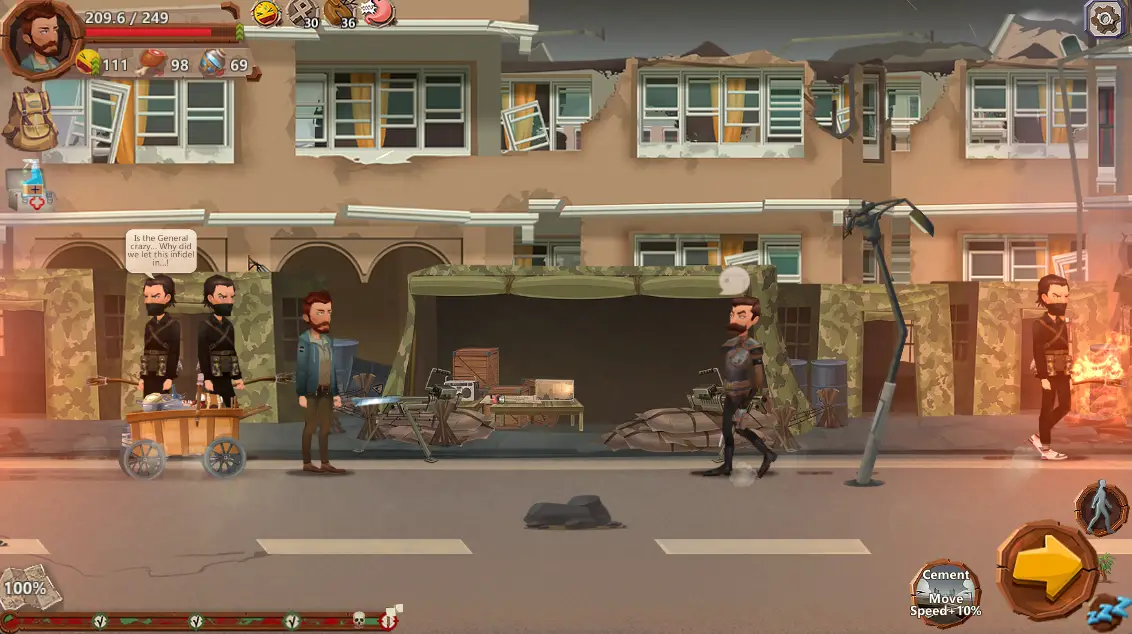
For the seventh and final postcard in this area, ‘La défense,’ proceed until you reach the last checkpoint and encounter the boss of the area, a man named General Fadi. As you walk into the camp, toi’ll find the postcard on a table just before you speak to General Fadi.
Collecting this postcard will provide you with a +1 boost to your Defense.
Zone 3 Cartes postales
Félicitations! You should now have collected all seven postcards by the end of the second area. In the third area, there are two more postcards to find, and these will be the last ones to collect!
Eighth Postcard
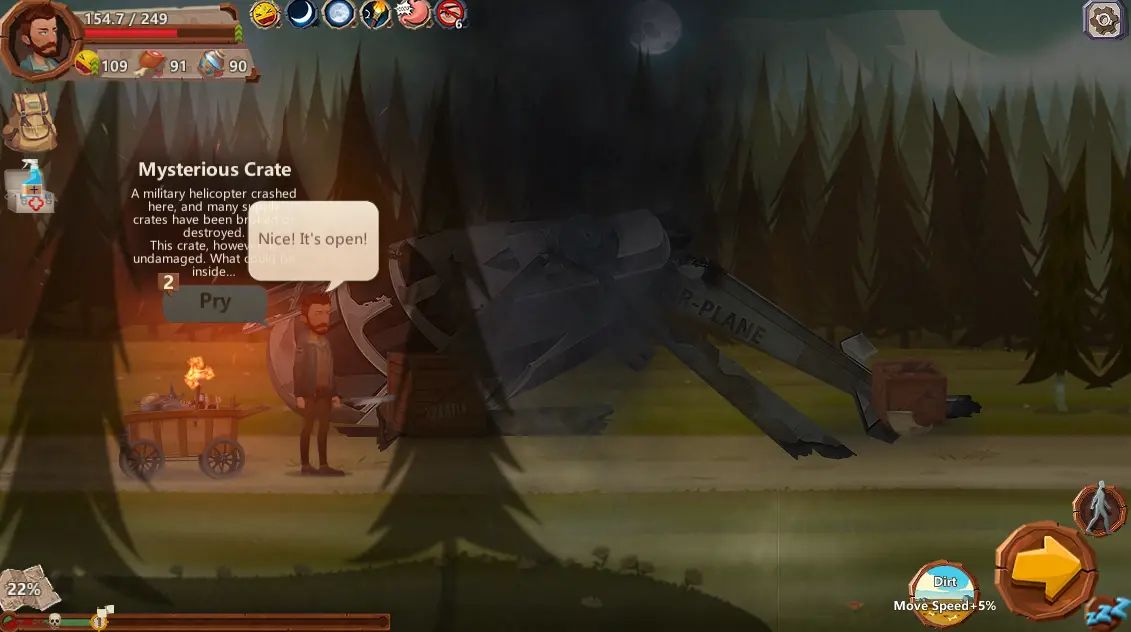
To get the eighth postcard, ‘Agilité,’ exercise caution with the number of saves you make before reaching your first checkpoint in the third area. À un moment donné, toi’ll encounter a wrecked helicopter. Look for a big box that has a ‘Pry’ option, et toi’ll have three attempts to open it. If you successfully open it, toi’ll receive the postcard. toutefois, si tu ne le fais pas’t succeed, simply reload and try again. ‘Agilité’ provides a +1 increase to your Agility.
Ninth Postcard

To obtain the ninth and final postcard, ‘Intelligence,’ proceed to the end of the third area. Toi’ll come across a man working with a ‘charity’ who offers you a ‘different route.’ Walk past the bodies and talk to the man while he’s standing with two people behind him. Toi’ll need to engage in conversation and then a fight with him. Once you defeat him, you will receive the last postcard.
‘Intelligence’ adds a +1 to your Intelligence. Congratulations on collecting all the postcards in the game!
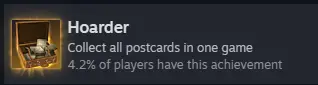
Félicitations! Toi’ve successfully collected all the postcards, et la réalisation ‘Accusateur’ is now yours! Well done on your accomplishment!
C'est tout ce que nous partageons aujourd'hui pour cela Accueil derrière guide. Ce guide a été initialement créé et rédigé par TroubleMakerAri. Si nous ne parvenons pas à mettre à jour ce guide, vous pouvez trouver la dernière mise à jour en suivant ceci lien.