
- Titre: PRÉVENU
- Date de sortie:
- Promoteur:
- Éditeur:
Les informations sur FOREWARNED sont encore incomplètes. S'il vous plaît, aidez-nous à remplir les détails du jeu en utilisant ceci formulaire de contact.
This Guide will go over the various levers including what they open and their visual indicators. Besides the levers and the material they allow access to, ce guide a gagné’t have any core instruction. Please see other guides, the wiki page, or the in-game tutorial for core instruction. In a later addition to this guide, I will add pictures of the rooms that the levers open and different variations of those rooms.
If there are any inaccuracies, commentaires, or concerns, leave a message in the comment section and I will address them as they come up. Merci!
Levers will spawn randomly and inconsistently throughout the map. With the v25 Major Update, there are now FOUR different levers that can be pulled.
- Main Door/Lower Level Lever
- Prison Lever(s)
- Treasury Lever(s)
- Drain Lever
Main Door/Lower Level Lever

Prison Lever(s)

Treasury Lever
Drain Lever
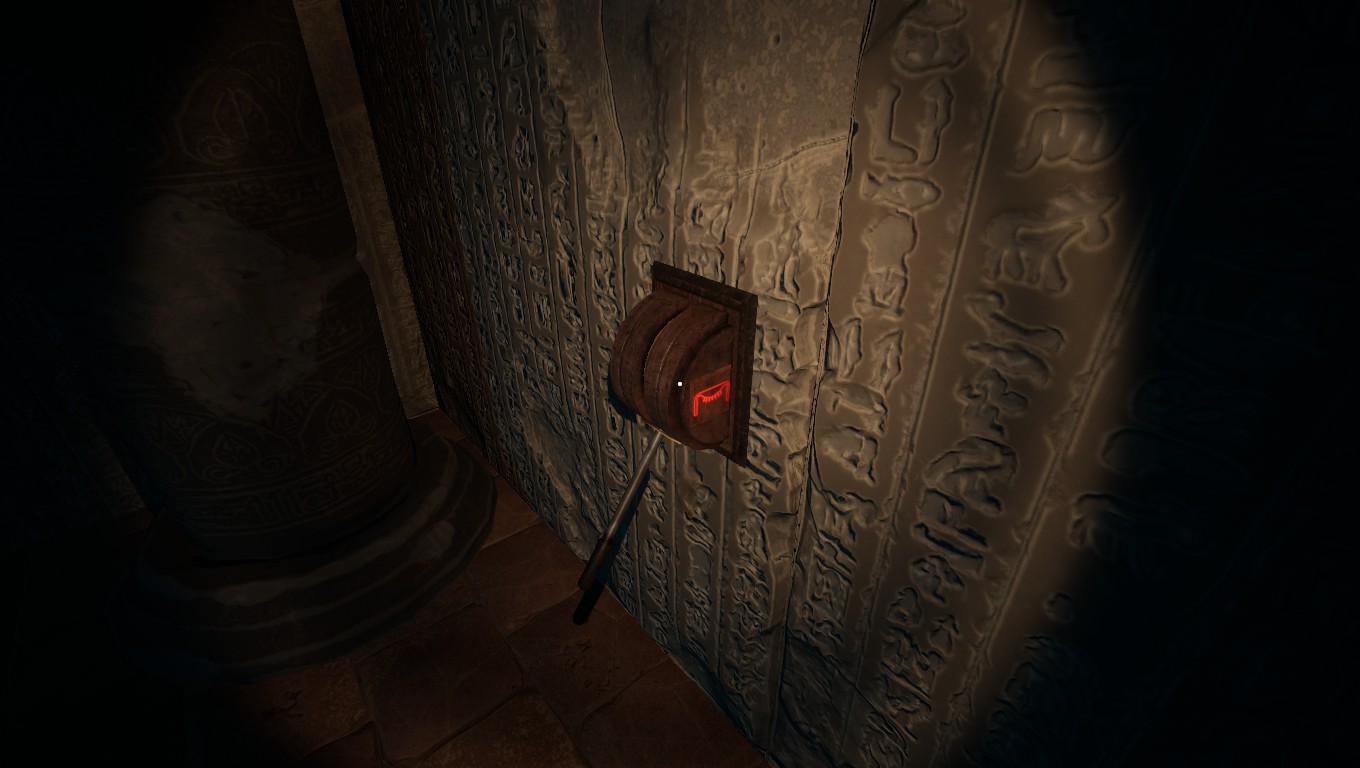
Main Door/Lower Level Lever
The Main Door/Lower Level Lever will always appear as a blue lever and will appear twice per session. These levers will always be blue in color. When starting the expedition you will need to move the lever to open the main tomb door. Closed is indicated by the lever being in a lower position and Open is indicated by the lever being in the raised position. Flip the lever by pushing « E » by default on your keyboard (Holding the lever with your grip button and moving your hand upward Q2VR.)
Your first interaction will be when opening the main tomb, upon moving the lever to the upwards position the main tomb door will open. This lever will disappear for the duration of the expedition.
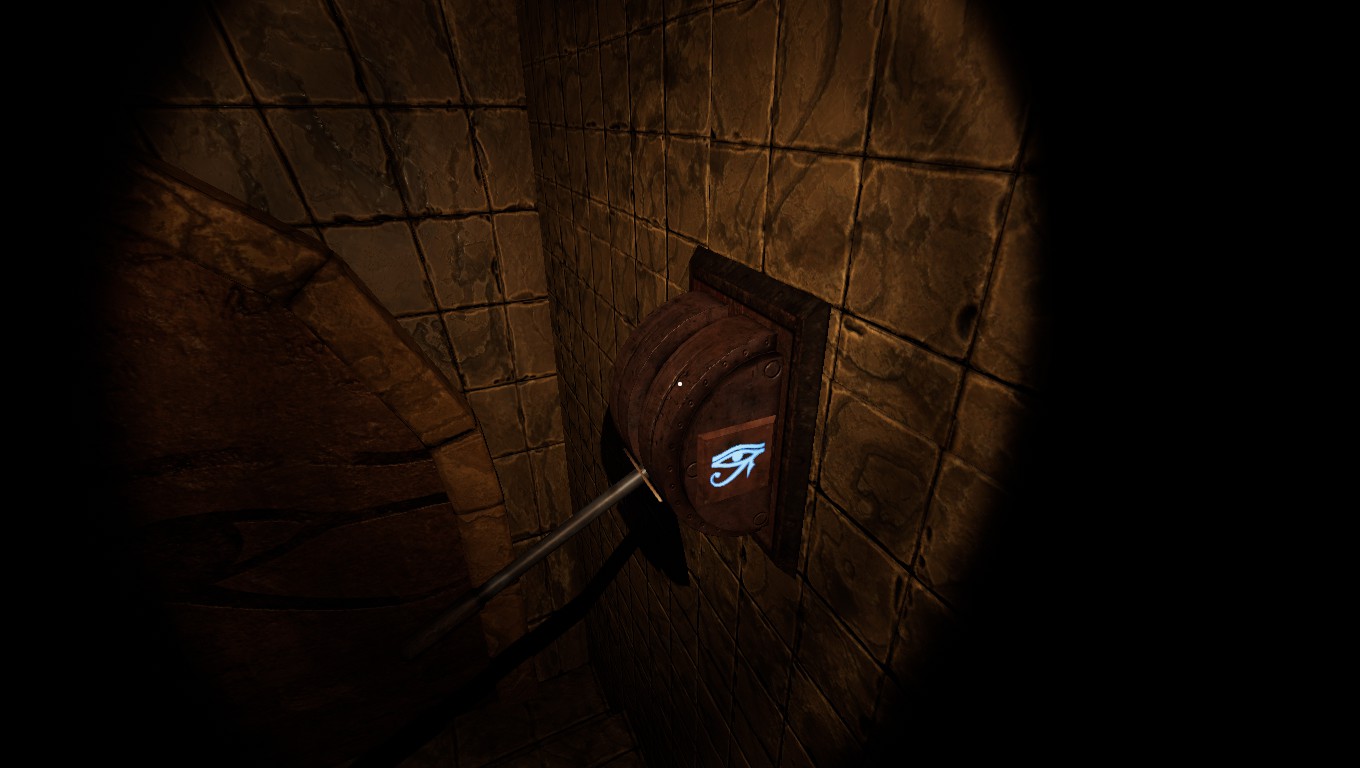
Upon selecting a Mejai the Main tomb door will close. Scattered across the tomb there will be another lever thats spawn and looks identical to the main tomb door. This lever will only spawn once the main tomb door has closed and the Mejai has manifested. You must move the lever to its upward position to open the Main Tomb door. In the v25 major update, this also allows access to the lower levels if the Mejai selection was correct.
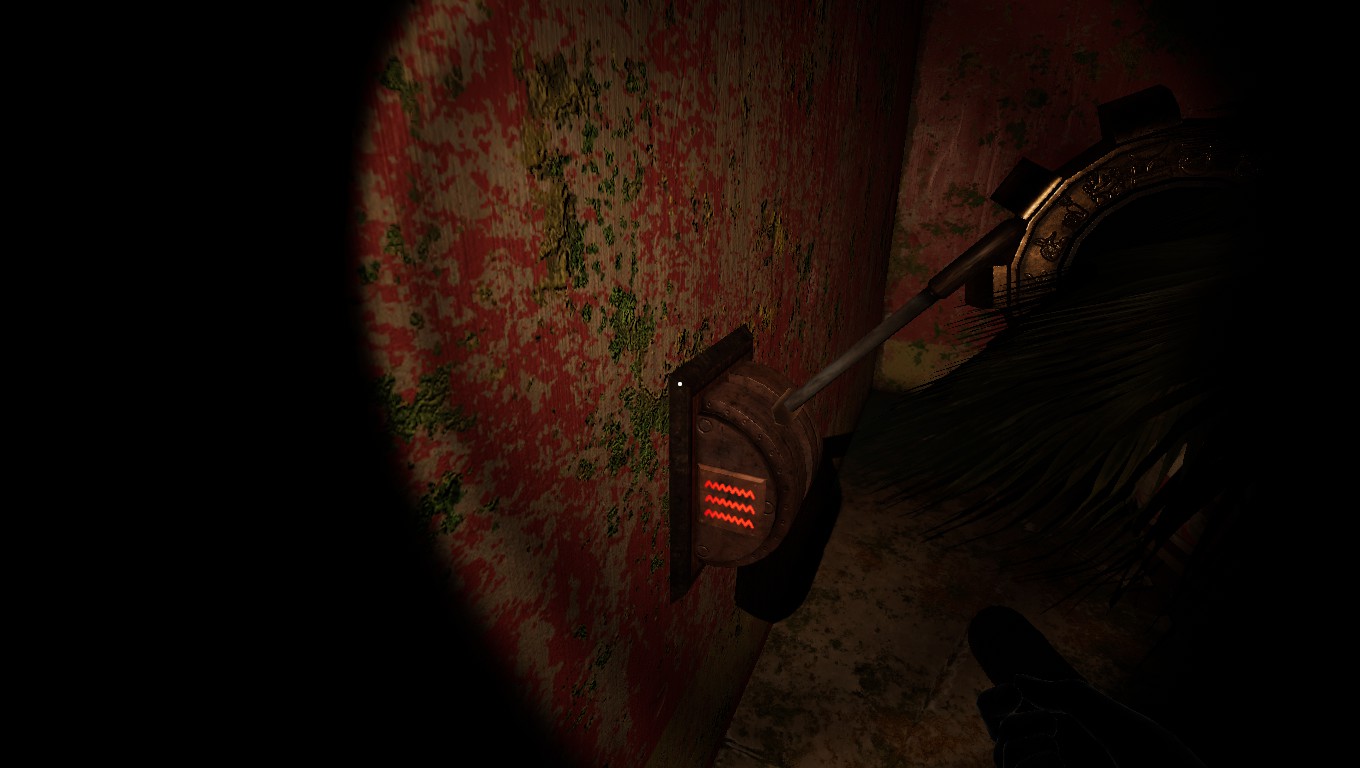
Prison Levers
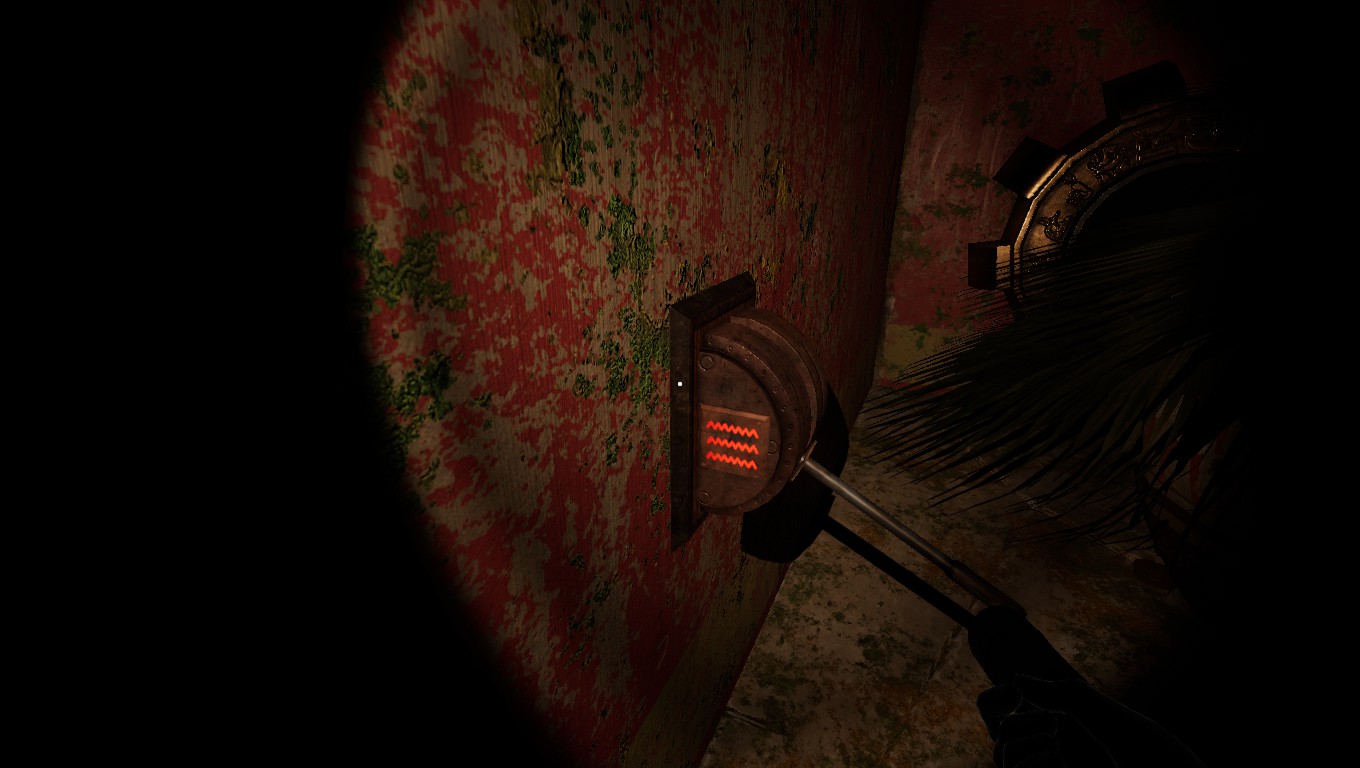
The Prison Levers (also sometimes called Slave Levers) may spawn in Main Tomb. These levers will always be red in color. Although rare, in some scenarios the levers may not spawn as there is no Prison to open. If the levers do spawn, they will never spawn alone, they will always spawn together in groups of two. In a co-op expedition, you and teammate will need to pull the levers simultaneously for the prison to open. Upon successful completion you should hear a click, or trigger noise. In the event of a solo expedition upon pulling the first lever will cause the lever to stay in its upright position. When you find the second lever and pull it the prison will open. Upon successful completion of opening the prison the levers will remain in the upright position. Careful! Toi’ll need both levers to be able to open the Prison. There is a chance that one of the levers can spawn inside the inner tomb, guessing the Mejai incorrectly locks you out and by extent could prevent you from gaining access to the second lever.
*Reports in 25.6 of levers being pulled but no prison opening or on the map, I too have experienced it. I assume its a bug, ill try to update this guide once its corrected.*
Prison Lever (Closed Position)
Prison Lever (Raised Position)
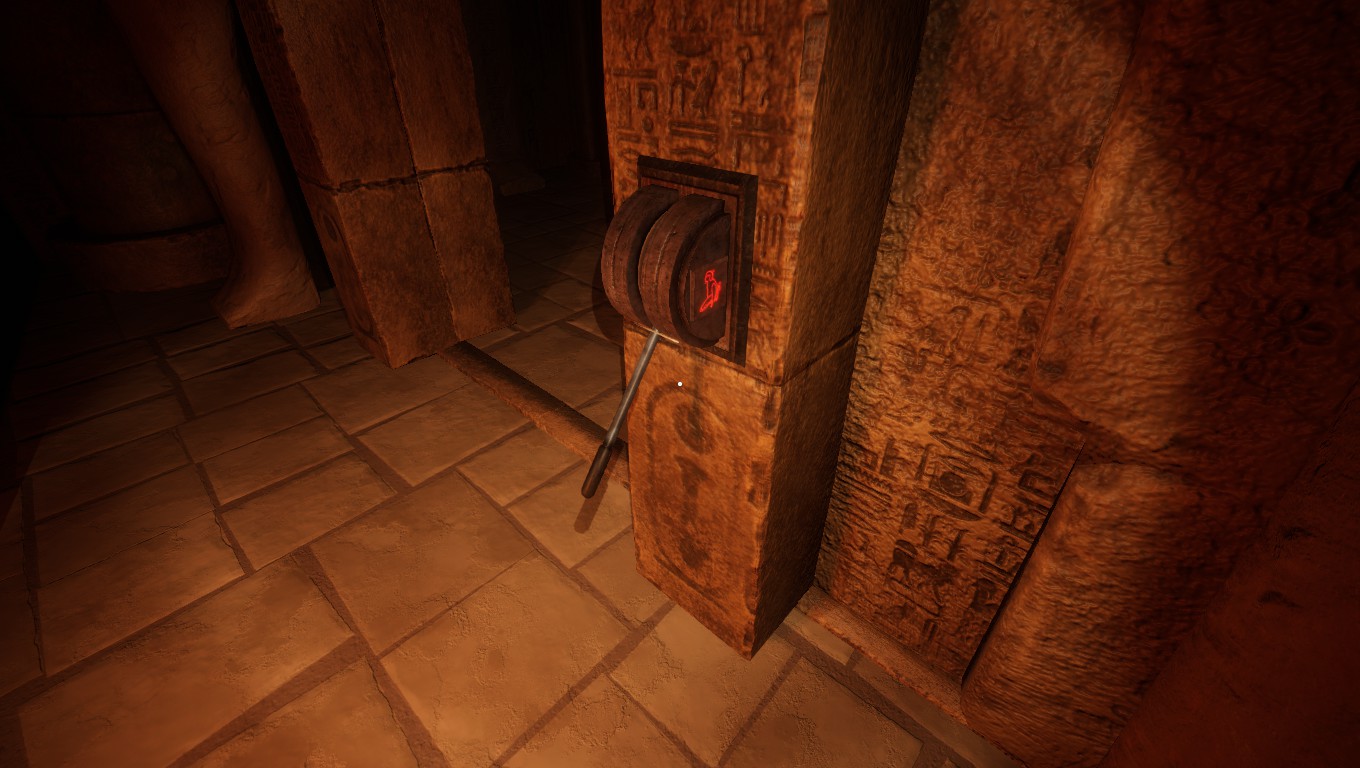
Treasury Levers
The Treasury Levers (also sometimes called Treasure/Gold Room Levers) may spawn in Main Tomb. These levers will always be red in color. Although rare, in some scenarios the levers may not spawn as there is no Treasury to open. If the levers do spawn, they will never spawn alone, they will always spawn together in groups of two. In a co-op expedition, you and teammate will need to pull the levers simultaneously for the prison to open. Upon successful completion you should hear a click, or trigger noise. In the event of a solo expedition upon pulling the first lever will cause the lever to stay in its upright position. When you find the second lever and pull it the Treasury will open. Upon successful completion of opening the Treasury the levers will remain in the upright position. Careful! Toi’ll need both levers to be able to open the Treasury. There is a chance that one of the levers can spawn inside the inner tomb, guessing the Mejai incorrectly locks you out and by extent could prevent you from gaining access to the second lever.
*Reports in 25.6 of levers being pulled but no Treasury opening or on the map, I too have experienced it. I assume its a bug, ill try to update this guide once its corrected.*
Treasury Lever (Closed Position)
Drain Lever
The Drain Lever (also sometimes called Water/Flood Lever) may spawn in the Inner Tomb during certain scenarios. This lever will always be red in color. The lever is restricted to spawning in the new Oasis map introduced as part of the Eternal Banishment v25 Major Update. There is only one of these levers that spawn so during a coop session you will not need a teammate to assist. In the new Oasis map portions of the map are flooded, the flooded areas can restrict easy access to Canopic Jars, Or, Photos, and other objectives. D'après mon expérience, you do not necessarily need to drain the water from these areas to complete the objectives and gain items, it just makes it much easier. Upon pulling the Drain lever in the inner tomb the water outside the inner tomb will drain and the inner tomb will be flooded. Assurez-vous que vous’ve gotten everything needed out of the inner tomb before pulling the lever.
Drain Lever (Typically spawn on the left inside wall of the inner tomb)
C'est tout ce que nous partageons aujourd'hui pour cela PRÉVENU guide. Ce guide a été initialement créé et rédigé par Heykay. Si nous ne parvenons pas à mettre à jour ce guide, vous pouvez trouver la dernière mise à jour en suivant ceci lien.