This is a guide explaining different usage and scenarios for Blank Roads 4, like how to make awesome bus stops, control zebra crossings and make advanced and realistic junctions, and many tips for making great road markings
Nodes and crossings
All BR4 roads have built in nodes customized for zebra crossings, and these will load whenever you have a junction with zebra crossings. Since there are tons of node combinations, we have simplified it as much as possible to avoid complications and also to reduce the file size of each workshop asset. À cause de ça, the user needs to do a few setups manually.
Zebra crossings on junction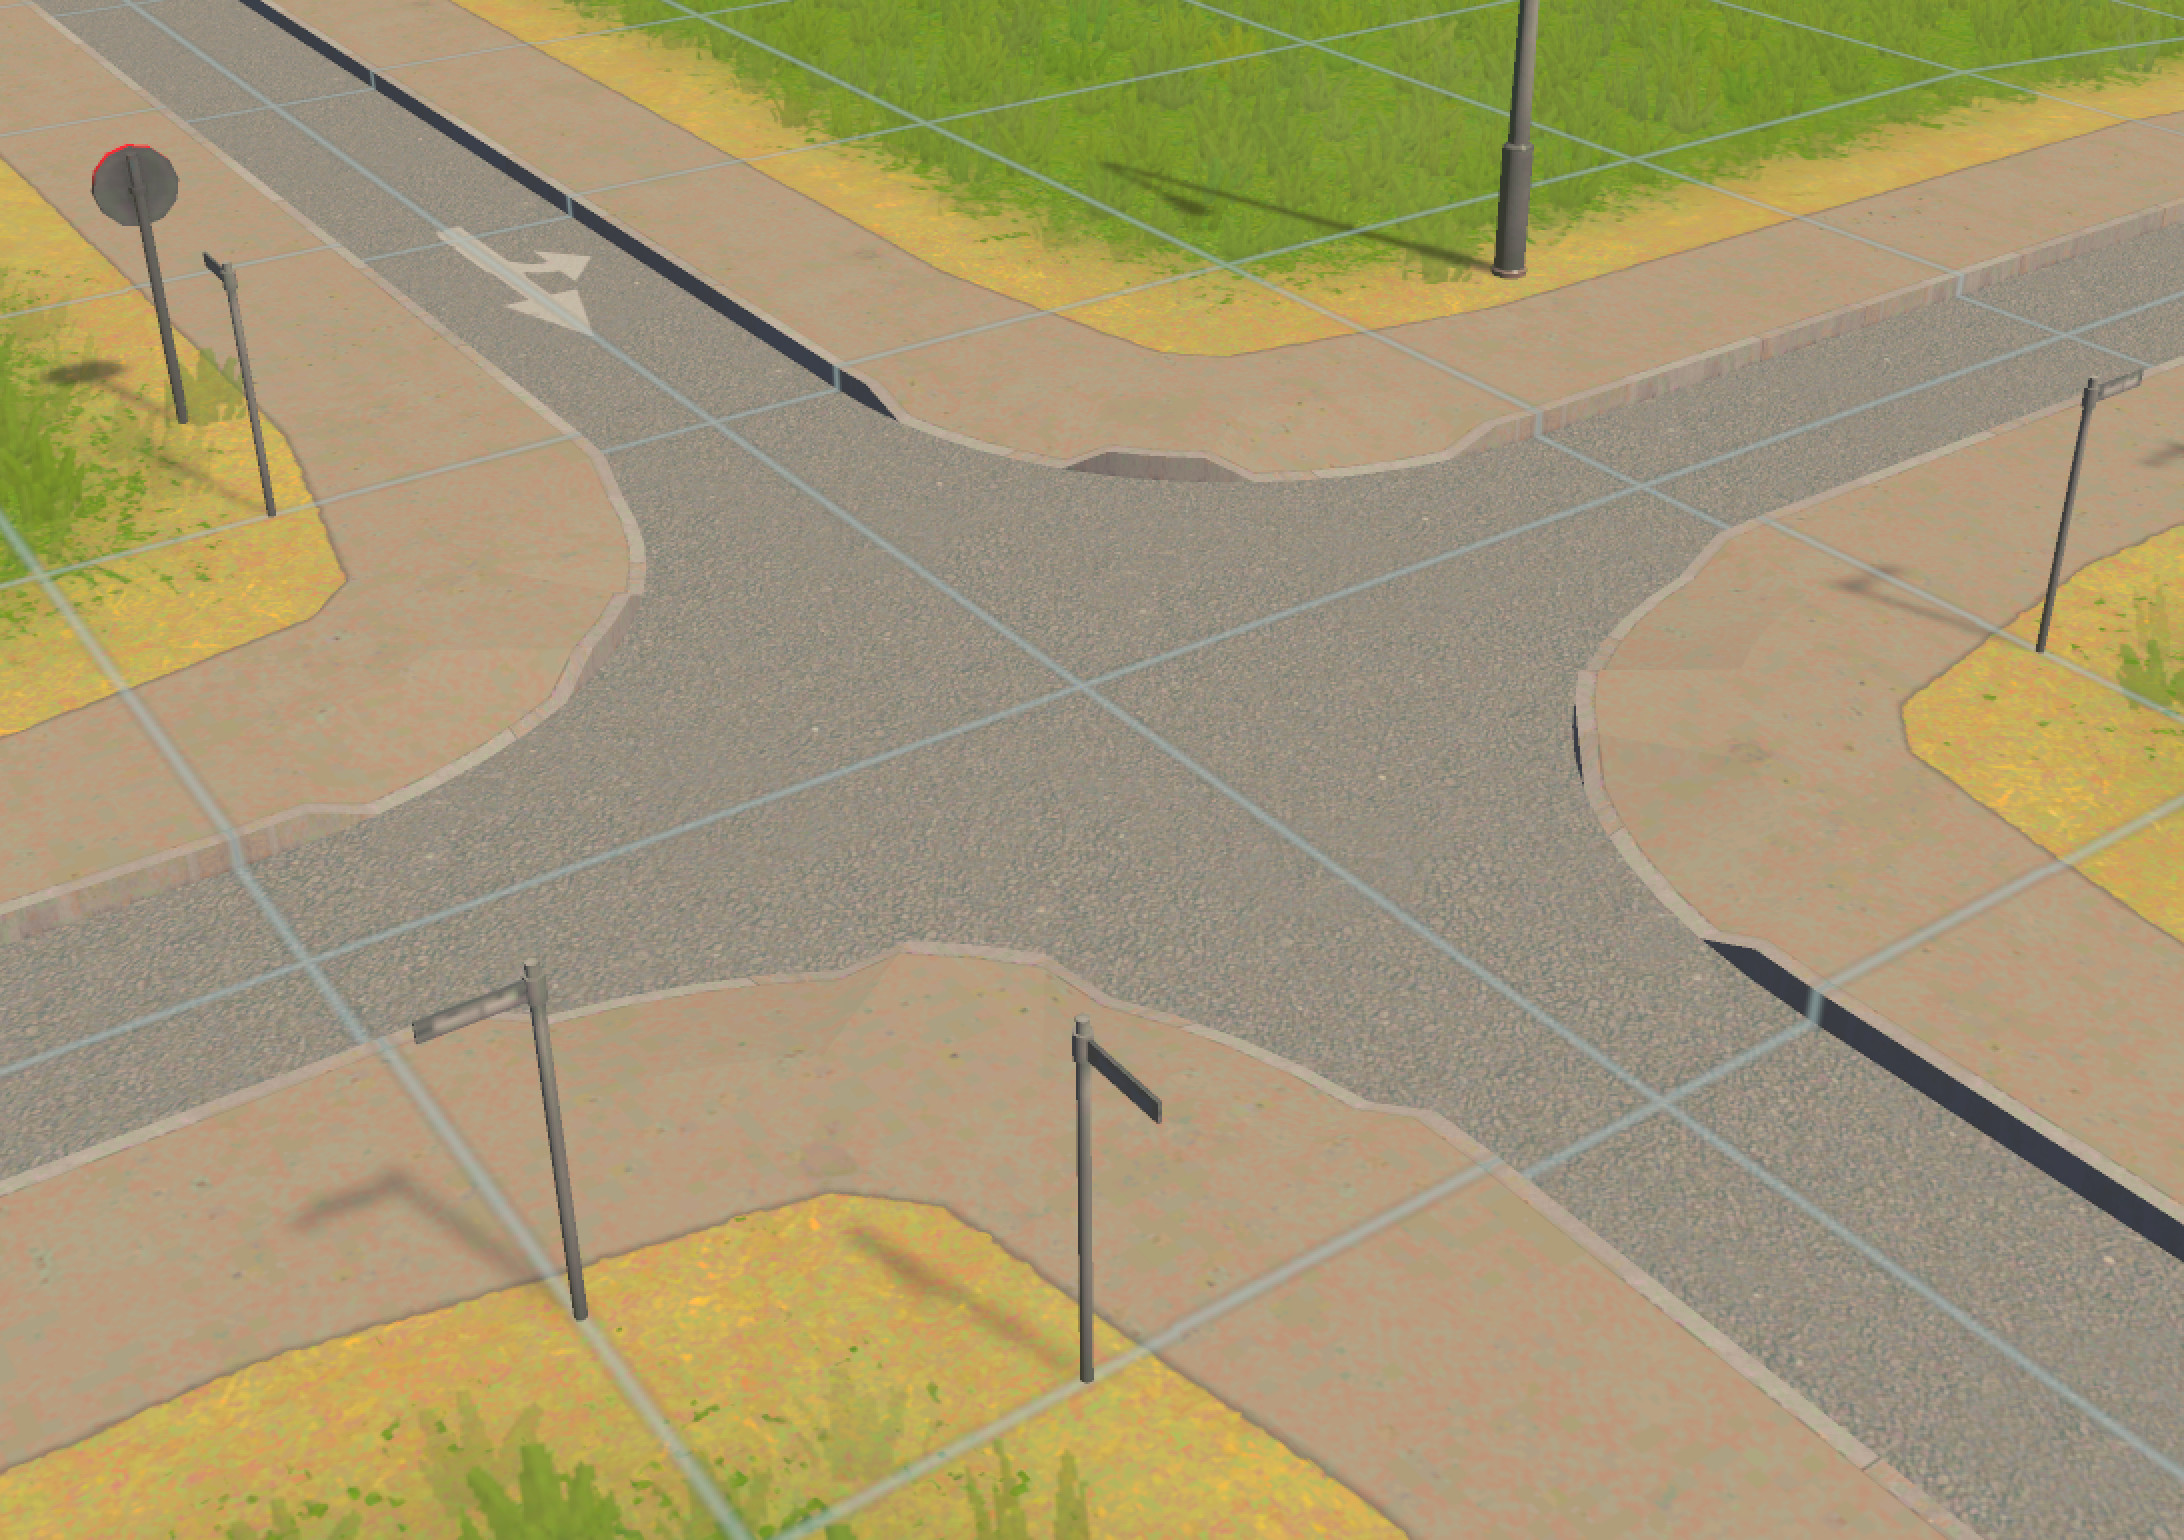
By default all crossings on a junction is activated. When you deactivate one or more crossings by using TM:PE the lowered curb disappears. Utiliser IMT to paint zebra crossings.

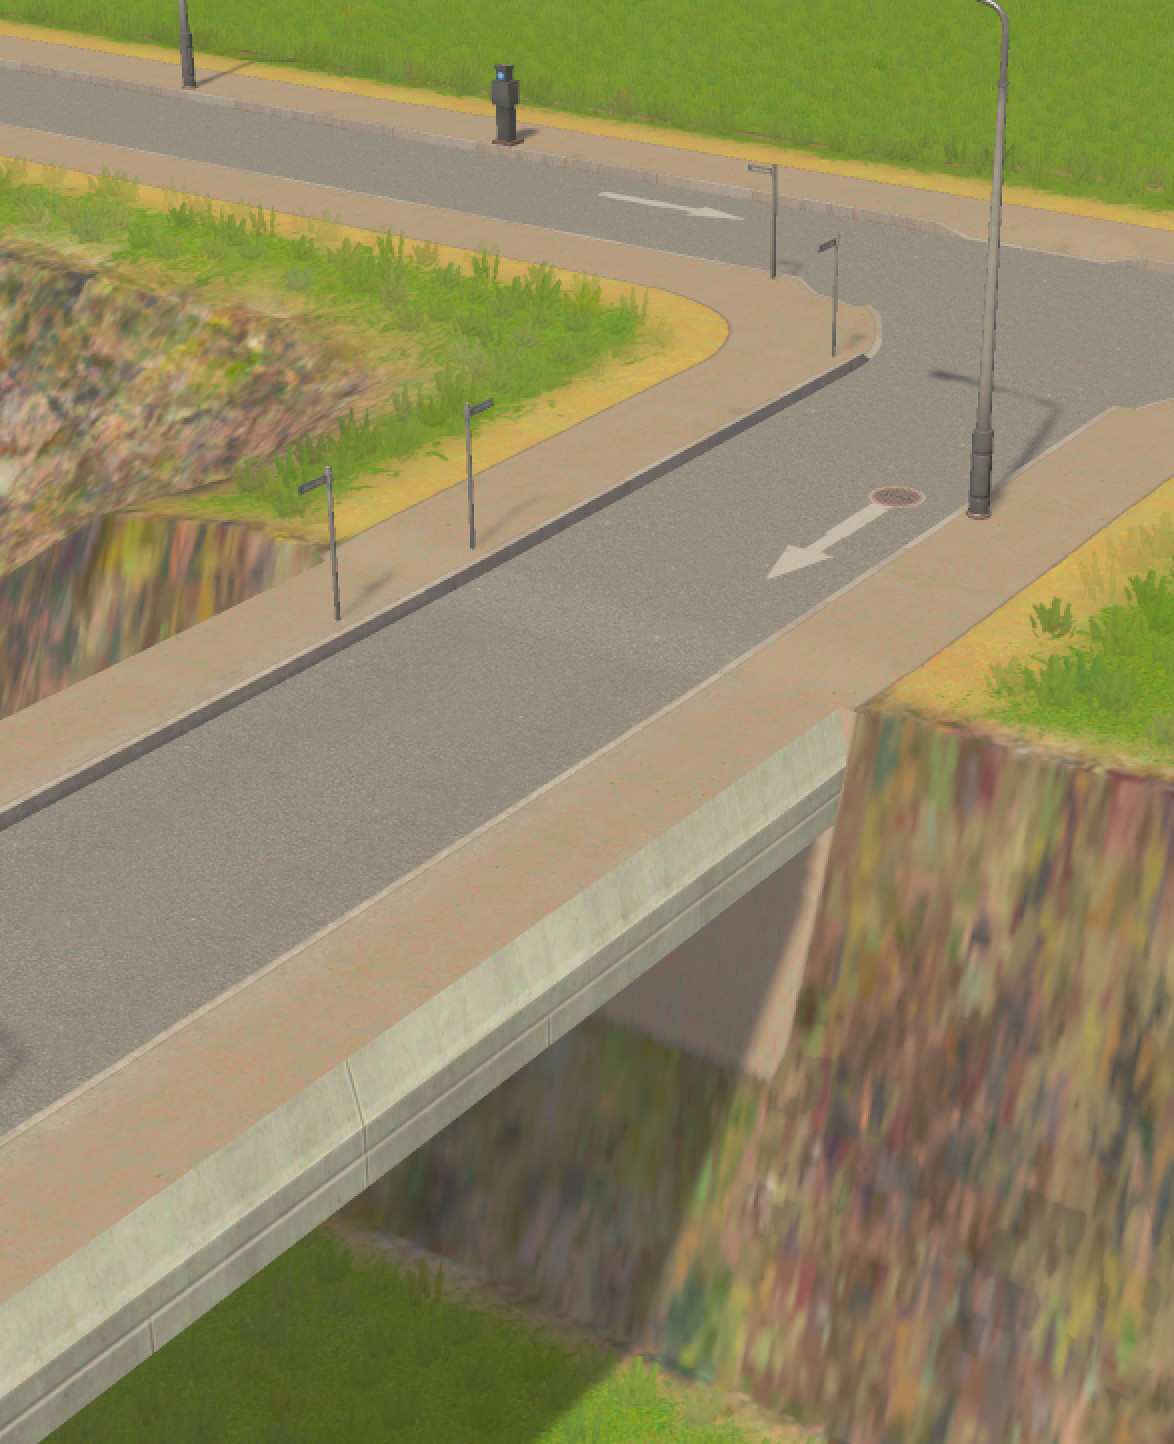
Bridge nodeIn some occasions, there are bits of pavement visible on a bridge node (this is a game issue). Pour résoudre ça, use Move IT and raise/move it until the issue disappears, ou utiliser RCN and change the node type to e.g. « stretched ».

To build a realistic-looking bridge, set nodes to the same level using MoveIT.
Bus stops
All roads that include a bus stop have a marking on the bottom right corner of the icon that says « BUS ». The bus will stop in the right or left lane (the lane you set). To make bus bays, see this tutorial:
https://youtu.be/JxIS9lwYfds
C'est tout ce que nous partageons aujourd'hui pour cela Villes: Horizons guide. Ce guide a été initialement créé et rédigé par KPTR2112. Si nous ne parvenons pas à mettre à jour ce guide, vous pouvez trouver la dernière mise à jour en suivant ceci lien.