- Titre: Arma 3
- Date de sortie:
- Promoteur:
- Éditeur:
Informations sur Arma 3 est encore incomplet. S'il vous plaît, aidez-nous à remplir les détails du jeu en utilisant ceci formulaire de contact.
I noticed that all the guides for achieving this particular goal focus on the Support 08 Sofia scenario. While it can get the job done, constantly being destroyed by MANPADS and APCs and having to start over again can be incredibly frustrating. Donc, I have created this guide specifically for those who prefer a more risk-free method of completing it on scenario 04 Rodopoli.
Commencer
Pour commencer, load scenario 04 Rodopoli. There are several reasons why we choose this scenario:
- No enemy anti-aircraft (AA) or heavily armored personnel carriers (APCs). The opponents in this scenario only consist of technical vehicles and infantry.
- Easier Objective Landing Zones (LZs). The designated LZs in Rodopoli do not have large cities or extremely hilly terrains that require extra precision and careful maneuvering.
- More agile helicopter. The PO 30 Orca in this scenario is smaller and offers better controllability compared to the NATO Ghost Hawk. It also has pilot-controlled miniguns and rockets instead of the two miniguns.
- Reduced small arms fire.
- Rodopoli prioritizes speed over safety. While you are less likely to be destroyed by the enemy, you will not have any downtime and must transport the 10 groups as quickly as possible. Ayant 400 tickets is mandatory, or you will easily lose.
Une fois que vous’re in the lobby, check the parameters in the top right corner of the menu and adjust the tickets to 400 and the time to 03:00. While the achievement can be completed during daylight, be aware that you will face more ground fire.
Conseils généraux
Ignore the Taru helicopter and opt for the Orca instead.
Speed is of utmost importance. The FIA will swiftly capture Charlie, Écho, and Foxrot, and you will lose tickets rapidly once they do. I managed to complete this achievement with approximately 100 tickets remaining. Despite the overall safer scenario, you need to be significantly faster than in 08 Sofia.
Utilize your weapons when necessary. The Orca is equipped with a minigun and rockets, which you can use for self-defense if you cannot flee quickly enough.
Avoid 50-caliber fire. If you come under fire from such weapons, turn around and retreat. While not as dangerous as CSAT APCs, they can still be lethal.
Do not approach any objectives beyond Delta. It is too risky. If all objectives up to and including Delta are captured, return to base and take a break while the FIA recaptures one or two of your objectives. Just keep an eye on the tickets to avoid sudden defeat.
Landing Zones (LZs)
Feel free to experiment and find your own LZ within a 270-meter radius of the objective as long as it is relatively safe. The provided images are just examples.
LZ ALPHA:
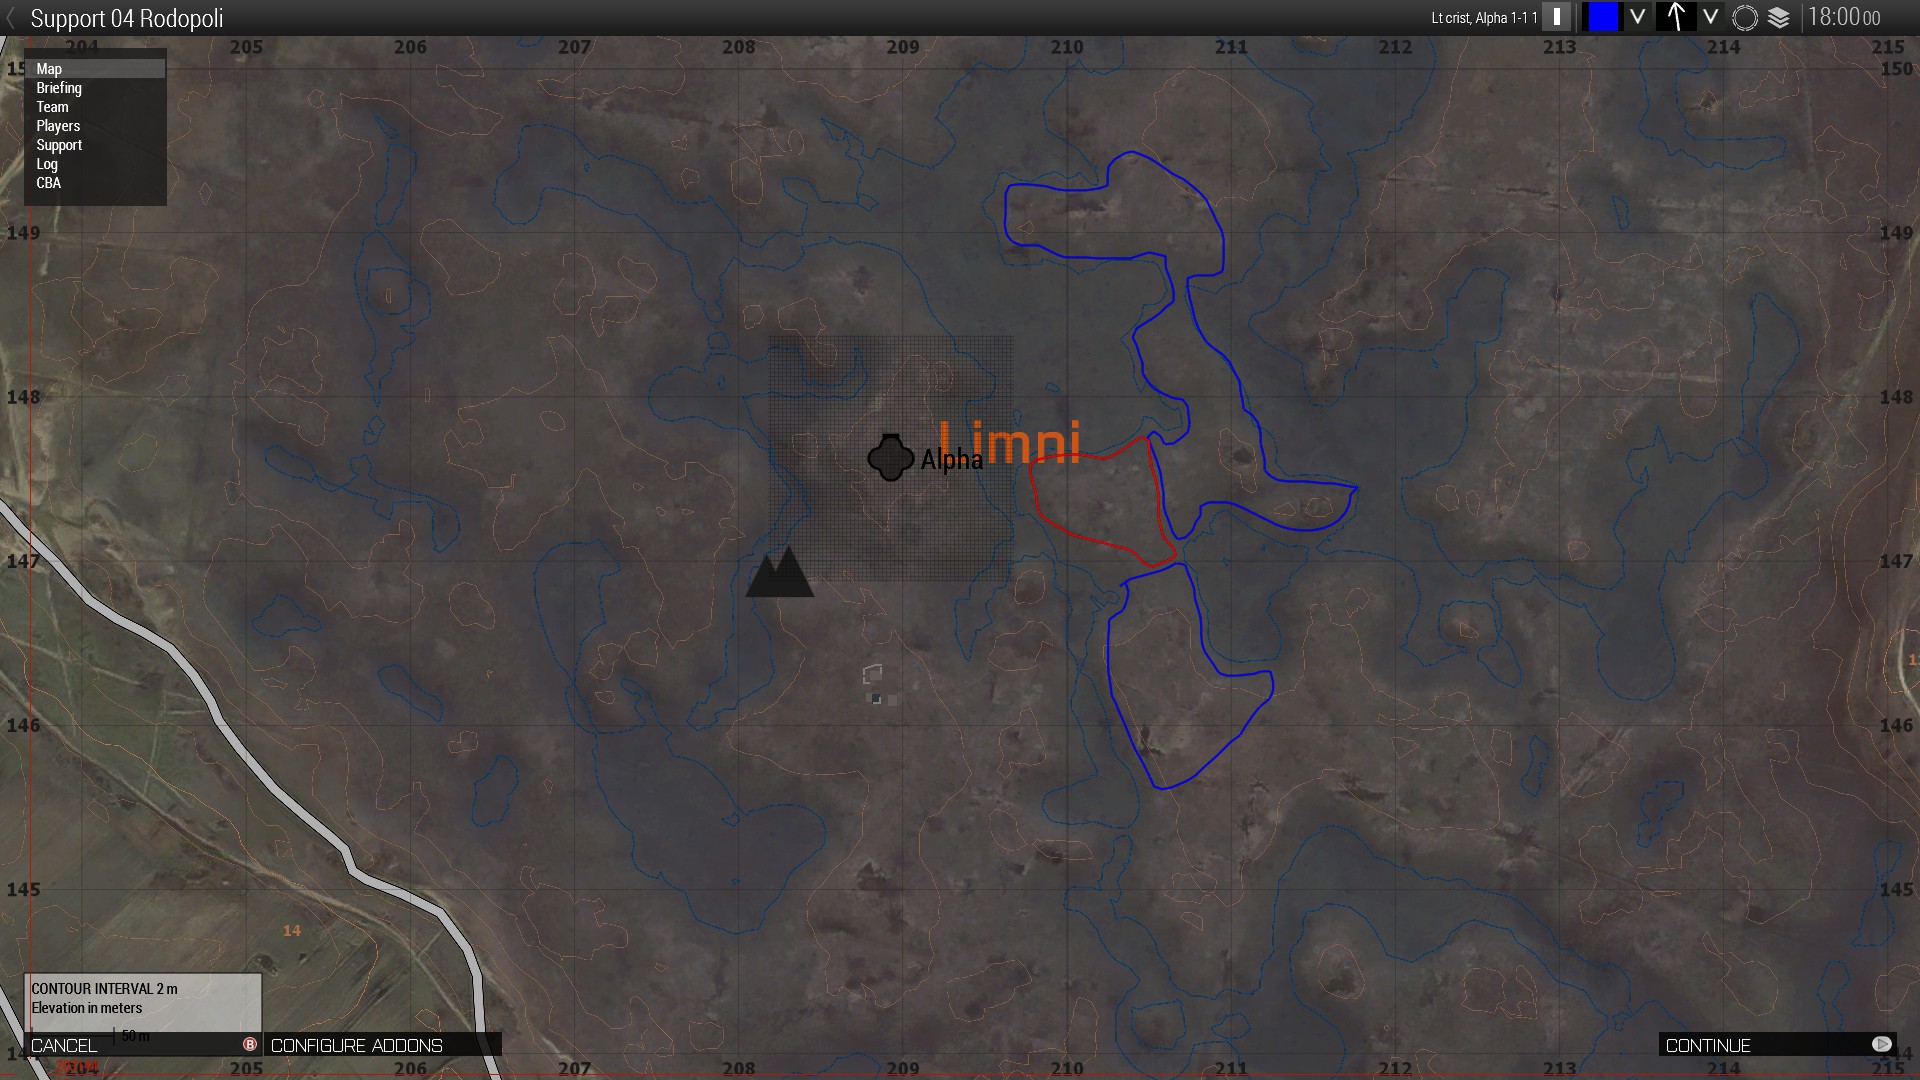
Choose the blue area for landing as it offers good visibility and no obstacles. Although half of it is shallow water, it is still a manageable landing zone. Drop off the closest groups here until it is fully captured. (Conseil: If a group boarded your helicopter before Alpha was fully captured, you can still drop them there, and it will count as a landing.)
LZ BRAVO:
This LZ is straightforward. Aim to land on the south or east side if there is any danger present.
LZ CHARLIE:
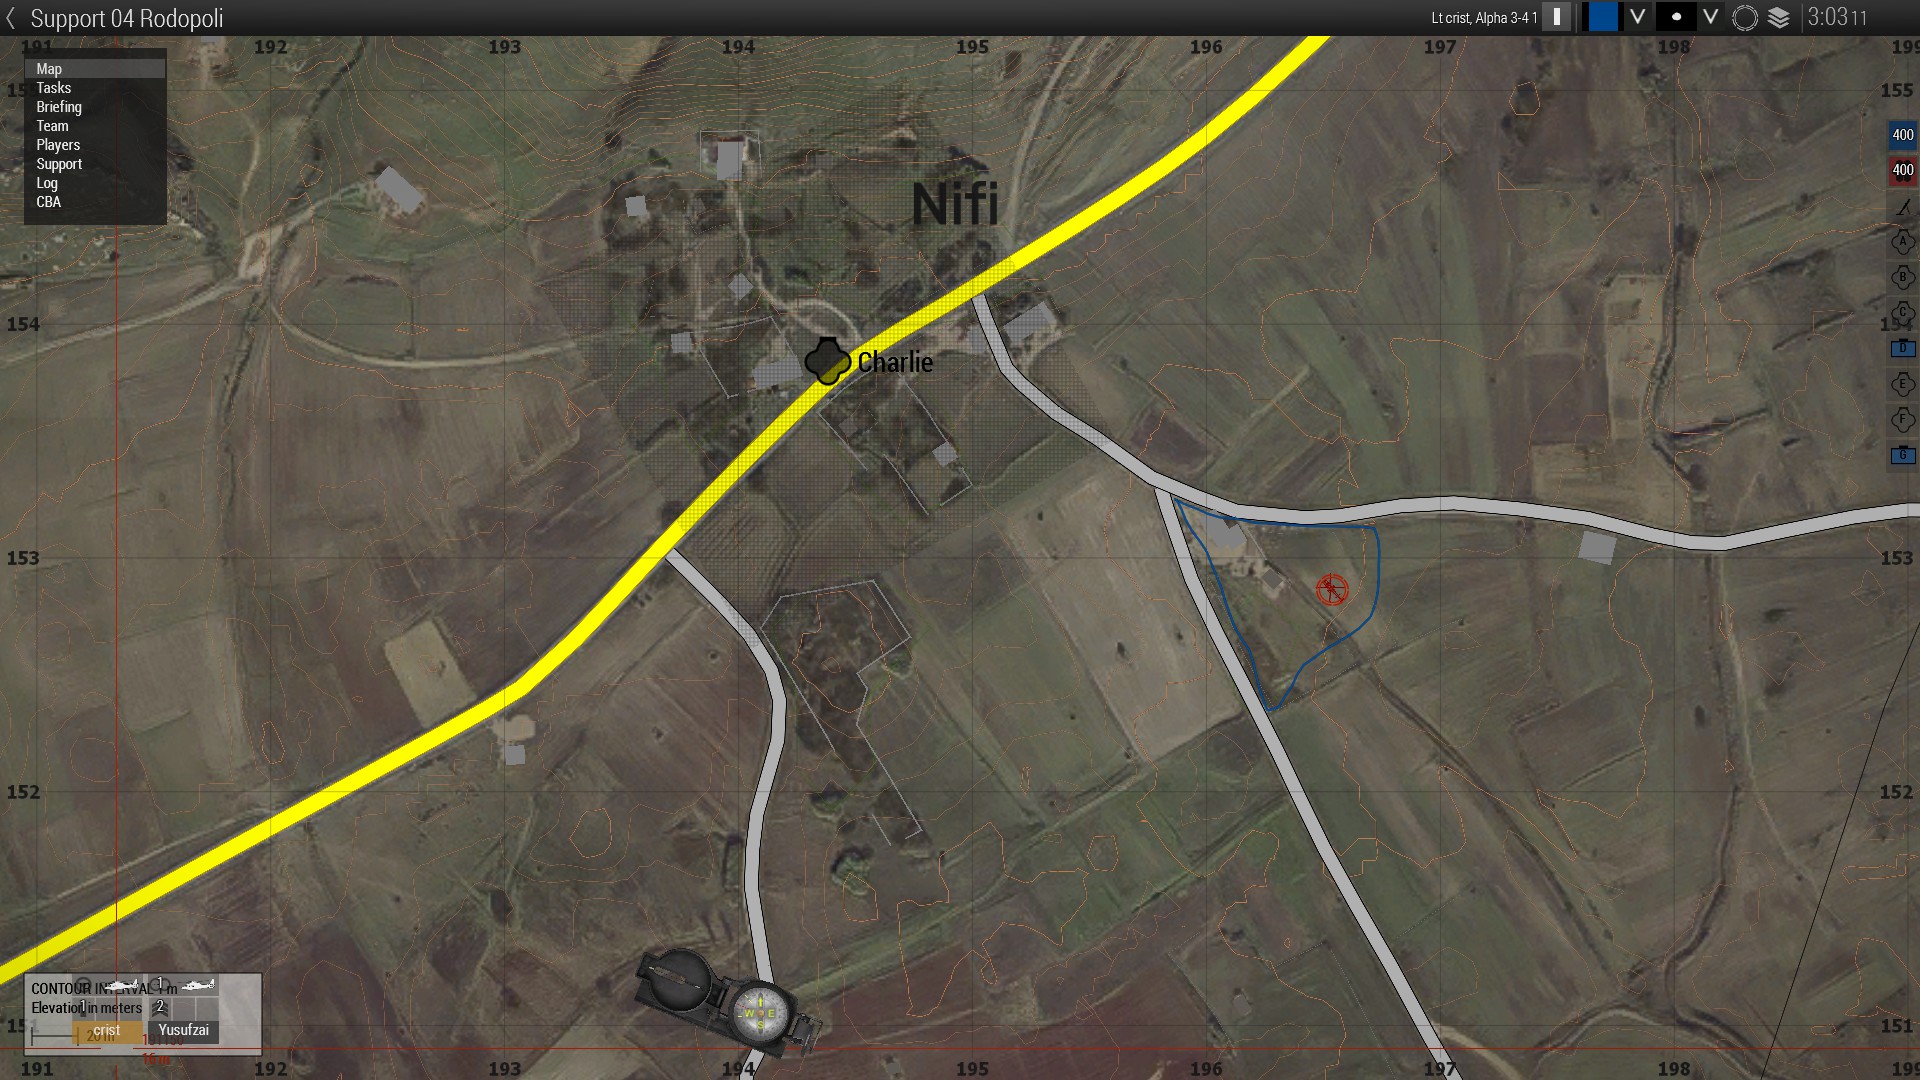
For maximum safety, land in the blue area, which provides good cover and flat terrain.
LZ DELTA:
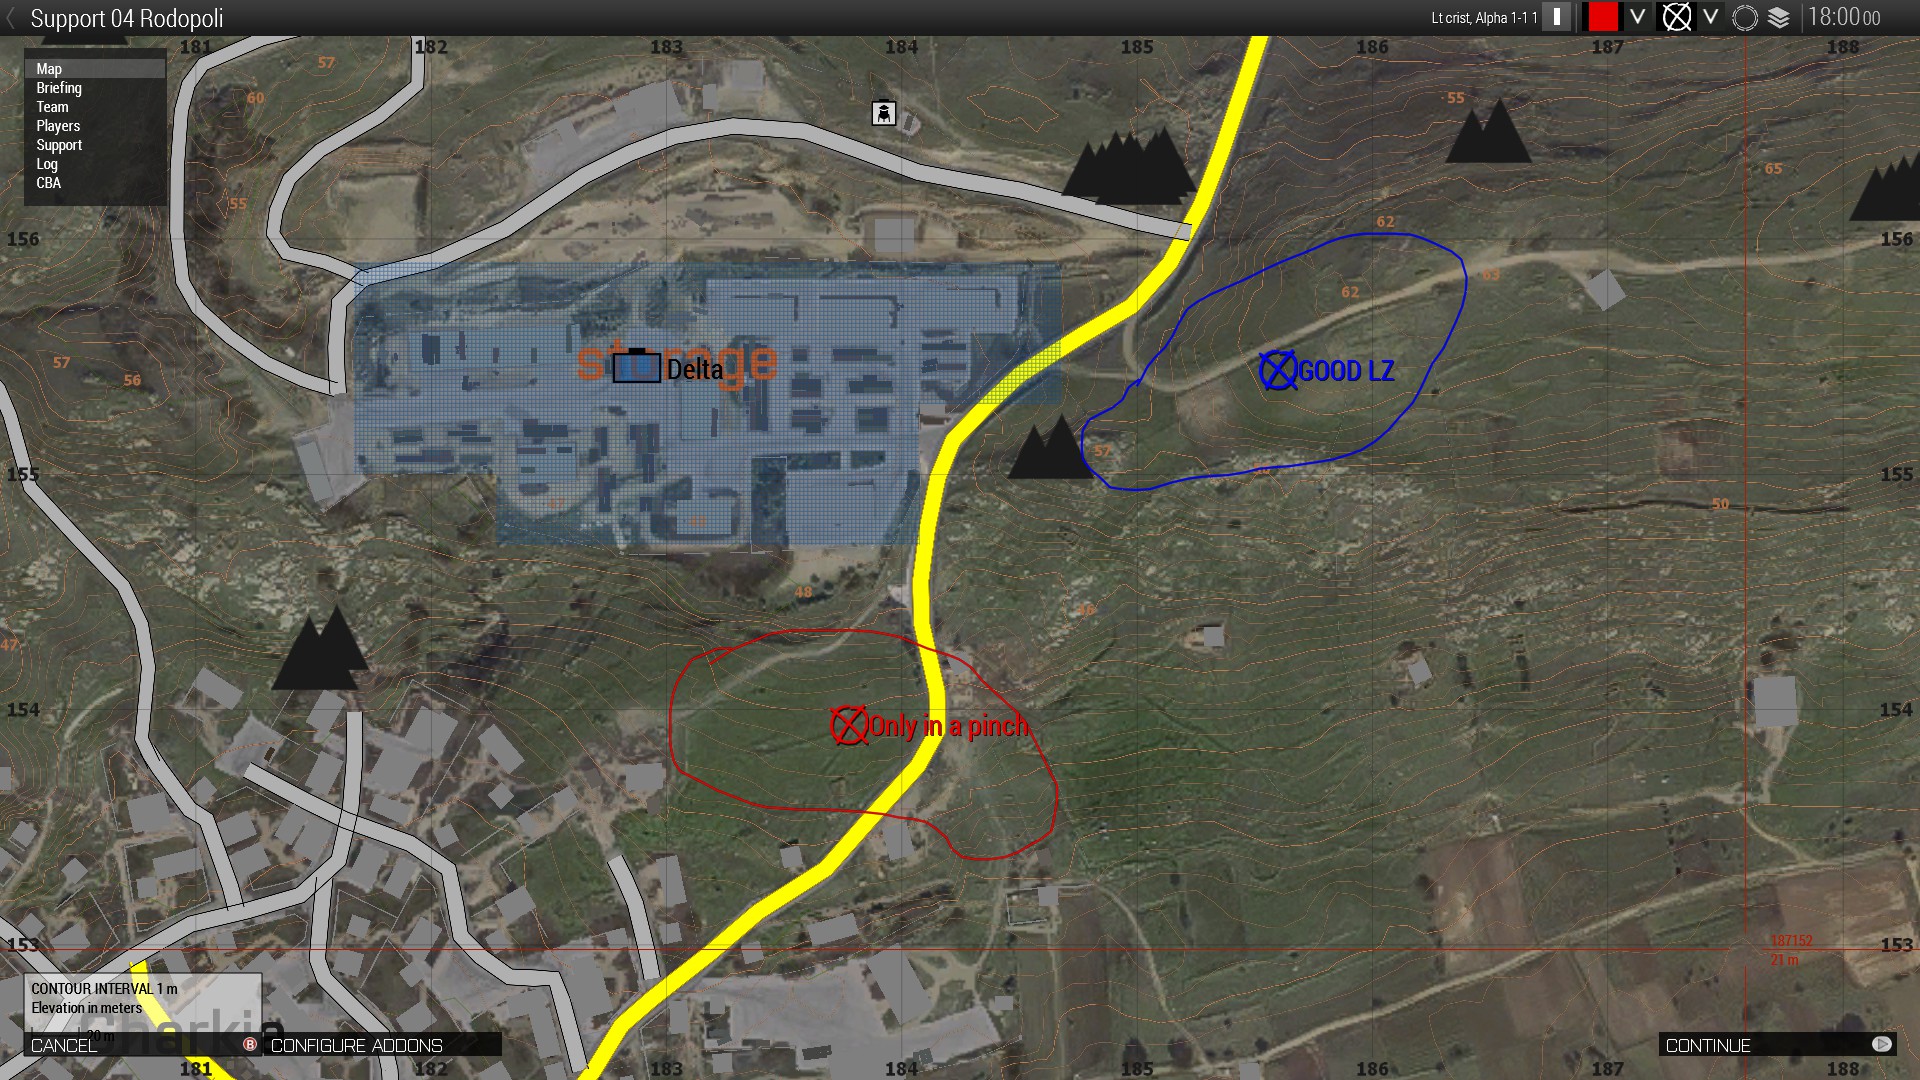
This is likely the most challenging LZ of the four. It has hilly terrain and limited cover. The best approach is to land on the hills to the east. Keep an eye out for any machine gunners on the tower directly on the objective, as they pose a threat and should be checked during each approach.
Conclusion
I hope this guide has been helpful to you. It is my first-ever guide, so any suggestions are greatly appreciated. Enjoy your flying and best of luck, achievement hunter! I believe you can do it!
Final Note: Consider using mods such as Enhanced Map and Enhanced GPS to assist you along the way.
C'est tout ce que nous partageons aujourd'hui pour cela Arma 3 guide. Ce guide a été initialement créé et rédigé par Crystal/GMT+2. Si nous ne parvenons pas à mettre à jour ce guide, vous pouvez trouver la dernière mise à jour en suivant ceci lien.