
- Título: Rogue Company
- Fecha de lanzamiento:
- Revelador:
- Editor:
Information about Rogue Company is still incomplete. Por favor ayúdanos a completar los detalles del juego usando esto formulario de contacto.
Rogue Company is capped to 150 FPS by default. This guide explains how to change that setting.
Setting Framerate Limit Above 150 FPS
Por defecto, Rogue Company has a framerate cap of 150 FPS. There is no in-game setting for this, so if you want to set it higher or lower, you’ll need to make the following changes to your config file:
Paso 1: Navegar a:
C:\Users\[Usuario]\AppData\Local\RogueCompany\Saved\Config\WindowsNoEditor
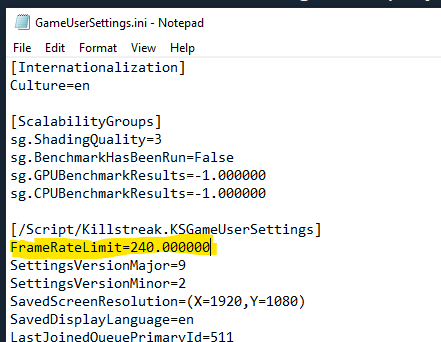
Paso 2: Abierto GameUserSettings.ini
Paso 3: Bajo «[/script/killstreak.ksgameusersettings]», add the following line:
FrameRateLimit=240.000000
You may change 240 to whatever value you’d like. Tenga en cuenta que 0.000000 does NOT seem to uncap the framerate.
Paso 4: Save and close. Inicia el juego.
Nota: If you find that the file reverts, you may need to set GameUserSettings.ini to read-only. Right-click the file, haga clic en Propiedades, add a checkmark to «Sólo lectura» y haga clic en Aceptar.
Verify Your FPS
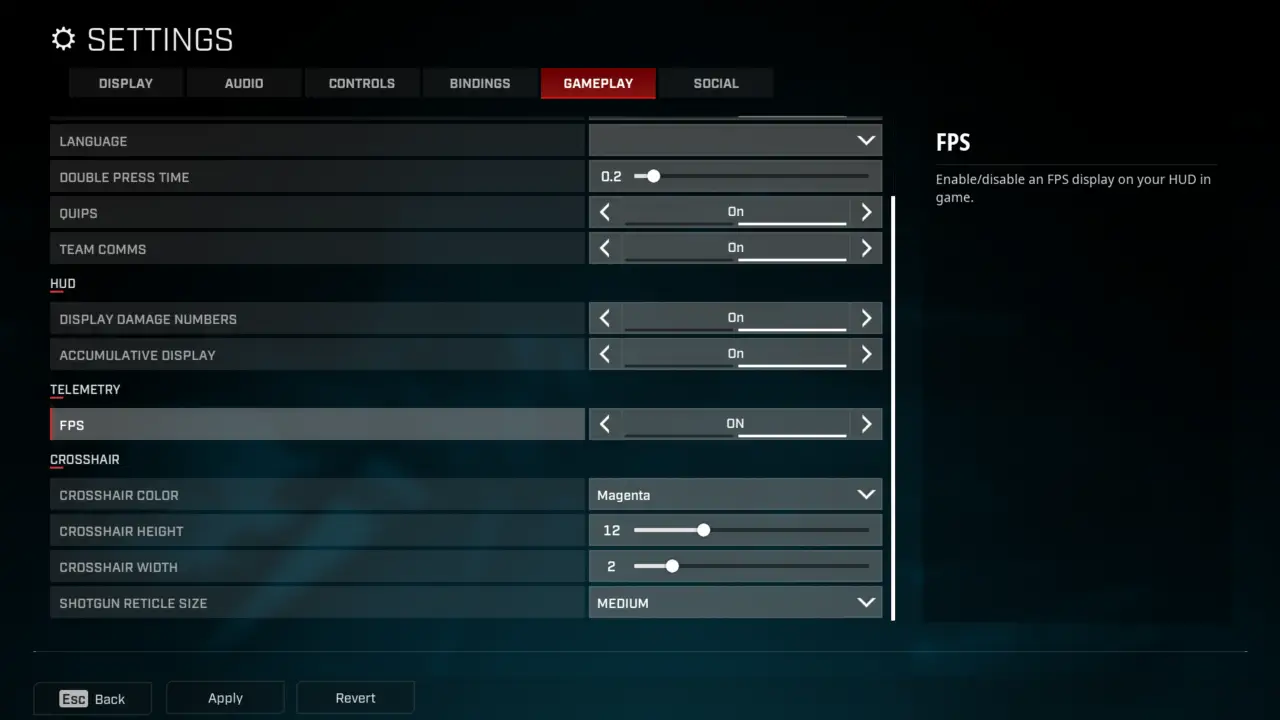
To enable the in-game FPS monitor and verify your change, simply navigate to Settings – Gameplay and set Telemetry – FPS: EN.
Your current FPS will be displayed in the upper-left corner while in a match or in the Shooting Range.
Eso es todo lo que estamos compartiendo hoy para este Rogue Company guía. Esta guía fue originalmente creada y escrita por plagueseason. En caso de que no actualicemos esta guía, puede encontrar la última actualización siguiendo este enlace.