Saltar al contenido
Bits antidisturbios

Bits antidisturbios

  • Hogar
  • Noticias
  • Guías
  • Videoguías
  • Notas del parche
  • Reportar abuso
  • Alternar formulario de búsqueda

Retro Gadgets – Intermediate Coding Tutorial Guide

Publicado el 12/13/2022 Por WORM RIDAAA! No hay comentarios en Retro Gadgets – Intermediate Coding Tutorial Guide
  • Título: Retro Gadgets
  • Fecha de lanzamiento:
  • Revelador:
  • Editor:
Information about Retro Gadgets is still incomplete. Por favor ayúdanos a completar los detalles del juego usando esto formulario de contacto.

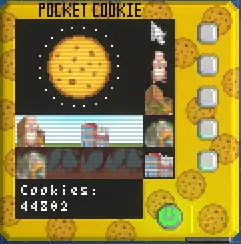
In this tutorial I show you how to code in Retro Gadgets by creating a 2D platformer!

Introducción

En este video, I show you how to create the following features:

  • Time based animations
  • Player movement controller
  • Play audio
  • Sprite Collision
  • Guardar el juego + Auto save
  • Random spawning mechanic

I have created sections in this guide for some of the major features, and you can find the completed gadget on the workshop! I recommend following along with the video, but you can also view the code below. This is mainly a tutorial on how to code in Retro Gadgets, however if people plan to use the code for a 2D platformer it definitely needs updating. I may come back and update the guide and project in the future.

Si esta guía te resultó útil, I would greatly appreciate if you rated it and left a comment on how I can improve!

Video

Interfacing with chips

We need to initialize each chip that we added and configure them for our project.

local video: VideoChip = gdt.VideoChip0 local screenMain: Screen = gdt.Screen0 local rom: ROM = gdt.ROM local audio: AudioChip = gdt.AudioChip0 local memory: FlashMemory = gdt.FlashMemory0 local lowerButton: LedButton = gdt.LedButton0 local upperButton: LedButton = gdt.LedButton1 local movementButton: DPad = gdt.DPad0 screenMain.VideoChip = video audio:SetChannelVolume(30, 1)

Importing Assets

Once we have the ROM configured, we can import assets that we uploaded and import built in assets such as a font. ROM stands for read only memory, and data stored here cannot be changed after compilation.

Here’s the sprite sheet for example. Notice how I have the right facing sprites in one row and the left facing sprites in another. This will make it easier to animate them later. All assets need to be placed inside the import folder which can be found in the main menu.

The photo is blurry because the sprites are only 16px tall.

–activos– local font: SpriteSheet = rom.System.SpriteSheets[«StandardFont»] local dummy: SpriteSheet = rom.User.SpriteSheets[«dummysprite1.png»] local coin: SpriteSheet = rom.User.SpriteSheets[«coinsprite.png»] local coinsound: AudioSample = rom.User.AudioSamples[«coinsound.wav»]

Player and Coin Variables

Setup the variables that will be used by the player and coin. We have various tick counters in order keep track of time for our player animations, coin spawn rate, and random seed for coin position.

–player controller vars– local playerXPosition: number = 0 local playerYPosition: number = 48 local jumping: boolean = false local falling: boolean = false local playerProfile = {} –true = facing right / false = facing left local playerFacingIdle: number = 2 –coin vars– local isCoinSpawned: boolean = false local coinPosition: number = 0 local coinSpawner: number = 0 local tickCounter: number = 0 local globalTickCount = 0

Save and Auto save

In order for saving to work correctly, you need to initialize the variables that you want to save if a save does not exist. De lo contrario, when you try to use those variables they will be nil.

initSave()

should be called right after your local variable initialization. You can only save a single table to memory and tables in LUA operate with key -> value pair mapping. This is similar to dictionaries in other languages like Java.

function saveGame() memoria:Ahorrar(playerProfile) end function initSave() local loadData = memory:Carga() if loadData[«puntaje»] == nil then playerProfile[«puntaje»] = 0 saveGame() else playerProfile = loadData end end initSave()

Update Function

It is good practice to keep your update function clean and not to write too much logic here. Let other methods handle your functionality. It would be a good idea for me to make an auto save function which calls save every 60 ticks rather than have that logic here. 60 ticks is roughly equal to 1 second when a program is running at maximum speed.

— update function is repeated every time tick function update() video:Claro(color.black) playerController() spawnCoin() playerCollision() drawScore() incrementTicks() if globalTickCount % 60 == 0 and globalTickCount >= 60 then saveGame() end end

Increment Tick Counters

–increment all ticks by 1– function incrementTicks() tickCounter = tickCounter + 1 coinSpawner = coinSpawner + 1 globalTickCount = globalTickCount + 1 fin

Draw Score

We draw the score every frame with it’s own function just in case we want to update it later.

function drawScore() video:DrawText(vec2(2, 2), fuente, «Puntaje: «..tostring(playerProfile[«puntaje»]), color.white, color.clear) fin

Movement Controller + animaciones

This is a basic controller that I made to handle animations. I explain the whole controller in the video. The only thing to note is that I do not handle when the player pressed down on the DPad so the character disappears for a second.

The time based animation can be seen in how we change the character animation based on the tickCounter variable. 15 ticks is roughly equal to 1/4 of a second, y en 30 ticks we reset the counter to repeat the animation. The running and jumping animations are comprised of 2 frames each. While the running animation is based on time, the jumping animation is based on the player height in the scene. This wouldn’t work if the player is expected to jump on other objects.

function playerController() if movementButton.X == 0 and movementButton.Y == 0 then tickCounter = 0 inactivo() end if tickCounter > 29 then tickCounter = 0 end if movementButton.X > 0 then playerXPosition = playerXPosition + 1 playerFacingIdle = 2 caminar(2) elseif movementButton.X < 0 then playerXPosition = playerXPosition – 1 playerFacingIdle = 3 caminar(3) end if movementButton.Y > 0 and playerYPosition == 48 then jumping = true end if jumping == true then jumpAnimation() elseif falling == true then fallingAnimation() end end function fallingAnimation() local animationNum = 4 if playerYPosition >= 48 then falling = false jumping = false elseif playerYPosition > 32 then animationNum = 4 playerYPosition = playerYPosition + 1 elseif playerYPosition >= 24 then animationNum = 5 playerYPosition = playerYPosition + 1 end video:DrawSprite( vec2(playerXPosition, playerYPosition), dummy, animationNum, playerFacingIdle, color.white, color.black) end function jumpAnimation() local animationNum = 4 if playerYPosition > 32 then animationNum = 4 playerYPosition = playerYPosition – 1 elseif playerYPosition > 24 then animationNum = 5 playerYPosition = playerYPosition – 1 elseif playerYPosition <= 24 then jumping = false falling = true end video:DrawSprite( vec2(playerXPosition, playerYPosition), dummy, animationNum, playerFacingIdle, color.white, color.black) end function idle() video:DrawSprite( vec2(playerXPosition, playerYPosition), dummy, 1, playerFacingIdle, color.white, color.black) end function walk(dirección: número) local animationNum = 2 if tickCounter >= 0 and tickCounter < 15 then animationNum = 2 elseif tickCounter >= 15 and tickCounter < 30 then animationNum = 3 end video:DrawSprite( vec2(playerXPosition, playerYPosition), dummy, animationNum, dirección, color.white, color.black) fin

Random Coin Spawning

This is how we spawn the coin in a random position on the screen between 1-56. Since our coin is an 8×8 sprite, we draw the coin at a maximum of x = (64-8). In order to get random number generation working, we need to call the

math.randomseed(globalTickCount)

function where globalTickCounter is a different number every time. This seed generation works similarly to minecraft world’s seed.

We also use the coinSpawner variable to determine if 180 ticks or roughly 3 seconds has passed before spawning a new coin.

function spawnCoin() if isCoinSpawned == false and coinSpawner > 180 then math.randomseed(globalTickCount) coinPosition = math.random(56) isCoinSpawned = true elseif isCoinSpawned == true then video:DrawSprite(vec2(coinPosition, 26), moneda, 0, 7, color.white, color.clear) end end

Player Collision and Playing Audio

We are checking if the left side of our player is left of the center of the coin, and the right side of our player is right of the center of the coin. We then check if the height of the player is at least as high as the center of the coin. Since we statically spawn coins at y = 26, and the bottom of the coin is at y = 34, we can do this by checking if the player’s head is at least at y = 30.

function playerCollision() if isCoinSpawned == true then –calculate the collision box– if coinPosition + 4 >= playerXPosition and coinPosition + 4 <= playerXPosition + 16 then if playerYPosition <= 30 entonces –picked up coin– playerProfile[«puntaje»] = playerProfile[«puntaje»] + 1 isCoinSpawned = false coinSpawner = 0 audio:Jugar(coinsound, 1) end end end end

Eso es todo lo que estamos compartiendo hoy para este Retro Gadgets guía. Esta guía fue originalmente creada y escrita por WORM RIDAAA!. En caso de que no actualicemos esta guía, puede encontrar la última actualización siguiendo este enlace.

Si cree que alguno de los contenidos de este sitio viola sus derechos, incluyendo sus derechos de propiedad intelectual, por favor contáctenos inmediatamente usando nuestro formulario de contacto.
Guías Etiquetas:Retro Gadgets

Navegación de entradas

Publicación anterior: How to Fix Retro Gadgets FPS Drop, Retraso, y problemas de tartamudeo
Publicación siguiente: How to Fix Chop Goblins Crashing, Accidente en el lanzamiento, y problemas de congelación

Deja una respuesta Cancelar la respuesta

Tu dirección de correo electrónico no será publicada. Los campos obligatorios están marcados con *

  • Título: Retro Gadgets
  • Fecha de lanzamiento:
  • Revelador:
  • Editor:
Information about Retro Gadgets is still incomplete. Por favor ayúdanos a completar los detalles del juego usando esto formulario de contacto.

Descargo de responsabilidad

Todo el contenido citado se deriva de sus respectivas fuentes.. Si cree que hemos utilizado su contenido sin permiso, asegúrese de comunicarse con nosotros y lo tomaremos en serio.
  • Sobre nosotros
  • Contáctenos
  • política de privacidad
  • Términos de servicio

Derechos de autor © 2025 Bits antidisturbios.

Funciona con Tema PressBook Noticias para WordPress