- Titel: Douhou Doppelfokus
- Veröffentlichungsdatum:
- Entwickler:
- Herausgeber:
Information about Touhou Double Focus is still incomplete. Bitte helfen Sie uns dabei, die Details des Spiels auszufüllen Kontaktformular.
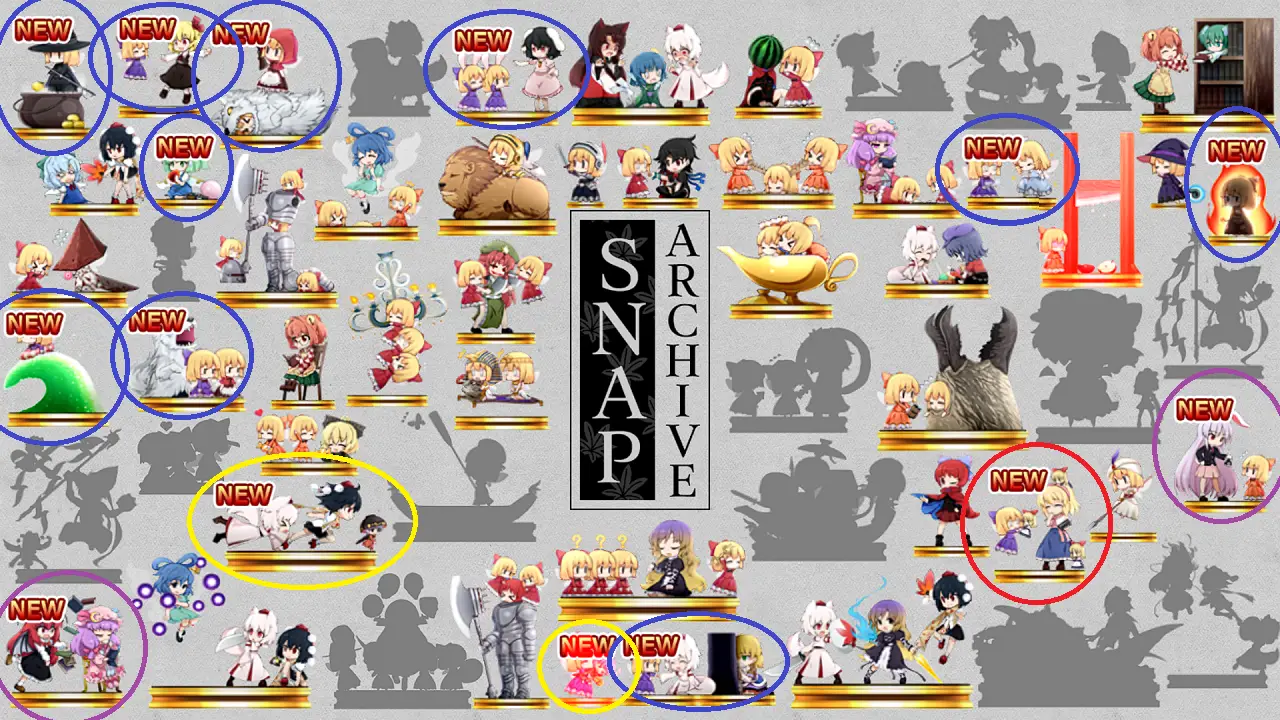
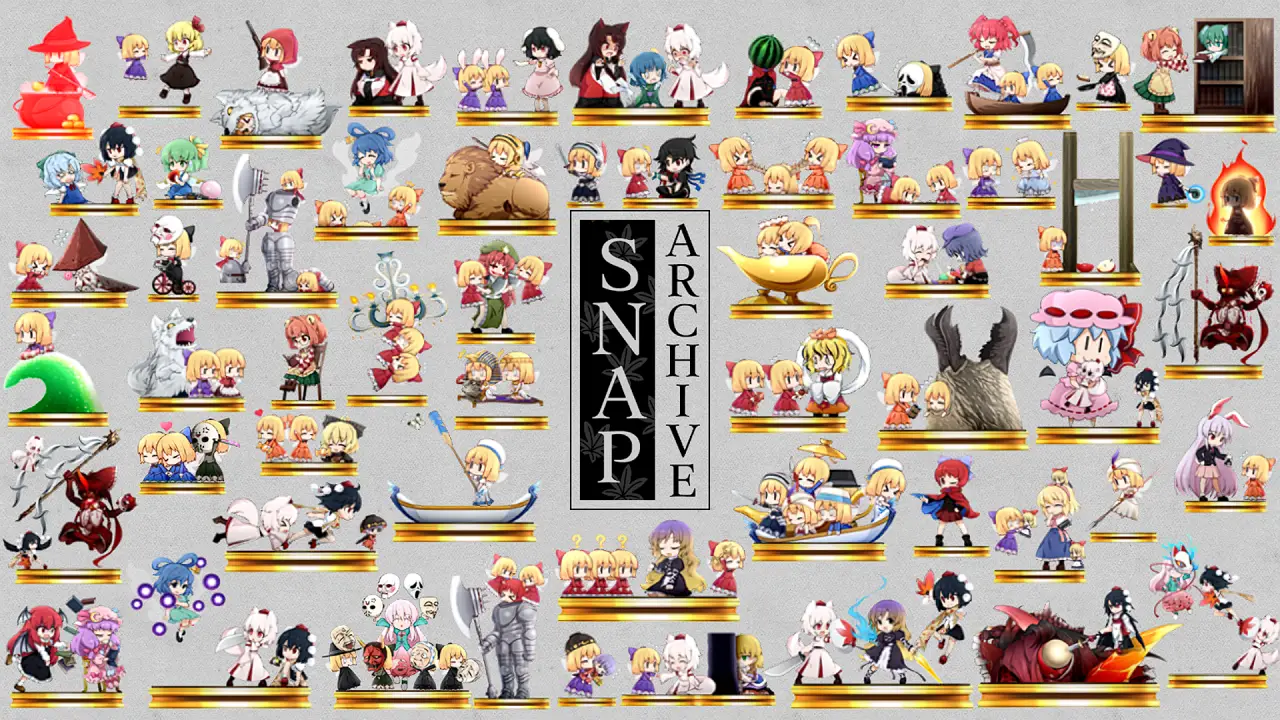
A guide on how to complete the Snap Archive and obtain the Talented Journalist achievement in Touhou Double Focus. Some other achievements related to this too!
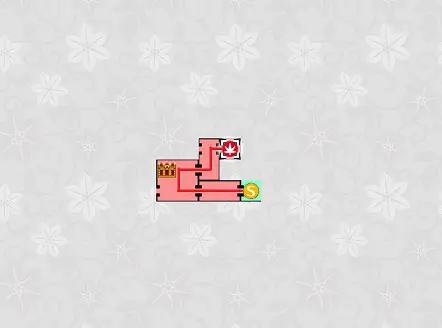
Find Aya’s Camera
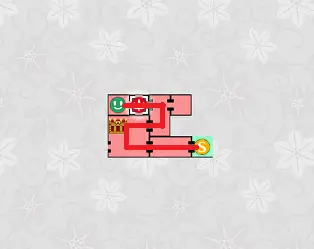
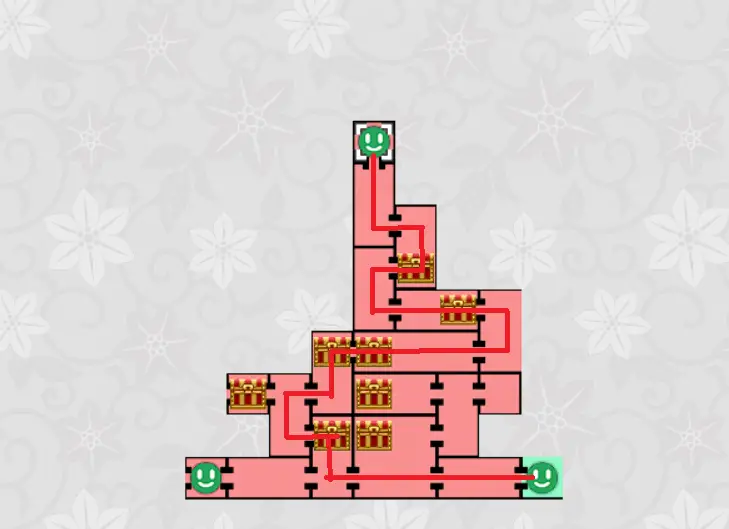
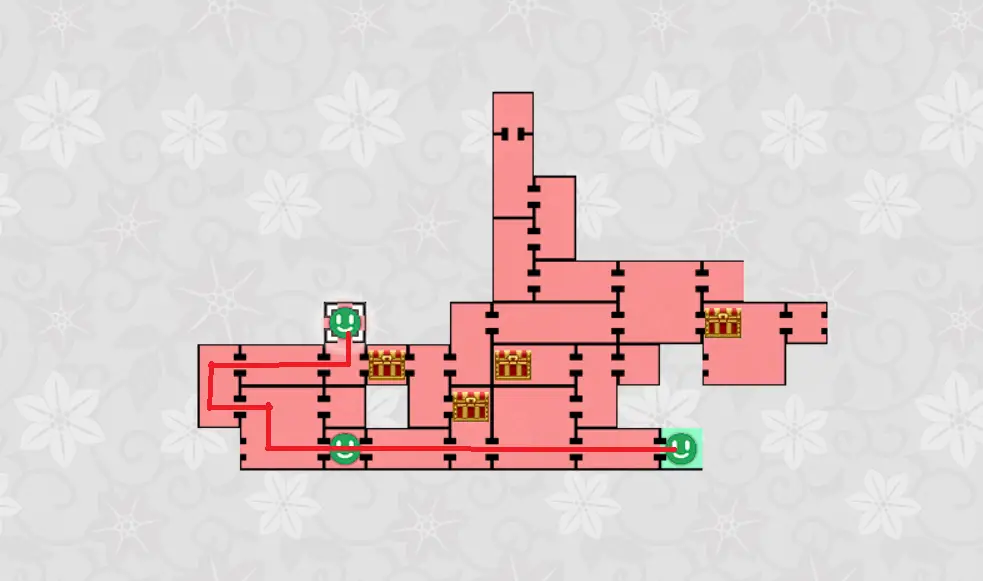
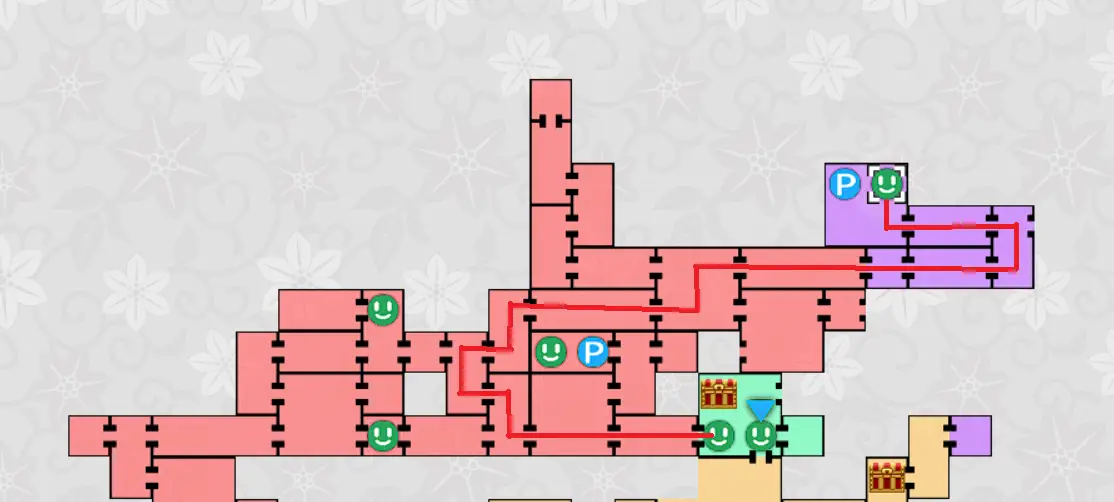
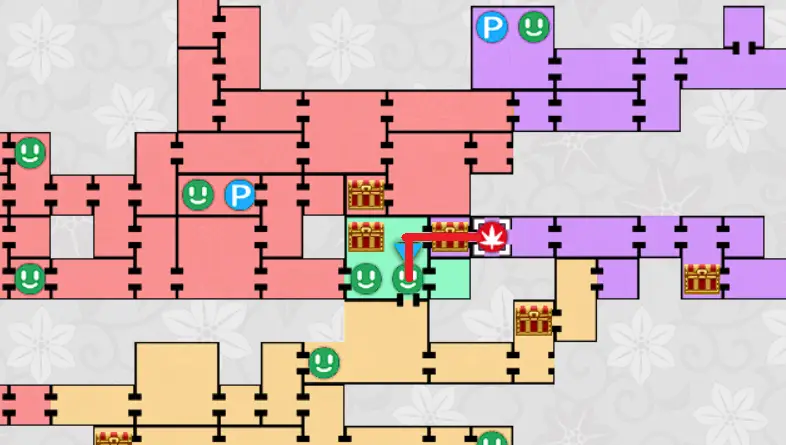
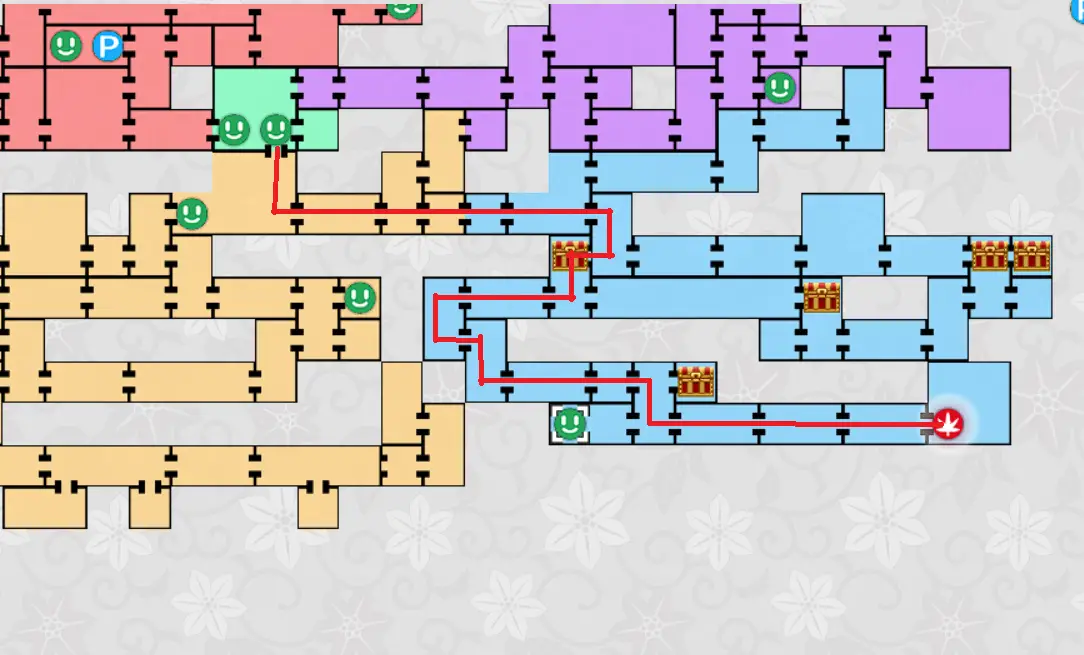
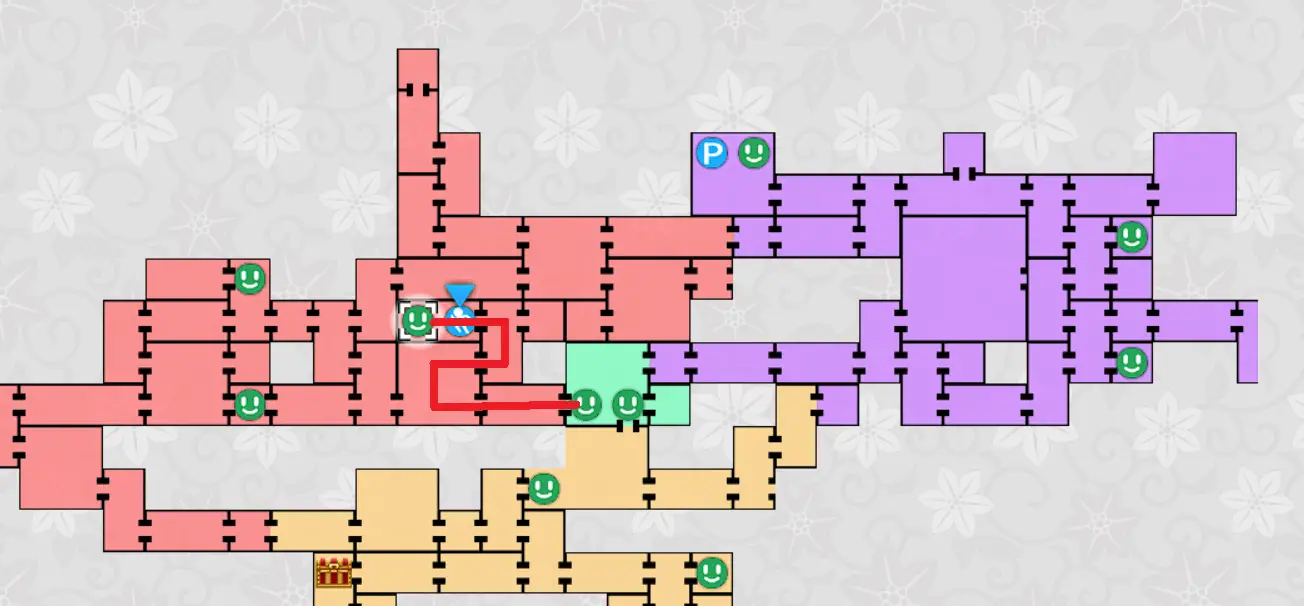
Before we even begin completing this, you need to find Aya’s trusty tool of partial truth and justice! You will get this very early on with just simple exploration, but in case you went ahead and missed it early on, here’s a map picture guide on how to get it:
If you’re in the room, you’ll see this „Buch“, move near it and unlock Aya’s ability!
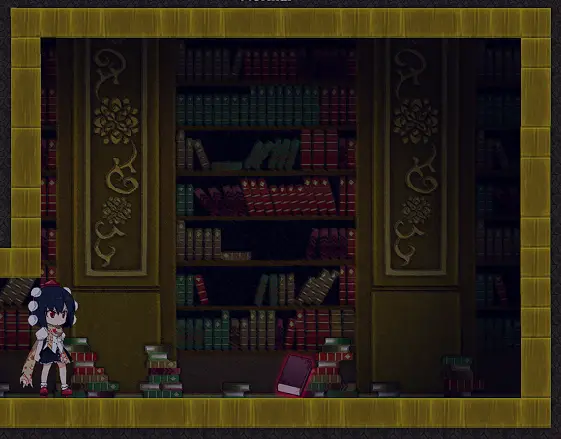
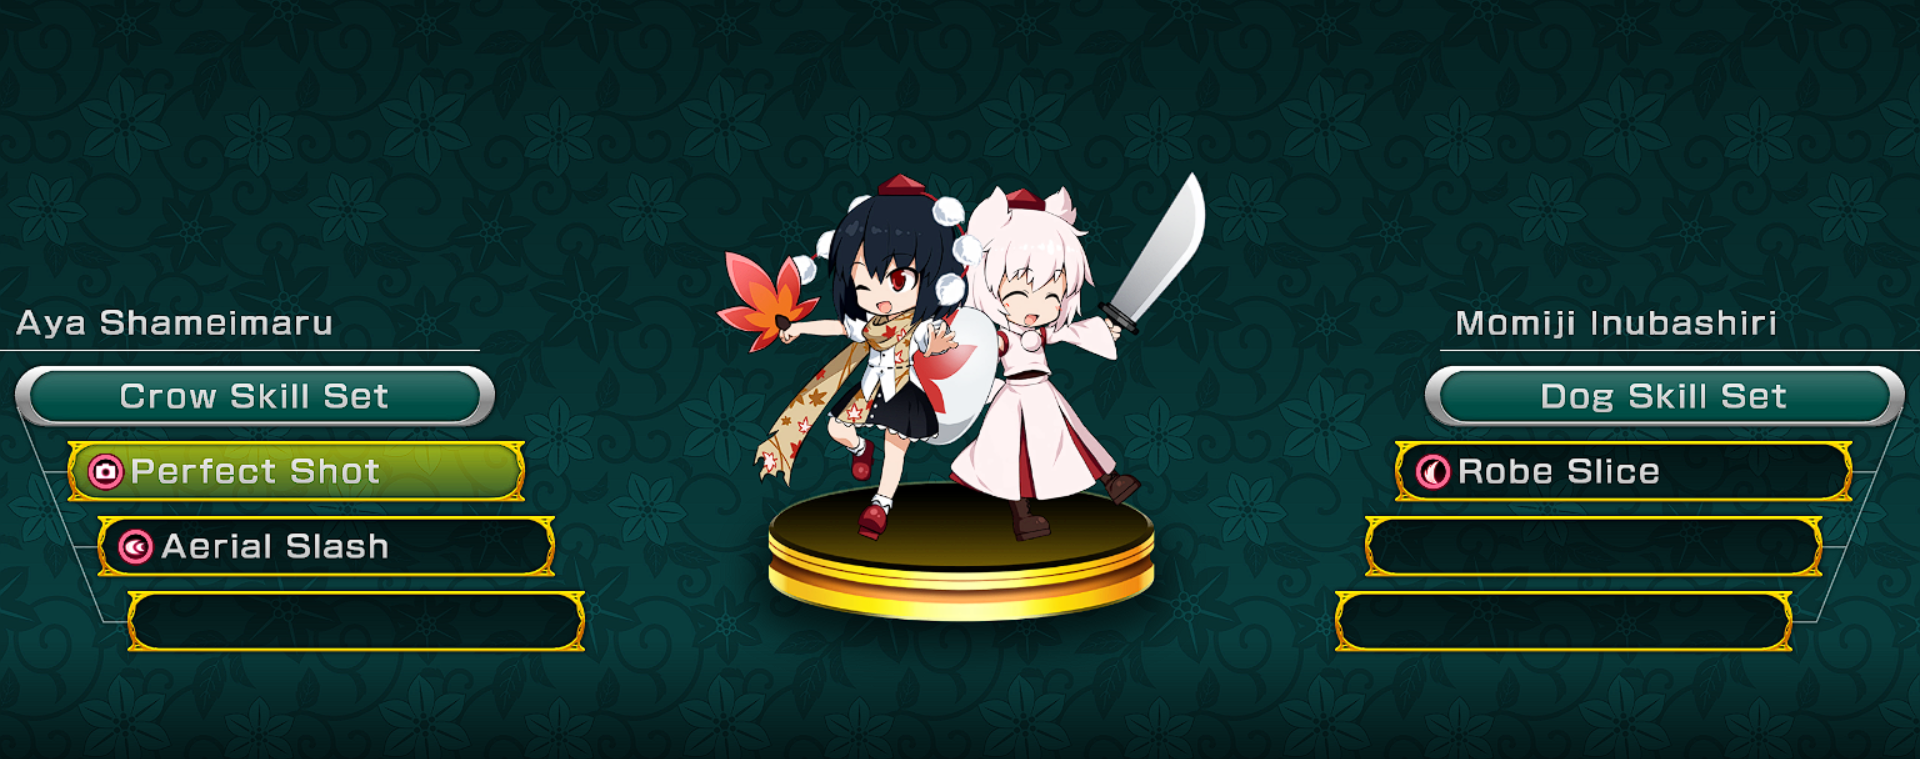
After taking it, you’ll unlock Perfect Shot.
This is the ability you’ll use everywhere to start saving images in your snap archive! Be sure to equip it after obtaining it!
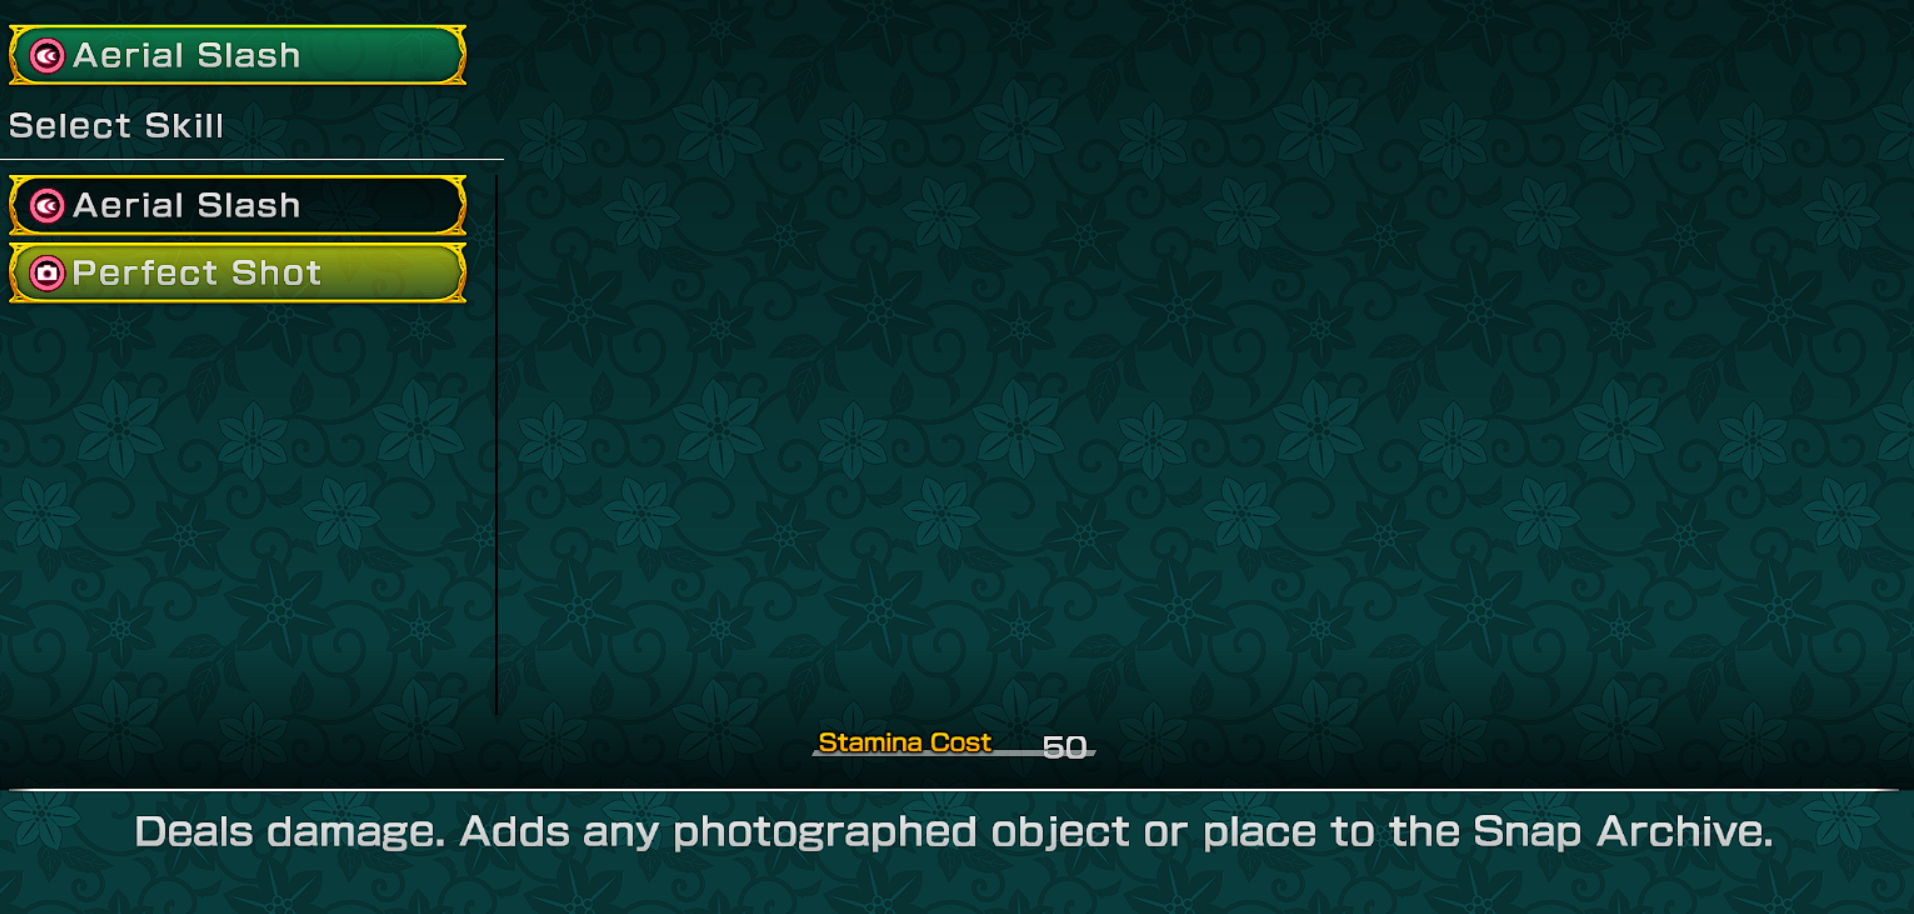
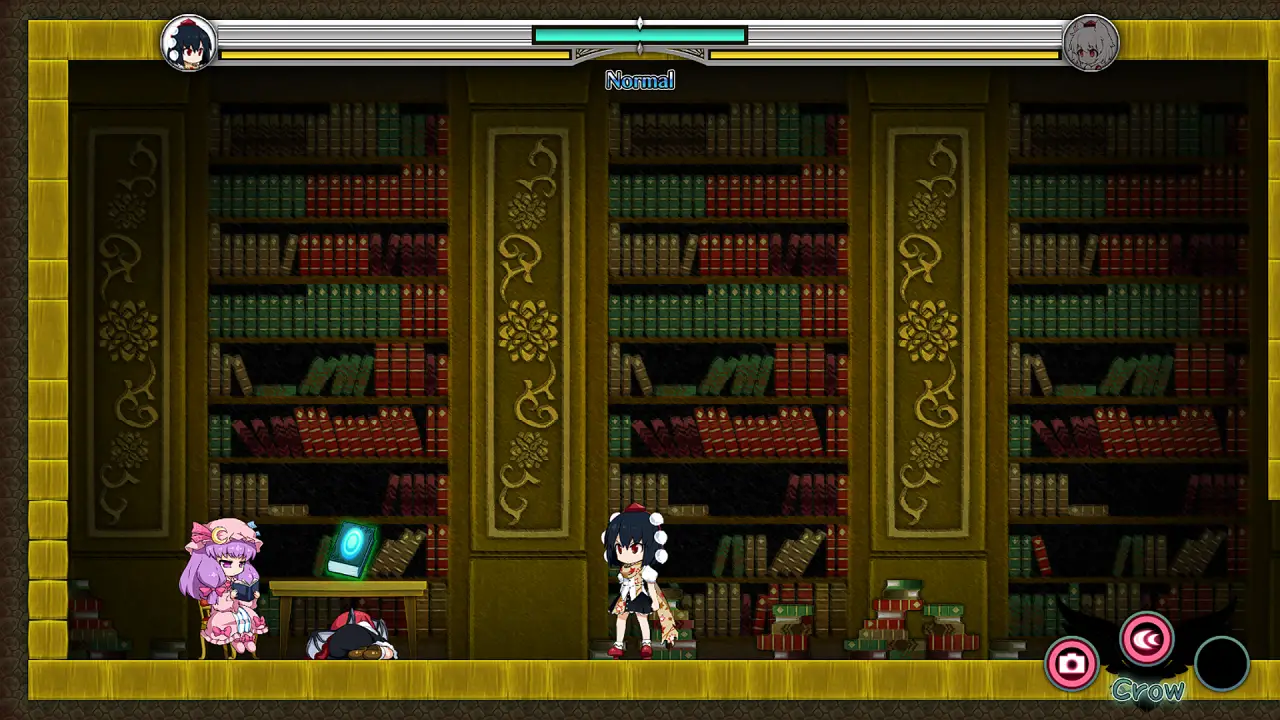
How to Use Camera
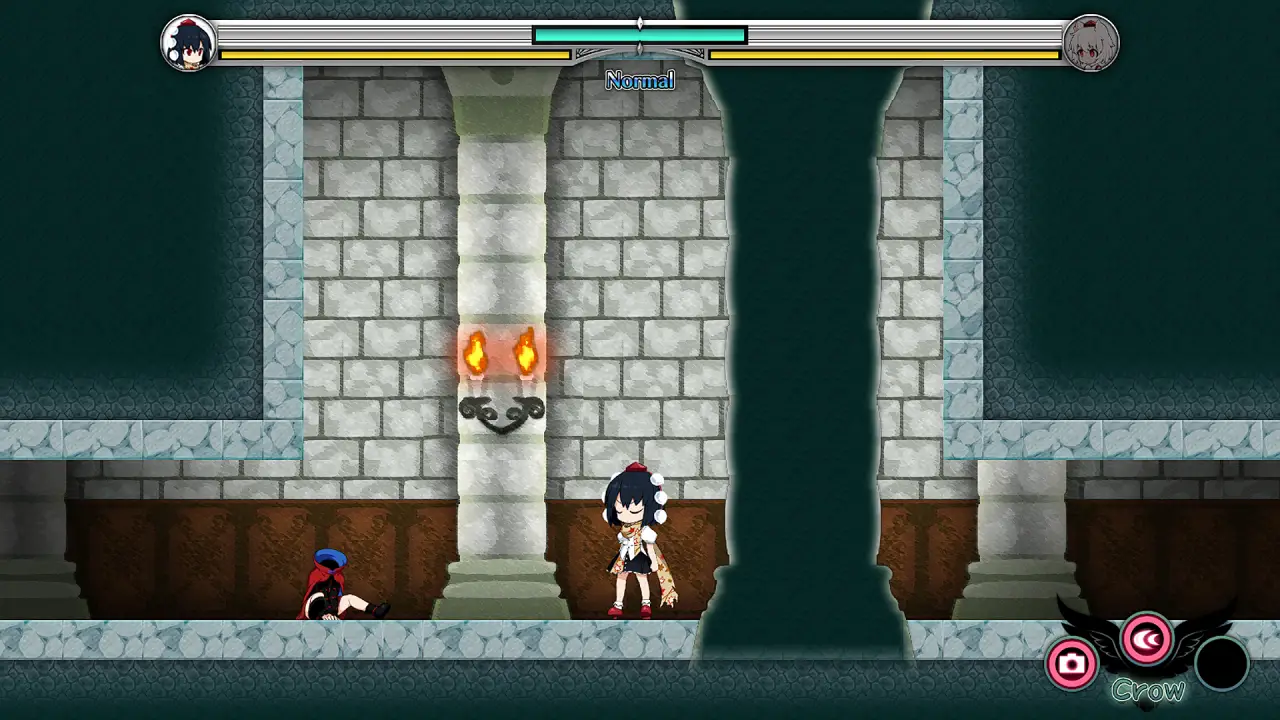
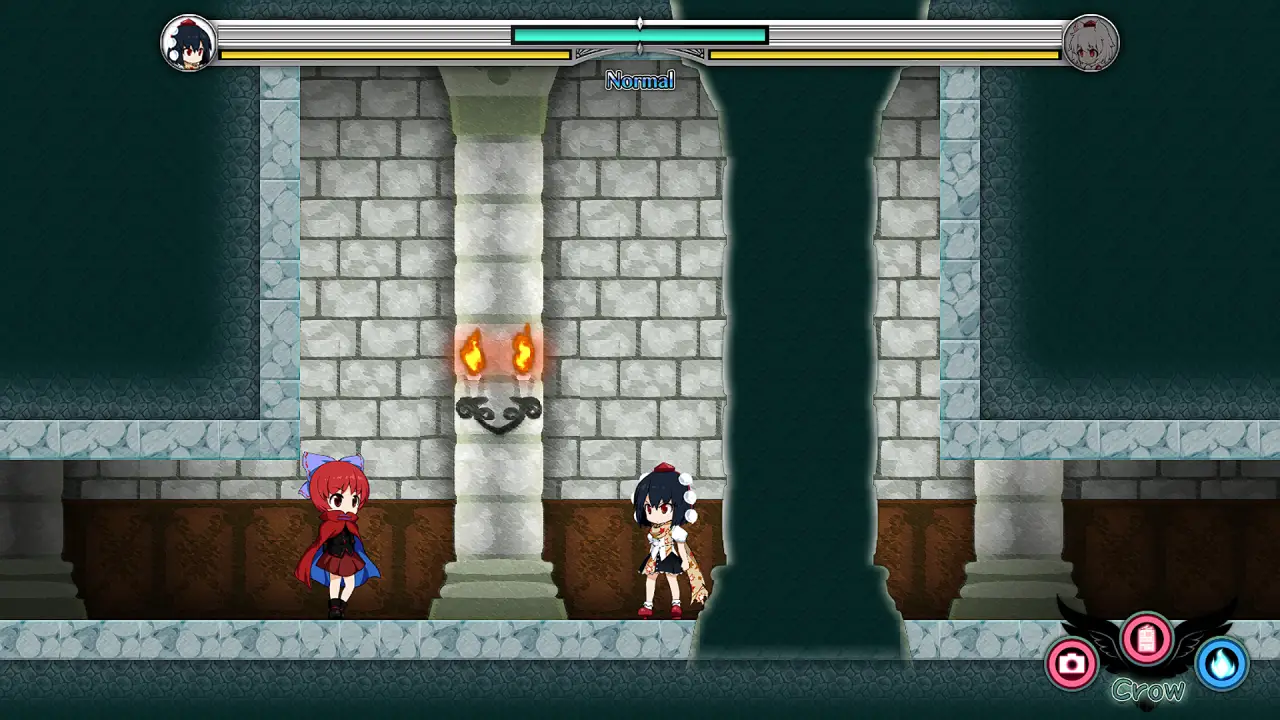
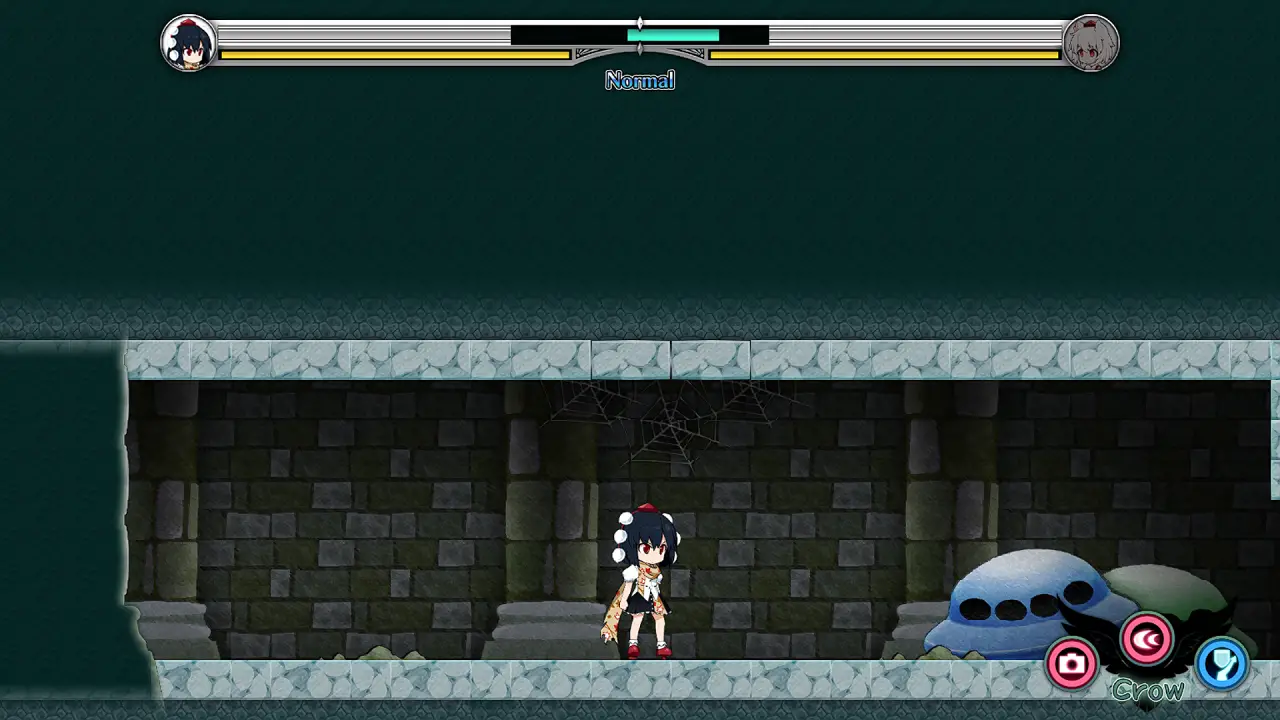
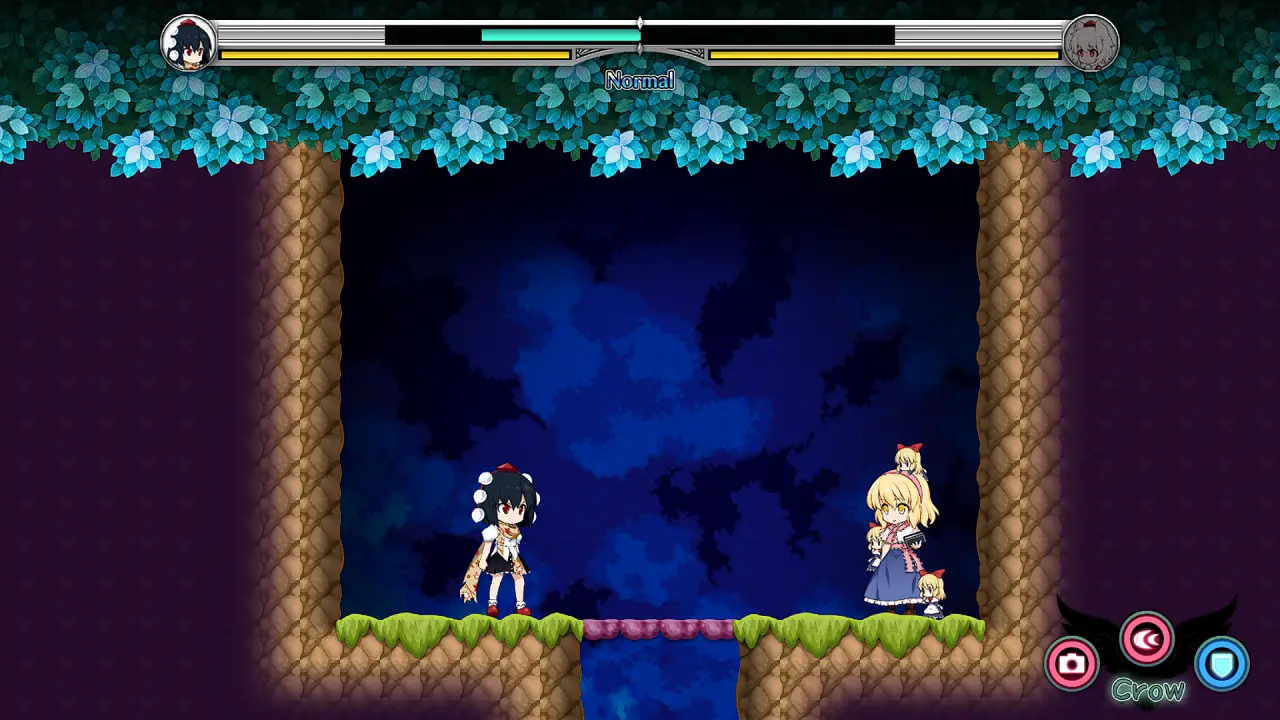
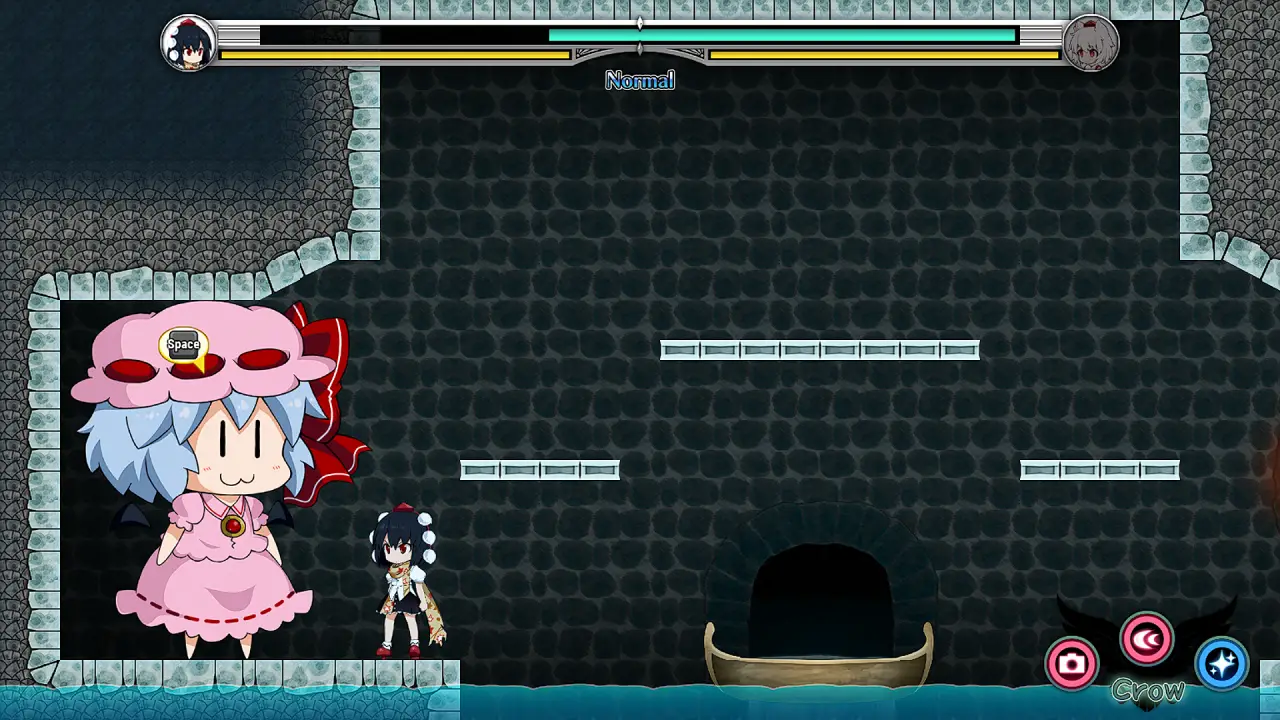
After equipping the Perfect Shot ability, you can start using it as a regular attack. As said in the description, enemies hit will automatically be updated to your snap archive!
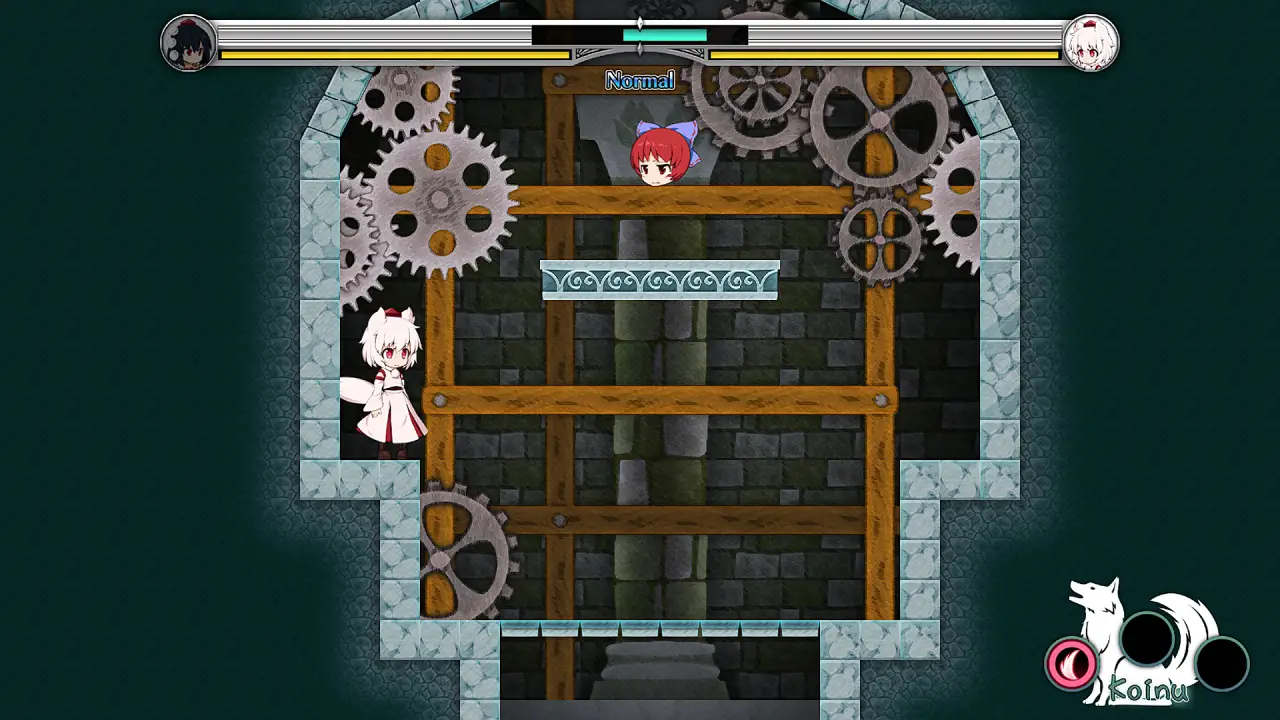
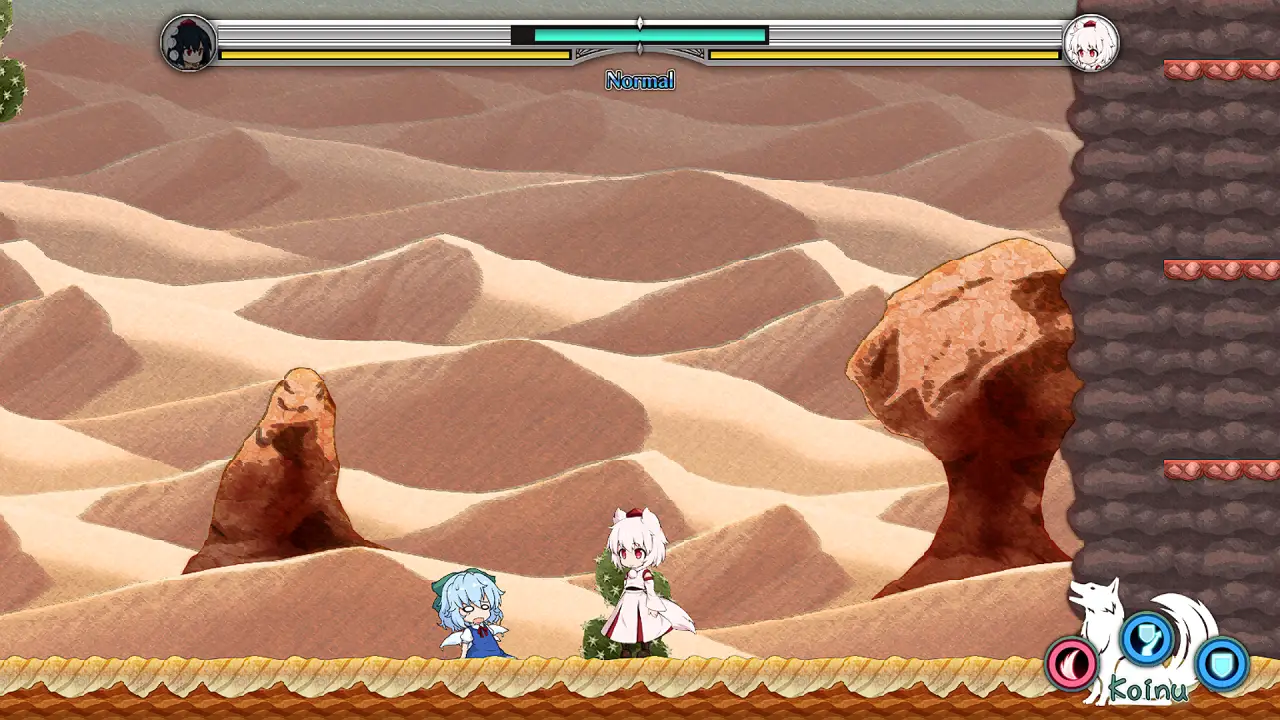
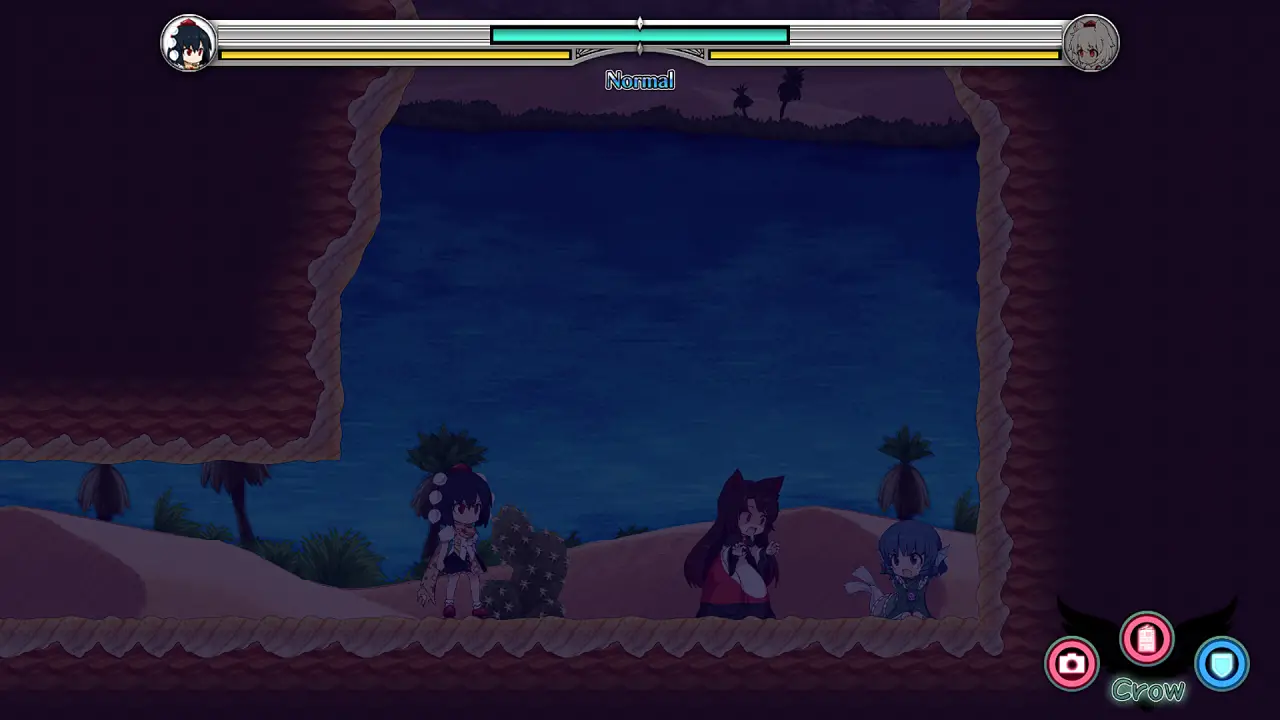
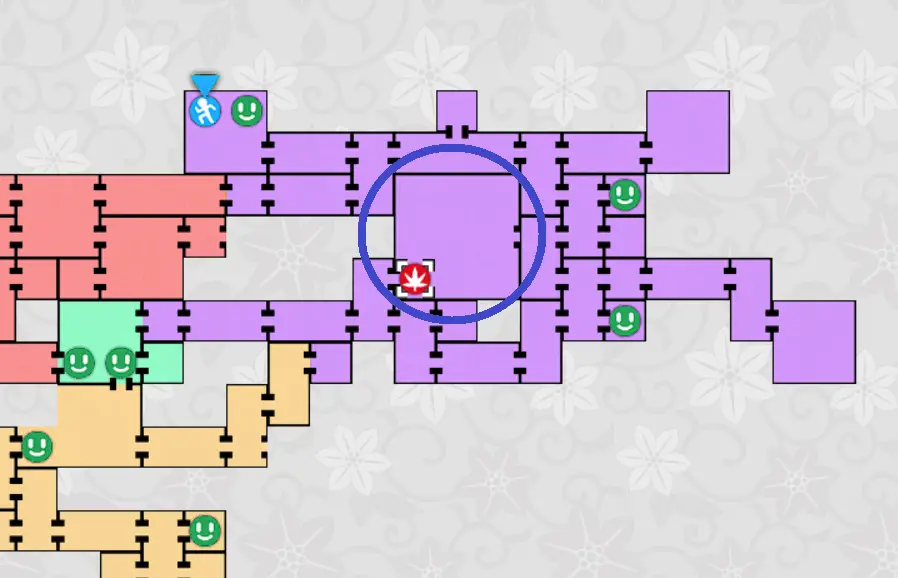
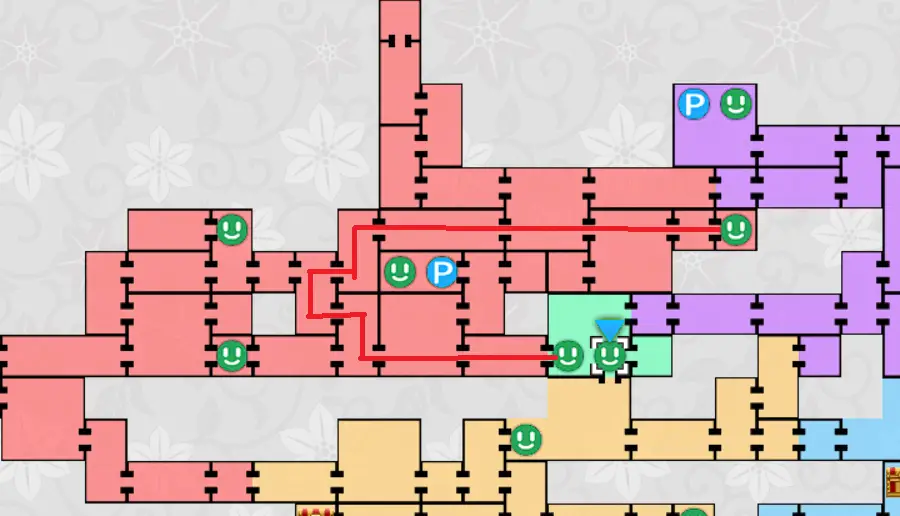
Be aware that the ability has zone where it needs to hit the enemies, you can’t be too close or too far! Image explanation below:
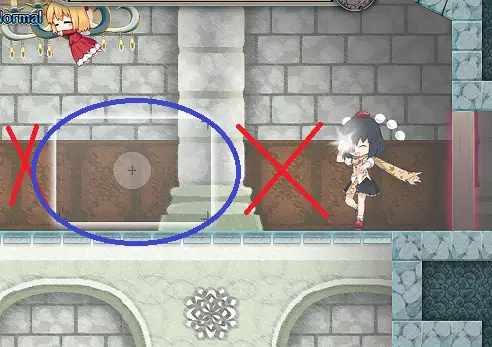
- The red crosses mean enemies in these zones will not be hit, therefore will not take damage or be added to the snap archive.
- Only enemies in the blue circle (shown in-game as a rectangle) will take damage and be updated to the snap archive.
Snap Archive will not only record enemies but also various NPCs(which we will cover later in this guide), so be sure to snap a photo before talking with them!
Some of these things are miserable and will not be doable again once missed, meaning you need to do a new save!
Getting the Pictures
There are a couple of things you should remember before we start snapping photos!
- All NPCs at least have 1 snap archive entry
- All normal enemies at least have 1 snap archive entry
- Bosses have 2 snap archive entries each: The first entry when they get hit by Perfect Shot and a second entry when Perfect shot is the finishing blow.
- Boss locations shown on this guide will show their initial location to find them. After defeating them once, you can fight them again in the base area on the right and attempt to get their photos there. Somit, all boss snap archives can be obtained in a single save.
- Some entries can unlock another achievement. This will be mentioned in this guide.
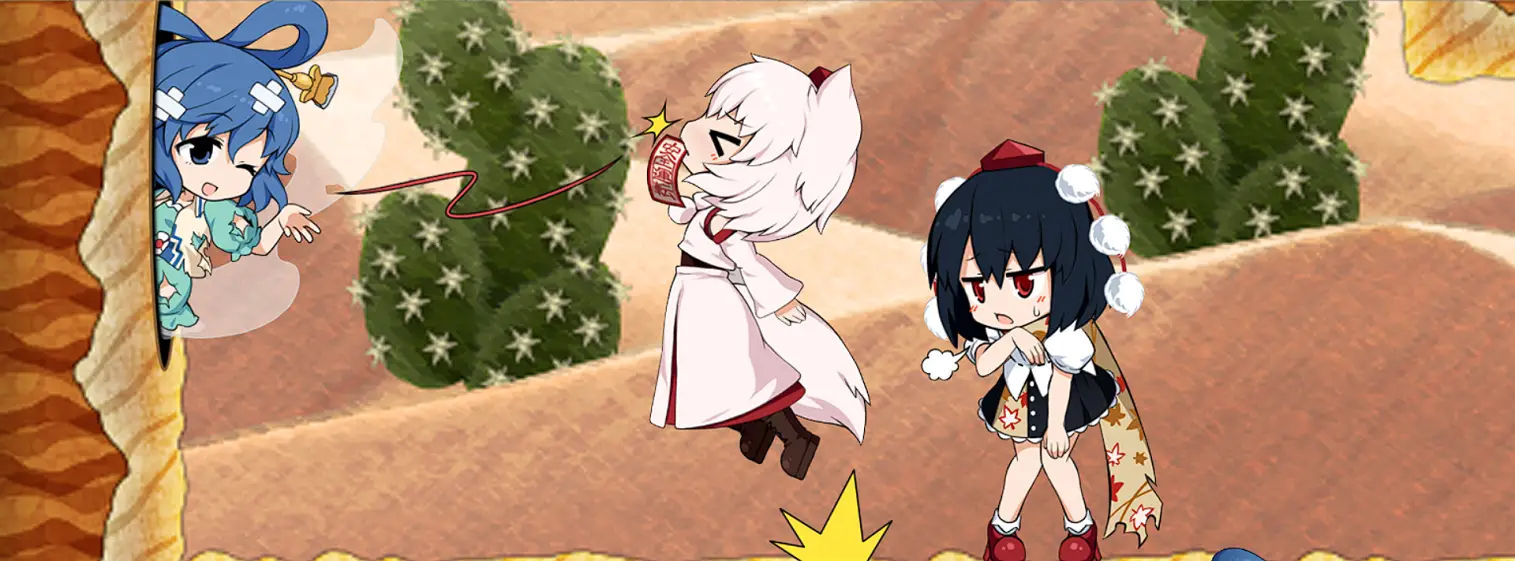
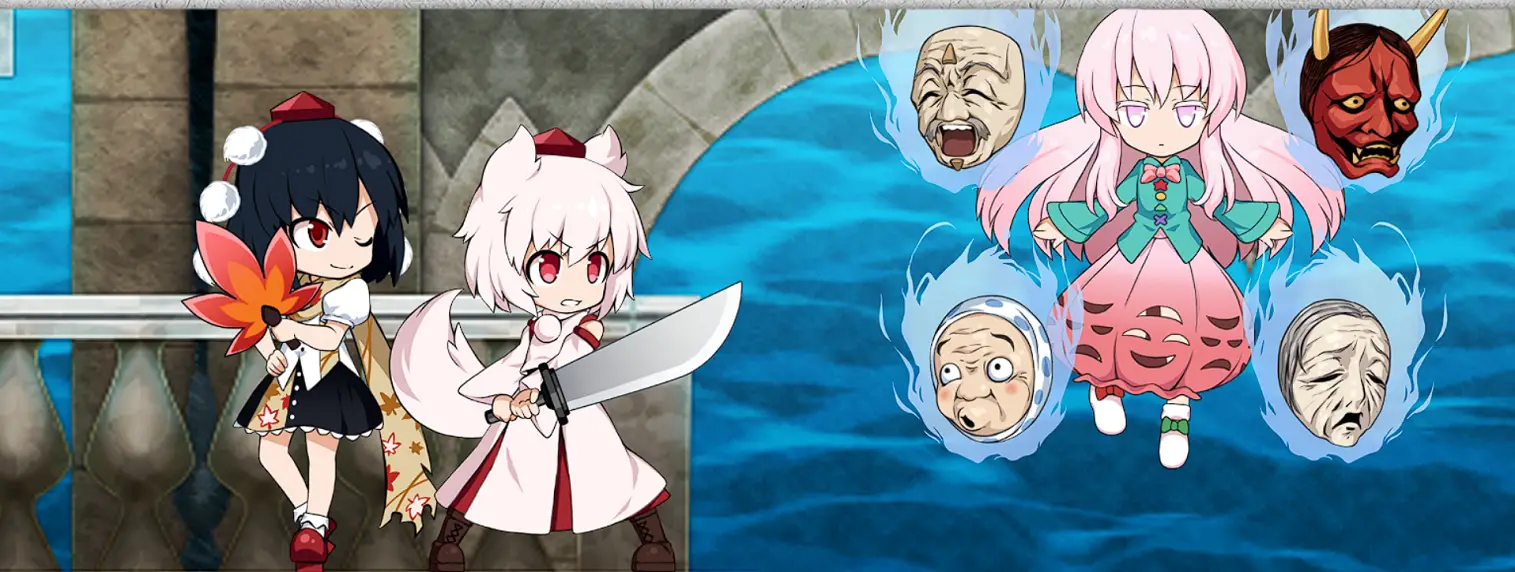
„And so the journey of completing the archive begins.. err– also solving this incident“
Base Area
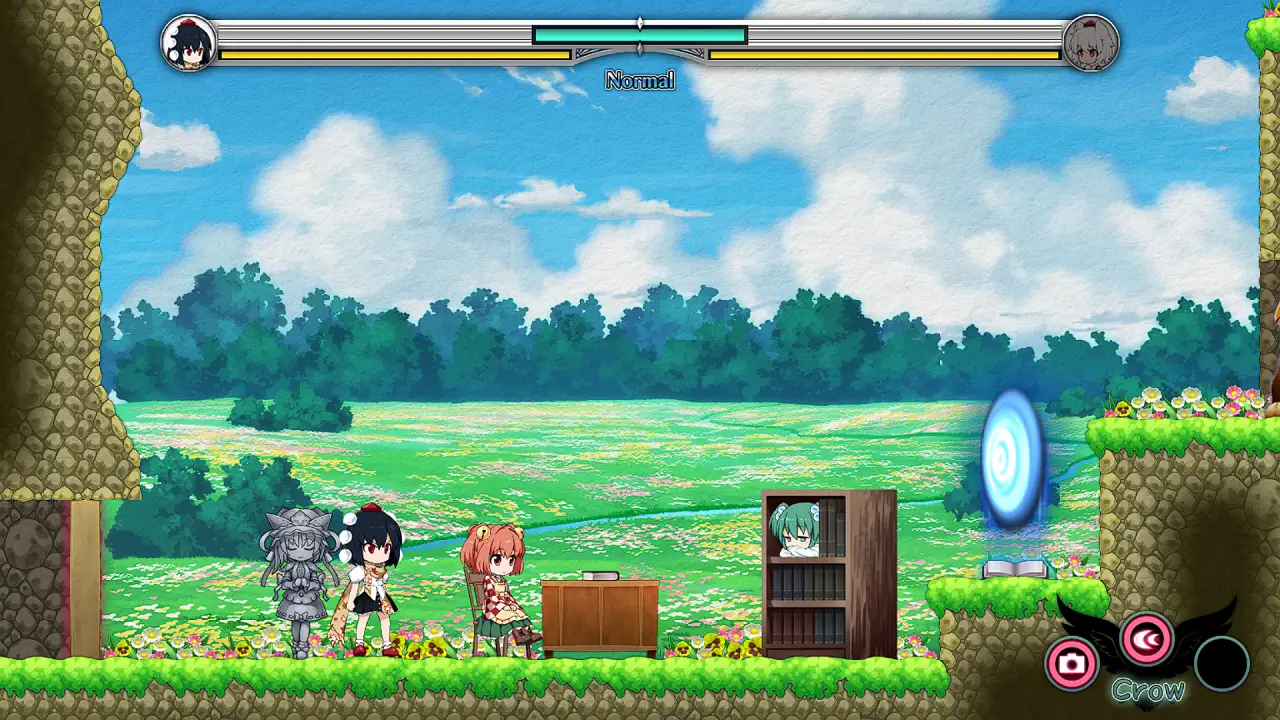
Der Base Area hat nur 2 NPCs that you can snap a photo with, and these people will be Kisume and Kosuzu.
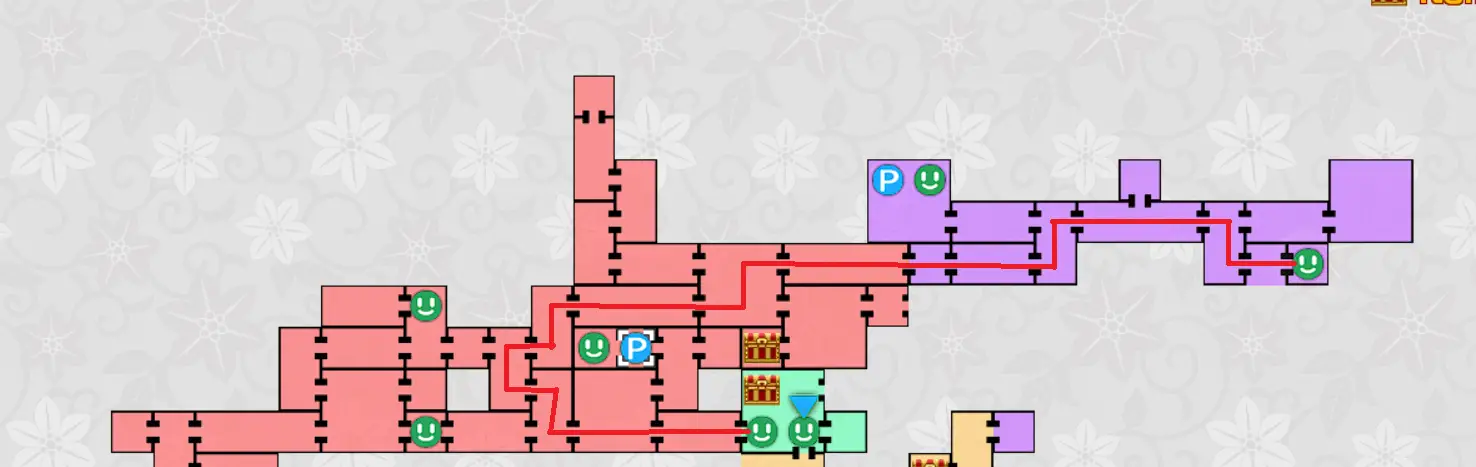
Schlossbereich
Unlike the Base Area, Die Schlossbereich has multiple rooms and a lot of enemies.
Basic Enemies
- Fairy Swordswoman
- Fairy Magician
- Fairy Knight
- Fairy hanging on a chandelier
- Fairy Pyramid Head
- Fairy riding a lion
NPCs
Patchouli Knowlege (This entry will no longer be obtainable once you „finden“ Koakuma, so be sure to snap this early.)
Sekibanki’s Head (Du kann nicht get this snap archive anymore if you picked up the head before taking a picture of it)
Sekibanki (Sekibaki has 2 Einträge: Before you return her head, and after you return her head)
Hong Meiling
Nue Honjouu
For Nue, it’s not her specifically but you need to snap a picture of the UFO in the hallway. This also unlocks the Unidentified Underground Passage Leistung
Chef – Byakuren Hijiri


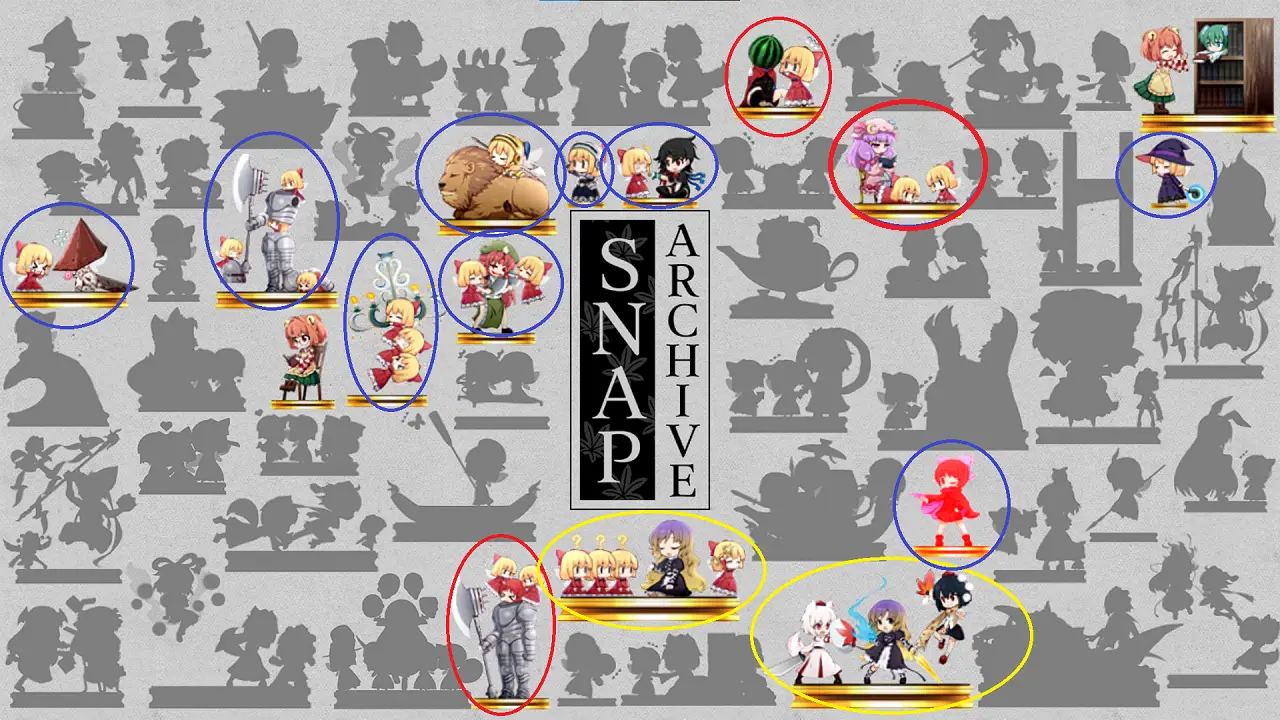
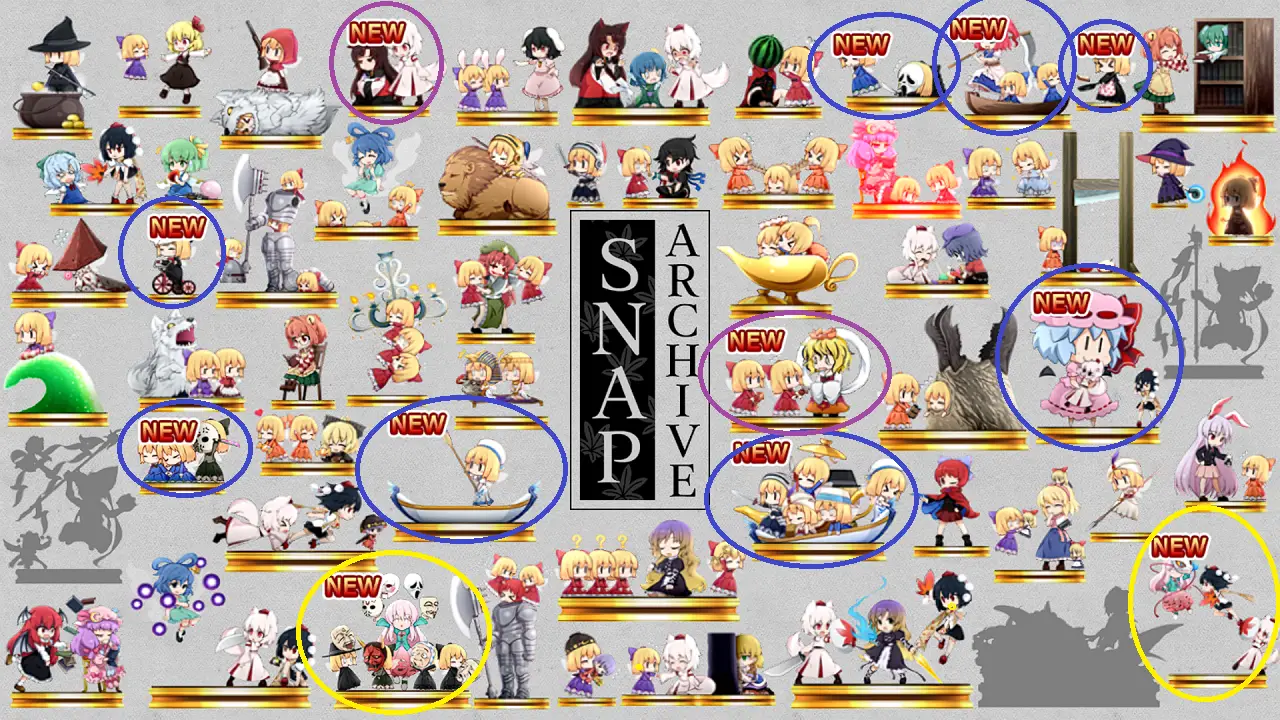
- Blue Circle means entries you cannot miss and can be obtained anytime.
- Red Circle means entries you can miss depending on your progression/what you do. It can be replaced by Blue Circle entries (like Sekibanki here).
- Yellow Circle means boss entries.
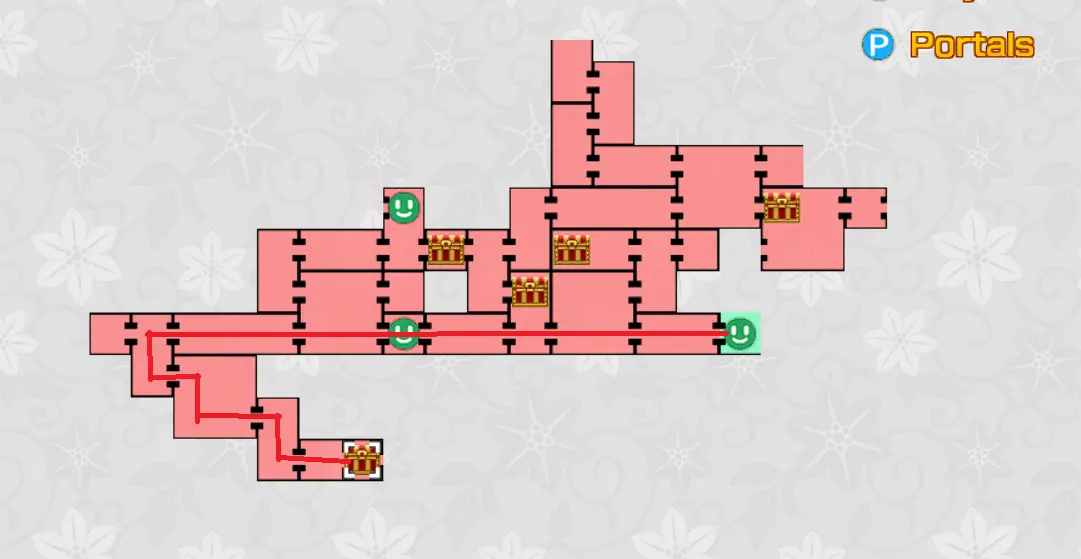
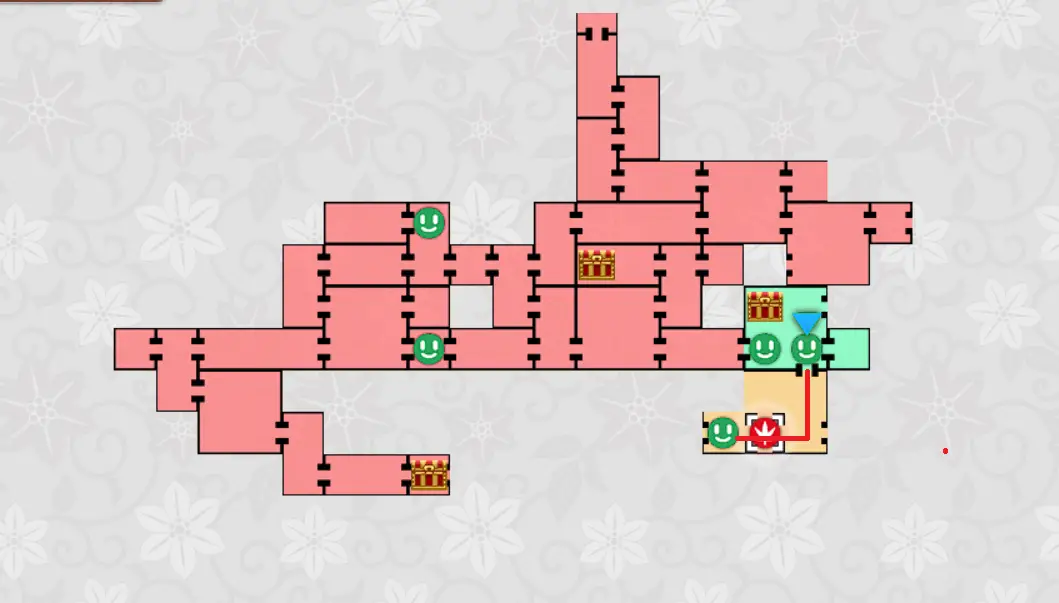
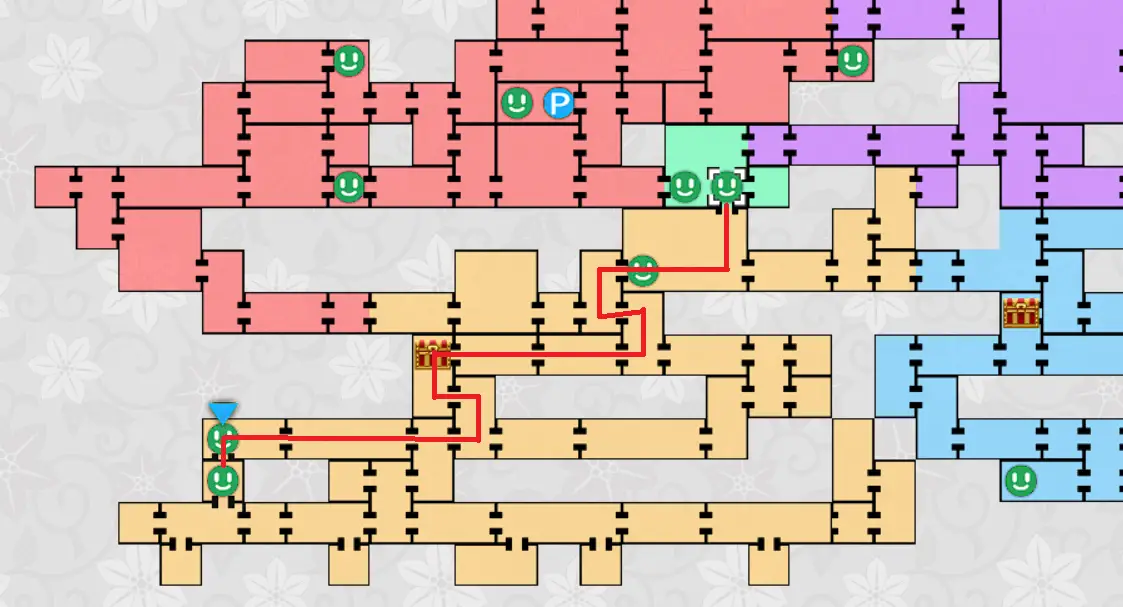
Desert Area
- Fairy Spearwoman
- 2 Fairies on a carpet
- Fairy in a lamp
- Fairy with snappers on her head
- Fairy that buries underground
- Fairy on a Guillotine
NPCs
Cirno
Yamame Kusodani
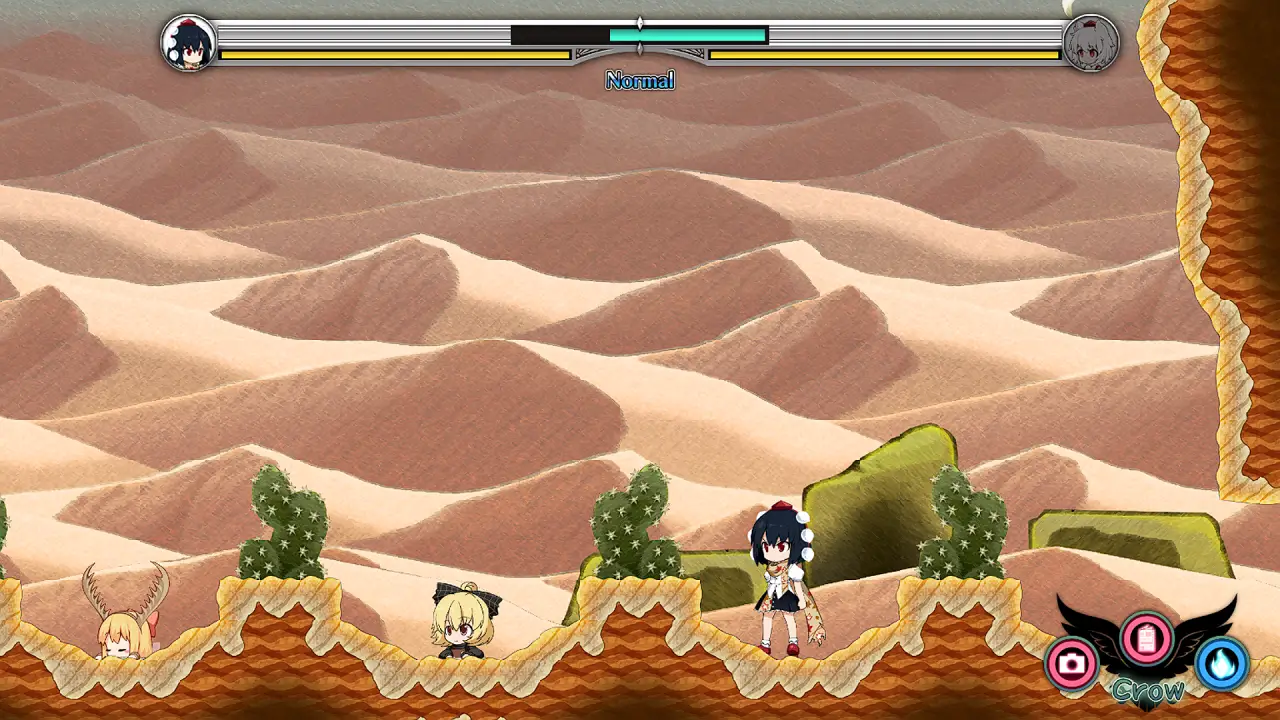
Kageou and Wakasagihime (This will disappear once you manage to calm Kagerou down, so be sure to snap this early)
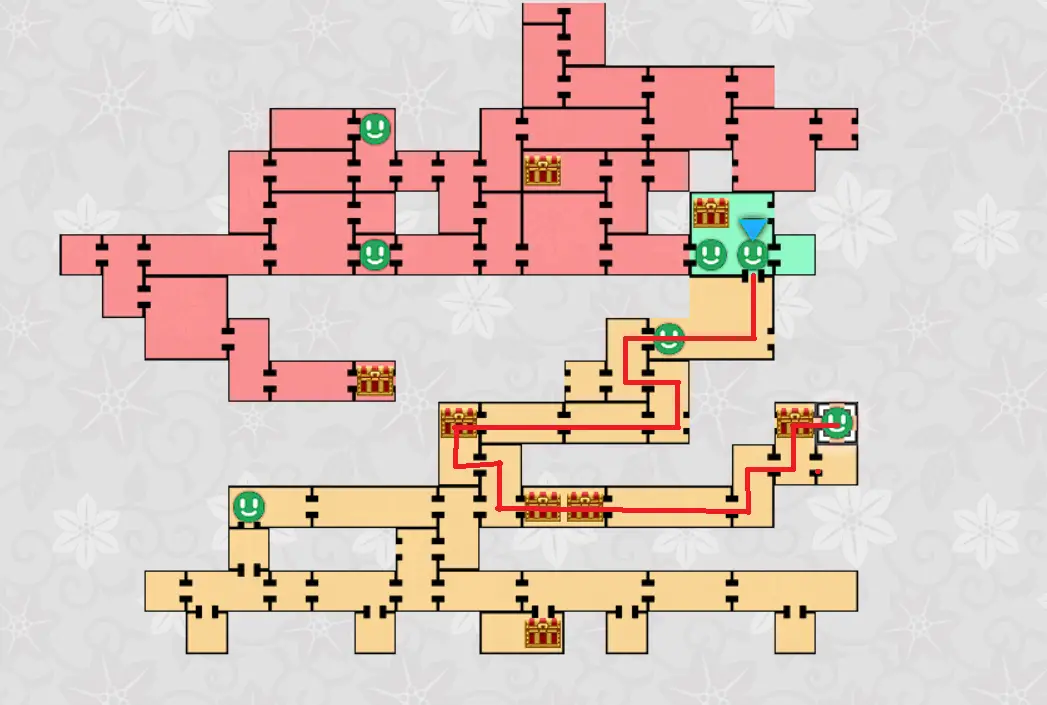
Yoshika
While Yoshika is actually in another area (not desert), she’s an isolated case and you can only access her by going to the desert so she’s included here. (Her entry is only obtainable before you give her the Talisman so be sure to snap this first before giving it)
Boss -Seiga Kaku
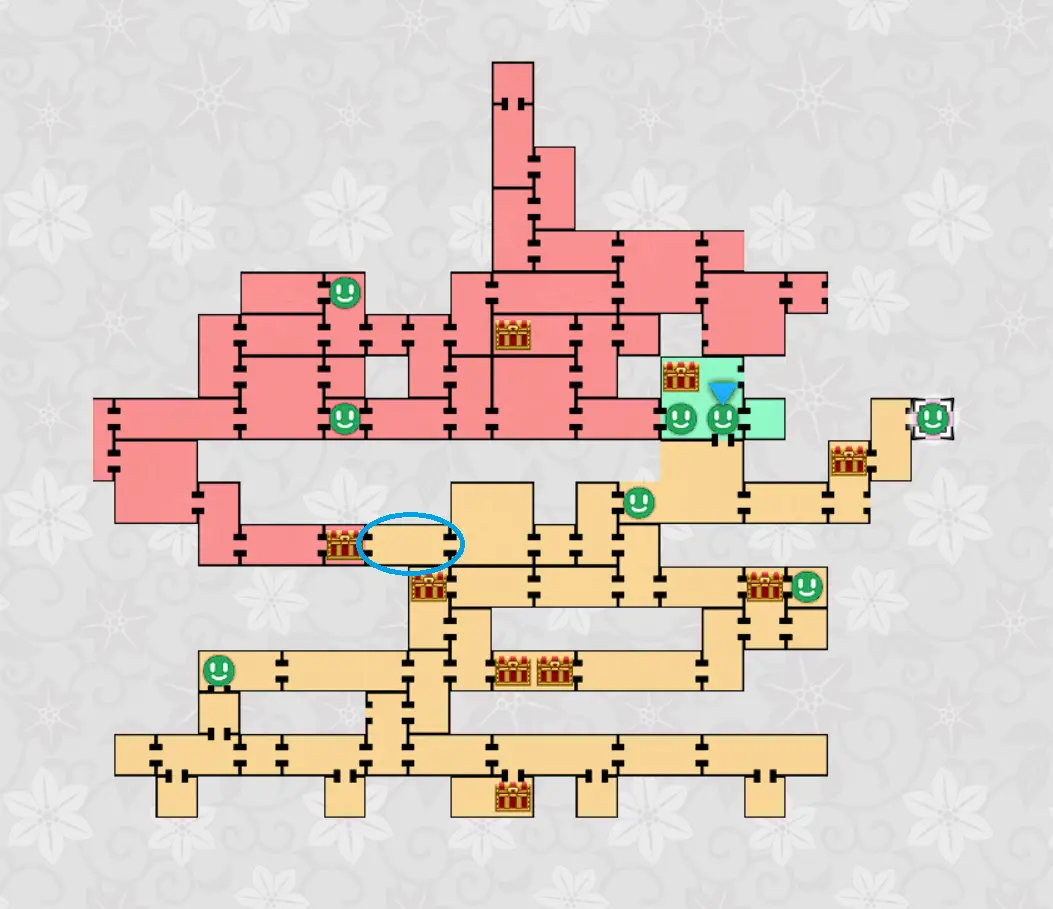
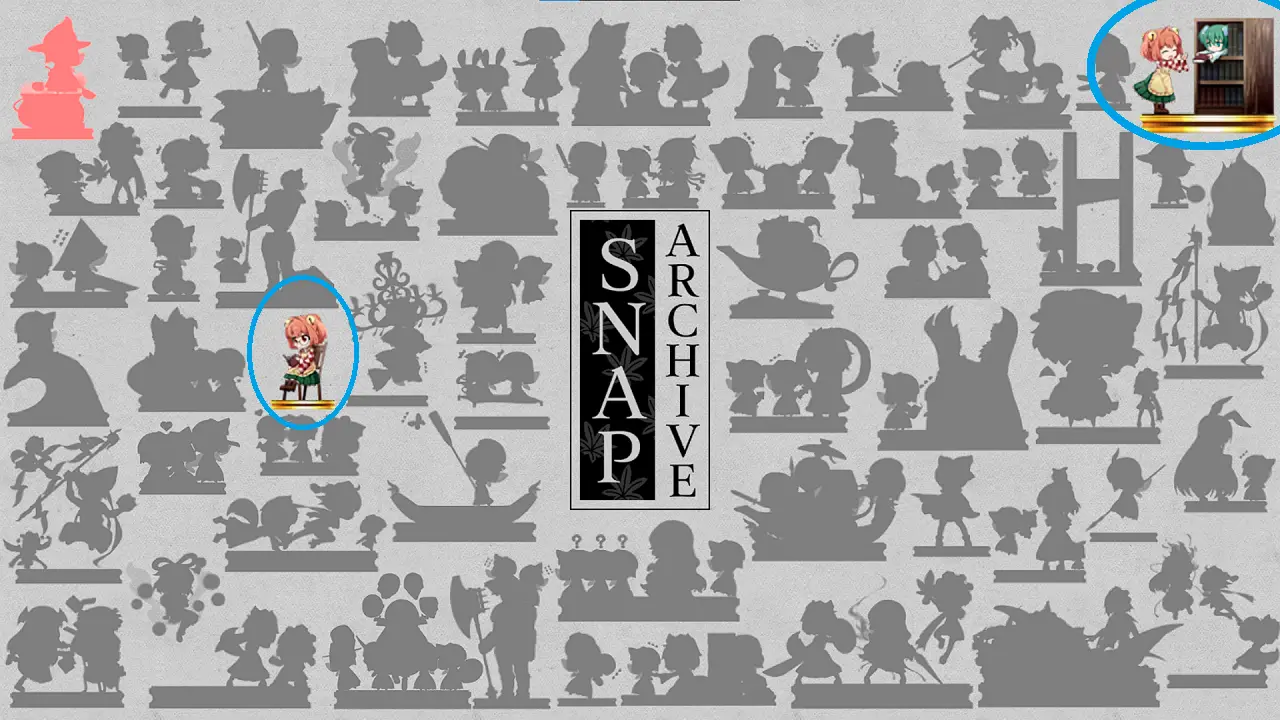
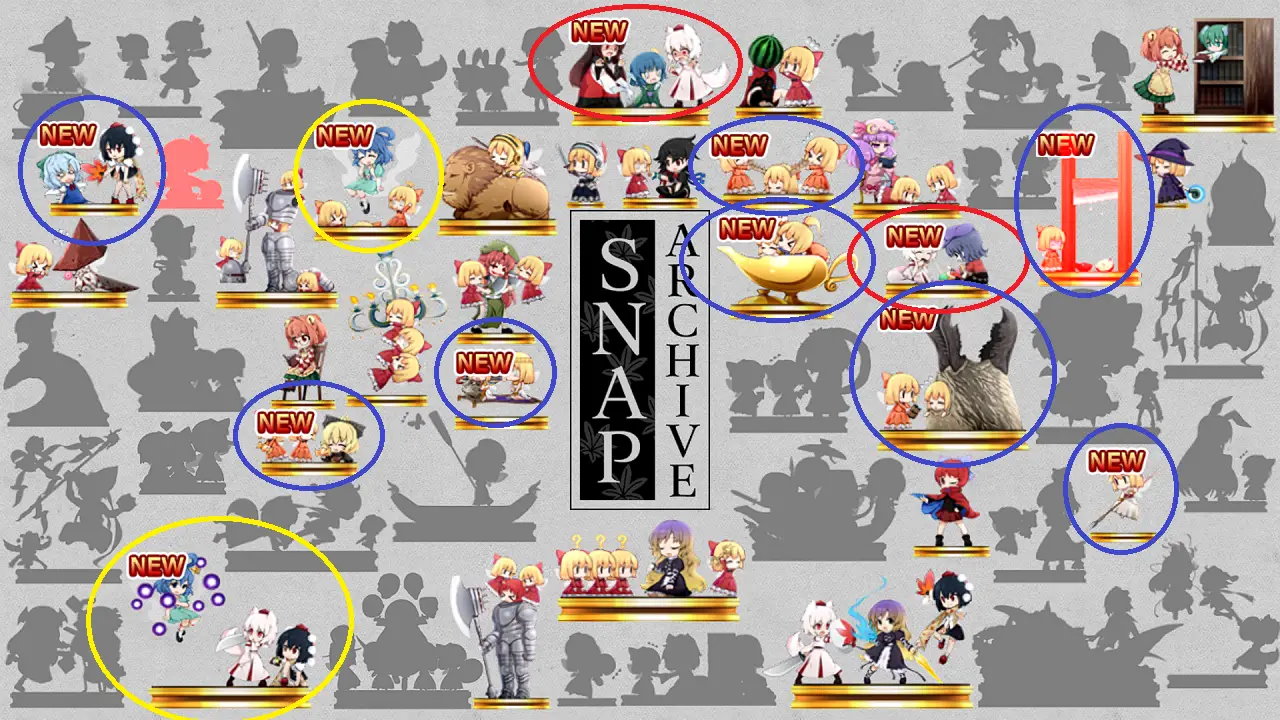
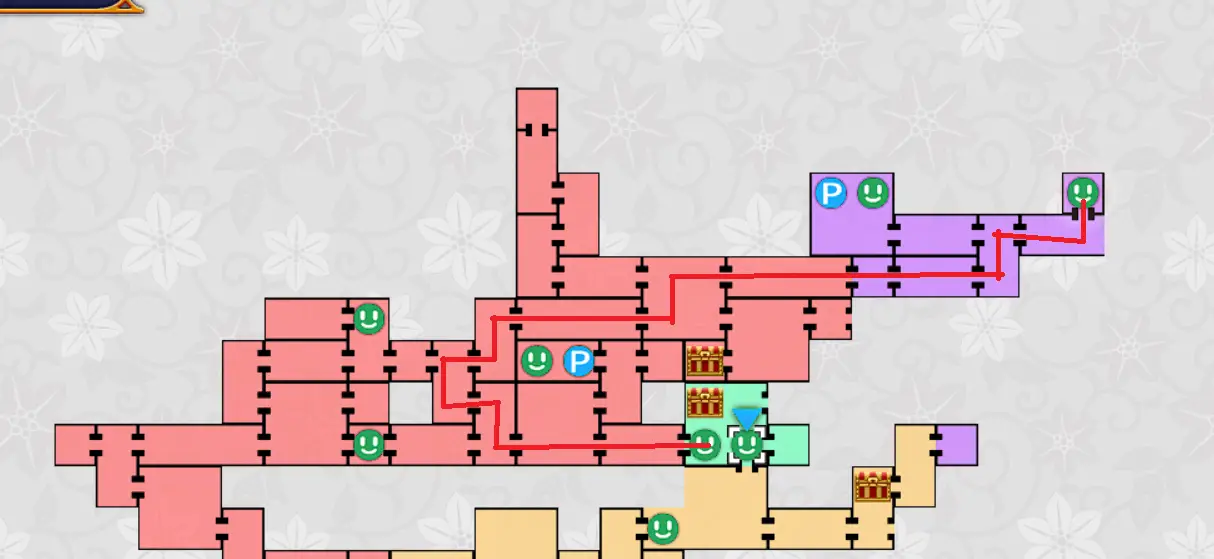
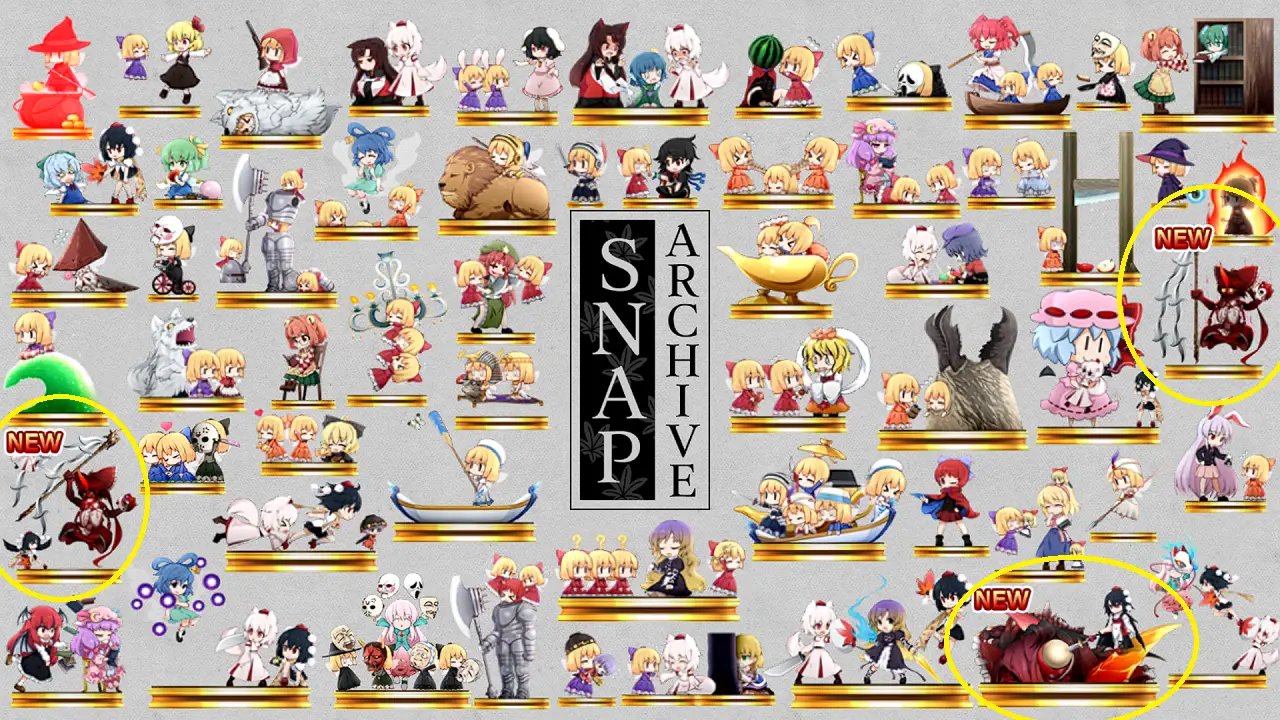
Snap Archive after all of this should now look like this
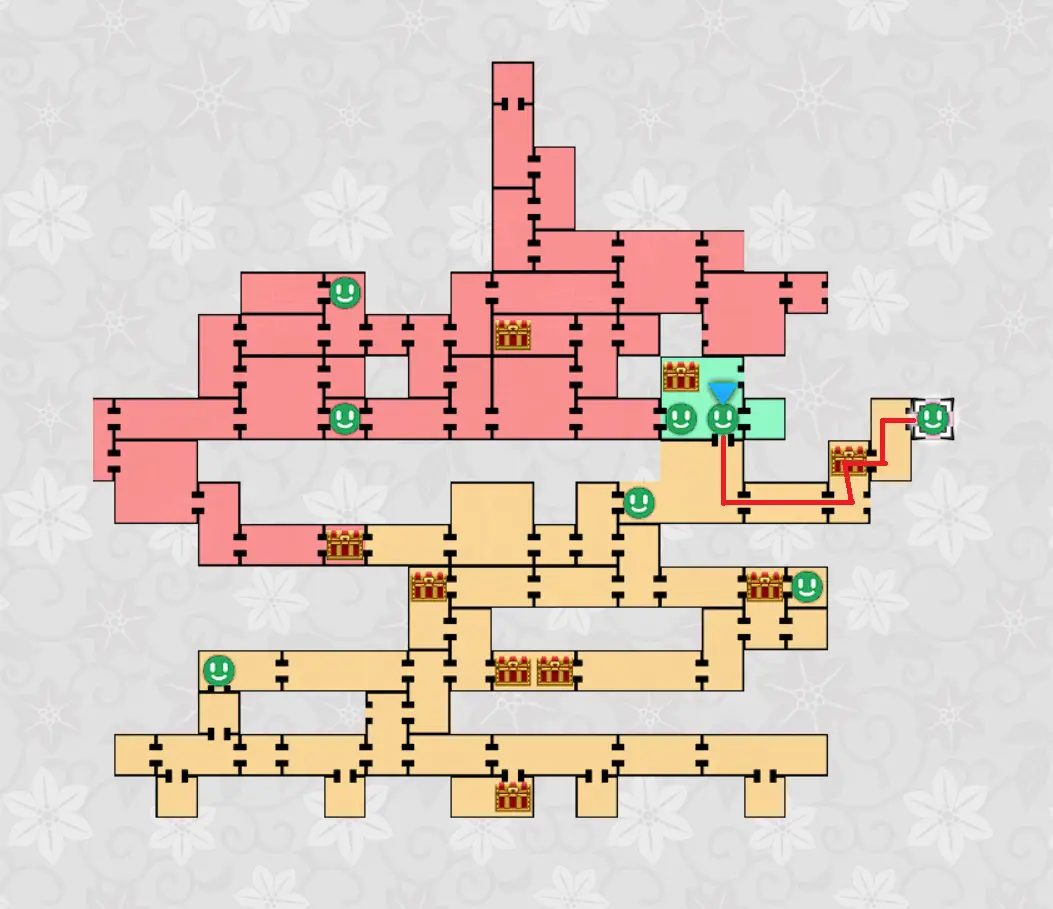
Fairy Tale Area
- Wolf Fairy
- Fairy with a gun
- Fairy that throws matches
- Snow White Fairy
- Swimming Fairy
- Fairies with a cauldron
Rumia
Alice Margatroid (Alice’s only available BEFORE you talk to her, so be sure to snap before you talk with her)
Daiyousei
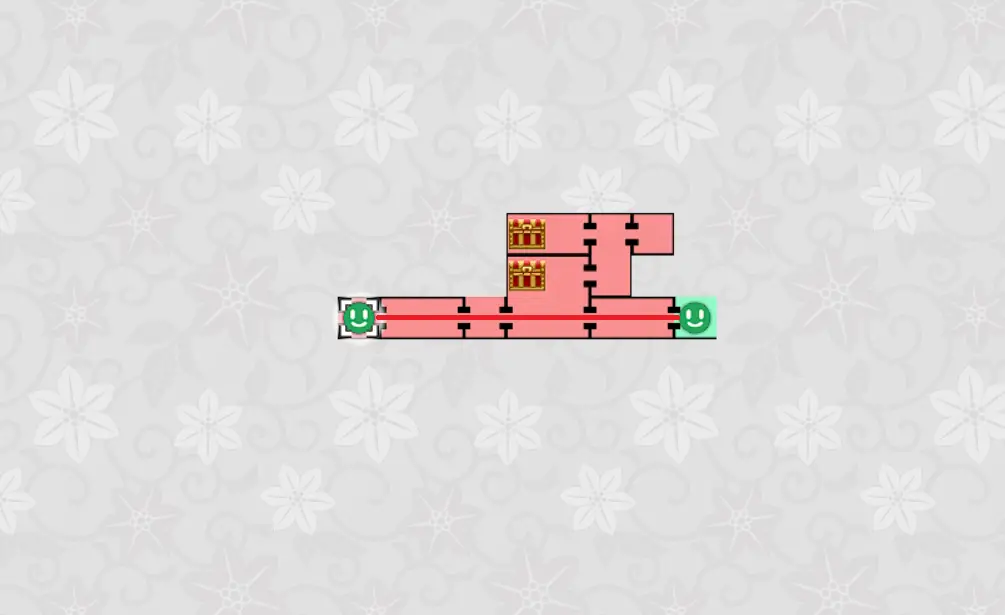
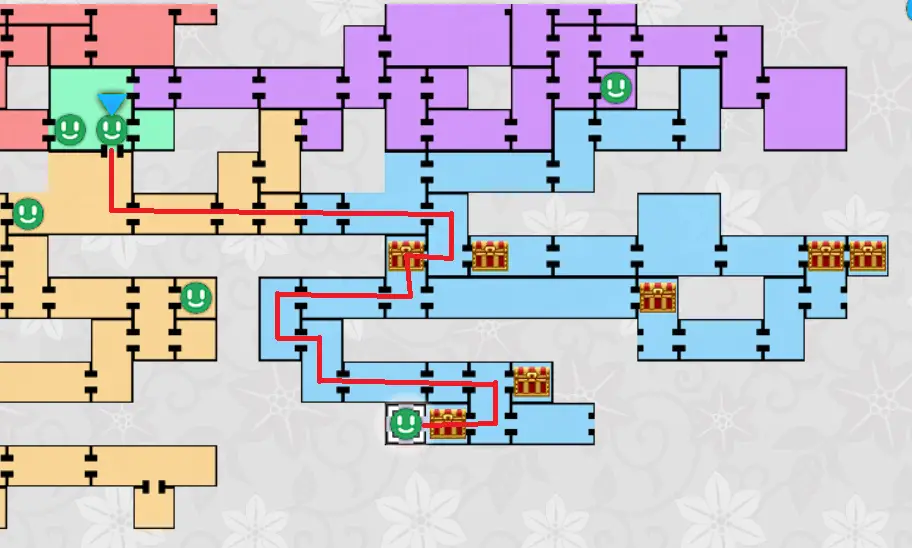
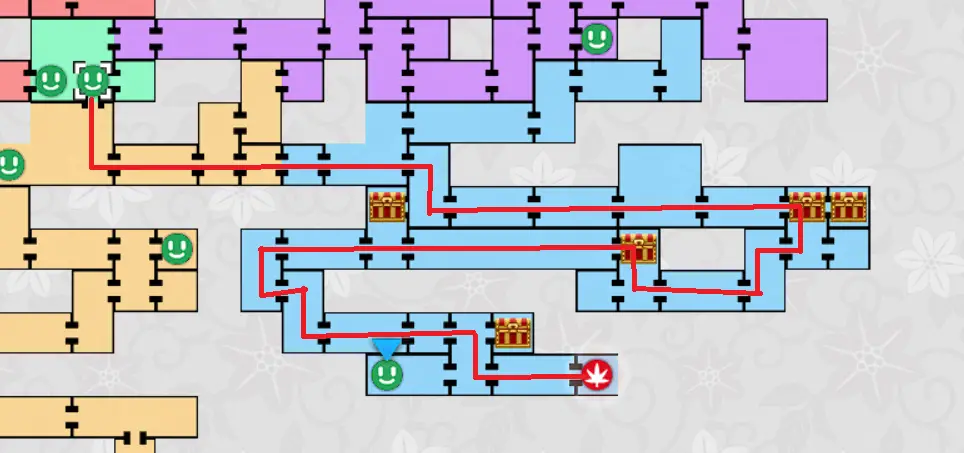
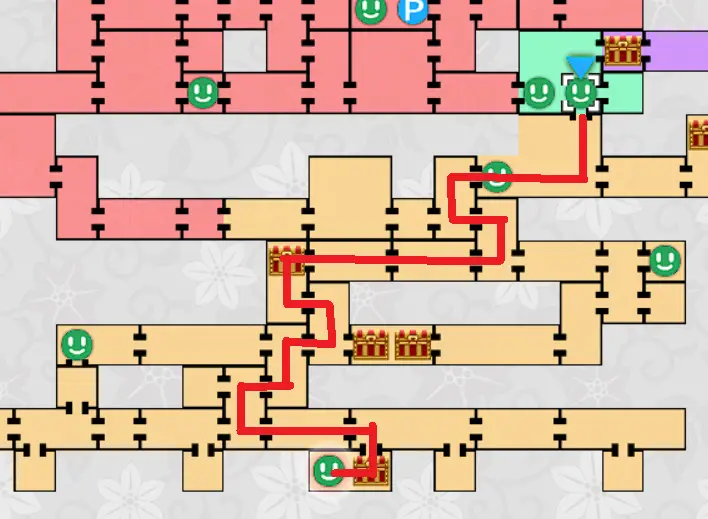
Tewi Inaba
Here I showed 2 Routen: Red is from the base without the crawl ability while Yellow is the route with the crawl ability. Taking to Tewi and getting gut punched will unlock Reisen in the Desert area.
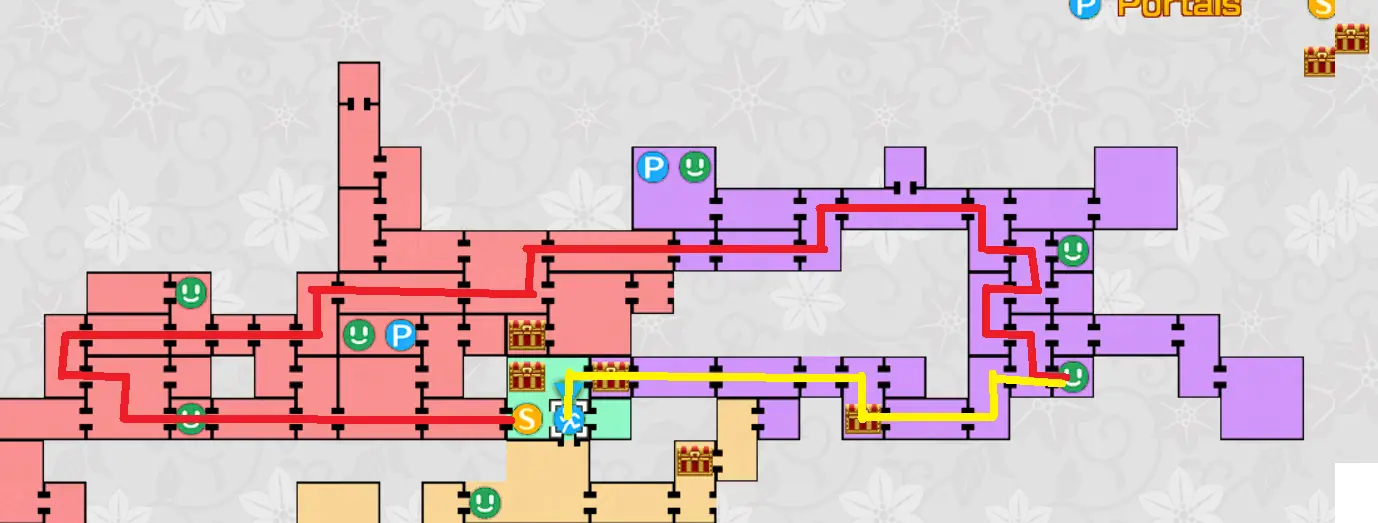
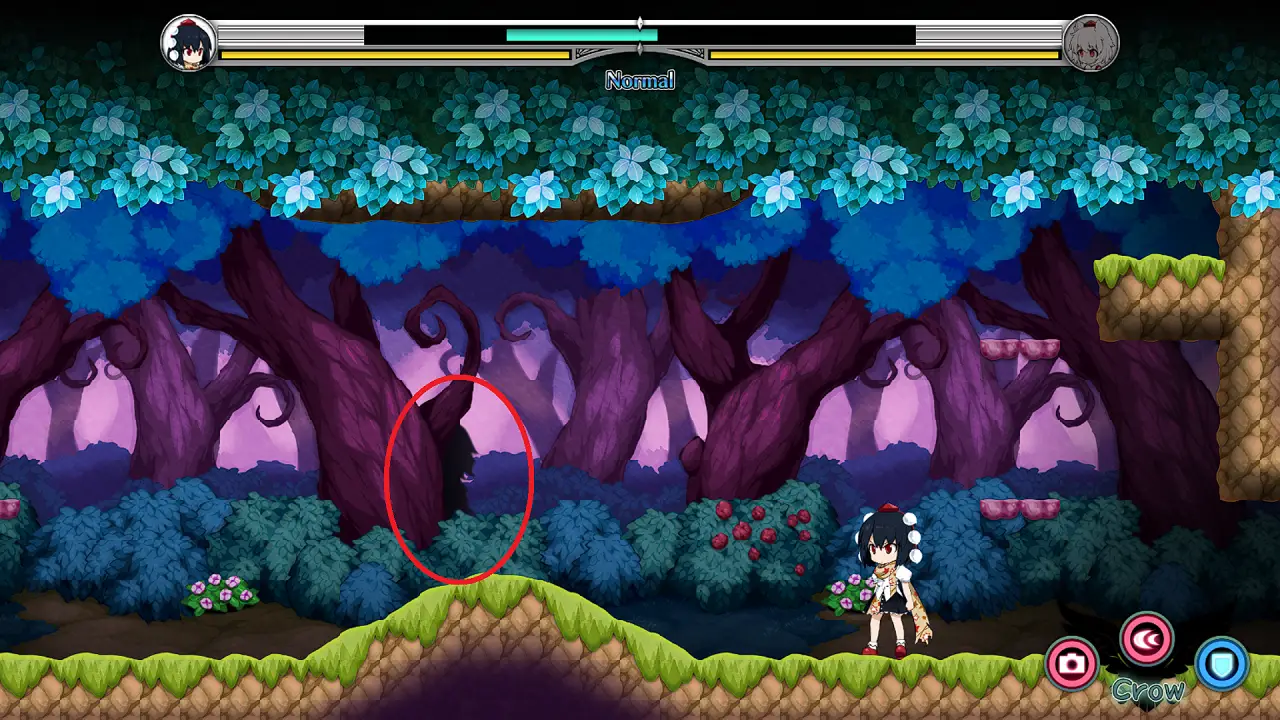
Parsee Mizuhashi
Like Nue, Parsee is not seen directly but rather hidden behind a tree. Take a snap of the tree that has a shadow figure and she’ll be saved in the snap archive. Also unlocks the Eyes of Jealousy Leistung.
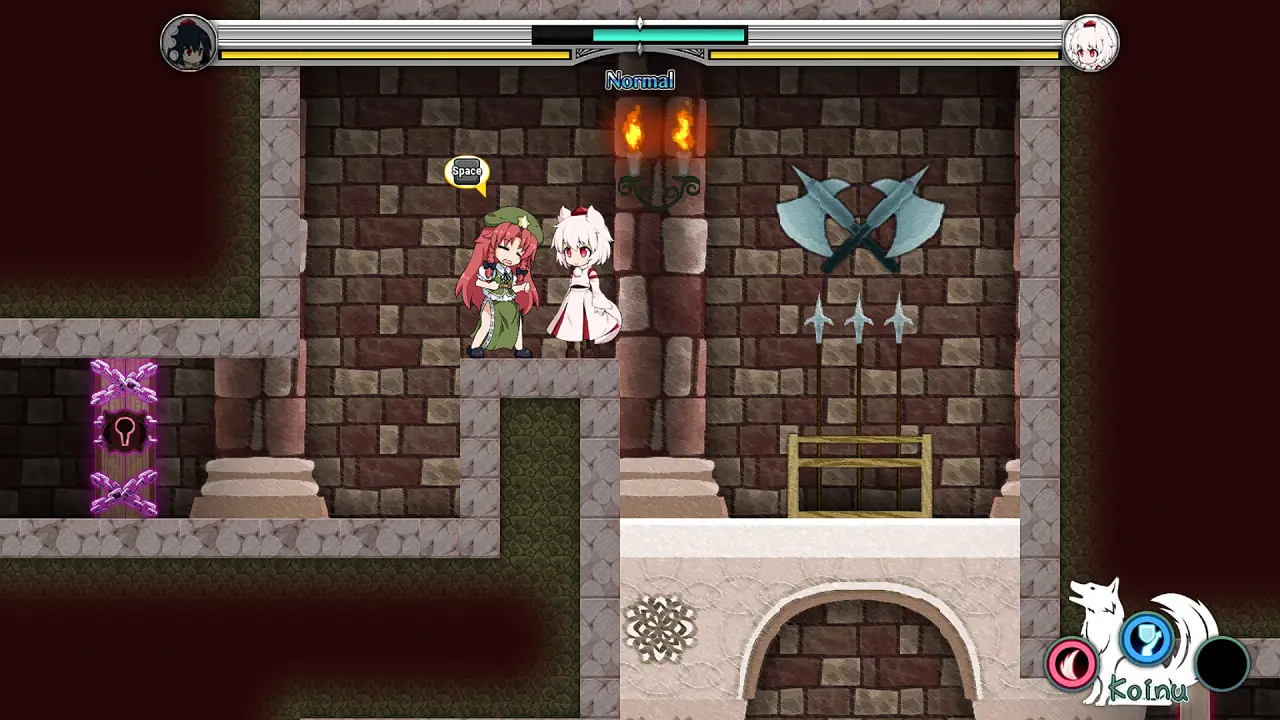
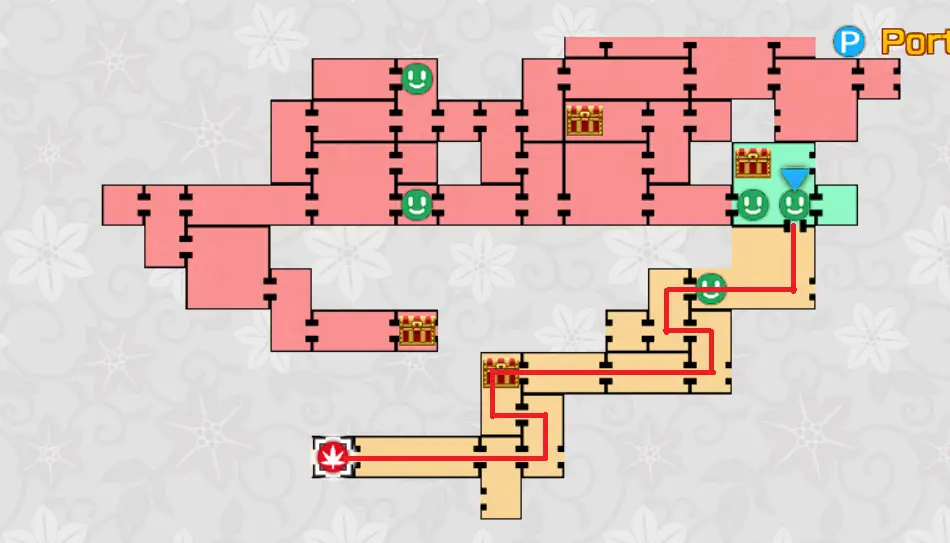
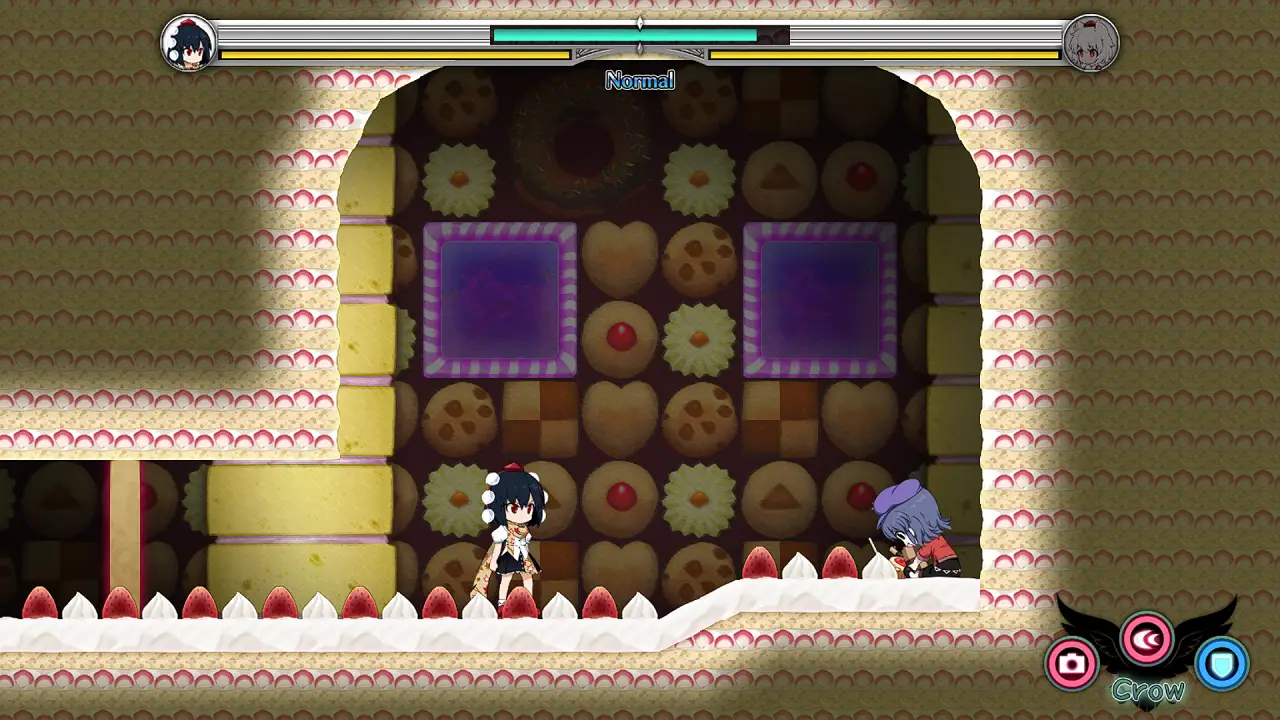
Chef – Shinmyoumaru Sukuna
Unlike most bosses, Sukuna’s snap archive entry is actually unlocked in a different way. Since you guys would be fighting in a race, you’ll need to snap photos of Sukuna while she’s not moving.
You need to snap photos of her while she’s in these places for both entries.

Nachdem ich sie besiegt habe, you can now unlock Koakuma&Patchouli’s snap entry.
-
- Purple circle means entries you need to backtrack too after acquiring certain abilities/talking to someone. Check this part of the guide to read about it.
Water City Area
- Fairy that throws knives (and doesn’t die)
- Mafia Fairy
- Fairy with Jigsaw’s mask
- Fairy with a spooky mask
- Fairy with a boat (This fairy has 2 Einträge: While it’s alone and another snap when she’s carrying some other fairies)
NPCs
Remilia(?)
Komachi

Chef – Hatata no Kokoro
Nachdem ich sie besiegt habe, you can now unlock Kagerou’s snap entry.
Snap Archive after all of this should now look like this
Bulletpad Area
This area is super unique, and it only contains snaps for the bosses itself.
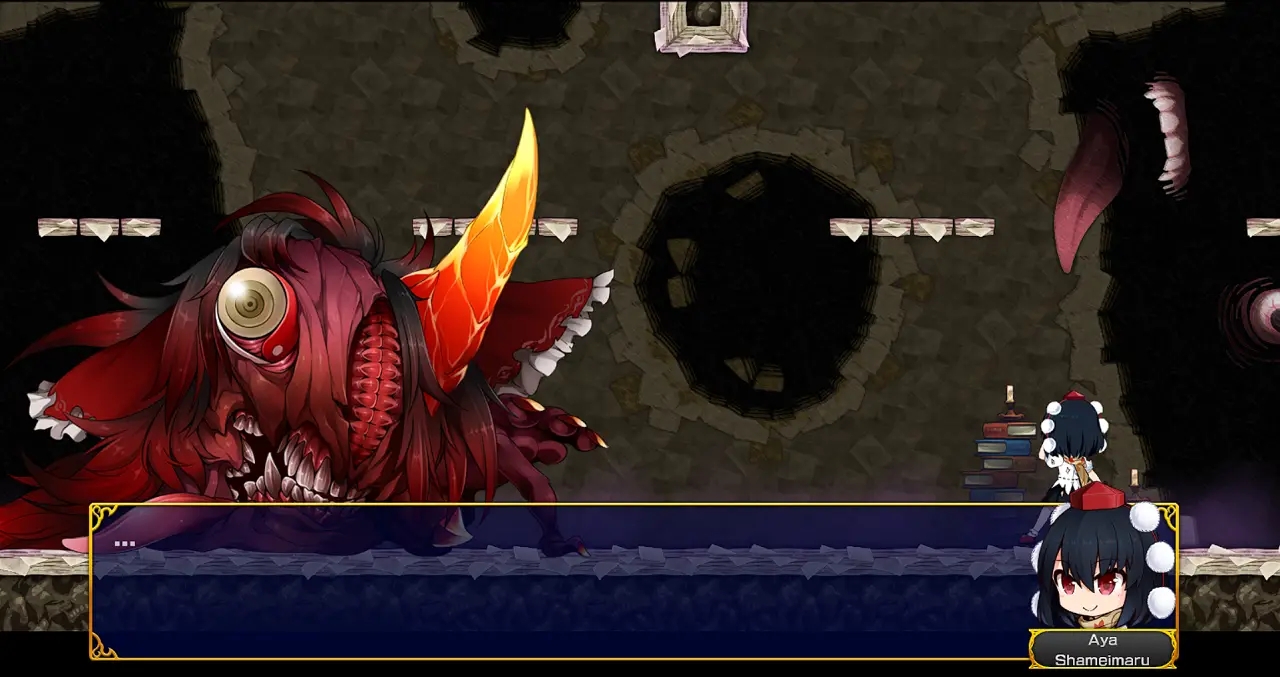
Chef 1 – Hakurei Demon
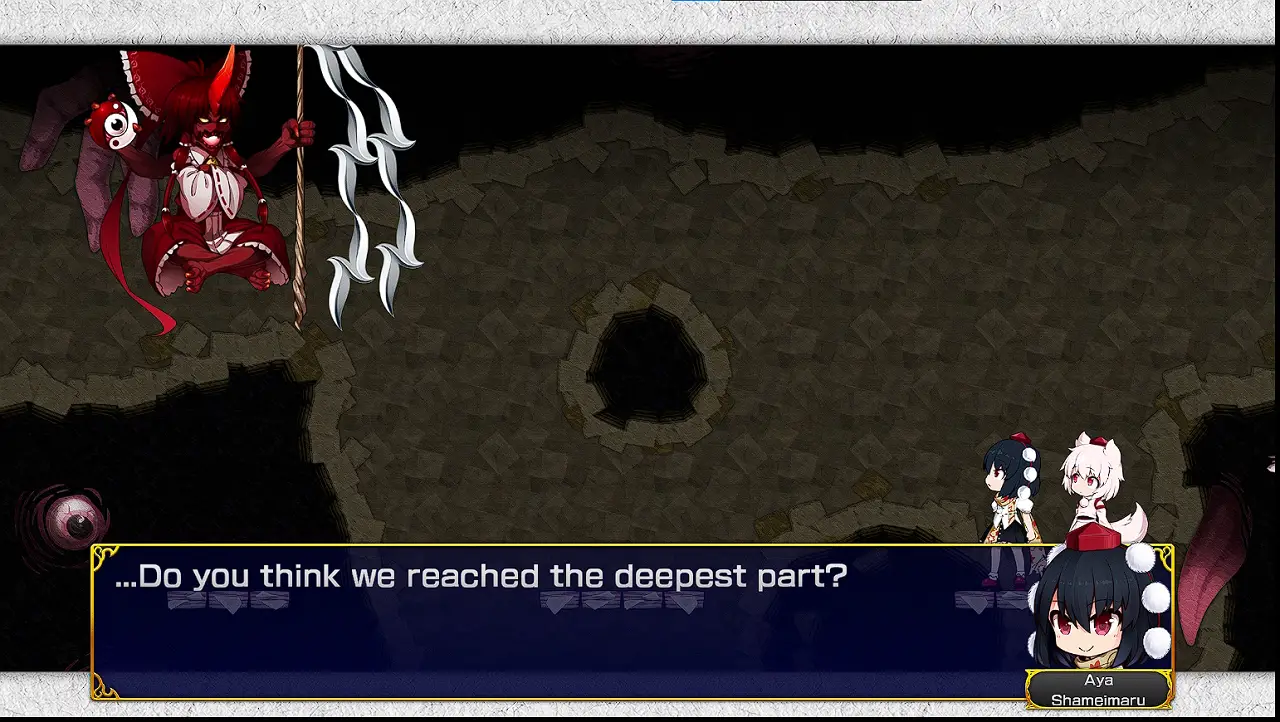
Chef 2 – Grotesque of Horror (not the real name, I have no idea what’s the real name)
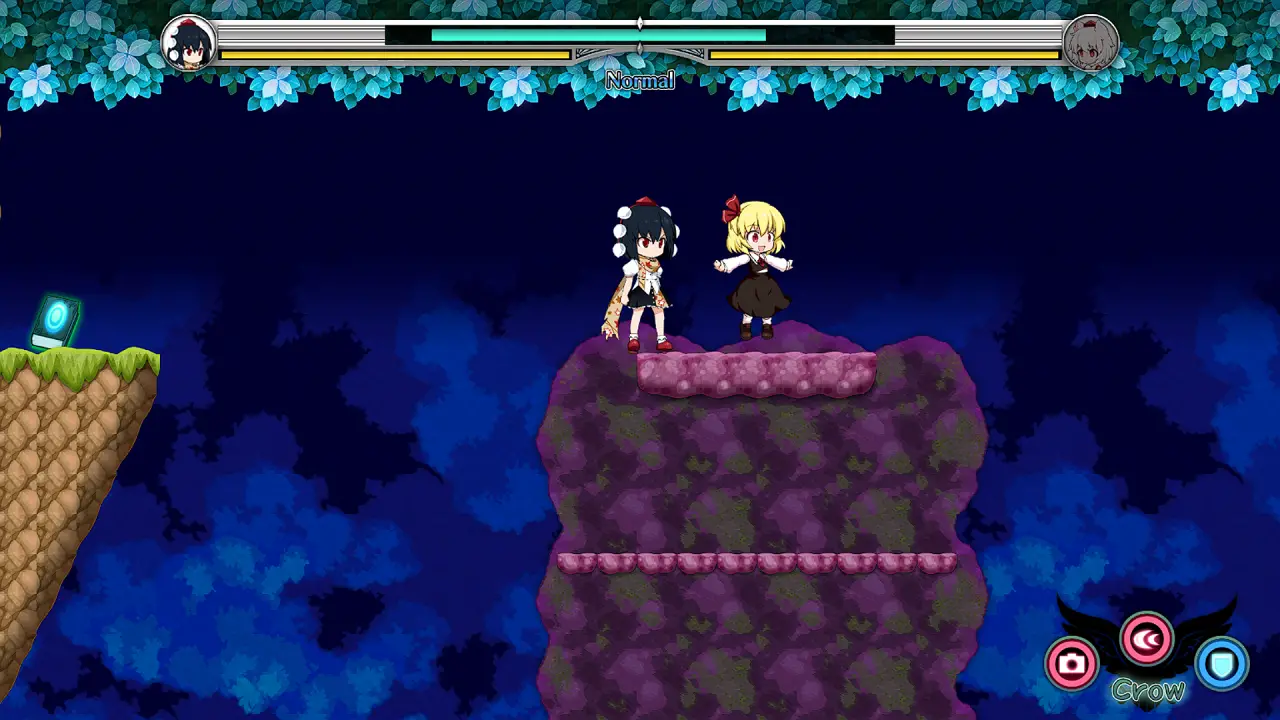
Unlike all of the other bosses, you only need to defeat this boss in order to get the Snap photo.
Snap Archive after all of this should now look like this
Other Snap Entries
Some entries only get unlocked after a specific progression, which is noted in the other parts of this guide earlier. Those parts are covered here so people won’t get confused if they’re reading this while playing the game progressively.
Reisen Inaba (Desert Area)
Reisen is only unlocked once you manage to talk with Tewi. Wenn Sie es nicht getan haben, she will not appear in this area. (Her entry is only obtainable before you talk to her, so make sure you snap a picture before talking with her).

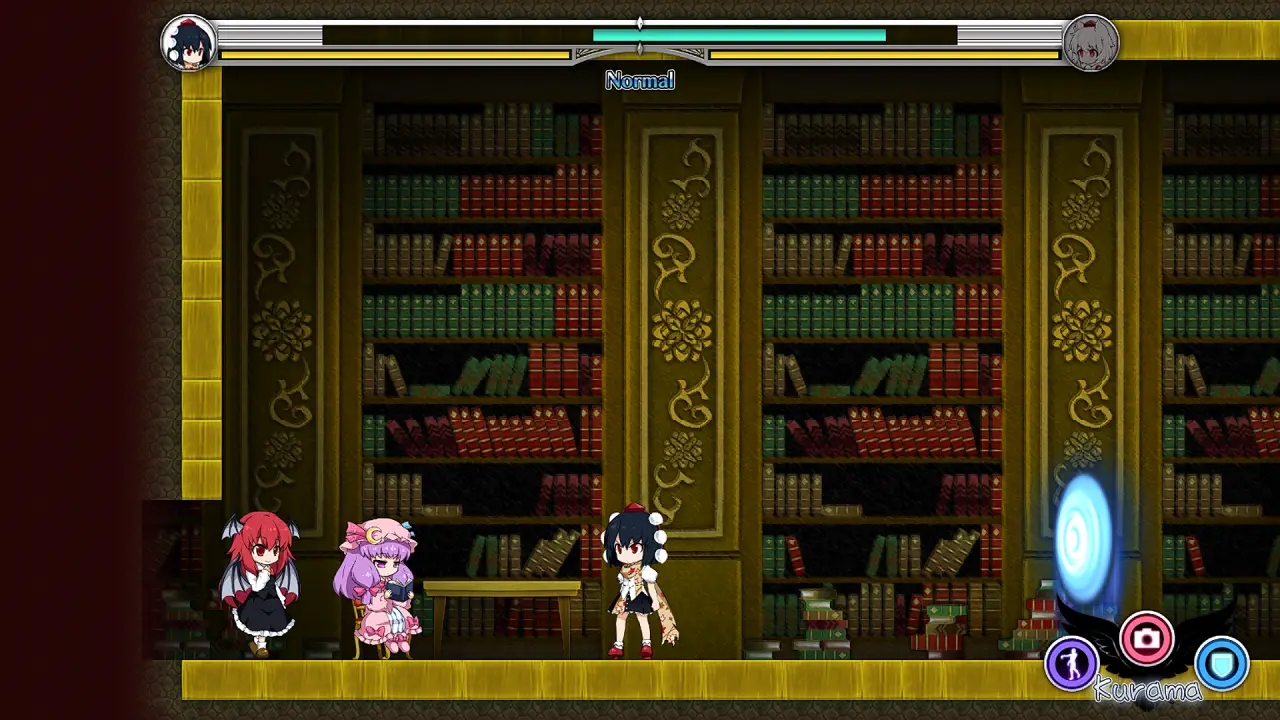
Koakuma and Patchouli (Schlossbereich)
You can only get this after defeating Sukuna, which unlocks the crawl ability. Crawl under the desk where Koakuma is lying and start the conversation, then snap a photo.
Shou Toramaru (Schlossbereich)
You can only get to her after talking to Komachi and then to Kosuzu.
Kagerou Imaizumi (Desert Area)
You can only get to her after defeating Kokoro, then calming her down with the Mask on her previous location with Wakagasihime. She then moves to a different location where you can get the photo.
Talented Journalist
Glückwunsch! You’ve completed the Snap Archive!
Indem Sie dies tun, you should have obtained the following achievements:
- Unidentified Underground Passage
- Eyes of Jealousy
- Photo Finish
Das ist alles, was wir heute dafür teilen Douhou Doppelfokus Führung. Dieser Leitfaden wurde ursprünglich erstellt und geschrieben von Misuki. Für den Fall, dass wir diesen Leitfaden nicht aktualisieren können, Sie können das neueste Update finden, indem Sie diesem folgen Verknüpfung.