- Titel: Aus den Tiefen
- Veröffentlichungsdatum:
- Entwickler:
- Herausgeber:
Informationen über die Tiefen sind noch unvollständig. Bitte helfen Sie uns dabei, die Details des Spiels auszufüllen Kontaktformular.
Want to turn a light on and off with the same button? Fold wings back and forth? Submerge and Surface?
This guide shows the way I know to make a toggle/switch that lets you change from one state to another at the press of a single button.
Haftungsausschluss
This is one way ICH know of creating a toggle/switch using ACBs. If there are alternative and/or easier ways, I haven’t been able to find them, so if you know of other/easier ways, Bitte hinterlassen Sie einen Kommentar.
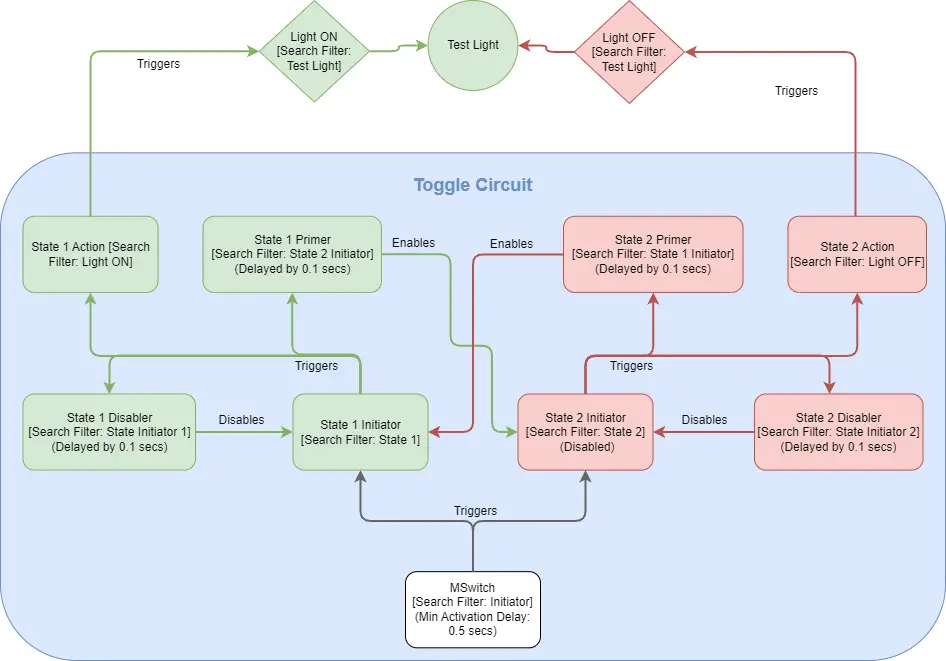
Flussdiagramm
I will use the example of turning a light on and off (setting intensity to 30% Und 0% jeweils).
The actual toggle itself will need at least 9 ACBS. These won’t do anything on their own, but we will get to that.
Here’s a flowchart to hopefully aid in explaining how this work.
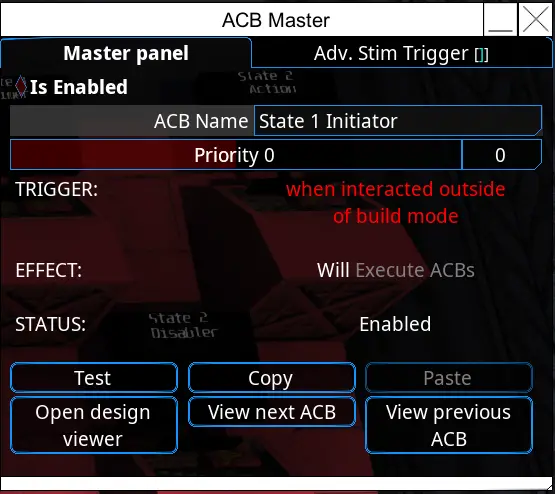
MSwitch
MSwitch (Master Switch) is the first ACB. Triggering it is essentially the flicking of the light switch.

Replace the Prefix with something relating to the function this Toggle will affect. In unserem Fall „Light MSwitch“ will work. If we then use an ACB Controller we can create a button and set its Search Filter to „Light MSwitch“.
Stellen Sie auf ein Interaktion unless you want it to trigger through other events. Setting it to Interaktion is in my experience a good way to ensure it does not trigger unless it gets executed.
Set this to 0.5 to prevent repeated activation (you might get away with setting it as low as 0.2, but I stick with 0.5).

Note that all of the other ACBs going forward will have their Condition set to Interaktion, so their section will only include the Zustand if there is something unique to be set there.
- Ziel ACBS

- Set the Action to Ausführen and put „Initiator“ into the Search Filter.
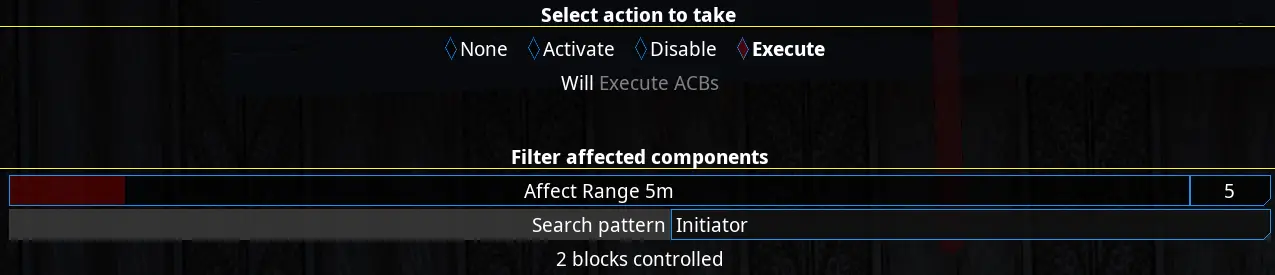
Affect Range depends on how far away you place the other ACBs. If you place them closer, you can reduce the Affect Range. This will prevent other nearby Toggle/Switch Circuits from being triggered by this one.
State 1 & 2 (Initiators)
The next two ACBs will be beginnings of the two separate chains of ACBs that will make this toggle work. They are nearly identical in setup.
Let’s start with the Master window this time.
Name one of the two „State 1 Initiator“ und der andere „State 2 Initiator“. Der „Initiator“ is the important part here, as the MSwitch is set up to search for that word.
Deaktivieren eins of these two ACBs.
This is vital, as the way the Toggle works is by alternating which of these two ACBs is enabled.
- Set Target: ACBS
- Set Action: Ausführen
- Search Pattern:
- „State 1“ für State 1 Initiator
- „State 2“ für State 2 Initiator

State 1 & 2 Aktion
These two ACBs are the ones you will configure to trigger each of the two states you’re trying to toggle/switch between. So one of these will trigger the light to turn on, the other will turn it off.
Gleich wie zuvor, the names are identical except for the numbers. Ensure those are set correctly.
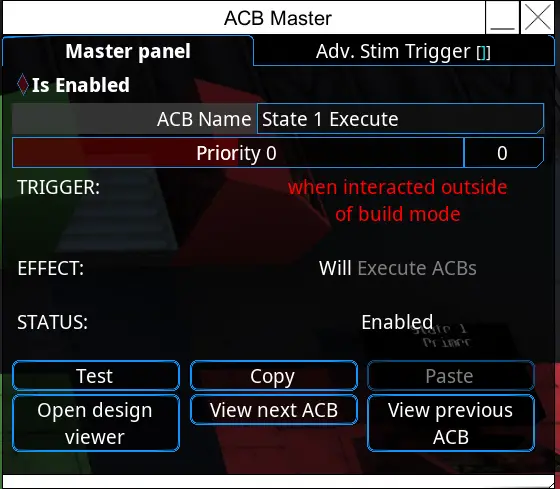
Several Options:
- Set Target to ACBs. Set Search Pattern to an ACB you want to trigger. (In unserem Beispiel, the ACB is named „Light On“ and will turn the light on when triggered by this „State 1 Aktion“ ACB.) The advantage of this method is that this single ACB can trigger groups of others as long as they are named in such a way that the search filter can affect them.

- Or you can directly set this ACB to do the action you want it to (such as turning the light on.)
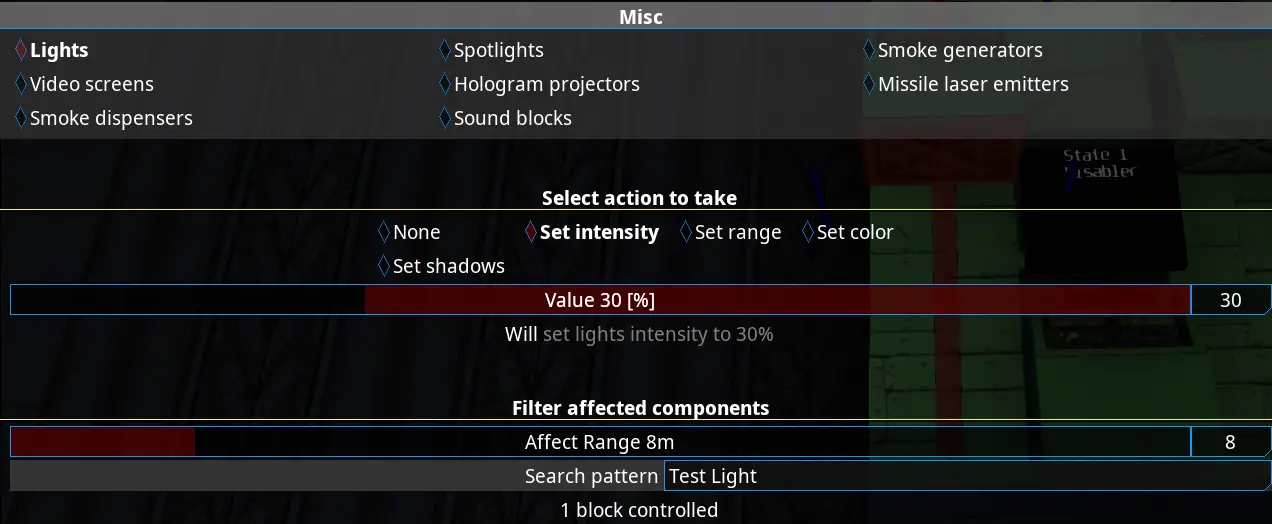
Am wichtigsten – Was auch immer State 1 Aktion triggers needs to be different from State 2 Aktion. Zum Beispiel, State 1 Action will turn the light ON, while State 2 Action will turn the light OFF.
State 1 & 2 Disabler
These next two ACBs will disable their respective State Initiators nach einer kurzen Verzögerung.
Du kennst die Übung, change the number for State 2.
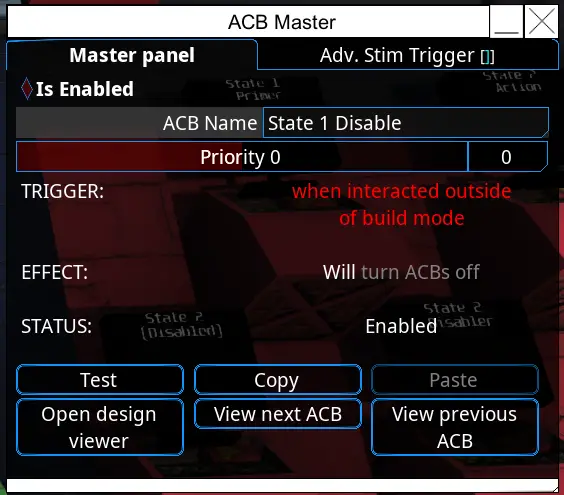
Effect Delay: Set this to 0.1s

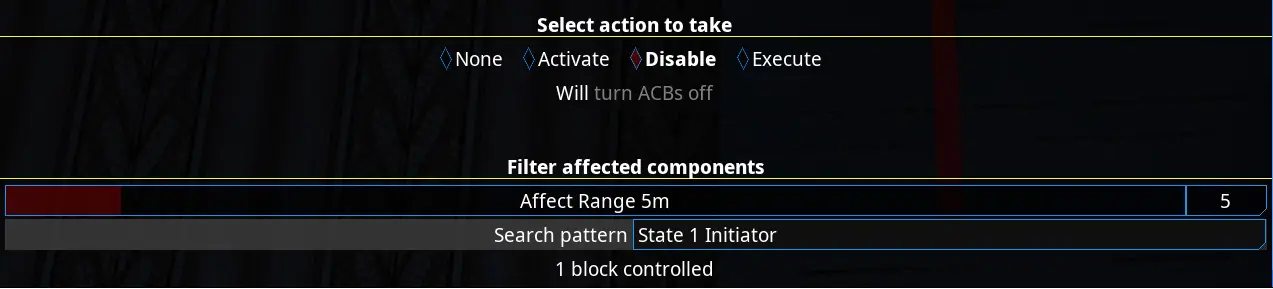
- Ziel: ACBS
- Aktion: Deaktivieren
- Search Filter: State 1 Initiator (or State 2 jeweils)
State 1 Primer
This one is triggered as part of State 1. It will enable the State 2 Initiator.
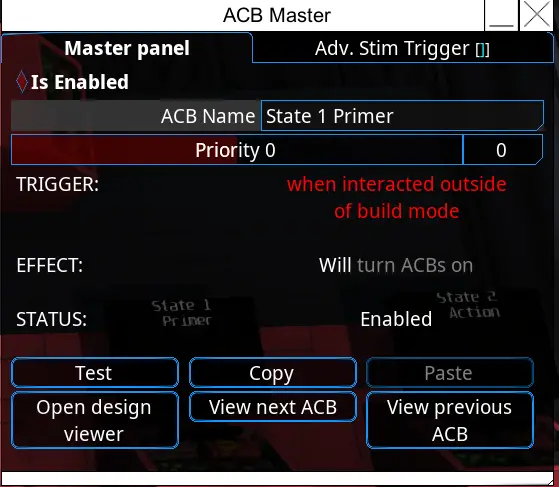
Effect Delay: Set this to 0.1s
- Ziel: ACBS
- Aktion: Aktivieren
- Search Filter: State 2 Initiator
State 2 Primer
This one is triggered as part of State 2. It will enable the State 1 Initiator.

Effect Delay: Set this to 0.1s
- Ziel: ACBS
- Aktion: Aktivieren
- Search Filter: State 1 Initiator
My Prefab
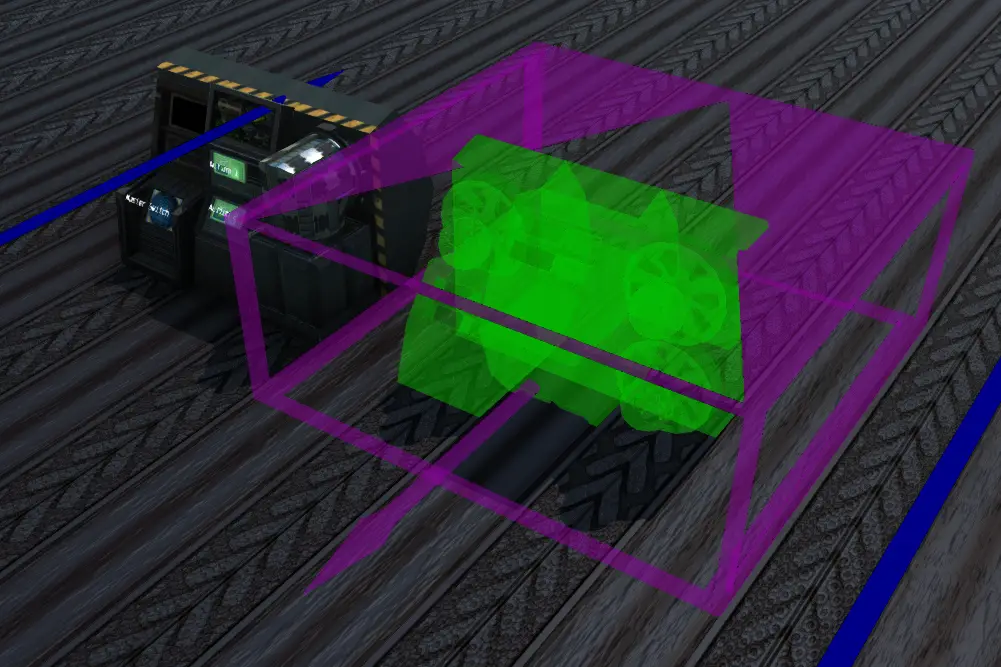
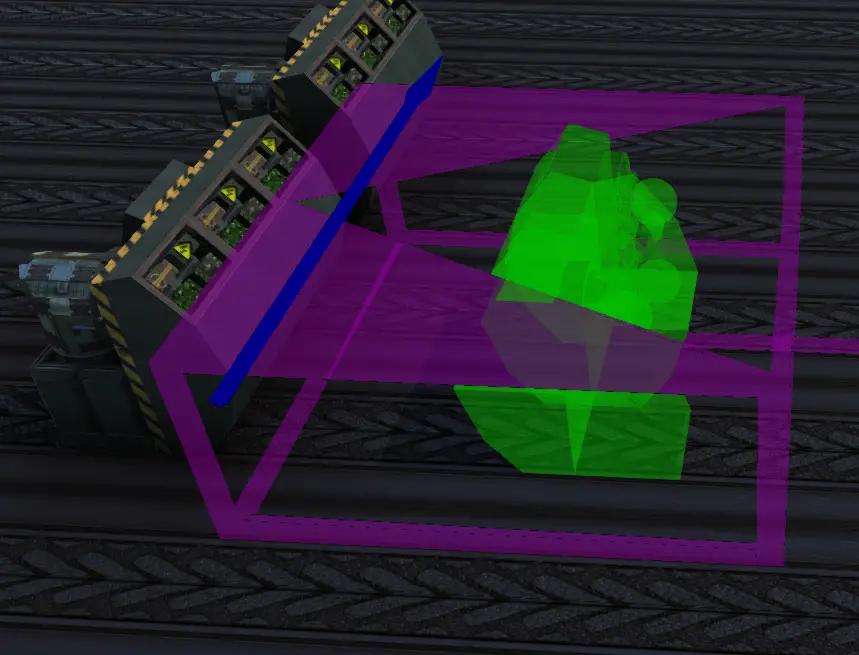
Since this whole assembly is made up of 9 ACBS, it does take up some space. Jedoch, by moving the ACBs closer together and reducing the Affect Range of each block to the minimum to communicate with every required block, the assembly can fit into a 3x2x2 footprint.
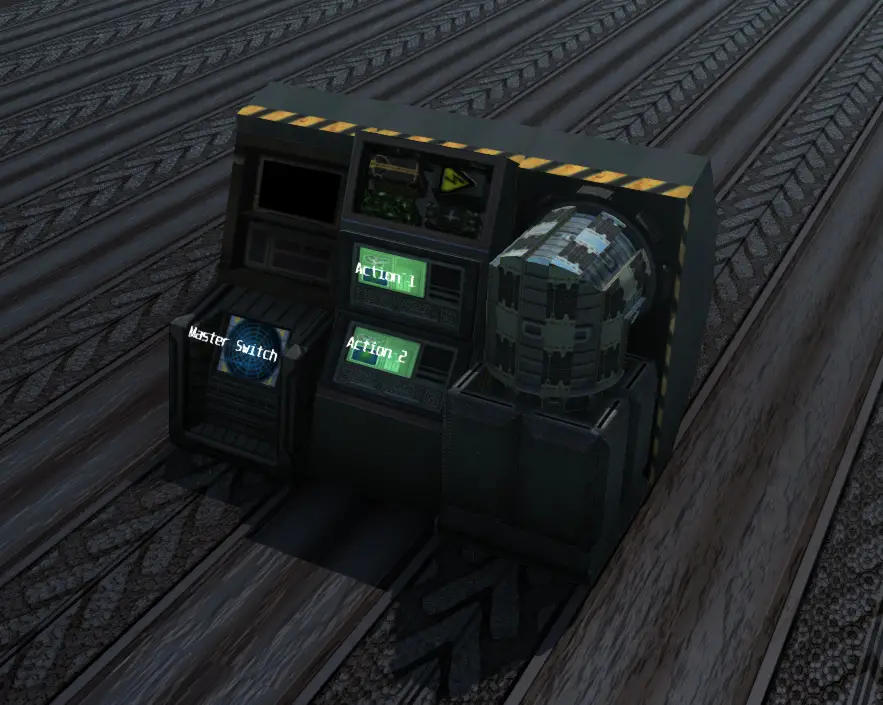
Note that I used Mimics and Decorations to make the thing look a little neater.
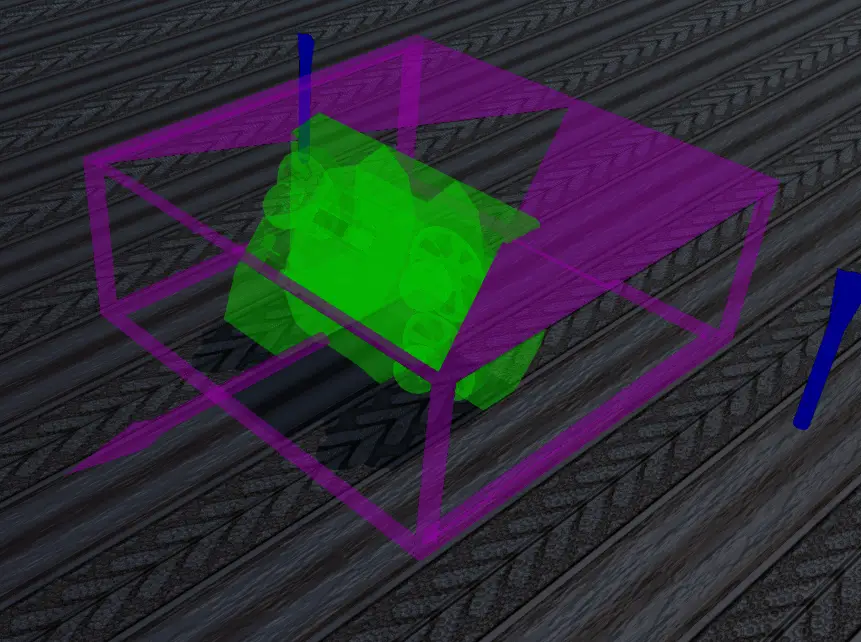
As for using multiple Toggles, they can be placed close to each other, Aber for my particular Prefab Toggles need to be spaced with 1-2 blocks between them as shown below.
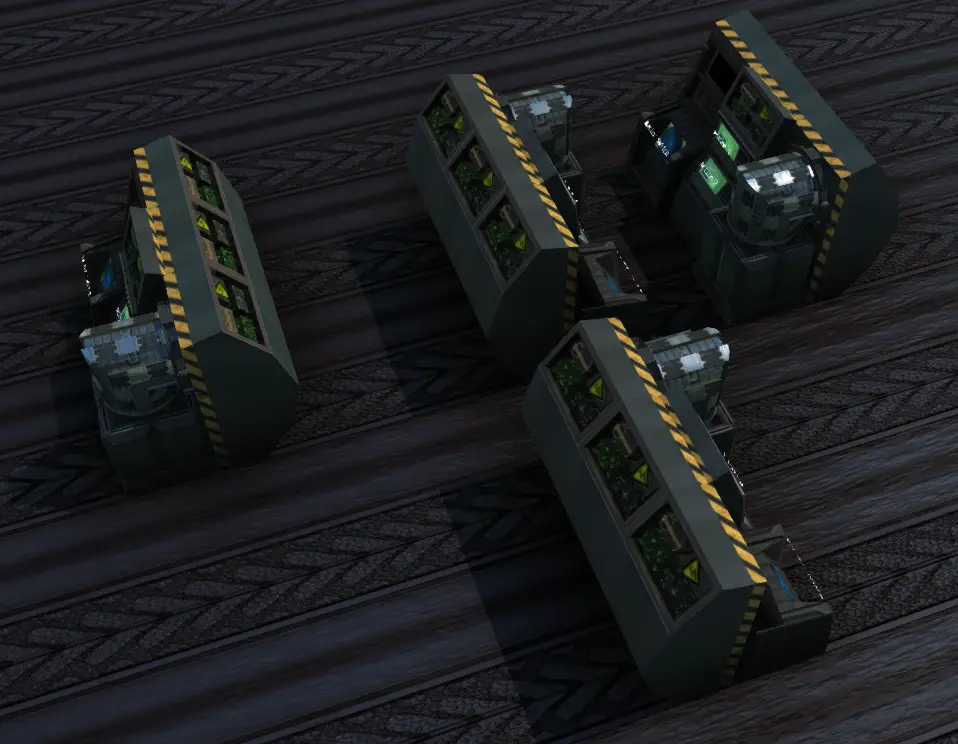
The footprint for my Prefab includes these boundaries. The empty spaces can overlap, but need to be clear of block from other Toggles.
Soweit mir bekannt ist, it’s not possible to share Prefabs directly, but I have uploaded my Prefab as a Vehicle to the Workshop. You can spawn it and create your own Prefab from it.
Das ist alles, was wir heute dafür teilen Aus den Tiefen Führung. Dieser Leitfaden wurde ursprünglich erstellt und geschrieben von Lurakin. Für den Fall, dass wir diesen Leitfaden nicht aktualisieren können, Sie können das neueste Update finden, indem Sie diesem folgen Verknüpfung.