- Titel: DEPO: Death Epileptic Pixel Origins
- Veröffentlichungsdatum:
- Entwickler:
- Herausgeber:
Information about DEPO: Death Epileptic Pixel Origins is still incomplete. Bitte helfen Sie uns dabei, die Details des Spiels auszufüllen Kontaktformular.
In this guide you will learn everything you need to know to start generating your own levels for DEPO!
Main buttons in the editor

★ 1: Exit the editor.
★ 2: Delete current level.
★ 3: Load level.
★ 4: Save level.
★ 5: Undo change.
★ 6: Redo change.
★ 7: Delete selected object.
★ 8: Copy selected object.
★ 9: Move selected object.
★ 10: Rotate selected object.
★ 11: Scale selected object.
★ 12: Change units of measure in the 3 previous transformations.
★ 13: Play the loaded level.
Movement in the editor
Keyboard and mouse are required for optimal use of the level editor.★ Left click to rotate the camera.
★ Press left click while pressing any of the keys
W, A, S, Dto move around the scene.
★ Use the mouse wheel to zoom.
★ Click or select an area to select one or several objects in the scene.
Resource Browser window
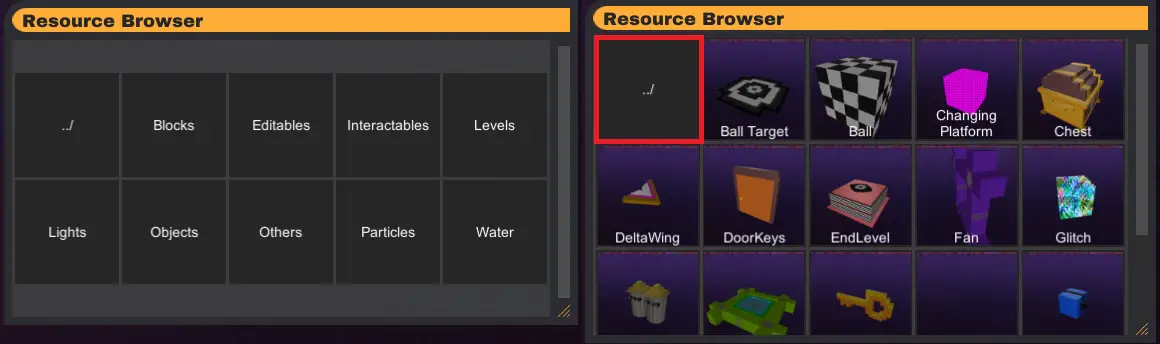
Im „Resource Browser“ section you can find different categories of objects:
„Blöcke„: simple elements in the construction of the level. You can change the color of most of them.
★ „Editables„: some elements that can be edited as text or images.
★ „Interactables„: elements that can be interacted with in a certain way.
★ „Ebenen„: are examples of prefabricated levels.
★ „Lichter„: different types of lights that you can add in scene. It is recommended to add only one sunlight for the performance to work well.
★ „Objekte„: decorative objects that cannot be interacted with.
★ „Andere„: are elements that do not fit into any of the other categories.
★ „Partikel„: particle systems that you can use to decorate your level.
★ „Wasser„: water kills the player, water from waterfalls can be passed through without any problem.
Once you open one of these sections you will find a lot of different elements that you can place in the scene if you click on them. To exit that category you must click on „../“ (in the image it is marked in red).
Inspector window
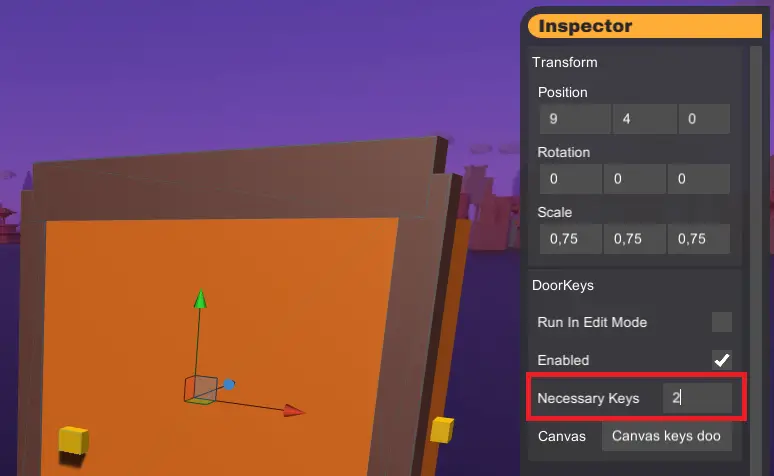
Im „Inspektor“ section you can change some parameters of the objects in the scene manually. Zum Beispiel, their scale, rotation or size.
Also some objects have special parameters, for example the „Door Keys“ object has a parameter called „Necessary Keys“ where you must enter the number of keys needed for the door to open.
Sometimes not all parameters are important and each one has its own rules, so it is advisable to experiment with the objects to understand how they work.
If you look at the image some parameters like „Run In Edit Mode„, „Ermöglicht“ oder „Canvas“ should not be changed.
Level Settings window
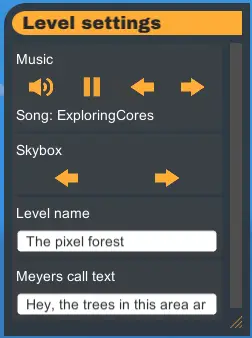
Im „Level Settings“ window you can edit some things about your level such as its Name, Musik, Hintergrund oder Meyers‘ Anruf.
Empfehlungen & advices
★ If you have problems saving a level because it is not generated in the folder, try changing the path where you are going to save it to another folder such as the desktop of your computer.
★ Remember to manually save changes as there is no autosave. When you hit the play button the level is not saved.
★ Once you are playing a level, you can return to the editor from the pause menu.
★ Levels can contain unlimited objects, but be careful not to overload them as on older computers they will not work well.
★ To place the player’s starting point in the level you must place the object called „Player Spawn“. This object will not be visible in the level, only in the editor.
★ Levels can be ended in two ways: durch die Verwendung der „End Level“ object or by obtaining a certain number of keys indicated in the „Brust“ Objekt.
★ In most interactive objects, their parameters can be adjusted, as in the „Jumper“, „DeltaWing“ oder „Changing Platform“.
★ It is recommended that before making a level you spend some time investigating how the editor and objects work.
★ Lights make the performance of the level worse so don’t add too many of them. Also only 1 light will be rendered at a time. It is also very important that you only add one Sun light, as it consumes a lot of computer resources.
★ Remember that you can share your levels via the file you generate when you save the level. Share that file to other players so they can play and modify your levels.
Das ist alles, was wir heute dafür teilen DEPO: Death Epileptic Pixel Origins Führung. Dieser Leitfaden wurde ursprünglich erstellt und geschrieben von Guiliam. Für den Fall, dass wir diesen Leitfaden nicht aktualisieren können, Sie können das neueste Update finden, indem Sie diesem folgen Verknüpfung.