- عنوان: Warhammer: End Times - Vermintide
- تاريخ الافراج عنه:
- المطور:
- الناشر:
Information about Warhammer: End Times - Vermintide is still incomplete. الرجاء مساعدتنا في ملء تفاصيل اللعبة باستخدام هذا نموذج الاتصال.
[W.I.P.] A guide to chests location for pesky Treasure Hunt Contracts.
Sometime some Lore book pages are also thrown in
A word on Areas, Zones and One Way Jumps
Zones are portions of the map that are separated by Points of No Return (usually a One Way Jump or a Platform/Boat) meaning that once you have left a Zone to enter another one, you will never be able to go back to the previous Zone.
Zone 1 is always the starting point and contains the Inventory box.
A Zone may be very small, like the starting point of River Reik or very large like the starting point of the Smuggler’s Run or even encompass the whole map like Wheat and Chaff أو Waterfront.
When there is a quick succession of One Way Jumps like in the River Reik between the cave exit and the marsh or at the end of Chain of Fire, it is not separate Zones for the sake of simplification.
One Way Jumps are usually – but not always – Points of No Return. When there is a way to come back, the Zone is still considered to be the same.
- في The Horn of Magnus, once you have survived the event of the horn blowing and the floor collapse you can return to the raise of the last One Way Jump where all the medical stuffs where available;
- في The Wizards Tower, you can return to the Hall of Mysteries from the Hall of Illusion;
- في Waterfront, you must return to the central area once you have completed the warehouses events;
- في The Courier, you can jump with the powder keg to access to the Tome in the Garden of Morr;
- في The Dungeons, you must return to the Passage of Desolation after collecting the first Tome;
- في River Reik you can return inside the hovel after jumping from it’s roof by jumping over the wall on the right;
- River Reik ends with a succession of two One Way Jumps that enables you to circle back to the boat.
Named Areas are portions of the map that trigger the apparition of a name on the screen.
على سبيل المثال, في The Horn of Magnus, the name “The Waterfront, River Teufel” appears when you exit the small alley and reach the waterfront. Unnamed Areas do not trigger the apparition of a name and therefore leave you under the impression that you are still in the last Named Area you entered into.
Named Areas may be adjacent or separated by unnamed Areas. Three areas may be adjacent. When one of them is Unnamed, this renders things difficult.For example, في The Horn of Magnus, “The Hog Pit” is adjacent to “Ranaldstrasse”. للأسف, there is an Unnamed Area adjacent to both that contains two chests, a Tome and a Gimoire. This means that if you go directly to the Unnamed Area from The Hog Pit, you are still under the impression that your are in The Hog Pit, whereas if you go first to Ranaldstrasse then to the Unnamed Area, you are under the impression that your are in Ranaldstrasse.
The worst case is probably Von Jungfreud Platz: apparently the map is botched and depending on were you go, the name may appear only when you exit/enter the Area near Oliver’s Inn or it may appear on the Platz itself if you explore the Area.
Chests per maps
The Horn of Magnus
You may also want to check out
De greed’smap available in the Vermintide Wiki on Fandom
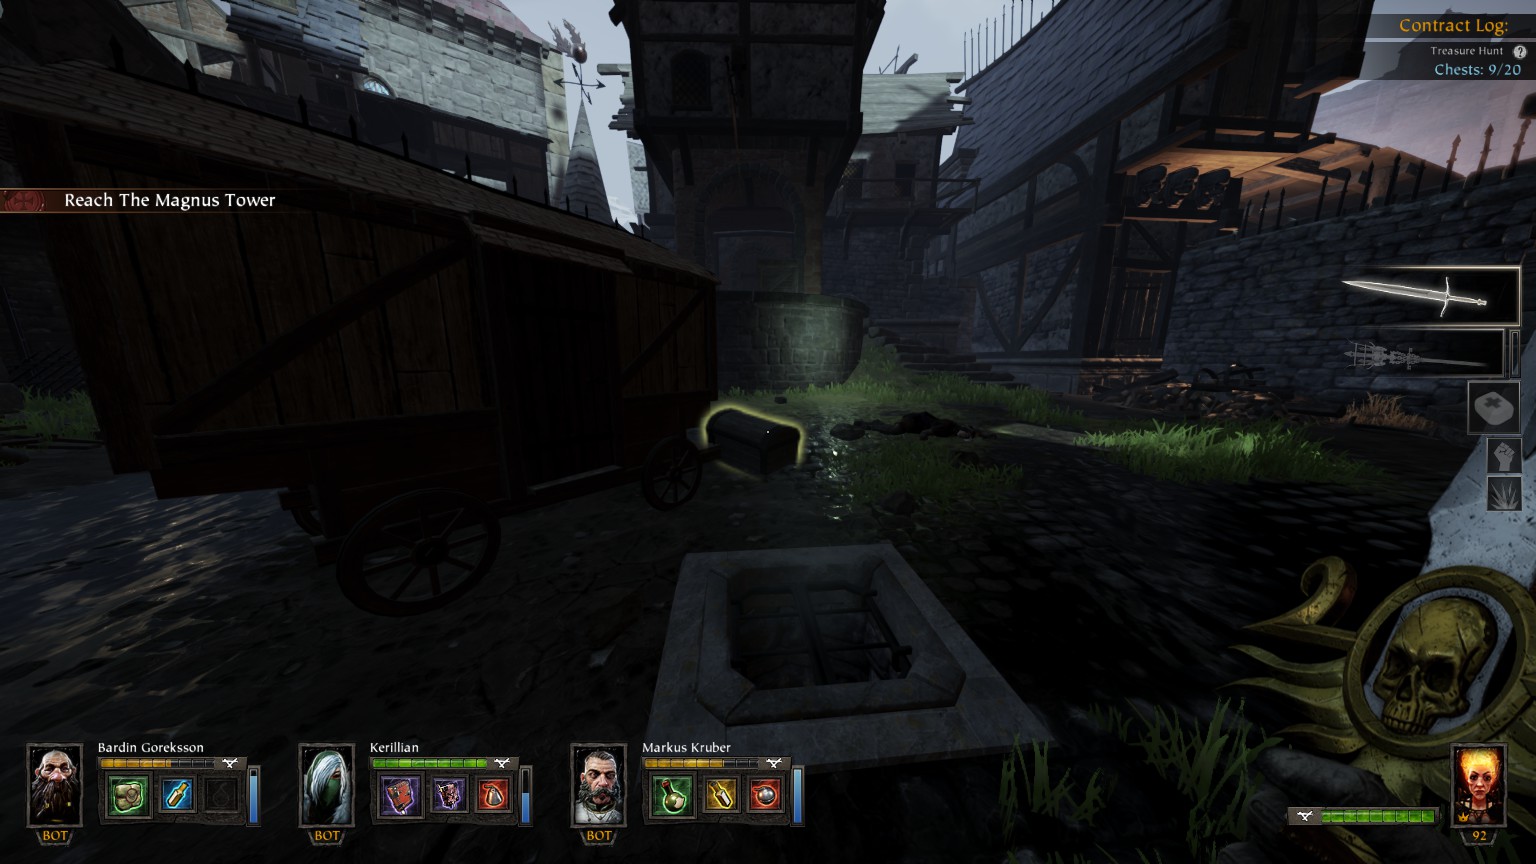
#1/26 On the waterfront
#2/26 On the waterfront
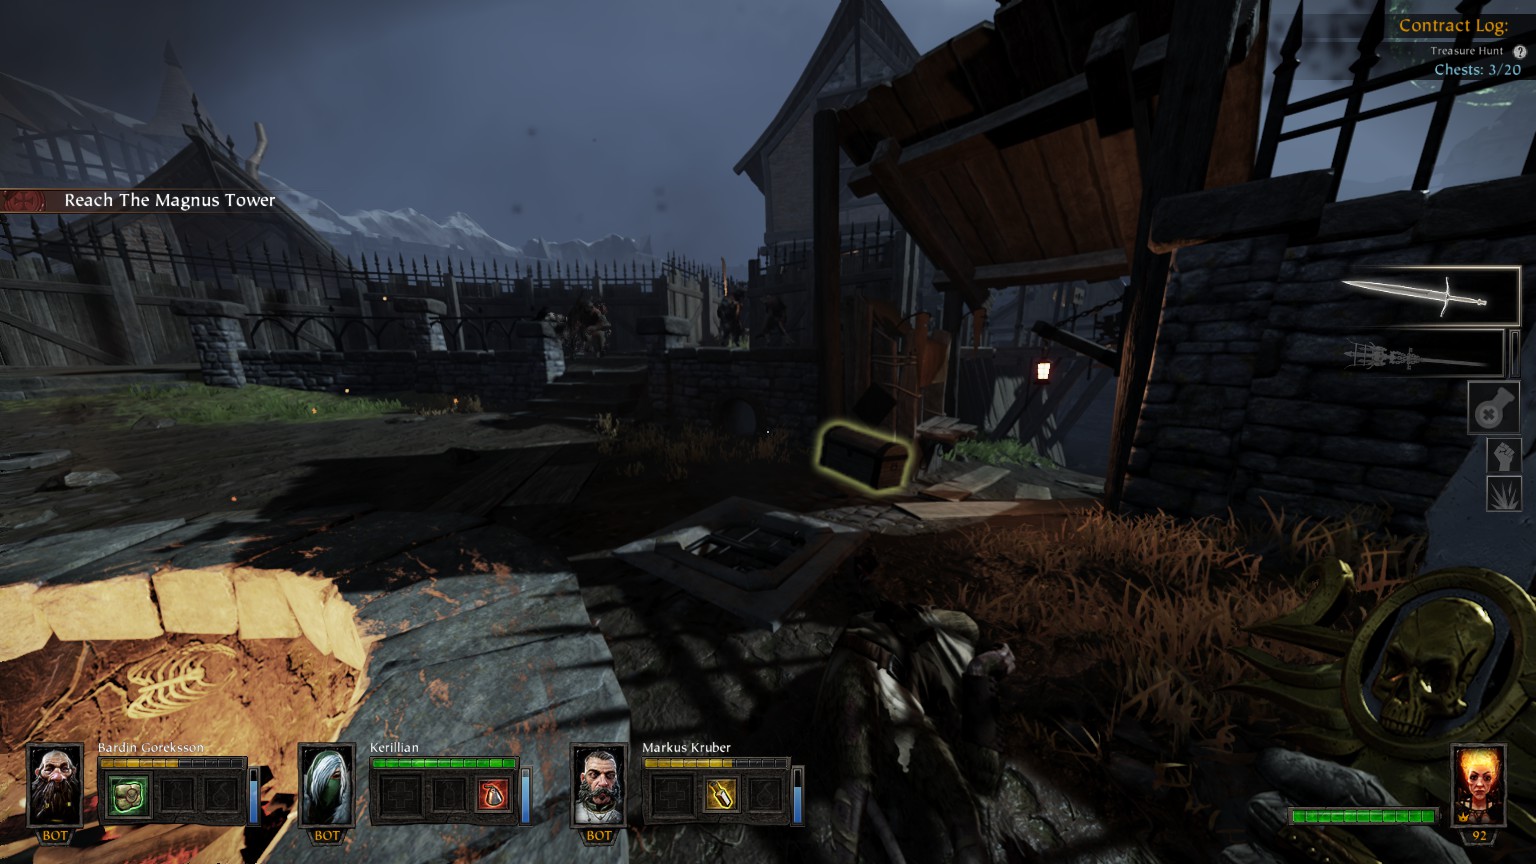
#3/26 (New Watch Barracks)
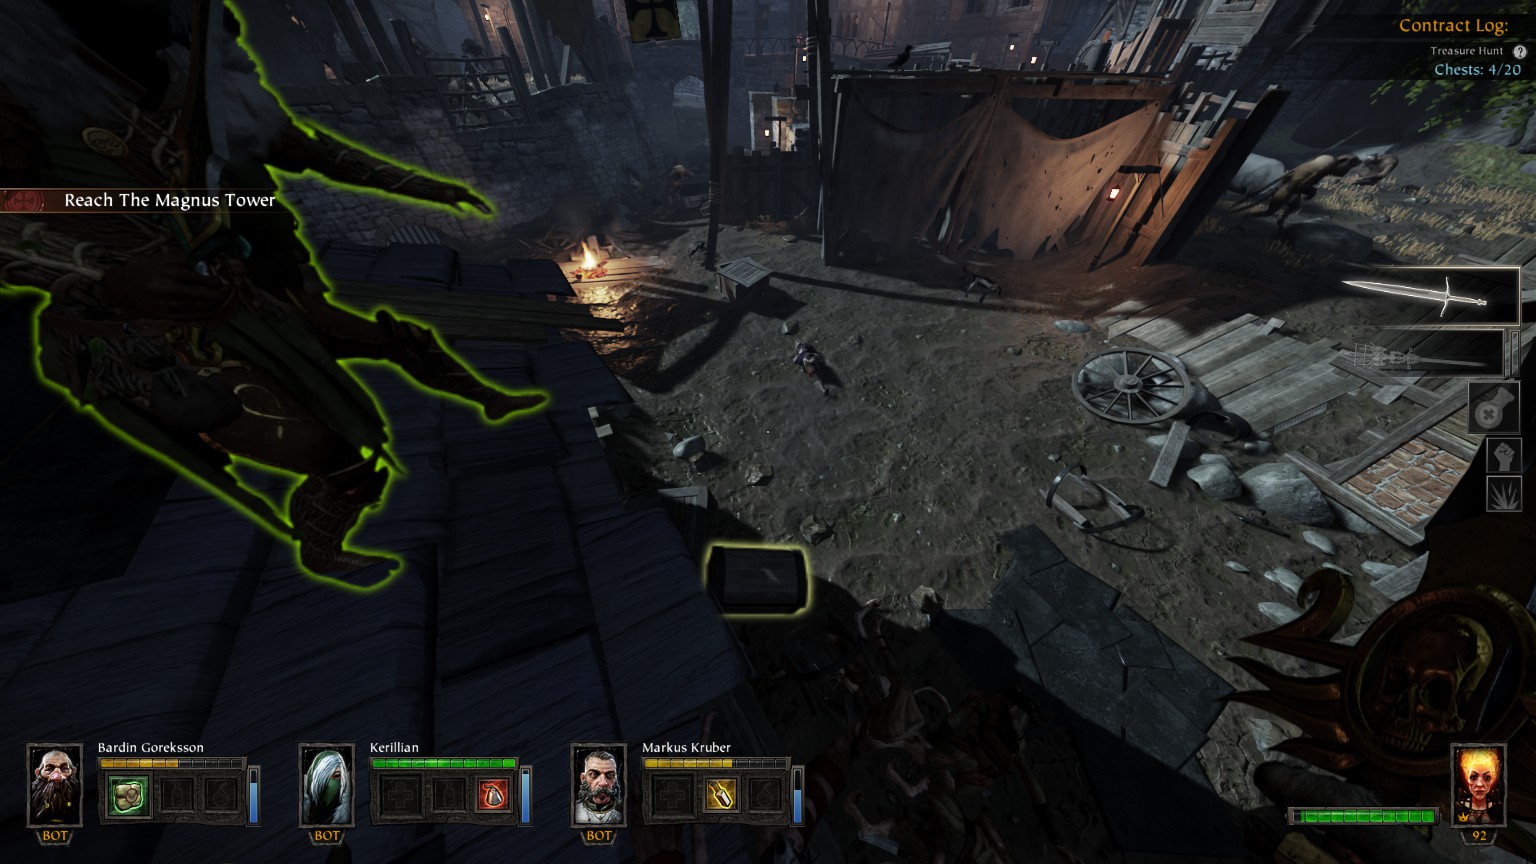
#4/26 After the one way jump, just before entering The Hog Pit area
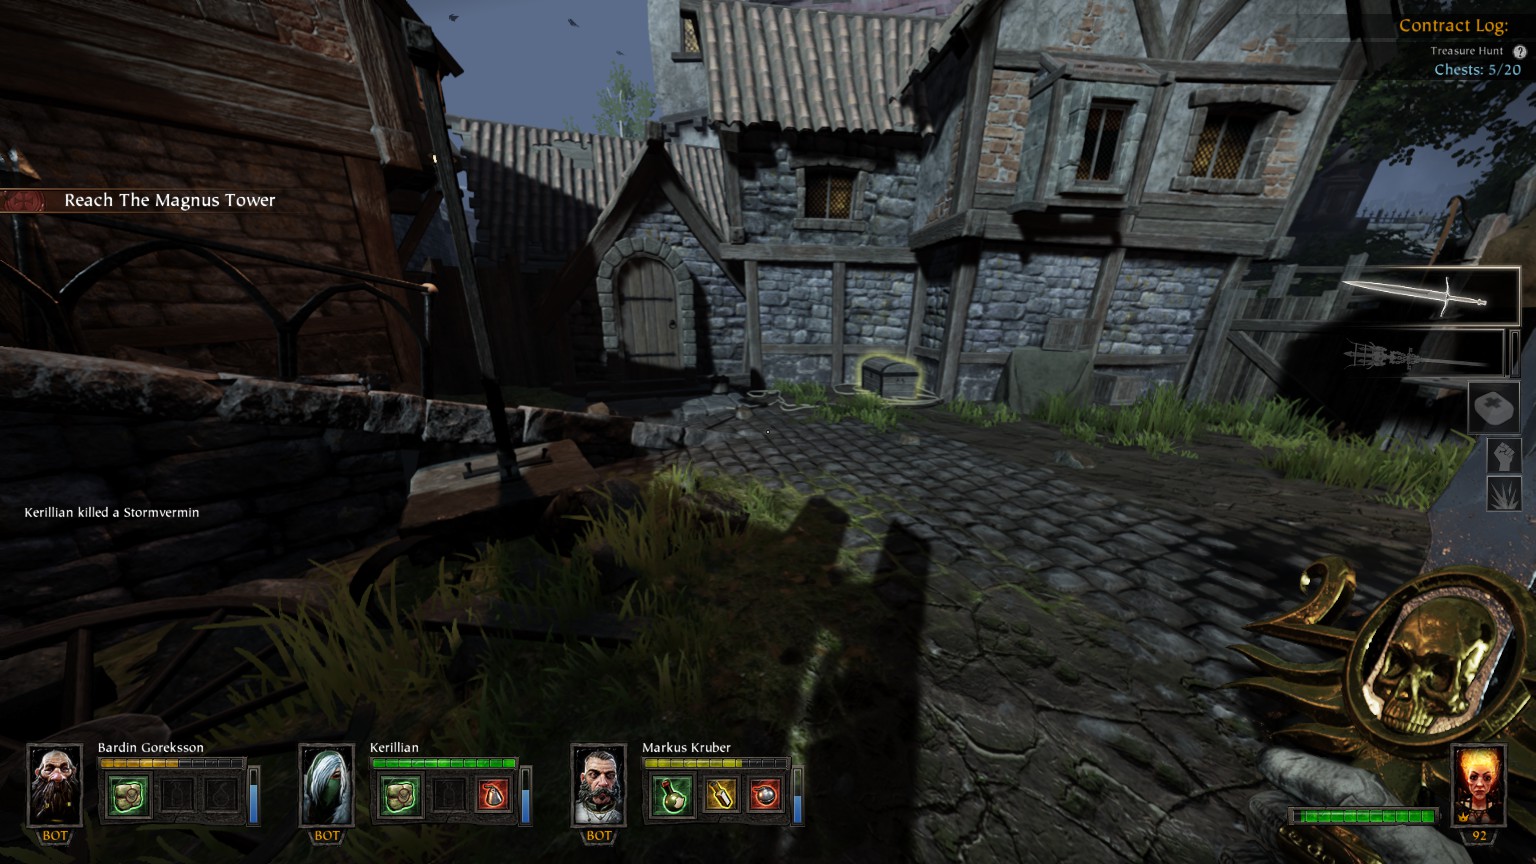
#5/26 (The Hog Pit) Left side
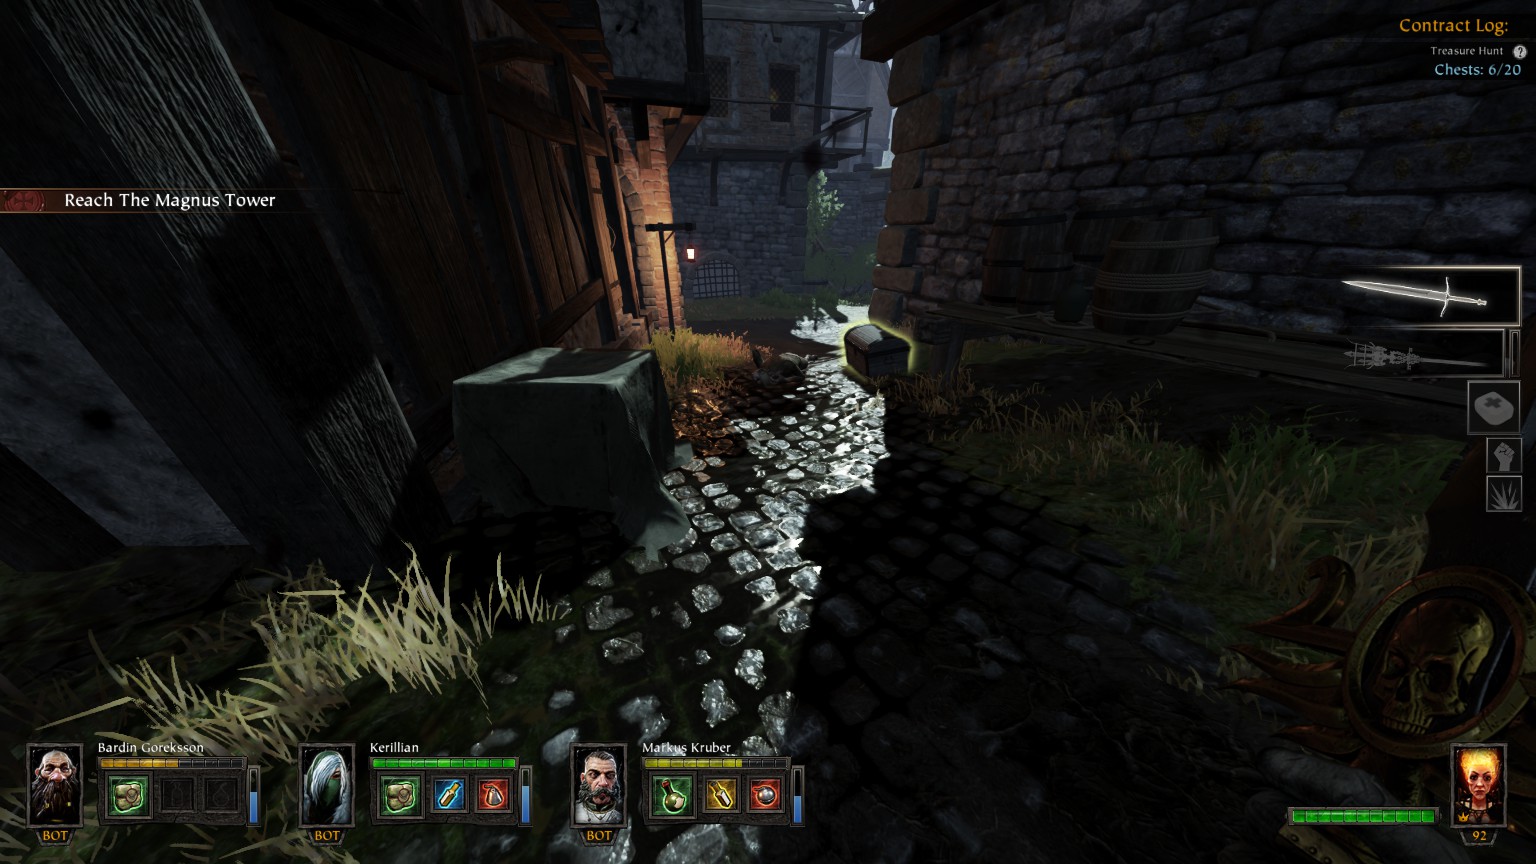
#6/26 (The Hog Pit) Right side
#7/26 After The Hog Pit parallel to the Ranaldstrasse on the right
#8/26 After The Hog Pit parallel to the Ranaldstrasse on the right, Small cellar where Tome #1 and Grim #1 are to be found
#9/26 (Ranaldstrasse) Right side of the street

#10/26 (Ranaldstrasse) Left side of the street, small courtyard on the way to Tome #2
#11/26 (Ranaldstrasse) Small building in the courtyard of chest #10, the chest contain Tome #2
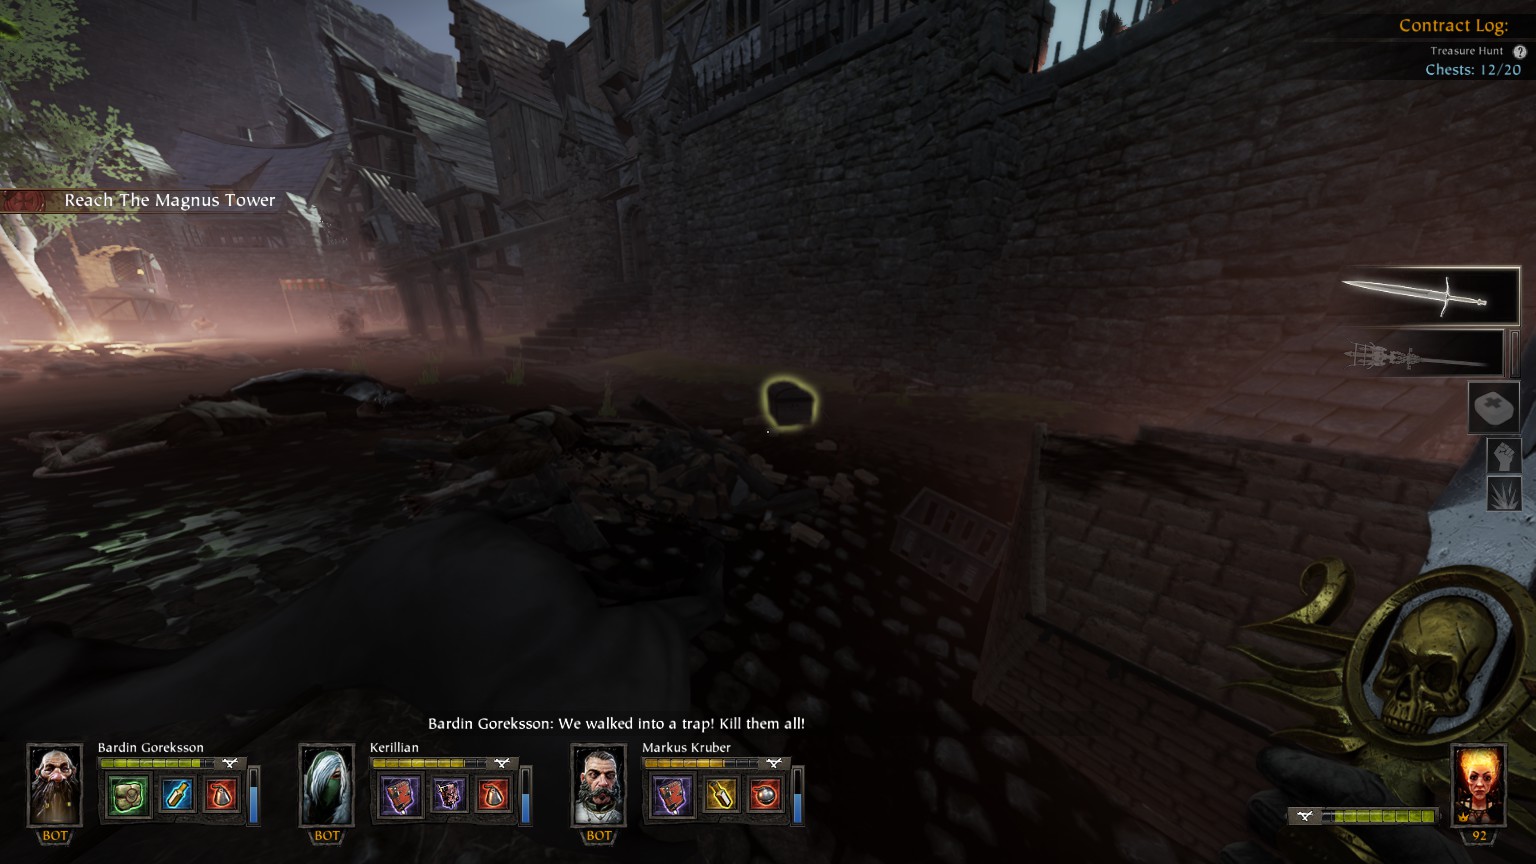
#12/26 (Strohmann Market)
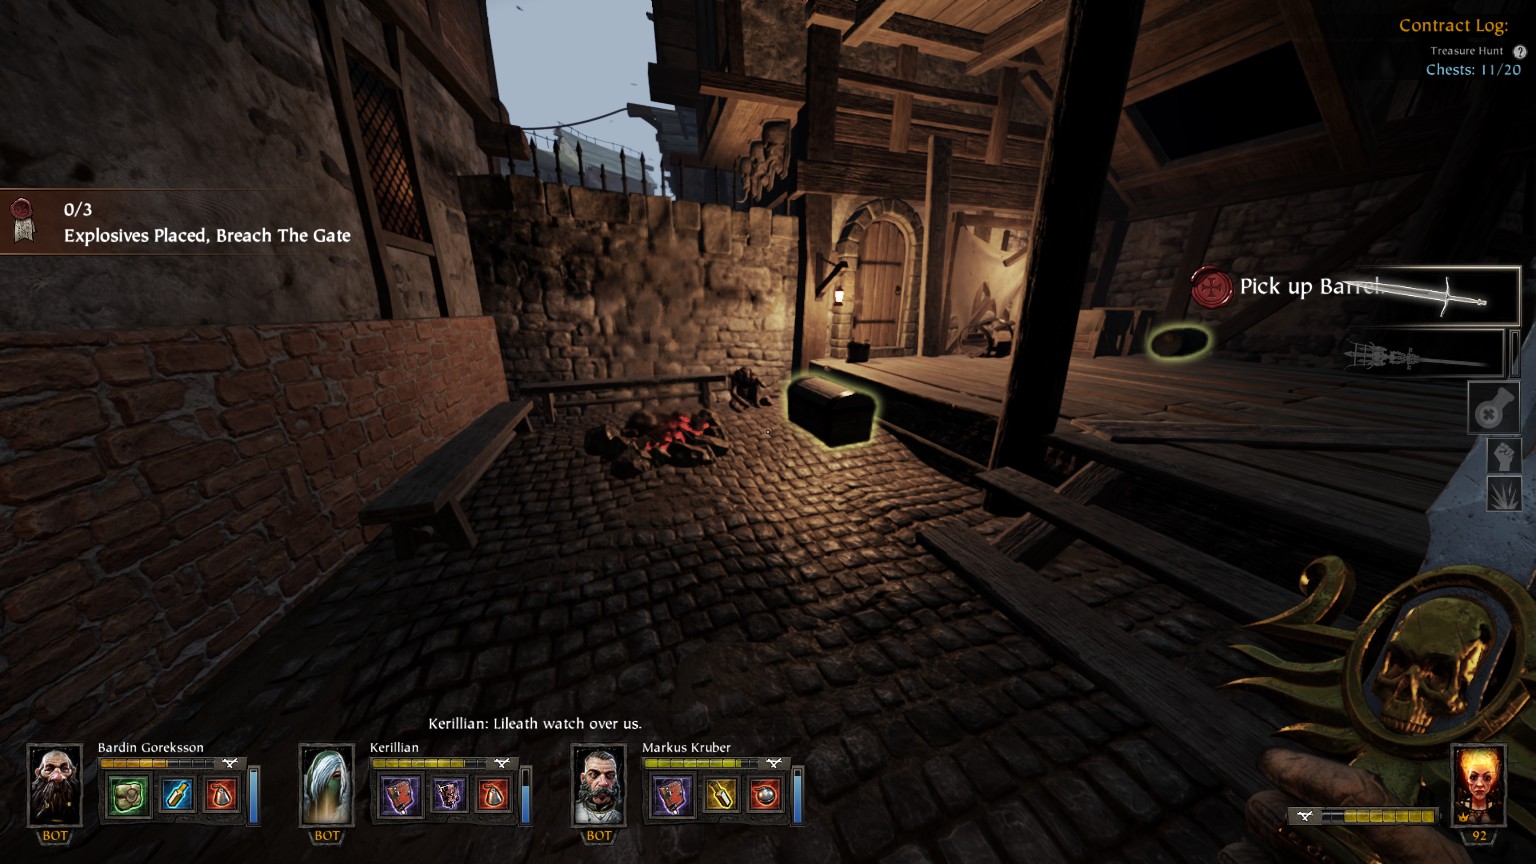
#13/26 After blowing the gate, على اليمين
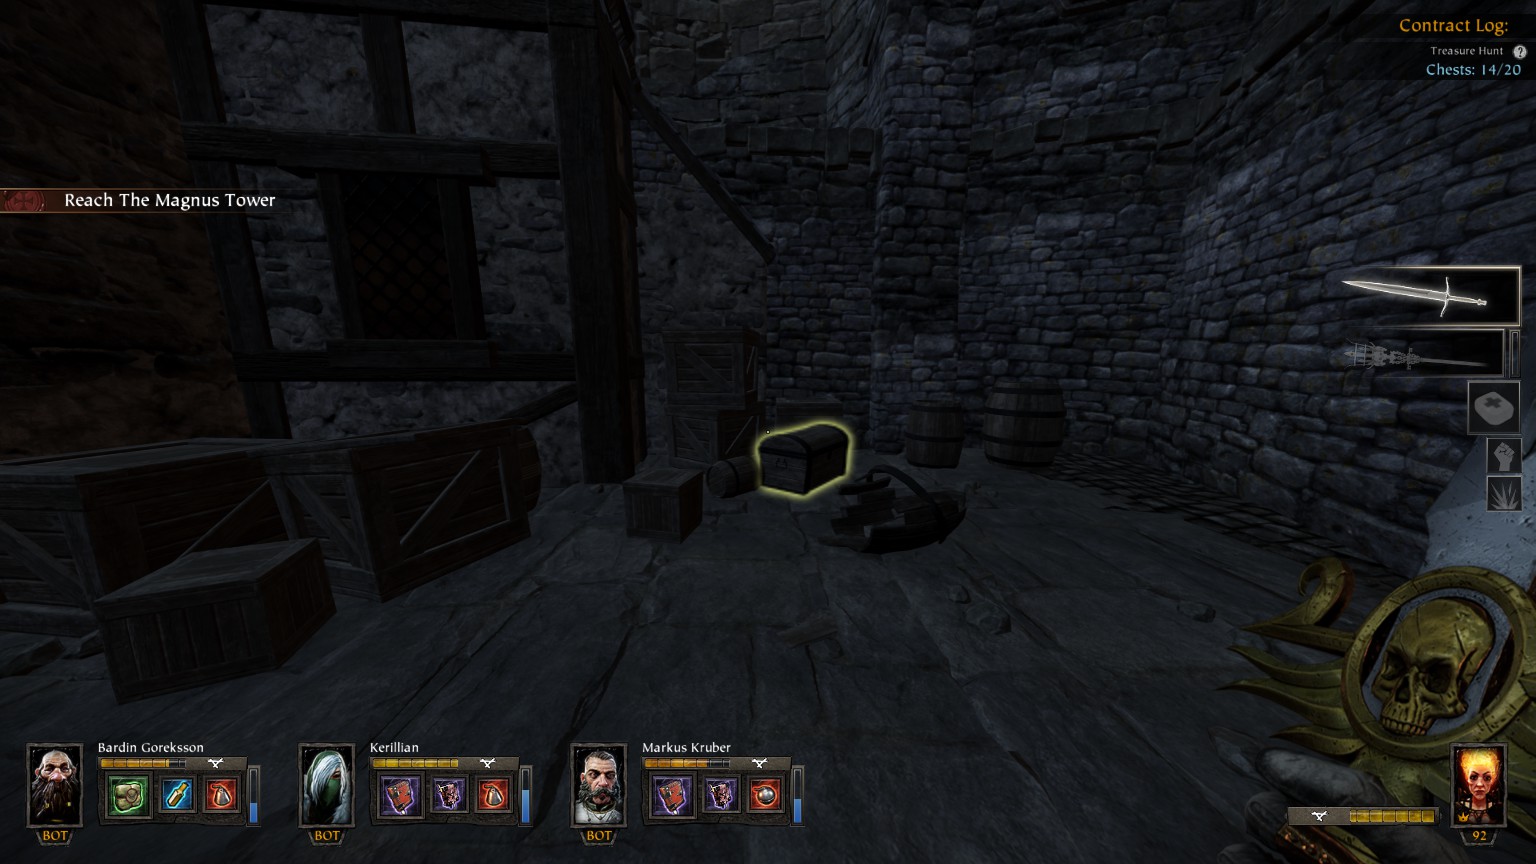
#14/26 After blowing the gate, على اليسار, just after Grim #2

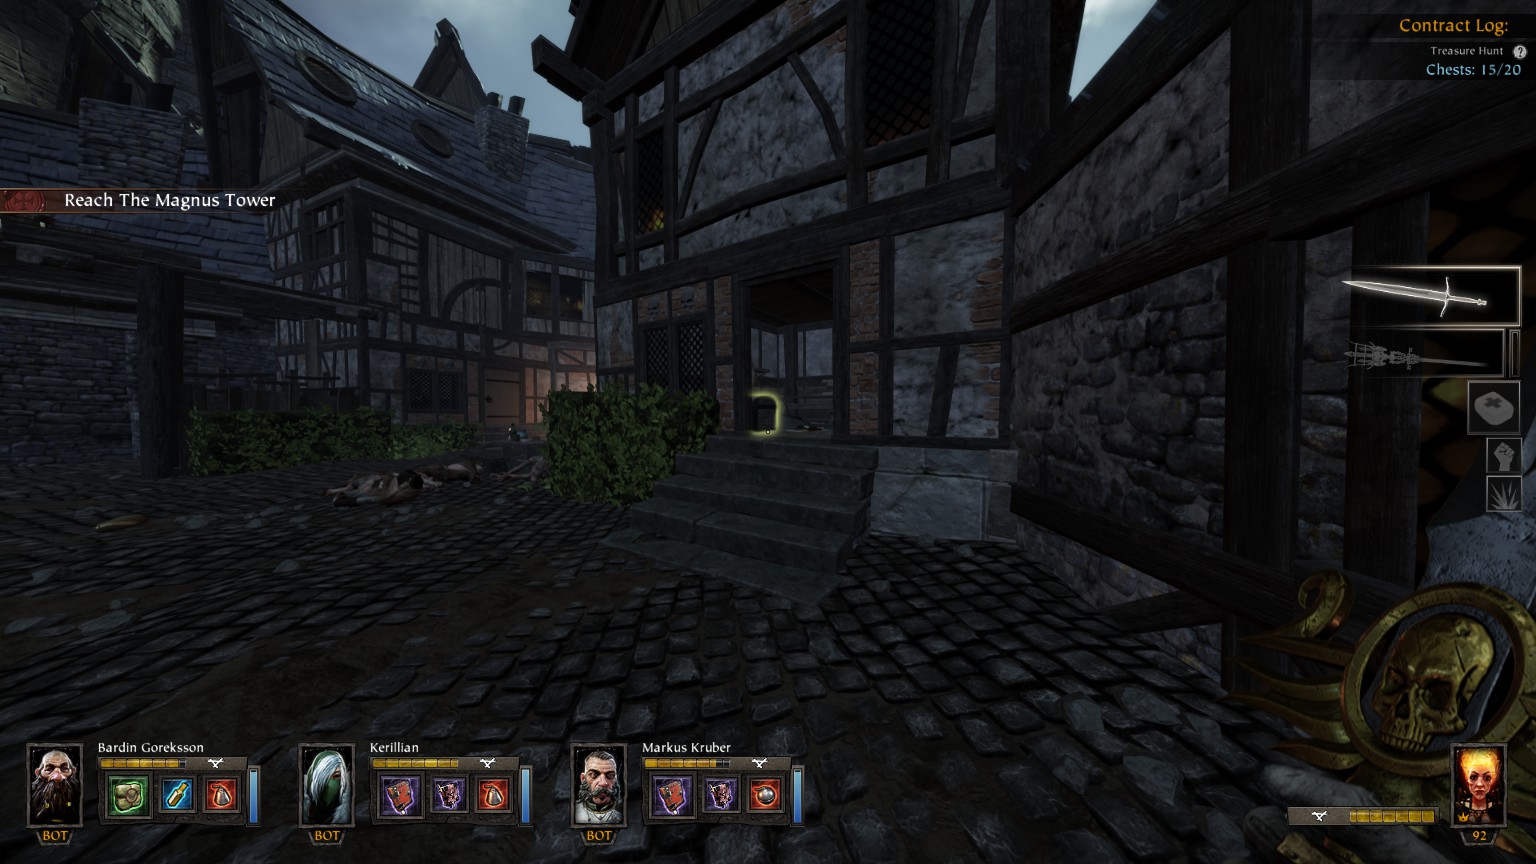
#15/26 Just before Oliver’s Inn area
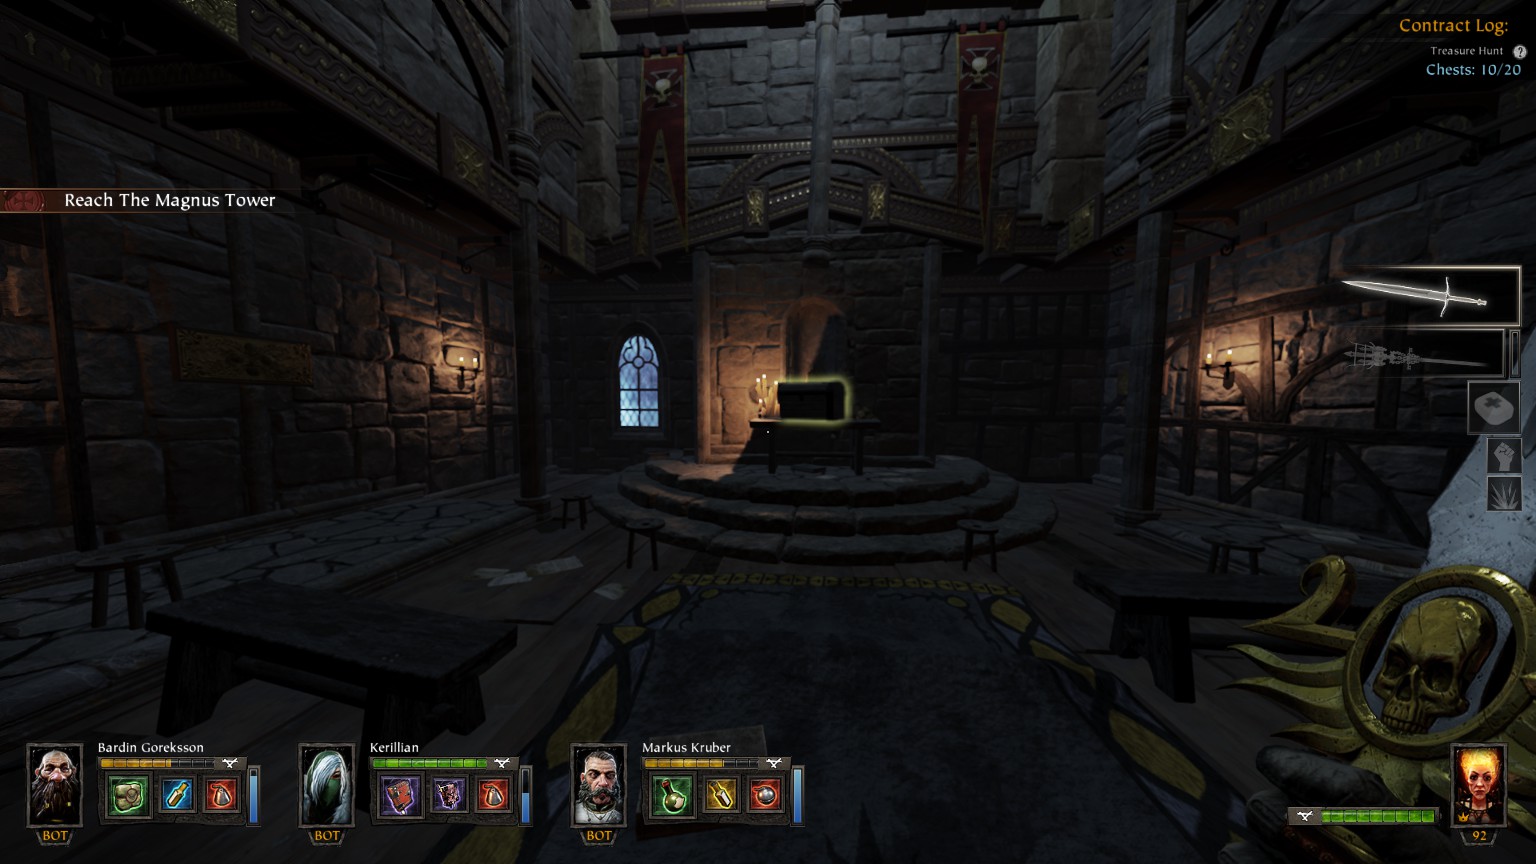
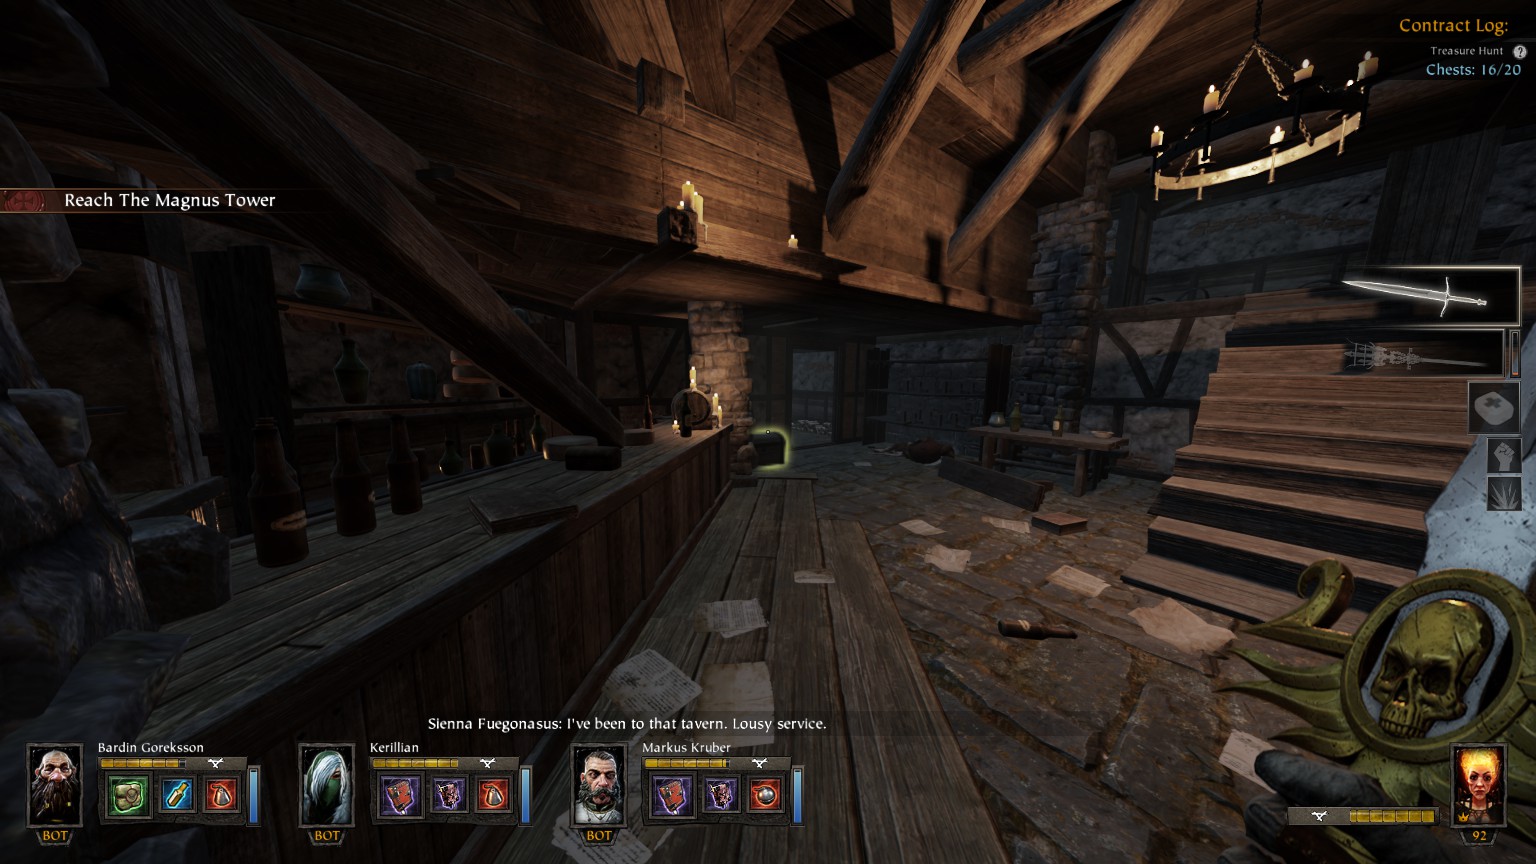
#16/26 (Oliver’s Inn) Small house on the right upon reaching the place in front of the Inn
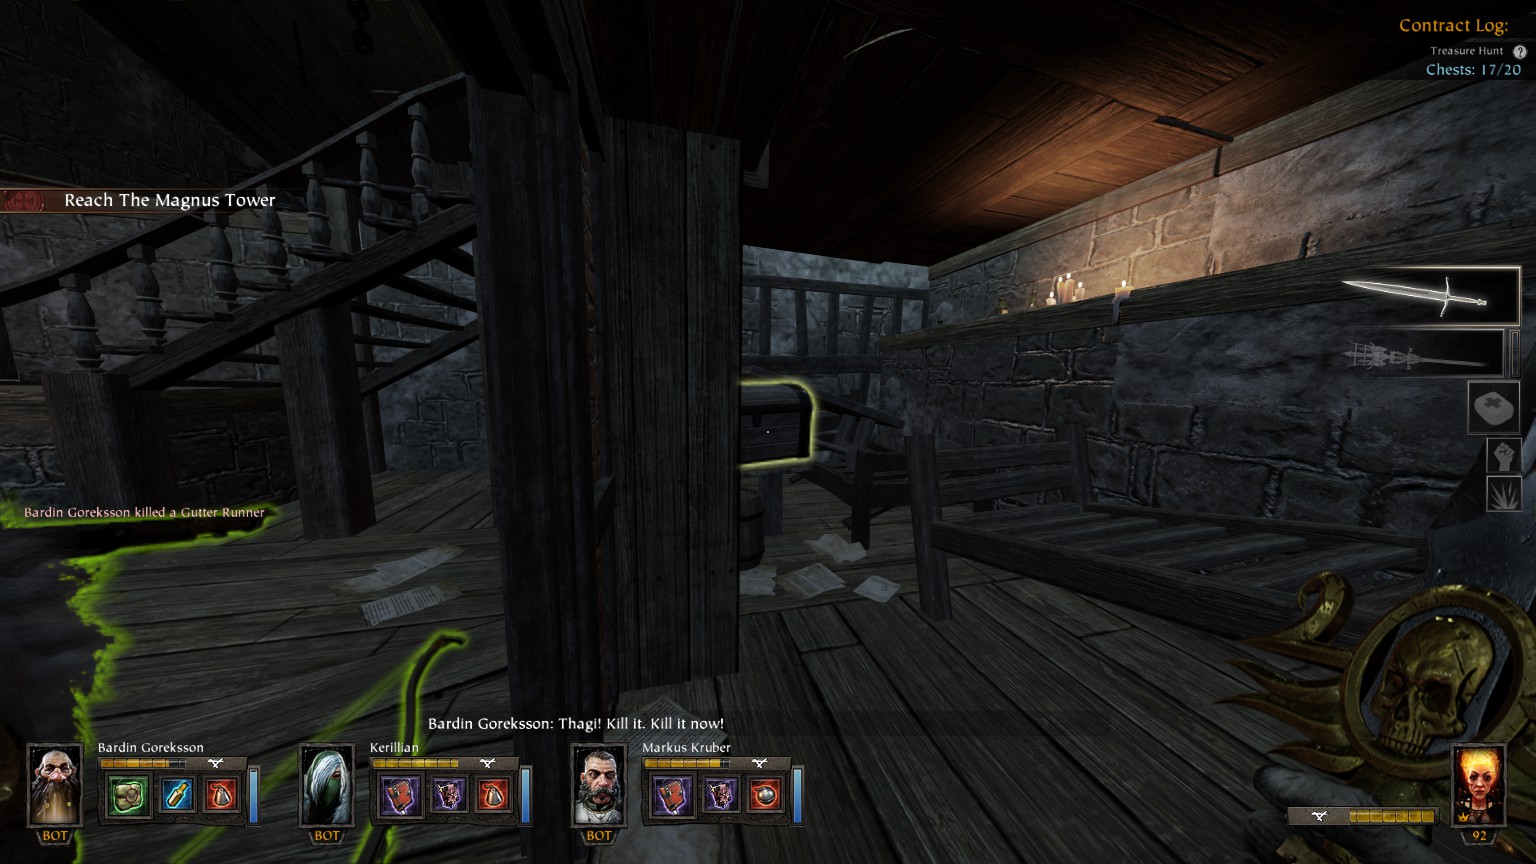
#17/26 (Oliver’s Inn) Ground floor of the Inn
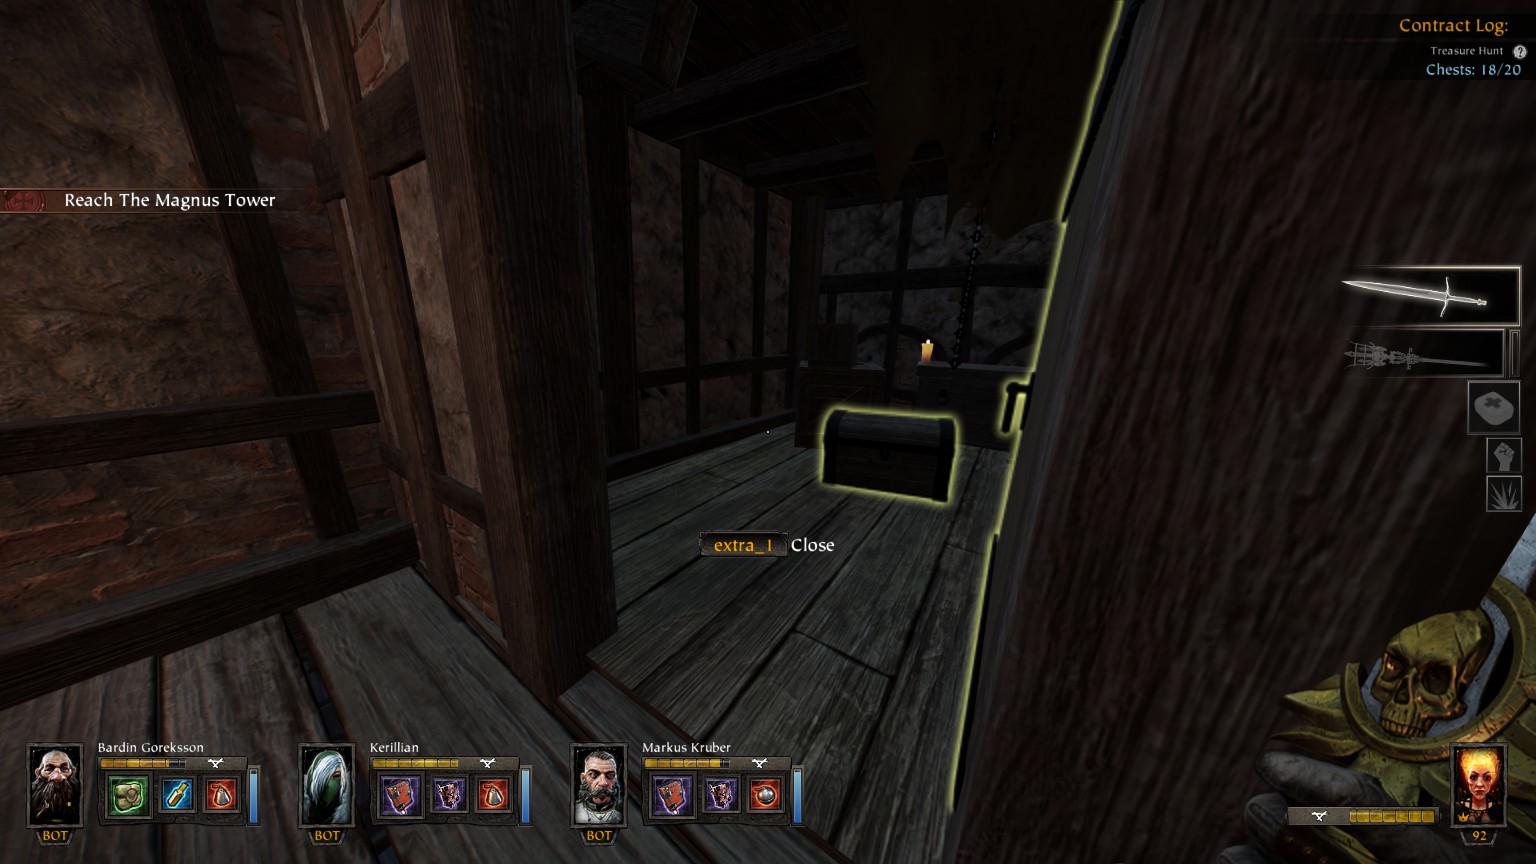
#18/26 After the one way jump, before the Rooftops
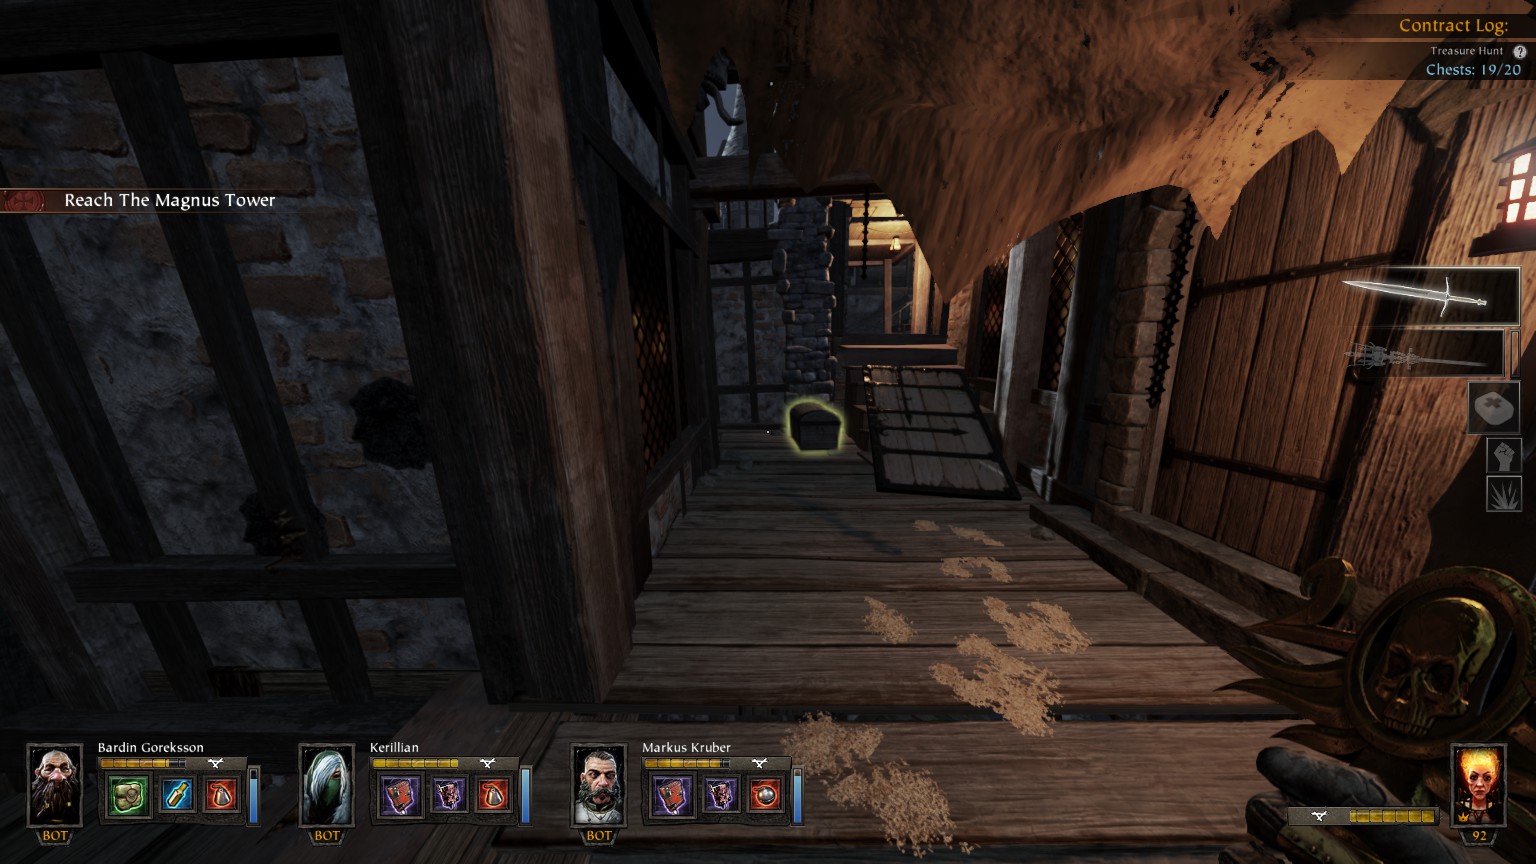
#19/26 After the one way jump, before the Rooftops, leads to the secret room of Tome #3
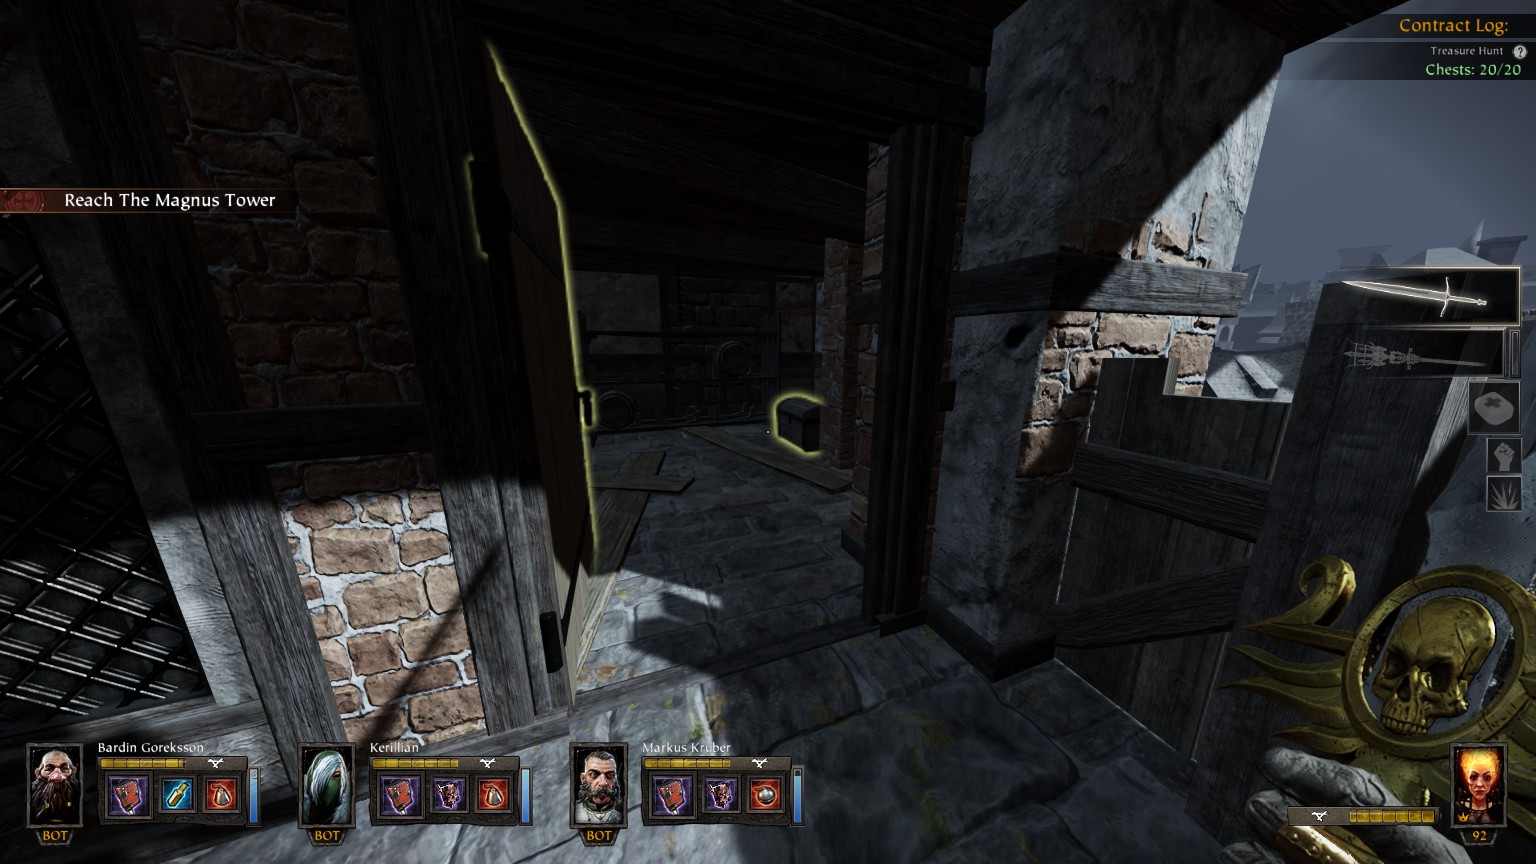
#20/26 After the one way jump, before the Rooftops
#21/26 After the one way jump, before the Rooftops, opens the secret room of Tome #3

#22/26 (Rooftops, Blucherweg) Small room on the left
#23/26 (The Tower Garrison) On the left just after the one way jump
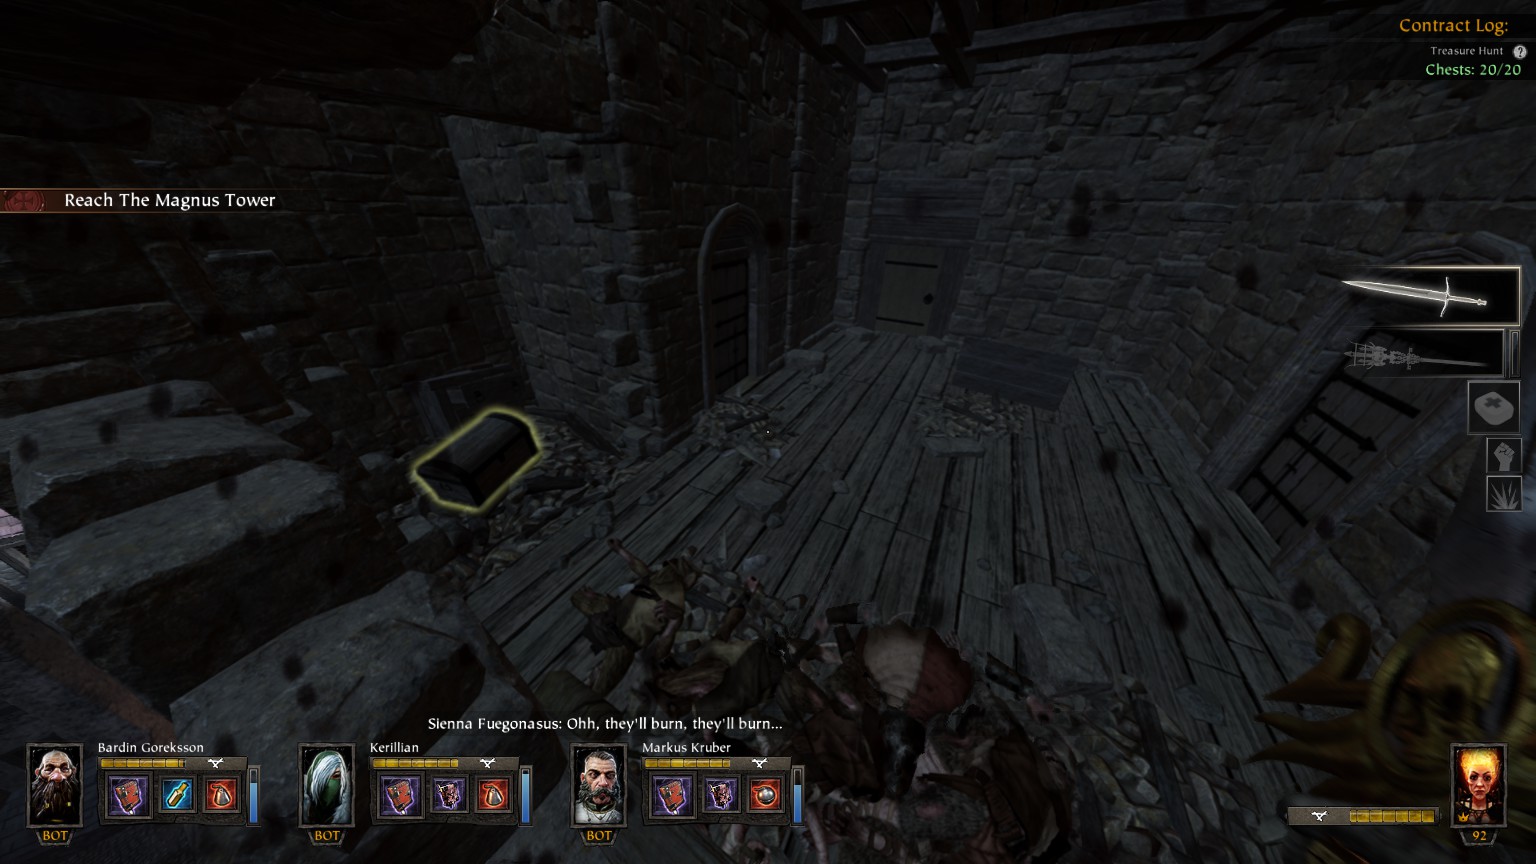
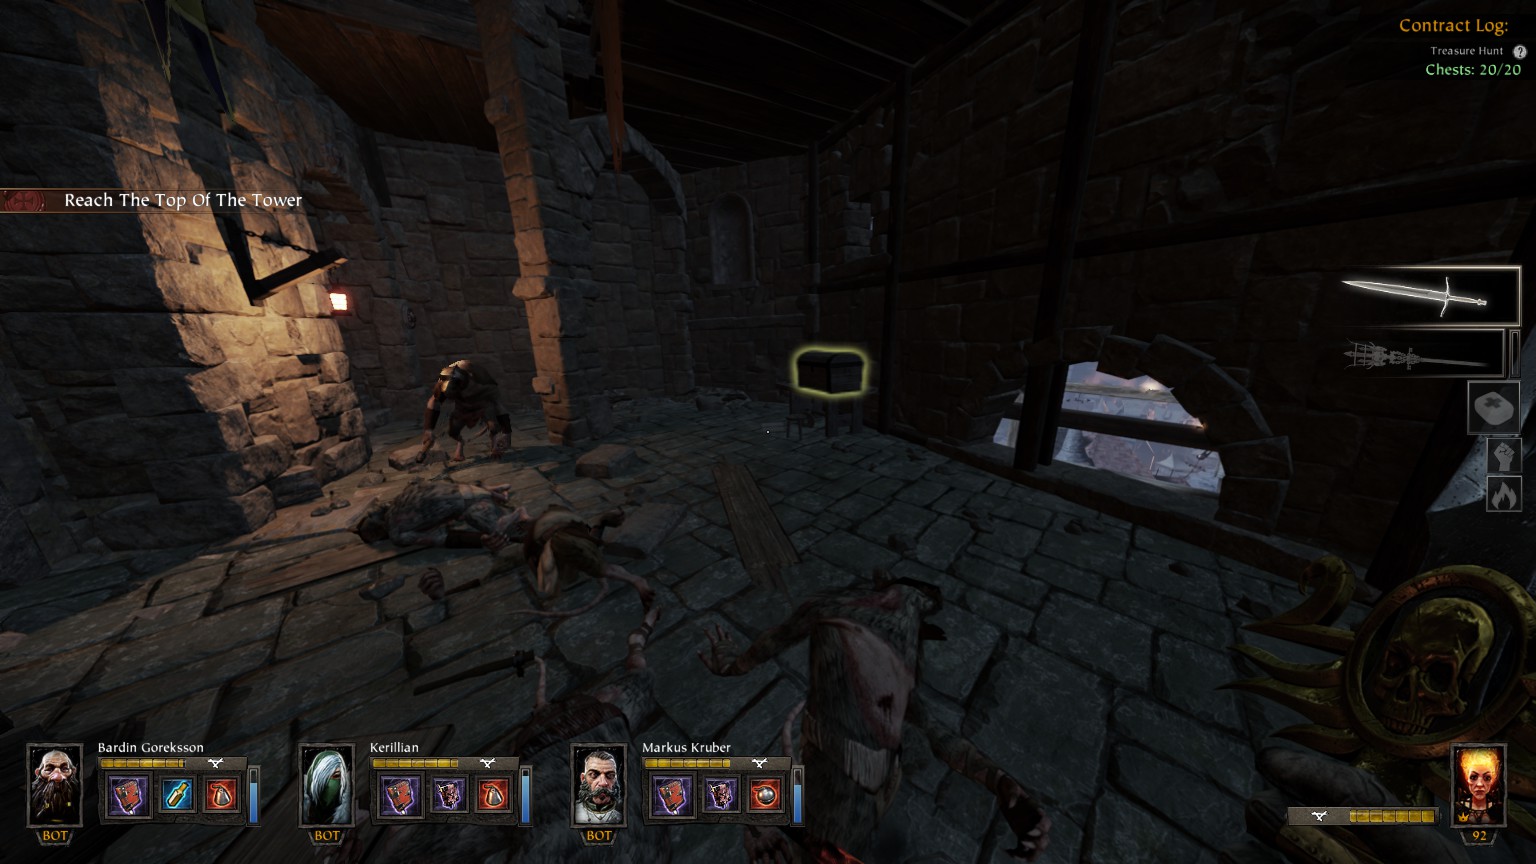
#24/26 (Magnus Tower)
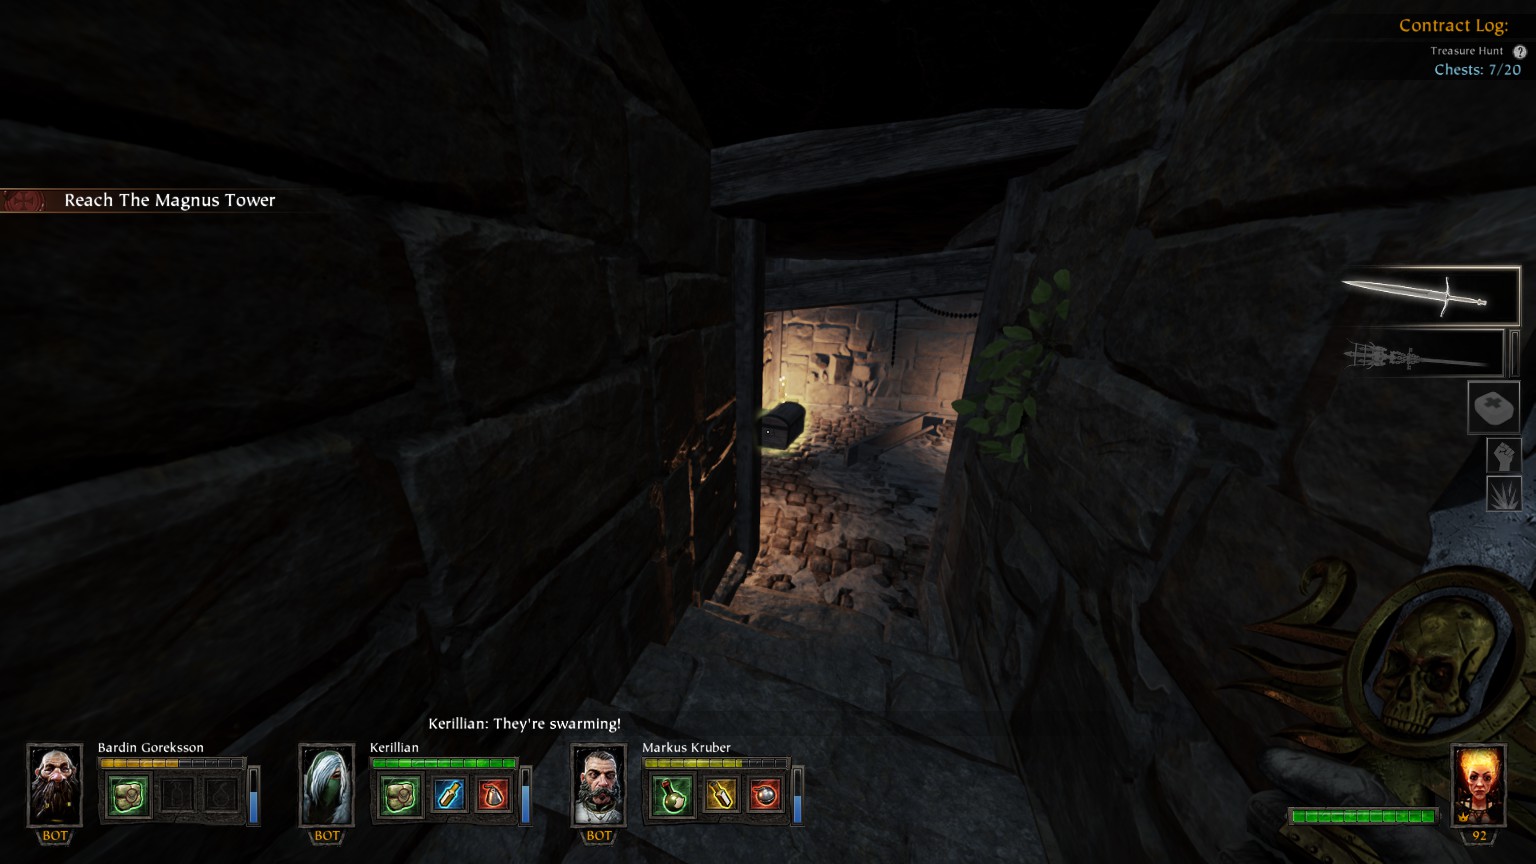
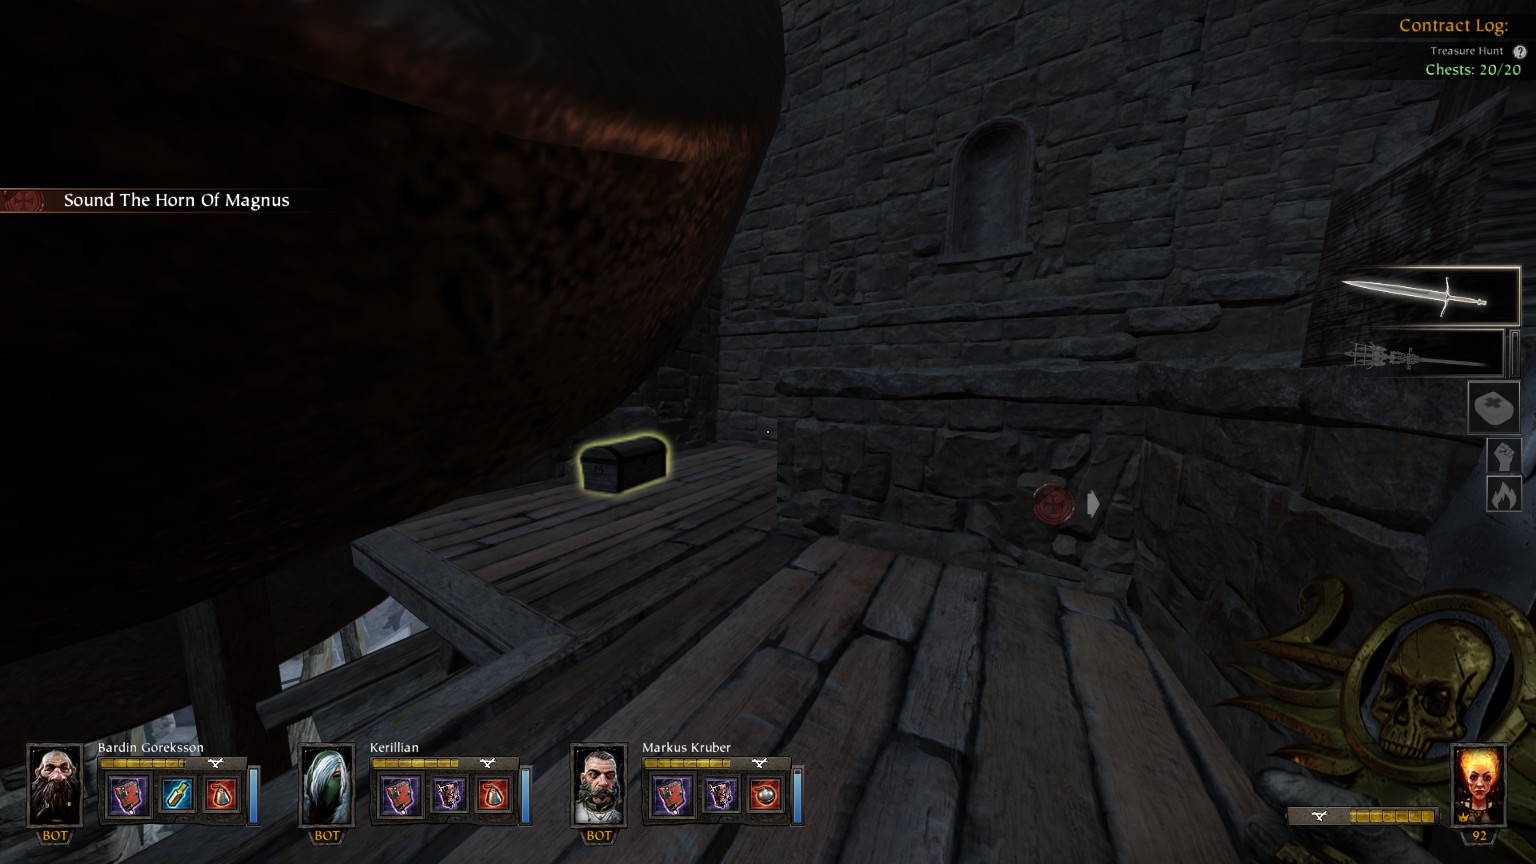
#25/26 (The Horn of Magnus) Just after the one way jump

#26/26 (The Horn of Magnus) On the left
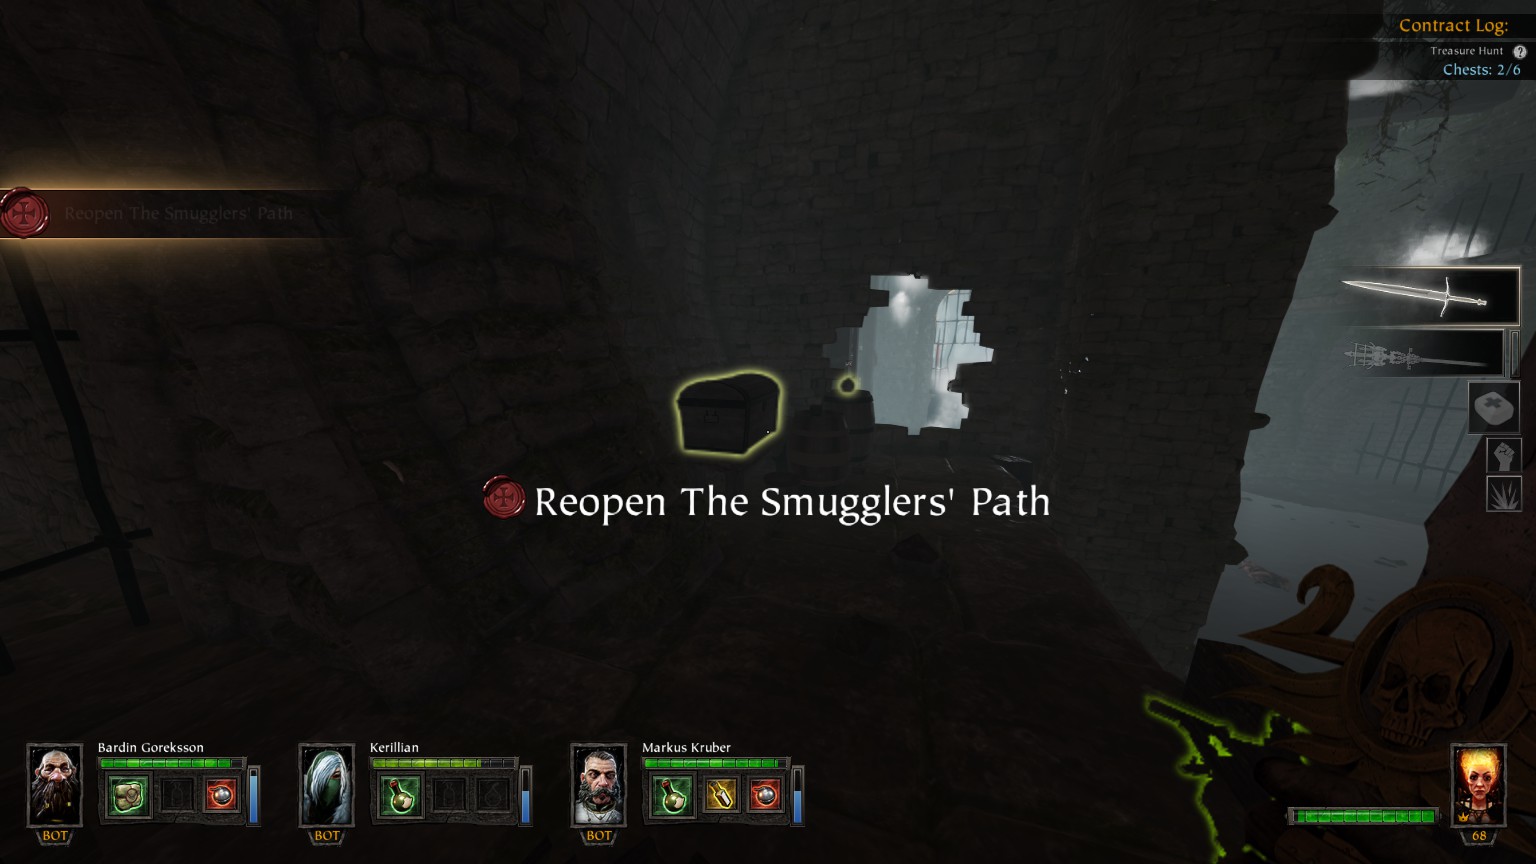
Smuggler’s run
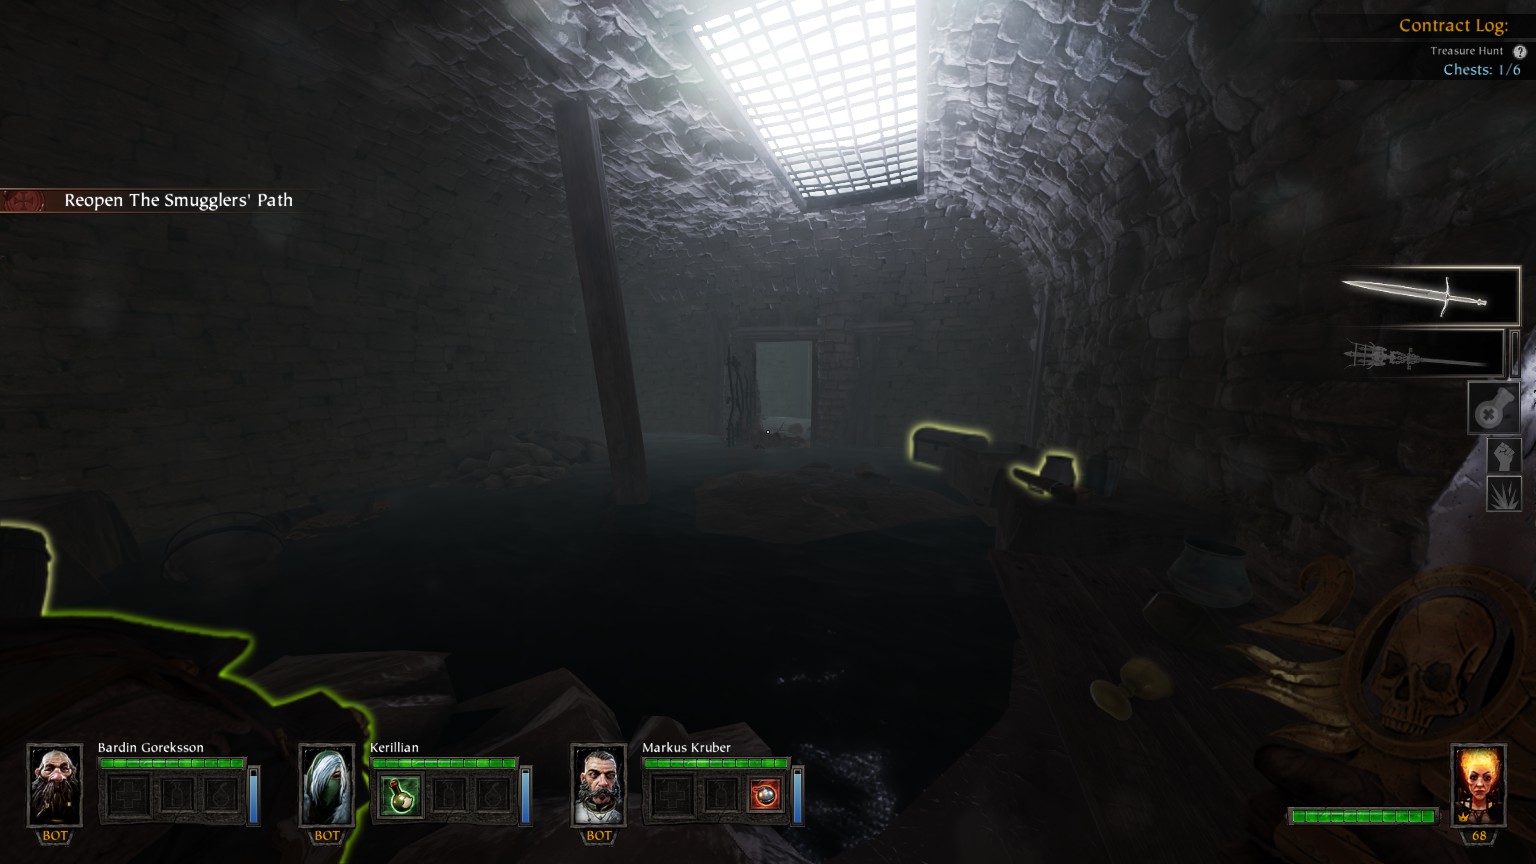
#1/6 (Smuggler’s Den) Beginning

#2/6 (Ubersreik’s Sewers) Chamber on the right, before floodgate 1
#3/6 (Magnusschleuse) On the right, just after floodgate 1
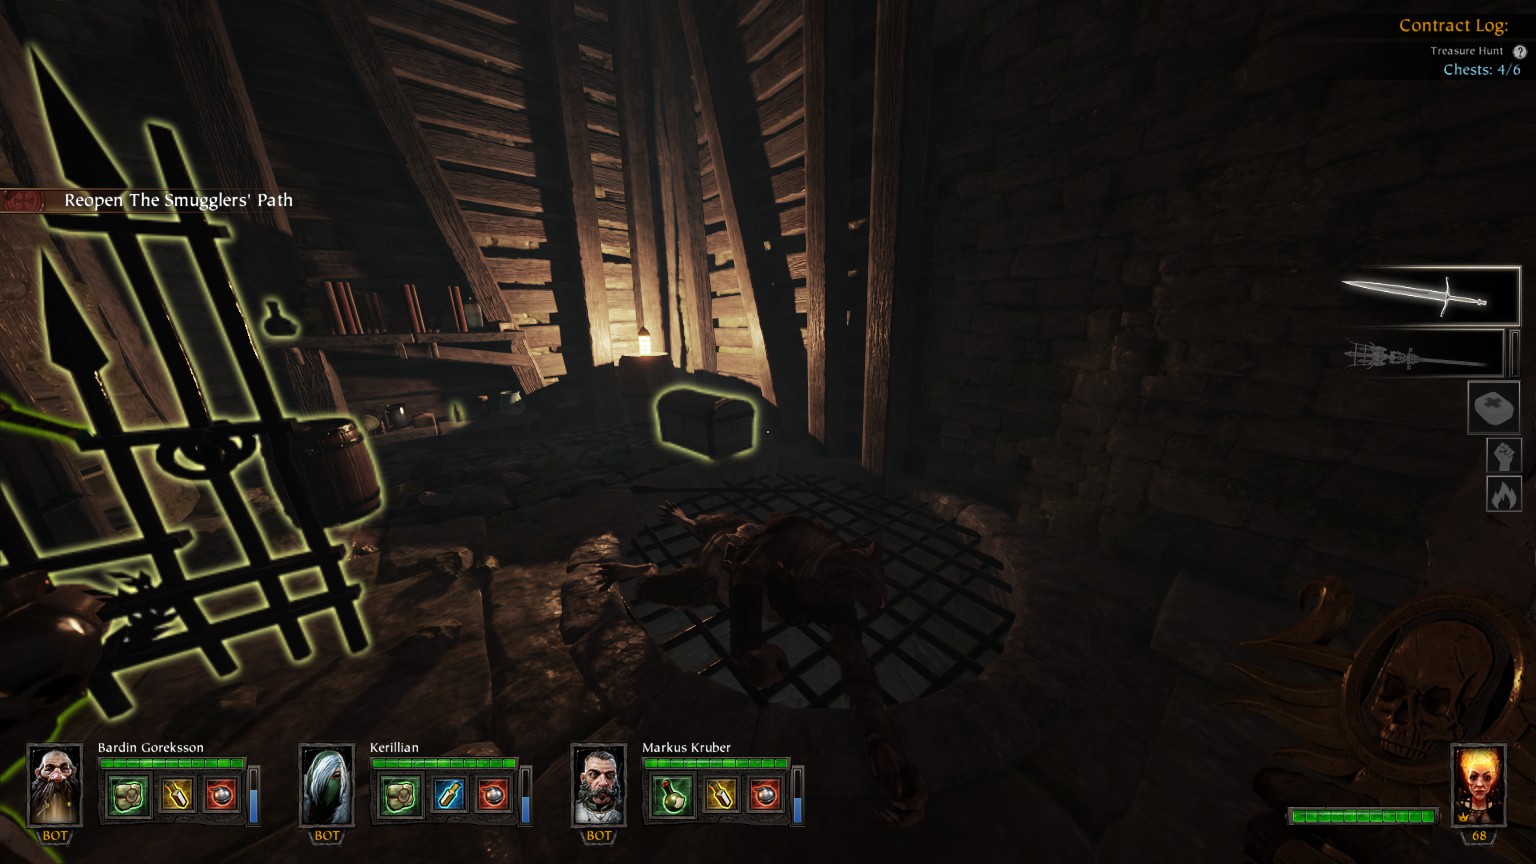
#4/6 (Brandt’s Halls) On the far side of the halls

#5/6 (Brandt’s Halls) Small room on the left just before floodgate 2
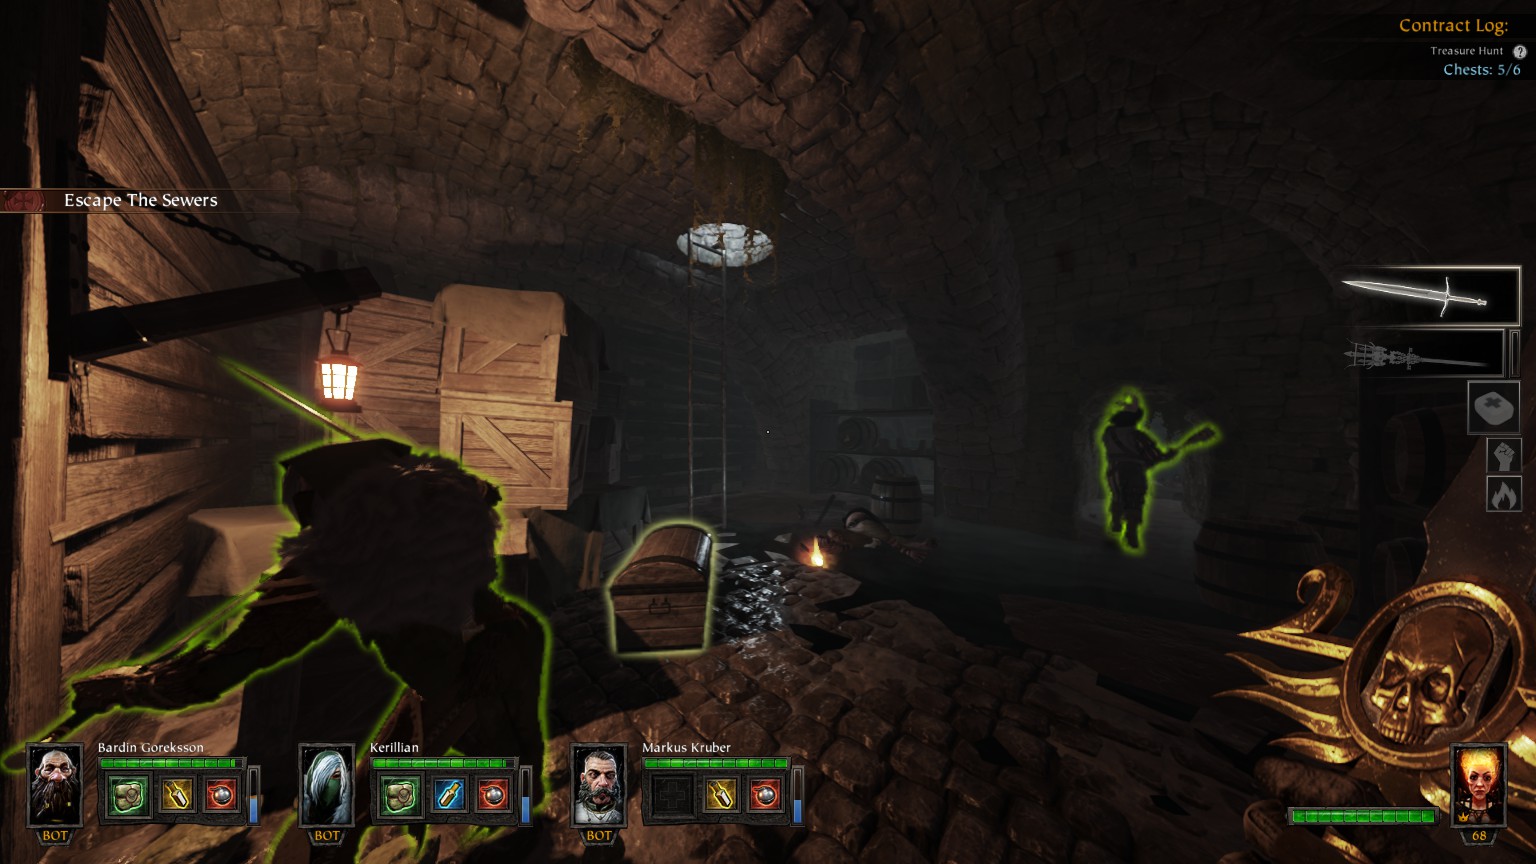
#6/6 (Sigmarschleuse) Sewer exit
Supply and Demand (to do)
You may also want to check out
De greed’smap available in the Vermintide Wiki on Fandom
#1/21 (Flugenheimweg)
#2/21 (Von Holzenauer Potion House)
#3/21 (Von Holzenauer Potion House)
#4/21 (The Dog Pens)
#5/21 (The Dog Pens)
#6/21 (Thulmannplatz)
#7/21 (The Old Granary)
#8/21 (The Old Granary)
#9/21 (The Old Granary)
#10/21 (Merchant Quarter)
#11/21 (Merchant Quarter)
#12 left/21 (Jaegerstrasse)
#12 right/21 (Ludwigsplatz)
#13/21 (Carpenter’s Guild)
#14/21 (Carpenter’s Guild)
#15/21 (Merchant Quarter Cesspool)
#16/21 (Merchant Quarter Cesspool)
#17/21 (Merchant Quarter Cesspool)
#18/21 (The Market Square)
#19/21 (The Market Square)
#20/21 (The Market Square)
#21/21 (The Market Square)
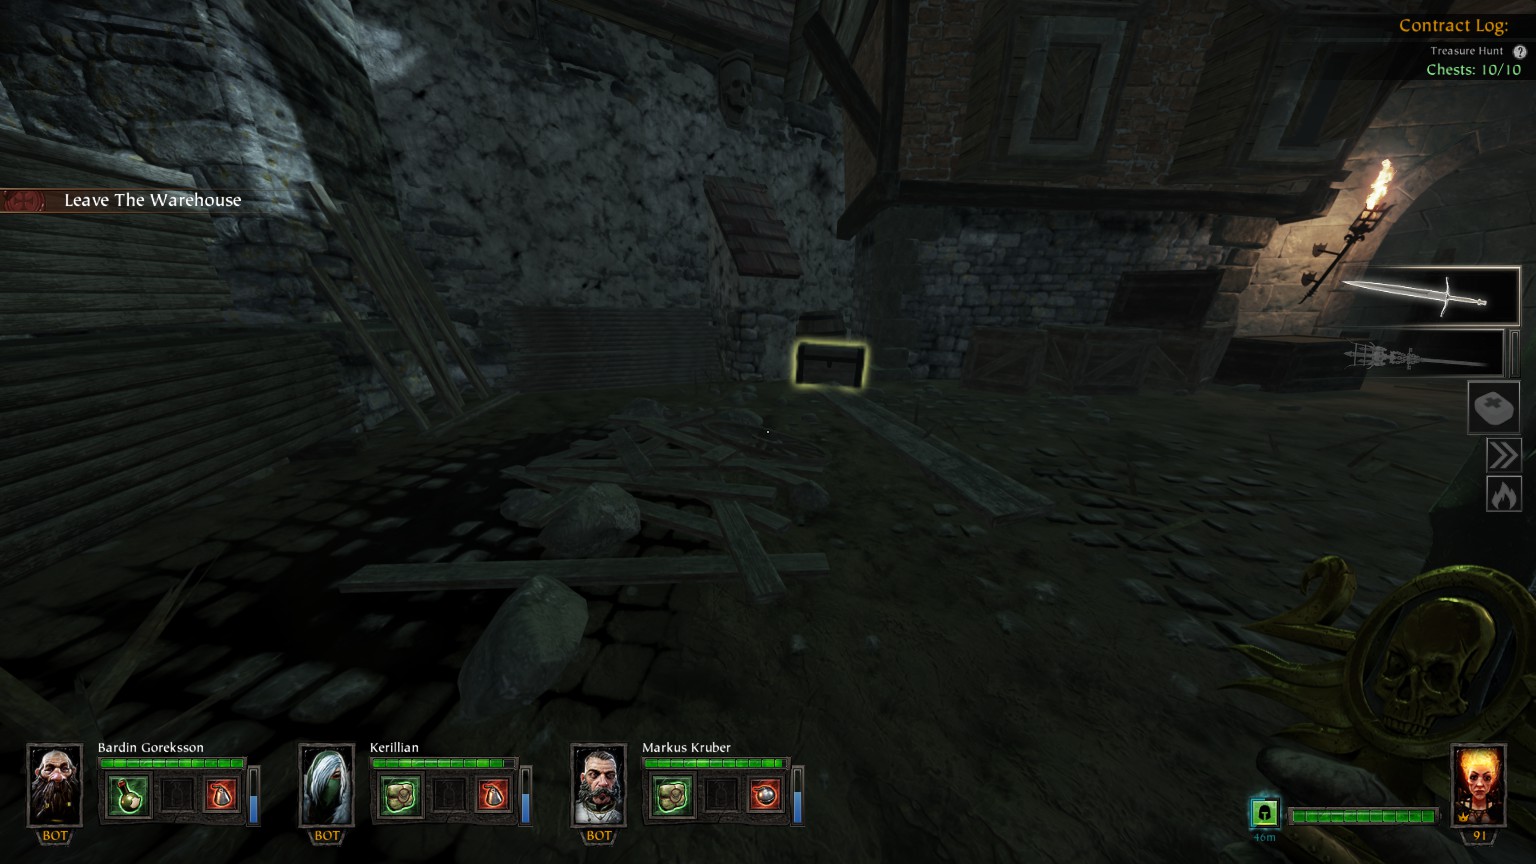
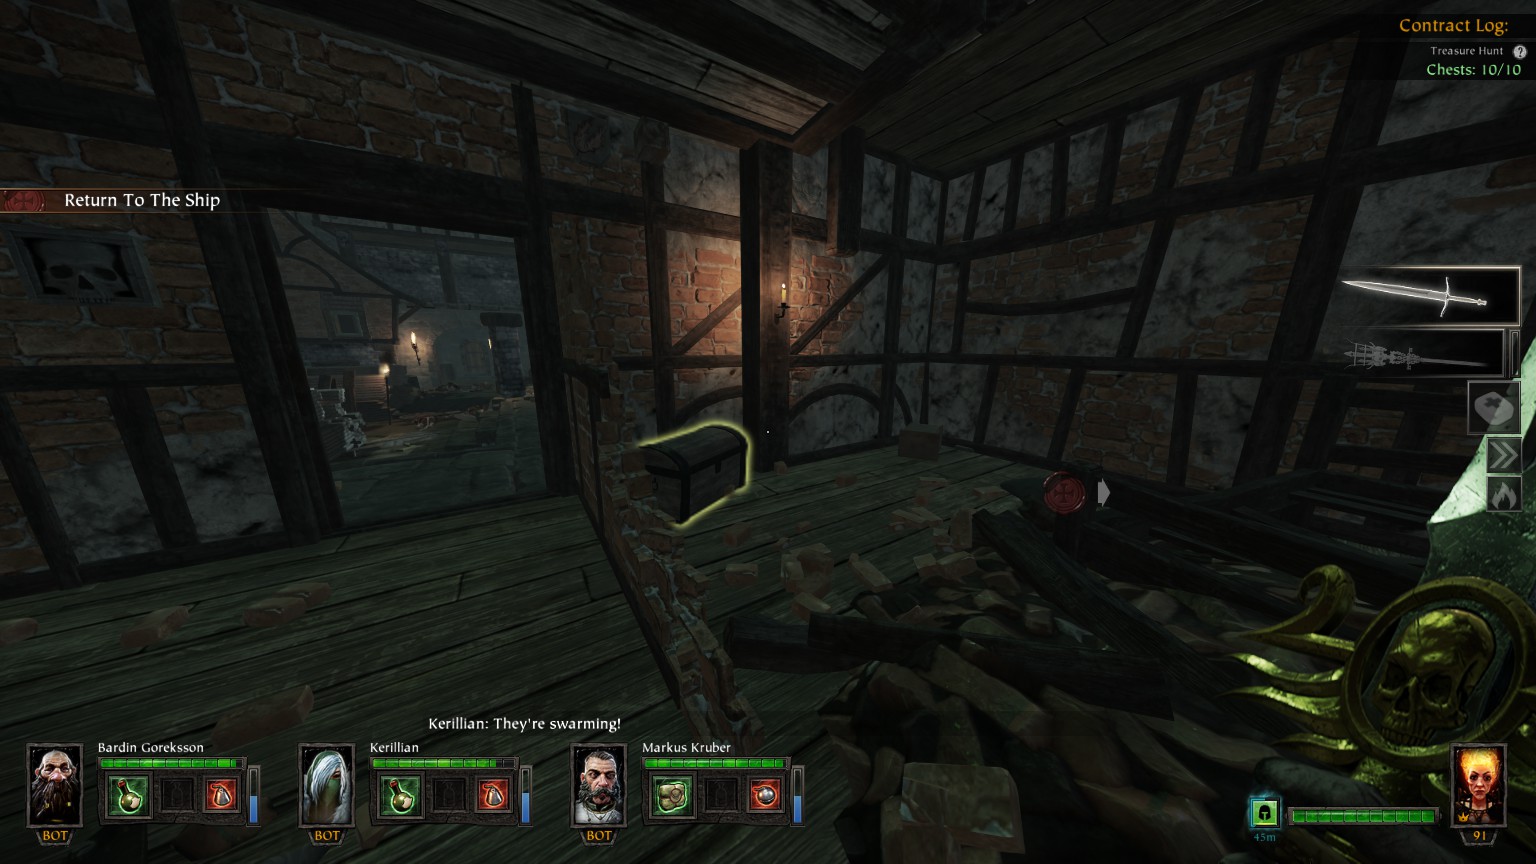
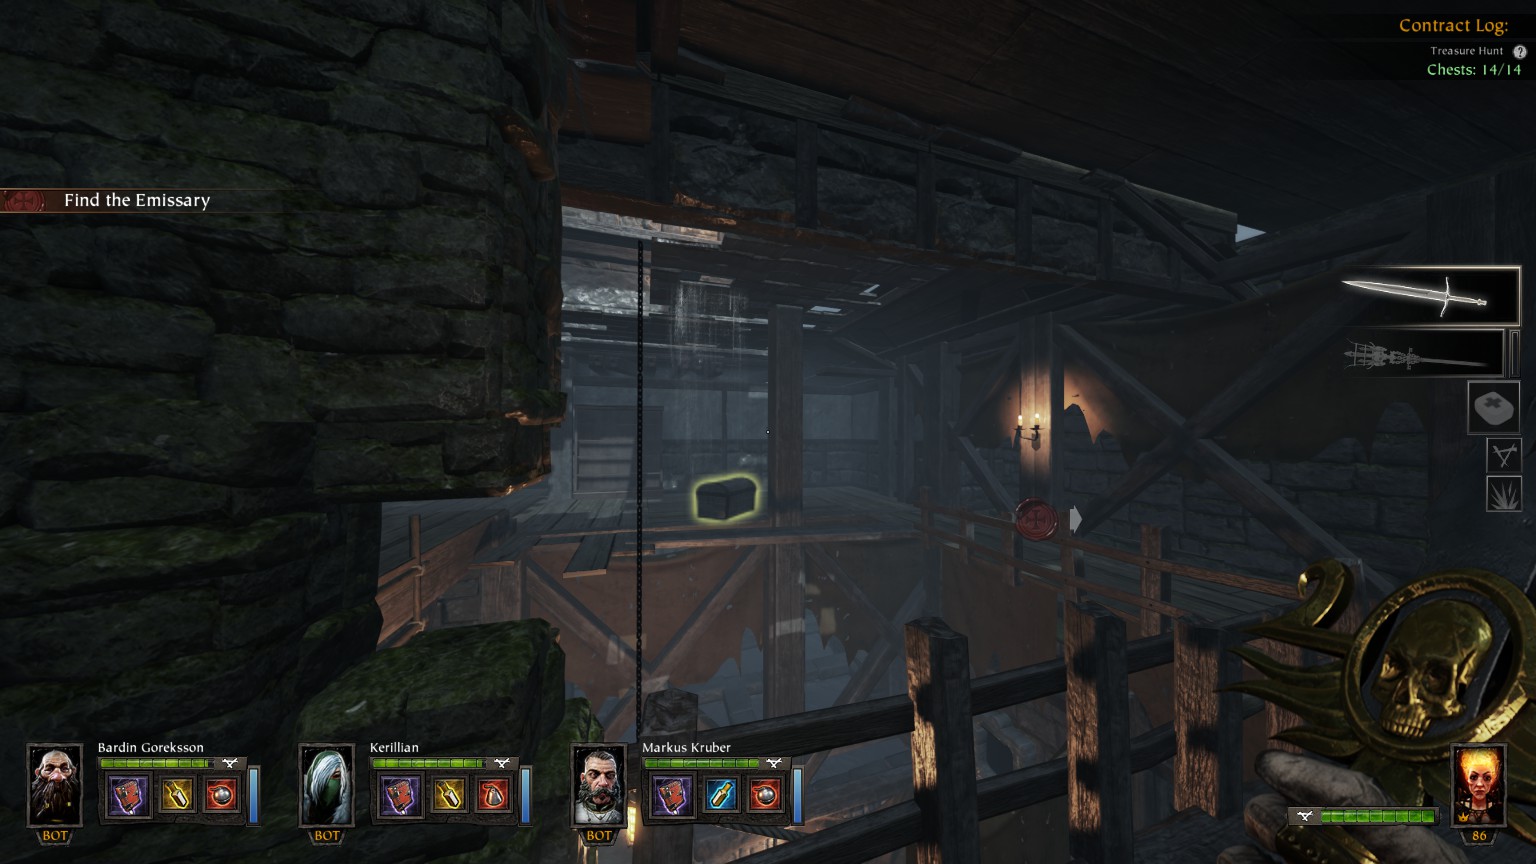
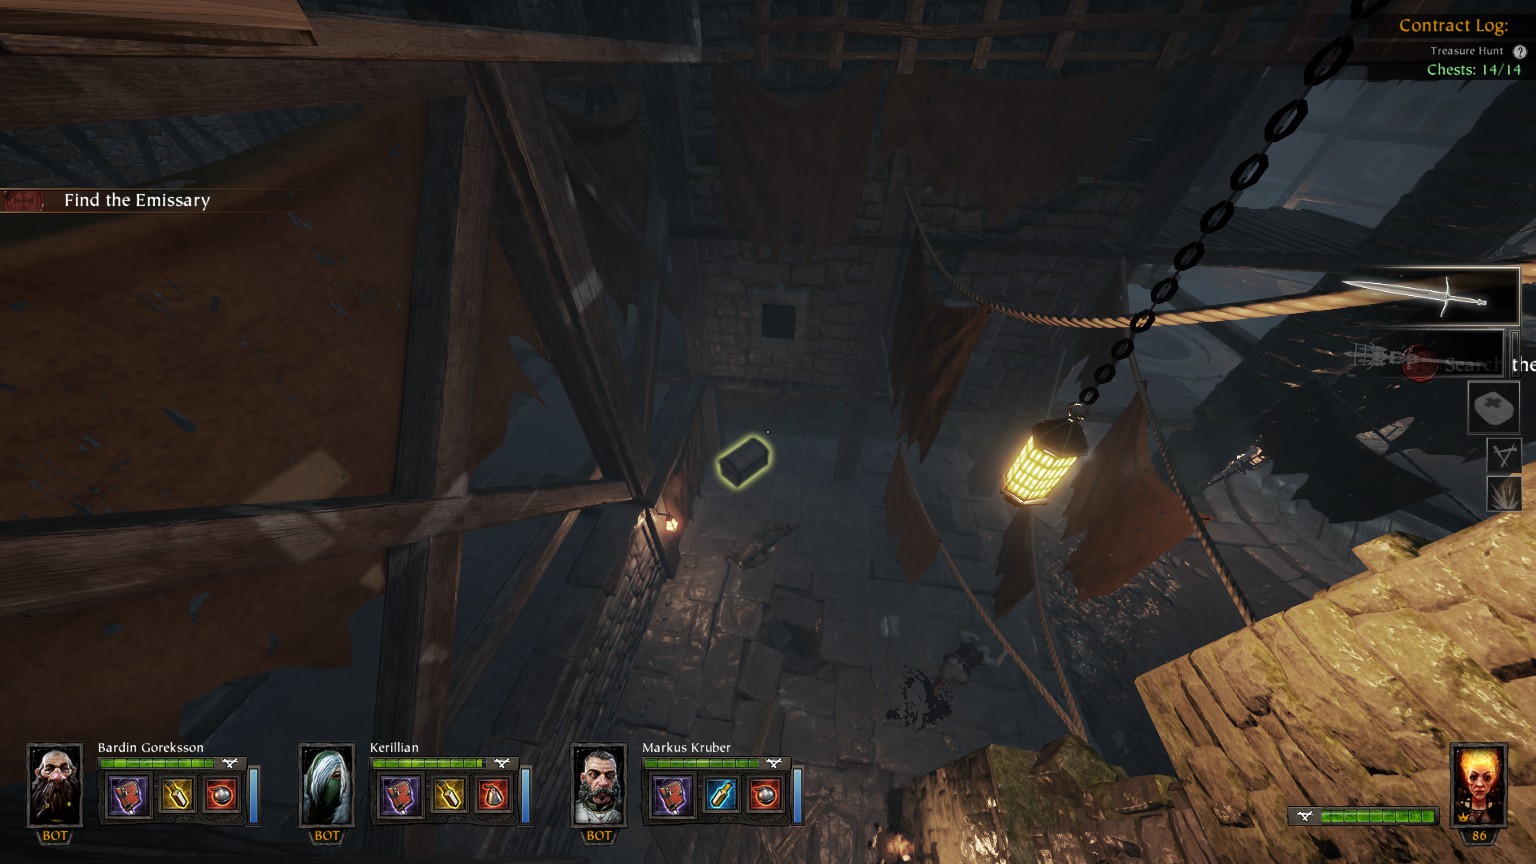
Black Powder
You may also want to check out the guide by inkyblackfire on steam that gives a video walk-through
Chests are counted counterclockwise to the map
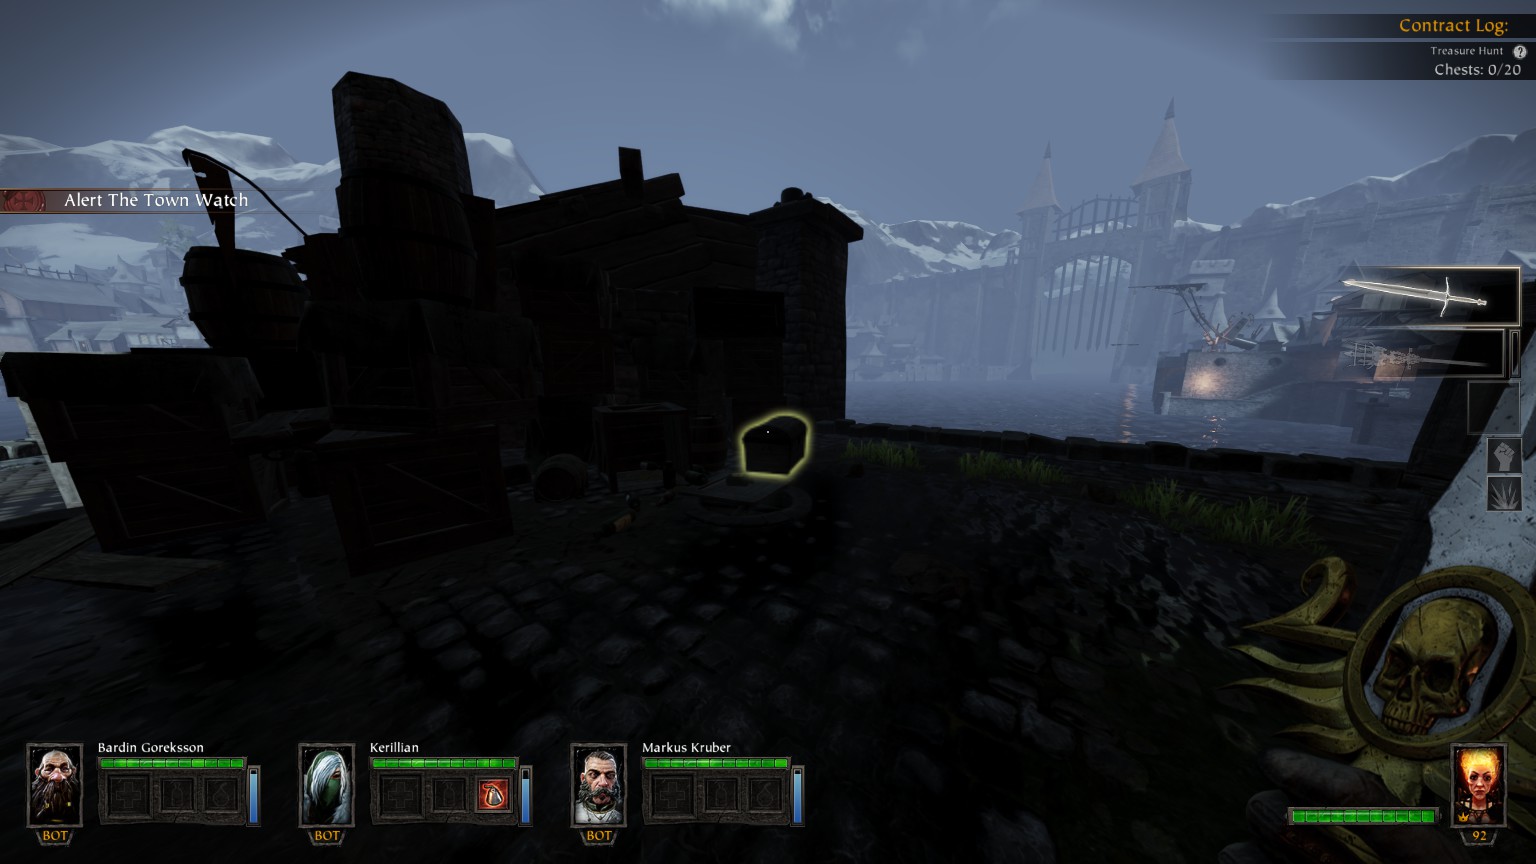
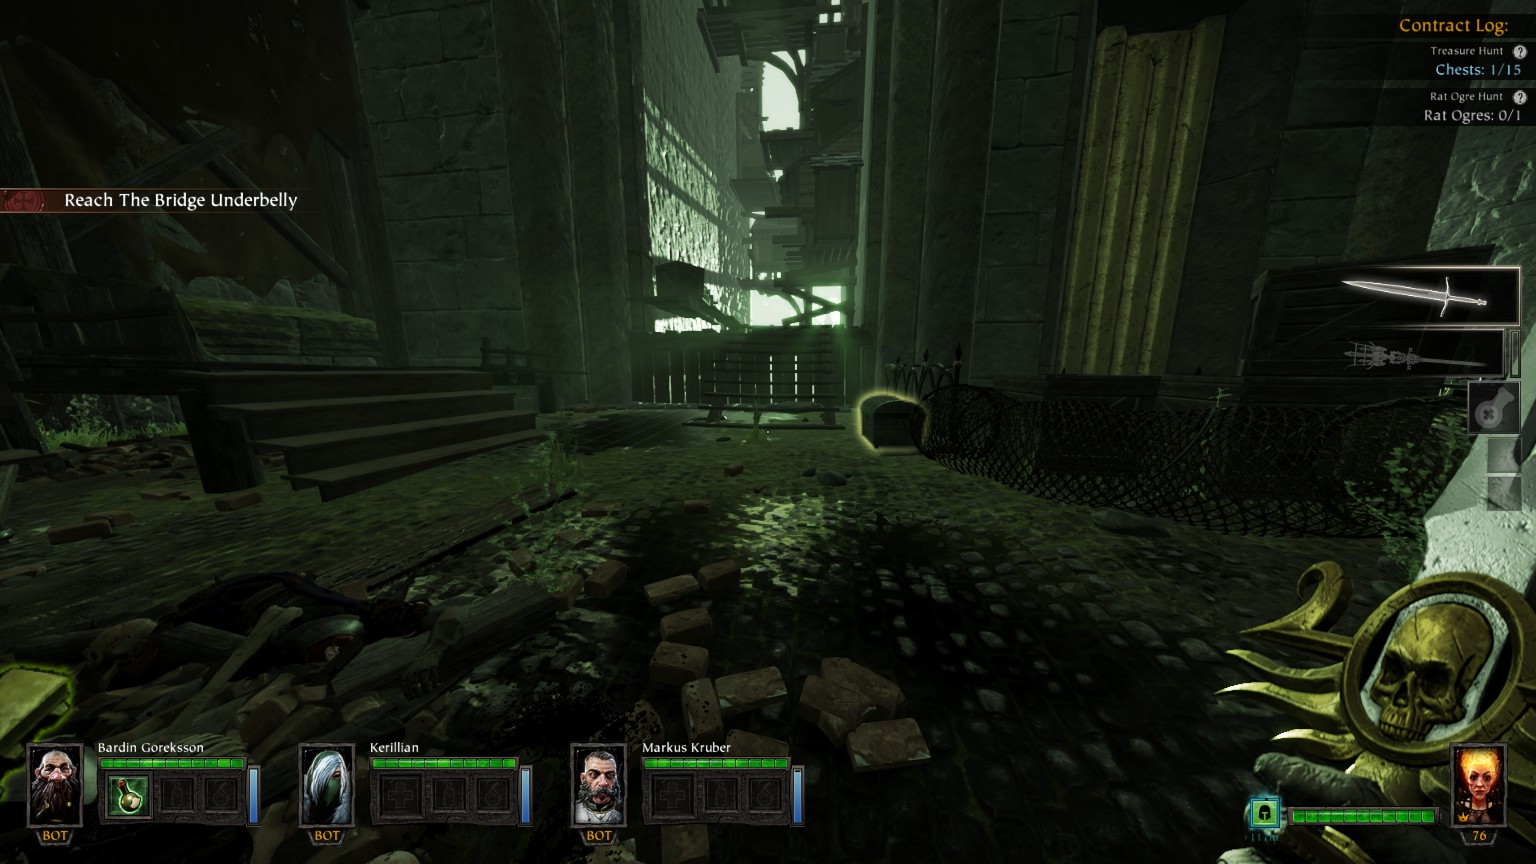
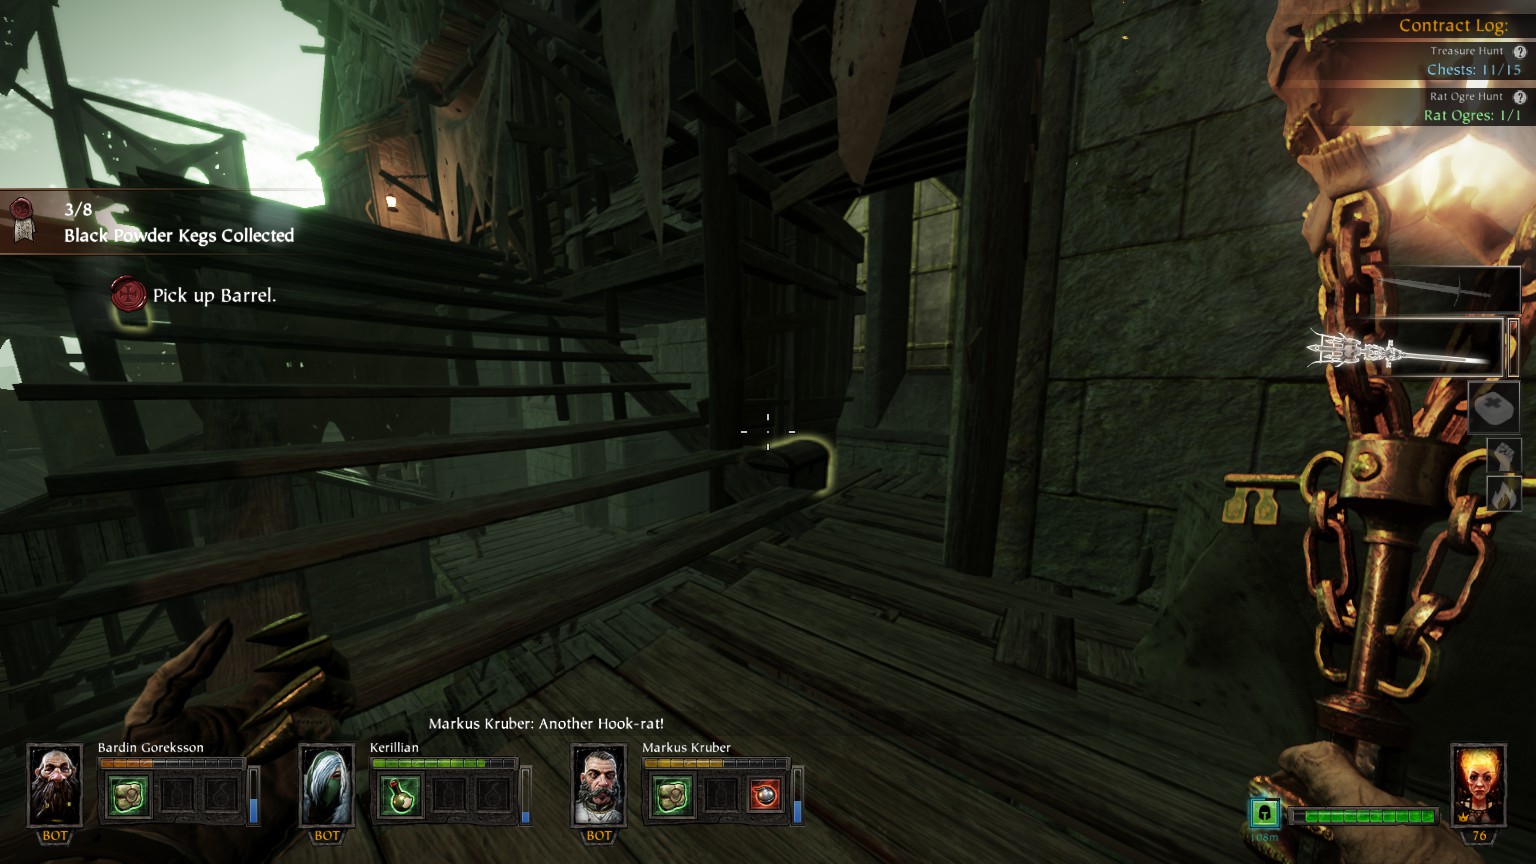
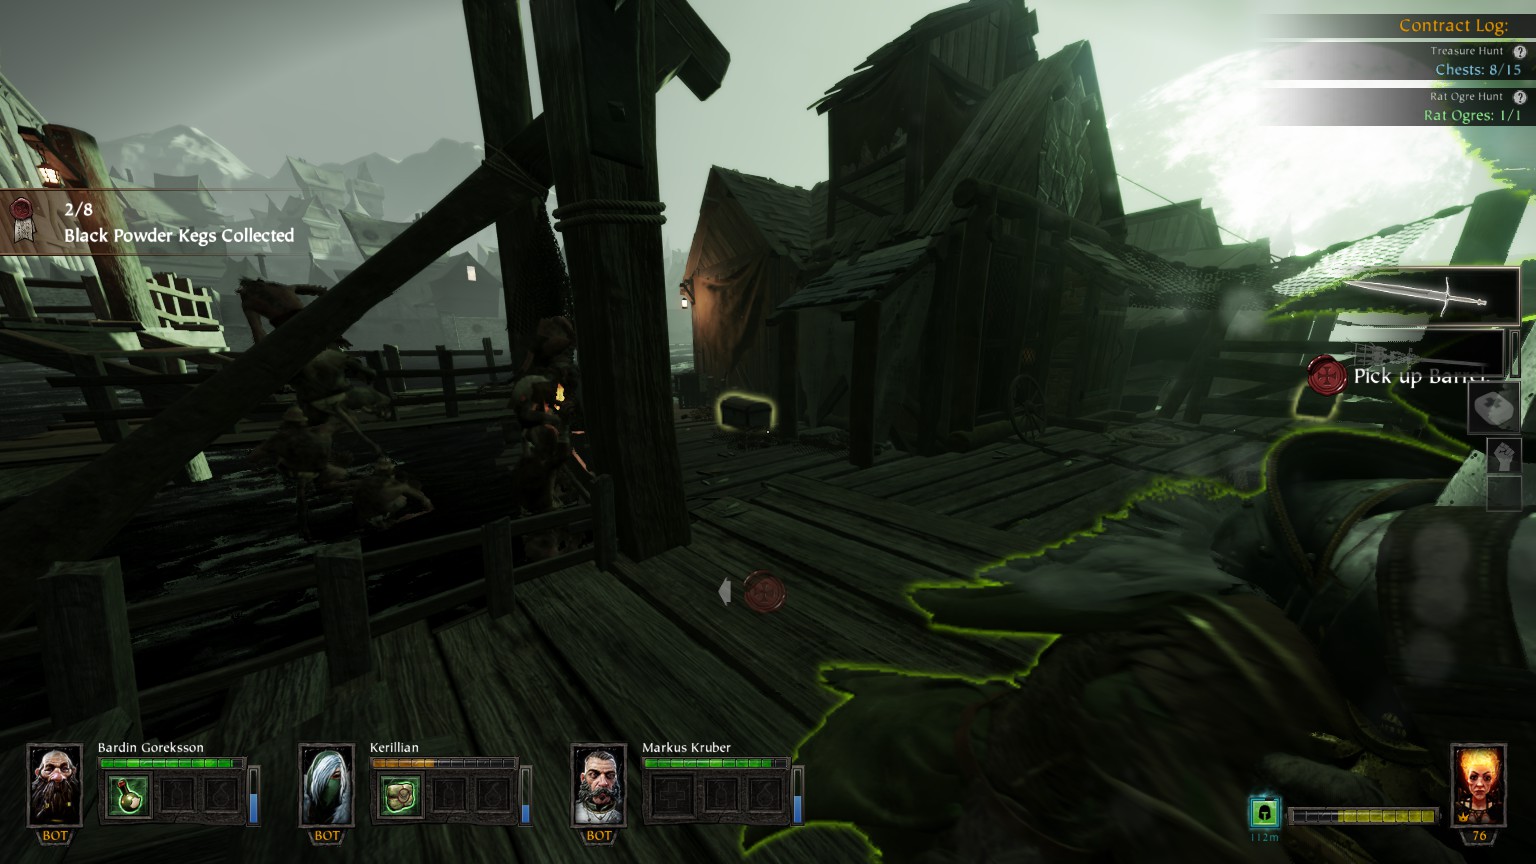
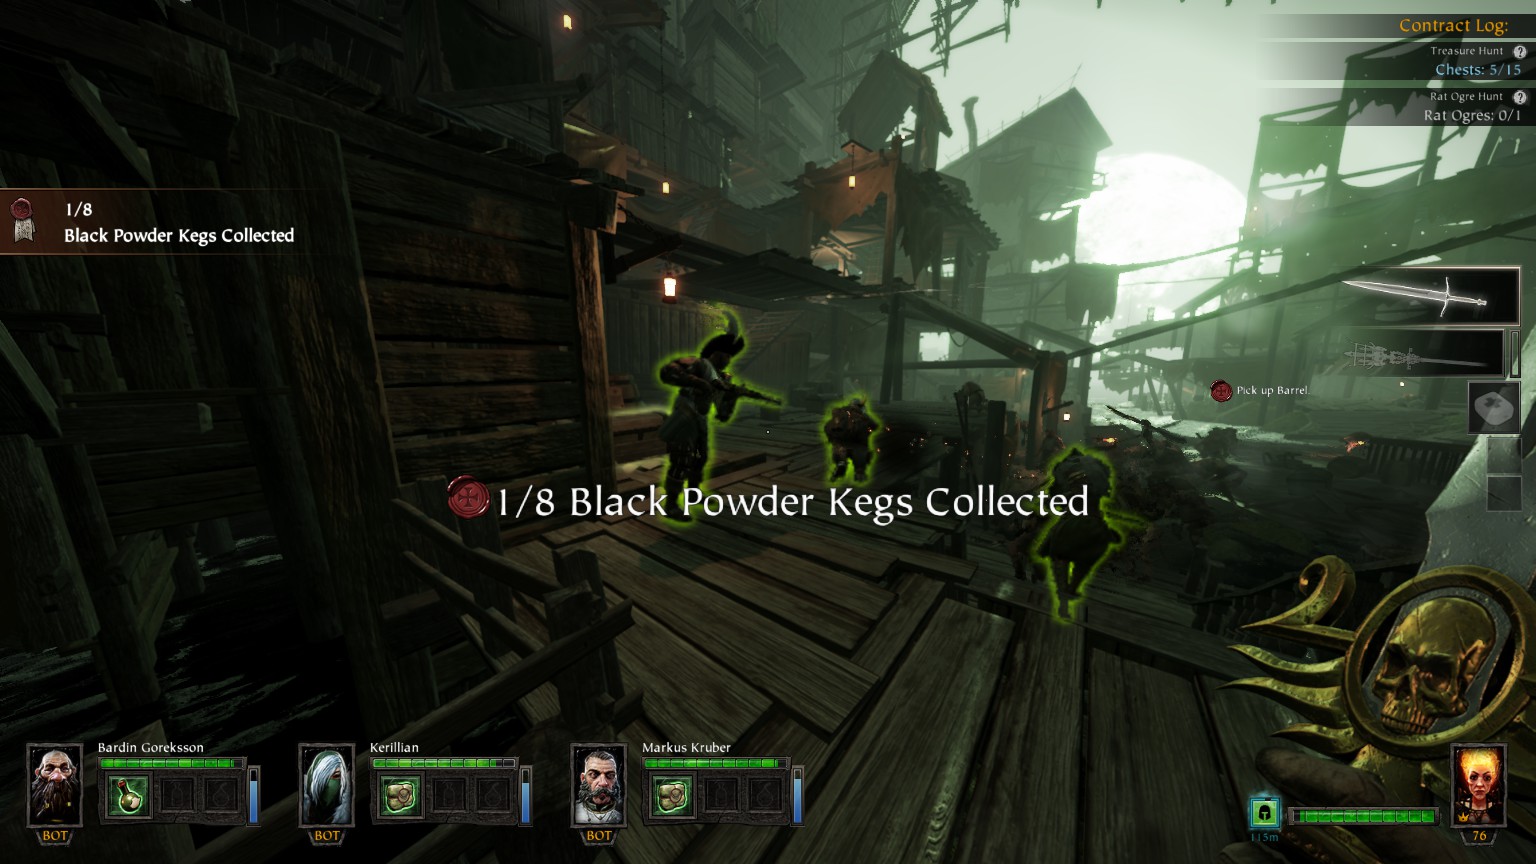
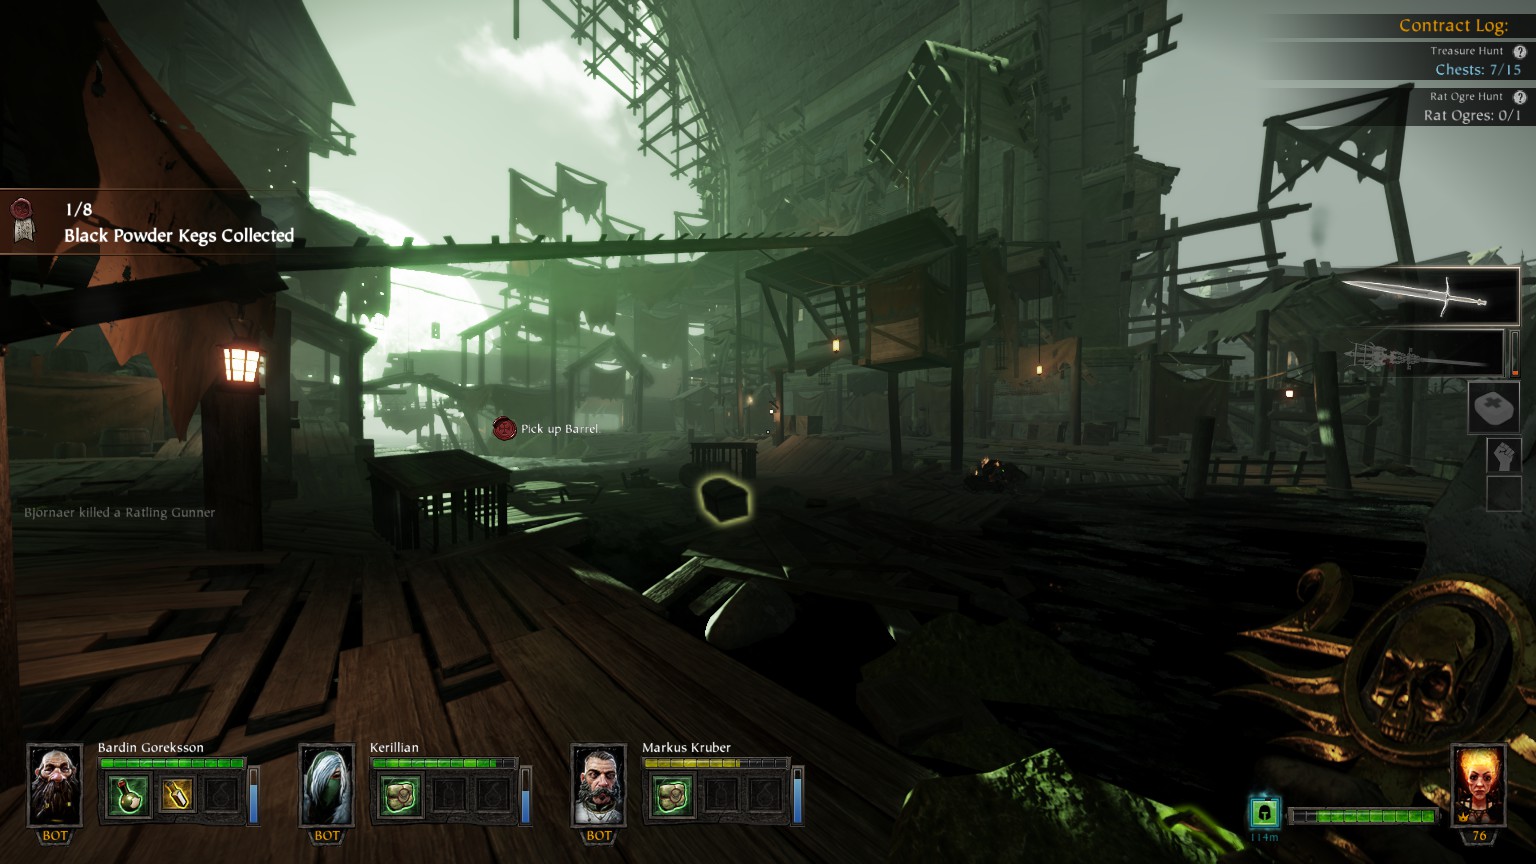
#1/15 Portside (you may also find a lore book page here)
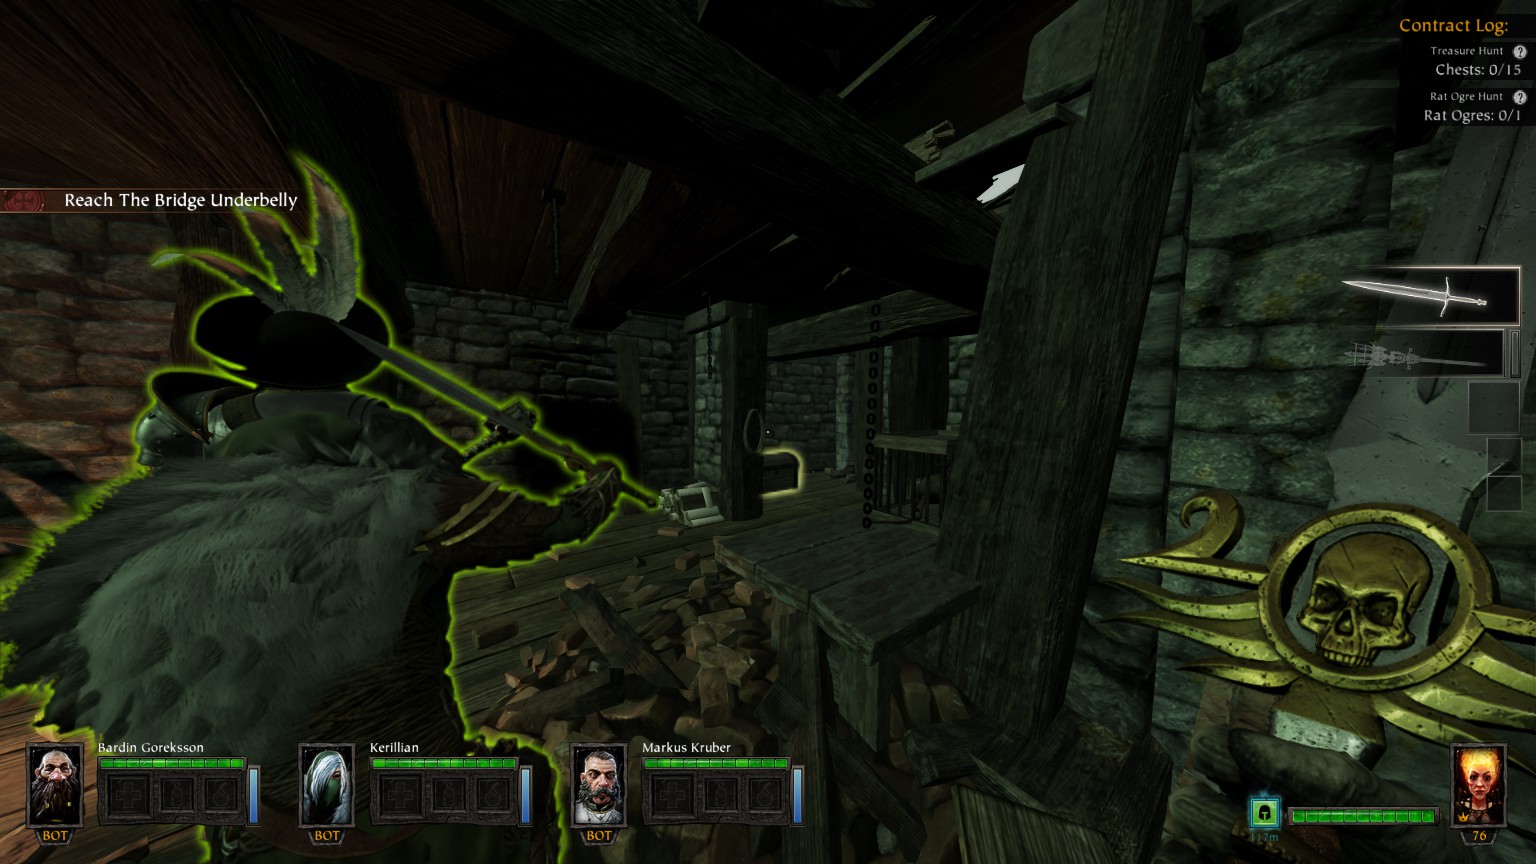
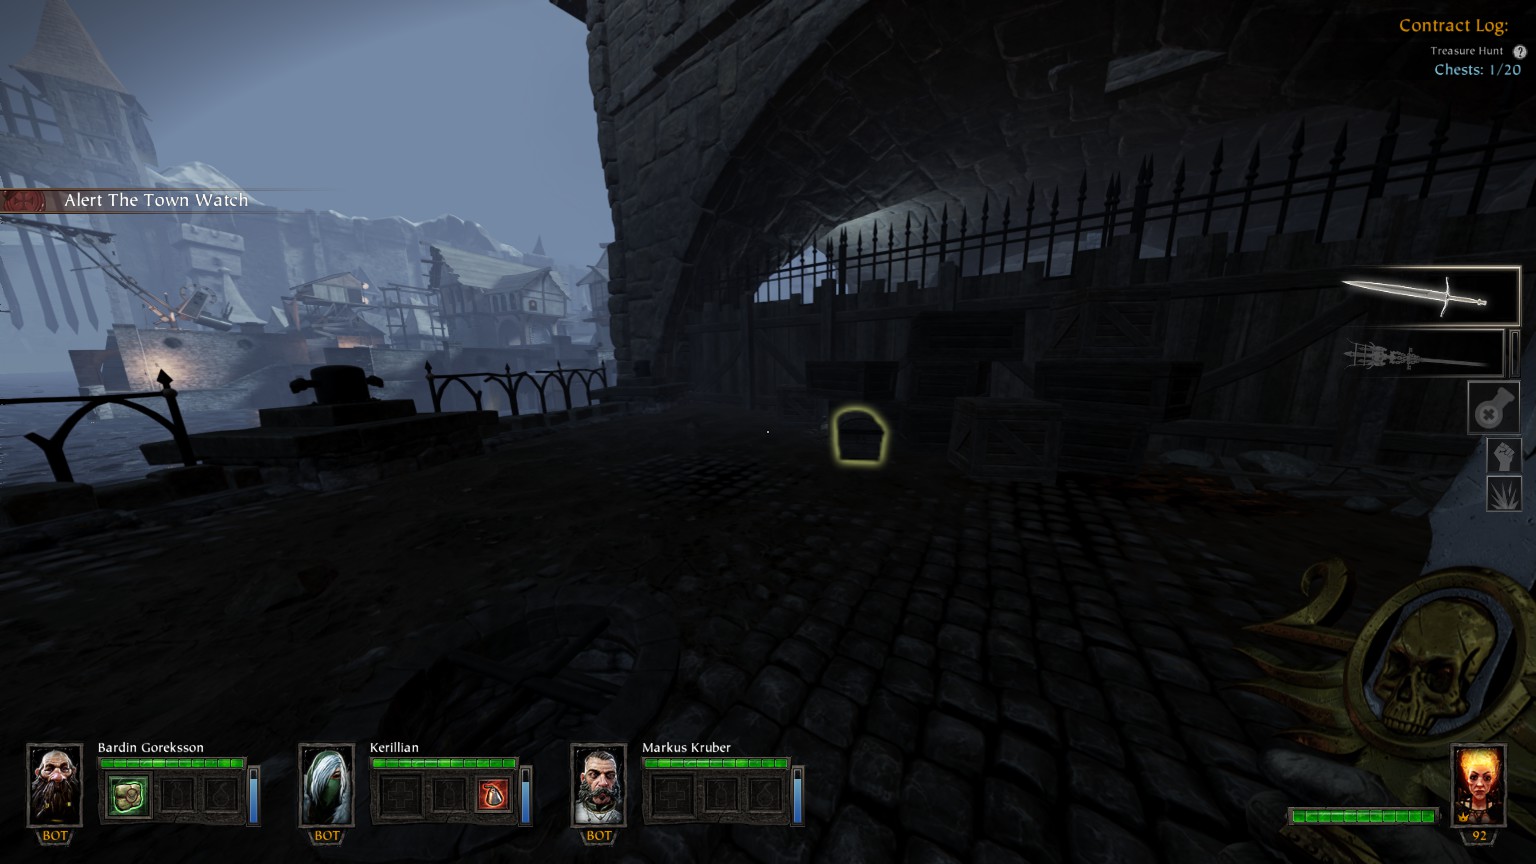
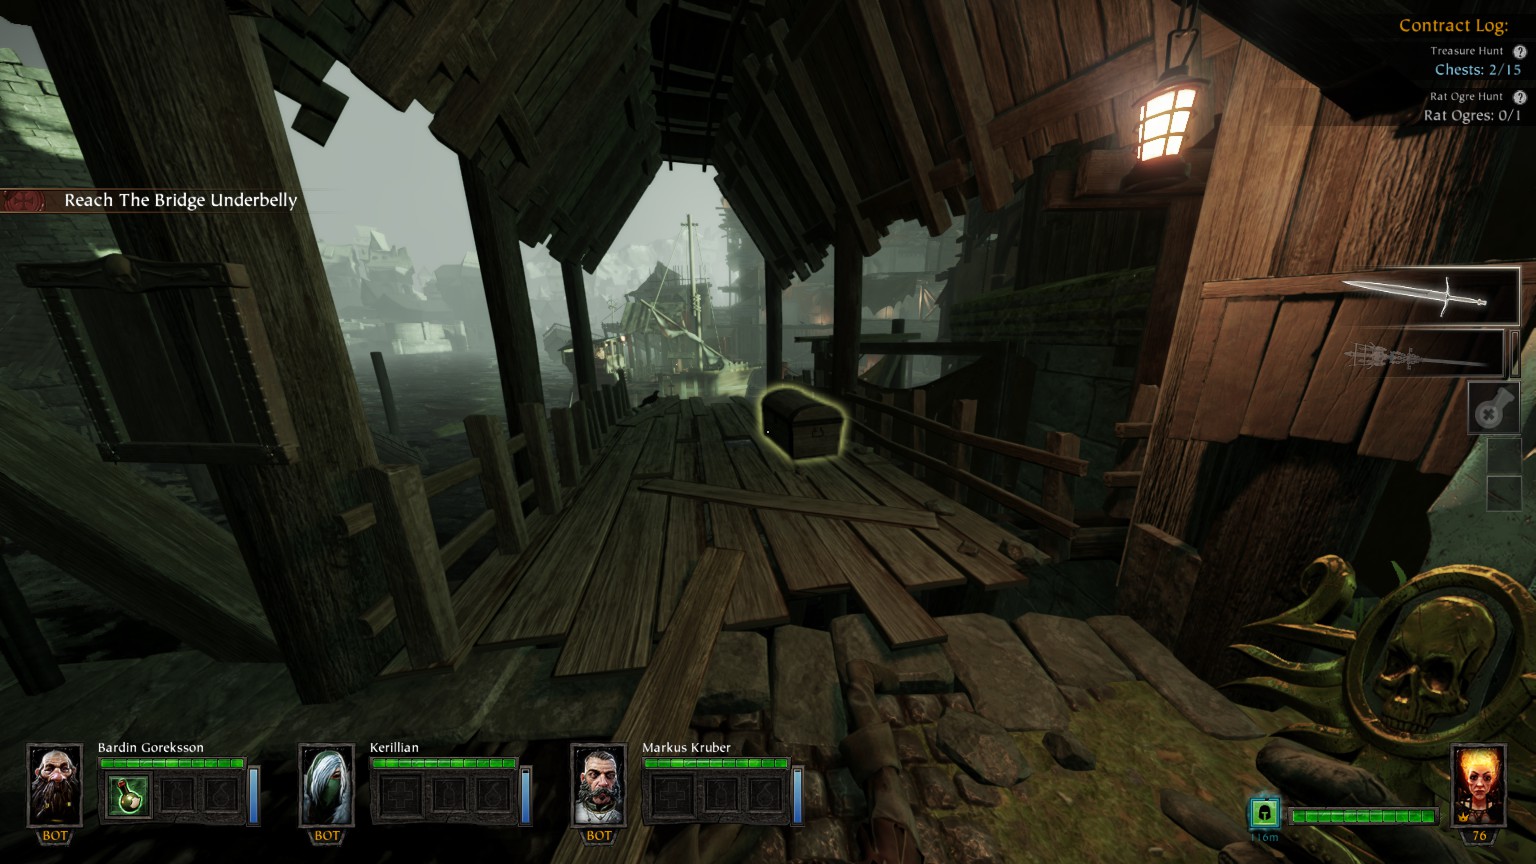
#2/15 Portside
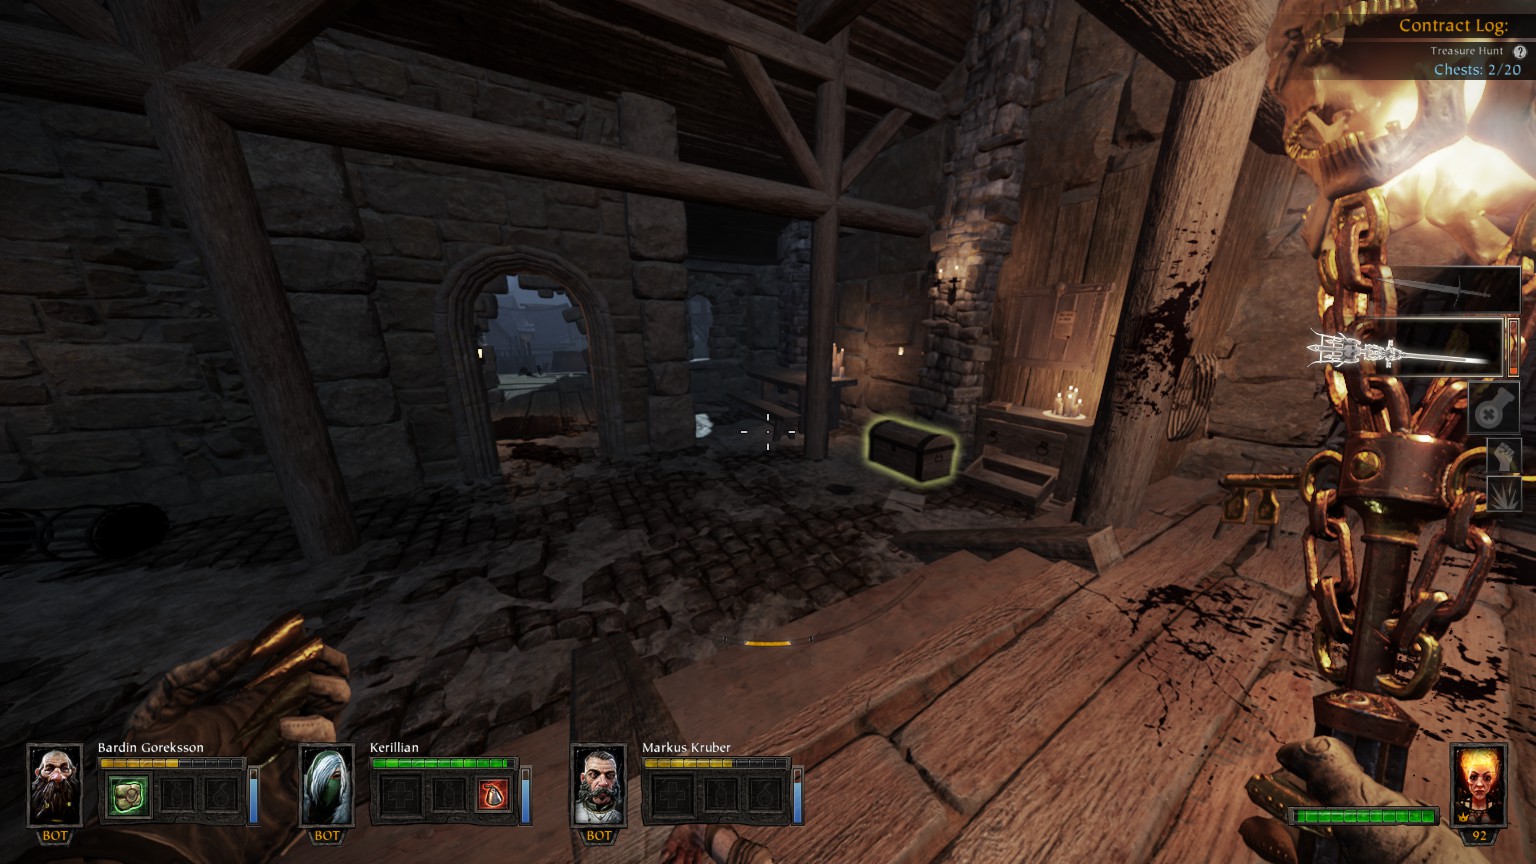
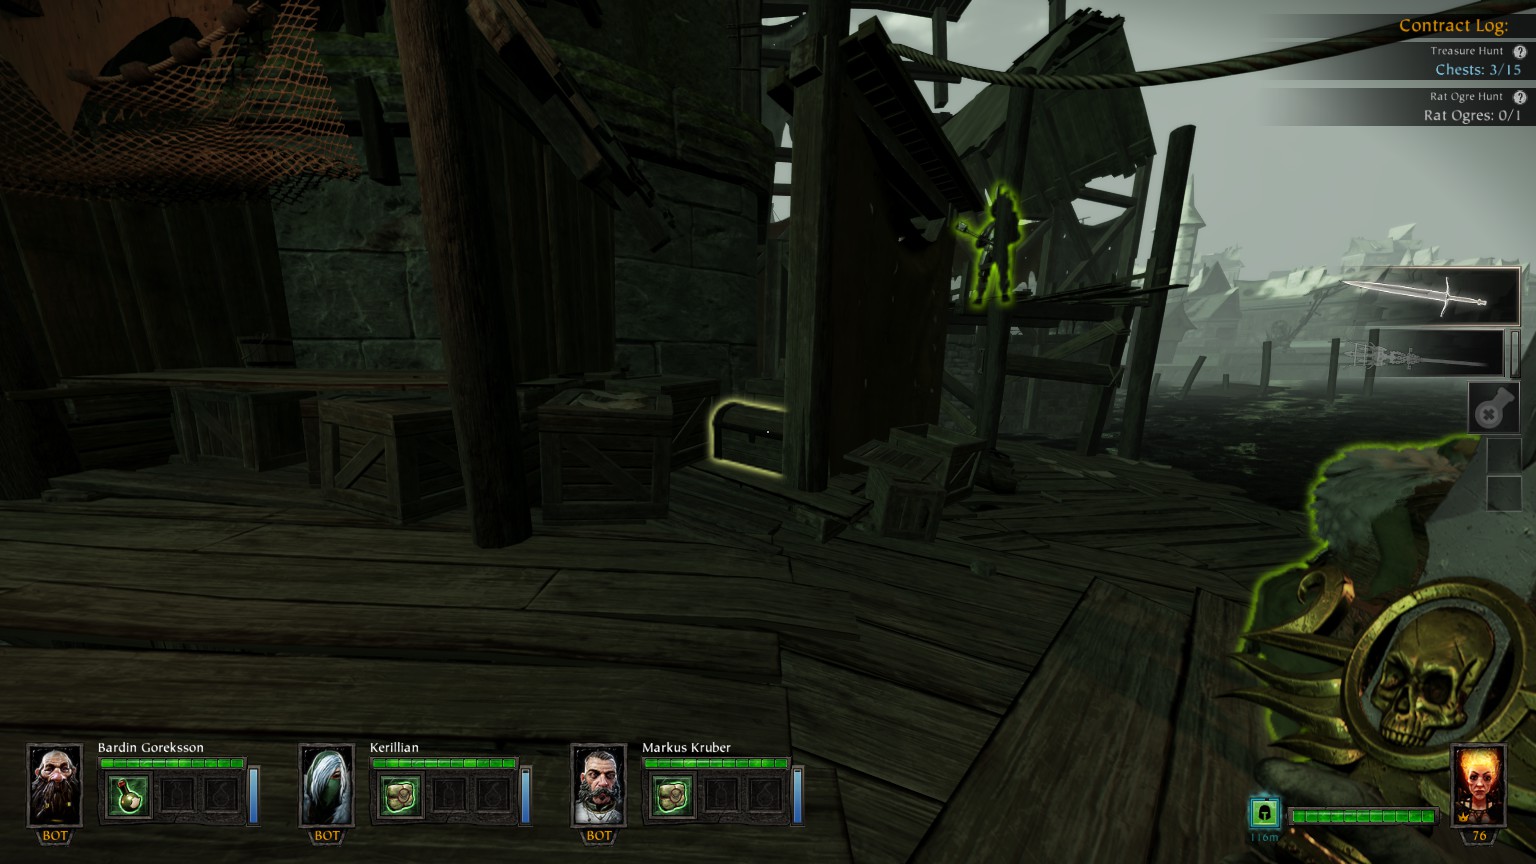
#3/15 Portside, just before point of no return
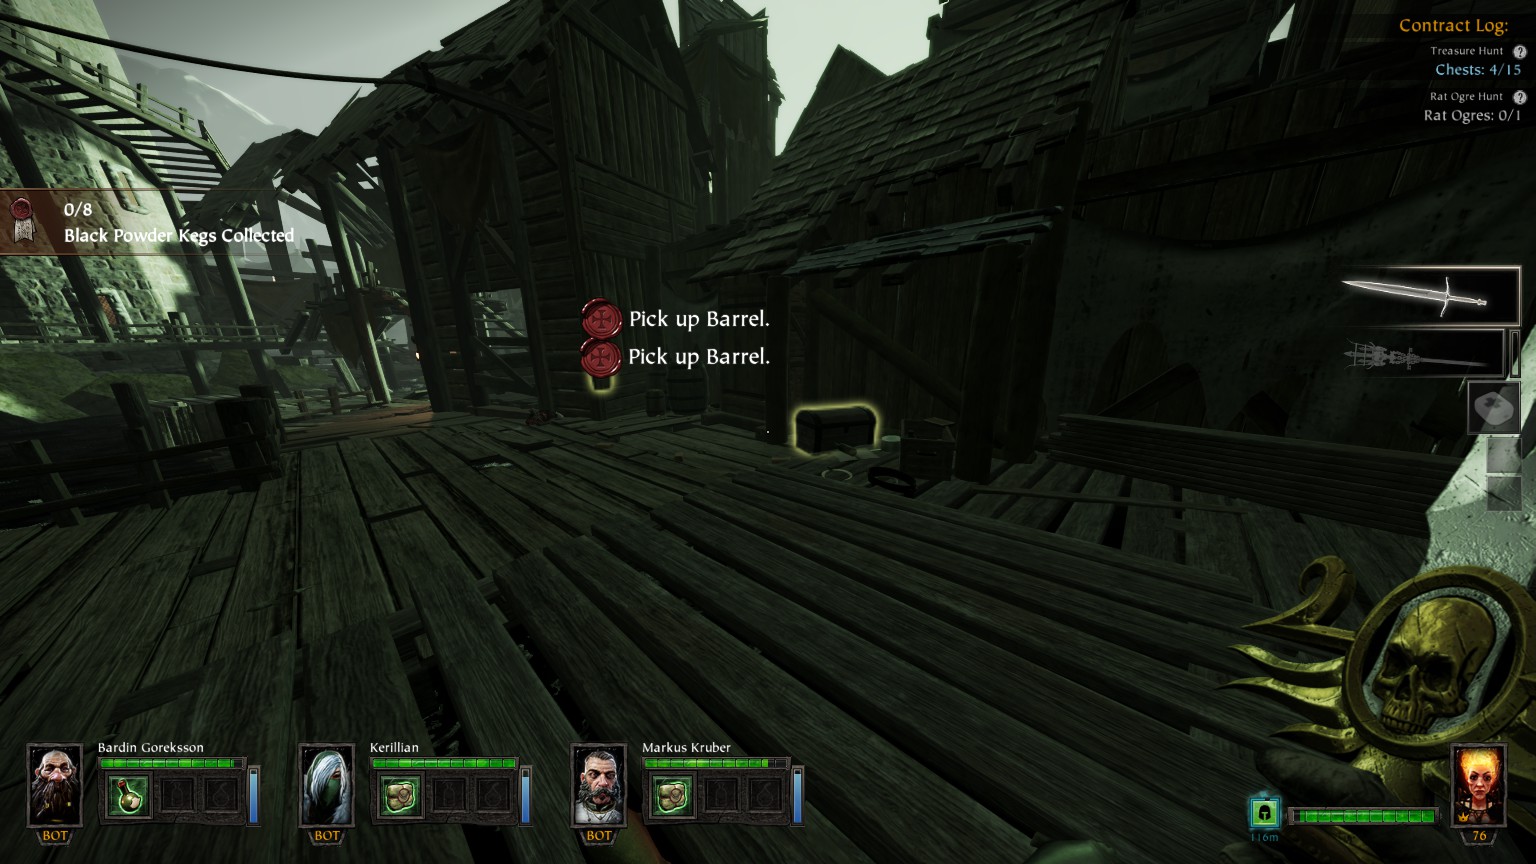
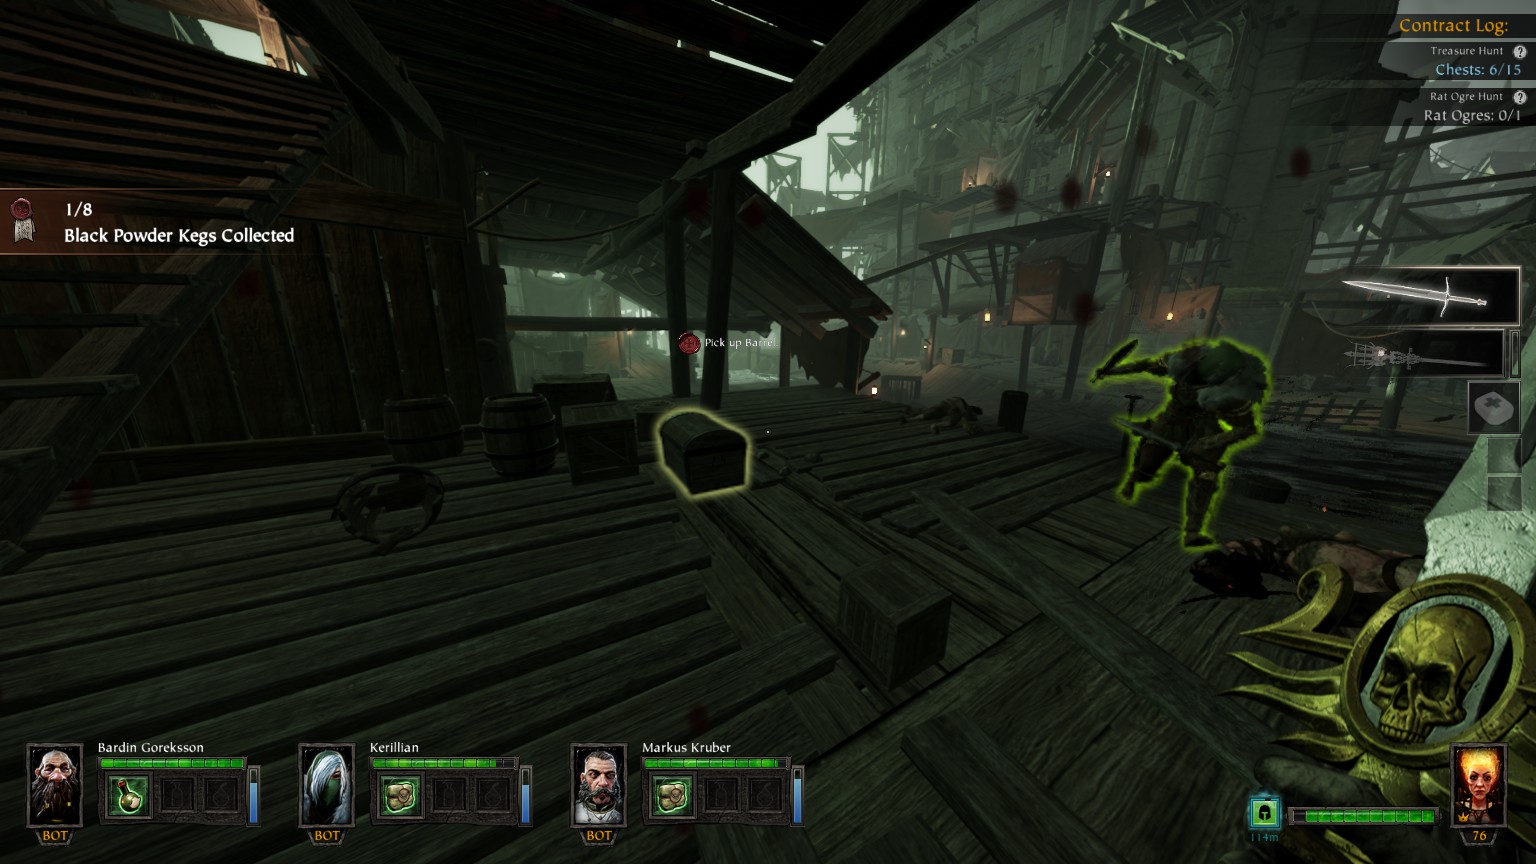
The Underbelly #4-6/15
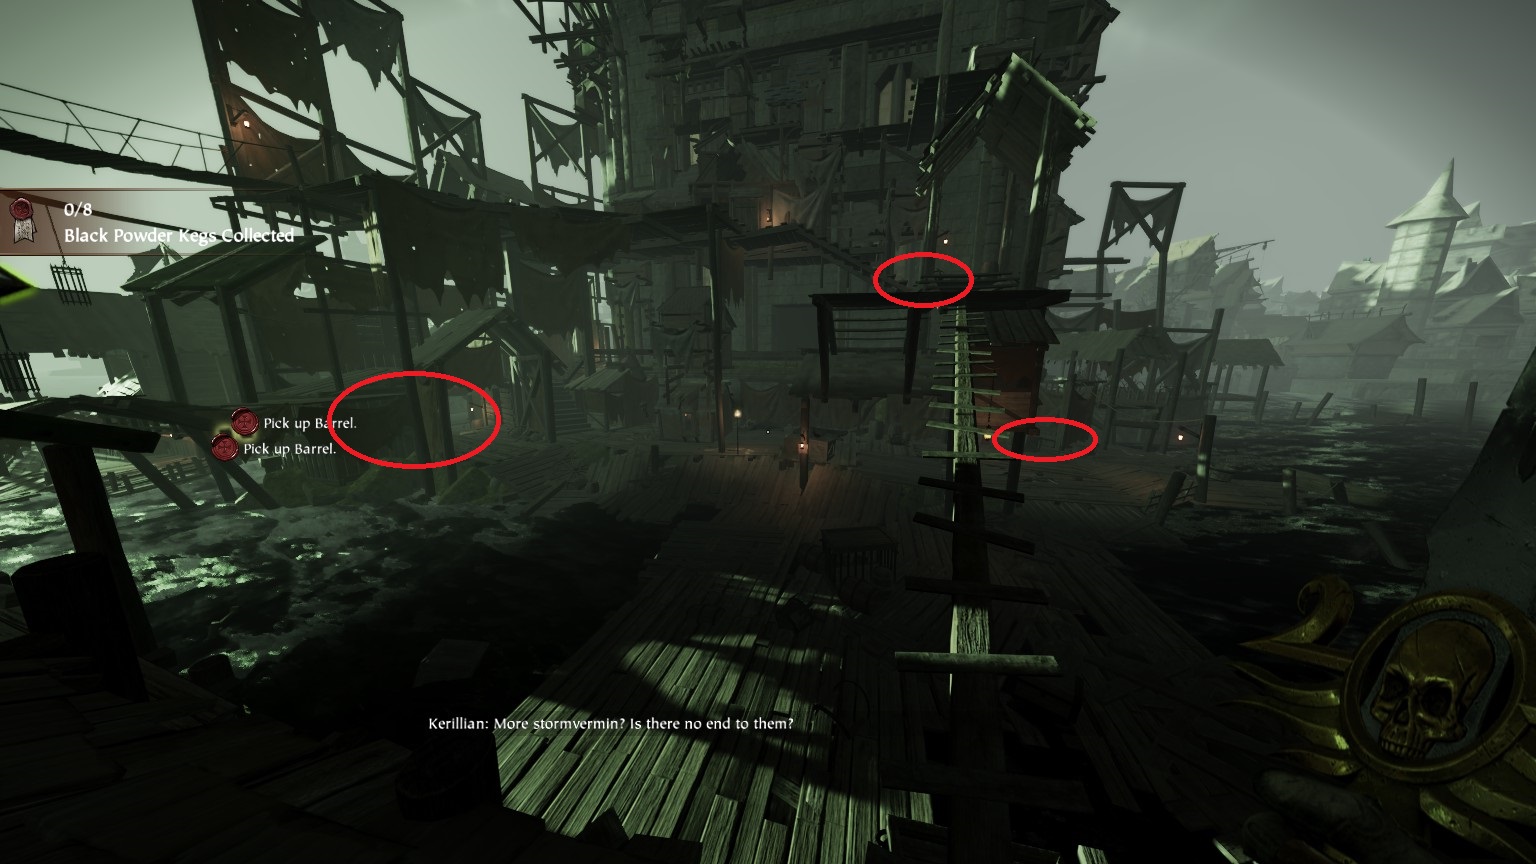
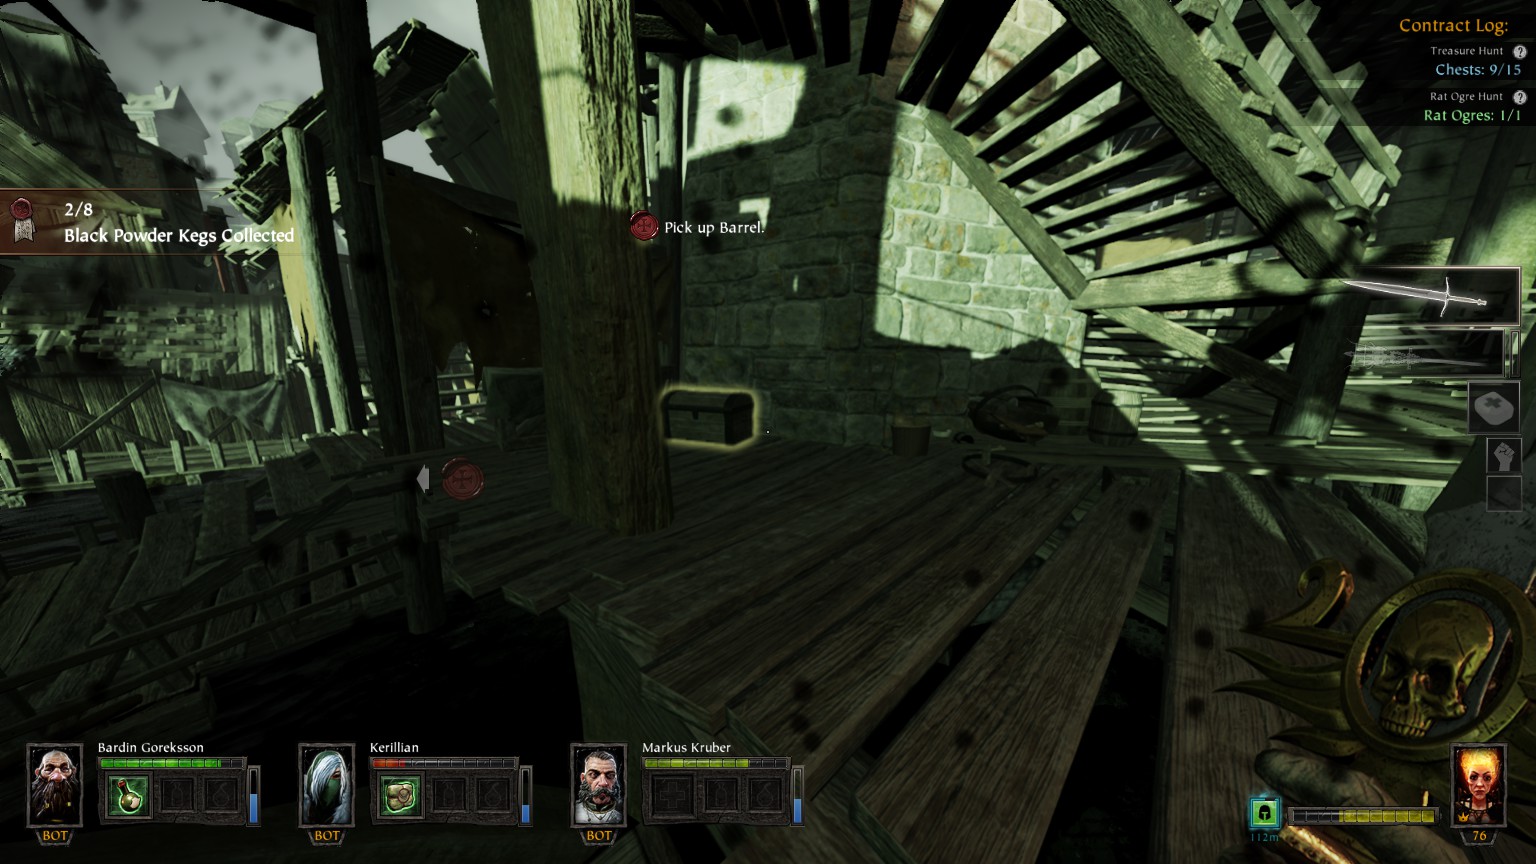
#4/15 The Underbelly, just after the point of no return
#5/15 The Underbelly, يمين, وسط, Top level
#6/15 The Underbelly, يمين, Top end, Lower level
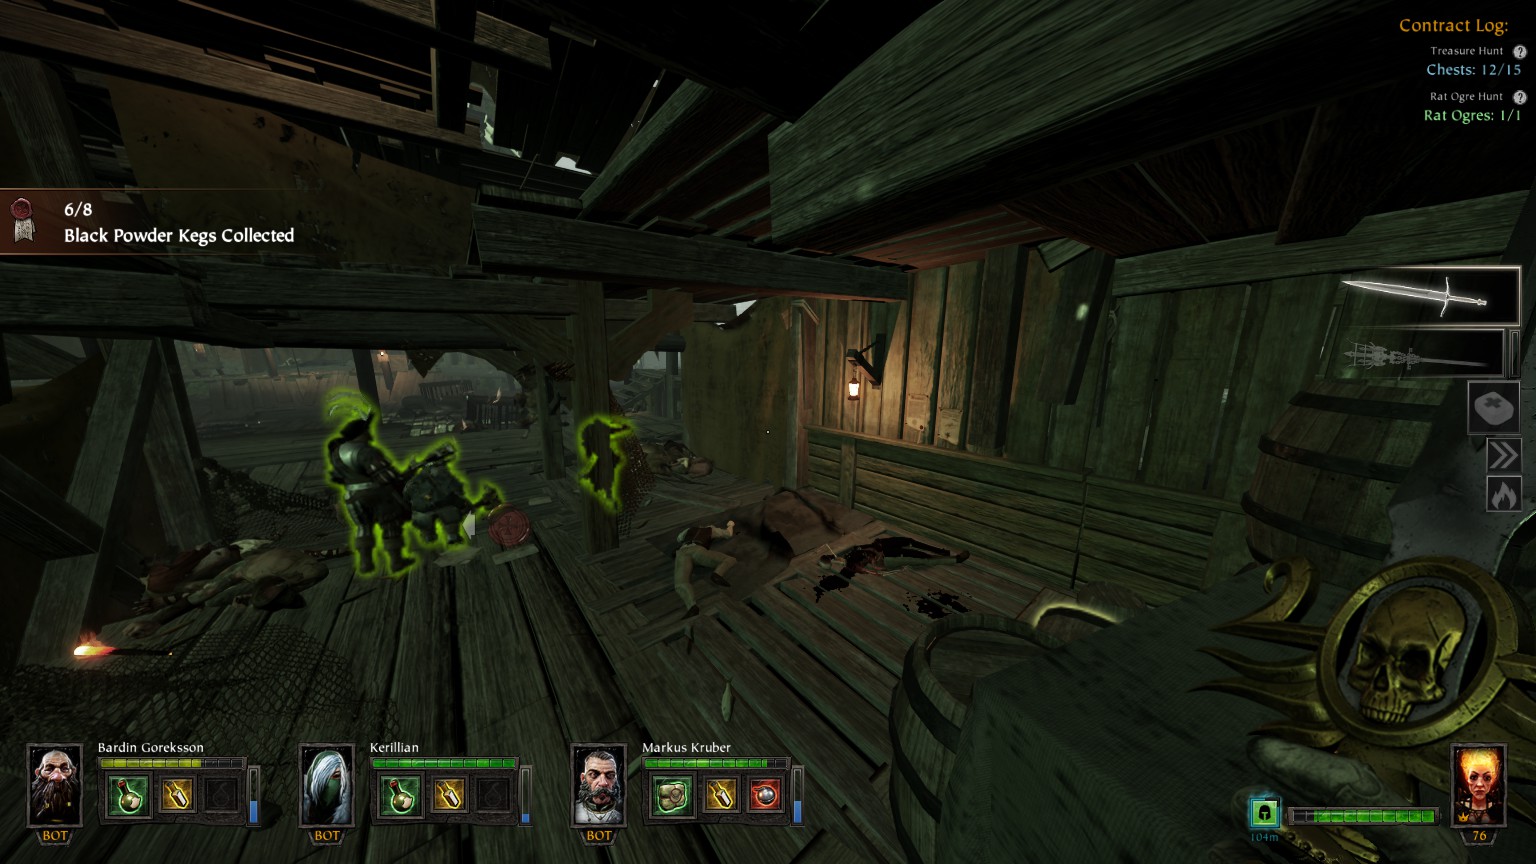
The Underbelly #7-15/15
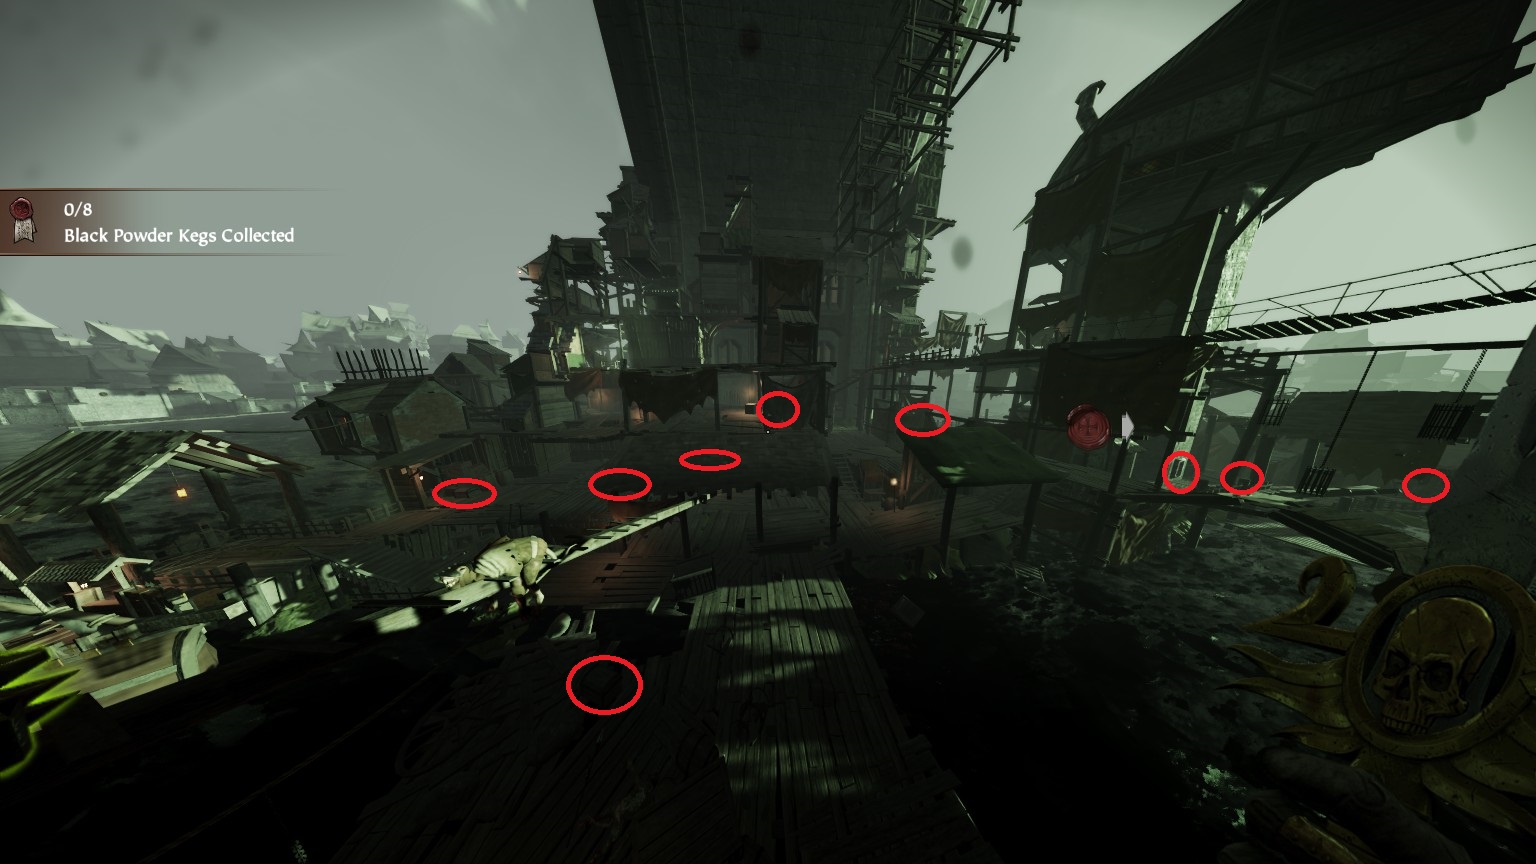
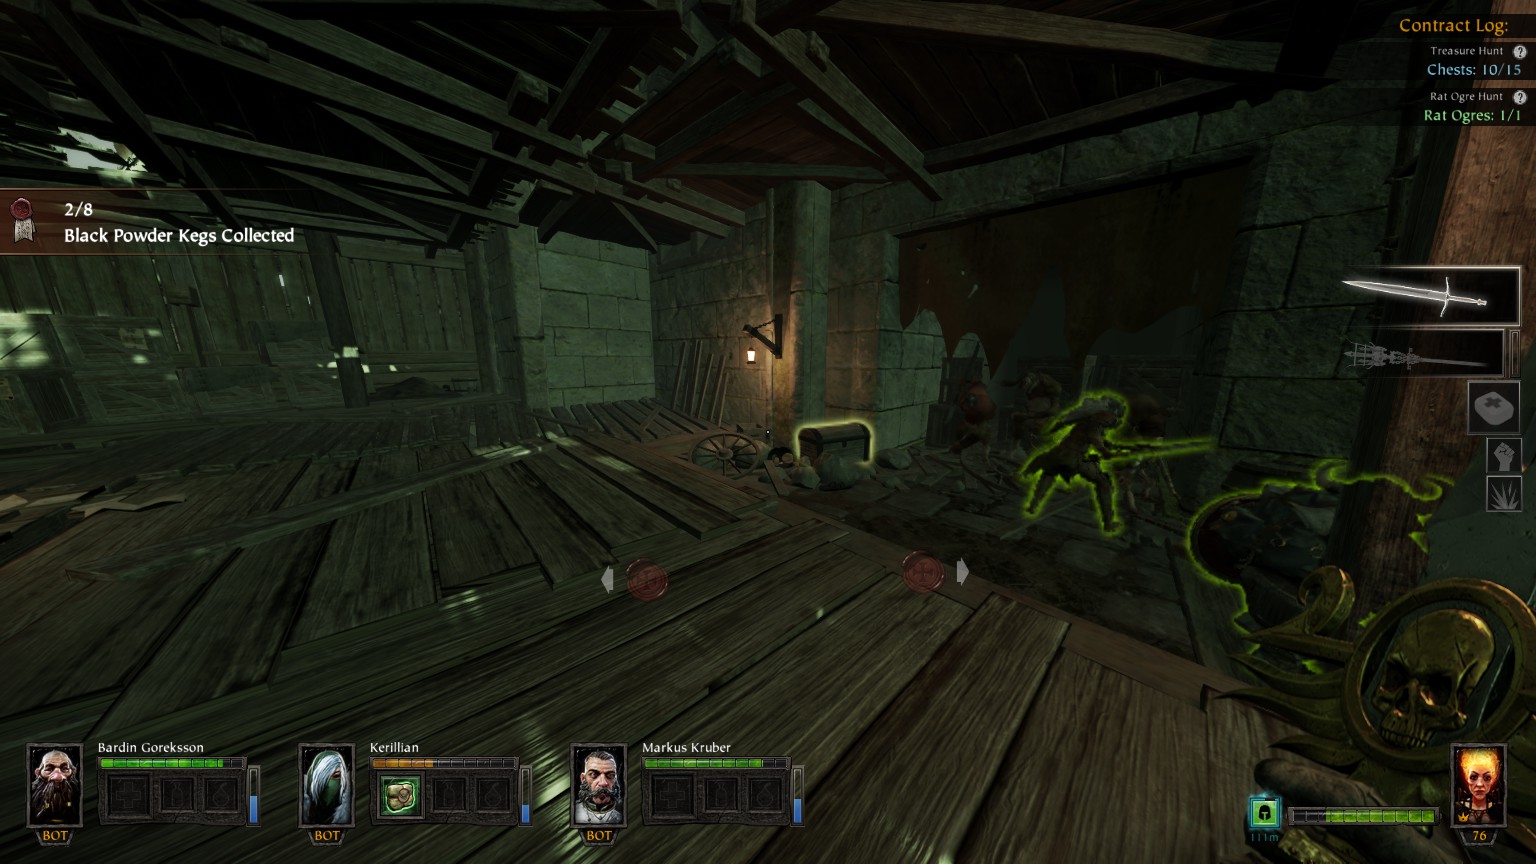
#7/15 The Underbelly, غادر, Top end, Lower level
#8/15 The Underbelly, غادر, Top end, Lower level
#9/15 The Underbelly, غادر, Top end, Lower level
#10/15 The Underbelly, غادر, Top end, Lower level (you may also find a lore book page here)
#11/15 The Underbelly, غادر, وسط, 1st level
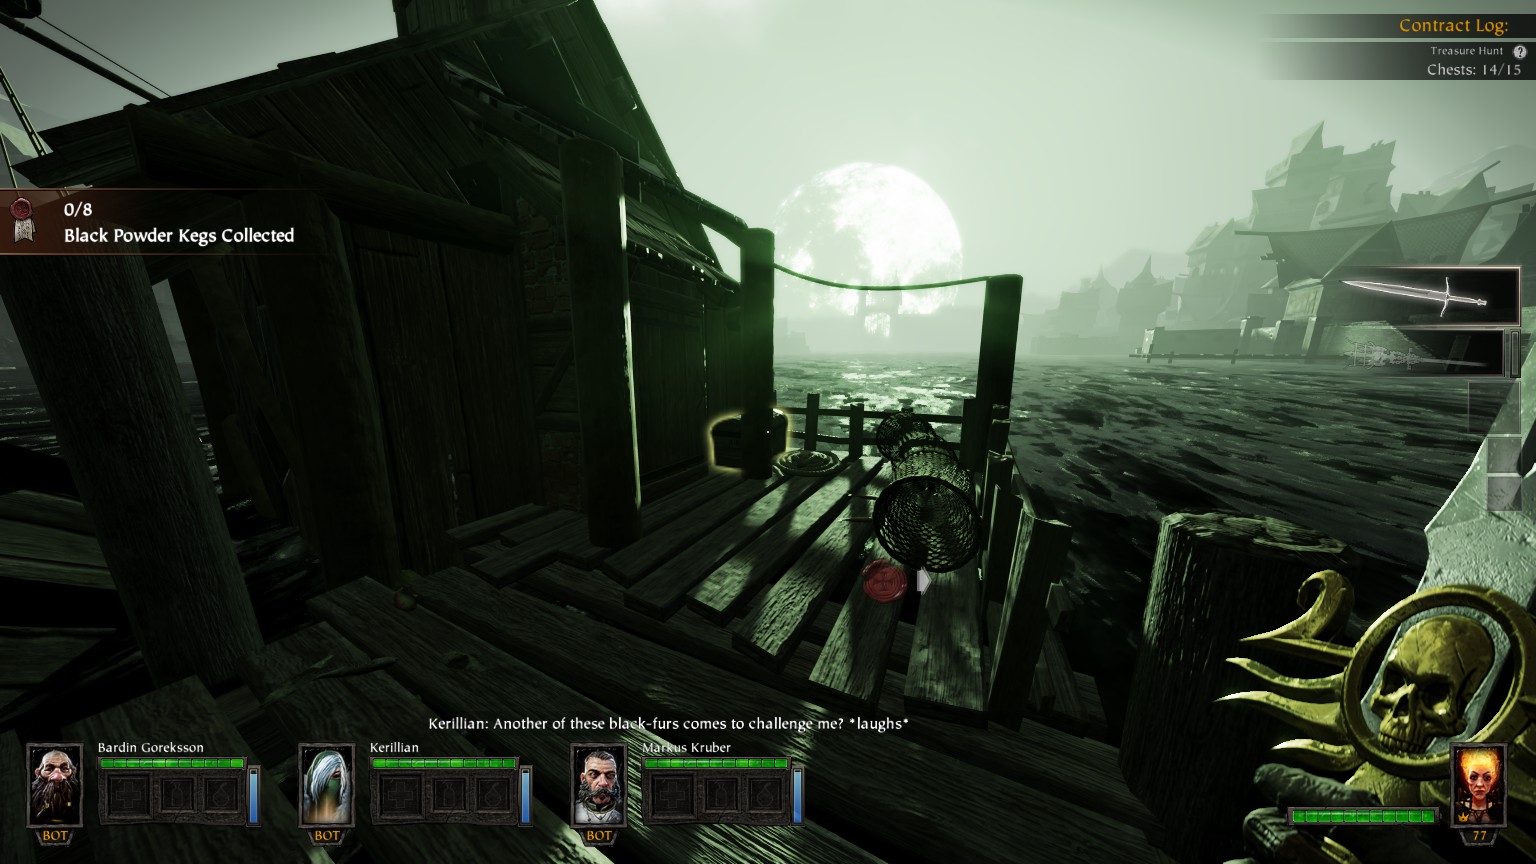
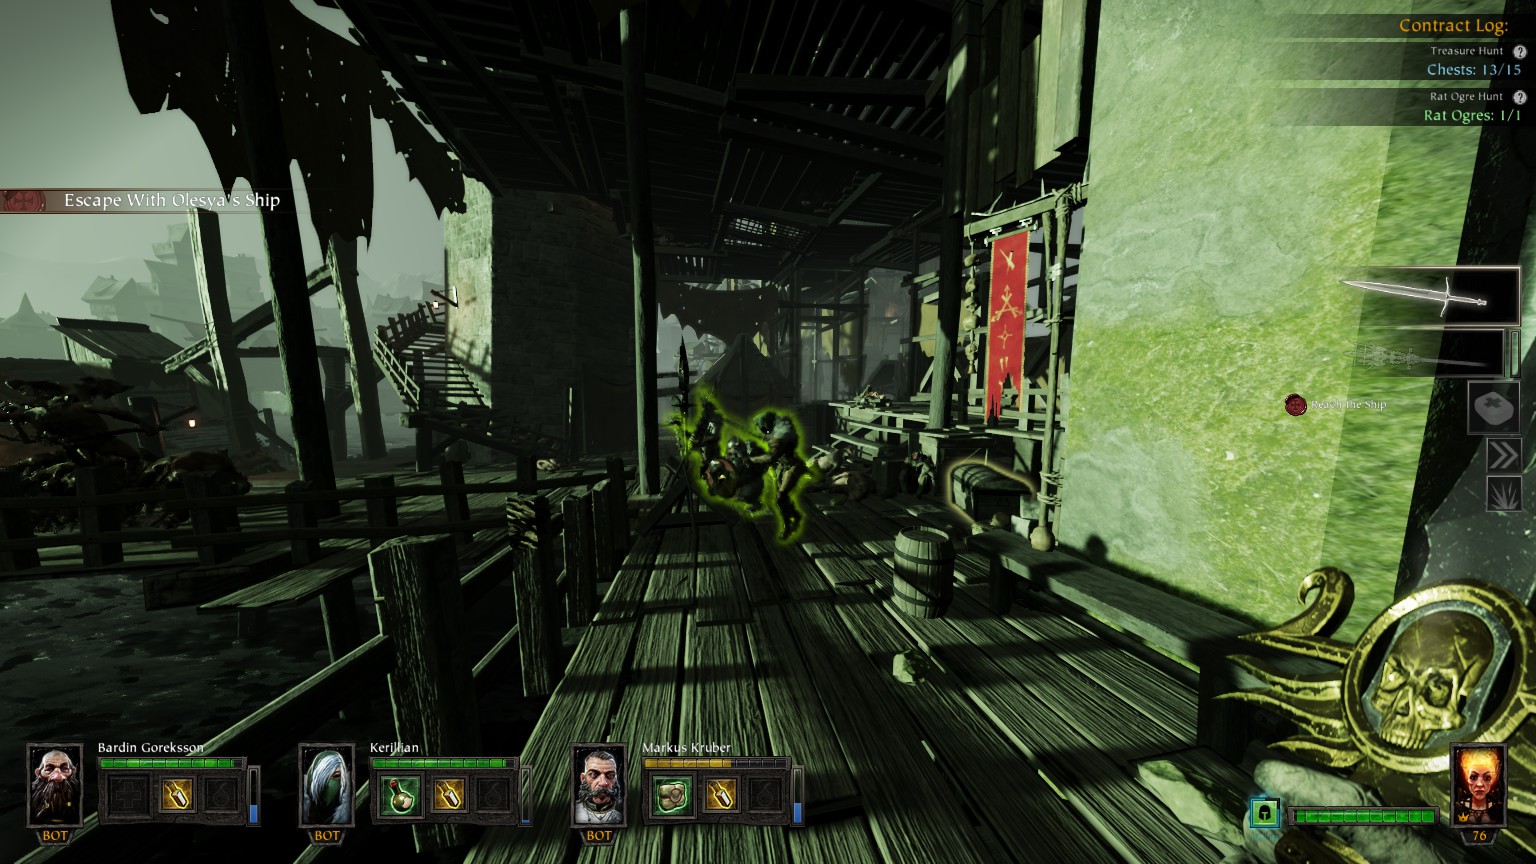
#12/15 غادر, Near boat, Lower level
#13/15 غادر, Near boat, Lower level
#14/15 غادر, Near boat, Lower level
#15/15 وسط, Lower level
The Wizard’s Tower
You may also want to check out
De greed’smap available in the Vermintide Wiki on Fandom
#1/21 (Secret Passage)
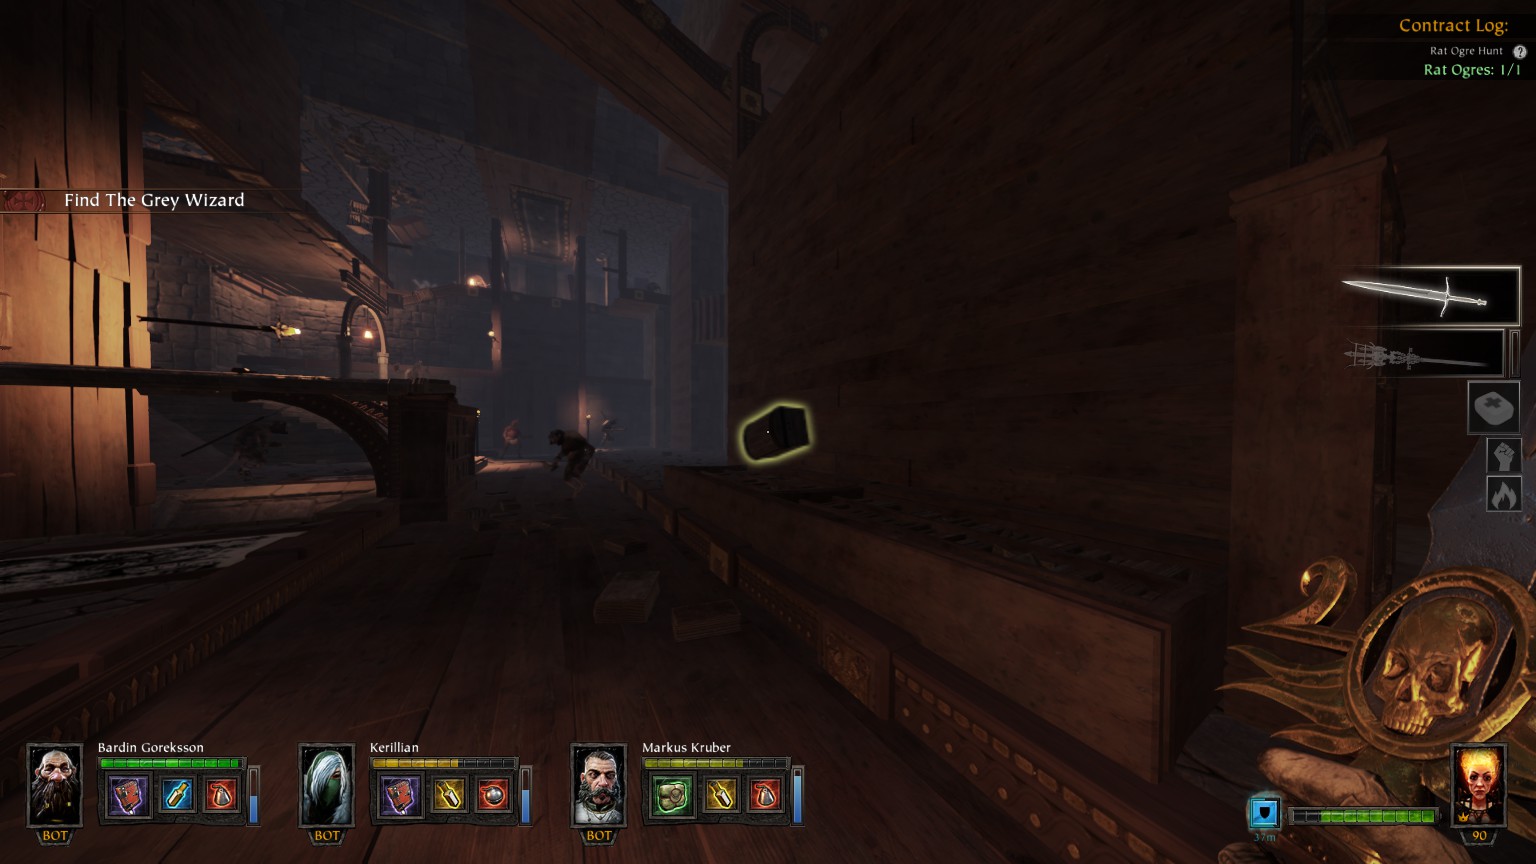
#2/21 (Main Library) Upper floor, beside Tome #1
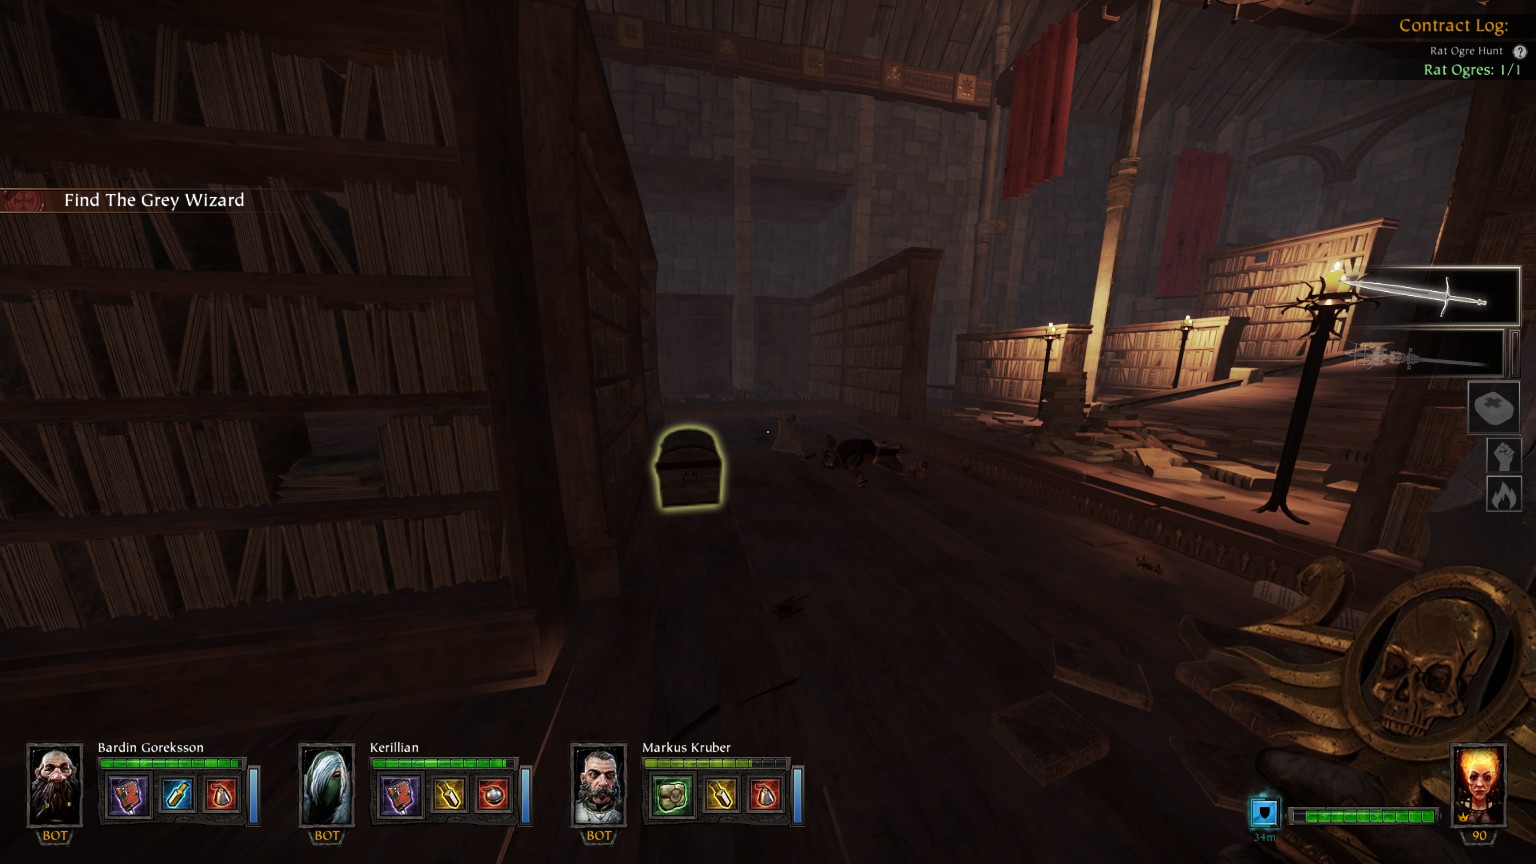
#3/21 (Main Library) Ground floor
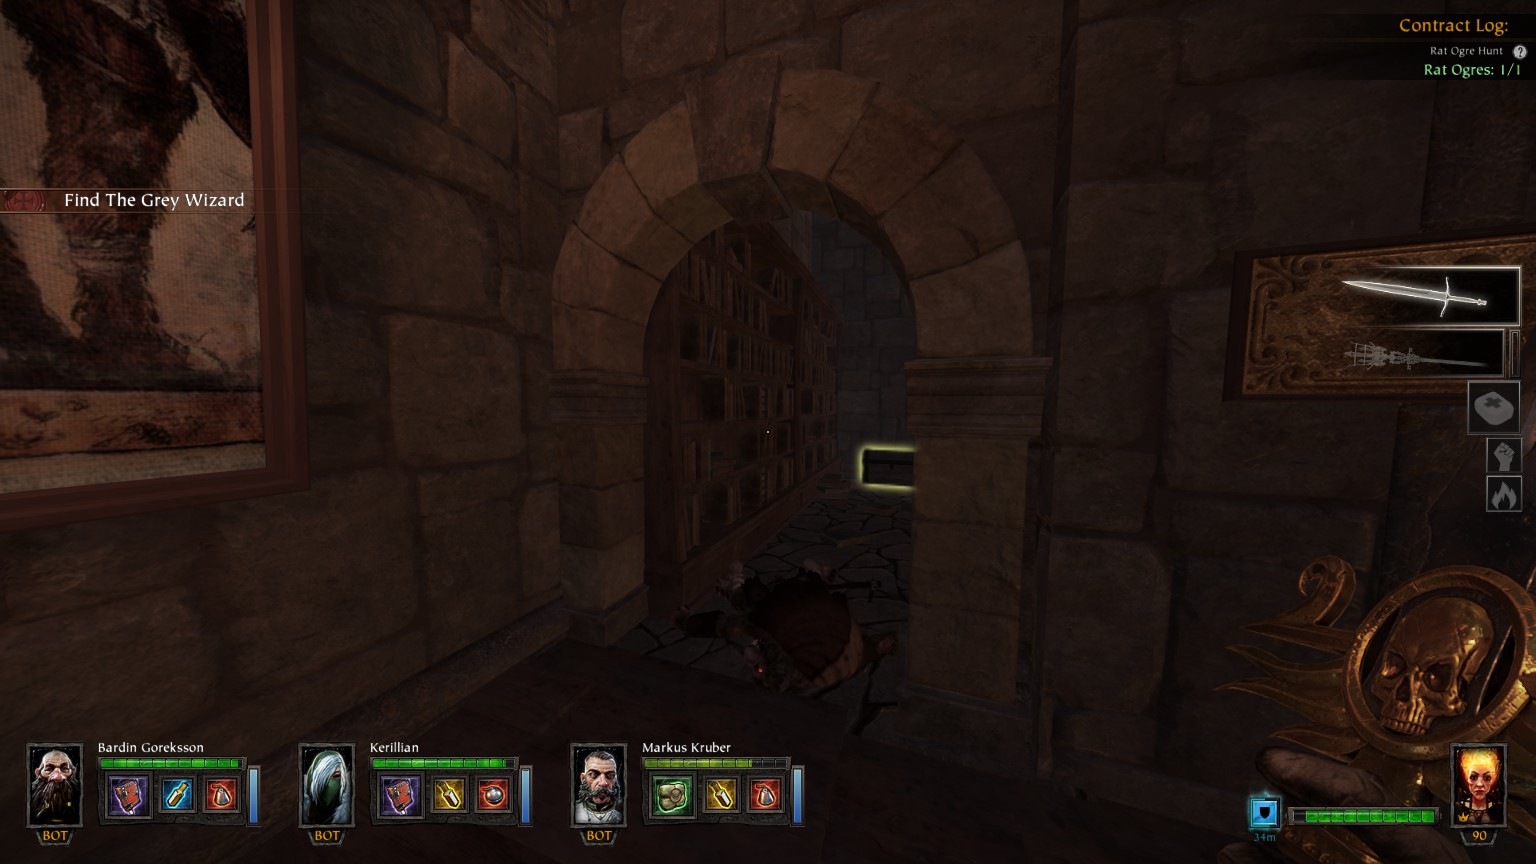
#4/21 (The Stairway)

#5/21 (The Stairway)
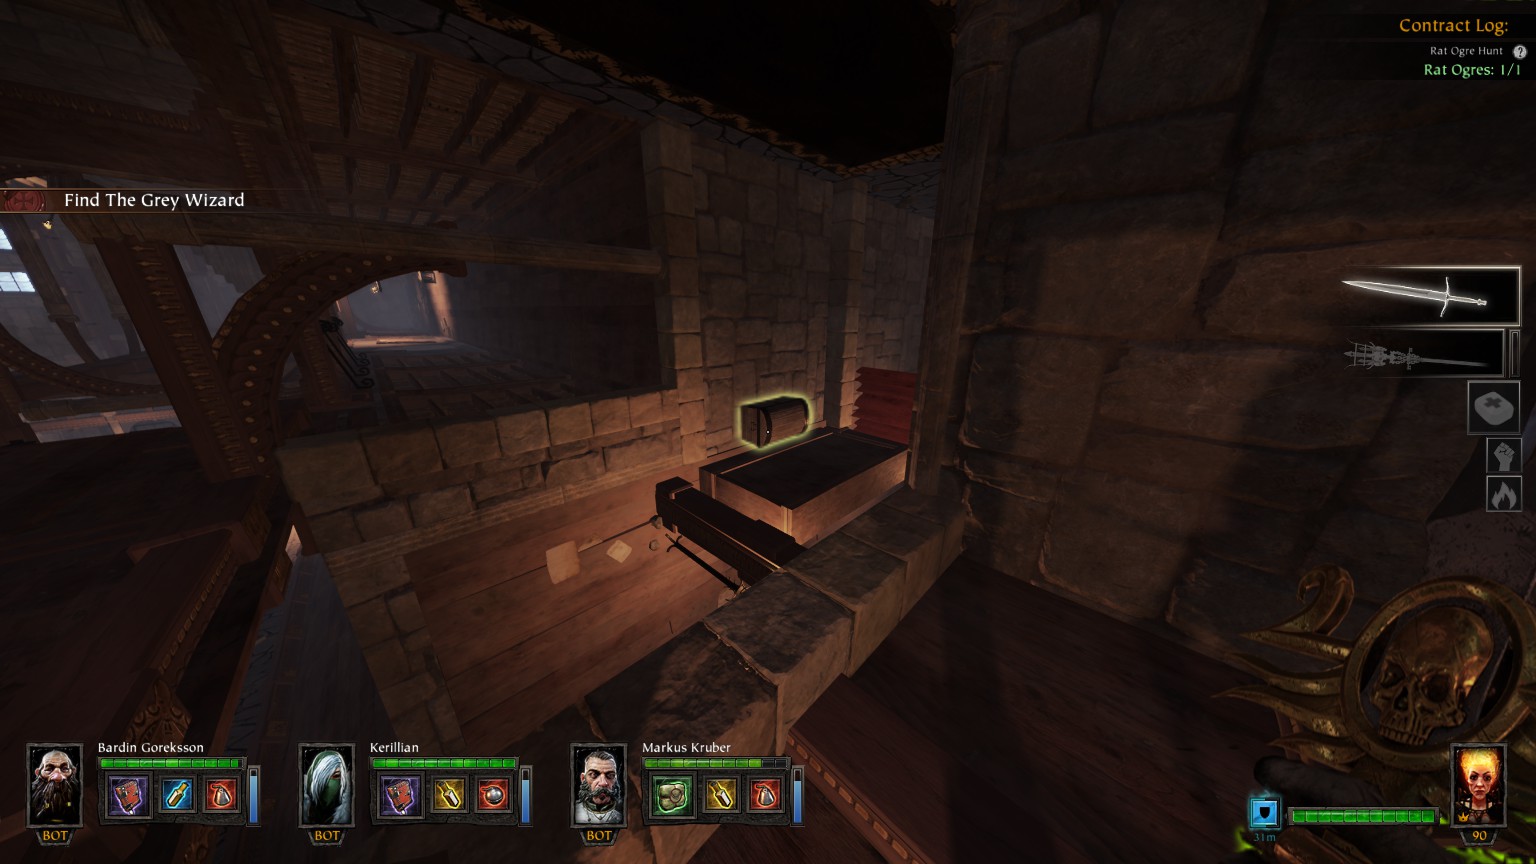
#6/21 (The Stairway) Nearby Grim #1
#7/21 (The Stairway) Just before one way jump to the Chamber of Gnignol
#8/21 Small room before Hall of Mysteries
#9/21 (Hall of Mysteries)
#10/21 (Hall of Mysteries)
#11/21 (Hall of Knowledge) Small corner on the left after one way jump

#12/21 (Hall of Knowledge)
#13/21 (Hall of Knowledge) Small corridor on the right just before the stairs to leave the area
#14/21 (Hall of Illusion)

#15/21 (Hall of Illusion) Contains Tome #3
#16/21 (The Tower Hall) Nearby Grim #2
#17/21 (The Tower Hall) About above previous chest
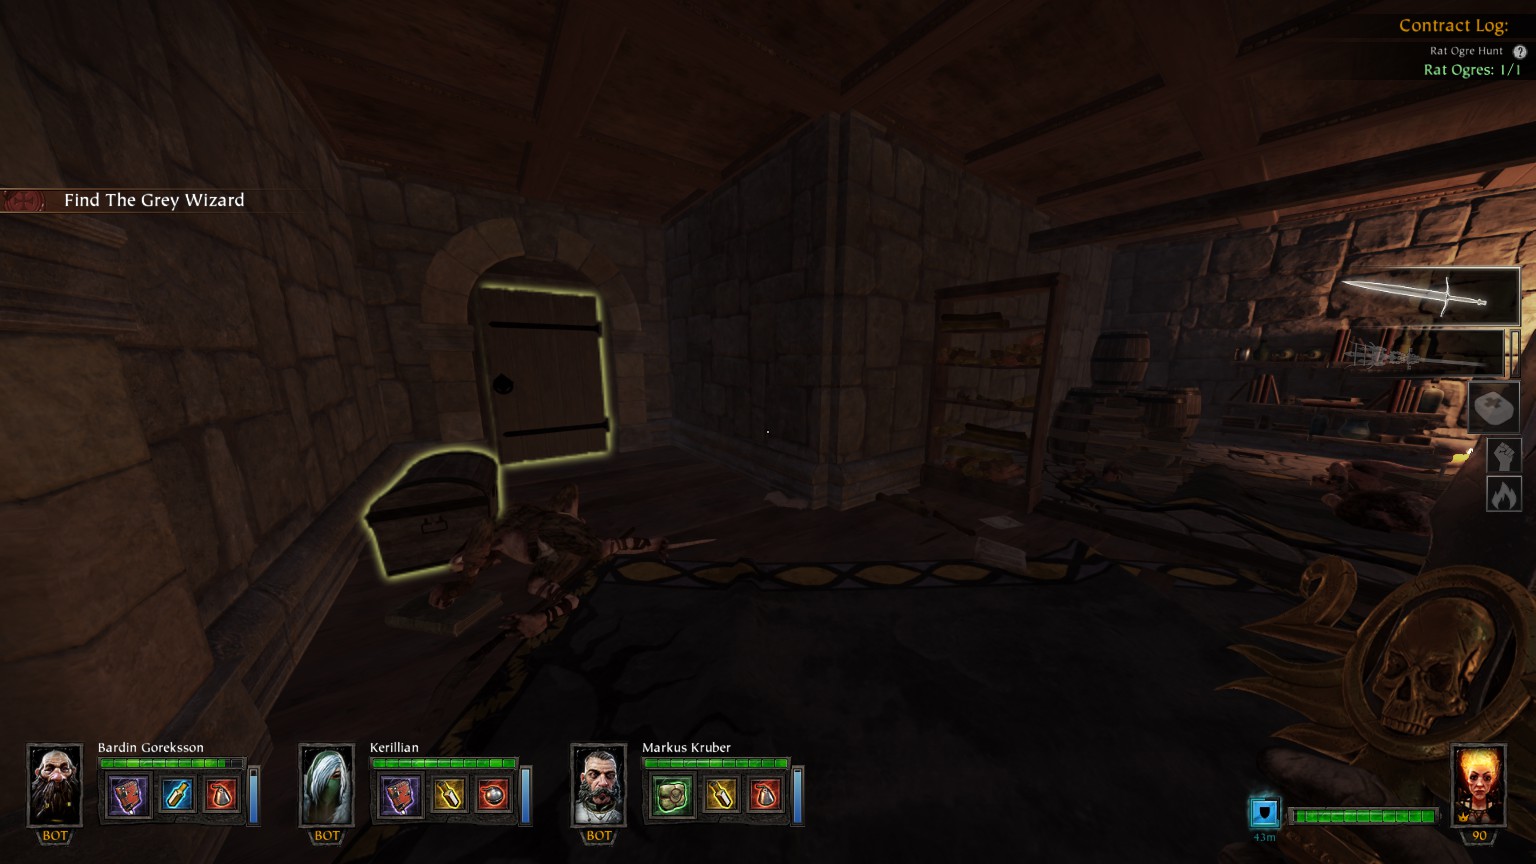
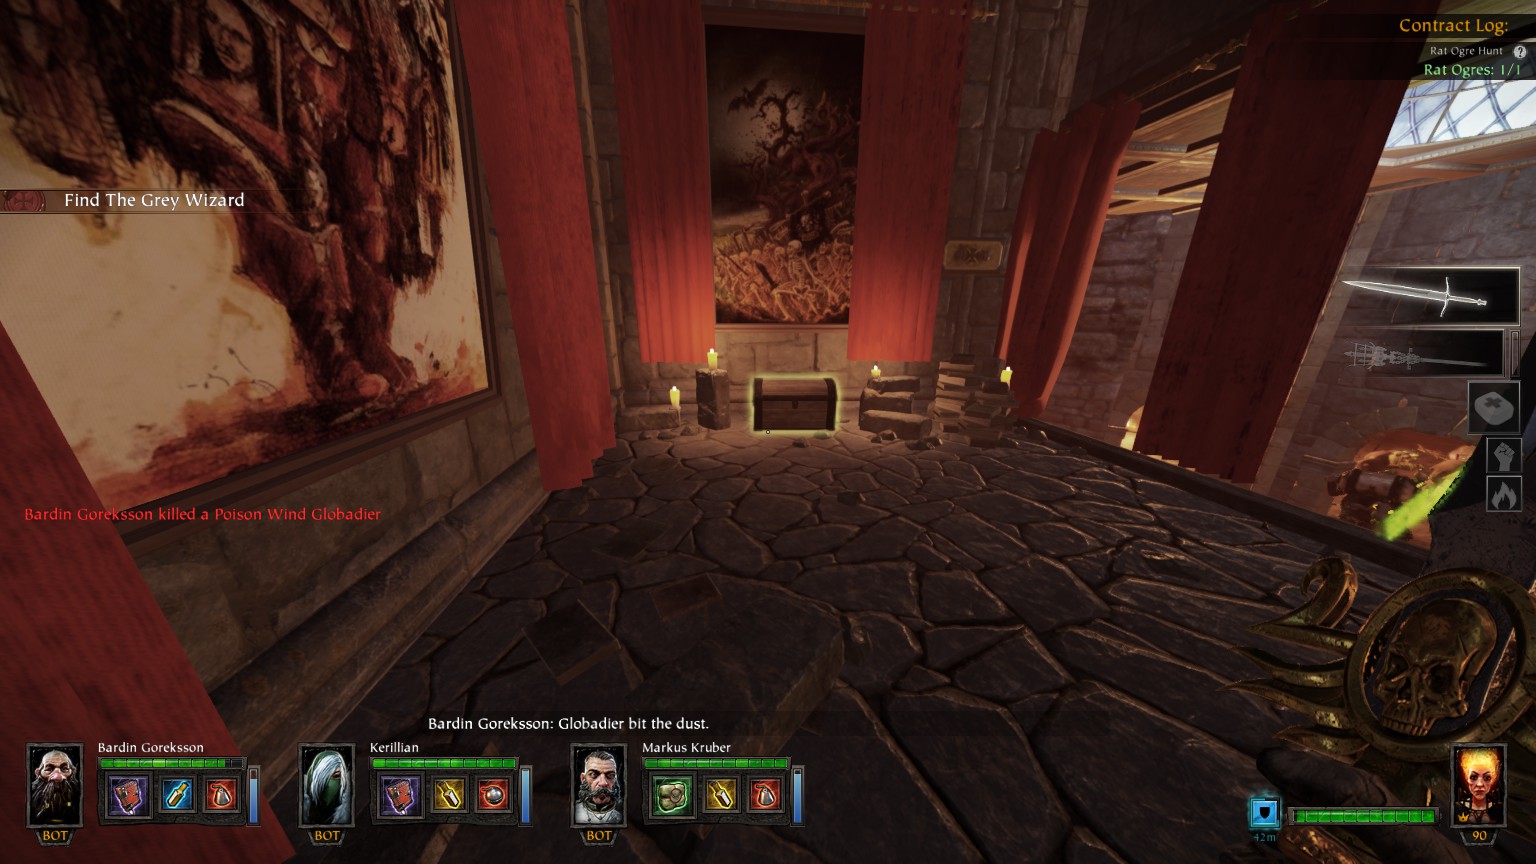
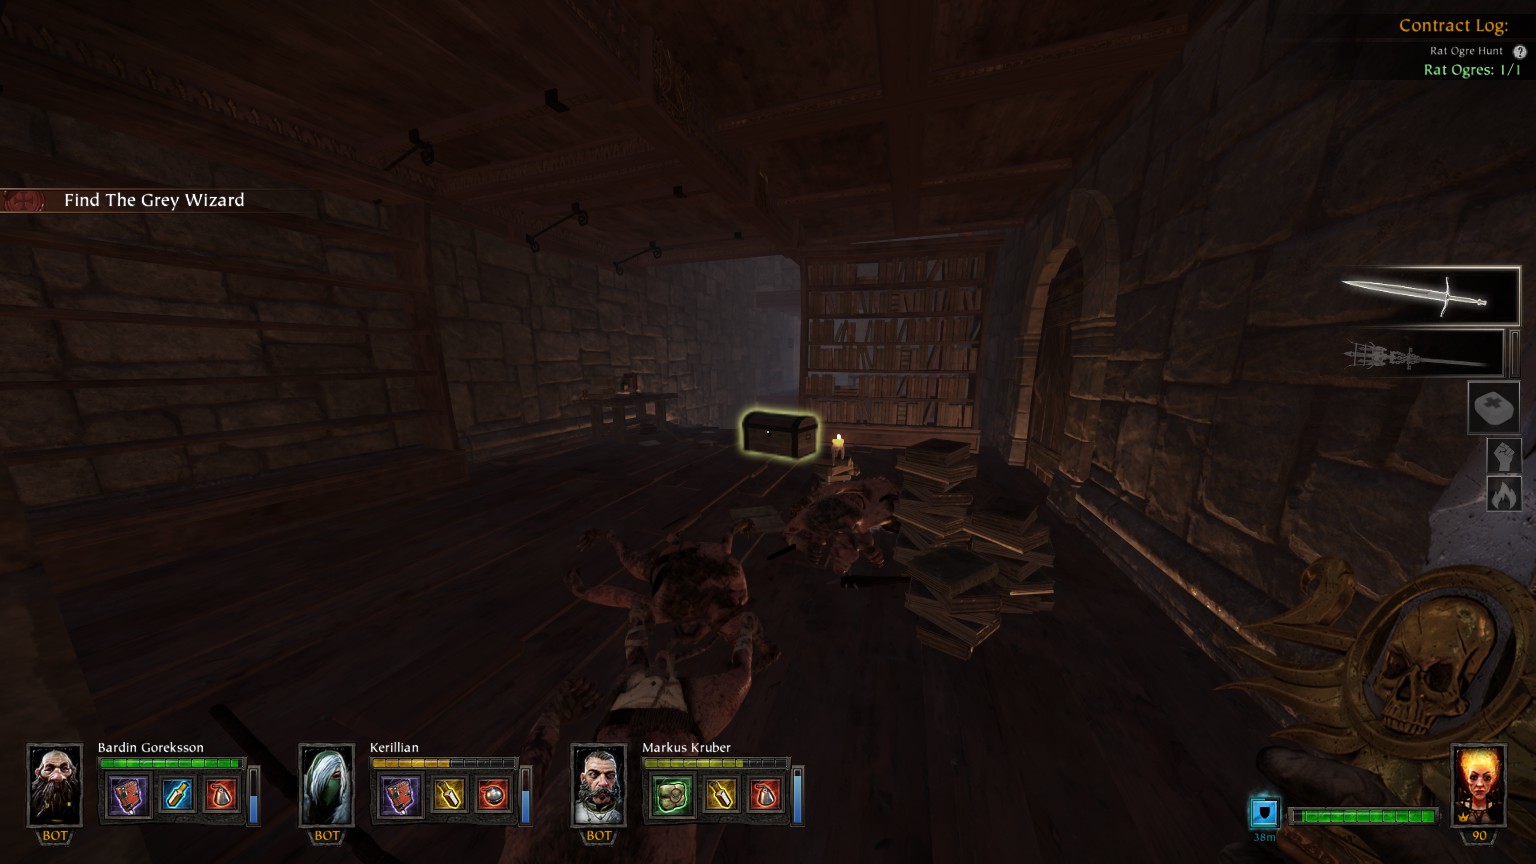
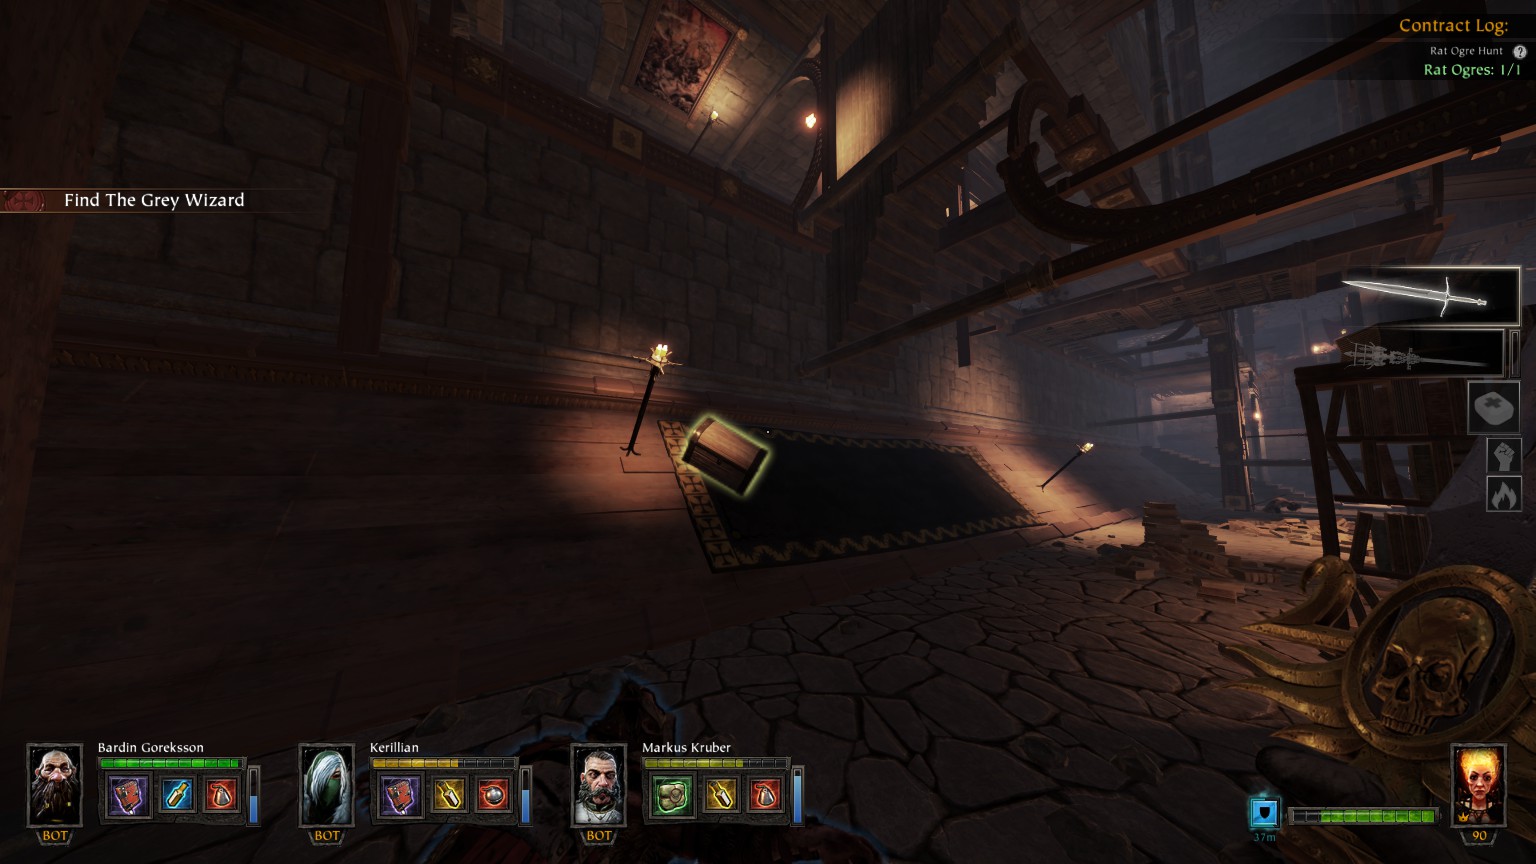
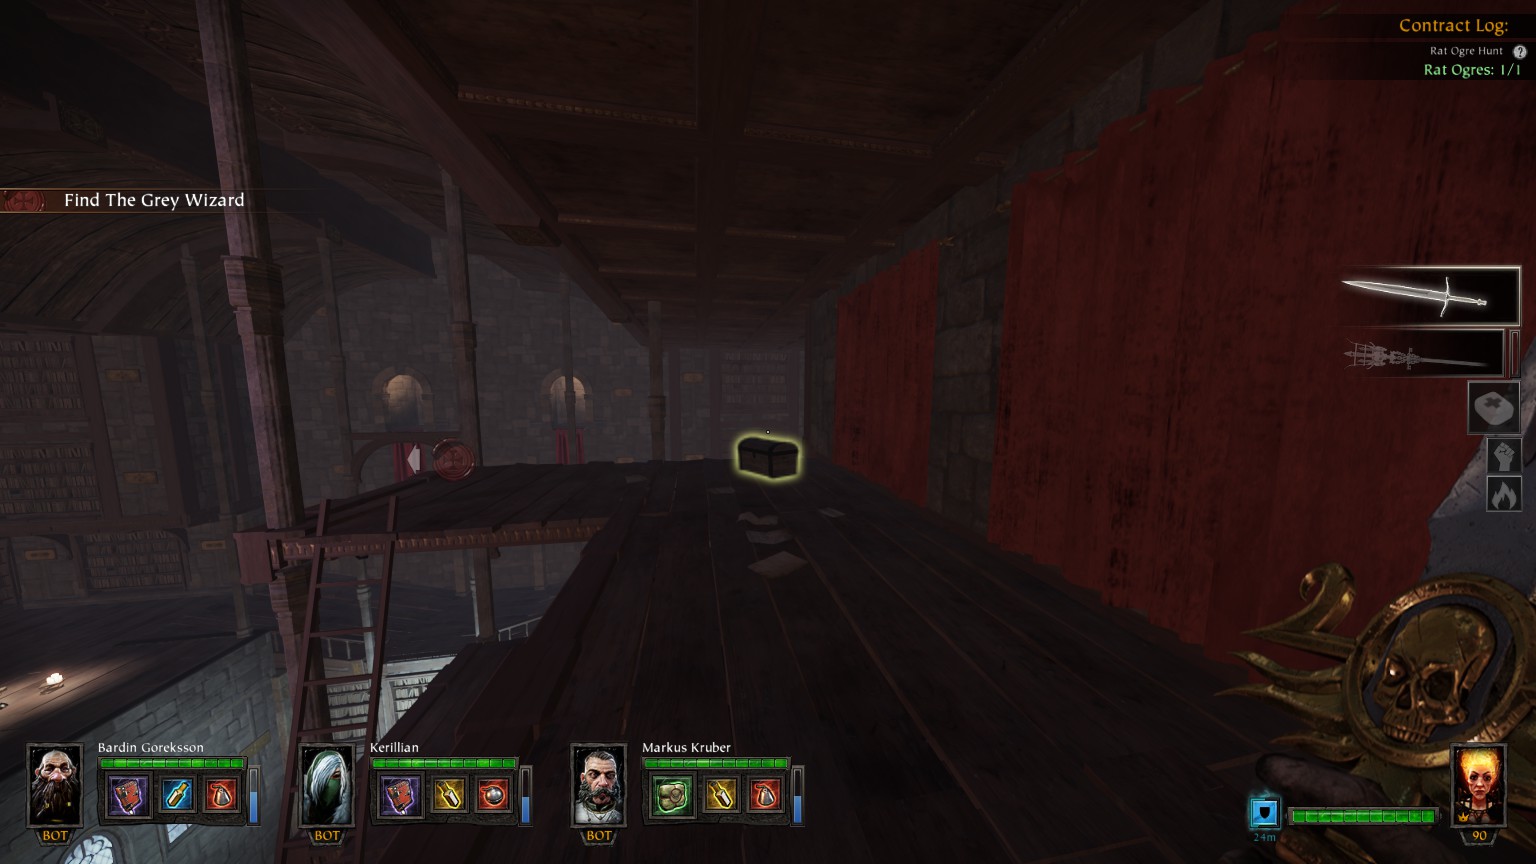
#18/21 (???) Just before one way jump to The Grey Wizard’s Study
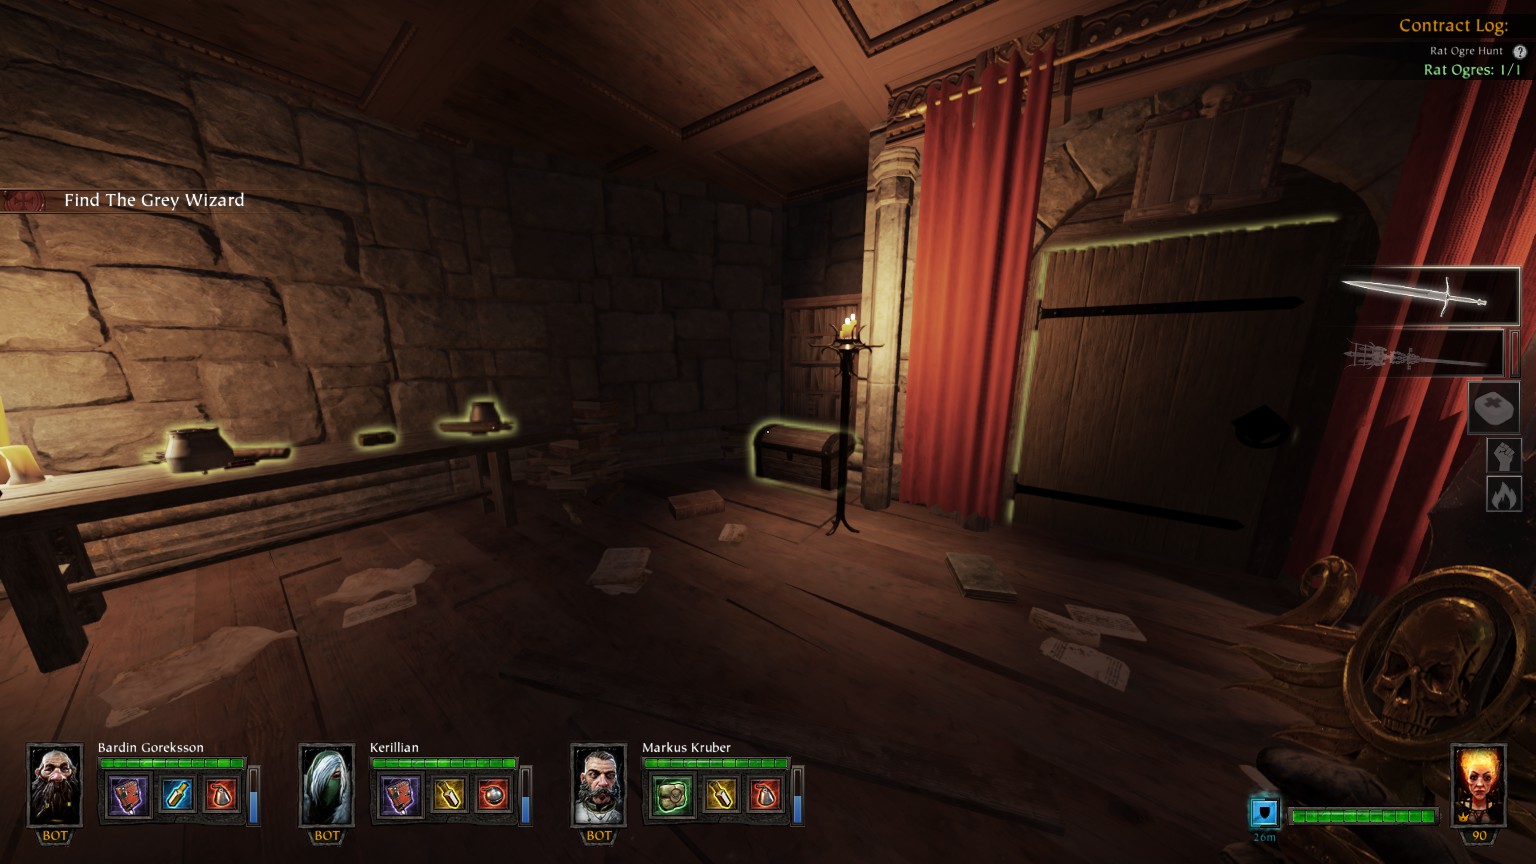
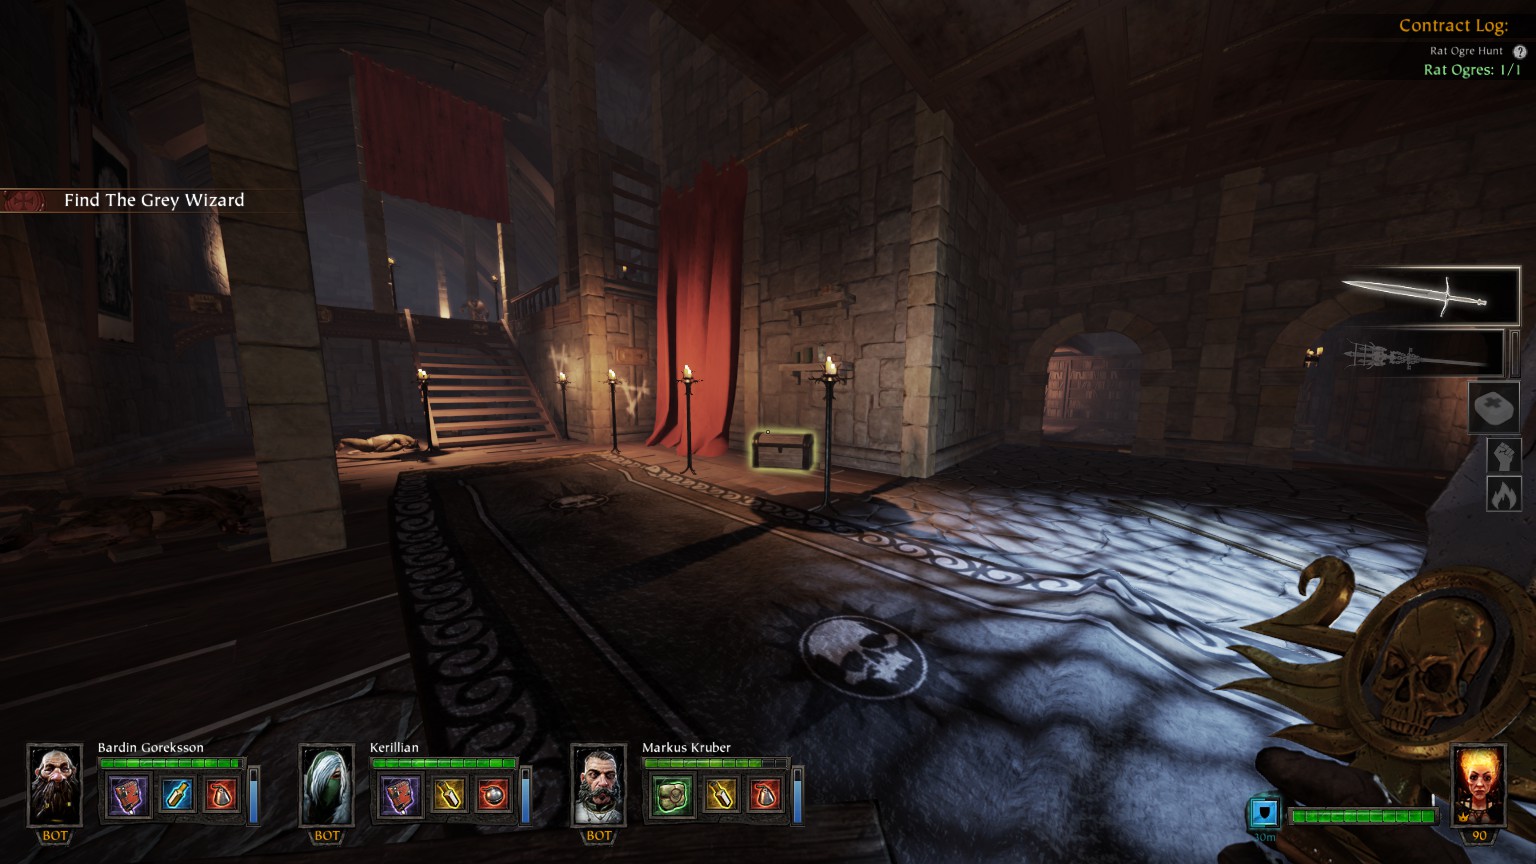
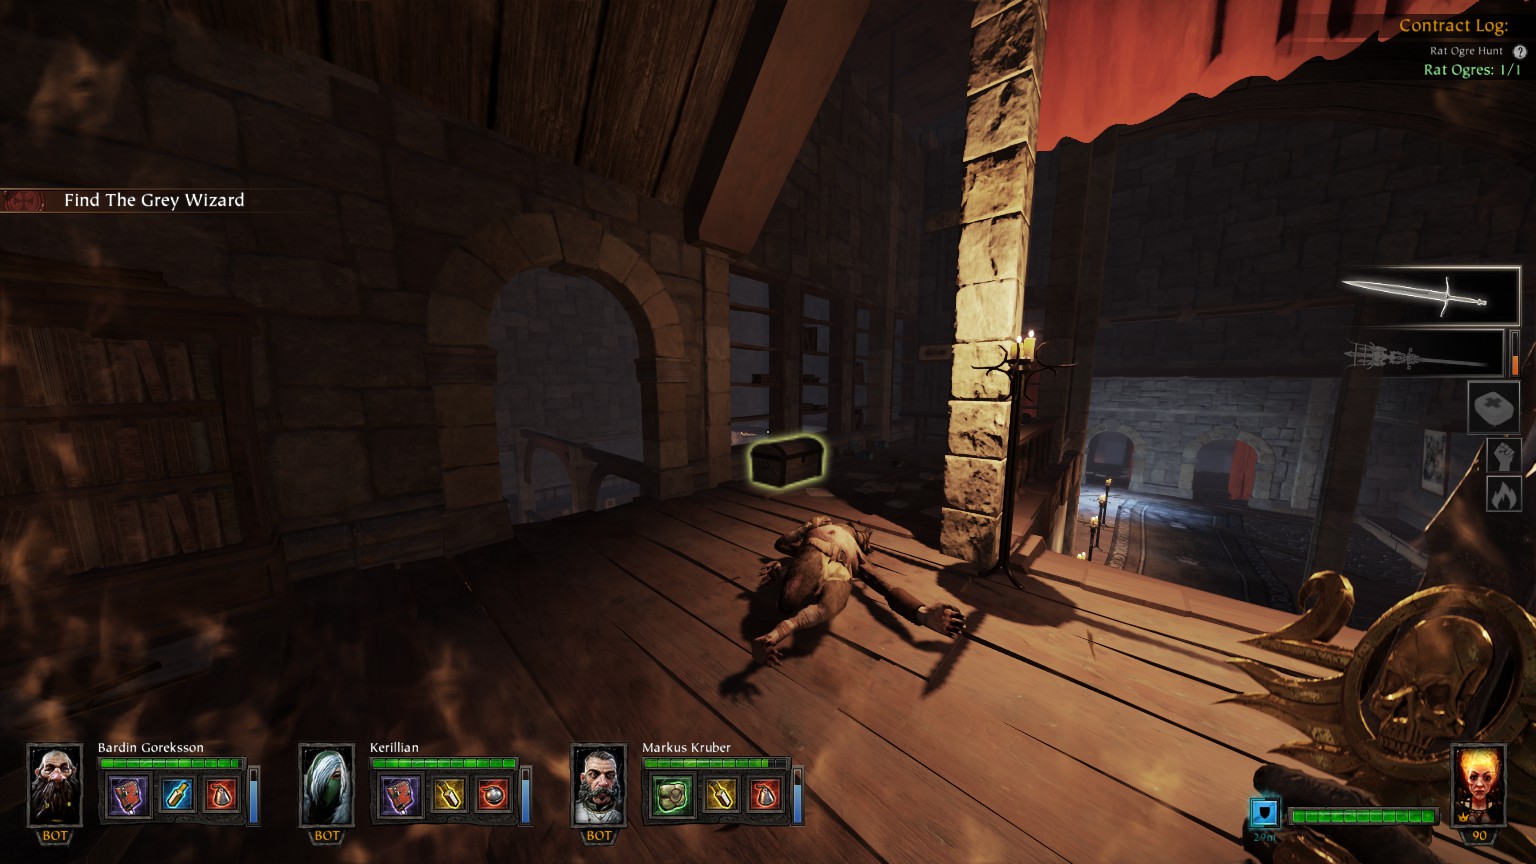
#19/21 (The Grey Wizard’s Study)
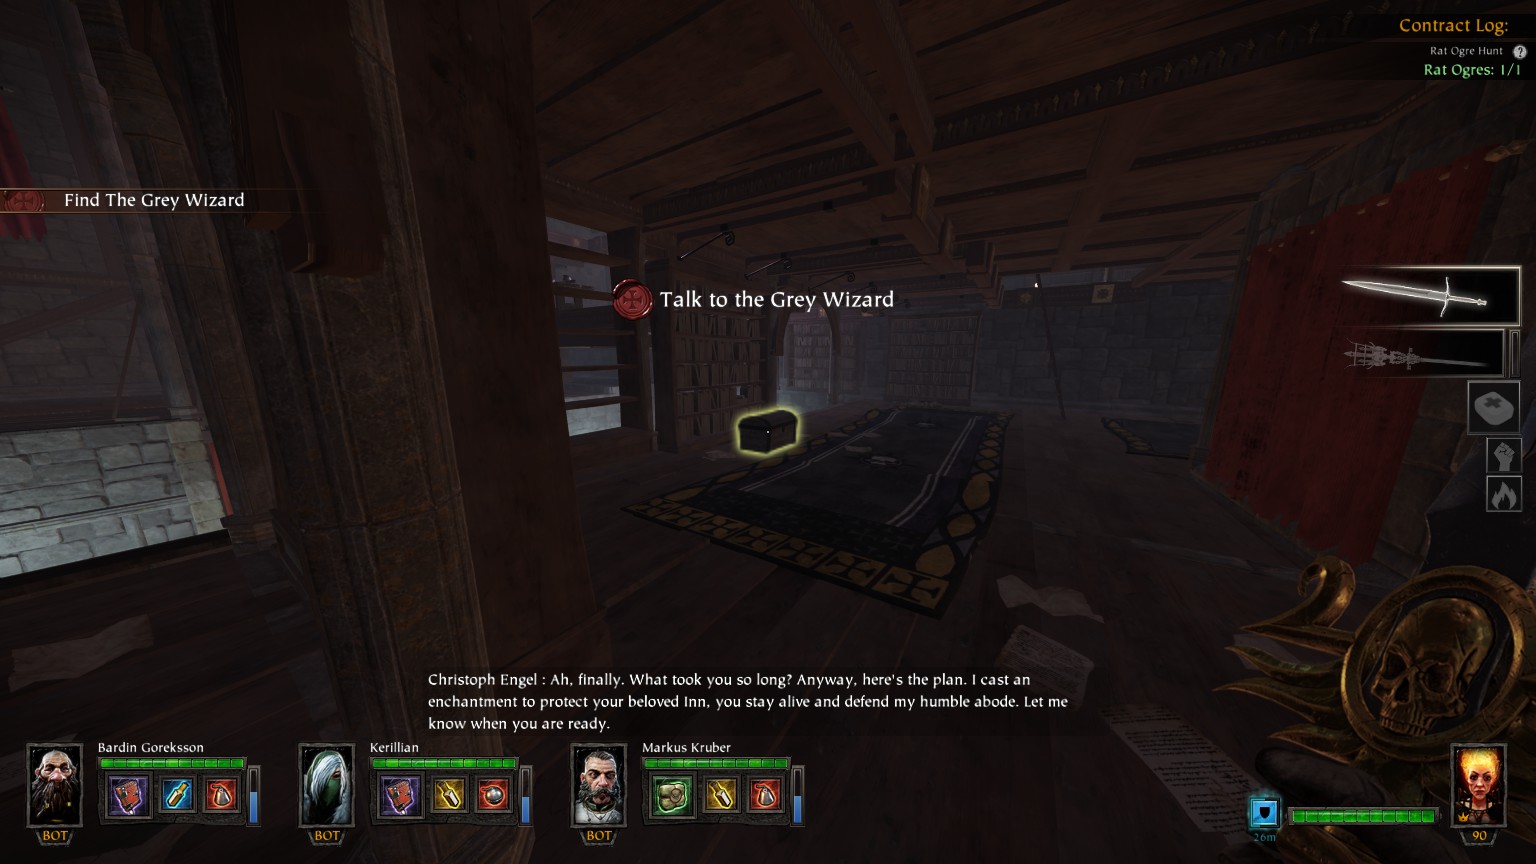
#20/21 (The Grey Wizard’s Study)
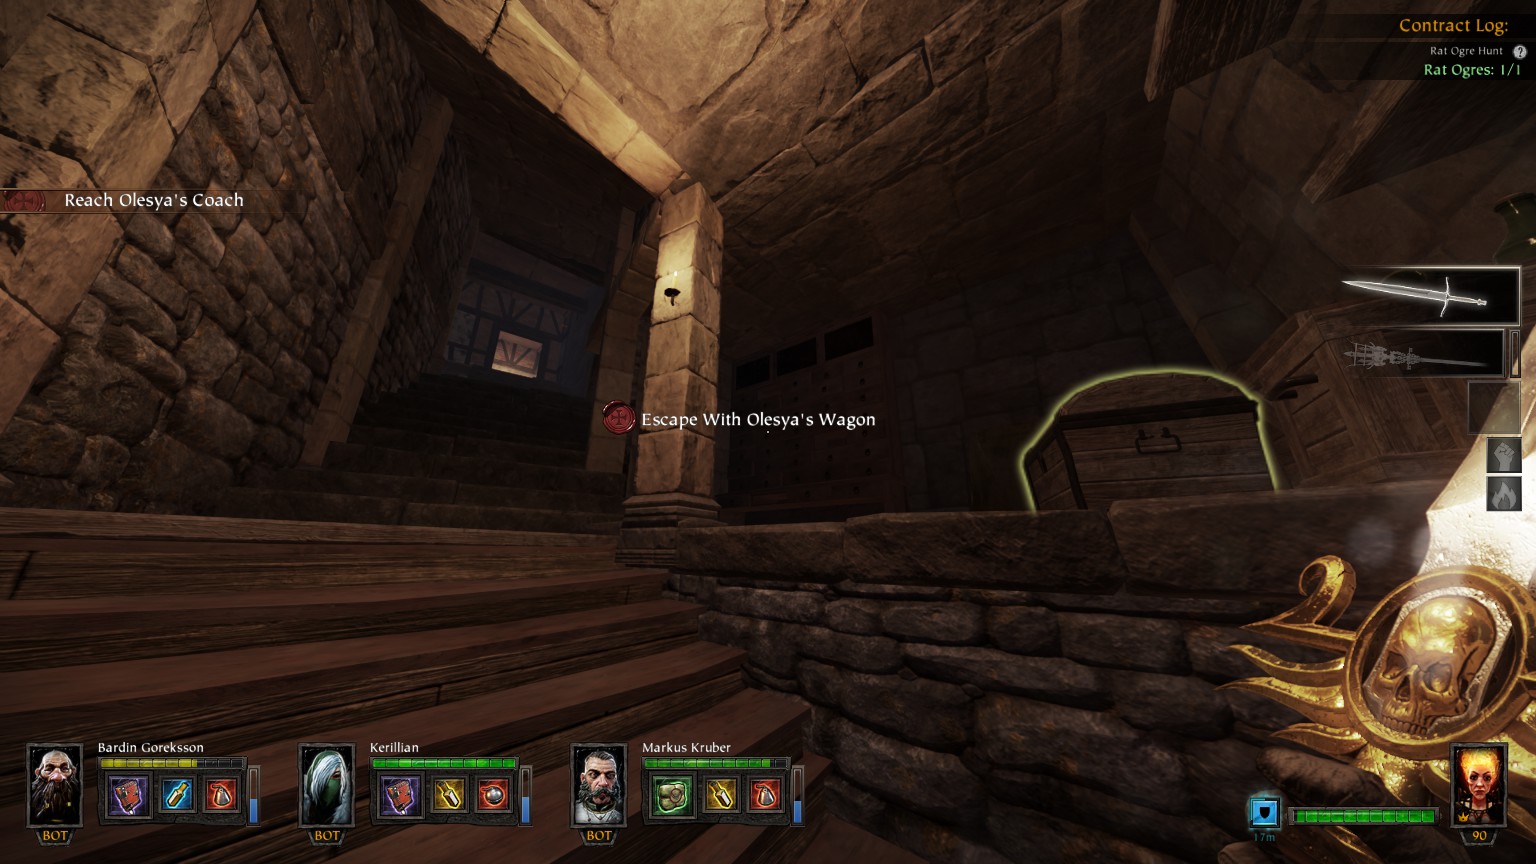
#21/21 Cordelia’s Apothecary Shop
Engines of War
You may also want to check out
De greed’smap available in the Vermintide Wiki on Fandom
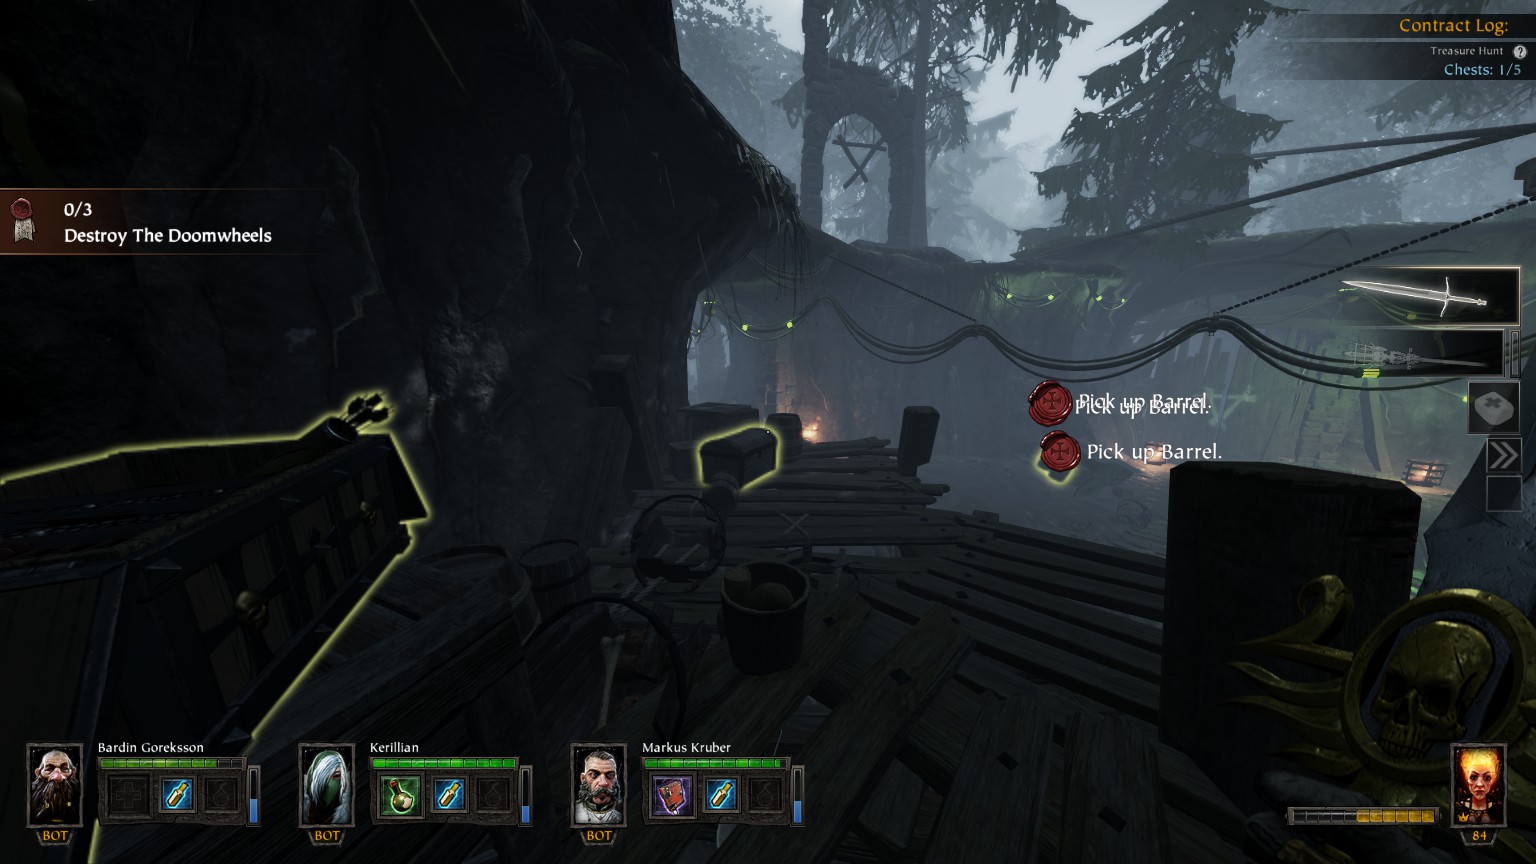
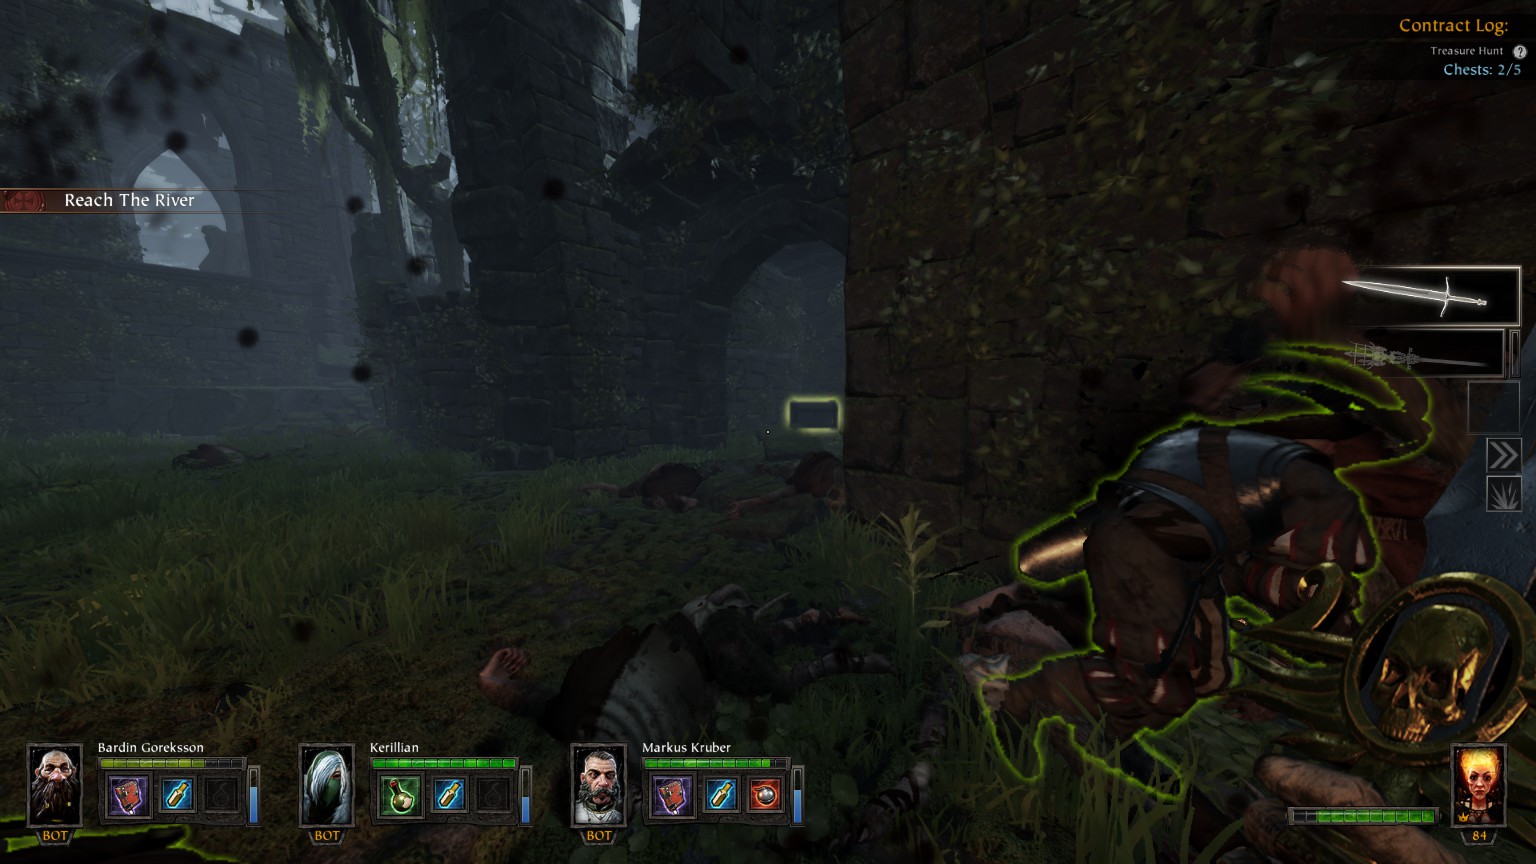
#1/5 (Forester’s Cave) near Grim #1 (You may also find a lore book page nearby)
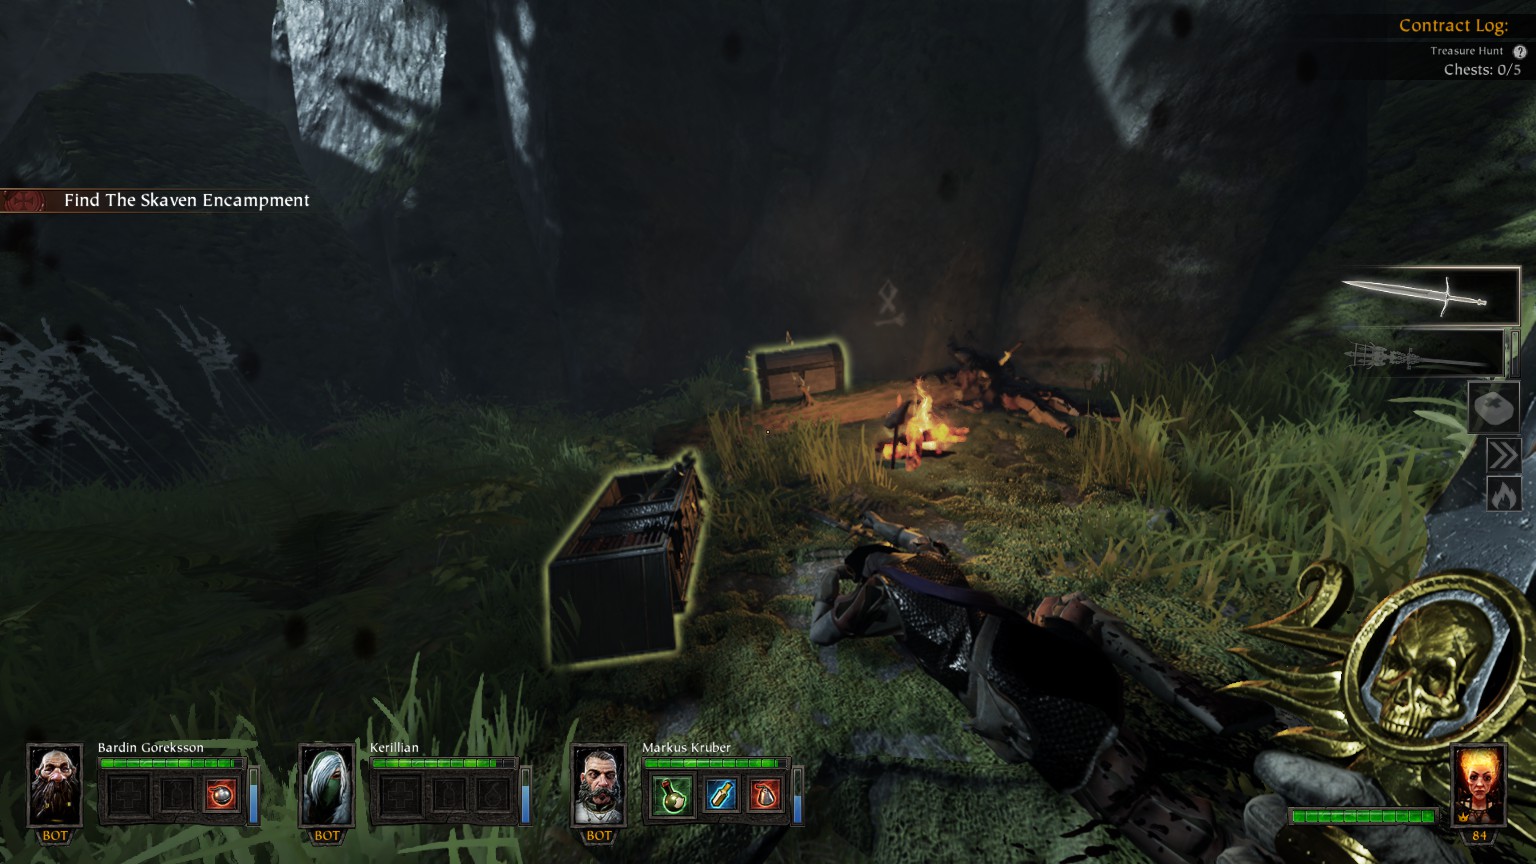
#2/5 (Skaven Encampment) Near barrels (You may also find a lore book page near one of the engines)
(You may find a lore book page just before the Gruewald Lodge Ruins entry)
#3/5 (Grunewald Lodge Courtyard) Afrer Tome #2 and Grim #2
#4/5 (The Mother Black)
#5/5 (The Mother Black)
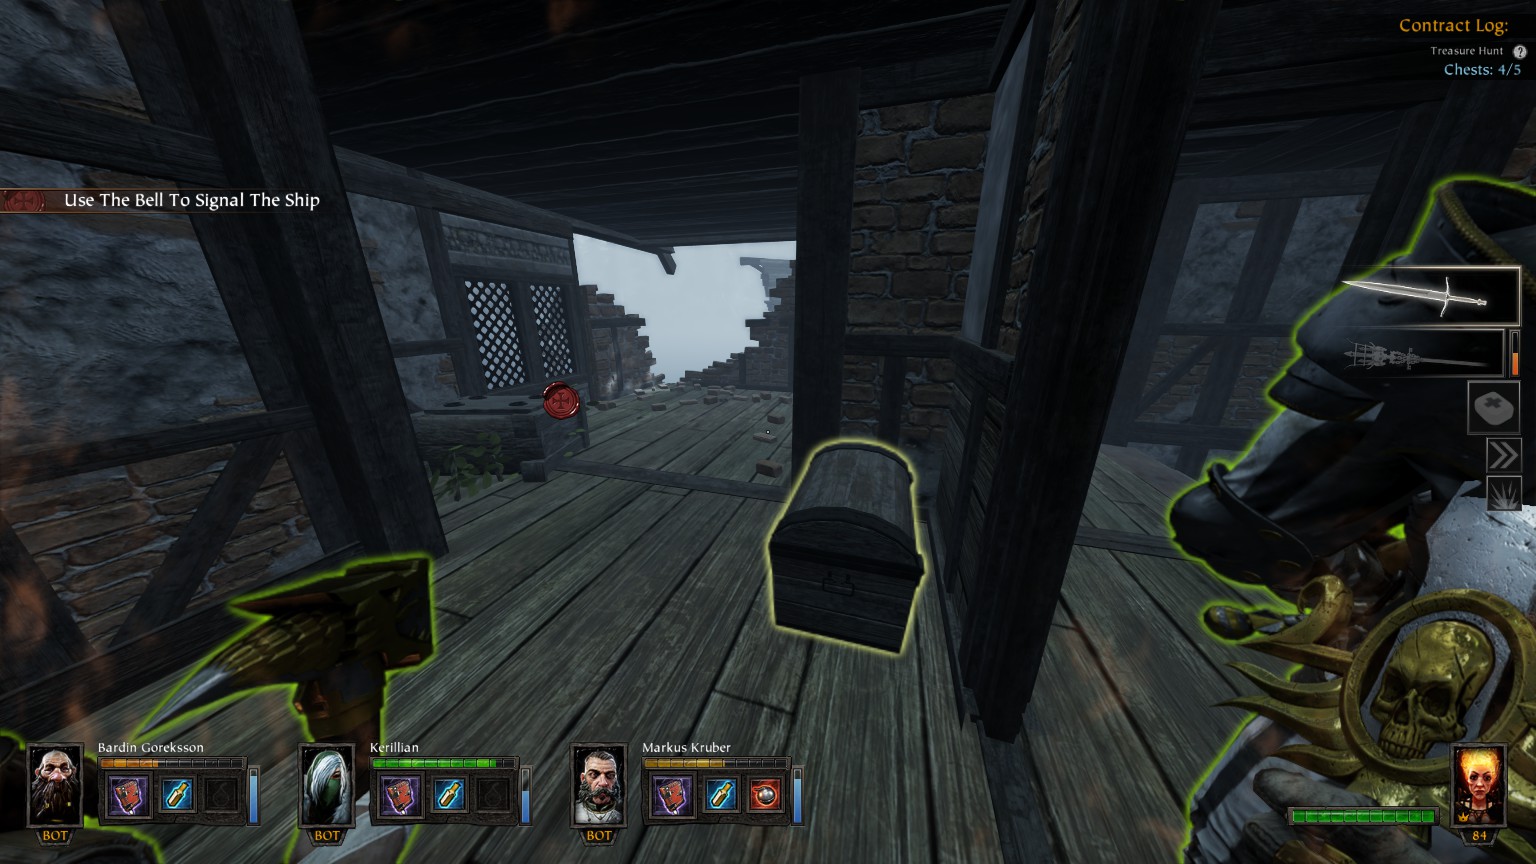
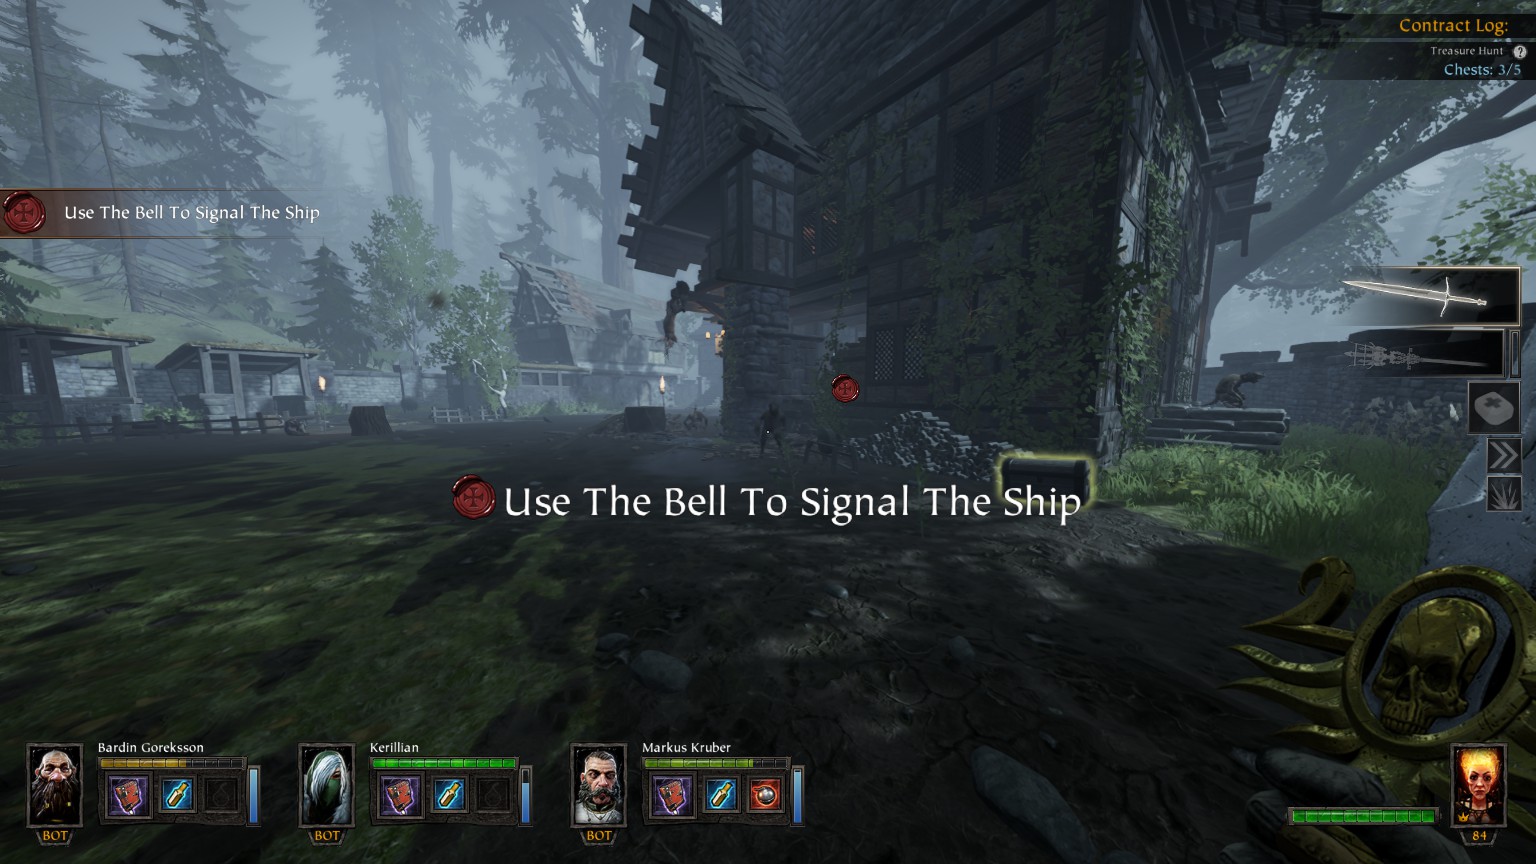
Man the Ramparts
You may also want to
check out the very detailed mapavailable in the Vermintide Wiki on Fandom
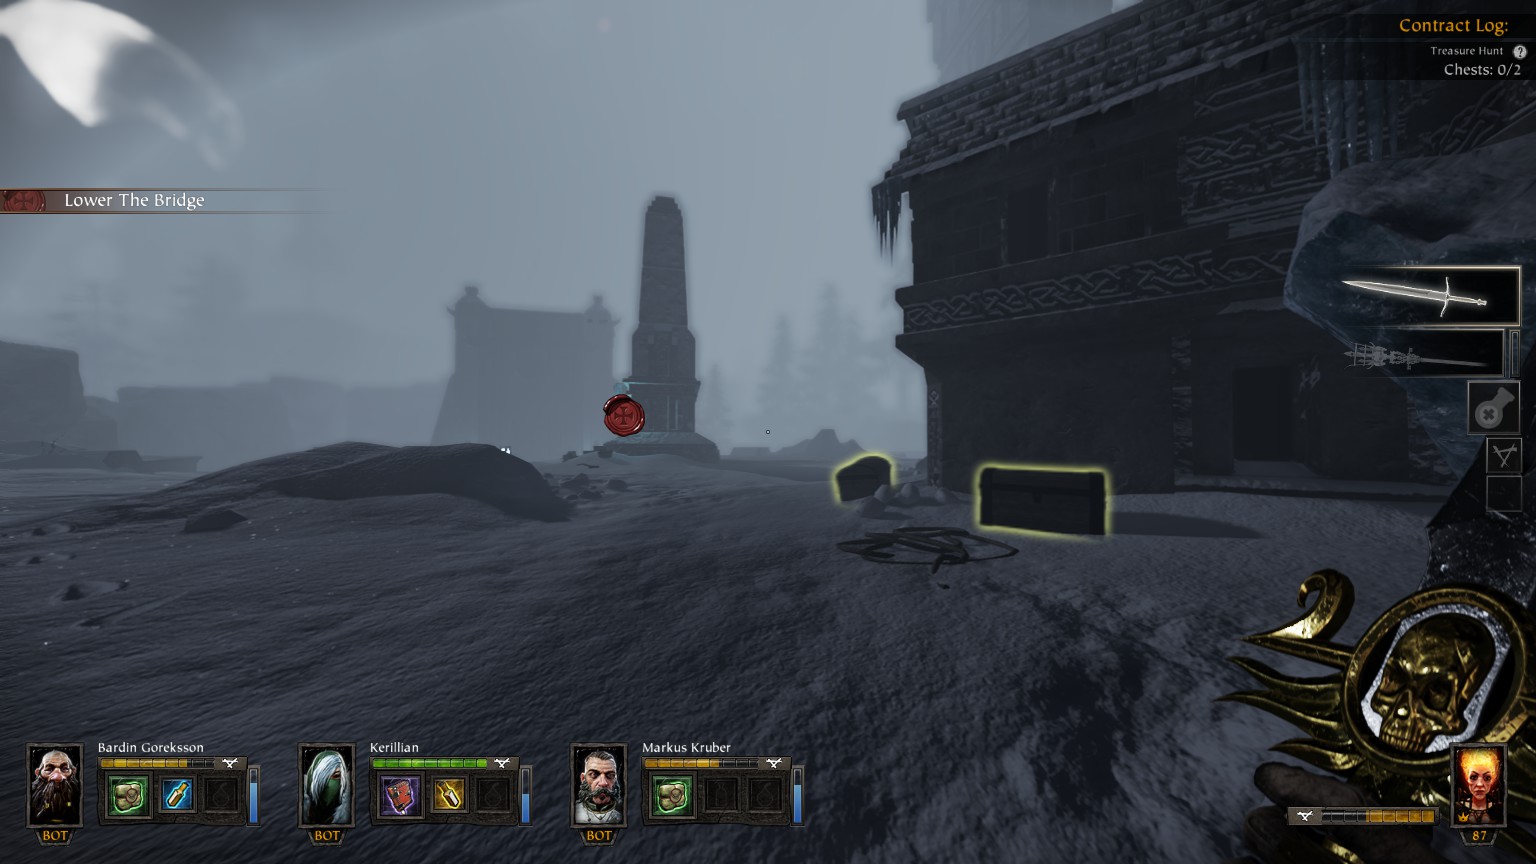
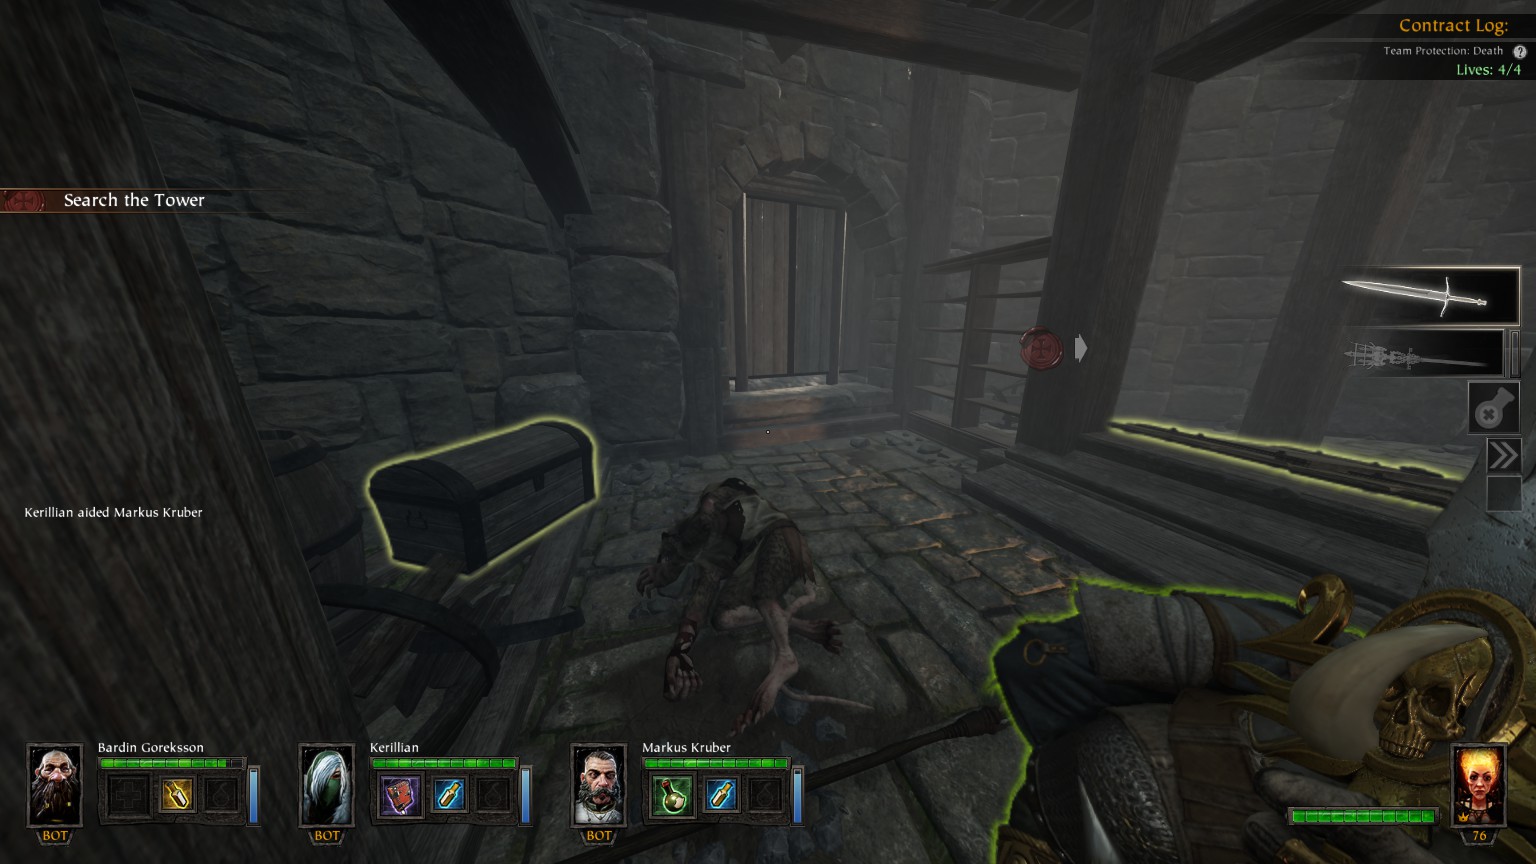
#1/5 (Helmsweg Tower) In the room where the platform lands

#2/5 (Hugeldal Tower) In the room under the small tower
#3/5 (Hugeldal Tower) Before the place where the Stormvermins pack usually awaits
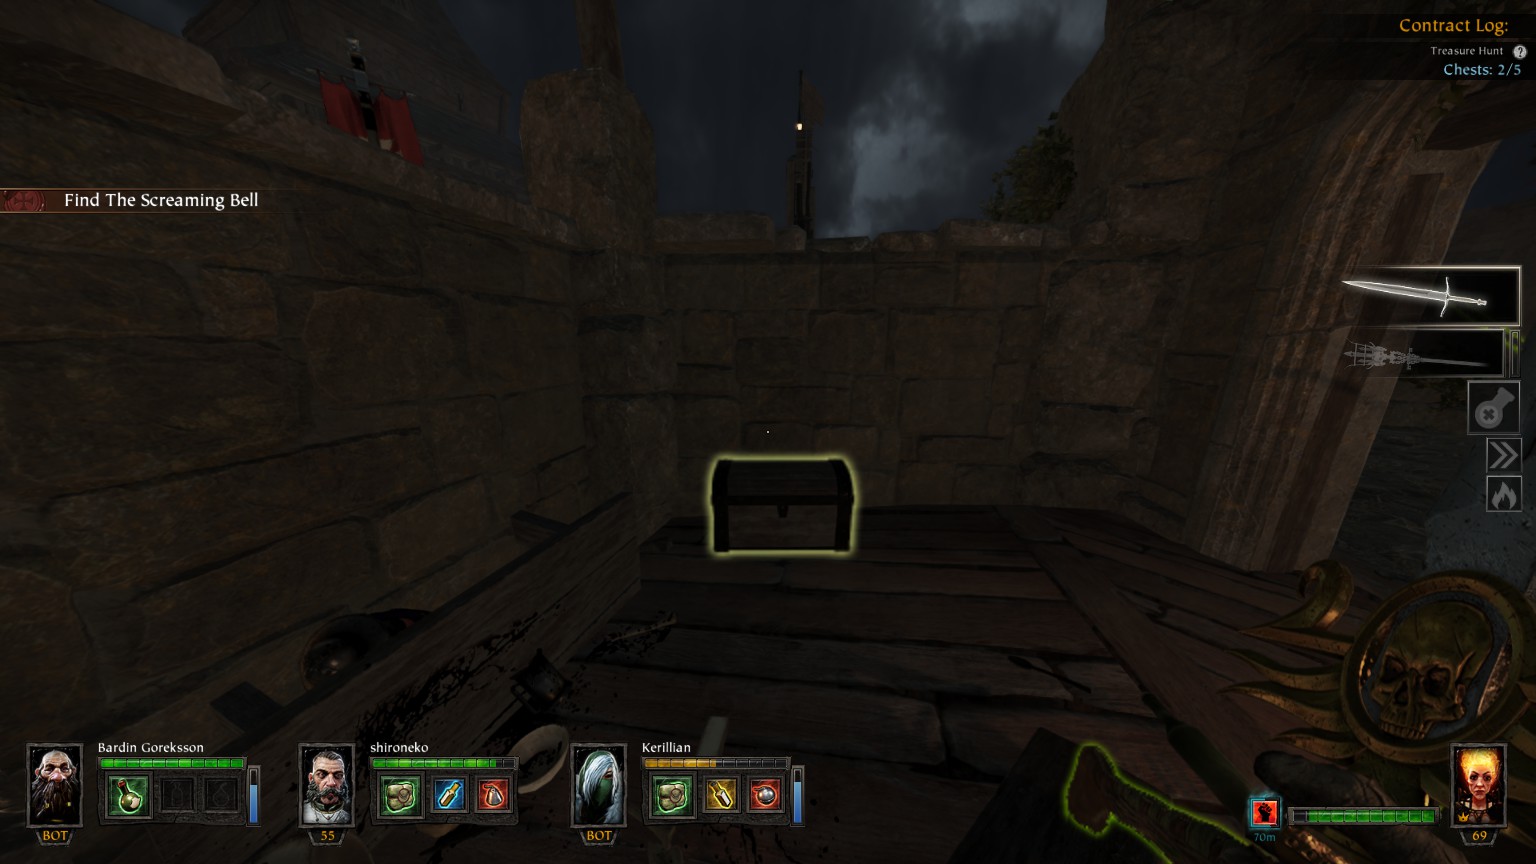
#4/5 (South Gatehouse) At the first chain
#5/5 (South Gatehouse) In the room upstairs (between chain 3 و 4)
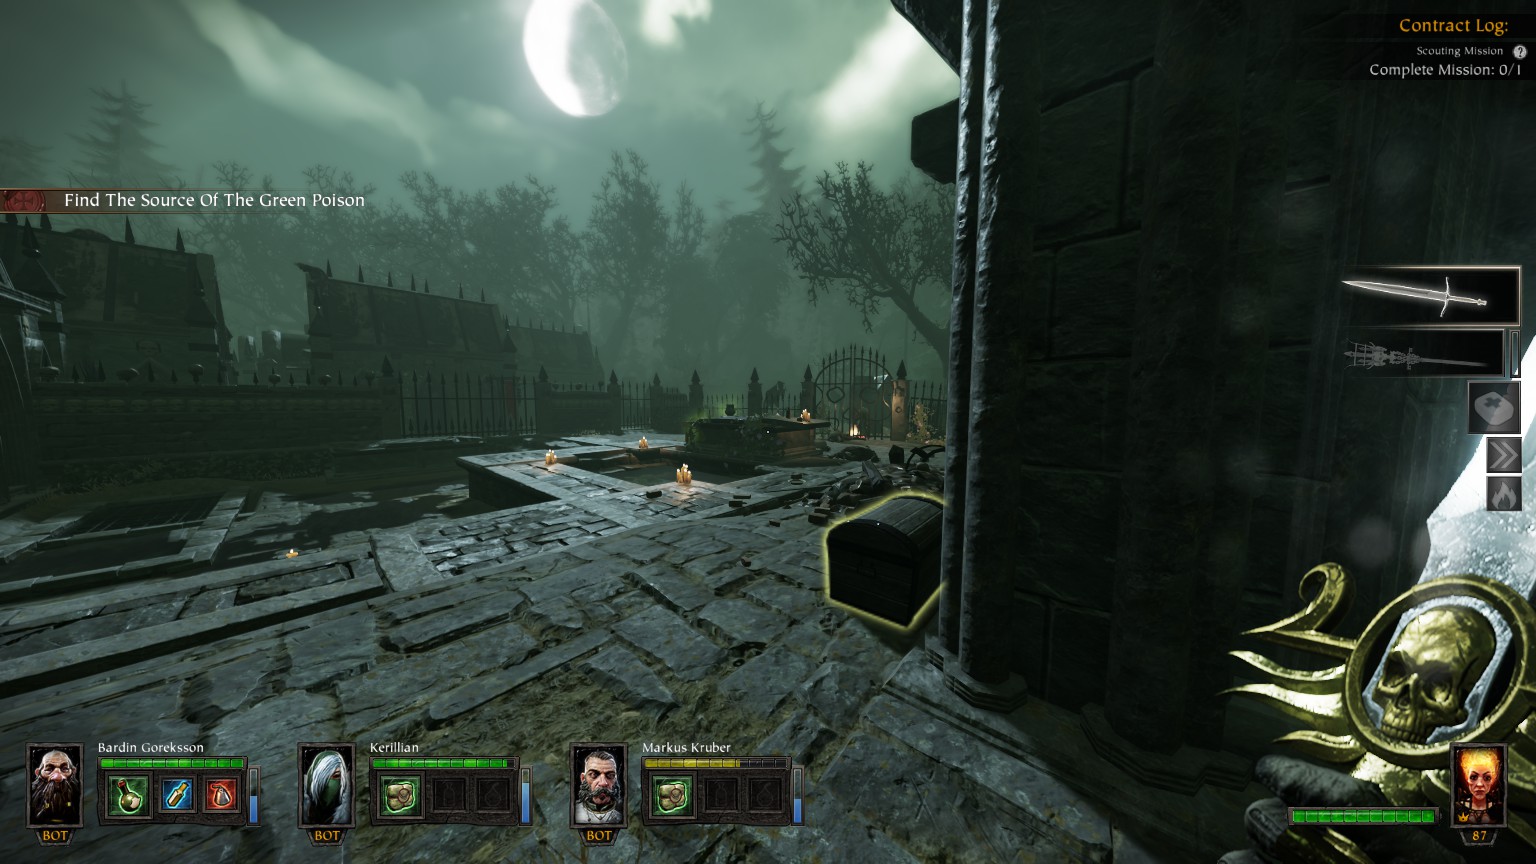
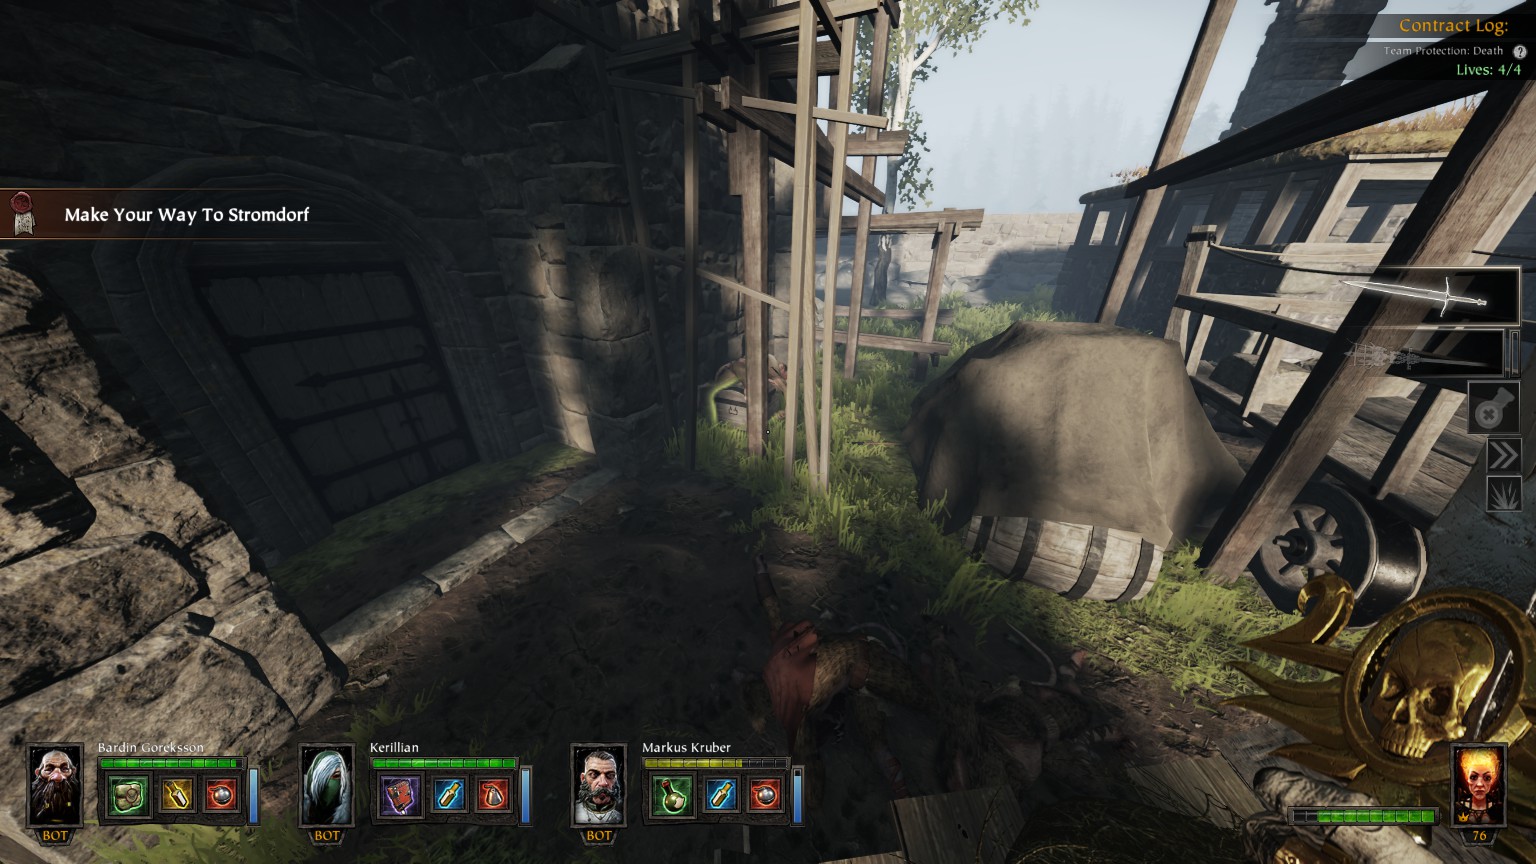
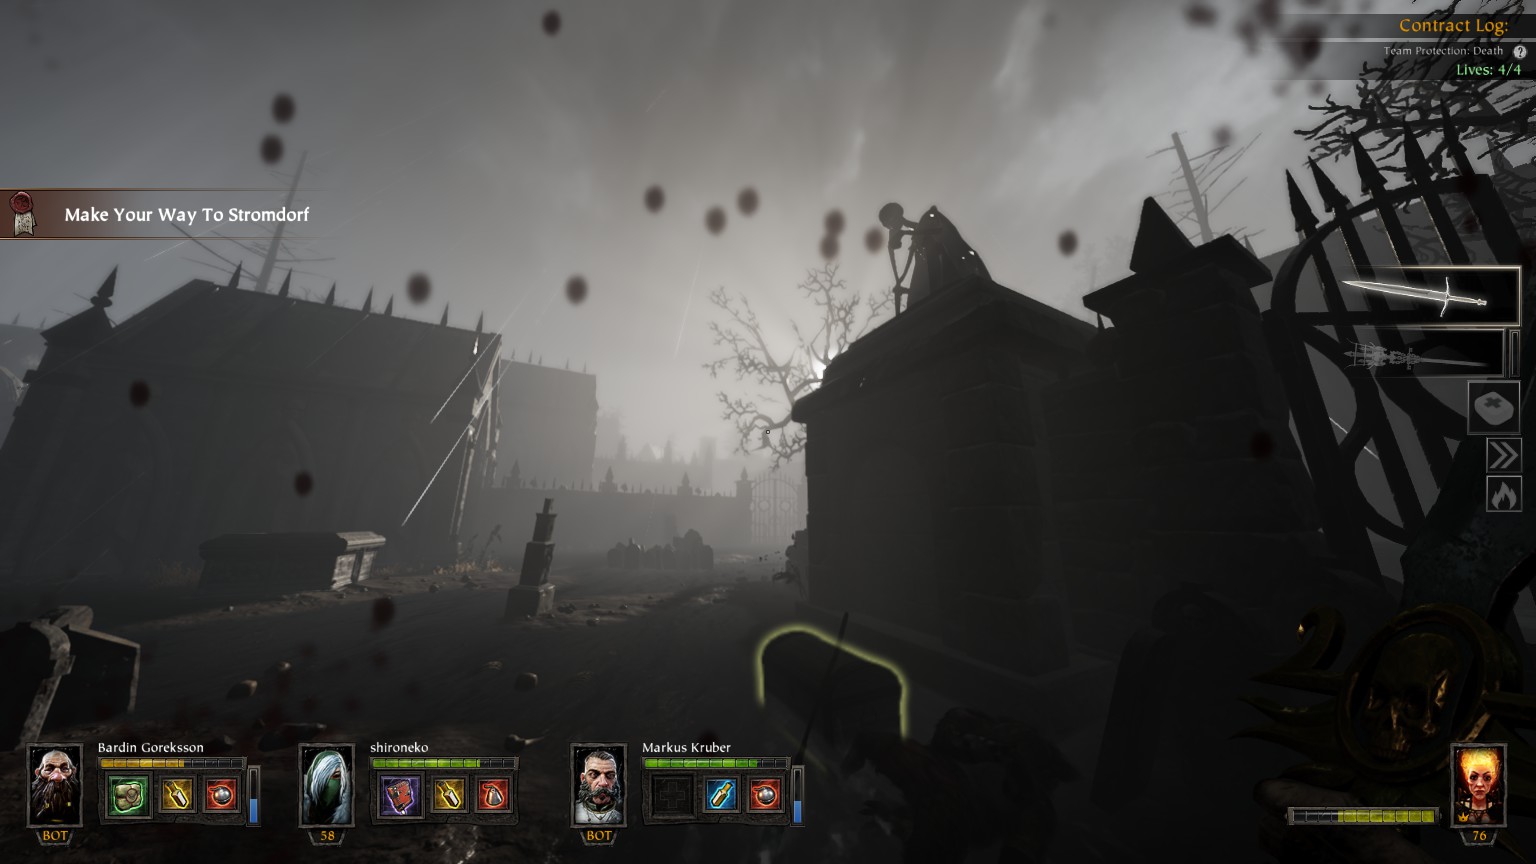
Garden of Morr
You may also want to check out
De greed’smap available in the Vermintide Wiki on Fandom
#1/6 (Morr’s Field) On the right after entering the first dangerous area
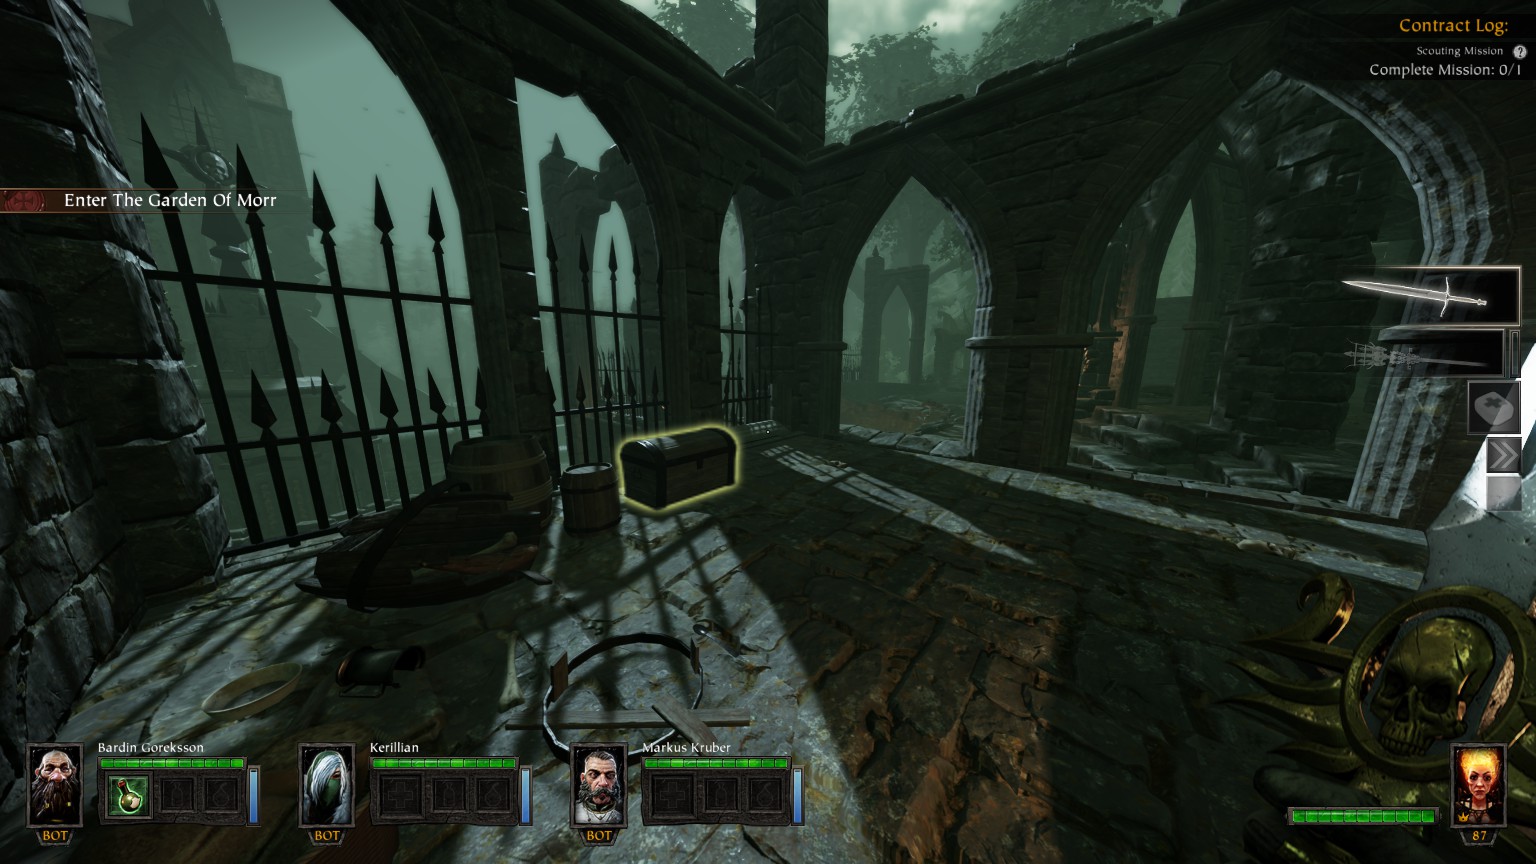
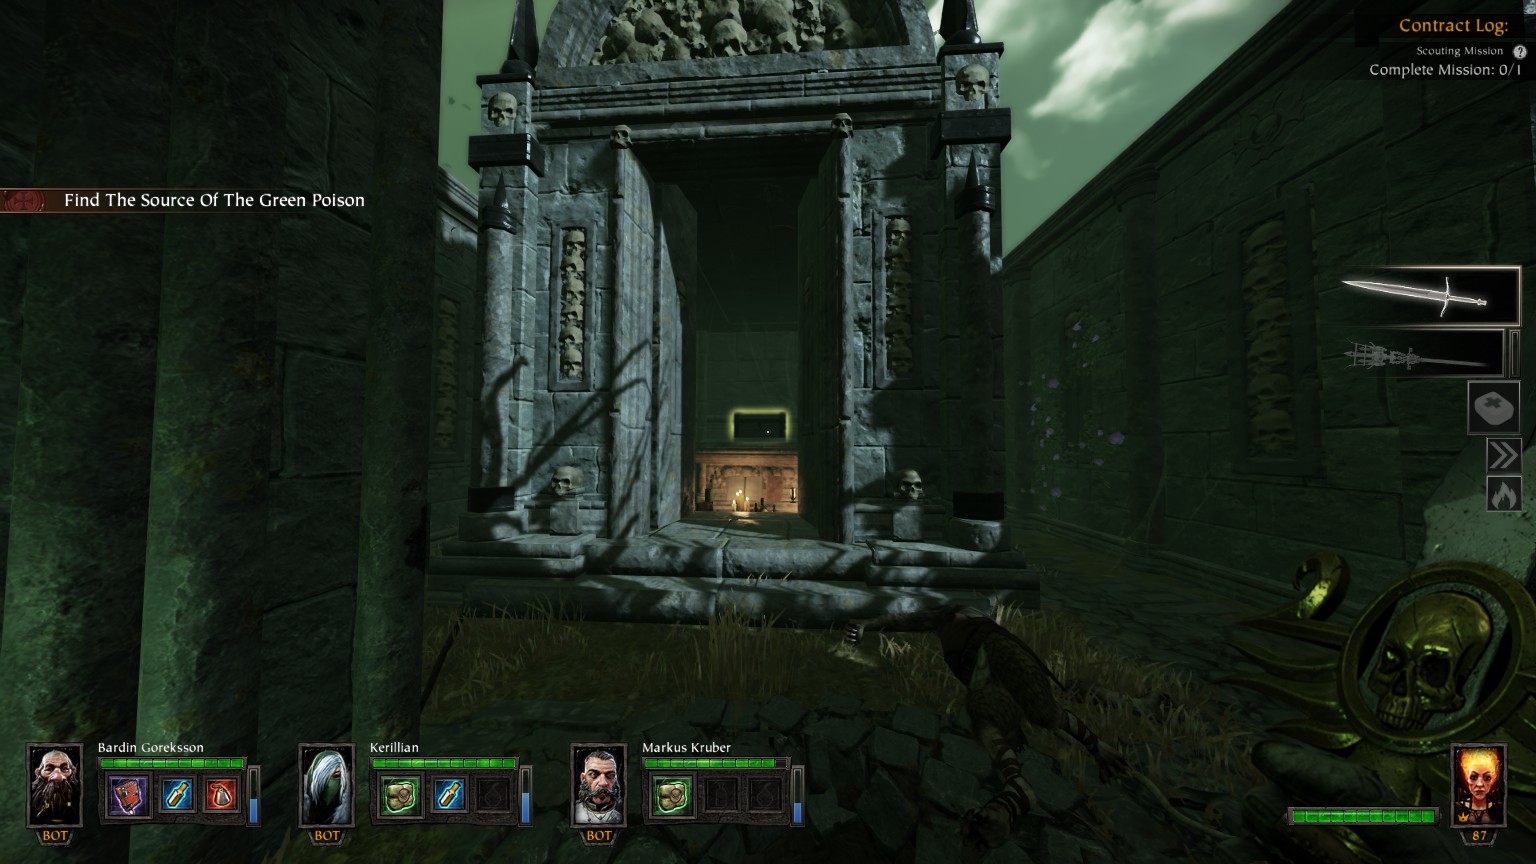
#2/6 (Augur’s Embrace) Before Tome #1
#3/6 (Garden of Spirits) Into the maze of tombs
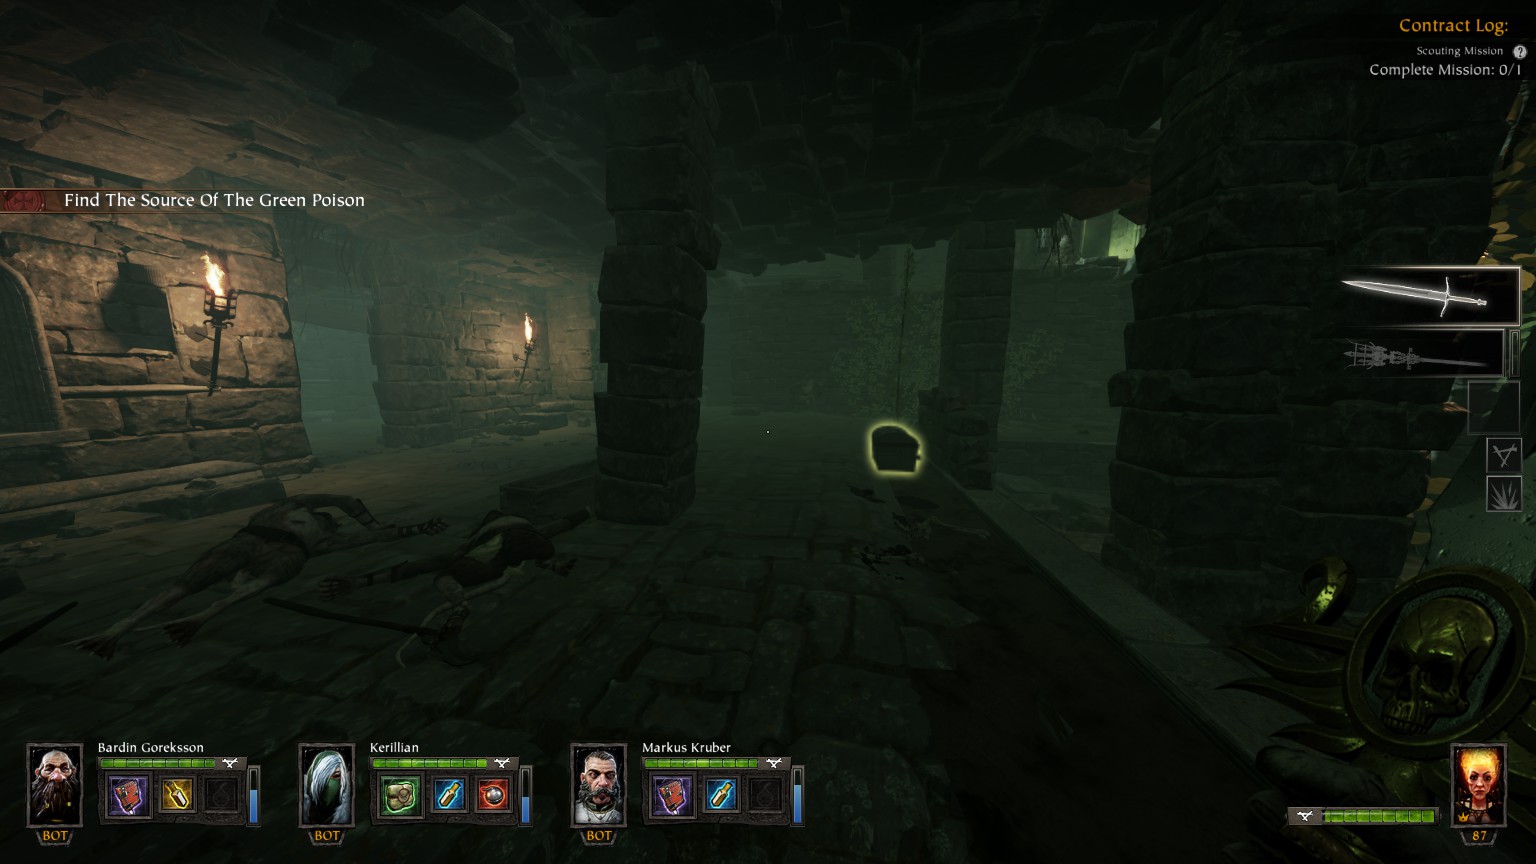
#4/6 (Von Vogelmann’s Crypt)
#5/6 (Peasant Hill) Before Grim #2
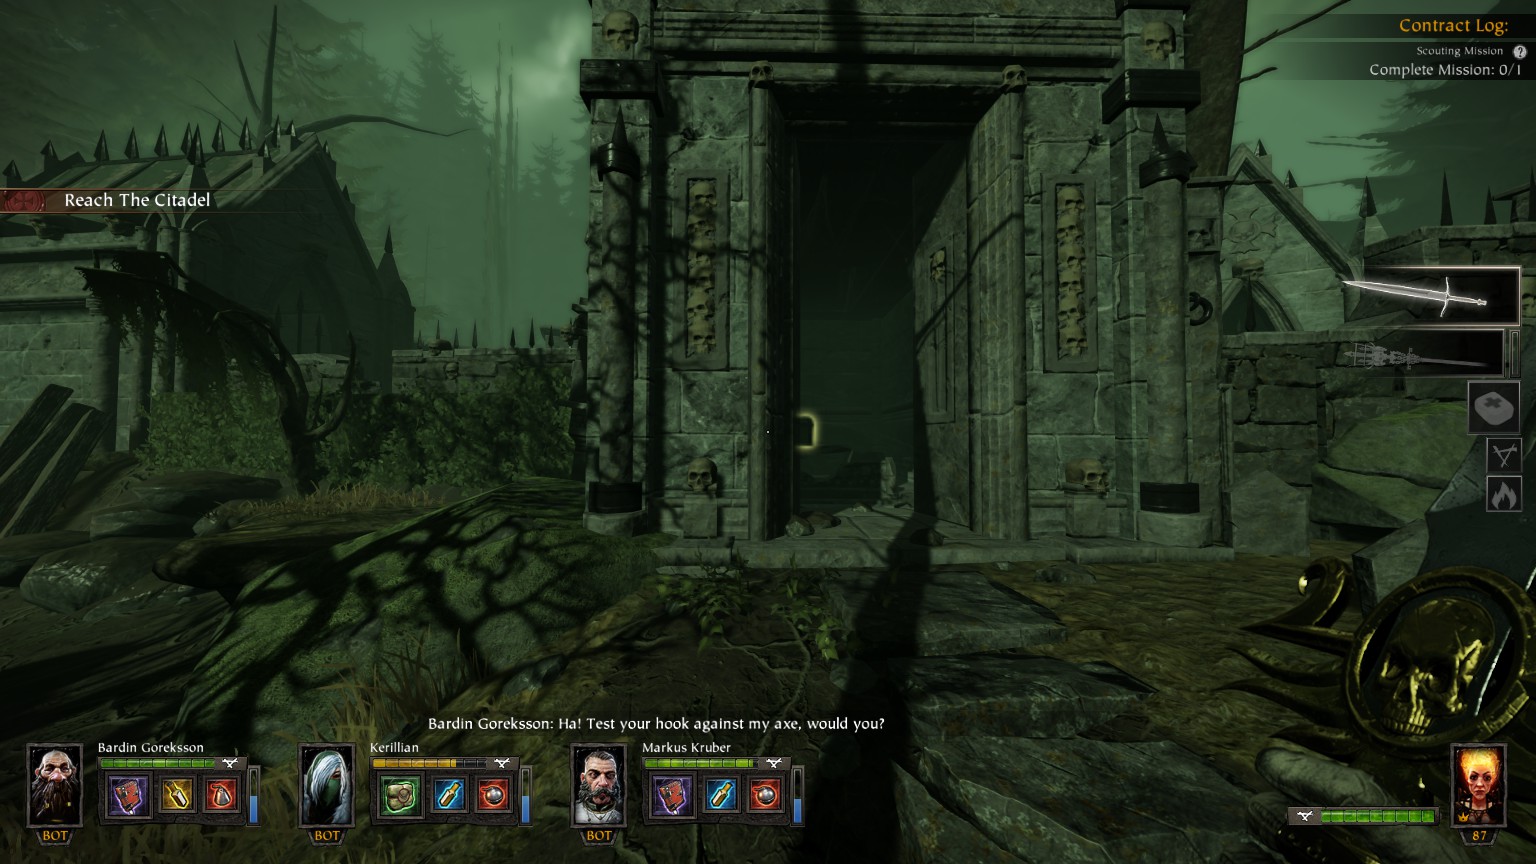
#6/6 (Dream Gardens) Just before the Citadel of Morr area
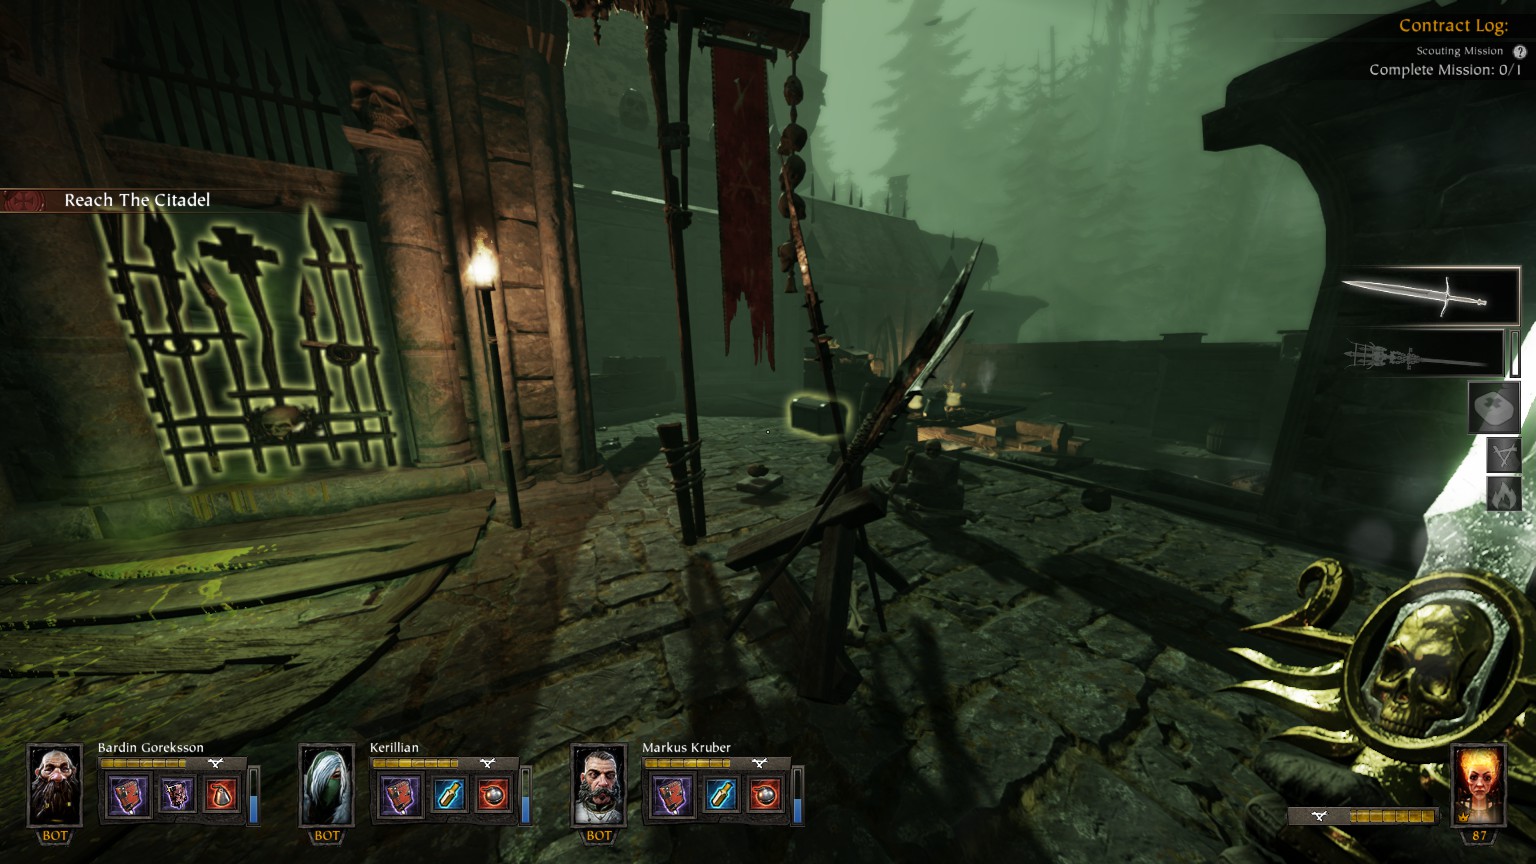
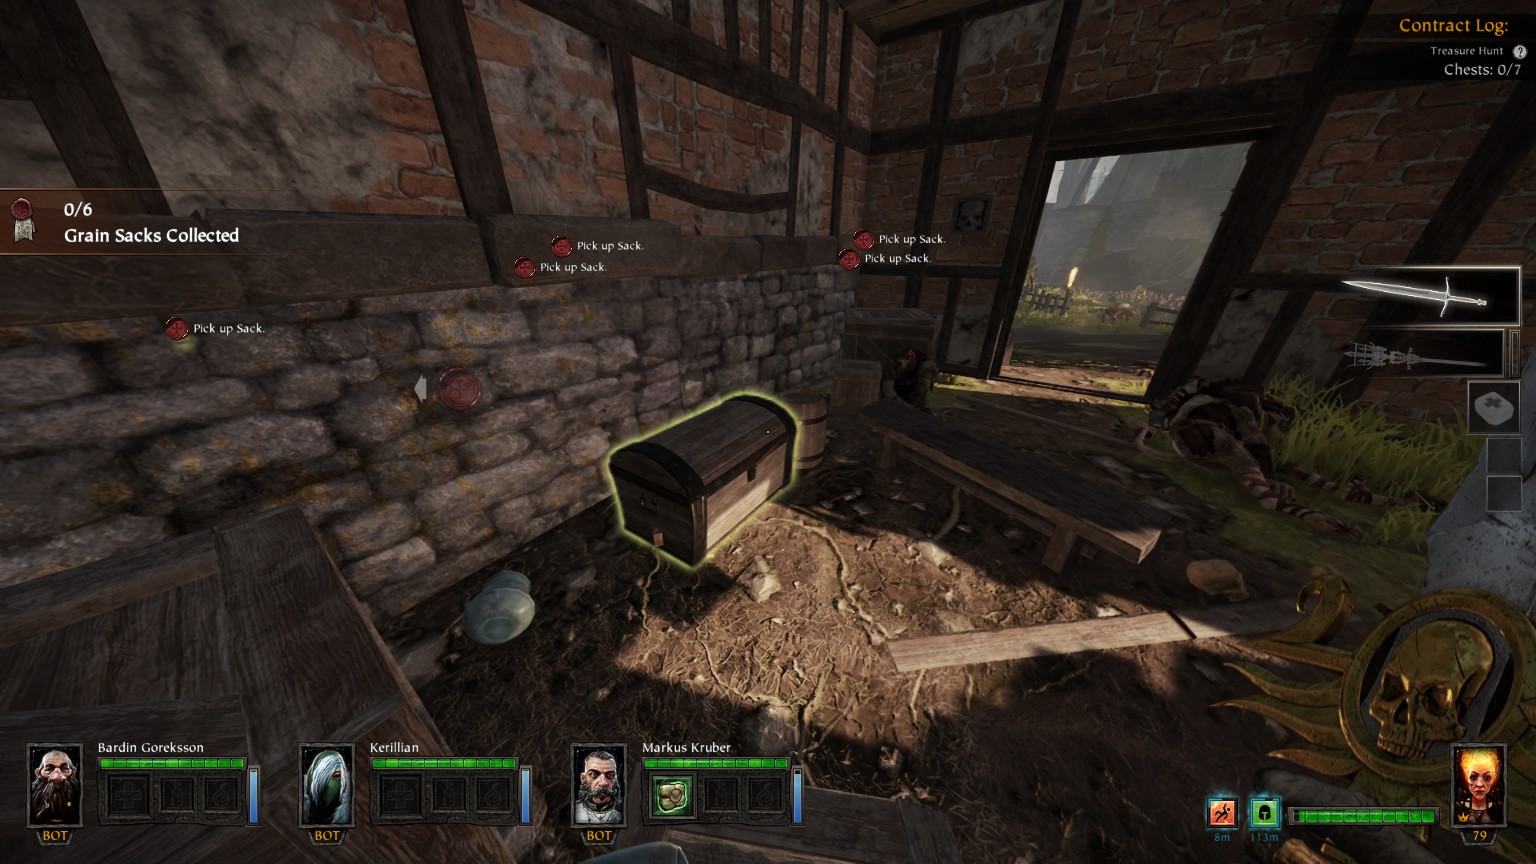
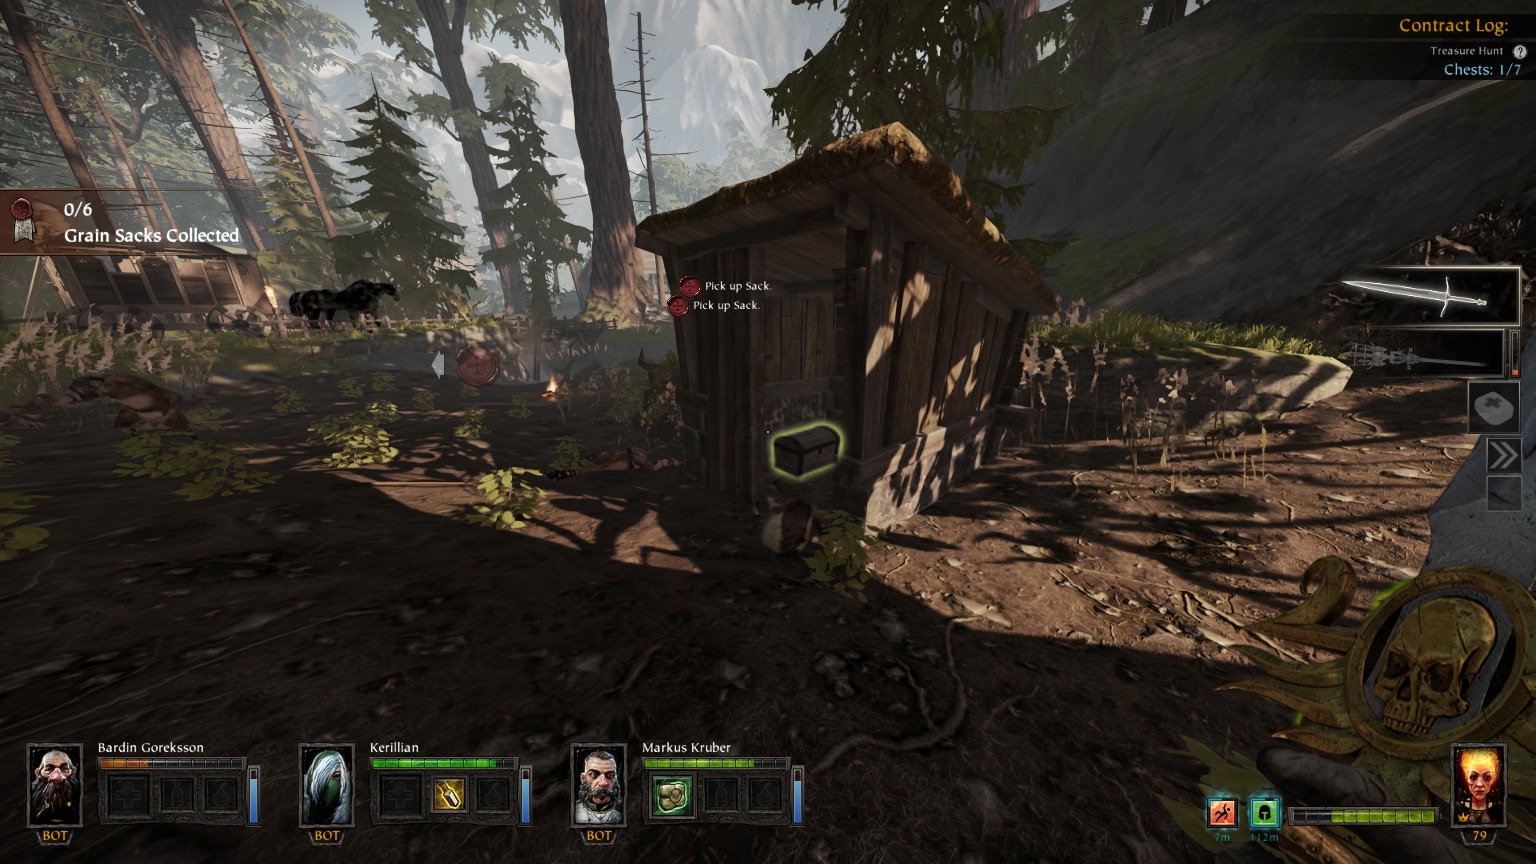
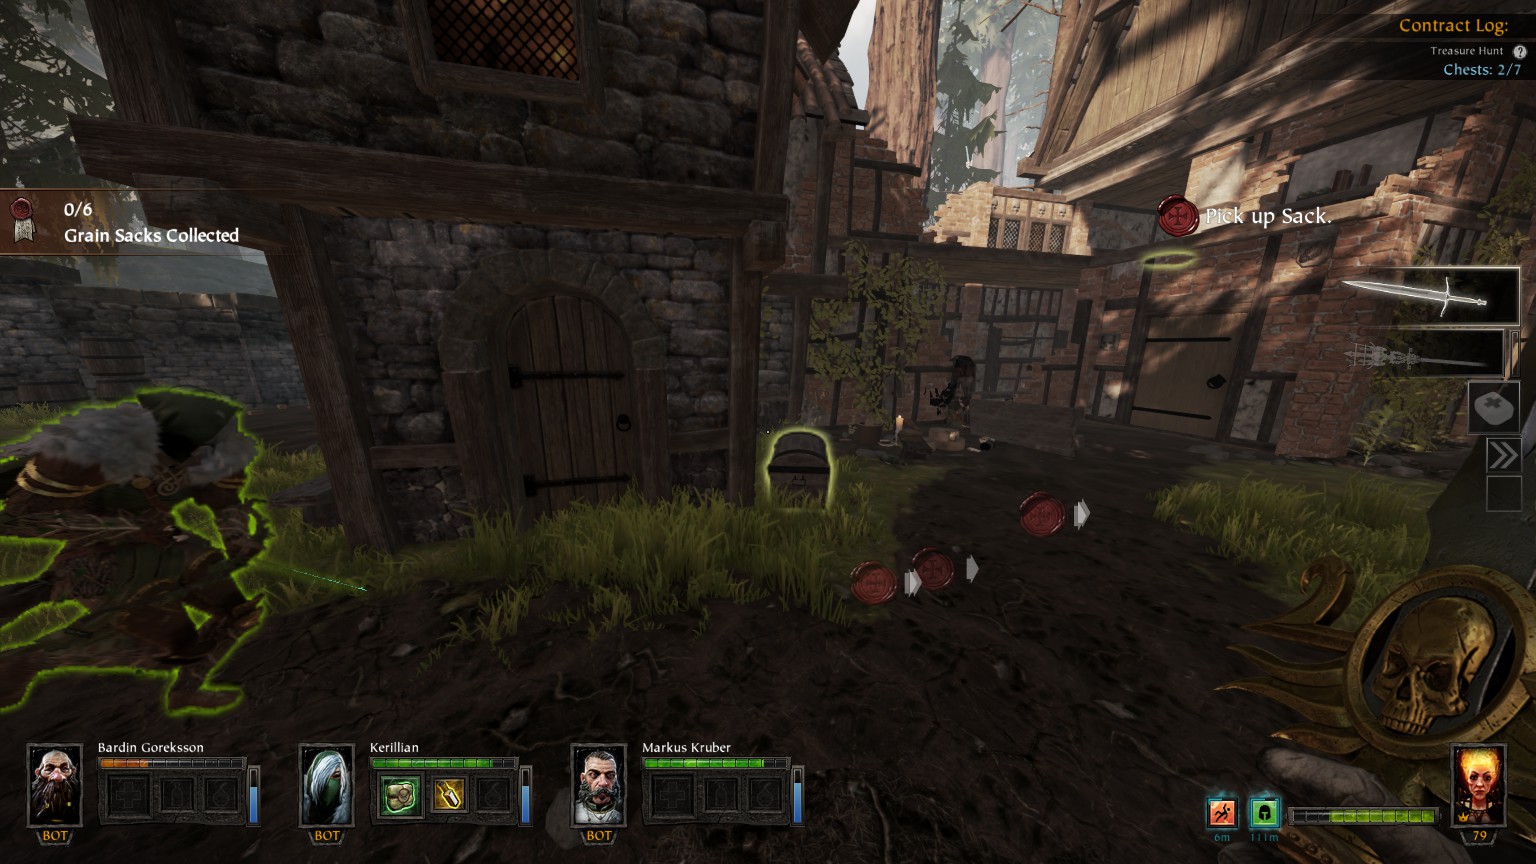
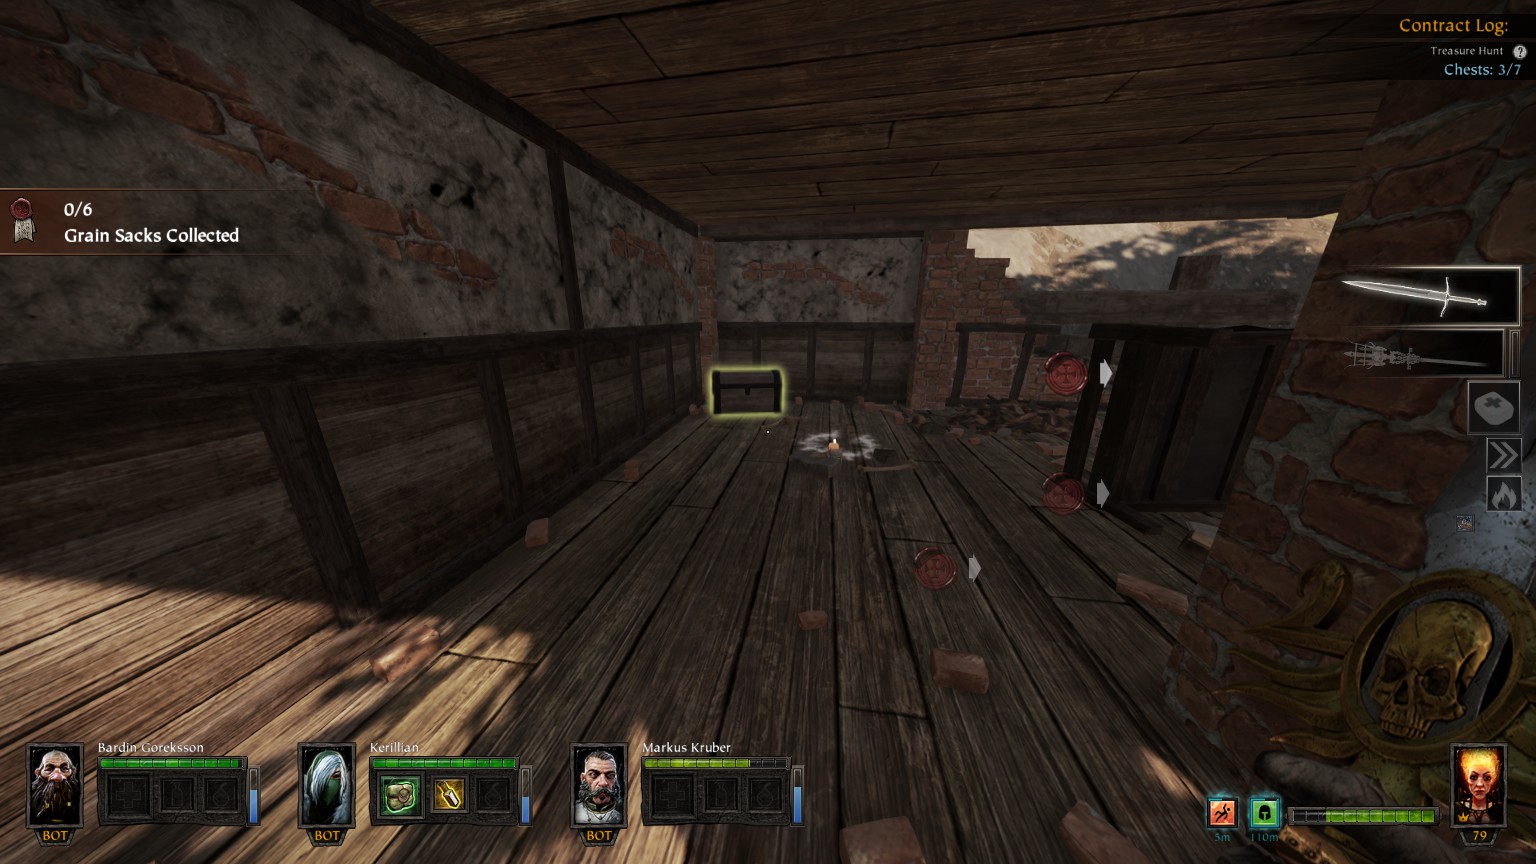
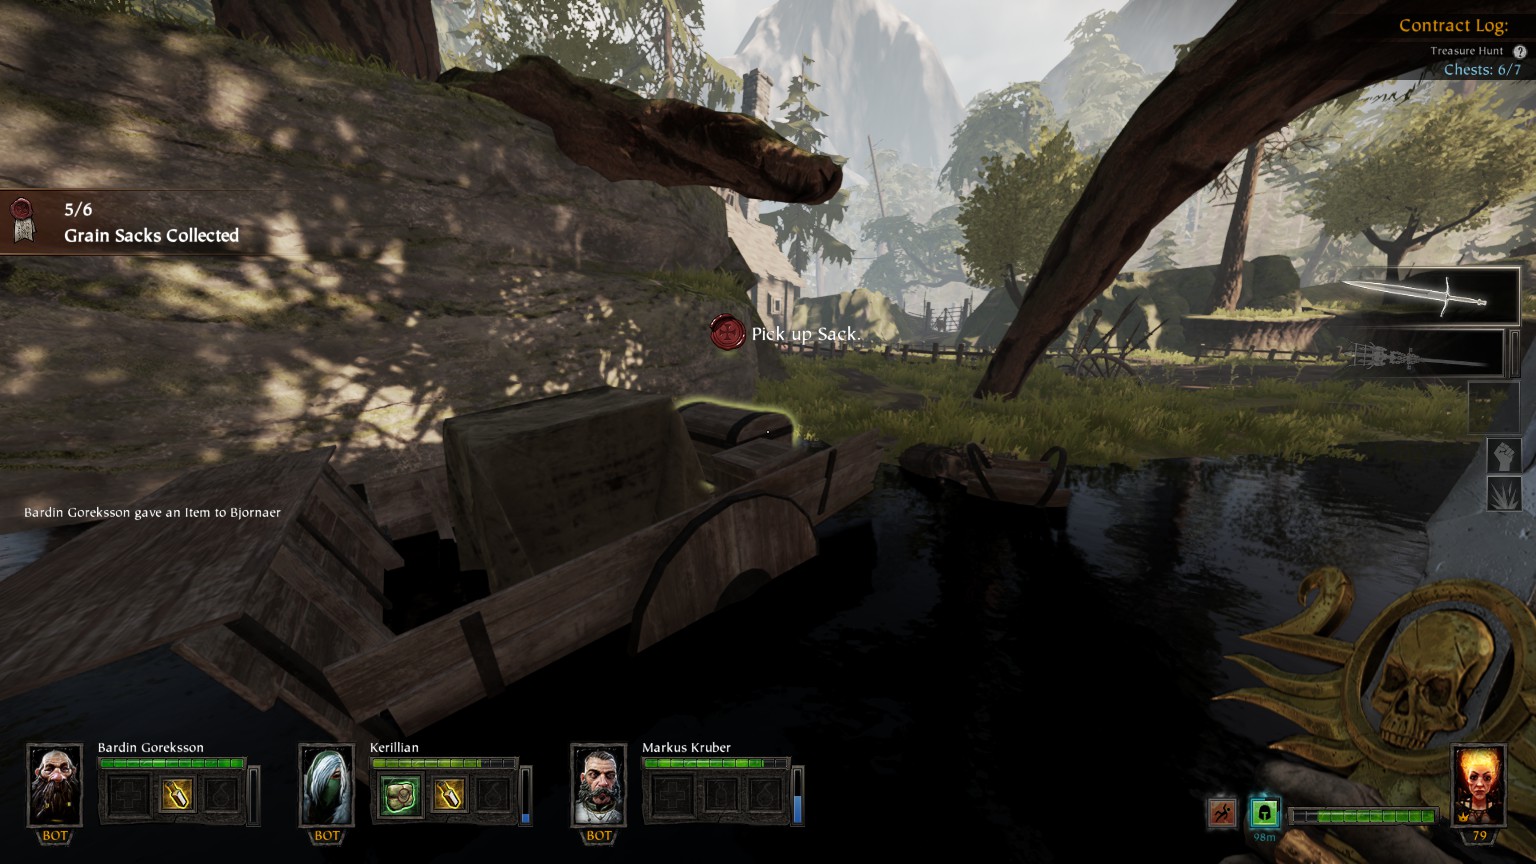
Wheat and Chaff
#1/7 (Muler Residence)
#2/7 Near Muler Residence
#3/7 (Freudenberger Lodge)
#4/7 (Freudenberger Lodge)
#5/7 (Hausler Pig Farm & صومعة)
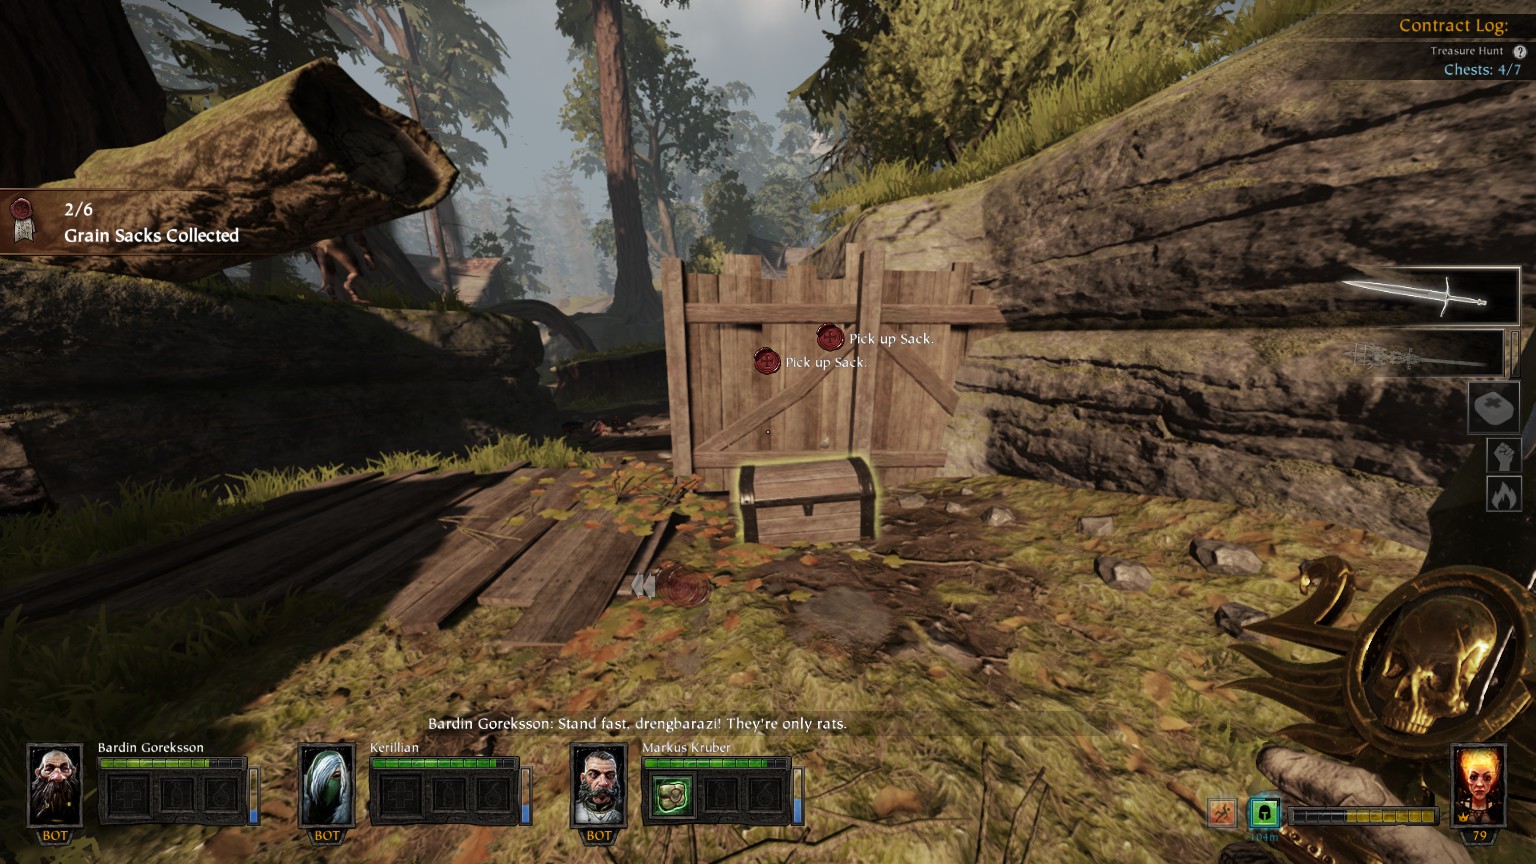
#6/7 between Freudenberger Lodge and Hausler Pig Farm & صومعة

#7/7 between Freudenberger Lodge and Hausler Pig Farm & صومعة
Waterfront
You may also want to check out “List of chests per map” by u/jimethn on reddit
#1/16 (South West Waterfront)
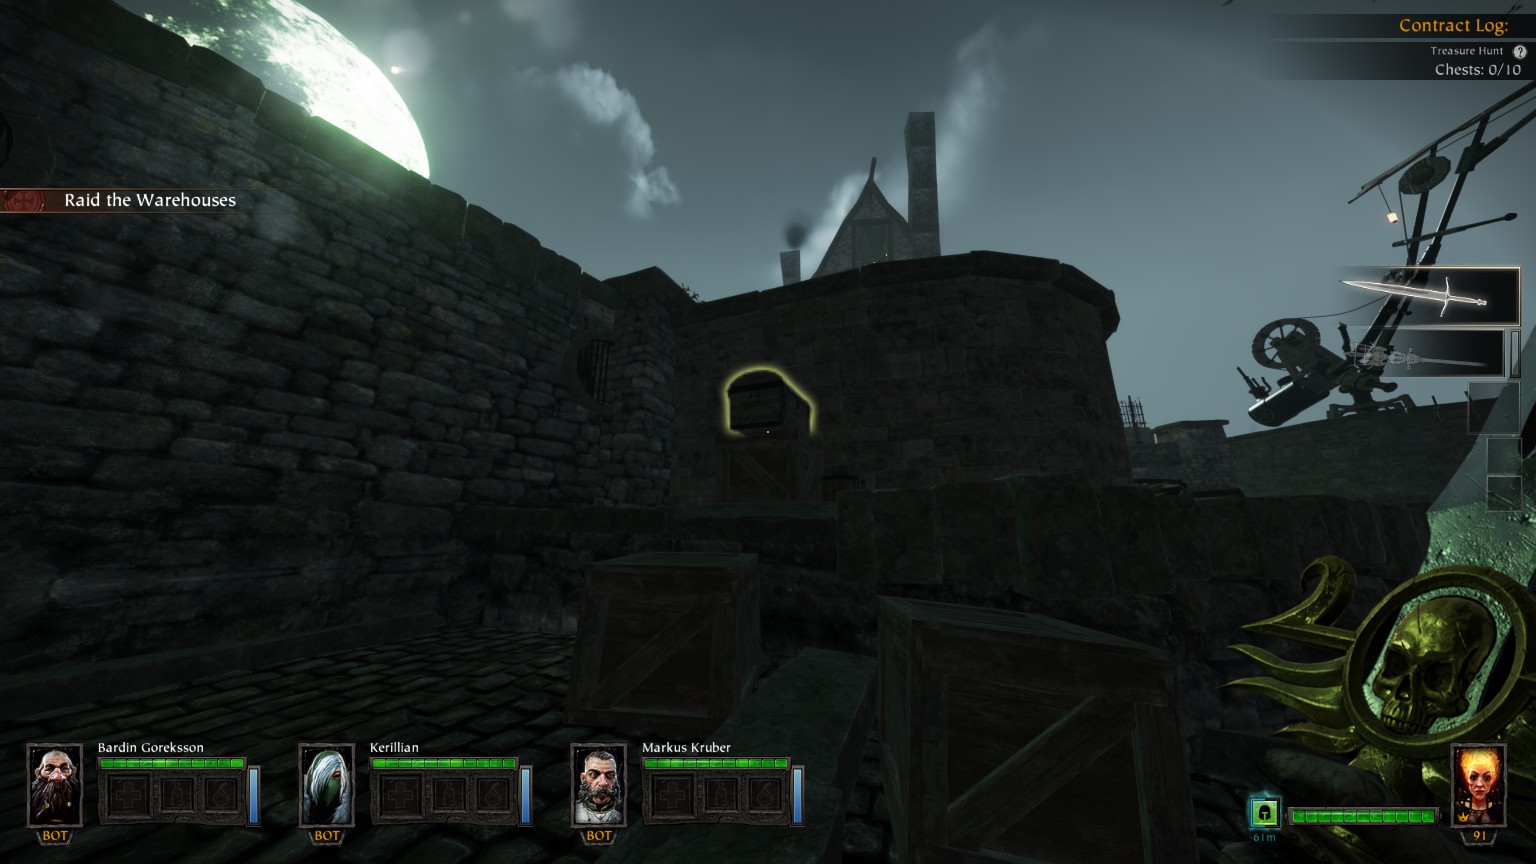
#2/16 (South West Waterfront)
#3/16 (South West Waterfront)
#4/16 (South West Waterfront)
#5/16 (Von Saponatheim Warehouse no. 3)
#6/16 (Von Saponatheim Warehouse no. 3)
#7/16 (Von Saponatheim Warehouse no. 3)
#8/16 (Back Yard)
#9/16 (The Dockhands Pitch)
#10/16 (The Dockhands Pitch)
#11/16 (The Dockhands Pitch)

#12/16 (South West Waterfront)
#13/16 (بögenhafen Shipping)
#14/16 (بögenhafen Shipping)
#15/16 (بögenhafen Shipping Lumber Yard)
You may find some lore book page nearby on the planks
#16/16 (بögenhafen Shipping Lumber Yard)
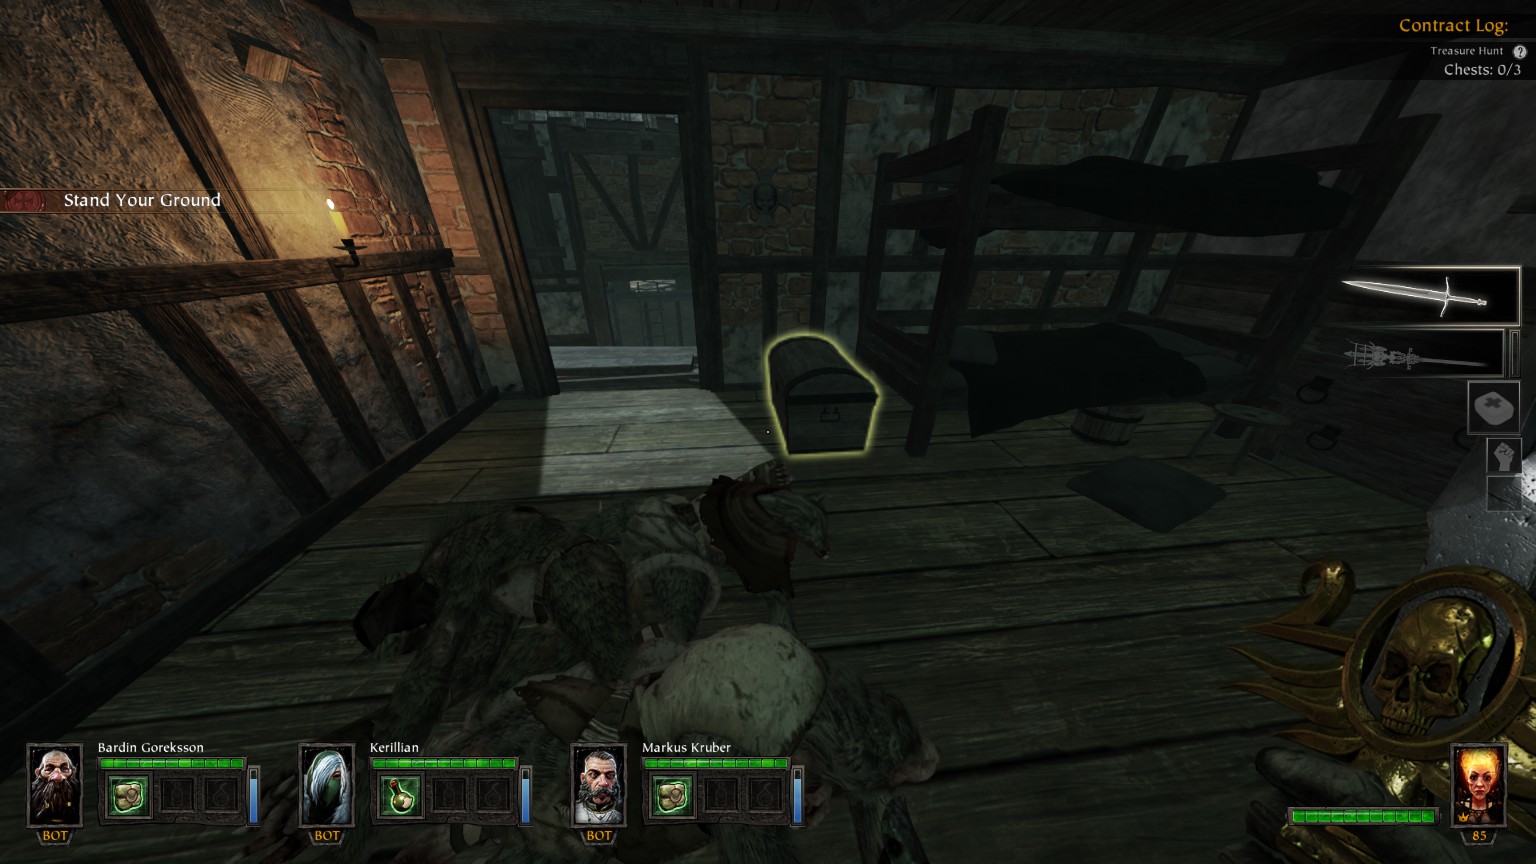
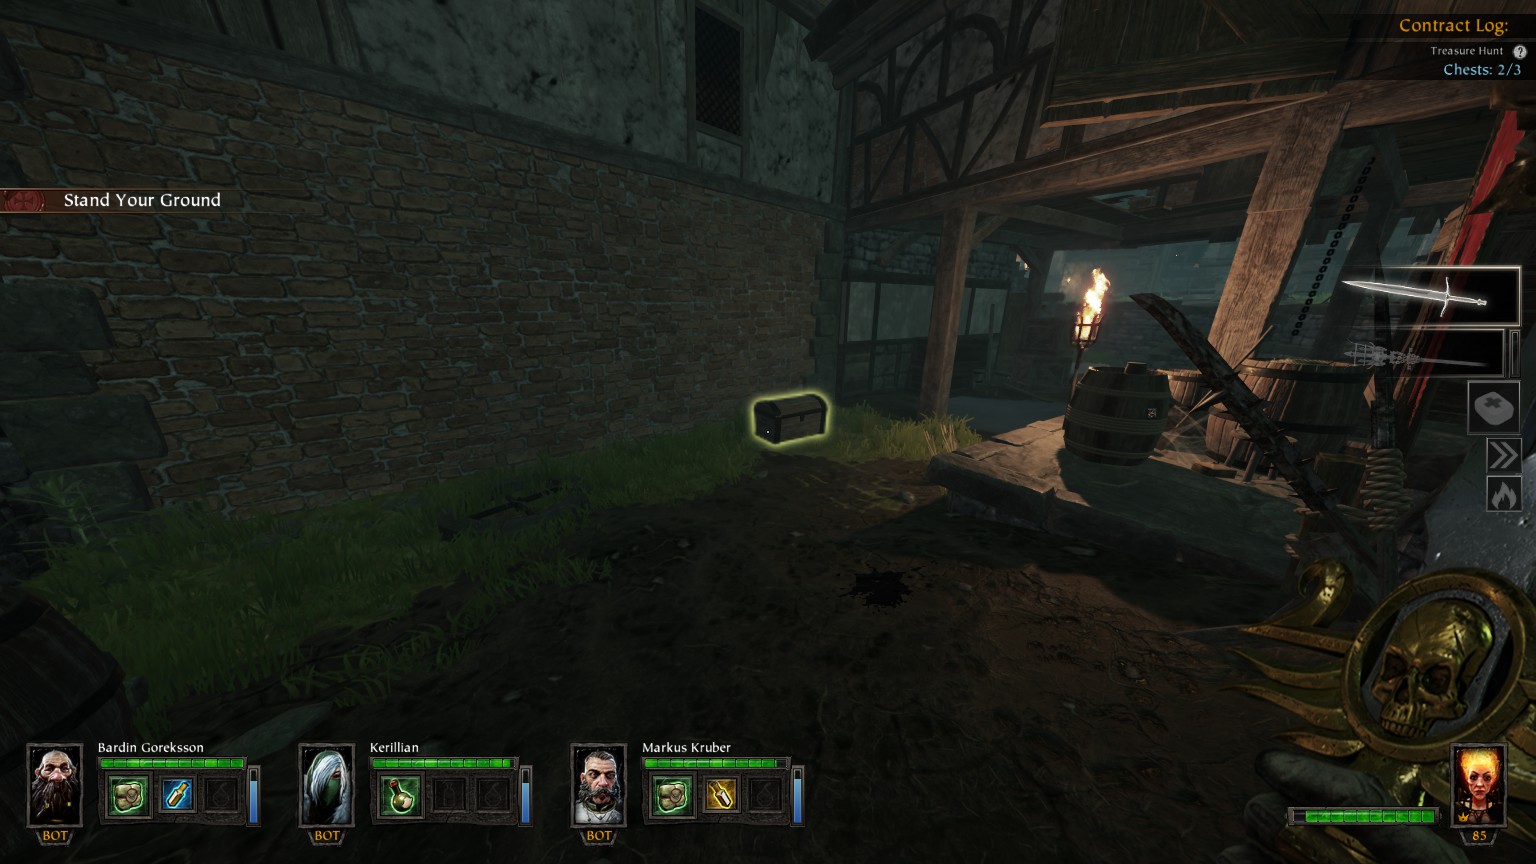
Well Watch
You may also want to check out
AgainPyromancer’smap available in the Vermintide Wiki on Fandom (Advanced Map Strategy Guide)
Chests are numbered clockwise
#1/3 Building near Tenement’s Well
#2/3 In front of Tenement’s Well
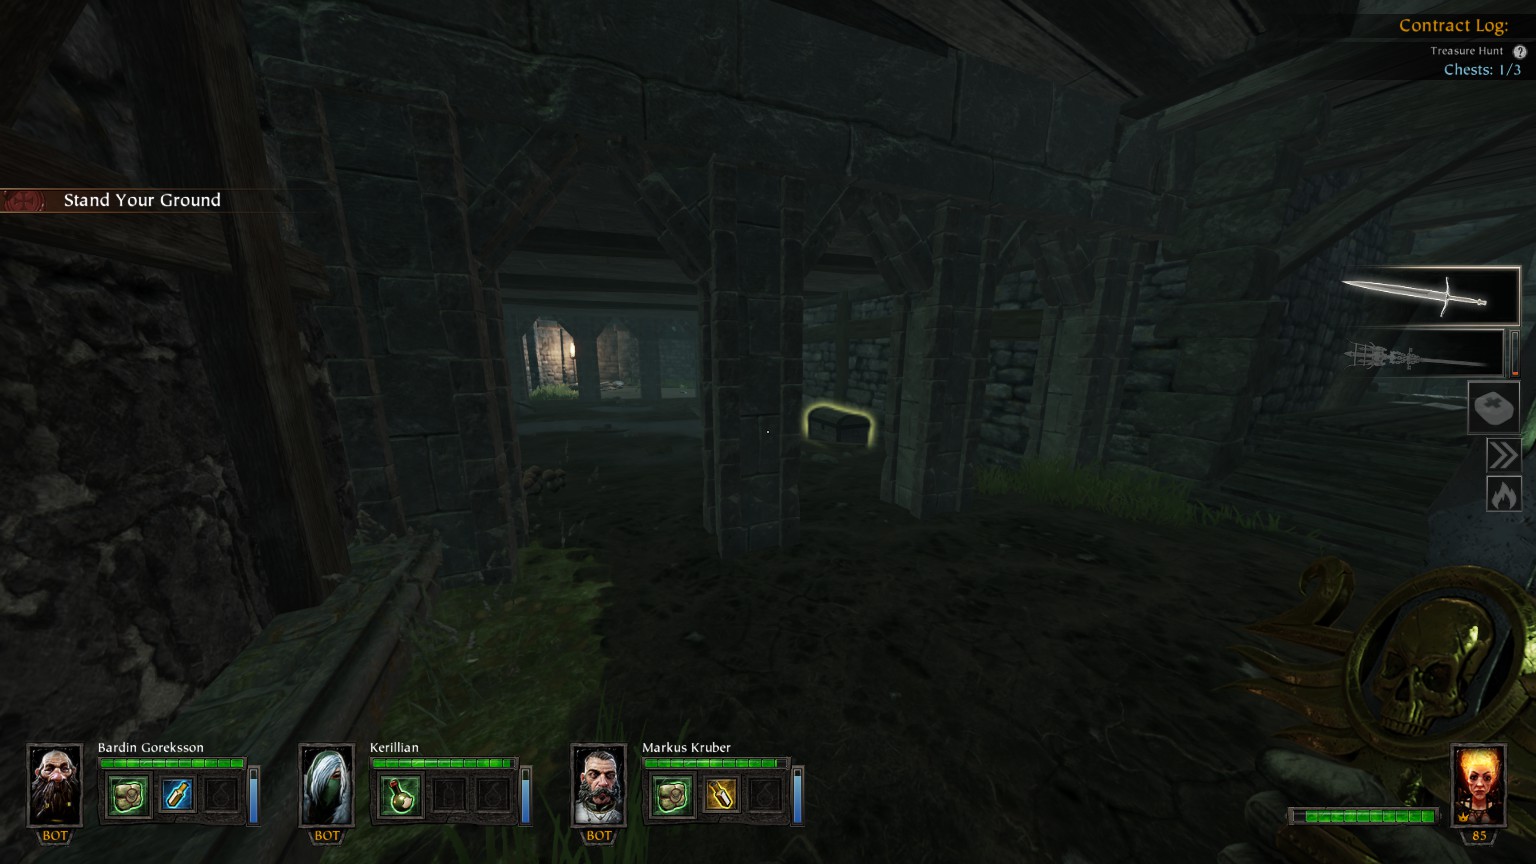
#3/3 On the left path from Chest #2 to Burgher’s Mansion Well
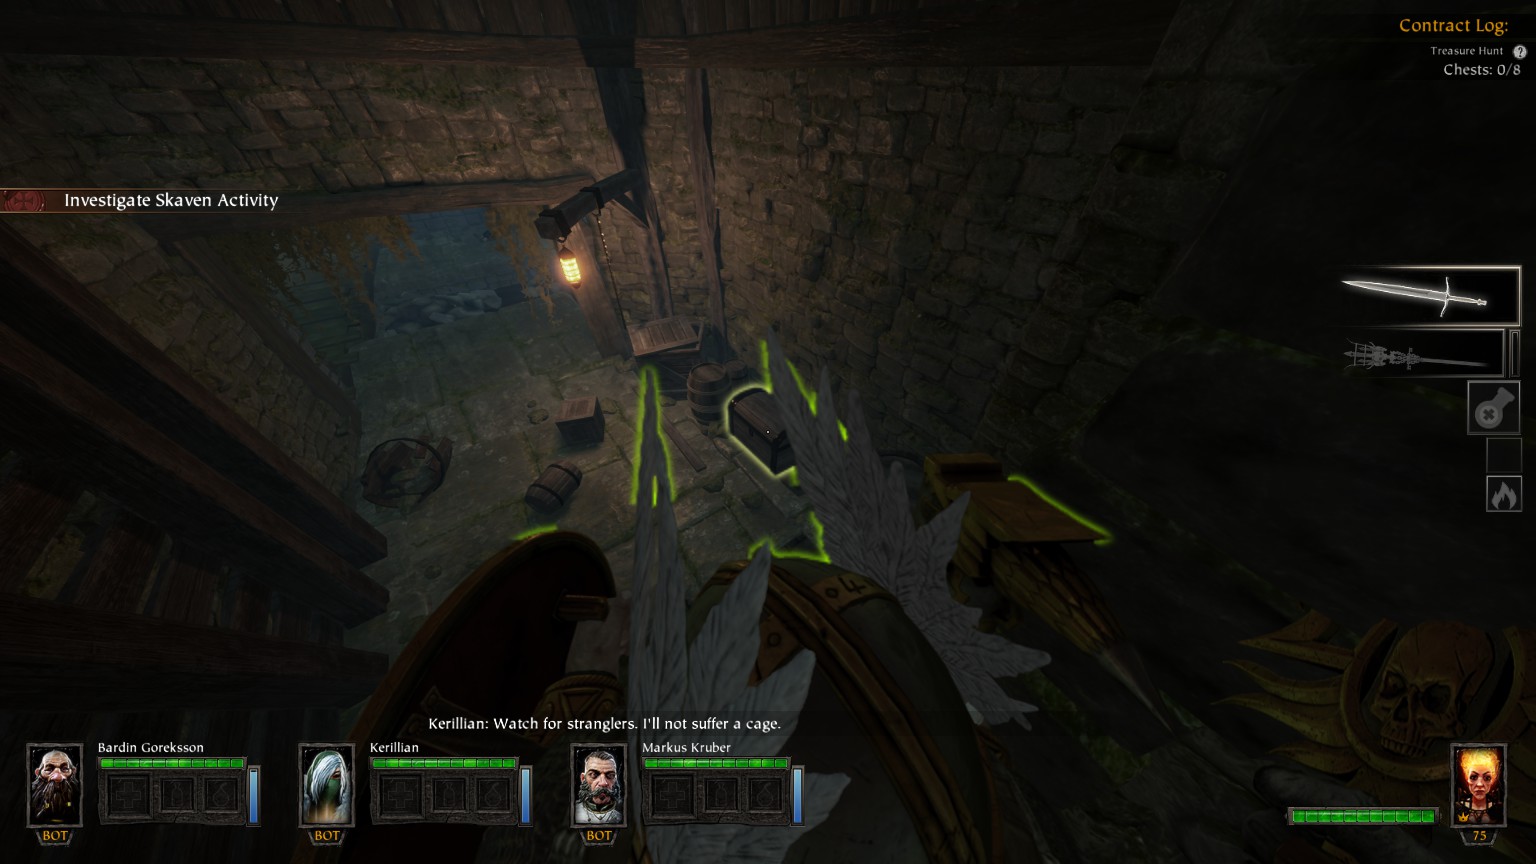
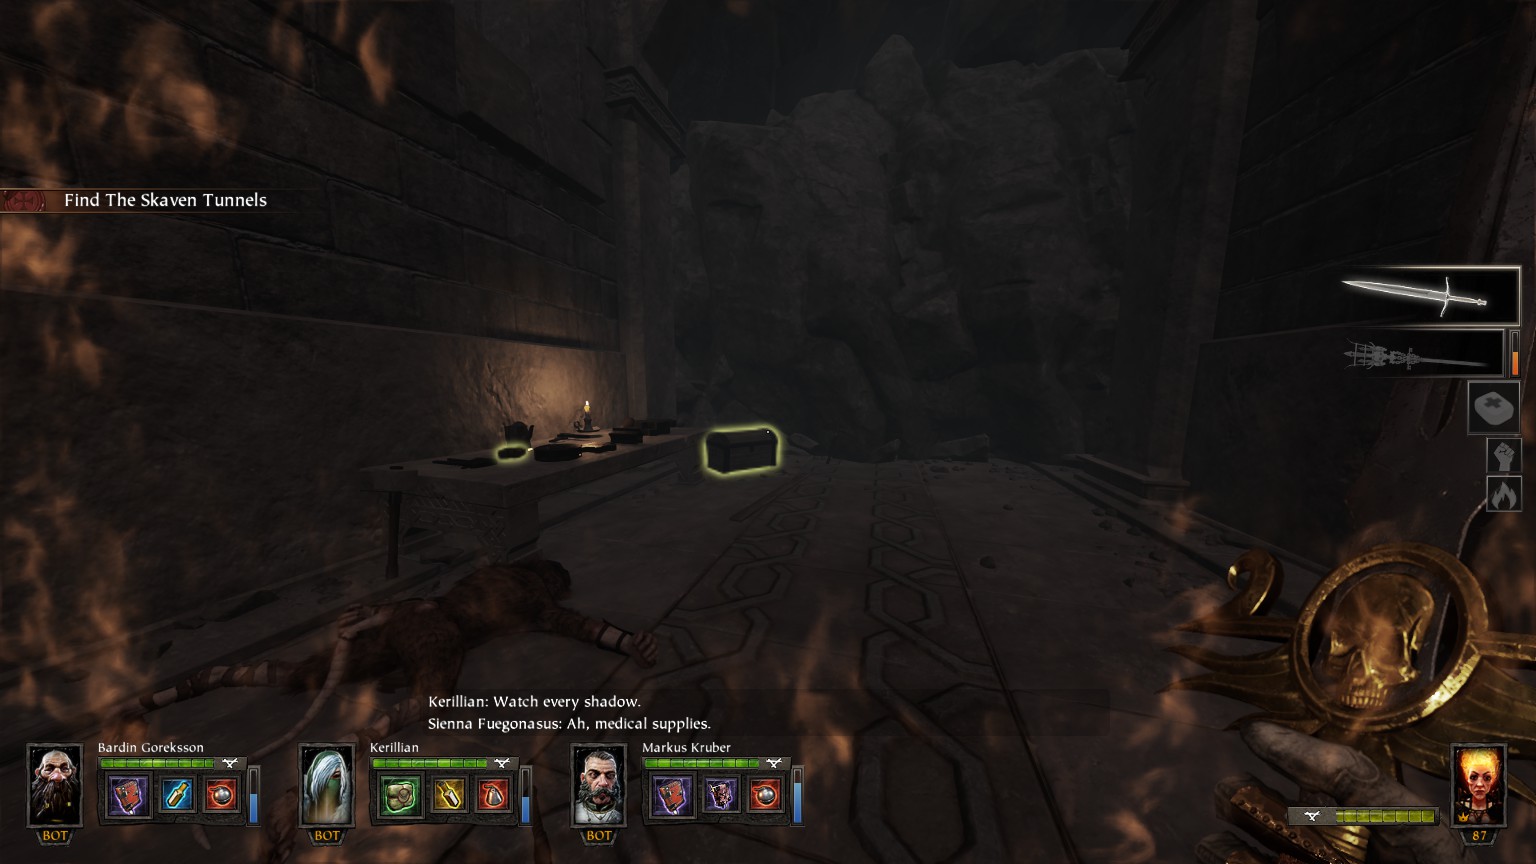
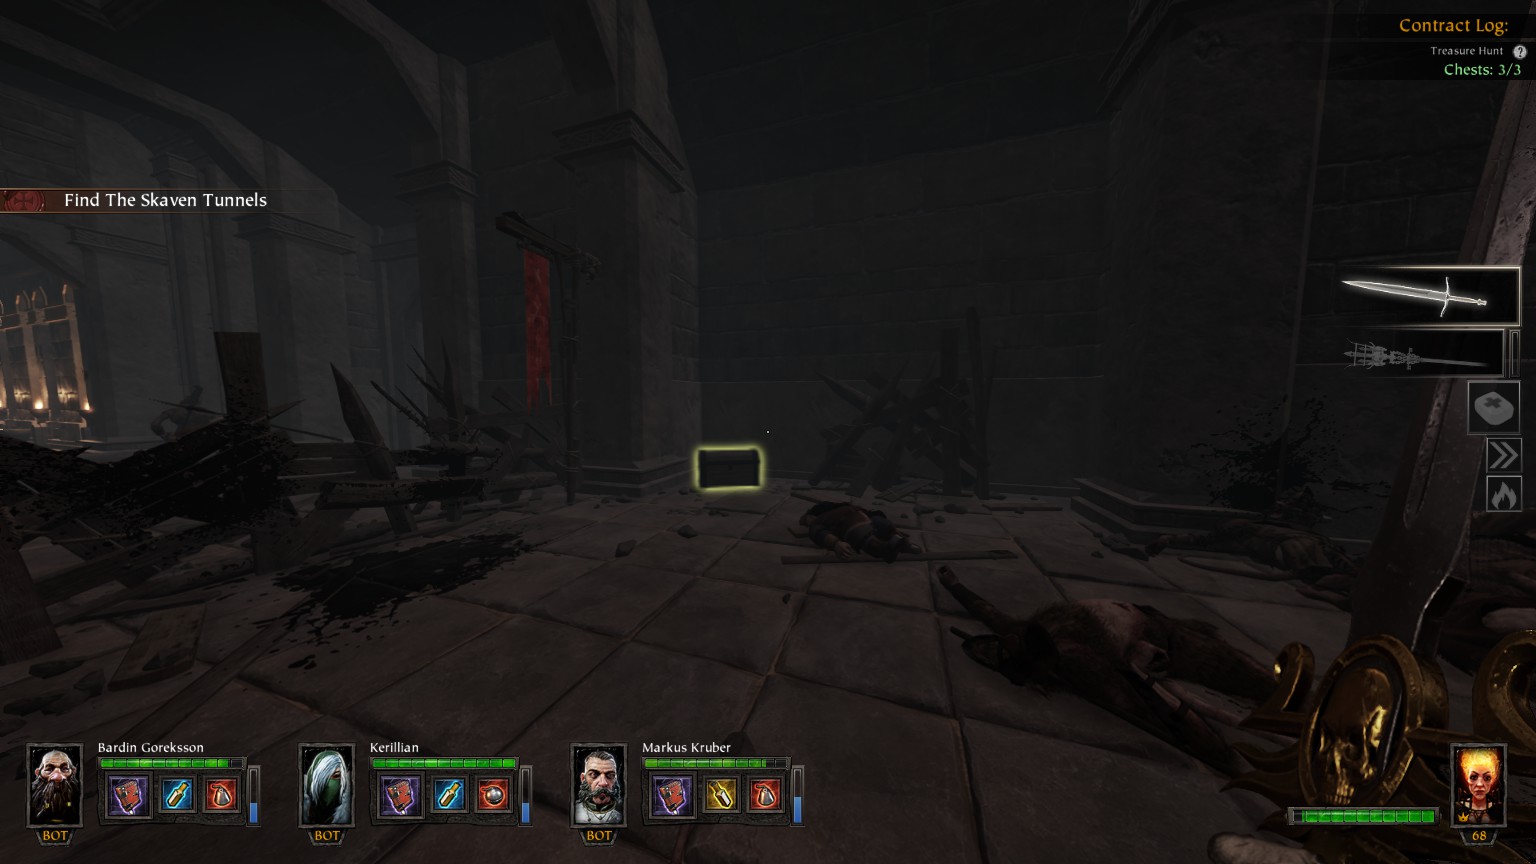
The Enemy Below
You may also want to check out
De greed’smap available in the Vermintide Wiki on Fandom (some are missing)
#1/8 (Northwest Sewer Hub) Passage on the right just before
Northwest Sewer Systemمنطقة
(you may find a lore book page in the passage between chest #1 و #2)
#2/8 (Northwest Sewer System) Passage on the right
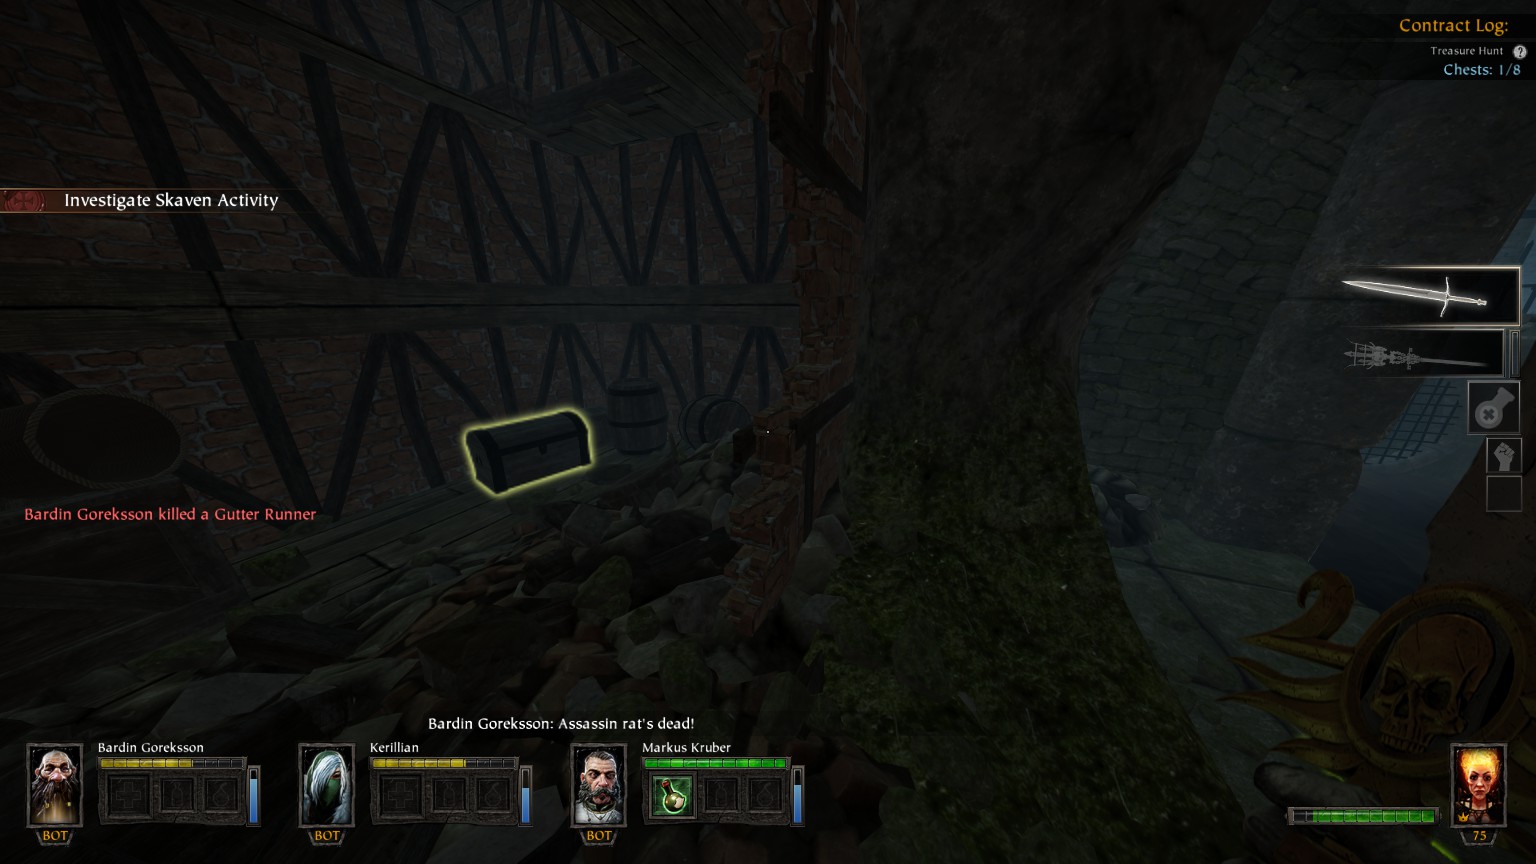
(you may find a lore book page on the right after chest #2)
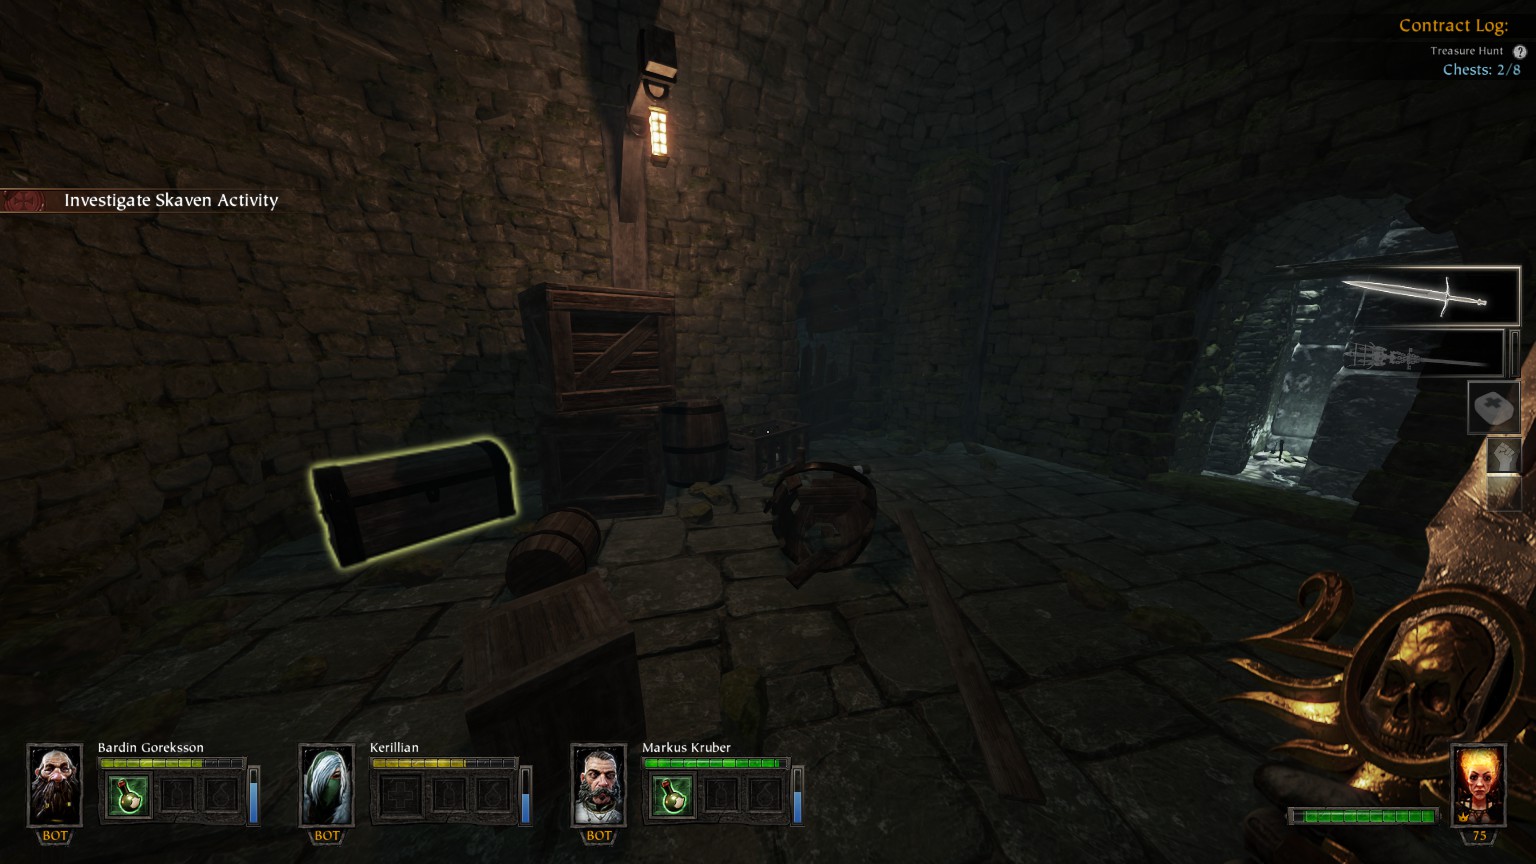
#3/8 (The Mandred Stairs) Just after Grim #1 (You can grab Tome #1 behind the palisade)
#4/8 (between Lower West Sewer and Skaven Tunnels) After Tome #1
#5/8 (Skaven Tunnels) Just before Tome #2
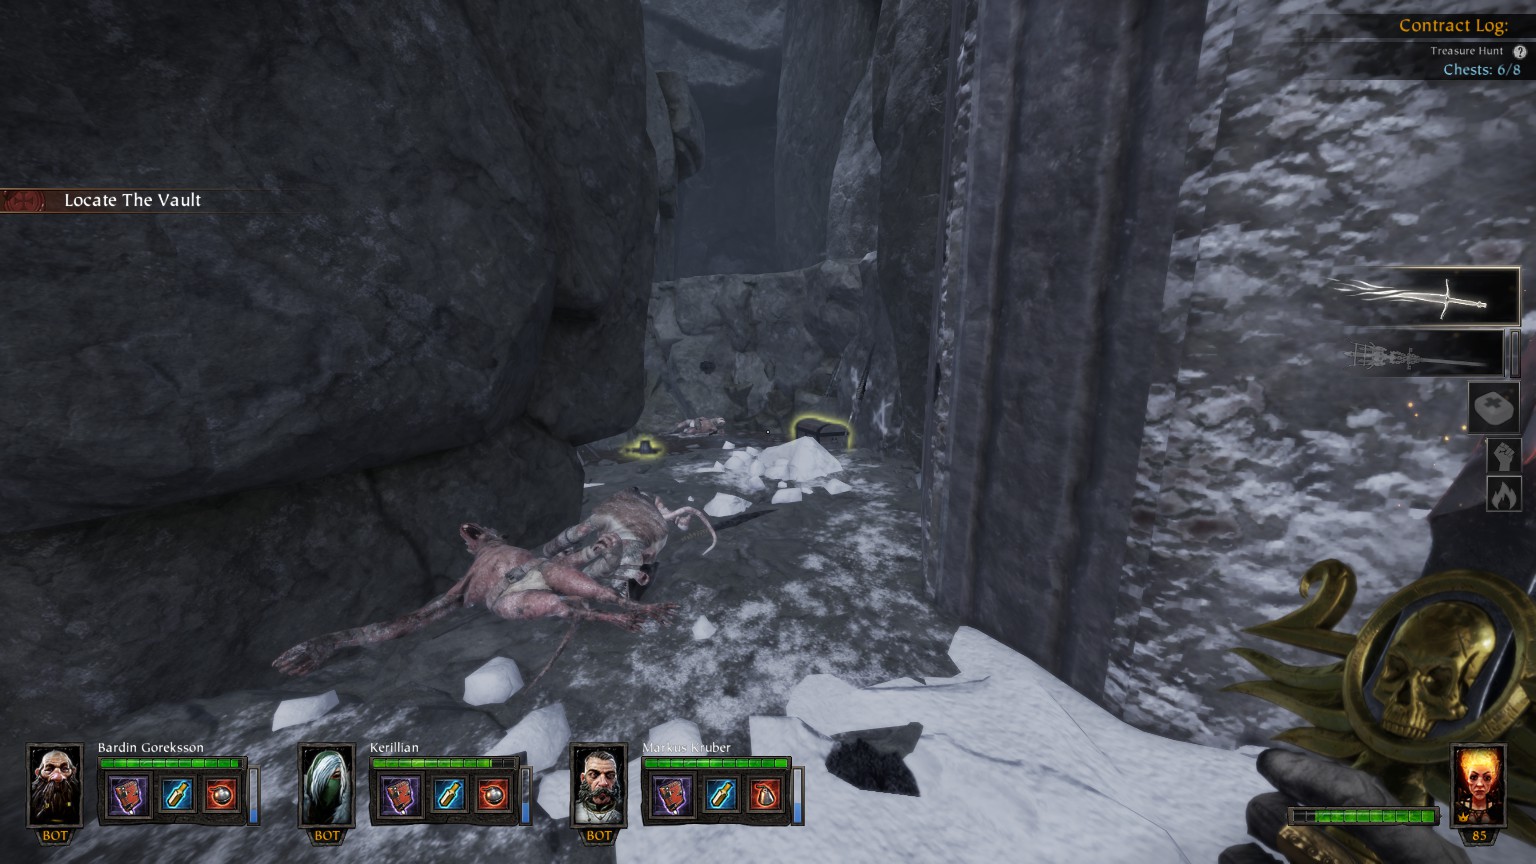
#6/8 (The Under Empire) Just before Grim #2, need to crouch
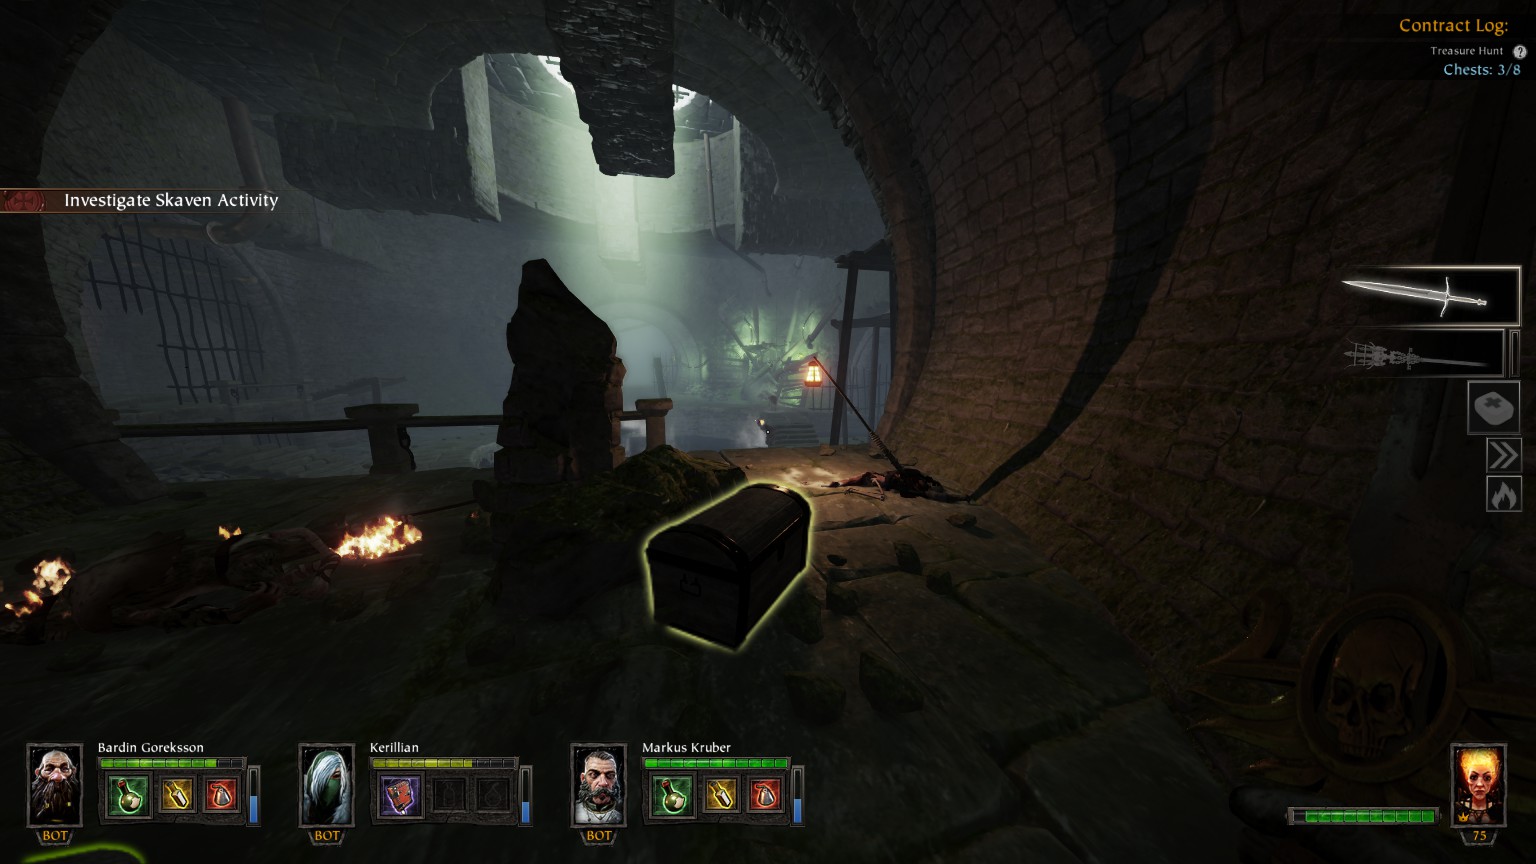
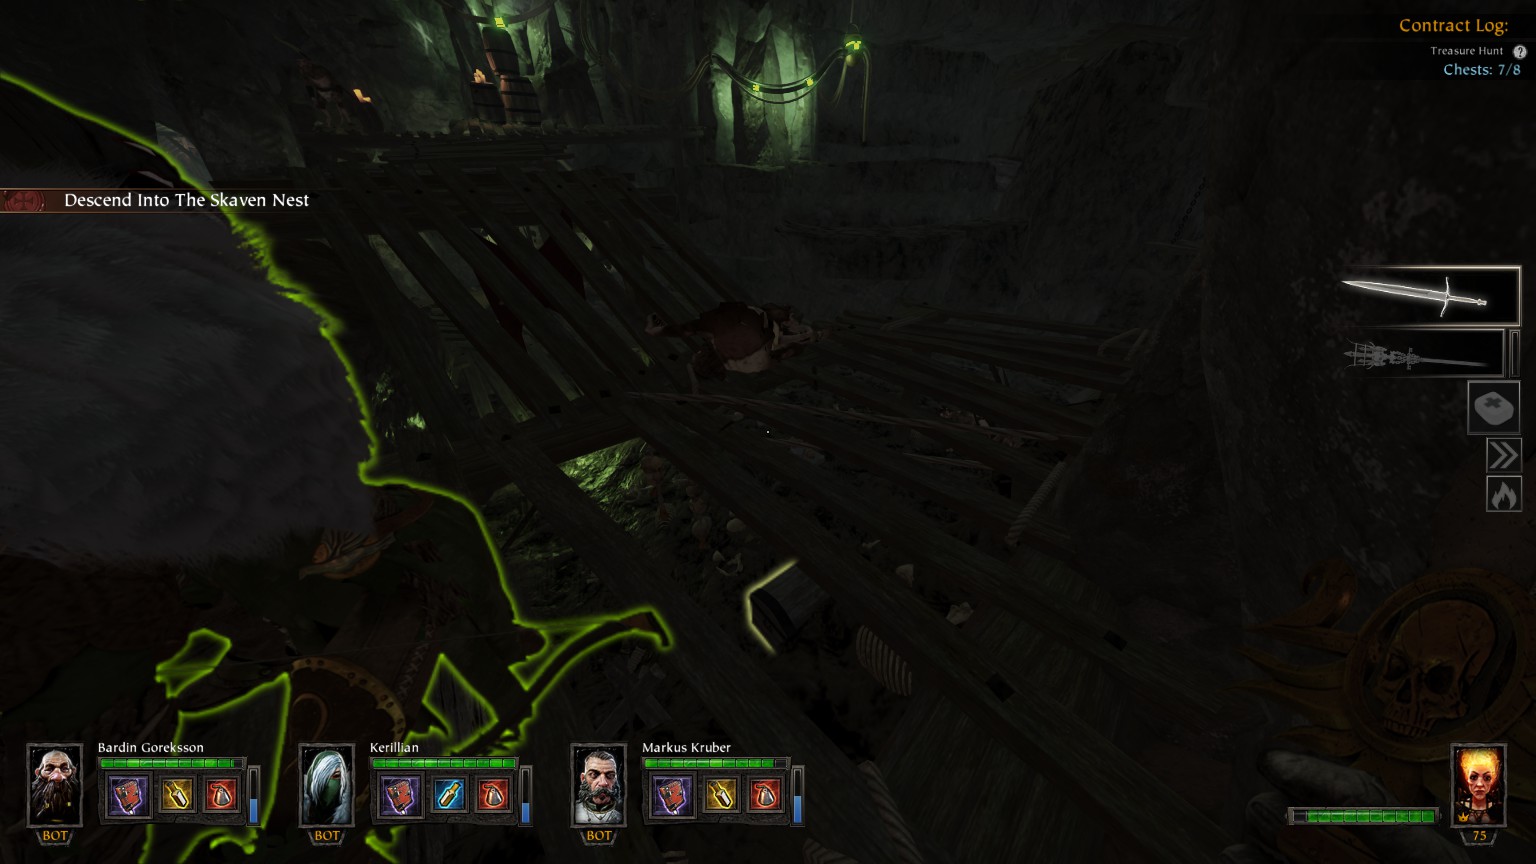
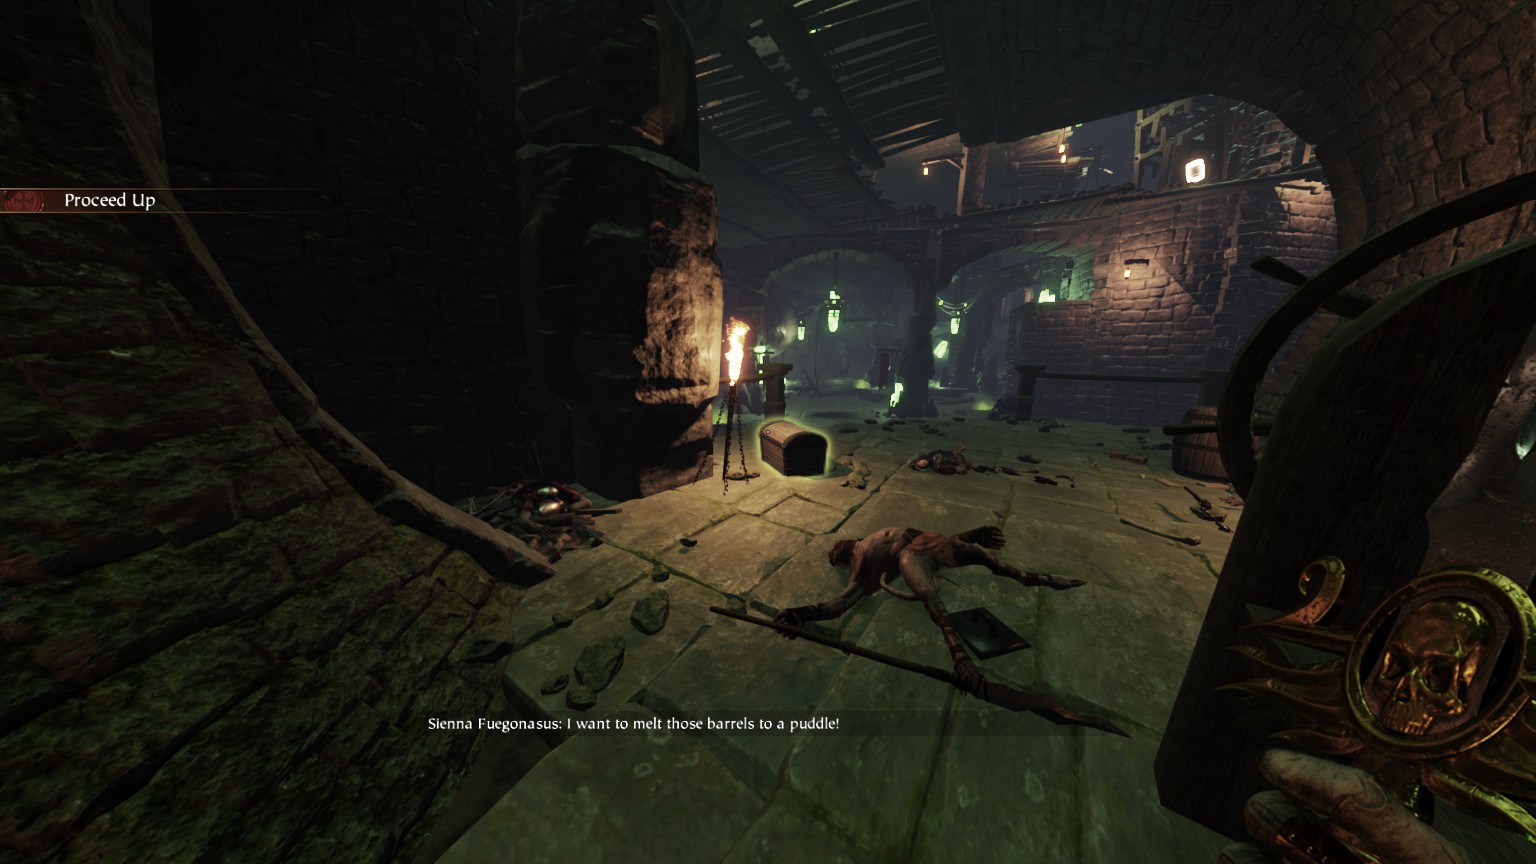
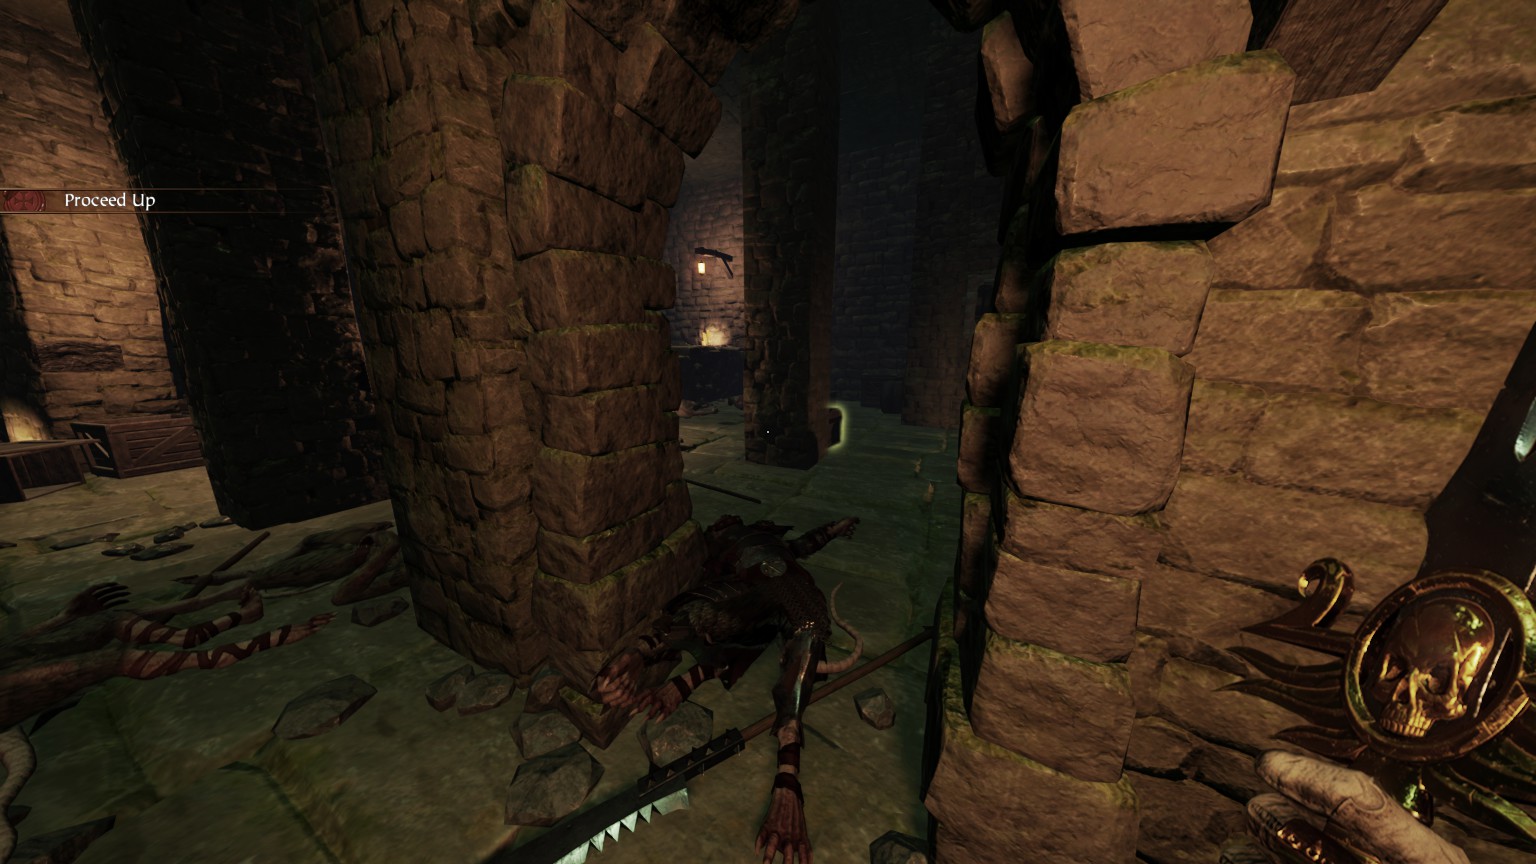
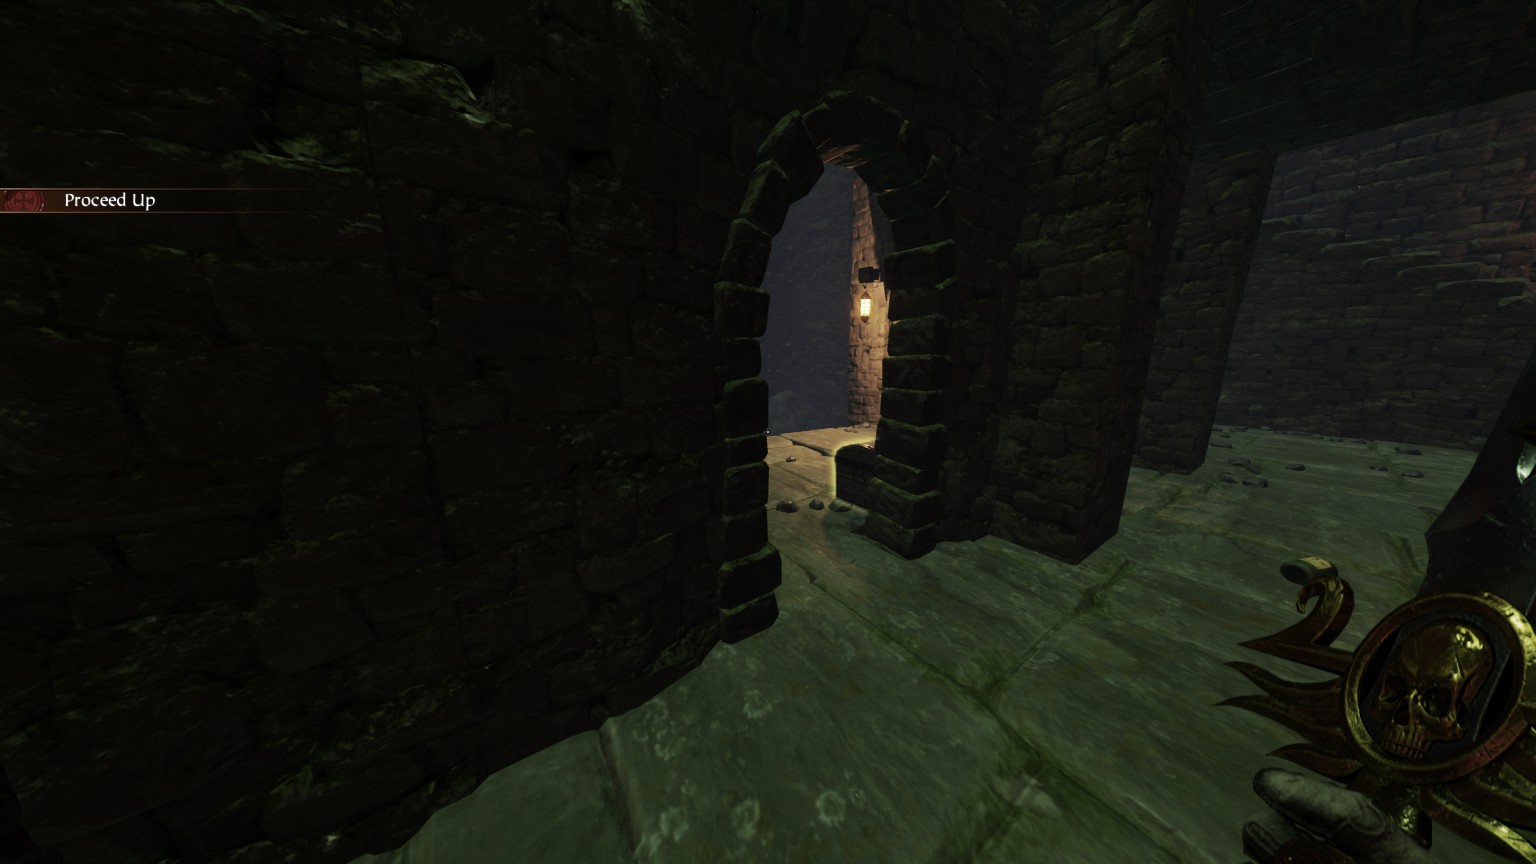
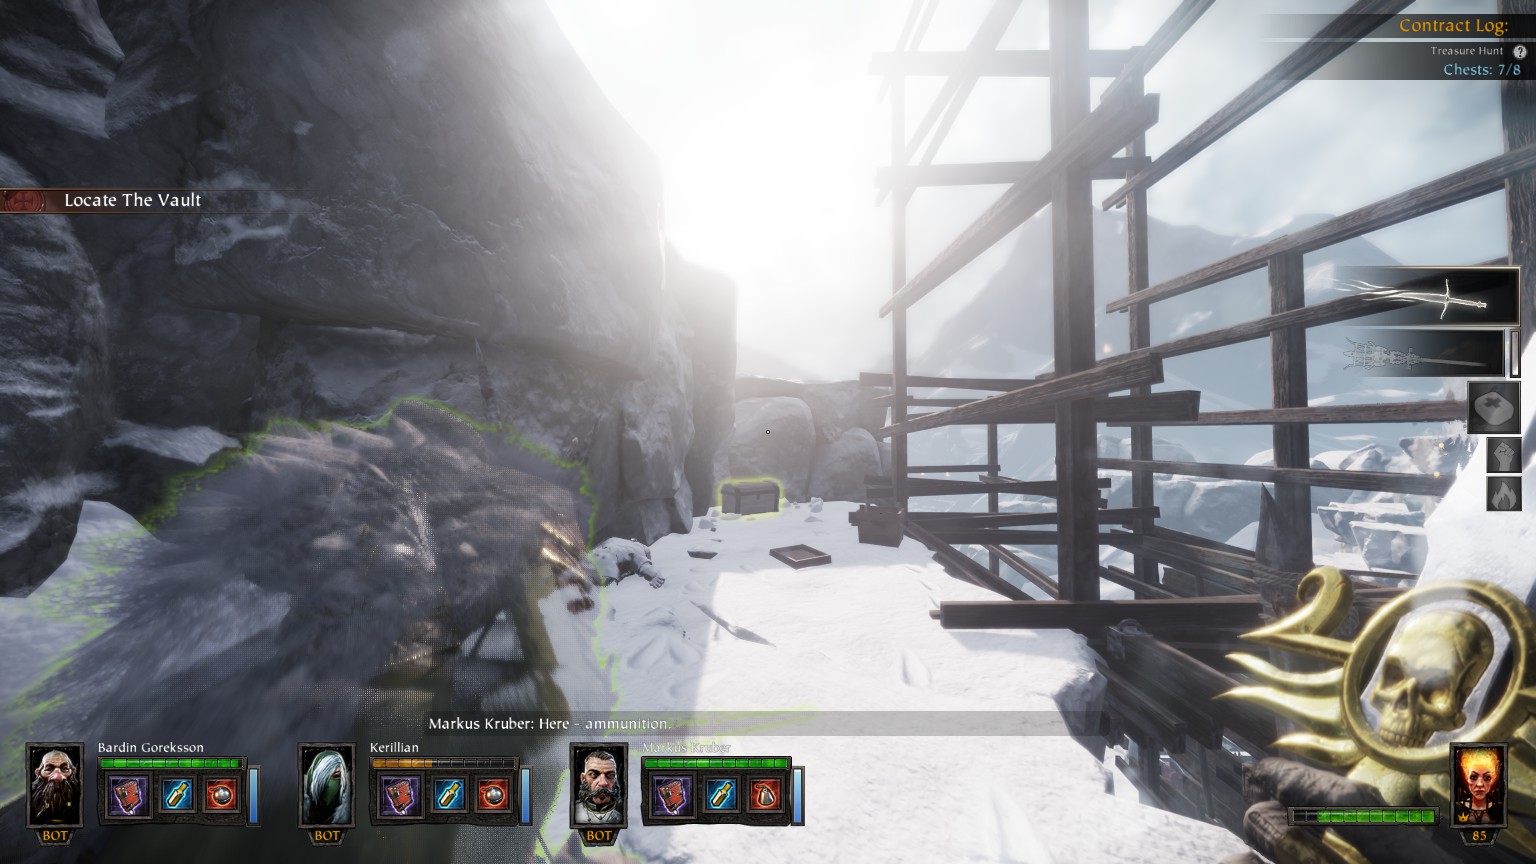
#7/8 (Skaven Nest) Passage on the right, same ground level as Tome #3
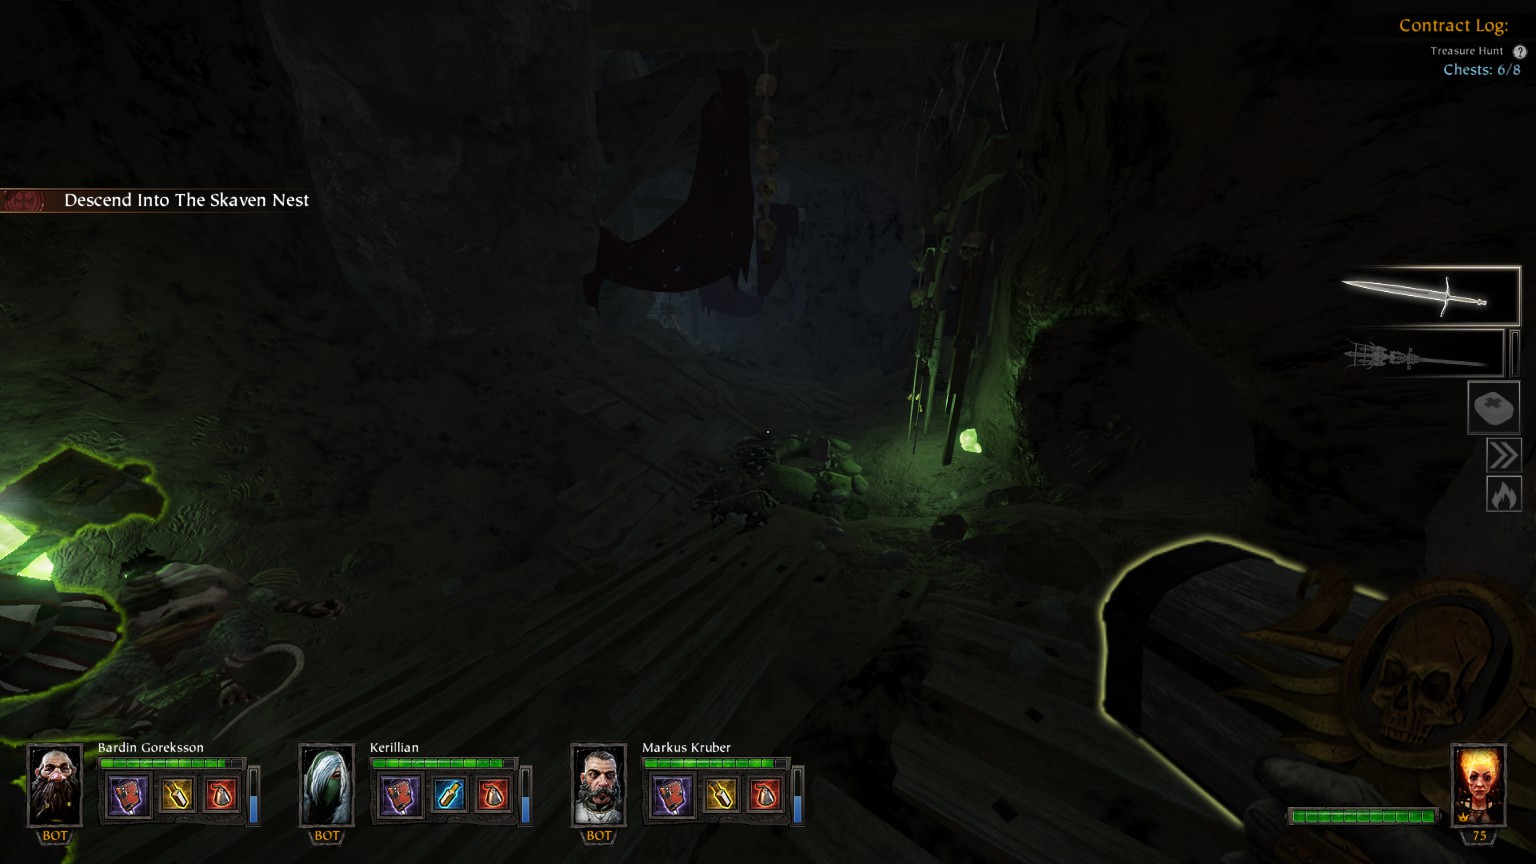
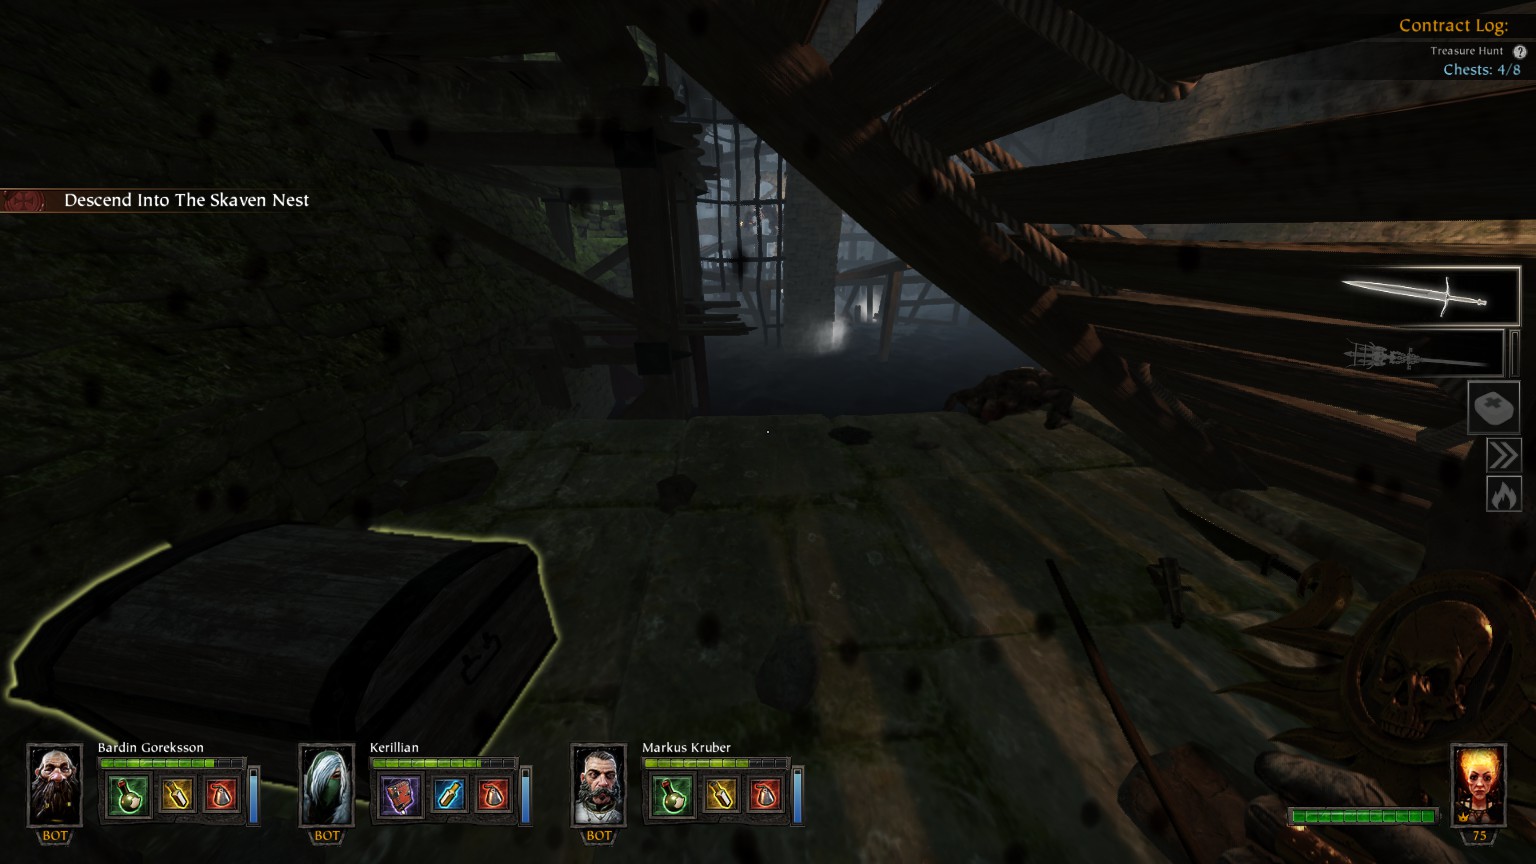
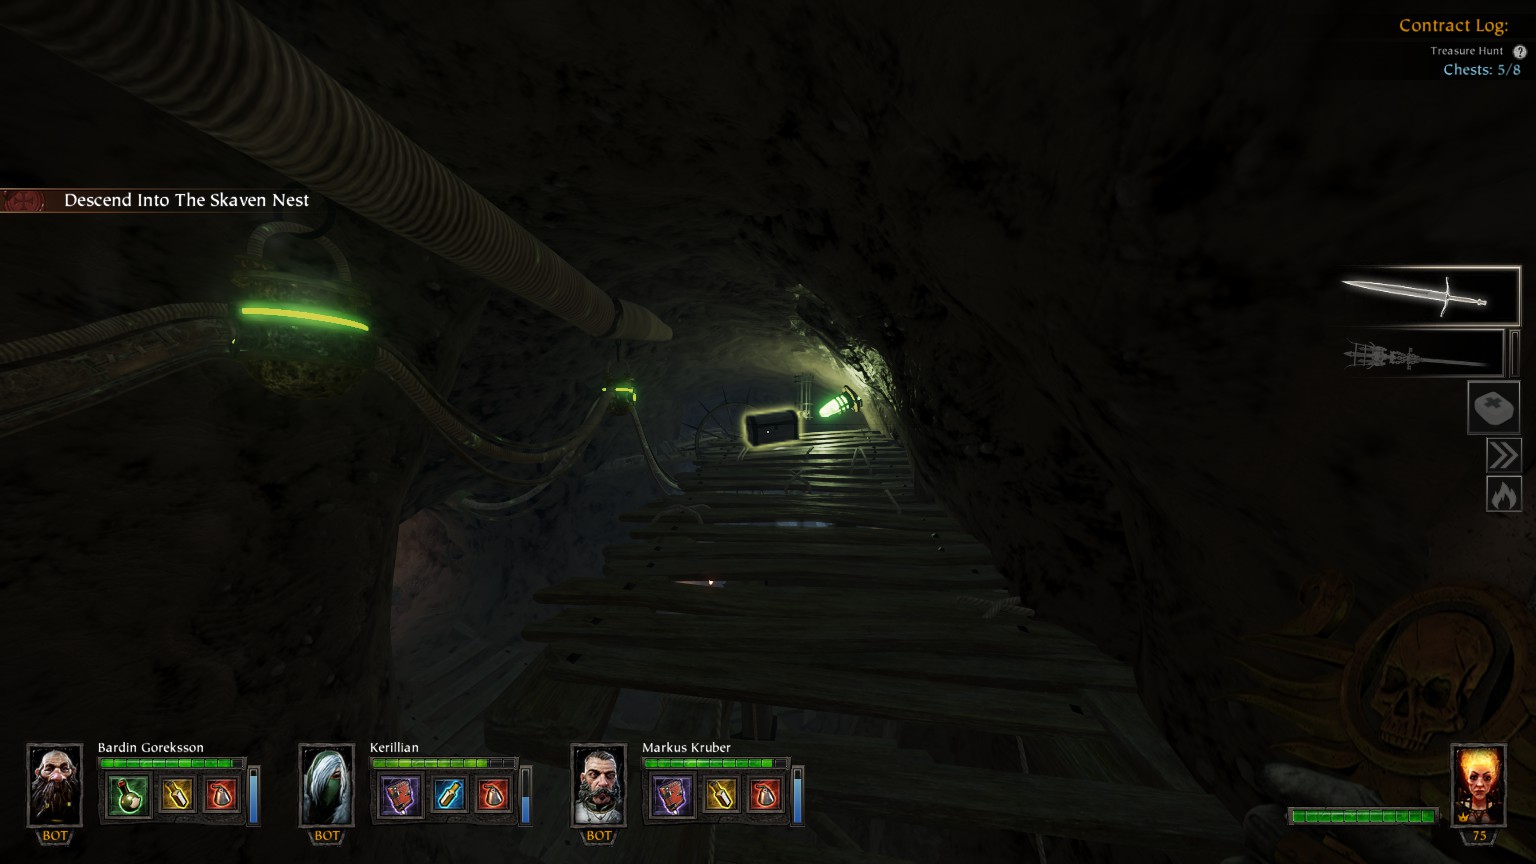
#8/8 (Skaven Nest) Before the last point of no return to the finale
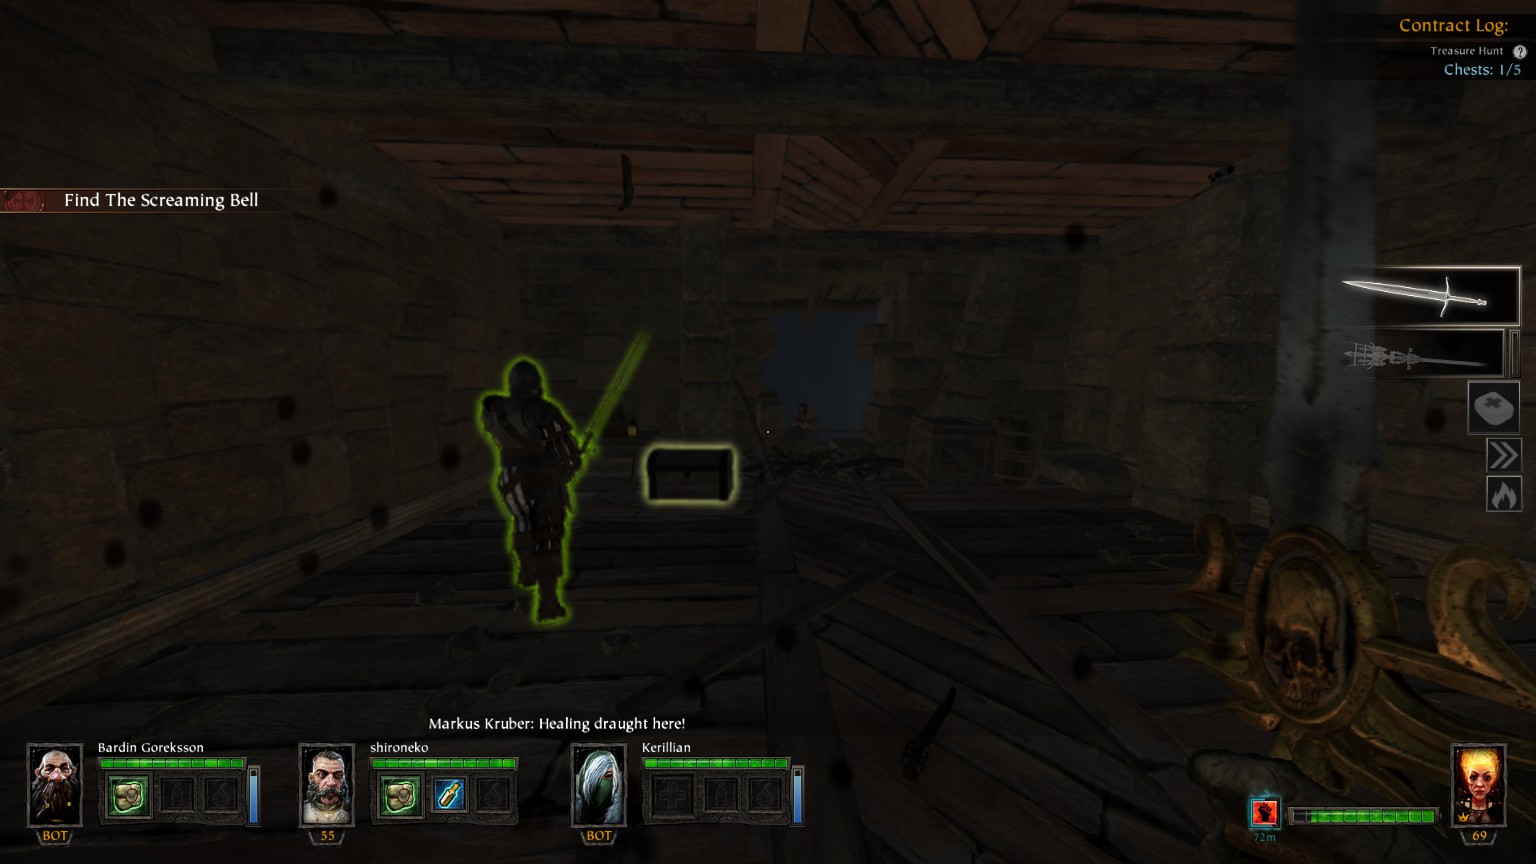
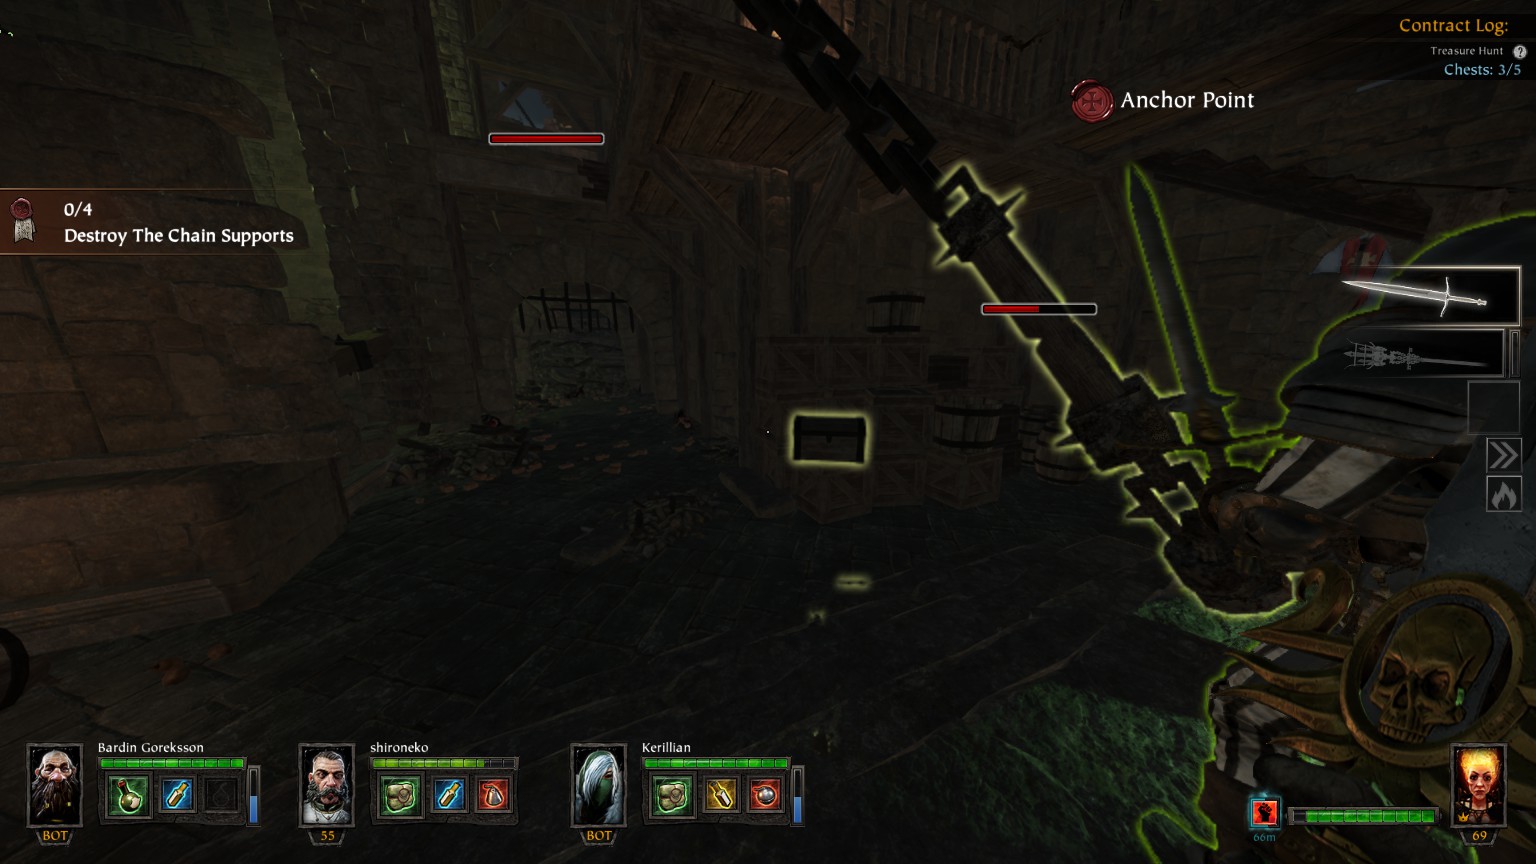
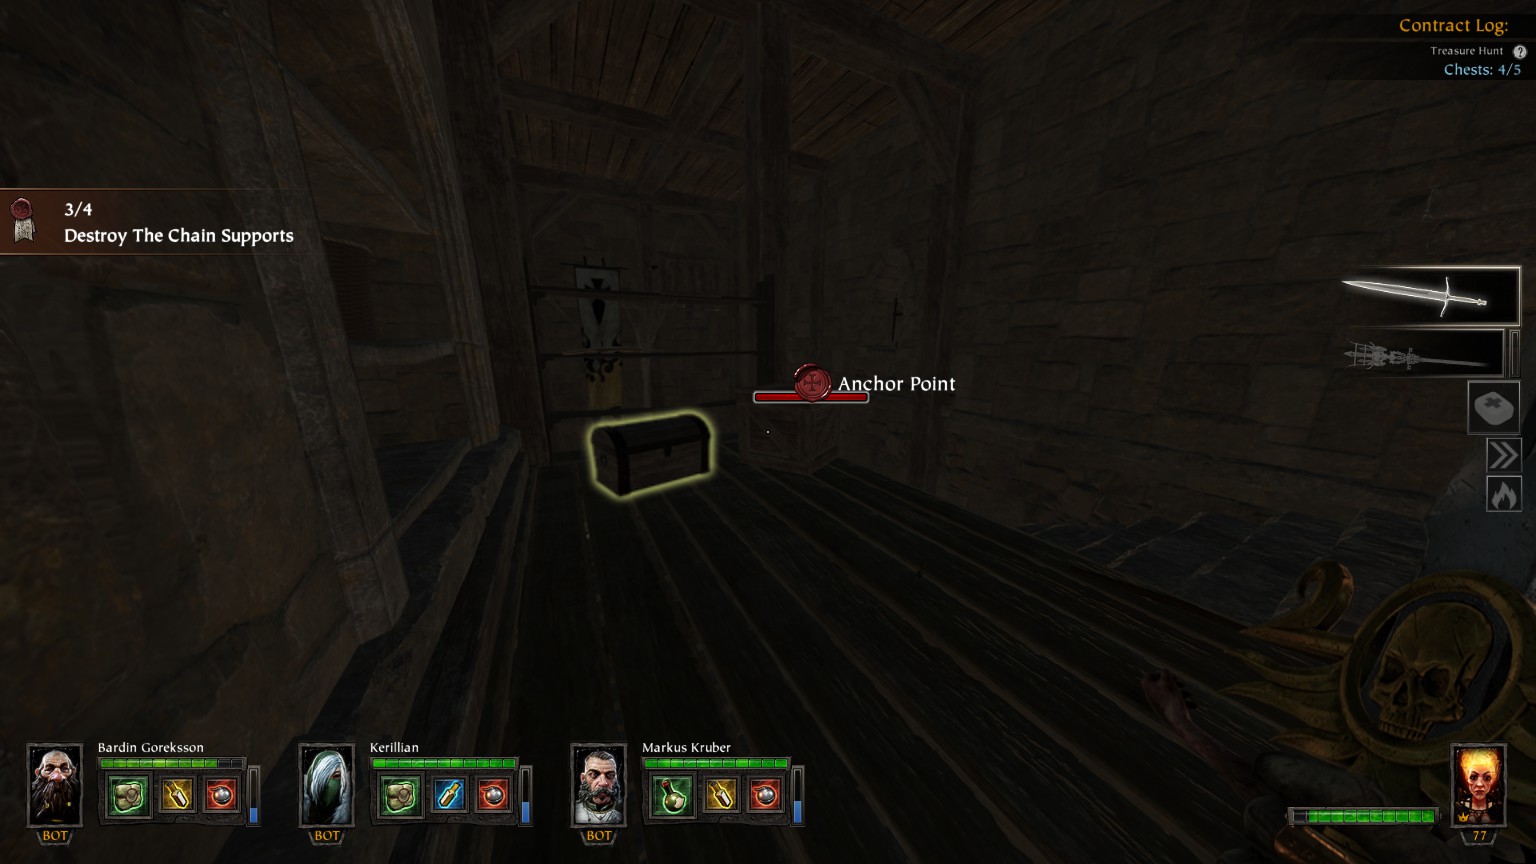
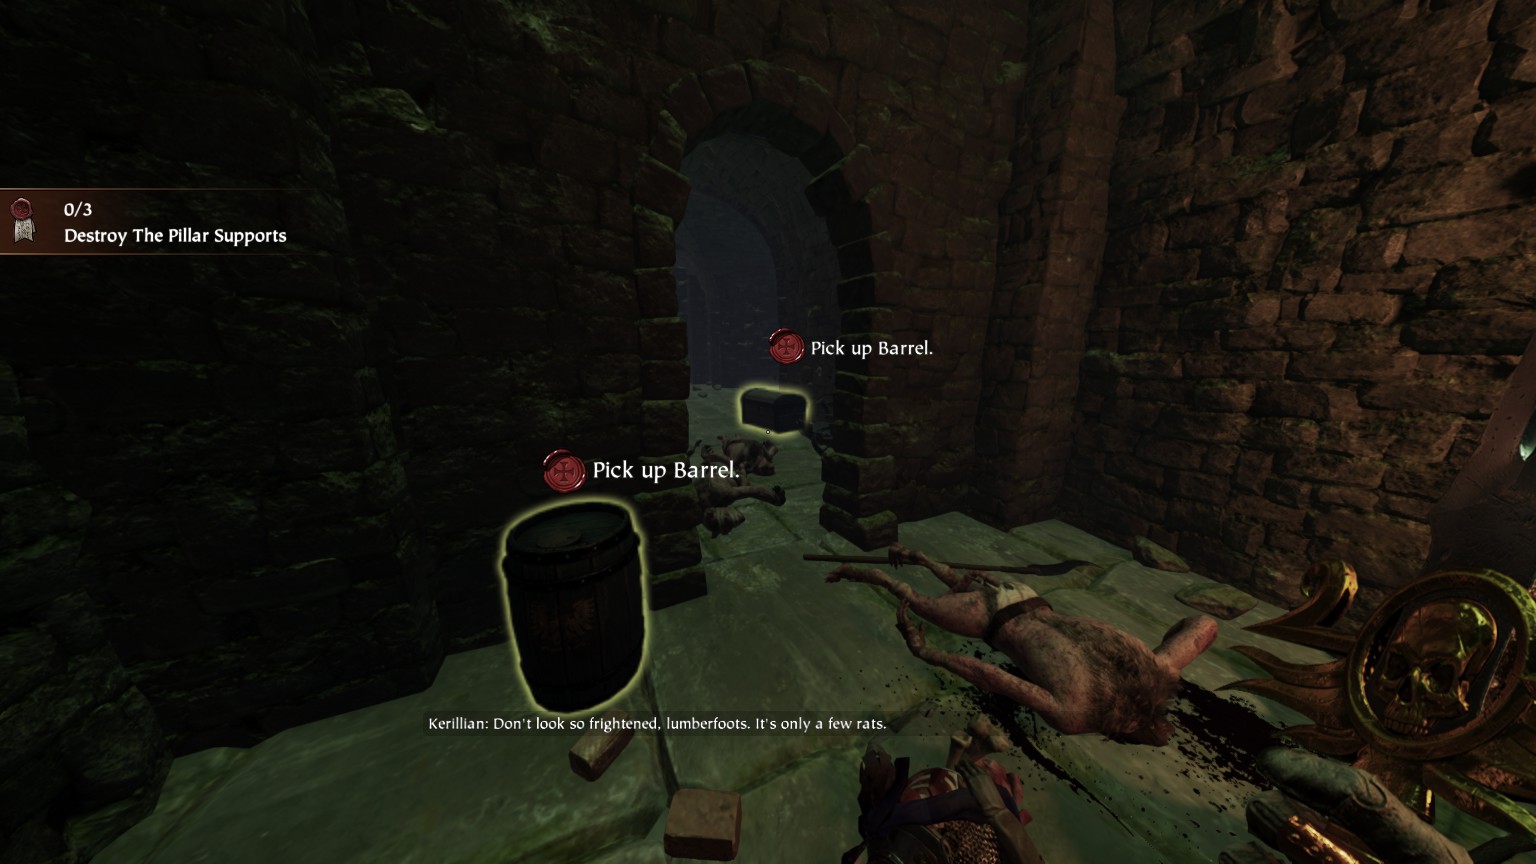
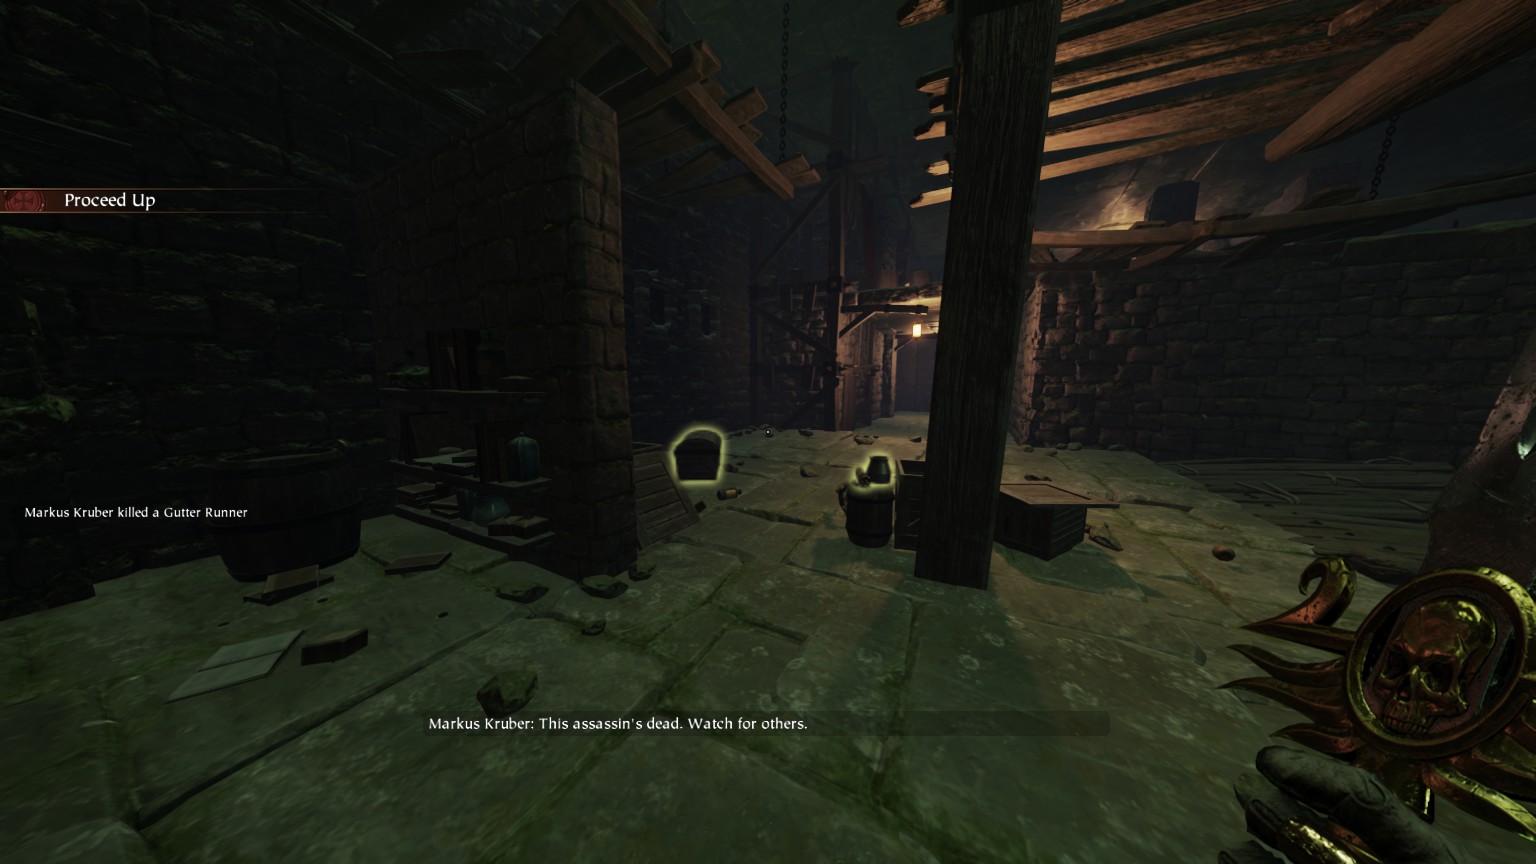
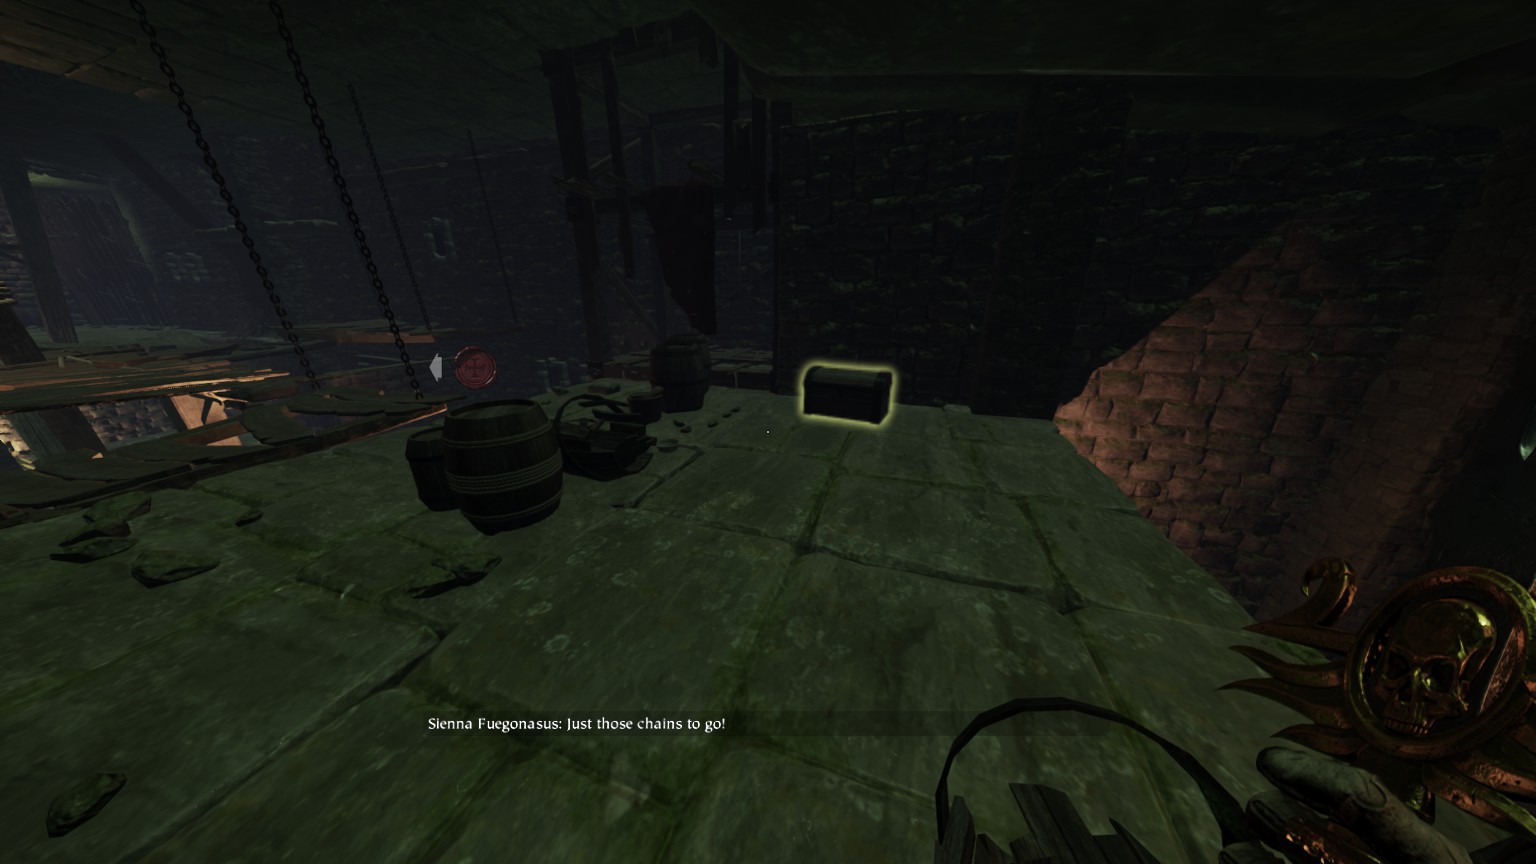
The White Rat
You may also want to check out
De greed’smap available in the Vermintide Wiki on Fandom
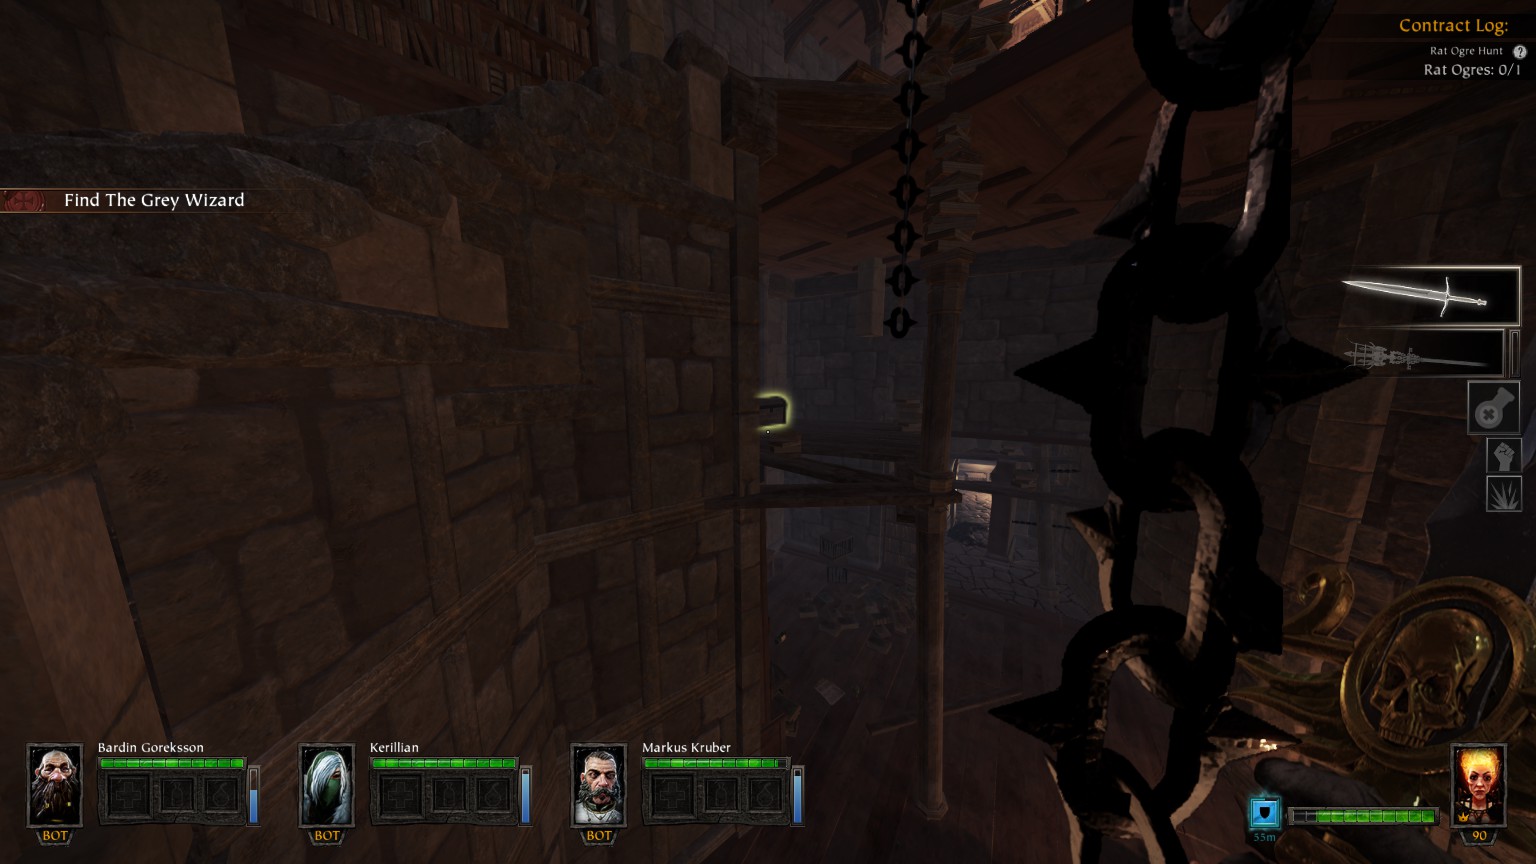
#1/9 (Grey Seer’s Chamber) Ground floor at gate opener
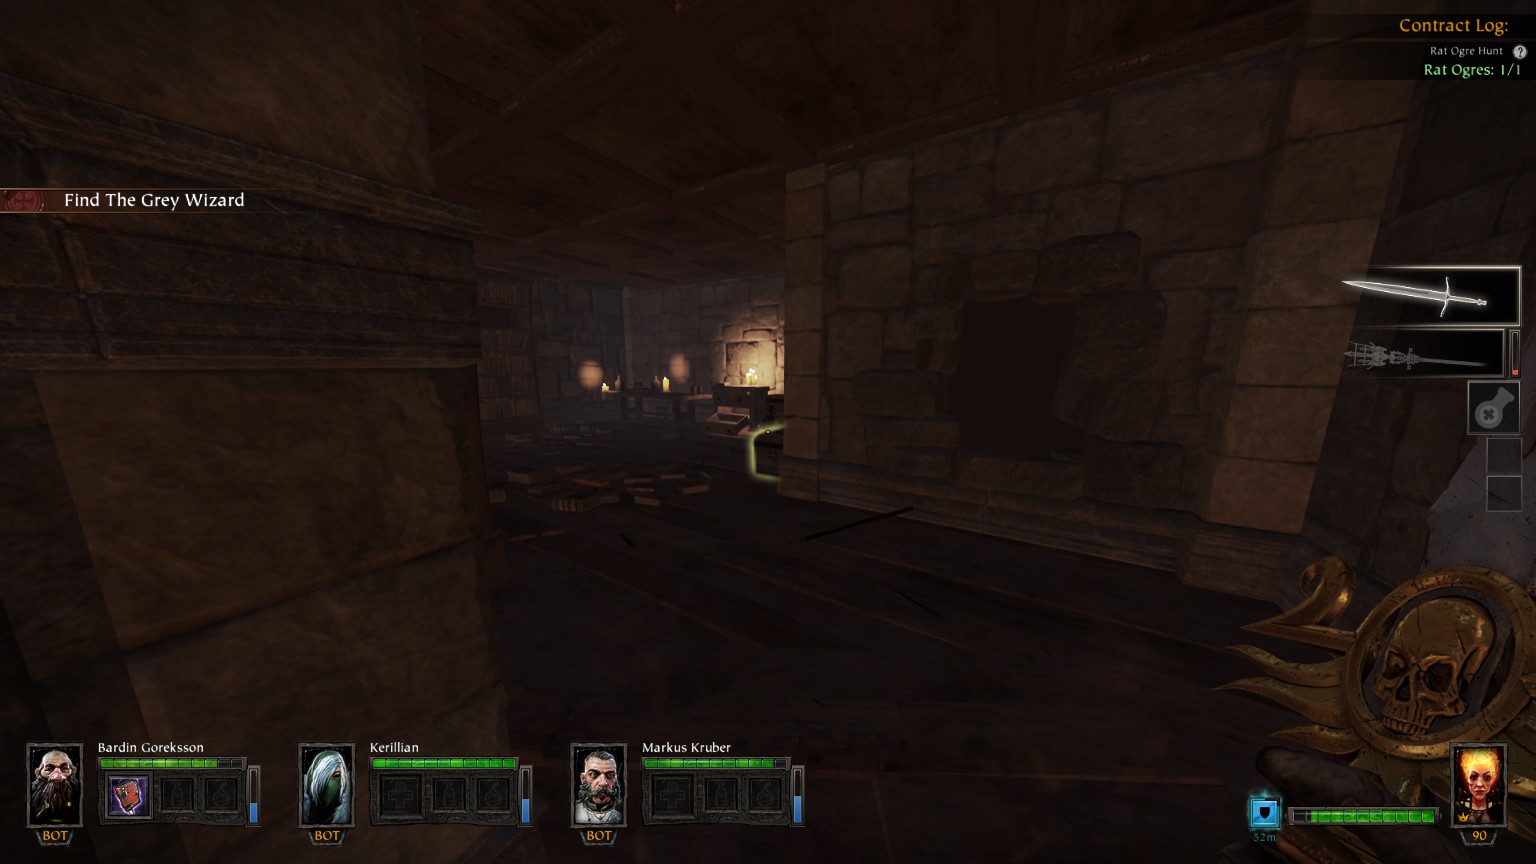
#2/9 (Grey Seer’s Chamber) Ground floor, room after the gate
#3/9 (Grey Seer’s Chamber) Ground floor, room after the gate
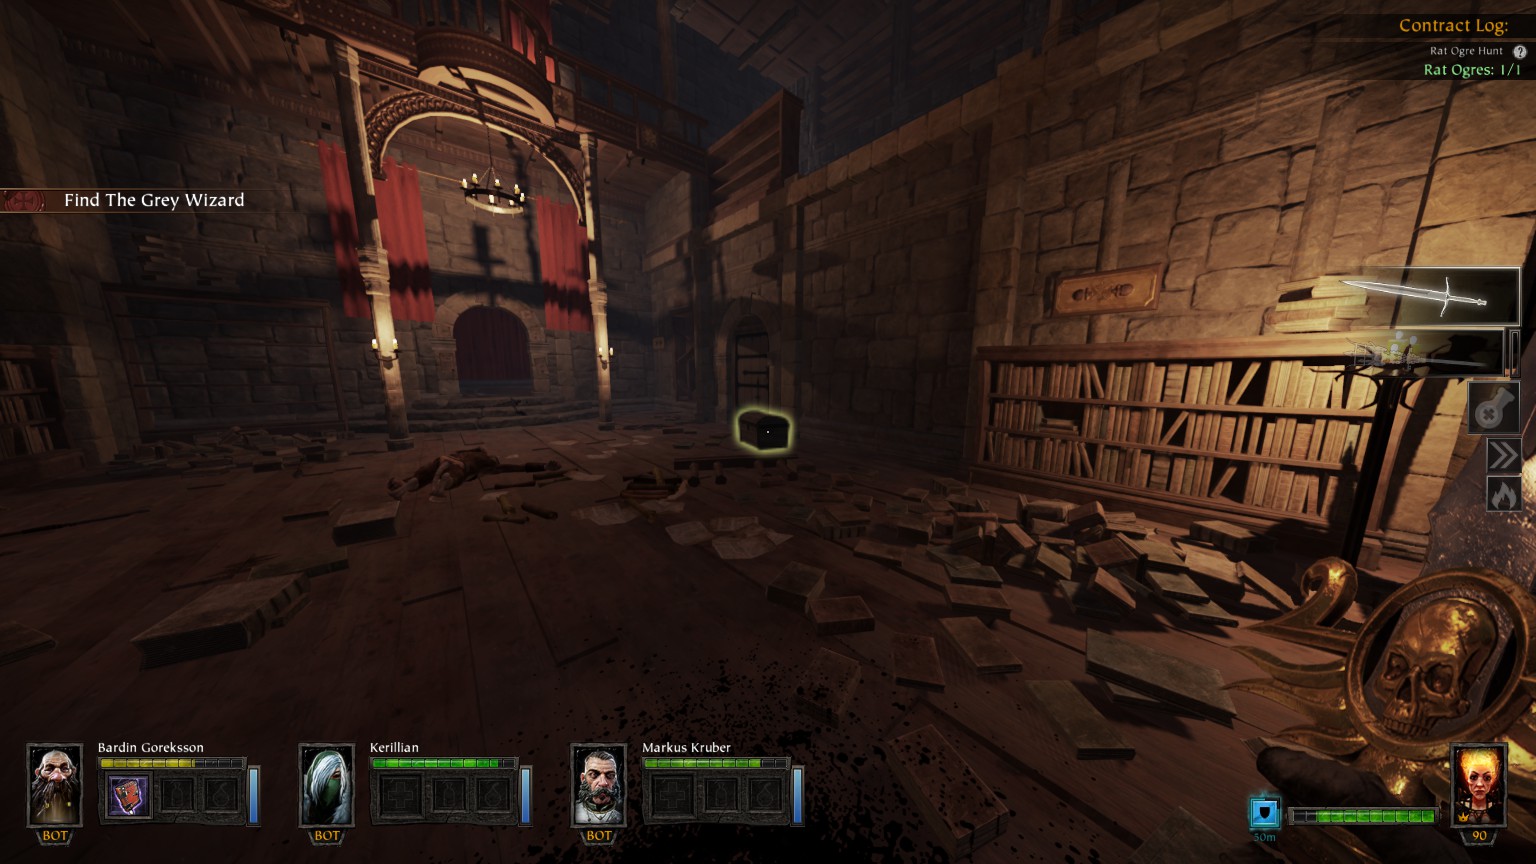
#4/9 (Grey Seer’s Chamber) First floor
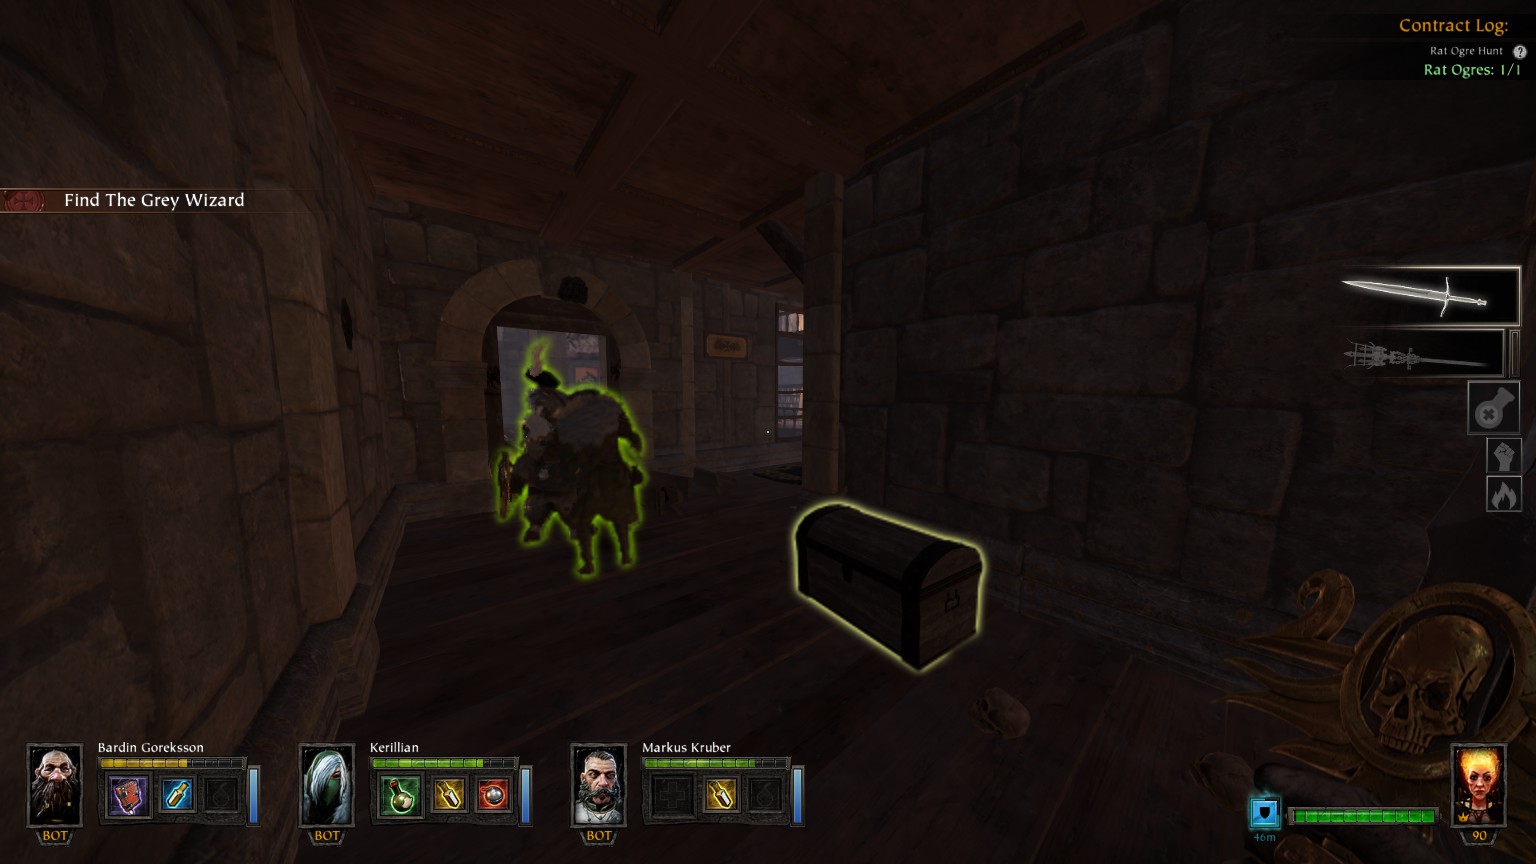
#5/9 (Grey Seer’s Chamber) Second floor after pillar is destroyed
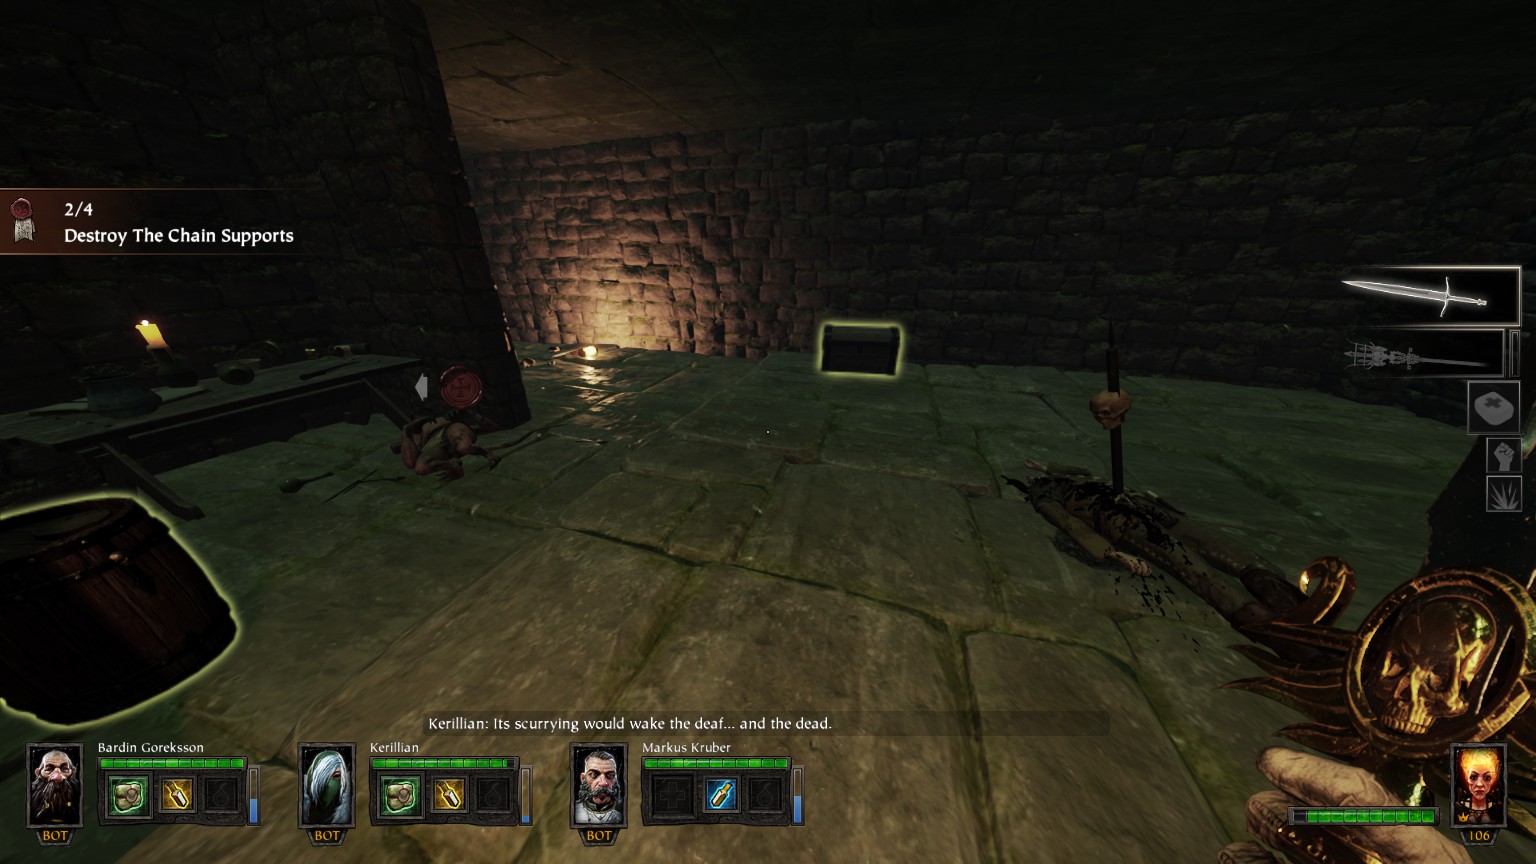
#6/9 (Grey Seer’s Chamber) Third floor, corner near fist chain support
#7/9 (Grey Seer’s Chamber) الطابق العلوي, corner above second chain support
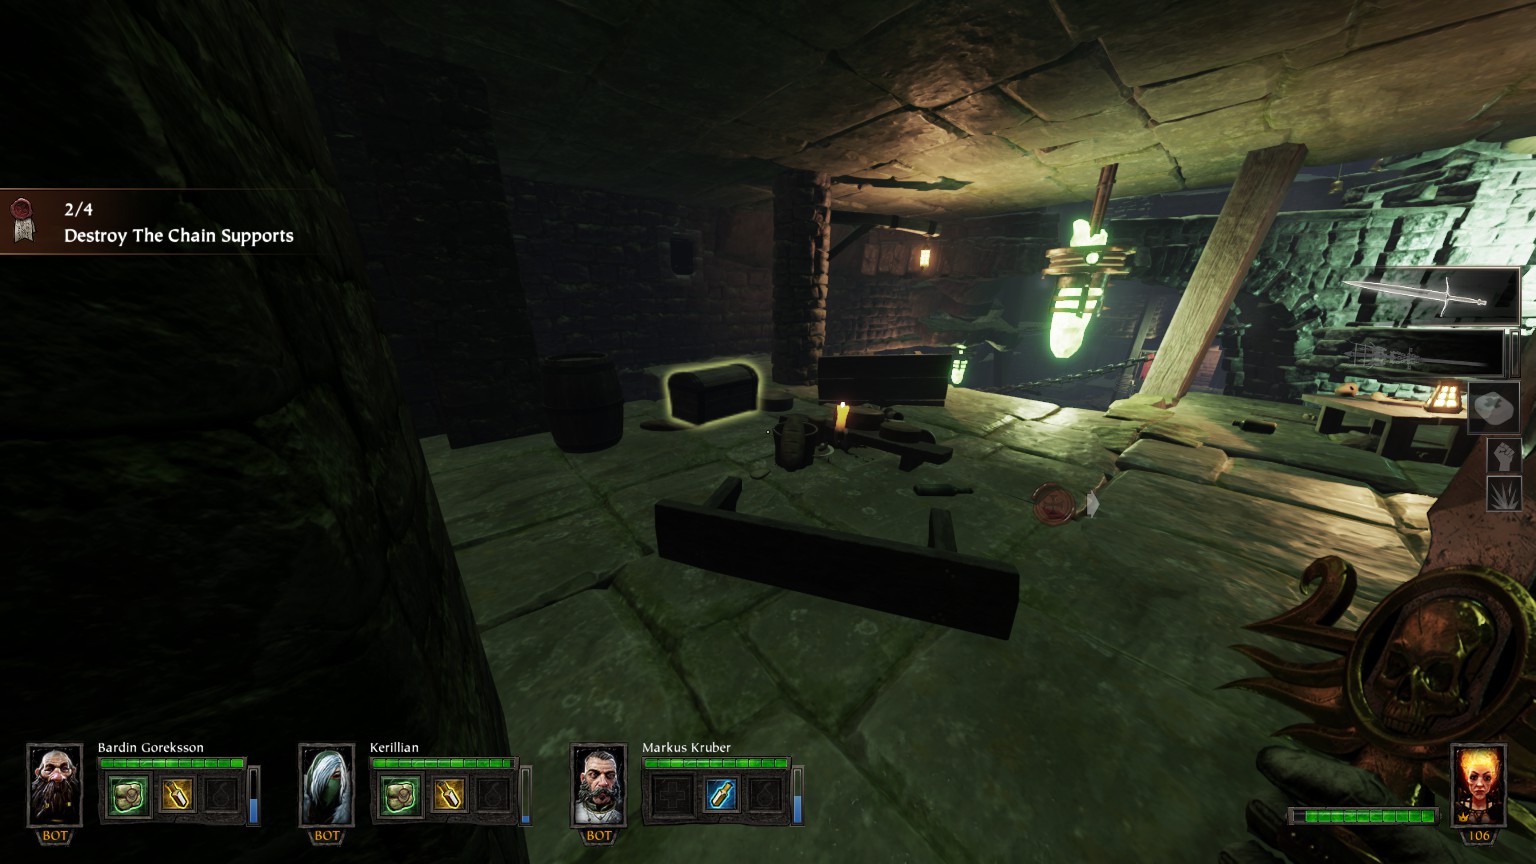
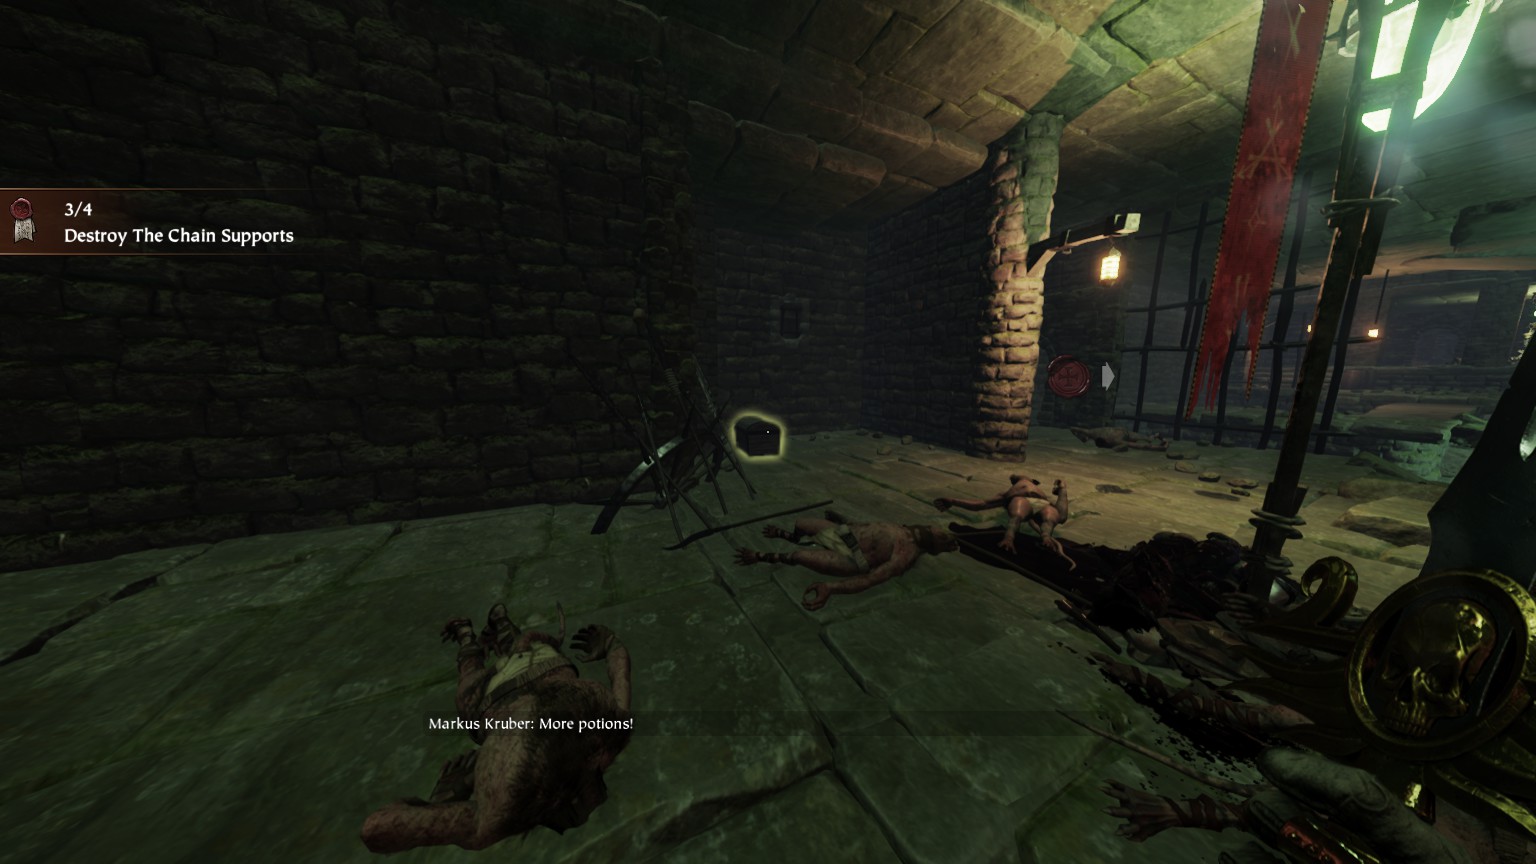
#8/9 (Grey Seer’s Chamber) Third floor, corner near third chain support
#9/9 (Grey Seer’s Chamber) Third floor, corner near fourth chain support
Castle Drachenfels
You may also want to check out
De greed’smap available in the Vermintide Wiki on Fandom
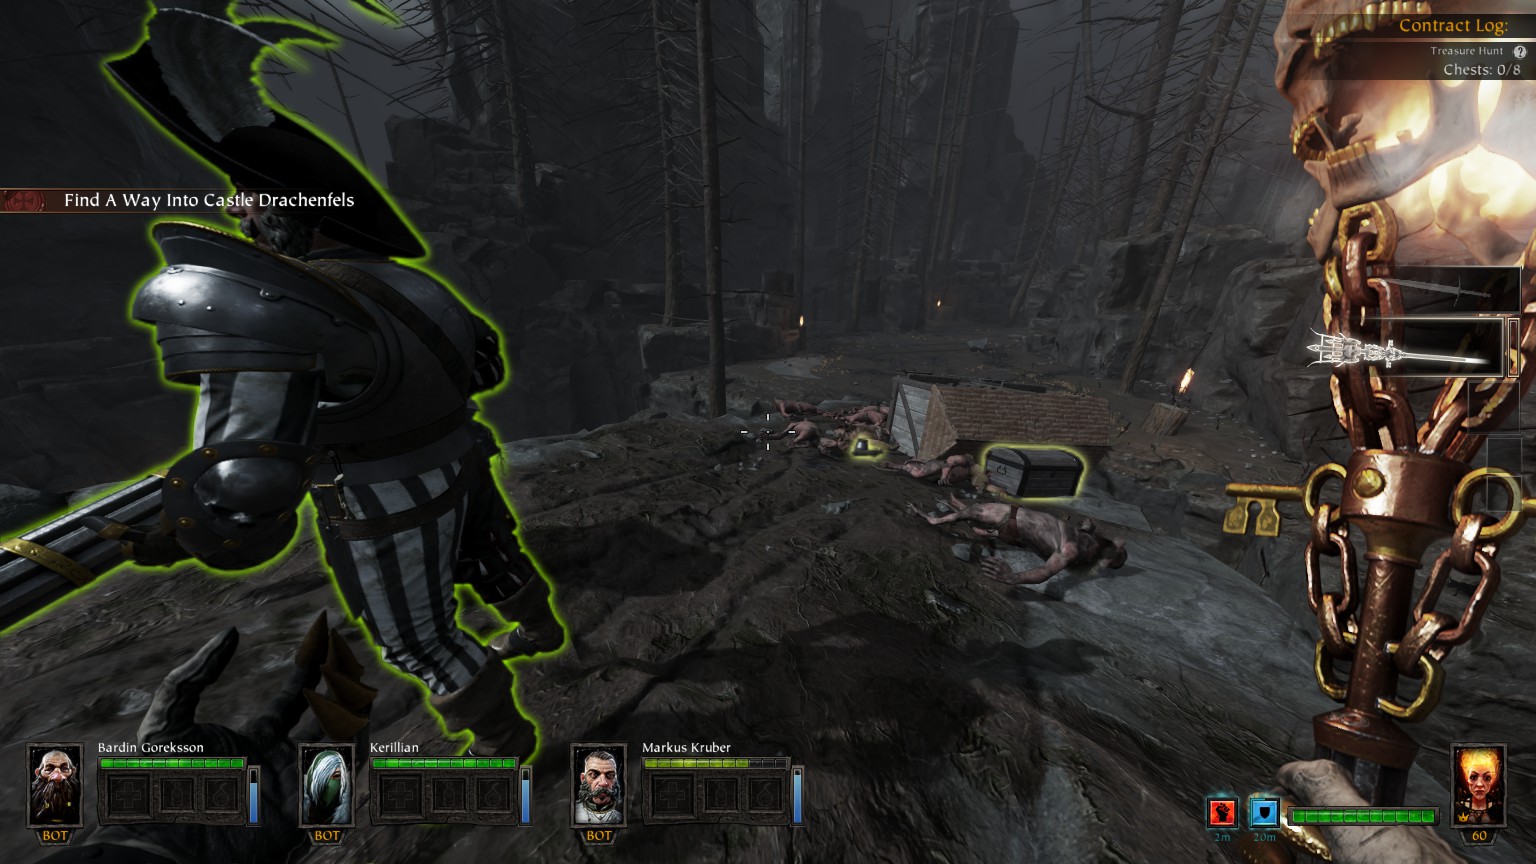
#1/8 (Castle Bridge) Just before 1st one-way jump
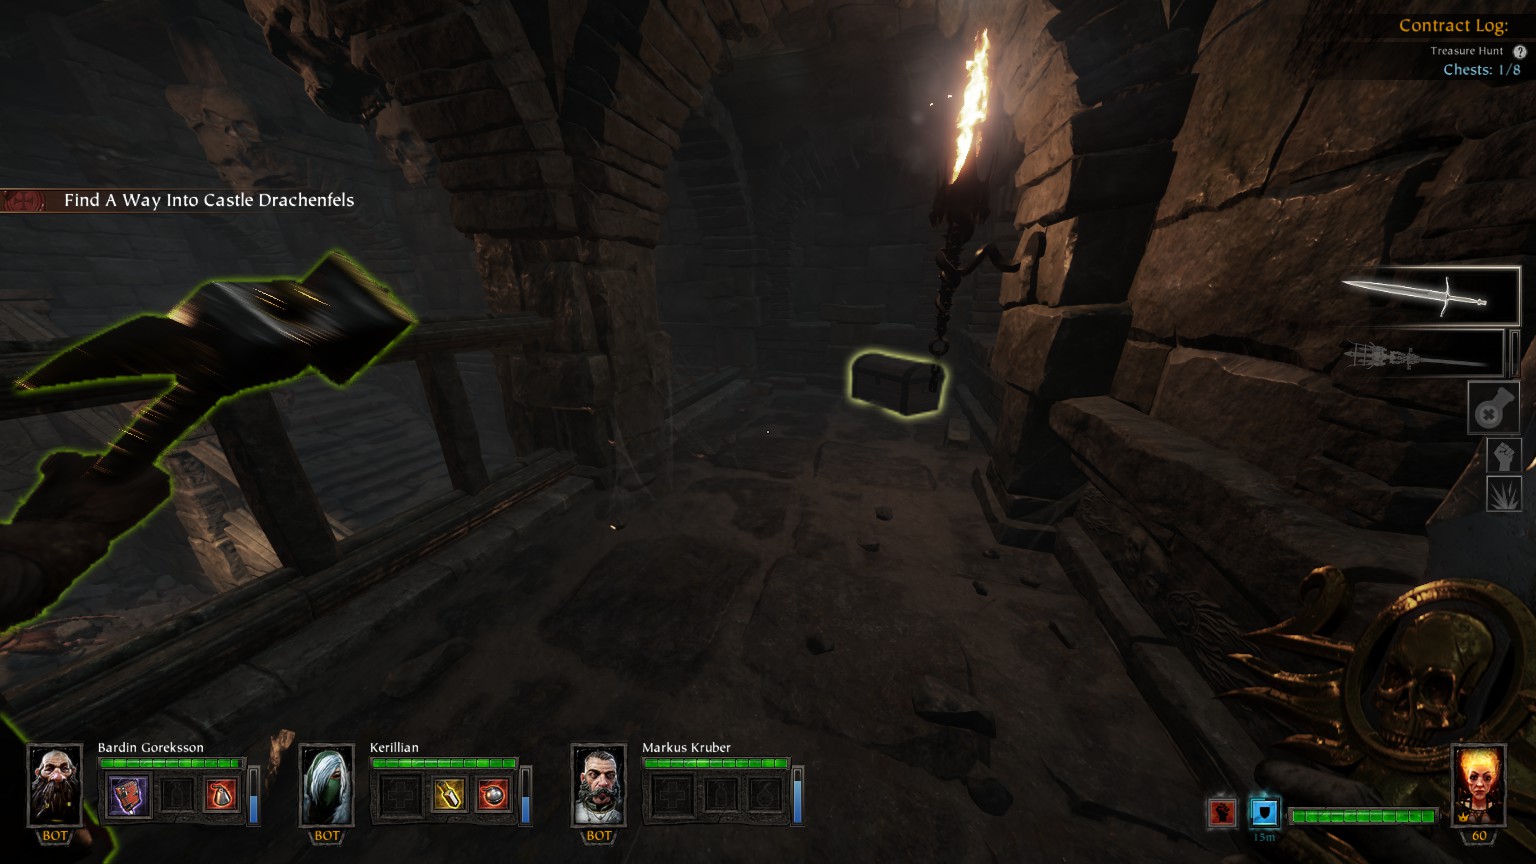
#2/8 (Drachenfels Catacombs) After Tome #1, before lever to secret door
#3/8 (الطابق الأرضي) Just after the Hall of the Poison Feast area
#4/8 (الطابق الأرضي) After the Hall of the Poison Feast area, على اليمين
#5/8 (West Wing) After Tome #3, in a small room with 2 doors to the corridor
#6/8 (West Wing) Just before jump to Grim #2
#7/8 (West Wing) Just before jump to Grim #2
#8/8 (West Wing) Just after jump to Grim #2 over the hole to the Secret Passage (don’t miss the jump)

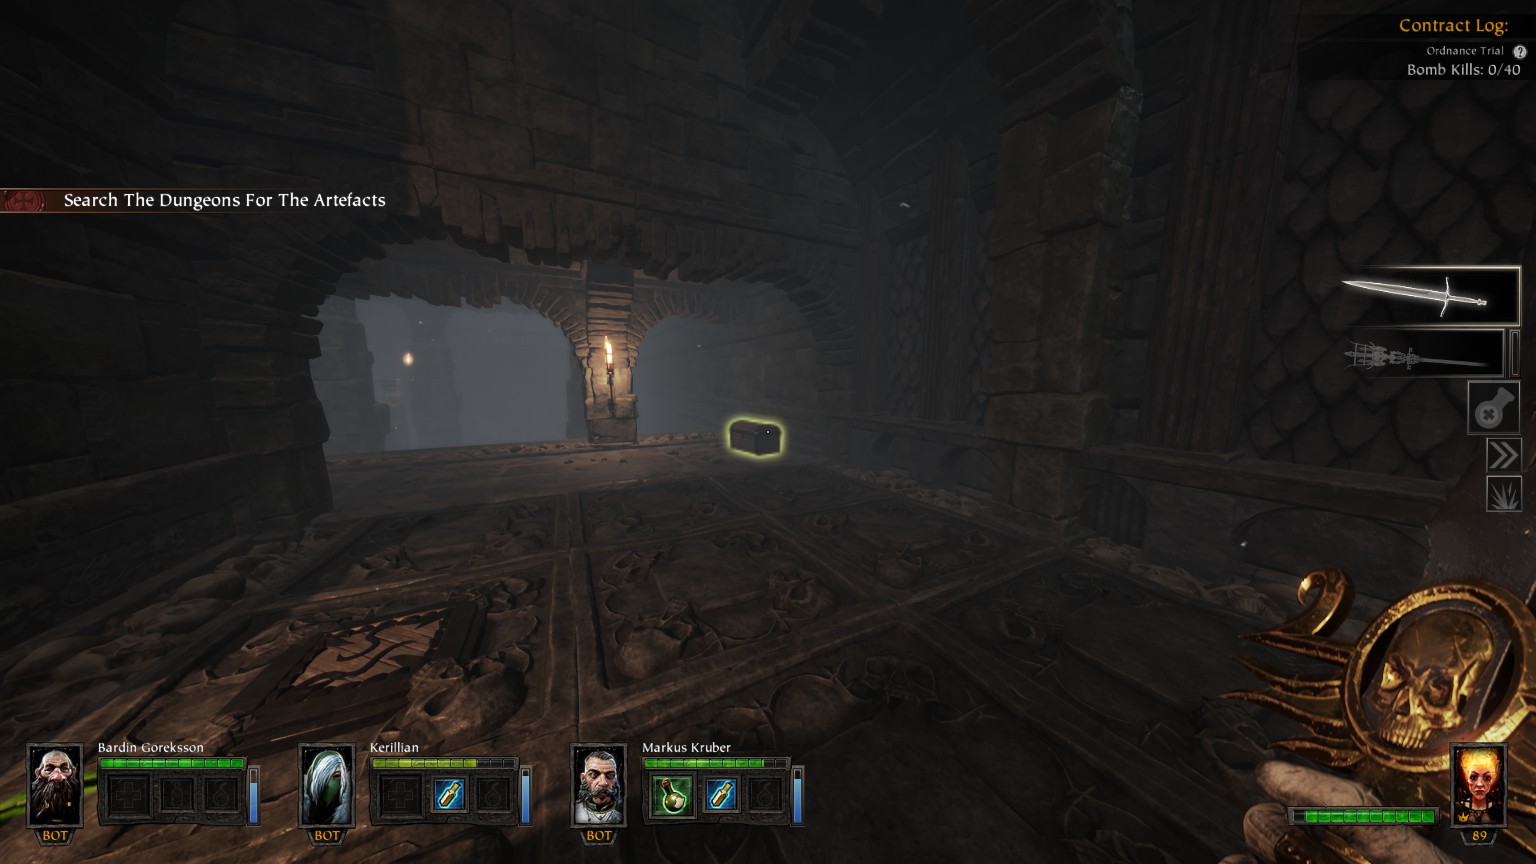
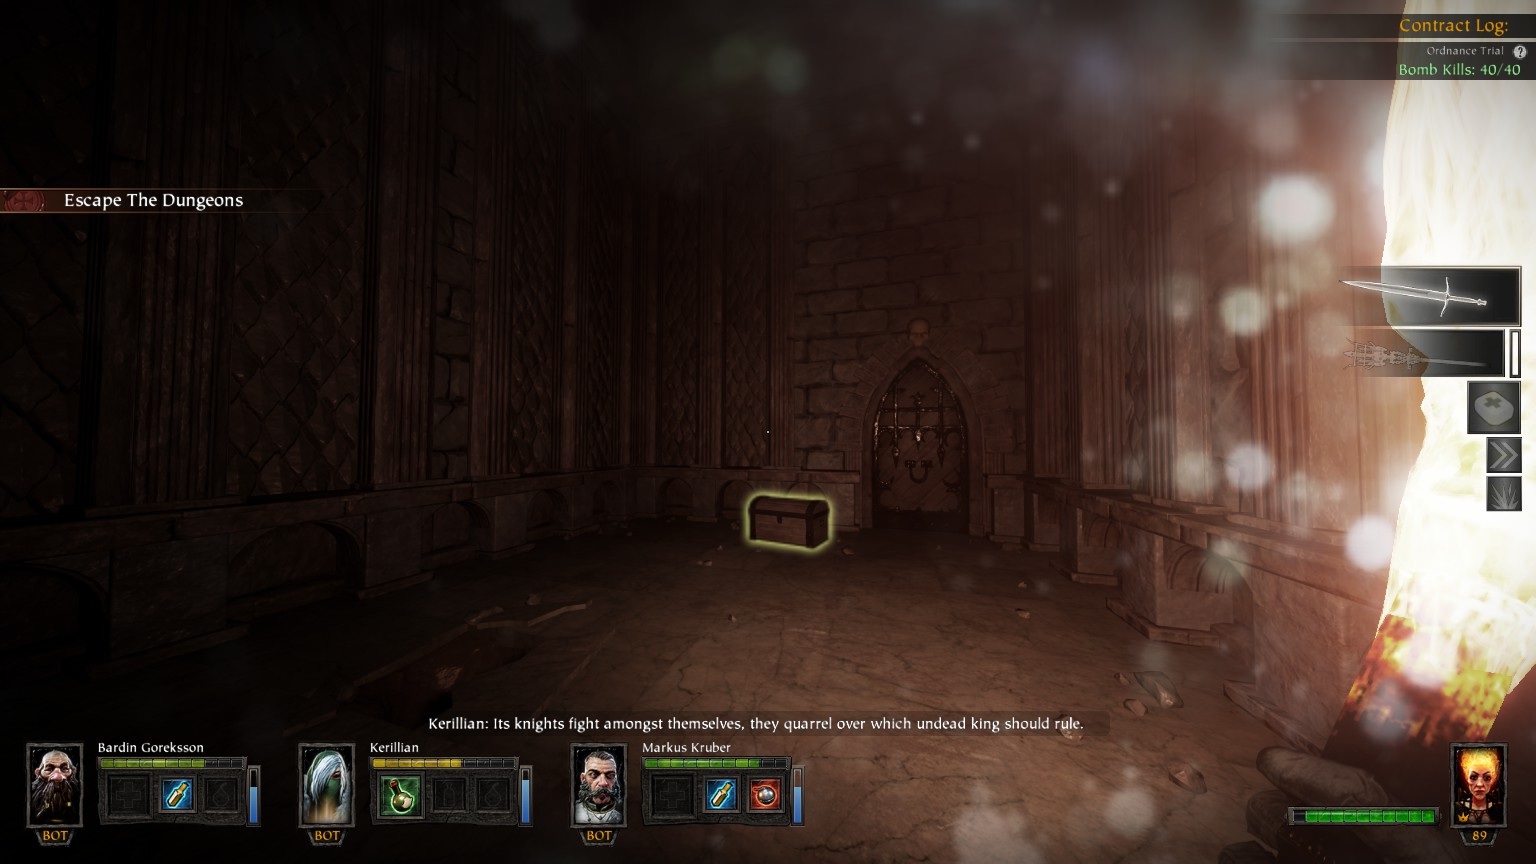
The Dungeons
You may also want to check out
De greed’smap available in the Vermintide Wiki on Fandom
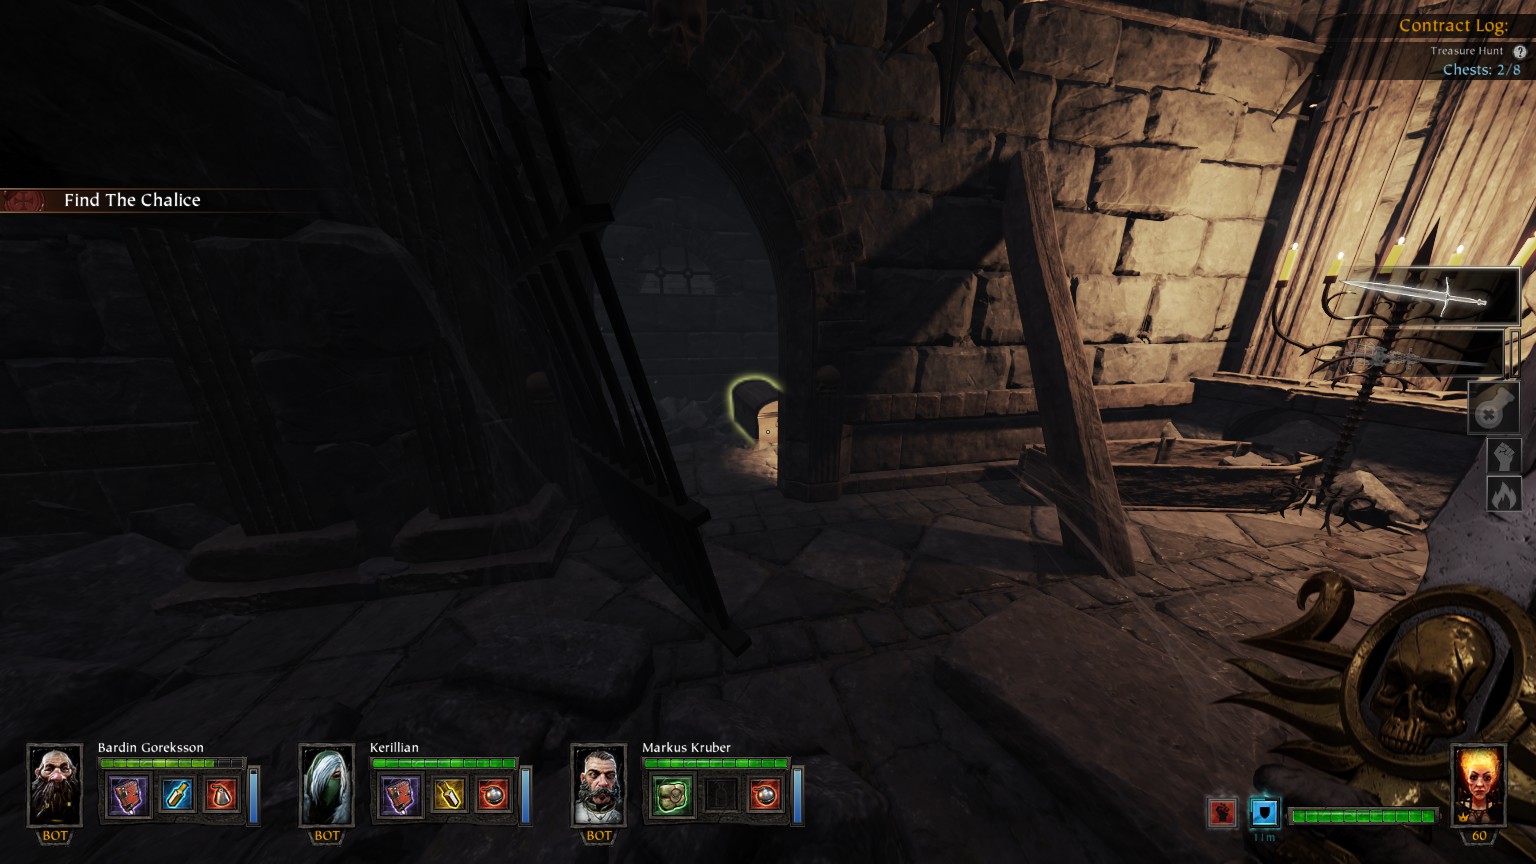
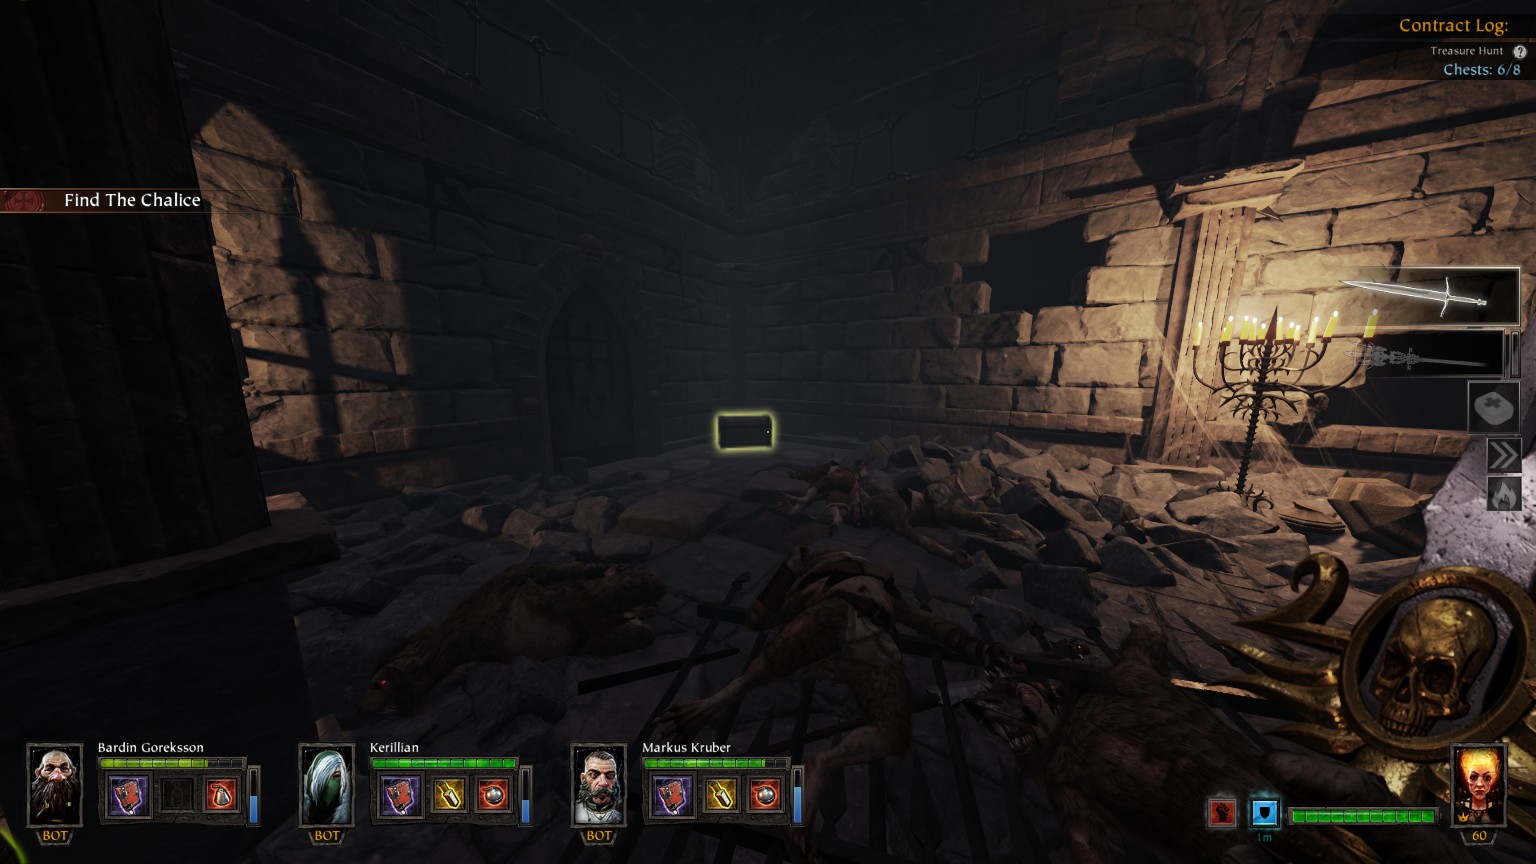
#1/17 (Dungeon Entrance) Look back before entering the Atrium
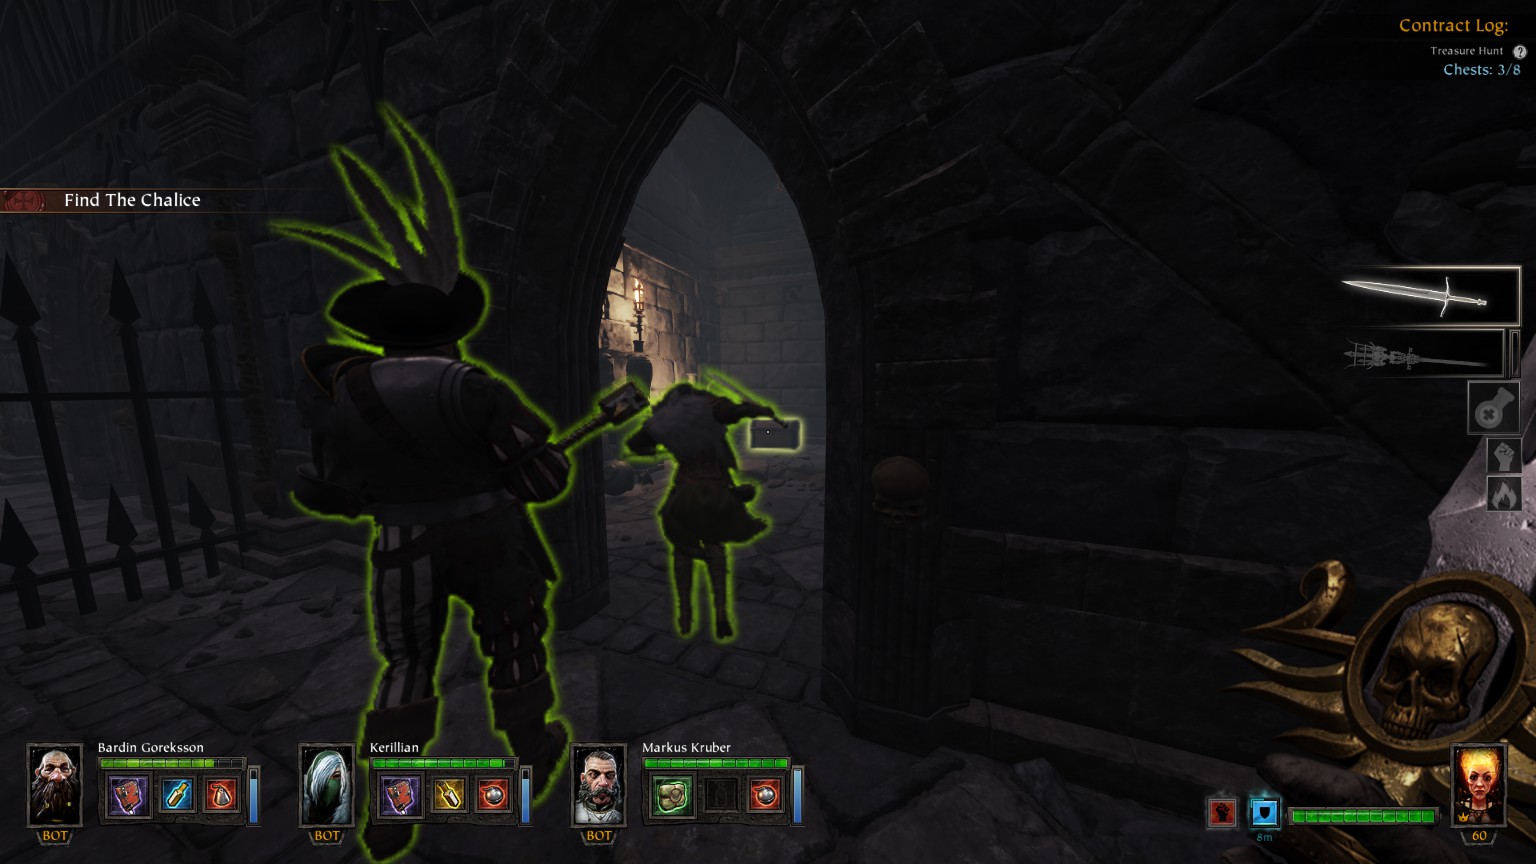
#2/17 (Atrium)
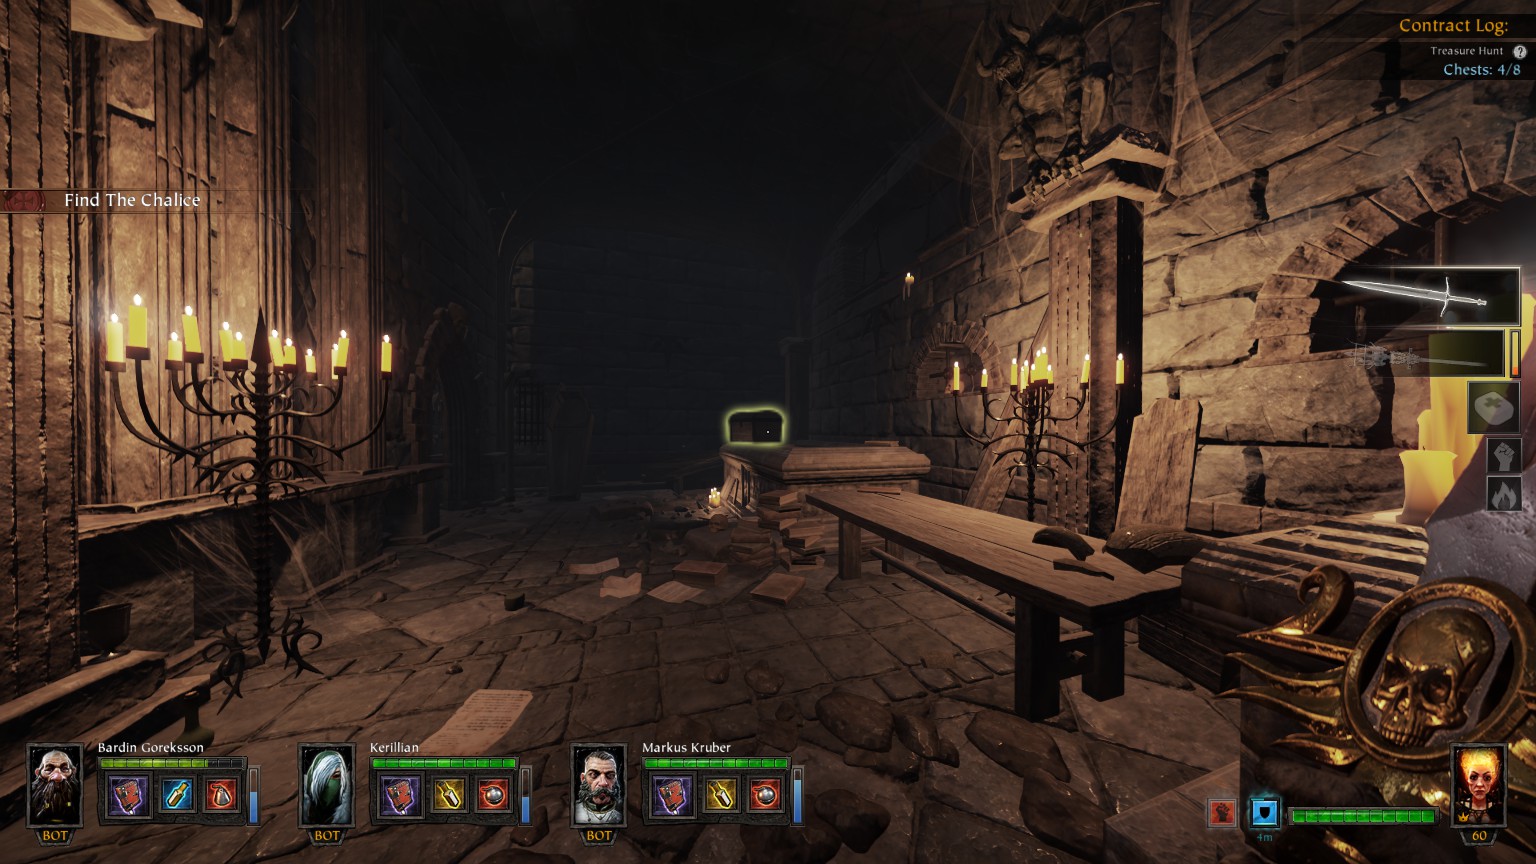
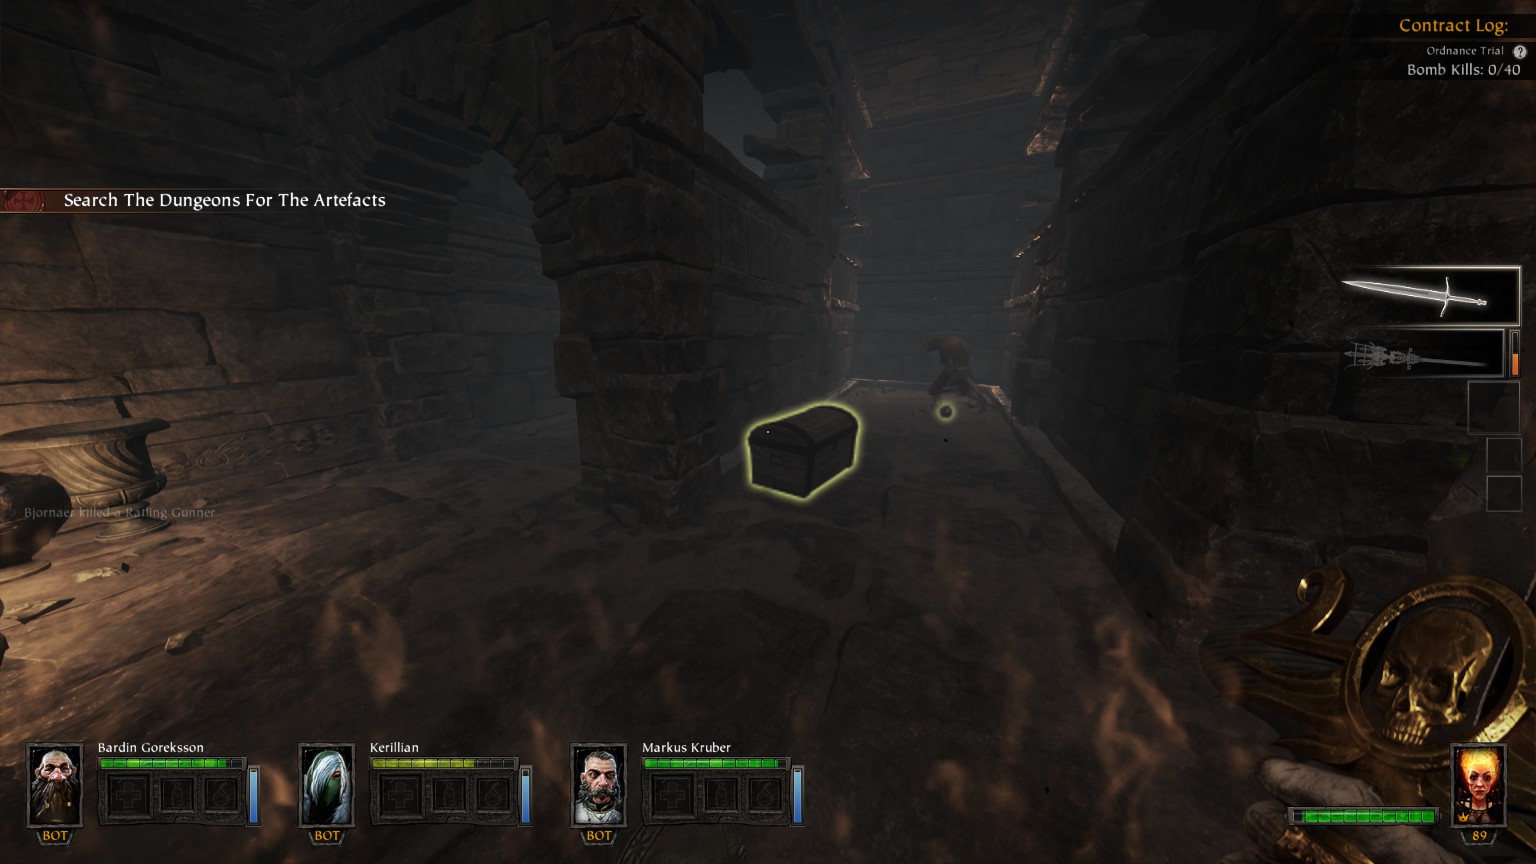
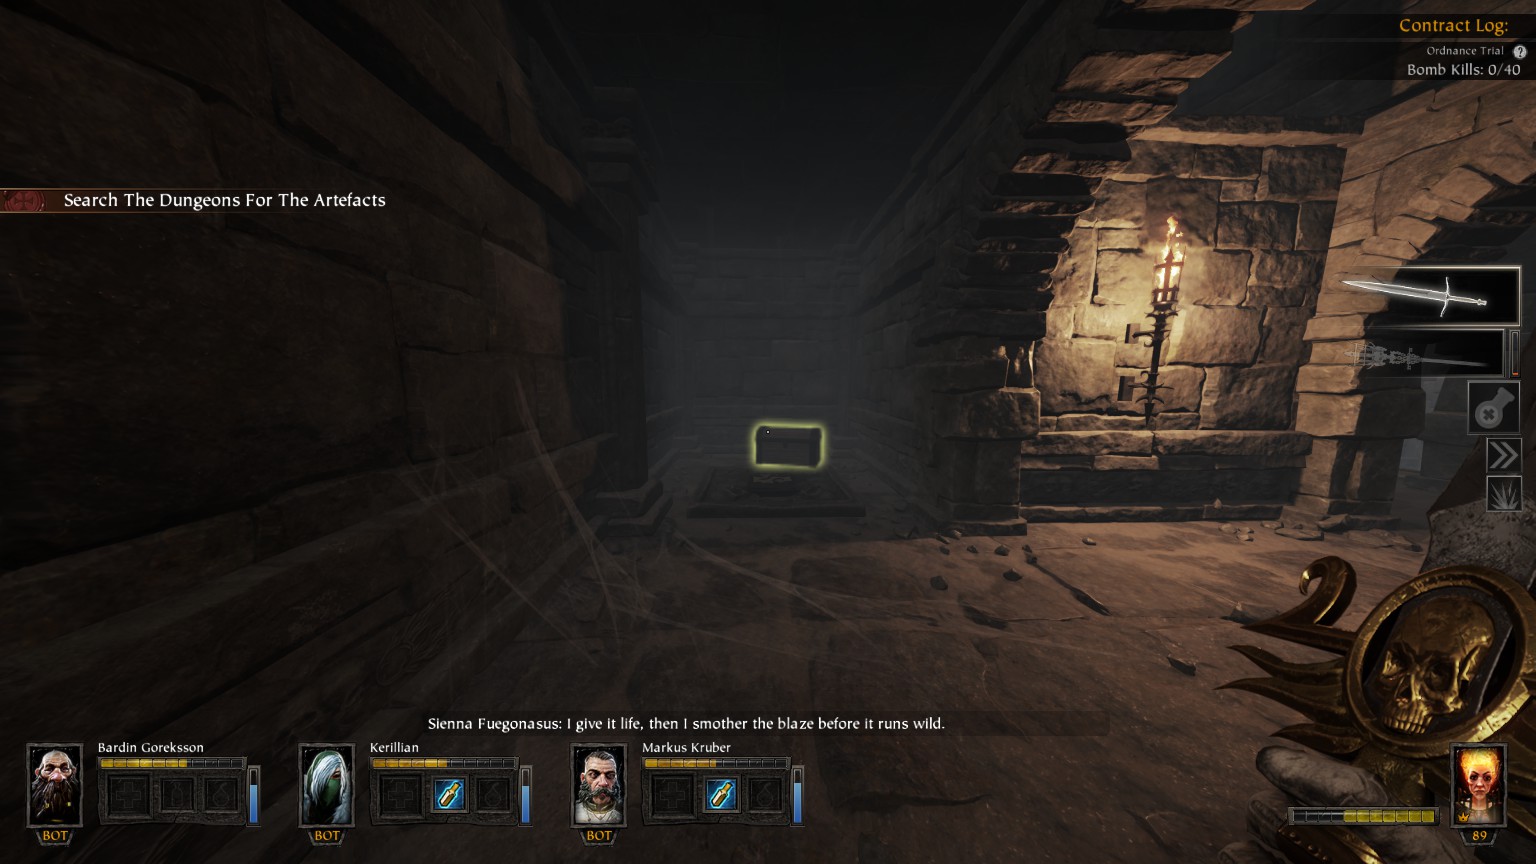
#3/17 After the Atrium, small room on the left
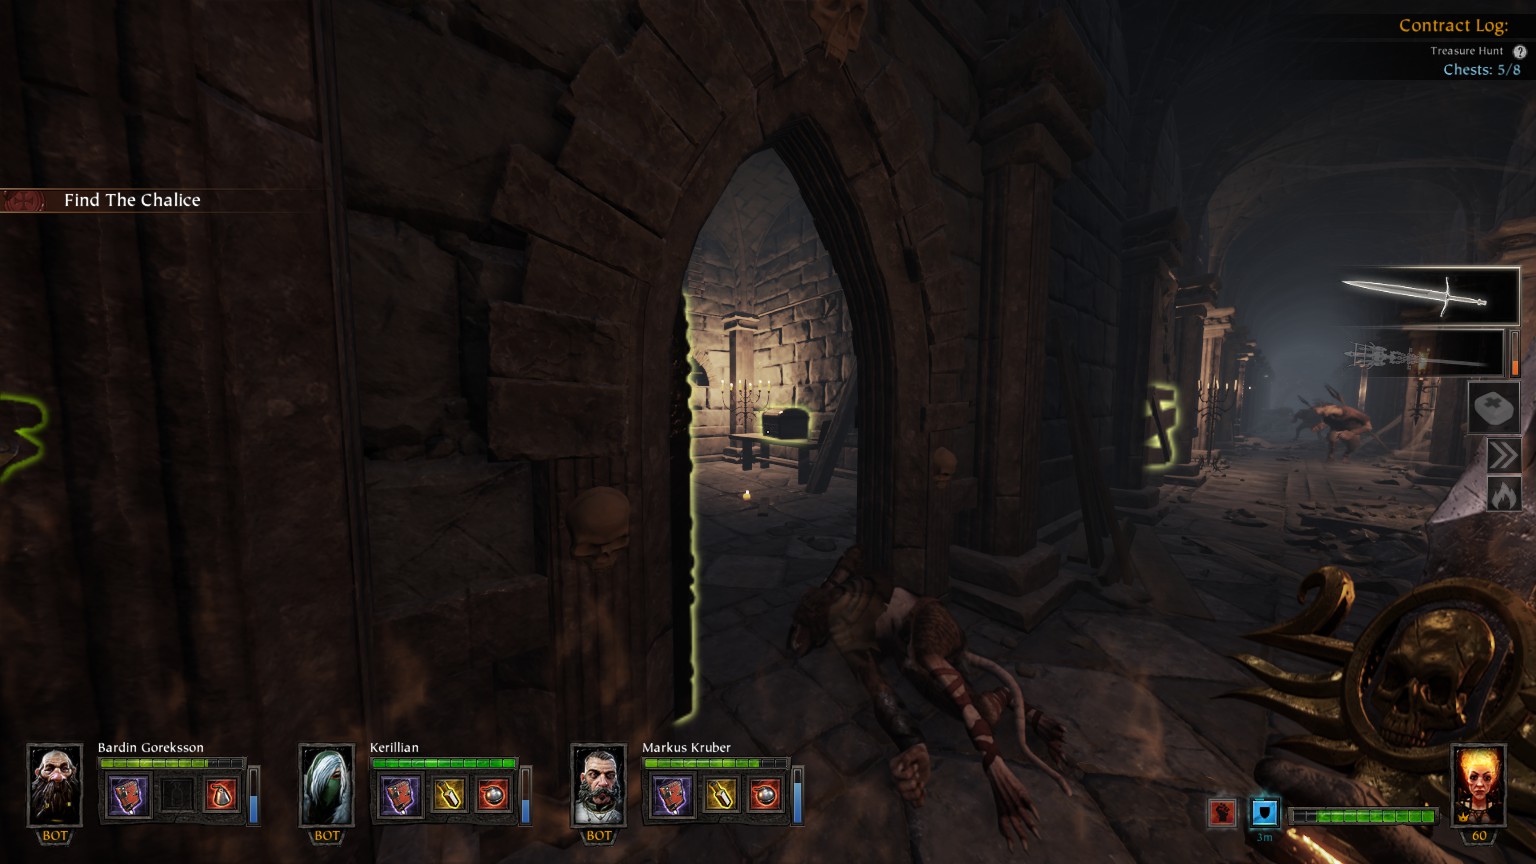
#4/17 (Pillars of Despair)
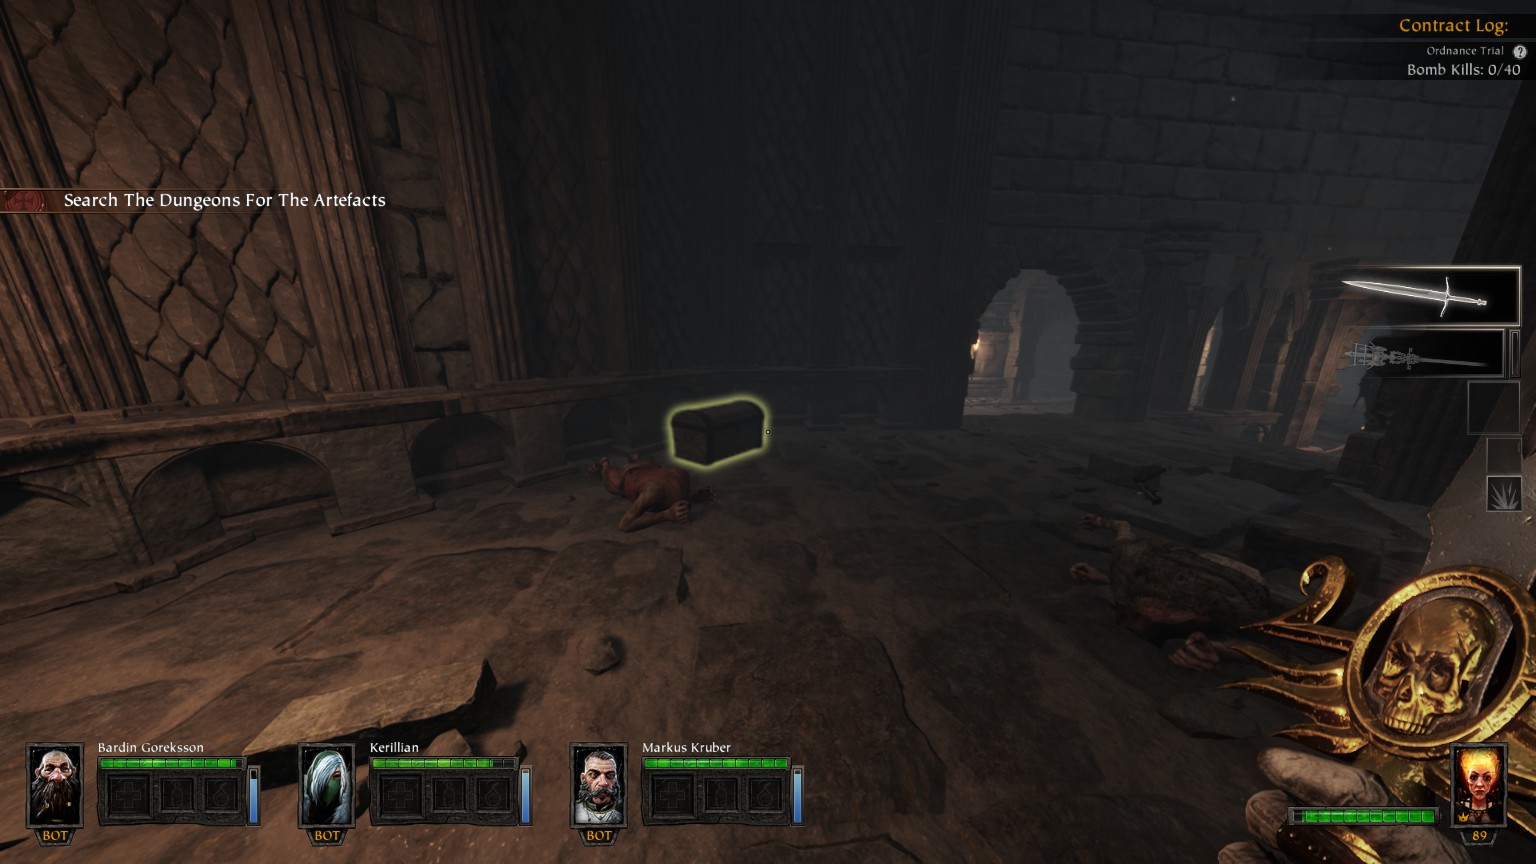
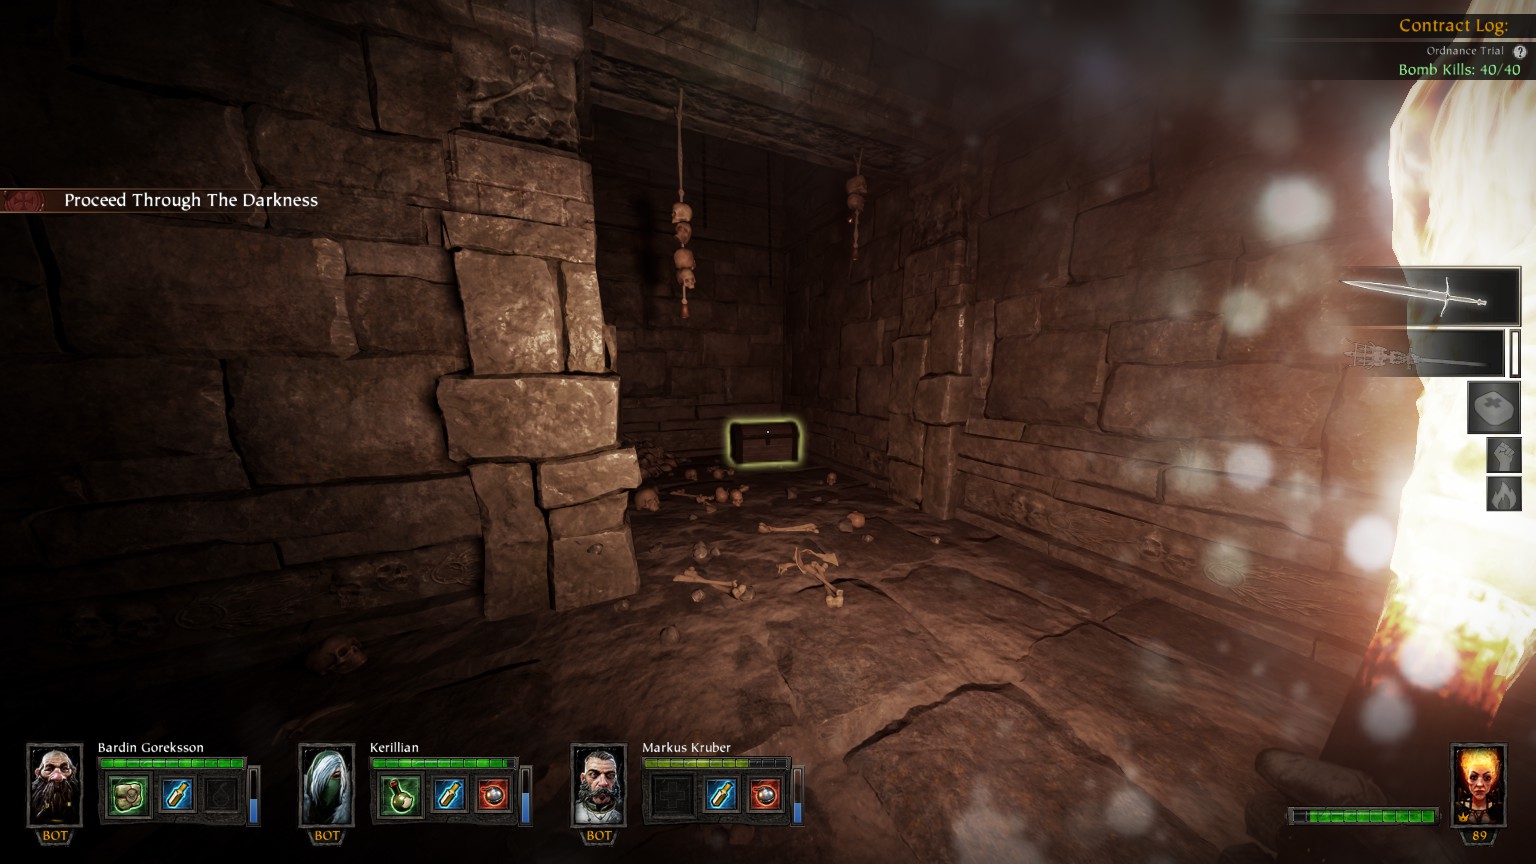
#5/17 Small alcove after Pillars of Despair magical darkness
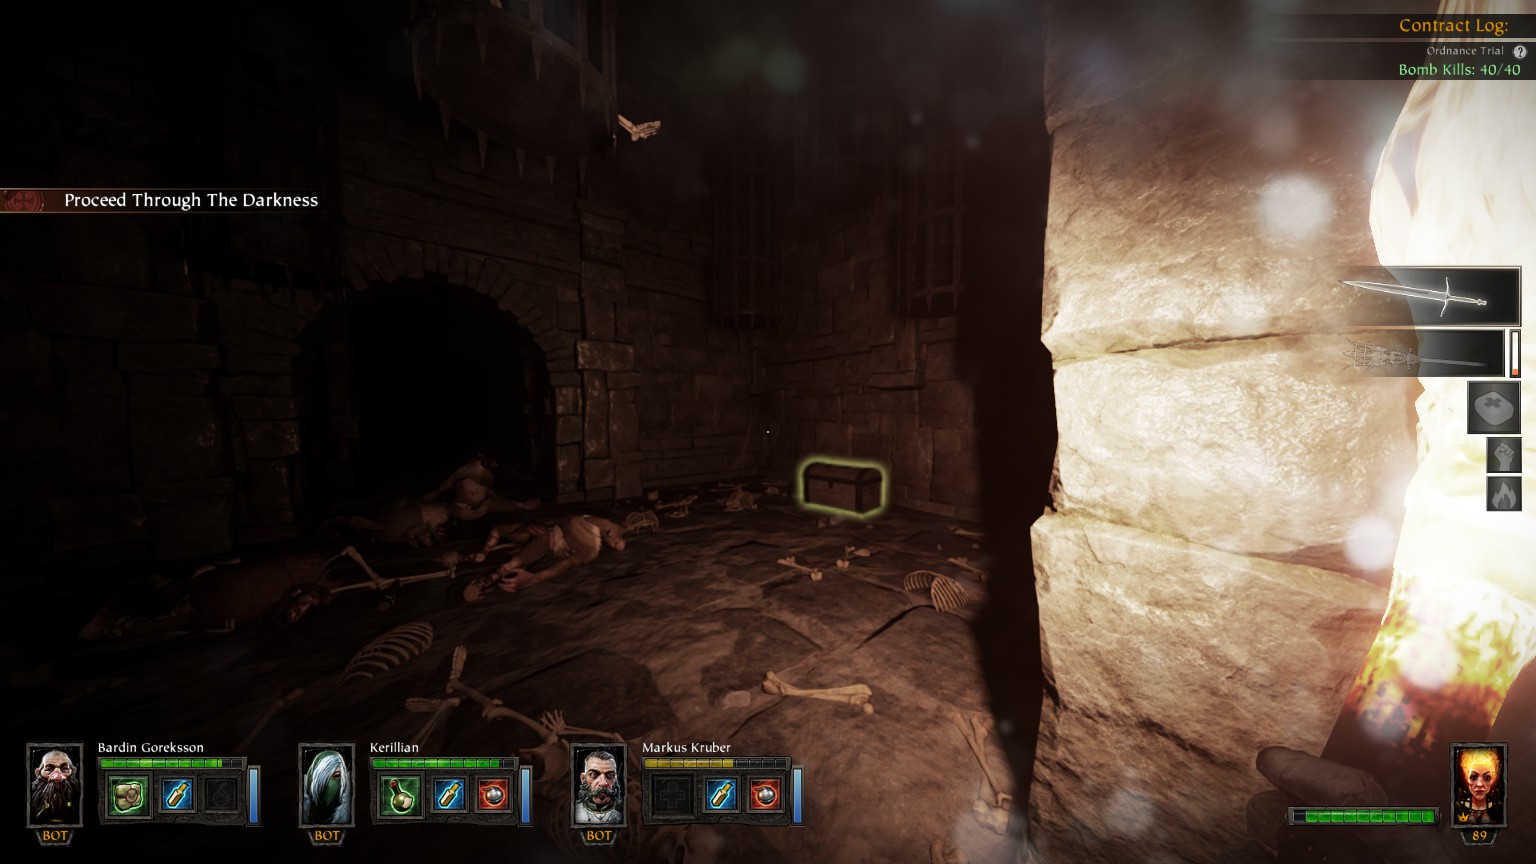
#6/17 Small room just after chest #5
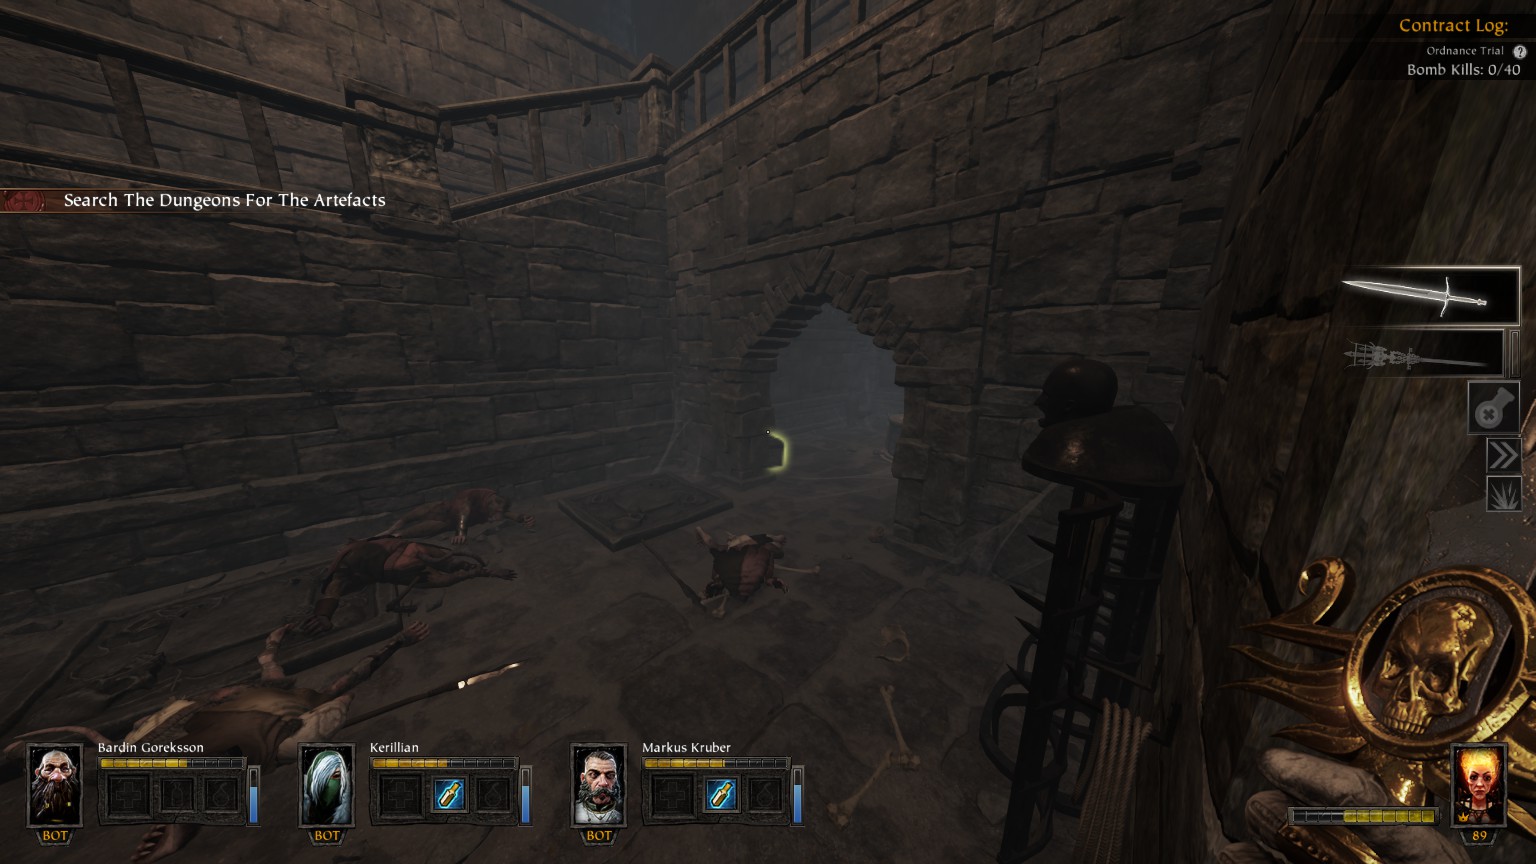
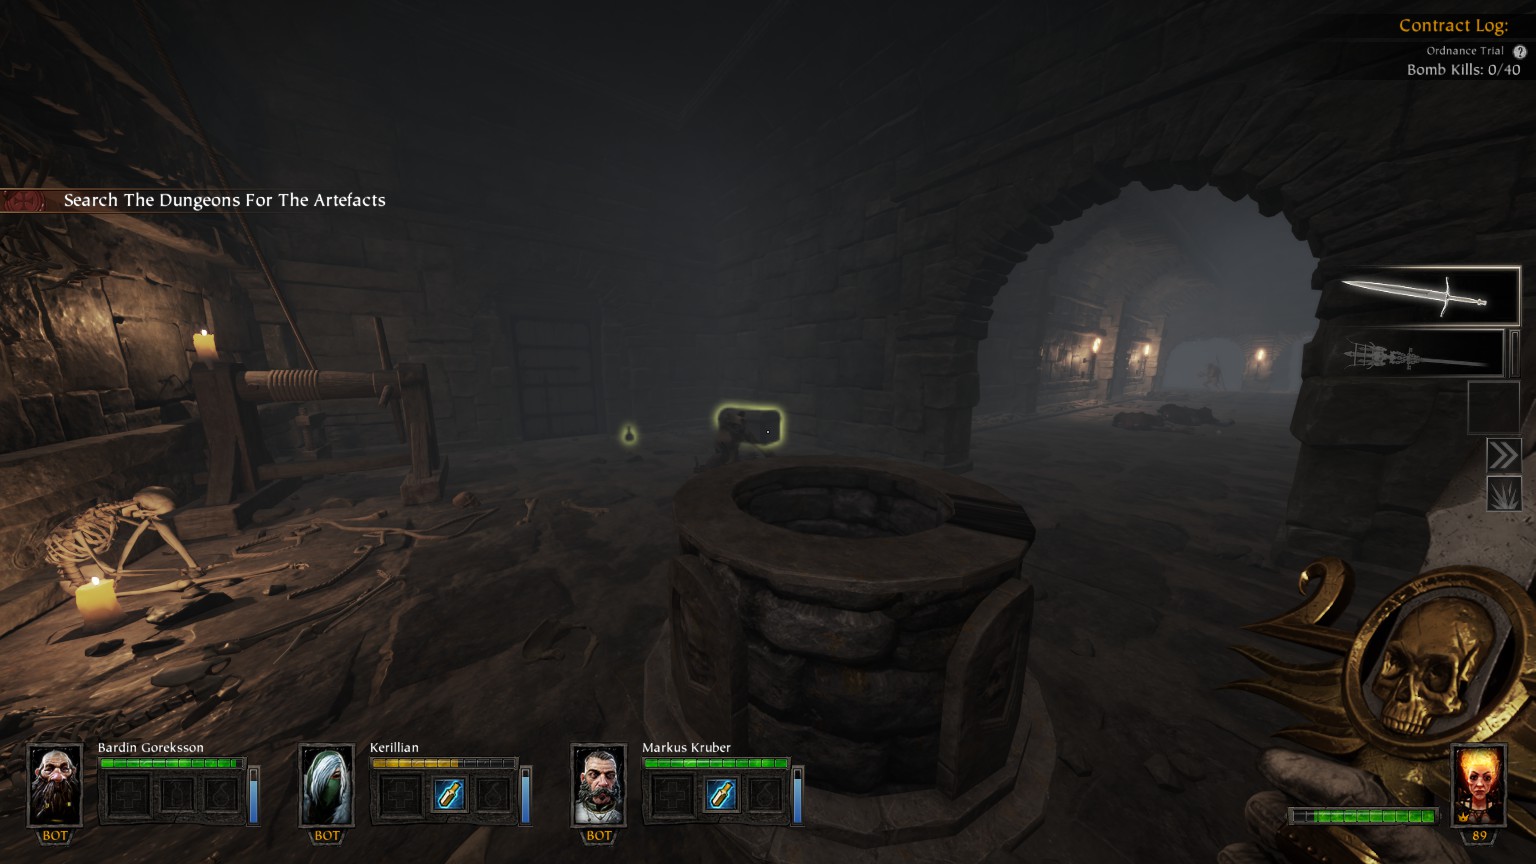
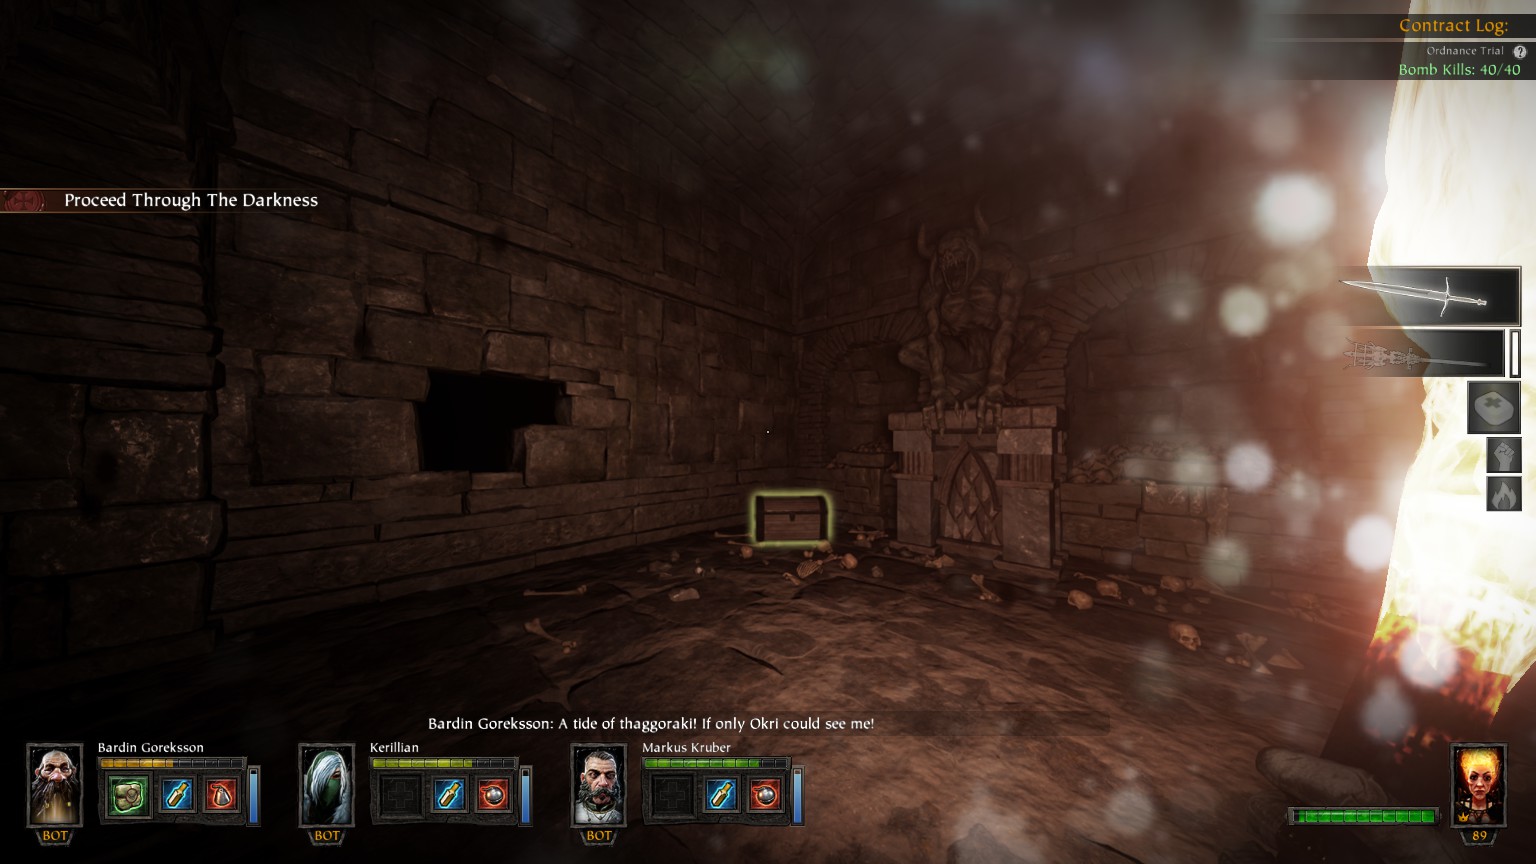
#7/17 Just before Passage of Desolation

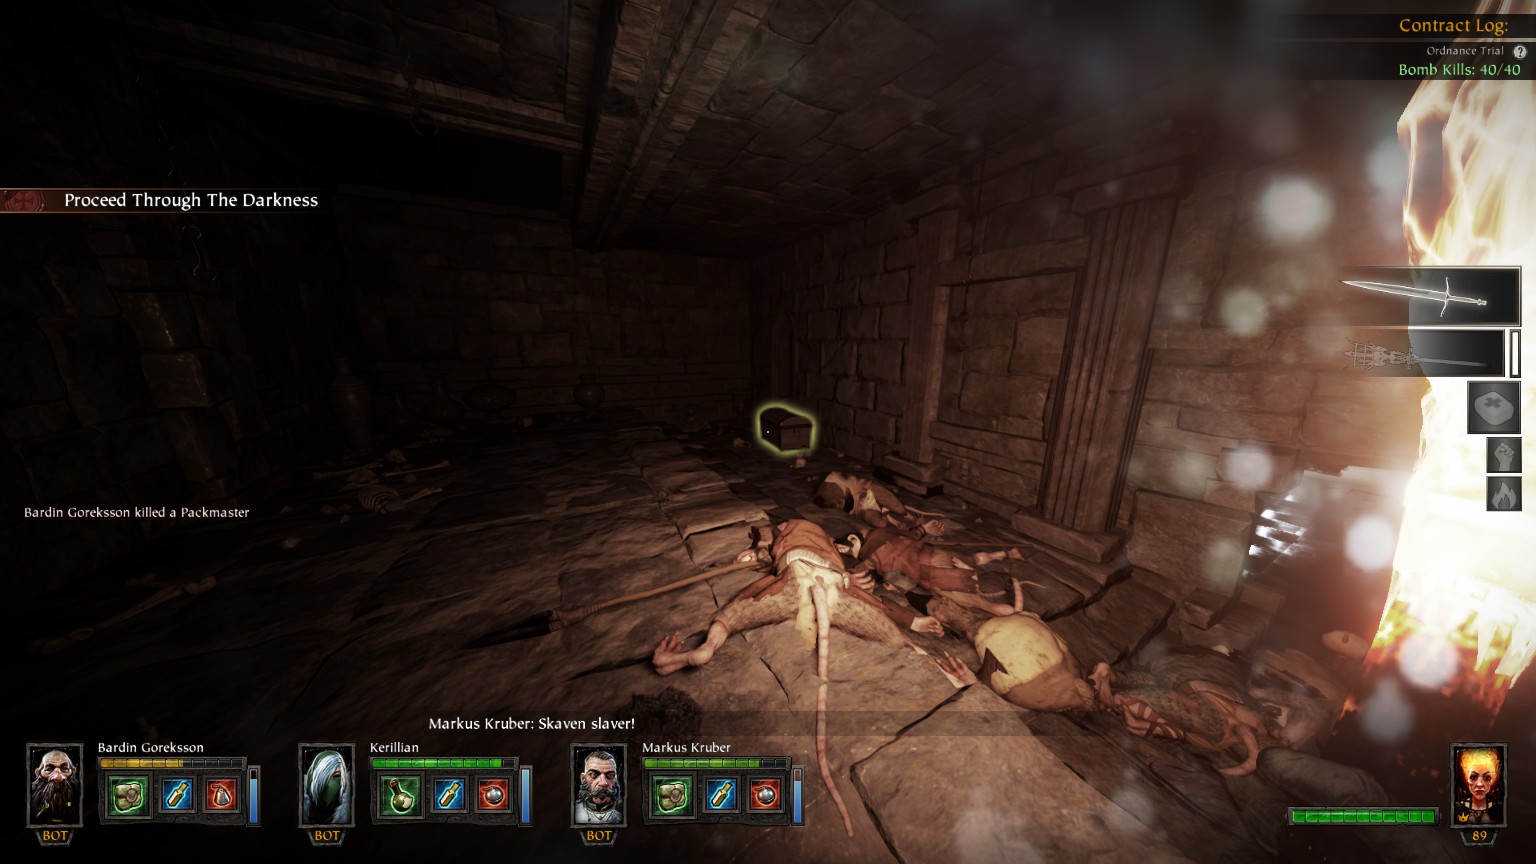
#8/17 (Passage of Desolation) Near Grim #1
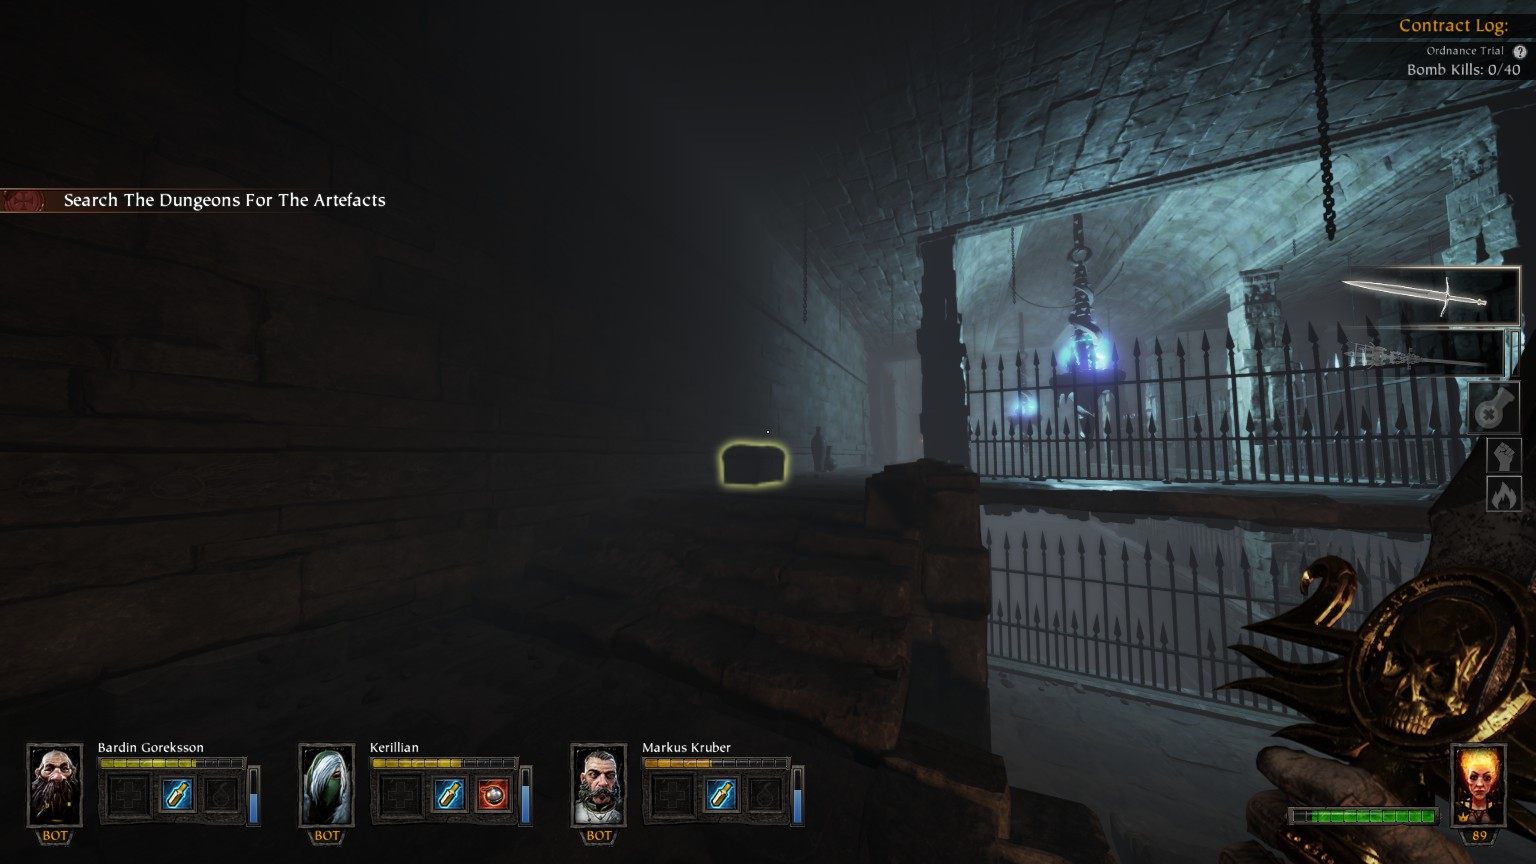
#9/17 (Passage of Desolation) Just after double jump, before Tome #1
#10/17 (Gaoler’s Domain)
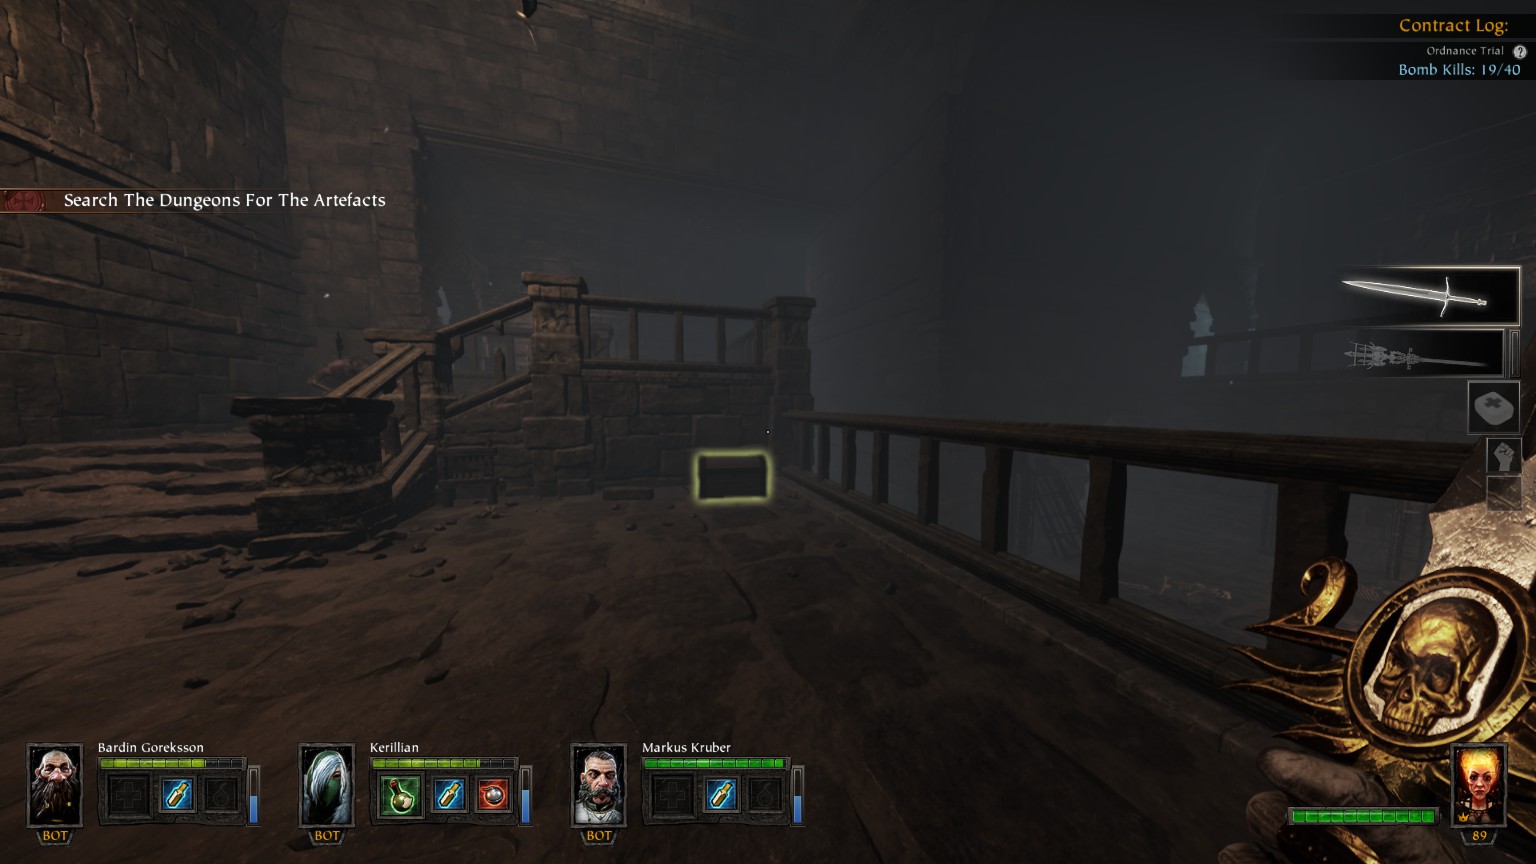
#11/17 (Morose Vista) After Tome #2, near jump into the Shadow Gallery
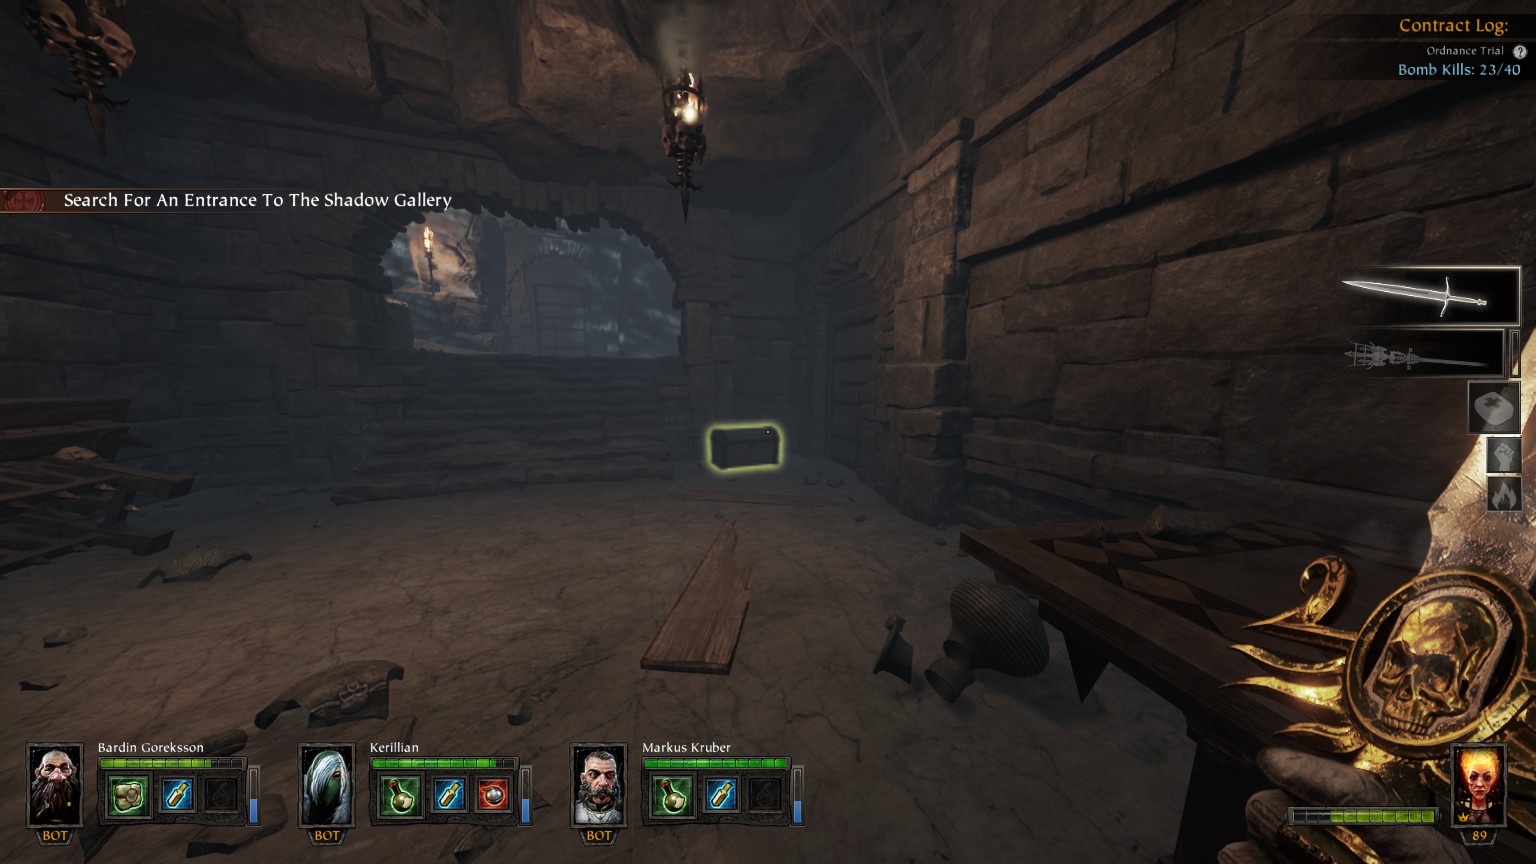
#12/17 (Halls of Obscurity) Follow the left wall, in a small alcove (you may find a Lore Book page nearby)
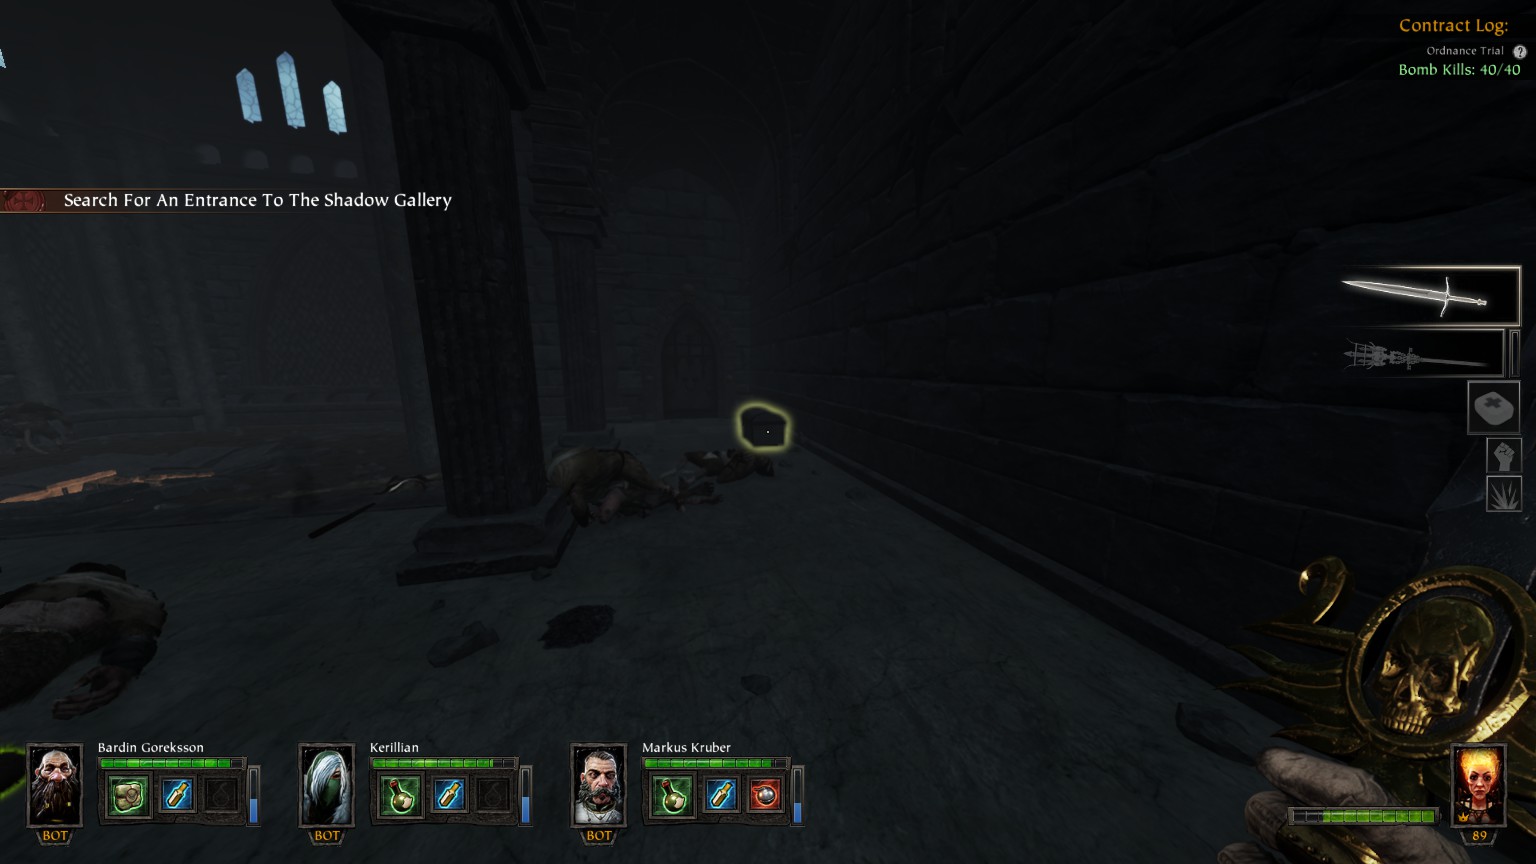
#13/17 (Halls of Obscurity) Small alcove on the left just after the wood beam passage
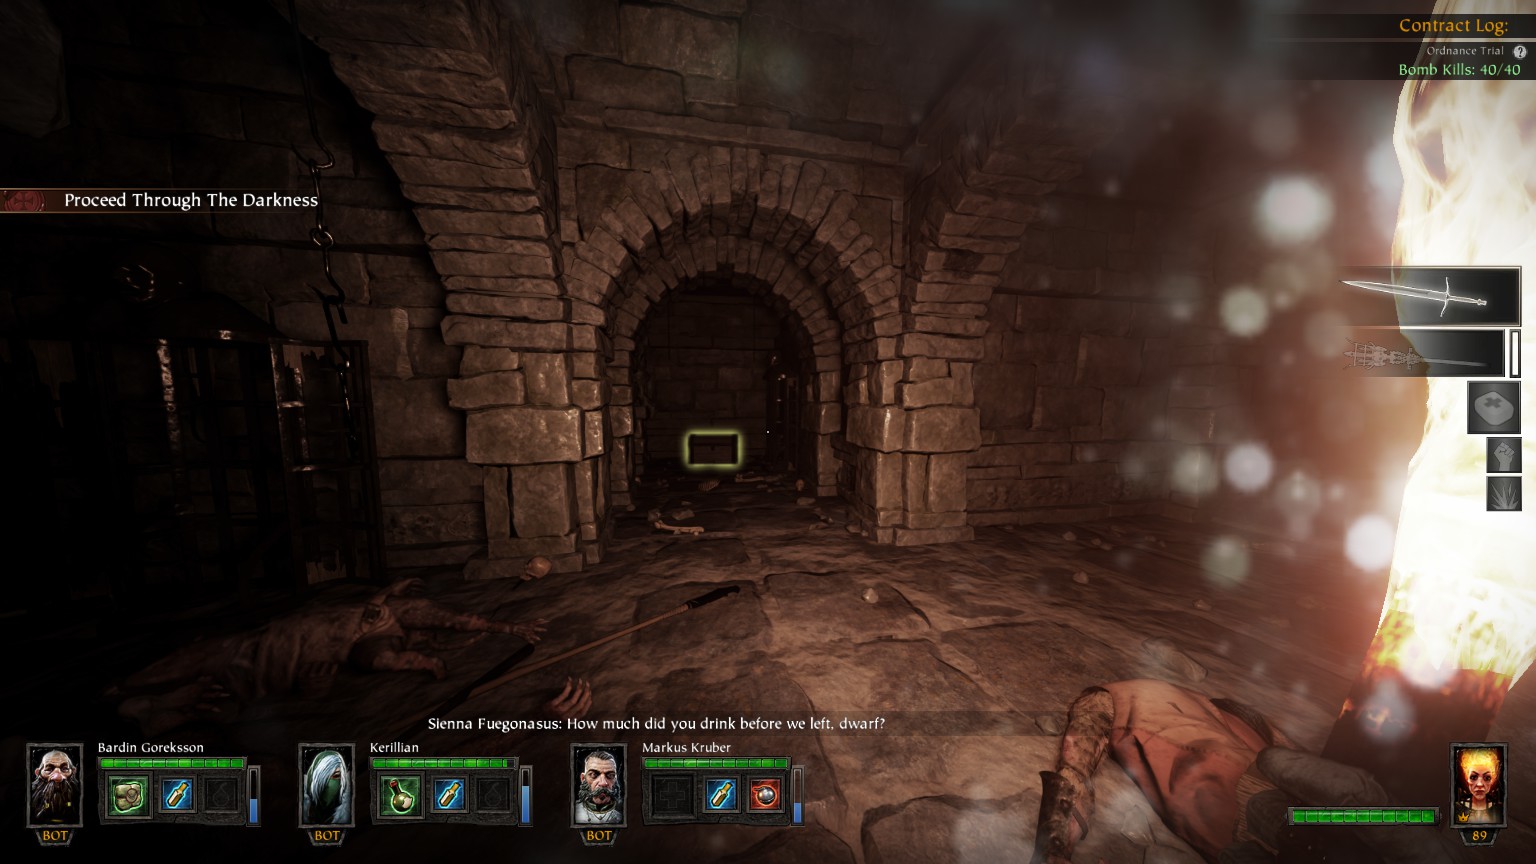
#14/17 A little bit after the one way jump, before entering the Bone Chambers
#15/17 (Bone Chambers) After the hole on the ground to the lever that open the secret chamber of Grim #2
#16/17 (Bone Chambers) Just before the one way jump to the Relic Chamber
#17/17 (Relic Chamber) Just after the event
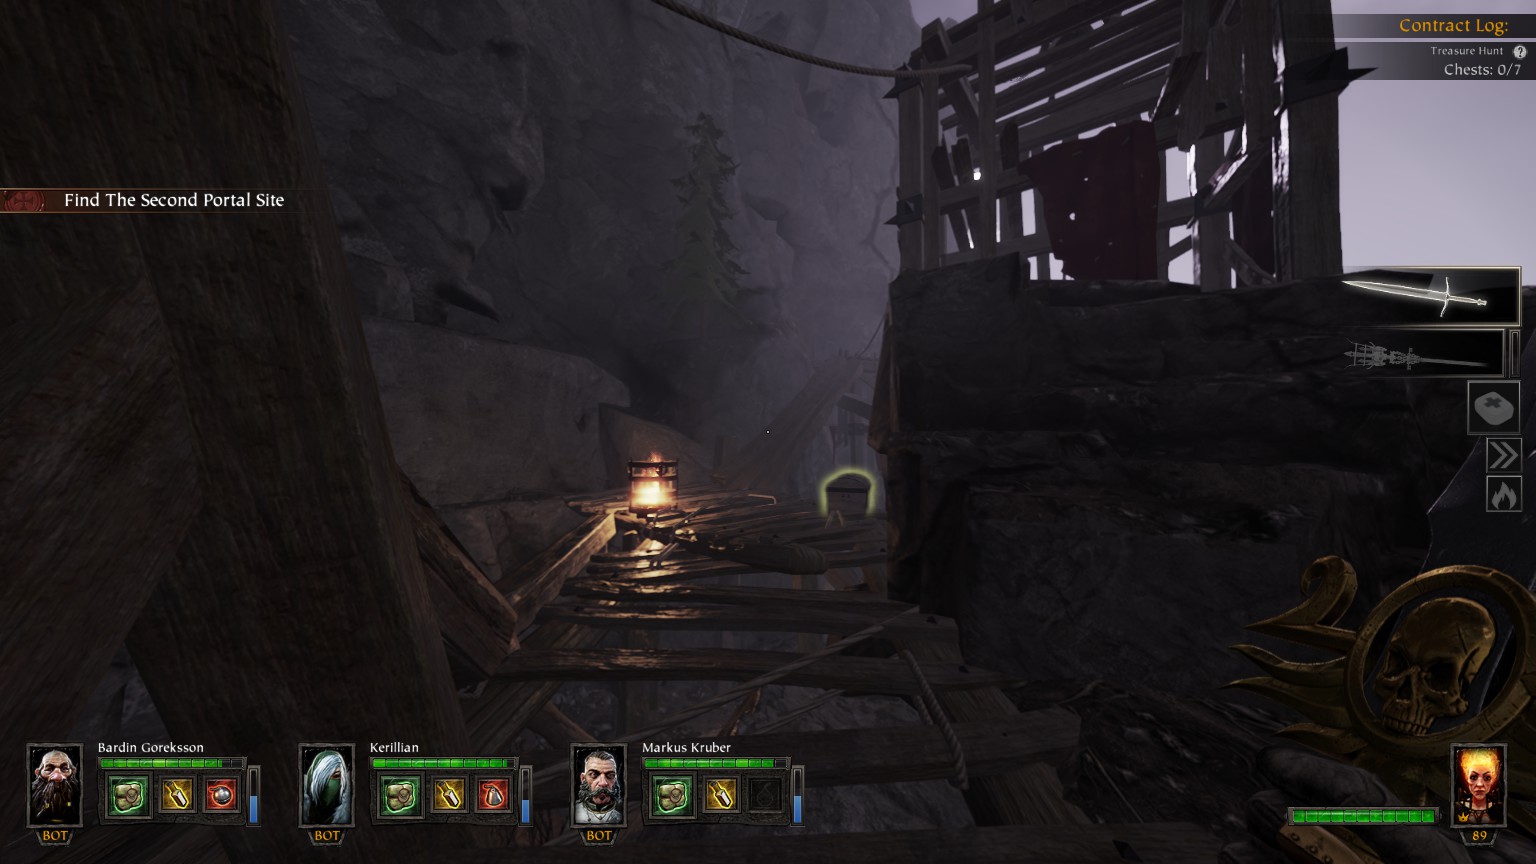
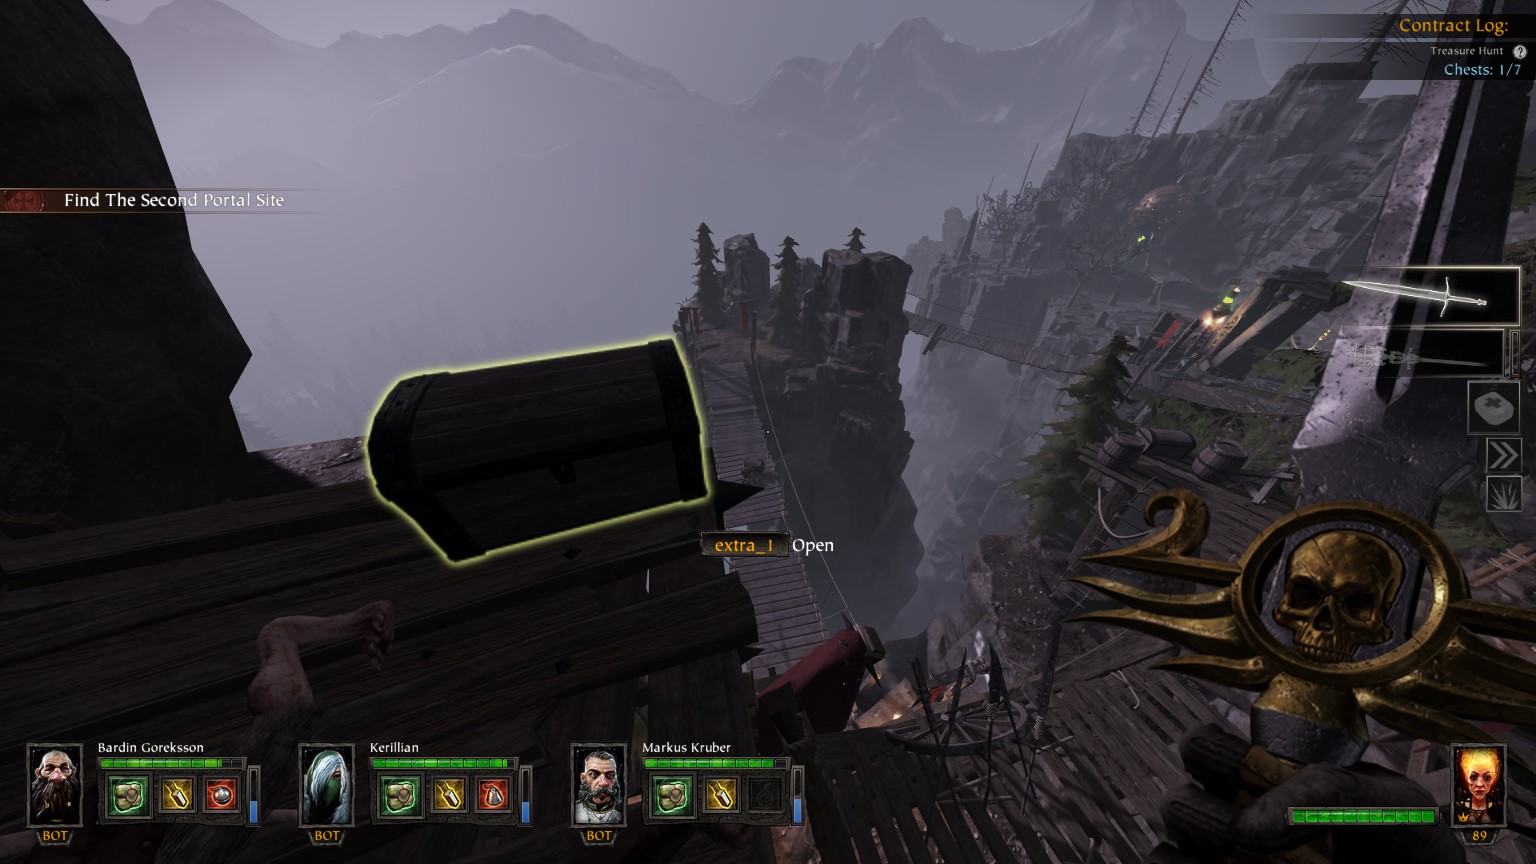
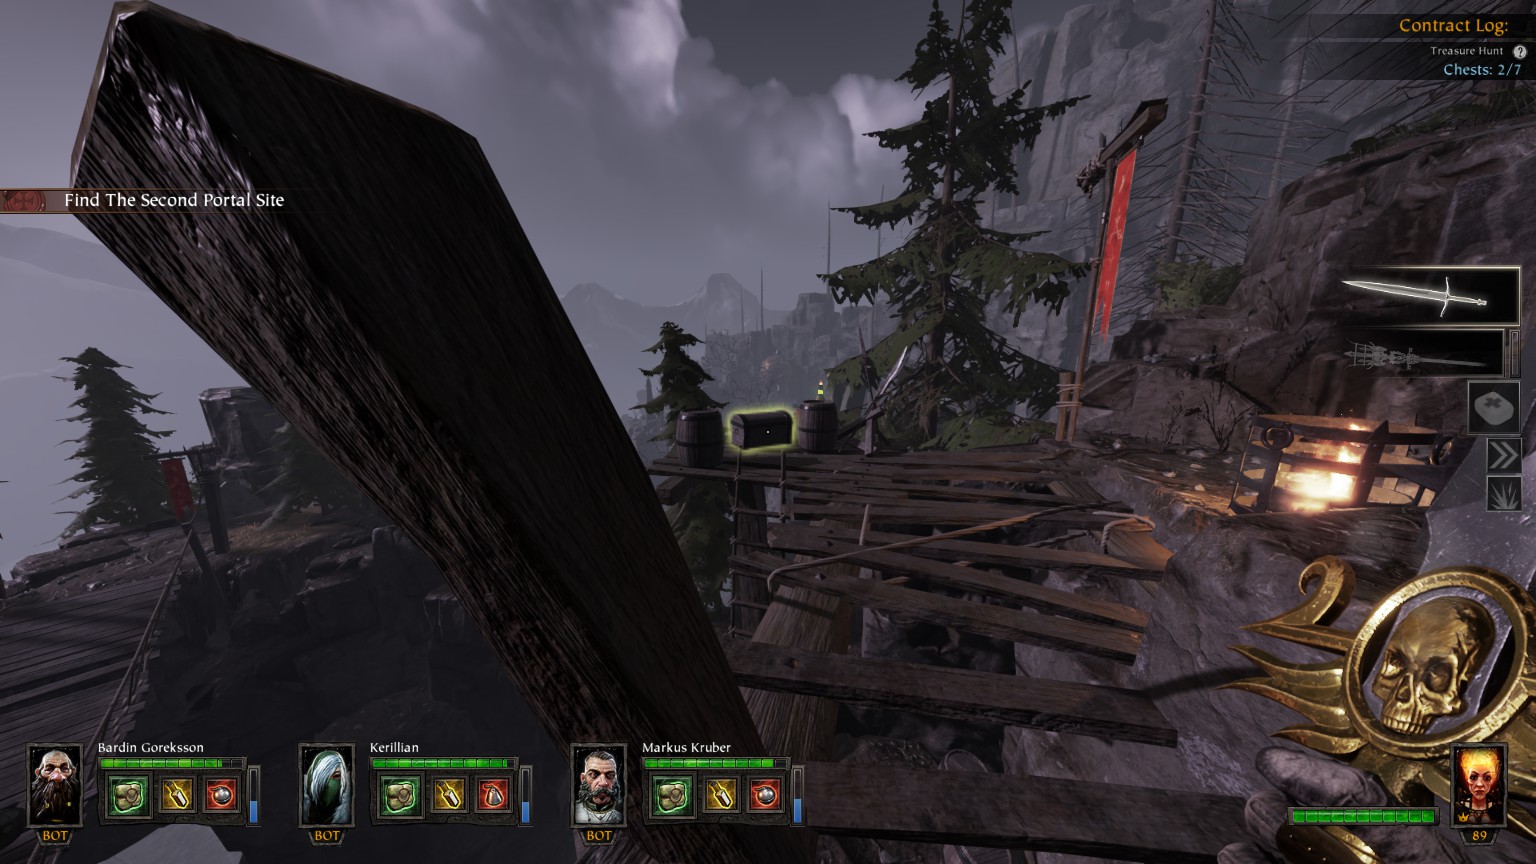
Summoner’s Peak
You may also want to check out
De greed’smap available in the Vermintide Wiki on Fandom
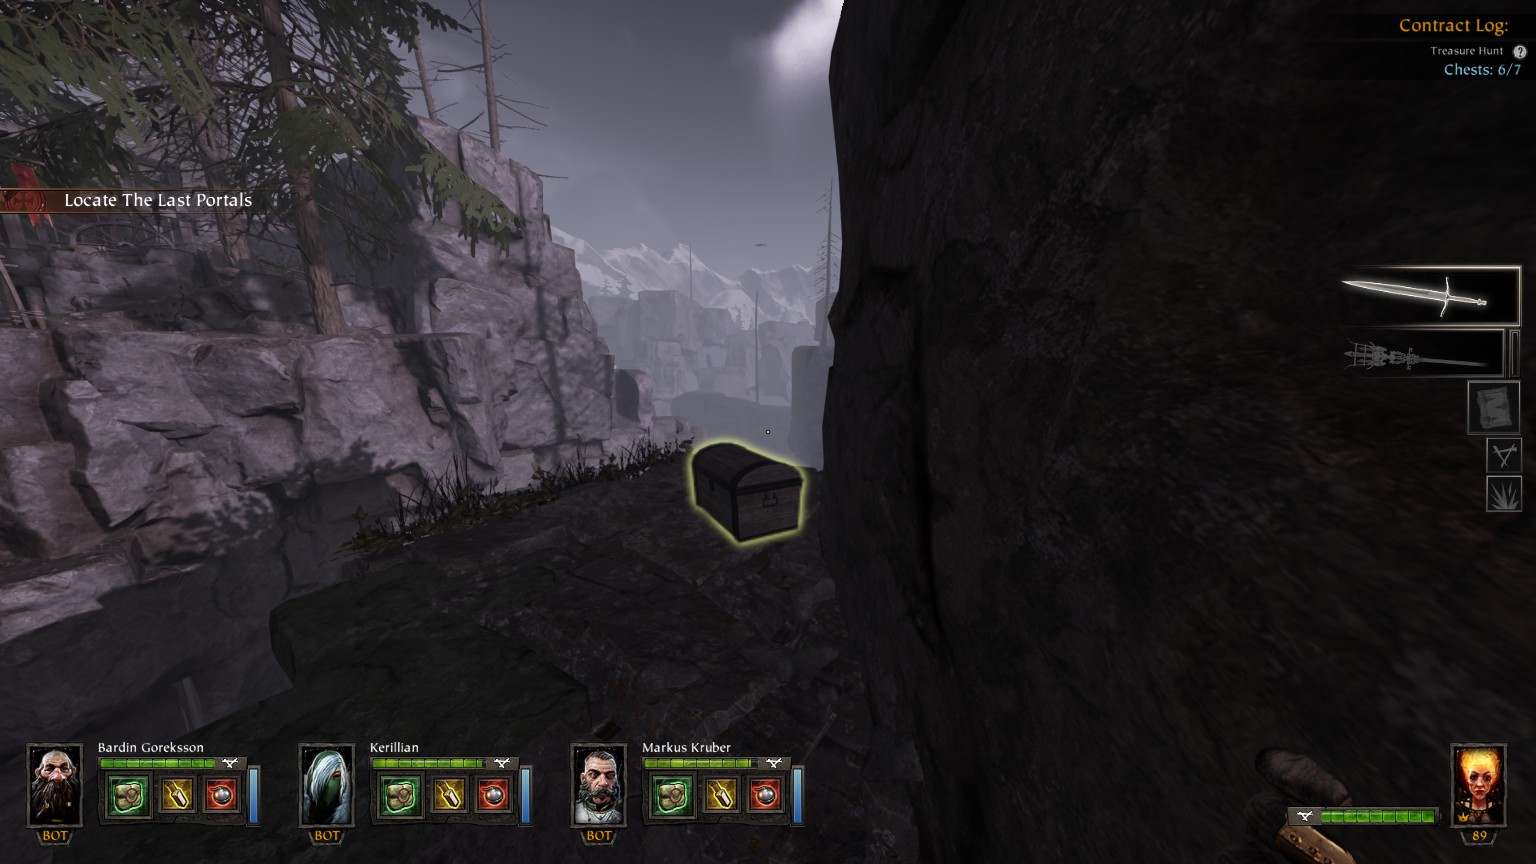
#1-3/7 (Snagglefang Camp) Camp after destroying the first portal
#4-6/7 (Camp Skabclaw) Camp after destroying the second portal
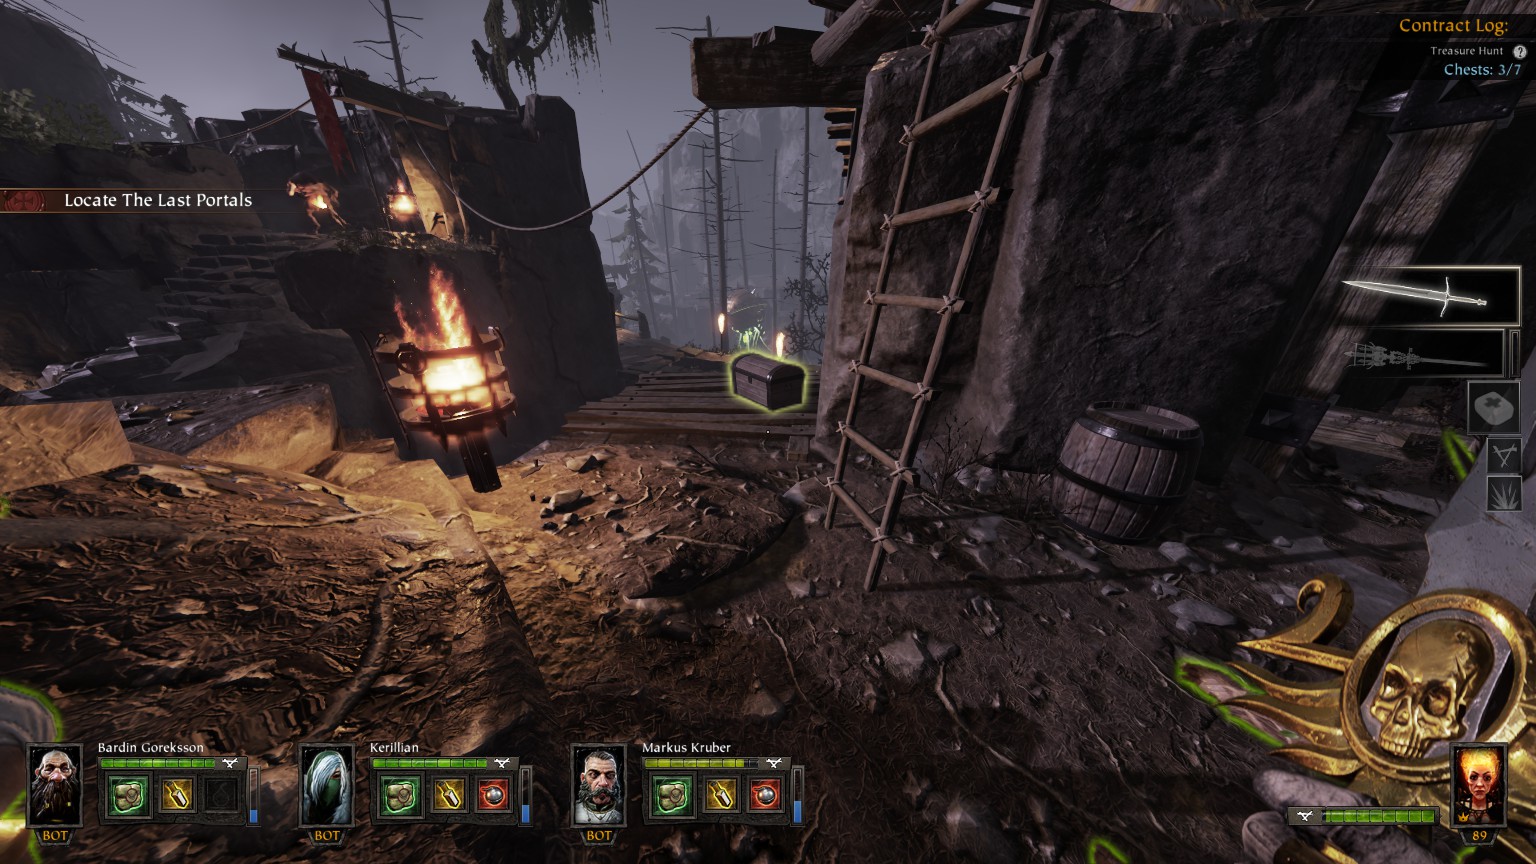
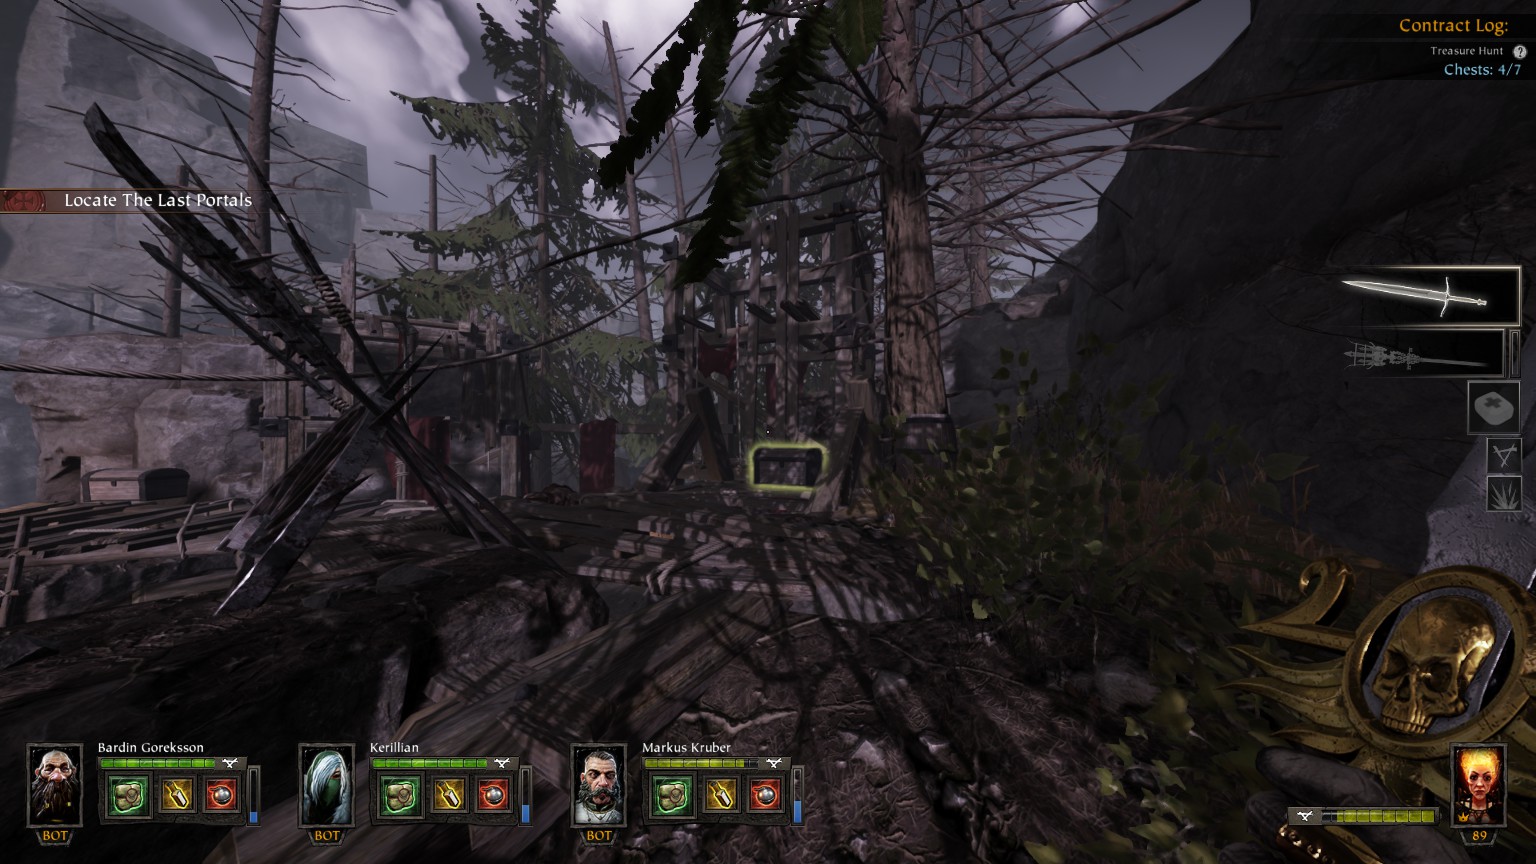

#7/7 (before Grandfather’s Summit) Just before jump to third portal
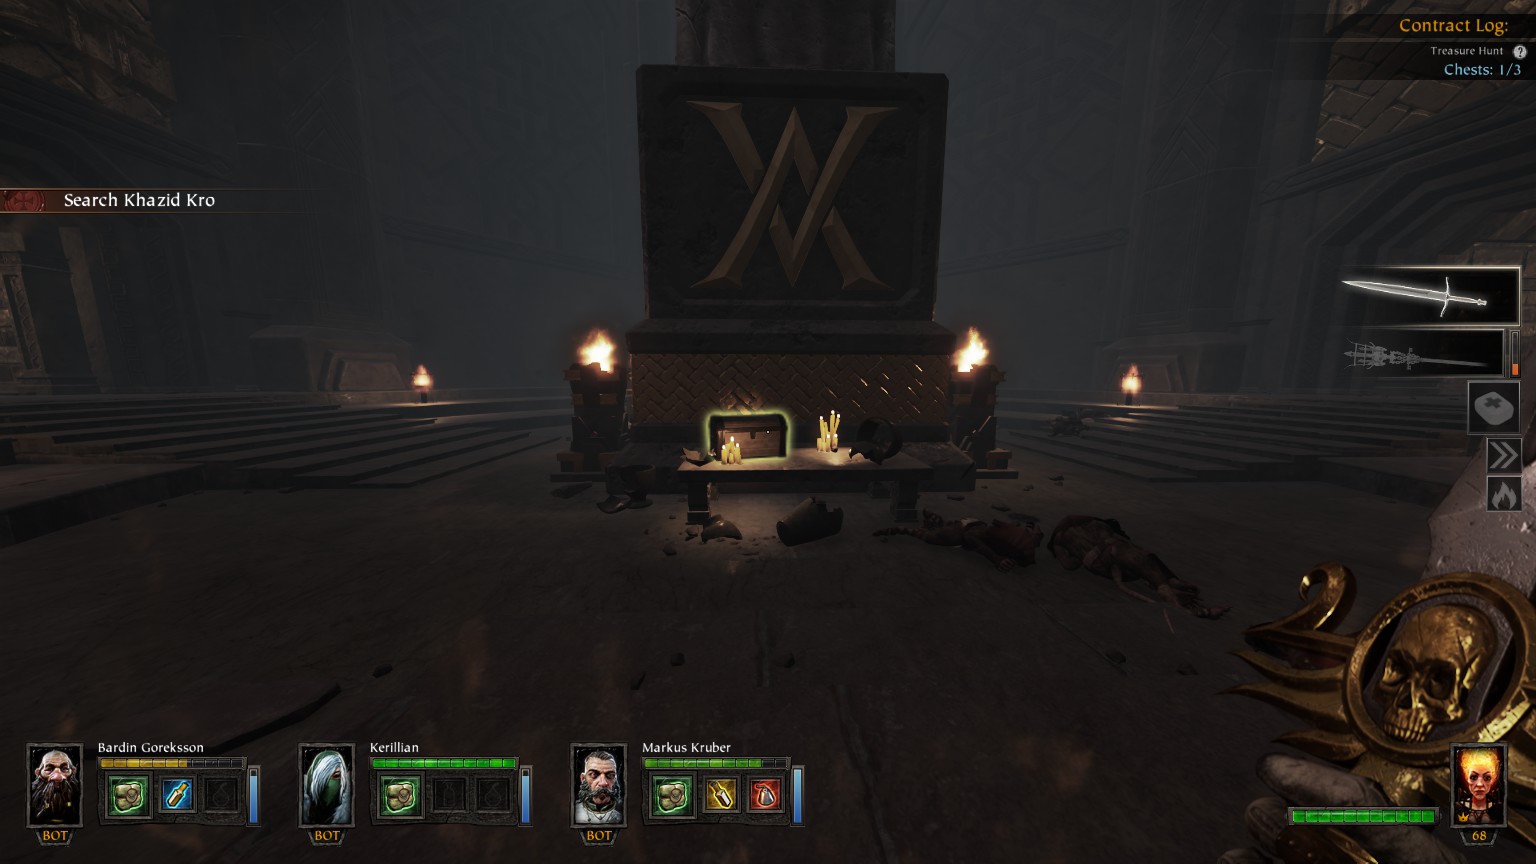
Khazid Kro
You may also want to check out
De greed’smap available in the Vermintide Wiki on Fandom (A lot missing)
If entry way is the lower gate
#1/4 (Storerooms) In isolated room
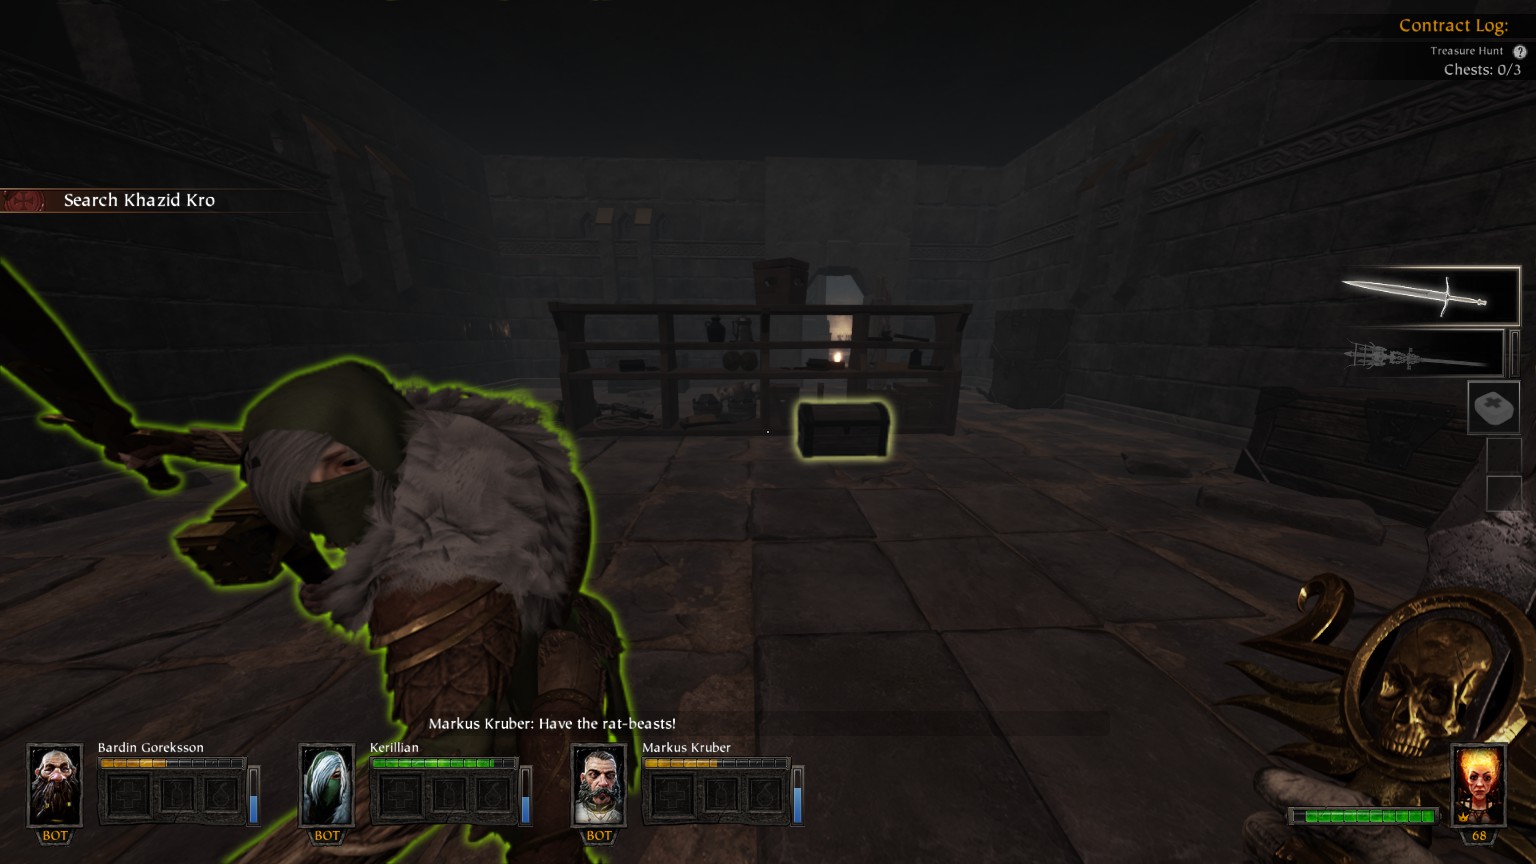
If entry way is the upper gate
#1/4 (Railway Tunnel) In small room without door

#2/4 (Temple of Valaya) After Grim #1, before Tome #1 & #2
#3/4 (After Black Crow Brewery) Just after the Stabilize the Pressure event (You may find some lore book page here)
#4/4 (After Maintenance Tunnels) Just before jump to finale
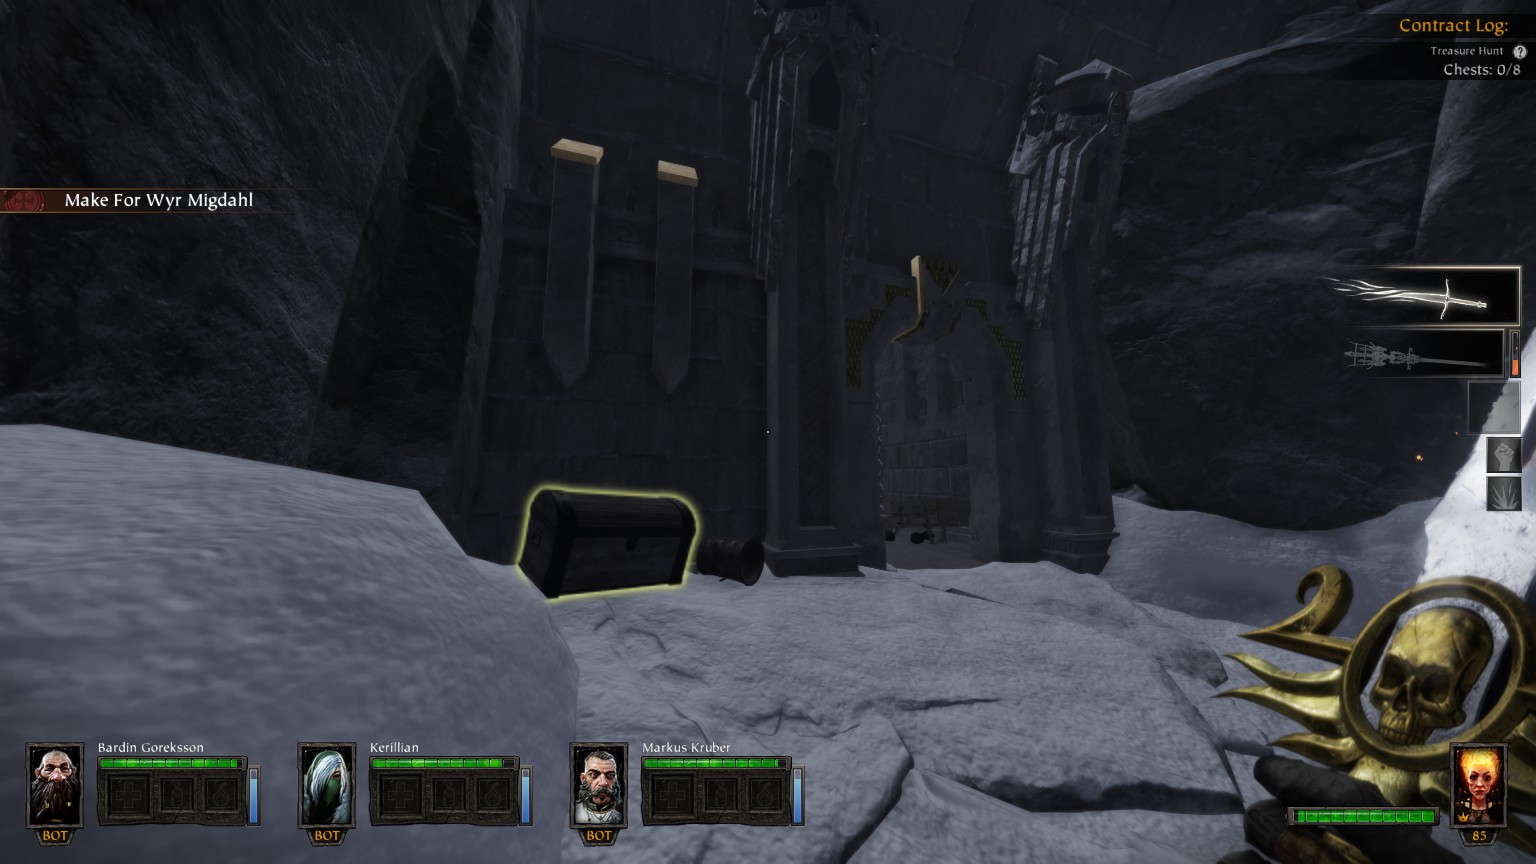
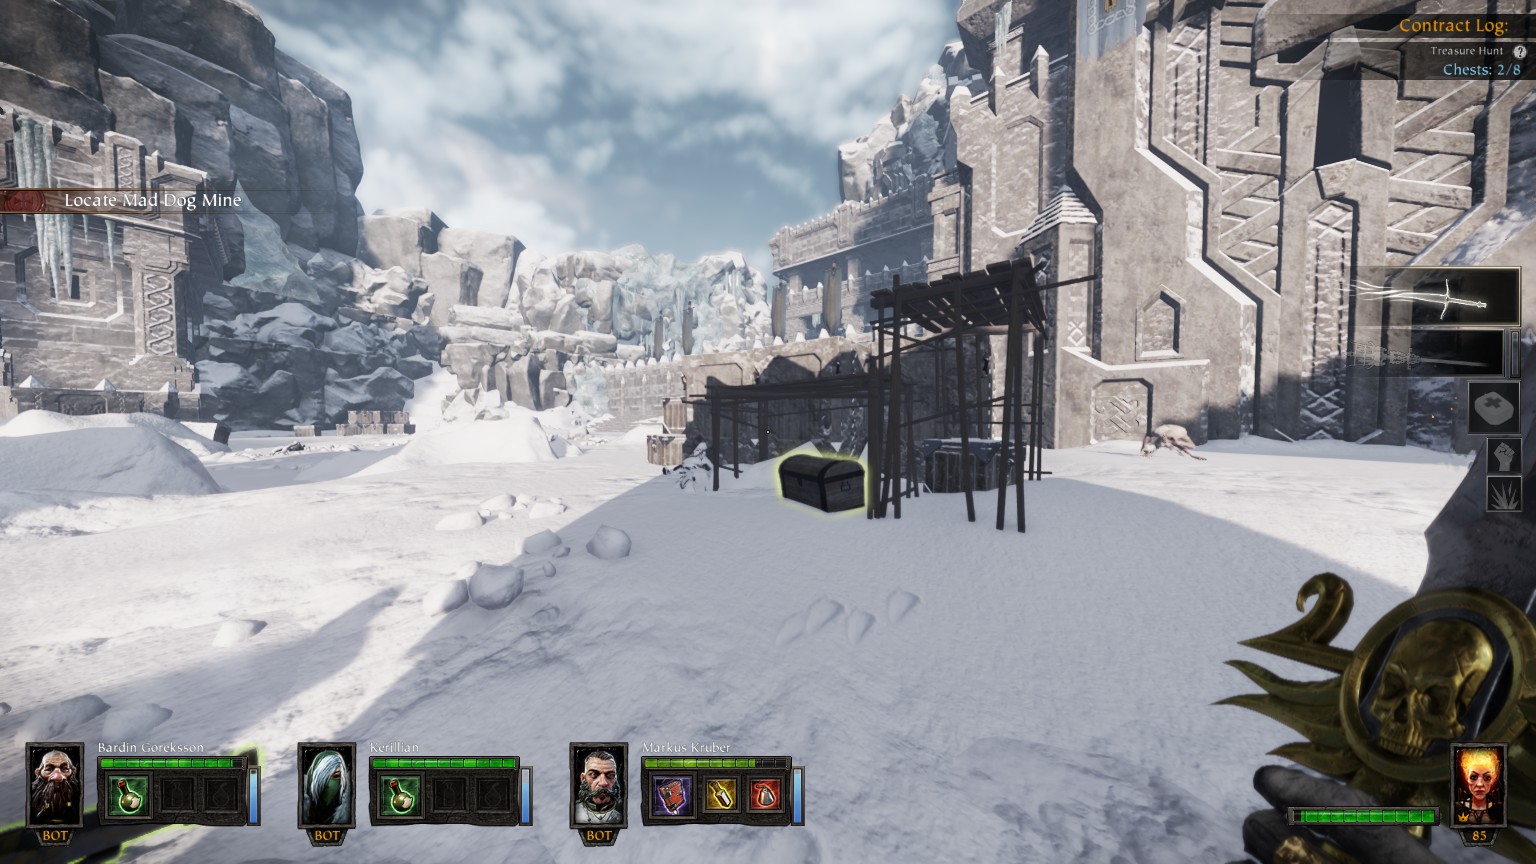
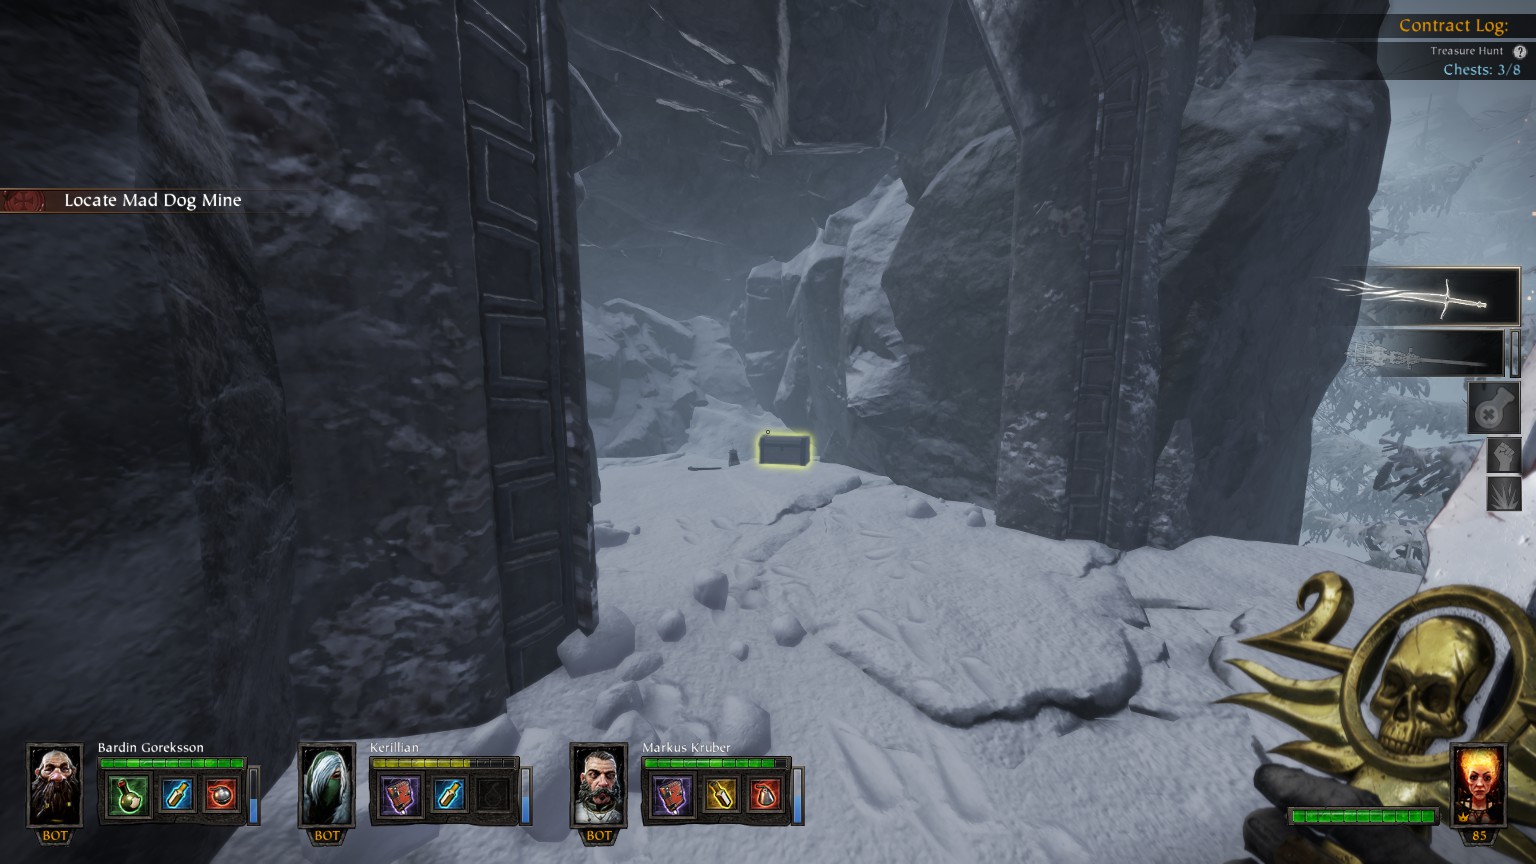
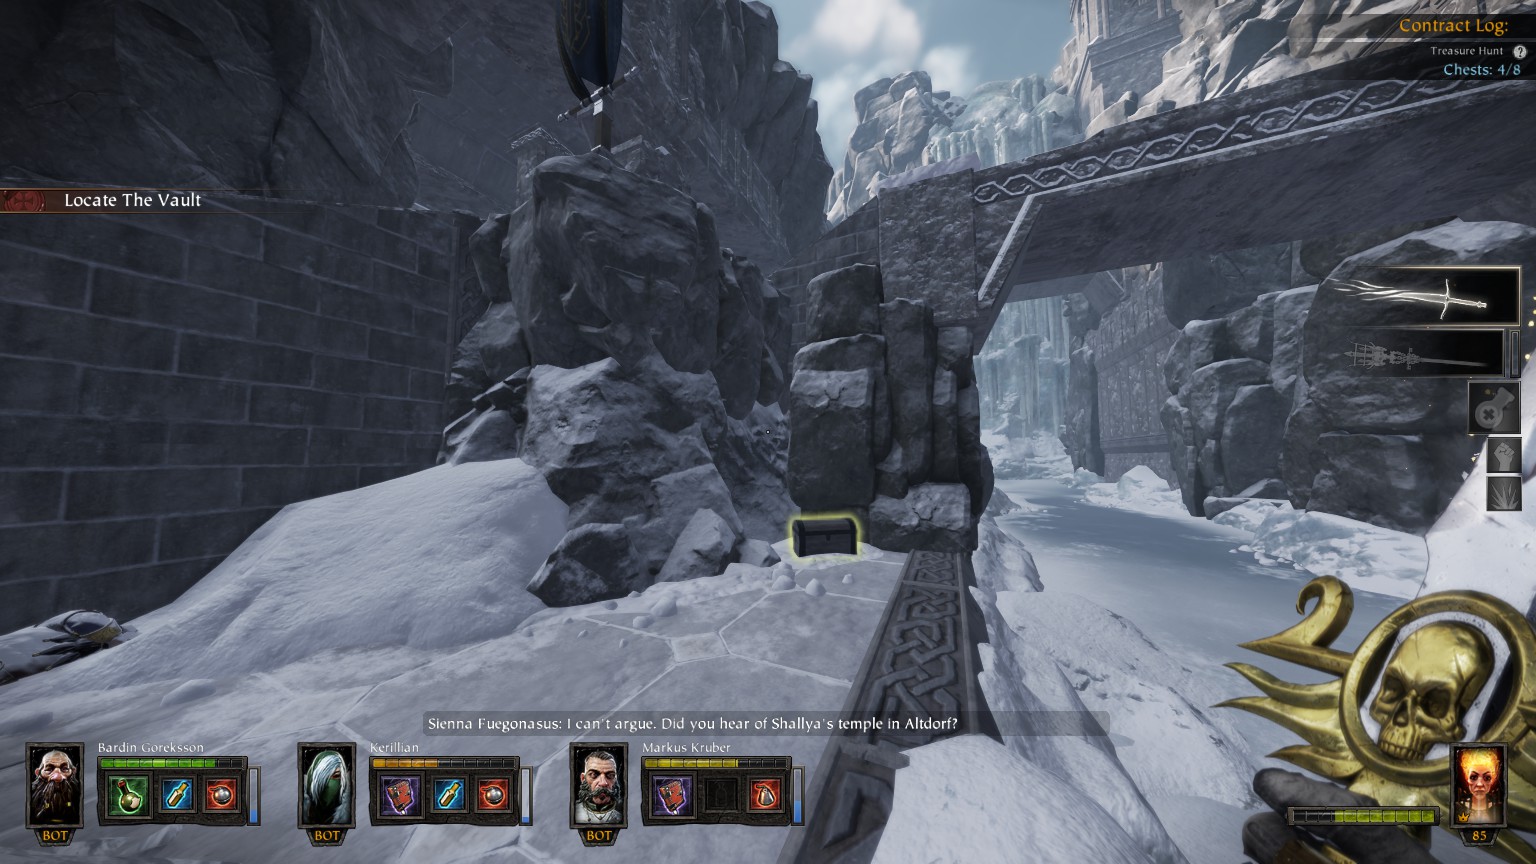
The Cursed Rune
You may also want to check out
De greed’smap available in the Vermintide Wiki on Fandom
#1/8 (Bardin’s Path) Just before Tome #1
#2/8 (Main Road) On the right after one-way point
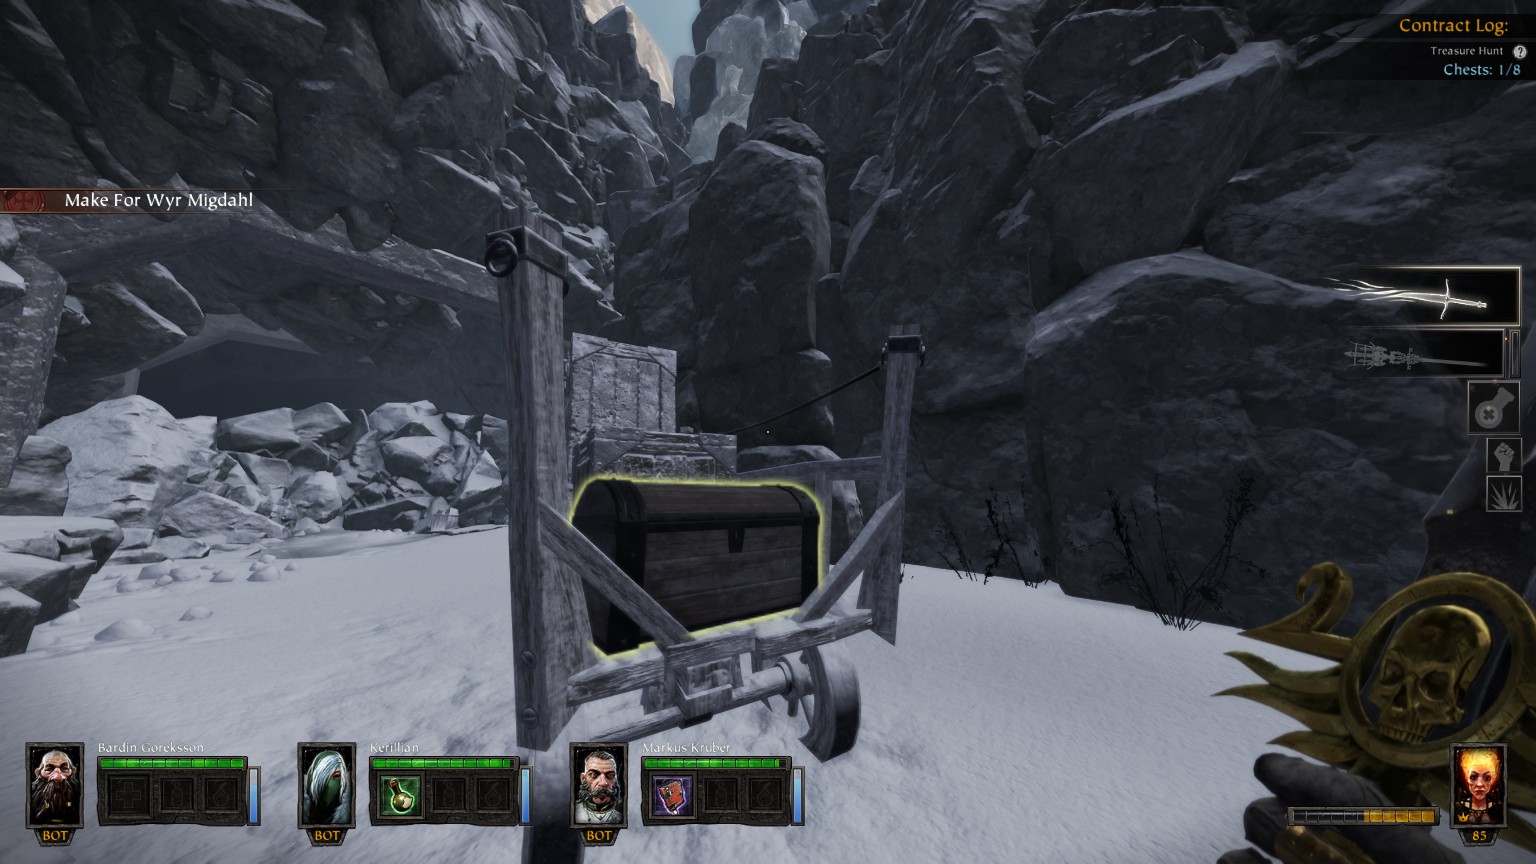
#3/8 (Wyr Migdahl) In the Tome #2 & قاتمة #1 منطقة
#4/8 (Ravines) Just before one-way point to the frozen lake
You may find a lore book page in the Wyraz Varn (the frozen lake) on the left shore
#5/8 (Mad Dog Mine – أقل) Before Tome #3
#6/8 (Railyard)

#7/8 (Mad Dog Mine – above) Just after Grim #2
#8/8 (Mad Dog Mine – above) Just before platform
Chain of Fire
You may also want to check out
De greed’smap available in the Vermintide Wiki on Fandom
#1/2 & 2/2 At the bridge event, near Tome #2
The Courier
You may also want to check out
De greed’smap available in the Vermintide Wiki on Fandom (some are missing)
After pulling the lever, there is a secret passage that allow to pick up the Grim and go back to the Carrion Canyon from the Signal Tower.
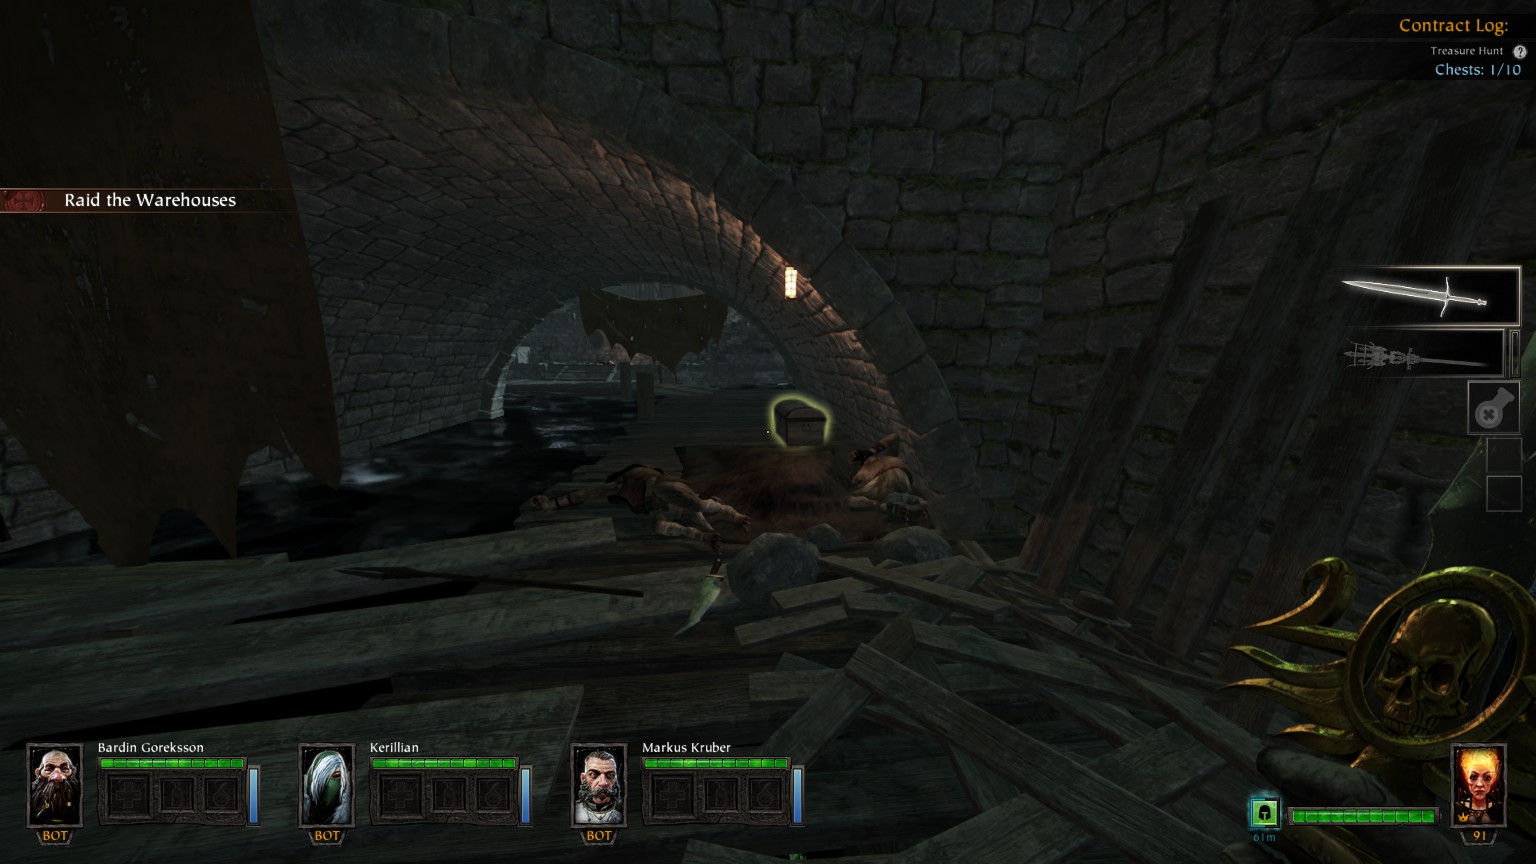
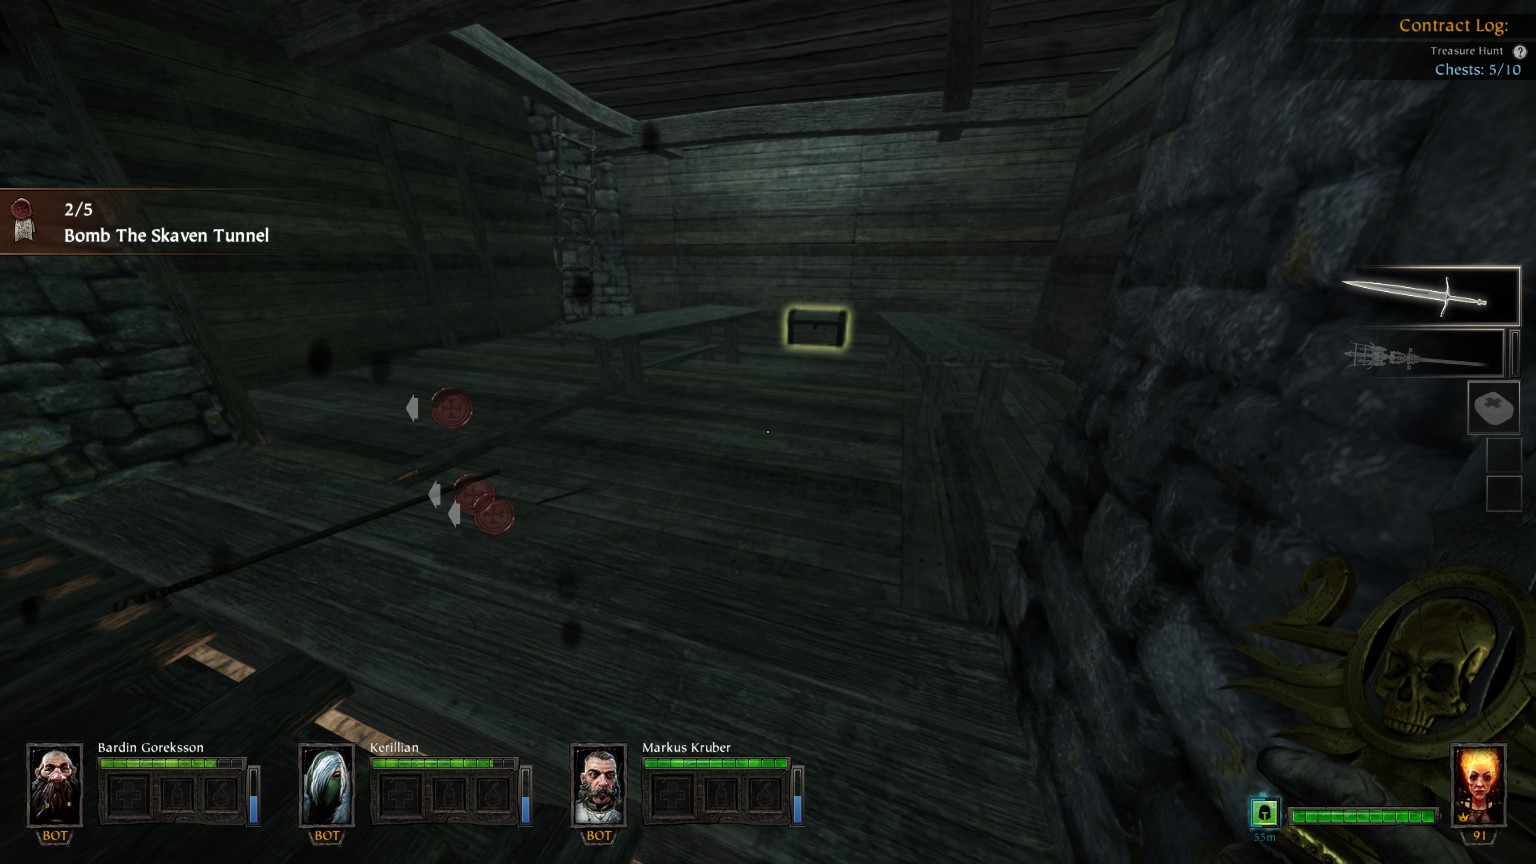
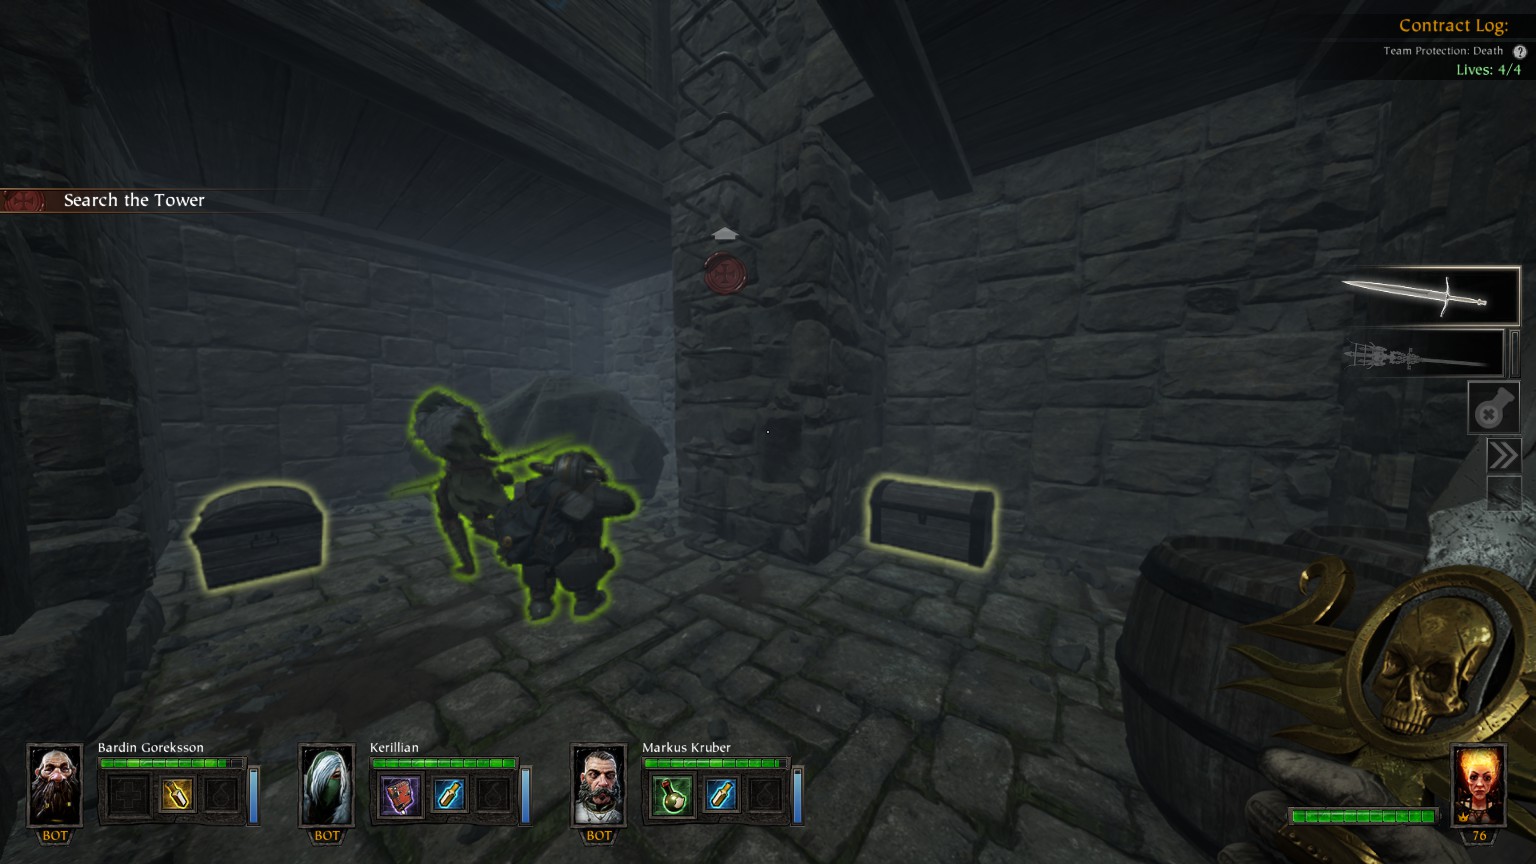
#1/10 (Signal Tower) Near the trapdoor that leads to chests #2 & #3
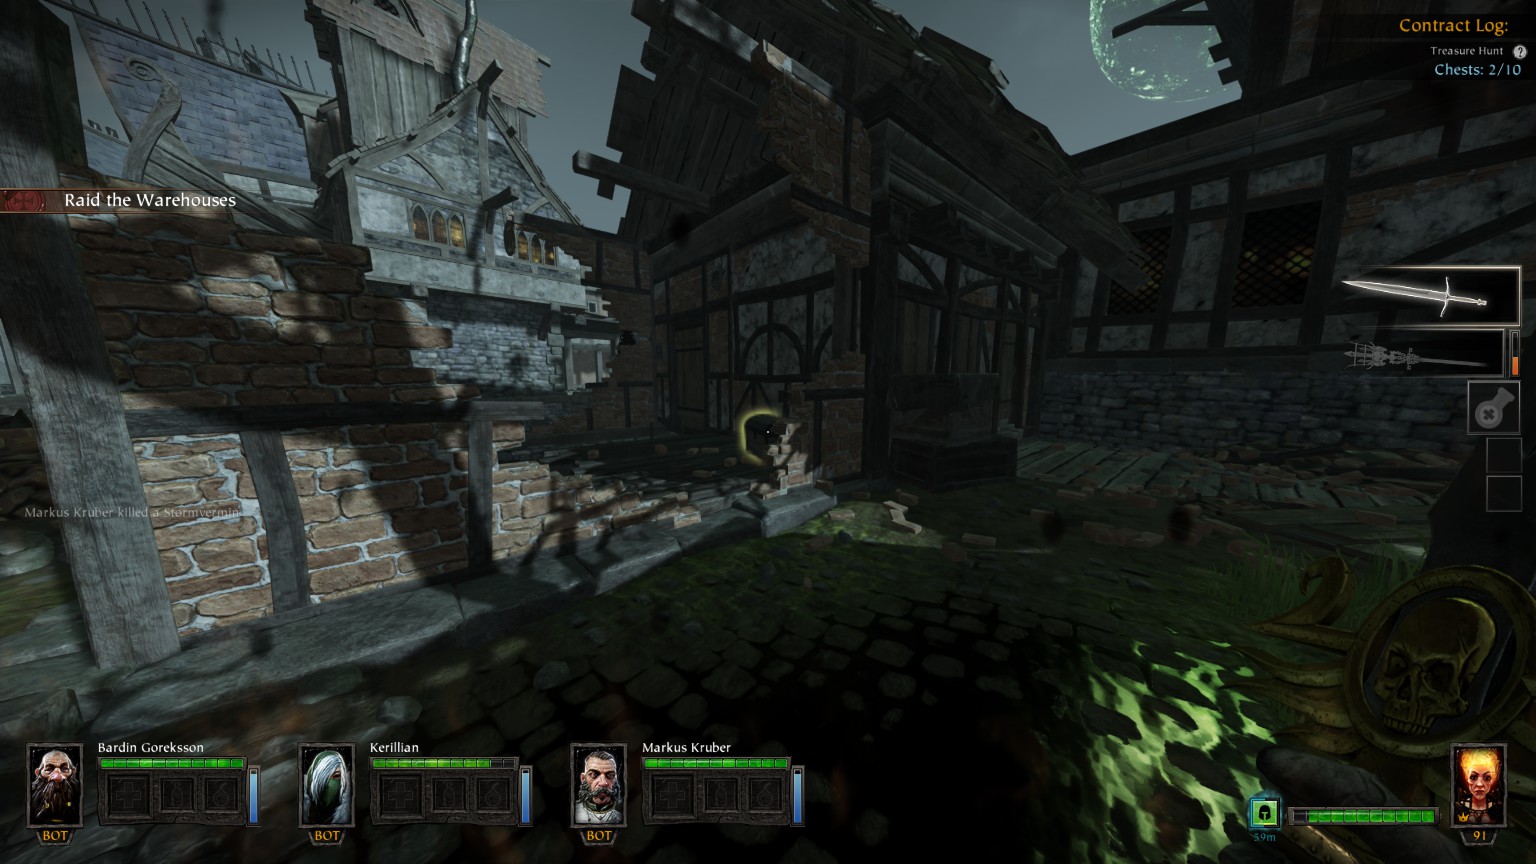
#2/10 & 3/10 (Signal Tower) Under the trapdoor
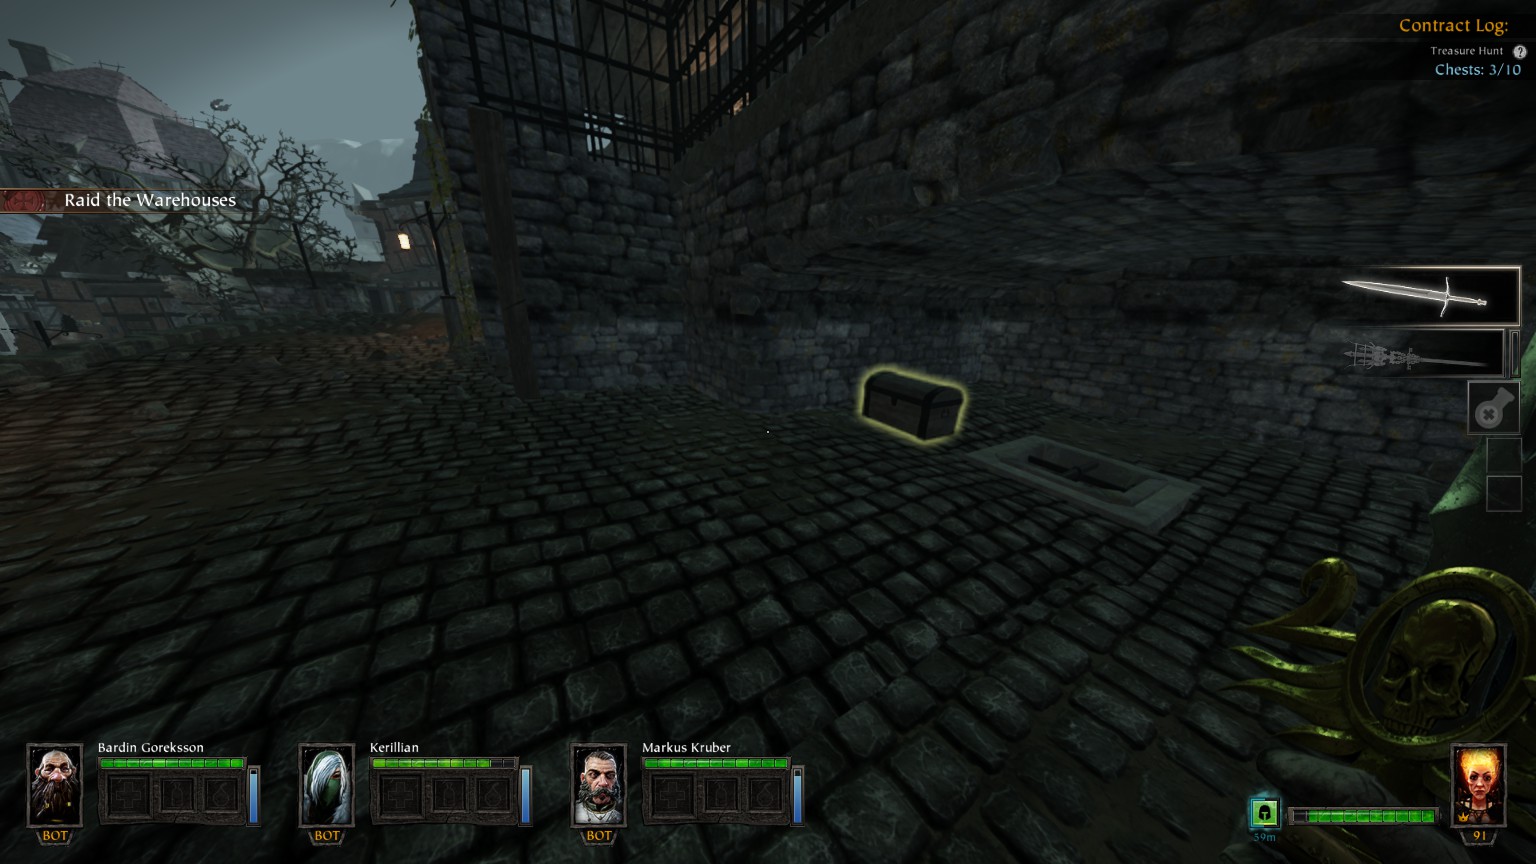
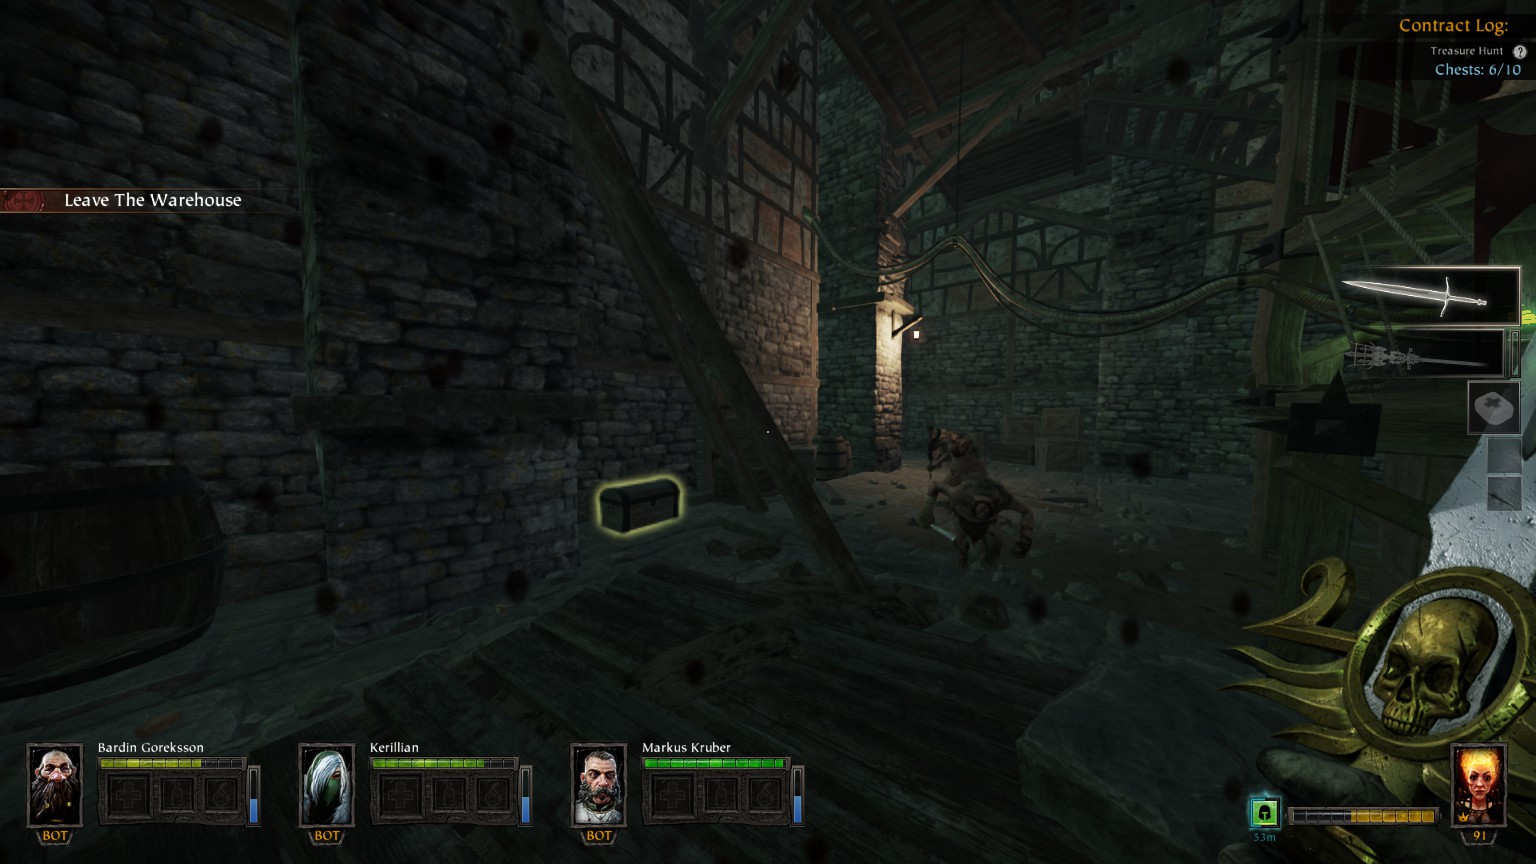
#4/10 (Signal Tower)
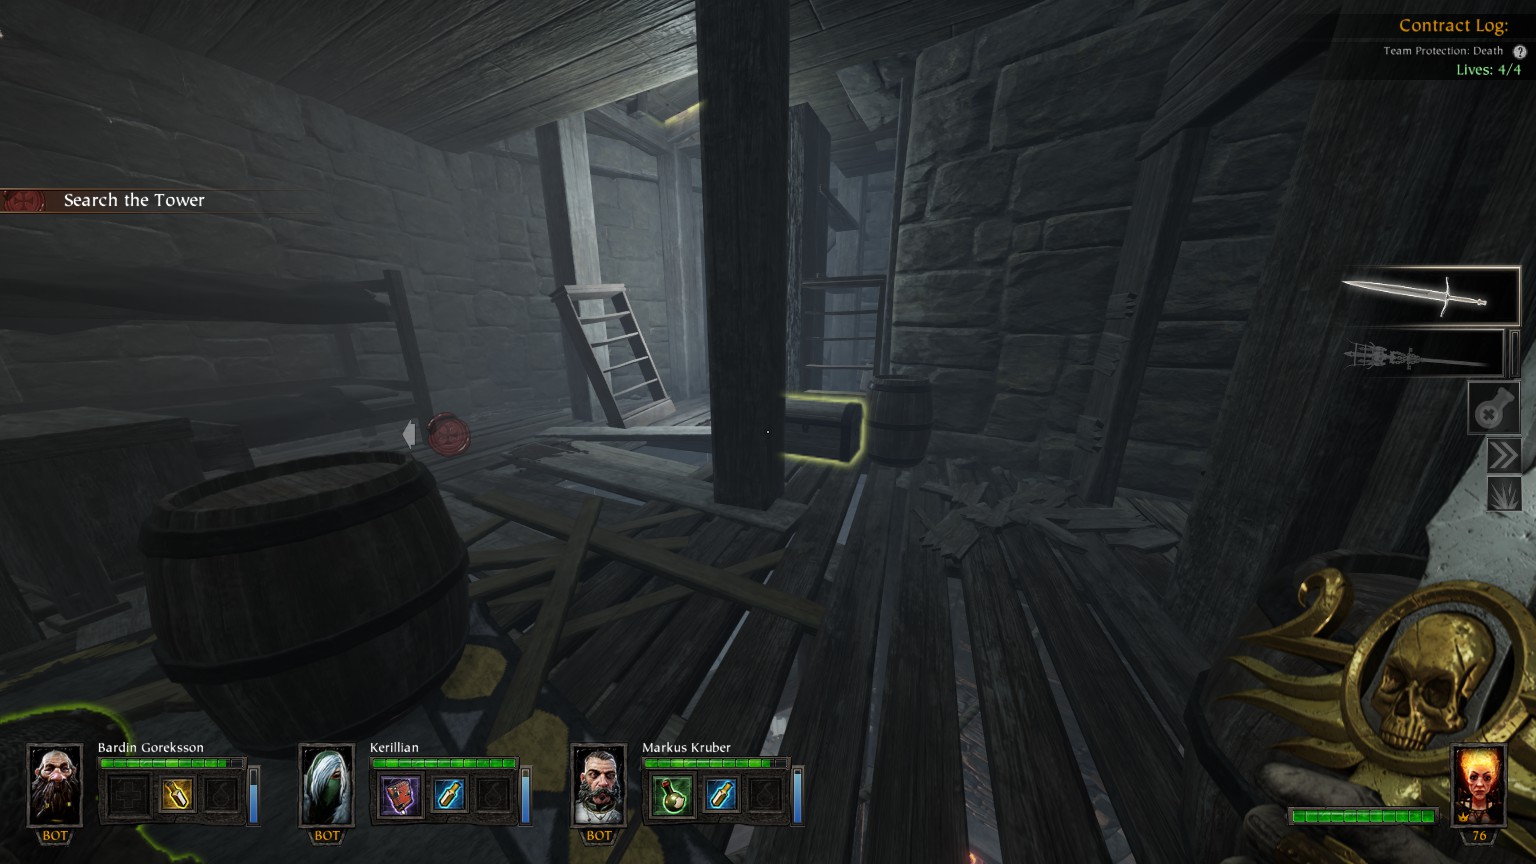
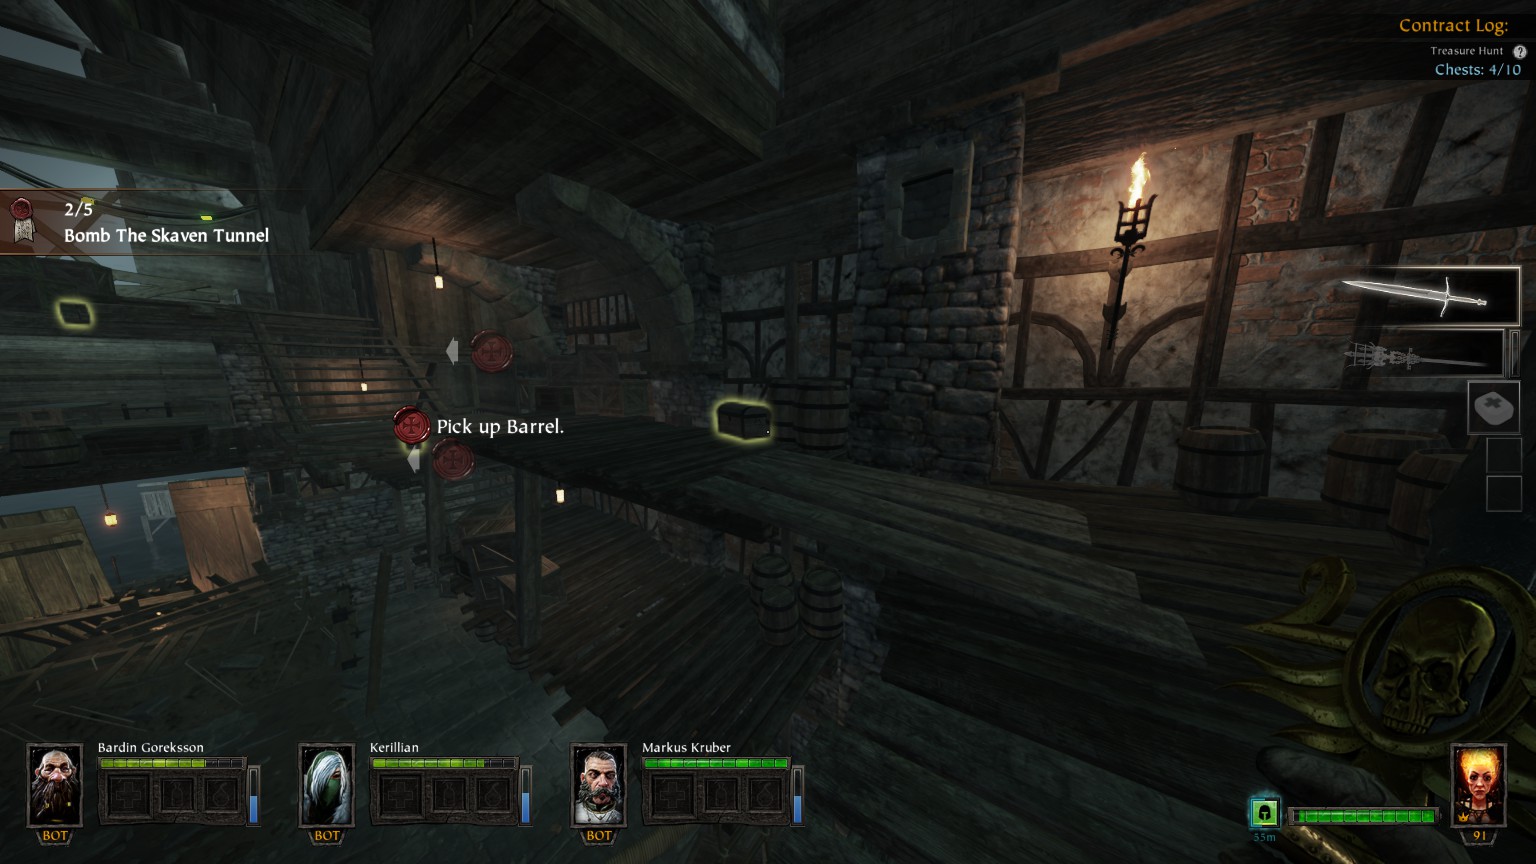
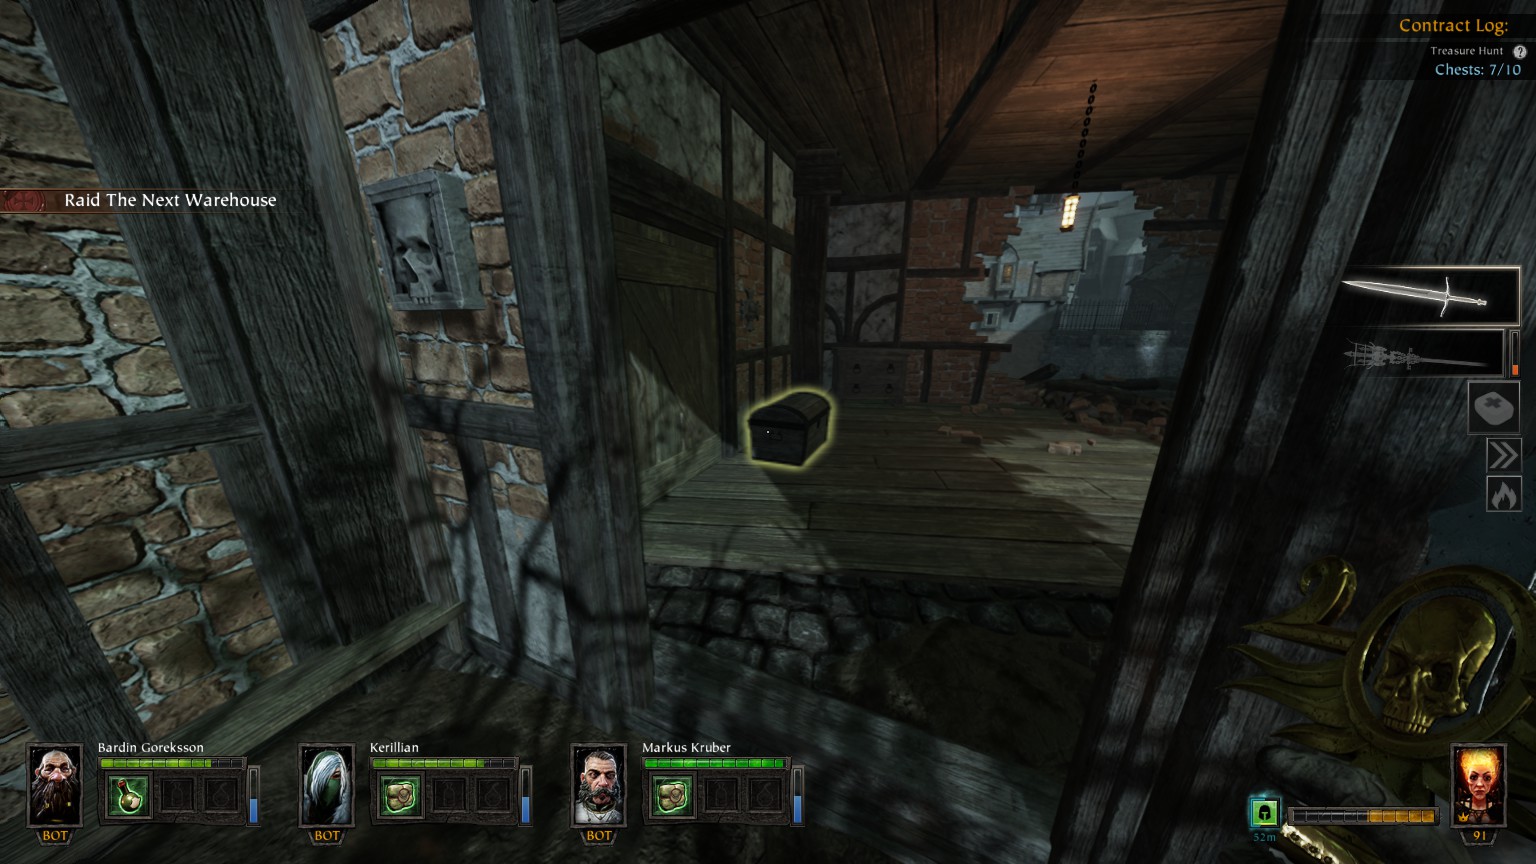
#5/10 (Signal Tower)
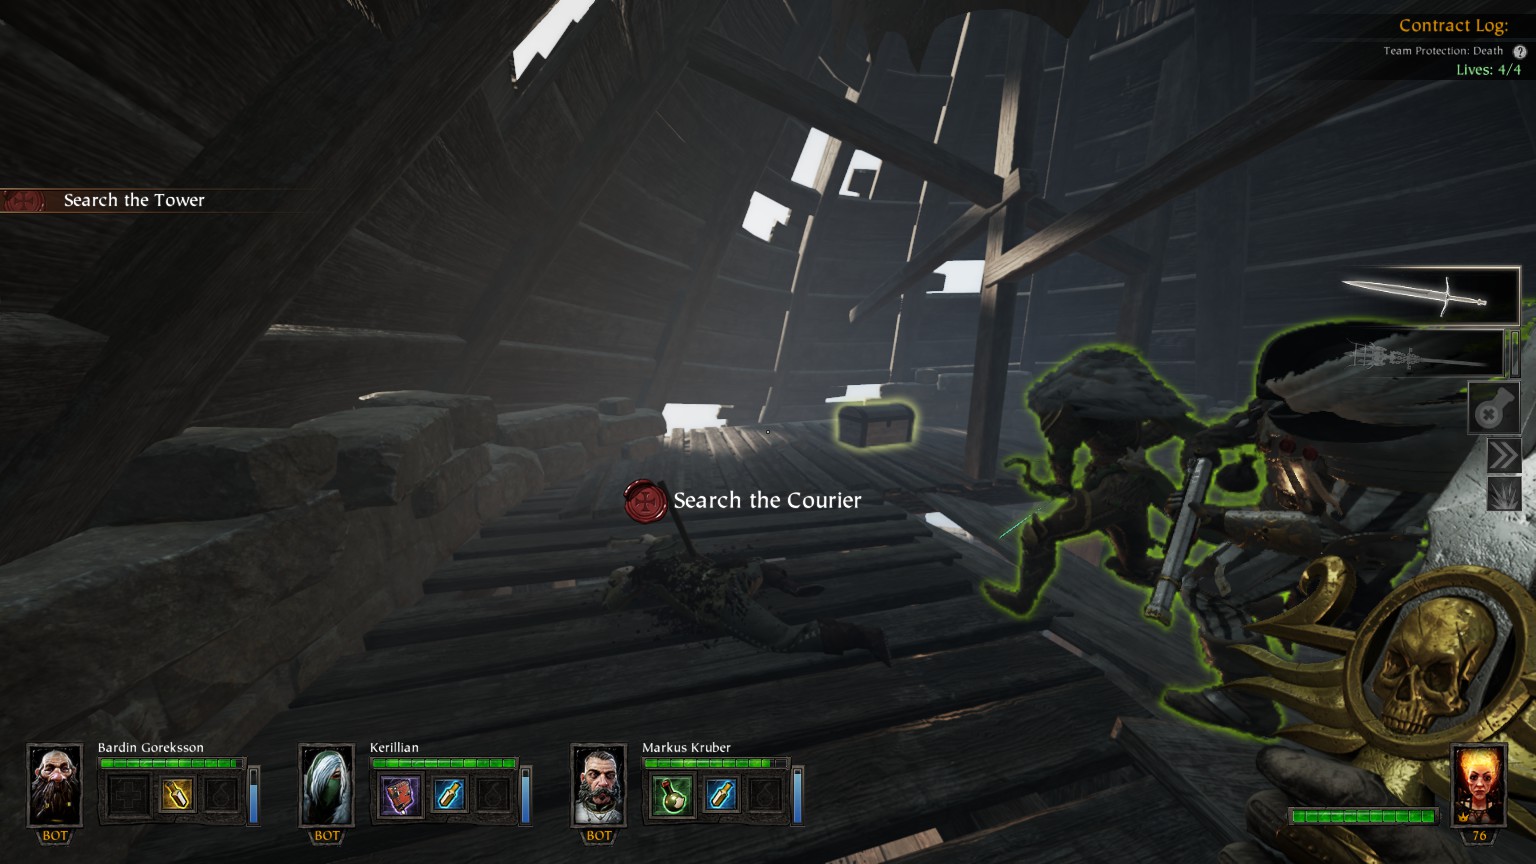
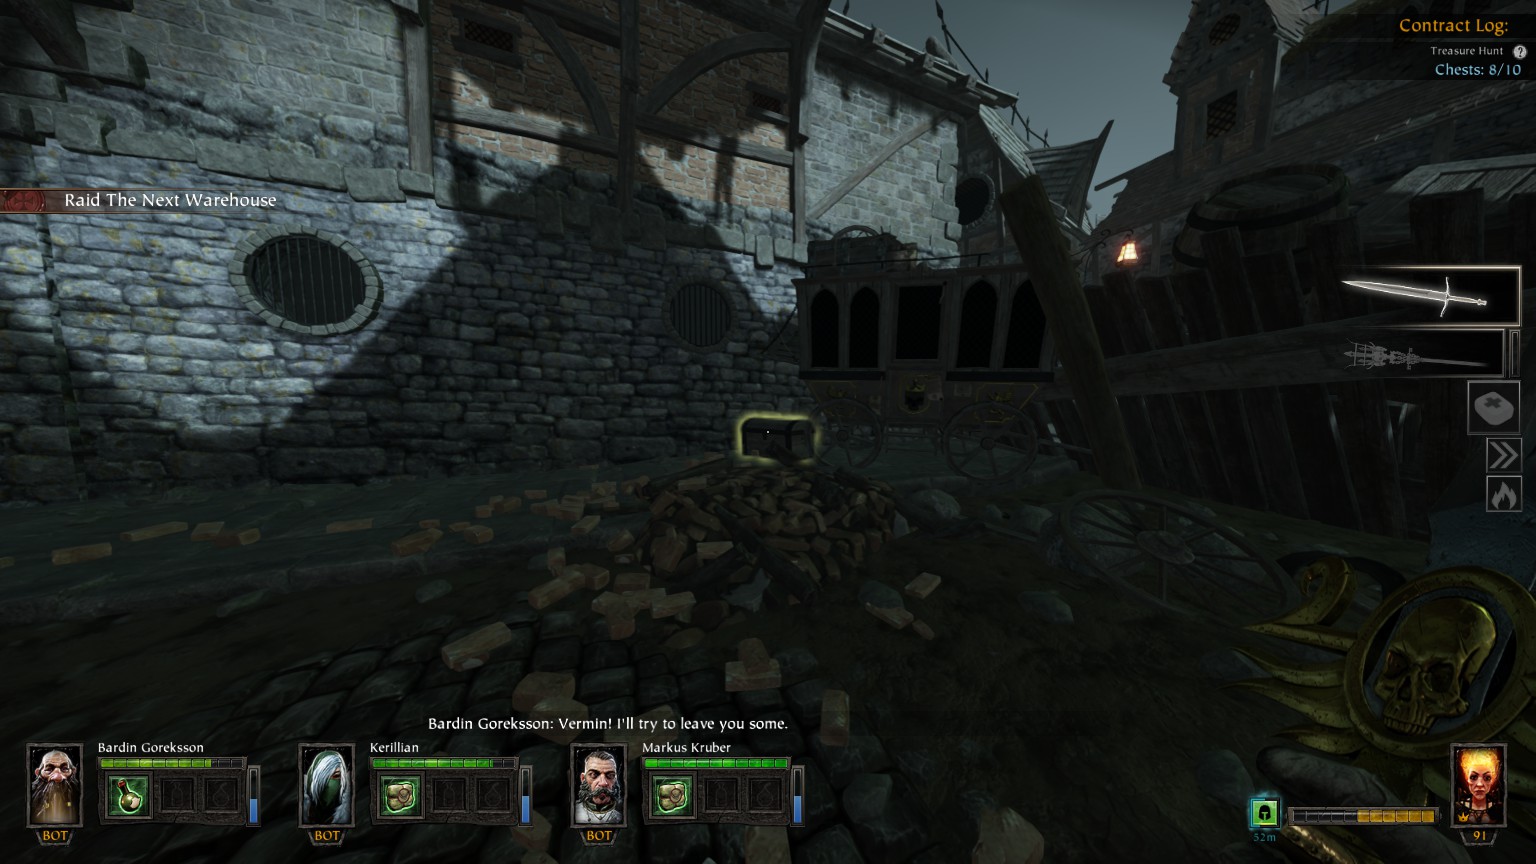
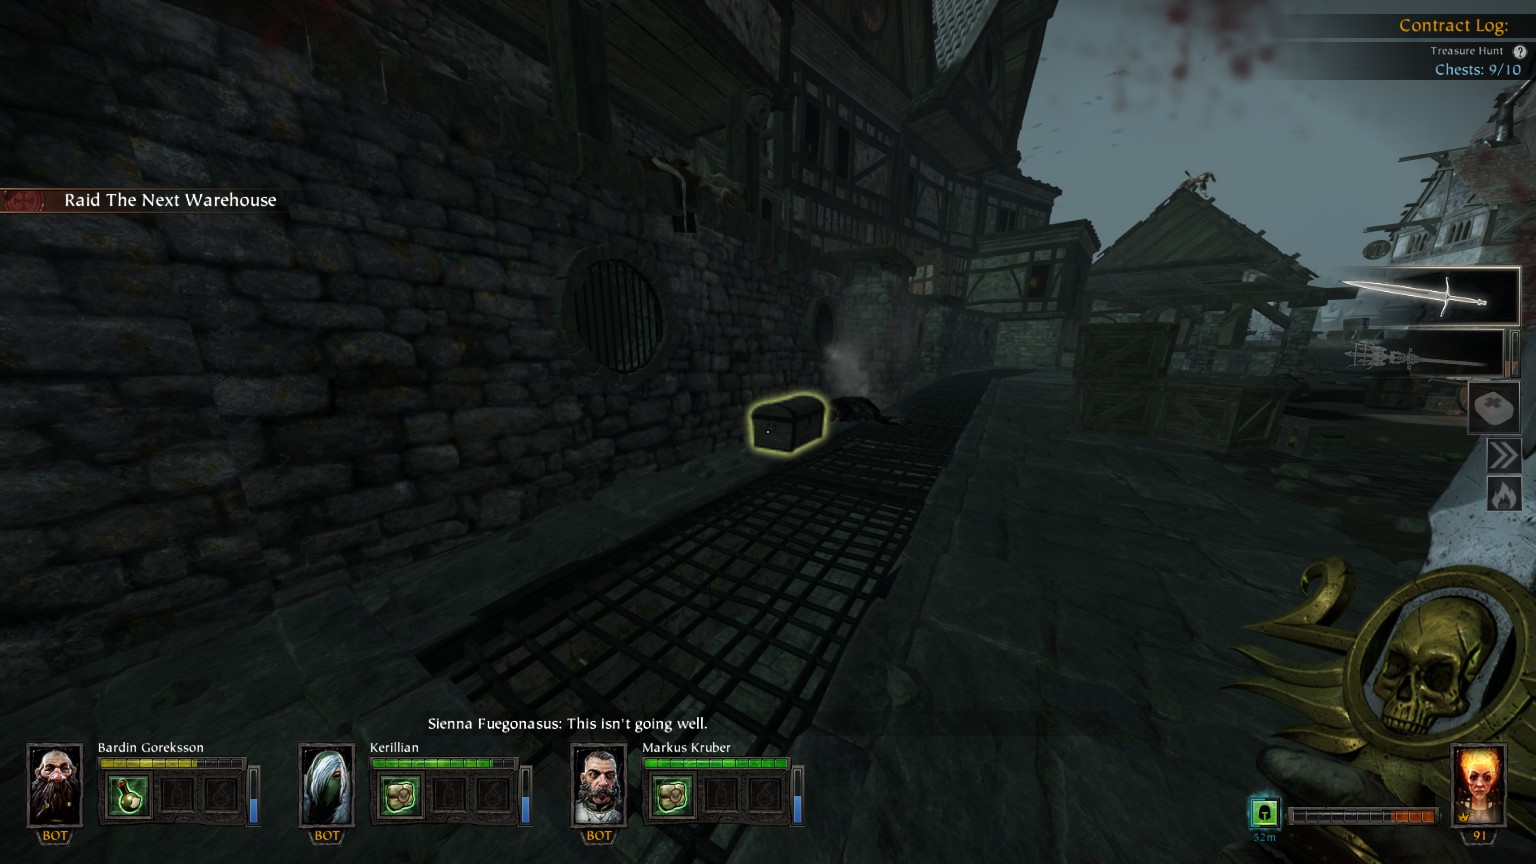
#6/10 (Signal Tower) Last chest before the point of no return
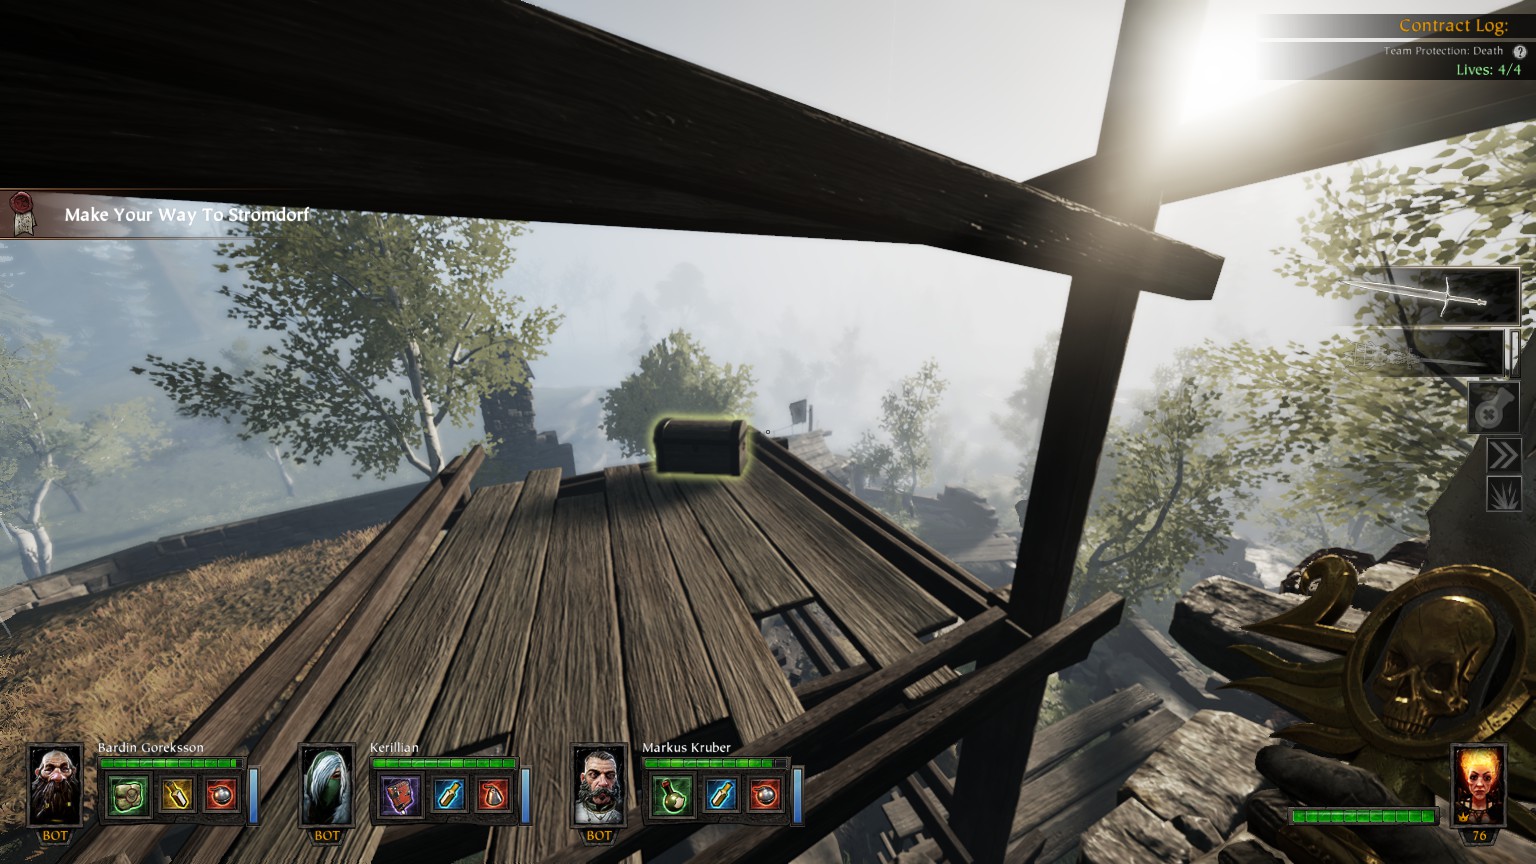
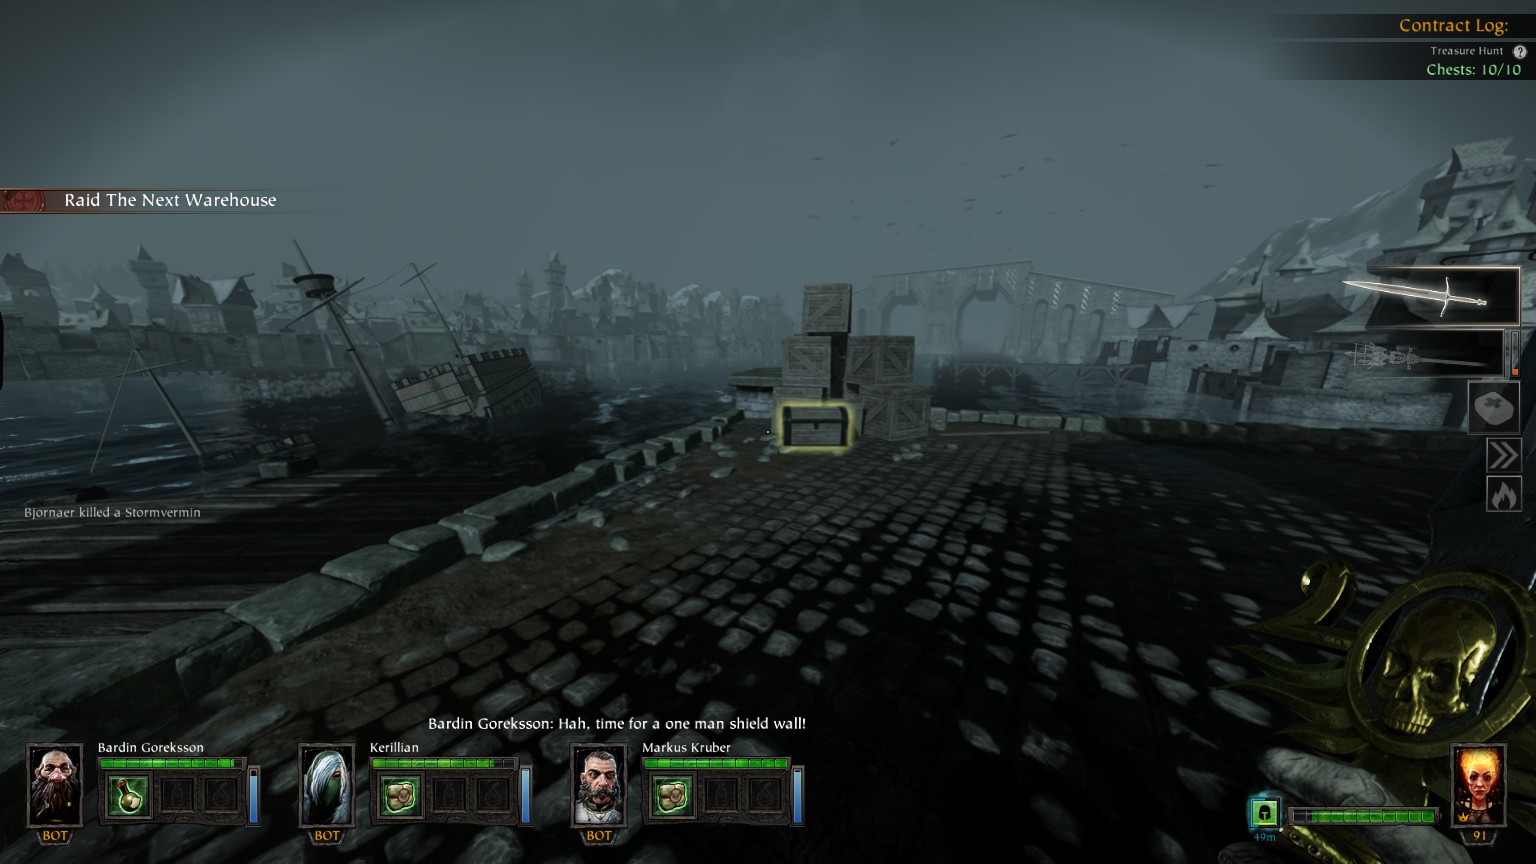
#7/10 (Signal Tower)
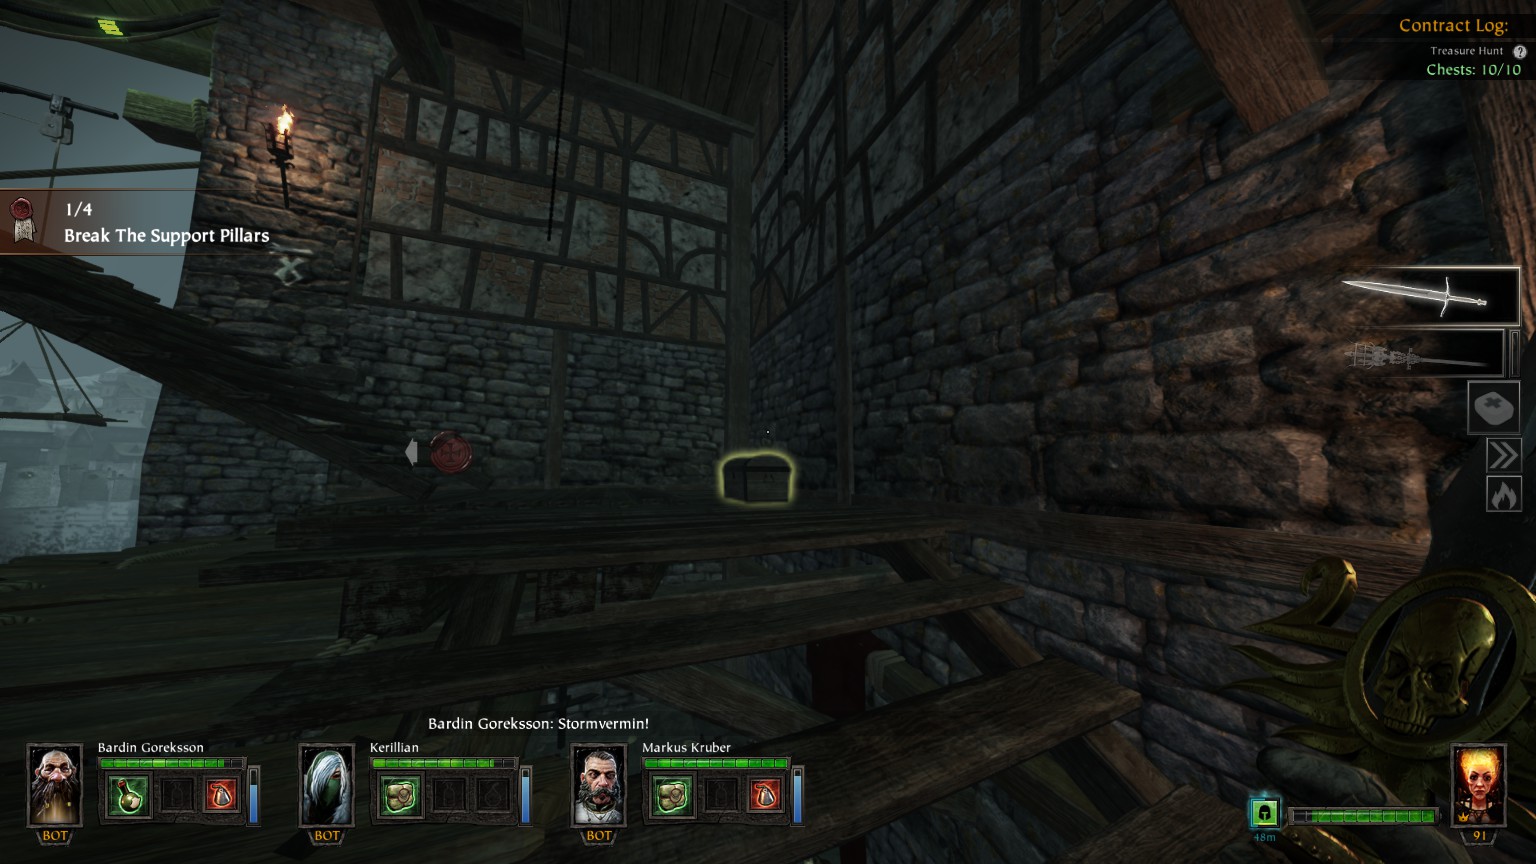
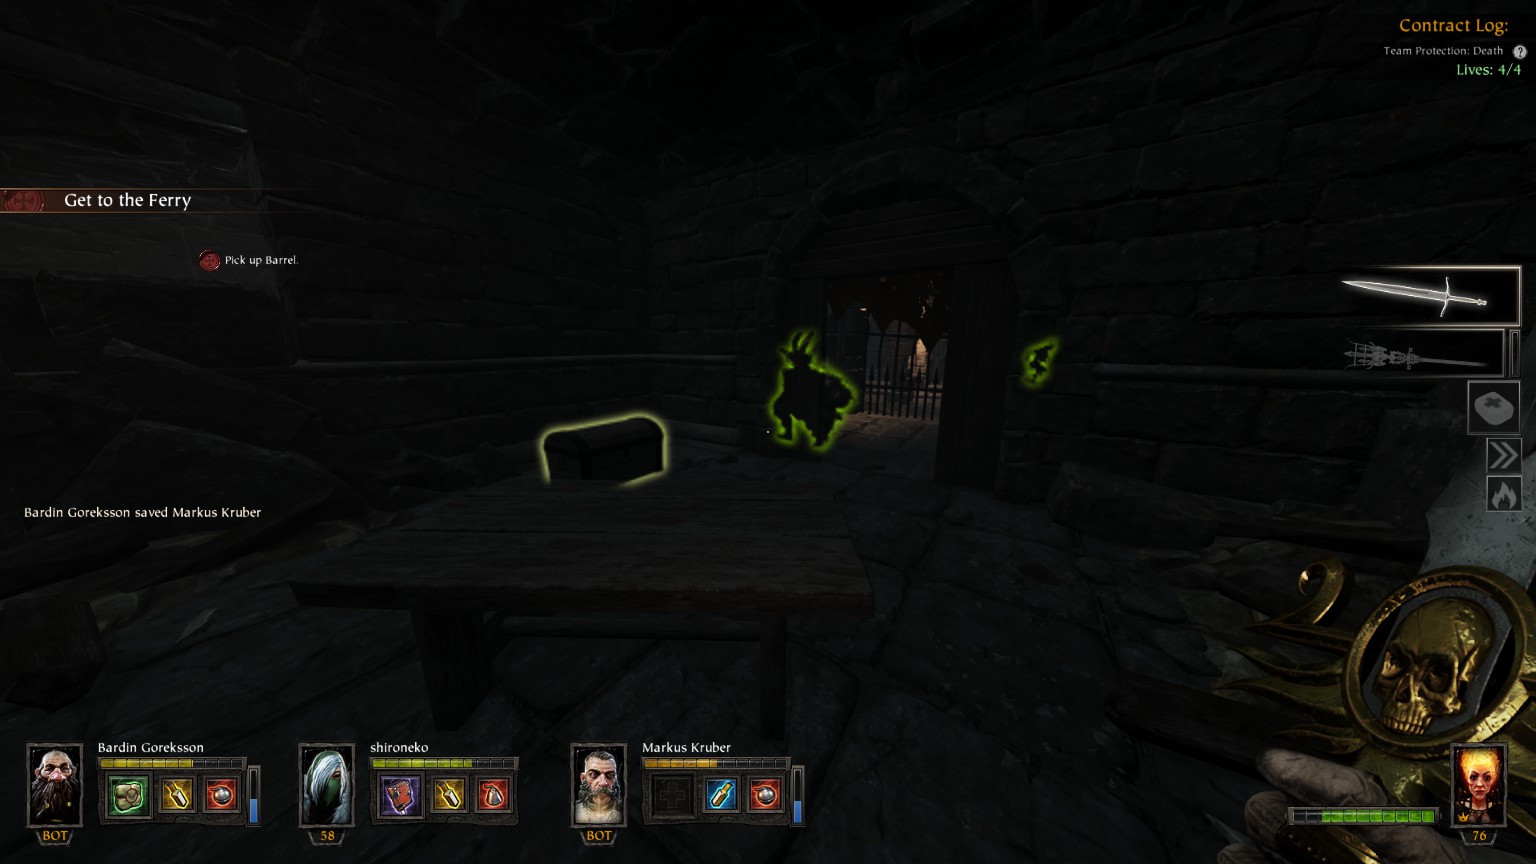
#8/10 (Garden of Morr)
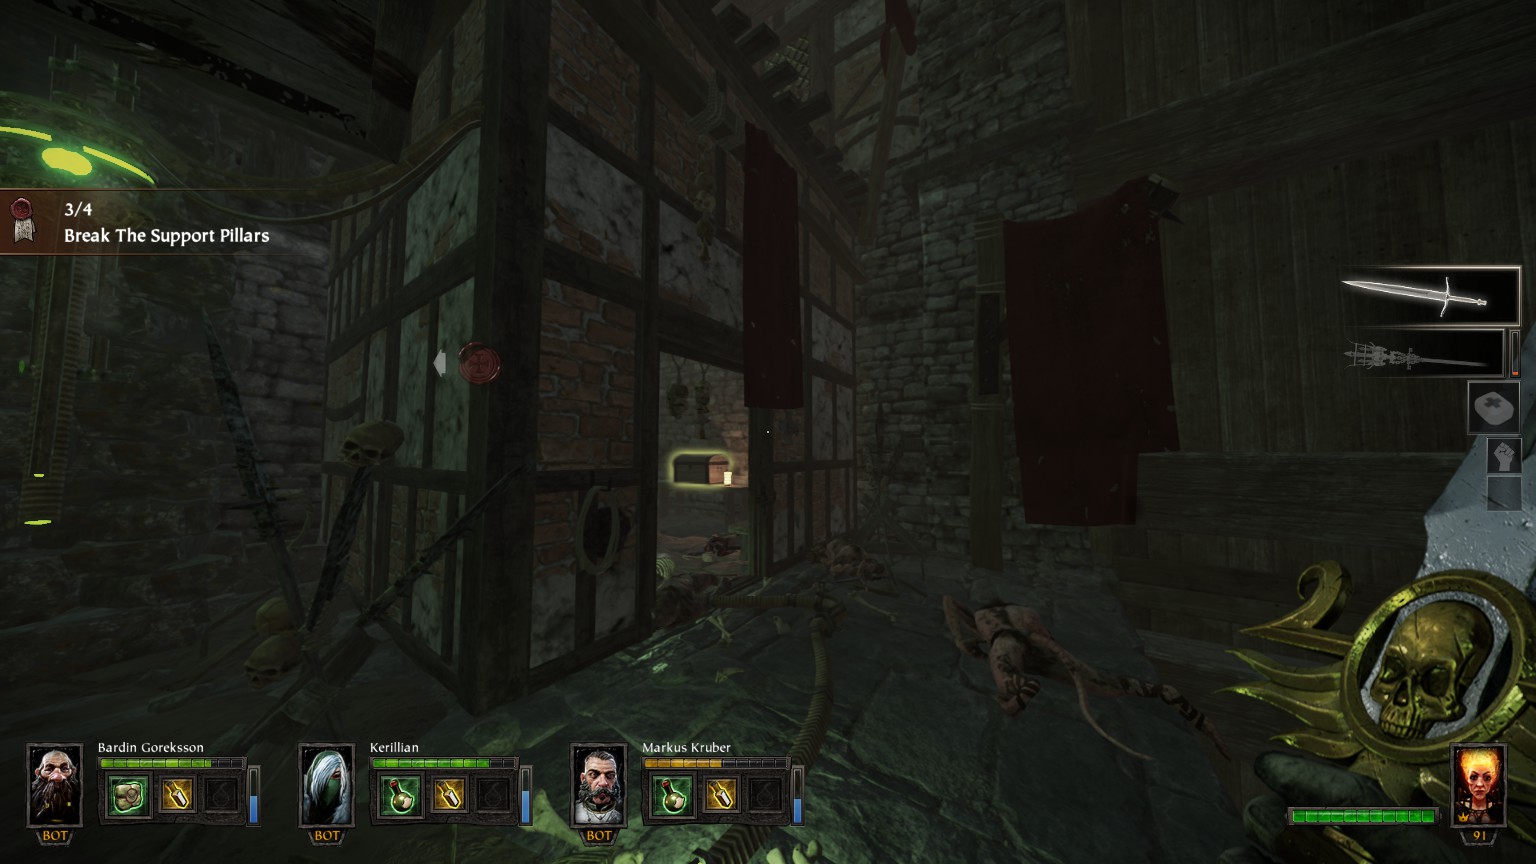
#9/10 (Embalming Chamber)
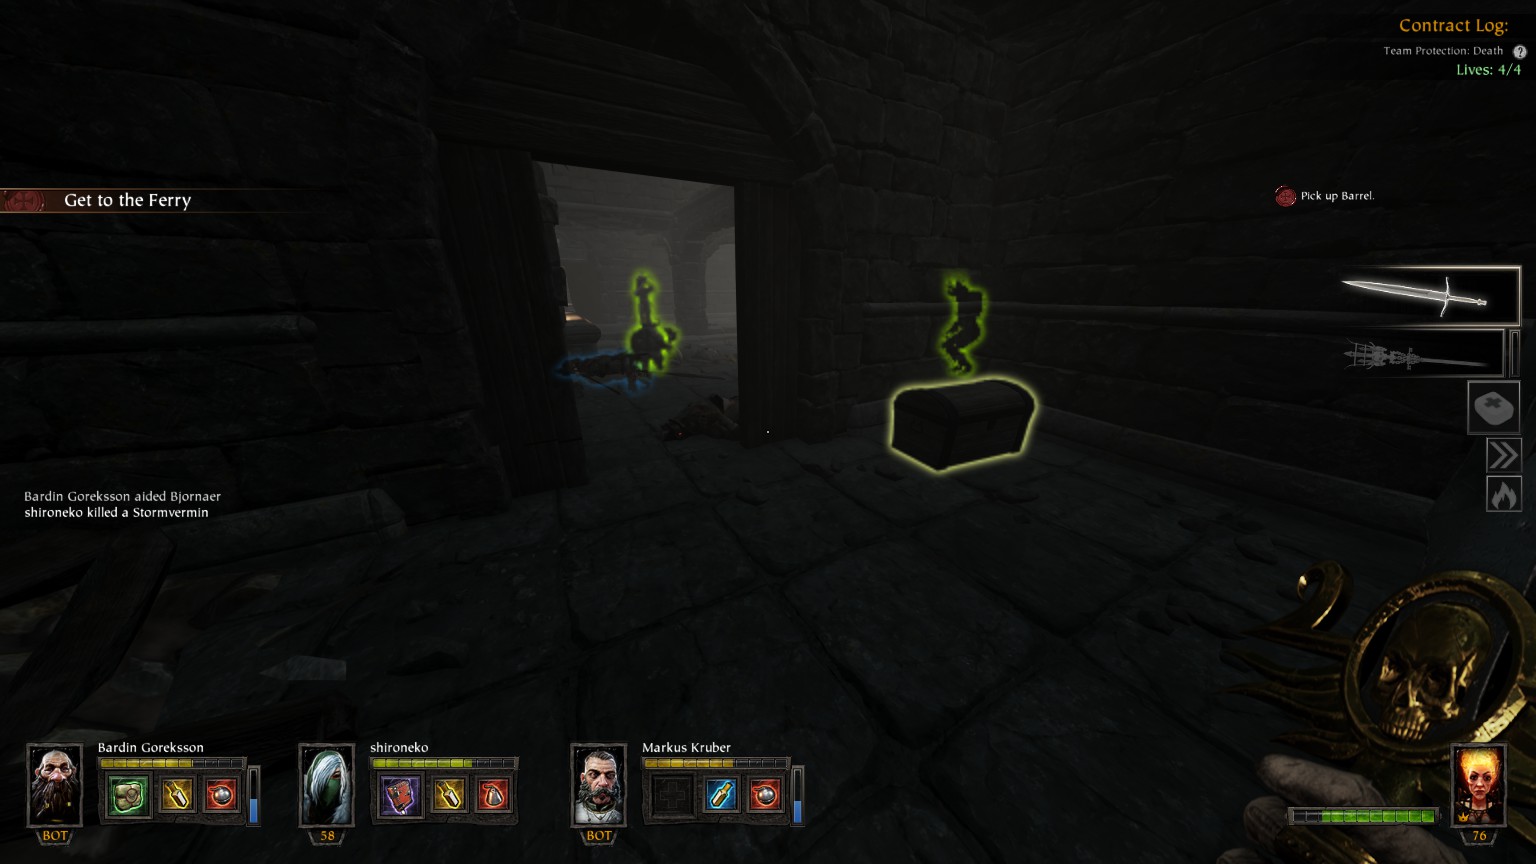
#10/10 (Embalming Chamber)
Reaching Out
You may also want to check out
De greed’smap available in the Vermintide Wiki on Fandom
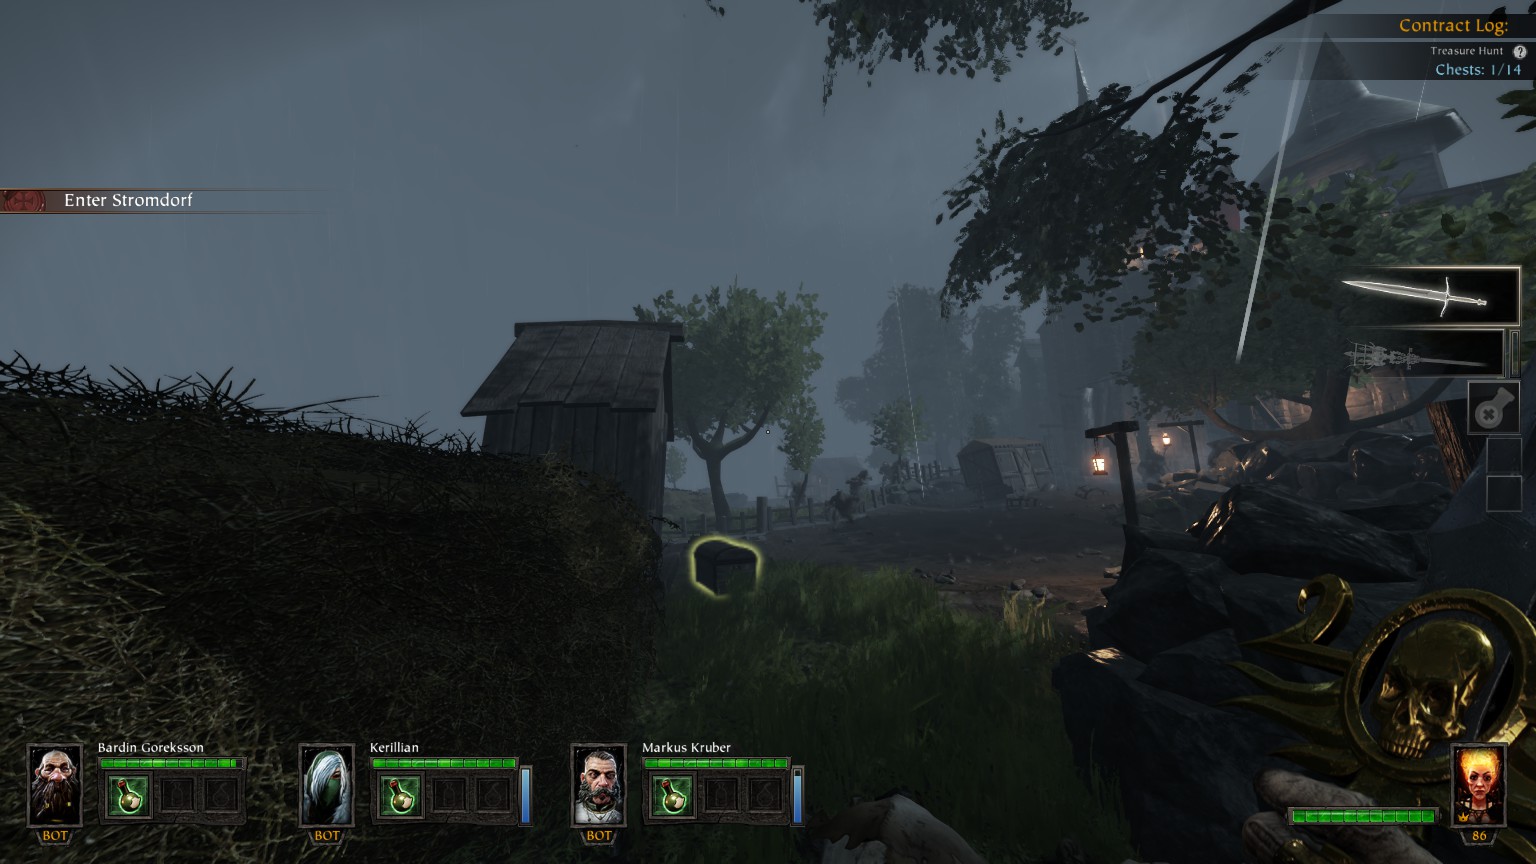
#1/17 (The Coffin Road)
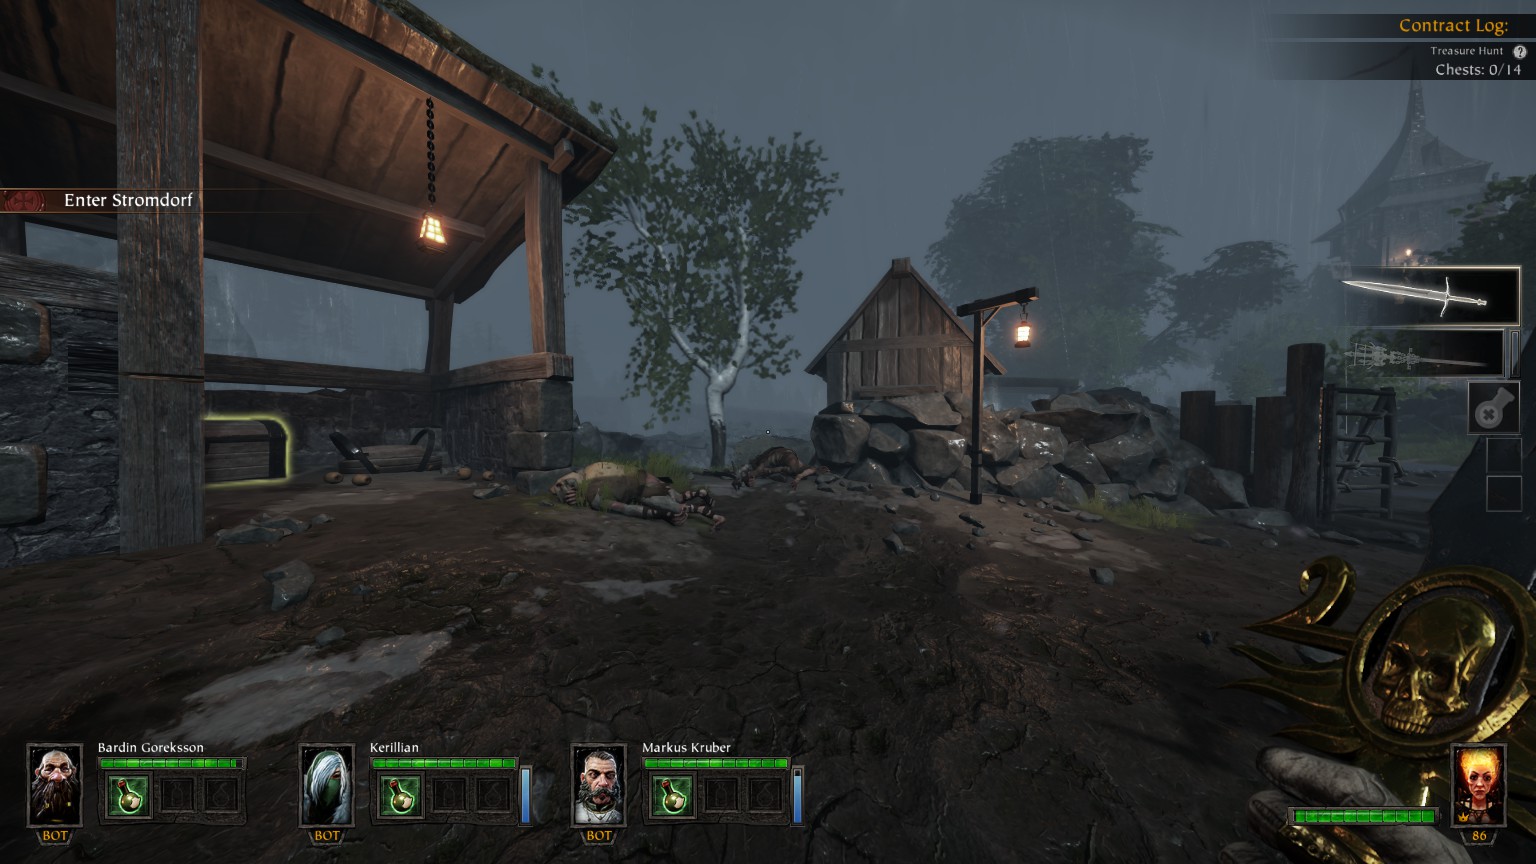
#2/17 (The Coffin Road)
#3/17 (Schumtzigstrasse) Just after the Grim, على اليسار
#4/17 (Schumtzigstrasse) Near the house containing Tome #1
#5/17 (Schumtzigstrasse) Behind the ladder to reach Tome #1

#6/17 (Schumtzigstrasse) In the room with Tome #1

#7/17 (Schumtzigstrasse) In the room just bellow Tome #1’s room
#8/17 (unnamed area between Schumtzigstrasse and Market Square)
#9/17 (Market Square) Ground level on the left side of the market place before the shrine of Shallya (the small well with medical loot)
#10/17 (Market Square) Just after the shrine of Shallya
#11/17 (Market Square) To the right, after market place
#12/17 (Marschstrasse) In the hourse, just before the one-way point
#13/17 (Back-alleys) على الجانب الأيسر, after the one-way point
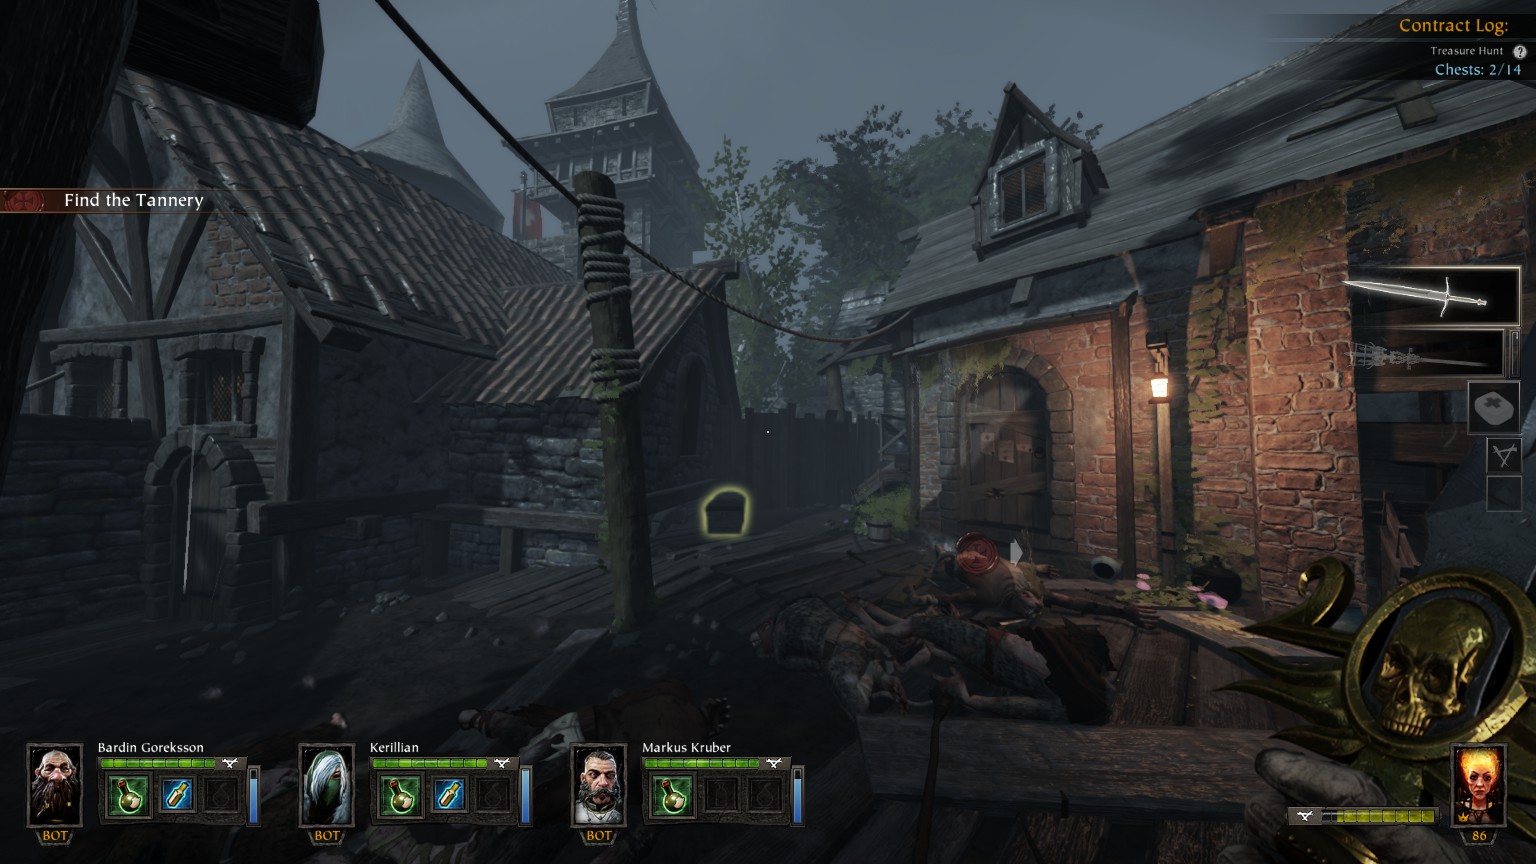
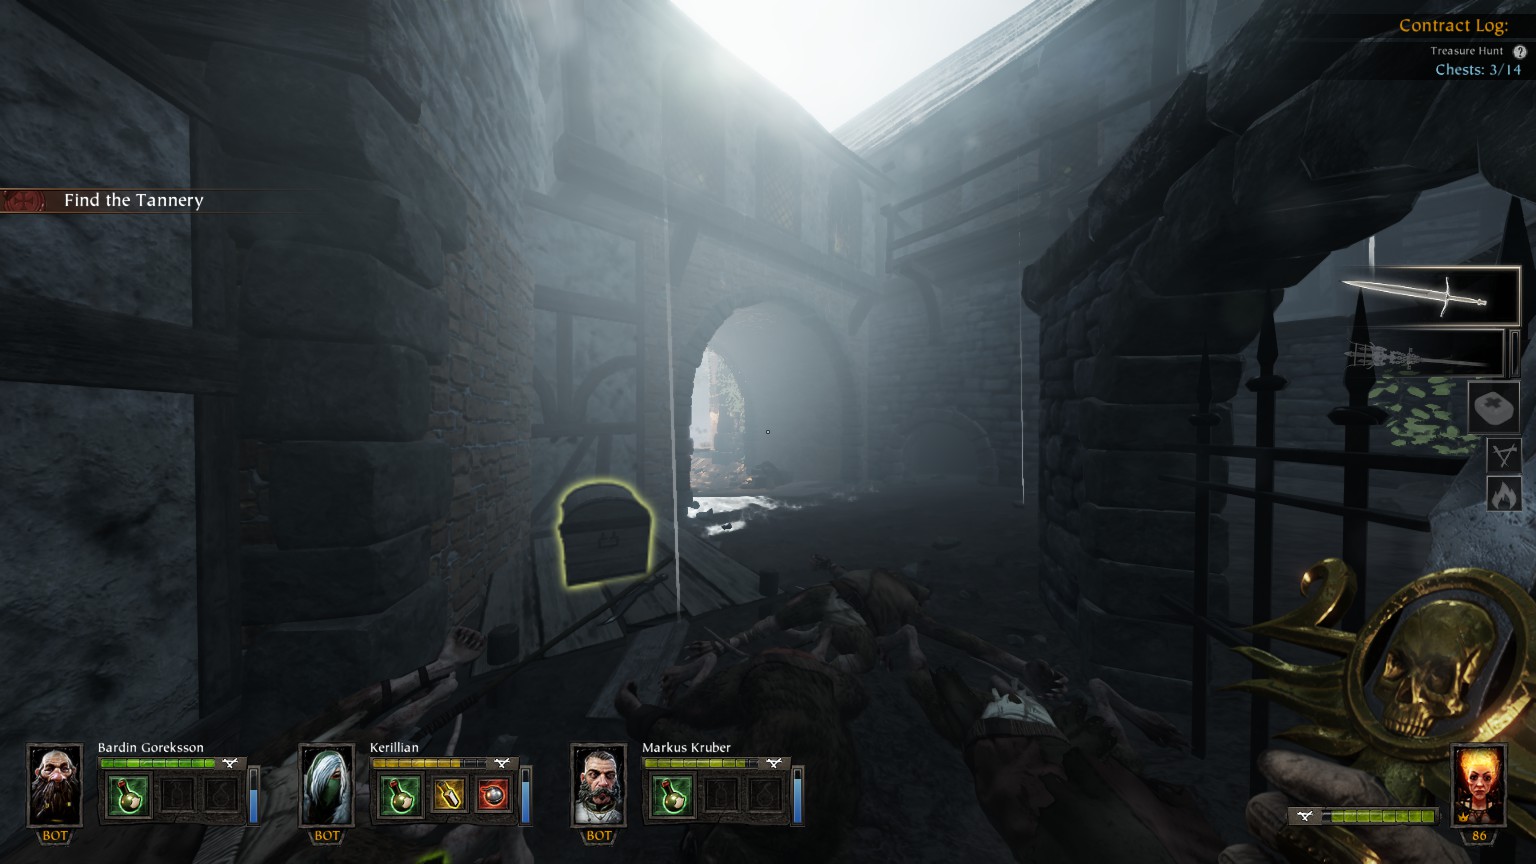
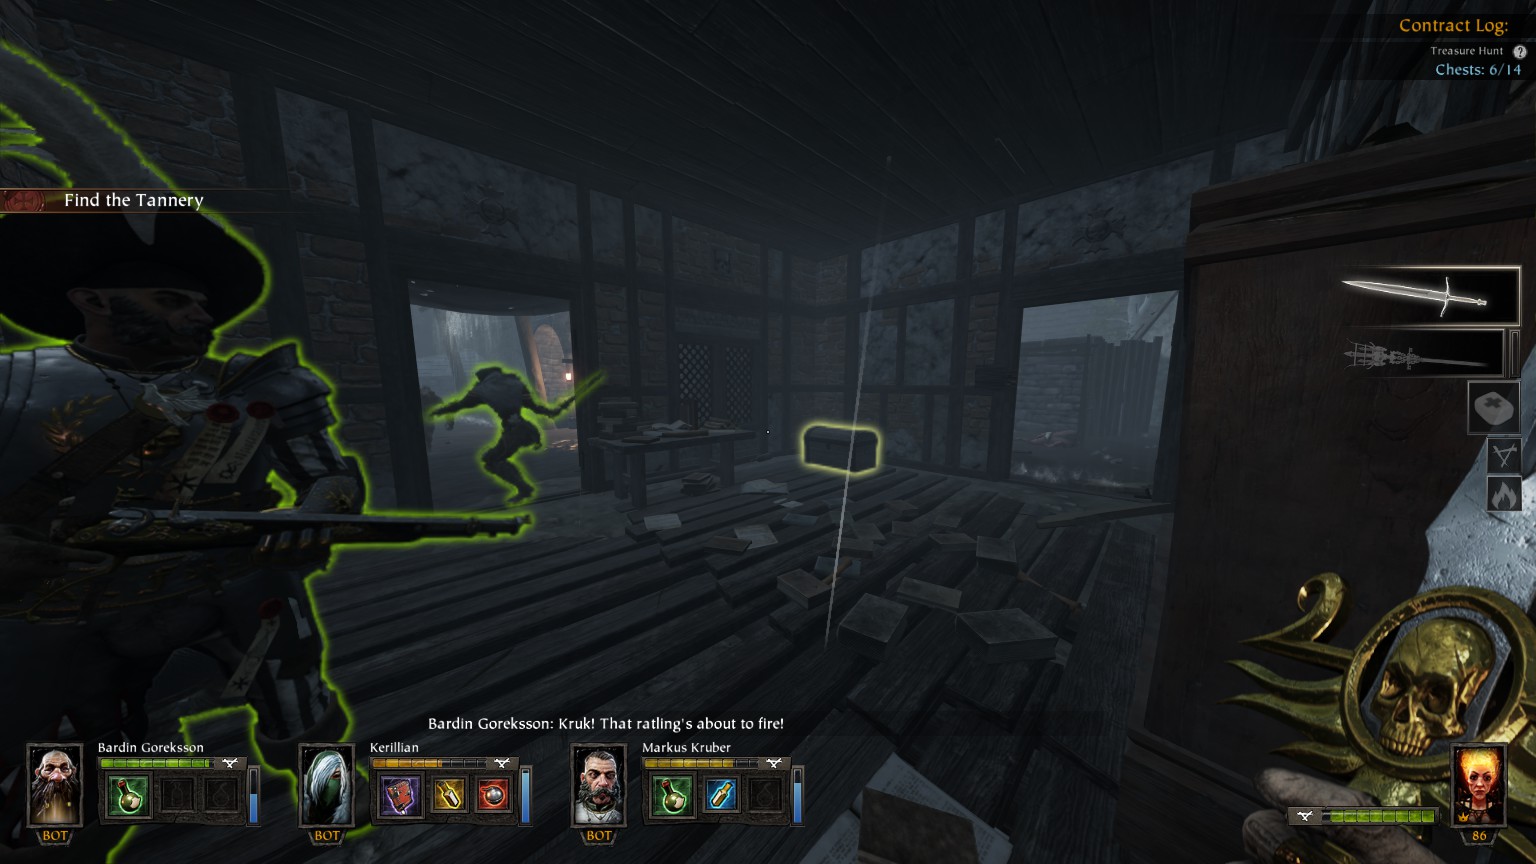
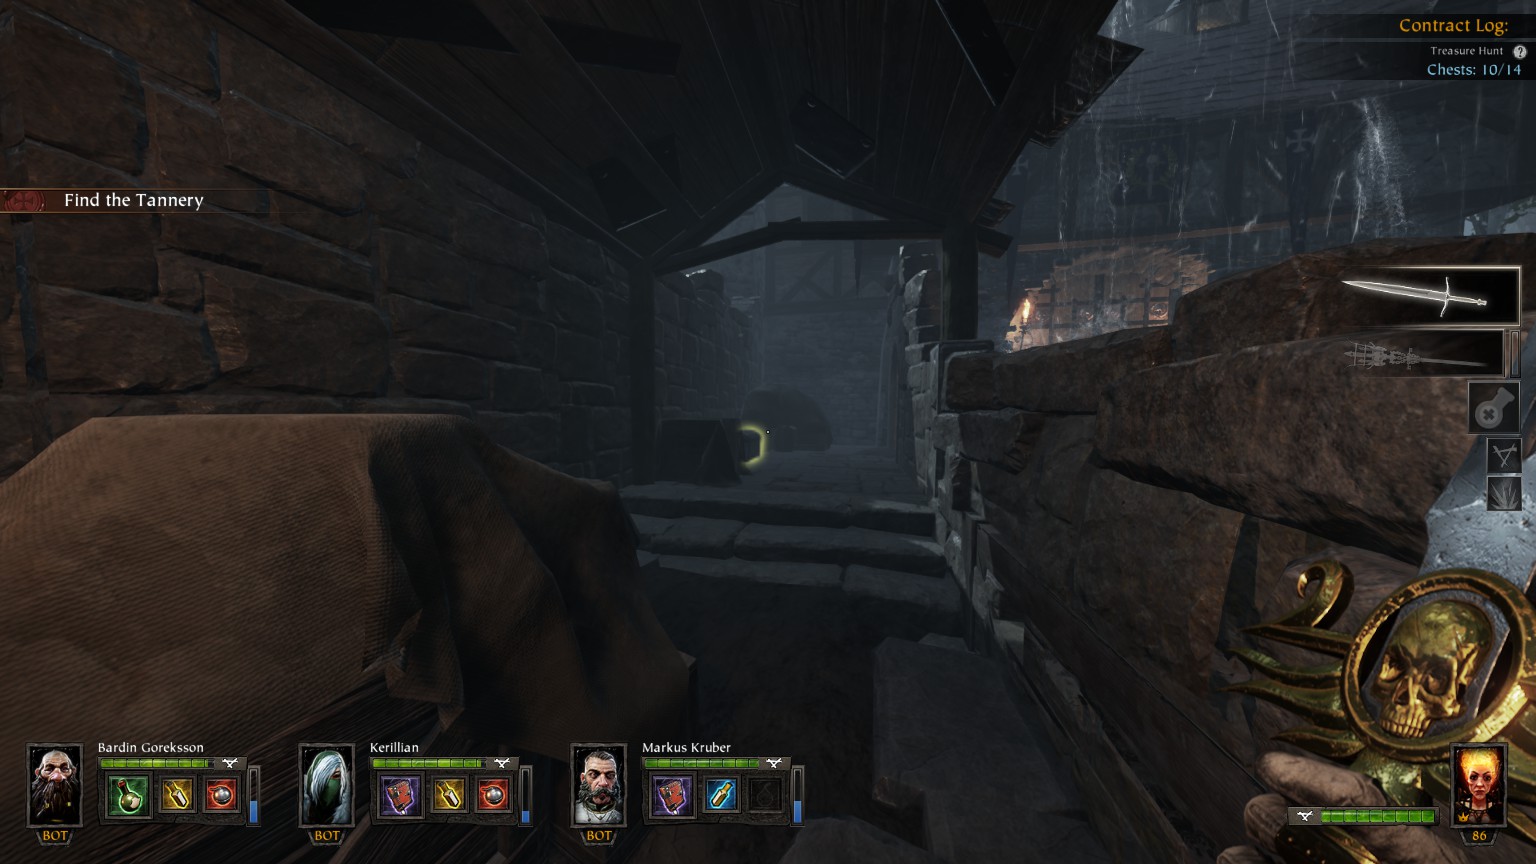
#14/17 (Gerber Tannery) On the right side, after the one-way point after Tome #3
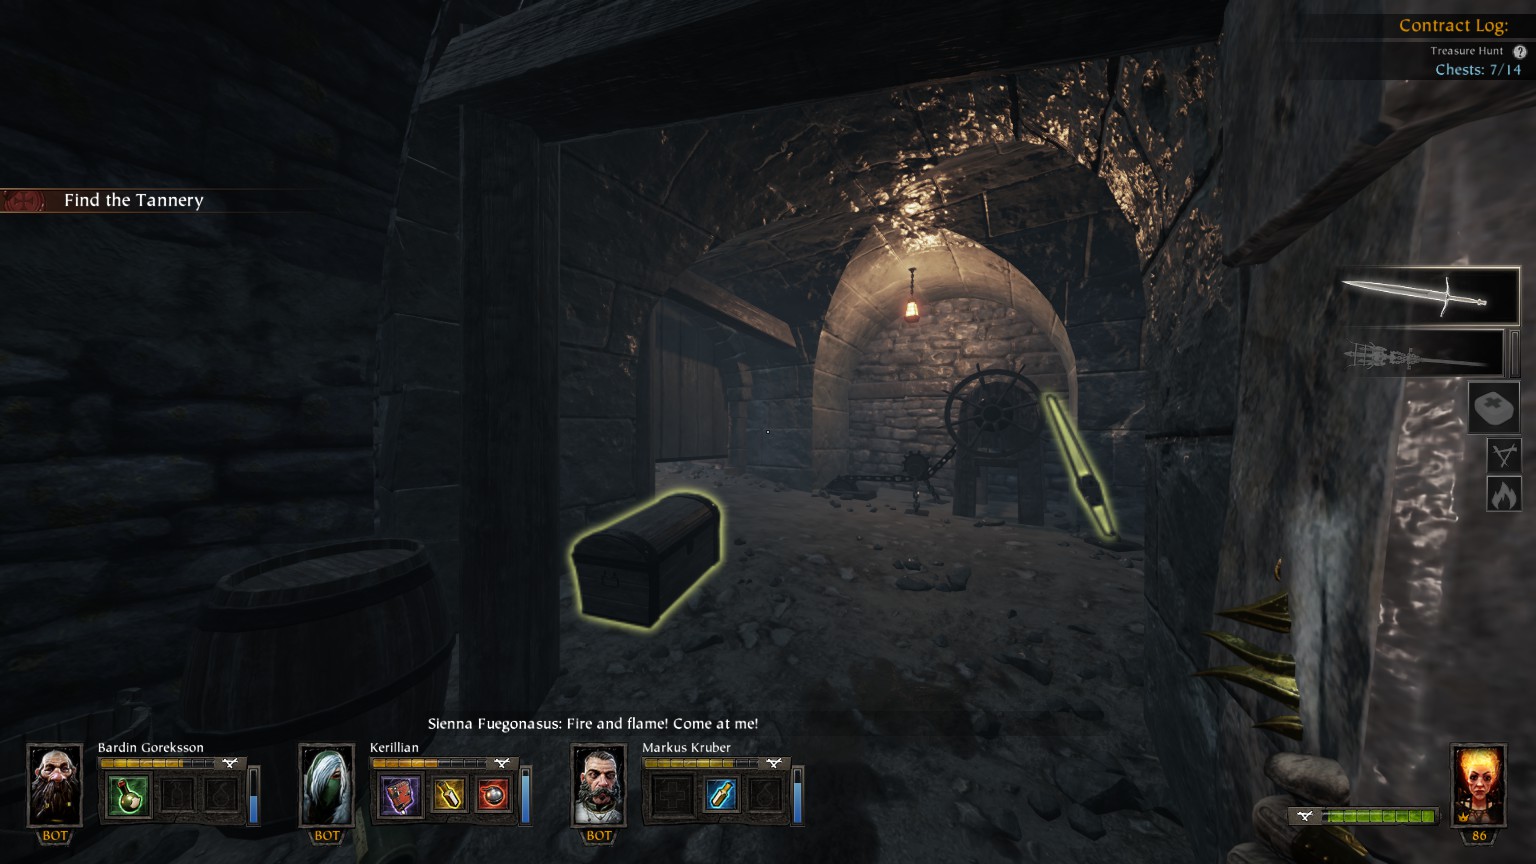
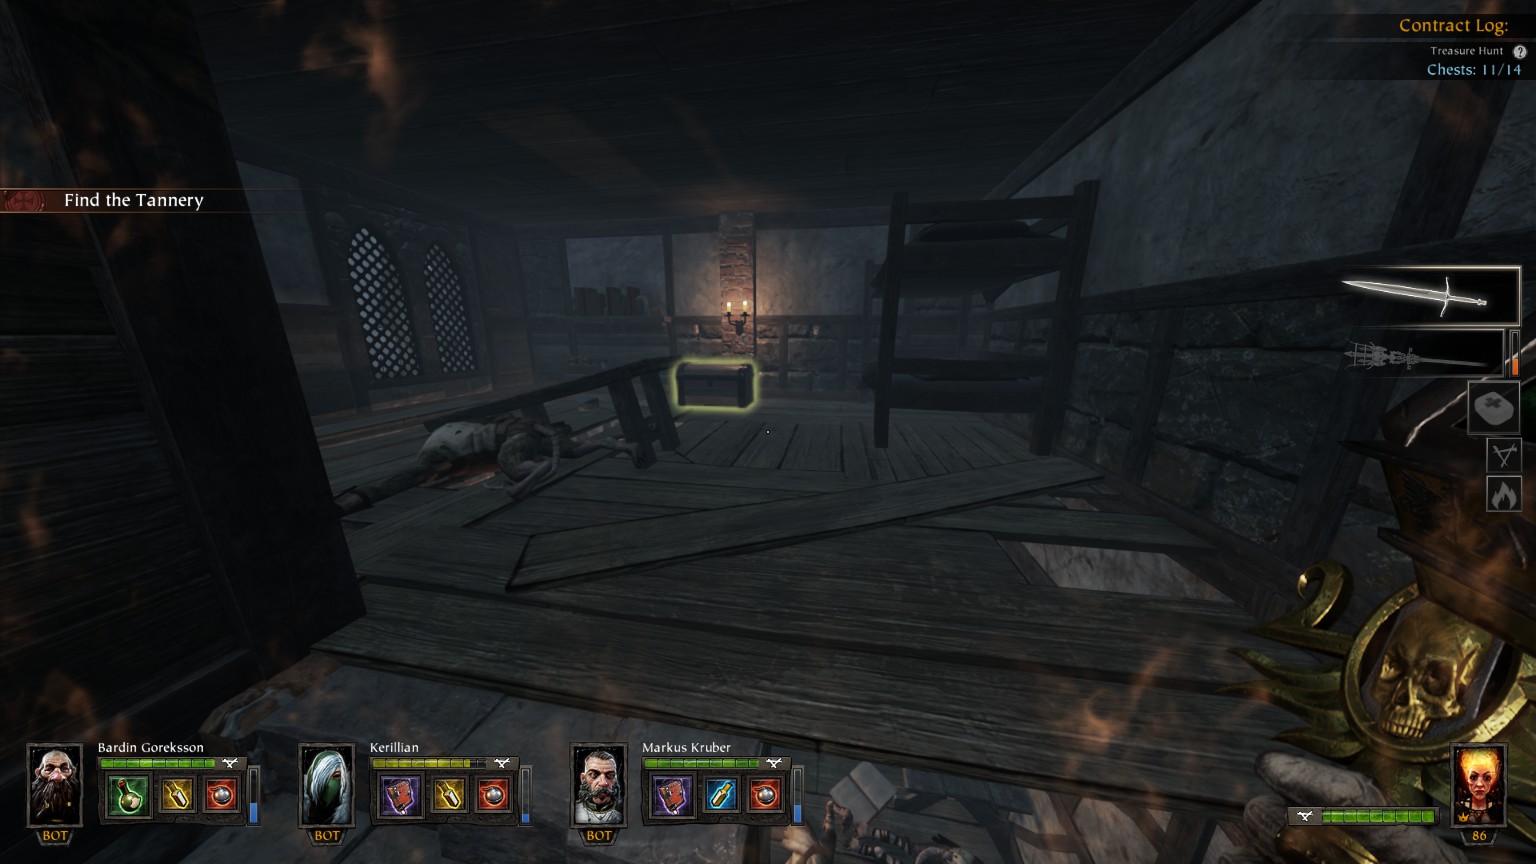
#15/17 (Gerber Tannery) Before entering the tannery

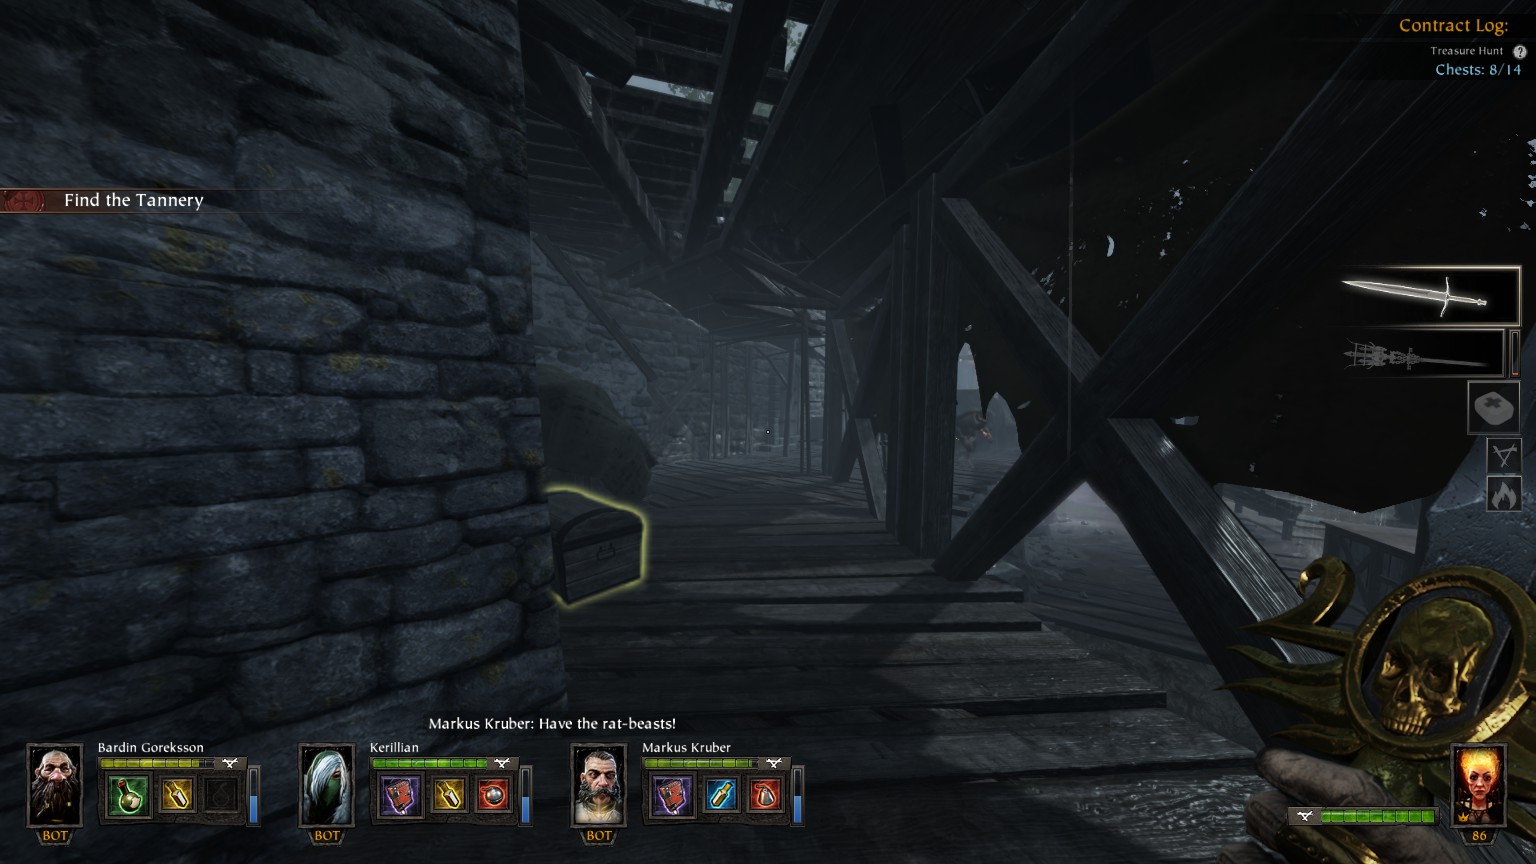
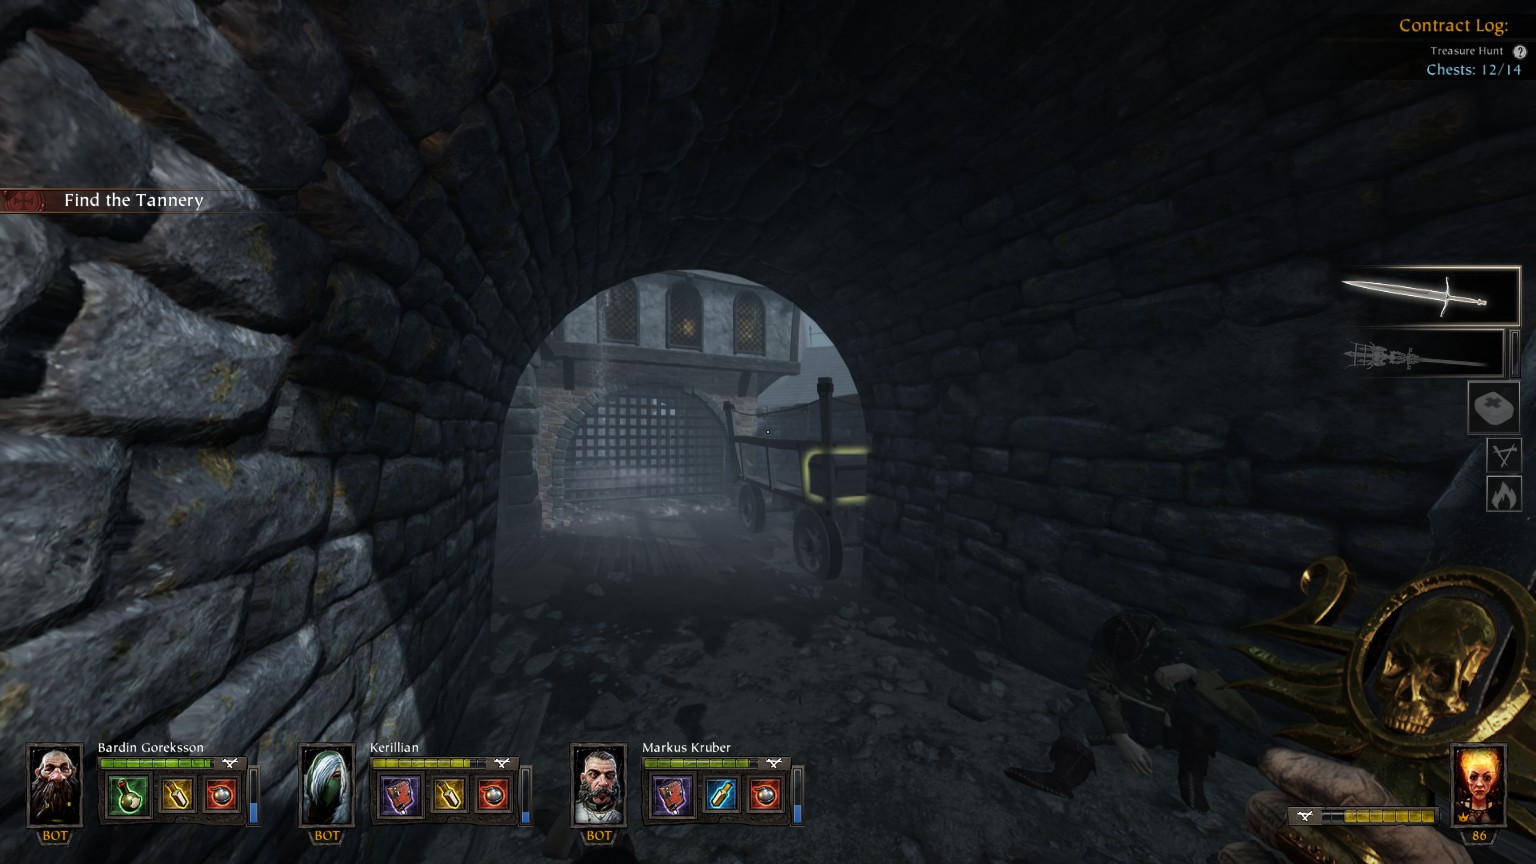
#16/17 (Gerber Tannery)
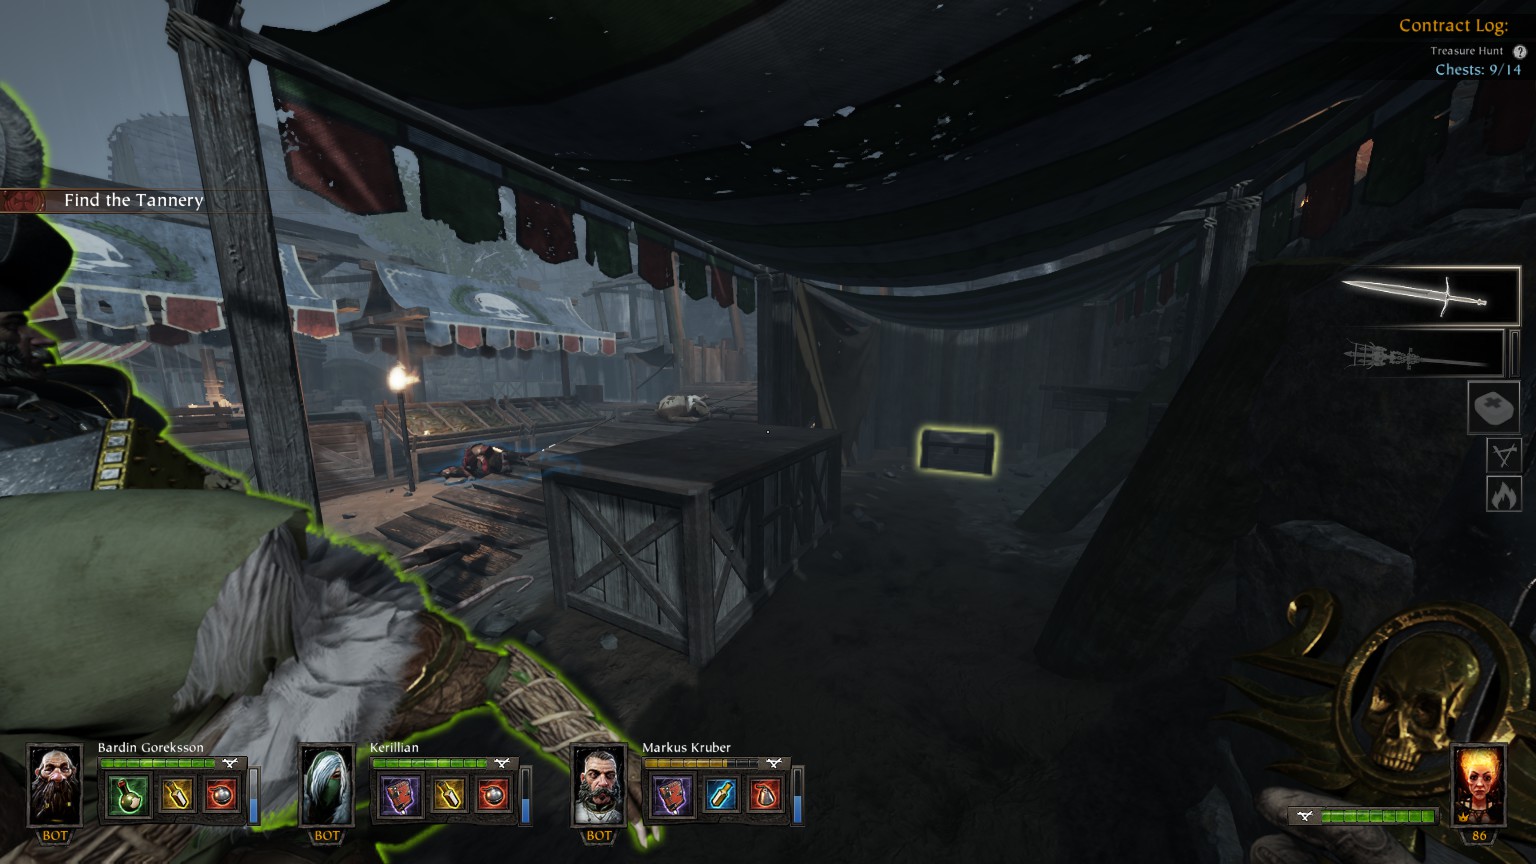
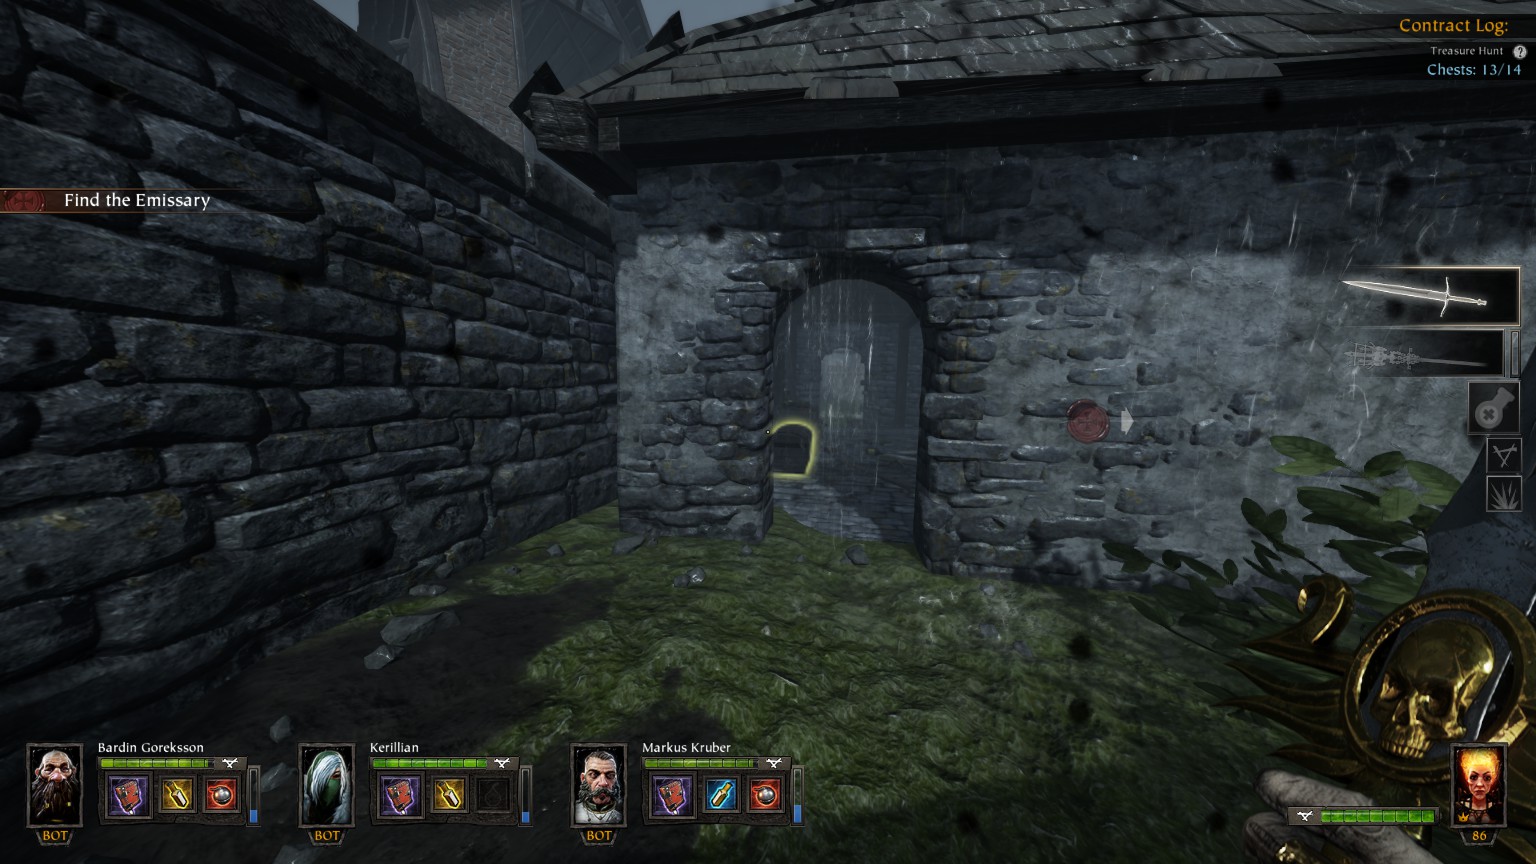
#17/17 (Gerber Tannery)
Reikwald Forrest
You may also want to check out
De greed’smap available in the Vermintide Wiki on Fandom
#1/12 Stick to the right
#2/12 (Drednock Glade)
#3/12 (Drednock Glade)

#4/12 (Drednock Glade) Just before Tome #2, under the bridge after the one way jump
#5/12 (Reiksmund Fort) Stick to the right after the one way jump
#6/12 (Reiksmund Fort) Just after chest #5, stay on the right
#7/12 (Deadman’s Lurk)

#8/12 (Deadman’s Lurk) Stick to the left upon entering the cave
#9/12 (حügelbach stream) Stick to the right after the cave (whereas Grim #2 is on the left)
#10/12 & #11/12
#12/12 (Reikwald Forest edge) Stick to the right after the one way jumps
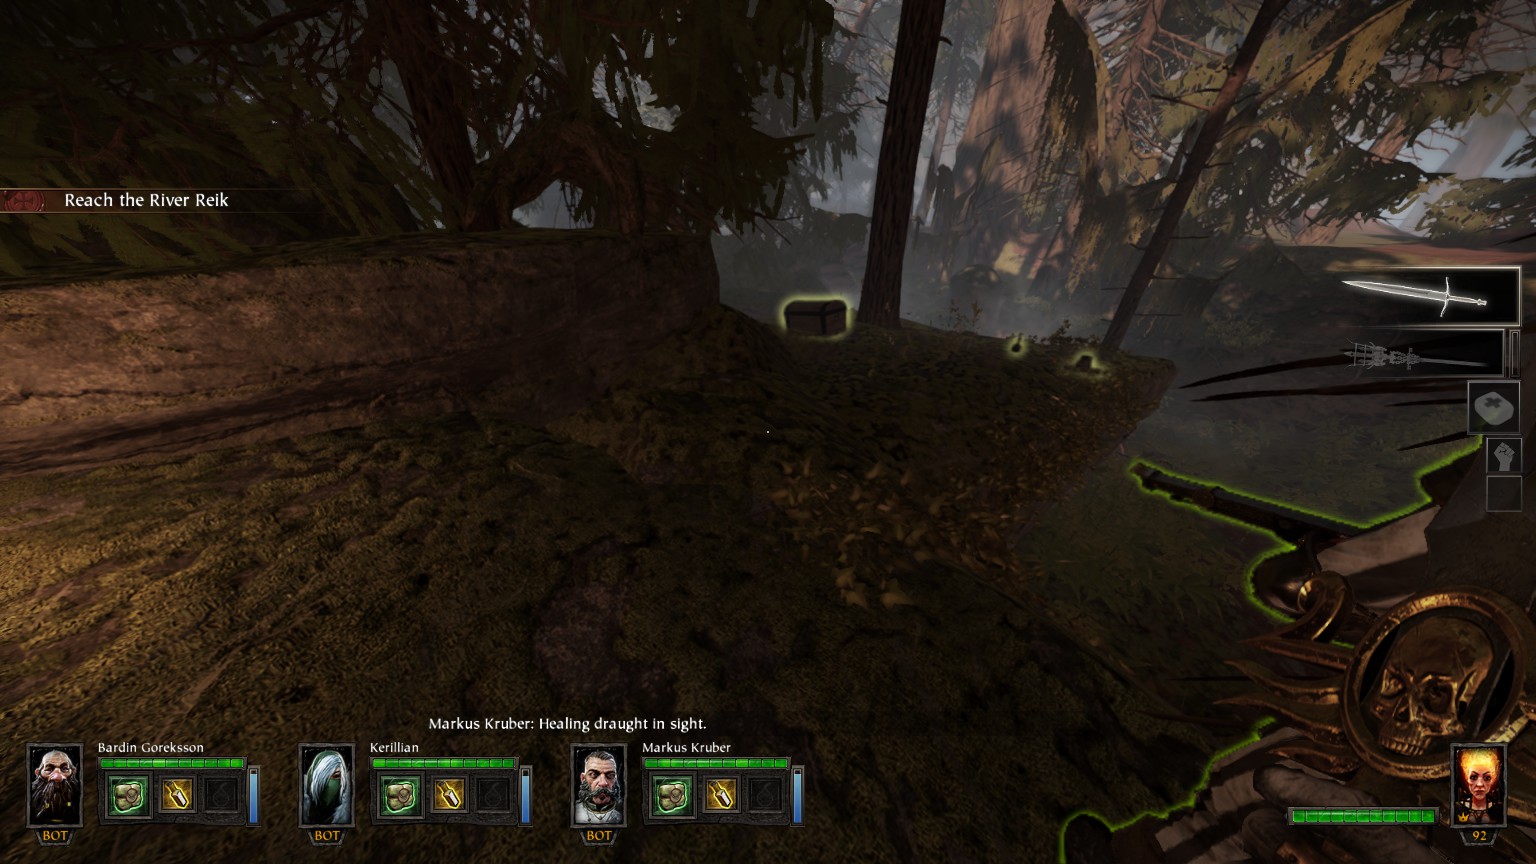
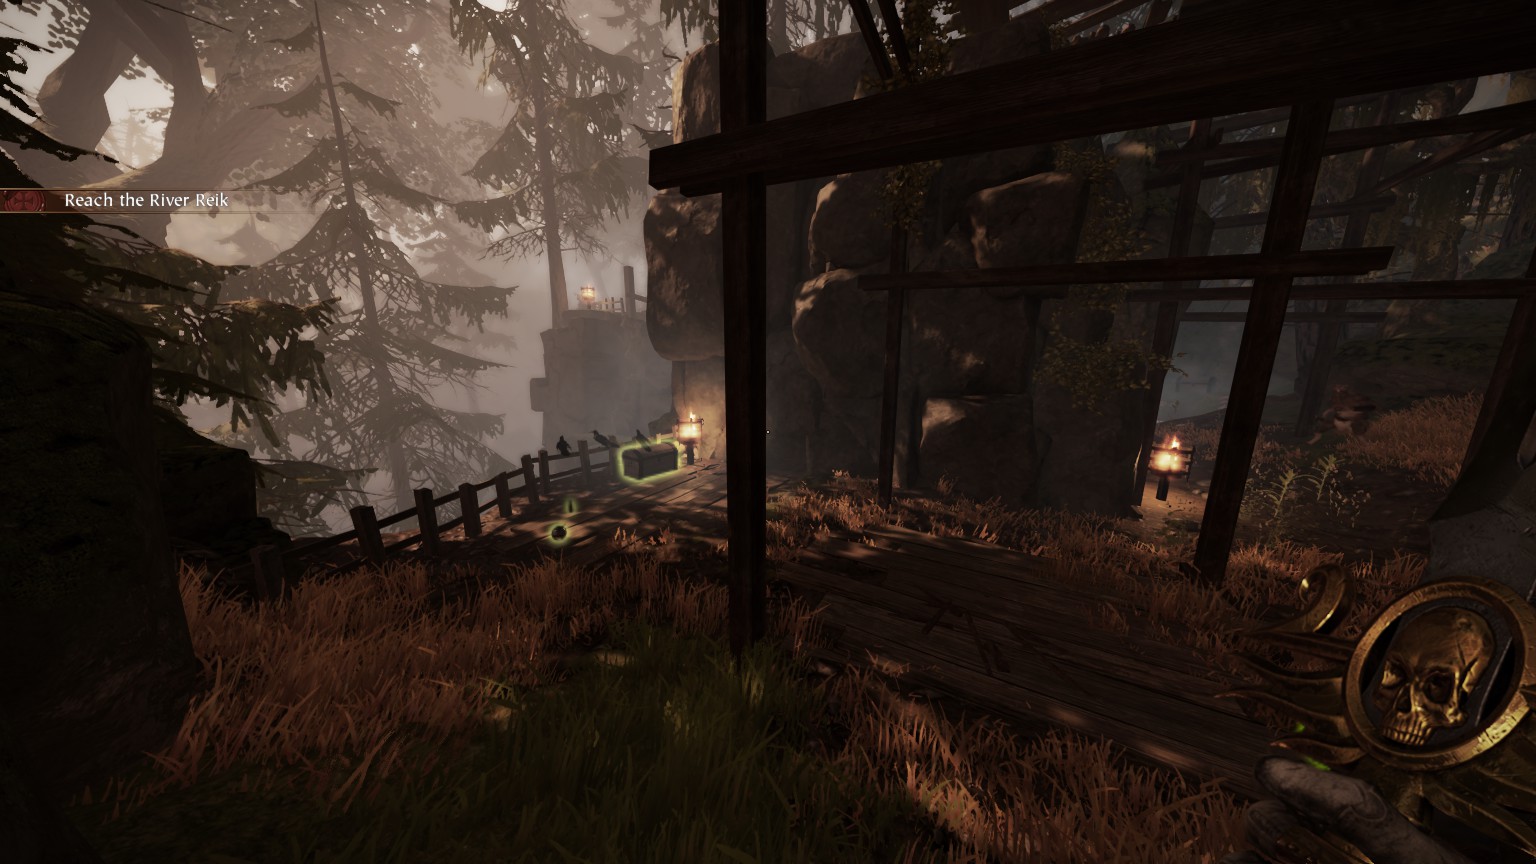
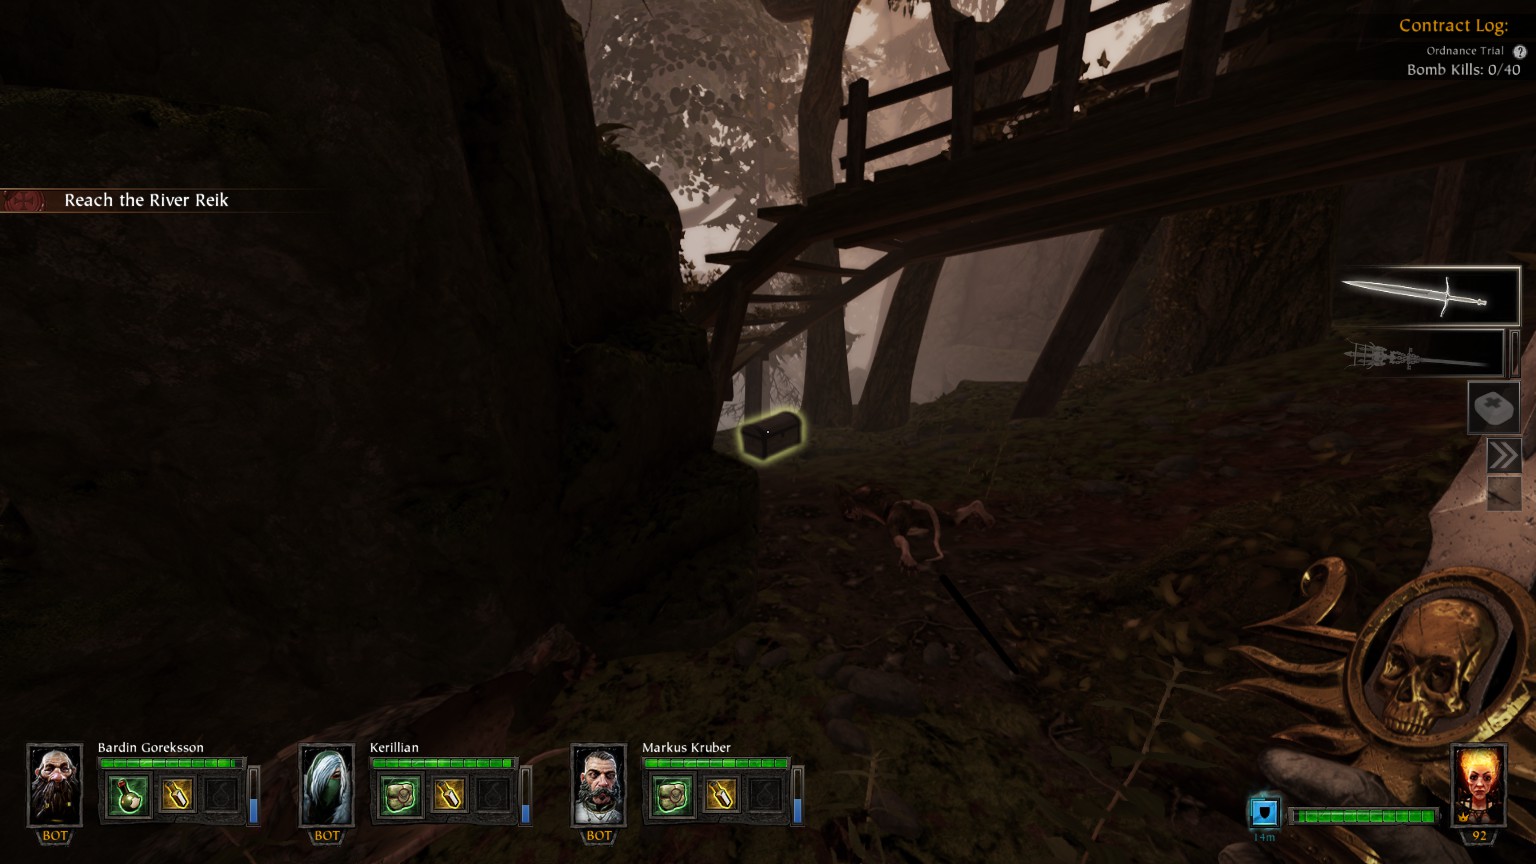
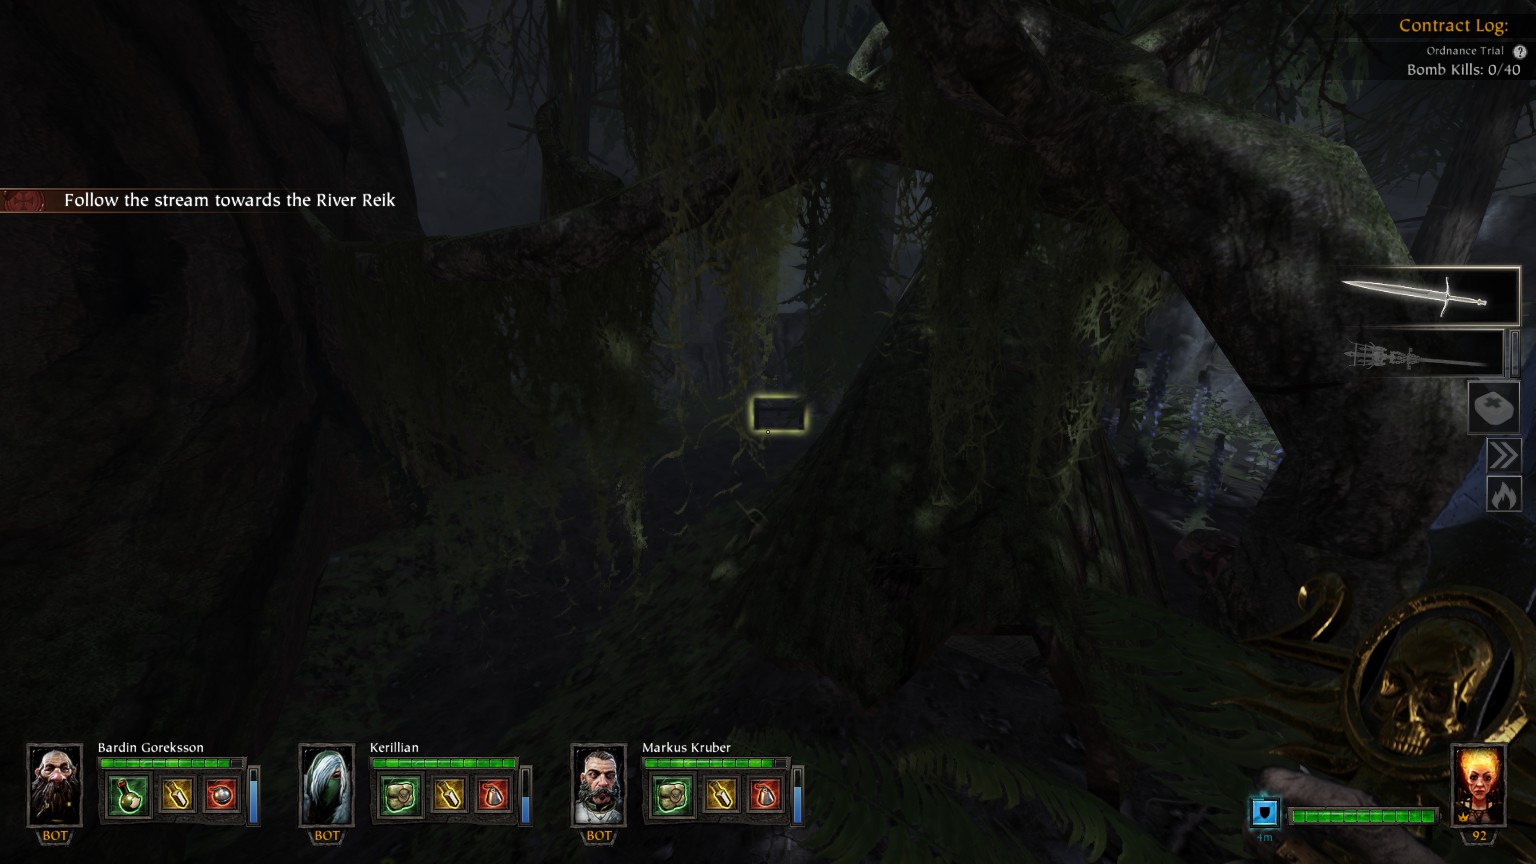
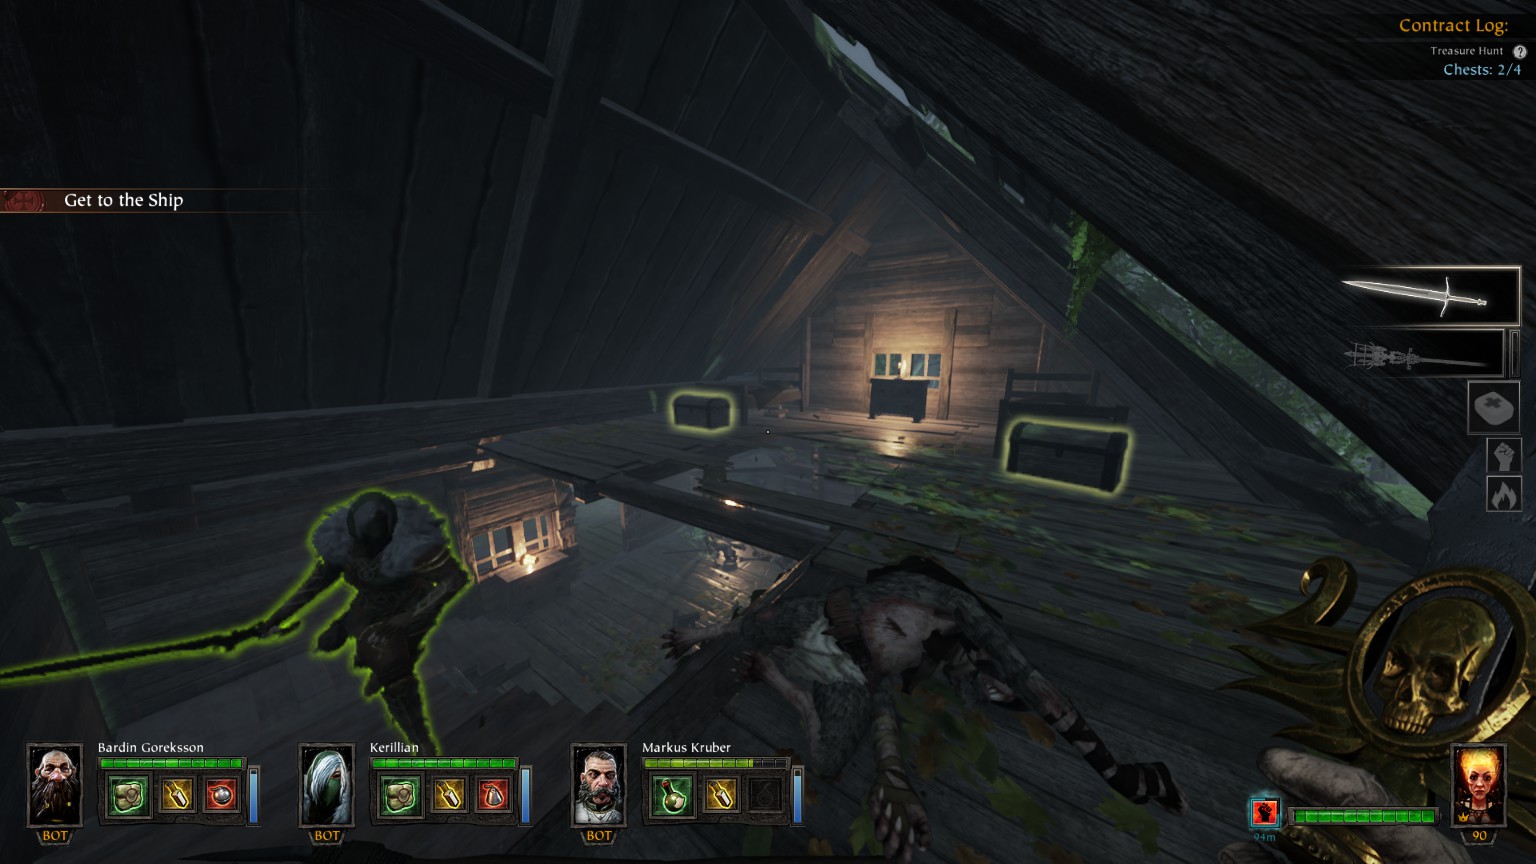
River Reik
You may also want to check out
De greed’smap available in the Vermintide Wiki on Fandom
The locked secret chest containing the Tome in the
حügelbach Tributaryarea does not count for the Treasure Hunt
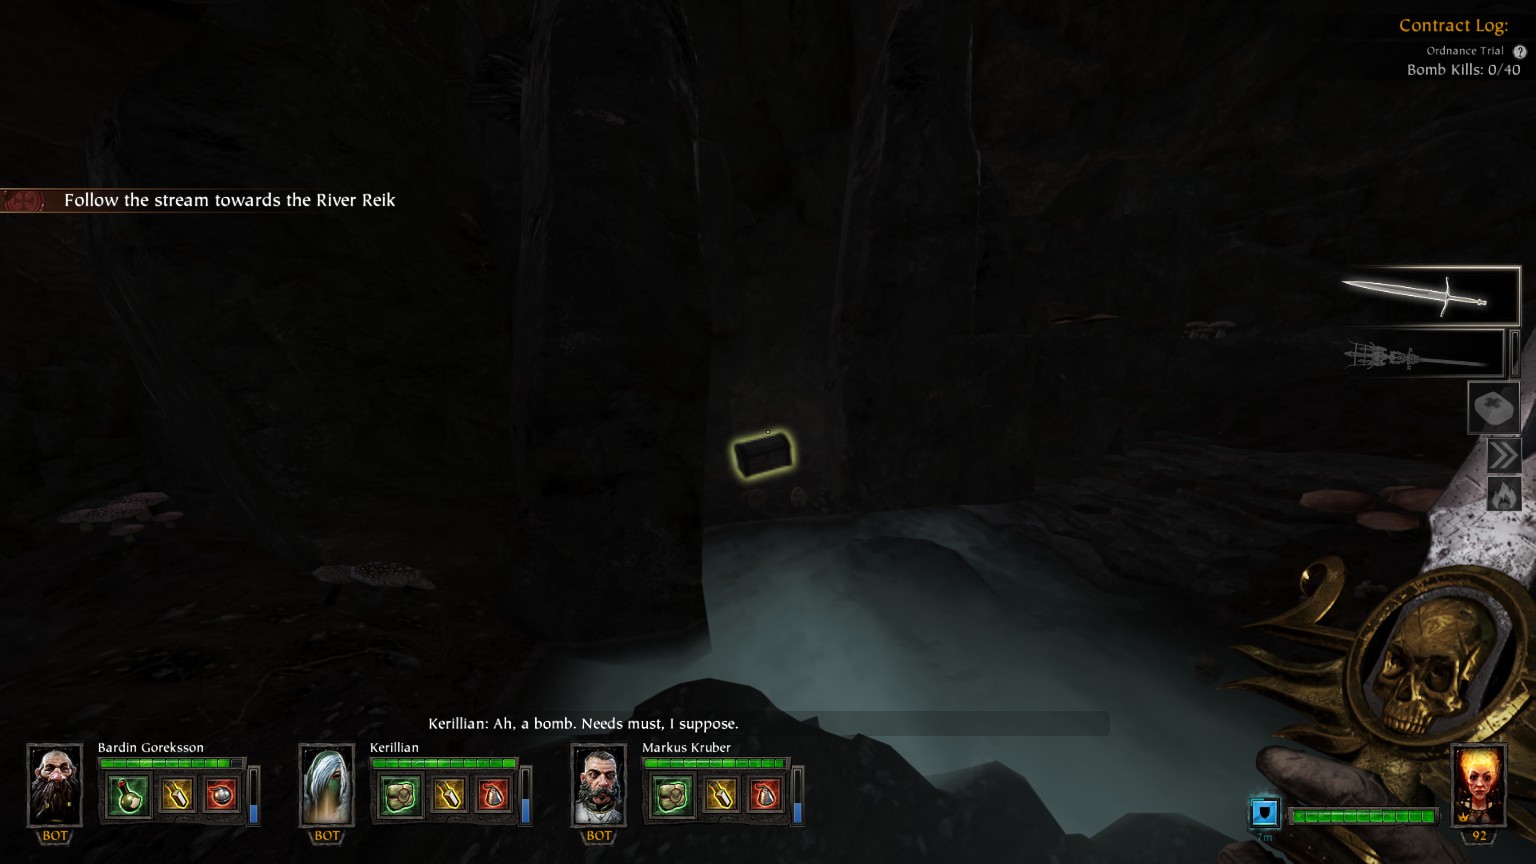
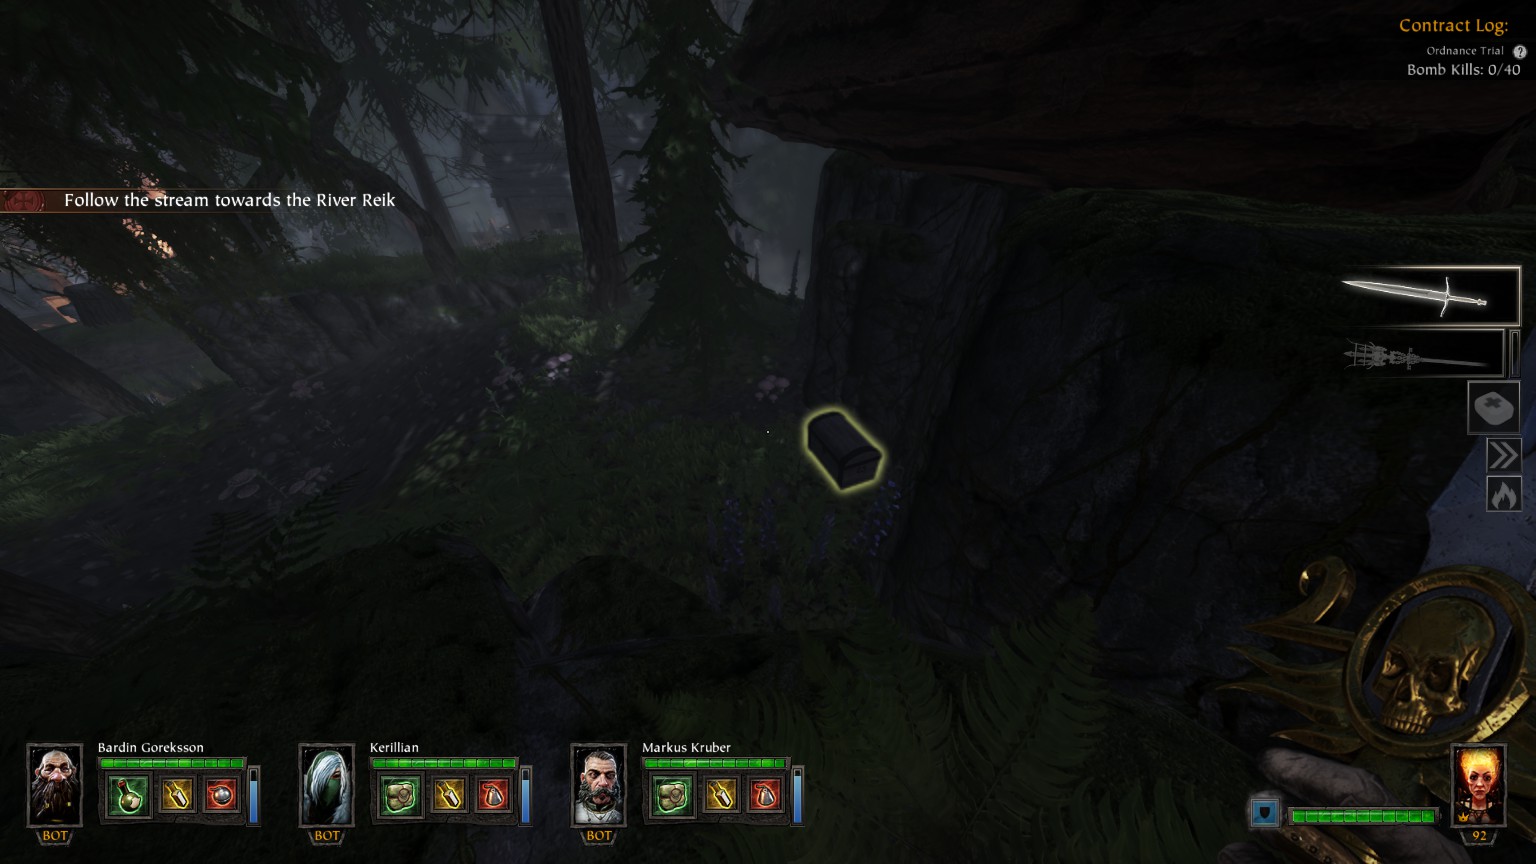
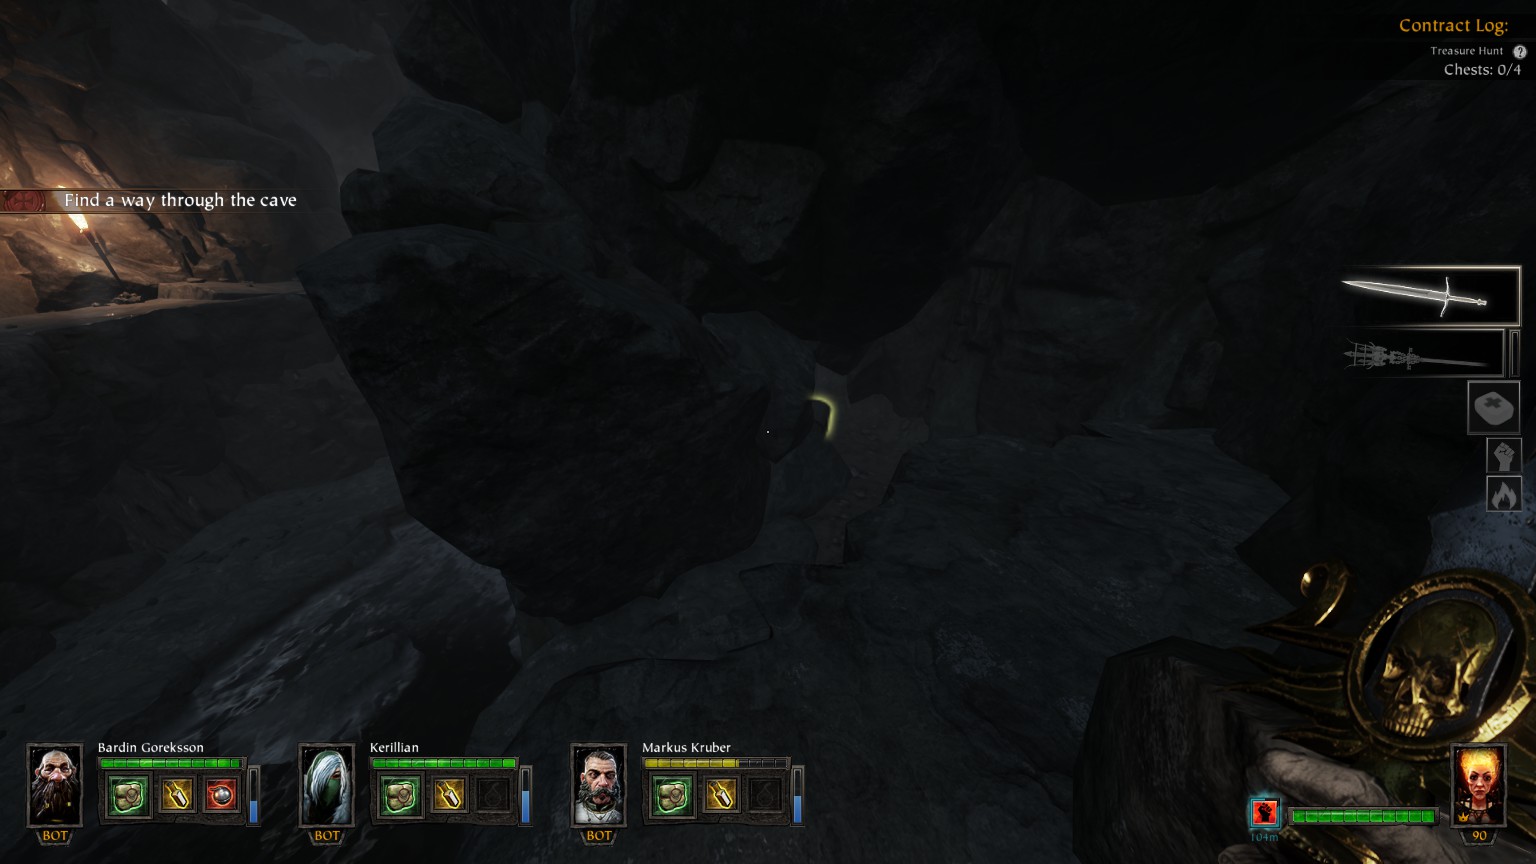
Chests – River Reik – #1/4 (Smuggler’s Cave) Trace back from the cave exit by following the left hand wall (or follow the right hand wall from the entrance after avoiding the loop)
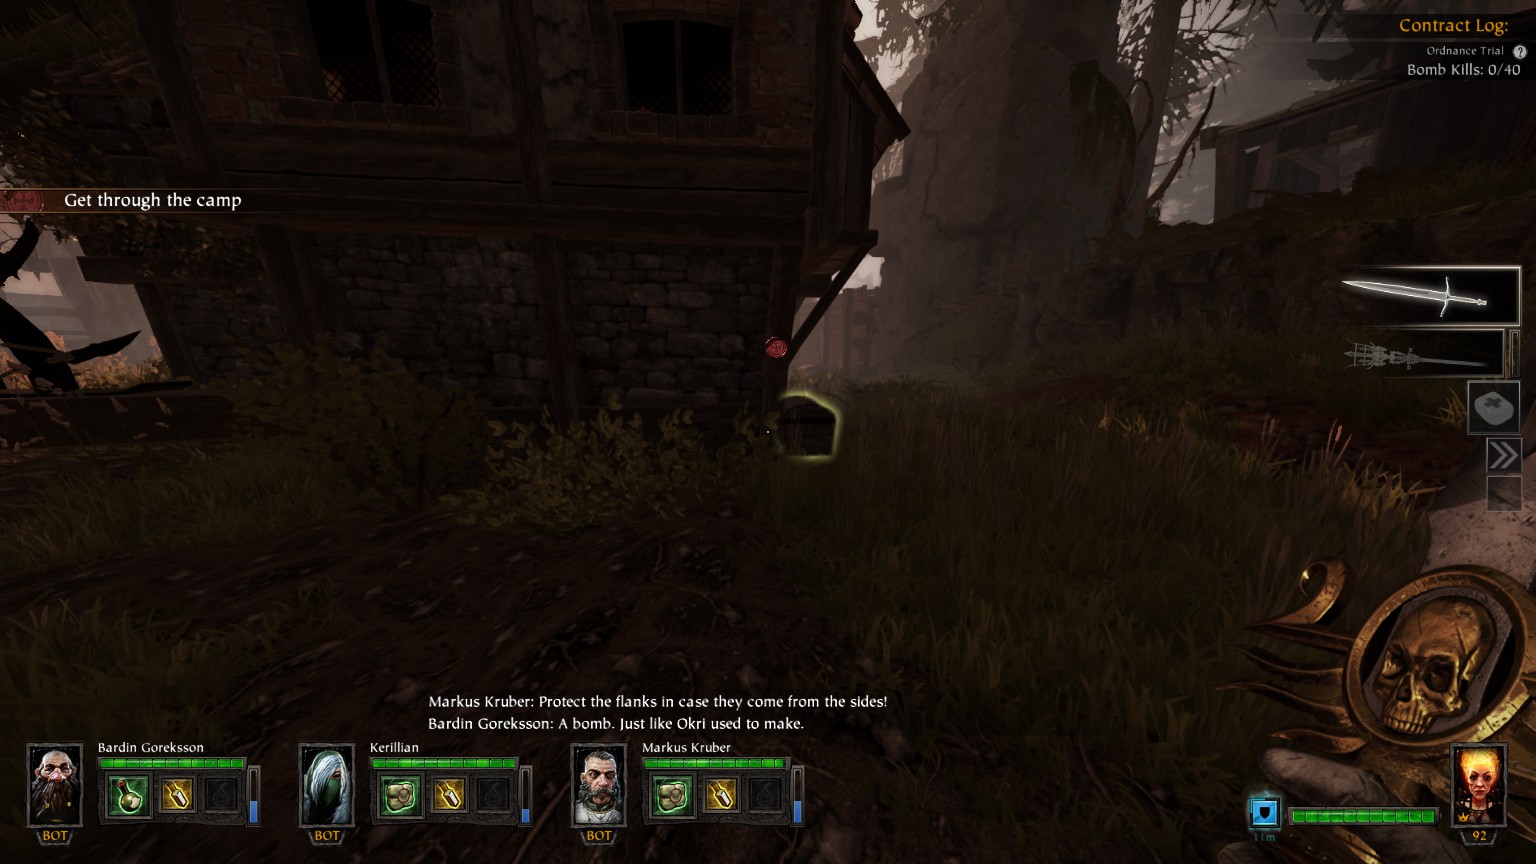
Chests – River Reik – #2/4 Into Ol’ Knopfelspiel hovel just before Grim #1

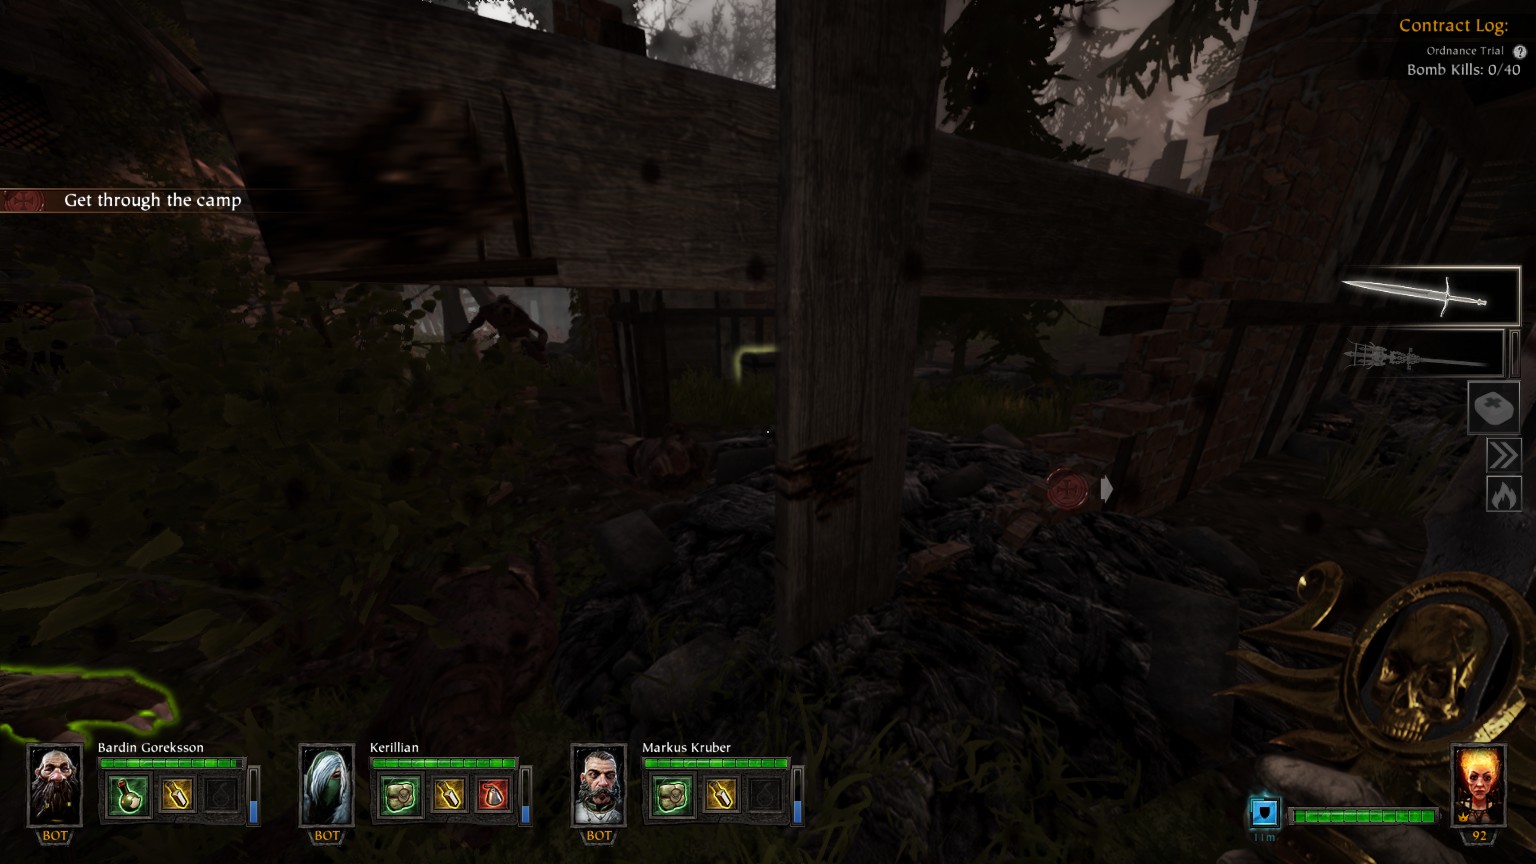
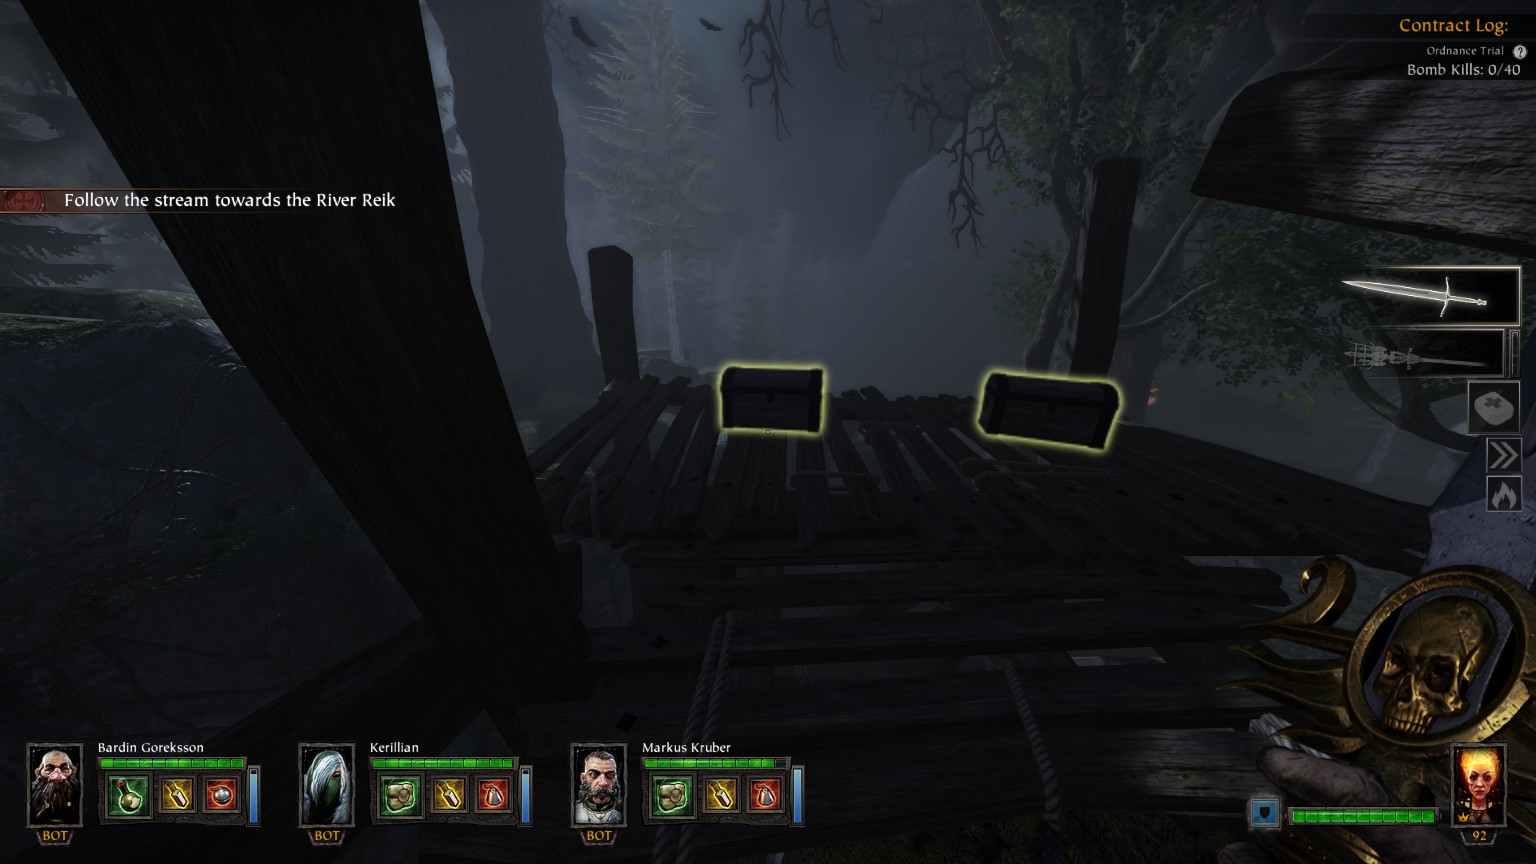
Chests – River Reik – #3/4 & #4/4 Into Ol’ Knopfelspiel hovel just beside Tome #3
هذا كل ما نشاركه اليوم من أجل هذا Warhammer: End Times - Vermintide مرشد. تم إنشاء هذا الدليل وكتابته في الأصل بواسطة Bjornaer. في حالة فشلنا في تحديث هذا الدليل, يمكنك العثور على آخر تحديث باتباع هذا وصلة.