- عنوان: Factorio
- تاريخ الافراج عنه:
- المطور:
- الناشر:
Information about Factorio is still incomplete. الرجاء مساعدتنا في ملء تفاصيل اللعبة باستخدام هذا نموذج الاتصال.
Information on defensive measures and optimal designs in Factorio.
Pollution Control
This guide is primarily focused on defence techniques and better designs, however one of the best forms of defence is actually limiting pollution and preventing the cloud reaching enemy nests. This is especially beneficial in the early stages of a game, where the factory can be more vulnerable to attacks.
Steps should be taken to limit pollution, at least until construction robots become available, which are able to repair the wall and defensive turrets. Manually repairing the wall can be very time consuming, and potentially too big a job for the player to do alone.
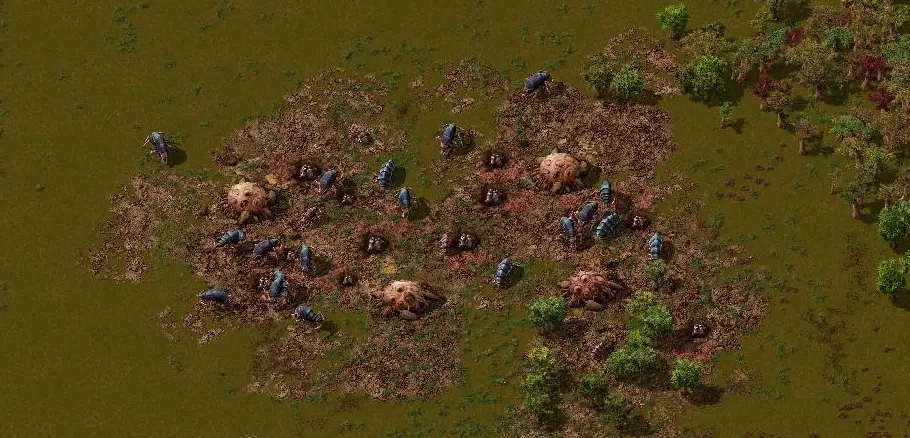
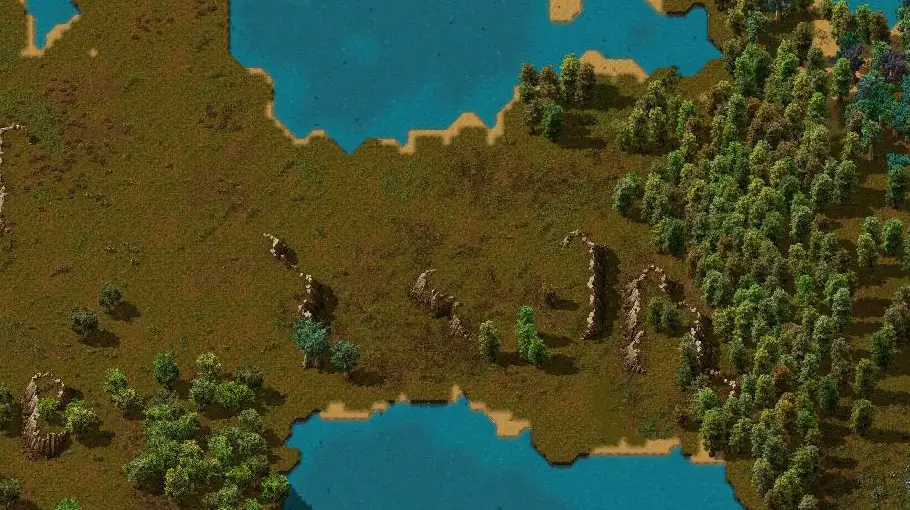
Early Game Basic- Helpful Terrain
Use the terrain to your advantage. Cliffs cannot be destroyed and are essentially unbreakable walls. Incorporate them in your early defence. Narrow stretches of land are choke points that can be used to maximise defences and reduce the amount of gun turrets needed. Capturing these areas early can prevent enemy expansion across these sections.
Gun Turrets
The first defence turret that becomes available for the player is the gun turret. This weapon is useful against early biters, لكن, against more evolved enemies, weapon research is required and more powerful ammunition (uranium>أحمر>أصفر).
One of the most effective designs is the “gun turret pod”. This design involves 9 turrets, in a circle layout, whereby the middle turret is used to reload the outer guns. The main benefit of this is that it is self reloading, guns that fire more are resupplied which makes better use of valuable ammunition. It is a powerful formation, مع 9 layers of firing covering each turret.
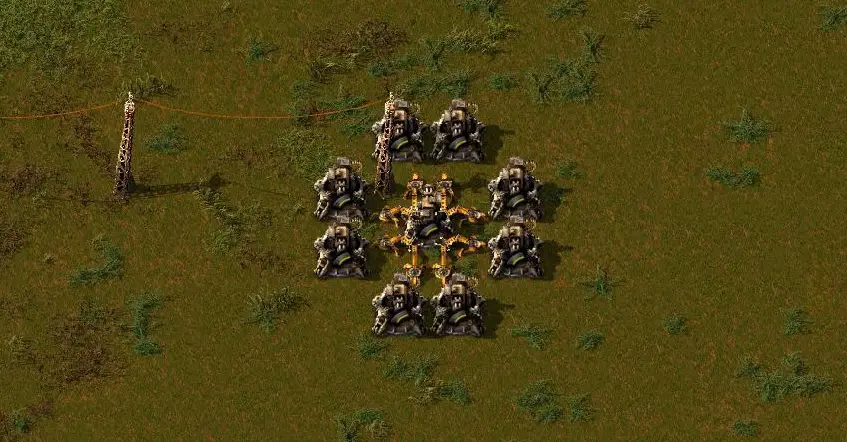
It also requires less gun turrets to set up, as biters are drawn to military buildings, it is not necessary for a continuous turret wall. The design also does not need an ammunition belt, which can be very costly in terms of iron consumption. The only downside of the turret pod, is that ammunition levels need to be monitored, and occasionally the middle turret needs to be manually reloaded (200 maximum).
Flamethrower Turret
The next weapons system that becomes available for the player is the flamethrower turret. The flamethrower turret is the most damaging defence weapon in Factorio, and is a major upgrade from the gun turret. It also has the longest range of all the defensive systems, and doesn’t require electricity to operate. Flames have the ability to eliminate many enemies simultaneously, however there is a slight time delay on this weapon, creating a small blind spot in the defence.
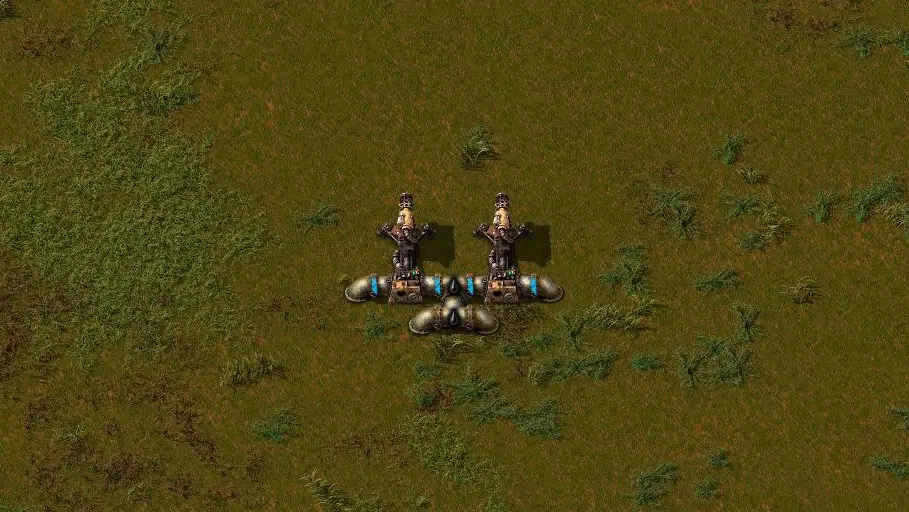
Usually several lines of wall, and a few flamethrower turrets are enough to eliminate all enemies within Factorio. Refined oils as ammunition also provide a boost to damage (Light>Heavy>Crude). It is also useful to include a secondary oil connection at the back to the turrets in case of damage causing a disconnection.
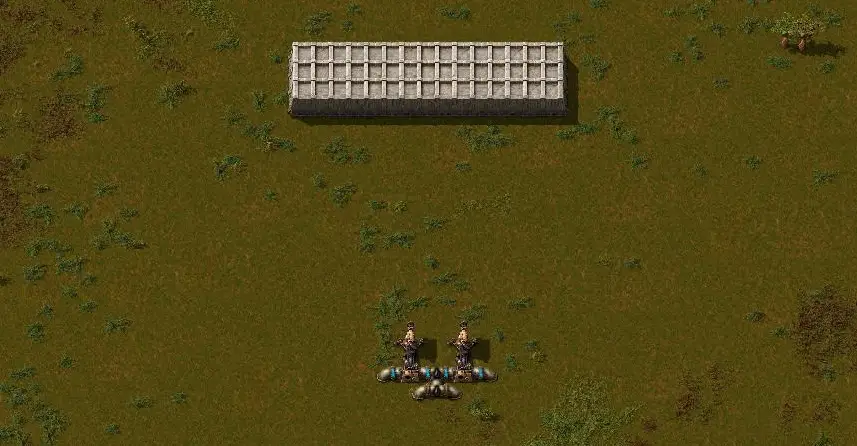
The most optimal approach when using flamethrower defence is to leave a large gap between the turret and the wall to maximise the range advantage. In addition to this, obstacles can be put in front of the wall, (dragon teeth) which can slow down enemies giving the flamethrower turrets enough time to do their work- this reduces the time delay weakness.
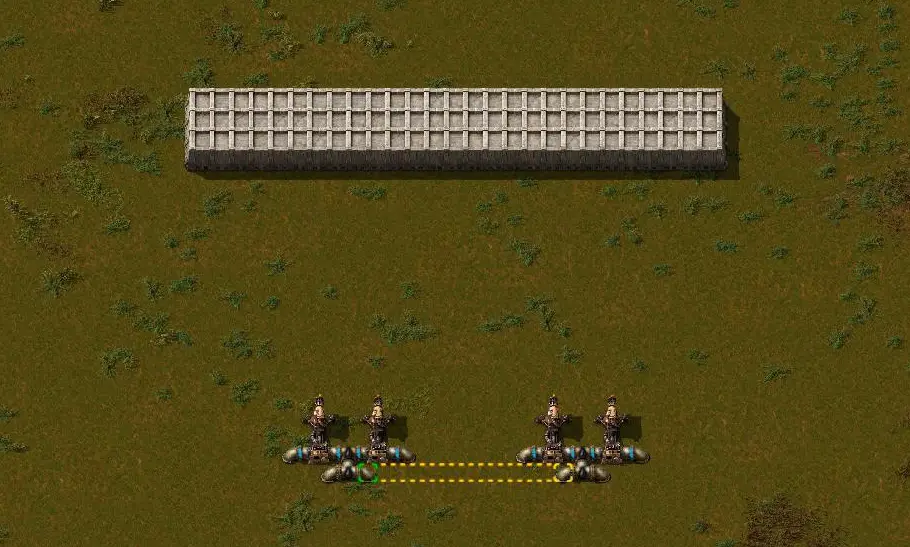
It is optimal to leave a gap of 16 wall blocks between the flamethrower turret and the end of the wall (where enemies first make contact with solid impassable wall). This is enough space to protect the flamer, however not too far that any repair robots are vulnerable to spitter attacks. Bohemoth spitters have a long range, and there is a risk that robots may get trapped.
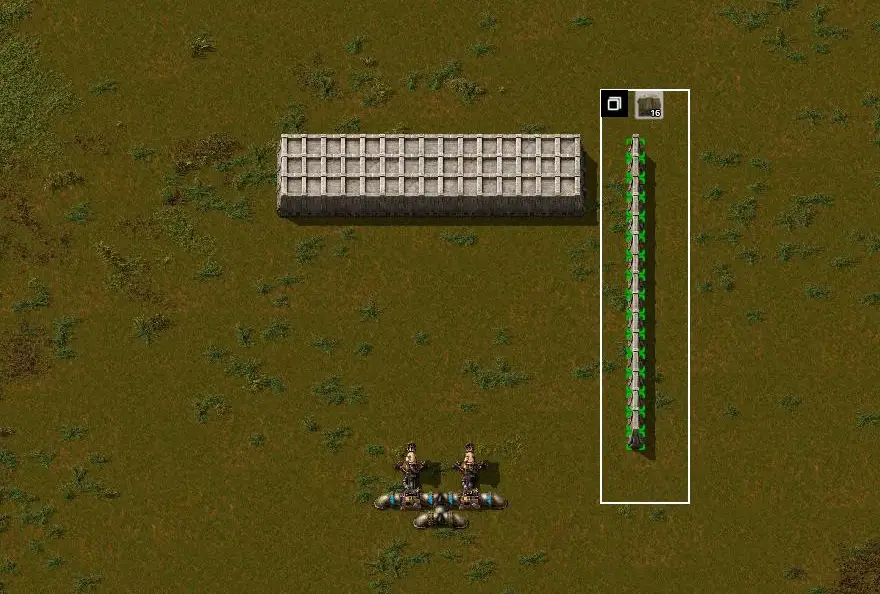
Dragon teeth designs are incredibly useful at slowing down the enemy, trapping them, and giving the defences more time to eliminate attackers. For the best part of the game, they can be placed further than 16 wall blocks of the flame turret. In the late game, bohemoth spitters, and fast robot speed, may require all walls to be repositioned to within 16 wall blocks.
In worlds that are heavily infested with enemies, it may be a good idea to upgrade to flamethrower turrets as soon as possible.
Dragon Teeth Obstacle Designs
An integral part of flamethrower defence are dragon teeth, or obstacles intended to slow down the enemy before they reach the wall. There are also some helpful wall designs that can be used for directing enemies into certain areas. Shown within this segment are some practical examples, however there are many layouts that could be utilised.
Damage and Placing
All dragon teeth designs will eventually take damage from enemies. Some layouts are very efficient, minimising damage, however due to a random element within attacks, all will suffer damage over time. This creates a dilemma, placing walls further out provides the defence turrets greater protection, لكن, repairing or replacing the walls by robots becomes more dangerous. Walls far out can leave robots vulnerable to attack, especially from spitters, in particular bohemoth spitters.
Solid impassable walls should be placed up to 16 wall blocks from flamethrower turrets, and/or 11 wall blocks from laser turrets to ensure complete safety for robots. Efficient dragon teeth designs could be placed beyond this (for most of the game), لكن, towards the late game, powerful waves of large enemies may require all walls to be within safe limits. If robots start getting trapped by spitters, or are destroyed repairing the wall, that signals the need to reposition the defensive wall.
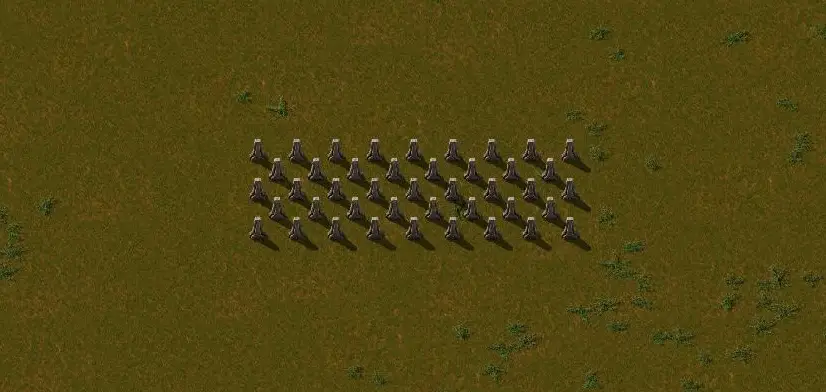
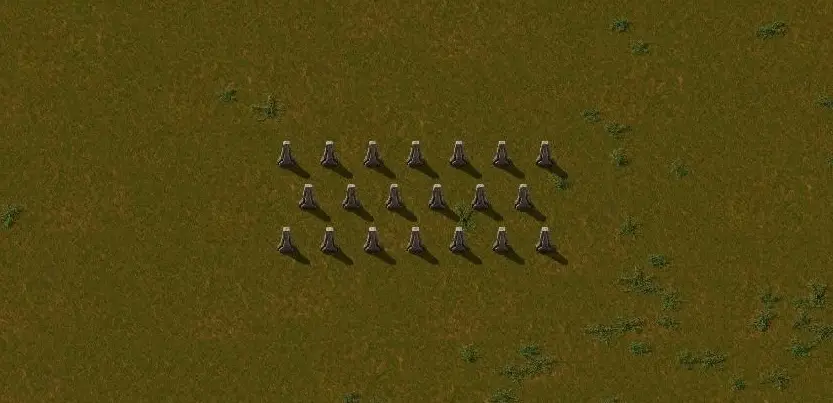
Maze
A practical and easy to place dragon teeth design that takes minimal damage from enemies.
Poles
Traditional dragon teeth designs will slow down and stop enemies, but will take more damage. It is denser than the maze design, providing more protection, however is less efficient in terms of damage/repair. It needs to be placed within 16 wall spaces of the flame turret, to safeguard repairing robots.
More spaced out poles will take less damage, however enemies will not be slowed down as much.
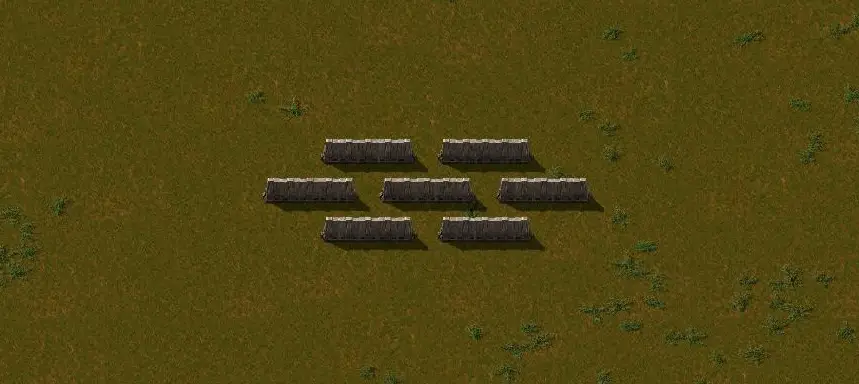
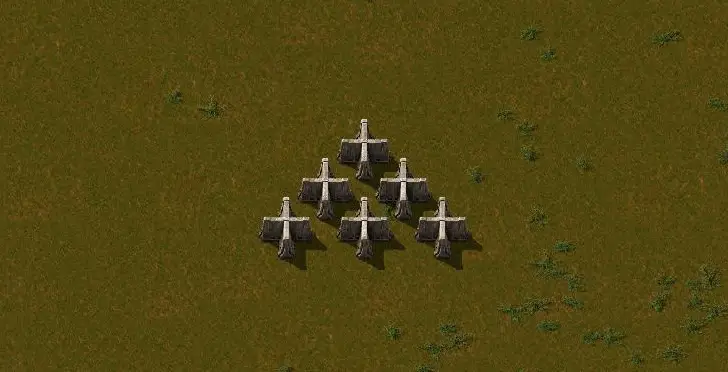
Shaped
A useful design that confuses biter pathfinding, and will trap enemies in kill zones.
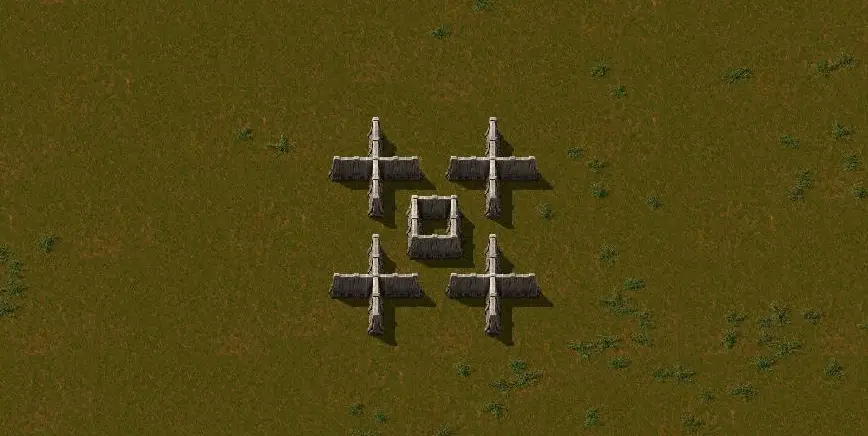
Directing Tank Traps
Wall crosses that are placed close together can be used to direct enemies into locations, or break up large waves of biters. على سبيل المثال, to direct enemies away from weak areas in the defence, or into kill zones. These are not really suitable as dragon teeth, however can be used to alter enemy pathfinding beyond the defences outwith the perimeter.
Laser Turrets
Laser turrets are generally the last defensive turret utilised by the player. Laser turrets run off the electricity grid, and will consume more power when firing shots.
The research requirements of laser turret upgrades include; damage and speed, and the first couple of levels are essential against the larger enemies within Factorio. In terms of power and research, this form of defence can be costly, لكن, without the need for physical ammunition, laser turrets are really useful for defending hard to resupply places. They also have a longer range than gun turrets. A substation can enable a block of laser turrets to be placed tightly together.
Laser turrets, aside from the initial construction, are non polluting, if solar energy is used on the power network. They are also very effective when used in flexible defence boxes, which can enable a makeshift wall to be built quickly in newly captured areas.
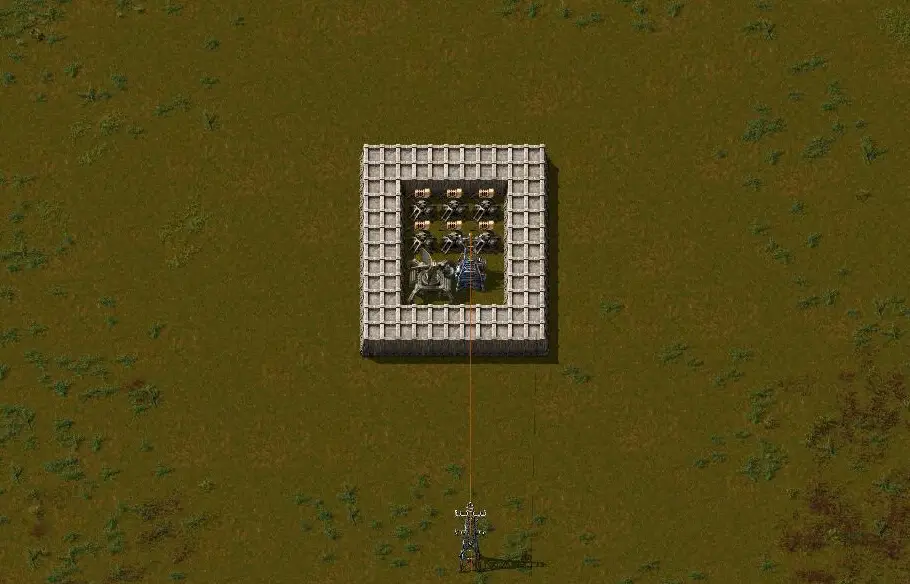
Defense Boxes
In the same idea as in the basic gun turret pods, “defence boxes” can be a good design instead of a wall, أو, to build quickly if a wall is not feasible. A laser turret defence box blueprint can be dropped down and built by robots fast to defend an area. All that it requires is a connection to the electricity grid. This can save on resources too as less turrets are needed, defences are stronger (more overlapping layers of fire), and the design is flexible and easy to build. A variety of dragon teeth wall formations could be used.
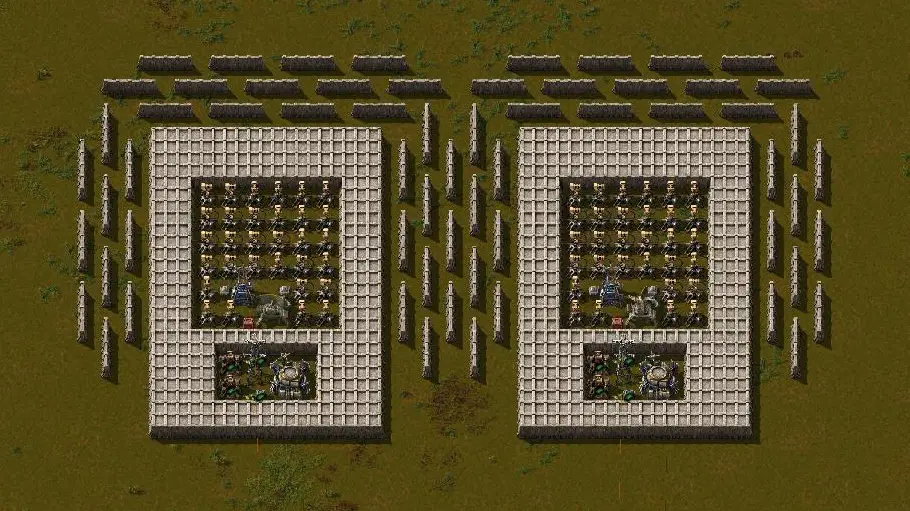
Defence boxes can be increased in strength by adding flame turrets and even uranium ammunition fed gun turrets. The combined approach utilising all the defences available is the most cost effective way at defending against enemies in the late game.
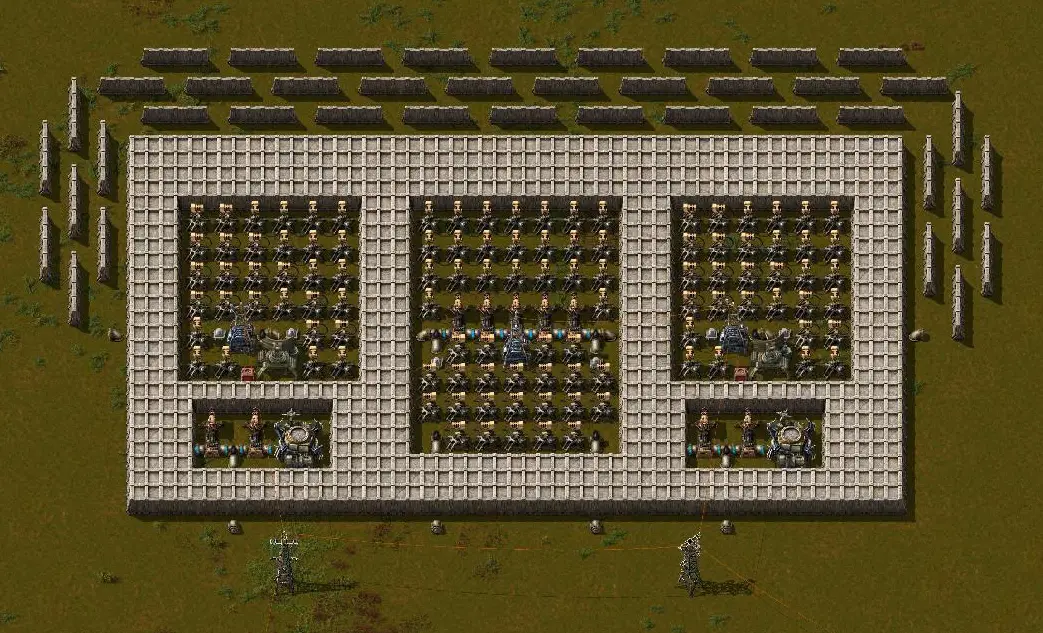
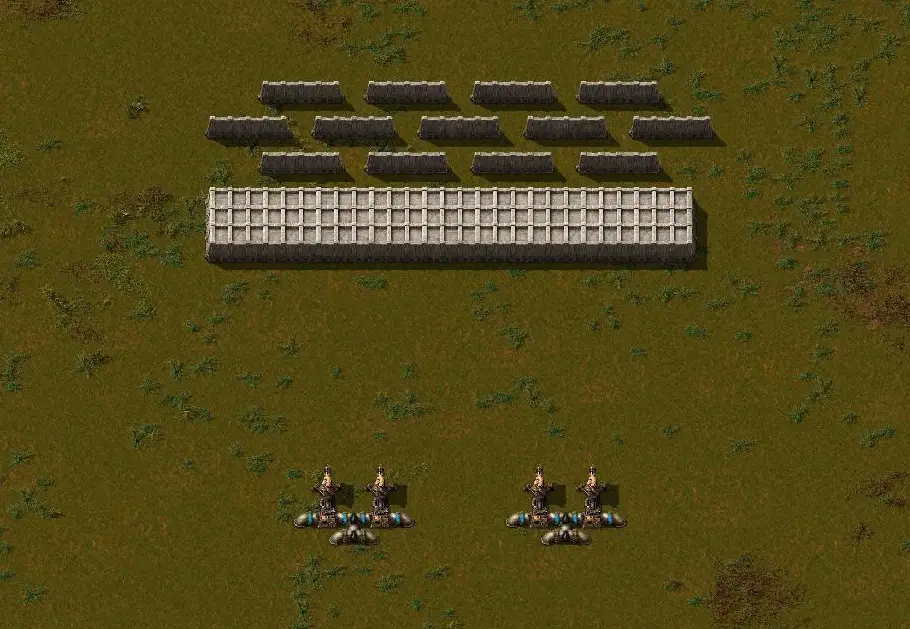
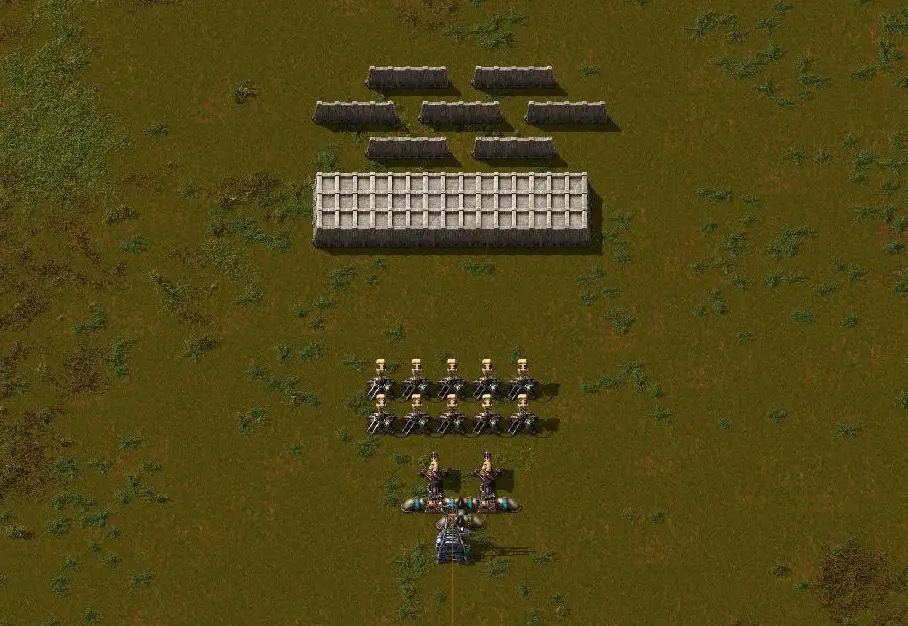
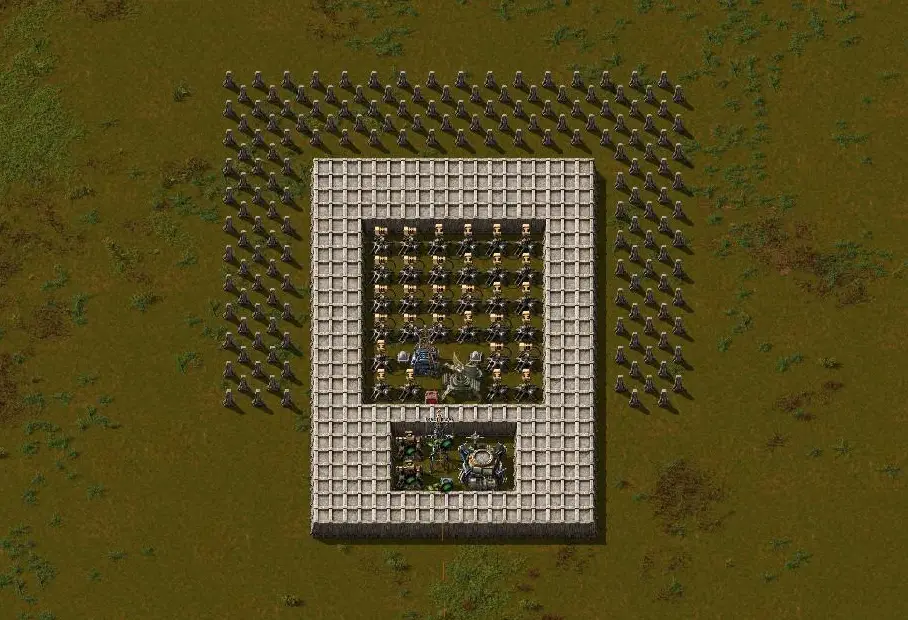
The Multi Turret wall
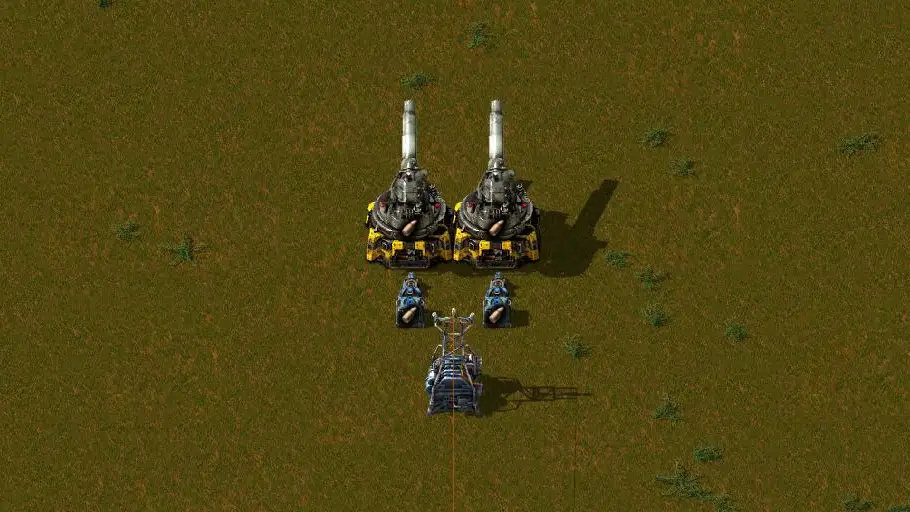
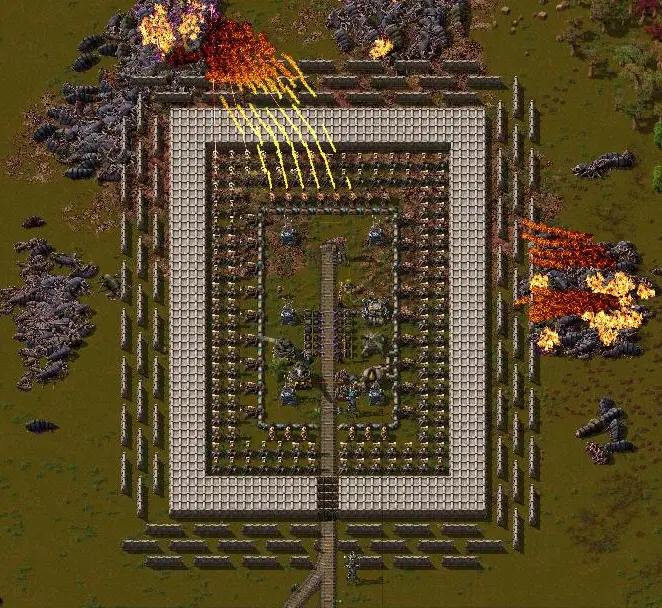
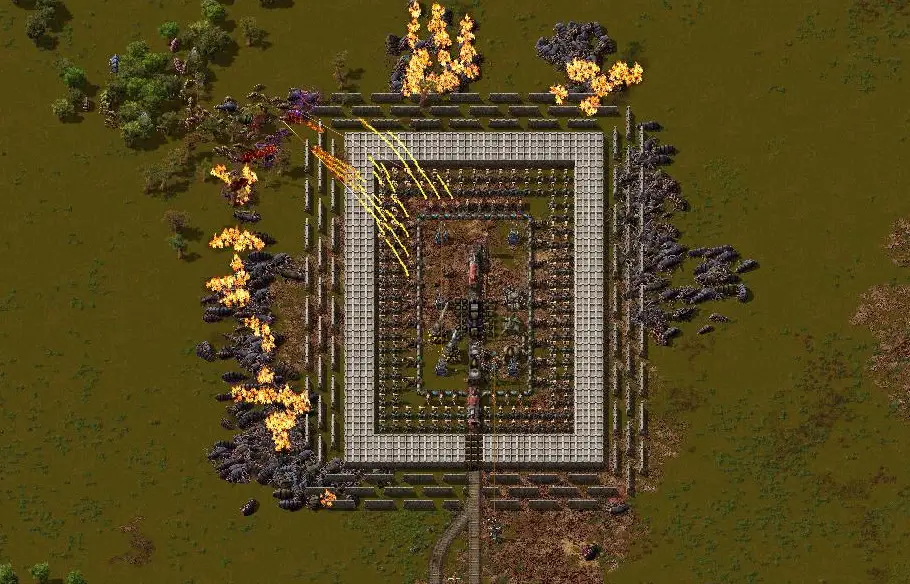
In the late game, research becomes more expensive for each turret type. و, each weapon has strengths and weaknesses, that can complement each other if used in combination. A wall design combining flamethrowers, lasers and uranium ammunition fed gun turrets, provides the most optimal way at defending in the late game, or against large waves of powerful enemies.
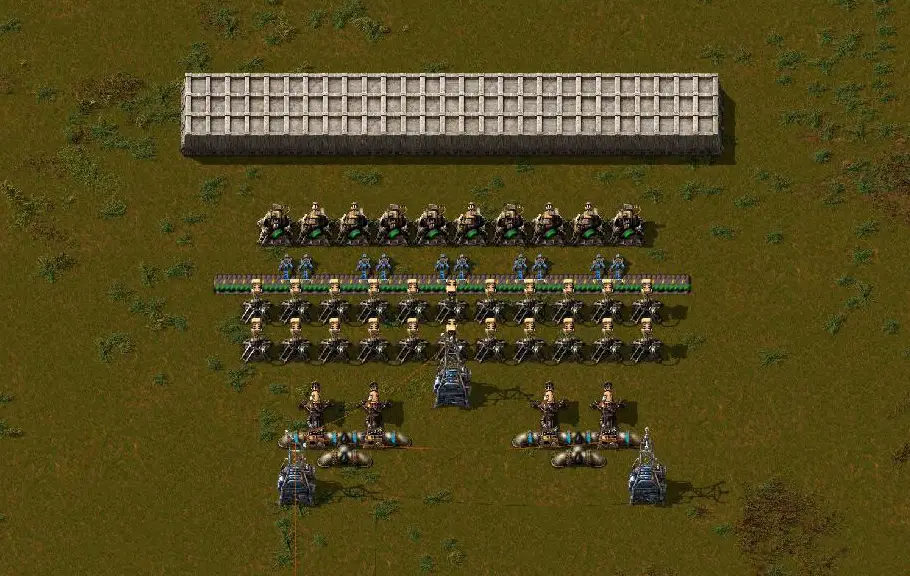
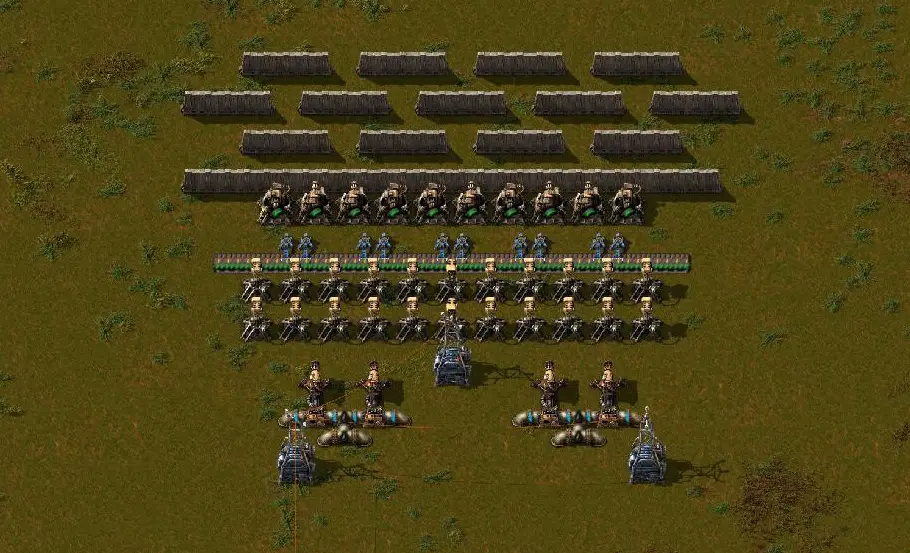
The wall design builds upon the designs of the past involving flamethrower turret wall spacing, and laser turrets, however an extremely powerful uranium ammunition fed gun turret system is included at the front. This design ensures the ranges of all the guns converge at the same area maximising damage. The pictures above demonstrate a late game design, so all walls are within 16 wall blocks from flamethrower turrets to protect robots from bohemoth spitter.
مناجم (extra option)
Mines can be an extremely powerful defence that not only can kill enemies, but they also stun and temporarily stop them too. In the absence of permanent infrastructure, either due to resource limitations or attacks, mines are a useful aid that can either be laid by the player or robot.

The major weakness of mines is that construction robots may be put in potential danger, when automatically replacing them. They can also be destroyed by friendly fire. لكن, they are very powerful ordinance even at a low research level, and can be effectively utilised against highly evolved enemies. Mines are best used in vulnerable areas or known biter routes.
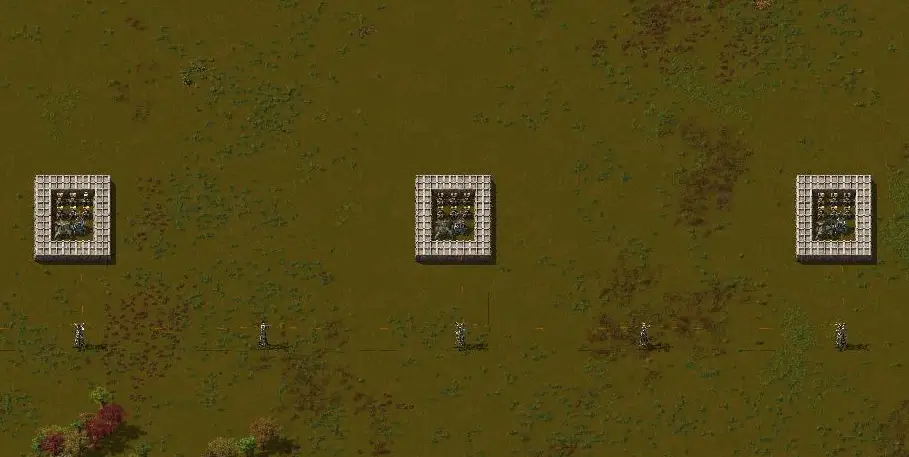
Artillery and Outpost Resupply
Towards the late game, artillery can be unlocked with gives the player access to long range guns. Artillery can automatically fire upon enemy nests that are within range, or the remote can be used by the player, to precisely target nests, areas of land, or enemies that fall outwith the auto range of the guns.
Artillery is useful as it can prevent biters expanding close to the factory, which may increase the number of attacks that form against the player. Nests that arise nearby can also spawn bohemoth worms, which pose a risk, as they are able to outshoot flamethrower turrets. Artillery can also be used to eliminate very large and dangerous nests without putting the player in danger.
These ideas can lead to the utilisation of the artillery outpost, that can be automatically resupplied by train. These outposts are solely tasked with locking down and protecting areas. Being automatically resupplied means once they are constructed, they do not need maintenance by the player.
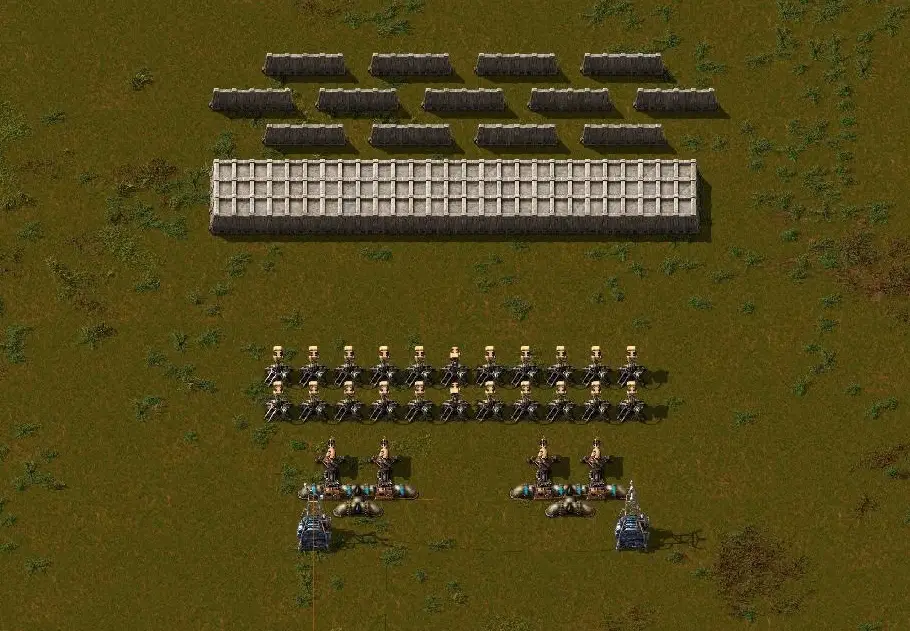
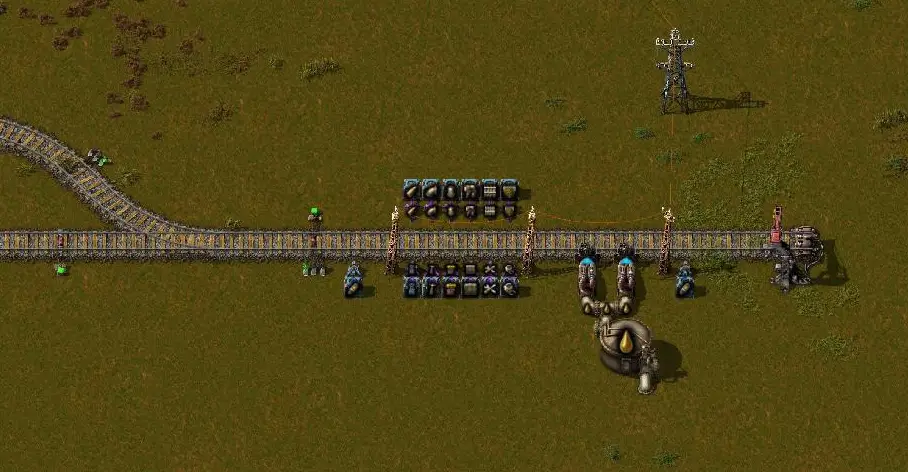
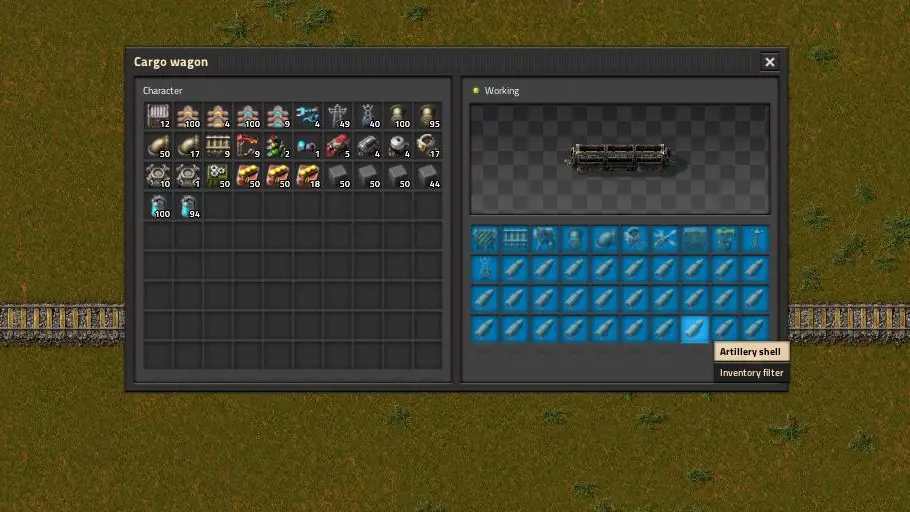
Artillery Resupplying Station (loading items)
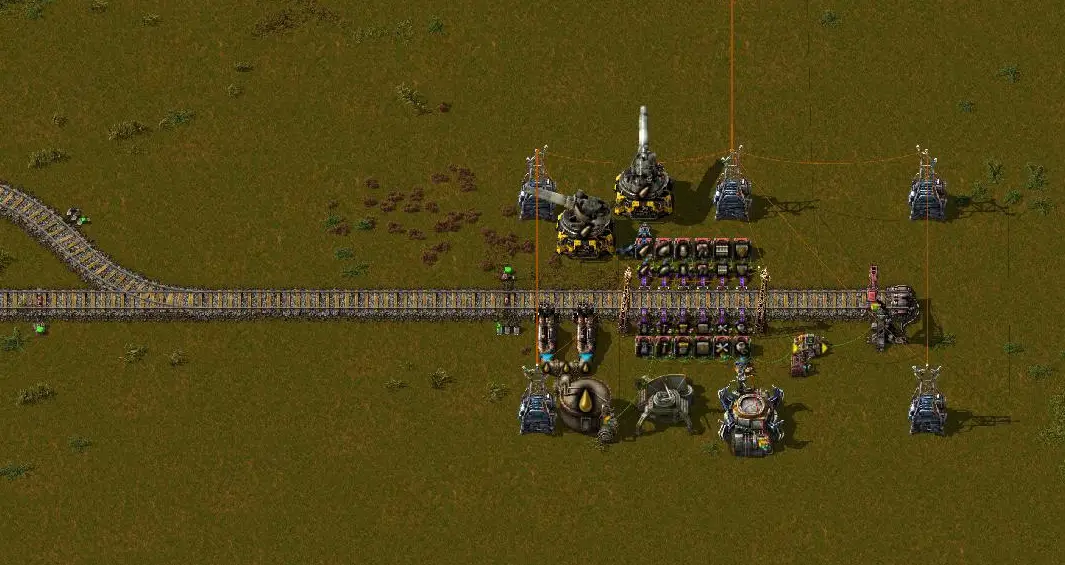
Artillery Outpost (unloading items)
The resupply train enters and exits on a two way track to provide protection from enemies.
The circuit network turns the station on when items run low, allowing multiple outposts to be resupplied by the same train. The train cargo wagon storage boxes need to be designated by using the inventory filter option (middle mouse button). This ensures only the items required are loaded onto the train.
Note it is important to keep outposts disconnected from the main logistics network.
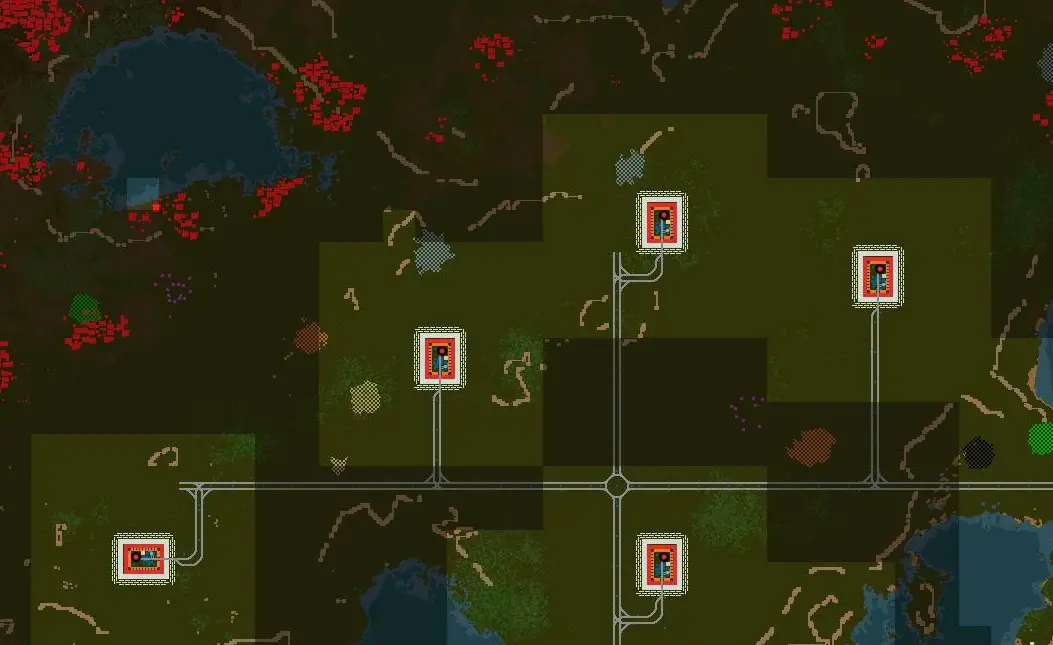
The artillery outpost is a flexible design, that can greatly increase the defence of very large factories, or resource patches a long distance away close to powerful enemies. Using the circuit network to resupply the outposts only when items are needed, this eliminates the need for mass logistics across the map, saving time and increasing the performance of the game.
هذا كل ما نشاركه اليوم من أجل هذا Factorio مرشد. تم إنشاء هذا الدليل وكتابته في الأصل بواسطة piper.spirit. في حالة فشلنا في تحديث هذا الدليل, يمكنك العثور على آخر تحديث باتباع هذا وصلة.