Mining is fundamental to your late-game colony. High-tier weapons, tools, and armor are all going to require a simple understanding of mining and prospecting.
Miners
Miners are assigned through the ‘job’ menu on the right side of the screen.
Miners should be assigned based on a couple of things:
- Mining skill level
- Other jobs assigned to the colonist
- التخصص
Other jobs assigned to the colonist:
Mining can be a long and laboring skill. لذلك, like my military colonists with essential jobs like cook, brewer, and doctor I will typically refrain from adding as a miner.
التخصص:
Specialty is represented by stars in the job selection area. Specialty is assigned when a colonist joins you and is genetic (can be passed to children). From my knowledge, there is no way to change this.
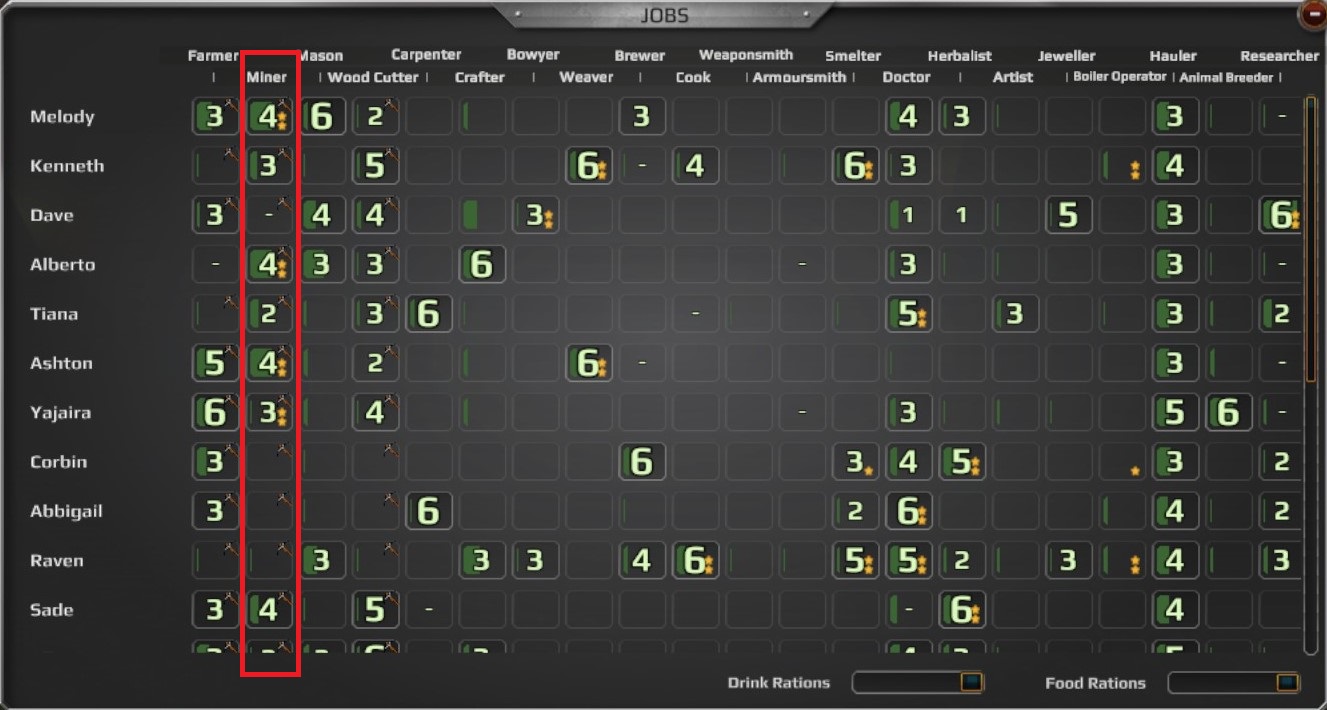
Assigning miners require you to raise the priority by left-clicking the miner slot. You can also decrease this priority by right-clicking the same spot.
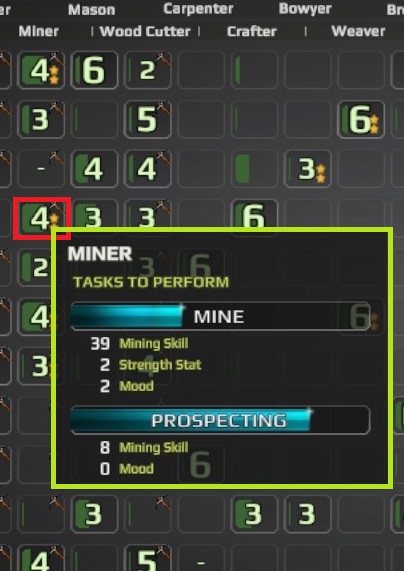
Hovering over the ‘miner’ bubble will show you a colonist’s mining and prospecting levels, as well as what affects them.
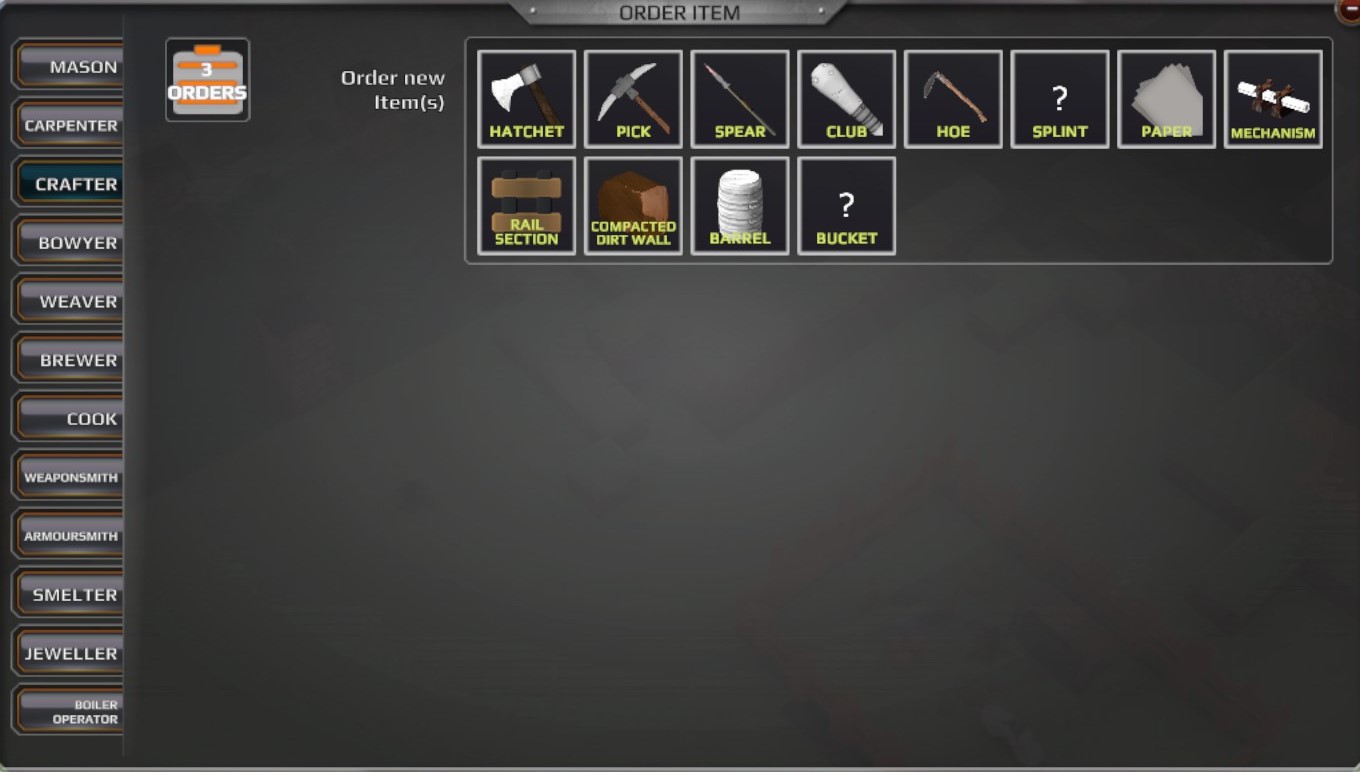
Pickaxes can be built through the crafter. Increasing the extra difficulty will give you a higher quality item while making it more likely to fail the craft.
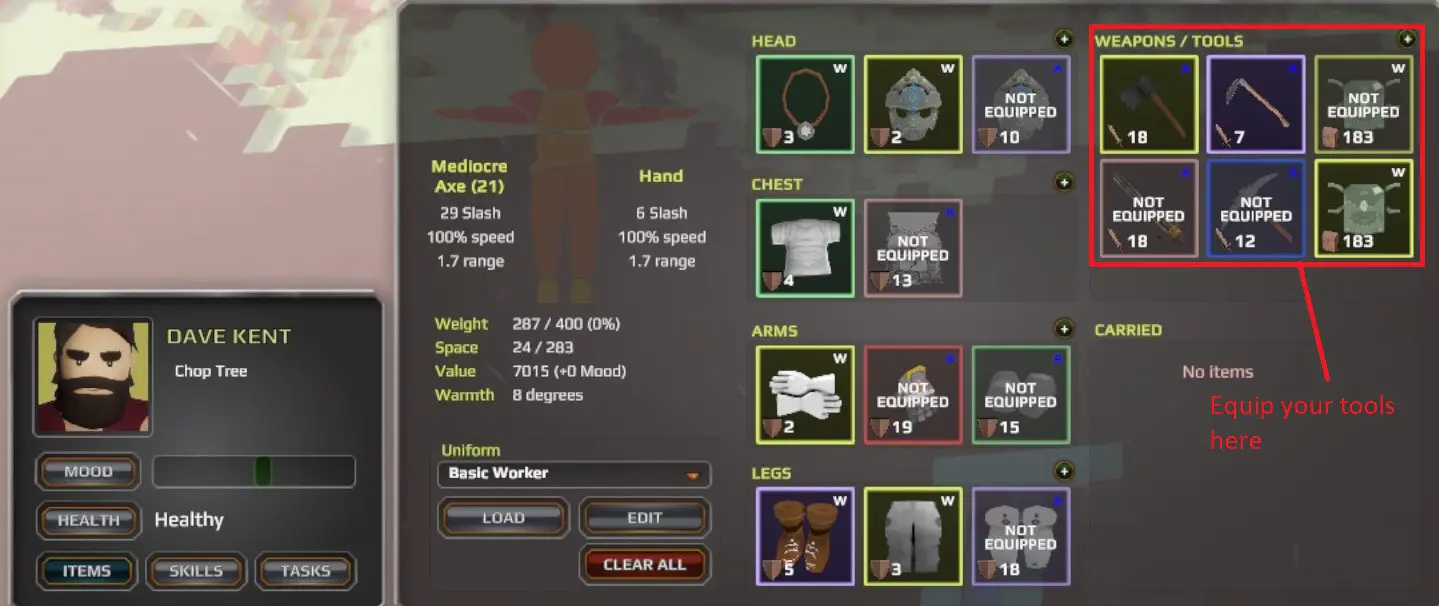
After a pickaxe is built you have to assign it to your desired miner. Click on your desired colonist in the top right and click on items when they pop up in the bottom left.
Prospecting and Mining
Prospecting will allow you to find a plethora of different things underground. This includes Coal, Hemetite, Chalcopyrite, Galena, Opal, and Cassiterite.
These are the ones I have located thus far.
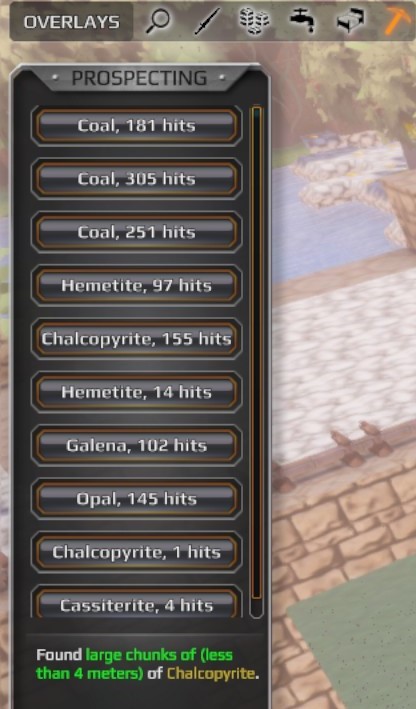
The prospecting bar can be accessed by clicking on the pickaxe at the top left of your screen. The item on the left is what you’re looking for.
The ‘hits’ on the right essentially show if you are mining in the right direction. The more hits, the closer you are.
If this is too small click on it, it is as large as I can make it.
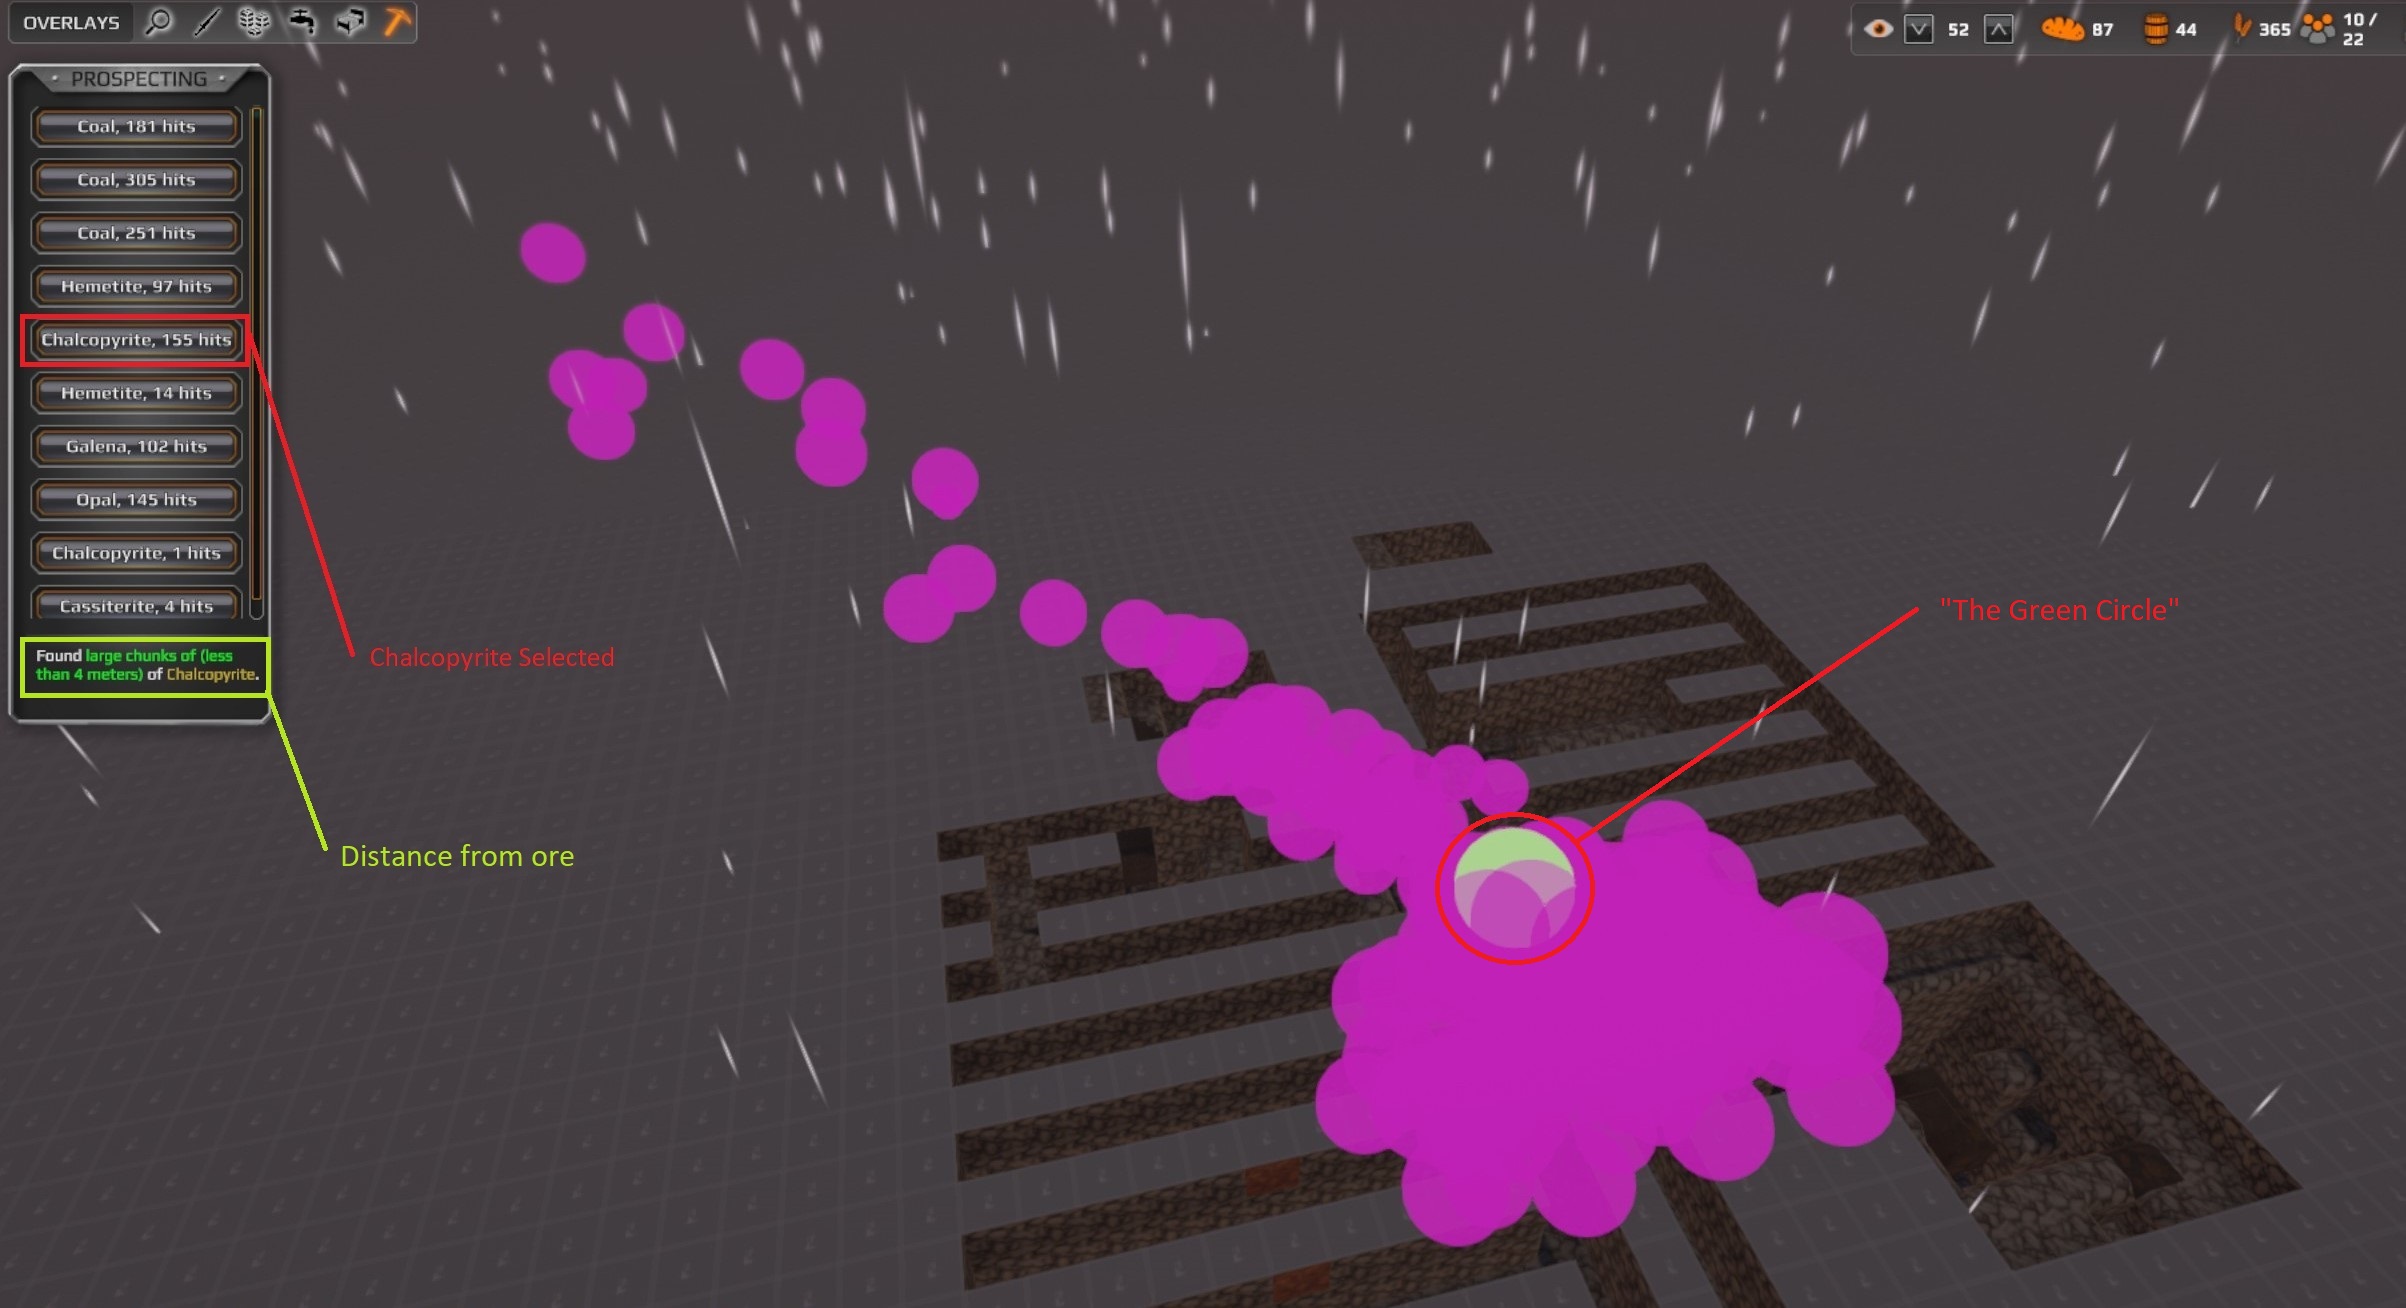
In this example I selected Chalcopyrite, 155 hits.
As you can see I have a mine similar to something you’d find in Minecraft. A shaft that leads down as you can see on the left and strip mining which allows me to locate the ore.
Highlighted in green is the distance the ore is from the green circle.
If your prospecting screen looks like mine, then strip mine like I did and you will likely find some ore.
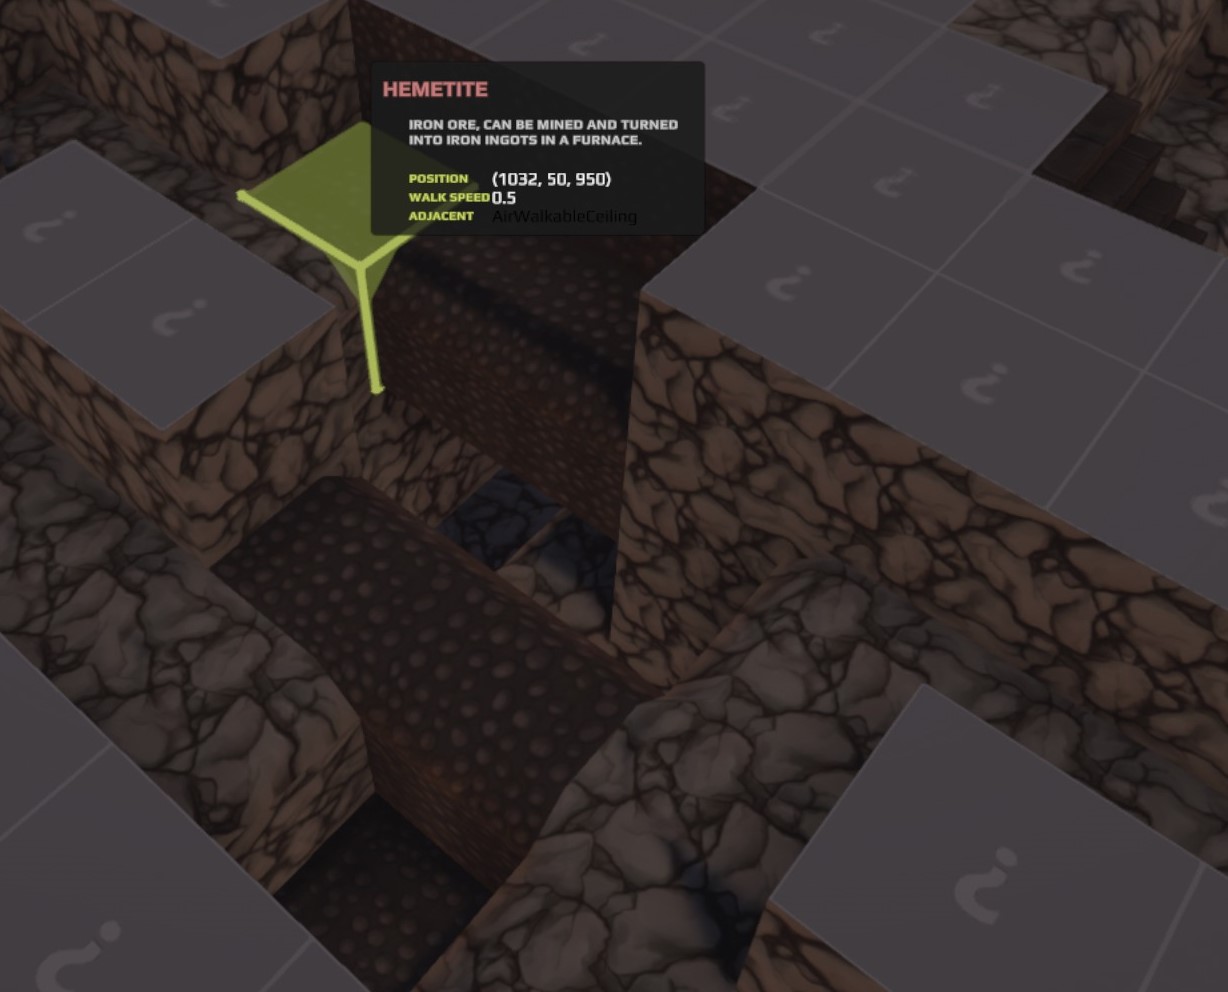
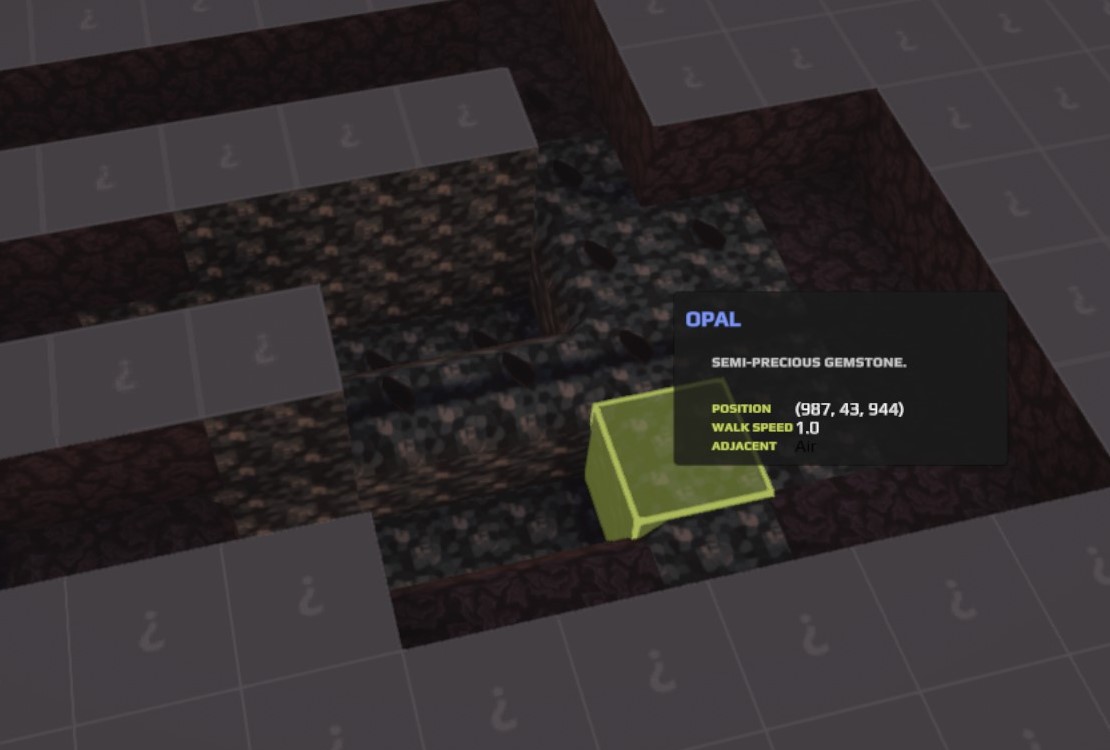
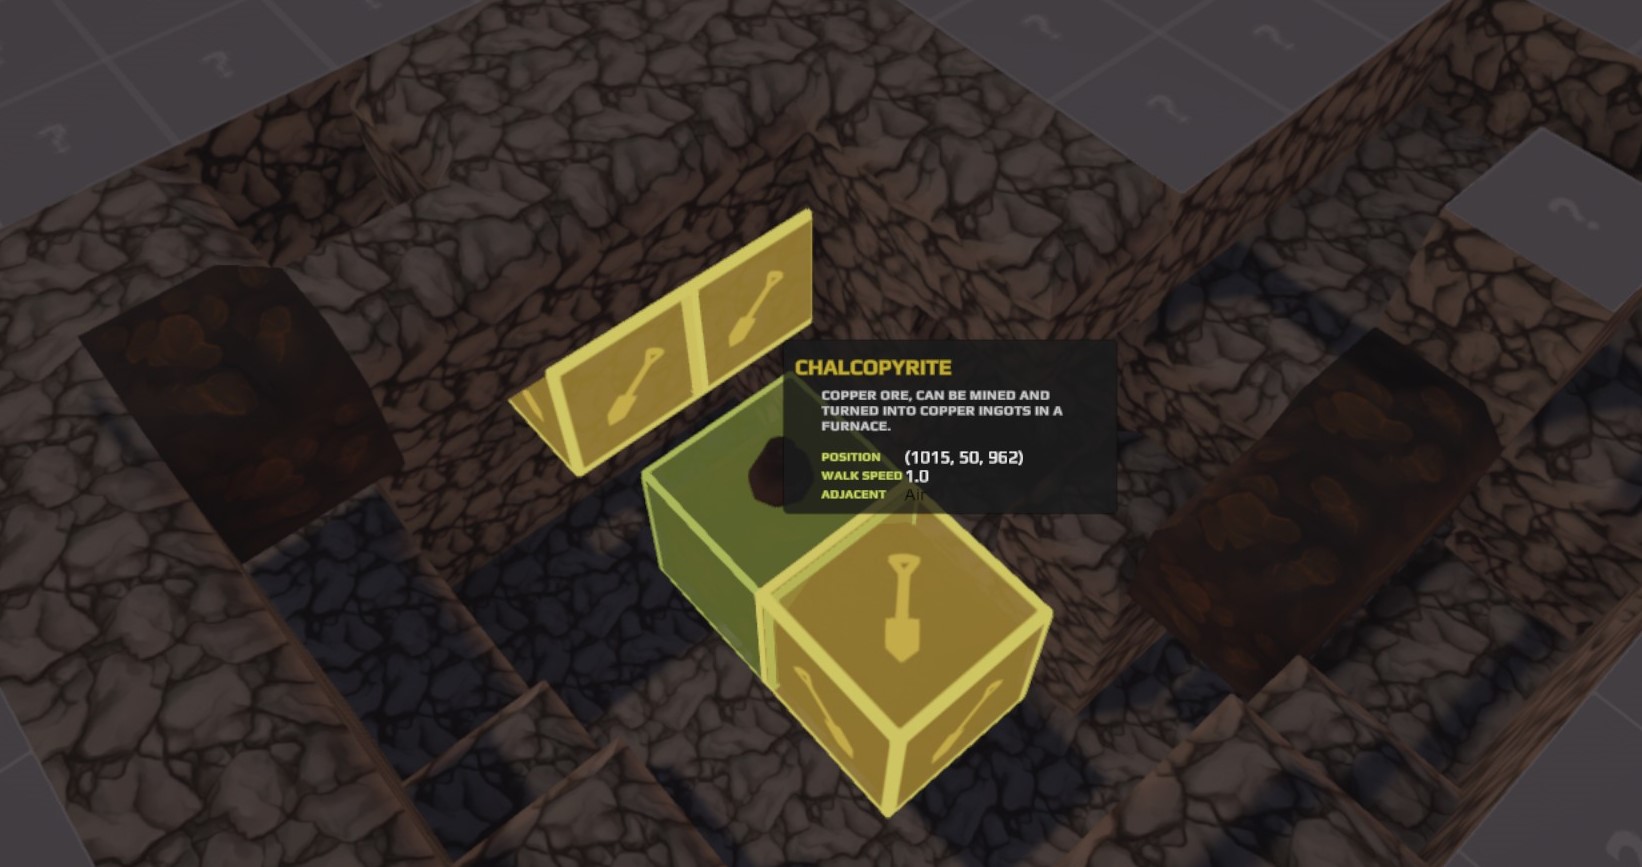
These are a few ores I could find that I haven’t mined yet.
You will definitely know when you find one it is pretty distinct.
هذا كل ما نشاركه اليوم من أجل هذا Embark مرشد. تم إنشاء هذا الدليل وكتابته في الأصل بواسطة Brady. في حالة فشلنا في تحديث هذا الدليل, يمكنك العثور على آخر تحديث باتباع هذا وصلة.