
- عنوان: Demonologist
- تاريخ الافراج عنه:
- المطور:
- الناشر:
Information about Demonologist is still incomplete. الرجاء مساعدتنا في ملء تفاصيل اللعبة باستخدام هذا نموذج الاتصال.
A simple guide to the Bedlam Maze, which must be maneuvered to exorcise the ghost.
ابدء
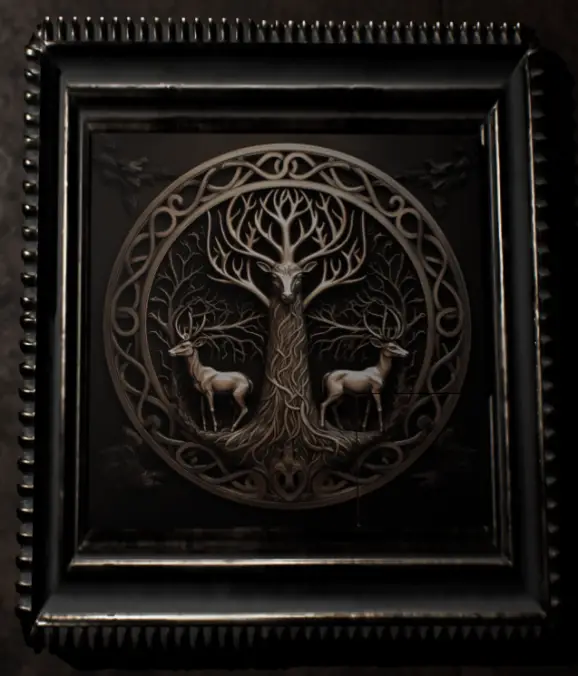
لتبدأ, once all the players have voted on the ghost, you’ll gain access to the secondary objectives. The initial step is to find a golden puzzle or painting depicting a deer head that transforms into a tree, like the one shown below. This piece can appear on empty walls throughout the building, on any floor.
أيضًا, don’t overlook the basement area known as “Cells.” It can potentially spawn on one of the walls down there. To reach the basement, head to the stairway directly opposite the main entrance, slightly to the right. ال “Pattern A” mentioned is the paper located next to the tile maze.
Sliding Puzzle
After you’ve obtained the deer tree piece, you’ll unlock the sliding puzzle located in Cells. This puzzle is randomized each time, and there isn’t a fixed solution. Here’s a helpful tip: try to get the pieces on one side in their correct positions first, and then work on the side perpendicular to it. على سبيل المثال, you can start with the top row and then tackle the left column. Regardless of which side you begin with, always start from the corner.
If you find yourself stuck, consider changing the directions in which you slide the pieces. أحيانا, when it seems like you’re getting closer, you might actually be moving farther away from the solution.
Solving Your Own Puzzle
If you want to solve the puzzle independently, there’s a hint available in the Cells area. You can find it by looking directly to the left of the sliding block puzzle on the table.
The Layout
In a room to the left of the main entrance, specifically the left of the two doors along that wall, you’ll come across a room that contains a sheet with a cryptic puzzle. لكن, you probably already know about it if you’re following this guide. بالإضافة إلى ذلك, you can open a very small door next to the micro tile puzzle and “Pattern A.” I’m not entirely sure if it serves any purpose, but it can be quite amusing.
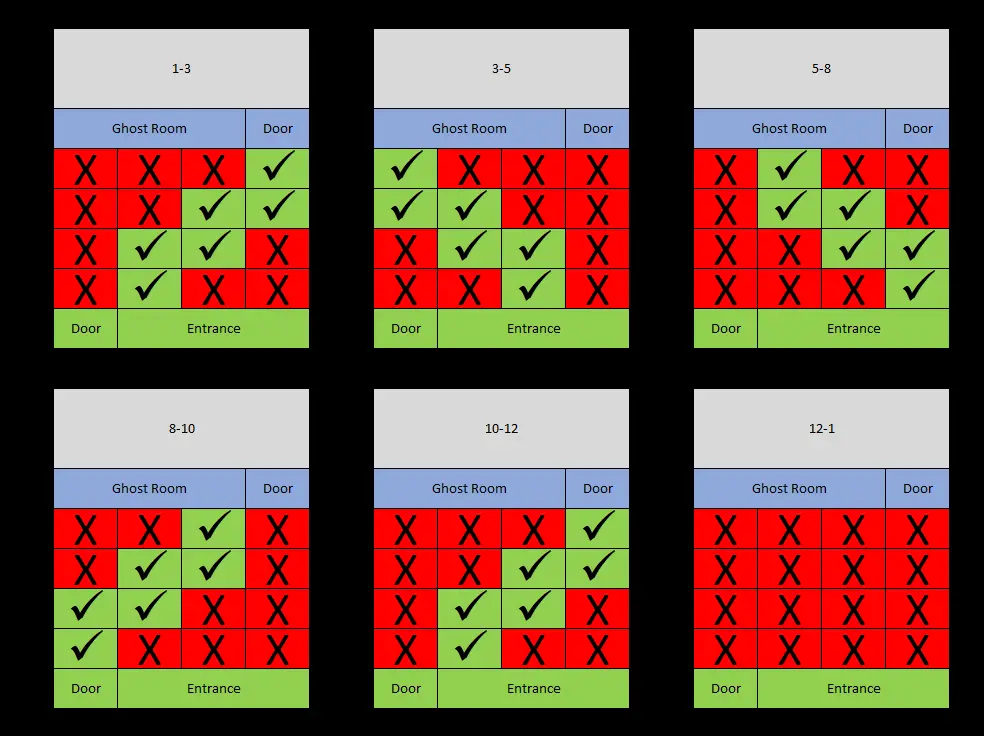
Keep in mind that the correct path on the tiles changes depending on the in-game time, which you MUST view using the Pocket Watch item. The clock on the EMF device tracks the real-life time on your device, so here are the accurate pathways based on the time period.
النصائح والحيل
Here are some helpful tips and tricks to keep in mind:
- Be very careful not to misstep or misread the pocket watch, as it plays a crucial role in the puzzle.
- After entering the ghost death room on the other side of the puzzle, you can proceed to the third step.
- Crossing back over the puzzle can be disorienting, so take your time to think it through or retrace your steps from the beginning with your cursor.
- Keep an eye out for a roll of electrical tape and a scalpel; these items spawn randomly across the map on any floor. Don’t forget to check Cells for them.
- There are a total of 5 electrical breakers across the map. Two of them spawn preemptively with the two necessary fuses to complete the exorcism. Before the second side objective is completed, you can locate but not collect them. One is in the basement near the broken lift, two are on the first floor (one behind the desk on the right and the other behind the door to the stairs on the right side of the map), and the remaining two are on the second floor (one in the office to the left of the broken lift and the other behind the stair door on the second floor).
- Once you’ve collected the scalpel, tape, and two fuses, return to the ghost death room. Place the scalpel in the chair and the fuses in the fuse box on the left. Repair one spot on the left wall’s wire and one on the right wall’s wire, as well as one wire leading from the far wall to the chair.
- After placing the fuses and scalpel and repairing the three wire locations, you can activate the lever to exorcise the ghost. The tiles become neutral the moment you press the lever with all steps completed. Make sure to confirm that the exorcism animation has started, which is indicated by a silhouette being in the electric chair.
هذا كل ما نشاركه اليوم من أجل هذا Demonologist مرشد. تم إنشاء هذا الدليل وكتابته في الأصل بواسطة TTV_EmersonMFridge. في حالة فشلنا في تحديث هذا الدليل, يمكنك العثور على آخر تحديث باتباع هذا وصلة.